
chinese corn soup

title 1
chinese corn soup
⏱️ cook time 15 minutes
🍽️ servings 4
⚡ Difficulty easy

intro

Silky, savory Cantonese-style corn soup with sweet tender kernels, wispy egg strands, and light umami broth, ready in under 25 minutes for cozy, comforting weeknight meals.

Ingredients
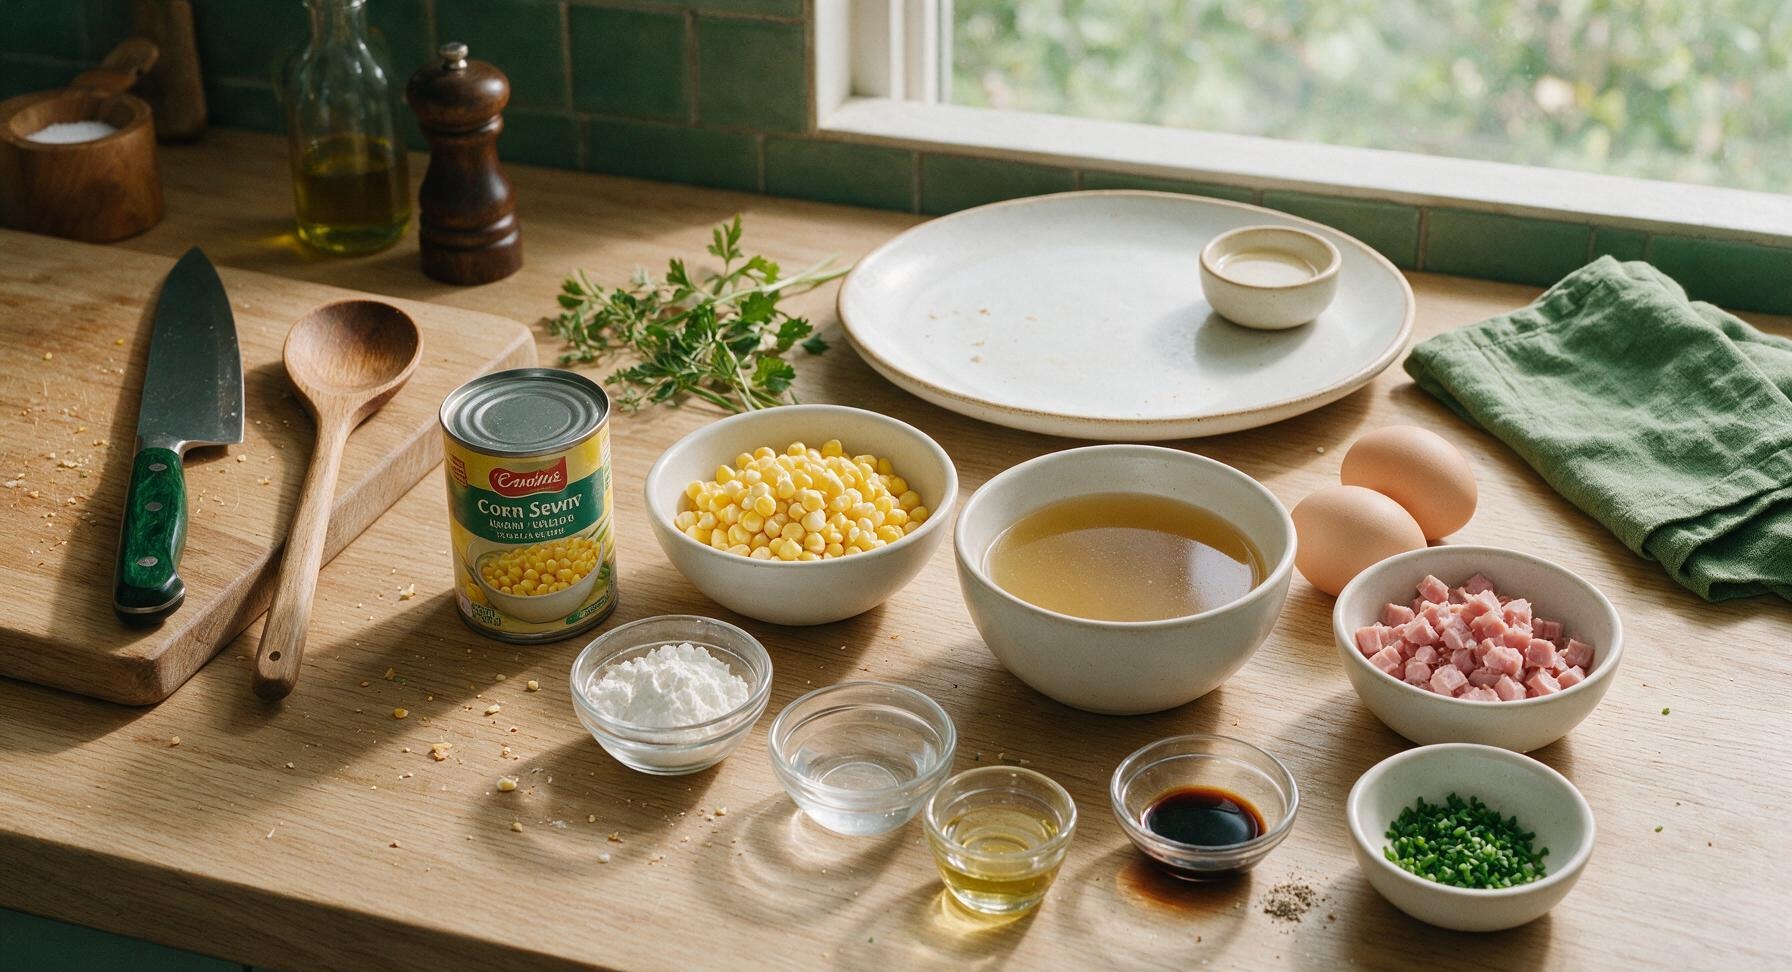
Cream-style sweet corn 420g (1 standard can)
Whole sweet corn kernels 1 cup, frozen and thawed
Low-sodium chicken broth 4 cups
Large eggs 2
Lean cooked ham 50g, finely diced
Cornstarch 2 tablespoons
Cold water 3 tablespoons
Light soy sauce 1 tablespoon
Toasted sesame oil 1 teaspoon
Ground white pepper 1/4 teaspoon
Fresh chives 2 tablespoons, finely chopped

Steps

1

Prep measured ingredients

Place the block of cooked ham and fresh chives on the bamboo cutting board. Use the walnut-handled chef knife to dice the ham into uniform 5mm cubes, then finely chop the chives. Crack the 2 large eggs into a small white ramekin, and whisk lightly with a fork until just combined (avoid over-whisking to prevent froth, which creates uneven egg strands). Combine 2 tablespoons cornstarch and 3 tablespoons cold water in a second small ramekin, stir with the matte gray silicone whisk until completely smooth, with no visible lumps.

Step 1
step1:Prep measured ingredients
2

Simmer broth and corn

Set the 3L stainless steel soup pot on the matte black induction cooktop (set to medium heat) positioned on the right half of the counter. Pour in 4 cups low-sodium chicken broth, 420g cream-style sweet corn, 1 cup thawed whole corn kernels, finely diced ham, and 1 tablespoon light soy sauce. Stir gently with the beech wood soup spoon to combine, then bring to a gentle simmer (small bubbles breaking at the pot edges, not a violent rolling boil) over 5 minutes. Use the fine-mesh strainer to skim any pale foamy bits from the soup surface if they appear.

Step 2
step2:Simmer broth and corn
3

Thicken with cornstarch slurry

Give the cornstarch slurry a quick re-stir, as cornstarch settles quickly to the bottom of the ramekin. Slowly pour the slurry into the simmering soup while stirring constantly in slow, wide circular motions with the beech wood soup spoon. Continue to simmer for 2 minutes, until the soup thickens to a light, silky consistency that lightly coats the back of the spoon—this should be a thin, pourable thickness, not thick like gravy or pudding. If small lumps form, stir vigorously for 30 seconds to break them up.


Step 3
step3:Thicken with cornstarch slurry
Step 3
step3:Thicken with cornstarch slurry
4

Stream in beaten eggs

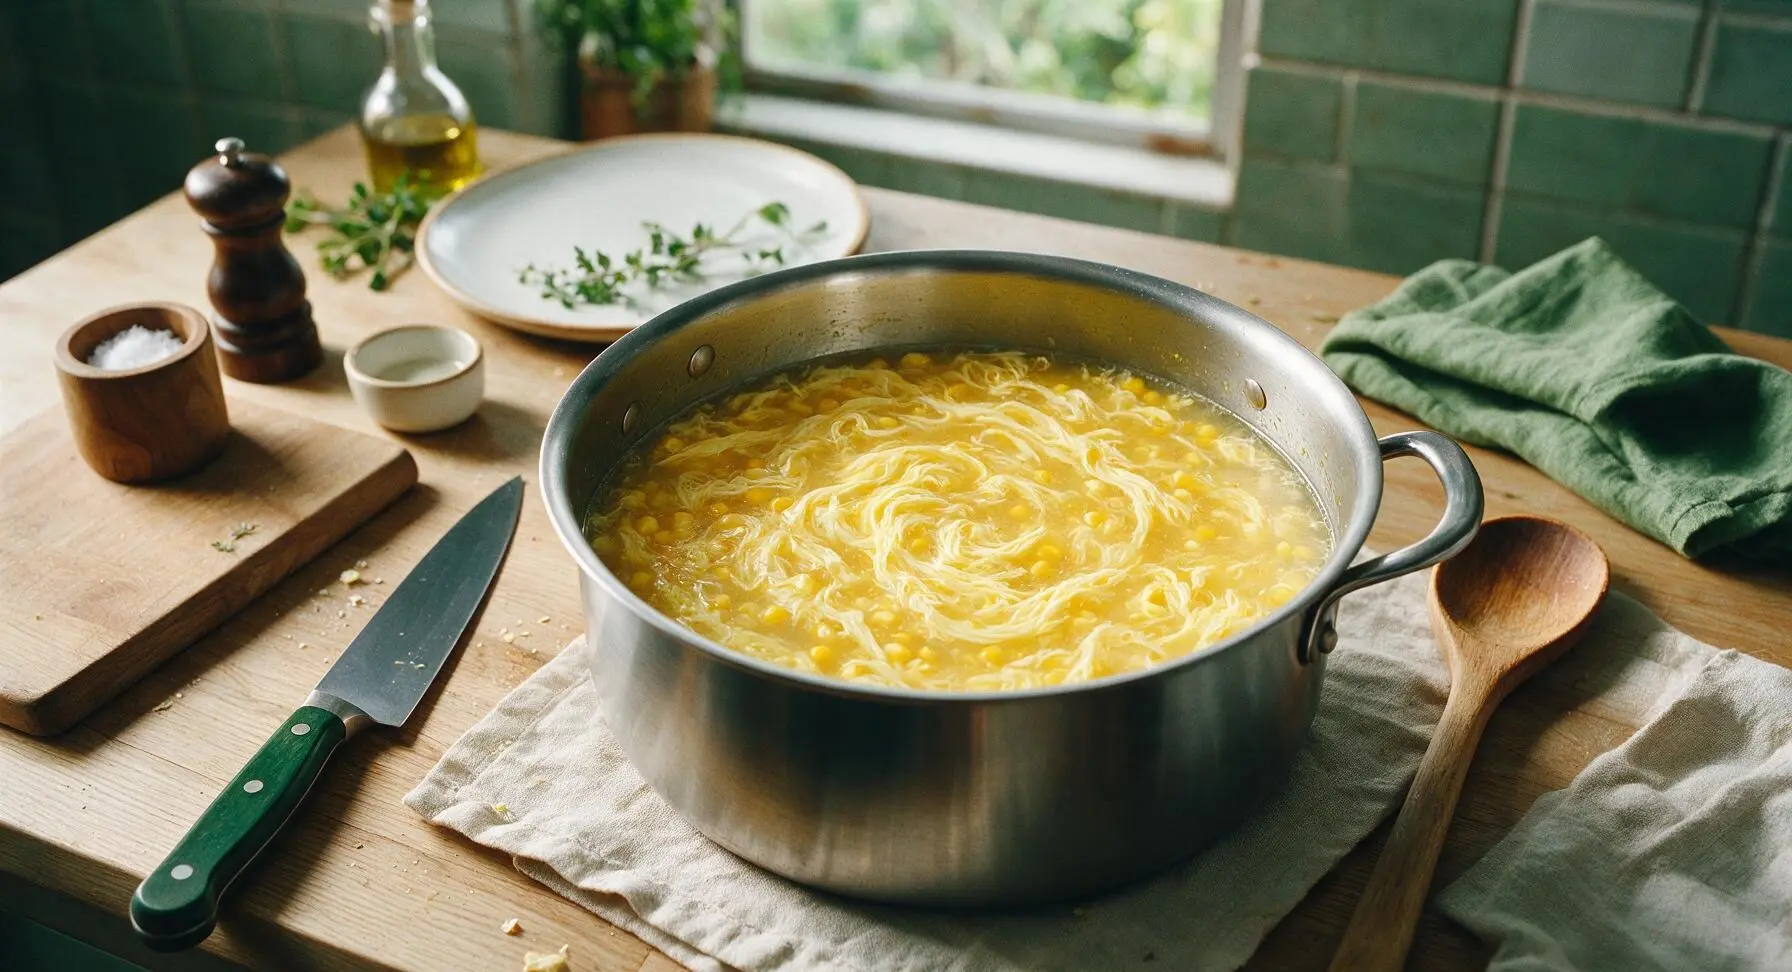
Turn the induction cooktop heat down to low. Stir the thickened soup in a slow, steady clockwise circle to create a gentle, smooth vortex. Hold the ramekin of beaten eggs 15cm above the pot, and pour the eggs in a very thin, slow stream while continuing to stir the soup in the same circular motion. This creates delicate, wispy egg strands instead of large, rubbery clumps. Once all egg is added, stop stirring immediately—overmixing will break the strands into tiny, unappetizing crumbs.

Step 4
step4:Stream in beaten eggs
Step 4
step4:Stream in beaten eggs
5

Season to final taste

Turn off the induction cooktop heat completely. Stir in 1/4 teaspoon ground white pepper and 1 teaspoon toasted sesame oil. Taste the soup carefully, and add a tiny pinch of fine sea salt from the acacia wood salt cellar only if needed—the soy sauce and ham already contribute significant salt. Do not return the soup to a boil after adding sesame oil, as high heat will destroy its delicate nutty aroma and make it taste bitter.

Step 5
step5:Season to final taste
6

Ladle and garnish bowls

Use the stainless steel soup ladle to portion the hot soup evenly into the matte white ceramic soup bowls. Top each bowl with a small pinch of finely chopped chives. Serve immediately while hot, paired with a matte white ceramic soup spoon for each serving.

Step 6
step6:Ladle and garnish bowls

Tips

1.Always re-stir your cornstarch slurry right before adding it to the soup: cornstarch sinks rapidly to the bottom of the ramekin, and pouring only the starchy water from the top will result in a thin, watery soup, while the settled undissolved starch will create gluey lumps.
2.Pour beaten eggs from at least 15cm above the pot into gently moving liquid: pouring eggs too close to the surface or into still soup will create large, rubbery egg clumps instead of the delicate, wispy strands that are signature to this soup.
3.Use ground white pepper instead of black pepper for authentic Cantonese flavor: black pepper has a sharp, bold, piney flavor that overwhelms the sweet, delicate taste of corn, and its dark specks disrupt the soup’s smooth pale golden appearance, while white pepper adds warm, subtle heat without visual distraction.


✨ You May Also Like

Soups & Stews
🍜 Japan

Rich, umami-dense Hokkaido-style miso ramen with chewy noodles, savory fermented broth, and classic toppings, a cozy, deeply satisfying warm meal.

⏱️ 45 minuteSoups & Stews ★ 4.5
Soups & Stews
🍜 United States

A hearty, peppery tripe and root vegetable stew with colonial Philadelphia roots, thick, warming, and packed with bold savory flavor for cold winter days.

⏱️ 2 hours 3Soups & Stews ★ 4.6
Soups & Stews
🍜 Mexico

Hearty, warming red pork posole loaded with tender hominy, slow-simmered in a rich smoky chile broth, served with zesty fresh garnishes for a deeply comforting, satisfying meal.

⏱️ 2 hours 3Soups & Stews ★ 4.7
Soups & Stews
🍜 United States

Warm, soothing classic chicken noodle soup loaded with tender chicken, soft egg noodles, and savory veggies, perfect for chasing chills and feeding the whole family.

⏱️ 40 minuteSoups & Stews ★ 4.9
Soups & Stews
🍜 France

Deeply savory caramelized onion broth topped with crusty bread and bubbly melted Gruyère, a timeless French bistro comfort food ideal for cold days.

⏱️ 1 hour 25Soups & Stews ★ 4.8
Soups & Stews
🍜 United States

Hearty, briny Maryland crab soup loaded with sweet blue crab, tender summer vegetables, and zesty Old Bay, a beloved Chesapeake Bay coastal comfort staple.

⏱️ 55 minuteSoups & Stews ★ 4.9

chinese corn soup:Frequently Asked Questions

1.Can I make this Cantonese corn soup vegetarian? ▾
Absolutely! Swap the low-sodium chicken broth for rich, low-sodium vegetable broth, and replace the lean cooked ham with diced firm baked tofu or sautéed shiitake mushrooms for matching savory depth. Keep all other ingredient ratios the same, and you’ll get the same silky, sweet, umami bowl in the same 25-minute cook time.
2.Why do my egg strands come out clumpy instead of wispy? ▾
The most common culprit is pouring beaten egg too quickly into rapidly boiling broth. Turn the heat to low so the broth is at a gentle simmer, stir the soup in a slow, steady circular motion, then drizzle the beaten egg in a thin, slow stream. Wait 10 seconds before stirring again to get those delicate, light wispy strands everyone loves.
3.Can I use only fresh corn instead of cream-style corn? ▾
You can, but you’ll miss that signature velvety, thick base cream-style corn provides. If you skip it, blend 1 cup of fresh sweet corn kernels with ¼ cup of broth to mimic that creamy texture, then stir it in with the remaining whole kernels to keep that bright, sweet corn flavor without canned product.
4.How long does leftover corn soup keep in the fridge? ▾
Stored in an airtight, sealed container, this soup will stay fresh for 3 to 4 days in the refrigerator. When reheating, warm it gently over medium-low heat on the stovetop, stirring occasionally, rather than microwaving on high, to keep the egg strands soft and prevent the broth from separating.
5.Can I freeze this Cantonese corn soup? ▾
I don’t recommend freezing it, unfortunately. The egg strands will turn rubbery and grainy when thawed, and the corn texture will get mushy once frozen and reheated. This soup comes together so fast in 25 minutes that it’s far better made fresh, or prepped ahead with measured ingredients ready to toss in the pot.
6.What if I don’t have cooked ham on hand? ▾
No problem! Lean cooked ham adds a subtle salty, savory note, but you can swap it for diced cooked chicken breast, crispy crumbled bacon, diced cooked shrimp, or even omit it entirely for a simpler, lighter version. If you omit it, add a tiny pinch of white pepper to boost the broth’s umami depth.
7.Do I need to add extra cornstarch to thicken the soup? ▾
You won’t need extra thickener if you use the full amount of cream-style sweet corn called for in the recipe—it creates that perfect light, silky consistency without a starchy aftertaste. If you prefer a slightly thicker soup, mix 1 teaspoon of cornstarch with 1 tablespoon of cold water and stir it into the simmering broth before adding the egg.
8.Is this soup spicy? Can I add heat to it? ▾
Traditional Cantonese corn soup is mild, savory, and sweet with no added heat, so it’s great for kids and sensitive palates. If you want a little kick, add a pinch of white pepper, a tiny drizzle of chili oil, or a sprinkle of chopped fresh jalapeño right before serving to keep the bright flavor without overpowering the sweet corn.
9.Why use low-sodium chicken broth instead of regular? ▾
Low-sodium broth lets you control the salt level of the final soup, since canned cream-style corn and cooked ham both already contain added sodium. If you only have regular chicken broth, skip adding any extra salt at the start, and taste right before serving to adjust seasoning so you don’t end up with an overly salty bowl.
10.Can I add extra vegetables to this soup? ▾
Absolutely! Traditional Cantonese versions keep it simple, but you can stir in ¼ cup of finely diced carrot, frozen green peas, or finely chopped baby bok choy during the last 3 minutes of cooking for extra color and nutrition. Just keep dice small so veggies cook quickly and don’t weigh down the light broth.
11.How do I get the restaurant-style silky broth texture? ▾
Skip boiling the soup rapidly after adding ingredients, and make sure to use the full ratio of cream-style corn to whole kernels. When adding eggs, don’t over-stir once you drizzle them in—overmixing breaks the delicate strands into tiny, grainy bits instead of creating those soft, floating wispy strands you get at dim sum restaurants.
12.Can I make this soup with canned whole corn only? ▾
You can, but you’ll need to replicate the cream-style corn base to get the right texture. Drain one can of whole kernel corn, then blend half of it with a splash of broth until smooth, and leave the other half as whole kernels. This mimics the mix of creamy base and sweet, snappy whole kernels the recipe calls for.
13.Should I beat the eggs with anything before adding them to the soup? ▾
Just beat the eggs lightly with a fork until the whites and yolks are fully combined—no need to add water, cornstarch, or oil. Adding extra ingredients to the egg can make the strands heavy or tough instead of light and delicate. A quick, light beat is all you need for perfect wispy egg bits every time.
14.Can I use turkey ham instead of regular pork ham? ▾
Definitely! Lean cooked turkey ham works just as well as traditional pork ham here, with a similar mild, salty flavor and lean profile. Just dice it into small, ¼-inch pieces so it distributes evenly throughout the soup, and add it during the last 2 minutes of cooking just to warm it through, since it’s already fully cooked.
15.How do I prevent the soup from getting watery? ▾
Make sure you don’t add extra broth beyond the recipe ratio, and don’t overcook the whole corn kernels, which can release excess water as they break down. If your soup still feels too thin, let it simmer uncovered for 2 to 3 minutes before adding the egg to reduce slightly, rather than dumping in extra thickener.
16.Is this soup gluten-free? ▾
As written, it is naturally gluten-free as long as you use gluten-free low-sodium chicken broth, and confirm your canned cream-style corn and cooked ham have no hidden gluten-containing additives or thickeners. There’s no soy sauce, wheat-based thickener, or other gluten ingredient in the base recipe, so it’s easy to adapt for gluten-free diets.
17.Can I meal prep components of this soup ahead for busy weeknights? ▾
Absolutely! You can dice the ham, measure out your cream-style corn and whole kernels, and beat the eggs 2 days ahead, storing each component in separate sealed containers in the fridge. When you’re ready to eat, just heat the broth, add the corn and ham, then drizzle in the egg—total active cook time drops to under 10 minutes.
18.What’s the best way to serve this Cantonese corn soup? ▾
Serve it hot as a light starter for a Chinese-inspired meal alongside stir-fries and steamed rice, or as a quick, cozy light lunch on its own. A tiny sprinkle of chopped scallion on top right before serving adds a bright, fresh pop of flavor that pairs perfectly with the sweet corn and savory broth, no extra garnish needed.
19.Why does my soup have a weird starchy aftertaste? ▾
That starchy flavor usually comes from adding too much cornstarch thickener, or using cream-style corn with added modified food starch. If you notice this, stir in an extra ¼ cup of chicken broth and a tiny pinch of white pepper to balance the flavor, and opt for cream-style corn with no added thickeners next time for a cleaner taste.
20.Can I add extra protein to make this a more filling main dish? ▾
Of course! Stir in ½ cup of diced cooked chicken, small peeled salad shrimp, or crumbled silken tofu during the last 2 minutes of cooking to boost the protein content without making the soup heavy. Keep the pieces small so they mix evenly with the corn and egg strands, and adjust salt lightly to taste after adding your protein.

Comments (10)

2 days ago

OMG this was SO good! I made this for a quick weeknight dinner last night and my two picky kids went back for seconds, even asked for it in their school lunch thermos today! 15 minute cook time is a total game changer for our busy soccer practice nights. I did toss in a tiny bit of extra white pepper because we love a little warmth.

yesterday

Wait do you think it holds up in a thermos? I’ve been looking for hot lunch ideas for my 1st grader that don’t get all mushy!

2 hours ago

So happy your kids loved it! This soup holds up great in a sealed thermos for 4-5 hours—just give it a quick stir before serving, and it’ll be perfect for school lunches!

3 days ago

Brought this to my office potluck yesterday and people were scraping the crockpot clean! I doubled the recipe and added a handful of chopped imitation crab like my grandma used to put in her version, and it was chef’s kiss. Super easy even for someone like me who burns toast half the time lmao.

2 days ago

Love the imitation crab addition! That’s such a classic Cantonese variation, it adds such a nice briny sweetness—great call for a potluck crowd!

5 days ago

Meal prepped 4 servings of this for my work lunches this week and it’s perfect! Low effort, light but filling, doesn’t get weird when I reheat it in the office microwave. I skipped the cornstarch slurry to cut a few calories and it was still totally tasty, will be making this on repeat.

1 week ago

First time ever making any kind of Chinese soup at home and this was way easier than I thought! Wait though—when I poured the egg in, it turned into big clumps instead of those thin wispy strands? Did I mess up the temperature? It still tasted great just looked a little goofy.

5 days ago

I had that problem the first time too! You gotta turn the heat down to low and pour the egg super slow while stirring the soup in a circle the whole time, works like magic!

3 days ago

Great tip from @HomeCookLin! The key is to make sure your soup is at a gentle simmer (not a rolling boil) when you add the egg, and stir consistently as you pour to get those delicate egg ribbons. Don’t worry, clumpy egg still tastes just as delicious!

yesterday

Made this for my partner when he was feeling under the weather last week and he swore it cured his cold faster than any soup from the takeout spot down the street! We added a little drizzle of sesame oil on top right before serving and wow, that’s non-negotiable for us now.

2 hours ago

That sesame oil drizzle is such a perfect finishing touch! We’re so glad it helped your partner feel better—there’s nothing like a warm bowl of corn soup when you’re under the weather.

30 minutes ago

Total win for my grocery budget! I already had a can of corn, eggs, chicken broth, and cornstarch in my pantry so I didn’t even have to run to the store for this. Tastes way better than the takeout version that costs $8 a bowl, will be making this at least twice a month from now on.

2 hours ago

Made this vegan by swapping the chicken broth for vegetable broth and skipping the egg, added some extra diced tofu for protein, and it came out amazing! Love that the base recipe is so easy to tweak for different dietary needs. 10/10.

30 minutes ago

Love that vegan swap! Adding silken diced tofu is such a great way to add protein without the egg, I’ll have to add that variation to the recipe notes for other plant-based cooks!

2 weeks ago

Wait hold on, this tastes EXACTLY like the corn soup I get from my favorite Cantonese dim sum spot?! I can’t believe how fast it came together, I feel like I’ve been wasting so much money ordering delivery for years. Quick question—can I use frozen corn instead of canned? I have a giant bag in my freezer I need to use up.

1 week ago

I used frozen corn last week and it worked perfectly! I let it thaw for a few minutes first and patted it dry a little so it didn’t water down the soup, tasted even better than canned imo.

5 days ago

Frozen corn works beautifully here! You don’t even need to thaw it first if you don’t want to—just toss it straight into the simmering broth and it’ll cook in 2-3 minutes. So glad it matches your favorite dim sum spot’s version!

5 minutes ago

Made this in my tiny dorm kitchen with just a hot plate and a cheap pot and it still turned out perfect! No fancy tools needed, all ingredients are cheap and easy to find at the campus grocery store. My roommate begged me for the recipe after she stole a bite off my plate lmao.

just now

That’s what we love to hear! This recipe is designed to be super low-fuss, no fancy equipment required—so stoked you and your roommate enjoyed it!

1 week ago

Added a tiny pinch of chili flakes and a splash of rice vinegar to my bowl for a little tang and heat, and it was so good! The base recipe is perfectly mild so it’s super easy to customize to your own taste preferences. I’ll be bringing this to my next family dinner for sure.