
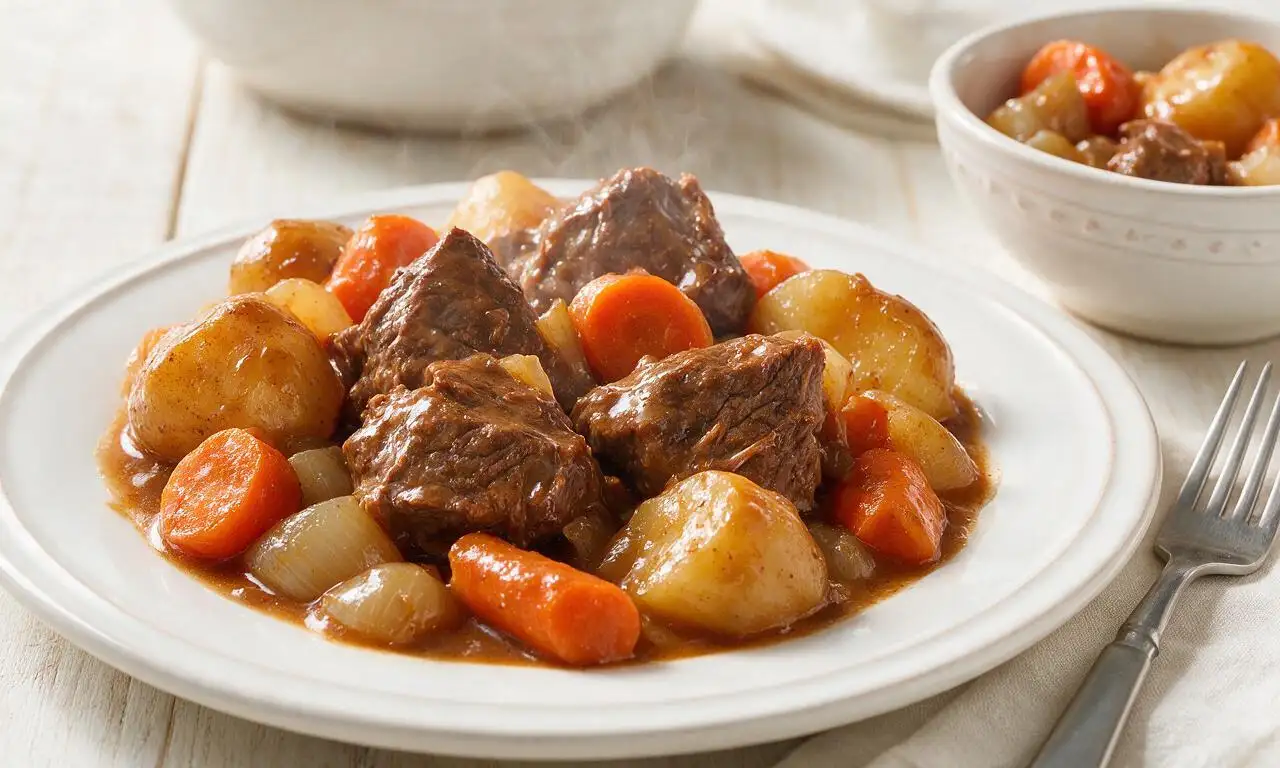
Classic Pot Roast with Vegetables

title 1
Classic Pot Roast with Vegetables
⏱️ cook time 3 hours 15 minutes
🍽️ servings 4
⚡ Difficulty medium

intro

Tender slow-braised beef chuck with root vegetables in rich savory gravy, the ultimate cozy, crowd-pleasing one-pot family comfort meal.

Ingredients

Boneless beef chuck roast 1.5 kg (3.3 lbs)
Olive oil 2 tablespoons (30 ml)
Yellow onion 2 medium (300g, cut into 5cm wedges)
Carrots 4 large (350g, peeled, cut into 5cm chunks)
Celery 3 stalks (200g, cut into 5cm chunks)
Yukon Gold potatoes 4 medium (500g, quartered)
Garlic 6 cloves, crushed
Tomato paste 2 tablespoons (32g)
All-purpose flour 3 tablespoons (24g)
Low-sodium beef broth 750 ml (3 cups)
Worcestershire sauce 2 tablespoons (30 ml)
Dried thyme 1 teaspoon
Dried rosemary 0.5 teaspoon
Bay leaves 2 whole leaves
Kosher salt 1.5 tablespoons
Freshly ground black pepper 1 teaspoon
Unsalted butter 1 tablespoon (14g)
Fresh flat-leaf parsley 2 tablespoons, chopped (for garnish)

Steps

1

Prep and season beef

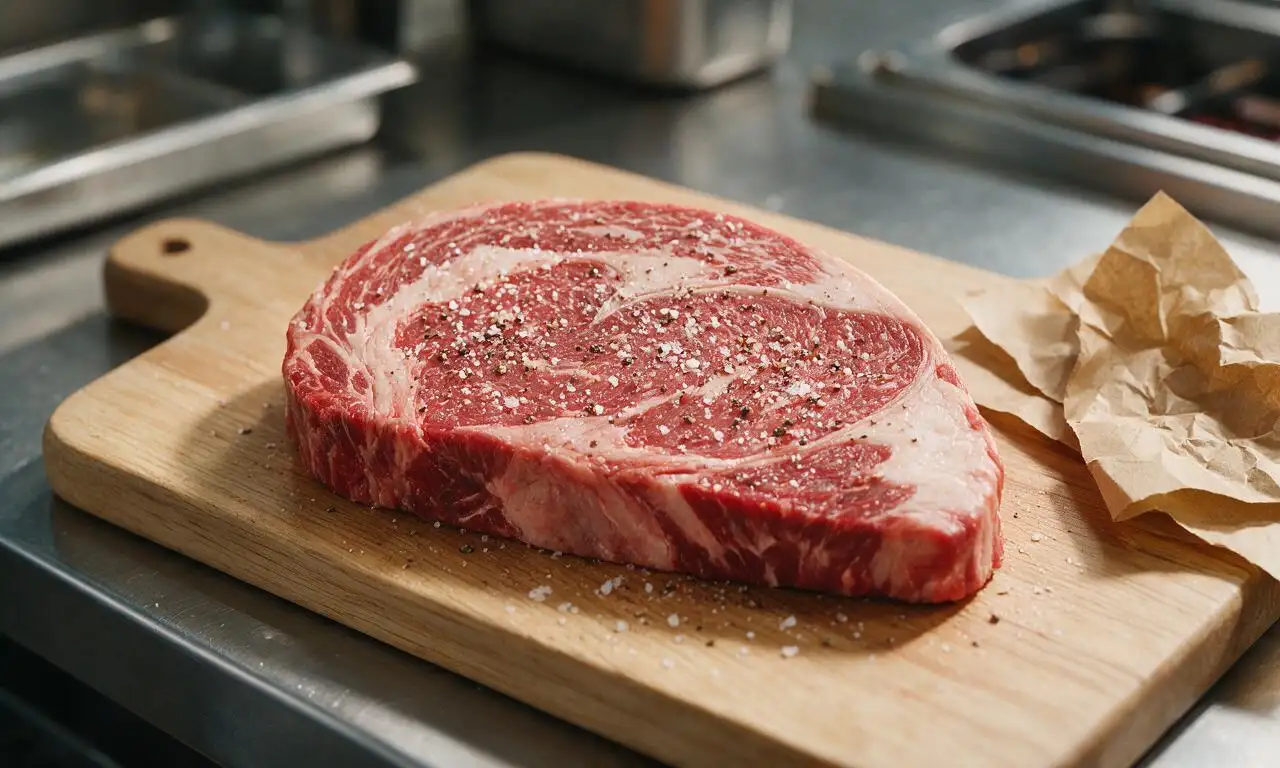
Pat the 1.5kg boneless beef chuck roast completely dry with paper towels, then rub all sides evenly with 1 tablespoon kosher salt and 1 teaspoon black pepper. Let the roast rest at room temperature for 30 minutes to ensure even browning and cooking.
Step 1
step1:Prep and season beef
2

Sear the beef roast

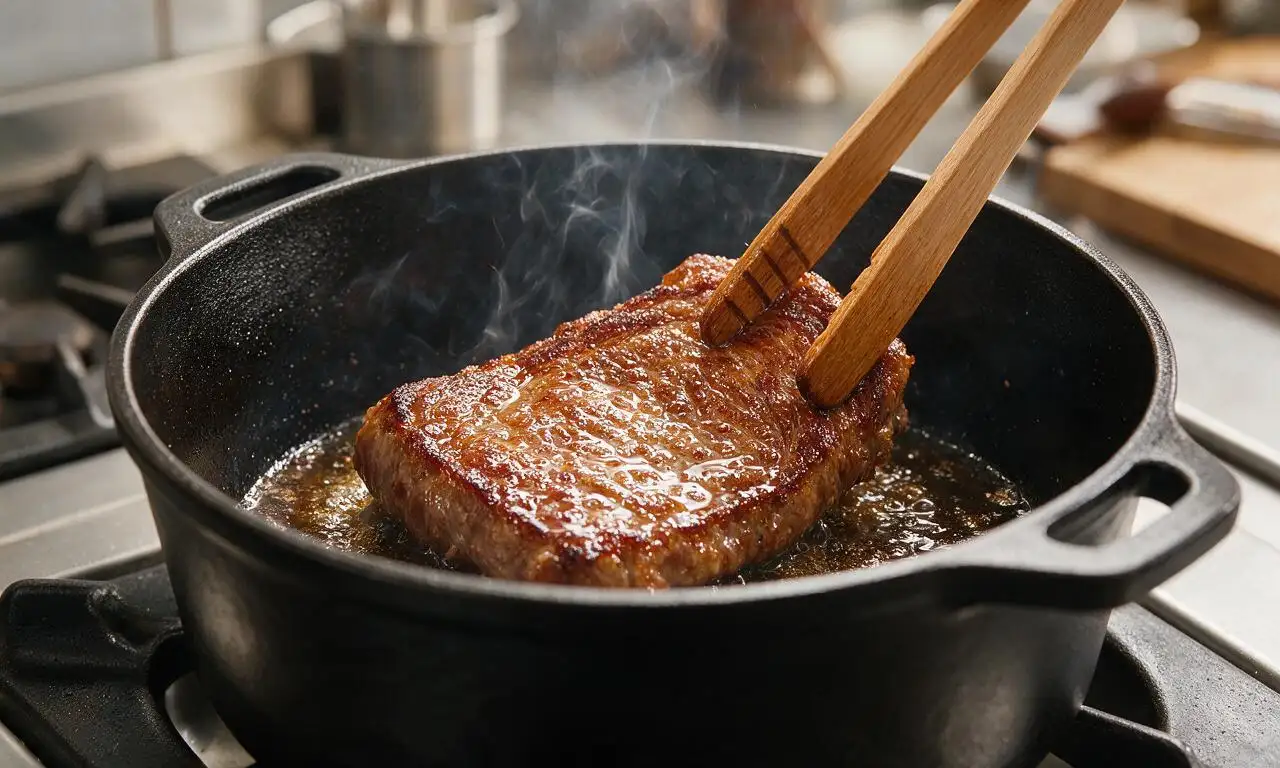
Heat 2 tablespoons olive oil in a heavy-bottomed 5.5L Dutch oven over medium-high heat (190°C/375°F). Once the oil is shimmering and just starting to smoke lightly, add the seasoned roast and sear for 4-5 minutes per side (top, bottom, and all cut edges) until a deep, golden-brown crust forms on every surface, about 20 minutes total. Transfer the seared roast to a clean plate and set aside.
Step 2
step2:Sear the beef roast
3

Sauté aromatic base

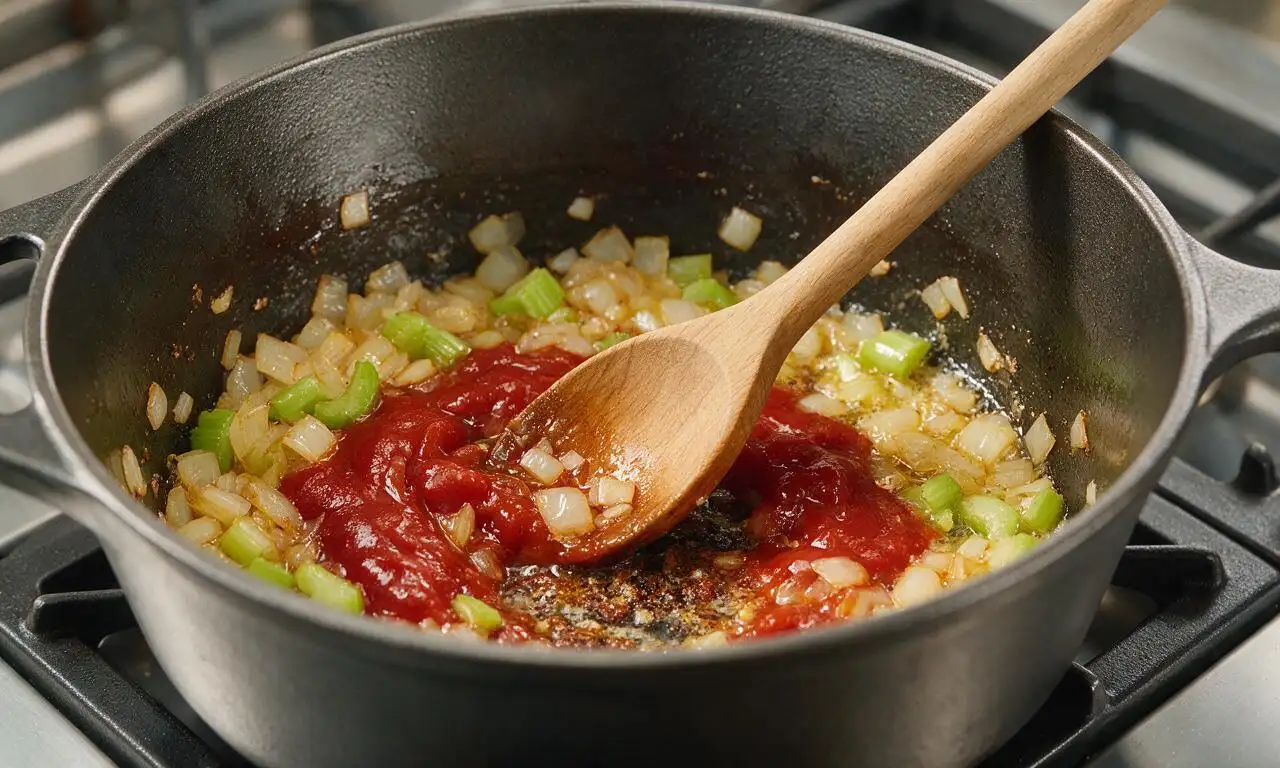
Reduce heat to medium (165°C/325°F), add 1 tablespoon unsalted butter to the remaining beef drippings in the Dutch oven. Add the 300g onion wedges, 200g celery chunks, and crushed garlic, cooking for 6-7 minutes until soft and lightly caramelized at the edges. Stir in 2 tablespoons tomato paste, 1 teaspoon dried thyme, and 0.5 teaspoon dried rosemary, cooking for 1 minute until fragrant and deep brick-red.
Step 3
step3:Sauté aromatic base
4

Build braising liquid

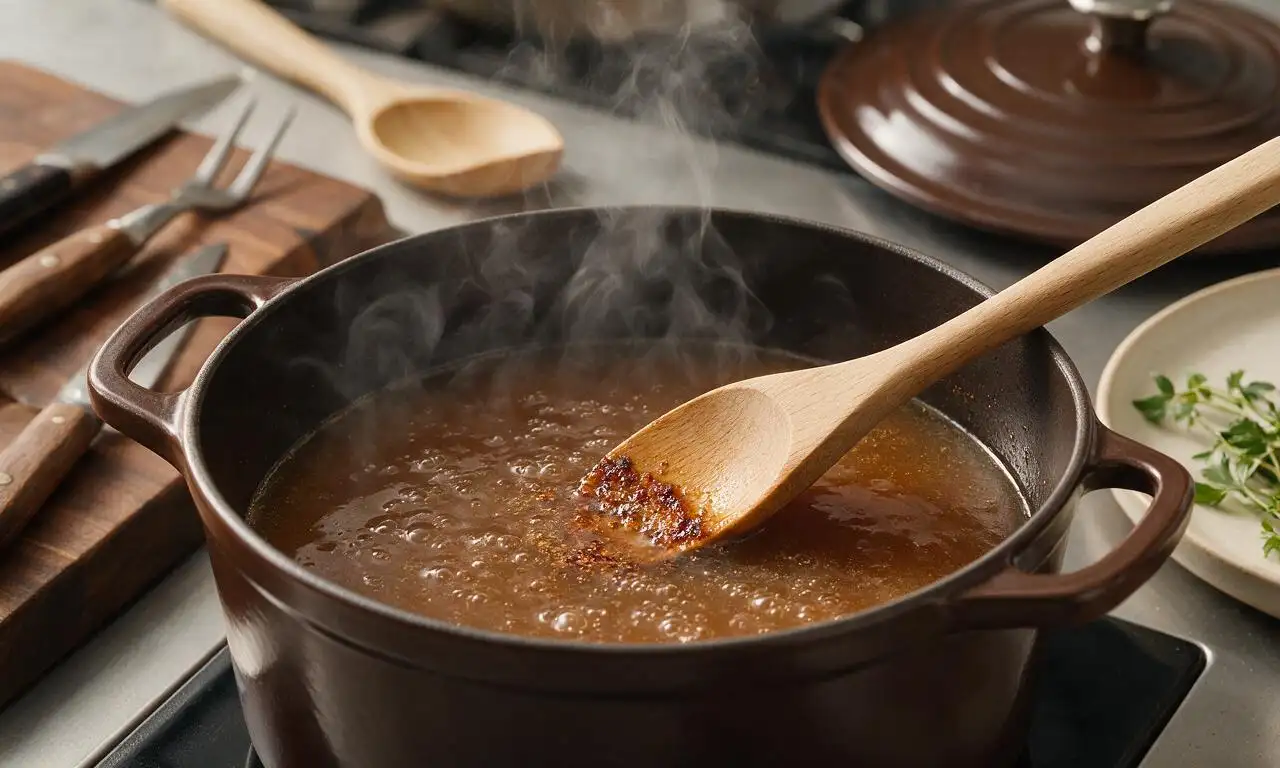
Sprinkle 3 tablespoons all-purpose flour over the cooked aromatics, stirring constantly for 2 minutes to cook out the raw flour taste. Slowly pour in 750ml low-sodium beef broth and 2 tablespoons Worcestershire sauce, scraping the bottom of the pot thoroughly with a wooden spoon to lift all browned fond bits into the liquid. Add 2 bay leaves and the remaining 0.5 tablespoon kosher salt, then bring the liquid to a gentle, low simmer.
Step 4
step4:Build braising liquid
5

Slow braise the roast

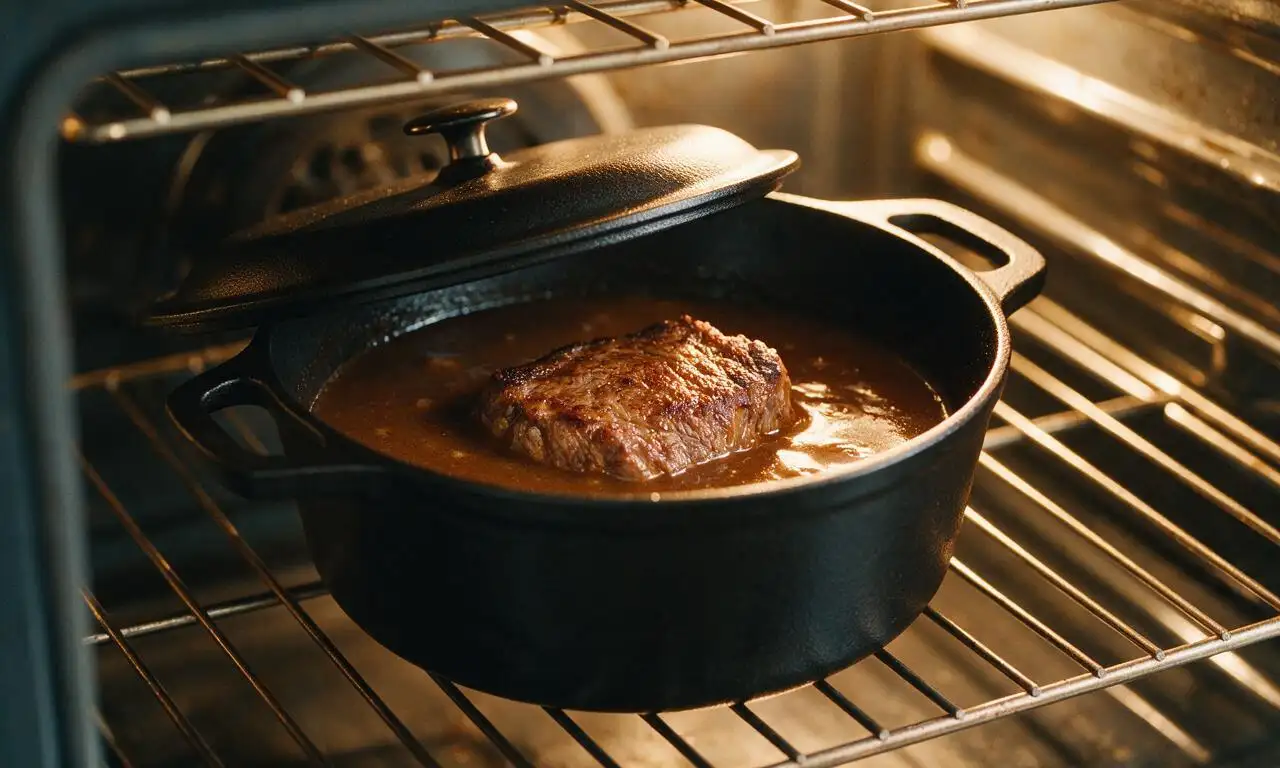
Return the seared beef roast to the Dutch oven, nestling it halfway into the simmering liquid. Cover the pot with a tight-fitting lid, transfer to a preheated 160°C (325°F) oven, and cook for 1 hour 45 minutes, using tongs to turn the roast once halfway through cooking to ensure even tenderness.
Step 5
step5:Slow braise the roast
6

Add root vegetables

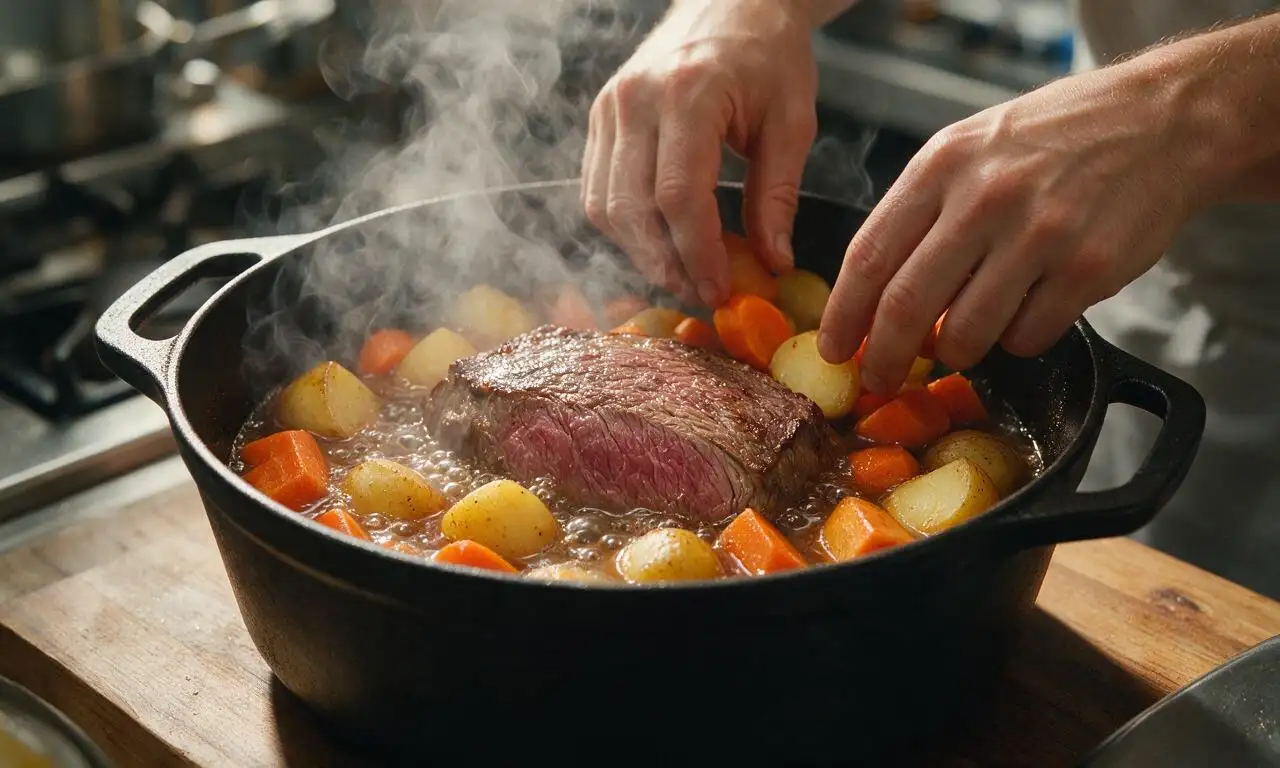
Carefully pull the oven rack out after 1 hour 45 minutes of braising, then nestle the 350g carrot chunks and 500g quartered Yukon Gold potatoes into the braising liquid around the roast. Replace the lid, slide the rack back, and cook for an additional 45 minutes at 160°C (325°F) until the beef is fork-tender (a fork slides in with no resistance) and vegetables are soft when pierced with a paring knife.
Step 6
step6:Add root vegetables
7

Rest and serve

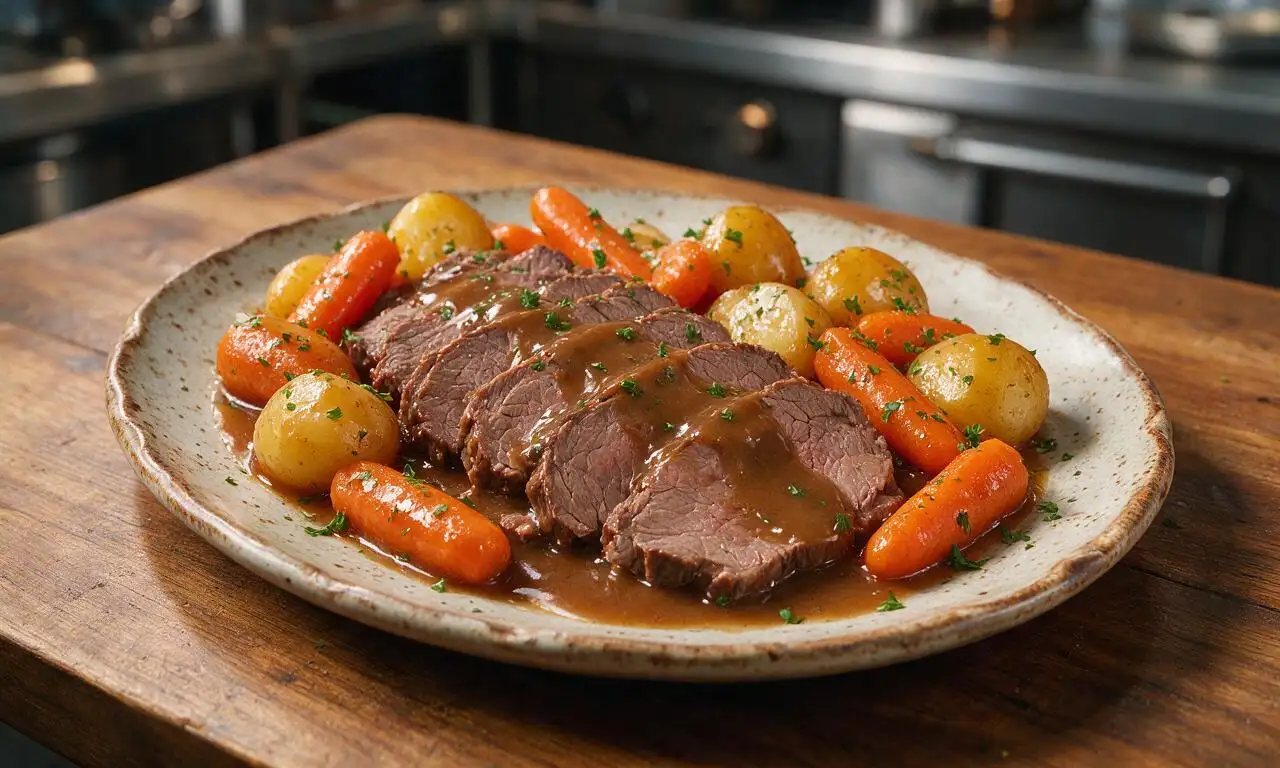
Remove the Dutch oven from the oven, transfer the roast and vegetables to a large serving platter, and tent loosely with aluminum foil to rest for 15 minutes. Skim excess rendered fat from the surface of the remaining gravy, discard the bay leaves, and adjust salt and pepper to taste. Slice the rested roast against the grain, pour the thickened gravy over the meat and vegetables, and garnish with 2 tablespoons chopped fresh flat-leaf parsley.
Step 7
step7:Rest and serve

Tips

1.Always pat the beef completely dry with paper towels before searing: surface moisture will cause the meat to steam instead of developing a deep, flavorful, crusty sear that builds the base of the gravy.
2.Do not raise the oven temperature above 160°C (325°F) to speed up cooking: high heat will make the chuck roast tough and stringy, while low, slow heat melts tough connective tissue for melt-in-your-mouth tenderness.
3.Always slice the rested roast against the grain: cutting perpendicular to the long muscle fibers shortens them, making each bite more tender rather than chewy.


✨ You May Also Like

Main Course
🍜 United Kingdom

A showstopping classic of tender seared beef, savory mushroom duxelles, and crisp prosciutto wrapped in flaky golden puff pastry, baked to juicy perfection.

⏱️ 2 hours 1Main Course ★ 4.7
Main Course
🍜 India

Tender charred marinated chicken simmered in a rich, spiced creamy tomato sauce, this iconic Anglo-Indian curry pairs perfectly with basmati rice or warm naan.

⏱️ 50 minuteMain Course ★ 4.6
Main Course
🍜 Thailand

Classic tangy, sweet, and savory Thai stir-fried rice noodles with shrimp, tofu, and crunchy garnishes, balancing all five core Thai flavor profiles.

⏱️ 30 minuteMain Course ★ 4.5
Main Course
🍜 United Kingdom

Crispy golden beer-battered cod and fluffy double-fried chips, served with tangy tartar sauce and malt vinegar: the timeless, beloved British pub comfort classic.

⏱️ 45 minuteMain Course ★ 4.7
Main Course
🍜 Mexico

Smoky, chile-marinated pork tacos with caramelized pineapple, fresh cilantro, and lime: a beloved classic Mexican street food perfect for casual summer gatherings.

⏱️ 1 hour 45Main Course ★ 4.8
Main Course
🍜 United States

Crunchy Fritos corn chips layered with savory beef chili and melted cheddar, topped with cool, zesty fixings for a beloved, cozy Tex-Mex comfort food.

⏱️ 35 minuteMain Course ★ 4.8

Classic Pot Roast with Vegetables:Frequently Asked Questions

1.Why is boneless beef chuck the recommended cut for pot roast instead of leaner options like sirloin? ▾
Beef chuck is ideal because it has generous marbling and tough connective tissue that melts into silky, rich texture during slow braising. Leaner cuts like sirloin lack that fat and collagen, so they’ll turn dry, tough, and stringy even with long cooking, rather than becoming fall-apart tender.
2.Should I bring the roast to room temperature before searing, or can I cook it straight from the fridge? ▾
Pat the roast very dry with paper towels, then let it sit at room temperature for 30 to 45 minutes before searing. Cold beef drops the pan temperature fast when it hits hot oil, leading to a pale, uneven sear instead of the deep, flavorful crust that builds your gravy’s base.
3.How much olive oil should I use for searing, and what heat level works best? ▾
Use 1 to 2 tablespoons of olive oil, just enough to lightly coat the bottom of your heavy Dutch oven. Heat it over medium-high until it shimmers, but don’t let it smoke. Too much oil makes the roast fry instead of sear, and smoking oil will give the final dish a bitter, burnt off-note.
4.Can I skip searing the roast to save time, or is that step really necessary? ▾
Don’t skip the sear! That deep brown crust on the beef creates hundreds of rich, complex flavor compounds via the Maillard reaction that you can’t get from slow cooking alone. Skipping it will leave your roast and gravy tasting flat, one-note, and far less savory, even with full cook time.
5.When do I add the carrots, celery, and onion so they don’t turn into mushy slop? ▾
Dice your yellow onion and celery to add in the first 30 minutes of braising to build deep flavor, but cut carrots into thick 2-inch chunks and add them during the last 60 to 90 minutes of cooking. That way they cook through to tender, sweet perfection without disintegrating into the gravy.
6.What’s the ideal oven temperature for braising pot roast so it doesn’t boil dry? ▾
Set your oven to 325°F once you’ve added braising liquid and covered the Dutch oven. This low, steady heat keeps the liquid at a gentle, constant simmer rather than a rolling boil, which prevents meat from seizing up and cuts down on excess liquid loss to evaporation.
7.How do I tell when the pot roast is actually done, instead of just relying on a set cook time? ▾
Don’t rely solely on timed recipes! The roast is done when you can slide a meat fork into the thickest part with zero resistance, and twist it easily to pull off tender shreds. If the fork meets any tough resistance, cover it back up and cook 20 to 30 minutes longer before checking again.
8.Can I make this pot roast in a slow cooker instead of a Dutch oven in the oven? ▾
Absolutely! Sear the roast and sauté your onion and celery in a pan first to build that critical base flavor, then transfer everything to your slow cooker. Cook on LOW for 7 to 8 hours, adding thick carrot chunks in the last 2 hours. Skip the HIGH setting—it will make the beef tough and stringy.
9.Why is my pot roast tough and chewy even after I cooked it for hours? ▾
Tough, chewy pot roast almost always stems from one of two common issues: you used too lean of a beef cut, or you cooked it at too high a temperature. Boiling beef instead of gently simmering it makes muscle fibers seize up fast, even with long cook times. Stick to chuck and low, steady heat.
10.How do I make smooth, lump-free gravy from the pot roast cooking liquid? ▾
Once you pull the roast and vegetables out, set the Dutch oven on the stovetop over medium heat. Skim excess fat off the top, then simmer the liquid for 5 to 10 minutes to concentrate flavor. For thicker gravy, whisk in a smooth slurry of 1 tablespoon cornstarch and 2 tablespoons cold water for zero lumps.
11.Can I prep the pot roast ingredients ahead of time for busy weeknight meals? ▾
Totally! You can trim the beef chuck, chop your yellow onion, celery, and carrots, and store them in separate airtight containers in the fridge for up to 3 days ahead. For even easier prep, sear the beef and sauté aromatics a day early, then just assemble and braise when you’re ready to cook.
12.Should I keep the pot fully covered while braising, or leave a gap for steam to escape? ▾
Keep the lid tightly sealed for almost the entire cook time! Trapping steam inside the pot creates a moist, even cooking environment that breaks down the chuck’s connective tissue evenly. If your lid doesn’t fit snugly, wrap a layer of aluminum foil under it to lock in extra steam and prevent liquid loss.
13.What other vegetables work well in this recipe if I don’t have enough carrots? ▾
You can swap in or add parsnips, turnips, rutabaga, waxy yellow potatoes, or whole pearl onions right alongside the carrots. Just make sure to cut all firm root veggies into uniform, thick chunks so they cook at the same rate, and add them in the last 90 minutes to avoid mushy texture.
14.How long do pot roast leftovers last, and what’s the best way to reheat them without drying out the beef? ▾
Leftovers will stay fresh in an airtight container in the fridge for 3 to 4 days, or freeze for up to 3 months. Reheat gently in a covered pot on the stovetop over low heat, adding a splash of beef broth if the gravy has thickened too much, to keep the beef moist as it warms through.
15.Do I need a lot of fancy herbs or seasonings to make the gravy taste rich and flavorful? ▾
You don’t need fancy, expensive add-ins! The browned beef, slow-cooked yellow onion, celery, and carrot create a deeply flavorful base all on their own. All you need is kosher salt, black pepper, one bay leaf, and maybe a sprig of fresh thyme for a perfectly balanced, rich gravy.
16.What size boneless chuck roast should I buy to feed a family of 4, with some leftovers? ▾
Pick up a 3 to 3.5 pound boneless beef chuck roast for 4 people. Chuck shrinks by roughly 30% as it cooks and fat renders out, so that size will give you enough tender, fall-apart beef for everyone at dinner, plus a small amount of leftovers for sandwiches or quick next-day lunches.

Comments (19)

2 days ago

OMG this pot roast was a total game changer for our Sunday family dinner! I was so worried my kids would turn their noses up at the carrots and potatoes, but they cleaned their plates and asked for seconds. The meat was so fall-apart tender I didn’t even need a knife to cut it. 10/10 will be making this every other week for meal prep too!

yesterday

Wait did you sear the roast first like the recipe says? I almost skipped that step last time and wondered if it makes a big difference!

2 hours ago

So glad your family loved it! Searing the roast first locks in so much deep, savory flavor and creates that amazing crust on the outside—we definitely don’t recommend skipping that step if you can help it!

1 week ago

Took me a little longer than the listed cook time because my oven runs a touch cold, but wow was it worth the wait. The gravy that forms at the bottom? SO good, I sopped it up with buttery dinner rolls. My husband said it tastes just like his grandma’s pot roast, which is the highest compliment possible in our house.

5 days ago

That’s such a sweet compliment! Oven temperature variations are totally normal—we always recommend checking the roast for fork-tenderness instead of sticking strictly to the timer, so it sounds like you did it perfectly!

3 days ago

First time ever making a pot roast and I was so intimidated because I thought it was super fancy, but the steps were actually really straightforward! Mine came out a little saltier than I wanted because I used regular broth instead of low-sodium, but that was my bad, not the recipe’s. Still ate three servings lmao.

5 days ago

Brought this to our neighborhood block party potluck last weekend and people were hounding me for the recipe before I even set the dish down! I added a handful of fresh thyme sprigs on top while it cooked because I had some lying around, and it smelled so good my dog was camped out by the oven the whole time. Only complaint is there were zero leftovers, I was hoping to have some for lunch the next day!

3 days ago

Oh the fresh thyme addition sounds chef’s kiss! Did you use a chuck roast for this? I have a rump roast in my freezer I’m wondering if it’ll work as a substitute.

2 days ago

We’re so flattered it was a potluck hit! Chuck roast is our top pick for this recipe because of the perfect marbling that keeps it moist, but rump roast will work too—just keep an eye on it so it doesn’t dry out during the long cook time. Your thyme add-in sounds amazing!

2 weeks ago

I was looking for a cozy Sunday meal that wasn’t total junk food, and this fit the bill perfectly! I swapped the regular potatoes for sweet potatoes to add a little extra fiber, and it worked so well with the savoriness of the roast and onions. Will absolutely be adding this to my monthly rotation.

1 week ago

That sweet potato swap is such a smart, delicious twist! We love when readers customize recipes to fit their preferences—we might even have to test that version ourselves soon!

yesterday

Made this in my tiny apartment Dutch oven and it worked like a charm! My whole 500 sq ft place smelled like pot roast for two days straight and I’m not even mad about it. The only note I have is to make sure you cut your veggies into big enough chunks so they don’t turn to mush while it braises.

1 week ago

I’ve been making pot roast for 40+ years and decided to give this recipe a shot when my granddaughter sent it to me. I gotta say, the tip to deglaze the pan with red wine before adding the veggies? Game changer. Gave the whole dish so much more depth than my usual old method. Hats off to the chef!

5 days ago

I was on the fence about using red wine because I don’t drink—do you think beef broth works as a substitute for the deglazing step?

3 days ago

Made a big batch of this on Sunday to portion out for work lunches all week, and let me tell you, it tastes even better on day 3! The flavors meld so much as it sits in the fridge. I added some celery along with the carrots and potatoes because I had it in the crisper drawer, zero regrets.

2 days ago

How are you reheating it? I tried meal prepping pot roast once and the meat got all tough and weird when I microwaved it at work.

yesterday

Adding celery is such a great call! For reheating, we recommend sprinkling a tiny bit of water or broth over top and covering it loosely with a damp paper towel before microwaving in 30 second bursts—it keeps the meat moist instead of drying it out!

2 hours ago

Okay full transparency, I burned the first side of the roast when I was searing it because I got distracted by a TikTok, but even with that little mishap this turned out SO good. The veggies were perfectly tender, the meat was juicy, my roommate came out of his room asking what smelled so good before it was even done. 10/10 forgiving recipe for messy cooks like me.

30 minutes ago

We’ve all been there with the TikTok distractions! The best part about slow braised recipes like this is they’re super forgiving of little mishaps—so happy you and your roommate enjoyed it!

30 minutes ago

So happy this recipe is naturally gluten free as long as you use GF beef broth! I’ve been searching for a solid pot roast recipe that doesn’t require weird specialty ingredients, and this checks every box. Served it over mashed cauliflower for a cozy low-carb dinner last night, chef’s kiss.

2 weeks ago

This is my third time making this pot roast in the last two months, that’s how good it is. Last time I added a parmesan rind to the braising liquid like I do for my soups, and it added this amazing umami kick that I didn’t know I needed. Don’t knock it till you try it!

1 week ago

The parmesan rind trick is genius! I save all my rinds in the freezer for stuff like this, definitely trying that next time I make this roast.

yesterday

I was worried I wouldn’t have time for a 3+ hour cook time on a work day, but most of that is hands-off oven time! I got all my emails answered, folded two loads of laundry, and helped my kid with homework while it cooked. It felt like I pulled off a fancy dinner with barely any effort. Win win!

2 hours ago

Wait do you put the lid on the Dutch oven the whole time it’s in the oven? I keep accidentally letting too much steam out and my braises never come out right.

30 minutes ago

Love that you were able to knock out so much while it cooked! Yes, keep the lid tightly on the Dutch oven for almost the entire cook time—you can take it off for the last 20 minutes if you want the top of the roast to brown a little more, but keeping it sealed traps the steam that makes the meat so tender!

5 days ago

Cut the recipe in half since it’s just me and my partner, and it worked perfectly! We had enough for one dinner plus a little leftover for sandwiches the next day, which was such a nice treat. The pot roast sliders I made with the leftover meat were insane, topped with a little melted provolone and the leftover veggies.

3 days ago

Leftover pot roast sandwiches are one of our all-time favorite perks of making this recipe! That melted provolone addition sounds absolutely incredible, we need to try that ASAP.

just now

Added a little smoked paprika and a pinch of cayenne to the seasoning rub for the roast, and it gave the whole dish a tiny subtle heat that was so good. Not spicy at all, just a little extra warmth that paired perfectly with the cold rainy weather we had here over the weekend. Will definitely be doing that every time now.

1 week ago

Made this for our early Easter dinner with my in-laws, and I was so nervous it wouldn’t turn out because my mother-in-law is famous for her pot roast. Y’all. She asked ME for the recipe. I will never be able to top that win. Thank you for this foolproof recipe!

5 days ago

That is the ultimate win! My MIL is the same way, I’m saving this recipe for when they come visit next month so I can impress her too.

2 days ago

Full transparency: I have burned toast, set off smoke alarms making pasta, and once turned scrambled eggs into rubber. I saw this recipe said medium difficulty and almost skipped it, but I decided to go for it. IT TURNED OUT. The meat was tender, the veggies were perfect, my boyfriend thought I ordered takeout from a fancy steakhouse. I feel like a real adult now lmao.

yesterday

This is giving me so much hope! I’m the exact same way, I can barely make mac and cheese without messing it up. Did you follow the recipe exactly or make any tweaks?

2 hours ago

This is our favorite kind of comment! Even if you’re newer to cooking, the hands-off braising time means you don’t have to stand over the stove stressing—we’re so proud of you for pulling it off and impressing your boyfriend!

3 days ago

We had a random cold snap last week so I decided to make this, and it was the coziest meal ever. The only issue I had was that my potatoes took a little longer to cook through than the recipe said, but I think I cut them way too big. Next time I’ll cube them a little smaller so they’re done at the same time as the carrots.

2 days ago

Vegetable size totally impacts cook time! We recommend cutting root veggies into 1.5 to 2 inch chunks so they cook evenly without turning to mush—sounds like you already know what to adjust for next time, it’ll be perfect!

5 minutes ago

Used my brand new enameled Dutch oven for the first time to make this, and it was the perfect inaugural recipe! The clean up was so easy because nothing stuck to the bottom, even after searing the roast. Will be making this for years to come, I can already tell.

1 week ago

Y’all weren’t kidding about how good the leftovers are. I tossed the leftover shredded beef and veggies with some egg noodles and a splash of beef broth to make a quick pot roast noodle bowl for dinner last night, and it might have been better than the original meal. 10/10, zero food waste over here.



