
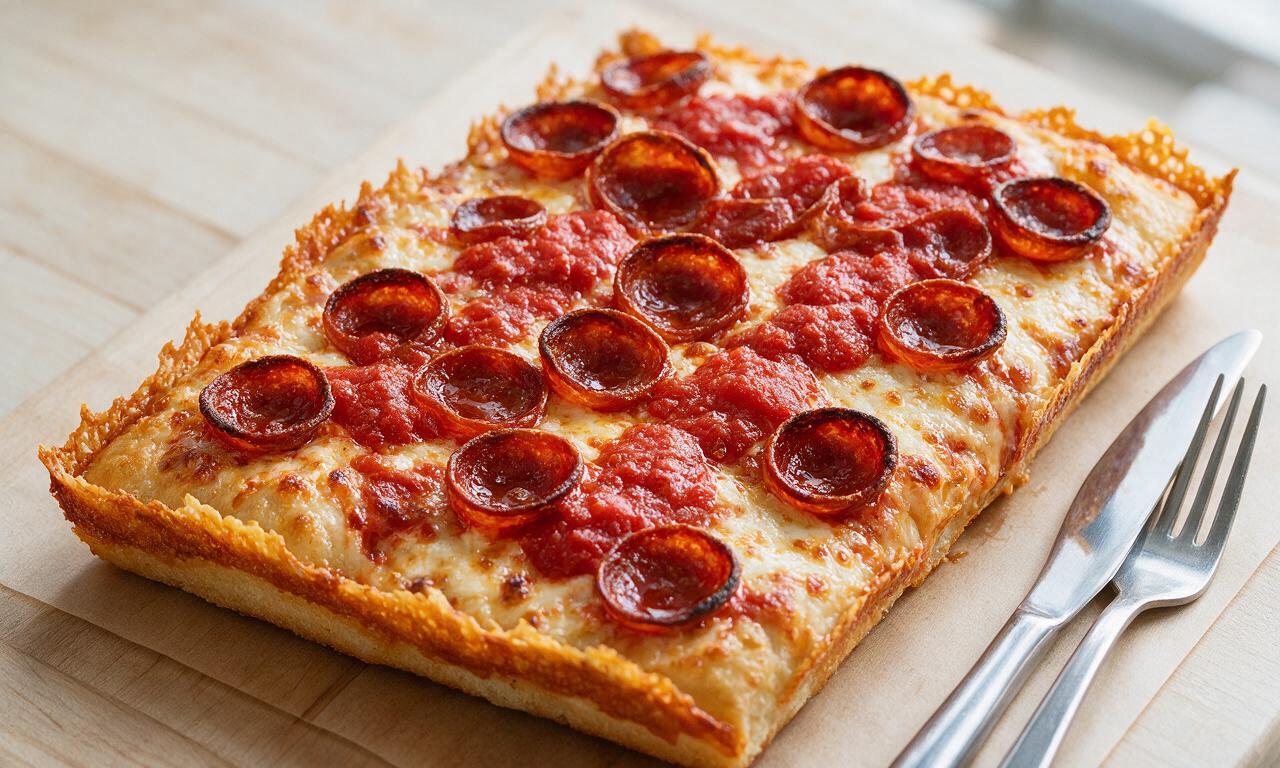
Detroit Style

Detroit Style
⏱️ cook time 2 hours 45 minutes
🍽️ servings 4
⚡ Difficulty medium

intro

Iconic square cheesy pizza from Detroit, Michigan, with a thick airy focaccia crust, crispy fried frico cheese edge, curled pepperoni cups, and signature dolloped tomato top.

Ingredients

Bread flour 320 grams (2.5 cups)
Instant dry yeast 7 grams (2 1/4 teaspoons)
Warm filtered water 240 ml (1 cup, 40°C/105°F)
Kosher salt 8 grams (1.5 teaspoons)
Extra-virgin olive oil 45 ml (3 tablespoons, divided)
Low-moisture brick cheese (or whole-milk mozzarella) 340 grams (12 oz, thickly shredded)
Thick-cut pepperoni slices 113 grams (4 oz, 3mm thick)
Seasoned pizza sauce 180 ml (3/4 cup, strained crushed San Marzano tomato)
Parmigiano-Reggiano cheese 28 grams (1/4 cup, finely grated)
Dried oregano 1 gram (1/2 teaspoon)

Steps

1

Mix the pizza dough

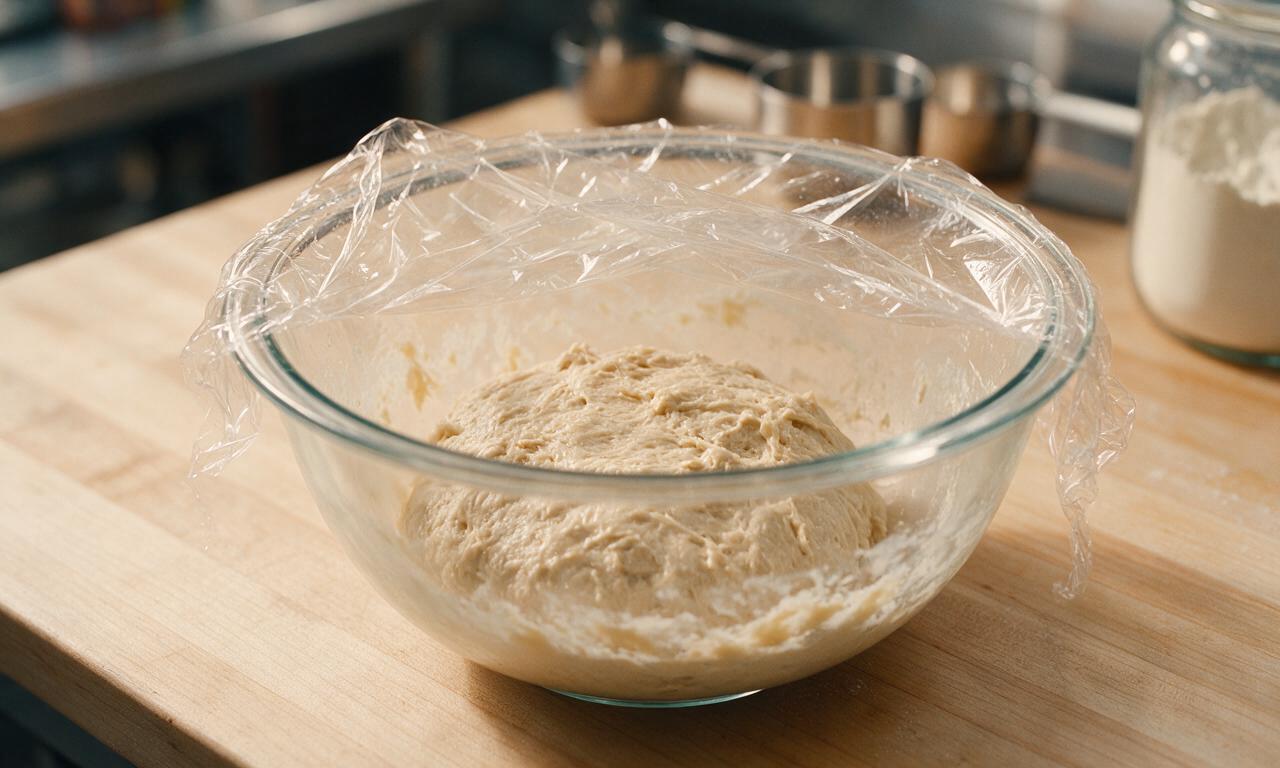
In a large mixing bowl, combine 320g bread flour, 7g instant yeast, and 8g kosher salt. Stir in 240ml warm (40°C/105°F) water and 15ml (1 tbsp) olive oil until a shaggy, sticky dough forms with no visible dry flour pockets. Cover the bowl tightly with plastic wrap and let rest at room temperature (21°C/70°F) for 2 hours, until the dough doubles in size and has small bubbles across its surface.
Step 1
step1:Mix the pizza dough
2

Prep the square pan

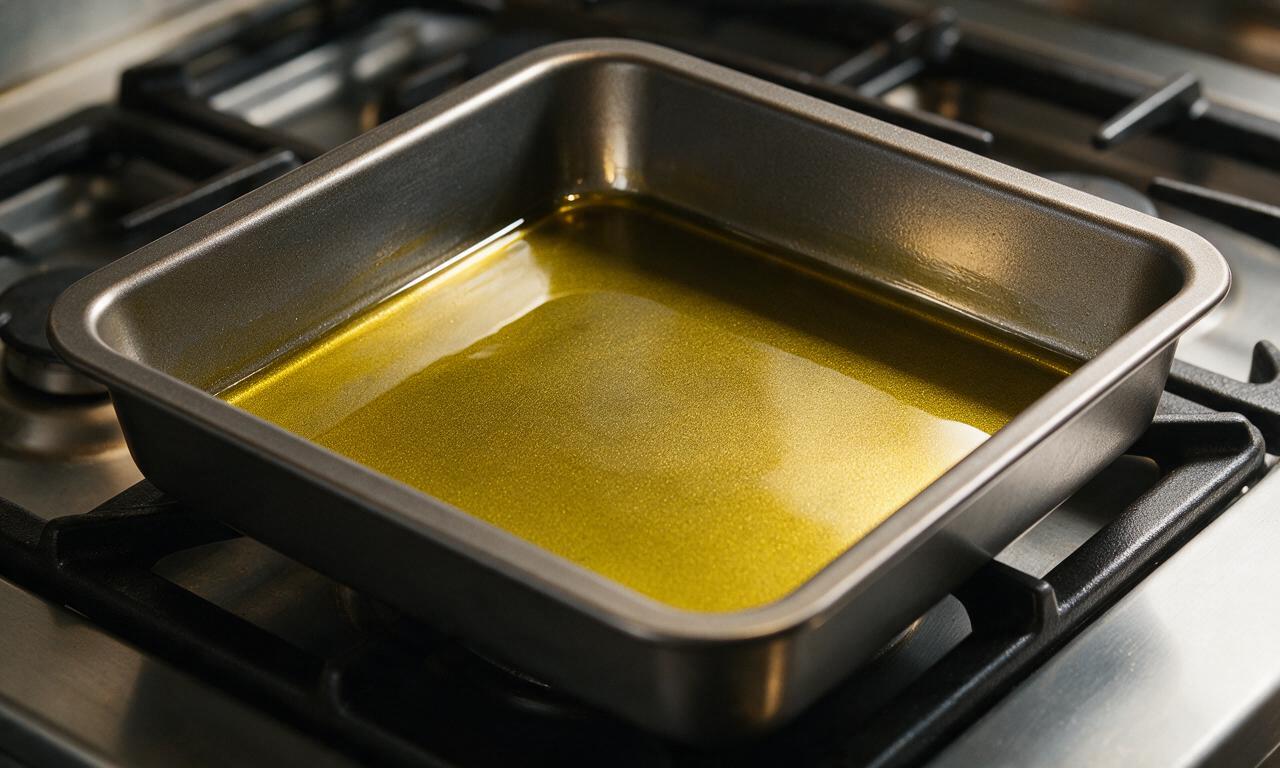
Pour the remaining 30ml (2 tbsp) olive oil into a 23x33cm (9x13 inch) heavy-gauge aluminum square pan (traditional blue steel Detroit-style pan preferred), tilting to coat the entire bottom and 1cm up the sides evenly. Do not wipe away excess oil, as this creates the signature crispy fried crust edge during baking.
Step 2
step2:Prep the square pan
3

Stretch and proof dough

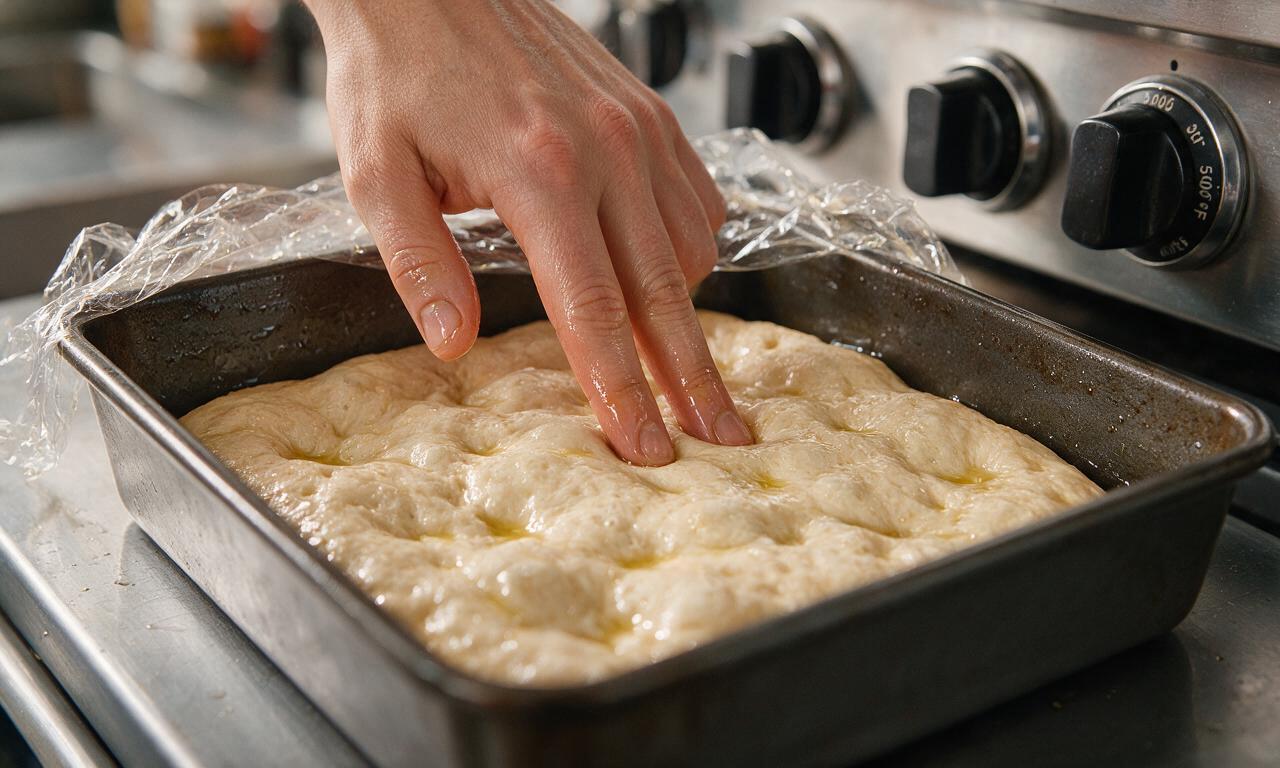
Gently transfer the risen, bubbly dough to the oiled pan. Use oiled fingertips to press and stretch the dough evenly across the entire pan bottom, dimpling the surface as you go. If the dough springs back repeatedly, let it rest for 5 minutes before resuming stretching, until it reaches all pan edges. Cover loosely with oiled plastic wrap and let proof for 15 minutes at room temperature while you preheat the oven to 260°C (500°F) with a rack in the middle position.
Step 3
step3:Stretch and proof dough
4

Layer cheese to edges

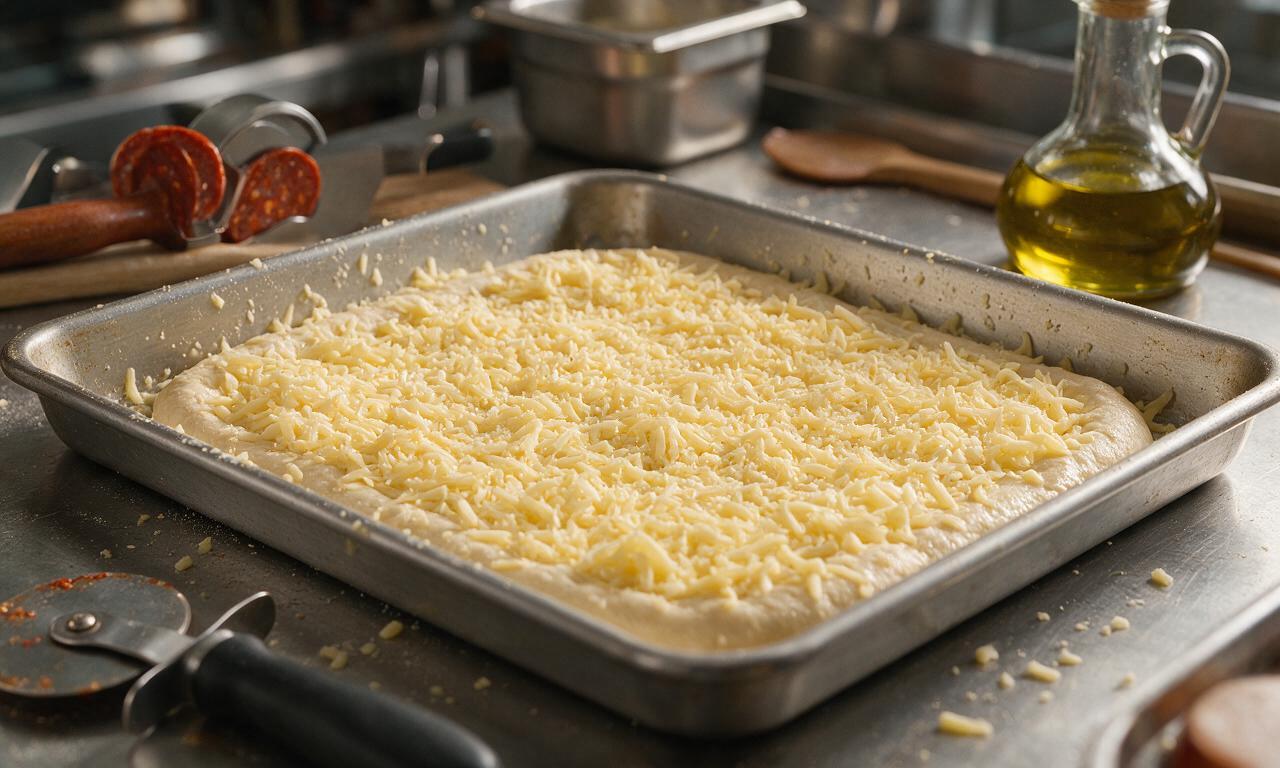
Once the dough is done proofing, sprinkle all 340g of shredded brick or mozzarella cheese evenly across the dough, making sure to spread cheese all the way to the very pan edges to create the crispy, golden frico crust when baked. Do not leave a bare border of crust, as is traditional for Italian-style pizza.
Step 4
step4:Layer cheese to edges
5

Top and bake pizza

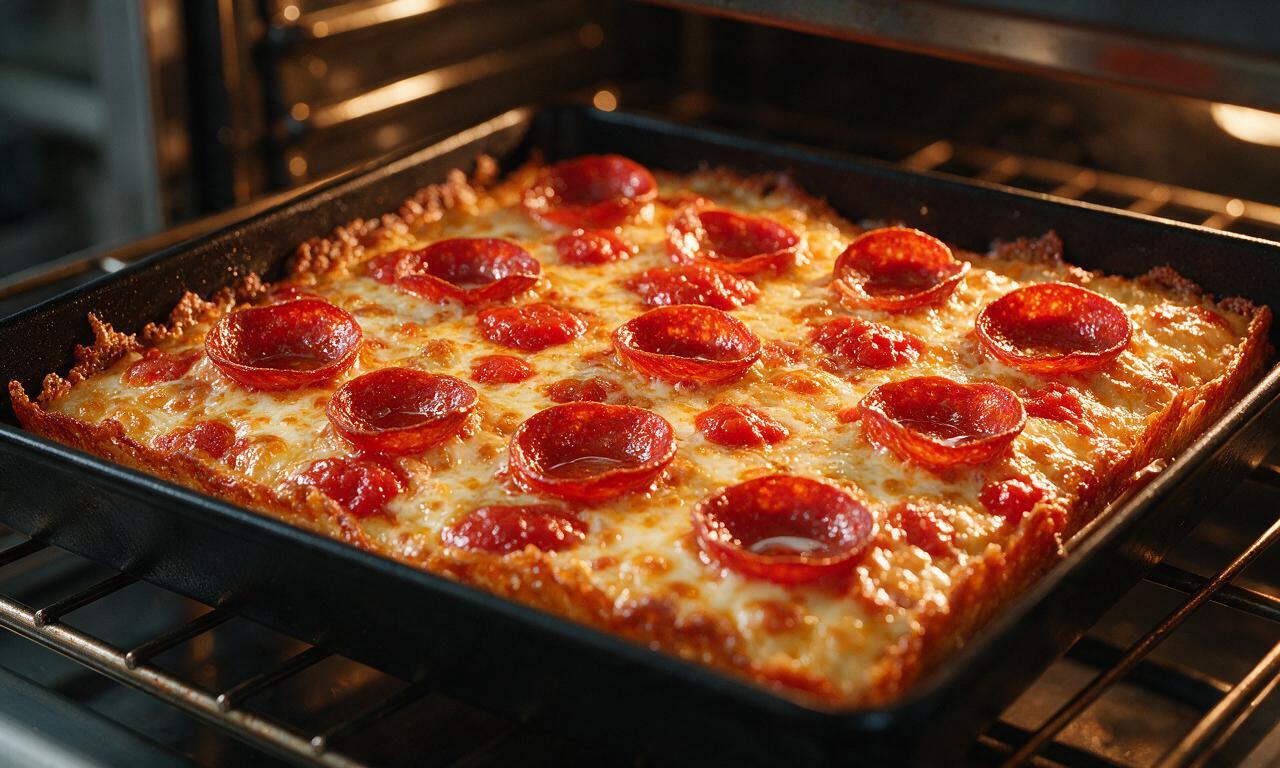
Arrange all 113g of thick-cut pepperoni slices in an even layer across the cheese, spacing slices 1cm apart so they crisp into curled cups as they cook. Dollop 30ml (2 tbsp) spoonfuls of the 180ml pizza sauce in 3 even rows across the pepperoni (6 total dollops, the traditional Detroit-style red top application, with no sauce spread under the cheese). Place the pan on the middle oven rack and bake for 15 minutes at 260°C (500°F), until the cheese at the edges is deep golden and crispy, sauce is gently bubbling, and pepperoni slices are curled into cups with rendered fat bubbling in their centers.
Step 5
step5:Top and bake pizza
6

Rest and serve pizza

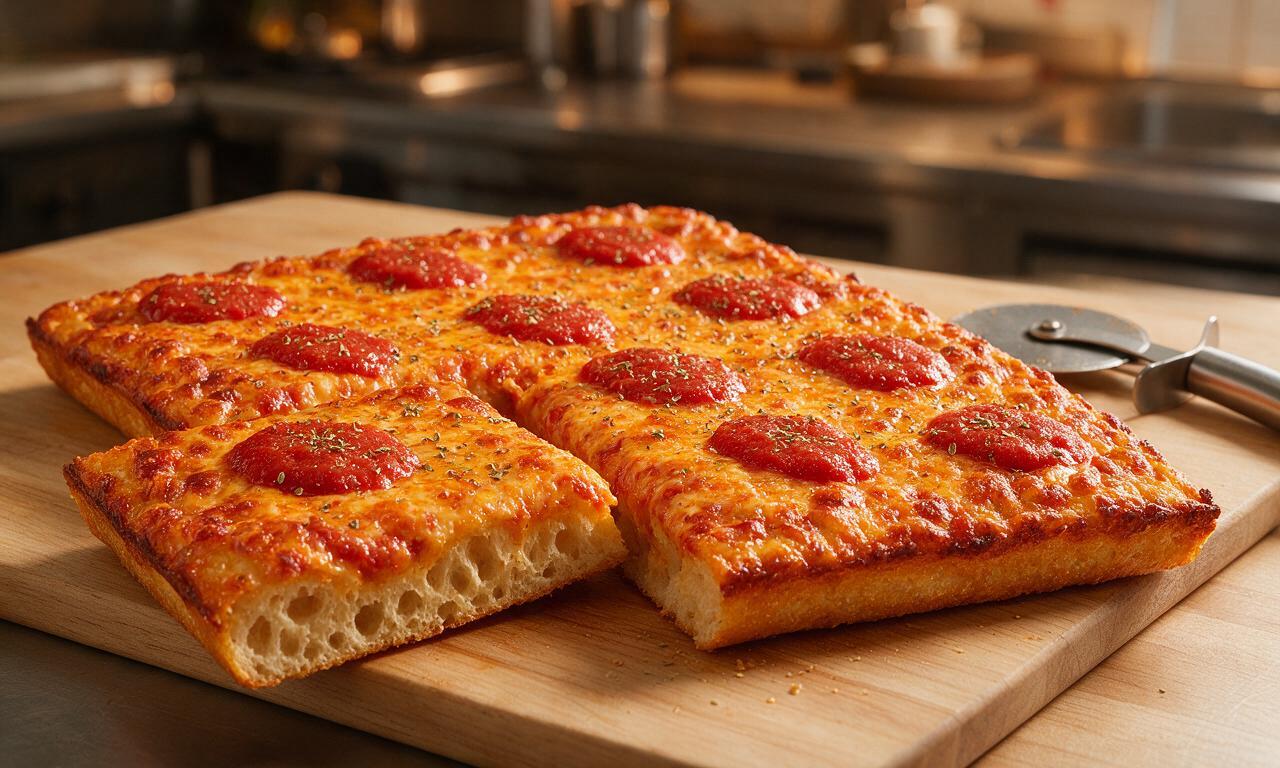
Remove the pan from the oven, and immediately sprinkle with 28g grated Parmigiano-Reggiano and 1g dried oregano. Let the pizza rest in the pan for 5 minutes to set, then run a thin knife around the pan edges to loosen the crispy frico crust, lift the whole pizza onto a wooden cutting board, cut into 8 equal square slices, and serve hot.
Step 6
step6:Rest and serve pizza

Tips

1.Always spread cheese all the way to the pan edges with no bare dough border; this creates the signature caramelized crispy frico crust that defines Detroit-style pizza.
2.Use thick-cut (3mm) pepperoni instead of thin deli slices; thin slices will burn at high heat instead of curling into the classic grease-holding crispy cups.
3.Skip spreading sauce under the cheese—this traditional 'red top' method of dolloping sauce on top of the cheese before baking prevents the thick crust from turning soggy.


✨ You May Also Like

Main Course
🍜 United Kingdom

A showstopping classic of tender seared beef, savory mushroom duxelles, and crisp prosciutto wrapped in flaky golden puff pastry, baked to juicy perfection.

⏱️ 2 hours 1Main Course ★ 4.7
Main Course
🍜 India

Tender charred marinated chicken simmered in a rich, spiced creamy tomato sauce, this iconic Anglo-Indian curry pairs perfectly with basmati rice or warm naan.

⏱️ 50 minuteMain Course ★ 4.8
Main Course
🍜 Thailand

Classic tangy, sweet, and savory Thai stir-fried rice noodles with shrimp, tofu, and crunchy garnishes, balancing all five core Thai flavor profiles.

⏱️ 30 minuteMain Course ★ 4.6
Main Course
🍜 United Kingdom

Crispy golden beer-battered cod and fluffy double-fried chips, served with tangy tartar sauce and malt vinegar: the timeless, beloved British pub comfort classic.

⏱️ 45 minuteMain Course ★ 4.9
Main Course
🍜 Mexico

Smoky, chile-marinated pork tacos with caramelized pineapple, fresh cilantro, and lime: a beloved classic Mexican street food perfect for casual summer gatherings.

⏱️ 1 hour 45Main Course ★ 4.7
Main Course
🍜 United States

Crunchy Fritos corn chips layered with savory beef chili and melted cheddar, topped with cool, zesty fixings for a beloved, cozy Tex-Mex comfort food.

⏱️ 35 minuteMain Course ★ 4.9

Detroit Style:Frequently Asked Questions

1.Can I use all-purpose flour instead of bread flour for the Detroit-style pizza crust?
Bread flour’s higher 12-14% protein content creates that signature chewy, airy focaccia-like crumb all-purpose flour can’t quite replicate. If you’re in a pinch, swap 1 cup of all-purpose per 1 ¼ cups bread flour plus 2 teaspoons vital wheat gluten, but expect a slightly less structured crust that won’t hold toppings as well.
2.Why is the sauce dolloped on top of Detroit-style pizza instead of spread under the cheese?
That signature dolloped tomato top keeps the thick crust from getting soggy during high-heat baking, since wet sauce never sits directly against the dough. It also creates bright, tangy tomato bursts in every bite instead of a uniform sauce layer, which is a core part of the classic Motor City flavor profile.
3.How do I get that iconic crispy, cheesy frico edge on my pizza?
Start by coating the entire bottom and sides of your square pan with a generous layer of extra-virgin olive oil. Spread shredded low-moisture mozzarella all the way to the very pan edges, so it touches the hot oil as it bakes and fries into that golden, crunchy, salty cheese rim everyone loves.
4.What type of pan do I need to make authentic Detroit-style pizza at home?
The traditional pick is a 10x14 inch hard-anodized aluminum or blue steel Detroit-style pizza pan, which conducts high heat evenly for a crisp bottom crust. If you don’t have one, a heavy-gauge 9x13 inch metal baking pan works—just skip glass, which won’t get hot enough to form a proper frico edge.
5.How do I get my pepperoni to curl into those crispy little cups instead of laying flat?
Reach for thicker-sliced, natural-casing pepperoni instead of thin, vacuum-sealed sandwich-style pepperoni. Lay slices in a single, non-overlapping layer across the cheese and bake at 475°F to 500°F—high heat will render fat fast and make edges curl up into perfect, grease-holding little cups.
6.How long should I let the dough rise to get that light, airy focaccia texture?
For the best crumb and deepest flavor, do a slow cold rise: after mixing dough with instant yeast, cover it and rest it in the fridge for 18 to 24 hours. If you’re short on time, a 2-hour room temperature rise works, but cold ferment creates those irregular, open air pockets that make the crust special.
7.The recipe calls for instant dry yeast—do I need to proof it first before mixing?
No, that’s the biggest perk of instant dry yeast! You can mix it straight in with your bread flour and other dry ingredients before adding warm filtered water, no pre-dissolving required. Just make sure your water is 105°F to 110°F—too hot kills yeast, too cold leads to slow, uneven rising.
8.Won’t all that olive oil in the pan make the pizza crust greasy?
You’ll want 2 to 3 tablespoons of extra-virgin olive oil spread evenly across the pan bottom and up the sides. It won’t make the crust greasy—instead, it fries the dough base for that signature crisp, golden bite, helps frico form, and keeps the crust from sticking to the pan as it bakes.
9.Can I prep the pizza dough ahead of time for easy weeknight meals?
Absolutely! Mixed, kneaded dough will keep tightly covered in the fridge for up to 3 days, and it actually tastes better the longer it cold ferments. Just pull it out 30 minutes before you plan to stretch it in the pan, so it warms slightly and presses out to the edges without springing back.
10.Why does the recipe specify kosher salt instead of regular table salt?
Kosher salt has larger, flakier crystals that distribute more evenly through dough for consistent seasoning, and it lacks the bitter, metallic aftertaste table salt can add from its anti-caking additives. If you only have table salt, use half the called-for amount, since it’s much denser than kosher salt.
11.Why does my dough keep shrinking back when I try to stretch it to the pan edges?
That means the gluten in your high-protein bread flour is too tight! After you set the mixed dough in the oiled pan, let it rest for 15 to 20 minutes before trying to press it out again. That short rest relaxes the gluten, so you’ll be able to spread it evenly to all four corners without it pulling back mid-bake.
12.How do I keep the thick Detroit-style crust from getting soggy under toppings?
First, bake the pizza on the lowest rack of your fully preheated oven, so the pan bottom gets direct, intense heat to crisp the crust. Second, lay your cheese all the way to the edges directly on the dough before adding sauce dollops—it acts as a moisture barrier between the crust and wet toppings.
13.How long should I let the pizza rest after baking before I slice it?
Let it rest for 3 to 5 minutes right in the pan before lifting it out and cutting it into traditional square slices. That short wait lets melted cheese set so it doesn’t slide off when you slice, and gives the frico edge just enough time to crisp up even more as it cools slightly.

Comments (18)

2 days ago

OMG, I made this for our weekly family dinner last night and it was a total hit! My kids kept asking for seconds before they even finished their first slice. The crispy cheese edge is chef’s kiss, way better than the takeout Detroit style we usually order. Only thing I messed up was stretching the dough too thin on one corner, oops.

yesterday

Same! I overstretched my first attempt too, turns out letting the dough rest for 10 extra minutes after spreading makes it so much easier to get that thick, even base.

yesterday

So glad the family loved it! That dough rest trick is spot on – if it springs back while you’re spreading, just walk away for 5-10 minutes and it’ll cooperate way better. Next time try adding a sprinkle of parm to the edges for extra crisp!

1 week ago

Game changer! Brought this to our neighborhood potluck last weekend and the whole pan was gone in 10 minutes flat. Everyone kept asking where I got the recipe, I felt like a total pro. Cook time felt a little long but 100% worth the wait for that fluffy, crispy crust.

5 days ago

Wait did you make it ahead and reheat it? I’m thinking of making this for our upcoming college tailgate and don’t want it to get soggy!

3 days ago

Great question! If you’re making it ahead, underbake it by 3 minutes, let it cool completely, then wrap tight and reheat on a sheet pan at 425°F for 8-10 minutes right before serving – it’ll stay perfectly crispy, no sogginess!

3 days ago

I was nervous about the medium difficulty rating since I’m pretty new to baking bread, but this recipe was so easy to follow! I prepped the dough Sunday night and baked it up for Monday dinner, zero stress. The pepperoni cups that get all crispy in the middle? SO good, I could eat those straight off the pan. Only tiny complaint is I wish I’d bought the right size square pan, my round cake pan made the crust a little thicker than pictured.

2 days ago

I used a 9x13 metal baking pan when I didn’t have the Detroit-style square pan and it worked almost exactly the same! Just make sure it’s not glass, the high heat makes glass pans tricky for that crispy bottom.

2 days ago

Love that you prepped the dough ahead – that cold ferment actually makes the crust taste even better! A 9x13 dark metal pan is the perfect substitute if you don’t have the traditional square Detroit pan, totally agree with skipping glass here for best crisp.

5 days ago

Grew up on NY slice, was skeptical that a Detroit style pie could live up to the hype, but wow – this recipe converted me. The crispy frico crust edge, the sauce dolloped on top, the thick pillowy dough? Absolute perfection. I added a little extra oregano and red pepper flake to the sauce and it hit just right.

3 days ago

Fellow NY pizza snob here, you’re telling me this is actually worth ditching my regular slice recipe for? I’ve been burned by bad ‘authentic’ Detroit recipes before.

2 days ago

Totally get the skepticism! The key to getting it right is laying the pepperoni all the way to the edges so the fat renders out and creates that crispy cheese frico, no sad floppy edges here. Give it a shot, I think you’ll be surprised!

yesterday

This looks absolutely insane! Has anyone tried making this with gluten free bread flour? My husband has celiac and I’ve been searching for a good Detroit style GF recipe that doesn’t turn out dense or crumbly. If it works with a 1:1 GF flour swap I’ll be making this every Friday for pizza night, no cap.

2 hours ago

I used my go-to 1:1 GF baking flour (the one with xanthan gum already added) and added an extra tablespoon of olive oil to the dough, turned out perfect! My non-GF roommates didn’t even notice a difference.

30 minutes ago

So glad the GF swap worked for you! For anyone else trying it, just make sure to let the GF dough rest an extra 20 minutes before spreading, it’s a little stiffer than regular dough and needs that time to relax.

2 weeks ago

Made this in my dorm’s tiny apartment oven last week and even with my janky old baking sheet it turned out SO good! My roommates and I split the whole pan between the three of us while we studied for midterms, best study break meal ever. 10/10, will be making this every other week for sure.

1 week ago

Wait did you have to adjust the oven temp at all? My dorm oven runs like 50 degrees hot, I’ve burned so many frozen pizzas in it lmao

1 week ago

That’s awesome that it worked out in a dorm oven! If your oven runs hot, just drop the temp by 25 degrees and keep a close eye on it during the last 5 minutes of baking – the edges should be deep golden and crispy, not burnt.

5 days ago

I need everyone to know that the cheese pull on this pizza is insane. I took a video for my food Instagram and it got 200 likes, all my followers are asking for the link now. Pro tip: use a mix of low moisture mozz and a little bit of white cheddar for extra depth of flavor, trust me.

3 days ago

Love that pro tip! The white cheddar addition is such a good call, it adds that little sharp kick that pairs perfectly with the salty pepperoni. Thanks for sharing!

30 minutes ago

Wait, the total cook time says 2 hours 45 minutes – most of that is inactive dough rise time, right? I’m trying to plan out our Saturday night dinner timeline so I don’t have hangry kids banging on the oven door asking when it’s done. Looks too good to mess up the timing!

just now

You got it! Only about 25 minutes of that total time is active prep and baking – the rest is letting the dough proof and rise, so you can hang out with the kids, help with homework, or prep sides while you wait. No rushed timeline needed!

1 week ago

Leftovers of this are even better the next day! I heated a slice up in my air fryer at 400 for 3 minutes and the crust got even crispier than it was fresh out of the oven. Meal prepped two pans this week so I have quick lunches all work week, game changer for my busy schedule.

5 days ago

Oh that’s such a good idea! I usually reheat pizza in the microwave and it gets all soggy, can’t wait to try the air fryer trick with my leftover slices this week.

2 days ago

I’ve never made pizza dough from scratch before and I was so intimidated, but the step by step instructions for this recipe were so clear! My dough rose perfectly, the crust was light and fluffy, even my super picky sister said it was better than our local pizza joint’s Detroit pie. So proud of myself!

yesterday

That makes us so happy to hear! There’s nothing better than nailing a homemade dough for the first time – that confidence is going to lead to so many amazing homemade pizzas down the line. Great job!

2 hours ago

Quick question! Do I need to use the cup-and-char pepperoni for this to be authentic? I only have regular sliced pepperoni in my fridge right now and I don’t feel like running to the grocery store in the rain. Will it still turn out good if I use what I have?

30 minutes ago

Regular sliced pepperoni works totally fine! The cup-and-char just gets those nice crispy grease cups everyone loves, but regular pepperoni will still be delicious. If you want a little extra crisp, just lay the slices out on a paper towel for 10 minutes before putting them on the pizza to soak up excess grease.

3 days ago

I swapped the suggested quick sauce for my family’s homemade Sunday marinara and it was a match made in heaven. The thick crust stands up so well to a heartier sauce, no soggy middle at all. Served this with garlic bread and Caesar salad for our extended family dinner last Sunday, everyone went back for thirds.

2 days ago

I did the exact same thing! My nonna’s marinara recipe paired with this crust is unbeatable, I’ll never order delivery pizza again.

5 days ago

Okay, full transparency: I burned the first batch of this because I got distracted playing with my dog and forgot to set a timer. But it smelled so good while it was baking that I made another batch the next day, set three timers, and it was perfect. Worth every minute, even the slightly charred first attempt got picked at by my dog lol.

3 days ago

LMAO this is so relatable, my golden retriever has been the reason I’ve burned so many baked goods. At least he got a little snack out of the first attempt, right?

2 days ago

Made this for my office potluck yesterday and I had three people slide me their Venmo asking me to make them a whole pan for their families. It’s that good. The crispy cheese edges are addictive, I had to stop myself from picking at them before I brought the pan in to share.

1 week ago

Added a drizzle of hot honey on top after baking and oh my GOD, it’s the best sweet-savory combo ever. The spice from the pepperoni, the sweet honey, the salty crispy cheese? I could eat an entire pan by myself, no shame. 10/10, will be adding hot honey every single time I make this from now on.

2 weeks ago

This is way cheaper than ordering delivery for my family of four! All the ingredients cost me less than $15 total, and we had enough leftovers for lunch the next day. Way better quality than the $30 delivery pizza we usually get on Friday nights, this is our new go-to for sure.

3 days ago

I never eat pizza crust but I ate every single bite of the crust on this pizza. The buttery, crispy, cheesy edges are so good I was scraping the pan to get every last crumb. Who even am I right now?

5 minutes ago

Tasted great, but my smoke alarm went off twice while baking because the cheese dripped a little onto the bottom of my oven. Definitely put a baking sheet on the rack below the pizza pan next time to catch drips, lesson learned. Flavor was 10/10 but the smoke alarm chaos knocked a couple points off for me.



