
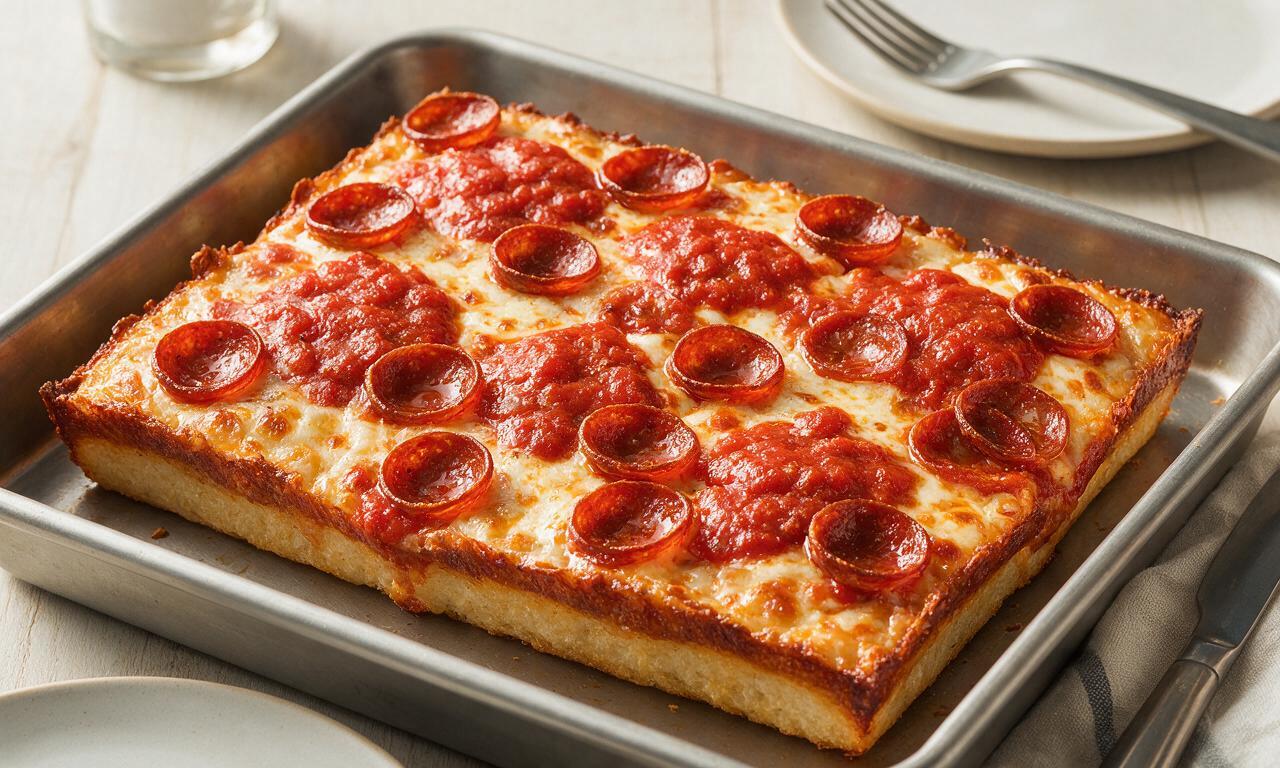
Detroit-Style Pizza

Detroit-Style Pizza
⏱️ cook time 1 hour 10 minutes
🍽️ servings 4
⚡ Difficulty medium

intro

Crispy, cheesy square pizza with a thick airy crust, signature crispy frico cheese edges, zesty dolloped tomato sauce, and cupped pepperoni, baked hot in a steel pan.

Ingredients

Bread flour 320 grams (2.5 cups)
Instant dry yeast 7 grams (2 1/4 tsp, 1 standard packet)
Warm water 240 ml (1 cup, 40°C/105°F)
Kosher salt 6 grams (1 tsp)
Extra-virgin olive oil 45 ml (3 tbsp, divided)
Freshly shredded low-moisture whole-milk mozzarella 450 grams (4 cups)
Cupping-style sliced pepperoni 85 grams (3 oz, ~36 thin slices)
Strained crushed San Marzano tomatoes 180 ml (3/4 cup)
Dried oregano 1 gram (1/2 tsp)
Garlic powder 1 gram (1/4 tsp)

Steps

1

Mix and rest dough

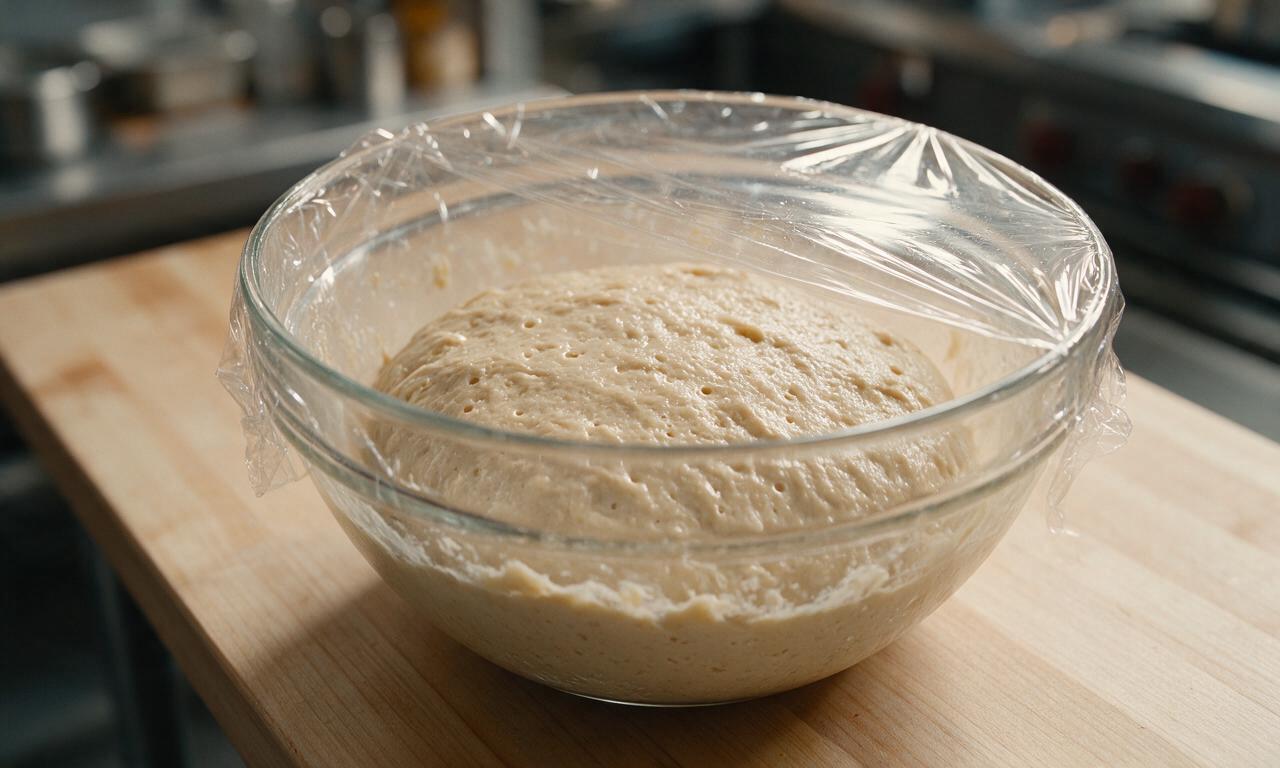
In a large mixing bowl, combine 320g bread flour, 7g instant dry yeast, and 6g kosher salt, stirring to distribute evenly. Pour in 240ml warm (40°C/105°F) water and 15ml (1 tbsp) olive oil, mixing until a shaggy, sticky dough forms with no dry flour pockets. Cover the bowl tightly with plastic wrap, and let rest in a warm (24°C/75°F) spot for 30 minutes, until the dough doubles in size and shows small air bubbles across its surface.
Step 1
step1:Mix and rest dough
2

Prep the baking pan

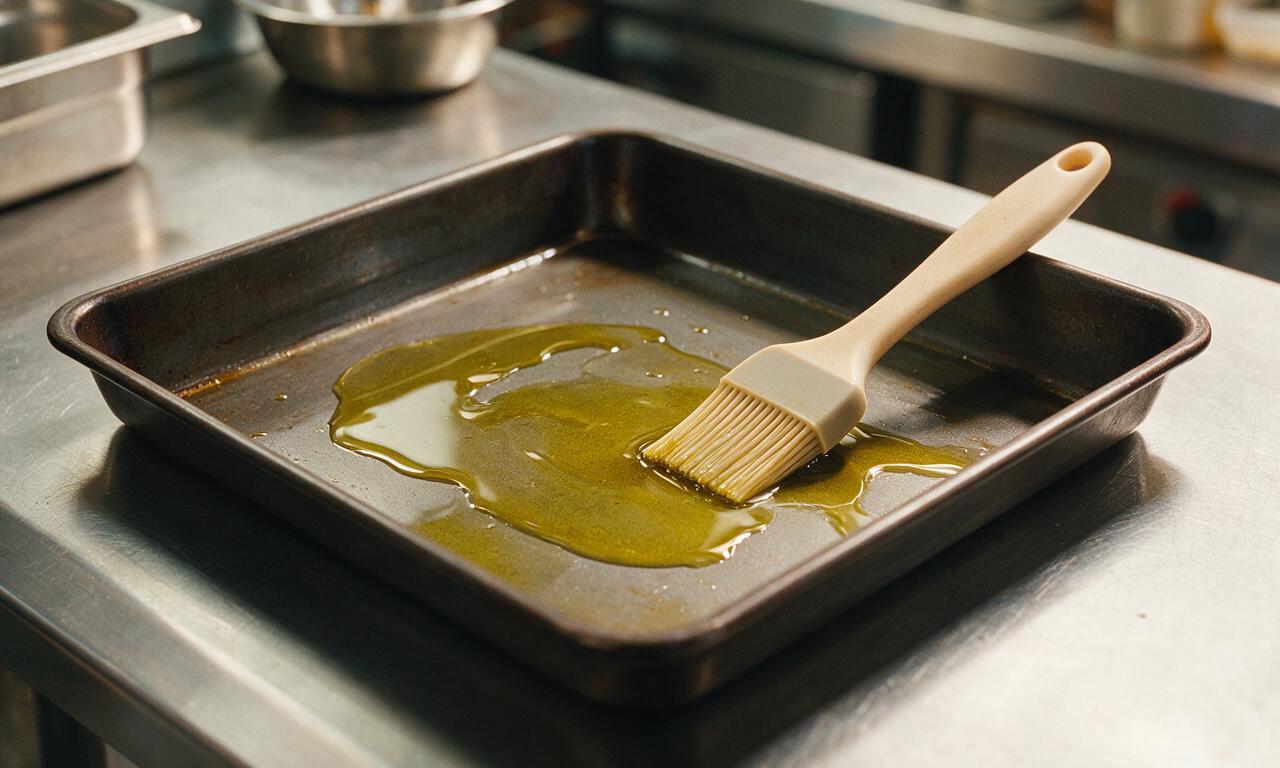
Pour the remaining 30ml (2 tbsp) olive oil into a 10x14 inch (25x35cm) heavy-gauge rectangular steel pizza pan. Use a silicone pastry brush to spread the oil evenly across the entire pan bottom and 1 inch up the inner sides. Avoid thin, flimsy non-stick pans, as they will warp at high heat and burn the crust before it cooks through.
Step 2
step2:Prep the baking pan
3

Stretch dough in pan

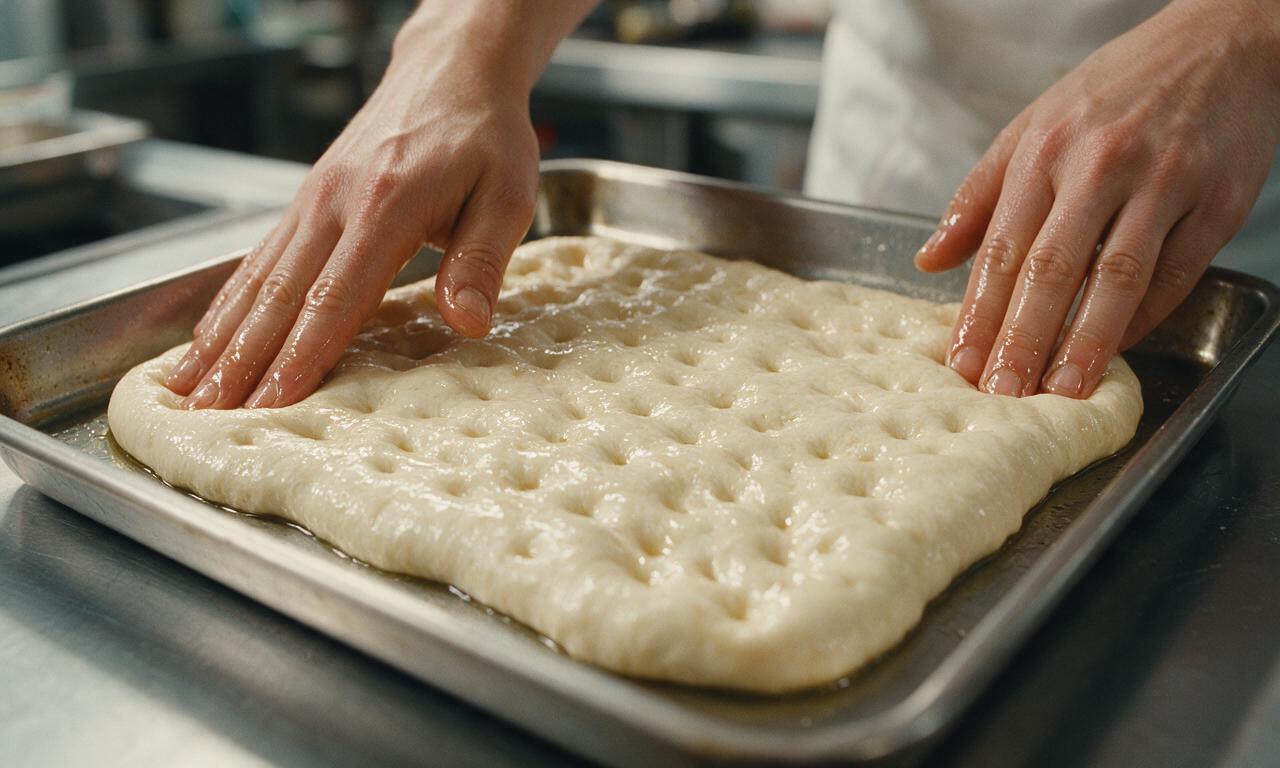
Transfer the proofed, bubbly dough directly into the center of the oiled pan. Gently press and stretch the dough with clean, oiled fingertips to reach all four pan corners and edges, dimpling the dough surface as you go. If the dough springs back and resists stretching, let it rest for 5 minutes to relax the gluten, then resume stretching. Let the stretched, dimpled dough rest uncovered for 15 minutes, while you preheat your oven to 260°C (500°F) with a rack set to the middle position.
Step 3
step3:Stretch dough in pan
4

Layer cheese and pepperoni

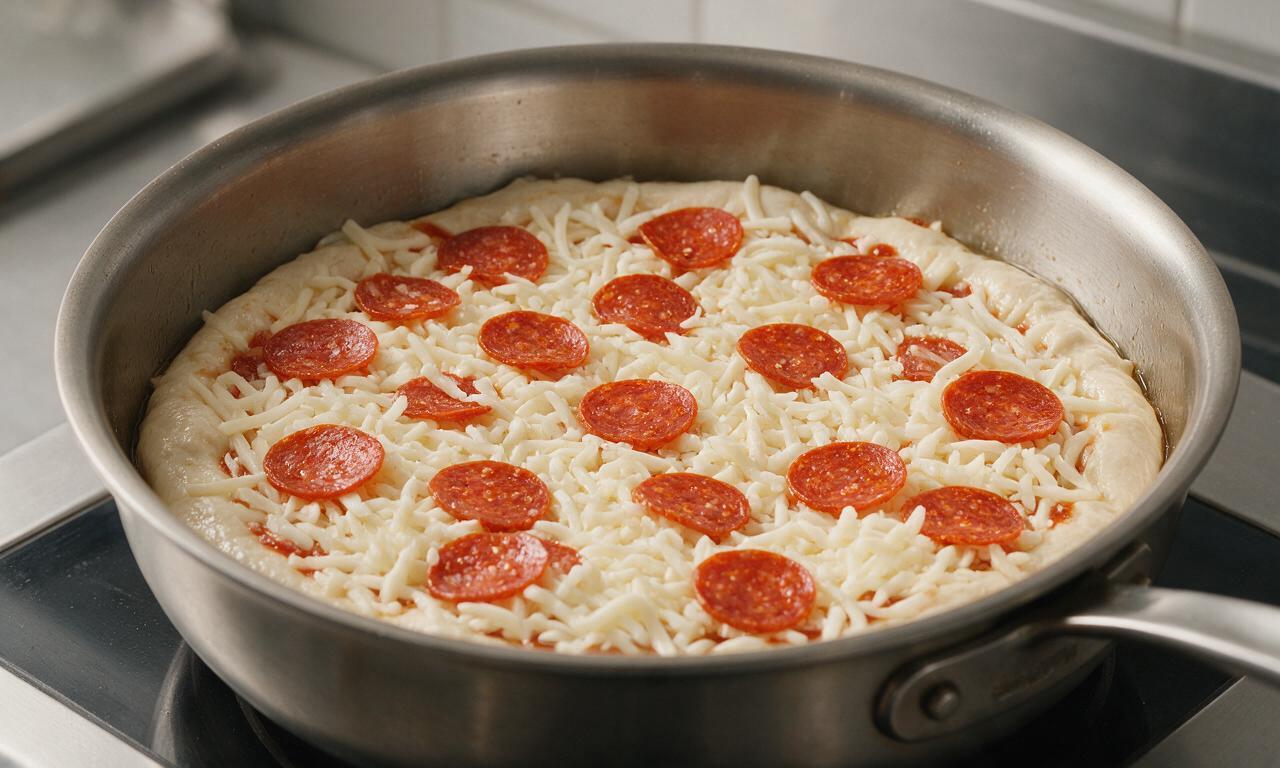
Once the dough has finished its 15-minute pan rest, spread 450g freshly shredded low-moisture mozzarella evenly across the entire dough surface, pressing cheese right up against the oiled pan edges to form the signature crispy frico crust. Evenly scatter 85g cupping pepperoni slices across the cheese, leaving 1/2 inch of space between slices so they can curl into crisp cups as they bake.
Step 4
step4:Layer cheese and pepperoni
5

Dollop seasoned sauce

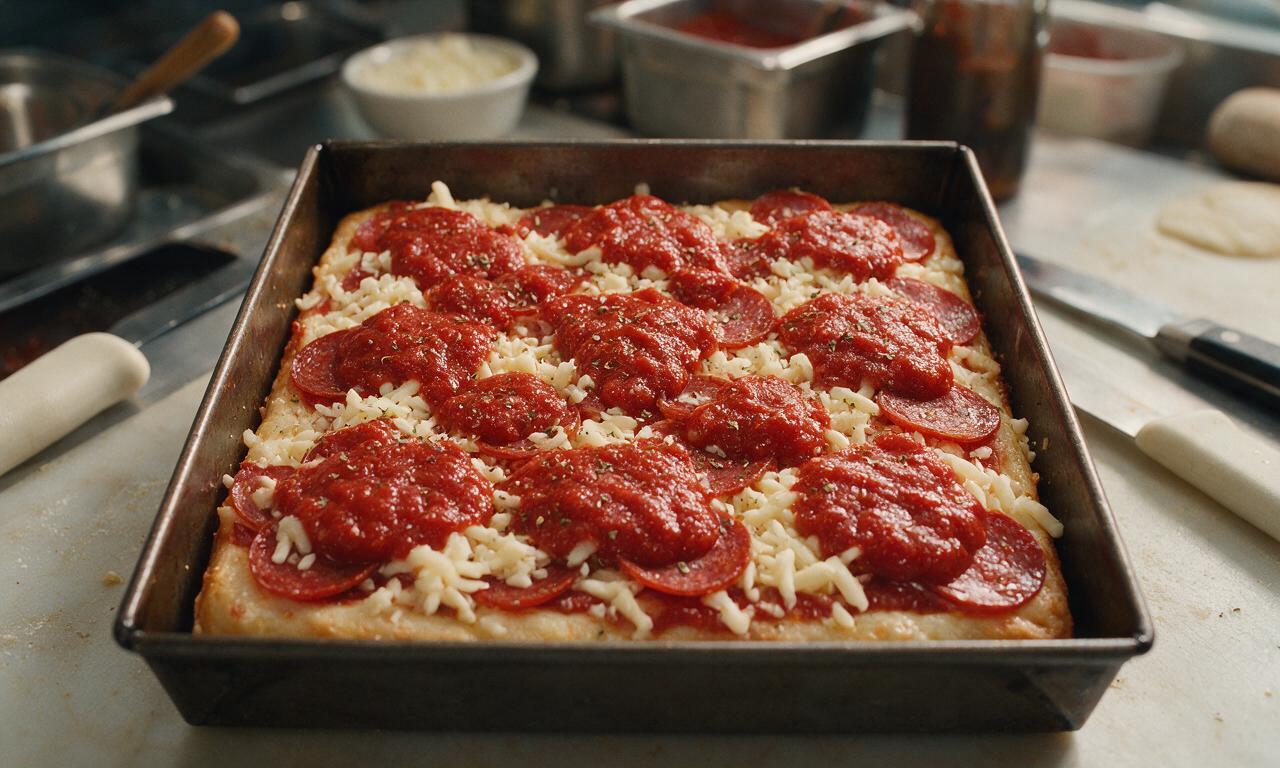
In a small bowl, stir together 180ml strained crushed San Marzano tomatoes, 1g dried oregano, and 1g garlic powder until evenly mixed. Dollop 3-tablespoon mounds of the sauce across the top of the cheese and pepperoni, spacing mounds 1 inch apart. Do not spread the sauce into a smooth layer, as this will trap moisture and make the thick crust soggy.
Step 5
step5:Dollop seasoned sauce
6

Bake to crisp perfection

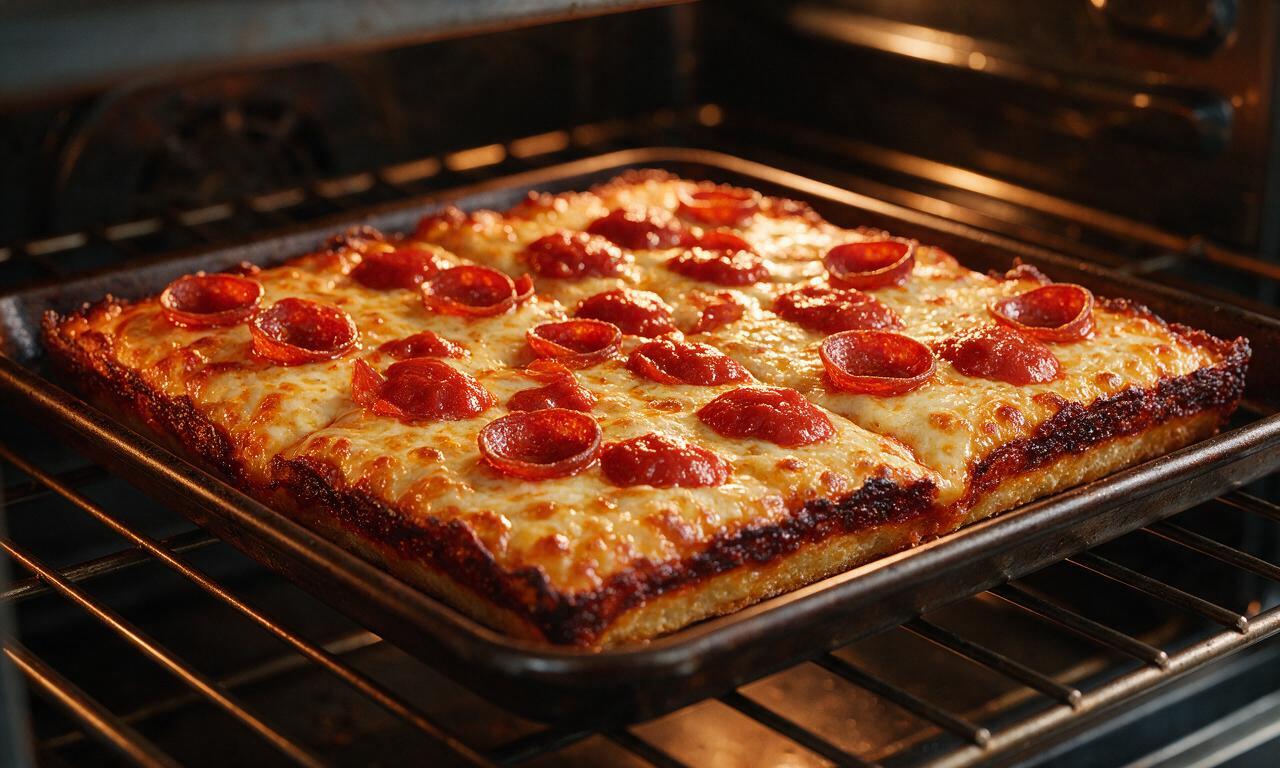
Carefully slide the pizza pan onto the preheated middle oven rack. Bake for 12-15 minutes at 260°C (500°F), rotating the pan 180 degrees halfway through the bake time to ensure even browning. The pizza is done when the cheese edges are deep golden and crispy, pepperoni slices are cupped and glistening, and sauce mounds are set with slightly darkened tops.
Step 6
step6:Bake to crisp perfection
7

Rest, slice, and serve

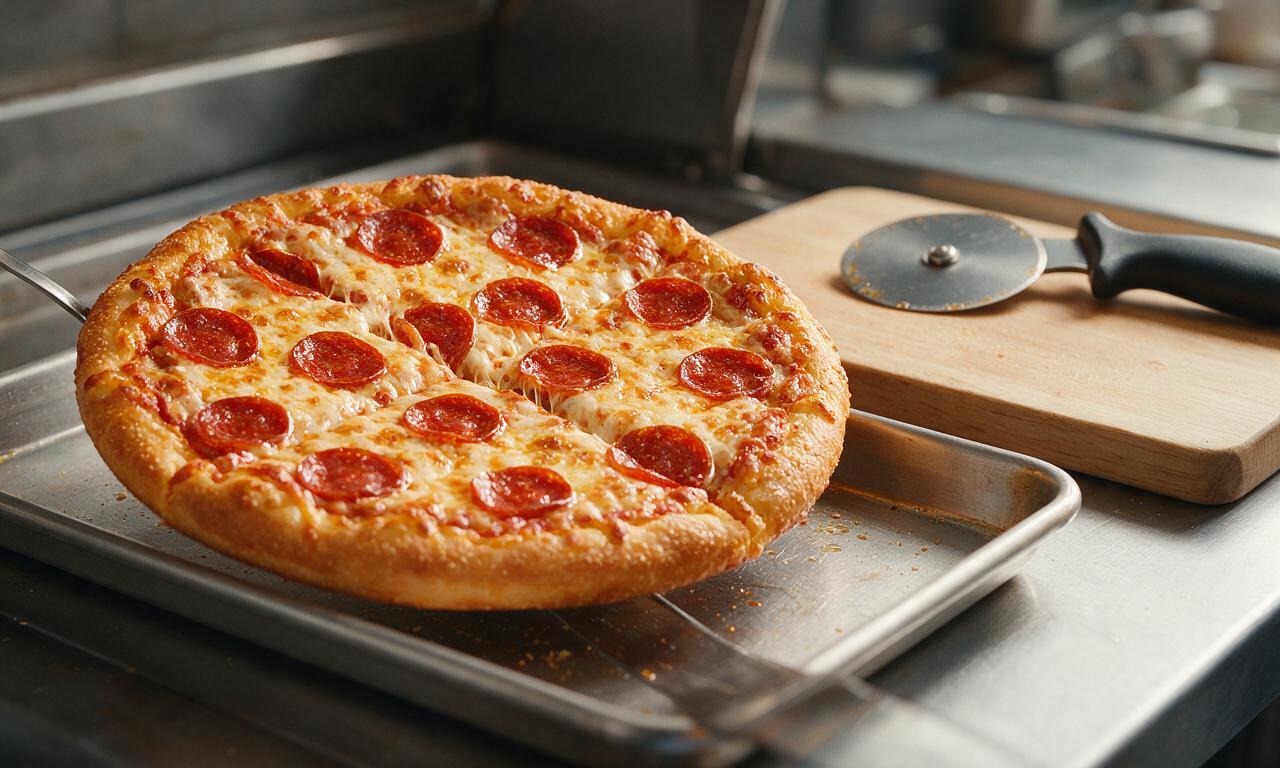
Remove the pan from the oven, and immediately run a thin metal spatula around the pan edges to loosen the crispy frico crust before it cools and sticks. Let the pizza rest in the pan for 5 minutes to set the cheese, then lift the whole pizza out and transfer it to a wooden cutting board. Slice into 8 equal square pieces and serve hot.
Step 7
step7:Rest, slice, and serve

Tips

1.Use freshly shredded low-moisture whole-milk mozzarella instead of pre-shredded bagged cheese; pre-shredded cheese is coated in potato starch or anti-caking agents that prevent the signature crispy, melted frico edge from forming.
2.Resist the urge to spread the tomato sauce across the entire pizza surface. The traditional Detroit-style 'red top' with spaced sauce dollops keeps the thick, focaccia-like crust light and crisp instead of soggy.
3.If you do not own a traditional blue steel Detroit pizza pan, a heavy-gauge anodized aluminum baking sheet works as a substitute; avoid thin, flimsy cookie sheets that warp at 260°C/500°F and cause uneven cooking.


✨ You May Also Like

Main Course
🍜 United Kingdom

A showstopping classic of tender seared beef, savory mushroom duxelles, and crisp prosciutto wrapped in flaky golden puff pastry, baked to juicy perfection.

⏱️ 2 hours 1Main Course ★ 4.7
Main Course
🍜 India

Tender charred marinated chicken simmered in a rich, spiced creamy tomato sauce, this iconic Anglo-Indian curry pairs perfectly with basmati rice or warm naan.

⏱️ 50 minuteMain Course ★ 4.8
Main Course
🍜 Thailand

Classic tangy, sweet, and savory Thai stir-fried rice noodles with shrimp, tofu, and crunchy garnishes, balancing all five core Thai flavor profiles.

⏱️ 30 minuteMain Course ★ 4.6
Main Course
🍜 United Kingdom

Crispy golden beer-battered cod and fluffy double-fried chips, served with tangy tartar sauce and malt vinegar: the timeless, beloved British pub comfort classic.

⏱️ 45 minuteMain Course ★ 4.9
Main Course
🍜 Mexico

Smoky, chile-marinated pork tacos with caramelized pineapple, fresh cilantro, and lime: a beloved classic Mexican street food perfect for casual summer gatherings.

⏱️ 1 hour 45Main Course ★ 4.7
Main Course
🍜 United States

Crunchy Fritos corn chips layered with savory beef chili and melted cheddar, topped with cool, zesty fixings for a beloved, cozy Tex-Mex comfort food.

⏱️ 35 minuteMain Course ★ 4.9

Detroit-Style Pizza:Frequently Asked Questions

1.Do I need a specialty Detroit-style steel pan to make this pizza, or can I use what I already have at home?
You don’t need a fancy specialty pan for great results! Grab a heavy-gauge 9x13 inch metal baking pan, and add 2 minutes of preheating time to nail that signature crispy frico edge. Skip glass or ceramic pans, though—they don’t conduct heat fast enough to crisp the crust, and will leave you with a soggy, dense bottom.
2.How do I get that iconic cupped, crispy pepperoni instead of flat, greasy slices?
Skip the thin, paper-like pre-sliced pepperoni from the dairy case and pick up thick-cut, natural-casing pepperoni for this recipe. Lay slices in a single layer all the way to the pan edges before baking; the high oven heat will make them curl into little cups that hold rendered grease and crisp up perfectly at the edges.
3.Why is the sauce dolloped on top instead of spread evenly over the crust like other pizza styles?
That signature dolloped sauce is a core Detroit-style tradition! Spreading a thick layer of sauce directly on raw dough weighs down the airy crust and causes sogginess. Placing 2-tablespoon blobs of sauce over the cheese lets the dough rise fully, and delivers bright, tangy sauce flavor in every bite without the mush.
4.My crust turned out dense instead of light and airy—what went wrong?
Dense crust usually comes down to three easy-to-fix missteps: using low-protein all-purpose flour instead of the recommended bread flour, under-kneading to build gluten, or cutting the proof time short. Let the oiled pan dough rise for 1.5 to 2 hours in a warm spot until it’s puffy and fills the whole pan for that perfect light crumb.
5.How do I get that shatteringly crispy frico cheese edge everyone fights over?
Those craveable caramelized cheese edges (called frico) are all about cheese placement! Unlike other pizza styles where you leave a crust border, push shredded low-moisture mozzarella all the way to the very edges of the oiled pan, so it touches the hot metal as it bakes to form that salty, crisp rim.
6.Can I prep the dough ahead of time to make weeknight baking easier?
Absolutely—prepping ahead actually makes the pizza taste better! Mix the dough with the instant yeast and warm water per the recipe, let it rest 30 minutes at room temp, then cover tightly and refrigerate for up to 3 days. Pull it out 2 hours before baking to proof in the oiled pan; cold ferment gives the crust a deeper, nuttier flavor.
7.Do I need a pizza stone, and what oven temperature works best for this recipe?
Skip the pizza stone entirely for Detroit-style pizza! Preheat your oven to 475°F with the rack in the lower third, so the pan sits close to the heating element. Bake for 12 to 15 minutes straight in your metal pan; the pan itself delivers the direct, high heat needed to crisp the crust bottom perfectly.
8.Why does the recipe call for extra-virgin olive oil in the pan instead of nonstick spray?
Nonstick spray won’t deliver the same golden, crispy crust bottom that a thin layer of extra-virgin olive oil does. Don’t forget to add a pinch of kosher salt to the oil for extra savory depth; the oil gently fries the crust as it bakes, adds subtle fruity notes, and prevents sticking far better than spray for this thick, puffy pie.

Comments (20)

2 days ago

OMG, this was the biggest hit at our Sunday family dinner! I’ve tried so many Detroit-style pizza recipes that end up with soggy crust, but this one was perfectly crispy on the edges, cheesy all the way to the pan, and the pepperoni cups got all crispy and greasy in the best way. My kids begged for seconds before they even finished their first slice! SO good.

yesterday

So glad your family loved it, Maggie! Pro tip for next time: let the dough rest in the oiled pan for 20 minutes before pressing it all the way out for even crispier edges!

1 week ago

Game changer alert! I brought this to my friend’s potluck last weekend and people were literally asking for the recipe before they finished eating. I was worried the cook time was too long for a weeknight, but I prepped the dough the night before and it came together so fast on bake day. 10/10, will be making this on repeat.

5 days ago

Wait, prepping the dough the night before is such a smart move! I’ve been making it same day but I’m gonna try that next time to save time after work.

3 days ago

I swapped the regular all-purpose flour for my go-to 1:1 gluten free flour blend and it still turned out amazing! The crispy cheese frico edges are to die for, I didn’t even miss the regular crust. Will be adding this to my weekly meal prep rotation for easy Friday night dinners.

30 minutes ago

Tasted great overall, but I ran into a little trouble when I first tried to press the dough into the pan—it kept shrinking back! I ended up with a slightly lopsided crust, but the flavor was still spot on. Any tips for getting the dough to stay stretched?

5 minutes ago

I had that same problem my first time! You just gotta let it sit for 10-15 minutes after you take it out of the fridge, it relaxes the gluten so it doesn’t shrink back. Worked like a charm for me on round two!

just now

Hank is exactly right! Cold dough is super springy—letting it come up to temp a bit and rest in the pan makes pressing it out so much easier. Glad the flavor worked out for you even with the lopsided crust, that’s the homemade charm!

2 weeks ago

I was skeptical about baking pizza in a square metal pan instead of my round pizza stone, but wow, this converted me. The crispy caramelized cheese around the edges is something you just can’t get with a regular round pie. I loaded on extra pepperoni like the recipe said and it was perfect.

2 weeks ago

So happy you gave the Detroit-style pan method a shot! That frico edge is our favorite part too—hard to go back to regular pizza once you’ve had it!

yesterday

Made this for my roommates last night and we demolished the whole pan in 10 minutes flat. It was so much easier than I thought it would be for a medium difficulty recipe! I used pre-shredded mozzarella because that’s all I had at the grocery store and it still slapped. 10/10.

30 minutes ago

Pre-shredded cheese works in a pinch! I did the same my first time, but tried shredding my own low-moisture mozz last week and it melted even smoother. Still delicious either way though!

1 week ago

I cut the whole pan into individual slices and froze them for quick work lunches this week. They reheat perfectly in the toaster oven—crust stays crispy, cheese gets all melty, tastes just as good as the day I baked it. Way better than frozen pizza!

3 days ago

My family is super picky about pizza sauce—we hate it when there’s too much, and this recipe’s sauce amount was exactly right! It’s spread thin, so you don’t get soggy crust, and the oregano and garlic in it taste just like the pizza I grew up eating outside Detroit. Only change I made was adding a little sprinkle of parm on top before baking.

2 days ago

Fellow Detroit expat here! This recipe tastes exactly like the pies I’d get at Buddy’s as a kid, I was so shocked I nailed it at home. The parm sprinkle sounds chef’s kiss, I’m stealing that for my next bake.

yesterday

Love the parm add-in! And we’re so glad it hits that nostalgic note for you—we tested this recipe so many times to get that classic Detroit pizzeria flavor right at home.

2 hours ago

I added a handful of pickled jalapeños on top of the pepperoni for a little heat and it was chef’s kiss. The richness of the cheese and the crispy pepperoni pairs so well with the tangy kick from the jalapeños. Definitely making this again for game night next month!

30 minutes ago

The pickled jalapeño addition sounds incredible! That tangy heat cuts through the rich cheese perfectly—we might have to test that variation ourselves!

5 days ago

I tried making this with vegan pepperoni and dairy-free cheese for my sister who’s vegan, and even the non-vegan people at the table were going back for more slices. The crust recipe is so solid it carries all the toppings perfectly, no sad soggy vegan pizza here!

2 hours ago

Wait, I totally forgot to put the pepperoni on top of the cheese like the recipe said, I layered it under the cheese by accident! It still tasted good, but I didn’t get those cute crispy pepperoni cups everyone is talking about. Bummed I messed that up, but I’ll get it right next time!

30 minutes ago

Oh no, I did that my first bake too! The pepperoni needs to be on top so the fat renders out and gets the edges crispy, right? Next time lay em out in overlapping rows right before popping the pan in the oven and you’ll get perfect cups.

5 minutes ago

I actually like layering half the pepperoni under the cheese and half on top! You get the meaty flavor all through the pie and still get the crispy cups on top. Win win!

2 weeks ago

I’ve been searching for a reliable Detroit-style pizza recipe for years, and this is the one! The crust is light and airy on the inside, crunchy and fried on the bottom from the oil in the pan, and the cheese goes all the way to the edges like it’s supposed to. Served it with a side of ranch for dipping and it was a perfect weekend meal.

2 weeks ago

Ranch dip is the perfect pairing, we won’t tell the pizza purists! So happy you found your go-to Detroit-style recipe here.

yesterday

I was worried the medium difficulty rating meant I’d be stuck in the kitchen for hours, but the steps were so straightforward! My 10 year old even helped me press the dough into the pan and arrange the pepperoni, it was such a fun little activity for us after school. We had a blast making it and it turned out delicious.

2 hours ago

That sounds so fun! I made this with my 8 year old last week and she loved watching the pepperoni curl up in the oven. It’s such a great recipe to make with kids because the steps are simple and the payoff is huge.

2 days ago

Paired this with a cold hazy IPA last night and it was the perfect Friday night combo. The salty, crispy pepperoni and buttery crust went so well with the hoppy beer. I’ll be making this for every fight night watch party from now on, no question.

1 week ago

Made this last night for my partner’s birthday in my regular 9x13 metal baking pan because I don’t have the fancy Detroit-style pan, and it still turned out amazing! The crust was crispy, the cheese melted perfectly, I was so worried I’d mess it up without the special gear. Do you think a blue steel pan makes that big of a difference?

5 days ago

I have the blue steel pan and I’ve also made it in a regular 9x13, and the difference is super minimal! The blue steel gets a little crispier on the bottom, but the regular pan works totally fine if you don’t want to splurge.

3 days ago

Gabe is spot on! A regular 9x13 metal pan works perfectly for this recipe—just make sure it’s at least 2 inches deep so you don’t have cheese bubbling over in your oven. Hope your partner loved it!

just now

Leftovers of this are INSANE. I had a cold slice straight from the fridge for breakfast this morning and it was even better than it was last night for dinner. Don’t @ me, cold pizza is superior, and this recipe holds up so perfectly in the fridge.

just now

Cold Detroit-style pizza for breakfast is unbeatable, I’m right there with you! The thick crust doesn’t get soggy in the fridge like thin crust does, it’s perfect.

3 days ago

I added a little drizzle of hot honey on top after it came out of the oven and it took this pizza to a whole new level. The sweet heat paired with the salty pepperoni and crispy cheese is *chef’s kiss*. Don’t sleep on the hot honey addition, trust me.

5 days ago

I used my leftover sourdough discard in the dough instead of the regular active dry yeast the recipe calls for, and it gave the crust such a nice tangy depth of flavor! It paired so well with the rich cheese and zesty pepperoni. Will definitely be doing that swap every time I make this now.

3 days ago

That sourdough swap sounds absolutely delicious! That tangy kick would complement the salty toppings so perfectly, thanks for sharing that tip!

2 days ago

Wait, how much discard did you use? I have a jar of discard in my fridge right now and I’ve been looking for ways to use it, this sounds perfect!

1 week ago

I used to order Detroit-style pizza from my local takeout spot every single Friday, but this recipe is so much better and way cheaper! I calculated the cost per pan and it’s less than half what I pay for delivery, and it tastes fresher too. Why did I wait so long to try making it at home?

5 days ago

Same! I was dropping $25 a pie on delivery and now I make two pans for less than $10 total, it’s wild. Plus I can load on as much pepperoni as I want without paying extra for toppings.

3 days ago

Nothing beats homemade for flavor and value! So glad this replaced your takeout habit—there’s something so satisfying about pulling that perfect crispy pan of pizza out of your own oven.

2 weeks ago

Made this for the football watch party last weekend and it was gone before halftime. I made two pans thinking we’d have leftovers, and people went back for thirds. Even my cousin who swears he hates thick crust pizza had two slices. Absolute home run of a recipe.



