
easy pan fried chicken

title 1
easy pan fried chicken
⏱️ cook time 20 minutes
🍽️ servings 4
⚡ Difficulty easy

intro

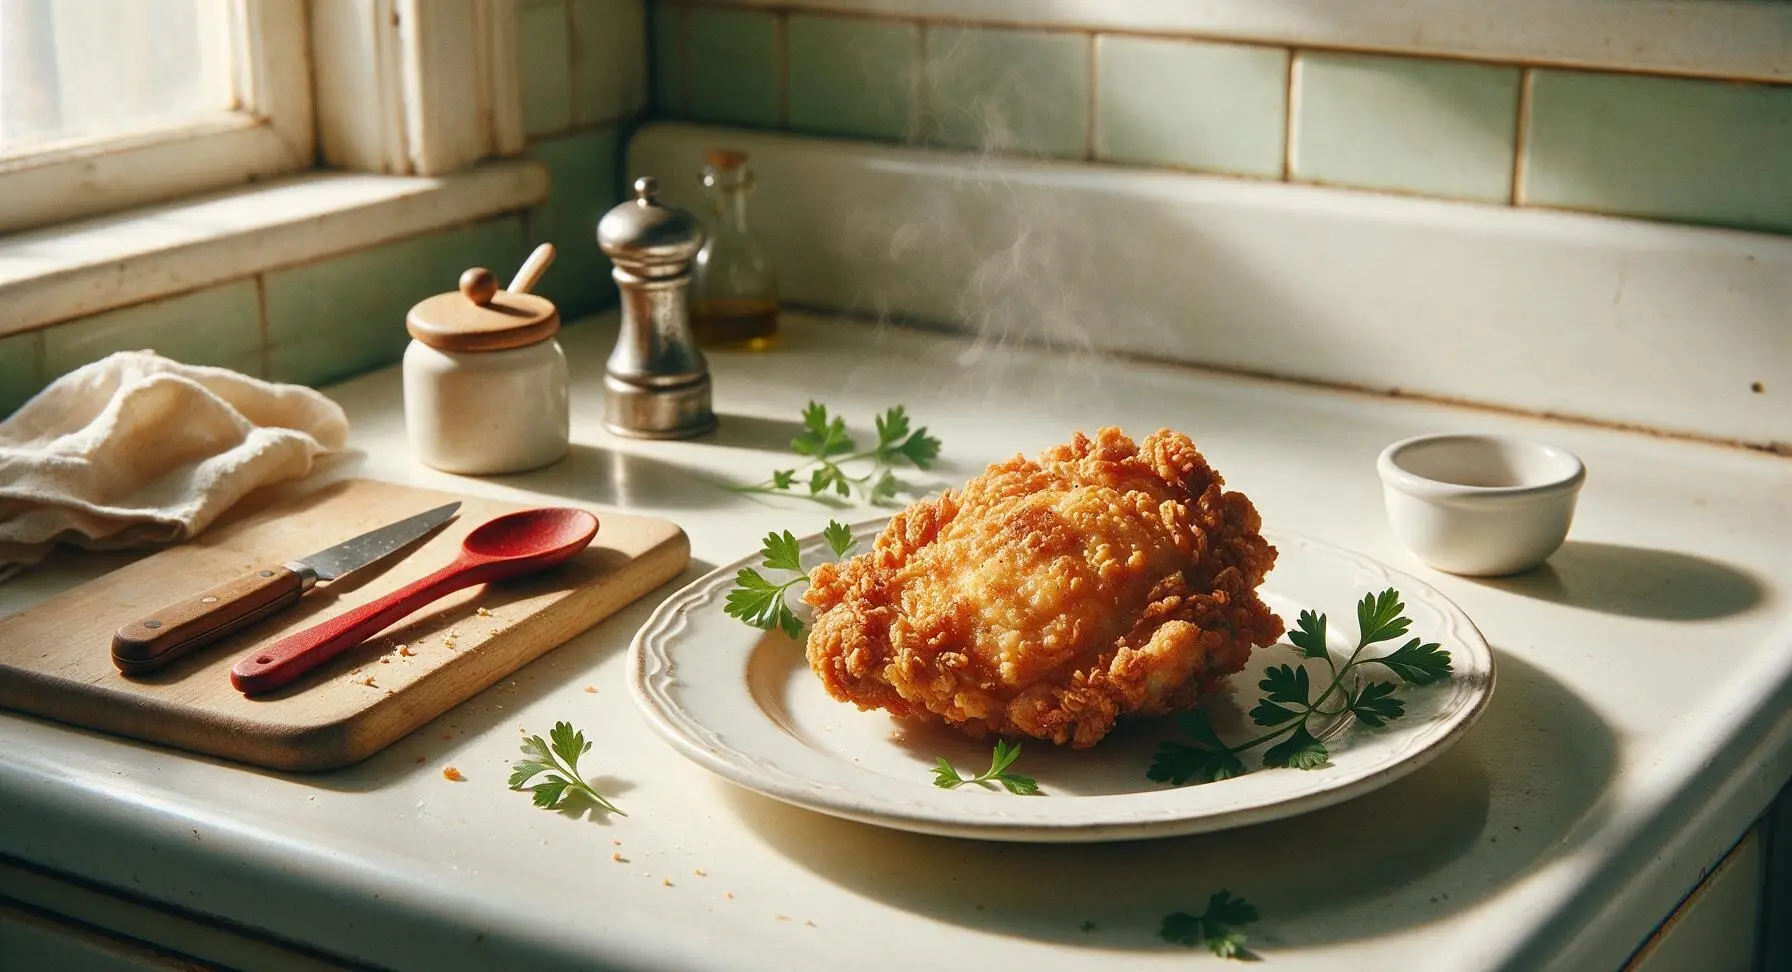
Crisp, golden craggy crust outside, juicy, savory chicken inside—this no-fuss pan fried chicken comes together in 30 minutes with pantry staples, no deep frying required.

Ingredients
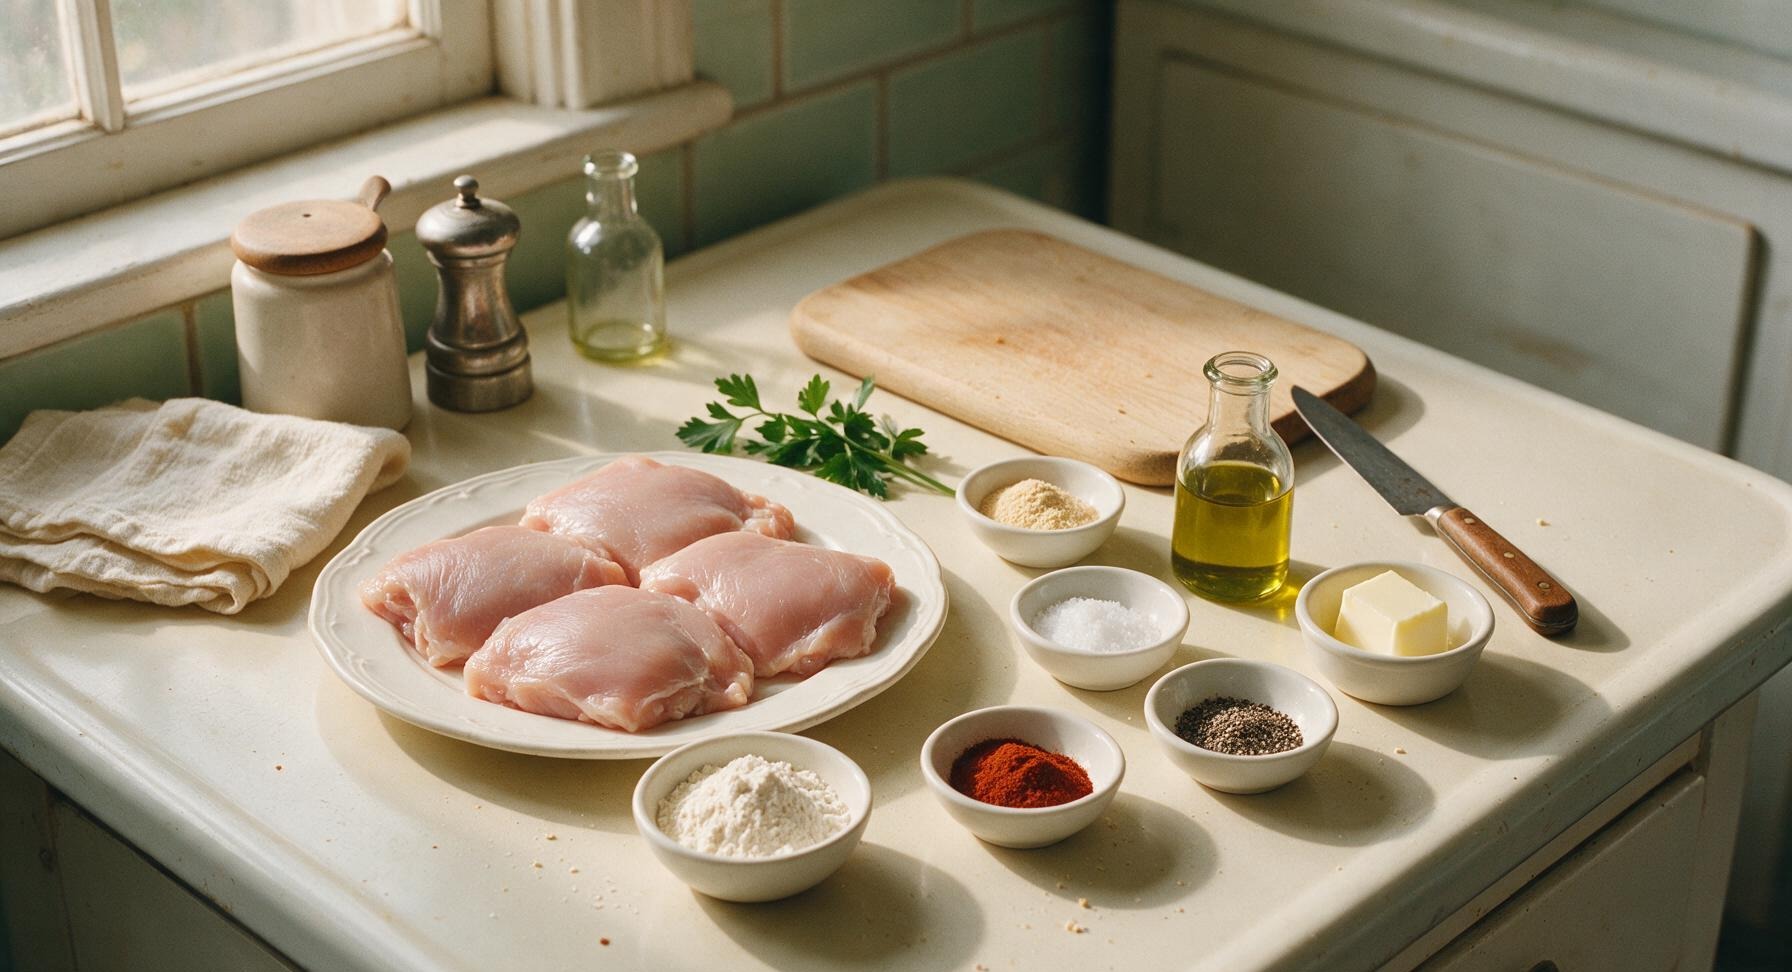
Boneless, skinless chicken thighs 680g (4 large pieces, ~170g each)
All-purpose flour 45g (1/3 cup)
Garlic powder 3g (1 tsp)
Smoked paprika 2g (1 tsp)
Kosher salt 5g (1 tsp)
Freshly ground black pepper 1g (1/2 tsp)
Extra-virgin olive oil 27g (2 tbsp)
Unsalted butter 28g (2 tbsp)
Fresh flat-leaf parsley 5g (1 small bunch, for garnish)

Steps

1

Pat Chicken Dry

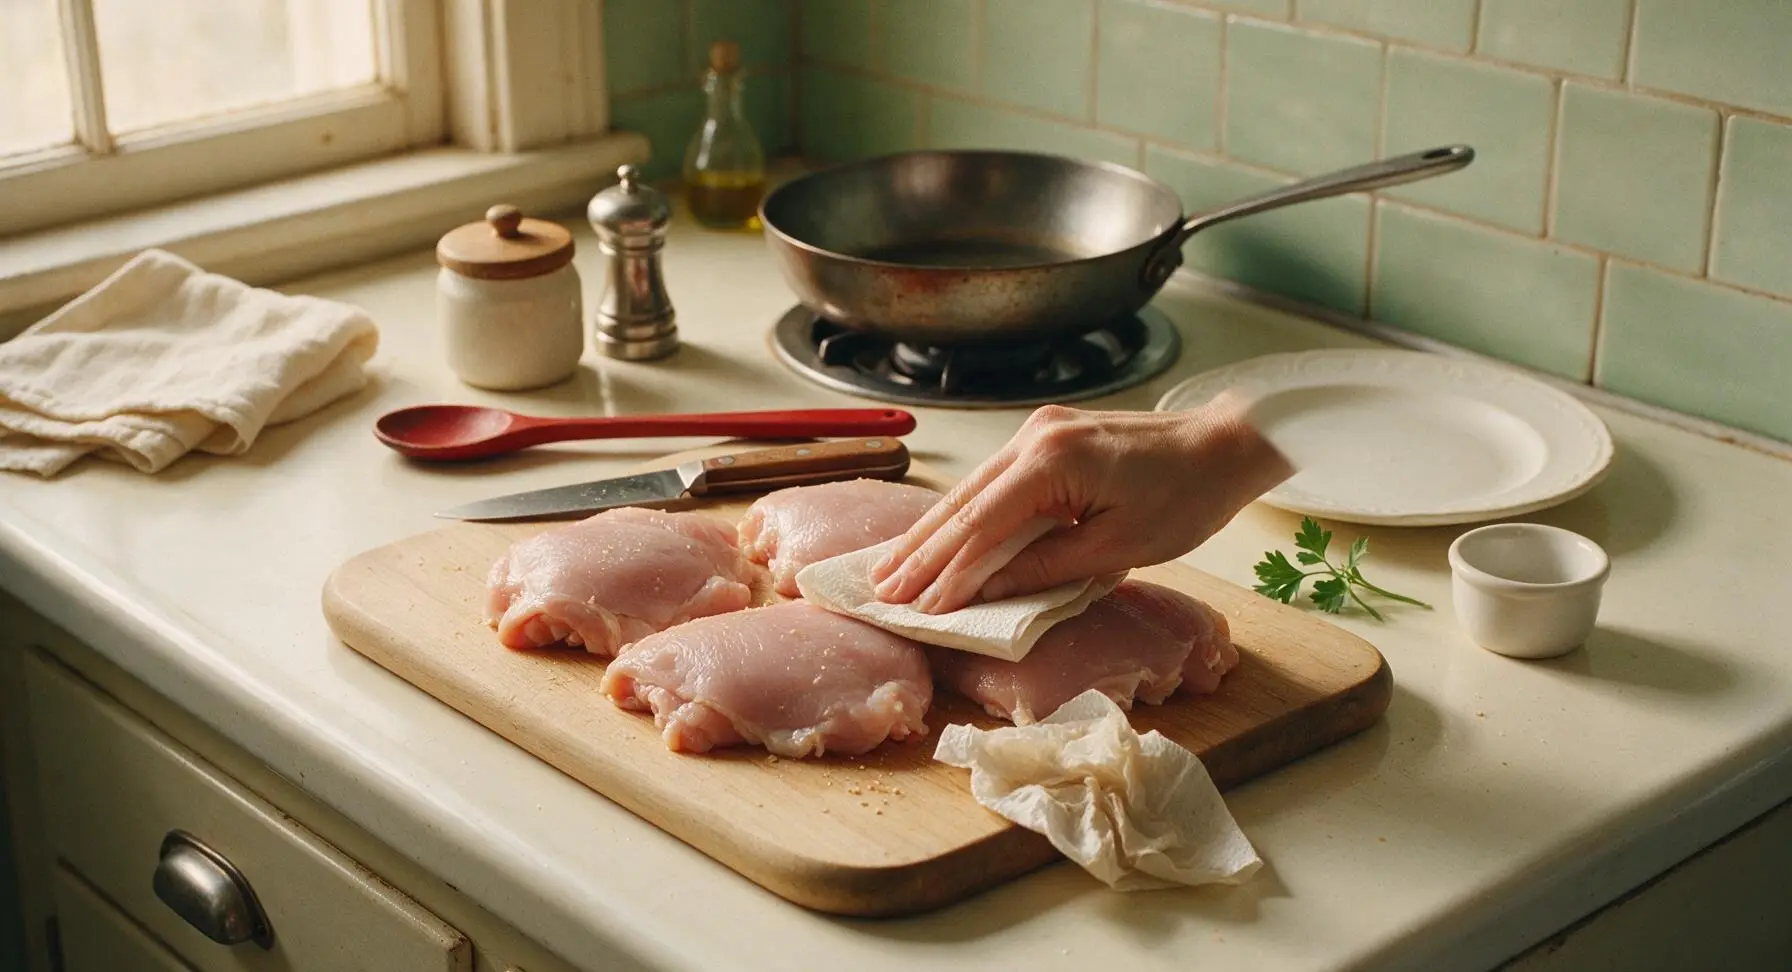
Place the 4 boneless, skinless chicken thighs on the acacia wood cutting board. Tear off 2 sheets of unbleached paper towel and firmly press all surfaces of each chicken thigh until completely dry to the touch, with no visible surface moisture remaining. Discard damp paper towels in a countertop scrap bin. Fully dry chicken is the foundation of a crisp, non-soggy crust.
Step 1
step1:Pat Chicken Dry
2

Mix Seasoned Coating

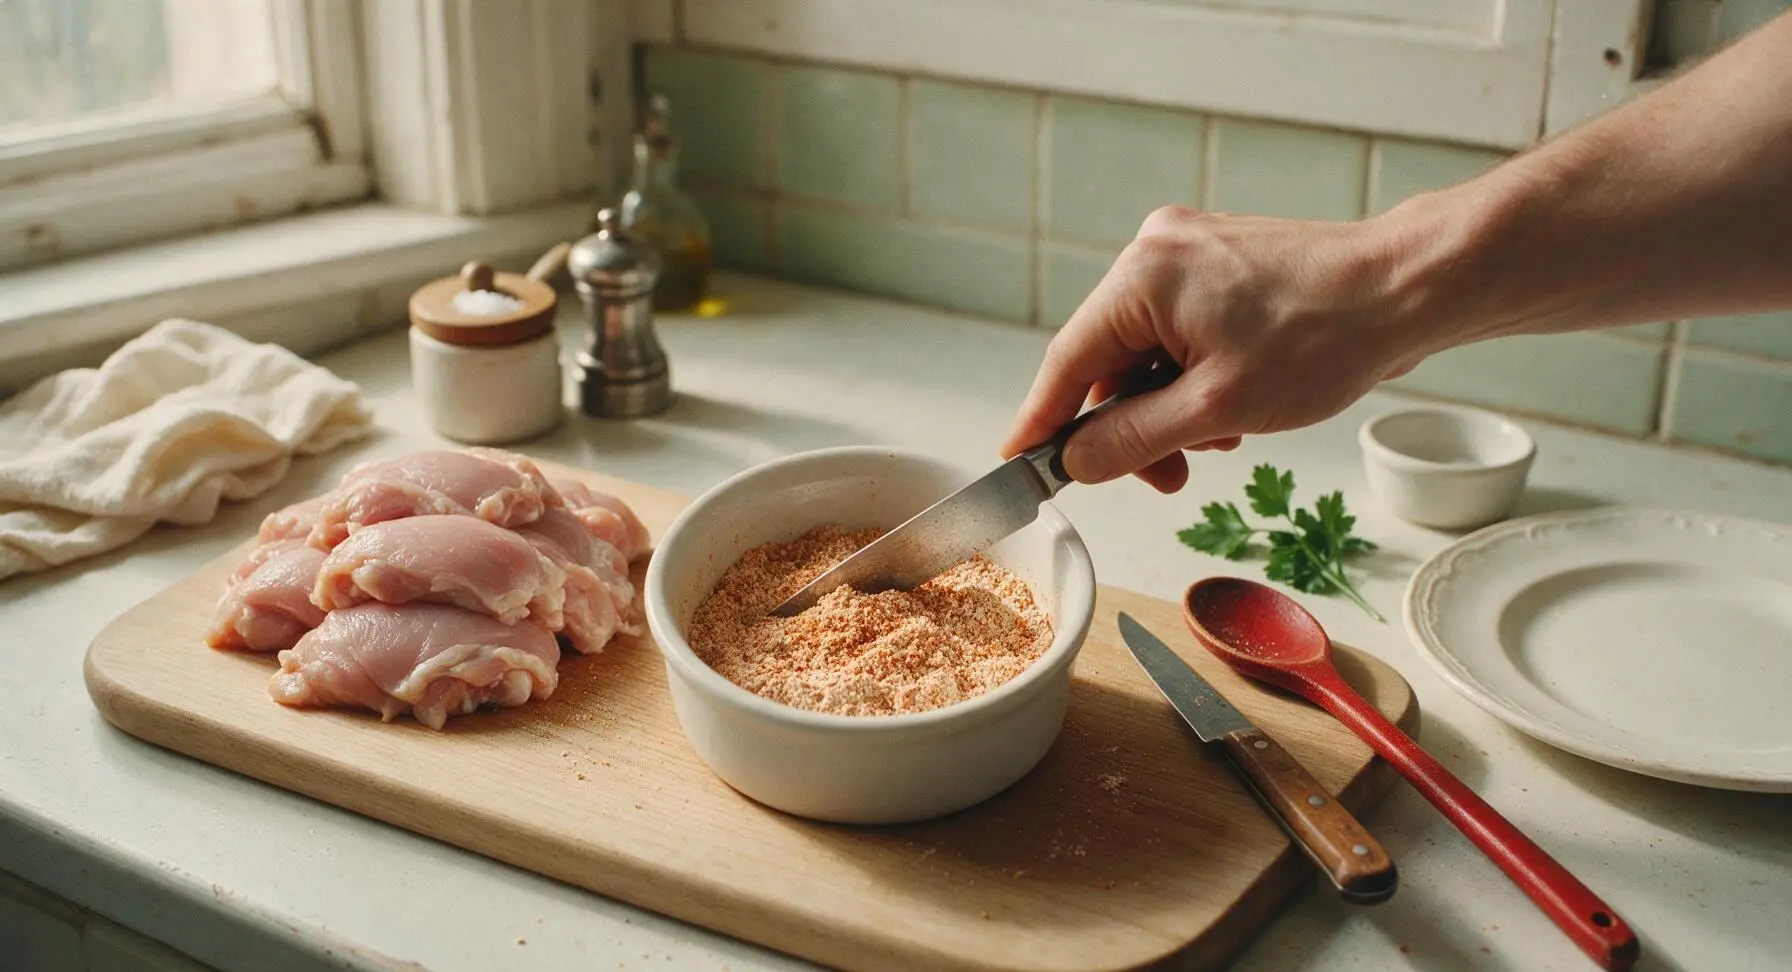
In the 10cm matte white ceramic ramekin, combine the 1/3 cup all-purpose flour, 1 tsp garlic powder, 1 tsp smoked paprika, 1 tsp kosher salt, and 1/2 tsp freshly ground black pepper. Stir with the tip of the chef’s knife until all spices are evenly distributed throughout the flour, with no concentrated clumps of spice visible.
Step 2
step2:Mix Seasoned Coating
3

Dredge Chicken Evenly

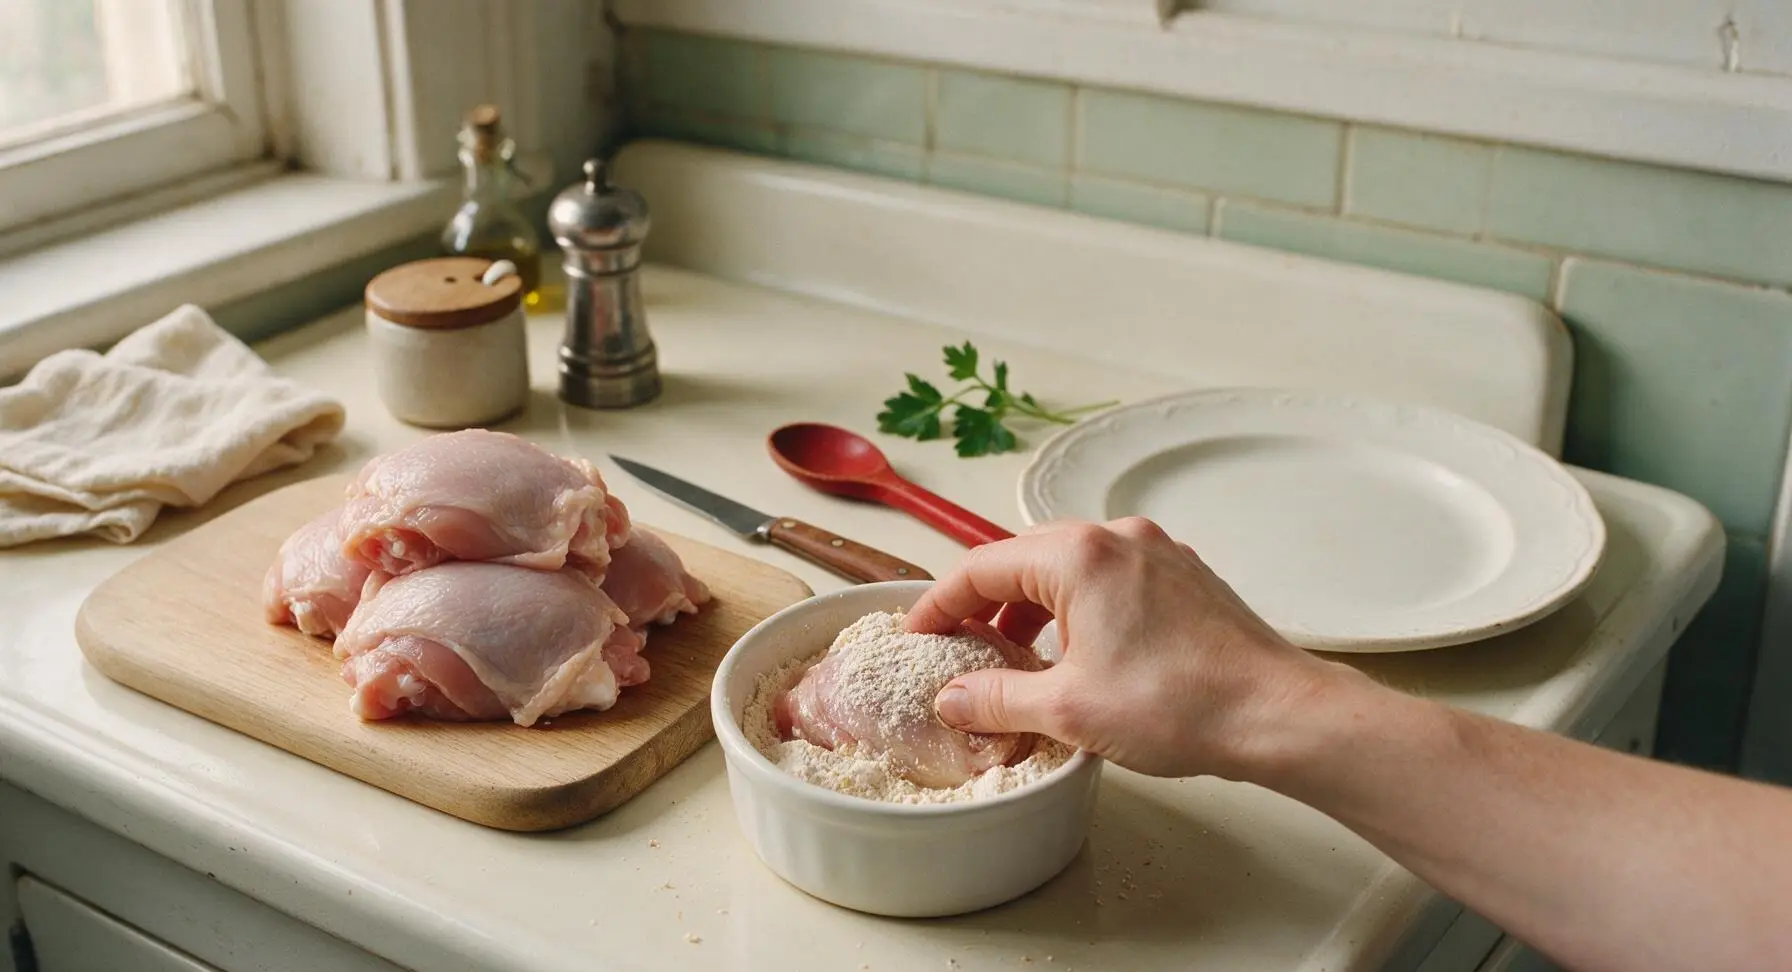
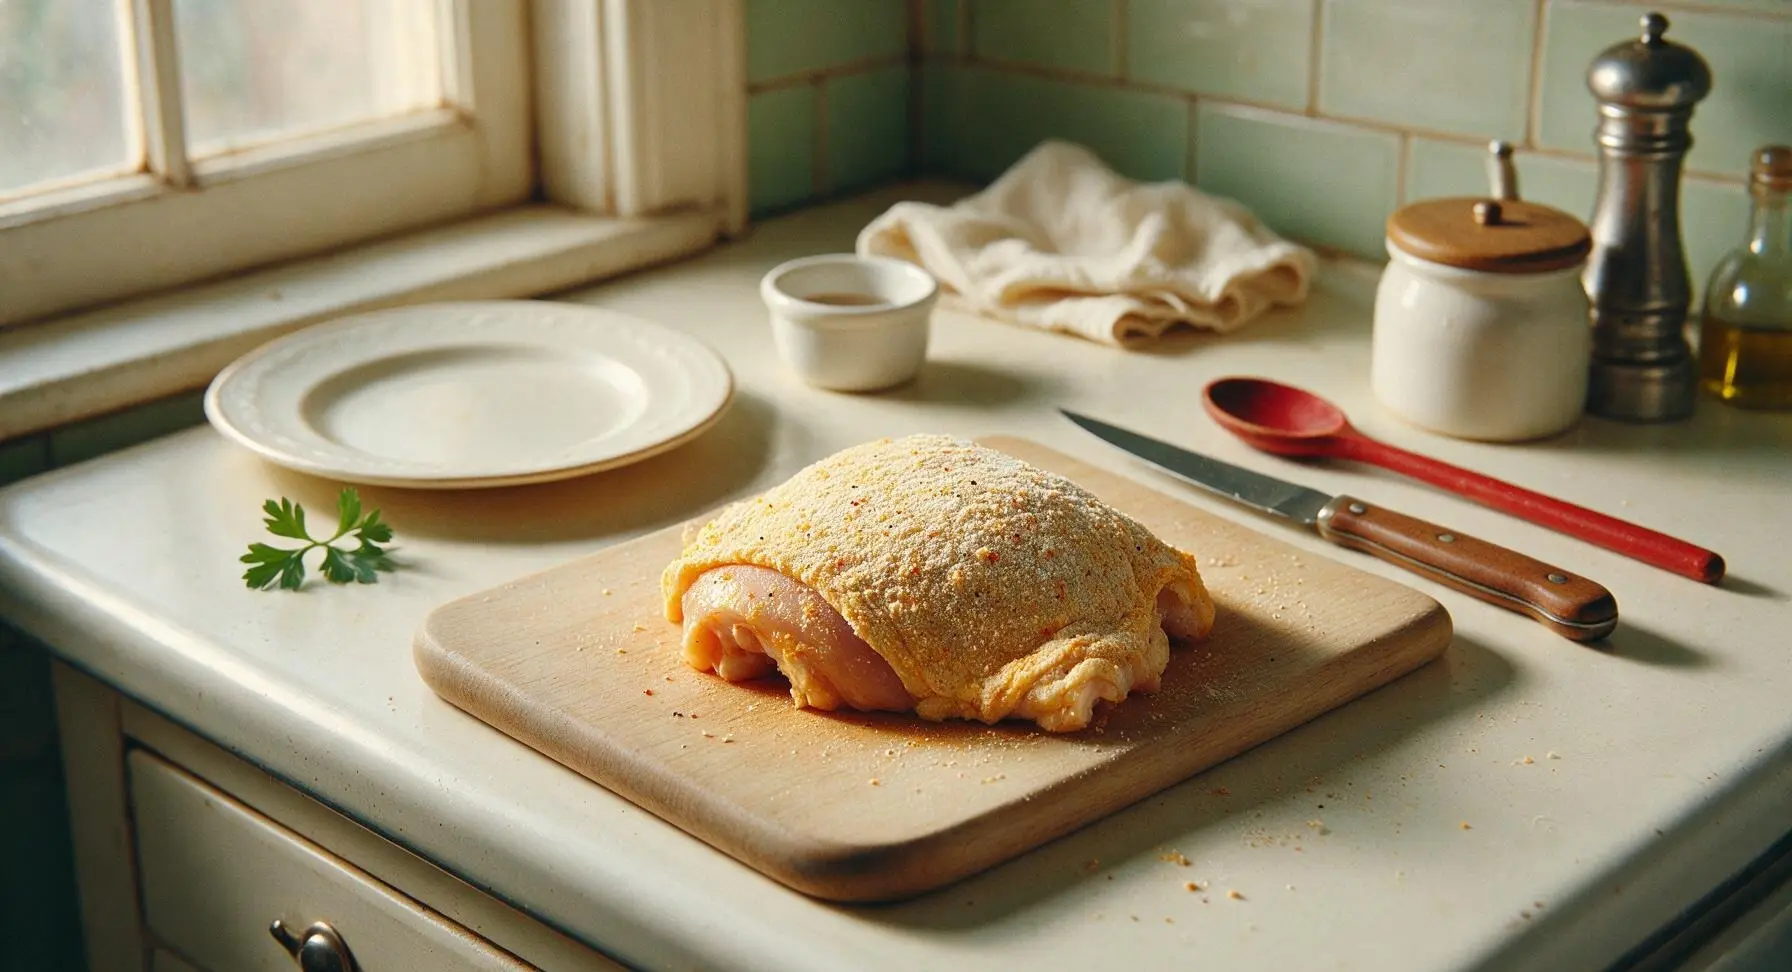
Working one piece at a time, place a chicken thigh into the seasoned flour mixture. Turn to coat all sides completely, then press the flour firmly into the chicken surface so the coating adheres tightly. Shake off any excess loose flour back into the ramekin, then set coated chicken pieces on the empty section of the cutting board. The finished coating should be a thin, even, matte layer across every surface, with no thick, powdery clumps of flour.
Step 3
step3:Dredge Chicken Evenly
Step 3
step3:Dredge Chicken Evenly
4

Preheat Pan and Oil

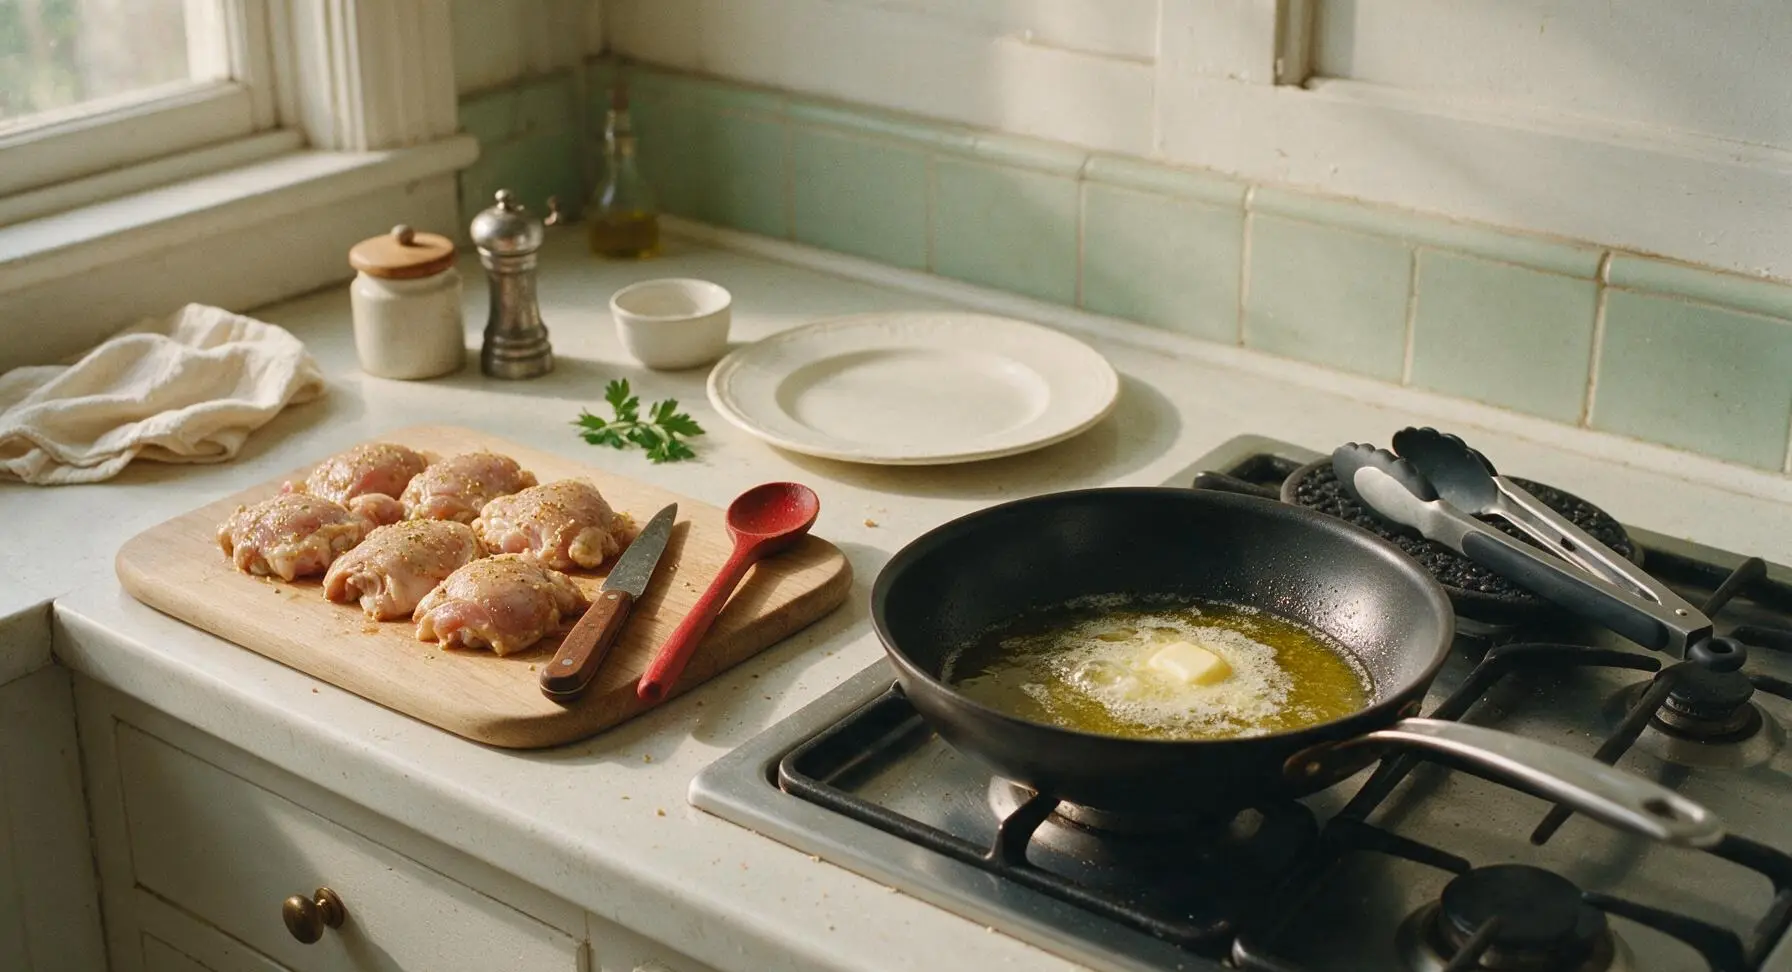
Place the 12-inch carbon steel frying pan on the front right burner over medium heat (350°F / 175°C measured pan surface temperature). Add the 2 tbsp olive oil to the pan, and heat until the oil shimmers across the pan surface but is not smoking, about 2 minutes. Add the 2 tbsp unsalted butter, and wait until it melts completely and the initial foaming subsides, about 30 seconds.
Step 4
step4:Preheat Pan and Oil
5

Fry First Chicken Side

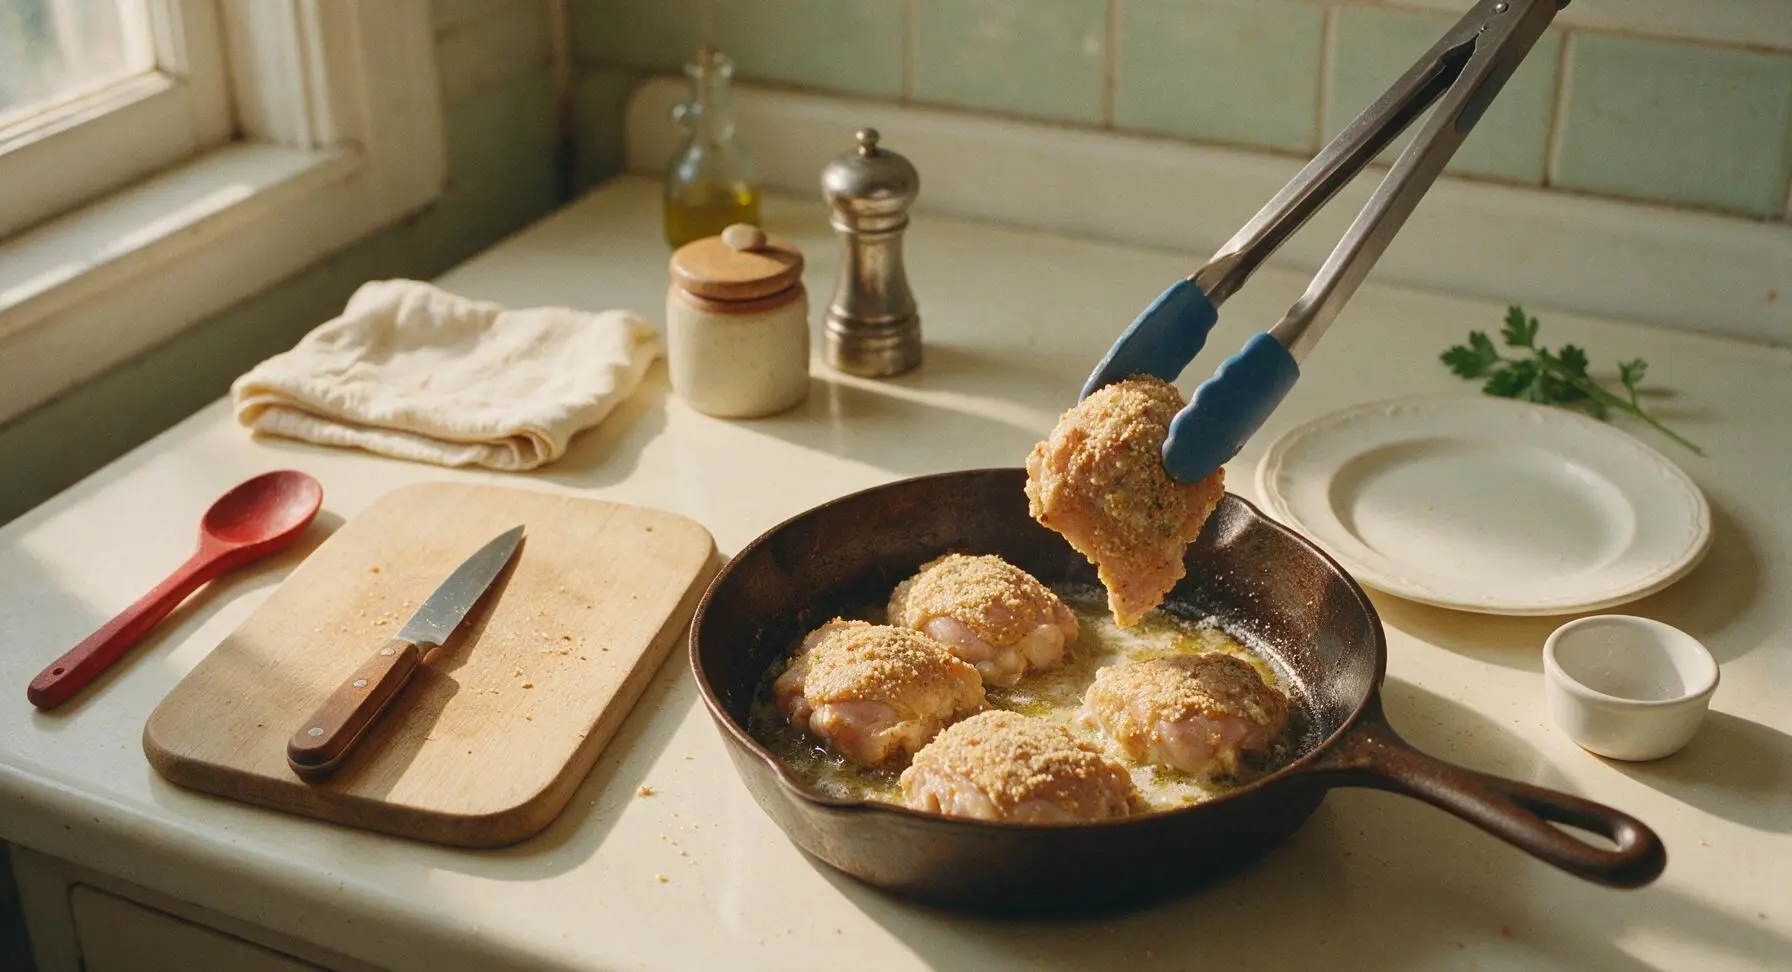
Use the silicone-tipped tongs to carefully place each coated chicken thigh into the preheated pan, smooth presentation side down, leaving 1 inch of space between each piece (cook in 2 batches if your pan is too small to avoid crowding). Let cook undisturbed for 7 minutes, until the bottom crust is deep golden brown and crispy, releasing easily from the pan surface when lifted gently with tongs. Do not poke, press, or move the chicken during this time to allow the crust to form properly.
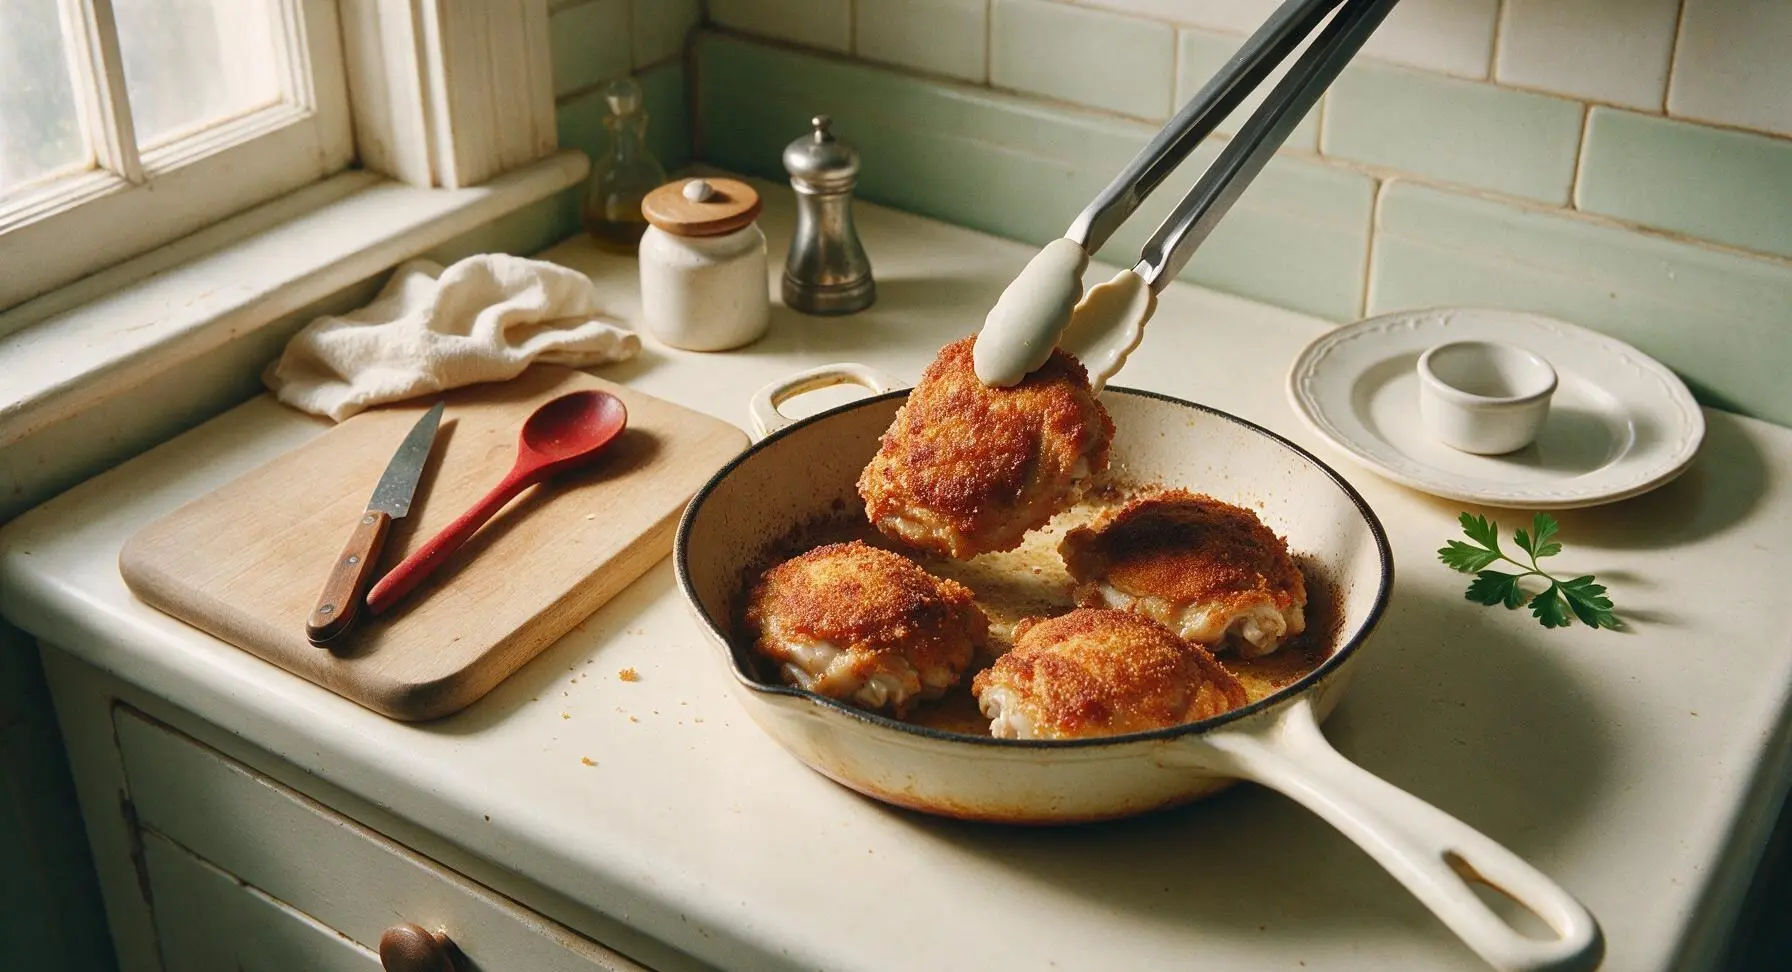
Step 5
step5:Fry First Chicken Side
Step 5
step5:Fry First Chicken Side
6

Cook Second Side Through

Use the tongs to flip each chicken piece to its second side. Continue cooking for another 6-8 minutes, until the second side is equally golden and crispy, and the internal temperature of the thickest part of each thigh reads 165°F (74°C) when checked with the instant-read thermometer. Adjust heat to medium-low if the crust starts to darken too quickly before the chicken reaches the target internal temperature.
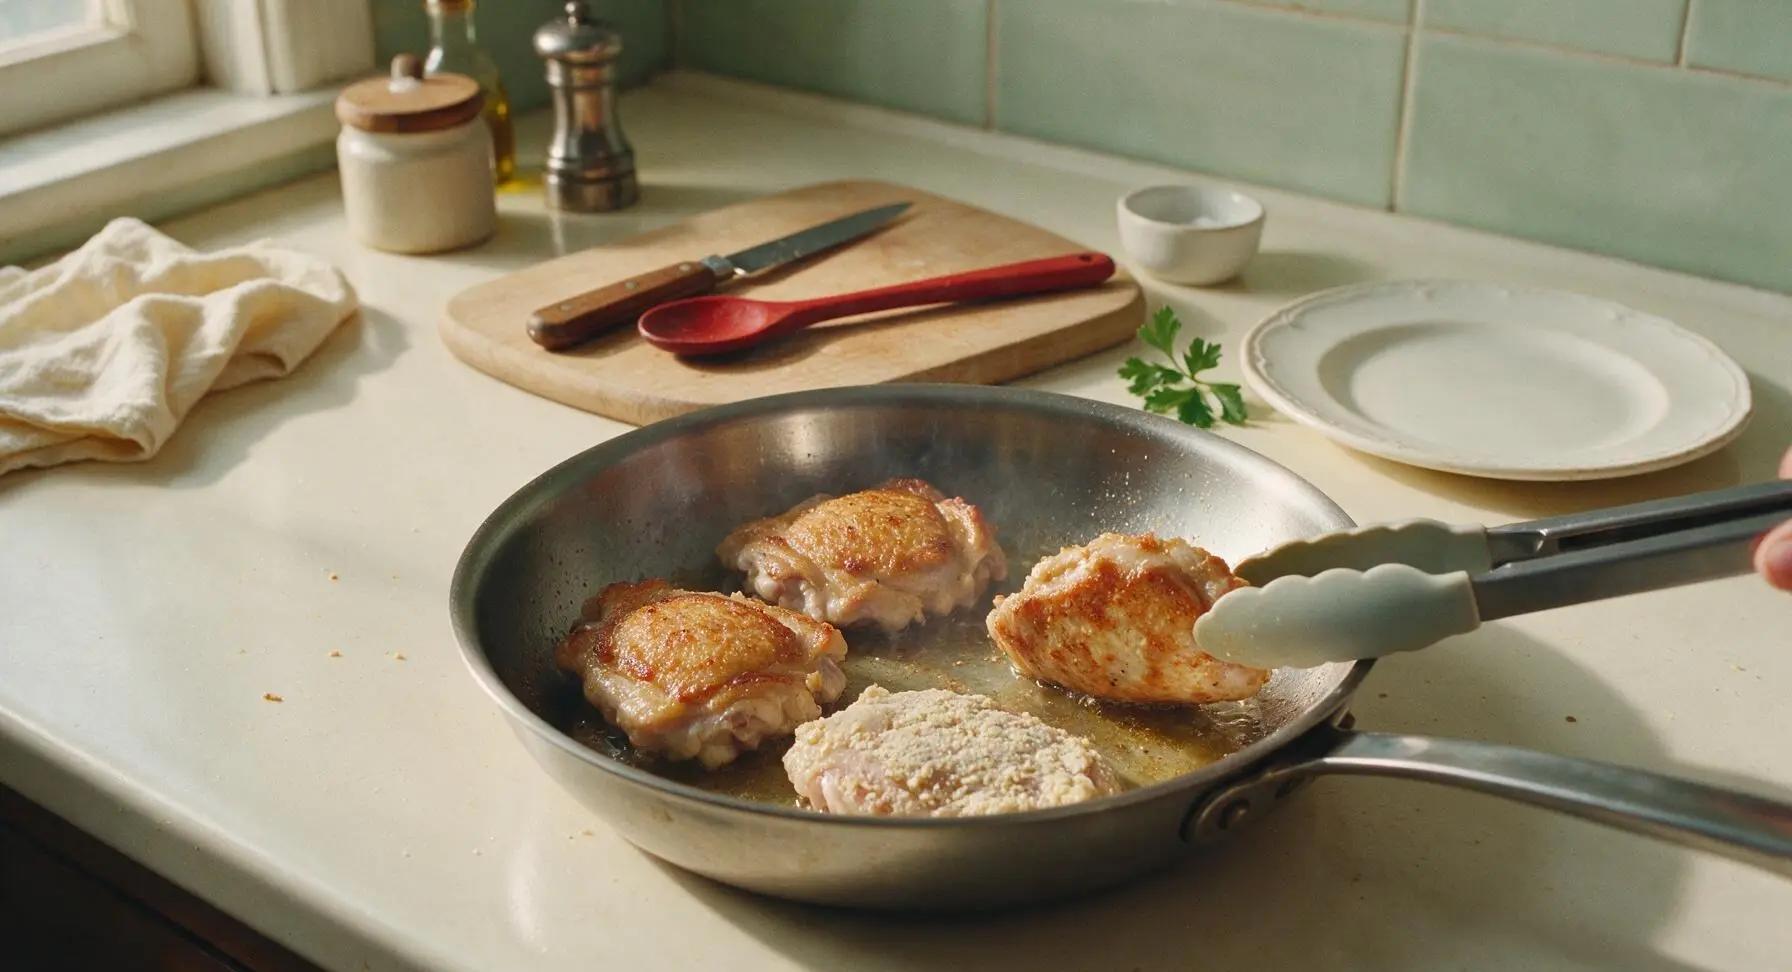
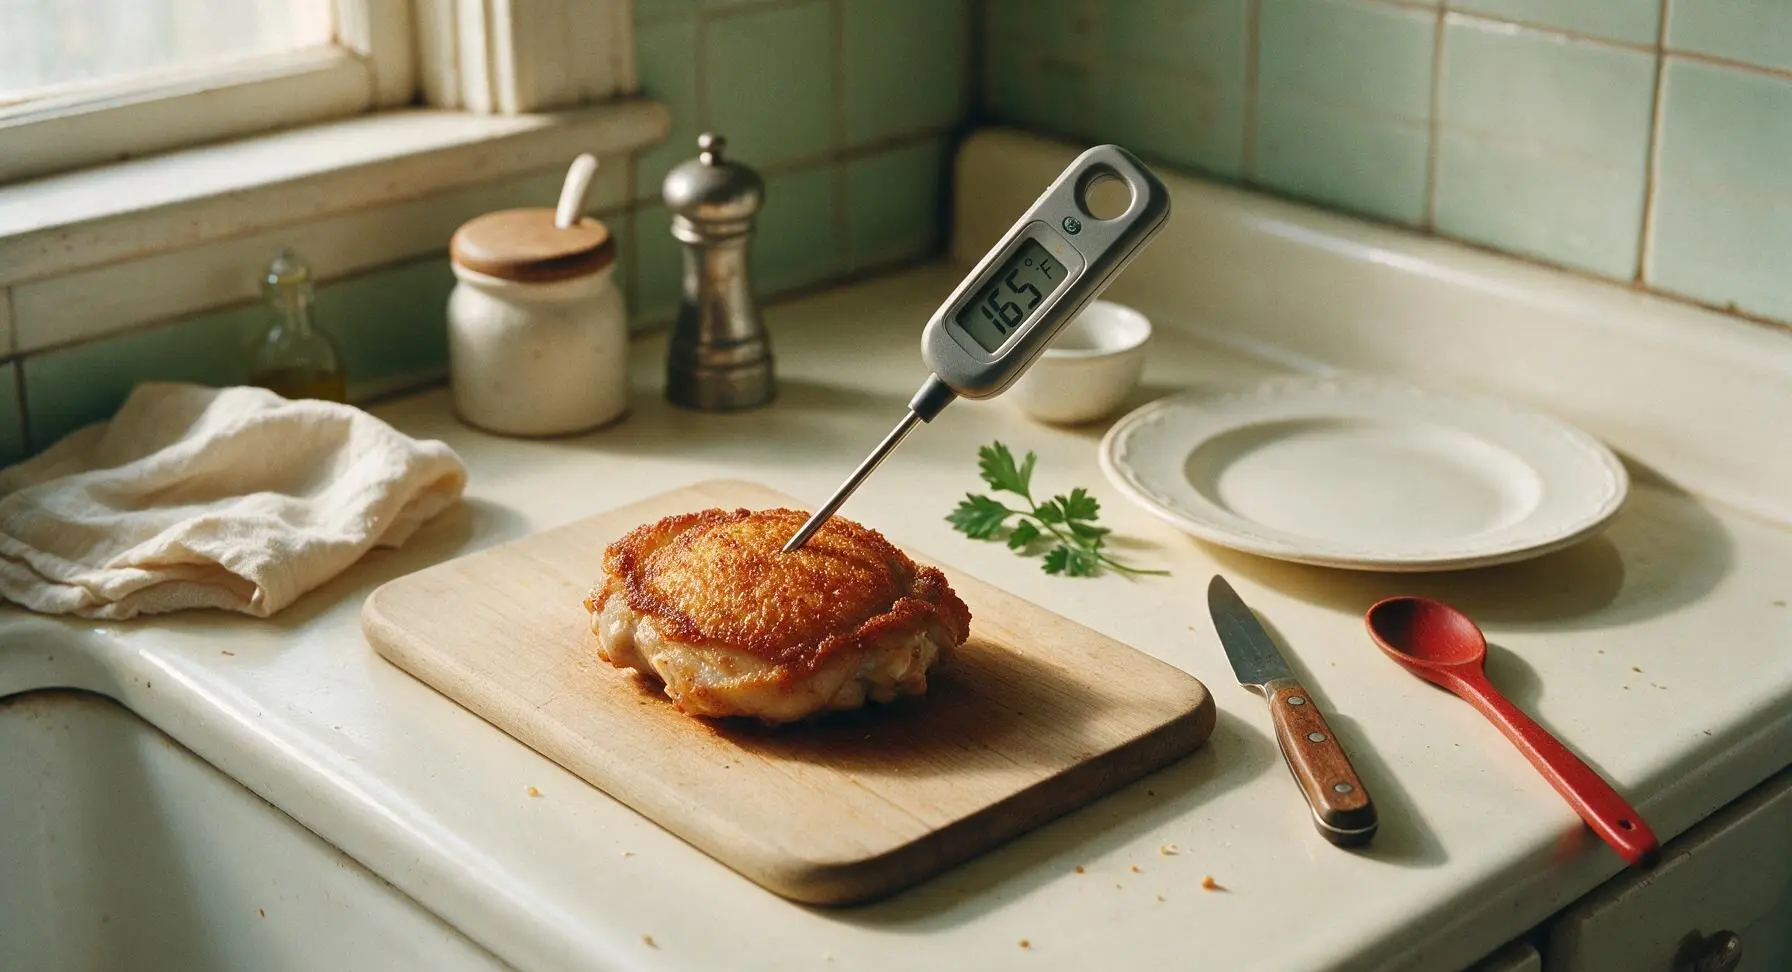
Step 6
step6:Cook Second Side Through
Step 6
step6:Cook Second Side Through
7

Rest Chicken Briefly

Use tongs to transfer the cooked chicken from the pan to a clean section of the counter lined with 1 sheet of paper towel. Let rest for 3 minutes to allow internal juices to redistribute, and to let excess surface oil drain off. Do not cover the chicken while resting, as trapped steam will make the crispy crust turn soggy.
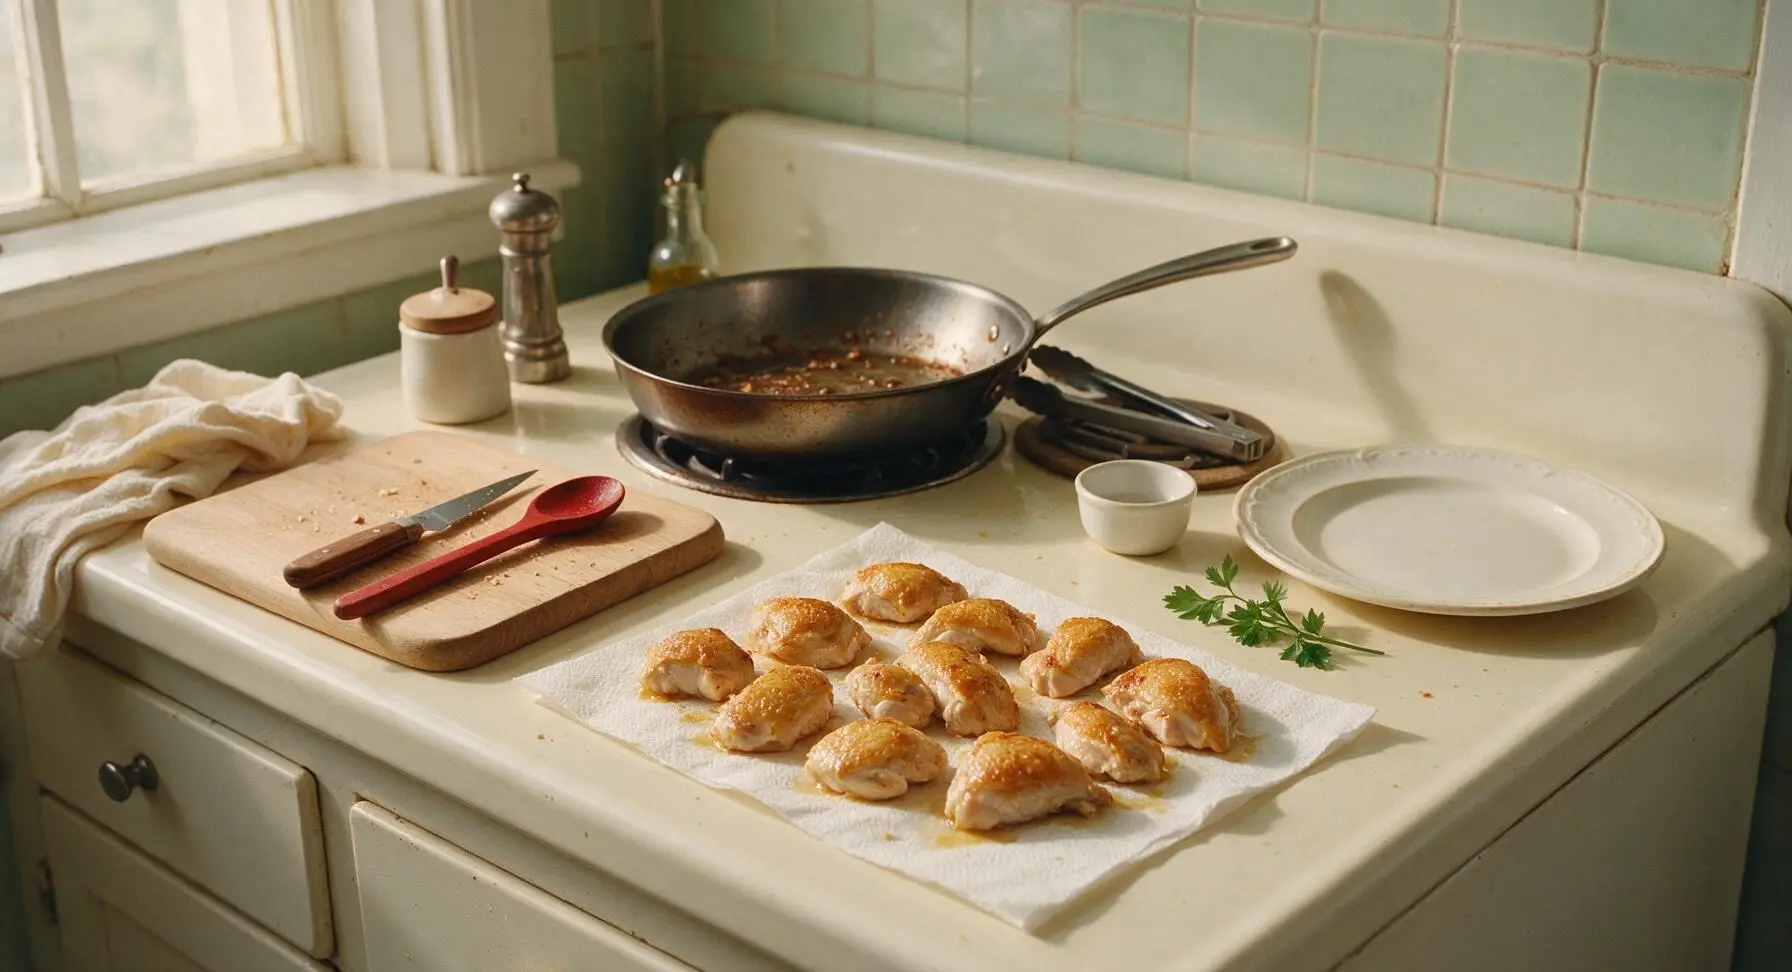
Step 7
step7:Rest Chicken Briefly
8

Plate and Garnish

Transfer the rested chicken to the matte cream ceramic dinner plate, arranging pieces in a slightly overlapping fan. Tuck a few small sprigs of fresh flat-leaf parsley between the chicken pieces for a bright pop of color and fresh, herby contrast. Serve immediately while the crust is crisp and the chicken is hot.
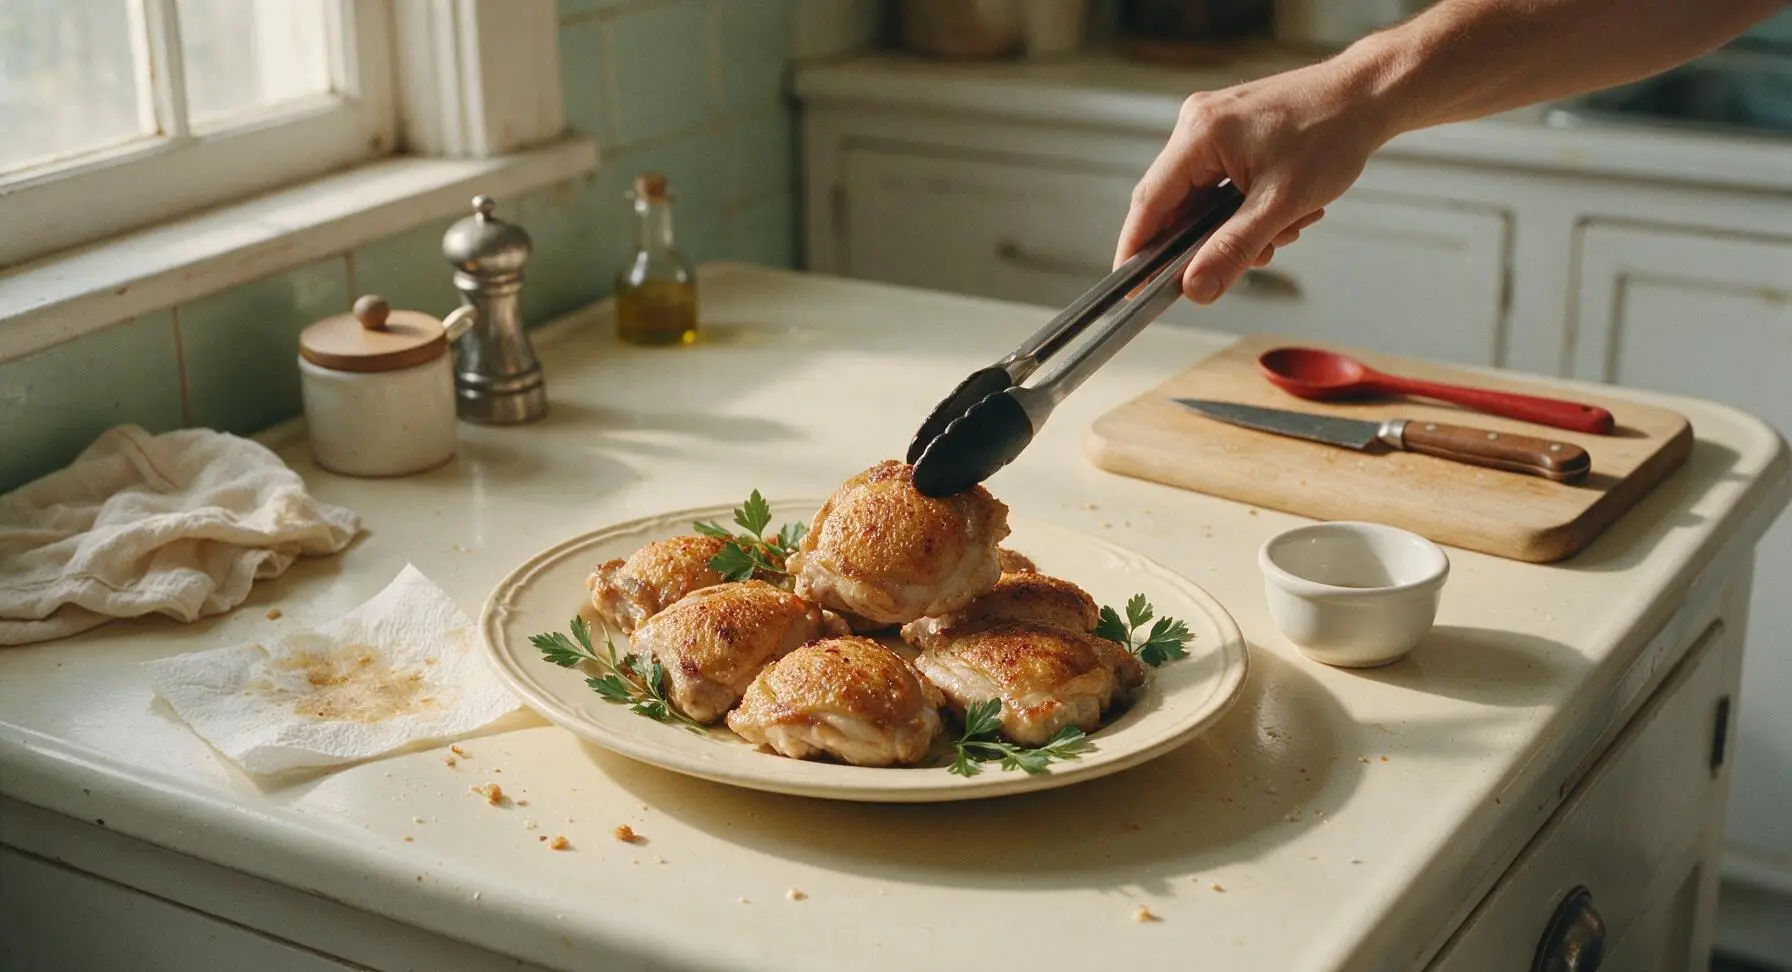
Step 8
step8:Plate and Garnish

Tips

1.Always pat chicken completely dry before dredging: any remaining surface moisture will mix with the flour to create a gummy, slippery coating that slides off during cooking instead of forming a crisp, craggy crust.
2.Resist the urge to move or poke the chicken for the full 7 minutes of the first cook time: constantly prodding or flipping breaks the forming crust and prevents deep golden browning; the chicken will release easily from the pan once the crust is fully set.
3.Opt for boneless, skinless chicken thighs instead of chicken breast for this recipe: thighs have a slightly higher fat content that stays juicy even if you overcook by a minute or two, making this recipe far more forgiving for beginner cooks with zero risk of dry, rubbery results.


✨ You May Also Like

Main Course
🍜 United Kingdom

A showstopping classic of tender seared beef, savory mushroom duxelles, and crisp prosciutto wrapped in flaky golden puff pastry, baked to juicy perfection.

⏱️ 2 hours 1Main Course ★ 4.7
Main Course
🍜 India

Tender charred marinated chicken simmered in a rich, spiced creamy tomato sauce, this iconic Anglo-Indian curry pairs perfectly with basmati rice or warm naan.

⏱️ 50 minuteMain Course ★ 4.6
Main Course
🍜 Thailand

Classic tangy, sweet, and savory Thai stir-fried rice noodles with shrimp, tofu, and crunchy garnishes, balancing all five core Thai flavor profiles.

⏱️ 30 minuteMain Course ★ 4.5
Main Course
🍜 United Kingdom

Crispy golden beer-battered cod and fluffy double-fried chips, served with tangy tartar sauce and malt vinegar: the timeless, beloved British pub comfort classic.

⏱️ 45 minuteMain Course ★ 4.7
Main Course
🍜 Mexico

Smoky, chile-marinated pork tacos with caramelized pineapple, fresh cilantro, and lime: a beloved classic Mexican street food perfect for casual summer gatherings.

⏱️ 1 hour 45Main Course ★ 4.8
Main Course
🍜 United States

Crunchy Fritos corn chips layered with savory beef chili and melted cheddar, topped with cool, zesty fixings for a beloved, cozy Tex-Mex comfort food.

⏱️ 35 minuteMain Course ★ 4.8

easy pan fried chicken:Frequently Asked Questions

1.Can I use boneless, skinless chicken breasts instead of thighs for this recipe? ▾
You absolutely can, but note that boneless, skinless thighs stay juicier thanks to their subtle internal marbling. If using breasts, pound them to an even ½-inch thickness first, and cut cook time by 2-3 minutes to avoid dry, tough results, as white meat dries out much faster than dark thigh meat.
2.Why does the flour crust fall off my chicken when I pan-fry it? ▾
Crust slippage usually happens if your chicken is too wet when you coat it in flour, or if you move the chicken too soon after adding it to the pan. Pat thighs completely dry with paper towels before dredging, and let the first side cook undisturbed for 4-5 minutes until the crust sets fully before flipping.
3.Should I let the floured chicken rest before adding it to the pan? ▾
Yes, a quick 5-minute rest after dredging in the seasoned flour makes a huge difference. It lets the flour adhere tightly to the chicken surface, so you get that signature craggy, crisp crust that doesn’t slide off, instead of a powdery, loose coating that separates as it cooks.
4.What type of oil works best for this pan-fried chicken? ▾
Reach for a neutral oil with a high smoke point, like canola, vegetable, or avocado oil. You only need ¼ inch of oil in the pan—no deep frying required! Avoid low-smoke-point extra virgin olive oil, as it will burn quickly and give your chicken a bitter, off-flavor before the crust crisps up.
5.How hot should my pan and oil be to get a golden crust without burning? ▾
Heat your pan over medium heat first, so the oil reaches 350°F before you add the chicken. If the oil is too cool, the crust will soak up excess oil and turn soggy; if it’s too hot, the outside will burn before the chicken cooks through. A tiny pinch of flour should sizzle immediately when dropped in to test temp.
6.Can I add extra spices to the flour coating beyond the base recipe? ▾
Absolutely! The base blend of garlic powder, smoked paprika, and kosher salt is totally customizable. Add a pinch of cayenne for heat, dried oregano for herby depth, onion powder, or black pepper to match your taste—just keep total added spices to ~1 teaspoon per cup of flour so the coating doesn’t get clumpy.
7.How do I know the chicken is fully cooked without cutting into it? ▾
The most reliable method is to use an instant-read thermometer inserted into the thickest part of the thigh—you’re looking for a safe internal temperature of 165°F. If you don’t have a thermometer, press the thickest part: firm, opaque meat with clear running juices means it’s ready to rest briefly before serving.
8.Why does my chicken crust turn out soggy instead of crisp? ▾
Soggy crust usually comes from overcrowding the pan, oil that’s too cool, or flipping the chicken too often. Cook in batches if your pan can’t hold all thighs in a single layer with space between them, keep oil at a steady 350°F, and only flip once the first side is deeply golden and set to lock in crispness.
9.Do I need to brine the chicken ahead of time for this recipe? ▾
No brining is required for this quick, 30-minute recipe! Boneless, skinless chicken thighs stay naturally juicy even without a brine, as long as you don’t overcook them. If you have an extra 30 minutes, you can toss thighs in a teaspoon of kosher salt ahead for deeper seasoning, but it’s totally optional.
10.Can I make this pan-fried chicken gluten-free? ▾
You can easily make this gluten-free by swapping the all-purpose flour for a 1:1 gluten-free all-purpose flour blend that contains xanthan gum. Skip plain almond or coconut flour on their own, as they won’t create that same craggy, crisp crust this easy, no-fuss recipe is known for.
11.How thick should chicken thighs be to cook evenly? ▾
For the most even cook, aim for thighs that are roughly ¾ to 1 inch thick. If your thighs are extra thick, gently pound them to an even thickness with a meat mallet before dredging—this prevents thin edges from overcooking and drying out before the thickest part cooks all the way through.
12.Can I use bone-in, skin-on chicken thighs instead of boneless, skinless? ▾
You can, but you’ll need to adjust the cook time. Bone-in, skin-on thighs will take an extra 6-8 minutes to cook through, since the bone slows heat transfer. Keep heat at medium so the flour coating doesn’t burn before the interior hits 165°F, and you’ll still get delicious, crisp results.
13.What are the best sides to serve with this pan-fried chicken? ▾
This versatile, savory chicken pairs perfectly with quick weeknight sides like roasted broccoli, creamy mashed potatoes, tangy coleslaw, buttered sweet corn, or a simple green salad. It also works great sliced on salads, tucked into sandwiches, or served with ranch or hot honey for dipping.
14.How should I store leftover pan-fried chicken? ▾
Let leftover chicken cool completely to room temperature, then store it in an airtight container in the fridge for up to 3 days. To reheat and bring back the crisp crust, warm it in a skillet over medium-low heat for 3-4 minutes per side, or in a 375°F oven—skip the microwave, which makes crust soggy.
15.Do I need a cast iron skillet to make this recipe? ▾
You don’t need a cast iron skillet, though it does hold heat really evenly for a consistent crust. Any heavy-bottomed skillet, like stainless steel or a heat-safe non-stick pan, will work just fine. Just avoid thin, lightweight pans that develop hot spots, which burn the crust in uneven patches.
16.Why does my pan-fried chicken turn out bland even with the seasoning blend? ▾
Bland chicken usually means you skimped on seasoning the flour, or forgot to season the chicken itself first. For the best flavor, season the flour generously with kosher salt, garlic powder, and smoked paprika, and give chicken a light salt sprinkle before dredging to flavor the meat, not just the crust.
17.Can I freeze cooked pan-fried chicken for later? ▾
Yes, you can freeze fully cooked, cooled chicken for up to 3 months. Wrap each piece tightly in plastic wrap, then store in a labeled freezer bag to prevent freezer burn. Thaw it in the fridge overnight, then reheat in a 375°F oven for 12-15 minutes until warmed through and the crust crisps back up.
18.Do I need to dip the chicken in egg before dredging it in flour? ▾
No egg dip is required for this simple, pantry-staple recipe! The natural moisture on the surface of patted-dry chicken is enough to make the seasoned flour adhere, especially if you let dredged chicken rest 5 minutes before frying. Skipping egg cuts down on prep time while still giving you that perfect craggy crust.
19.My pan is producing a lot of smoke while I cook the chicken—what’s wrong? ▾
Excess smoke usually means your heat is too high, or you’re using an oil with too low of a smoke point. Turn the burner down slightly to hold a steady medium heat, use a high-smoke-point neutral oil, and wipe out burnt flour bits between batches to prevent acrid, smoky flavors from developing.

Comments (18)

2 days ago

OMG this recipe is a total weeknight game changer! I got home from soccer practice at 6, had crispy juicy chicken on the table by 6:20 exactly. My picky middle kid asked for seconds, which never happens. I used a little extra paprika because we love spice, and it was chef’s kiss. 10/10 will be in our regular dinner rotation!

yesterday

Wait the extra paprika hack sounds so good! Did you use smoked or regular paprika? I’ve got both in my pantry and want to try this tonight!

yesterday

So glad your family loved it! Smoked paprika adds a fantastic deep, smoky flavor if you have it on hand, but regular works great too – feel free to adjust the spice level to your family’s taste!

3 days ago

Super easy for a dorm kitchen! I only have a tiny electric skillet and this still turned out perfectly crispy, no soggy skin at all. Way better than the frozen chicken patties I’ve been living off of all semester. Only note is I wish I’d seasoned a little heavier, next time I’ll add more garlic powder.

2 days ago

Great call cooking this in your electric skillet – this recipe is super versatile for small spaces! For extra seasoning, try salting the chicken 15 minutes before cooking to help the flavors sink in, it makes a huge difference!

yesterday

Made a big batch of this for my weekly meal prep yesterday! Held up perfectly in the fridge for 4 days, reheats great in the toaster oven so the skin stays crispy instead of getting rubbery like other pan-fried chicken recipes I’ve tried. Sliced it up for salads, wraps, and even quick chicken tacos all week. SO good!

1 week ago

Brought this to our neighborhood block party last weekend and everyone was asking for the recipe! I cut the chicken into smaller tenders so they were easier to pick up with toothpicks, served with a little honey mustard dip on the side. Gone in 10 minutes flat!

5 days ago

Wait I was at that party! Those were the chicken tenders you brought? I ate like 5 of them, no joke. So excited I found the recipe, gonna make them for my fantasy football draft this weekend!

5 minutes ago

First time I’ve ever made chicken that didn’t come out burnt on the outside and raw in the middle!!! The tip about cooking on medium heat and not flipping it too often was exactly what I was doing wrong before. My roommate thought I ordered takeout lmao

just now

Ugh same! I always flip chicken every 30 seconds because I’m paranoid it’ll burn, I had no idea that’s what makes the skin stick and get soggy. Can’t wait to test this out tomorrow!

just now

That makes our day to hear! The no-frequent-flipping rule is a total game-changer for crispy, evenly cooked chicken – so stoked you nailed it on your first try!

2 weeks ago

Great high-protein recipe that doesn’t require a million fancy ingredients. I used boneless skinless breasts because that’s what I had, followed the cook time exactly, and they were juicy not dry. Pairs perfect with roasted broccoli and quinoa for a quick post-gym dinner.

30 minutes ago

This turned out so flavorful, but I had to swap the regular flour for what I had in my pantry and the crust wasn’t as crispy as I wanted. Is there a good gluten free swap that will give that same crunch? I have a wheat allergy and would love to make this perfectly next time!

5 minutes ago

Absolutely! You can swap the all-purpose flour for a 1:1 gluten free all-purpose flour blend, or even use crushed rice cereal for extra crunch if you prefer. It comes out just as crispy as the original!

5 days ago

I grew up on my grandma’s cast iron fried chicken and I was skeptical a 20 minute pan-fried version could measure up, but color me impressed! I used my cast iron skillet like the recipe suggested, got that perfect golden crust, and the chicken was so juicy. Perfect for when I’m craving that comfort food taste but don’t want to spend 2 hours in the kitchen.

3 days ago

Cast iron is non-negotiable for fried chicken if you ask me! I add a tiny pat of butter at the end for extra richness, it’s *chef’s kiss*

2 days ago

Love the cast iron tip! Adding that little pat of butter at the end is such a great trick for extra flavor and a deeper golden crust – thanks for sharing!

2 hours ago

Made this for lunch today between Zoom meetings! Threw some chicken in the pan, hopped on a quick call, flipped it once, and had a delicious hot lunch without having to order Uber Eats. Even had time to toss a side salad together while it cooked. Will be making this at least once a week now.

1 week ago

Made this for my girlfriend last night for our at-home date night and she thought I’d been taking secret cooking classes! Paired it with mashed potatoes and roasted green beans, she said it was better than the chicken we had at that fancy bistro for our anniversary. Total win.

5 days ago

Bro I tried this for my date last week too and mine didn’t turn out half as good, what’s your secret? Did you brine the chicken first or just follow the recipe exactly?

3 days ago

This is so affordable to make! Chicken thighs were on sale for $1.99/lb this week, I already had all the seasonings in my cabinet, so dinner for 4 cost me under $5 total. Way cheaper than takeout and tastes way better. Only issue was my smoke alarm went off a little because I had the heat too high at first 😂

2 days ago

So glad this worked for your budget! If your smoke alarm goes off, just turn the heat down a touch and make sure your vent fan is on – medium heat is the sweet spot for crispy chicken without excess smoke!

2 weeks ago

Perfect keto-friendly recipe if you skip the flour (or use almond flour, which is what I did)! Crunchy, juicy, zero weird processed ingredients. I ate 3 thighs straight out of the pan they were so good, no sides needed lmao.

1 week ago

Wait how does the almond flour hold up? I’ve tried other recipes with almond flour and the crust always falls off when I flip the chicken. Any tips?

1 week ago

Make sure you pat the chicken totally dry before coating it in almond flour, and don’t flip it for the first 7 minutes! That’s what I did and the crust stayed totally intact.

1 week ago

I’ve been making pan-fried chicken for 60 years and this recipe is just as good as my old tried and true! Love that it’s quick enough for my grandkids to make when they’re over visiting, no complicated steps or weird ingredients. We all loved it.

2 days ago

Made this on my portable camp stove before the football game last weekend and it was a hit! Cooked up a whole pack of chicken thighs, passed them around to the tailgate crew, everyone was raving. Way better than the boring hot dogs and burgers everyone else brought.

yesterday

Wait this is genius for tailgates! I’m so sick of eating chips and brats every game day, definitely adding this to our menu for the homecoming game next month.

30 minutes ago

Tried this with boneless skinless breasts because that’s what I had, and they came out a little drier than I wanted. Any tips for adjusting the recipe for white meat? Flavor was incredible, just the texture was off for me.

5 minutes ago

I always pound my breasts to an even thickness before cooking them! If they’re thicker on one end they overcook on the thin side before the thick part is done, that might have been your issue.

just now

Great tip from Hank! If using chicken breasts, pound them to 1-inch even thickness, and reduce cook time by 2-3 minutes per side to avoid drying them out. You can also brine them for 15 minutes in salt water before cooking for extra juiciness!

5 days ago

I know this is a pan-fried recipe but I tried it in my air fryer on a whim (375F for 12 minutes, flipped halfway) and it was fantastic! Still crispy, less oil, super quick. Definitely will be making this both pan-fried and air fryer versions depending on how lazy I’m feeling that night.

yesterday

What dipping sauces go best with this? I made it last night and ate it plain, which was amazing, but I want to serve it for game night with a couple dip options for my friends.

yesterday

This pairs so well with so many dips! Our go-tos are honey mustard, spicy ranch, buffalo sauce, or even a simple garlic aioli. You really can’t go wrong – pick your favorites!

1 week ago

My toddler is going through that phase where she refuses everything except chicken nuggets, so I thought I’d try this and cut it into nugget-sized pieces. Y’ALL. She ate three whole pieces and asked for “more chicken please” without me even having to bargain with her. Win of the century.

5 days ago

Oh my kid is in that exact same phase! I’ve been buying frozen nuggets for months because it’s the only thing he’ll eat, I’m absolutely trying this tomorrow night. Fingers crossed!

3 days ago

Nothing beats a toddler-approved meal! Cutting it into nugget-sized pieces is such a smart hack for little kids, we’re so glad it was a hit at your house!



