
fried chicken no flour

title 1
fried chicken no flour
⏱️ cook time 25 minutes
🍽️ servings 4
⚡ Difficulty easy

intro

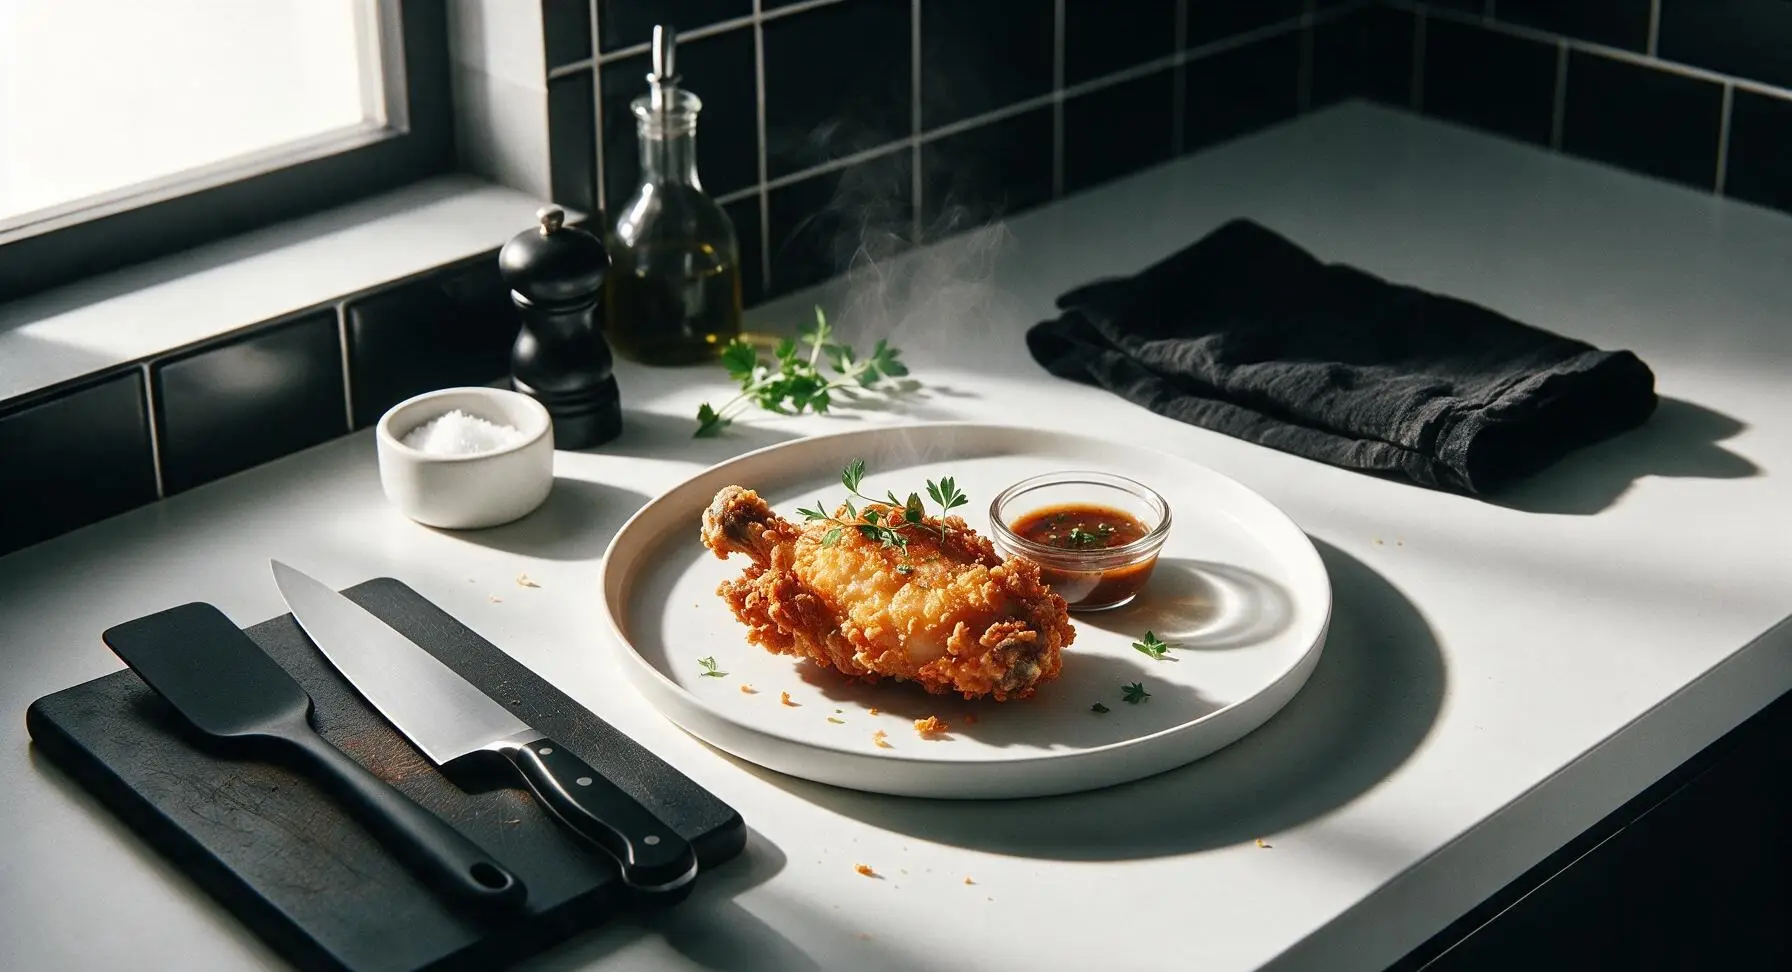
Shatteringly crisp, juicy bone-in fried chicken made without wheat flour, with a light cornstarch-egg crust that locks in savory, herby flavor for a gluten-free take on a Southern classic.

Ingredients
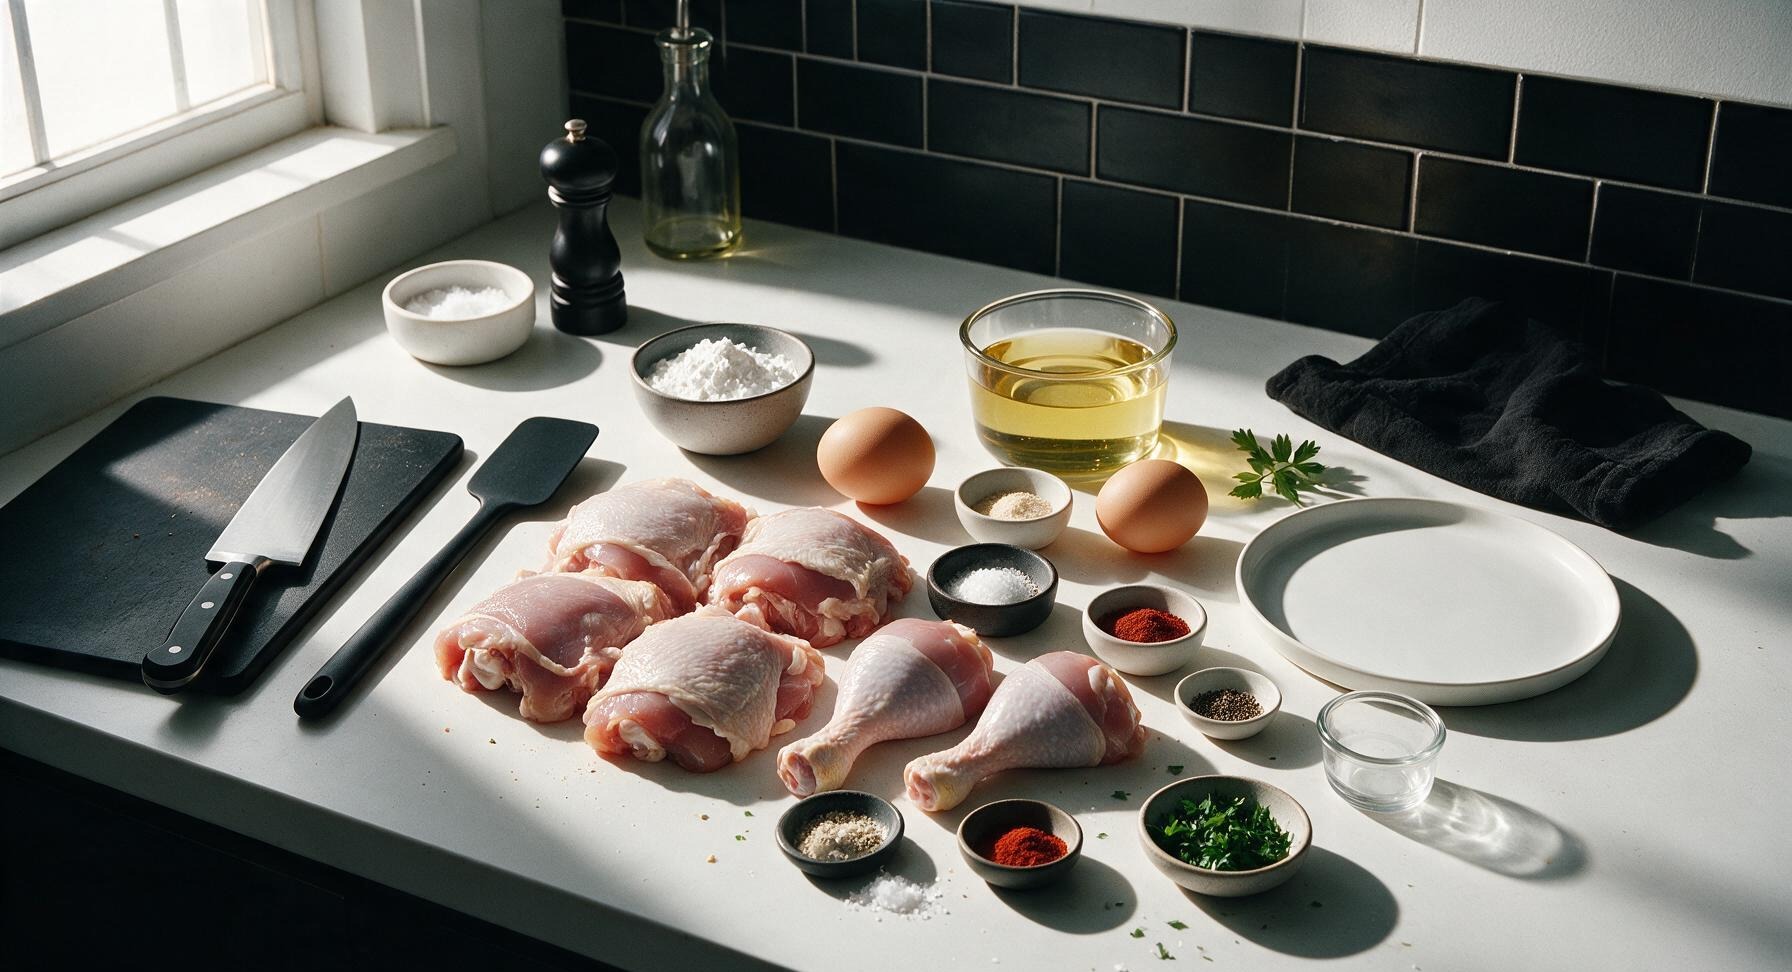
Bone-in, skin-on chicken thighs and drumsticks 900g (approx. 4 thighs, 4 drumsticks)
Cornstarch 1/2 cup (60g)
Large eggs 2
Kosher salt 1 tbsp
Garlic powder 1 tsp
Smoked paprika 1 tsp
Freshly ground black pepper 1/2 tsp
Dried thyme 1/2 tsp
Cayenne pepper (optional) 1/4 tsp
Neutral frying oil (peanut or canola) 3 cups (720ml)
Fresh flat-leaf parsley 2 tbsp, chopped
Flaky sea salt 1/4 tsp

Steps

1

Pat Chicken Dry

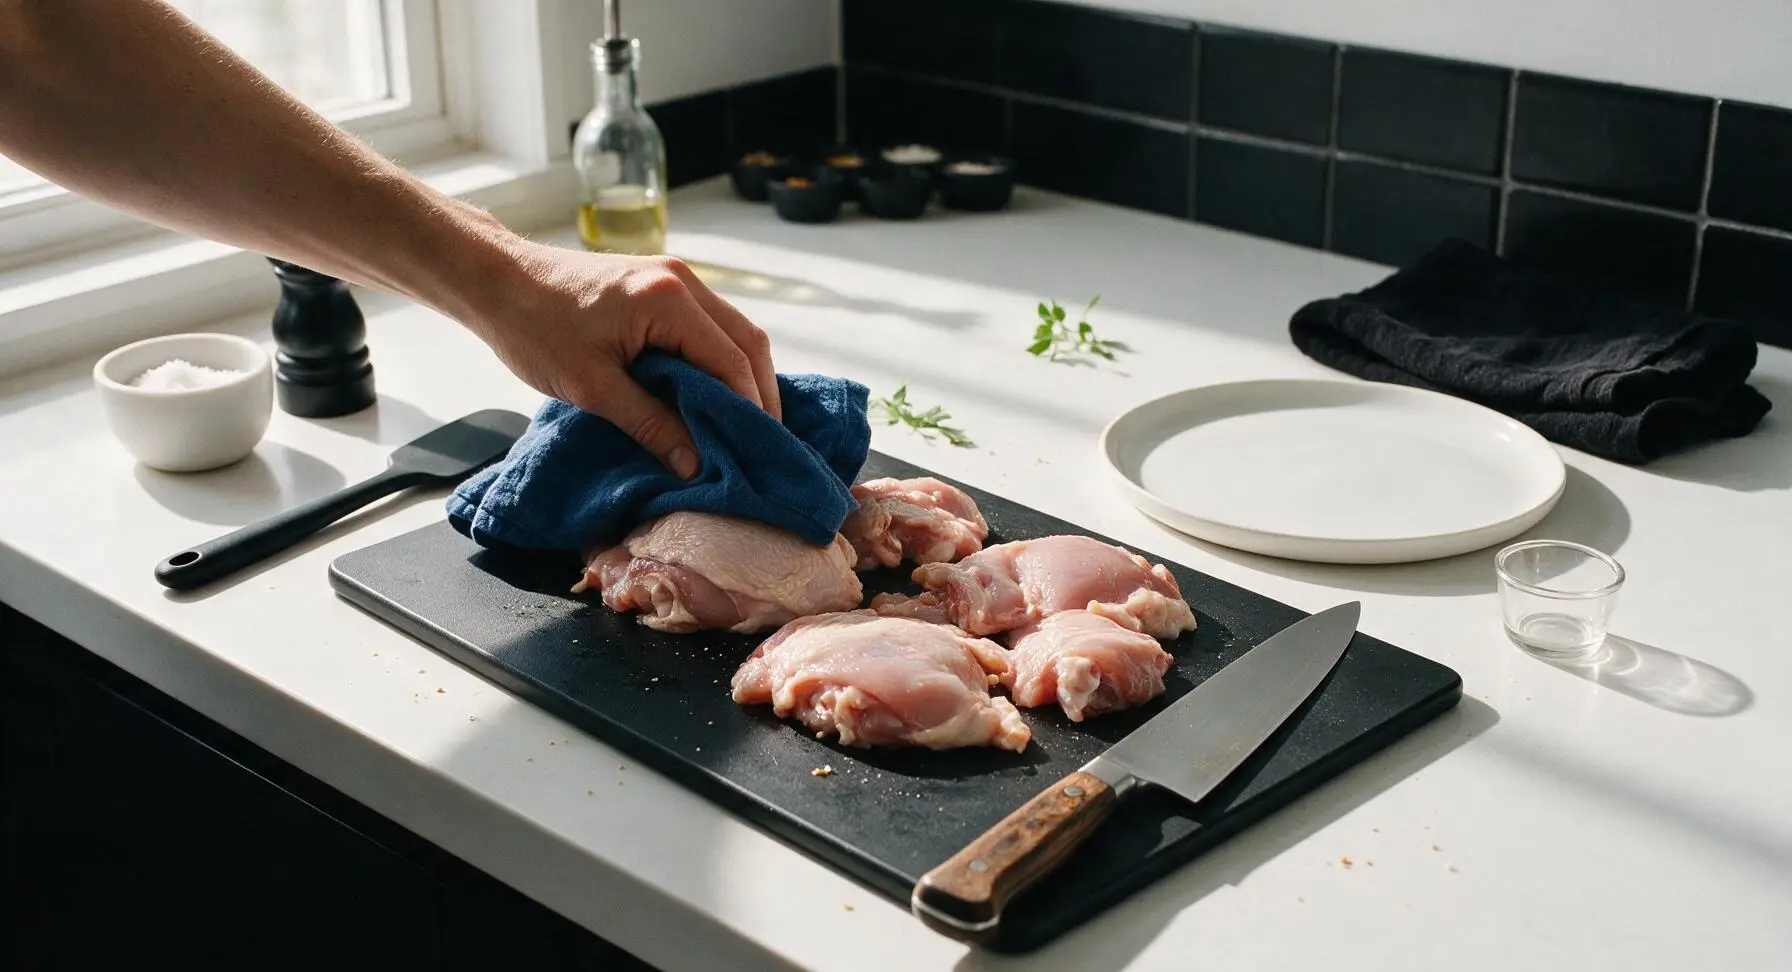
Place the raw chicken pieces on the matte black cutting board centered on the counter. Use the crumpled indigo cotton towel to thoroughly pat every surface of the chicken, including under loose skin edges where accessible, completely dry. Discard any damp towel sections. Properly dried skin is critical for a crisp, non-greasy crust; the chicken should feel matte and dry to the touch, not slimy or damp, after 2–3 minutes of patting.
Step 1
step1:Pat Chicken Dry
2

Mix Seasoned Coating

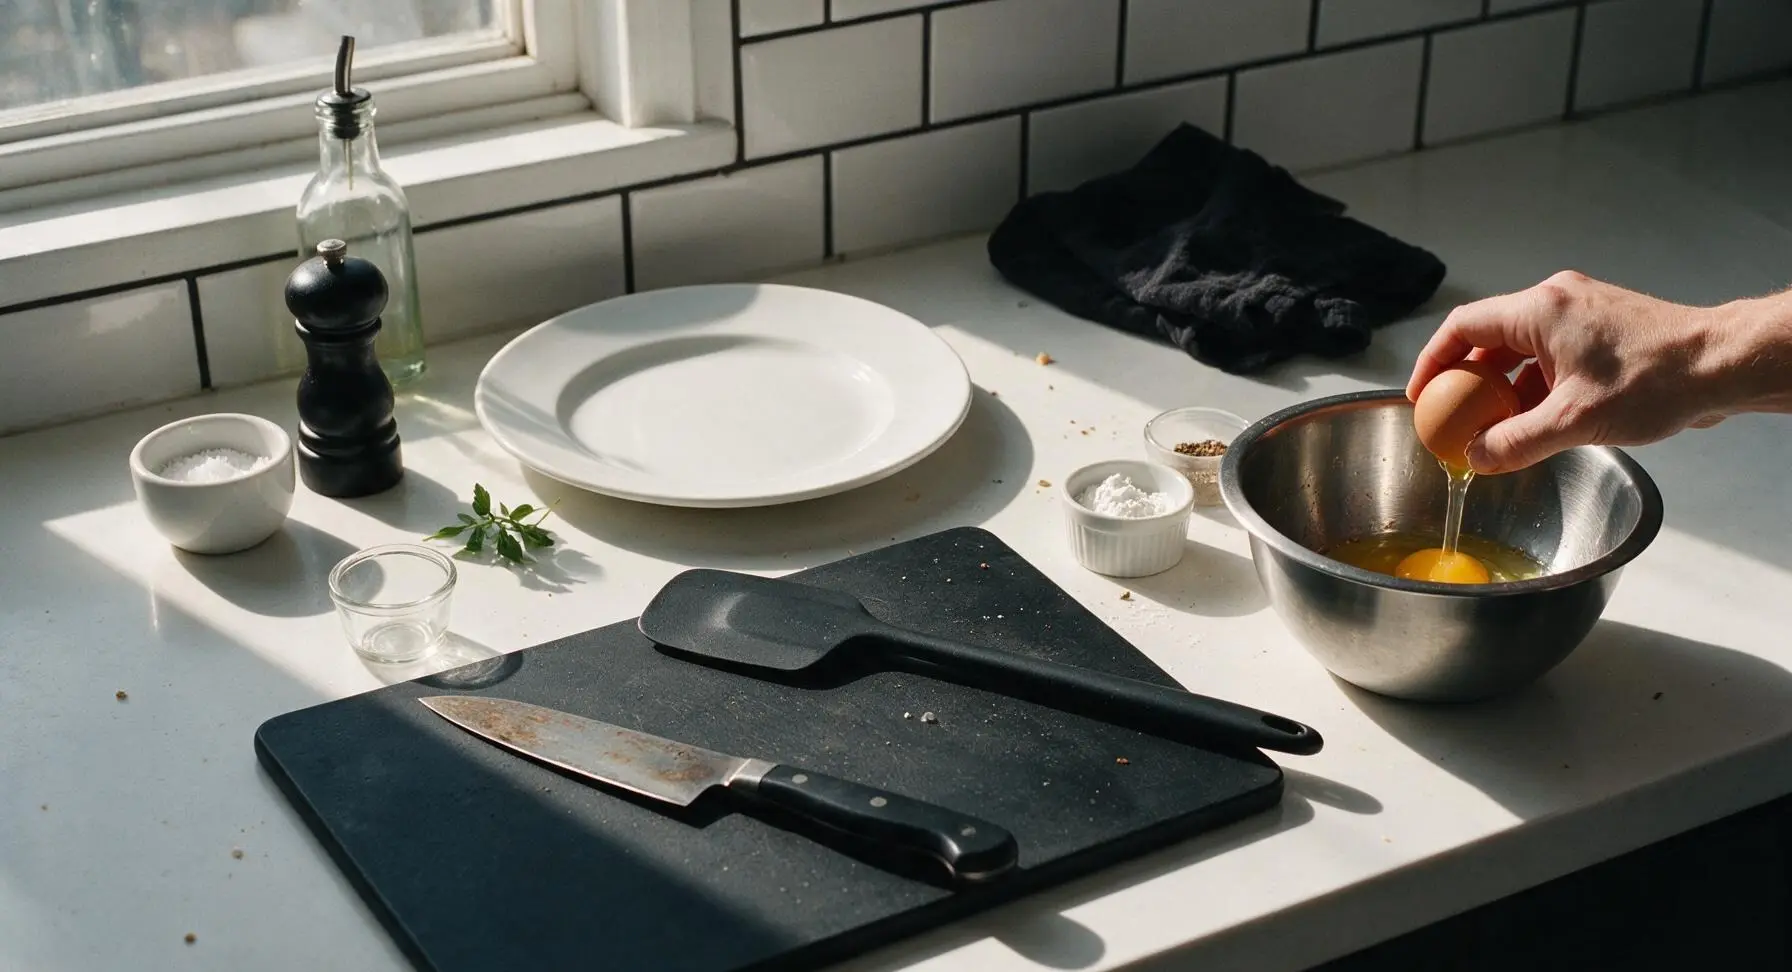
Crack the 2 large eggs into the brushed stainless steel mixing bowl, and whisk lightly with the wire whisk until yolks and whites are fully combined with no streaks. Add the 1/2 cup cornstarch, 1 tbsp kosher salt, 1 tsp garlic powder, 1 tsp smoked paprika, 1/2 tsp black pepper, 1/2 tsp dried thyme, and optional 1/4 tsp cayenne pepper to the bowl. Whisk steadily until the mixture forms a smooth, thick batter the consistency of heavy cream, with no dry lumps of cornstarch remaining.
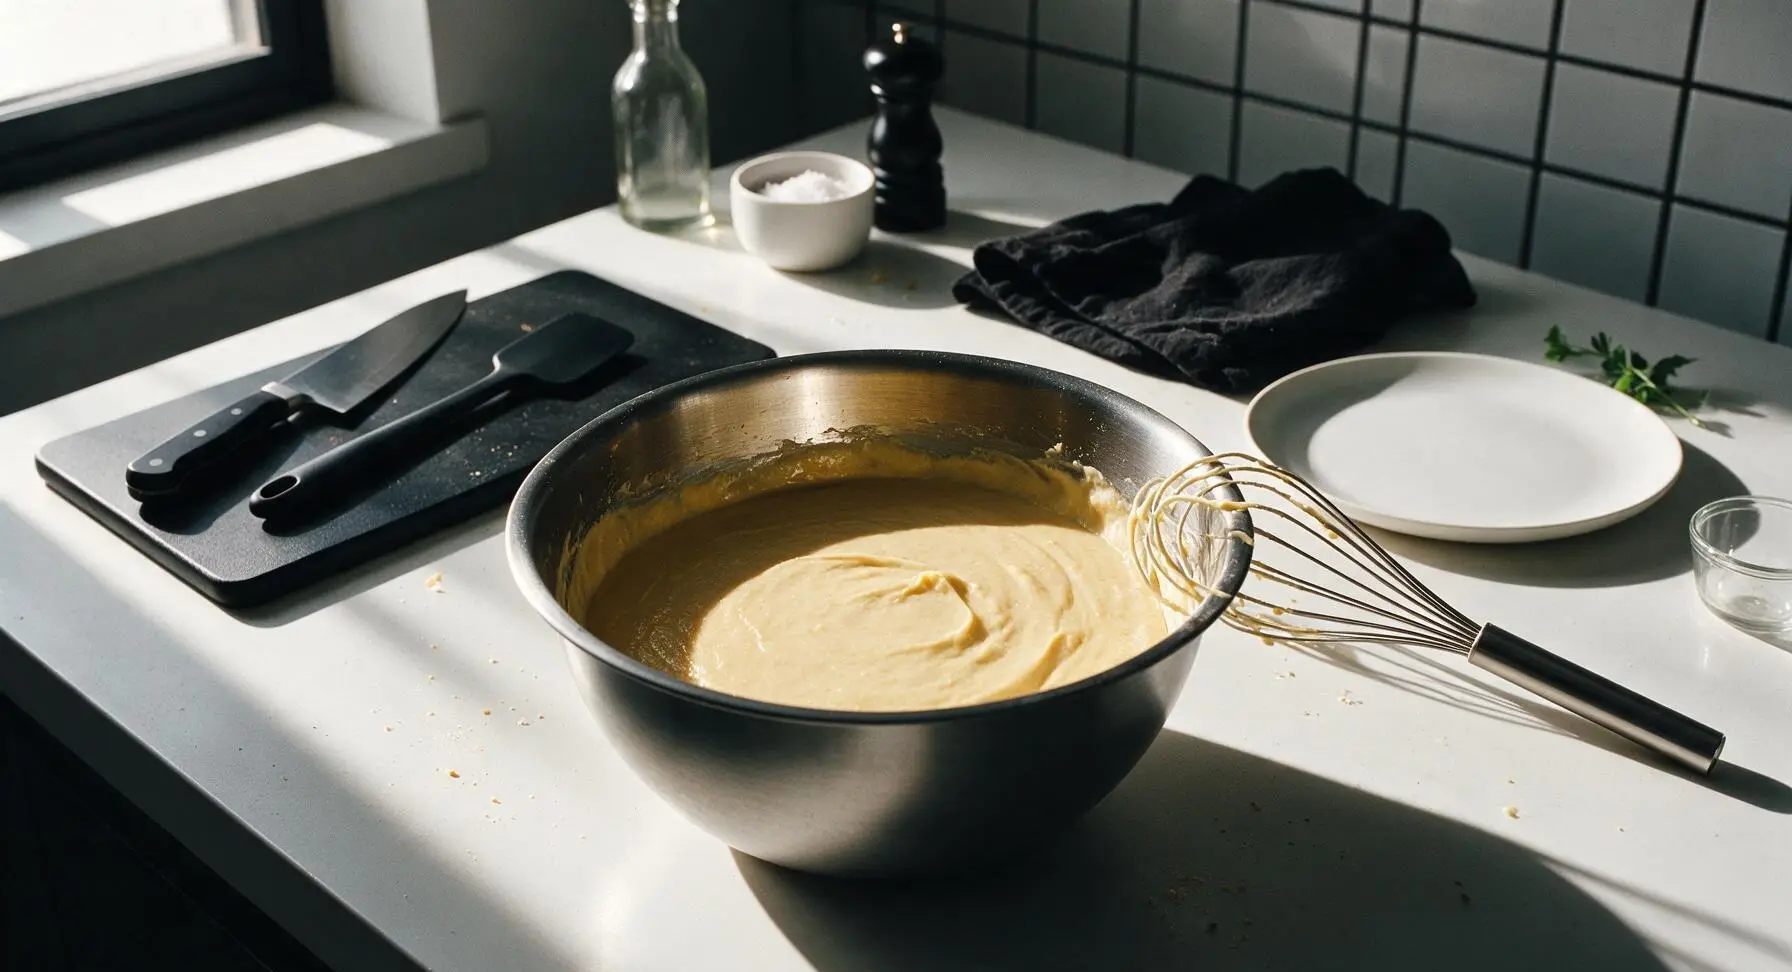
Step 2
step2:Mix Seasoned Coating
Step 2
step2:Mix Seasoned Coating
3

Coat Chicken Evenly

Working one piece at a time, submerge each chicken piece fully in the seasoned cornstarch-egg batter, turning to coat every surface, including under loose edges of skin. Lift each piece out of the batter, letting excess batter drip back into the bowl for 3–4 seconds, so only a thin, even layer clings to the chicken. Thick, gloppy batter will cause a soggy, uneven crust, so ensure no heavy drips remain before setting coated pieces aside on the edge of the cutting board.
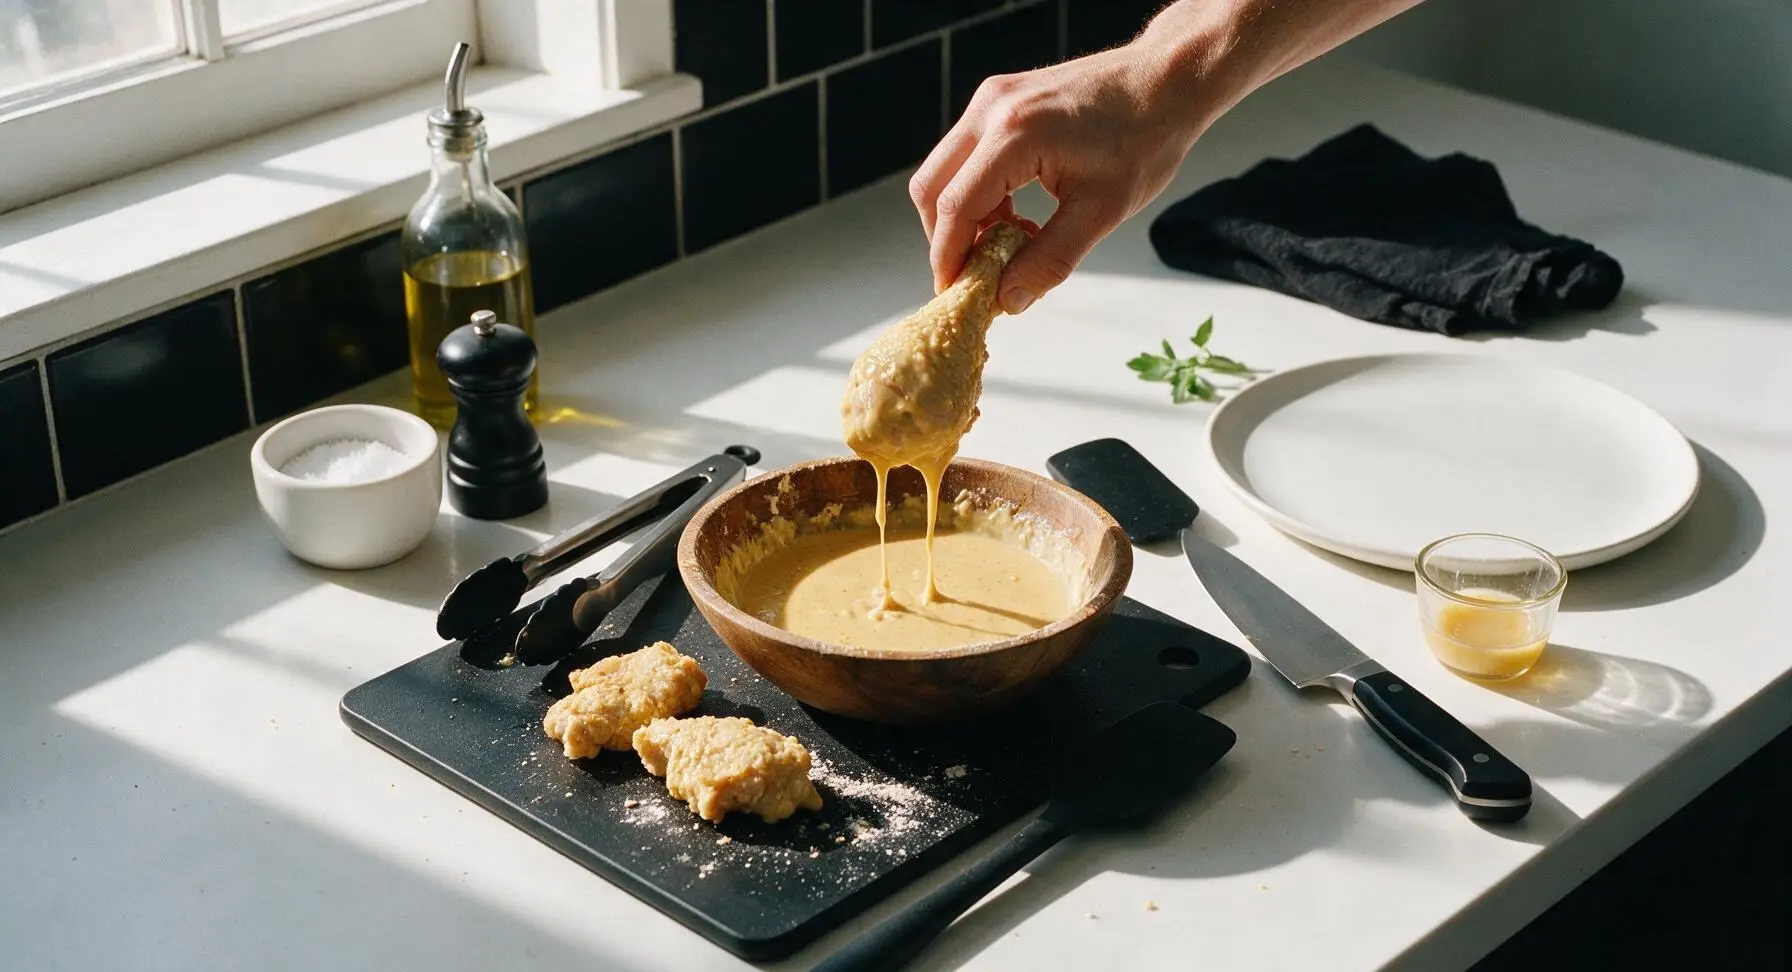
Step 3
step3:Coat Chicken Evenly
4

Heat Frying Oil

Place the 12-inch well-seasoned cast iron skillet on the central induction burner. Pour 3 cups of neutral frying oil into the skillet, until oil reaches 1 inch depth up the pan sides. Heat the oil over medium heat until it reaches a steady 350°F (175°C), measured with the clip-on candy thermometer. Do not let oil smoke; if it reaches above 375°F, turn heat down slightly and wait 2 minutes before adding chicken. The oil is ready when a tiny drop of batter dropped into it sizzles immediately and rises to the surface within 1 second.
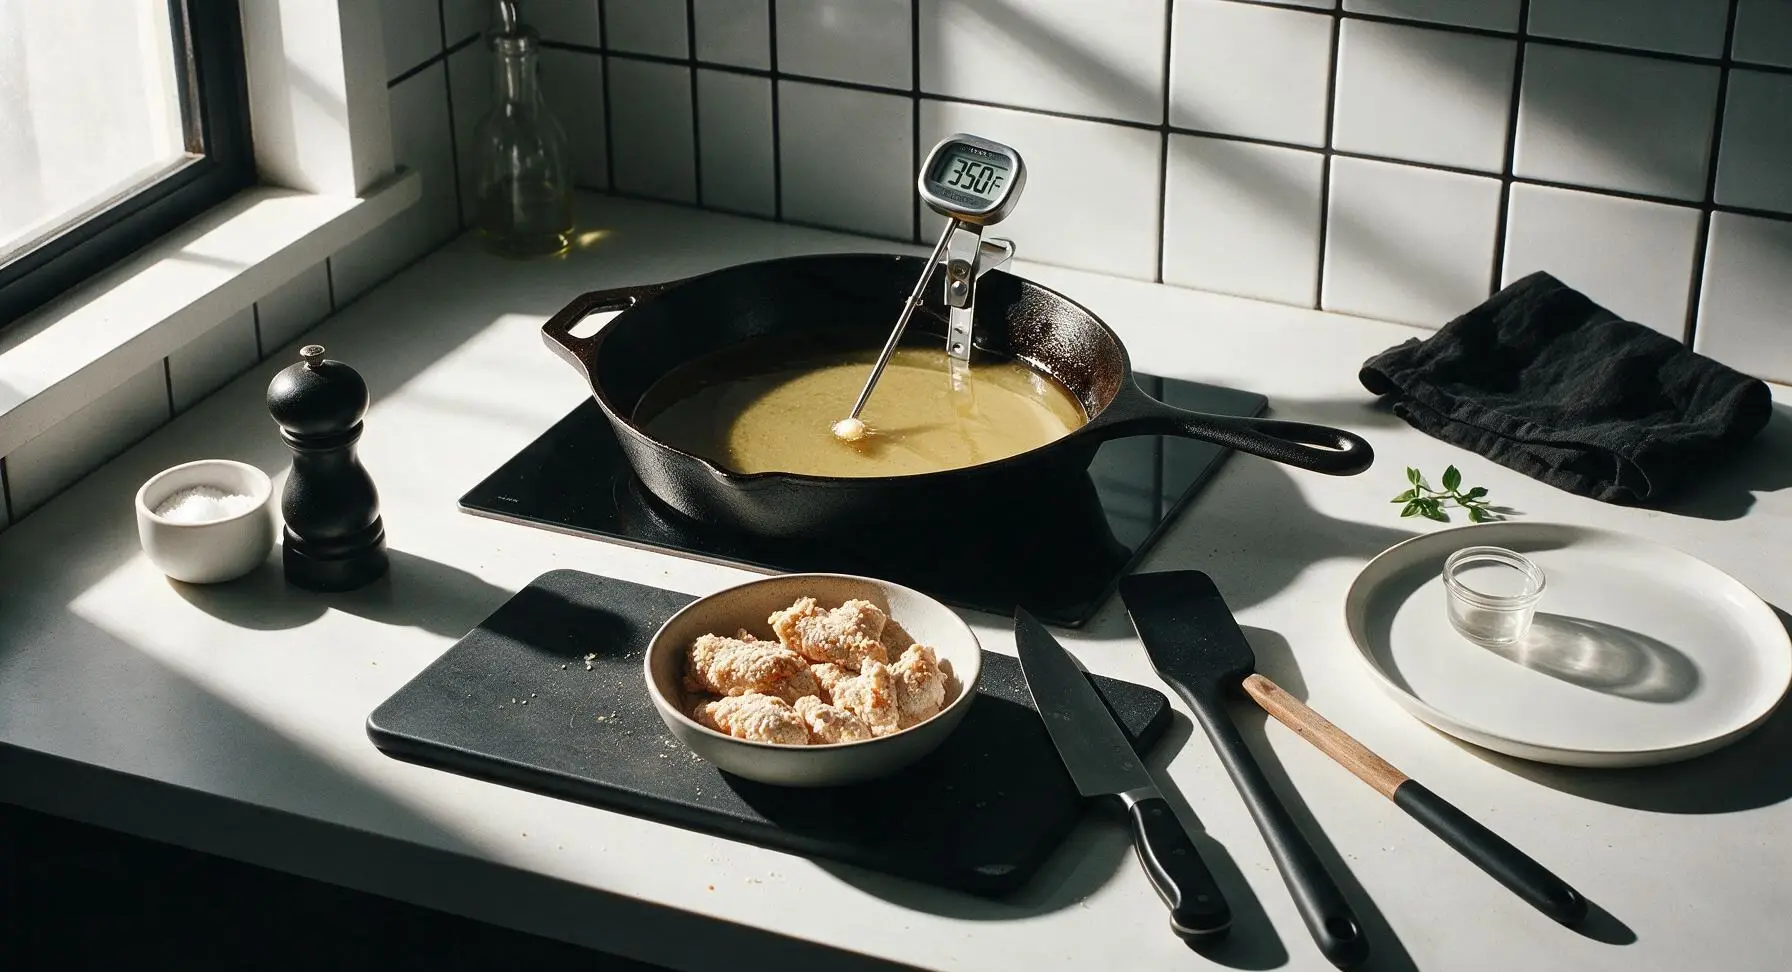
Step 4
step4:Heat Frying Oil
5

Fry First Chicken Side

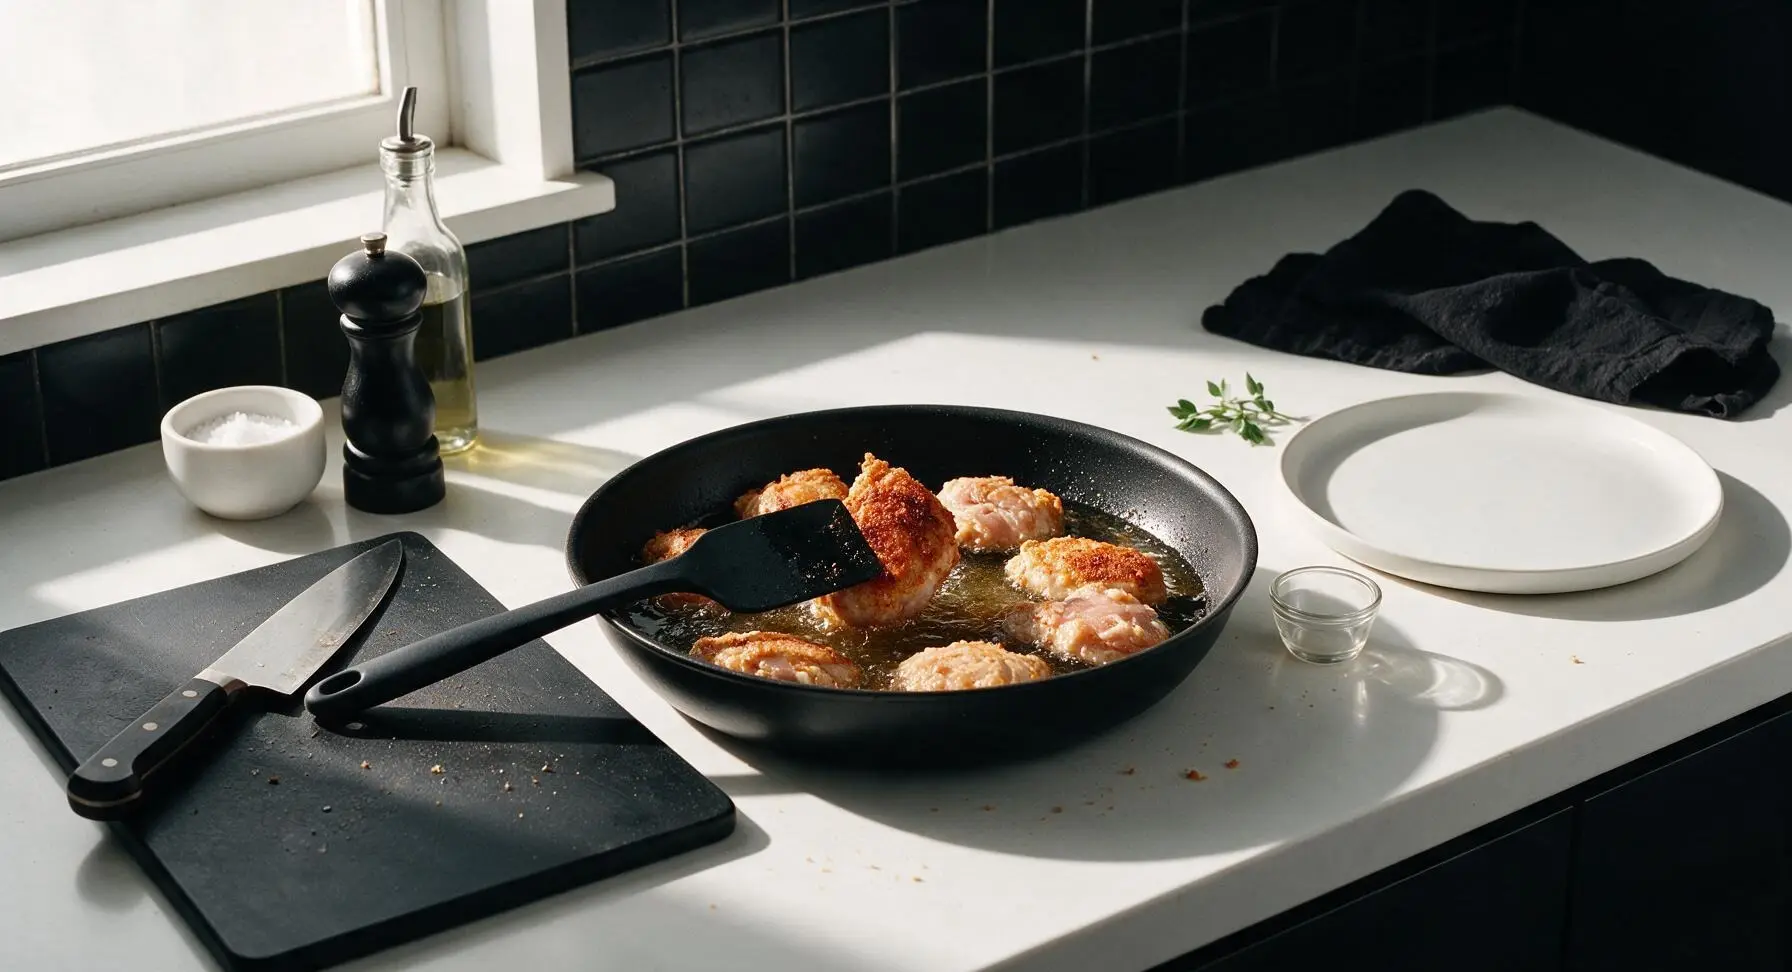
Using the silicone-tipped tongs, carefully lower half the coated chicken pieces into the hot oil one at a time, laying them away from you to avoid oil splatters. Do not overcrowd the pan; cook only 3–4 pieces per batch to keep oil temperature consistent. Fry undisturbed for 12 minutes, until the downward-facing side turns a deep golden brown and the crust sets firmly. Resist the urge to move the chicken early, as this will tear the delicate crust.
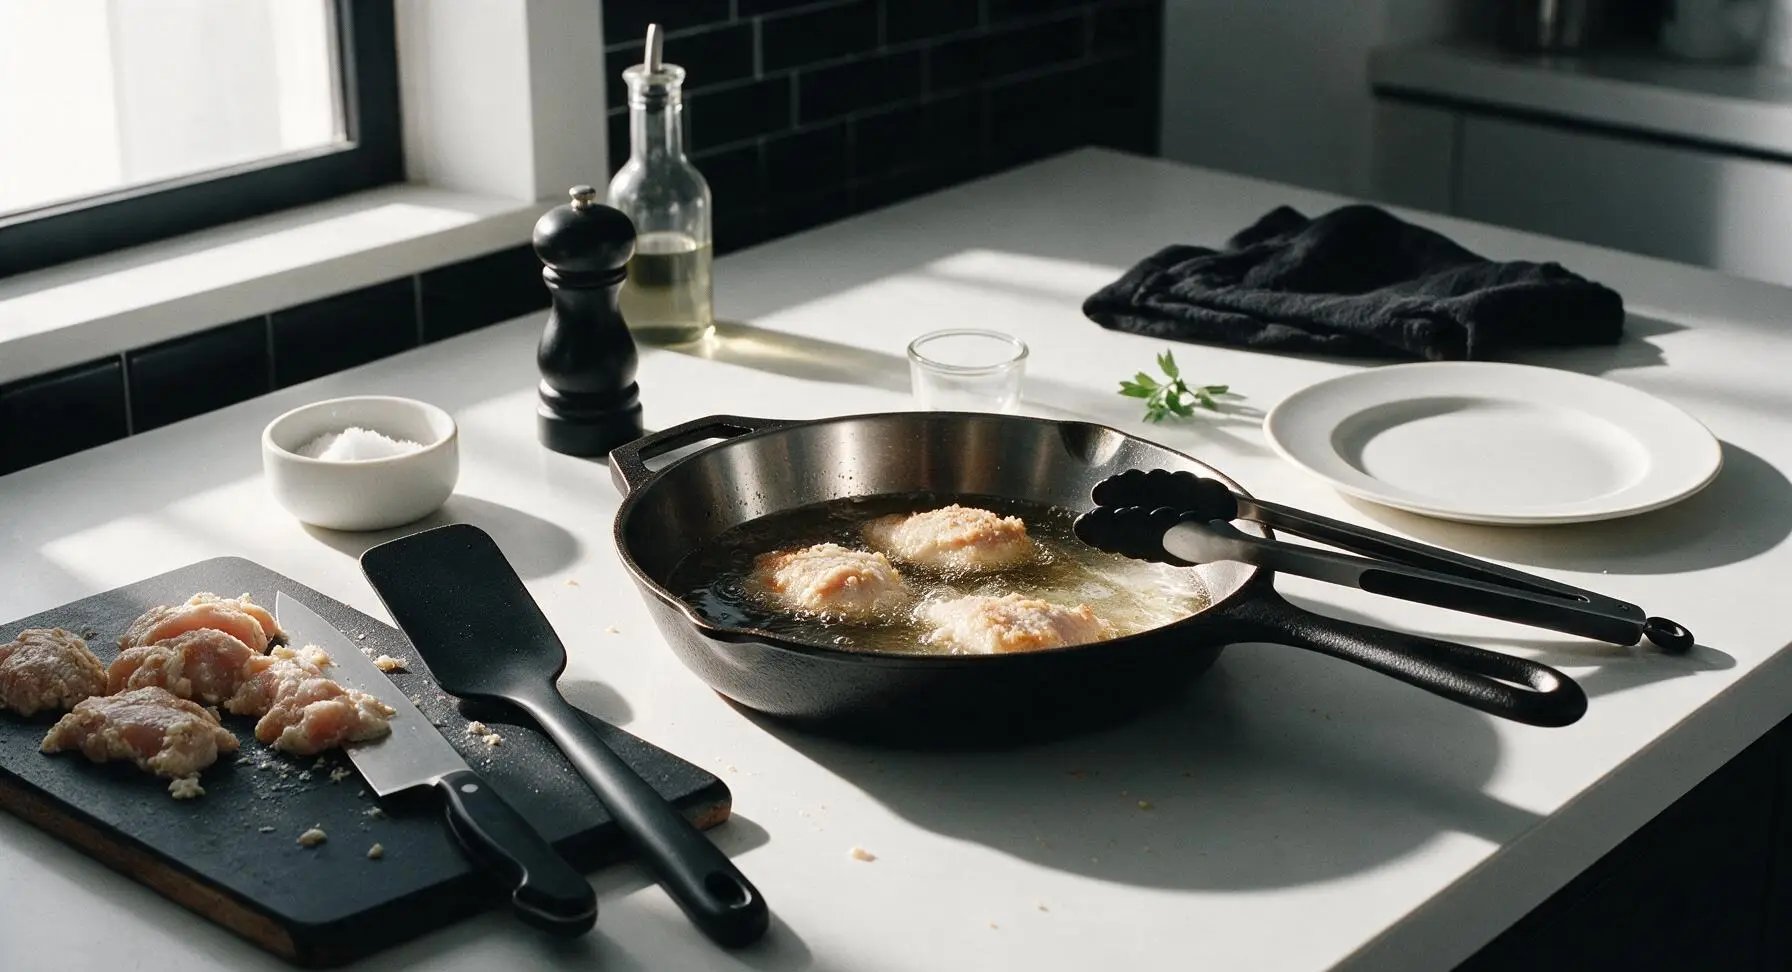
Step 5
step5:Fry First Chicken Side
6

Flip and Cook Through

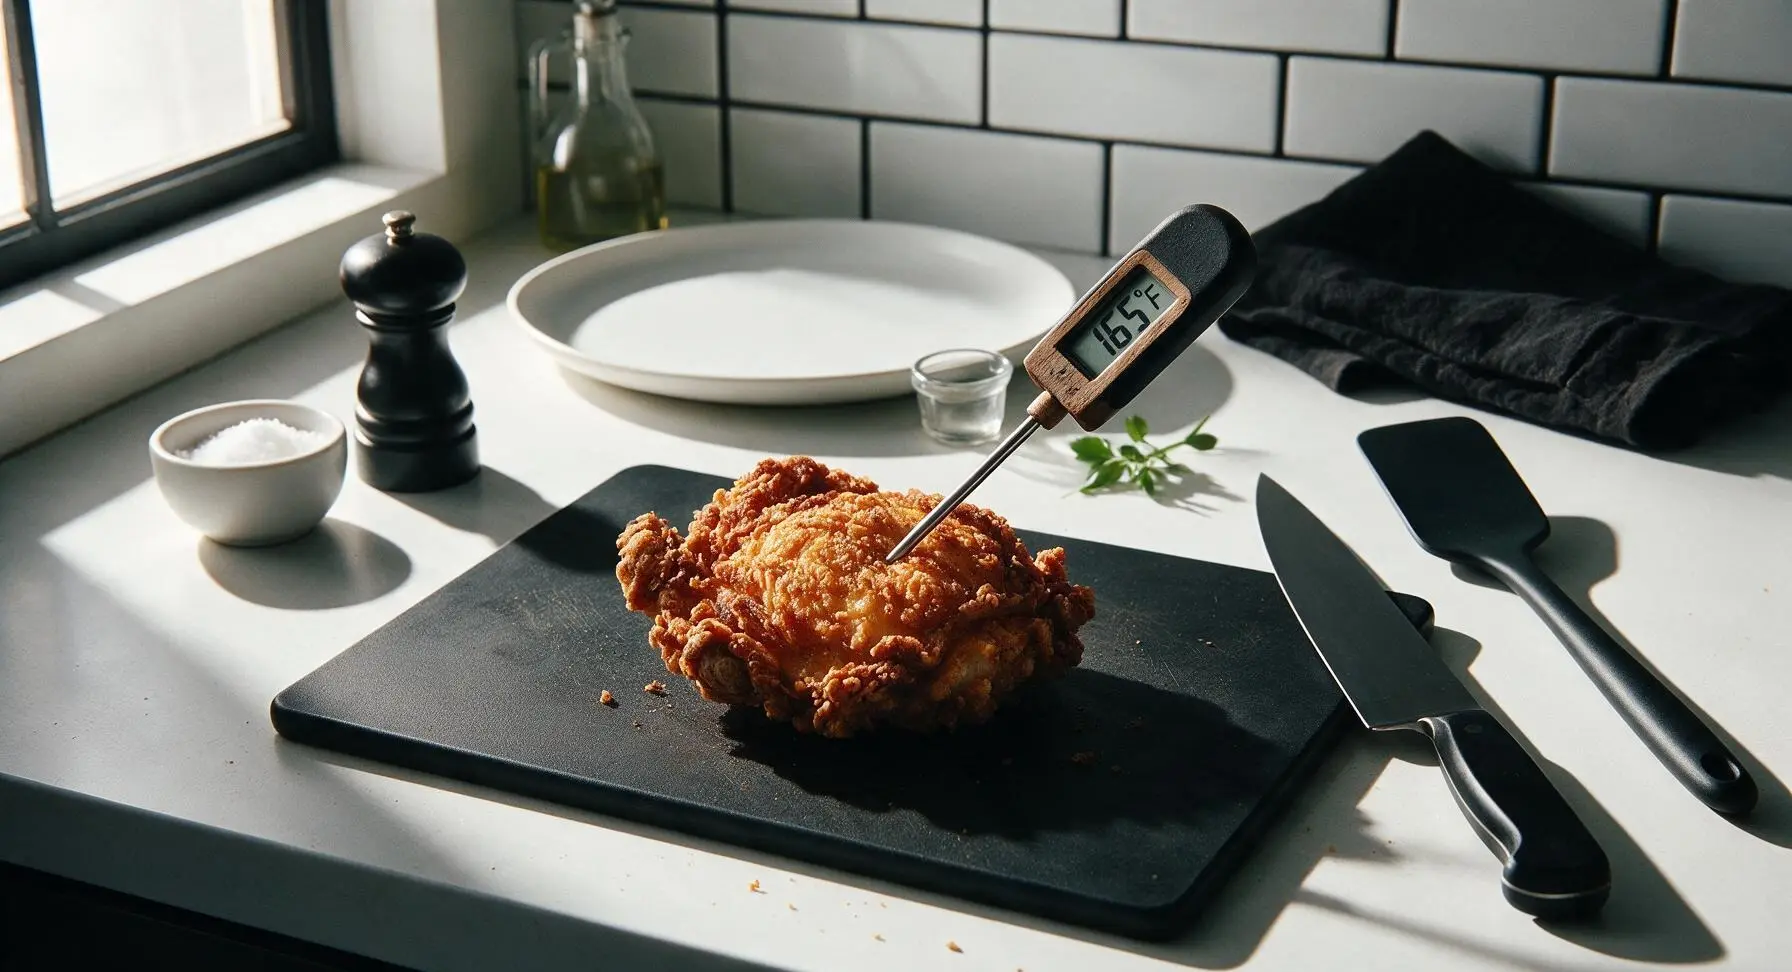
Use the tongs to carefully flip each chicken piece to the second side. Fry for an additional 10–12 minutes, until the second side is equally deep golden brown and crispy, and the internal temperature of the chicken reaches 165°F (74°C) when measured at the thickest part, away from bone. Adjust heat as needed to keep oil steady at 335–350°F throughout cooking.
Step 6
step6:Flip and Cook Through
Step 6
step6:Flip and Cook Through
7

Drain and Season

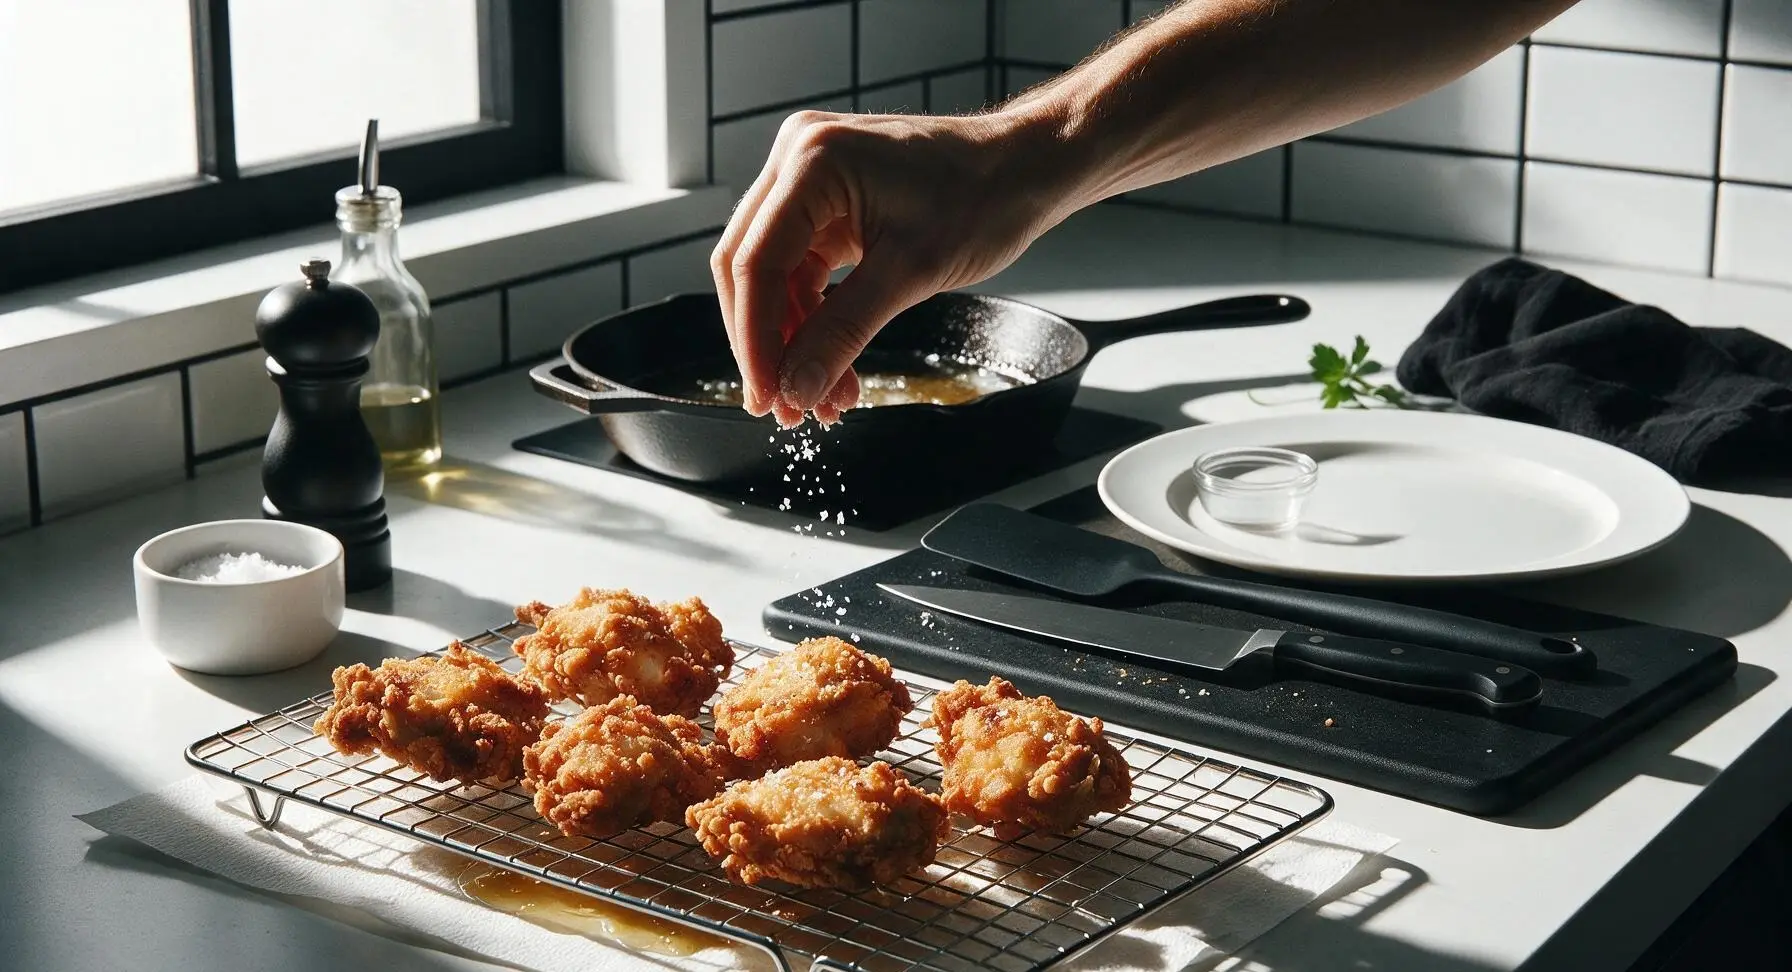
Use tongs to lift cooked chicken pieces out of the oil, holding each piece above the pan for 2 seconds to let excess oil drip off. Transfer the chicken to the chrome wire cooling rack set over the paper-towel lined baking sheet. Immediately sprinkle the hot chicken lightly with flaky sea salt while the crust is still hot and porous, so the salt sticks evenly. Let chicken rest 5 minutes before plating; do not drain on paper towels directly, as this will make the bottom crust soggy.
Step 7
step7:Drain and Season
8

Plate and Garnish

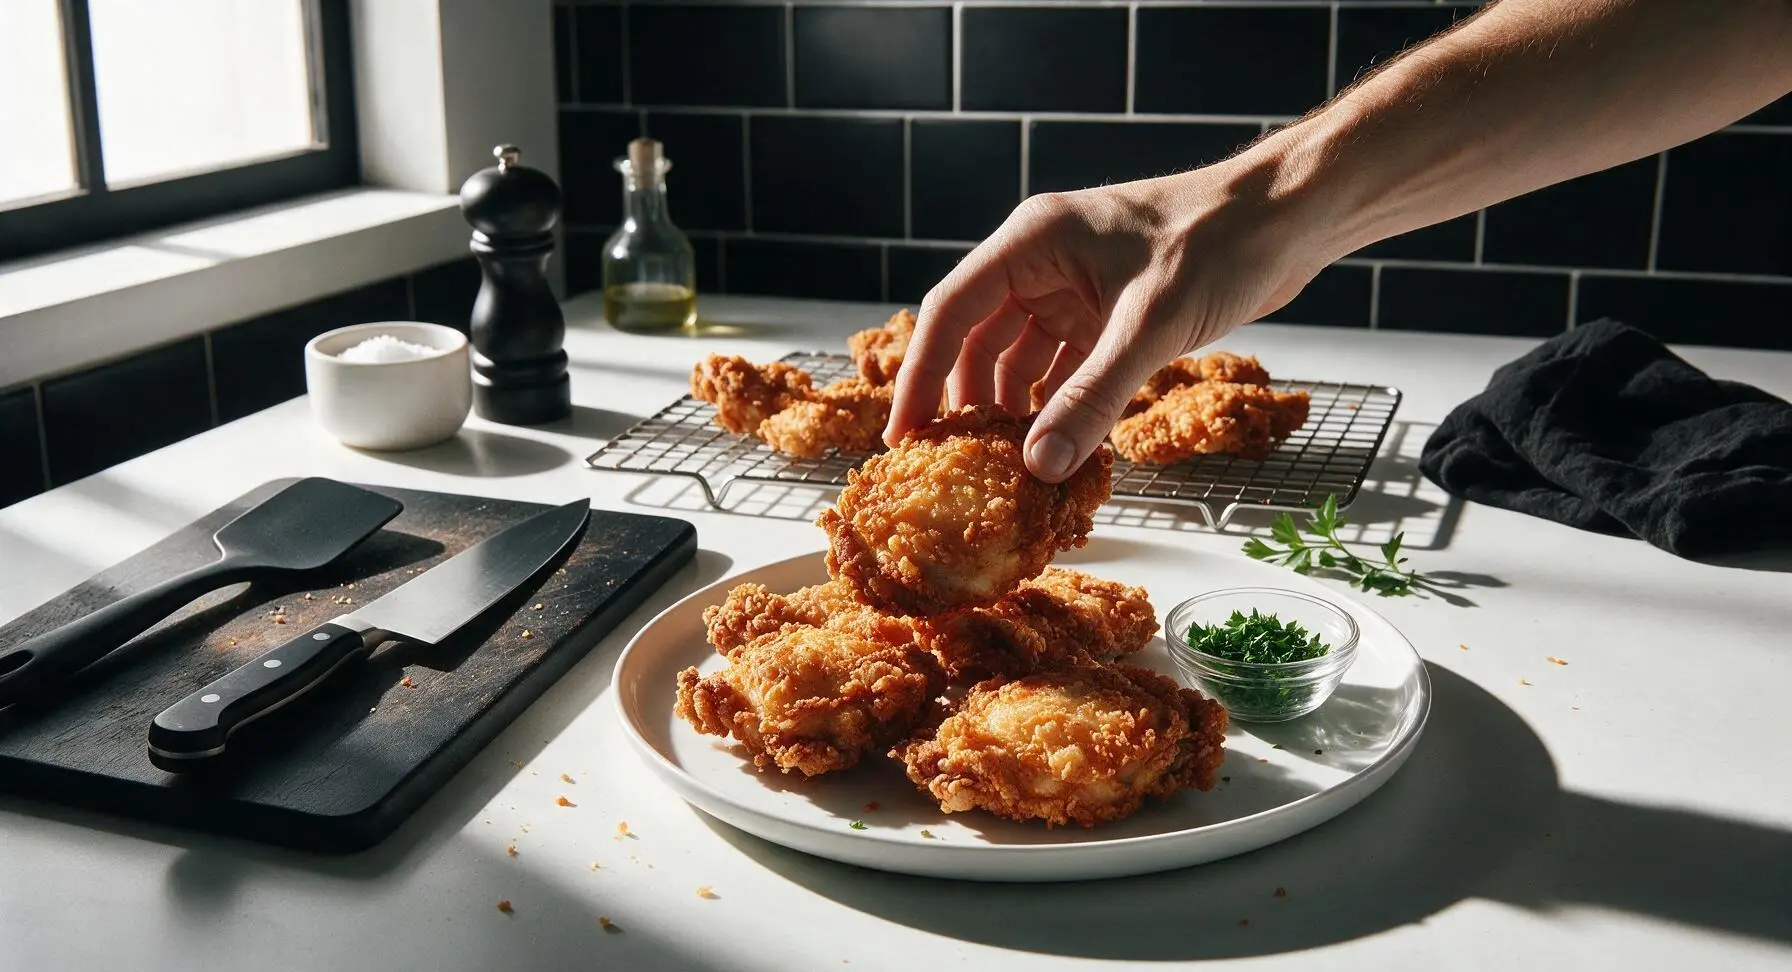
Arrange the rested fried chicken pieces on the cream white stoneware dinner plate, stacking them loosely for height. Sprinkle with the 2 tbsp chopped fresh parsley for a bright color contrast. Serve immediately, while the crust is still shatteringly crisp.
Step 8
step8:Plate and Garnish

Tips

1.Do not skip thoroughly drying the chicken skin: any residual surface moisture will cause hot oil to splatter dangerously and prevent the cornstarch coating from crisping properly, leading to a soggy, greasy crust instead of the desired shattery texture.
2.Maintain a steady oil temperature between 335–350°F throughout frying: oil that is too hot will burn the outer crust before the chicken cooks through near the bone, while oil that is too cool will cause the coating to absorb excess grease and turn soft. Check the temperature between batches and adjust burner heat as needed.
3.Drain cooked chicken on a wire rack rather than directly on paper towels: air circulation under the rack keeps the crust crisp on all sides, while placing chicken directly on paper towels traps steam against the bottom crust, making it soggy in as little as 2 minutes.


✨ You May Also Like

Main Course
🍜 United Kingdom

A showstopping classic of tender seared beef, savory mushroom duxelles, and crisp prosciutto wrapped in flaky golden puff pastry, baked to juicy perfection.

⏱️ 2 hours 1Main Course ★ 4.7
Main Course
🍜 India

Tender charred marinated chicken simmered in a rich, spiced creamy tomato sauce, this iconic Anglo-Indian curry pairs perfectly with basmati rice or warm naan.

⏱️ 50 minuteMain Course ★ 4.6
Main Course
🍜 Thailand

Classic tangy, sweet, and savory Thai stir-fried rice noodles with shrimp, tofu, and crunchy garnishes, balancing all five core Thai flavor profiles.

⏱️ 30 minuteMain Course ★ 4.5
Main Course
🍜 United Kingdom

Crispy golden beer-battered cod and fluffy double-fried chips, served with tangy tartar sauce and malt vinegar: the timeless, beloved British pub comfort classic.

⏱️ 45 minuteMain Course ★ 4.7
Main Course
🍜 Mexico

Smoky, chile-marinated pork tacos with caramelized pineapple, fresh cilantro, and lime: a beloved classic Mexican street food perfect for casual summer gatherings.

⏱️ 1 hour 45Main Course ★ 4.8
Main Course
🍜 United States

Crunchy Fritos corn chips layered with savory beef chili and melted cheddar, topped with cool, zesty fixings for a beloved, cozy Tex-Mex comfort food.

⏱️ 35 minuteMain Course ★ 4.8

fried chicken no flour:Frequently Asked Questions

1.Is this no-flour fried chicken safe for people with gluten sensitivities or celiac disease? ▾
Yes, it is entirely gluten-free as long as you use pure, unadulterated cornstarch (double-check for no wheat-based anti-caking agents on the label) and avoid cross-contamination from shared fry oil, prep tools, or surfaces. The simple egg and cornstarch crust contains zero wheat flour, making it a safe, satisfying swap for classic Southern fried chicken for gluten-sensitive eaters.
2.Why does this recipe use bone-in, skin-on chicken thighs and drumsticks instead of boneless cuts? ▾
Bone-in, skin-on thighs and drumsticks stay far juicier during high-heat frying: the bone conducts heat gently to prevent overcooking, and the skin renders out to add rich savoriness. Boneless, skinless cuts cook too fast and leak excess moisture that softens the crust, so these cuts deliver the ideal shatteringly crisp, juicy bite every time.
3.How do I keep the cornstarch crust crispy instead of getting soggy right after frying? ▾
Start by letting coated chicken rest 10 minutes before frying so the cornstarch and egg bind tightly instead of sliding off. Don’t overcrowd your fry vessel, which drops oil temperature too low and leads to greasy, soft crust. Rest finished chicken on a wire rack set over a baking sheet instead of paper towels, which trap steam that sogs out crispness fast.
4.What oil temperature works best for frying this no-flour chicken? ▾
Heat a neutral frying oil (peanut, canola, or avocado oil work great) to a steady 350°F before adding chicken. If oil is too hot, the cornstarch crust will burn before the meat cooks through; if it’s too low, the crust will soak up excess grease and turn soggy. Use a clip-on candy thermometer to track temperature consistently between batches.
5.Can I add extra seasonings to the cornstarch coating besides garlic powder and salt? ▾
Absolutely! The simple kosher salt and garlic powder base is a perfect blank canvas for customization. Mix in dry seasonings like smoked paprika, dried thyme, black pepper, onion powder, a pinch of cayenne, or even finely grated parmesan to the cornstarch for extra depth. Skip any wet add-ins, as extra moisture will break down the crisp crust texture.
6.How long does it take for the chicken to cook all the way through safely? ▾
For standard-sized bone-in thighs and drumsticks, expect 12 to 15 minutes of total frying time, flipping pieces halfway through for even browning. The most reliable way to confirm doneness is to insert an instant-read thermometer into the thickest part of the meat (away from the bone) — it should read 165°F, with juices running clear when pierced.
7.Does this cornstarch crust get as crispy as traditional flour-based fried chicken? ▾
It actually gets even more shatteringly crisp than many flour-coated versions! Cornstarch has a lower protein content than wheat flour, so it doesn’t form a tough, bready outer layer. When fried correctly, the egg and cornstarch sets into a light, snappy crust that locks in juiciness without the heavy, dense coating common with all-purpose flour recipes.
8.Why does my cornstarch coating sometimes slide off the chicken when I fry it? ▾
Coating slide almost always traces back to two easy-to-fix issues: either the chicken skin was too wet when you applied the egg and cornstarch, or you skipped letting coated chicken rest before frying. Pat chicken completely dry with paper towels first, press cornstarch firmly to adhere after dipping in egg, then rest 10 minutes so the coating bonds tightly before hitting hot oil.
9.Can I bake this no-flour fried chicken instead of deep frying it for a lighter option? ▾
You can, though the crust won’t be quite as shatteringly crisp as the deep-fried version. Arrange coated chicken on a wire rack set over a rimmed baking sheet, spritz all sides generously with neutral oil, and bake at 425°F for 35 to 40 minutes, flipping halfway, until the internal temp hits 165°F. The elevated rack lets air circulate to keep crust as crisp as possible.
10.Do I need to brine the chicken ahead of time for extra juiciness? ▾
Brining is totally optional, but it does boost juiciness and deep, evenly seasoned flavor if you have extra time. Do a simple 2 to 4 hour brine using 1/4 cup kosher salt per quart of cold water, then pat chicken completely dry before coating. Skip adding extra salt to the cornstarch if you brine, to avoid making the final dish too salty.
11.How should I store leftovers, and how do I reheat them to keep the crust crisp? ▾
Store leftover fried chicken in an airtight container in the fridge for up to 3 days. Skip the microwave for reheating, as it traps steam and turns the crust soggy and rubbery. Instead, arrange pieces on a wire rack set over a baking sheet and reheat in a 400°F oven for 10 to 12 minutes, until heated through and the crust crisps back up perfectly.
12.Can I use chicken breasts instead of thighs and drumsticks for this recipe? ▾
You can use bone-in, skin-on chicken breasts if you prefer white meat, but cut them into evenly sized 4-oz pieces so they cook at the same rate as dark meat cuts. Keep in mind breast meat is much leaner than thighs and drumsticks, so it will dry out quickly if overcooked — pull it from the oil as soon as it hits 165°F internally to keep it tender and juicy.

Comments (7)

2 days ago

OMG this crispy no-flour fried chicken is a total game changer! I’ve been avoiding refined flour for my gluten-free kiddo and was so sick of sad, soggy gluten-free fried chicken recipes. This came out perfectly crunchy in 25 minutes flat, my kids devoured 6 thighs between them at last night’s family dinner. 10/10 will be making this for our neighborhood potluck next weekend!

yesterday

Wait did you use boneless thighs or bone-in? I’m making this for my celiac friend this week and don’t wanna mess it up!

2 hours ago

Great question! Both work perfectly, but bone-in, skin-on thighs will give you extra crispiness if you have them on hand. Just make sure to pat the chicken totally dry before seasoning for the best crunch!

1 week ago

Super easy recipe, total cook time was spot on for me. Only reason I’m not giving 5 stars is that the first batch I made was a little under-seasoned for my taste, I added a pinch more paprika and garlic powder to the second batch and it was SO good. Meal prepped a whole batch for the week and it held up way better than I thought it would in the fridge!

5 days ago

So glad it worked for your meal prep! Everyone’s salt and seasoning preference is a little different, so feel free to bump up the spice blend to match your taste next time – a little extra paprika never hurts 😊

3 days ago

Brought this to a work potluck yesterday and everyone was hounding me for the recipe! Nobody could believe there was zero flour in the coating, it had that perfect shattery crunch I thought you could only get with a flour or batter dip. Even my super picky brother-in-law went back for thirds. Obsessed!

5 days ago

As someone who burns 90% of the fried recipes I try, I was shocked how easy this was! The difficulty rating is totally accurate, no fancy equipment needed, just a cast iron skillet and the seasonings I already had in my pantry. Crispy, juicy, zero burnt spots – my partner said it’s better than the takeout fried chicken we get down the street.

3 days ago

What oil did you use for frying? I’ve only got avocado oil at home right now, wondering if that’ll work?

2 days ago

Avocado oil works perfectly here! It has a high smoke point which is ideal for getting that crispy exterior without burning, so you’re all set. Canola or vegetable oil work great too if you have those down the line!

2 weeks ago

Y’all I was so skeptical of no-flour fried chicken, I grew up on my grandma’s flour-coated fried chicken and thought nothing could compare. This recipe? I ate three pieces straight out of the pan before I even set the table. The crunch is unreal, and the chicken stays so juicy inside, no dry bits at all. Total home run.

1 week ago

Same! I was fully prepared to be disappointed, but this might dethrone my grandma’s go-to recipe… don’t tell her I said that 😂

30 minutes ago

Just made this in my tiny dorm kitchen with a cheap electric skillet and it came out insane! I didn’t think I could make good fried chicken without a bunch of fancy ingredients, but this was so straightforward. My roommates are already begging me to make it again next week, we demolished the whole pack of chicken tenders in 10 minutes.

yesterday

Love that this is keto-friendly without all the weird pork rind crumb coatings most no-flour fried chicken recipes use! My only note is that my smoke alarm went off twice because I had the heat a little too high, oops. Turned it down a notch and the rest came out perfect, will absolutely be adding this to our weekly dinner rotation.

2 hours ago

So glad you loved the flavor! Quick tip to avoid the smoke alarm: keep your oil temp right around 350°F – a cheap candy thermometer works great to monitor it so you don’t get it too hot. Hope that helps for next time!



