
garlic butter shrimp and rice

title 1
garlic butter shrimp and rice
⏱️ cook time 20 minutes
🍽️ servings 4
⚡ Difficulty easy

intro

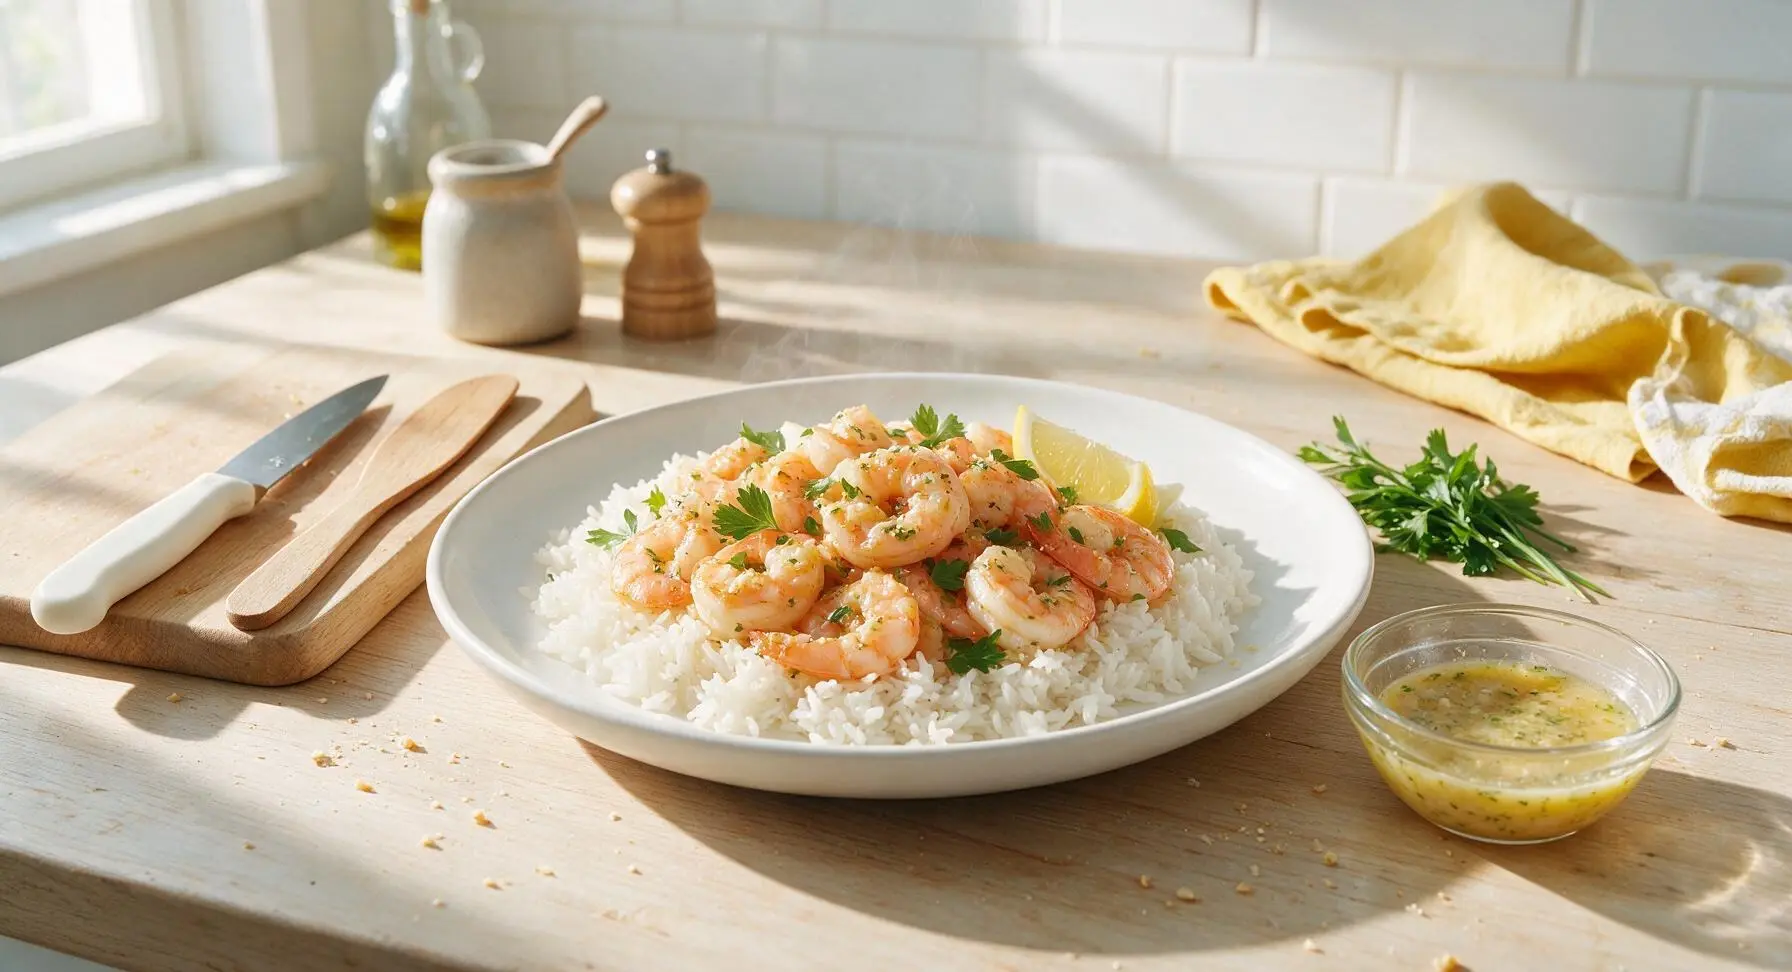
Juicy pink shrimp tossed in nutty garlic-lemon butter, served over fluffy separate-grain rice, brightened with fresh parsley and lemon—fast, flavorful, perfect for busy nights.

Ingredients
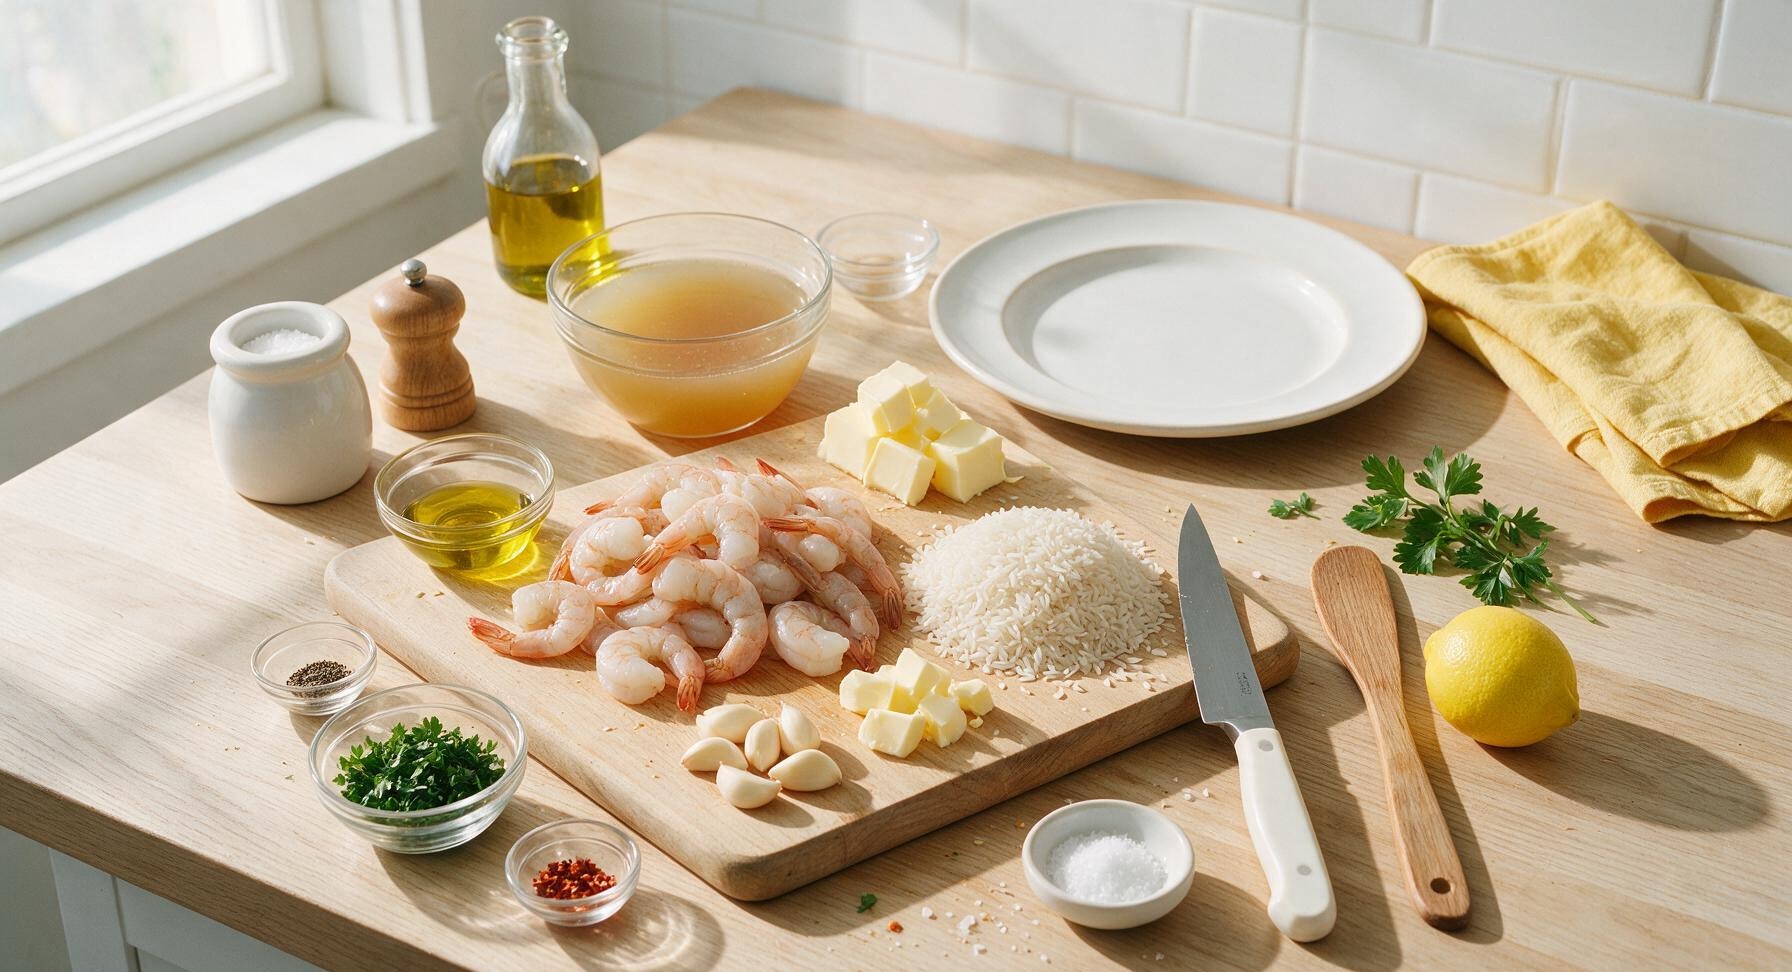
Large raw shrimp (peeled, deveined, tails on, 21-25 count) 500g
Long-grain white rice 1.5 cups (270g)
Unsalted butter 6 tbsp (85g)
Fresh garlic cloves 8 cloves (40g)
Low-sodium chicken broth 2.25 cups (540ml)
Extra-virgin olive oil 1 tbsp (15ml)
Fresh flat-leaf parsley 1/4 cup (10g, chopped)
Fresh lemon 1 whole
Kosher salt 1 tsp (5g)
Freshly ground black pepper 1/2 tsp (1g)
Red pepper flakes (optional) 1/4 tsp (0.5g)

Steps

1

Prep Shrimp and Aromatics

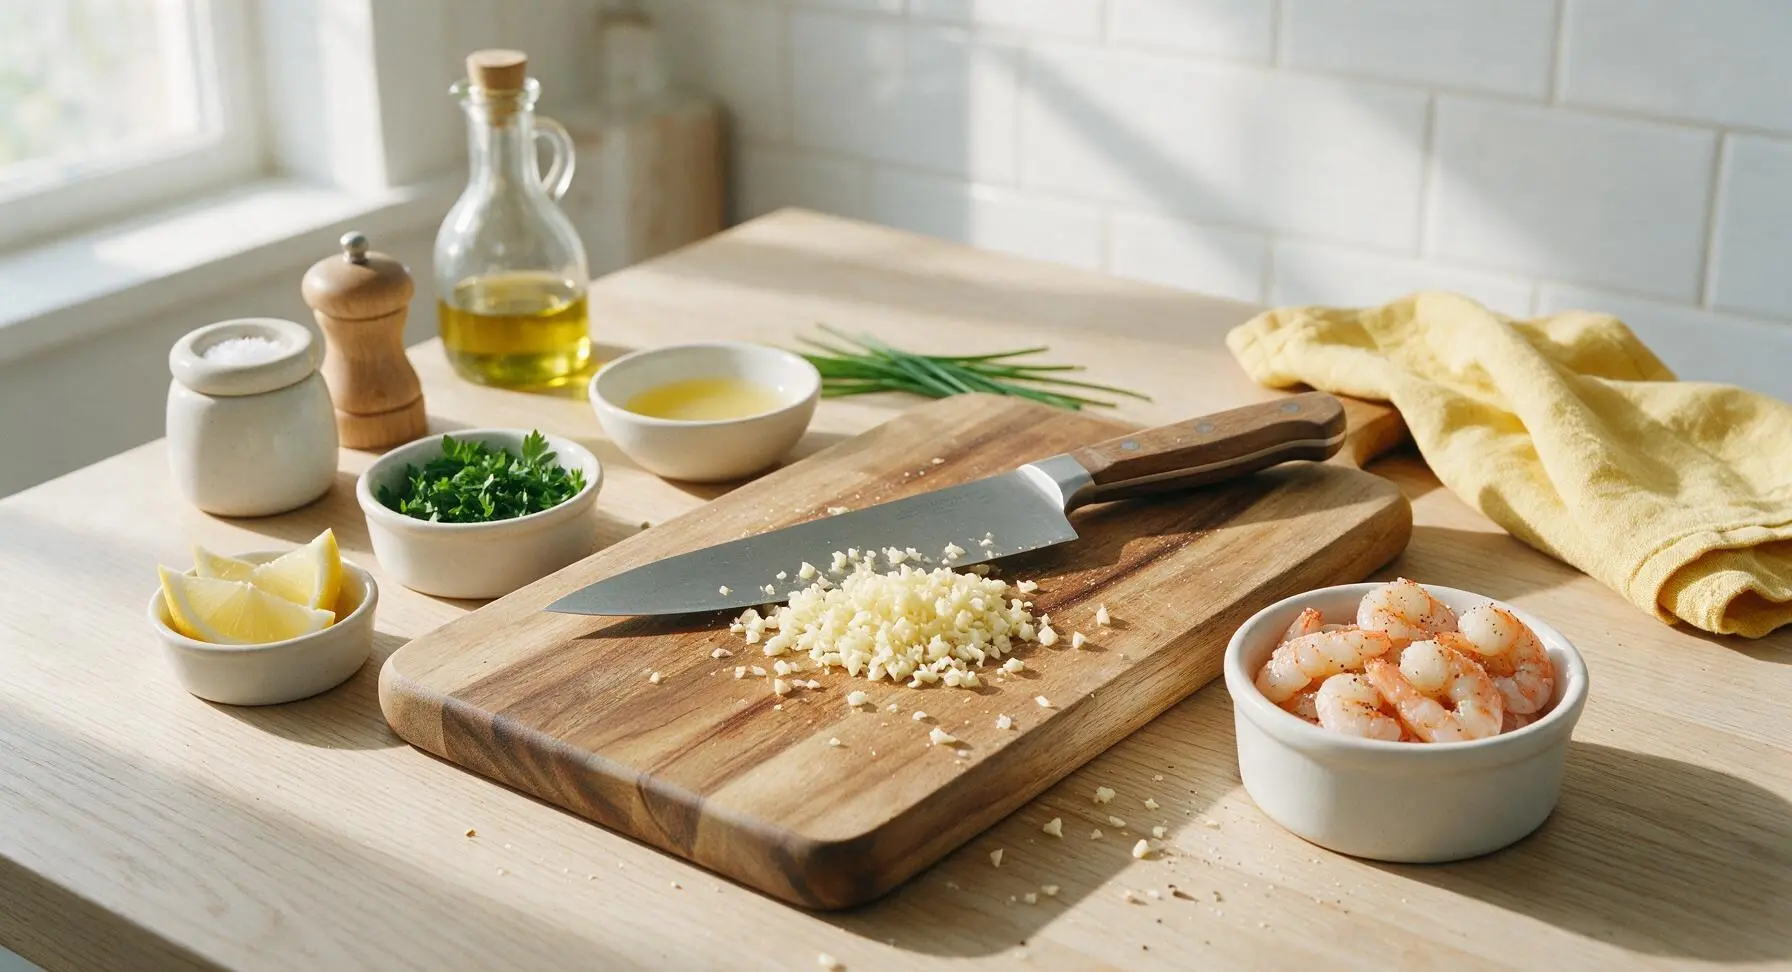
Pat 500g peeled, deveined large shrimp completely dry with paper towels, season with 1/2 teaspoon kosher salt and 1/4 teaspoon freshly ground black pepper, set aside in a small ramekin. Mince 6 garlic cloves finely, slice the remaining 2 cloves into thin slivers. Chop 1/4 cup fresh flat-leaf parsley, cut half the lemon into 4 wedges for serving, juice the remaining half to yield 1 tablespoon fresh lemon juice.
Step 1
step1:Prep Shrimp and Aromatics
2

Toast and Cook Rice

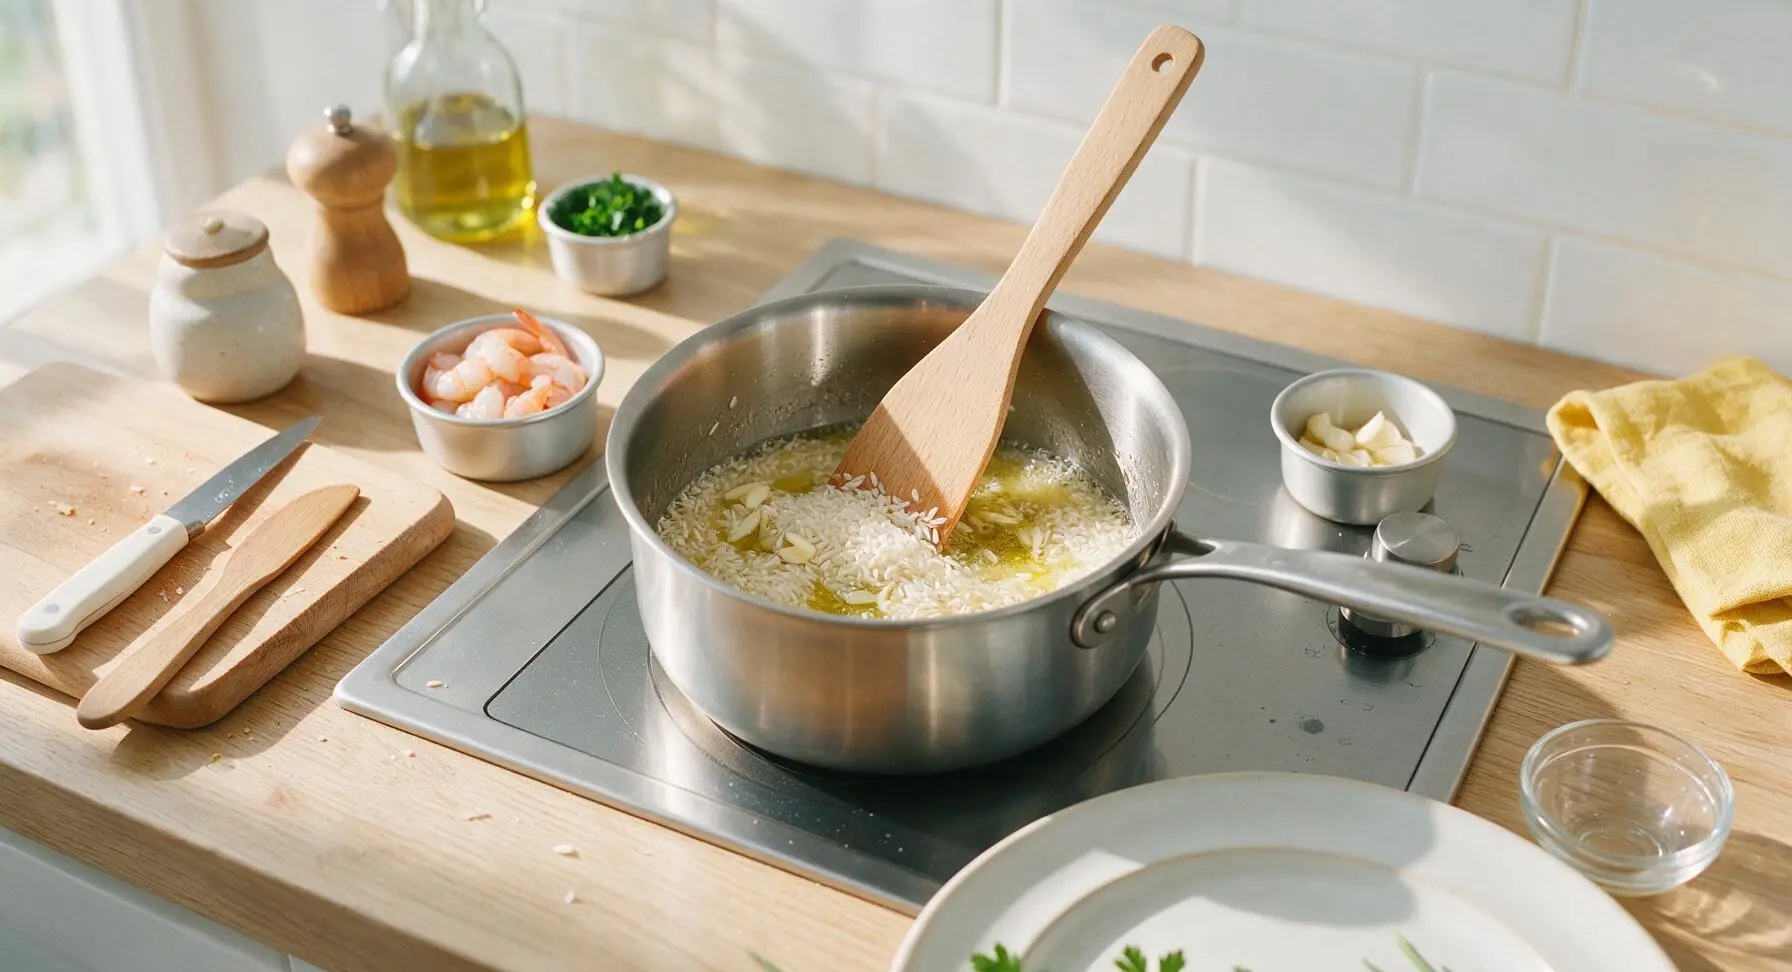
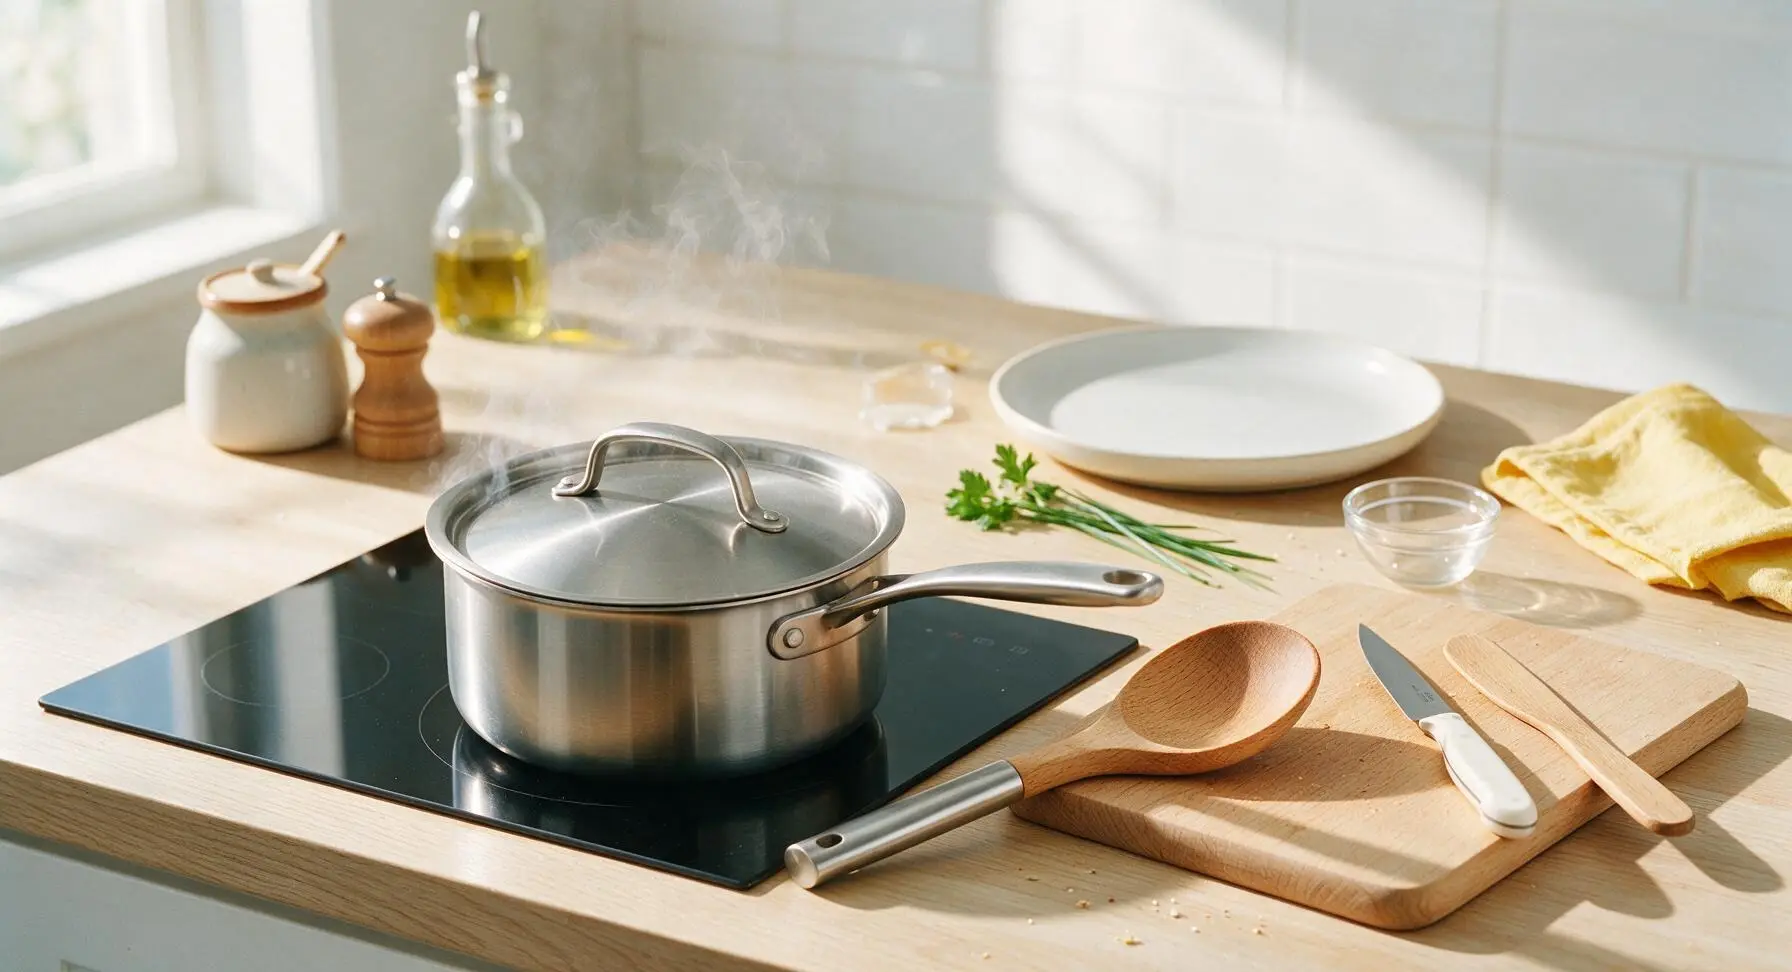
Place the 3-quart stainless steel saucepan on the induction cooktop over medium heat. Add 1 tablespoon extra-virgin olive oil and 1 tablespoon unsalted butter, heat until butter melts and foams. Add the thin garlic slivers, sauté for 30 seconds until fragrant (do not brown). Add 1.5 cups long-grain white rice, stir constantly with the beech wood rice paddle for 2 minutes until rice edges turn slightly translucent and smell nutty. Pour in 2.25 cups low-sodium chicken broth, add remaining 1/2 teaspoon kosher salt, stir once to combine, bring to a rolling boil. Reduce heat to the lowest setting, cover tightly with the lid, cook for 15 minutes without lifting the lid.
Step 2
step2:Toast and Cook Rice
Step 2
step2:Toast and Cook Rice
3

Sauté Garlic in Butter

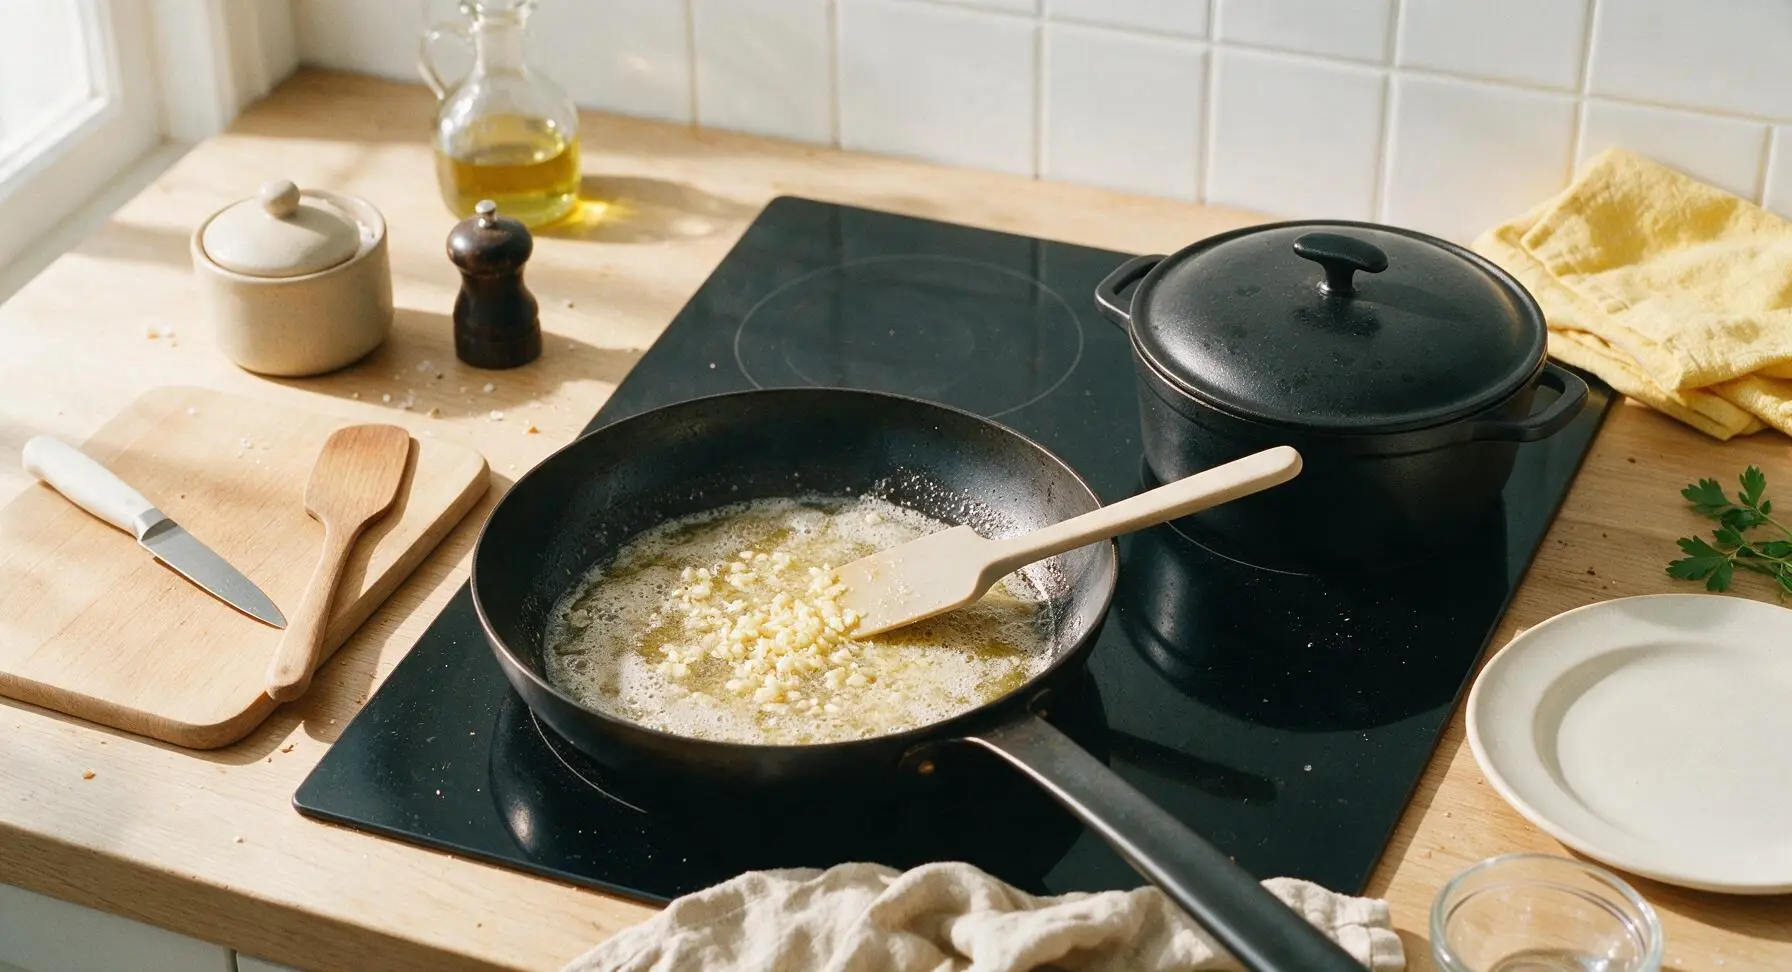
Once the rice has 8 minutes remaining in its cook time, place the 12-inch carbon steel skillet on the adjacent induction burner over medium heat. Add 3 tablespoons unsalted butter, melt until foaming subsides and butter turns a pale golden, nutty brown (about 2 minutes). Add the finely minced garlic and optional 1/4 teaspoon red pepper flakes, sauté for 20-30 seconds until fragrant, watching closely to avoid burning (burnt garlic tastes bitter).
Step 3
step3:Sauté Garlic in Butter
4

Sear Shrimp Evenly

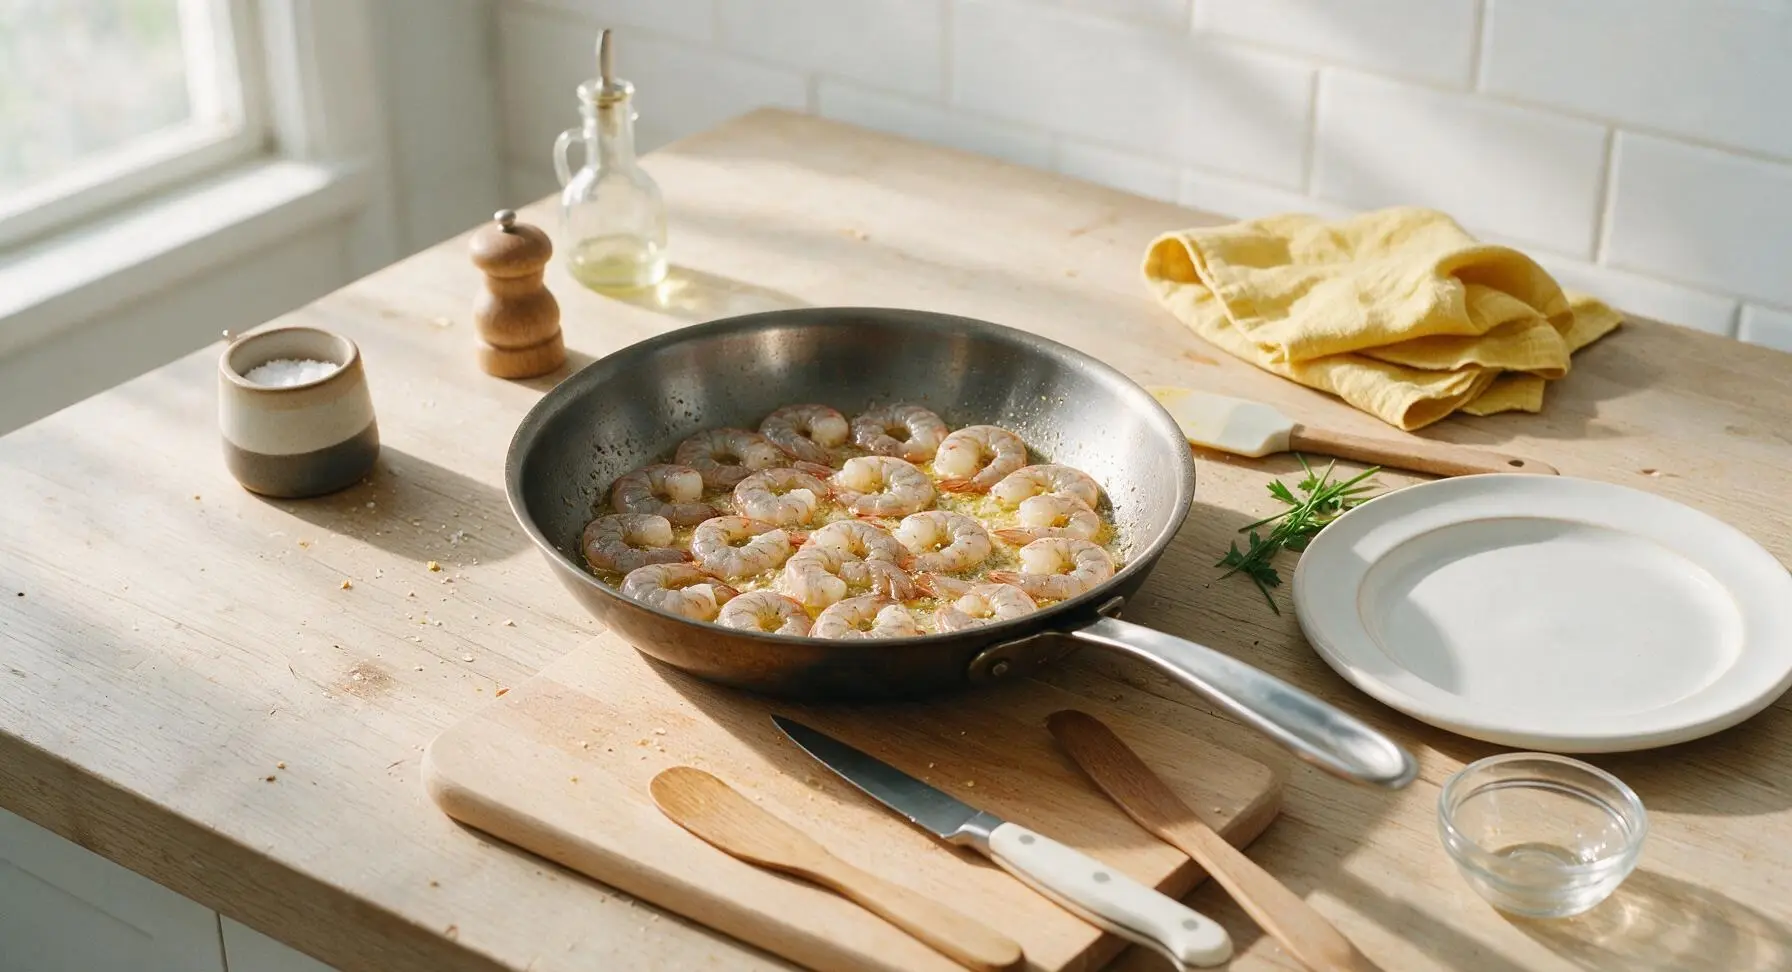
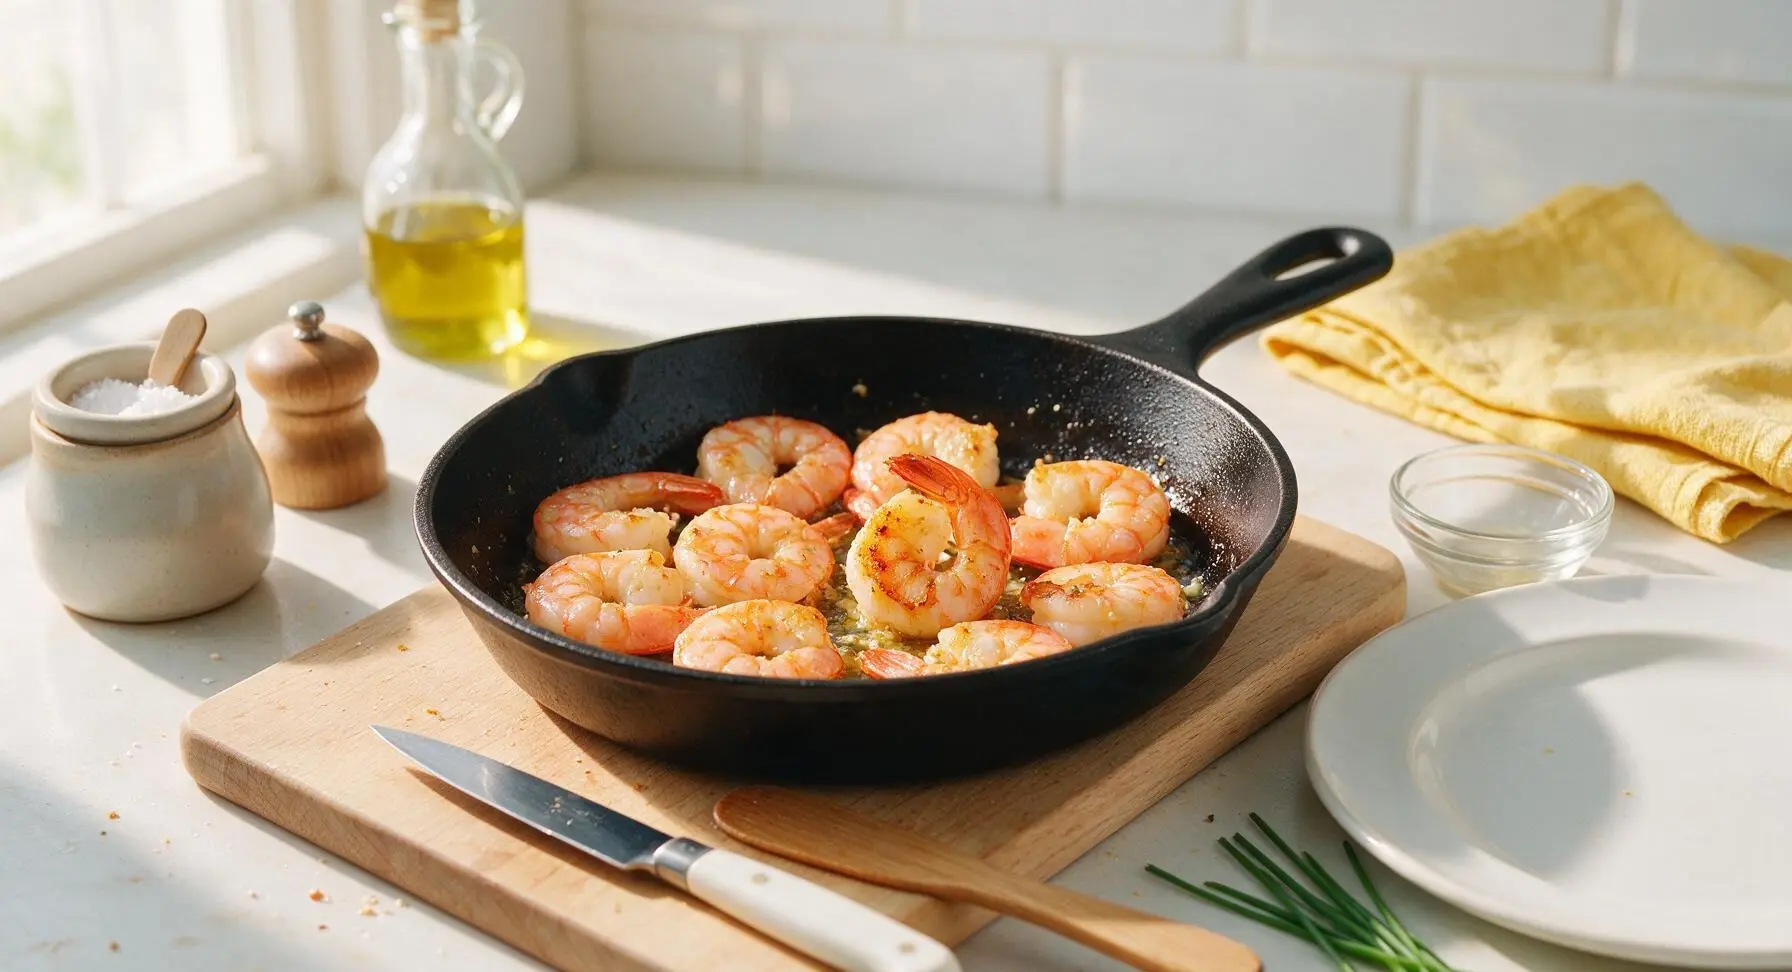
Add the seasoned dry shrimp to the skillet in a single even layer, working in 2 batches if needed to avoid overcrowding the pan. Cook undisturbed for 2 minutes until the bottom side turns bright pink and develops a slight golden edge. Flip each shrimp with the silicone spatula, cook for another 1.5-2 minutes until shrimp are just opaque all the way through—do not overcook, as extended heat will make shrimp rubbery.
Step 4
step4:Sear Shrimp Evenly
Step 4
step4:Sear Shrimp Evenly
5

Finish Butter Sauce

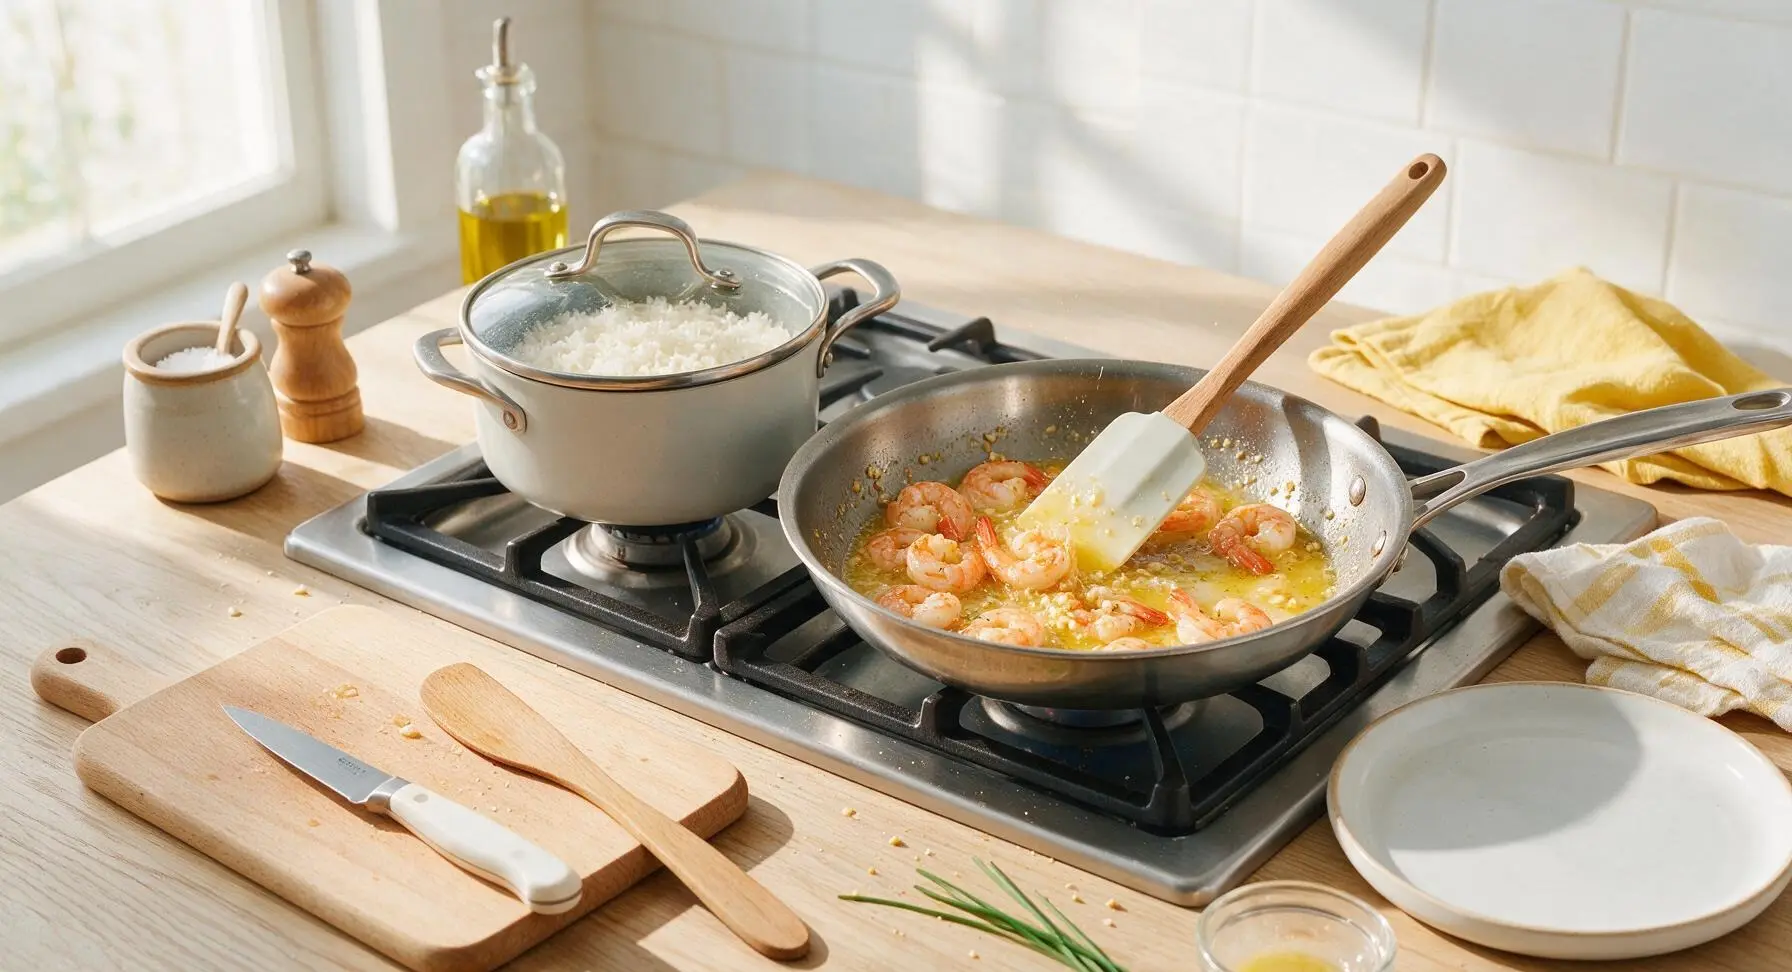
Turn the heat under the skillet to low, pour in 1 tablespoon fresh lemon juice, stir to combine with the butter and pan drippings, scraping up any golden browned fond bits from the bottom of the pan. Add the remaining 2 tablespoons of cold butter, swirl the pan until the butter melts into a smooth, glossy sauce. Taste and adjust seasoning with extra black pepper if needed, then turn off the heat.
Step 5
step5:Finish Butter Sauce
6

Fluff Cooked Rice

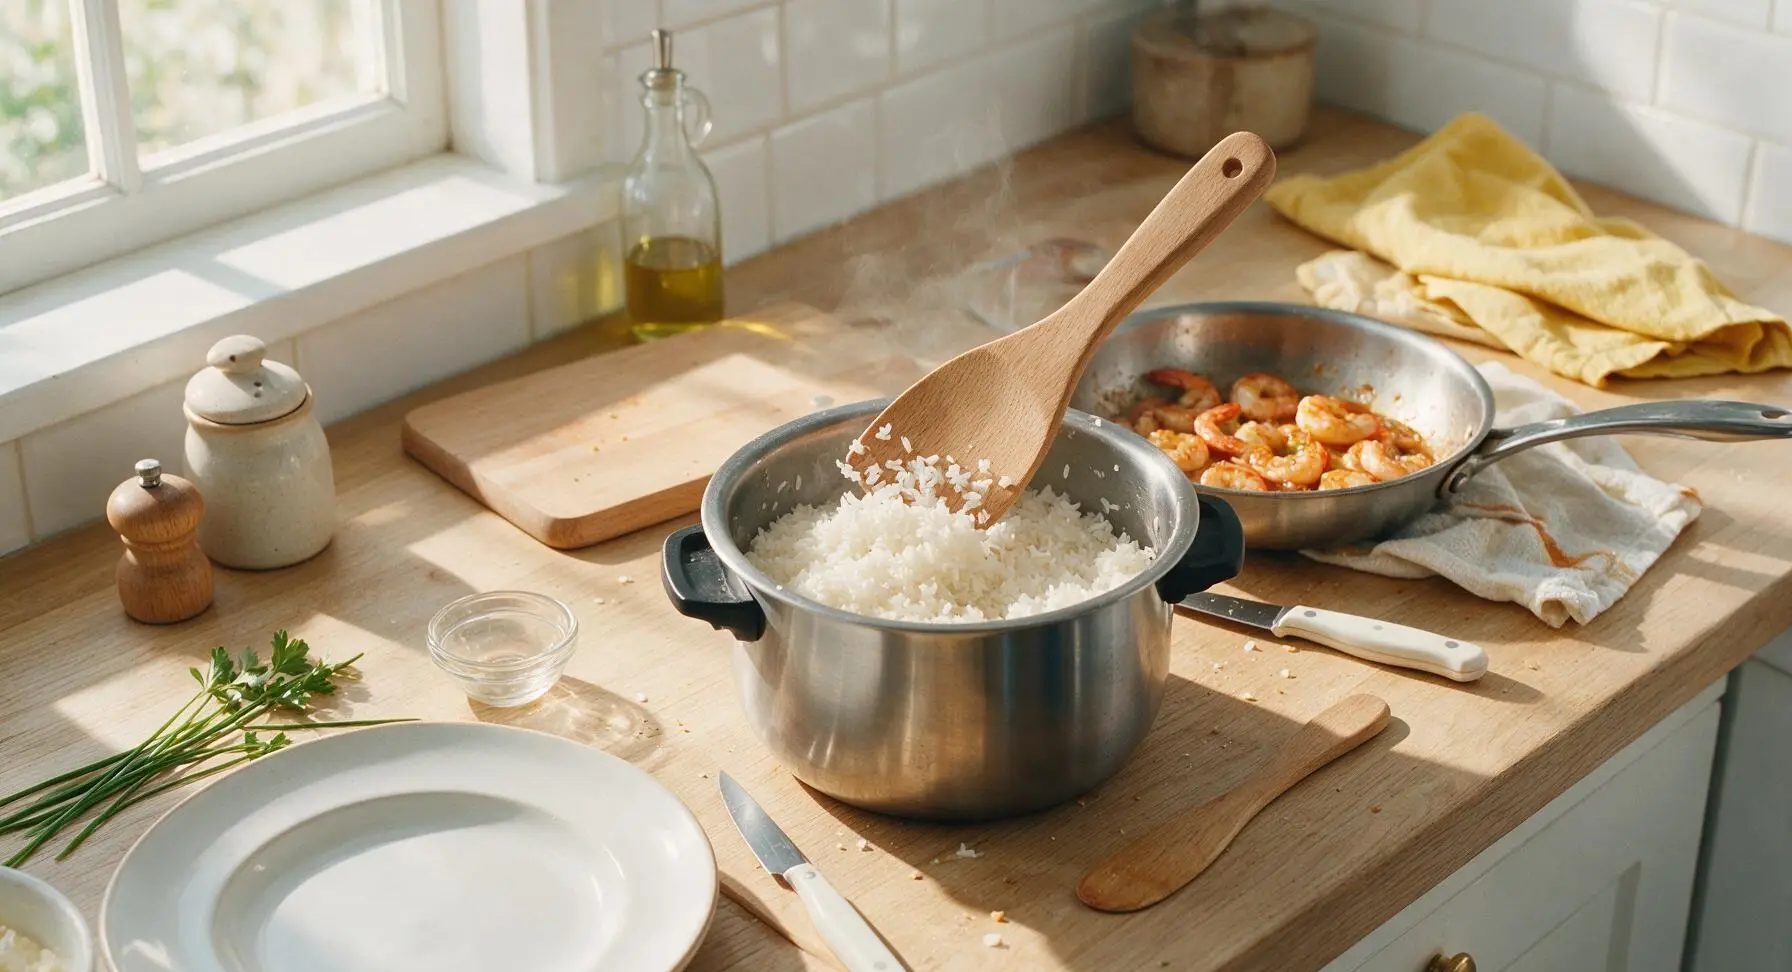
After the 15-minute rice cook time, turn off the heat under the saucepan, let the rice rest covered for 5 minutes. Remove the lid, fluff the rice gently with the wooden rice paddle, breaking up any clumps without mashing the grains to create light, separate fluffy rice.
Step 6
step6:Fluff Cooked Rice
7

Plate Rice and Shrimp

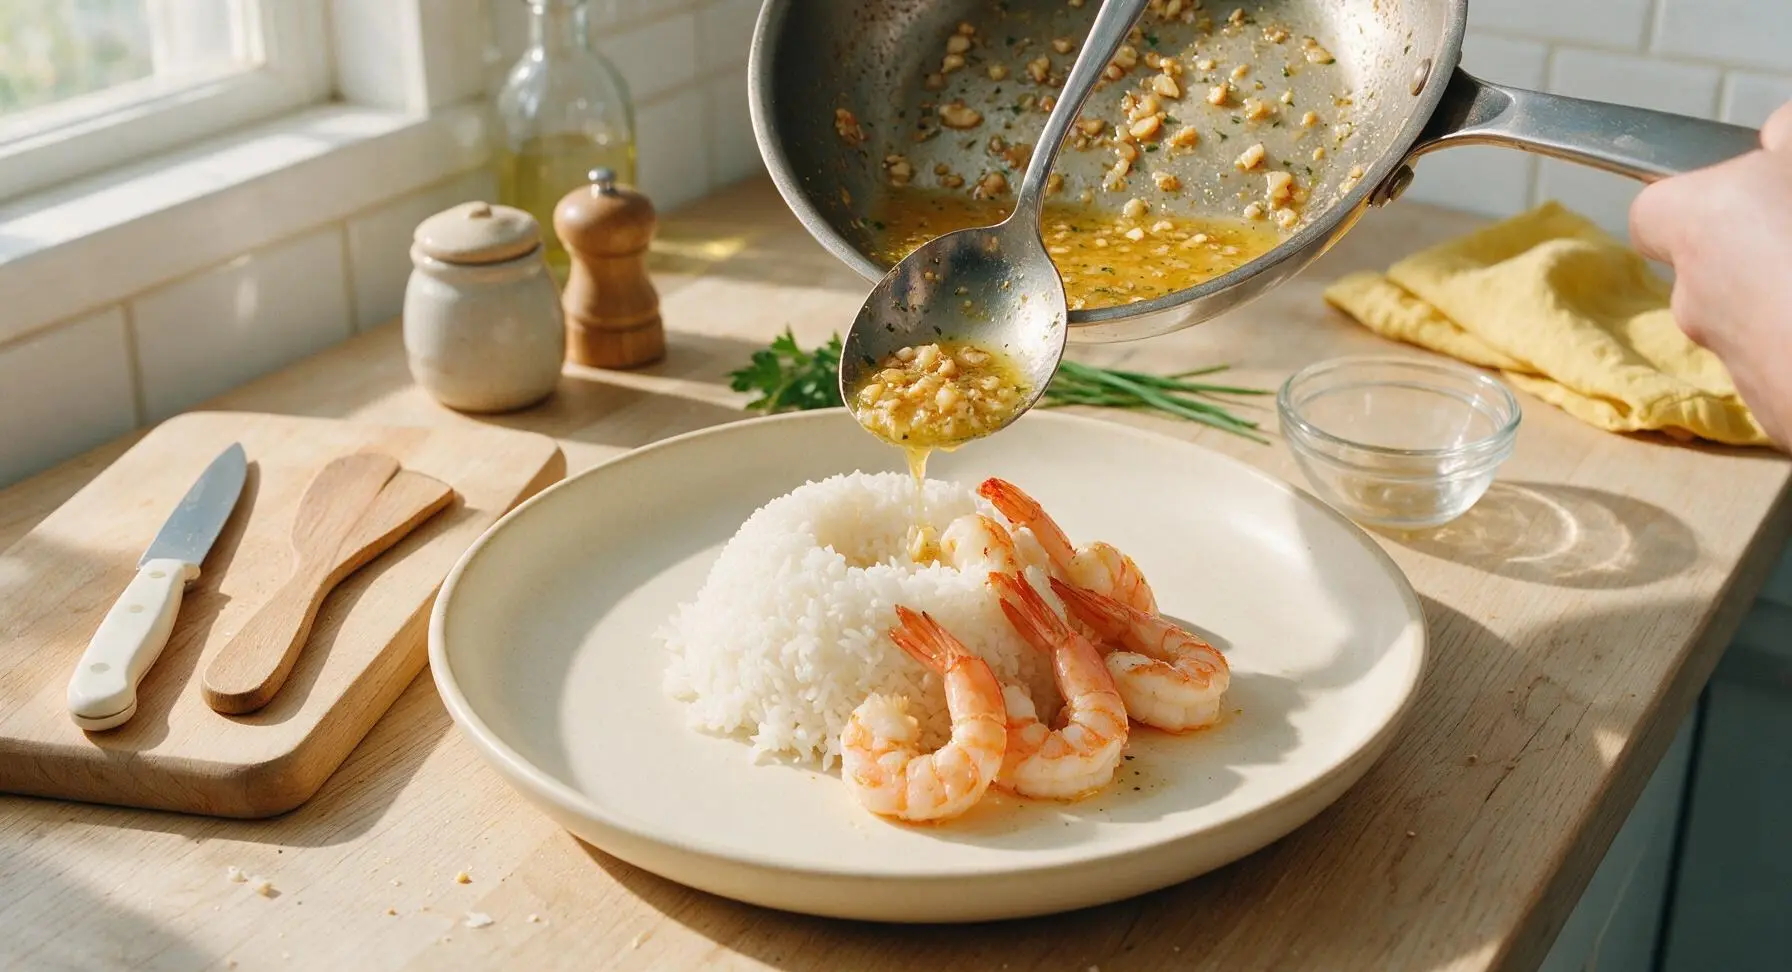
Scoop a generous 1-cup mound of fluffed rice onto the center of the matte cream ceramic dinner plate, creating a slight indentation in the top of the rice. Arrange 6-7 cooked shrimp on top of the rice, leaning them against the rice mound. Spoon 2-3 tablespoons of the garlic lemon butter sauce over the shrimp and rice, making sure to scoop up the golden garlic bits from the skillet.
Step 7
step7:Plate Rice and Shrimp
8

Garnish and Serve

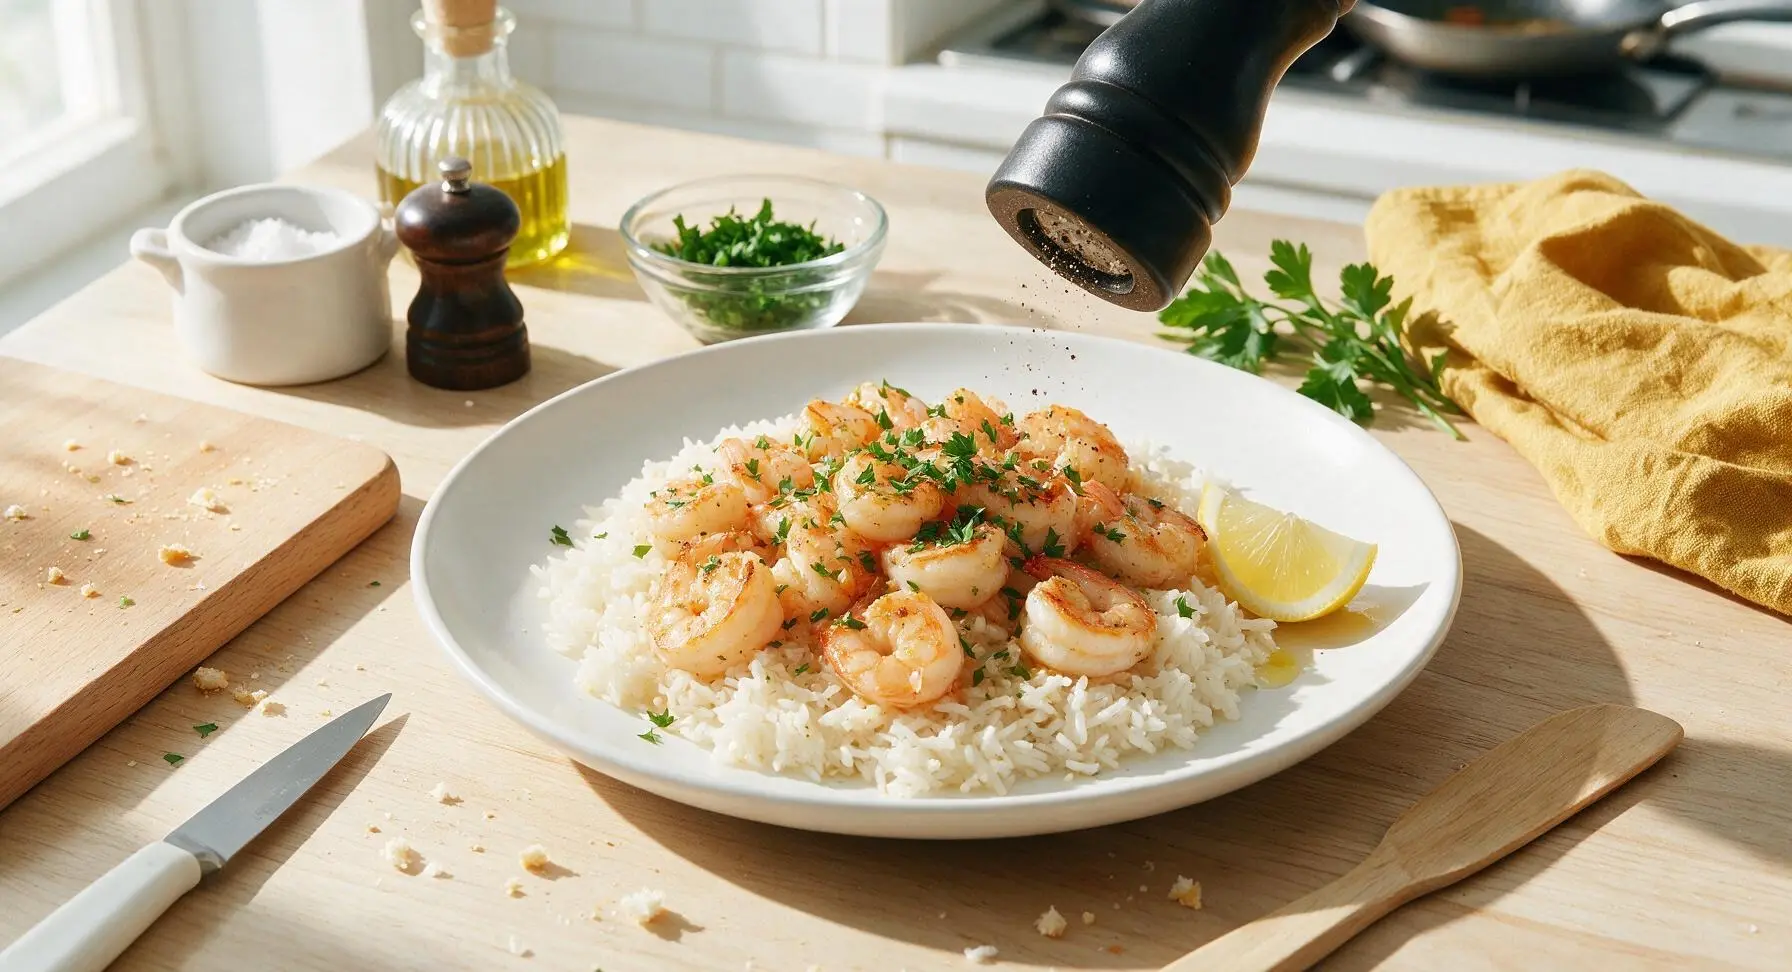
Sprinkle the top of the shrimp and rice with chopped fresh flat-leaf parsley, add a light crack of fresh black pepper, tuck a lemon wedge on the rim of the plate. Serve immediately while warm for best flavor and texture.
Step 8
step8:Garnish and Serve

Tips

1.Pat shrimp completely dry with paper towels before searing: Excess surface moisture will cause shrimp to steam instead of developing a light golden sear, which locks in sweet, briny shrimp flavor and prevents the butter sauce from becoming watery.
2.Never lift the rice lid during the 15-minute cook time: Trapped steam is critical for cooking rice evenly; peeking releases steam and can result in gummy, undercooked rice at the center of the pot, or mushy overcooked rice at the bottom.
3.Watch garlic closely while sautéing: Garlic can go from perfectly fragrant to burnt and bitter in as little as 10 seconds; if you notice dark brown or black spots on the garlic, discard it and start the butter base fresh to avoid ruining the sauce.


✨ You May Also Like

Main Course
🍜 United Kingdom

A showstopping classic of tender seared beef, savory mushroom duxelles, and crisp prosciutto wrapped in flaky golden puff pastry, baked to juicy perfection.

⏱️ 2 hours 1Main Course ★ 4.7
Main Course
🍜 India

Tender charred marinated chicken simmered in a rich, spiced creamy tomato sauce, this iconic Anglo-Indian curry pairs perfectly with basmati rice or warm naan.

⏱️ 50 minuteMain Course ★ 4.6
Main Course
🍜 Thailand

Classic tangy, sweet, and savory Thai stir-fried rice noodles with shrimp, tofu, and crunchy garnishes, balancing all five core Thai flavor profiles.

⏱️ 30 minuteMain Course ★ 4.5
Main Course
🍜 United Kingdom

Crispy golden beer-battered cod and fluffy double-fried chips, served with tangy tartar sauce and malt vinegar: the timeless, beloved British pub comfort classic.

⏱️ 45 minuteMain Course ★ 4.7
Main Course
🍜 Mexico

Smoky, chile-marinated pork tacos with caramelized pineapple, fresh cilantro, and lime: a beloved classic Mexican street food perfect for casual summer gatherings.

⏱️ 1 hour 45Main Course ★ 4.8
Main Course
🍜 United States

Crunchy Fritos corn chips layered with savory beef chili and melted cheddar, topped with cool, zesty fixings for a beloved, cozy Tex-Mex comfort food.

⏱️ 35 minuteMain Course ★ 4.8

garlic butter shrimp and rice:Frequently Asked Questions

1.What does 21-25 count shrimp mean, and can I use a different size? ▾
The 21-25 count label means there are 21 to 25 individual shrimp per pound, a meaty, quick-cooking size ideal for this recipe. You can use smaller 31-40 count shrimp if needed—just cut cook time by 30 to 45 seconds to avoid rubbery texture—or extra-large 16-20 count, adding 1 minute of total cook time.
2.How do I get fluffy, separate-grain white rice every time for this dish? ▾
Start by rinsing your long-grain white rice under cold running water until the water runs completely clear to wash off excess surface starch that causes clumping. Use a 2:1 ratio of low-sodium chicken broth to rice, bring to a rolling simmer, cover, turn heat to the lowest setting, and cook 15 minutes untouched before fluffing gently with a fork.
3.Should I leave the shrimp tails on, or can I peel them fully? ▾
Leaving the tails on adds a subtle, briny shellfish depth to the garlic butter as the shrimp cook, and gives the finished dish a polished, restaurant-style presentation. If you prefer no-fuss, utensil-free eating, you can absolutely peel the tails off entirely before cooking—just watch cook time closely, as tail-off shrimp cook marginally faster.
4.How do I keep my garlic from burning when making the garlic butter? ▾
Burnt garlic turns unpleasantly bitter fast and will throw off the whole dish’s bright, nutty flavor. Melt your unsalted butter over medium-low heat, add minced or sliced garlic once the butter is foamy but not browned, and stir constantly for 30 to 45 seconds until it smells fragrant, right before adding your shrimp to the pan.
5.Can I use frozen shrimp for this recipe, or does it have to be fresh? ▾
Frozen shrimp works perfectly for this dish, and is often higher quality than 'fresh' shrimp that’s been thawed on grocery store shelves for days. Thaw it overnight in the fridge, or in a bowl of cold tap water for 15 minutes, then pat completely dry with paper towels before cooking to get a nice sear instead of soggy, steamed shrimp.
6.Why does my shrimp always turn out rubbery, and how do I fix that for this recipe? ▾
Rubbery shrimp almost always comes from overcooking, or adding wet shrimp to the pan that steams instead of searing. Pat shrimp fully dry with paper towels before adding to hot garlic butter, cook only 1.5 to 2 minutes per side until opaque pink with faint golden edges, and pull them off heat immediately—they’ll finish cooking gently from residual heat.
7.Can I use salted butter instead of unsalted for the garlic butter sauce? ▾
You can use salted butter if that’s what you keep on hand, just adjust your added seasoning accordingly. Since this recipe uses low-sodium chicken broth, salted butter adds a nice baseline savoriness, but always taste the sauce before adding any extra salt to avoid over-seasoning—different salted butter brands have wildly varying sodium levels.
8.Can I use vegetable broth instead of low-sodium chicken broth if I don’t have chicken broth on hand? ▾
Absolutely. Swap low-sodium chicken broth for low-sodium vegetable broth if you’re out of chicken broth, or prefer a lighter plant-based cooking liquid. Pick a mild, non-roasted vegetable broth to avoid overpowering the delicate garlic, butter, and bright lemon notes. For a fully vegetarian take, swap shrimp for pressed, pan-seared extra-firm tofu cubes.
9.How far in advance can I prep the ingredients for this weeknight meal? ▾
This recipe is ideal for quick weeknight prep! You can peel and devein shrimp (if not buying pre-prepped), mince garlic, rinse your rice, and chop fresh parsley up to 2 days in advance, storing each component separately in sealed airtight containers in the fridge. Wait to cook the shrimp and rice until right before serving for the best, freshest texture.
10.What’s the best way to serve this dish, besides just topping rice with shrimp? ▾
While it’s delicious served simply with shrimp spooned over fluffy rice, you can toss the cooked rice directly in the leftover garlic-lemon butter in the pan for extra, even flavor. Pair it with a side of roasted broccoli or steamed asparagus, add a pinch of red pepper flakes for gentle heat, or a light sprinkle of grated parmesan for extra savoriness.
11.How long do leftovers keep in the fridge, and what’s the best way to reheat them? ▾
Store leftover shrimp and rice in a sealed airtight container in the fridge for up to 3 days. To reheat without turning shrimp rubbery, warm it gently in a covered skillet over low heat with a tiny splash of extra chicken broth to loosen the butter sauce, stirring occasionally, until just heated through. Skip high-power microwaving, which overcooks shrimp very quickly.
12.Can I use brown rice instead of long-grain white rice for this recipe? ▾
You can absolutely swap in long-grain brown rice for a whole-grain option, just adjust your cook time and liquid ratio. Brown rice needs a 2.5:1 ratio of broth to rice, and takes 40 to 45 minutes to cook into fluffy separate grains, so plan ahead: cook the rice fully first, then make the quick 5-minute garlic butter shrimp right before serving.
13.Do I need to devein shrimp, or is that step optional? ▾
Deveining shrimp is recommended for the best texture and flavor, as the dark intestinal vein can have a gritty, slightly bitter taste. If you’re extremely short on time you can skip it for very small shrimp, but for the large 21-25 count shrimp called for here, the vein is prominent enough that it’s worth the 2 minutes of extra prep time to remove it.
14.How much lemon should I add, and when is the best time to add it? ▾
For 1 pound of shrimp, use 2 tablespoons of fresh lemon juice, plus 1 teaspoon of finely grated lemon zest if you want extra bright, aromatic citrus flavor. Add the lemon juice off the heat right after you finish cooking the shrimp to keep the flavor bright; cooking lemon juice for too long makes it taste harsh and bitter instead of fresh.
15.Why didn’t my shrimp get that nice golden sear when I cooked them in butter? ▾
Lack of a nice golden sear almost always comes from two common home cook mistakes: overcrowding the pan, or adding wet shrimp to the butter. Cook shrimp in a single layer, working in two batches if your pan is too small to fit all of them without touching, and always pat shrimp completely dry with paper towels before adding them to hot, foamy butter.
16.Can I make this dish gluten-free for friends with dietary restrictions? ▾
This recipe is naturally gluten-free as written, as long as you double-check that your low-sodium chicken broth doesn’t have hidden gluten-containing additives or wheat-based thickeners. All other core ingredients—shrimp, long-grain white rice, butter, garlic, lemon, and fresh parsley—are naturally gluten-free, so no major swaps are needed to serve it to gluten-free guests.
17.What’s the right pan size and type to use for cooking the shrimp and garlic butter? ▾
Use a large, heavy-bottomed skillet—12 inches is ideal—for cooking 1 pound of 21-25 count shrimp. A heavy stainless steel or cast iron pan holds heat evenly to prevent hot spots that burn garlic, and the wide surface area gives you enough room to lay shrimp in a single layer for a nice sear without overcrowding.
18.I don’t have fresh parsley—can I use dried parsley instead, or skip it entirely? ▾
Fresh parsley adds a bright, grassy pop that cuts through the rich garlic butter, but if you don’t have it on hand, you can use 1 teaspoon of dried parsley (dried herbs are far more concentrated, so you need less) added when you cook the garlic, or skip it entirely. You can also swap in fresh chopped chives or basil for a similar fresh finish.
19.How long does this whole recipe take to make from start to finish? ▾
This recipe is designed specifically for busy weeknights, so it takes roughly 30 minutes total from when you pull ingredients out of the fridge to serving. You can cut that down to 20 minutes if you prep components ahead, or use pre-peeled, deveined shrimp, making it perfect for fast, last-minute dinners that still feel special and flavorful.

Comments (7)

30 minutes ago

Just finished making this for lunch and wow, it’s even better than the garlic butter shrimp I get at my local seafood spot! I added a squeeze of fresh lemon at the end and it brightened the whole dish up so much. Already sent the link to my mom and sister.

5 minutes ago

The lemon squeeze is non-negotiable for me too! I did that the first time I made it and now I can’t eat it without that little zing. So glad you liked it!

2 hours ago

Made this for my potluck last weekend and people were begging me for the recipe! I used jumbo shrimp instead of the regular size and it felt so fancy even though it only took me 20 minutes total. 10/10 will be making this again for our next game night.

yesterday

OMG this was SO good! I threw this together after work last night for my family of 4 and every single plate was licked clean. The garlic butter sauce is chef’s kiss — I even added a tiny pinch of red pepper flakes for a little kick and it worked perfectly. Total game changer for busy weeknights!

2 hours ago

Wait the red pepper flakes addition sounds chef’s kiss! Did you use about a 1/4 tsp or more? I love a little heat but don’t want to overpower the garlic butter for my kid who hates spicy food.

30 minutes ago

Hi Jake! Great question — 1/8 tsp adds super subtle warmth that even most kids don’t notice, 1/4 tsp is a mild kick for grown-ups. We’re so glad you loved the recipe, Mia, that red pepper tweak is such a good call!

2 days ago

Super easy to make, taste was great! My only note is that I wish the rice had a little more flavor on its own — next time I might cook the rice in a little chicken broth instead of plain water to bump it up. Perfect for meal prep though, I portioned out 4 containers for work lunches this week!

yesterday

Thanks so much for the honest feedback, Lizzy! Cooking the rice in low-sodium chicken broth is such a smart hack — it adds so much depth without extra work, we do that all the time too. So happy this works for your meal prep rotation!

3 days ago

Taste was solid, but I overcooked my shrimp by like 2 minutes and they got rubbery. Total user error, I know, but wish the recipe had a clearer note about how fast shrimp cooks! I’ll definitely give it another go though, because the flavor was there when I picked out the not-rubbery bits.

2 days ago

Oh no, sorry to hear your shrimp turned out rubbery the first time, Ryan! Great note — we added a quick tip to the recipe card that shrimp only needs 2-3 minutes per side over medium heat, and they’re done as soon as they turn opaque and pink. Give it another try, we promise it’s worth it!

1 week ago

My kids loved it!!! I have two super picky eaters who turn their nose up at basically any seafood, and they both asked for seconds. I skipped the fresh parsley because I didn’t have any on hand and it still tasted amazing. No fancy ingredients required, which is my favorite kind of recipe.

5 days ago

Oh this makes me so hopeful! My 7 year old refuses to touch shrimp too, did you serve it with anything on the side or just the rice and shrimp? I might test it out this weekend!

3 days ago

I just served it with some steamed broccoli on the side! I cut the shrimp up into tiny pieces and mixed them right in with the buttered rice so it wasn’t as "scary" for them, lol. Good luck, hope your kid loves it!

2 weeks ago

Really solid weeknight recipe! I used frozen pre-peeled shrimp to cut down on prep time even more, and it still turned out great. Only reason it’s not a 5 is I wished there was a little more sauce to coat the rice the first time I made it, so I doubled the butter and garlic on my second batch and that fixed it right up.



