
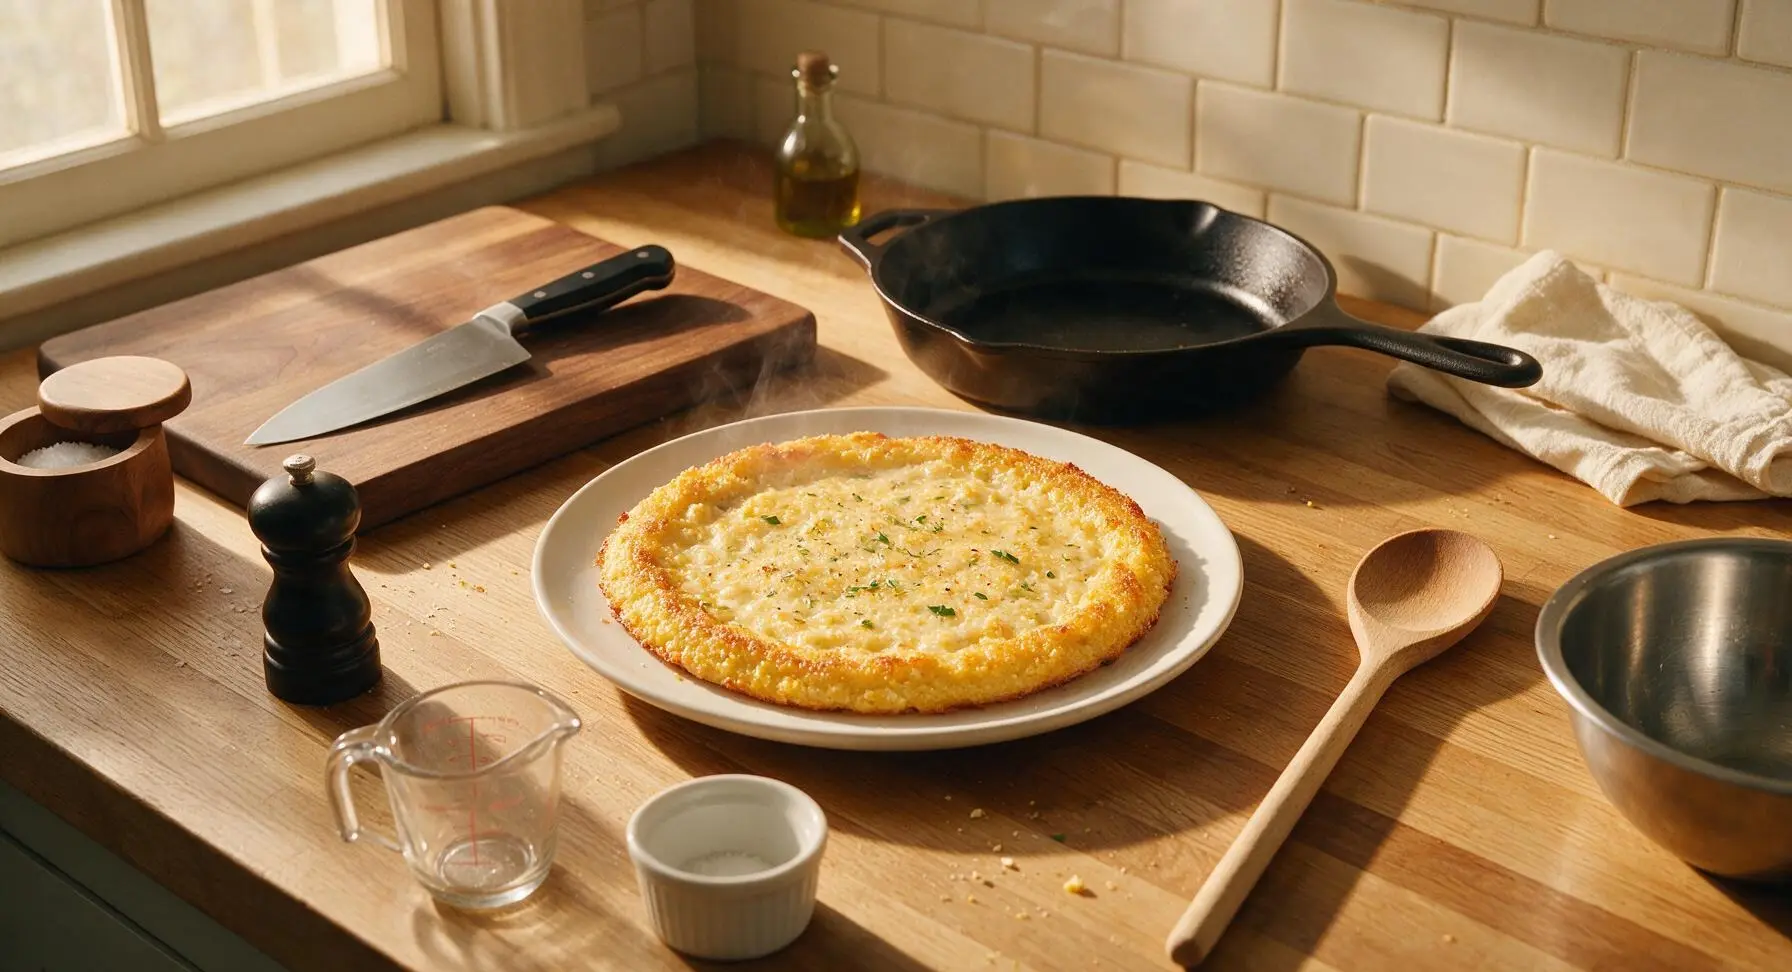
Grits Pizza Crust

title 1
Grits Pizza Crust
⏱️ cook time 40 minutes
🍽️ servings 4
⚡ Difficulty easy

intro

Crispy, golden, gluten-free grits pizza crust with a tender, creamy center—sturdy enough for all your favorite toppings, with cozy, nutty stone-ground corn flavor.

Ingredients
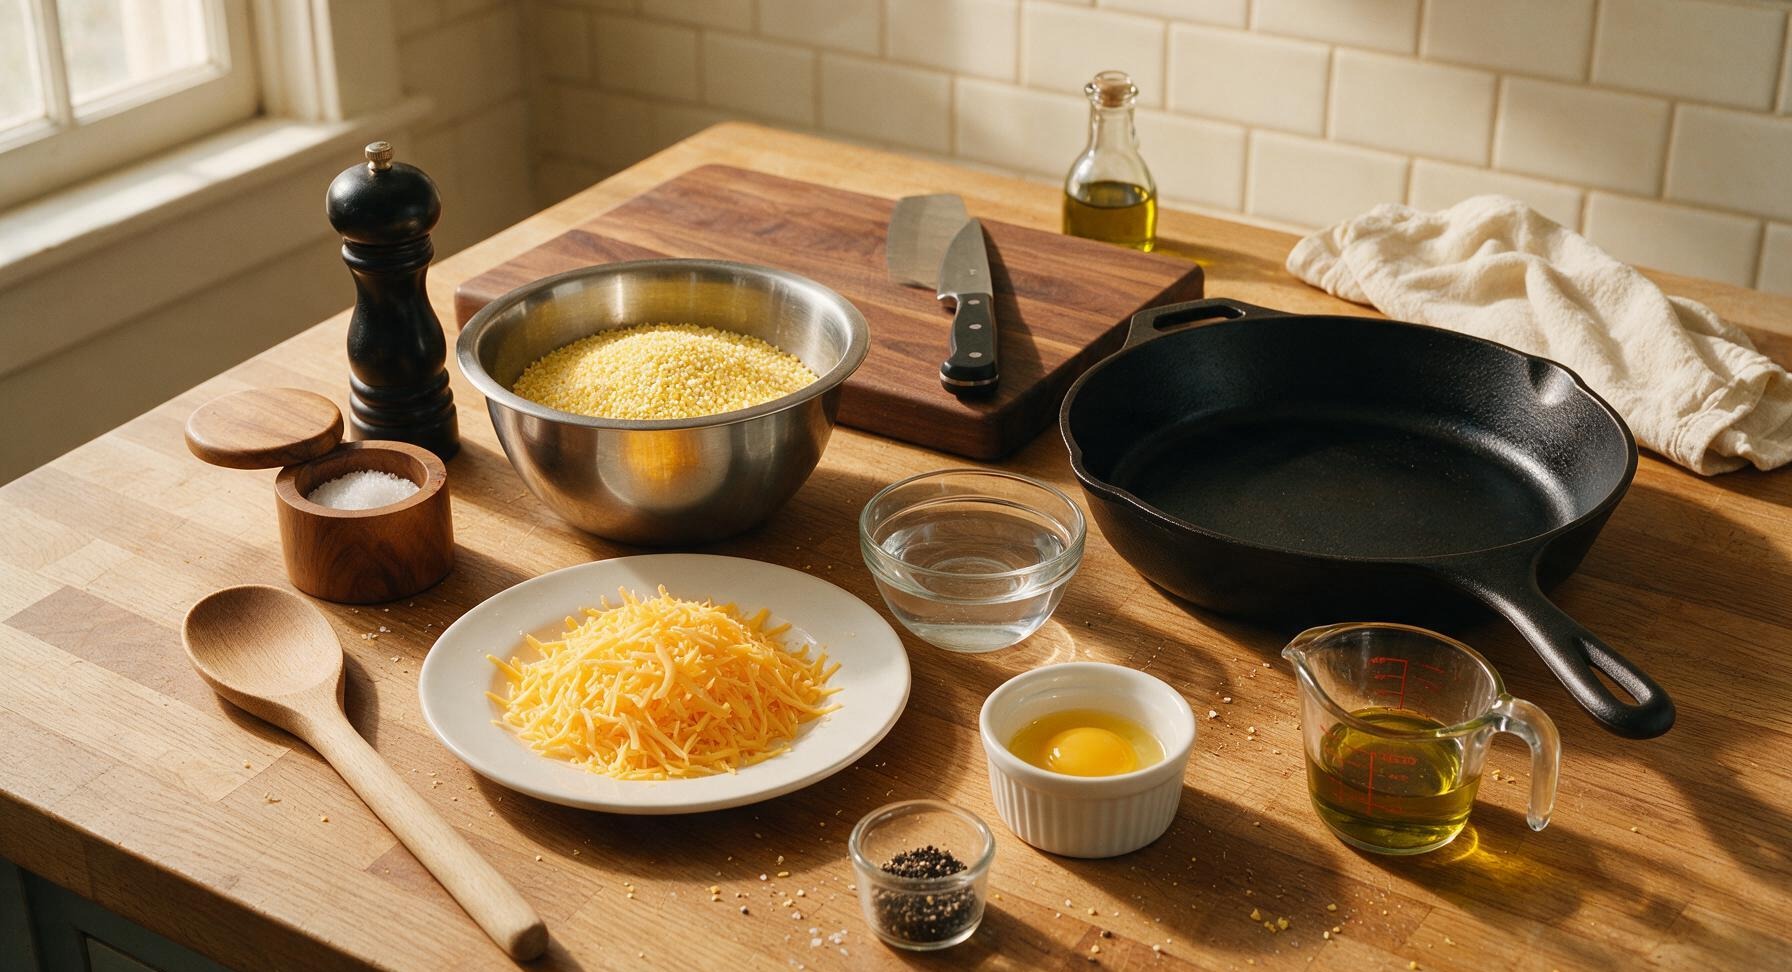
Stone-ground yellow grits 1 cup (dry)
Water 4 cups
Sharp cheddar cheese 1/2 cup, finely shredded
Large egg 1 each, lightly beaten
Extra-virgin olive oil 1 tablespoon, plus extra for pan
Fine sea salt 1 teaspoon
Freshly ground black pepper 1/4 teaspoon

Steps

1

Prep Pan, Shred Cheese

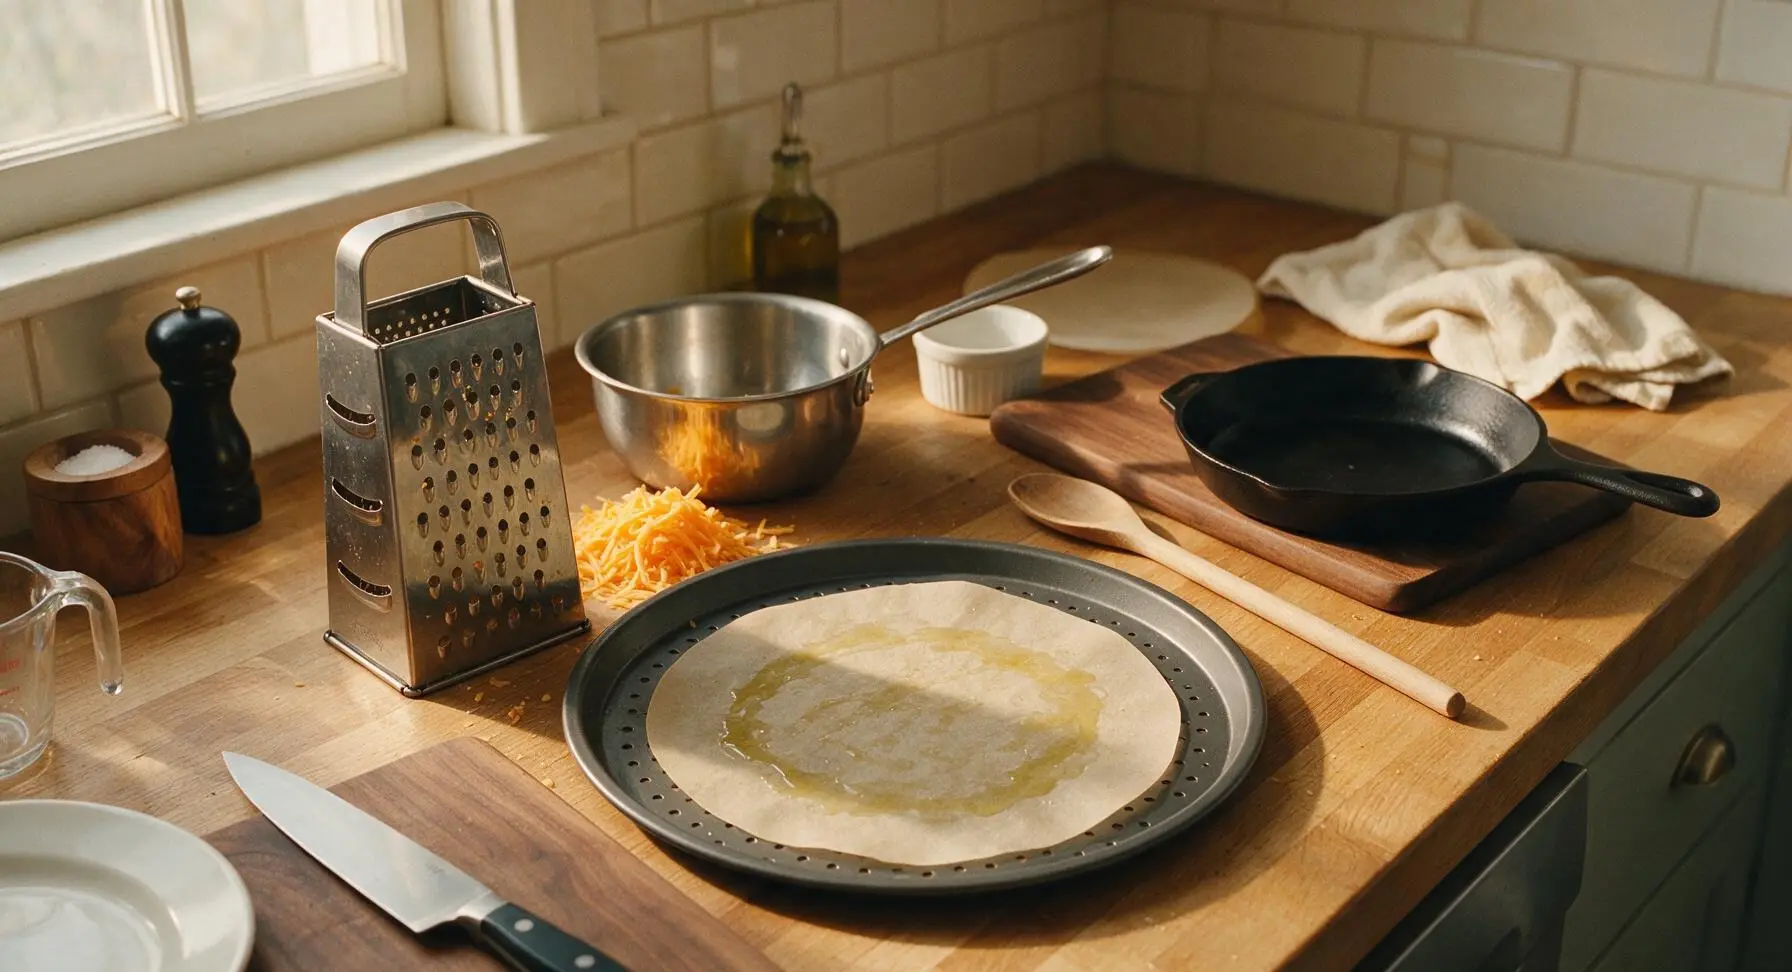
Preheat your oven to 425°F (220°C). Use the 4-sided stainless steel box grater to finely shred 1/2 cup sharp cheddar cheese, and set the shredded cheese aside in the stainless steel mixing bowl. Place the 12-inch matte dark gray perforated pizza pan on the center of the counter, lay the pre-cut 12-inch unbleached parchment circle flat across the pan surface, and rub 1 teaspoon of olive oil across the parchment with your fingertips or the silicone basting brush to prevent sticking. Set the prepared pan aside while you cook the grits base.
Step 1
step1:Prep Pan, Shred Cheese
2

Cook Creamy Grits Base

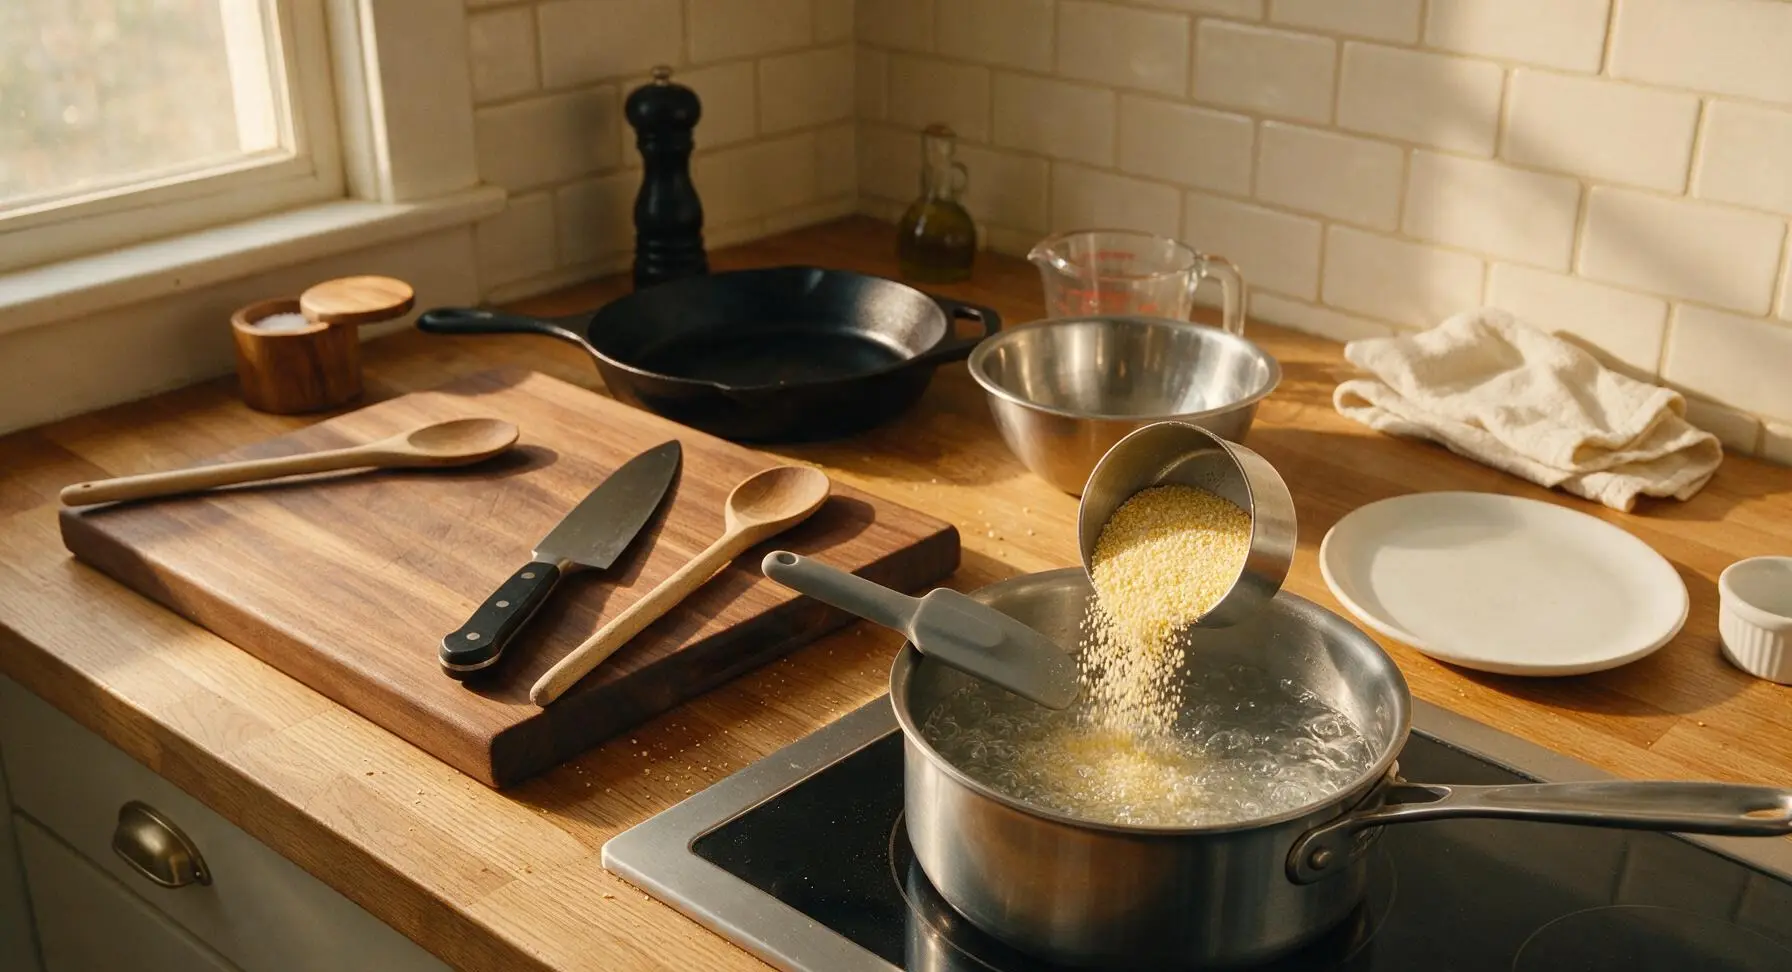
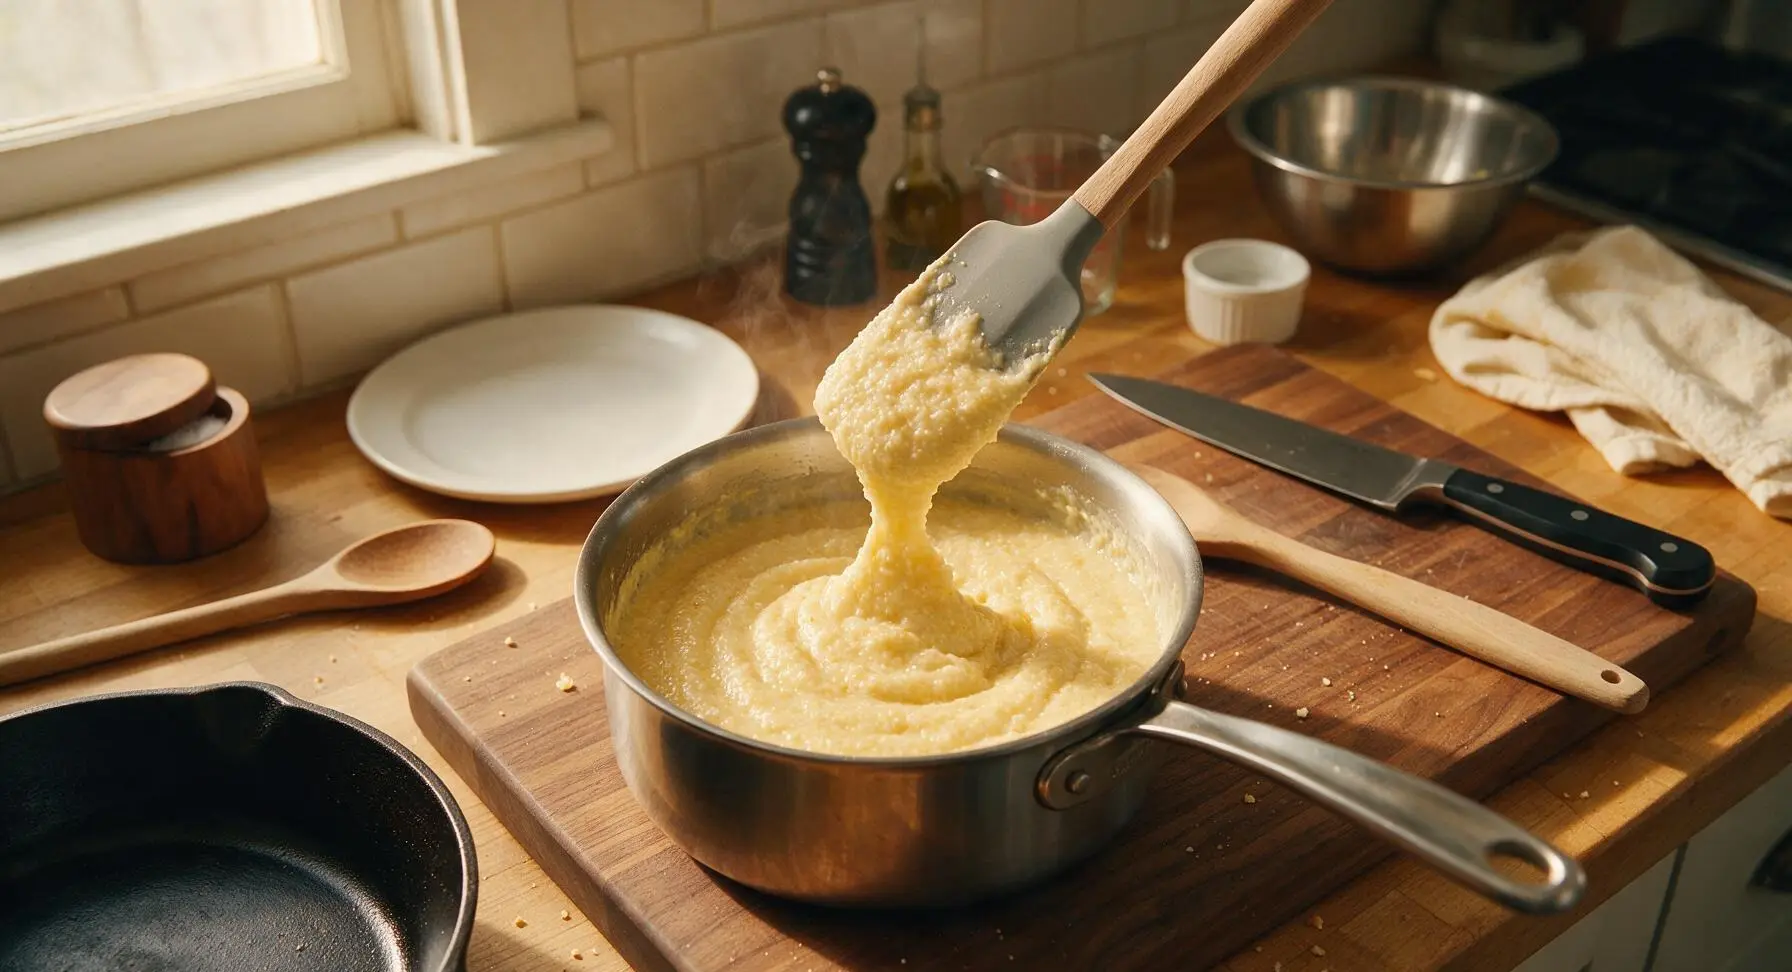
Pour 4 cups of water, measured in the glass liquid measuring cup, into the 2-quart stainless steel saucepan, add 1 teaspoon fine sea salt, and set over medium-high heat to bring to a rolling boil. Slowly pour 1 cup dry stone-ground grits, measured with the stainless steel dry measuring cups, into the boiling water, stirring constantly with the gray silicone spatula to prevent lumps from forming. Reduce heat to low, cover, and cook for 15 minutes, stirring every 3 minutes to prevent sticking on the pan bottom. The grits are done when they are thick, tender, and pull away slightly from the sides of the pan when stirred. Remove the pan from heat.
Step 2
step2:Cook Creamy Grits Base
Step 2
step2:Cook Creamy Grits Base
3

Stir in Cheese, Season

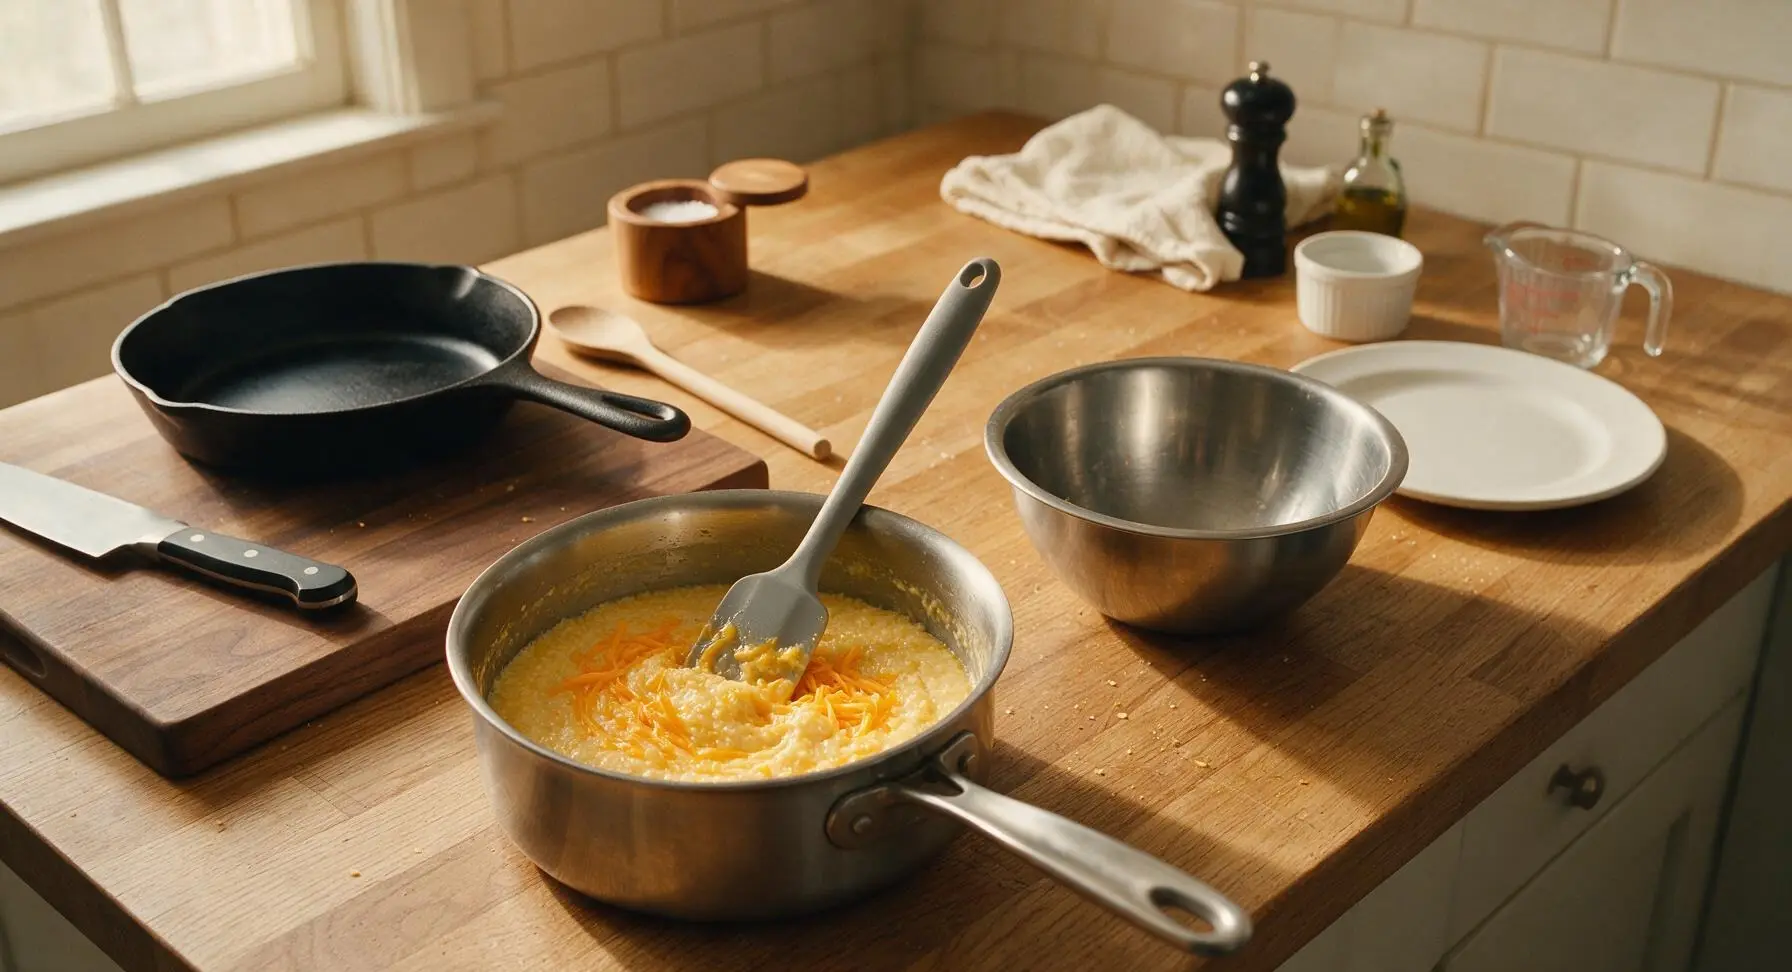
Add the reserved 1/2 cup finely shredded sharp cheddar, 1 tablespoon extra-virgin olive oil, and 1/4 teaspoon freshly ground black pepper to the hot cooked grits. Stir vigorously with the silicone spatula until the cheese is fully melted and evenly distributed, with no visible clumps of unmelted cheese remaining. Let the grit mixture cool for 5 minutes on the cool counter section, stirring once halfway through, to bring the temperature down so it does not curdle the egg added in the next step.
Step 3
step3:Stir in Cheese, Season
4

Incorporate Beaten Egg

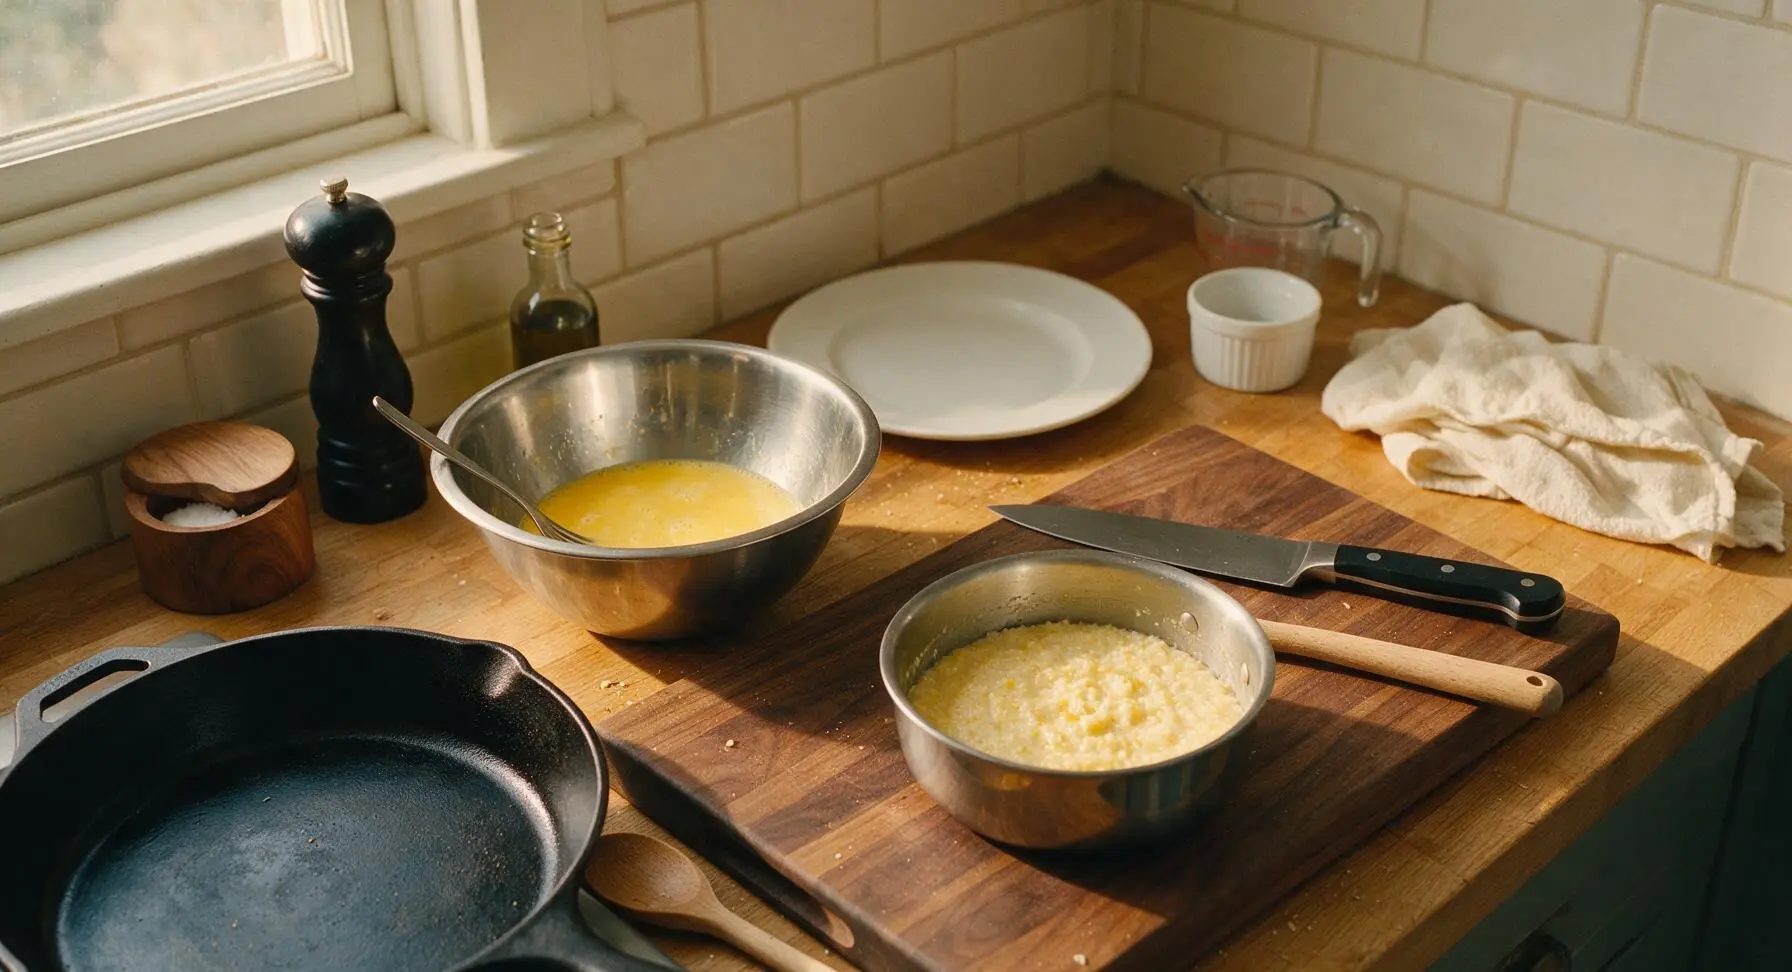
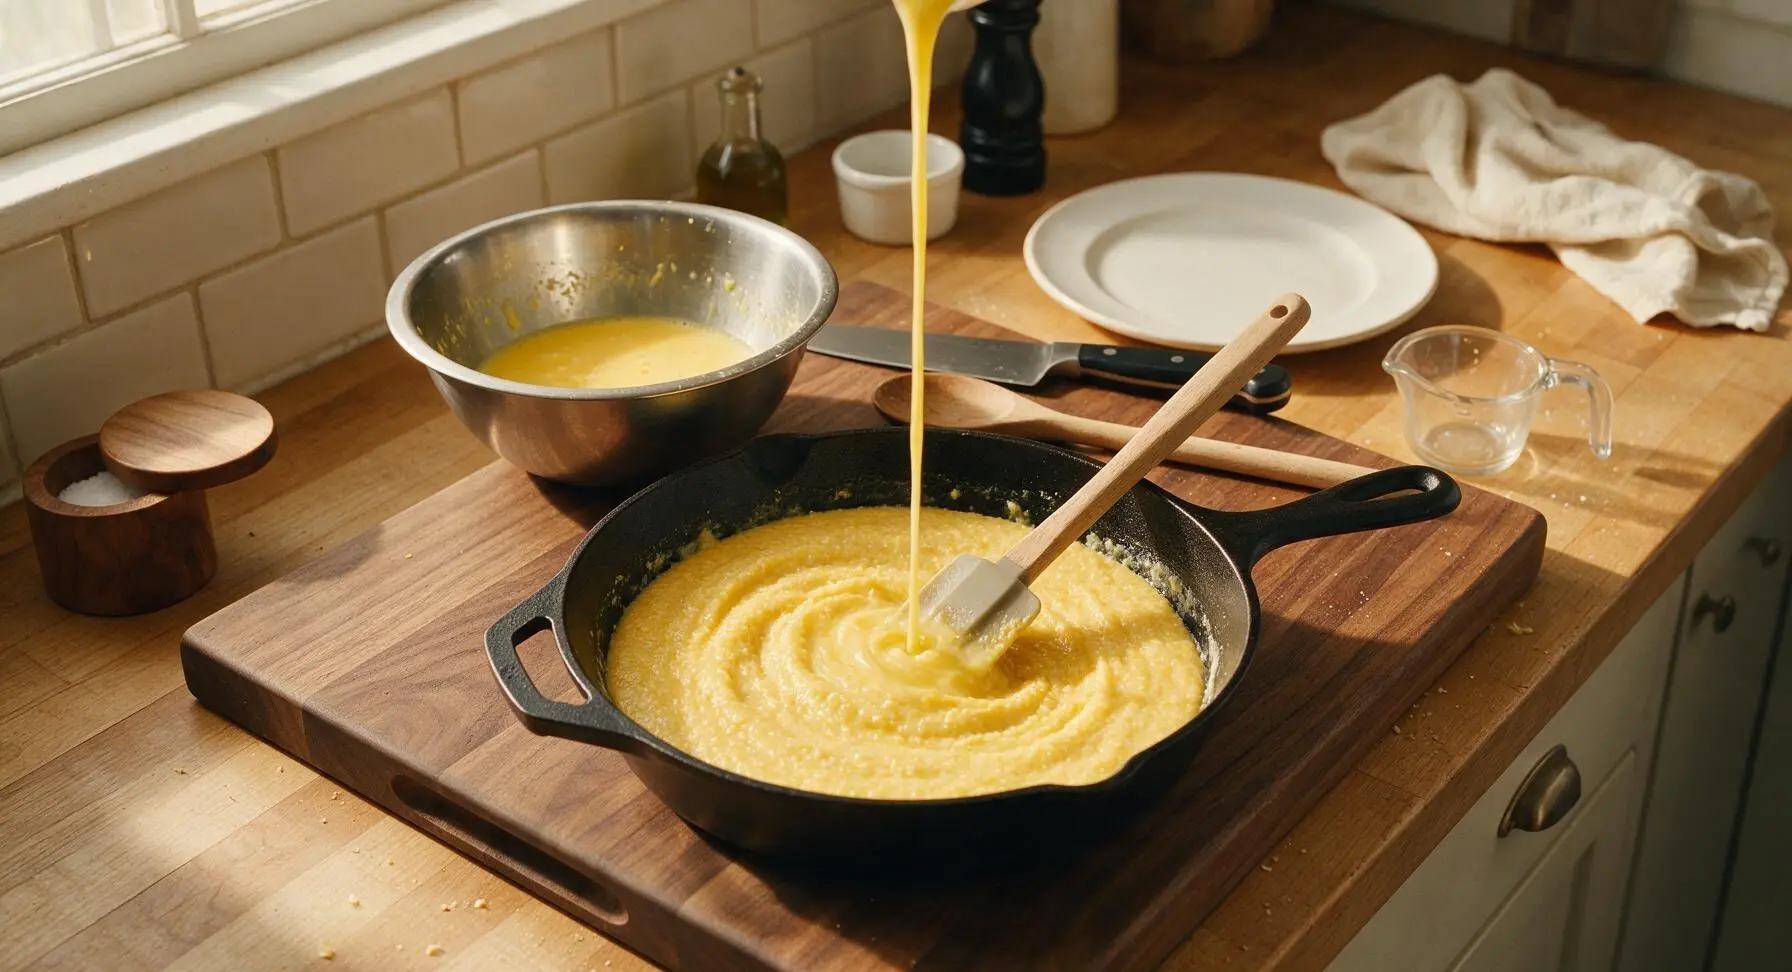
Crack the large egg into the now-empty medium stainless steel mixing bowl, whisk lightly with a fork until yolk and white are fully combined into a pale yellow uniform liquid. Pour the beaten egg slowly in a thin stream into the warm (not piping hot) cheese grits, stirring constantly and quickly with the silicone spatula to fully incorporate the egg. Stir for 30 seconds after all egg is added, until no streaks of egg remain, and the mixture is thick, smooth, and spreadable.
Step 4
step4:Incorporate Beaten Egg
Step 4
step4:Incorporate Beaten Egg
5

Spread Grits on Pan

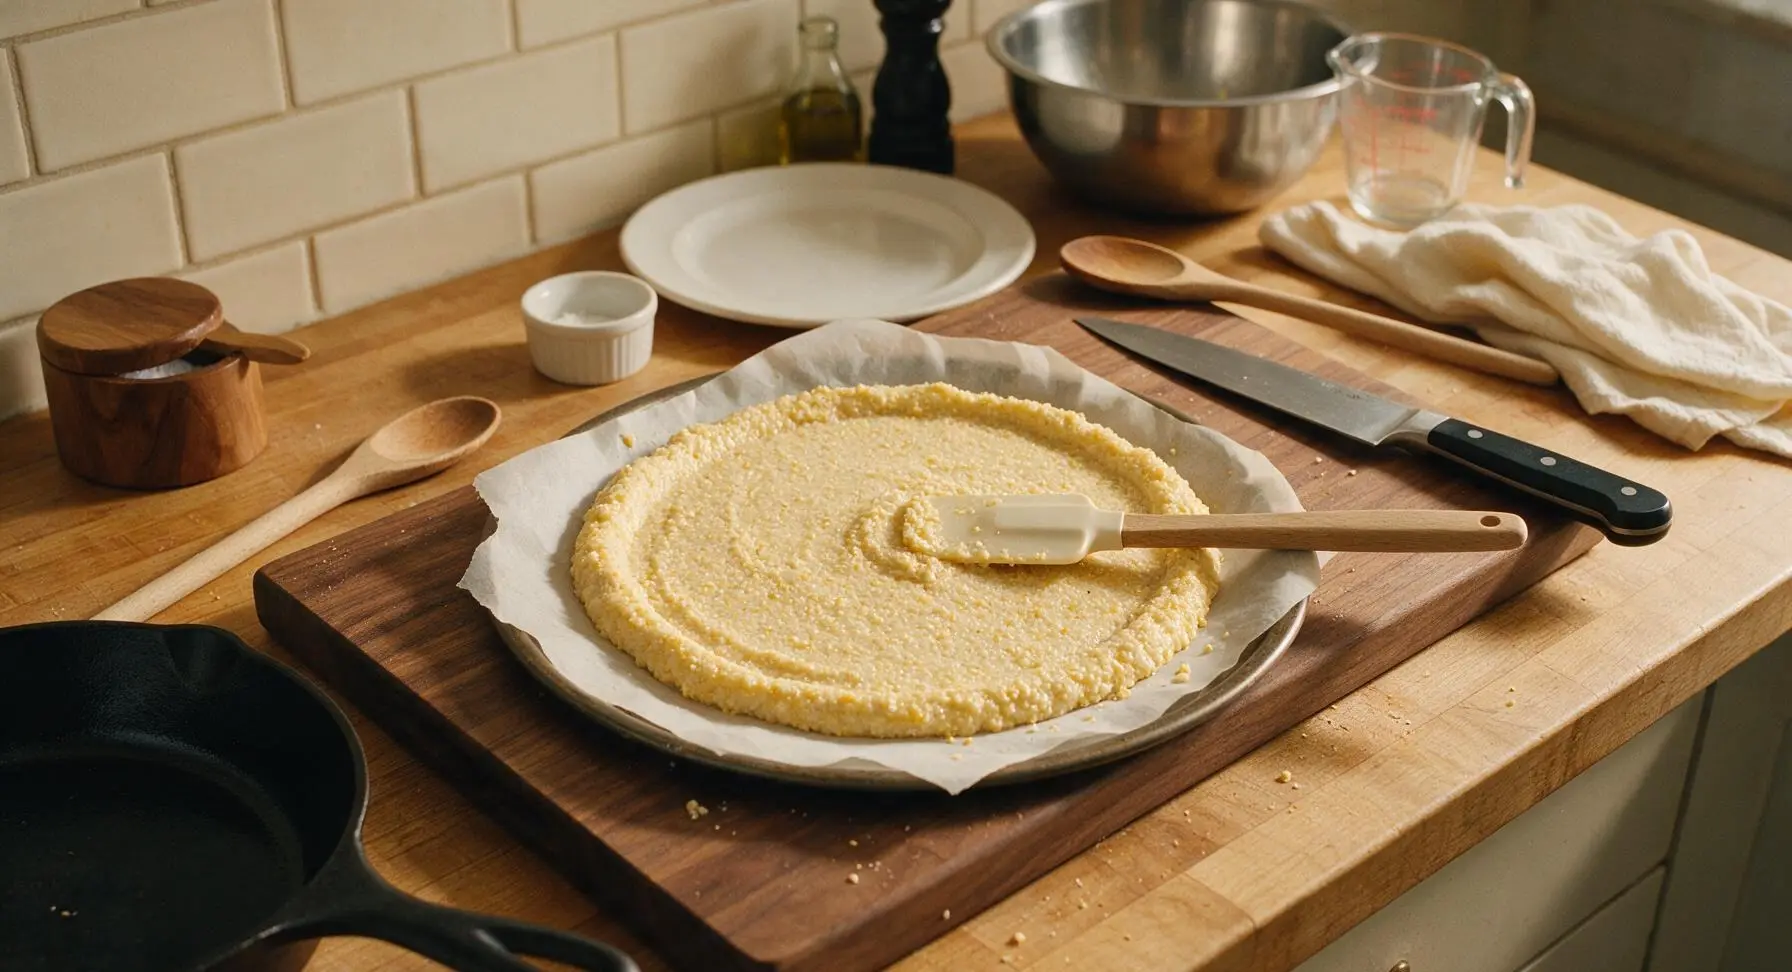
Scoop the entire thick grit and egg mixture onto the center of the parchment-lined pizza pan. Use the flat back of the silicone spatula to spread the grits evenly outward into a 12-inch circle, pressing firmly to create a uniform 1/4-inch thick base, with a slightly raised 1/2-inch edge around the entire perimeter to contain pizza toppings later. Check for thin spots or holes, and patch them with extra grit mixture to prevent cracking during baking.
Step 5
step5:Spread Grits on Pan
6

Bake to Crispy Perfection

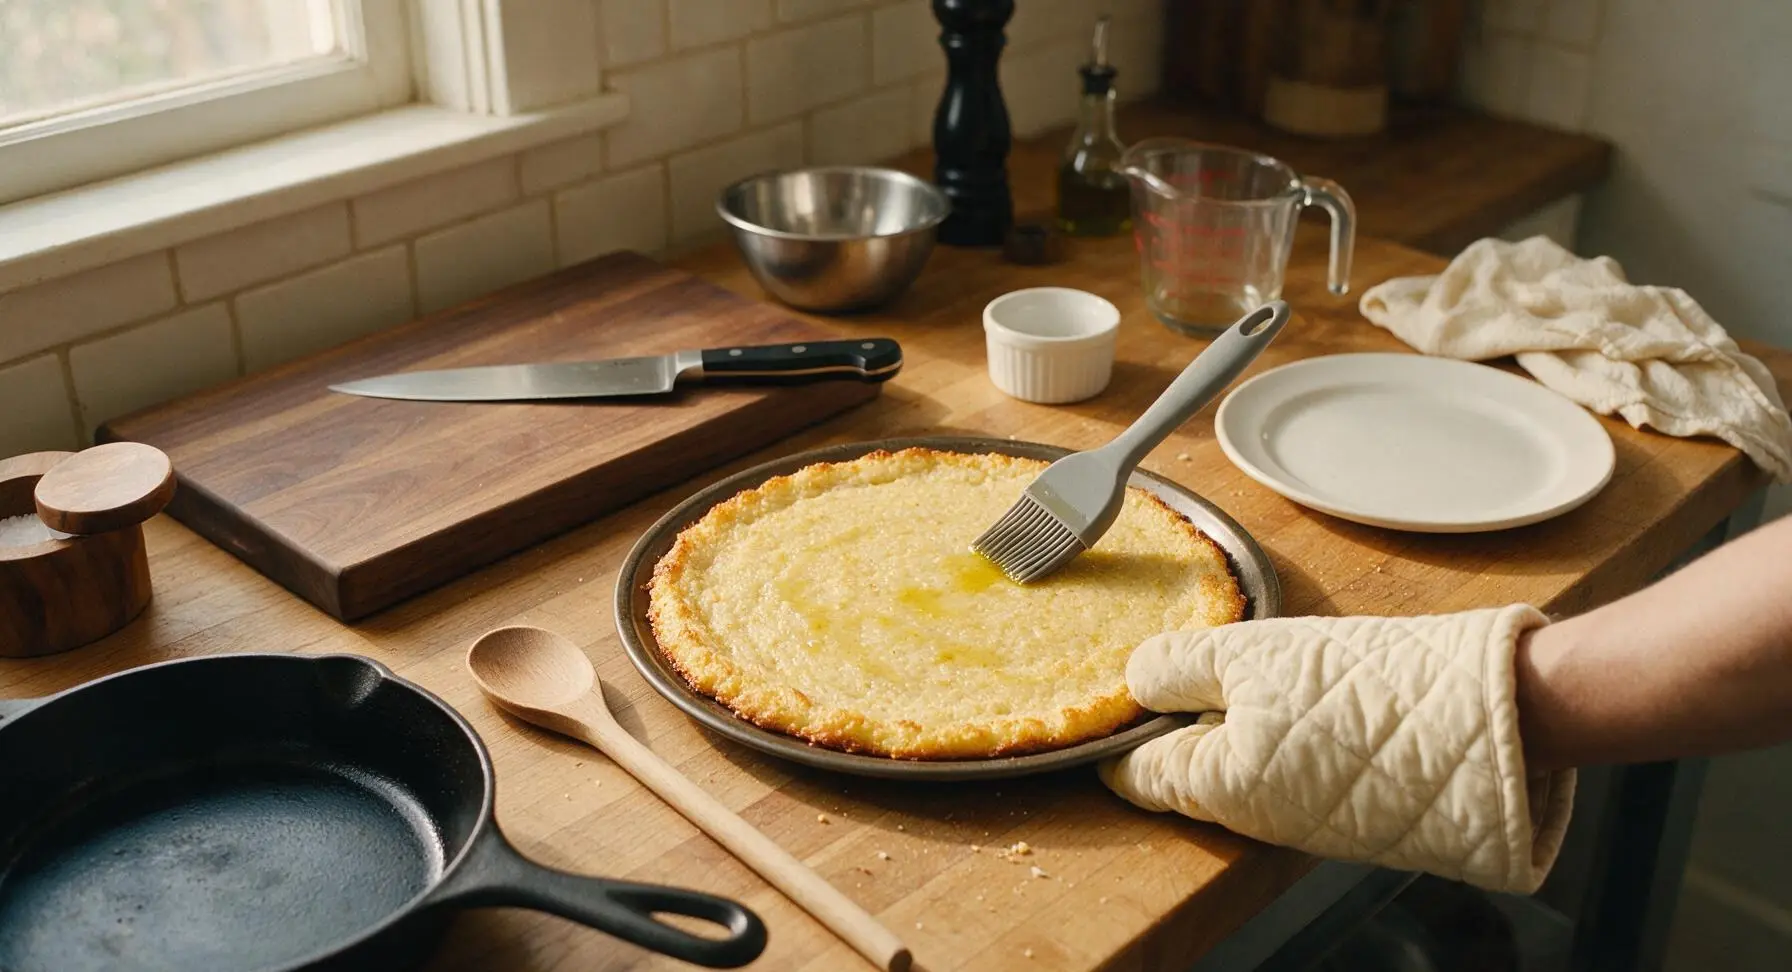
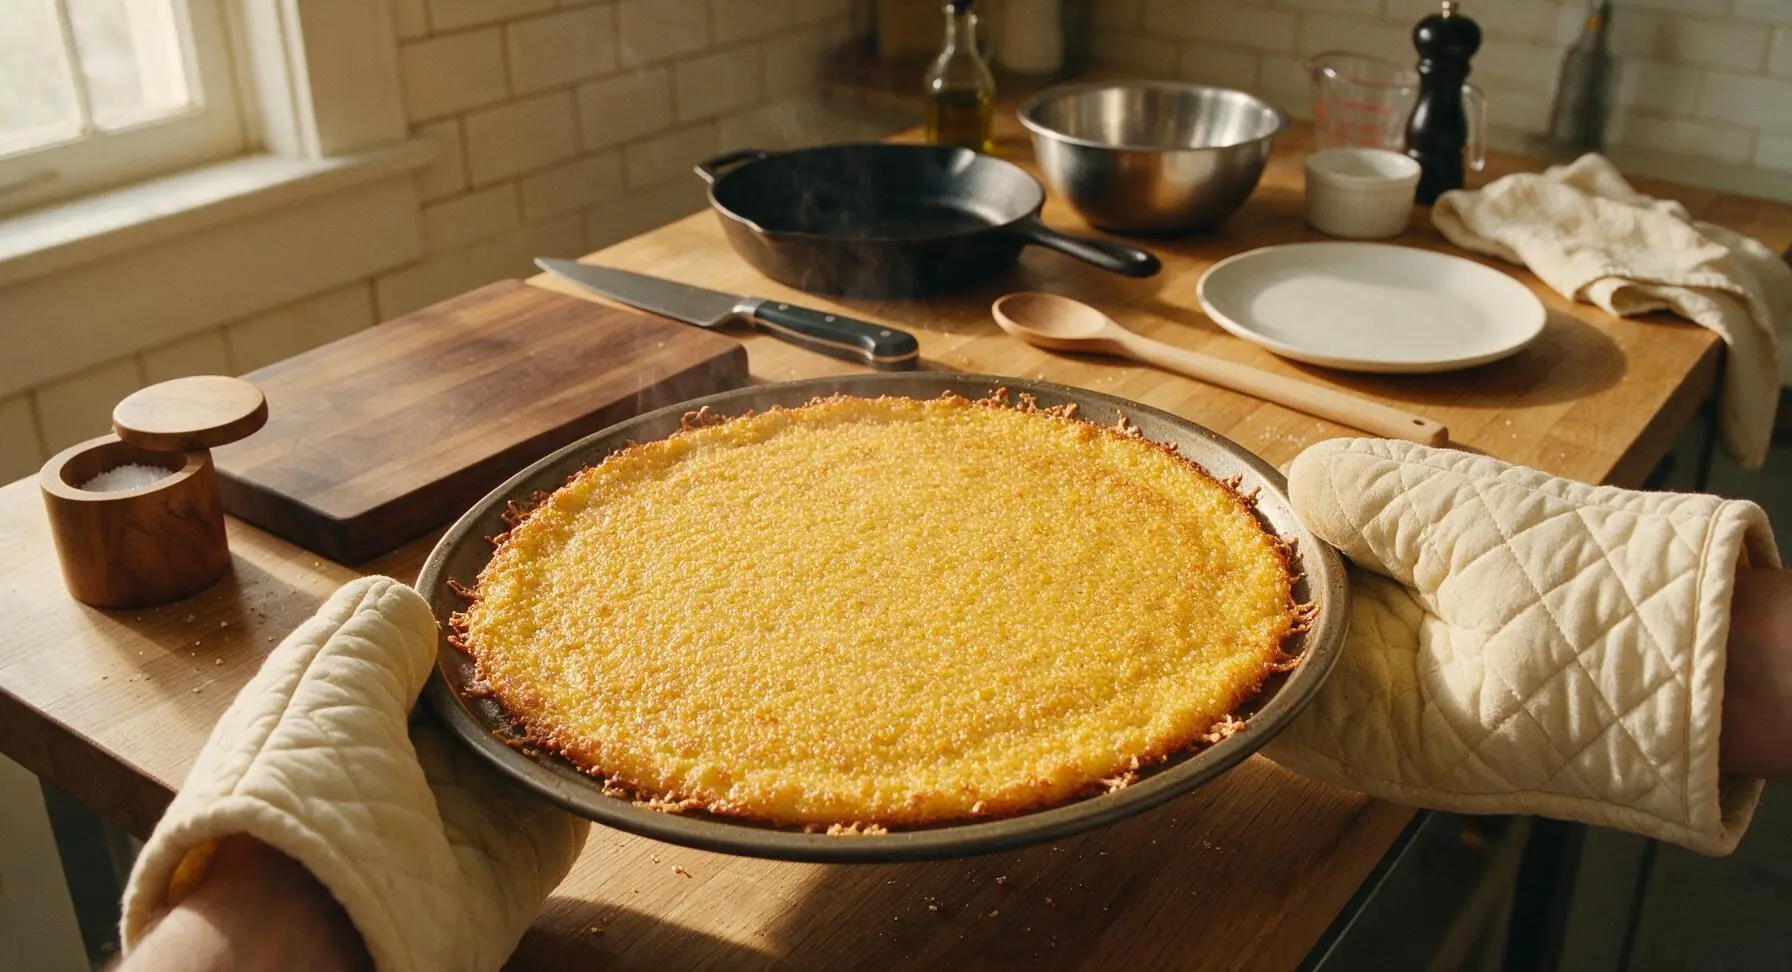
Carefully transfer the pizza pan with the spread grit crust to the center rack of the preheated 425°F (220°C) oven. Bake for 20 minutes, then use the quilted cream oven mitts to pull the pan out and set it on the counter. Brush the entire top surface of the crust lightly with 1/2 teaspoon olive oil using the small silicone basting brush, then return the pan to the oven for 5 more minutes. The crust is fully baked when the edges are deep golden brown, crispy to the touch, and the center is fully set with no soft, mushy jiggly spots.
Step 6
step6:Bake to Crispy Perfection
Step 6
step6:Bake to Crispy Perfection
7

Cool Slightly, Plate

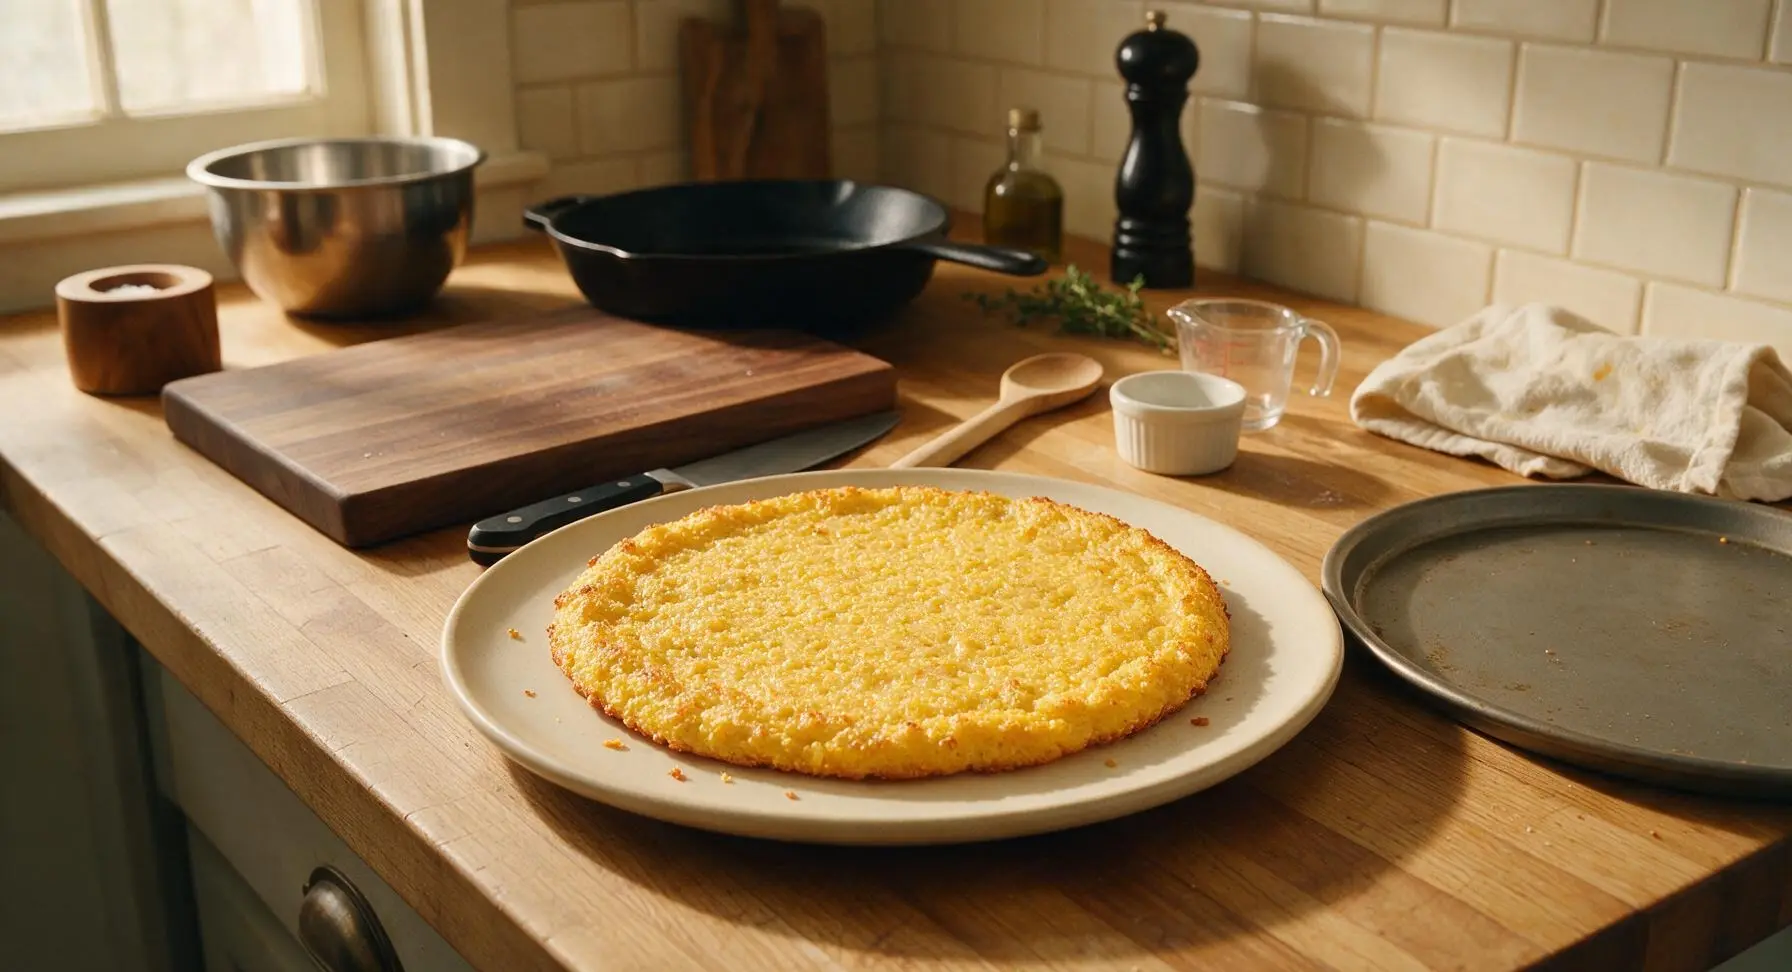
Let the baked grits crust rest on the pizza pan for 5 minutes to set and crisp up further, as the crust will be too soft to move immediately out of the oven. Use the silicone spatula to carefully loosen the crust from the parchment, then slide the crust onto the round matte cream ceramic dinner plate. The finished crust is sturdy enough to hold any pizza toppings, from classic marinara and mozzarella to roasted veggies, cooked sausage, or even breakfast toppings like bacon and eggs.
Step 7
step7:Cool Slightly, Plate

Tips

1.Use stone-ground grits instead of instant or quick-cooking grits for the sturdiest crust: stone-ground grits have a coarser, less processed grind that creates a shatteringly crisp edge and firm, non-mushy center, while quick grits have a finer grind that results in a softer, more fragile crust that cracks easily under heavy toppings.
2.Wait the full 5 minutes for cooked grits to cool before adding the beaten egg: if the grits are boiling hot when the egg hits them, the egg will curdle instantly, creating small lumps of cooked egg that weaken the crust structure and leave an uneven, grainy texture.
3.For an extra-crisp bottom crust, slide the parchment-lined crust directly onto the oven rack for the final 5 minutes of baking (instead of leaving it on the pan): the perforated pan allows good air flow, but direct rack contact lets more heat reach the base of the crust, eliminating any soggy spots for a pizzeria-style crisp bite.


✨ You May Also Like

Main Course
🍜 United Kingdom

A showstopping classic of tender seared beef, savory mushroom duxelles, and crisp prosciutto wrapped in flaky golden puff pastry, baked to juicy perfection.

⏱️ 2 hours 1Main Course ★ 4.7
Main Course
🍜 India

Tender charred marinated chicken simmered in a rich, spiced creamy tomato sauce, this iconic Anglo-Indian curry pairs perfectly with basmati rice or warm naan.

⏱️ 50 minuteMain Course ★ 4.6
Main Course
🍜 Thailand

Classic tangy, sweet, and savory Thai stir-fried rice noodles with shrimp, tofu, and crunchy garnishes, balancing all five core Thai flavor profiles.

⏱️ 30 minuteMain Course ★ 4.5
Main Course
🍜 United Kingdom

Crispy golden beer-battered cod and fluffy double-fried chips, served with tangy tartar sauce and malt vinegar: the timeless, beloved British pub comfort classic.

⏱️ 45 minuteMain Course ★ 4.7
Main Course
🍜 Mexico

Smoky, chile-marinated pork tacos with caramelized pineapple, fresh cilantro, and lime: a beloved classic Mexican street food perfect for casual summer gatherings.

⏱️ 1 hour 45Main Course ★ 4.8
Main Course
🍜 United States

Crunchy Fritos corn chips layered with savory beef chili and melted cheddar, topped with cool, zesty fixings for a beloved, cozy Tex-Mex comfort food.

⏱️ 35 minuteMain Course ★ 4.8

Grits Pizza Crust:Frequently Asked Questions

1.Is grits pizza crust actually gluten-free? ▾
Absolutely! This crust relies entirely on stone-ground yellow grits instead of wheat flour, so it’s naturally gluten-free. If you have celiac disease or severe gluten sensitivity, just opt for certified gluten-free stone-ground grits to avoid cross-contamination risks from shared processing equipment, and you’re good to go.
2.How sturdy is this crust for holding heavy pizza toppings? ▾
This crust is intentionally formulated to be sturdy enough for all your favorite toppings, from loaded pepperoni and sausage to roasted veggies and extra cheese. The combination of cooked grits, egg, and sharp cheddar sets firmly as it bakes, so you won’t end up with a soggy, floppy crust that drops toppings when you pick up a slice.
3.Can I use instant grits instead of stone-ground yellow grits? ▾
I don’t recommend it. Instant grits are pre-cooked and finely milled, so they’ll produce a mushy, bland crust without that signature nutty, deep corn flavor and satisfying texture stone-ground grits deliver. If you only have quick-cooking stone-ground grits, those work in a pinch, but skip instant for best results.
4.Why do you add sharp cheddar cheese to the grits crust? ▾
Sharp cheddar does double duty here: it adds a rich, tangy depth that pairs perfectly with the nutty corn flavor of the grits, and it helps bind the crust together as it melts and bakes. This creates that crispy golden outer edge while keeping the center tender and creamy, rather than dry or crumbly.
5.Do I need to pre-bake the grits crust before adding toppings? ▾
Yes, a short pre-bake is non-negotiable for ideal texture. After spreading your cooked grits mixture into your oiled pizza pan, bake it for 12–15 minutes at 425°F until edges are golden and the top is fully set. This step locks out sogginess once you add sauce, cheese, and toppings for the final bake.
6.What texture should I expect from baked grits pizza crust? ▾
It has the best of both worlds: a crispy, golden, slightly crunchy outer edge and bottom, with a tender, creamy, polenta-like center that has cozy, nutty corn flavor. It’s not dense or cracker-like, but it’s firm enough to hold a slice in one hand without it bending or falling apart as you eat.
7.Can I make this grits crust dairy-free? ▾
You can, with a couple easy swaps. Replace the sharp cheddar with a dairy-free sharp cheddar-style shred that melts well (look for one with added tapioca starch for best binding), and keep the egg and olive oil to maintain structure. Skip crumbly, non-melting dairy-free cheeses, as they won’t help bind the crust properly.
8.How thin should I spread the grits mixture on the pan? ▾
Aim for a ¼-inch thick even layer across your pan, with a very slight raised edge to contain sauce and toppings. If you spread it too thin, it will turn cracker-dry and brittle; if it’s thicker than ⅓ inch, the center will stay too soft and creamy to hold toppings properly, even after full baking.
9.Can I use a different cheese instead of sharp cheddar? ▾
Absolutely, as long as it’s a firm, melting cheese with good flavor. Smoked gouda, pepper jack, or fontina all work beautifully as swaps. Just avoid very soft, high-moisture cheeses like fresh mozzarella or brie for the crust itself, as they’ll add too much moisture and make the crust soggy instead of crisp.
10.Do I need to grease my pizza pan for this crust? ▾
Yes, a light coating of extra-virgin olive oil on your pan (I also recommend lining it with parchment paper for extra easy removal) ensures the crust gets that crispy golden bottom and doesn’t stick as it bakes. Don’t douse the pan in oil, though—about a teaspoon, spread evenly, is all you need.
11.Can I make this grits crust ahead of time? ▾
Definitely! You can pre-bake the crust fully, let it cool completely, wrap it tightly in plastic wrap, and store it in the fridge for up to 3 days, or freeze it for up to 3 months. When you’re ready to make pizza, just add your toppings and bake straight from chilled or frozen until heated through.
12.What purpose does the egg serve in this recipe? ▾
The large egg acts as a critical binder that holds the cooked grits and cheese together as the crust bakes. Without it, the crust will be crumbly and fall apart when you try to pick up a slice, no matter how long you bake it. It also adds subtle richness that keeps the center from tasting dry or bland.
13.What kind of pan works best for baking grits pizza crust? ▾
A heavy, dark metal pizza pan or cast iron skillet works best, as it conducts heat evenly to get that crispy bottom without hot spots. Avoid thin, flimsy aluminum sheet pans, as they can cause the crust to burn on the bottom before the center sets, and skip perforated pans, as soft grits will seep through holes.
14.How do I keep my grits crust from getting soggy under toppings? ▾
First, don’t skip the required pre-bake step. Second, go light on sauce—aim for a thin, even layer, rather than piling it on thick, and pat wet toppings like canned tomatoes or sautéed mushrooms dry before adding. A light sprinkle of cheese on the pre-baked crust before sauce also creates a helpful moisture barrier.
15.Can I use white grits instead of yellow stone-ground grits? ▾
You can, but you’ll miss out on that deep, nutty, sweet corn flavor that makes this crust so special. White grits have a milder, more neutral flavor, so your crust will taste blander overall. If you do use white grits, stick to stone-ground rather than instant for the best texture and structure.
16.How long do I cook the grits before assembling the crust? ▾
Cook your stone-ground grits in water according to package directions (usually 20–25 minutes for regular stone-ground grits) until they’re thick and creamy, with no raw gritty bite left. Take them off the heat, then stir in cheese, olive oil, and beaten egg quickly so the egg doesn’t curdle from the hot grits.
17.Can I cook this crust directly on a pizza stone for extra crispness? ▾
I don’t recommend sliding raw grits mixture directly onto a pizza stone, as the soft, wet mixture will spread and seep before it sets. If you want to use a pizza stone, pre-bake the crust on a parchment-lined pan first, then transfer the pre-baked crust (on parchment) to the hot stone for the final bake with toppings.
18.What’s the best way to store and reheat leftover grits pizza? ▾
Let leftover slices cool completely, then store them in an airtight container in the fridge for up to 3 days. Reheat slices in a 400°F oven or toaster oven for 5–7 minutes until the crust crisps back up. Skip the microwave, which will turn the crispy crust soft and mushy, ruining that perfect texture contrast.

Comments (18)

2 days ago

OMG this grits pizza crust is a total game changer! I’ve been gluten free for 3 years and was so sick of store bought crusts that taste like cardboard. This got crispy on the edges, held all my pepperoni and mushroom toppings perfectly, and my kids didn’t even notice it wasn’t regular pizza crust. 10/10 will be making this every Friday pizza night from now on!

1 week ago

Perfect for my weekly meal prep! I made a batch on Sunday, cut it into slices, and kept it in the fridge for quick lunch pizzas all week. It held up way better than I thought it would, no sogginess even after reheating in the toaster oven. Super easy too, I’m not much of a cook and I pulled this off no problem.

3 days ago

Brought this to our neighborhood potluck last weekend and everyone was asking for the recipe! I topped mine with BBQ chicken and red onion, and people went back for seconds. Who knew grits could make such a good pizza crust? So creative!

just now

Bro this is so cheap to make and tastes insane. I’m a broke college student with like 3 ingredients in my pantry most days, and this worked perfectly with the quick grits I had lying around. Topped it with leftover taco meat and cheese, chef’s kiss.

2 hours ago

I was skeptical at first but wow, this crust is SO good. I love that it’s higher in fiber and protein than regular white flour crust, and it doesn’t leave me feeling bloated after eating two slices. Only thing I did differently was add a little garlic powder to the grits while they cooked, would recommend!

2 weeks ago

As someone who grew up eating grits for breakfast every Saturday, I was so excited to try this savory take. It tastes like home! I topped mine with sausage gravy, scrambled eggs, and cheese for a breakfast pizza and my whole family devoured it. Will be making this for brunch next month when my sister visits.

30 minutes ago

Wait, quick question—can I use instant grits for this or do I need the stone ground kind? I have a box of instant in my cabinet and don’t want to run to the store if I don’t have to!

5 minutes ago

Great question! Instant grits work totally fine for this recipe, just make sure to cook them a little thicker than the package directions say so the crust holds together when you add toppings. Stone ground will give you a nuttier flavor, but instant is a great quick swap!

yesterday

Ugh I tried this last night and my crust came out super mushy in the middle? Did I do something wrong? I followed the cook time exactly but it just didn’t crisp up like the photos.

2 hours ago

I’m sorry to hear that! The most common reason for a mushy center is not spreading the grits thin enough on your baking sheet, or not letting them cool for 10 minutes before adding toppings. Try pressing them into an even 1/4 inch layer next time, and par-bake for 5 extra minutes if you like extra crispy crust!

1 week ago

Game. Changer. I made this last night for my partner who is obsessed with all things pizza, and he said it’s one of the best crusts he’s ever had, even better than our local takeout spot. We did a supreme topping with peppers, olives, sausage, and extra cheese. No leftovers at all!

5 days ago

Ooh the supreme topping idea sounds amazing! I’ve only done pepperoni so far, I’m definitely trying that next time. Did you pre-cook your sausage at all before putting it on top?

5 days ago

Is this vegan friendly if I use plant based butter and nutritional yeast instead of parmesan? I’ve been looking for more vegan pizza options that don’t cost a fortune at the grocery store.

3 days ago

Absolutely! Those swaps work perfectly, I’ve tested it with vegan butter and nutritional yeast and it comes out just as crispy and flavorful. You can also sprinkle a little vegan mozzarella on the edges for a cheesy crust effect if you want!

2 days ago

This is now my go-to weeknight dinner! 40 minutes total cook time is no joke, I got home from work at 6, had pizza on the table by 6:40, and my 10 year old ate three slices. Way faster than waiting for delivery too, saved me $20 on takeout.

yesterday

Right?! I was shocked how fast it comes together. I keep a bag of grits in my pantry now specifically for last minute dinners when I don’t have anything else planned.

5 minutes ago

Tried this for the first time yesterday and I have to say, the texture is way better than I expected. I was worried it would be grainy but it’s smooth, crispy on the edges, chewy in the middle just like regular pizza crust. I added a little cajun seasoning to the grits for a kick, highly recommend.

just now

Cajun seasoning is such a good call! I added red pepper flakes last time but cajun would be way better, especially with andouille sausage toppings. Thanks for the idea!

1 week ago

Can I freeze the pre-baked crust for later? I like to make a bunch of crusts ahead of time so I can just pull one out and top it on busy nights.

5 days ago

You totally can! Let the par-baked crust cool completely, wrap it tightly in plastic wrap and foil, and it will keep in the freezer for up to 3 months. No need to thaw when you’re ready to use it, just add toppings and bake an extra 5 minutes!

2 weeks ago

My kid has sensory issues with regular pizza crust texture and refuses to eat it, but I saw this recipe and thought I’d give it a shot. IT WORKED. He ate two whole slices last night and asked if we can have it again tomorrow. I could cry, pizza night has been a battle for 2 years.

1 week ago

Oh my gosh this gives me so much hope! My son is the same way, he hates the chewy bready texture of regular crust but loves grits. I’m making this tonight, fingers crossed it goes over well!

5 days ago

This makes my day to hear! So many families have told me this works great for kids who don’t like traditional crust, I hope your son loves it too, Amy!

5 days ago

Wait a second—has anyone tried making this as a breakfast pizza? I’m thinking sausage, egg, cheese, maybe some maple drizzle? Would the sweet and savory work here?

3 days ago

I did that last weekend! It was insane. I cooked the grits with a little extra black pepper, topped with crumbled bacon, scrambled eggs, cheddar, and a tiny drizzle of hot honey. Everyone at brunch went crazy for it.

2 days ago

Seconding the hot honey drizzle! I did a breakfast version too with sausage gravy instead of pizza sauce and it tasted like my grandma’s kitchen. 10/10

yesterday

Wait how many net carbs are in a serving of this? I’m doing low carb for my diabetes and need to track, it looks delicious but I can’t find the nutrition info!

2 hours ago

Hi Lisa! A 1/4 crust serving (the size of one personal pizza slice) comes out to around 18g net carbs if you use regular grits. If you use lower-carb grits alternatives, that number drops a bit. I’m working on adding full nutrition info to all my recipes very soon!

30 minutes ago

For what it’s worth, I made this last week and counted 19g net carbs per slice, and it didn’t spike my blood sugar nearly as bad as regular flour crust does! Just make sure to load it up with protein and veggie toppings to balance it out.

3 days ago

Has anyone tried making this in an air fryer instead of the oven? My oven broke last week and I’m surviving off my air fryer right now, I really want to try this!

2 days ago

I did! Press the grits into a small pan that fits in your air fryer, par bake at 375 for 15 minutes, add toppings, then air fry another 5-7 minutes until the cheese is melted. It gets SO crispy on the edges, better than the oven version honestly.

yesterday

Thanks for sharing that tip, Rae! I’ve had a few people ask about air fryer instructions, I’m going to test that method this week and add it to the official recipe notes!

1 week ago

I added a little creole seasoning and topped mine with shrimp, andouille, and bell peppers for a creole shrimp pizza and it was the best thing I’ve cooked all month. Who would’ve thought grits + pizza would be such a perfect match?

5 days ago

OH that sounds incredible. I have a bag of frozen shrimp in my freezer right now, I’m absolutely making this this weekend. Do you cook the shrimp first before putting it on the crust?

2 days ago

I sautéed them for 2 minutes with a little creole seasoning first so they didn’t get watery on the crust! Worked perfectly, no sogginess at all.



