
Habanero Mac and Cheese

title 1
Habanero Mac and Cheese
⏱️ cook time 35 minutes
🍽️ servings 6
⚡ Difficulty medium

intro

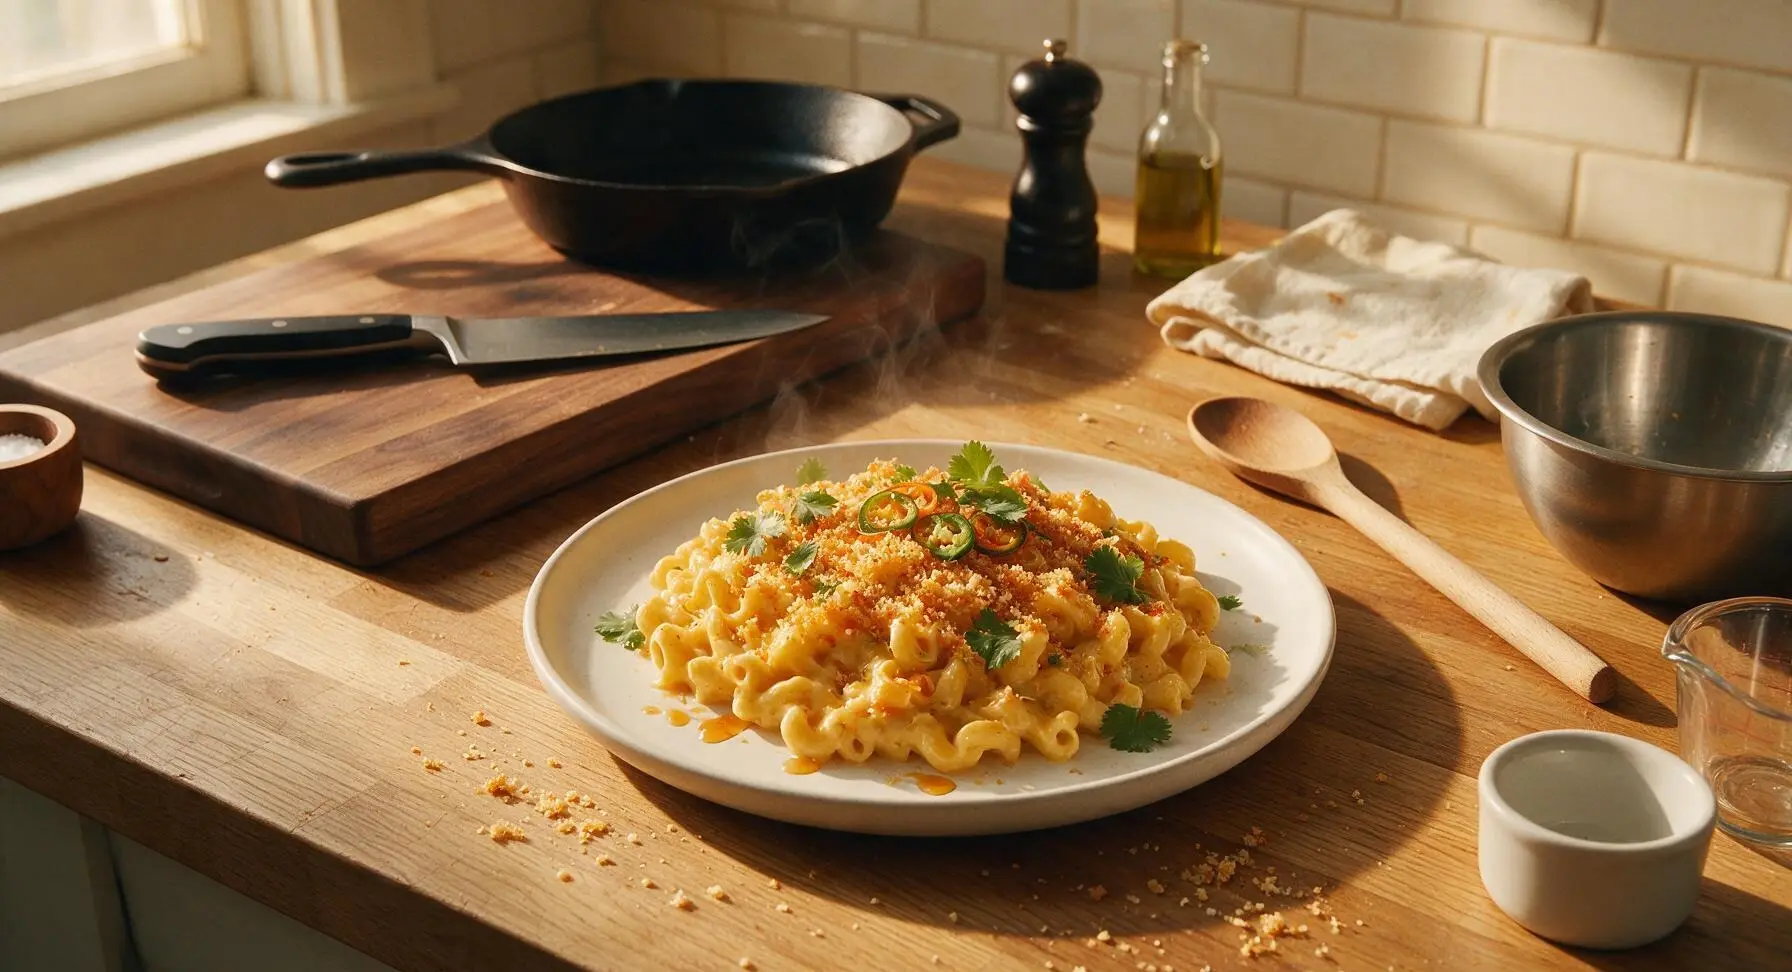
Velvety, rich baked mac and cheese with a slow, fiery habanero kick, crispy golden panko top, and balanced sharp cheese flavor—perfect shareable cozy comfort food.

Ingredients
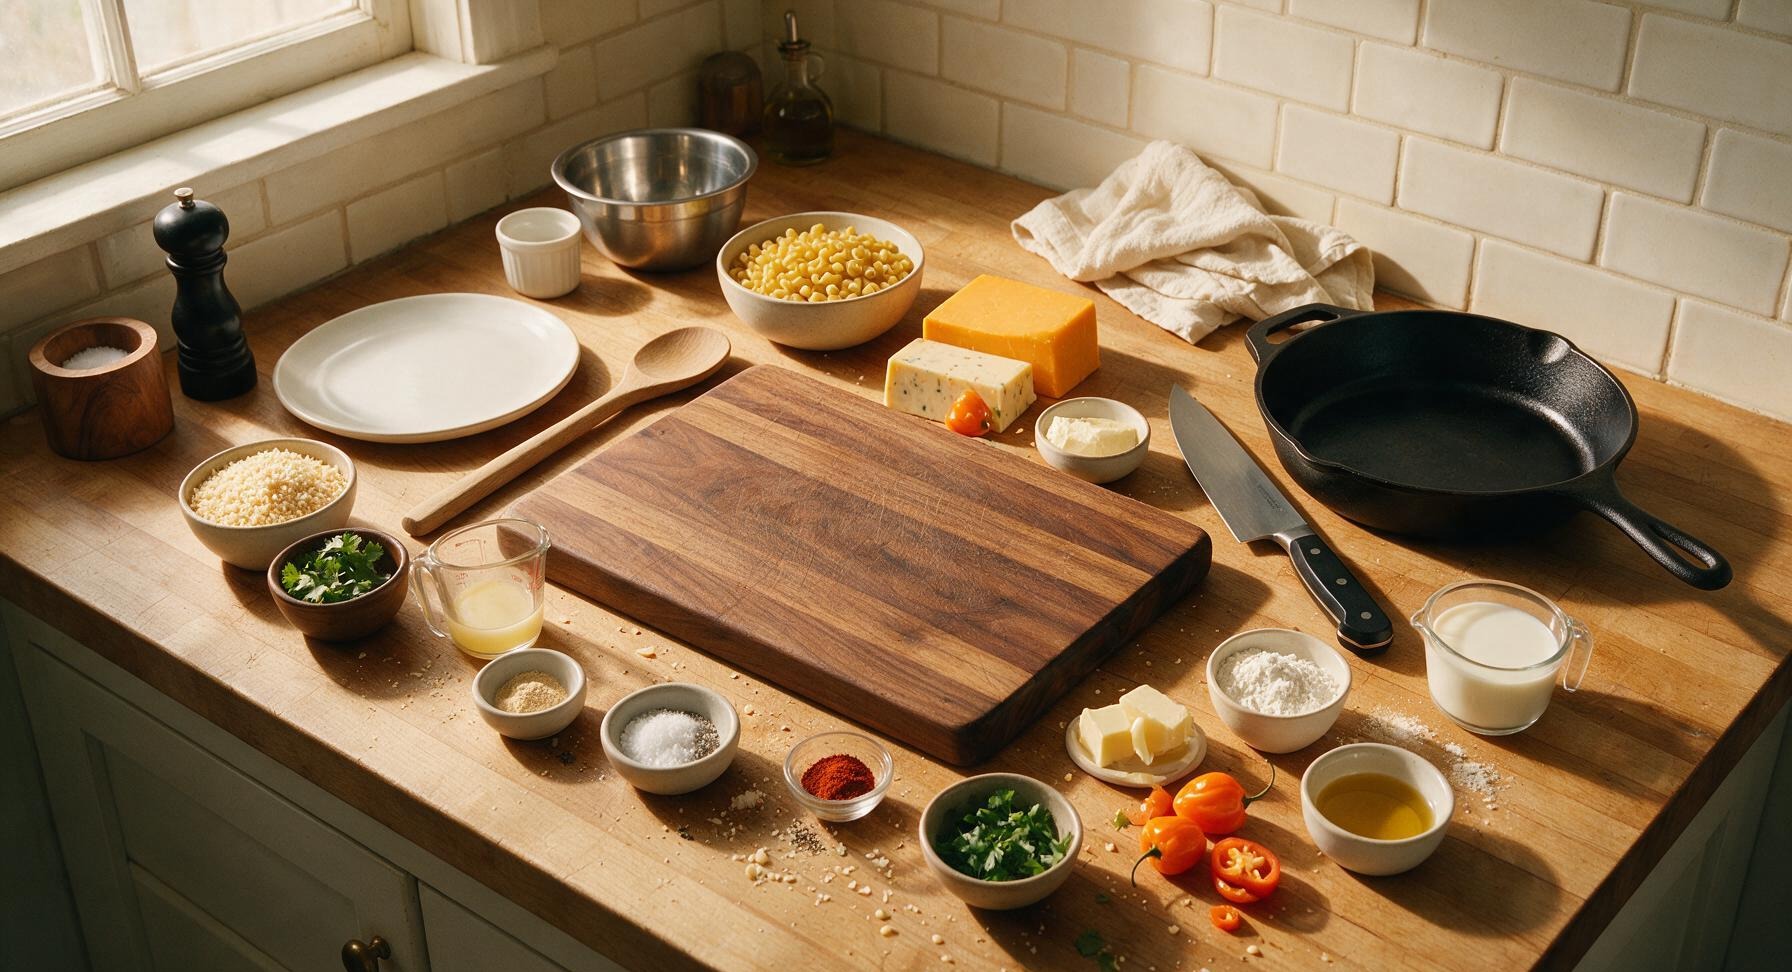
Dry elbow macaroni 1 lb (450g)
Sharp orange cheddar cheese 8 oz (225g)
Pepper jack cheese 4 oz (115g)
Fresh habanero peppers 3 (2 diced, 1 sliced for garnish)
Unsalted butter 4 tbsp (55g)
All-purpose flour ¼ cup (30g)
Whole milk 3 cups (720ml)
Panko breadcrumbs 1 cup (60g)
Garlic powder 1 tsp
Smoked paprika ½ tsp
Kosher salt 1.5 tsp
Freshly ground black pepper ½ tsp
Fresh cilantro 2 tbsp (chopped)

Steps

1

Prep Base Ingredients

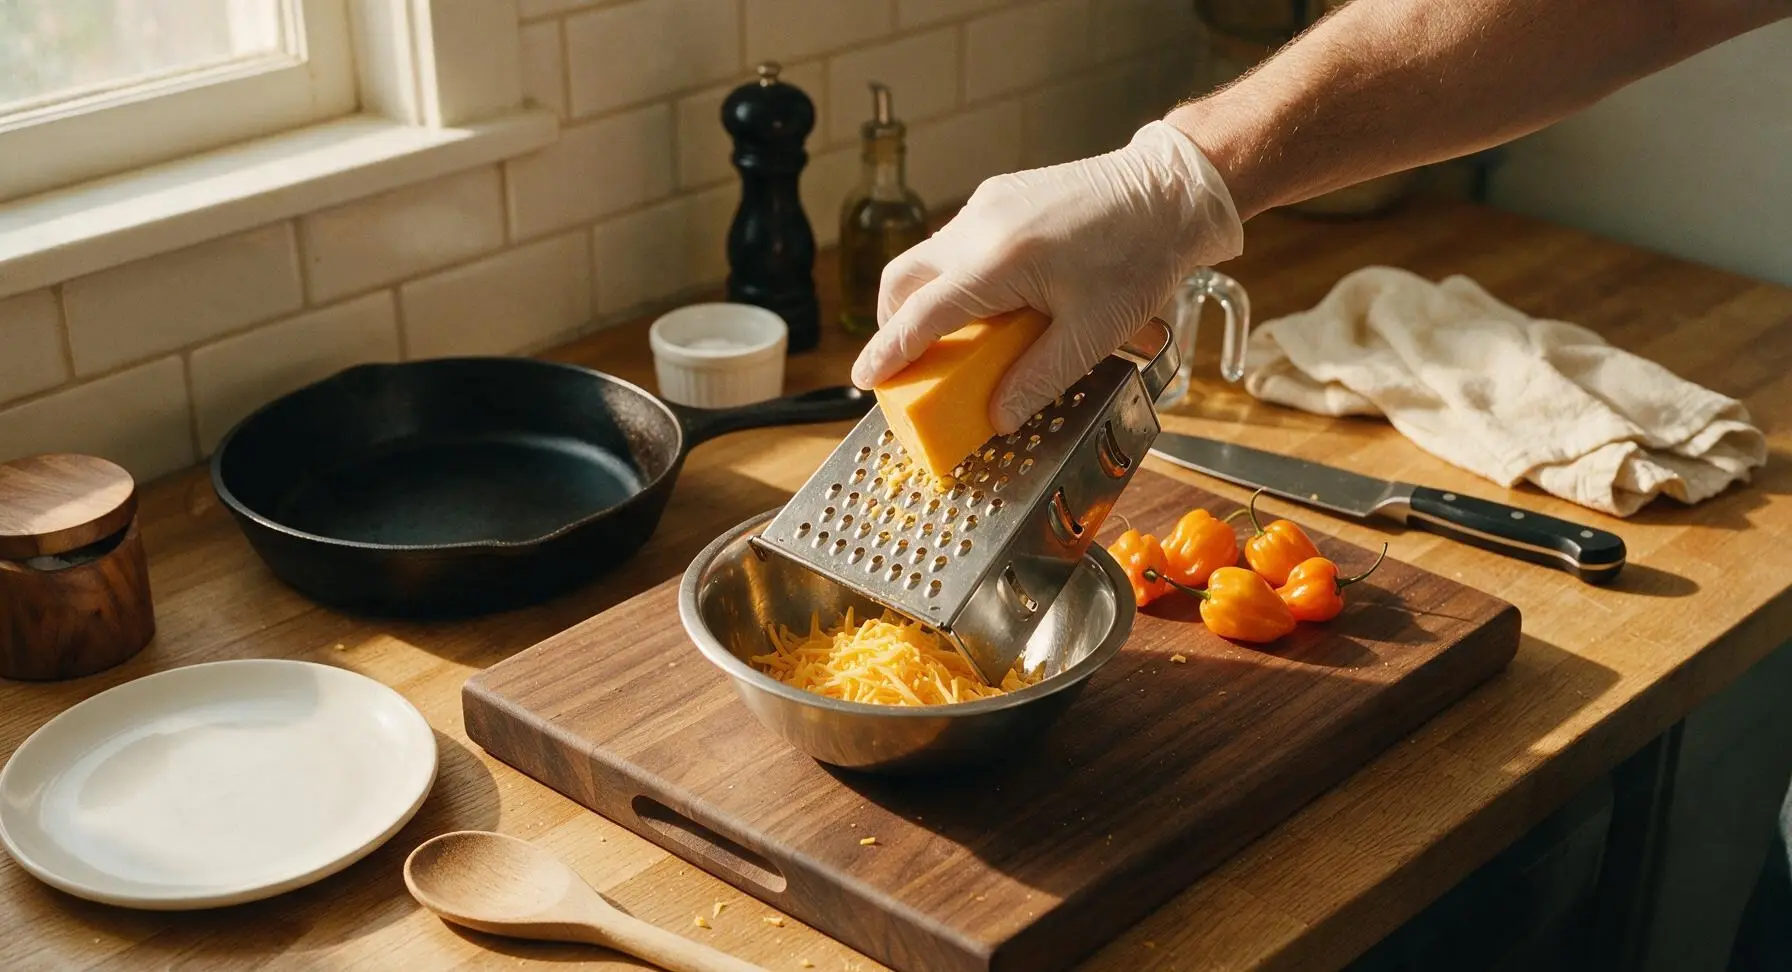
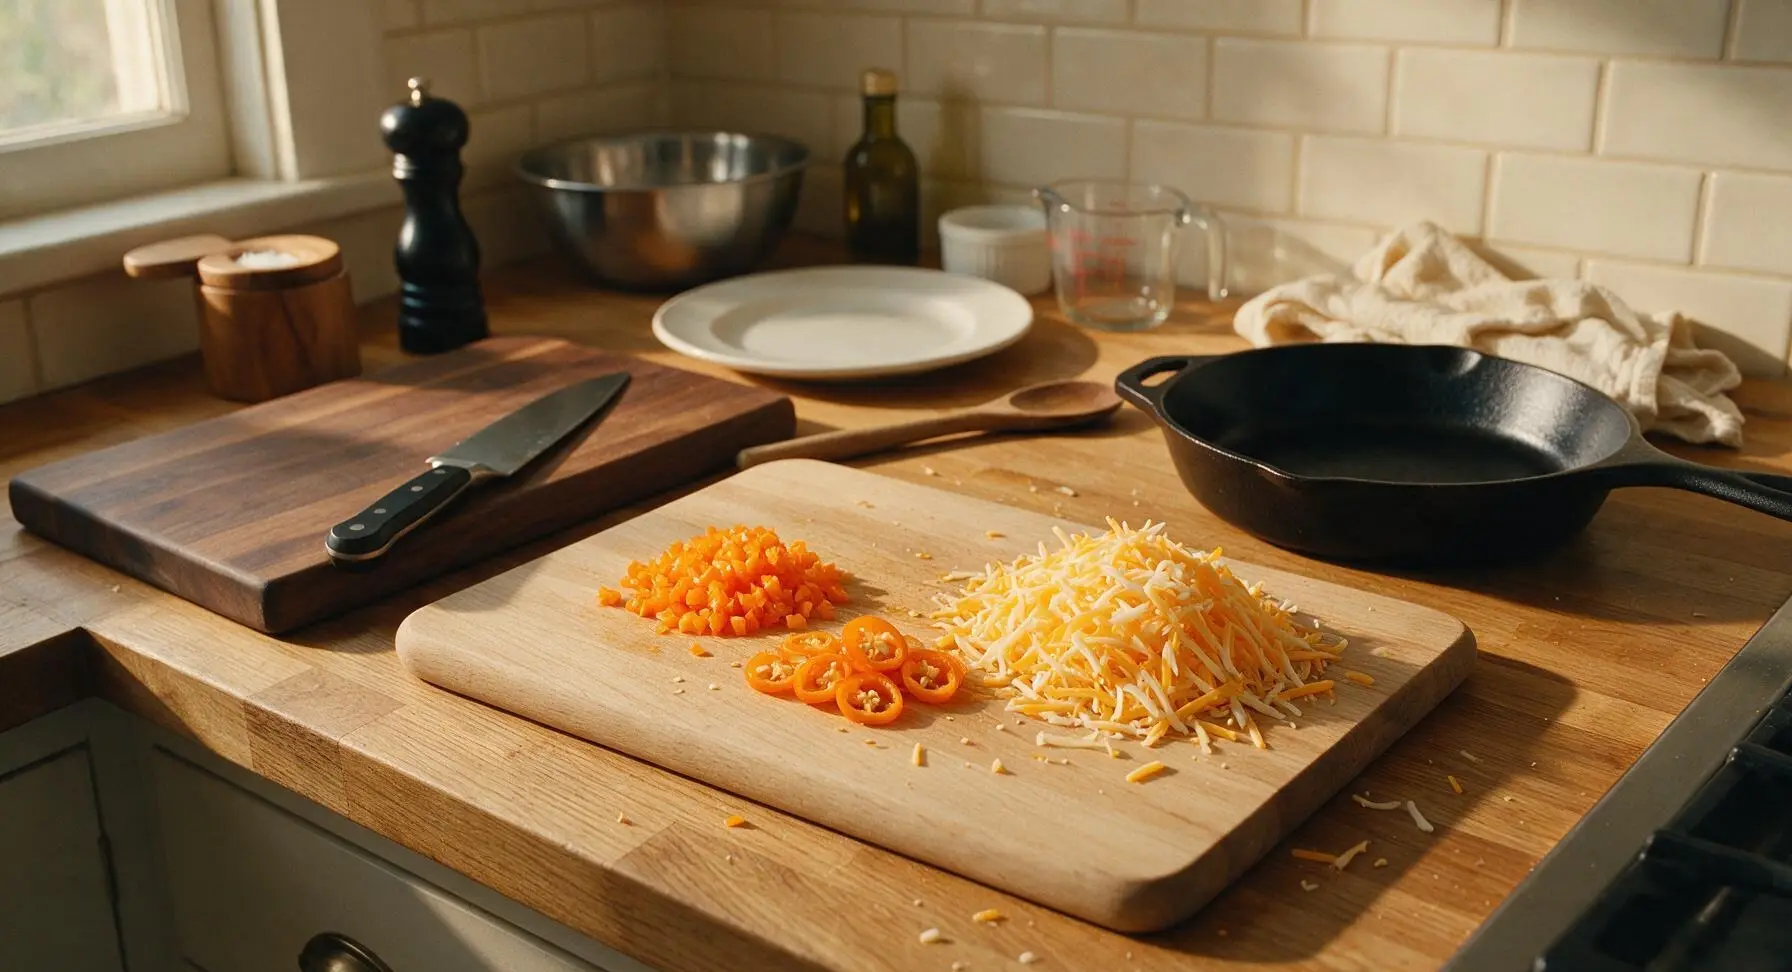
Set the beech wood cutting board at the center of the counter. Wear disposable food gloves if available to handle habaneros to avoid capsaicin irritation. Use the box grater to shred the sharp cheddar and pepper jack cheeses into the small stainless steel mixing bowl; set aside. Stem, seed, and finely dice 2 habanero peppers, then thinly slice the third habanero into rings for garnish, leaving seeds in the garnish slices for extra heat if desired. Discard habanero stems and seeds, and avoid touching your face while handling peppers.
Step 1
step1:Prep Base Ingredients
Step 1
step1:Prep Base Ingredients
2

Boil Pasta to Al Dente

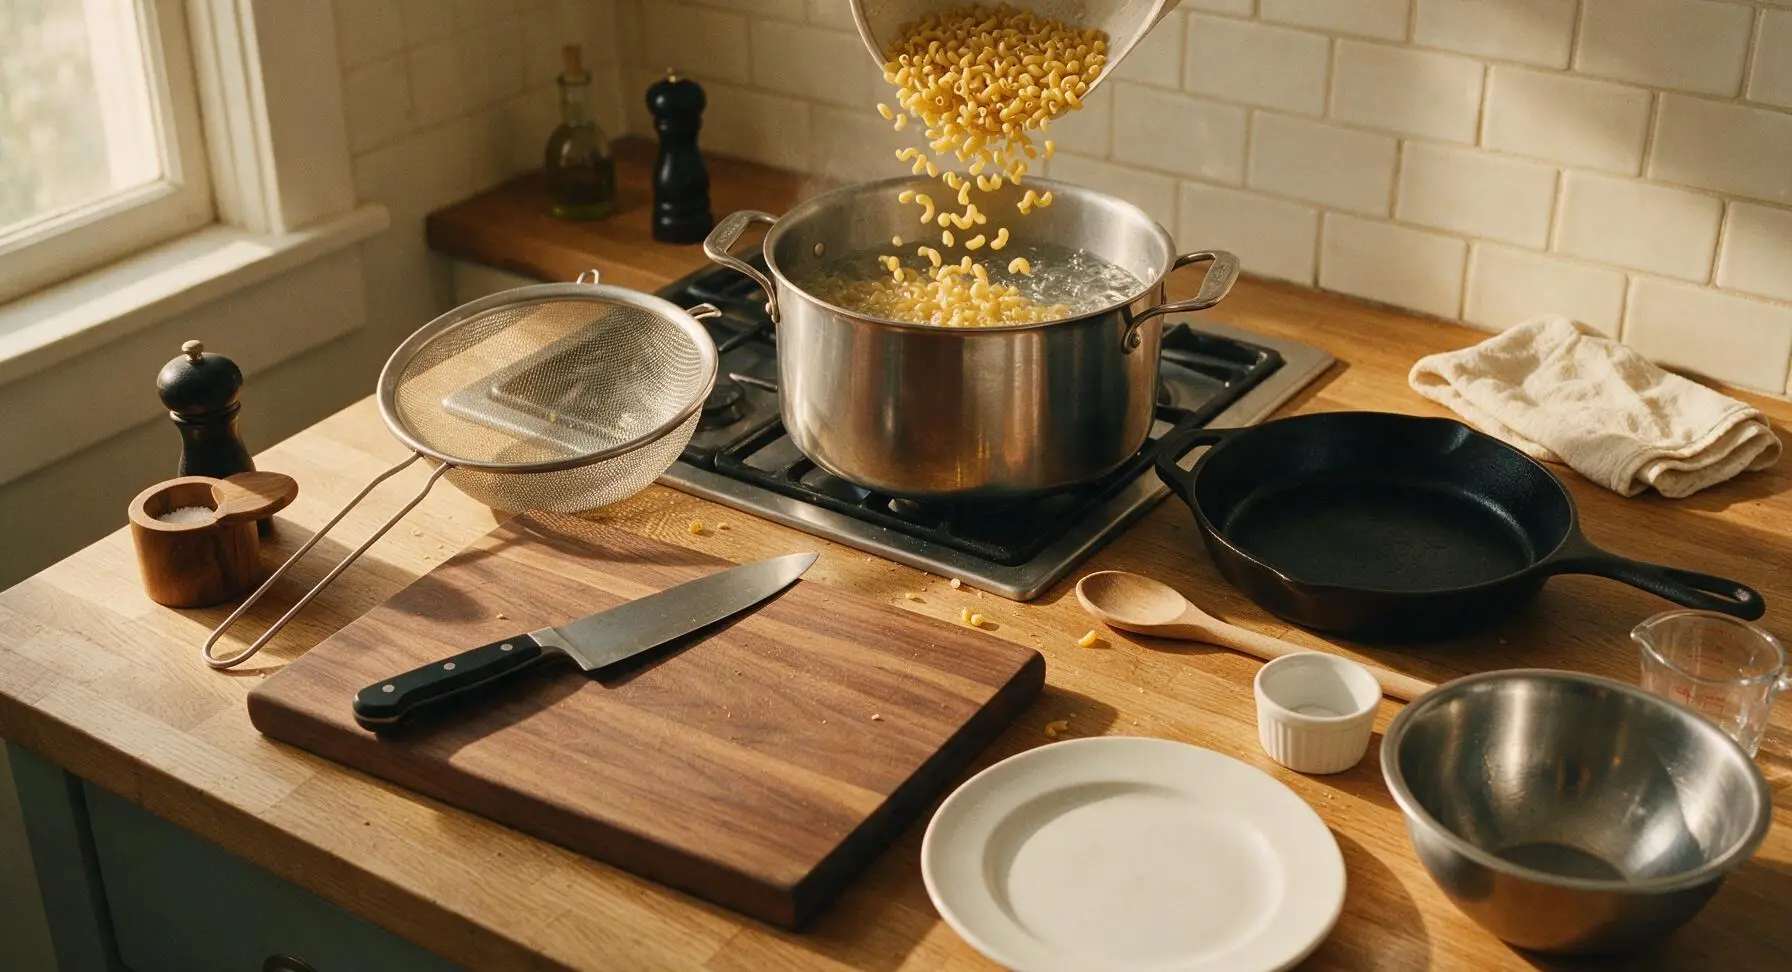
Fill the 5-quart stainless steel stock pot with 4 quarts of water, add 1 tablespoon of kosher salt, and bring to a rolling boil over high heat. Add the dry elbow macaroni and cook for 7 minutes, stirring occasionally, until the pasta is just al dente — it should have a slight firm bite at the center, as it will continue cooking during baking. Do not overcook to a mushy texture.
Step 2
step2:Boil Pasta to Al Dente
3

Drain Cooked Pasta

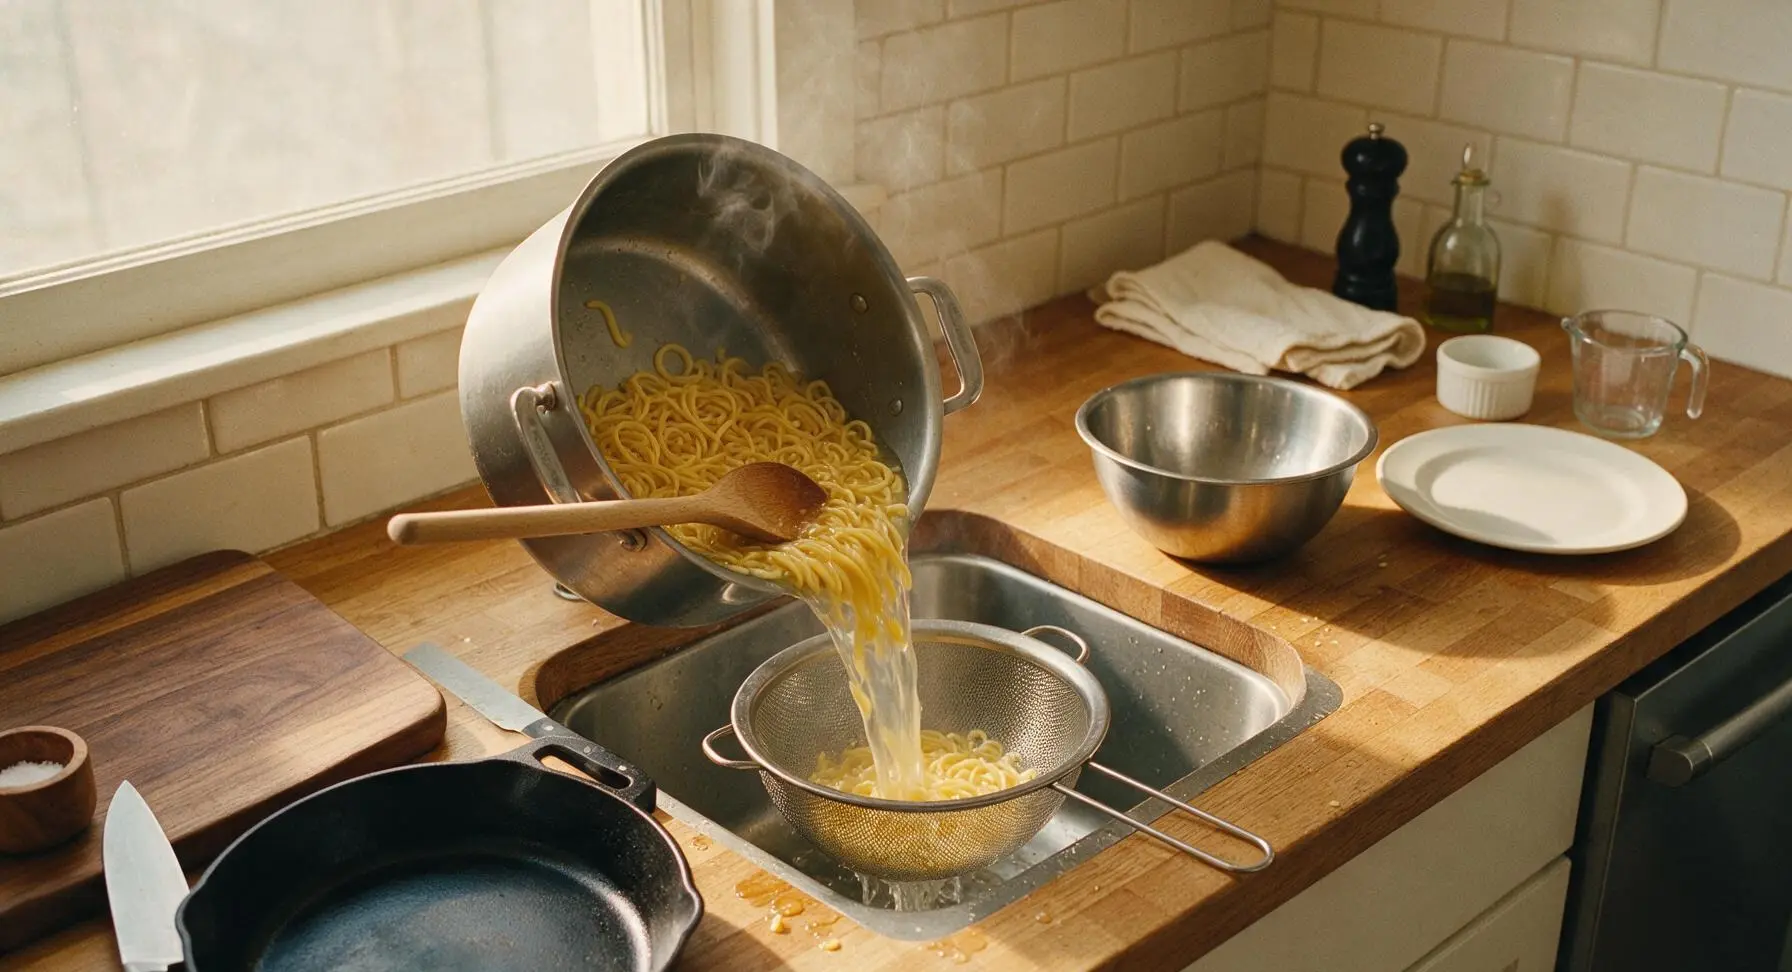
Once pasta reaches al dente texture, turn off the heat, and pour the pasta and water into the stainless steel mesh colander set in the sink. Shake gently to remove all excess starchy water, then set the colander with drained pasta aside; do not rinse the pasta, as the surface starch helps the cheese sauce adhere evenly to the noodles.
Step 3
step3:Drain Cooked Pasta
4

Make Spicy Roux Base

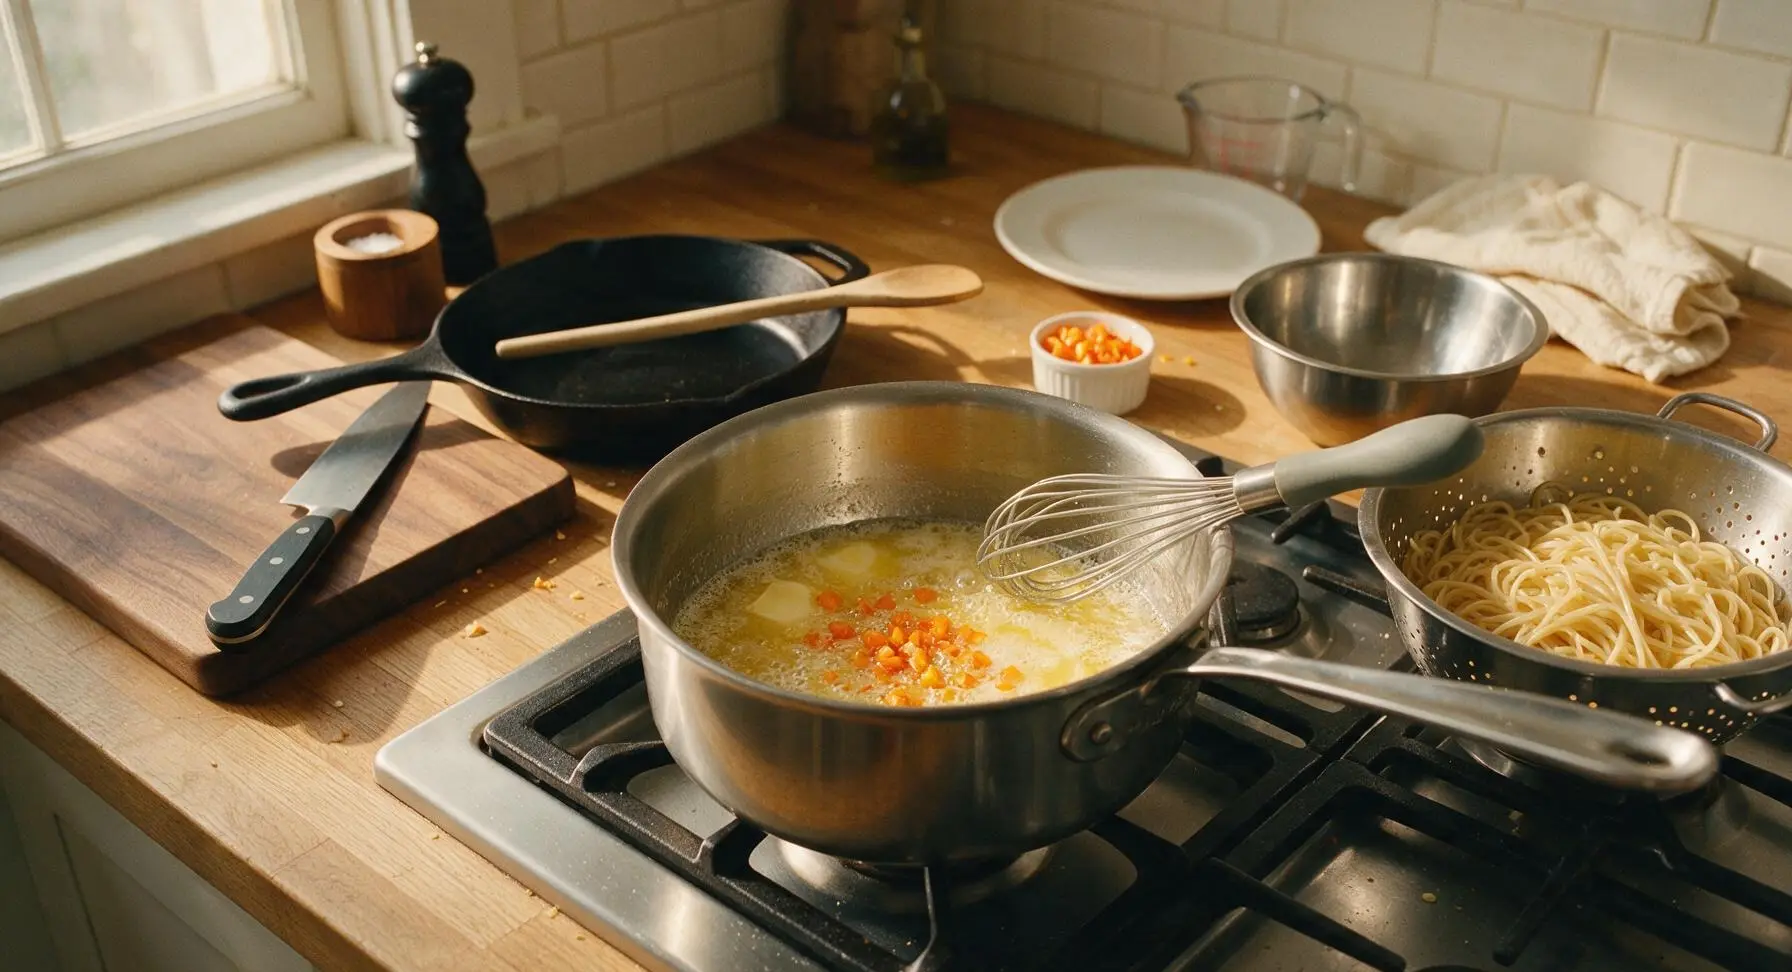
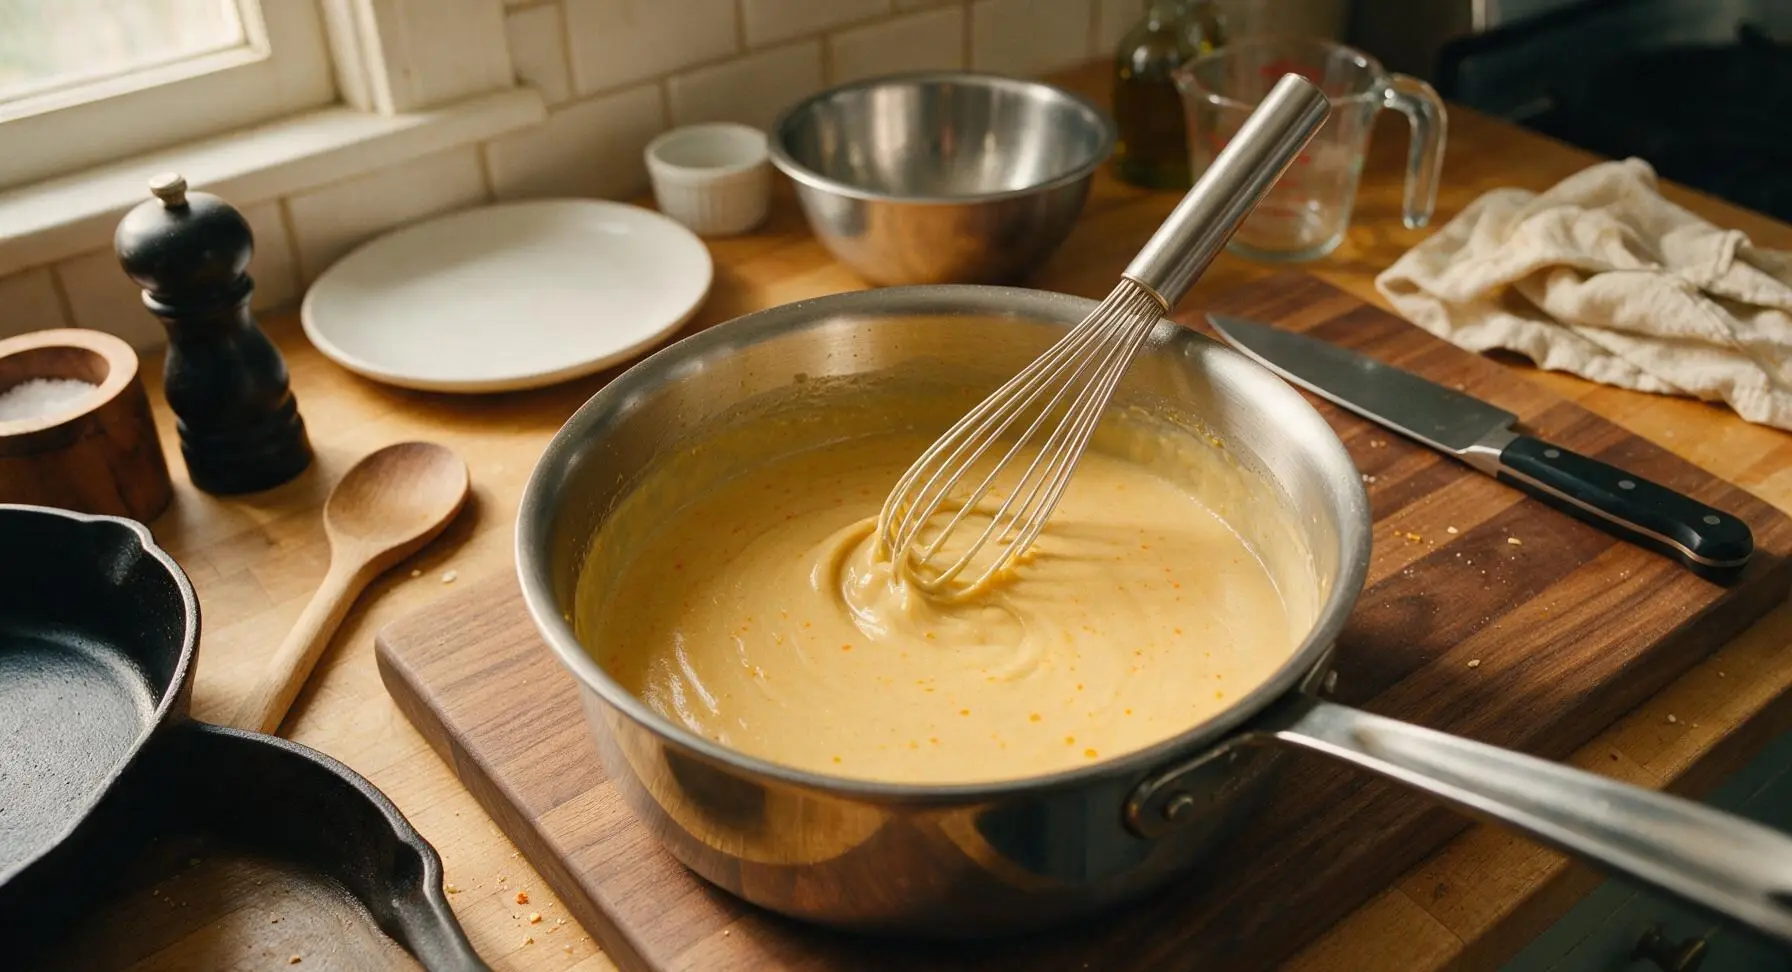
Place the 3-quart heavy-bottomed stainless steel saucepan over medium heat. Add 4 tablespoons of unsalted butter, and melt completely until foaming subsides, about 2 minutes. Add the finely diced habanero peppers and sauté for 1 minute until fragrant, then whisk in the ¼ cup all-purpose flour to form a smooth roux. Cook the roux for 2 minutes, whisking constantly with the silicone whisk, until it turns a pale golden color and smells nutty, to remove raw flour taste.
Step 4
step4:Make Spicy Roux Base
Step 4
step4:Make Spicy Roux Base
5

Build Creamy Cheese Sauce

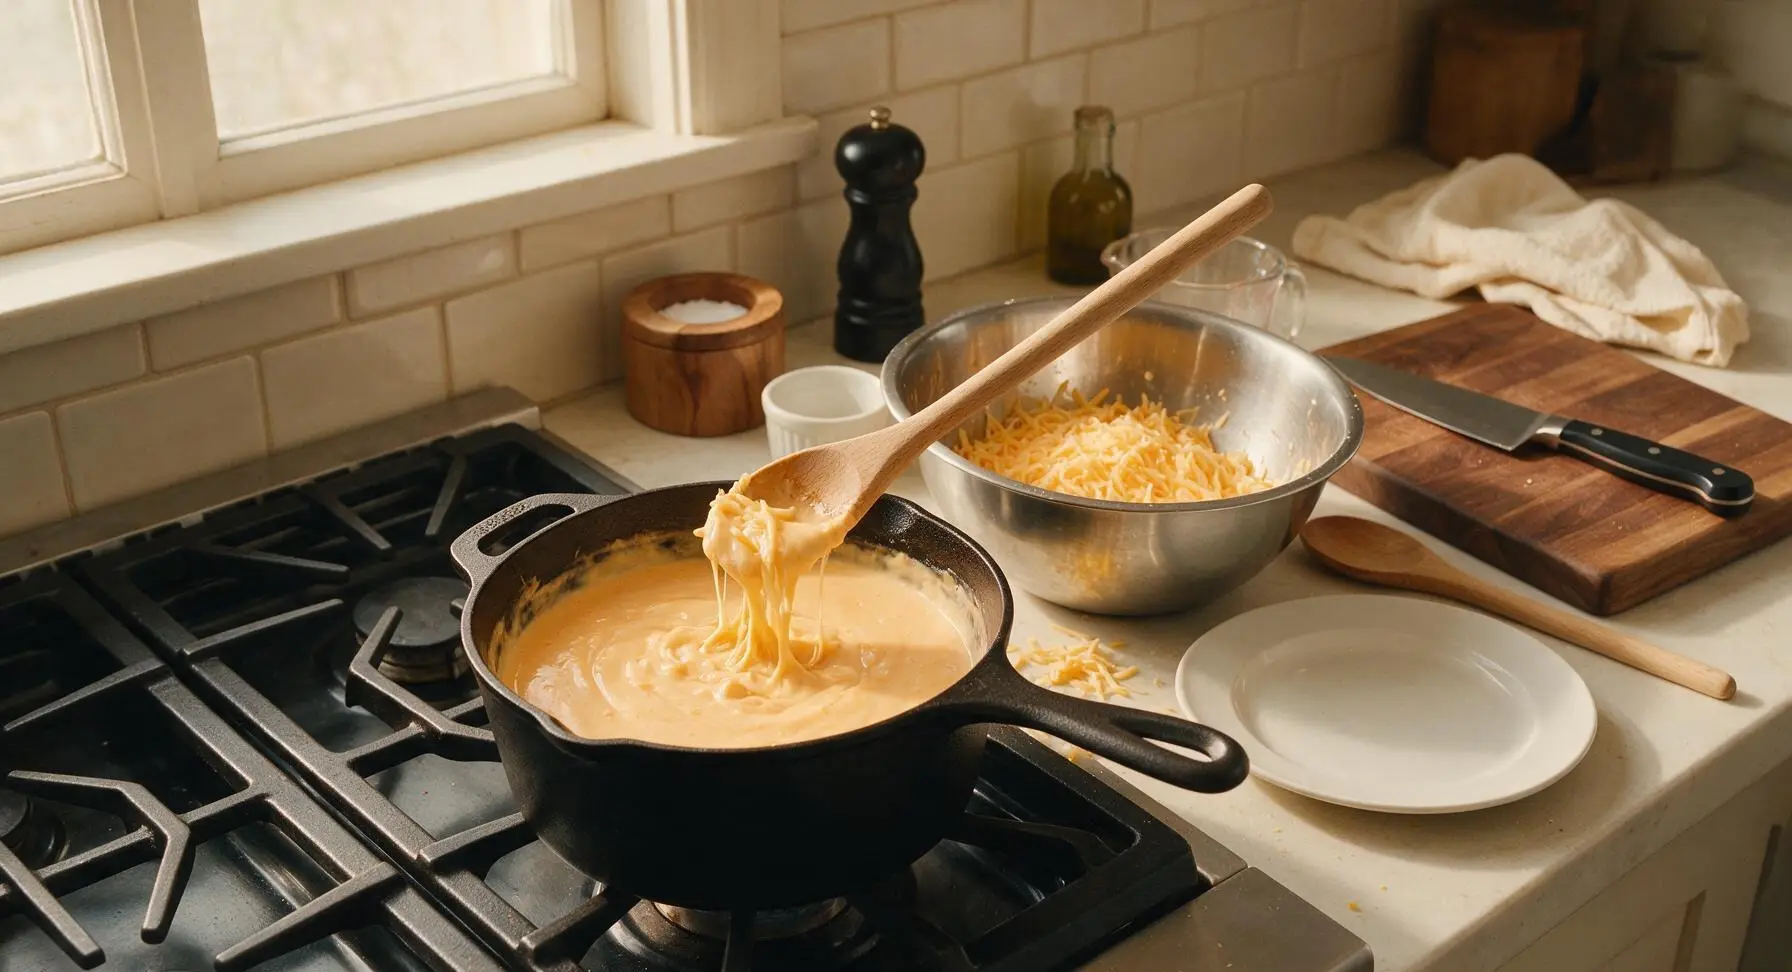
Slowly pour warmed whole milk into the roux, ½ cup at a time, whisking constantly after each addition to prevent lumps from forming. Once all milk is added, continue cooking the sauce for 4-5 minutes, whisking occasionally, until it thickens enough to coat the back of a spoon (run your finger across the coated spoon; the line should hold without running). Turn heat to low, then stir in 1 teaspoon garlic powder, ½ teaspoon smoked paprika, ½ teaspoon kosher salt, and ½ teaspoon black pepper. Add ¾ of the shredded cheese mixture, a handful at a time, stirring with the wooden spoon until fully melted and smooth, then remove the pan from heat.
Step 5
step5:Build Creamy Cheese Sauce
6

Combine Pasta and Sauce

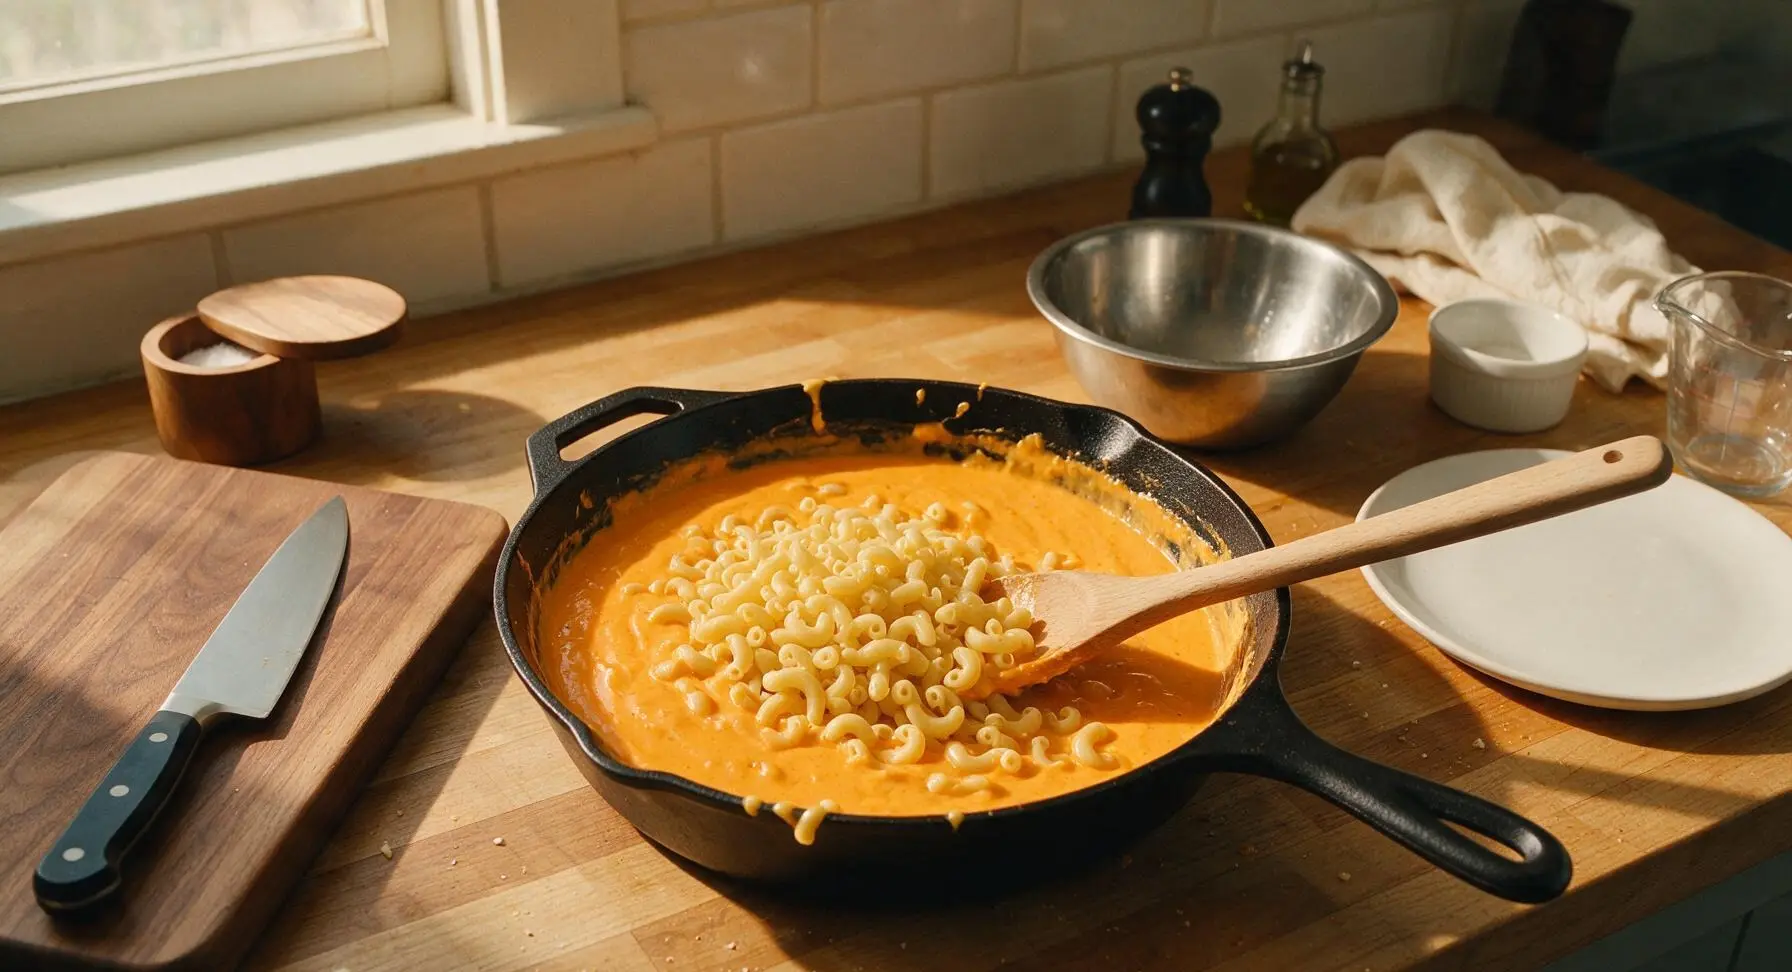
Add the drained elbow macaroni to the saucepan with the finished cheese sauce, stirring gently with the wooden spoon until every noodle is evenly coated in the thick, spicy cheese sauce. Taste and adjust salt if needed — the sauce should be well-seasoned, with a slow-building heat from the habaneros that does not overpower the rich cheese flavor.
Step 6
step6:Combine Pasta and Sauce
7

Assemble and Add Topping

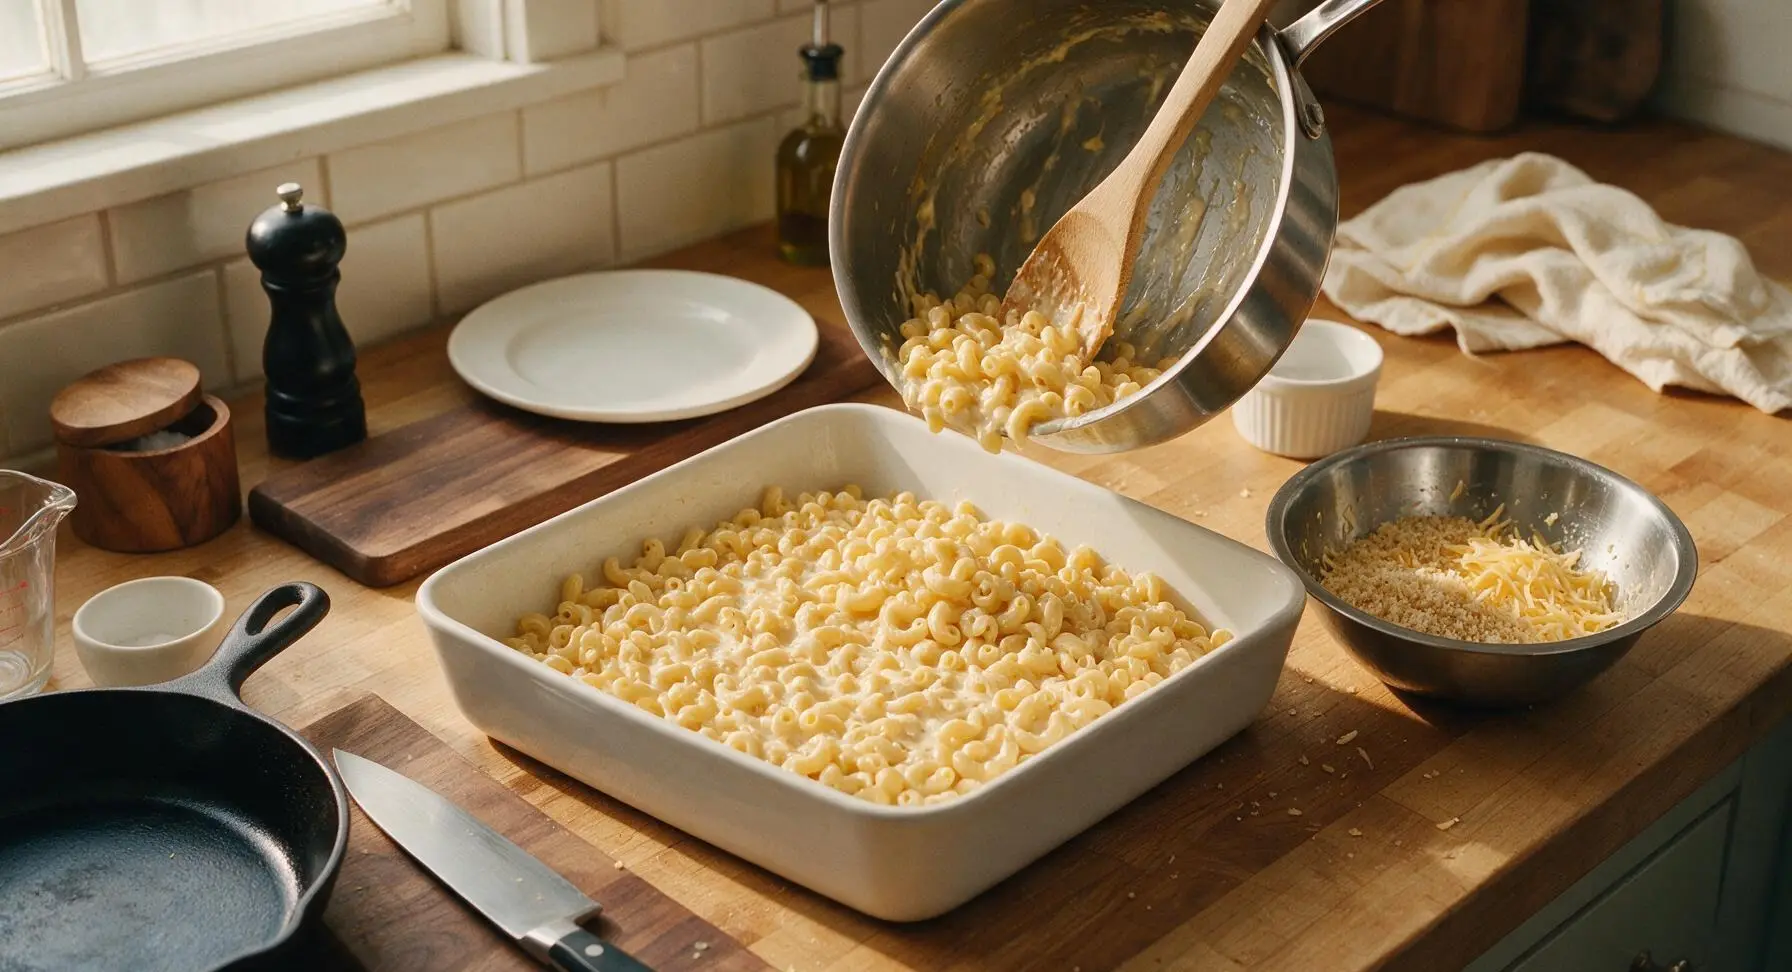
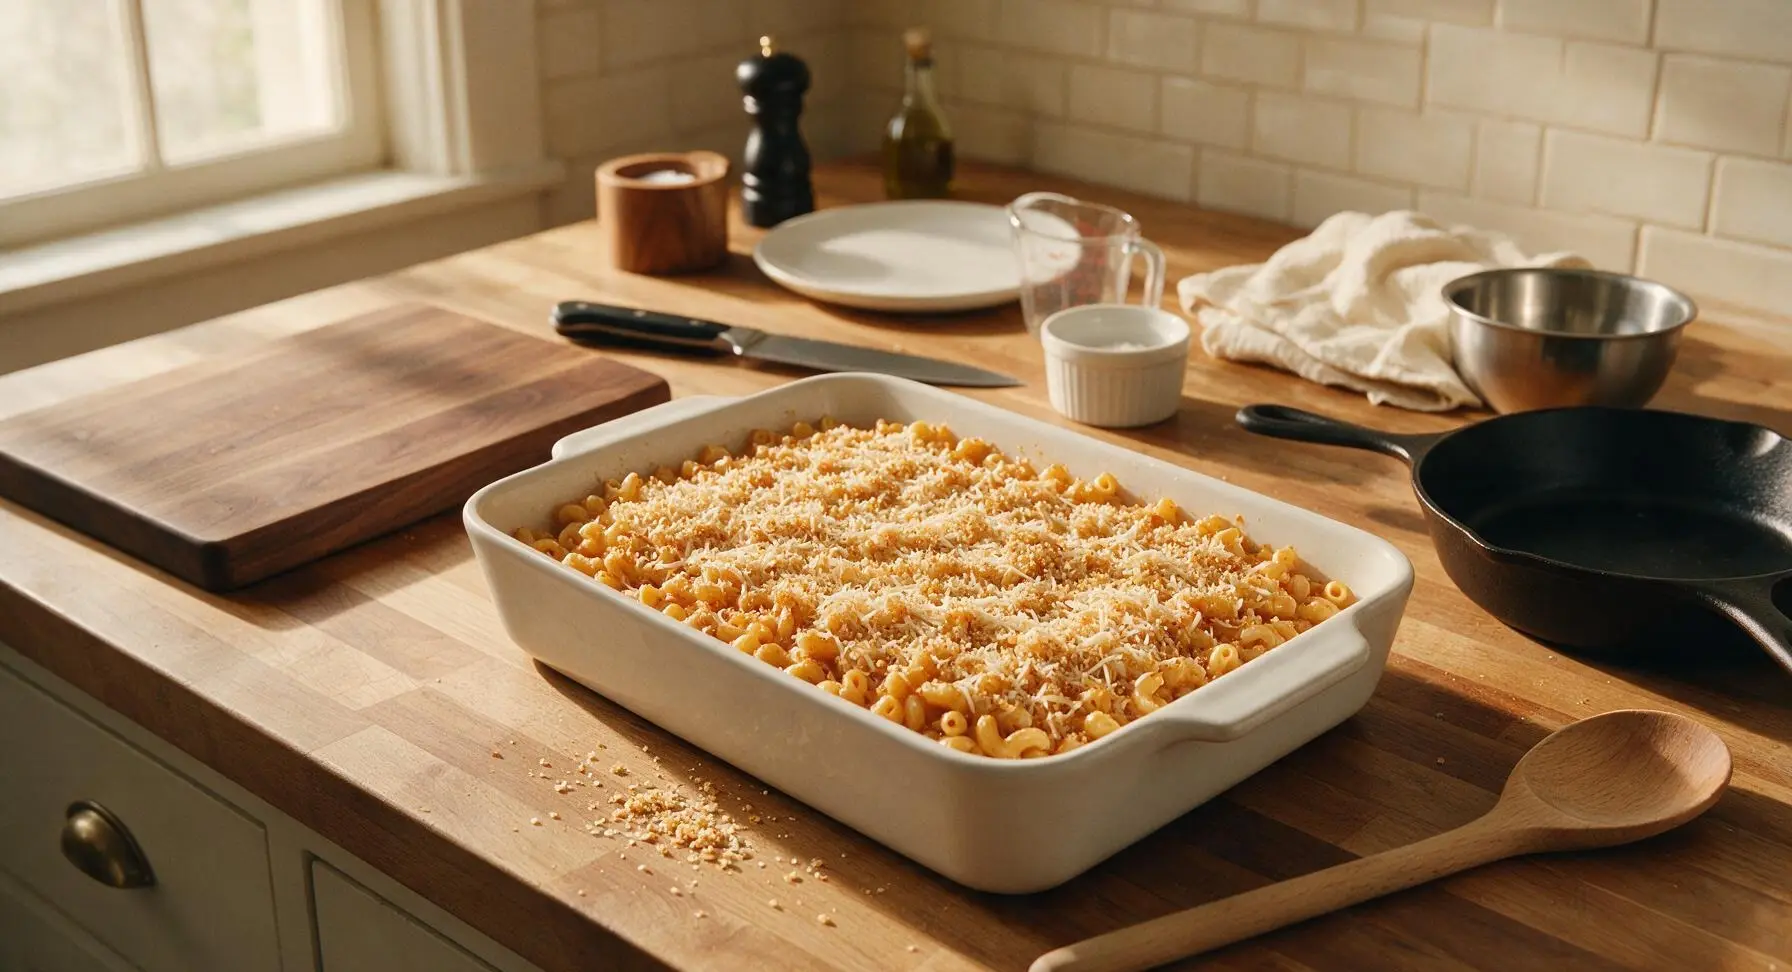
Pour the cheese-coated macaroni mixture into the 9x13 inch matte white ceramic baking dish, spreading it into an even layer with the wooden spoon. In the now-empty small stainless steel mixing bowl, toss the panko breadcrumbs with the remaining ¼ of shredded cheese, then sprinkle the mixture evenly over the top of the mac and cheese, covering the entire surface for a crispy baked top.
Step 7
step7:Assemble and Add Topping
Step 7
step7:Assemble and Add Topping
8

Bake Until Golden Bubbly

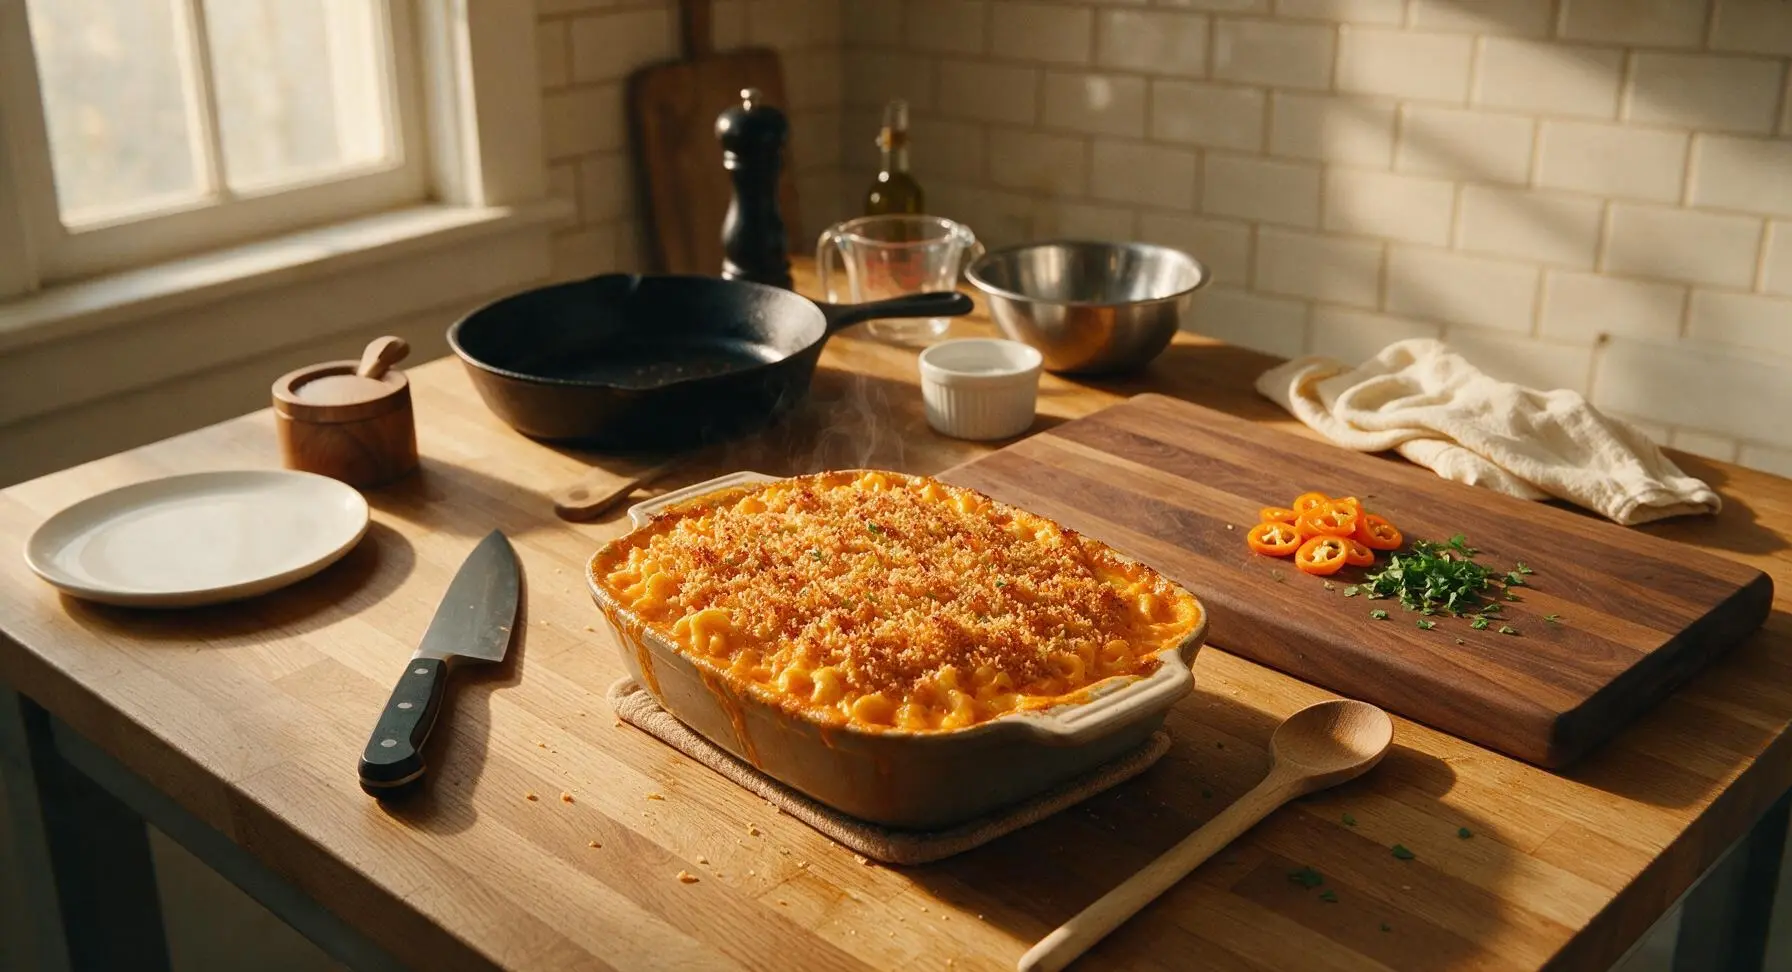
Place the baking dish on the middle rack of a preheated 375°F (190°C) oven. Bake for 20 minutes, until the cheese sauce is bubbling vigorously around the edges of the dish, and the panko topping is deep golden brown and crispy. Remove from the oven and let rest for 5 minutes before serving, to allow the sauce to set slightly. Garnish portions with thin habanero slices and chopped fresh cilantro.
Step 8
step8:Bake Until Golden Bubbly

Tips

1.Grate your own cheese instead of using pre-shredded packaged cheese. Pre-shredded cheese is coated in anti-caking potato starch that prevents it from melting into a smooth, velvety sauce, resulting in a grainy, separated texture.
2.Wear disposable food gloves when seeding and dicing habaneros. Habanero capsaicin oil can linger on skin for hours even after hand washing, causing painful irritation if you touch your eyes, nose, or sensitive skin.
3.Warm your whole milk in the microwave or small pan before adding it to the hot roux. Cold milk shocks the cooked flour-butter mixture, causing stubborn lumps that cannot be whisked smooth; slightly warm milk guarantees a silky, lump-free sauce.


✨ You May Also Like

Main Course
🍜 United Kingdom

A showstopping classic of tender seared beef, savory mushroom duxelles, and crisp prosciutto wrapped in flaky golden puff pastry, baked to juicy perfection.

⏱️ 2 hours 1Main Course ★ 4.7
Main Course
🍜 India

Tender charred marinated chicken simmered in a rich, spiced creamy tomato sauce, this iconic Anglo-Indian curry pairs perfectly with basmati rice or warm naan.

⏱️ 50 minuteMain Course ★ 4.6
Main Course
🍜 Thailand

Classic tangy, sweet, and savory Thai stir-fried rice noodles with shrimp, tofu, and crunchy garnishes, balancing all five core Thai flavor profiles.

⏱️ 30 minuteMain Course ★ 4.5
Main Course
🍜 United Kingdom

Crispy golden beer-battered cod and fluffy double-fried chips, served with tangy tartar sauce and malt vinegar: the timeless, beloved British pub comfort classic.

⏱️ 45 minuteMain Course ★ 4.7
Main Course
🍜 Mexico

Smoky, chile-marinated pork tacos with caramelized pineapple, fresh cilantro, and lime: a beloved classic Mexican street food perfect for casual summer gatherings.

⏱️ 1 hour 45Main Course ★ 4.8
Main Course
🍜 United States

Crunchy Fritos corn chips layered with savory beef chili and melted cheddar, topped with cool, zesty fixings for a beloved, cozy Tex-Mex comfort food.

⏱️ 35 minuteMain Course ★ 4.8

Habanero Mac and Cheese:Frequently Asked Questions

1.How spicy is this habanero mac and cheese, and can I adjust the heat to suit my tolerance? ▾
It delivers a slow, bright, fiery kick rather than a searing, unpalatable burn, since the rich cheese base mellows the fresh habaneros. To lower heat, fully remove all habanero seeds and pale inner membranes (where most capsaicin lives) or use 1 pepper instead of 2. For extra fire, leave membranes intact and add a pinch of cayenne.
2.Can I use pre-shredded cheese instead of grating my own for this recipe? ▾
I strongly recommend grating your own sharp orange cheddar and pepper jack for the silkiest possible sauce. Pre-shredded cheese is coated in potato starch and anti-caking agents that keep shreds separate in the bag, but those additives make the finished cheese sauce grainy, less velvety, and slower to melt evenly.
3.Do I have to bake this mac and cheese, or can I serve it straight from the stovetop? ▾
Baking creates that signature crispy golden panko top and helps the bright habanero and sharp cheese flavors meld, but you can skip the oven if you’re short on time. If you go stovetop, toast the panko in a little melted butter in a small skillet over medium heat for 2-3 minutes until golden, then sprinkle over top before serving.
4.How do I keep the cheese sauce from turning grainy or breaking while I make it? ▾
Start by making a smooth roux with butter and flour, then whisk in warm (not cold) milk gradually to avoid lumps. Add your grated cheese off the heat, a handful at a time, stirring constantly—never boil the sauce once cheese is added, as high heat causes cheese proteins to seize and create a grainy, broken texture.
5.Can I make this habanero mac and cheese ahead of time for a potluck or party? ▾
Absolutely! Assemble the mac and cheese (hold the panko topping) in a baking dish, cover tightly, and refrigerate for up to 2 days. When you’re ready to bake, add the butter-tossed panko, tack on 10-12 minutes of bake time to account for the cold dish, and cook until bubbly around the edges.
6.What should I do if I accidentally make the dish too spicy? ▾
If your finished mac is too fiery, stir in a few extra spoonfuls of warm milk or a handful of extra shredded mild cheddar to mellow the heat. Serving individual portions with a dollop of sour cream, a side of cool coleslaw, or a squeeze of fresh lime juice also cuts capsaicin heat quickly without diluting cheese flavor.
7.Can I substitute a different pasta shape if I don’t have elbow macaroni? ▾
Dry elbow macaroni is classic because its ridges and hollow center hold thick cheese sauce beautifully, but you can swap in any short, sturdy pasta shape. Great alternatives include cavatappi, rotini, shells, or campanelle—just cook pasta 1 minute less than package directions so it stays firm and doesn’t turn mushy during baking.
8.How do I get the panko topping extra crispy instead of soggy? ▾
Toss the panko crumbs in melted unsalted butter first so every crumb is lightly coated, then spread it in an even, thin layer over the mac right before baking. For extra crunch, broil the top for 1-2 minutes at the end of bake time (watch closely to avoid burning) until it’s deep golden all over.
9.Can I add mix-ins like bacon or veggies to this recipe? ▾
Definitely, this recipe is super customizable! Crispy crumbled bacon, roasted corn, diced pickled jalapeños, sautéed bell peppers, or shredded cooked chicken all pair beautifully with the habanero and sharp cheese flavor. Just fold mix-ins into the pasta and sauce before adding to the baking dish for even distribution.
10.How should I store leftovers, and how long will they keep? ▾
Let leftover mac and cheese cool completely, then transfer it to an airtight container and refrigerate for up to 4 days. Reheat individual portions in the microwave or oven, stirring in a splash of milk as needed to loosen the cheese sauce back to its velvety texture. I don’t recommend freezing, as the sauce will separate and turn grainy when thawed.

Comments (13)

2 days ago

OMG this habanero mac and cheese is a GAME CHANGER. I brought it to our neighborhood potluck last weekend and people were coming back for thirds, I even had three people ask for the recipe! The heat is perfectly balanced with the creamy cheese, not so hot that you can’t taste all the cheesy goodness. 10/10 will make again for our next family dinner.

1 week ago

My kids loved it!!! I was worried the habanero would be too spicy for them so I used half a pepper first, and they gobbled it up faster than the boxed stuff I usually buy for busy weeknights. Already added this to our regular meal prep rotation, it reheats so well in the microwave for quick lunches.

5 days ago

Pretty solid recipe, though I found the cook time was a little long for my oven — my breadcrumb topping got a touch darker than I wanted at the 20 minute bake mark. Next time I’ll cover it with foil for the first half. Flavor is unreal though, the habanero adds such a nice zing without being overwhelming if you seed the peppers properly.

30 minutes ago

Medium difficulty is fair for this one! I’m still pretty new to making roux from scratch and I only messed up once (lumpy cheese sauce first try, oops) but it still turned out SO good. Served it with grilled chicken for my partner and I last night, he said it’s better than the mac we get at our local BBQ spot.

3 days ago

Wait, has anyone tried making this with a mix of sharp cheddar and pepper jack? I want to amp up the cheese flavor a little for a game day party this weekend, not sure if that would throw off the balance with the habanero.

2 days ago

Great question! That cheese combo works beautifully — I’ve tested it with half sharp cheddar/half pepper jack and it adds an extra little kick that pairs perfectly with the habanero. Just make sure to shred your cheese fresh for the silkiest sauce!

2 weeks ago

How spicy is this really? I have super low heat tolerance — like, mild salsa is too much for me most days. Would it be totally ruined if I skipped the habanero entirely and just added a pinch of paprika for color?

1 week ago

I’m a total spice wimp too! I used 1/4 of a habanero with all the seeds and ribs removed, and it was just a tiny warm tingle, no burn at all. Skipping it entirely would still be good mac and cheese but you’d miss that little bright kick the pepper adds!

yesterday

Can I make this ahead and freeze it? I do big Sunday meal prep for the whole week and want to portion this out for lunches, but I don’t want the cheese sauce to separate when I thaw it.

yesterday

You absolutely can freeze this! Let it cool completely after baking, portion into airtight containers, and it’ll keep for up to 3 months. When you reheat, stir in a splash of milk to bring the sauce back to its original creamy texture.

5 minutes ago

Bro this is so much better than the instant mac I lived off freshman year. Only thing is I didn’t have panko for the topping so I crushed up some cheese crackers I had in my dorm, and it SLAPPED. 10/10 would recommend that hack if you’re short on ingredients.

just now

Cheese cracker topping is genius!!! I’m gonna try that next time I make this, I always forget to buy panko when I go to the grocery store by campus.

1 week ago

Made this to go with smoked brisket for our Fourth of July cookout and it was the star of the show, even next to the brisket that I spent 12 hours smoking. Everyone kept saying how much they loved the little heat kick with the smoky meat. Will absolutely be making this for every cookout from now on.

5 days ago

Love that pairing! Smoked brisket and spicy mac and cheese is such a perfect match, I’m so glad it was a hit at your cookout. Thanks for sharing!

2 days ago

Is there an easy swap for the all purpose flour to make this gluten free? My roommate has celiac and I want to make this for our apartment dinner night next week, but I don’t want to make her sick!

yesterday

I made this last week with a 1:1 gluten free all purpose flour blend and it worked perfectly! No weird texture or gritty taste in the roux at all, my whole family (who eats regular gluten) didn’t even notice a difference.

2 hours ago

That’s exactly the swap I recommend! A good 1:1 GF flour blend works flawlessly for the roux here, just make sure your breadcrumbs are also certified gluten free if you’re keeping the whole dish GF.

3 days ago

Okay I upped the habanero to three whole peppers because I love mouth-burning heat, and wow, this still didn’t disappoint! The creamy cheese cuts the heat just enough that it’s not painful, even with extra peppers. My roommate thought I was crazy when he saw how many peppers I chopped up but he ate two full servings too.

2 days ago

Three peppers??? I could never, lmao. I used one pepper seeded and it was perfect for my tolerance, but I respect the commitment to extreme heat. Good to know the cheese sauce balances out even extra habaneros!

2 days ago

Love the extra heat hack! If you really want to turn it up, you can even drizzle a little habanero hot sauce on top before serving for an extra punch, just warn your less spice-tolerant guests first 😂

yesterday

Help! I tried making this last night and my cheese sauce came out super grainy, what did I do wrong? I followed the steps exactly but it just didn’t get that smooth creamy look like the photos.

2 hours ago

This happened to me the first time I made homemade mac too! You probably added the cheese too fast while the heat was too high. Take the pan off the burner before you stir in the shredded cheese a handful at a time, it’ll get silky smooth every time.

30 minutes ago

That’s such a common issue, no stress! The biggest culprit for grainy sauce is overheating after adding cheese — once your roux and milk are combined and thickened, turn the heat all the way down (or off) before adding cheese slowly. Grating your own cheese instead of using pre-shredded (which has anti-caking agents) also helps a ton!

5 days ago

Wait, has anyone tested this with non-dairy milk and vegan cheese? My daughter is dairy free and she’s been begging for a spicy mac that actually tastes good, not like the weird frozen stuff from the grocery store.

3 days ago

I made this with oat milk and a mix of vegan cheddar and vegan mozzarella last week and it was so good! My non-vegan boyfriend ate half the pan before I even told him it was dairy free. Just make sure you pick a vegan cheese that melts well, the cheap block stuff doesn’t work great.

2 days ago

So glad you’re trying to adapt it for your daughter! I’ve had great results with unsweetened oat milk and high-quality melting vegan cheeses, too — just skip the pre-shredded vegan cheese if you can, since it often has additives that keep it from melting smoothly.



