
Ham and Pea Mac and Cheese

title 1
Ham and Pea Mac and Cheese
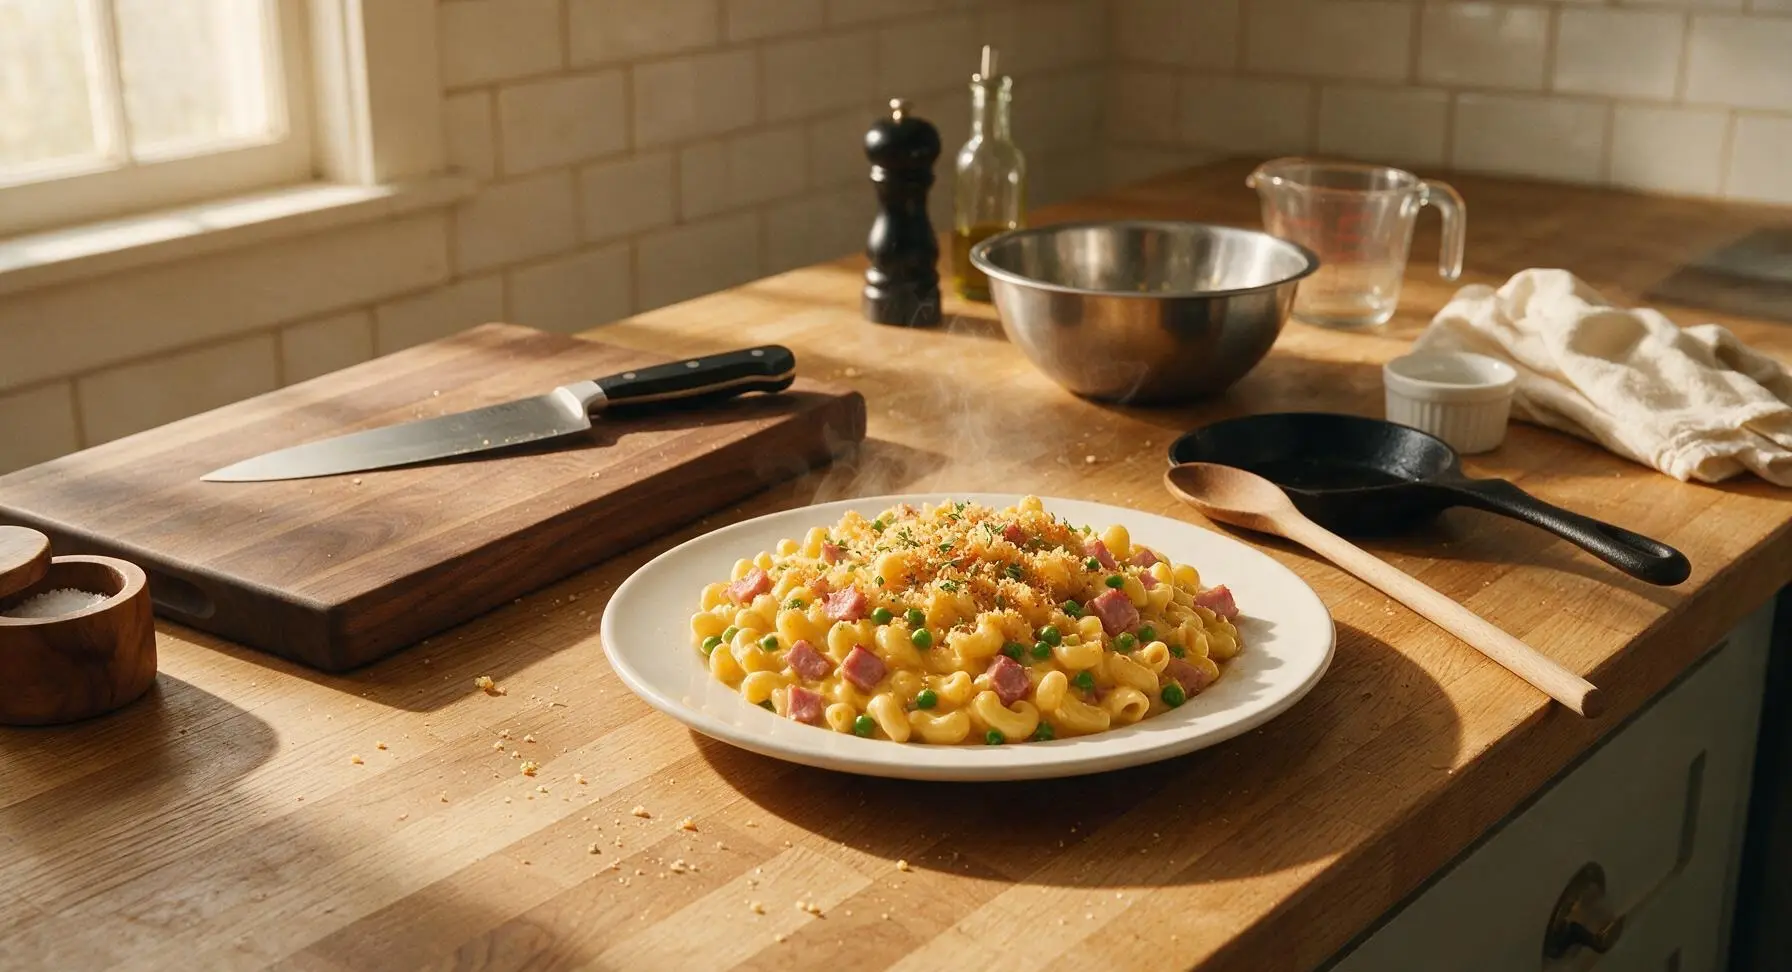
⏱️ cook time 25 minutes
🍽️ servings 4
⚡ Difficulty easy

intro

Velvety sharp cheddar sauce coats tender elbow pasta, studded with smoky diced ham and sweet bright peas, topped with crisp panko for the ultimate cozy, fast weeknight comfort meal.

Ingredients
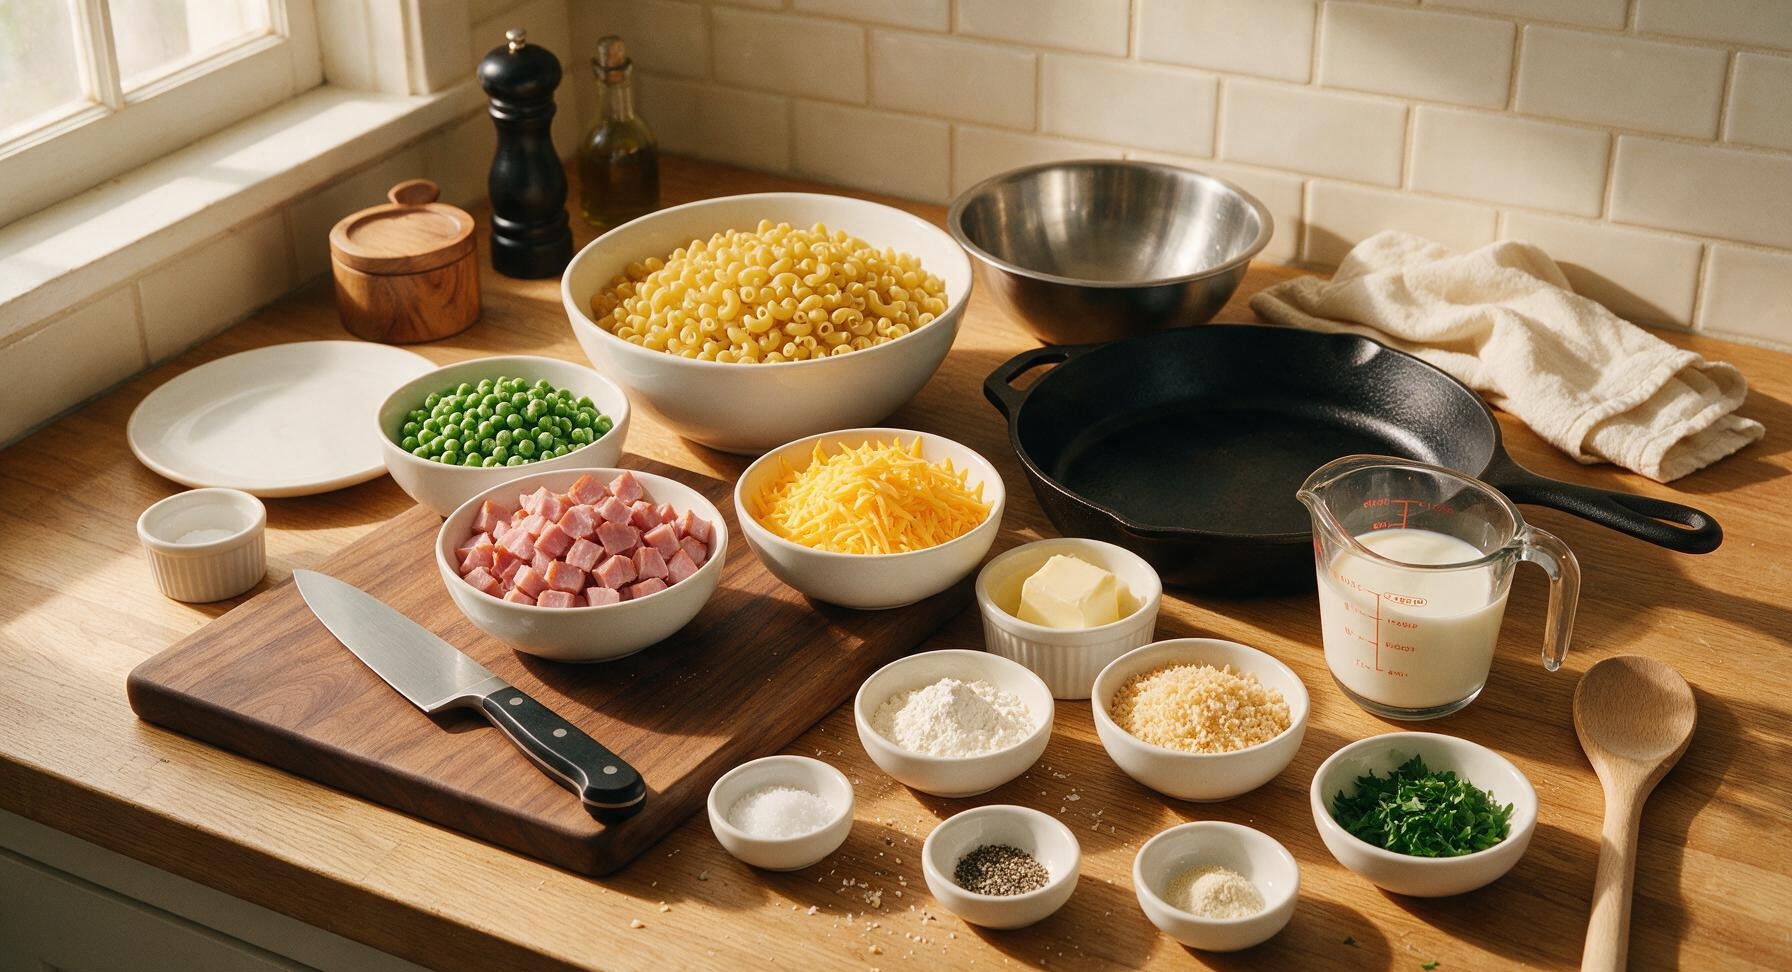
Dry elbow macaroni 225g (8oz)
Smoked ham steak 150g, diced into 1cm cubes
Frozen sweet peas 100g
Sharp yellow cheddar cheese 200g, freshly grated
Whole milk 350ml
Unsalted butter 30g
All-purpose flour 2 tbsp
Panko breadcrumbs 2 tbsp
Kosher salt 1 tbsp (for pasta water) + 1 tsp (for sauce)
Freshly ground black pepper 1/2 tsp
Garlic powder 1/4 tsp
Fresh flat-leaf parsley 1 tbsp, chopped

Steps

1

Cook Elbow Pasta

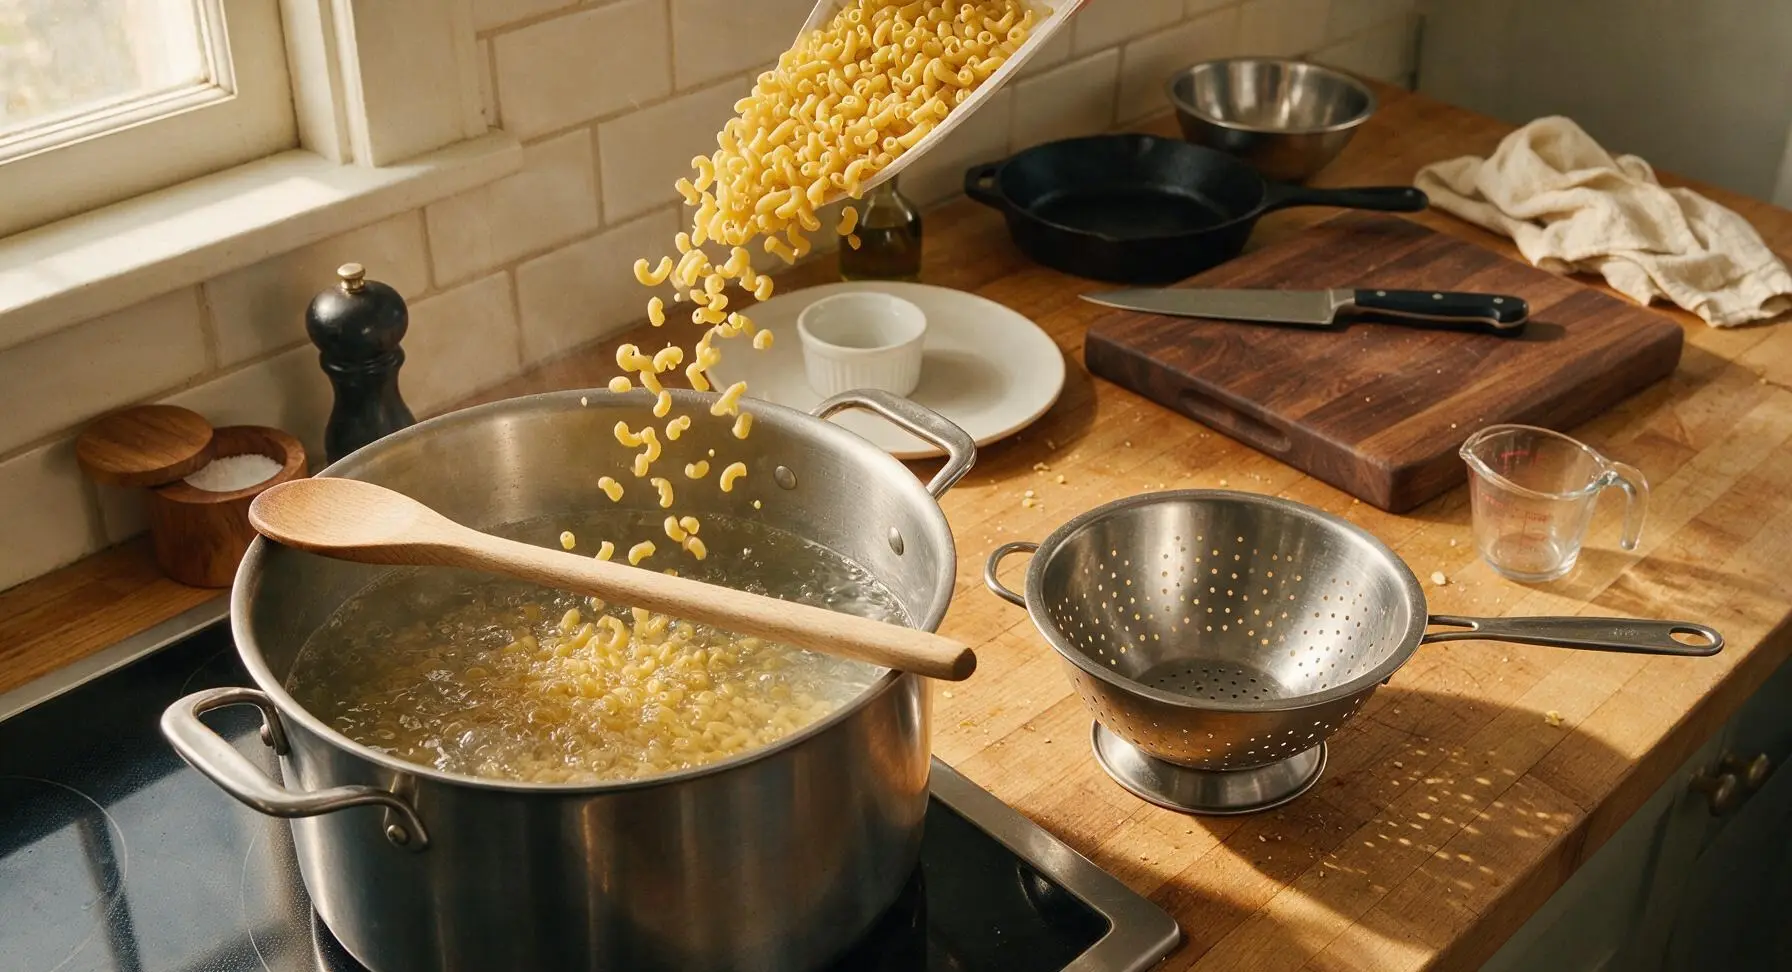
Fill the 6L stainless steel stock pot with 4L of water, add 1 tablespoon of kosher salt, and bring to a rolling boil over high heat on the left induction burner. Add dry elbow macaroni, stir once with the long beech wooden spoon to prevent sticking, and cook for 8 minutes until al dente (firm to the bite, with no raw white core). Reserve 60ml of starchy pasta water in the clear glass measuring cup, then drain pasta fully in the stainless steel colander and set aside. Do not rinse the pasta, as residual surface starch helps the cheese sauce cling evenly to noodles.
Step 1
step1:Cook Elbow Pasta
2

Prep Ham and Cheese

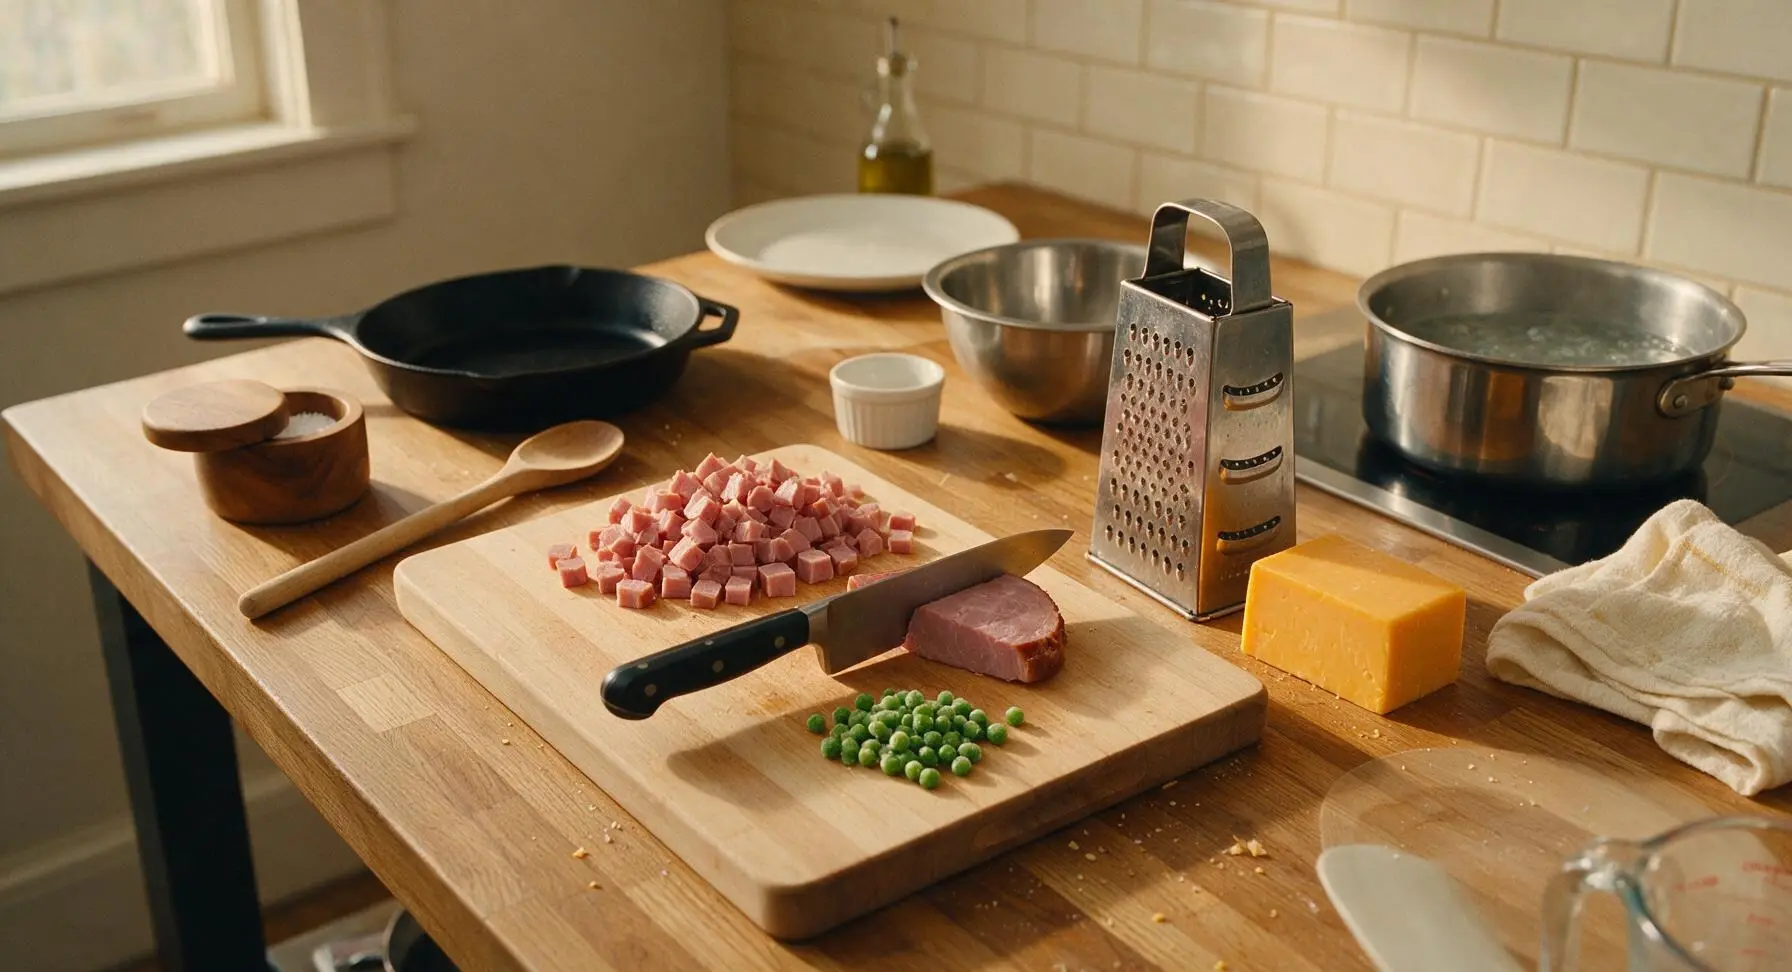
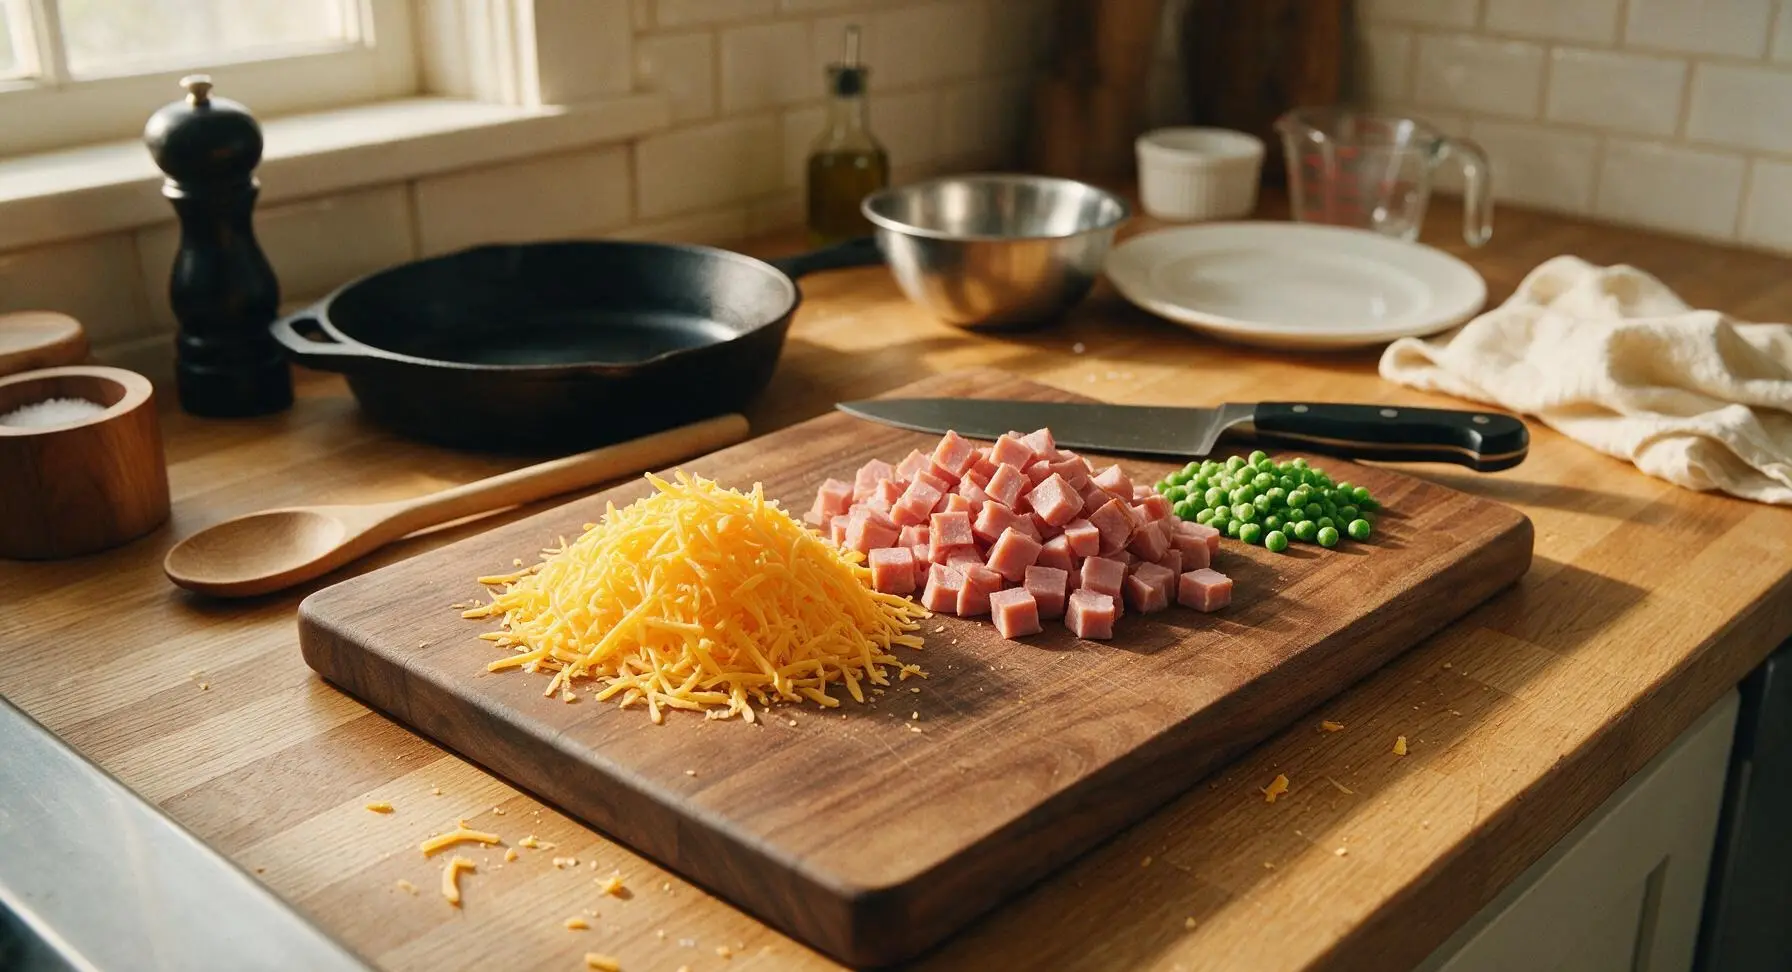
While the pasta cooks, place the honey beech wood cutting board in the center of the counter. Use the 8-inch walnut-handled chef knife to dice the smoked ham steak into uniform 1cm cubes. Use the 4-sided stainless steel box grater to shred the sharp cheddar cheese into fine, even shreds, discarding any hard, waxy edge pieces. Measure frozen peas into a small pile on the edge of the cutting board; no thawing is needed, as residual heat from the sauce and baking will cook them perfectly without turning mushy.
Step 2
step2:Prep Ham and Cheese
Step 2
step2:Prep Ham and Cheese
3

Build Sauce Roux Base

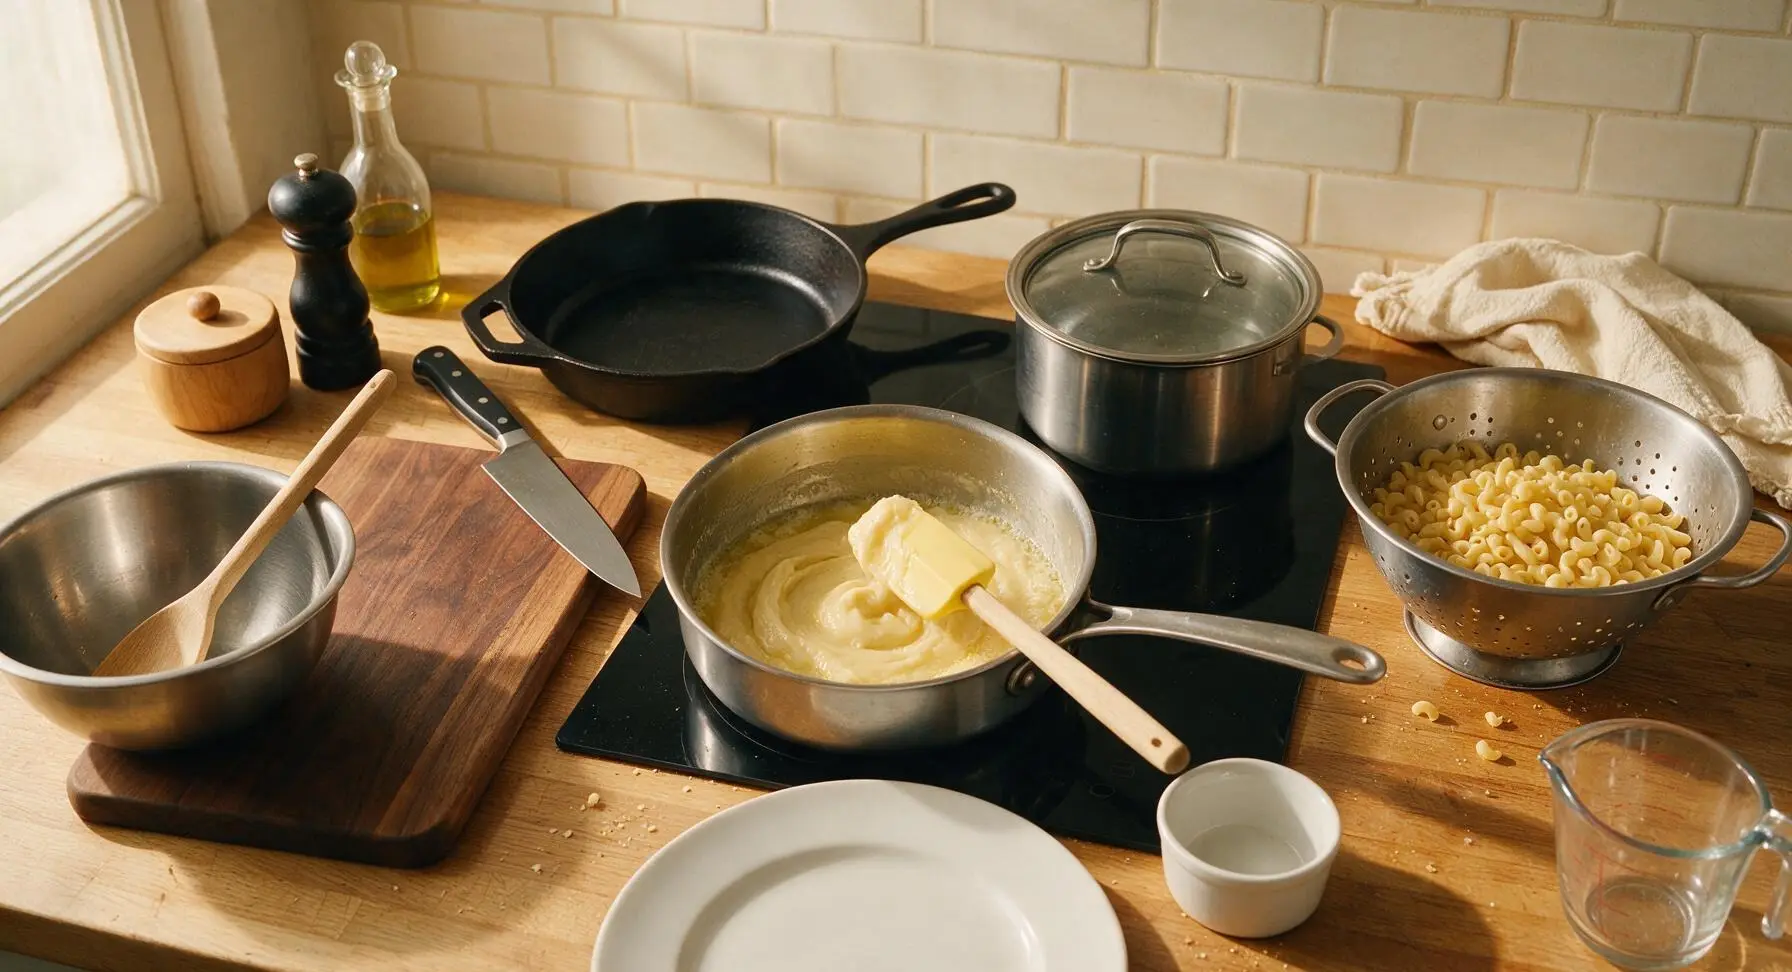
Place the 3L stainless steel saucepan on the right induction burner over medium heat. Add 30g unsalted butter and melt until foamy, about 1 minute. Add 2 tablespoons all-purpose flour, stirring constantly with the pale yellow silicone spatula for 2 minutes to cook out raw flour taste; the finished roux should be pale golden, smooth, and smell faintly nutty, with no dry flour lumps. Stir in garlic powder, 1 teaspoon kosher salt, and black pepper to toast the spices for 15 seconds until fragrant.
Step 3
step3:Build Sauce Roux Base
4

Finish Cheddar Sauce

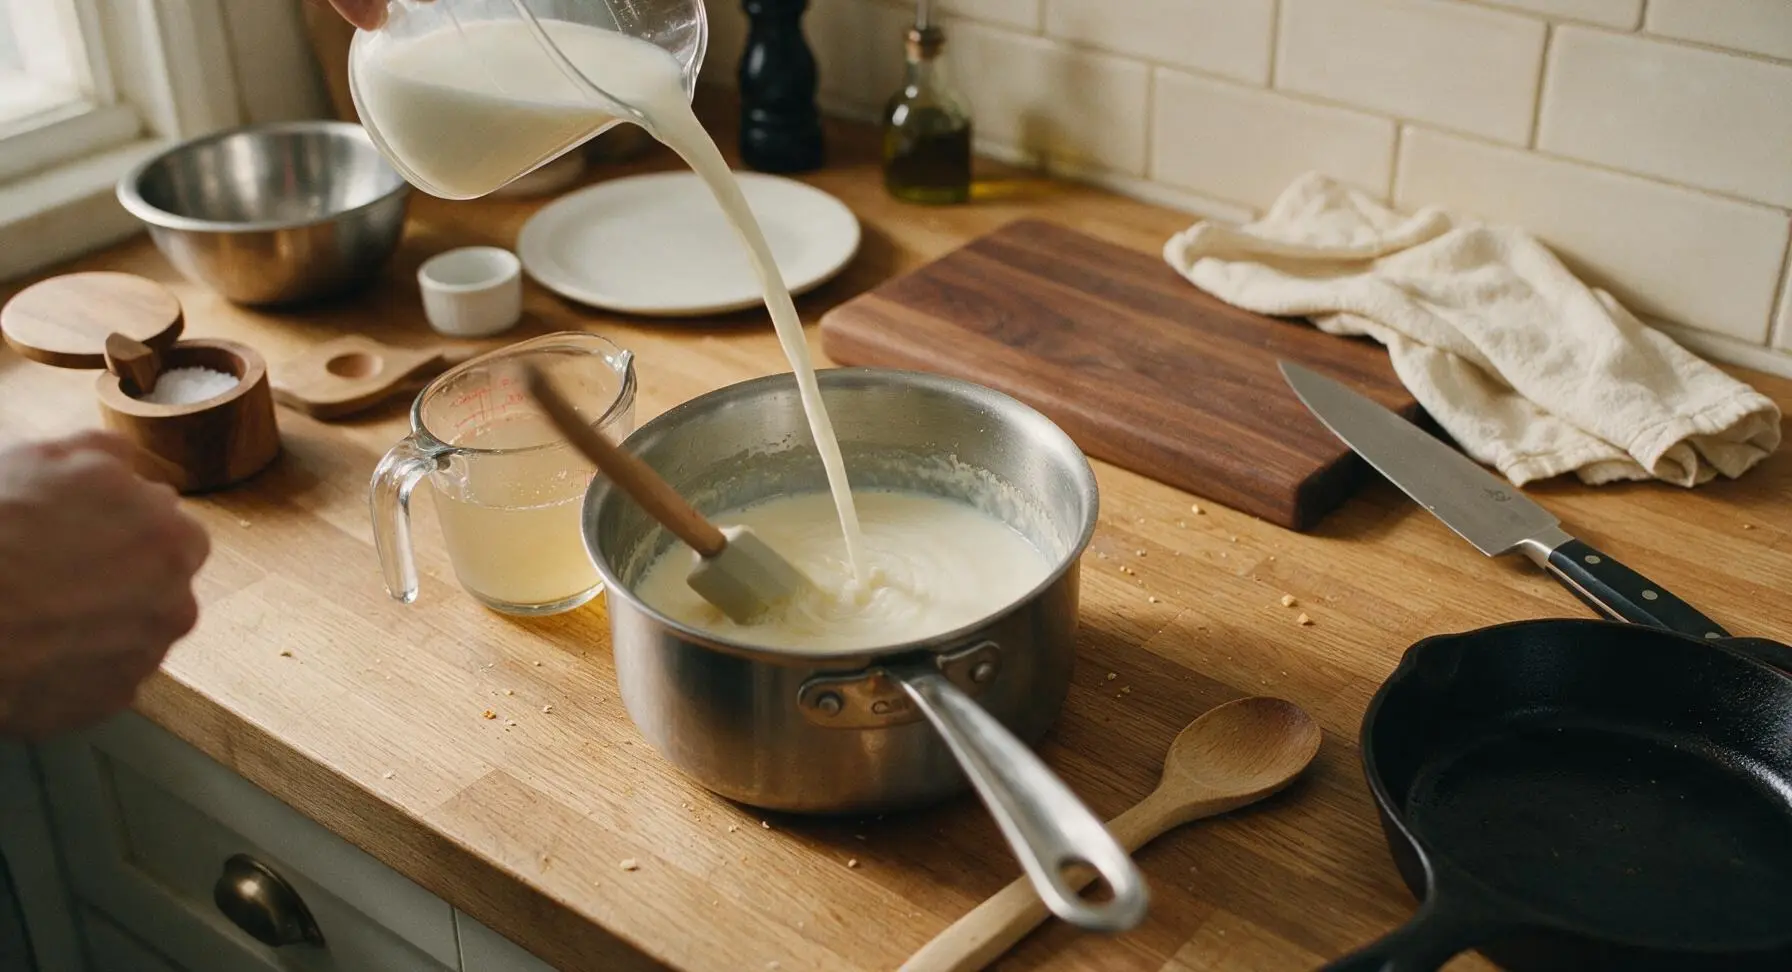
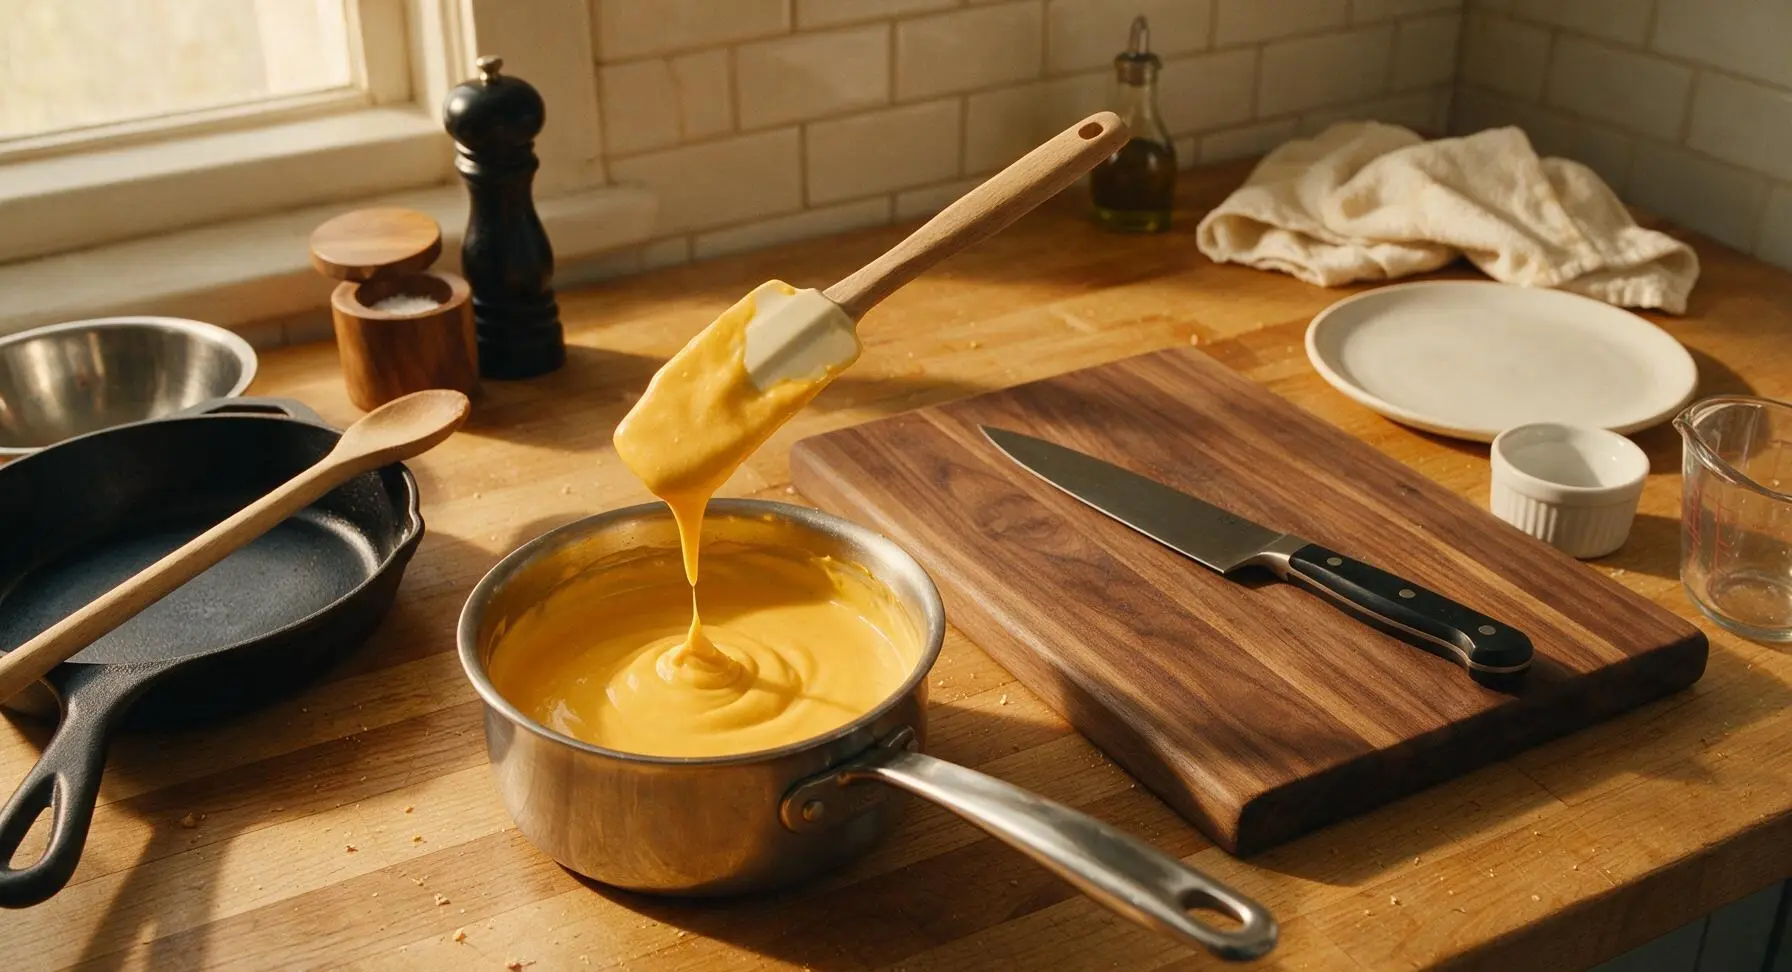
Slowly pour 350ml whole milk into the roux, stirring constantly with the silicone spatula to prevent lumps, until the sauce thickens to a coat-the-back-of-a-spoon consistency, 3-4 minutes. When you run your finger across the spatula coated in sauce, the line should hold cleanly without running. Remove the saucepan from heat, add 180g of the shredded cheddar (reserve 20g for topping), and stir until fully melted and smooth, about 1 minute. If the sauce feels too thick, stir in 1-2 tablespoons of reserved pasta water to thin to a velvety, pourable consistency.
Step 4
step4:Finish Cheddar Sauce
Step 4
step4:Finish Cheddar Sauce
5

Combine Pasta Mix-ins

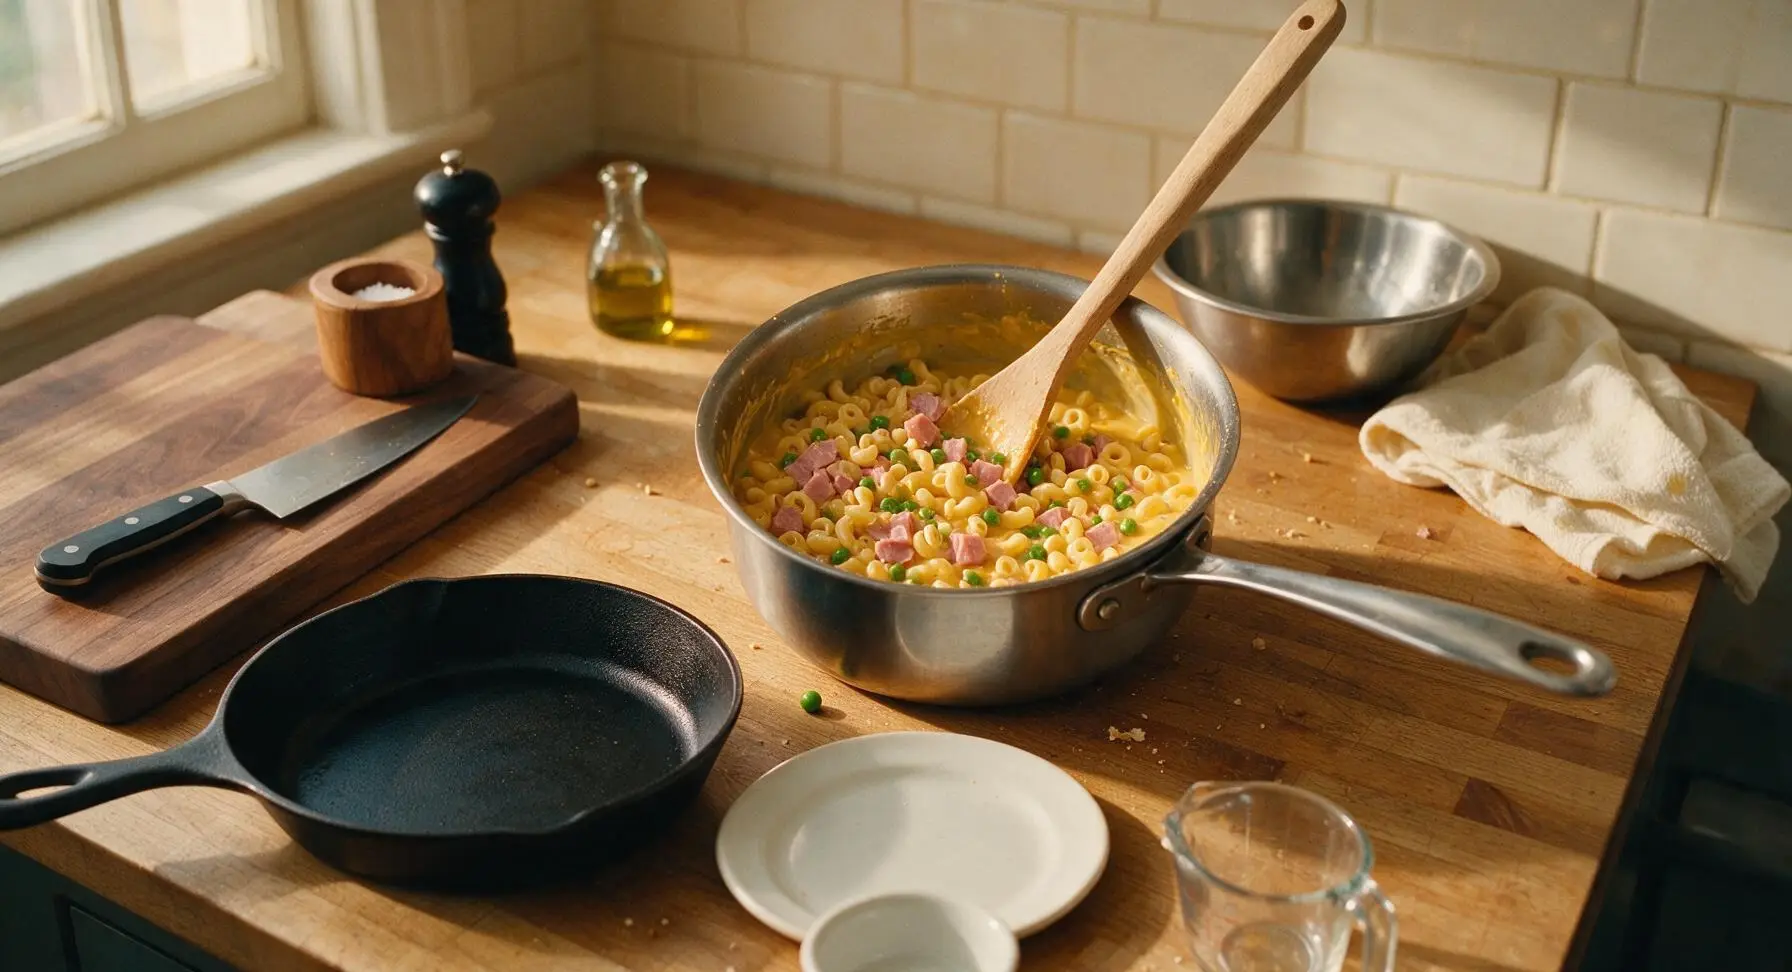
Add the drained elbow macaroni, diced smoked ham, and frozen sweet peas to the saucepan with the cheese sauce. Stir gently with the long beech wooden spoon until every pasta noodle is evenly coated in sauce, and ham and peas are evenly distributed throughout the mixture, about 1 minute. Take care not to over-stir, which can break pasta noodles or mash the peas.
Step 5
step5:Combine Pasta Mix-ins
6

Top and Bake Pasta

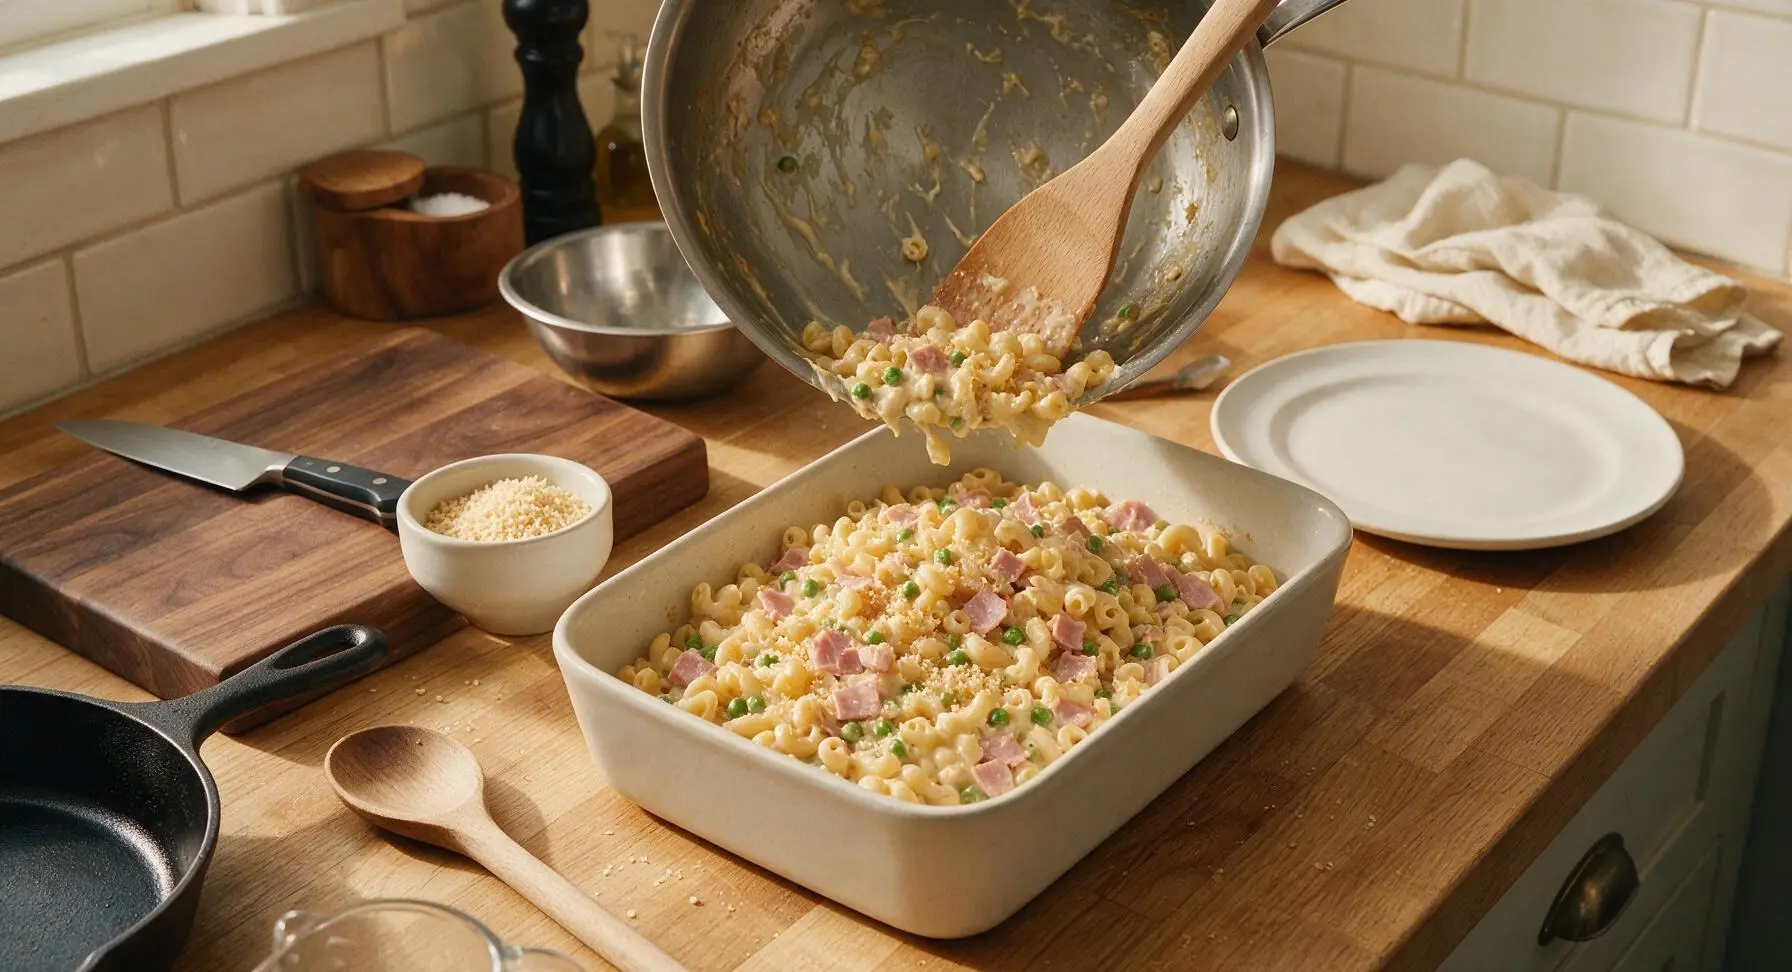
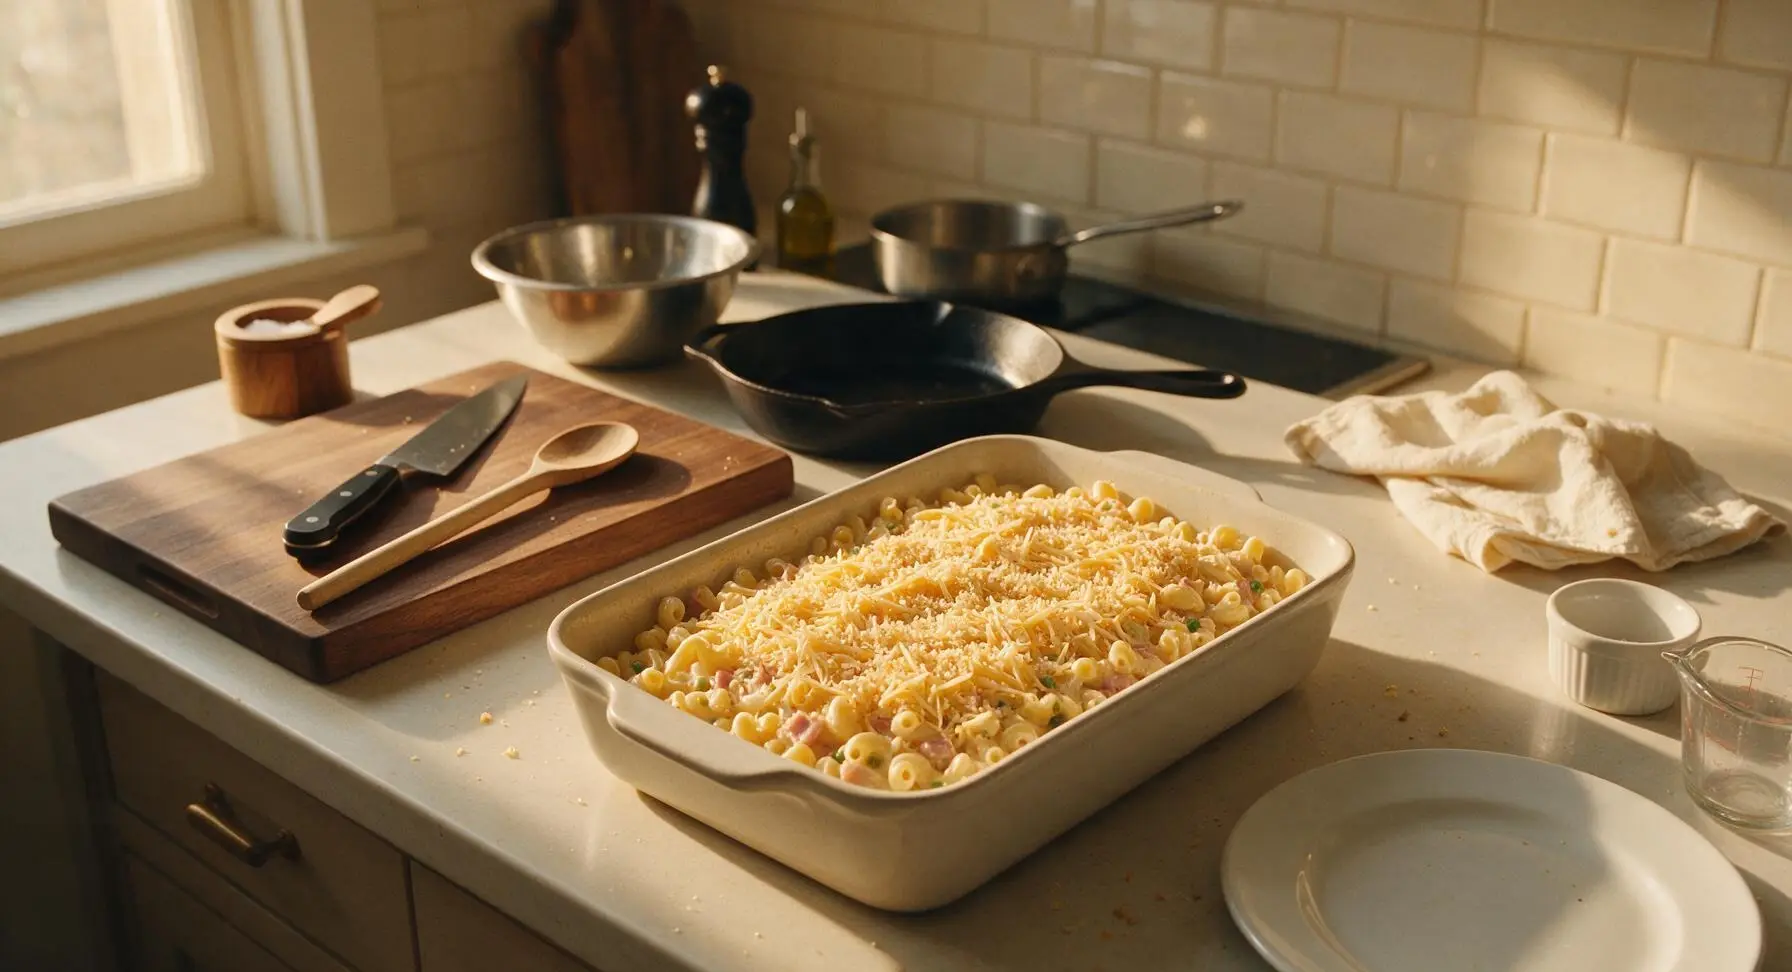
Preheat oven to 190C (375F). Transfer the entire pasta and sauce mixture to the matte off-white rectangular ceramic baking dish, spreading it into an even layer with the silicone spatula. Sprinkle the reserved 20g shredded cheddar evenly over the top, followed by 2 tablespoons panko breadcrumbs for a light, crisp crust. Place the baking dish on the center oven rack and bake for 12 minutes, until the sauce is bubbling around the dish edges and the panko topping is light golden brown.
Step 6
step6:Top and Bake Pasta
Step 6
step6:Top and Bake Pasta
7

Rest and Serve

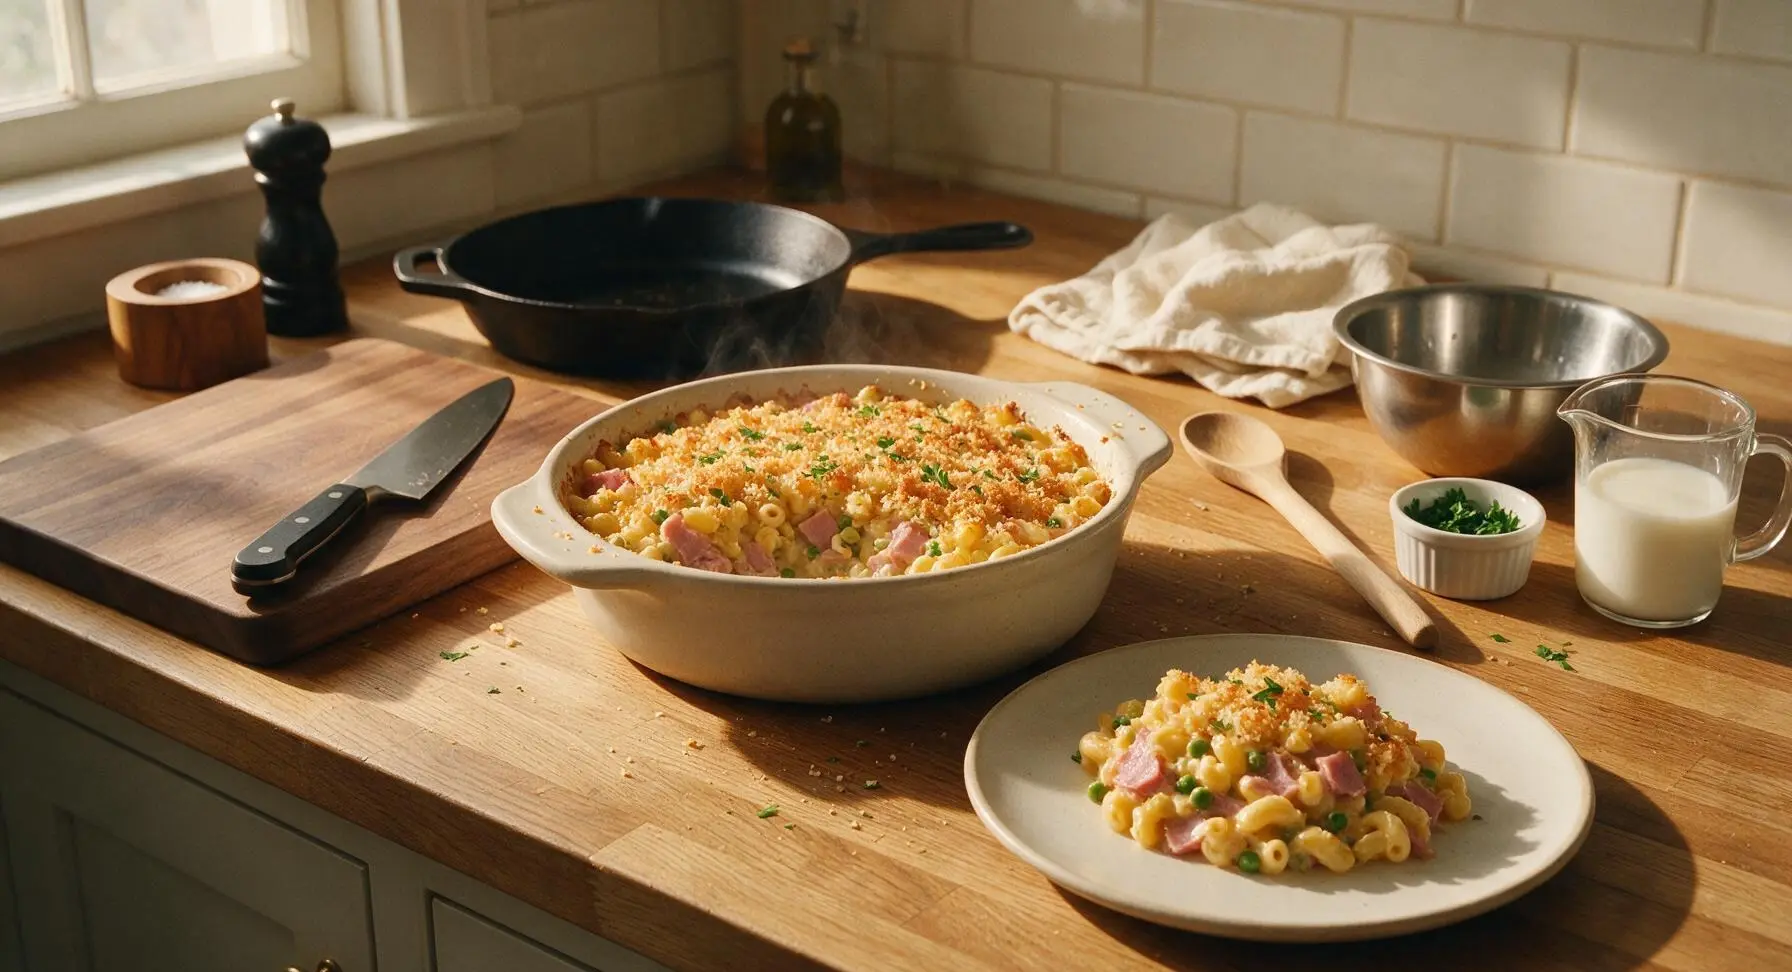
Carefully remove the baking dish from the oven and set it on the counter to rest for 5 minutes; this allows the cheese sauce to set slightly so it does not run when plated. Sprinkle chopped fresh flat-leaf parsley over the top before serving a generous portion onto the matte off-white dinner plate.
Step 7
step7:Rest and Serve

Tips

1.Grate your own cheddar cheese instead of using pre-shredded store-bought cheese: pre-shredded cheese is coated in potato starch and anti-caking agents that prevent smooth melting, leading to a grainy sauce, while freshly grated cheese melts into a perfectly velvety, cohesive texture.
2.Skip rinsing drained pasta: the starchy coating on cooked pasta binds with the cheese sauce to help it cling tightly to every noodle, rather than sliding off and pooling at the bottom of the dish.
3.Add frozen peas directly to the sauce without thawing: thawed peas release excess water that can thin the sauce and turn mushy when baked, while frozen peas heat through quickly to retain their bright color, sweet flavor, and subtle firm pop.


✨ You May Also Like

Main Course
🍜 United Kingdom

A showstopping classic of tender seared beef, savory mushroom duxelles, and crisp prosciutto wrapped in flaky golden puff pastry, baked to juicy perfection.

⏱️ 2 hours 1Main Course ★ 4.7
Main Course
🍜 India

Tender charred marinated chicken simmered in a rich, spiced creamy tomato sauce, this iconic Anglo-Indian curry pairs perfectly with basmati rice or warm naan.

⏱️ 50 minuteMain Course ★ 4.6
Main Course
🍜 Thailand

Classic tangy, sweet, and savory Thai stir-fried rice noodles with shrimp, tofu, and crunchy garnishes, balancing all five core Thai flavor profiles.

⏱️ 30 minuteMain Course ★ 4.5
Main Course
🍜 United Kingdom

Crispy golden beer-battered cod and fluffy double-fried chips, served with tangy tartar sauce and malt vinegar: the timeless, beloved British pub comfort classic.

⏱️ 45 minuteMain Course ★ 4.7
Main Course
🍜 Mexico

Smoky, chile-marinated pork tacos with caramelized pineapple, fresh cilantro, and lime: a beloved classic Mexican street food perfect for casual summer gatherings.

⏱️ 1 hour 45Main Course ★ 4.8
Main Course
🍜 United States

Crunchy Fritos corn chips layered with savory beef chili and melted cheddar, topped with cool, zesty fixings for a beloved, cozy Tex-Mex comfort food.

⏱️ 35 minuteMain Course ★ 4.8

Ham and Pea Mac and Cheese:Frequently Asked Questions

1.Can I use pre-shredded cheddar instead of shredding a block myself? ▾
I totally get the time-save appeal for a weeknight meal, but pre-shredded cheddar is coated in potato starch and anti-caking agents that keep it from melting smoothly, leading to a grainy sauce. If you’re in an absolute pinch, it will work, but freshly shredded sharp cheddar gives that perfectly velvety texture in just 2 extra minutes of prep.
2.Do I need to thaw frozen peas before adding them to the mac and cheese? ▾
Nope, no need to thaw them ahead! Frozen sweet peas are flash-frozen at peak ripeness, so tossing them straight in right before you finish mixing lets them heat through in 2-3 minutes without turning mushy. Thawing them first can lead to soggy, dull peas that lose that bright, sweet pop we love.
3.What can I use if I don’t have a smoked ham steak on hand? ▾
You’ve got great easy swap options! Leftover baked holiday ham, diced Canadian bacon, or crispy crumbled bacon all deliver that perfect salty, smoky note. For a meat-free version, swap ham for roasted smoked paprika cauliflower florets to keep that deep, savory flavor profile.
4.How do I keep the cheese sauce from turning grainy? ▾
The biggest culprit for grainy sauce is overheating the cheese once you add it. Take your roux and milk base off the heat for 1 minute before stirring in shredded cheddar a handful at a time, stirring constantly. Never boil the sauce after adding cheese, as high heat breaks down milk proteins and creates a gritty texture.
5.Can I make this recipe ahead of time for weekly meal prep? ▾
Absolutely! Assemble the mac and cheese (hold off on adding the panko topping) in an airtight container and store it in the fridge for up to 3 days before baking. Add the panko right before you pop it in the oven, and tack on 5-7 minutes of bake time to account for the chilled dish.
6.What if I don’t have elbow macaroni? Can I use a different pasta shape? ▾
Definitely! Any short, ridged pasta shape works perfectly here—think cavatappi, rotini, small shells, or campanelle. The nooks and crannies catch all that velvety cheese sauce, so you get a bite of sauce, ham, and pea in every forkful. Just cook pasta to al dente per package directions so it doesn’t turn mushy when baked.
7.My cheese sauce came out too thin—how do I thicken it up properly? ▾
No panic needed! First, let it simmer for 2-3 minutes over low heat (remember, don’t boil it once cheese is added) to let excess moisture cook off. If it’s still too runny, make a tiny slurry of 1 teaspoon cornstarch mixed with 1 tablespoon cold milk, stir it in, and simmer 1 more minute until it coats the back of a spoon.
8.Can I use a lower-fat milk or plant-based milk instead of whole milk? ▾
You can, but know that higher-fat milk gives that rich, creamy texture we love. 2% dairy milk works fine, but skim or thin plant-based milks (like unsweetened almond milk) will make a thinner, less rich sauce. If using lower-fat milk, add an extra 2 tablespoons of shredded cheese to boost creaminess.
9.Do I have to use panko for the topping? What other crunchy toppings work? ▾
Panko gives that signature light, crisp crunch, but you have tons of tasty swaps! Crushed buttered round crackers, regular plain breadcrumbs, crushed sour cream and onion potato chips, or even crispy fried onions all make delicious toppings. Toss your pick with 1 tablespoon melted butter first so it toasts up golden instead of drying out.
10.How do I store leftovers, and how long will they stay good? ▾
Let leftover mac and cheese cool completely to room temperature (don’t leave it out more than 2 hours for food safety), then transfer to an airtight container and stash it in the fridge for up to 4 days. Note that the panko topping will soften as it sits, so add a sprinkle of fresh panko when reheating for crunch.
11.What’s the best way to reheat leftovers so they don’t dry out? ▾
For single servings, reheat in the microwave with a tablespoon of milk stirred in, covered, for 60-90 seconds, stirring halfway through. For larger portions, reheat in a 350°F oven covered with foil for 15-20 minutes, adding a splash of milk to loosen the sauce before baking.
12.Can I add extra veggies besides peas to this recipe? ▾
Absolutely! This recipe is super flexible. Try stirring in steamed small broccoli florets, roasted diced bell pepper, sautéed spinach, or even caramelized onions for extra flavor and texture. Just make sure any extra veggies are cooked and patted dry first so they don’t leak excess water and thin your cheese sauce.
13.Why did my cheese sauce turn greasy and separated, and can I fix it? ▾
That usually happens when cheese gets too hot and fat splits out from the milk solids. To fix it, take the pan off the heat immediately, stir in a couple tablespoons of cold milk a teaspoon at a time, whisking vigorously until the sauce emulsifies back together. Add cheese off-heat going forward to avoid this issue.
14.Can I make this as a stovetop-only meal without baking it to save time? ▾
Totally! Skip the baking step entirely for a 20-minute stovetop weeknight meal. Once you mix cooked pasta, cheese sauce, diced ham, and peas together in the pot, toast your panko in a small skillet with a little butter until golden, then sprinkle it over top of each serving right before eating. No oven required.
15.Can I freeze this ham and pea mac and cheese for later meals? ▾
You can, though the sauce may separate slightly when thawed. Assemble the unbaked mac and cheese (without panko) in a freezer-safe dish, wrap tightly in plastic wrap and foil, and freeze for up to 3 months. Thaw in the fridge overnight, add panko, and bake at 375°F for 30-35 minutes until bubbly.
16.Is there a way to cut down on sodium in this recipe without losing flavor? ▾
Absolutely! Opt for a low-sodium smoked ham steak, go light on added salt in the pasta water and sauce until you taste the finished dish, and pick up unsalted sharp cheddar if it’s available at your store. The sweet peas and smoky ham already pack tons of bright, savory flavor, so you won’t miss the extra sodium.

Comments (10)

2 days ago

OMG this ham and pea mac and cheese was a total game changer for our weeknight dinner rotation! 25 minute cook time is no joke, I threw this together between soccer practice drop off and homework time and all three of my kids cleared their plates without complaining. Even my super picky 5 year old asked for seconds! The peas add just the right pop of sweetness against the creamy cheese, I will absolutely be making this for our next neighborhood potluck too.

yesterday

Wait did you use pre-diced ham or cut up leftover holiday ham? I have a ton of leftover Easter ham in the freezer I’ve been trying to use up!

2 hours ago

So glad your crew loved it! Leftover baked ham works perfectly here, it adds an extra salty, smoky depth that pre-diced grocery store ham can’t always match. Just pat it dry a little before tossing it in so it doesn’t water down the cheese sauce!

3 days ago

Made this last night for my roommate and I after a long day of yard work, SO good. I added a little extra sharp cheddar and a sprinkle of panko on top before broiling for 2 minutes for that crunch, chef’s kiss. Super easy even for someone who usually burns boxed mac lmao. 10/10.

2 days ago

Love that panko topping hack! A little crispy crunch on top of creamy mac is always a win, thanks for sharing your twist!

1 week ago

Perfect easy meal for dorm cooking! I made this in my little electric hot pot in my dorm room, used frozen peas and deli ham I grabbed from the campus market, no fancy equipment needed. Meal prepped 4 portions for the week and it reheats like a dream in the microwave, no weird separated cheese sauce. Saved me so much money on takeout this week, can’t recommend enough!

5 days ago

Brought this to our church potluck last Sunday and it was the first dish gone! Everyone was asking for the recipe, I had to text the link to like 8 people after service. The only thing I changed was I used a mix of gruyere and medium cheddar because that’s what I had in the fridge, turned out amazing.

3 days ago

Oh gruyere sounds so fancy and good! I’ve only ever used regular cheddar for mac, I’ll have to grab some next time I make this.

30 minutes ago

This looks so good, I’m dying to make it for my family this weekend! Quick question: can I swap the peas for broccoli? My kid swears peas are “little green balls of doom” but will devour broccoli no questions asked. Don’t want to mess up the recipe ratios though! Giving 4 stars for now because I haven’t gotten to make it yet, but I know it’s gonna be a hit.

5 minutes ago

I did broccoli last week when I realized I was out of peas! Just steam it a tiny bit first so it’s not rock hard, works totally fine, my kids didn’t even notice the swap lol.

just now

Great question! Broccoli is a perfect swap, just chop it into small, bite-sized florets and give it a quick 2 minute blanch before adding it to the pasta so it cooks evenly. No ratio adjustments needed!

2 weeks ago

I was craving comfort food but didn’t want something super heavy, and this hit the spot! I used whole wheat pasta, 2% milk, and extra peas to bulk up the veggie content, and it still tasted so rich and creamy. Didn’t even feel like a “lightened up” version, will be making this on repeat for post-gym dinners. So glad I found this easy recipe!

yesterday

This recipe took me right back to the mac and cheese my mom used to make when I was a kid! I added a tiny pinch of nutmeg to the cheese sauce like she always did, and the ham and peas make it feel like a full meal instead of just a side. Perfect easy dinner for when the grandkids come over, they go crazy for it.

2 hours ago

That pinch of nutmeg is such a classic, underrated trick for cheese sauce! It adds such a warm, cozy depth without tasting like nutmeg at all. So happy it brought back nice memories for you!

2 hours ago

Made this last week for meal prep and it was so good I’m already planning to make another big batch! Quick question: how well does this freeze? I make big batches of meals on Sundays to freeze for busy work weeks, and this looks like it would be perfect but I don’t want the sauce to get grainy when I thaw it.

30 minutes ago

I froze a couple portions of the batch I made last week! Let it thaw in the fridge for a day then reheat it low and slow on the stove with a splash of milk, it came out totally creamy no graininess!

5 minutes ago

Great question! This freezes really well for up to 3 months. Just let it cool completely before portioning into freezer-safe containers, and when you reheat, stir in a tablespoon or two of milk to bring the sauce back to its original creamy texture. Works like a charm!

5 minutes ago

I made this for dinner last night and my husband said it’s better than the mac and cheese we get at our favorite local diner! I used leftover honey baked ham from our weekend dinner and sweet peas from our garden this summer, it couldn’t have turned out better. So easy too, I didn’t have to spend an hour slaving over the stove.

just now

Leftover honey baked ham in mac? That sounds next level, I’m definitely doing that next time we have a ham dinner instead of making plain old ham sandwiches for days!

just now

Just got home from a long day at work and threw this together with stuff I already had in the fridge, and it’s SO good. Why didn’t I think to add ham and peas to mac and cheese sooner? The saltiness from the ham cuts through the rich cheese so perfectly, and the peas add a little fresh burst in every bite. No weird fancy ingredients, no complicated steps, just straight up cozy comfort food. 10/10.



