
Japanese Teriyaki Burnt Ends

title 1
Japanese Teriyaki Burnt Ends
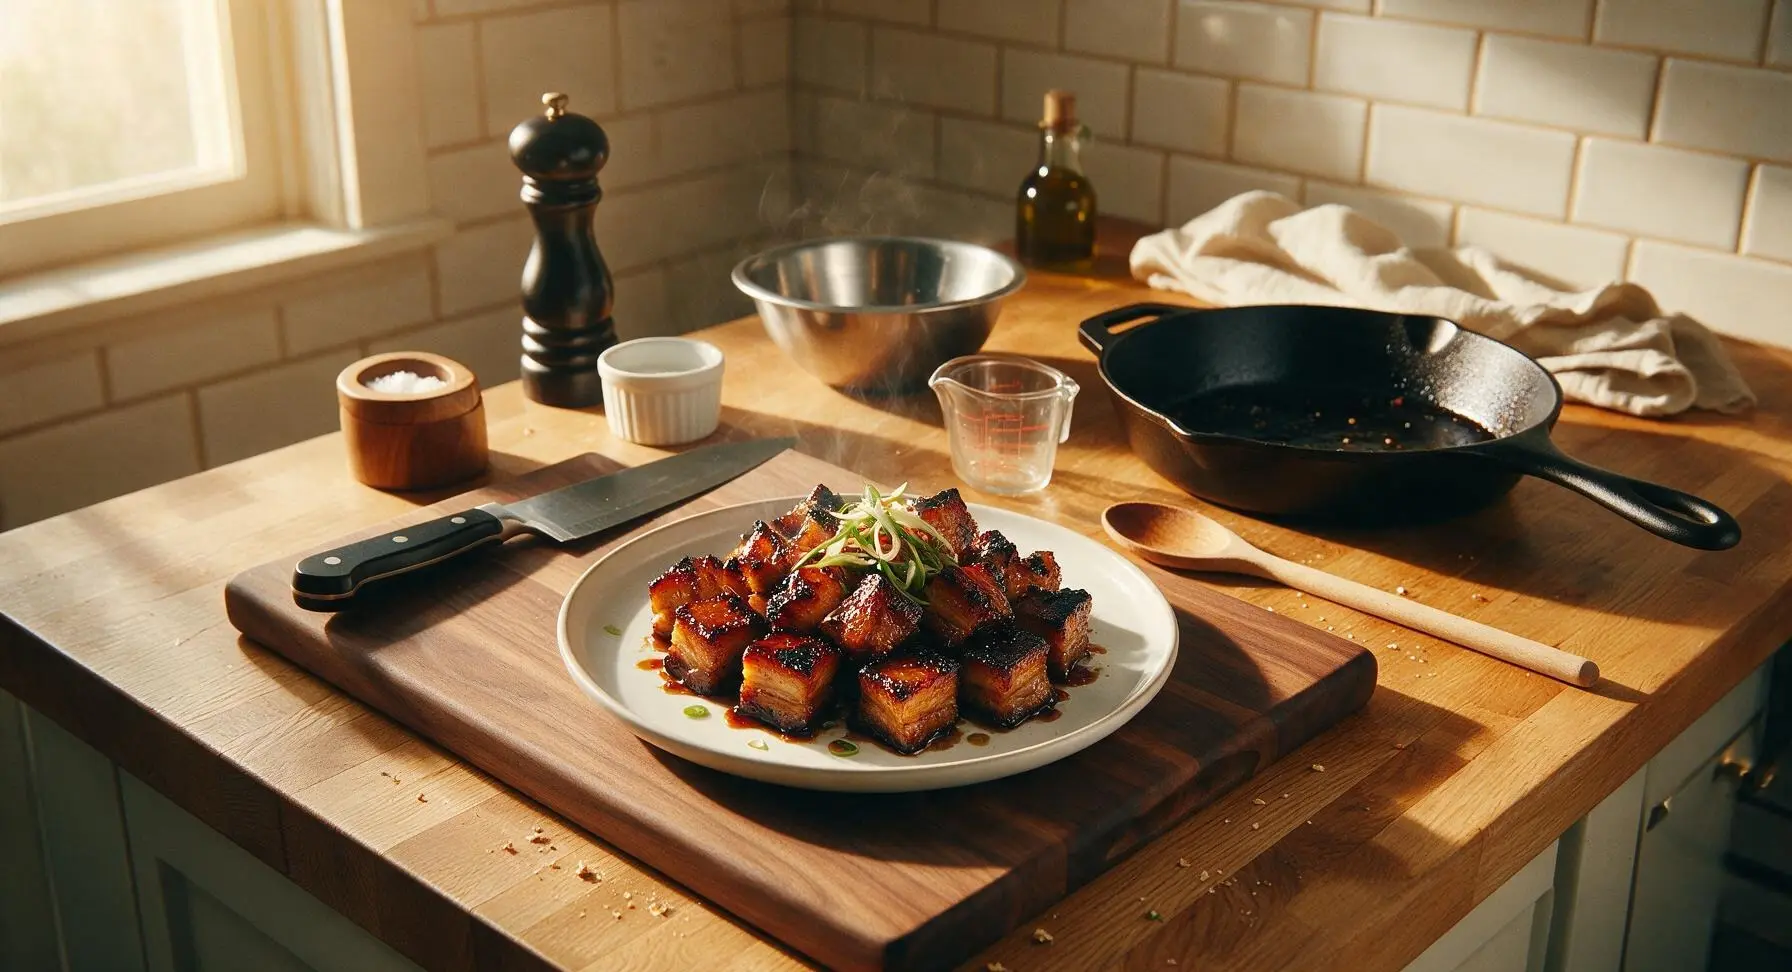
⏱️ cook time 2 hours
🍽️ servings 4
⚡ Difficulty medium

intro

Sticky, caramelized pork belly cubes coated in umami-rich teriyaki glaze, with crispy charred edges— a delicious fusion of classic BBQ burnt ends and bold Japanese teriyaki flavor.

Ingredients
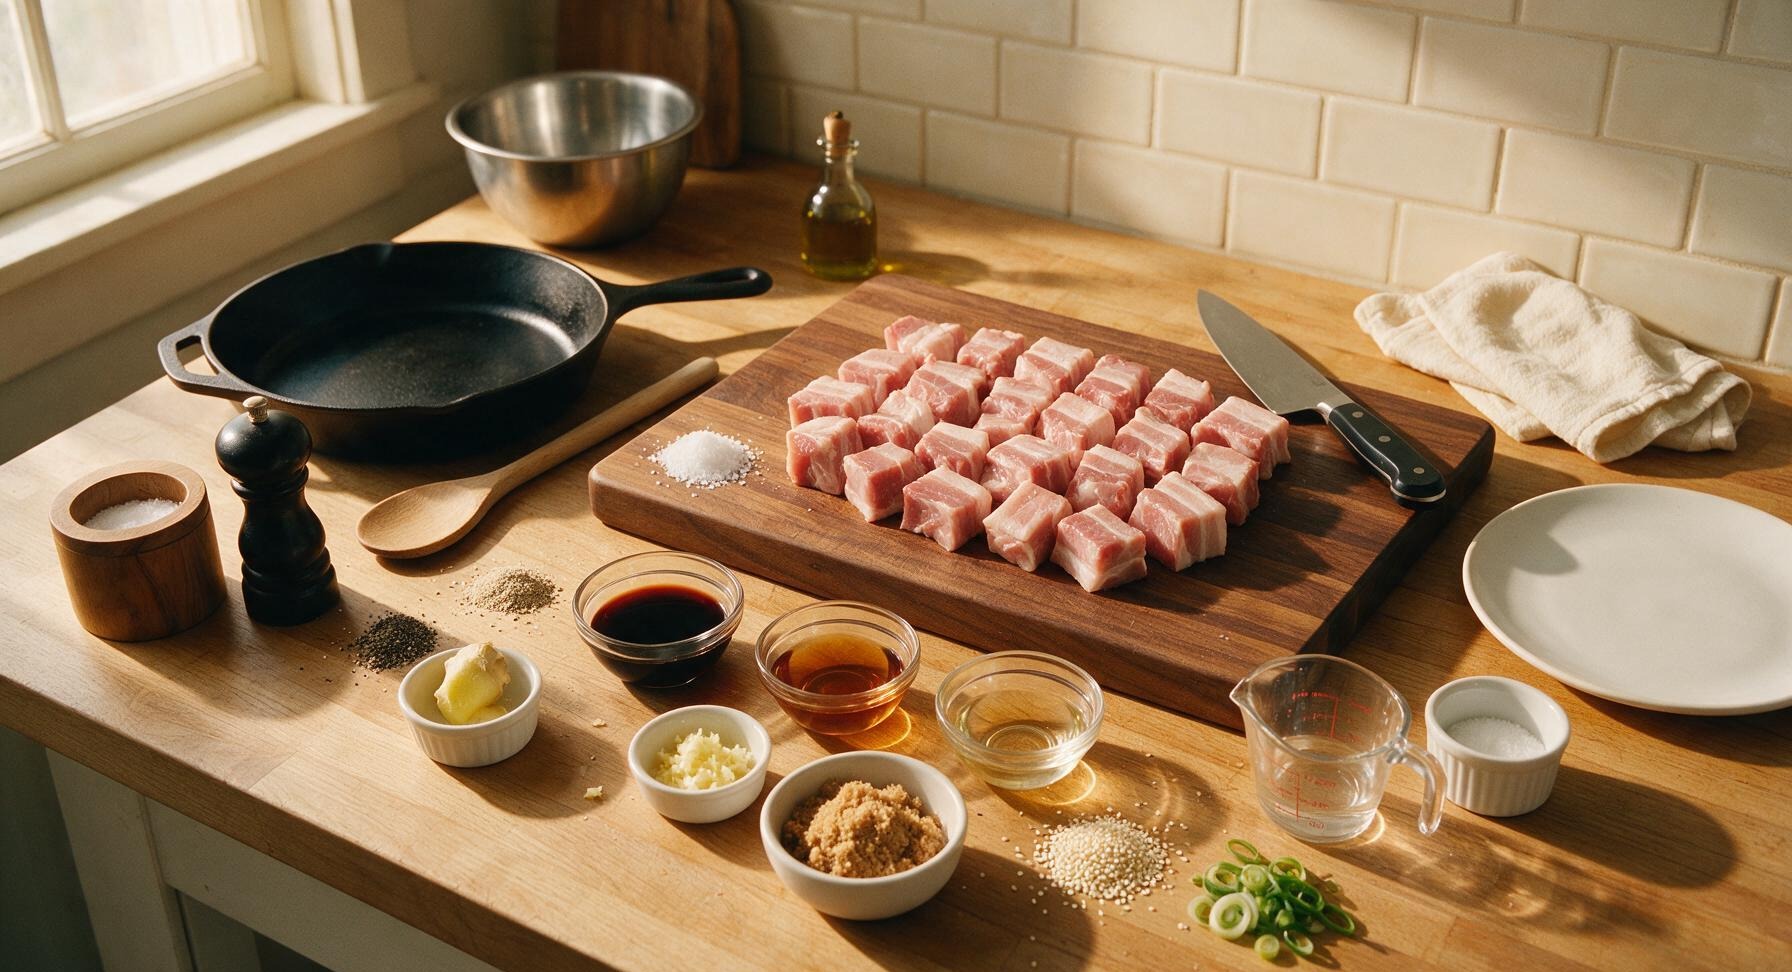
Skinless pork belly 1kg
Kosher salt 1 tbsp
Freshly ground black pepper 1 tsp
Garlic powder 1 tsp
Low-sodium soy sauce 120ml (1/2 cup)
Mirin 80ml (1/3 cup)
Sake 60ml (1/4 cup)
Packed light brown sugar 3 tbsp
Fresh ginger (peeled, grated) 2cm knob
Garlic cloves (minced) 2
Toasted white sesame seeds 1 tbsp
Scallions (green parts only, thinly sliced) 3

Steps

1

Cube the Pork Belly

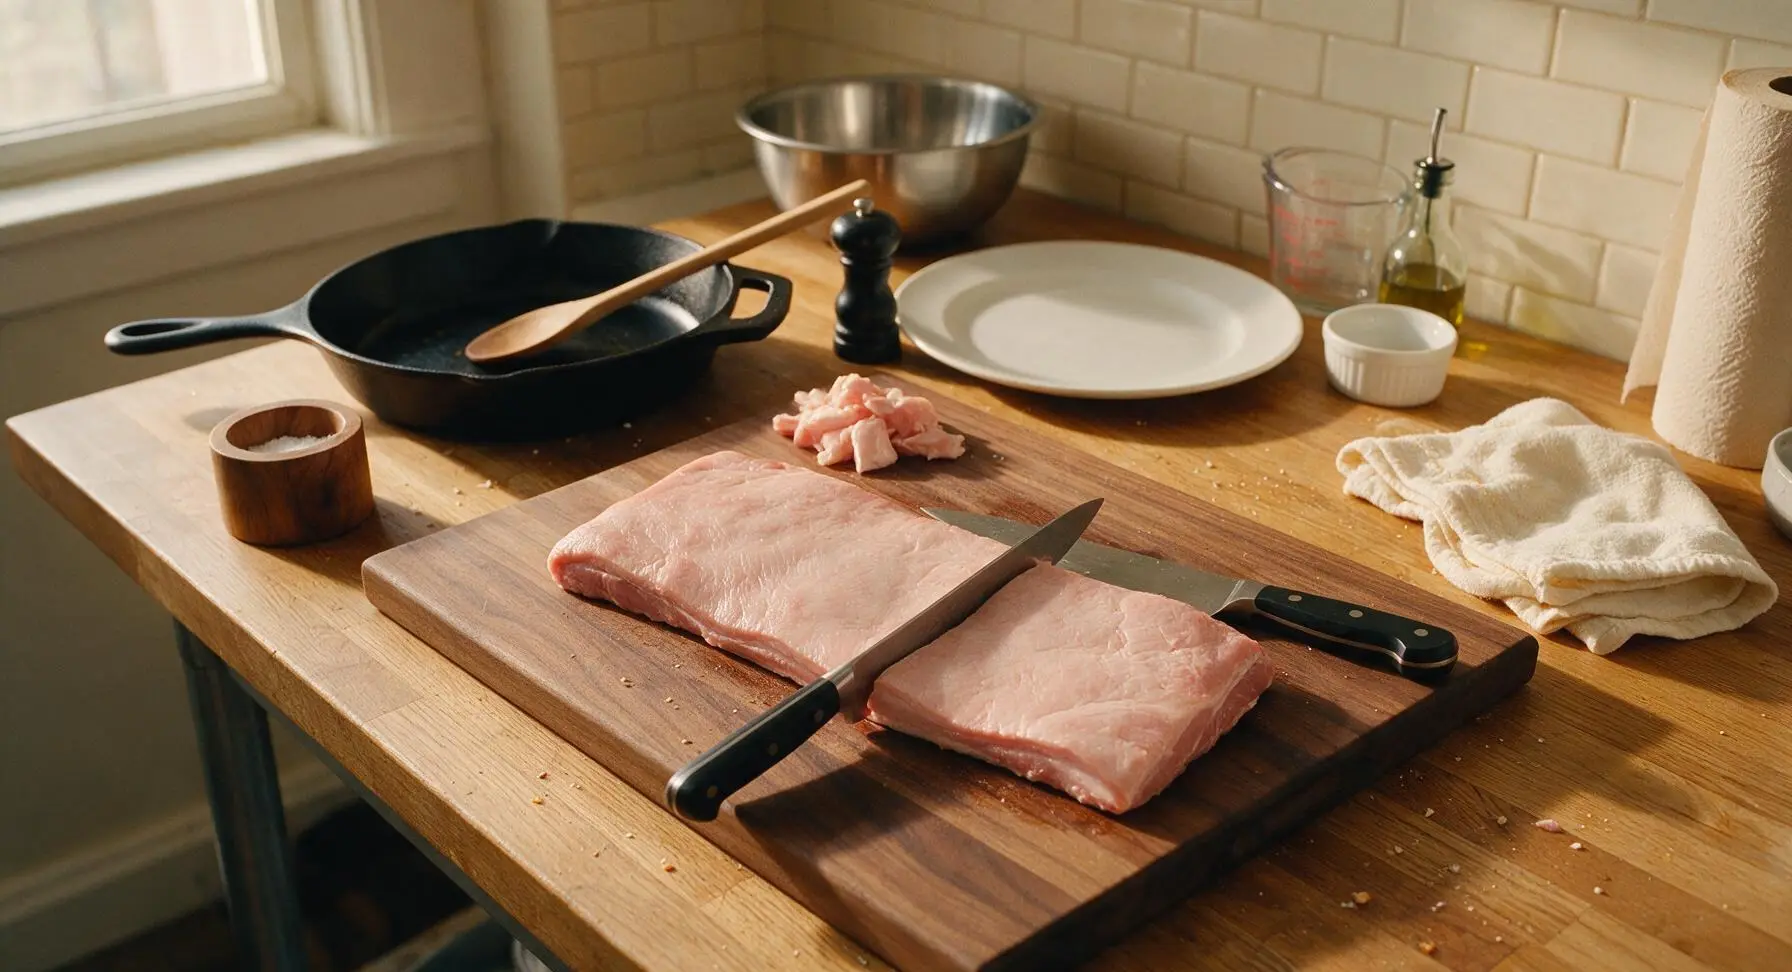
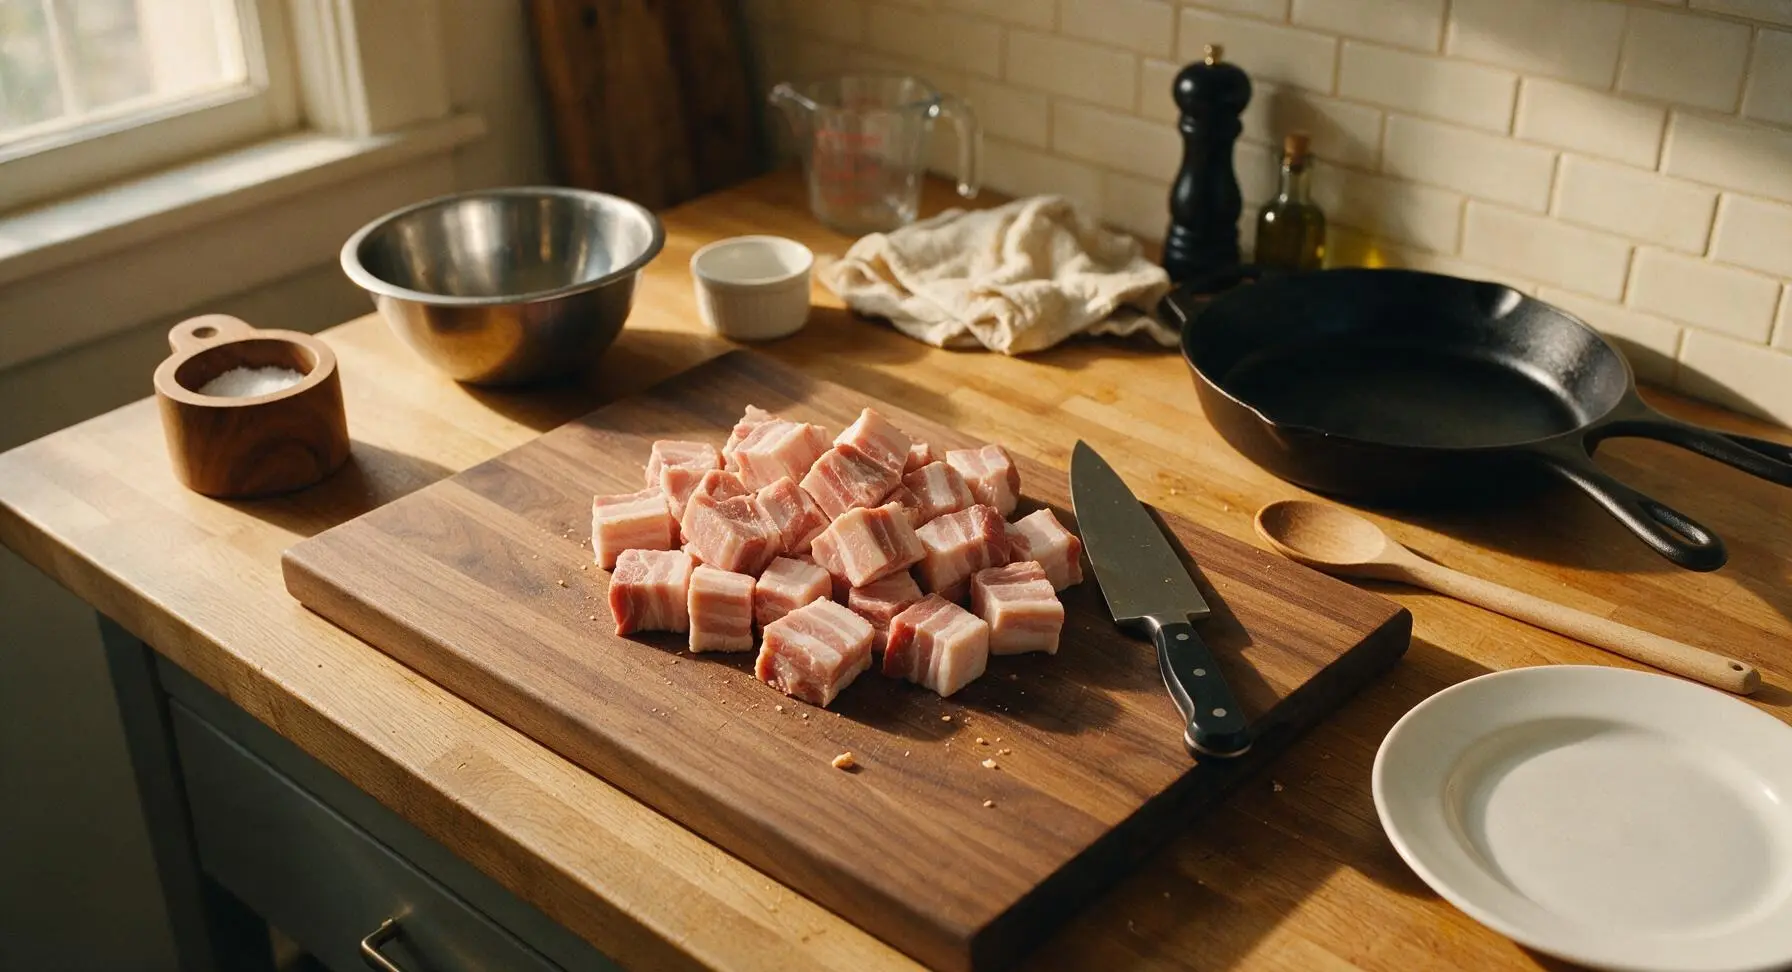
Place the whole skinless pork belly slab on the acacia wood cutting board. Using the 8-inch walnut-handled chef knife, trim any excess loose fat or thin silver skin from the slab, then cut the pork into uniform 3.5cm (1.5 inch) cubes, ensuring every cube has an even ratio of fat to lean meat. Pat all cubes completely dry with unbleached paper towels to encourage crisping and glaze adhesion during cooking.
Step 1
step1:Cube the Pork Belly
Step 1
step1:Cube the Pork Belly
2

Toss with Dry Rub

Add the kosher salt, black pepper, and garlic powder to the medium brushed stainless steel mixing bowl, stir briefly to evenly combine the spices. Add the dried pork belly cubes to the bowl, and toss thoroughly with the silicone-tipped metal tongs until every cube is evenly coated in a thin, uniform spice layer, with no clumps of seasoning left at the bottom of the bowl.
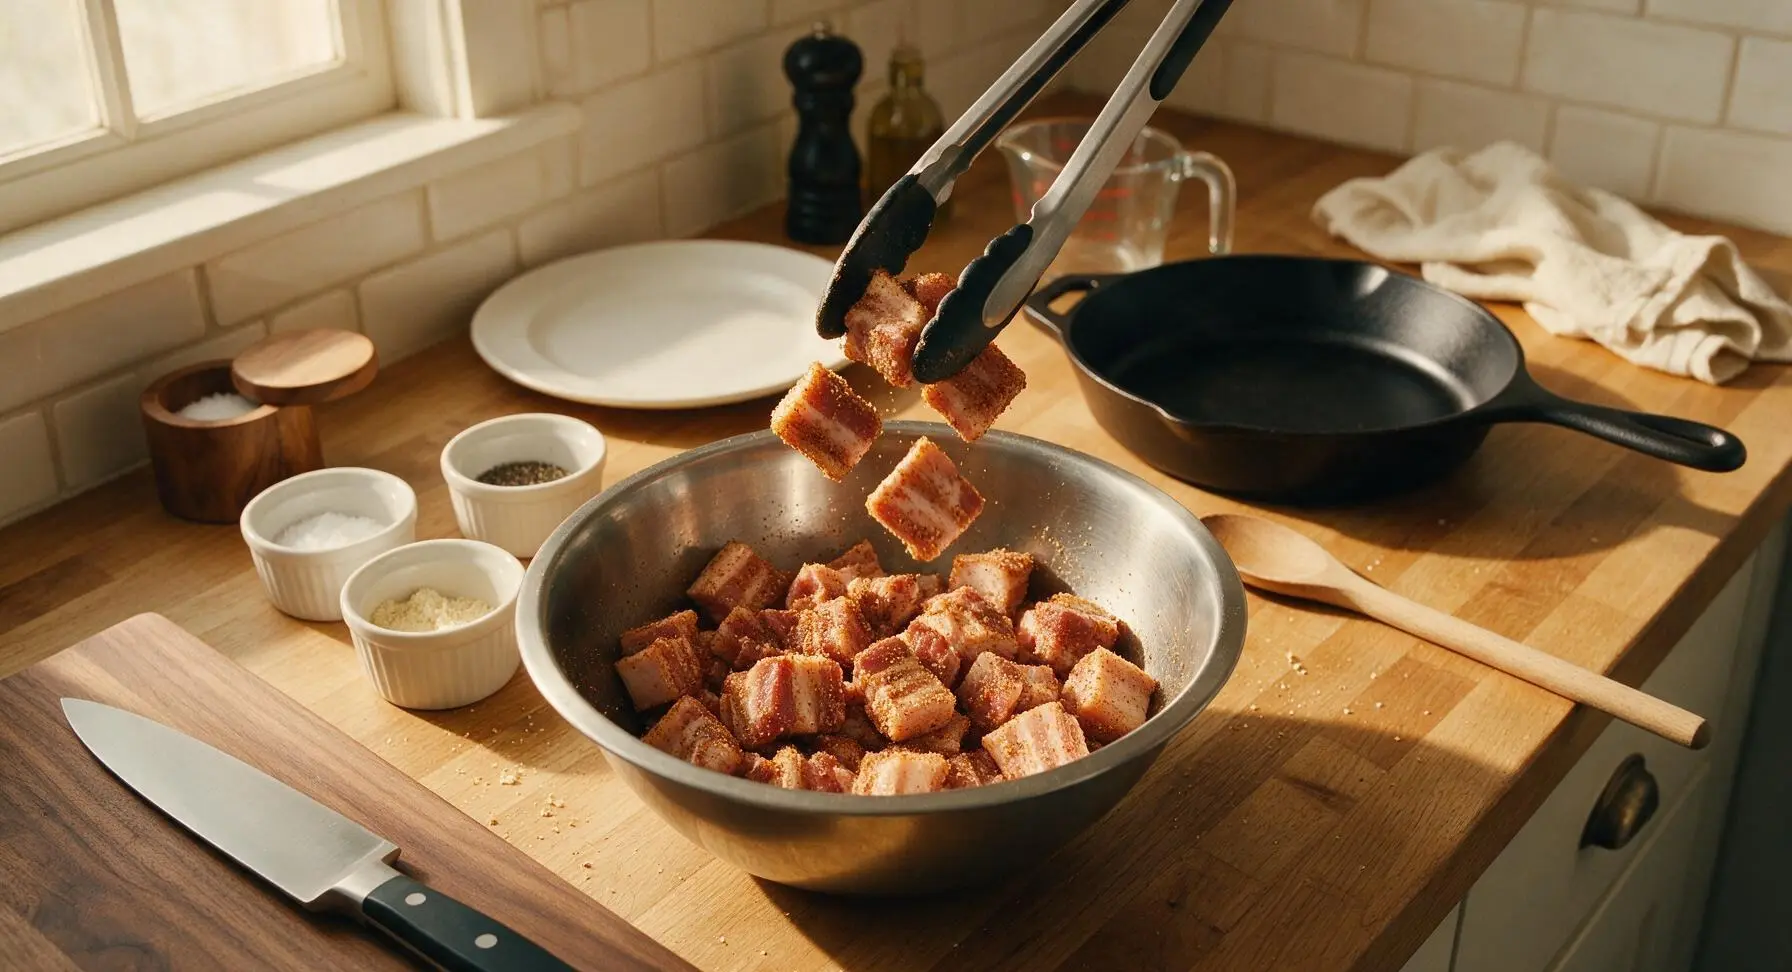
Step 2
step2:Toss with Dry Rub
3

Slow Roast Cubes

Arrange the seasoned pork belly cubes in a single layer, fat side up, in the heavy-gauge aluminum roasting pan, leaving 1cm of space between each cube to allow hot air flow for even rendering. Place the pan in a preheated 135C (275F) oven (or on the indirect heat side of a covered charcoal/gas grill) and cook for 1 hour 30 minutes, until the cubes are tender when pierced with a fork, and the fat has rendered to create a light golden-brown crust on the edges. Verify doneness with the instant-read thermometer: the internal temperature of the largest cube should read 93C (200F).
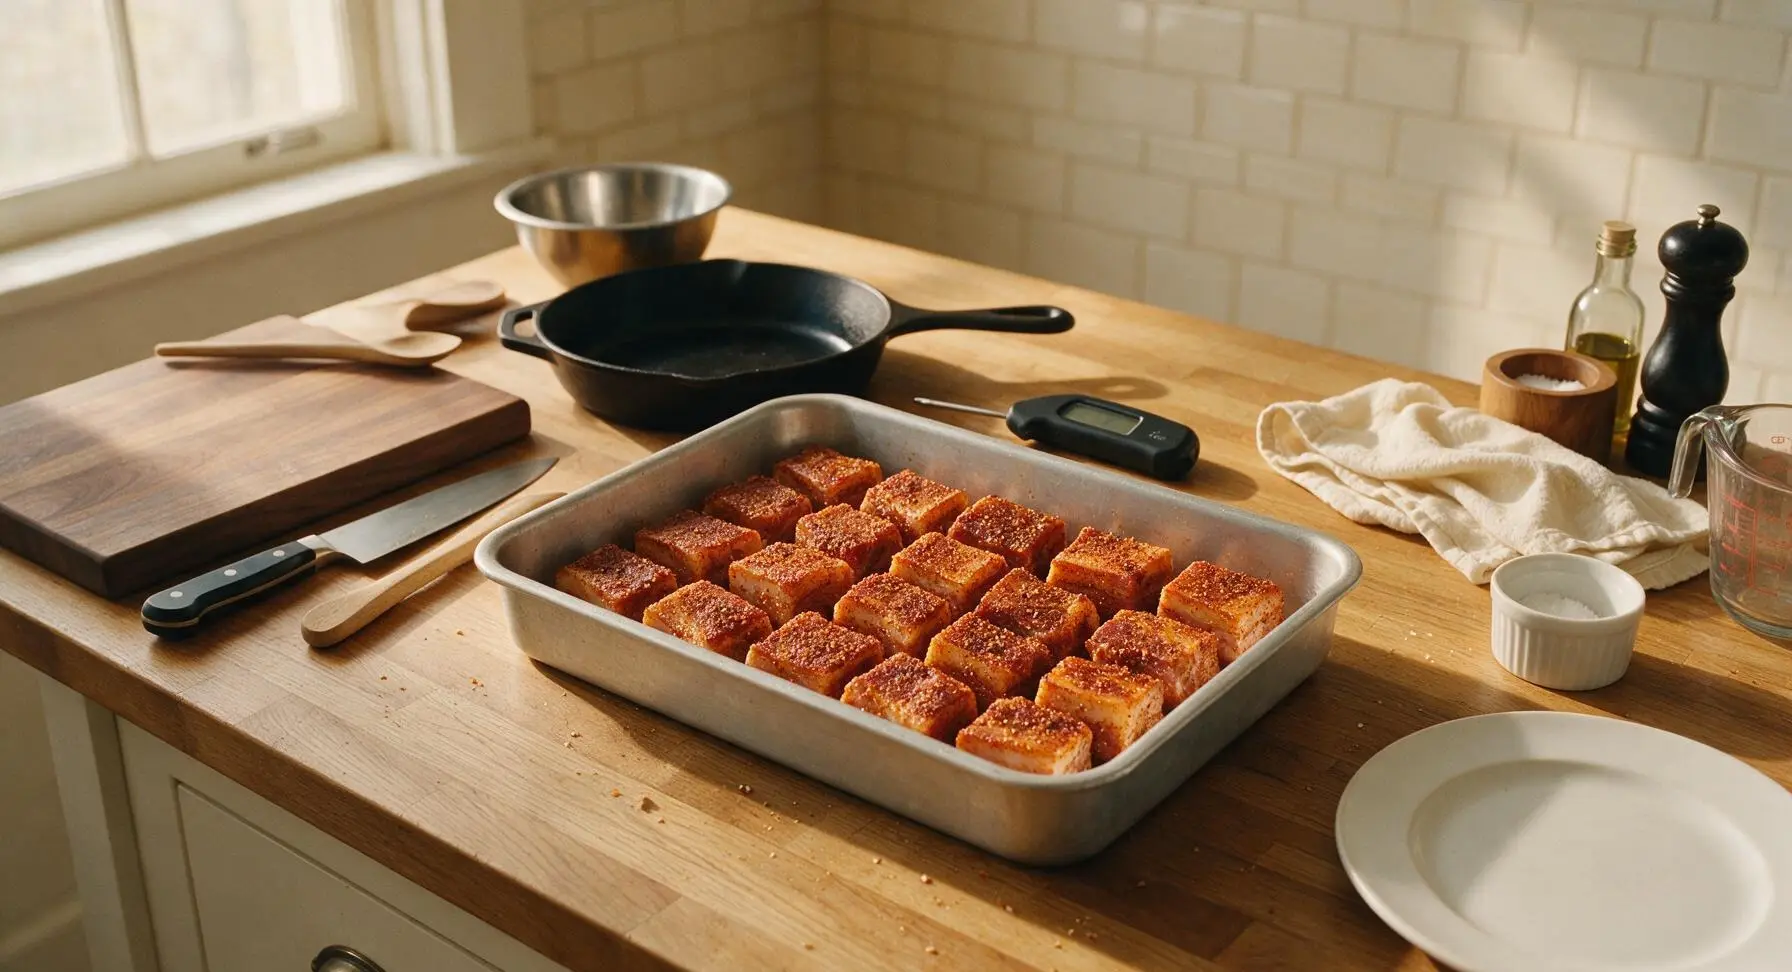
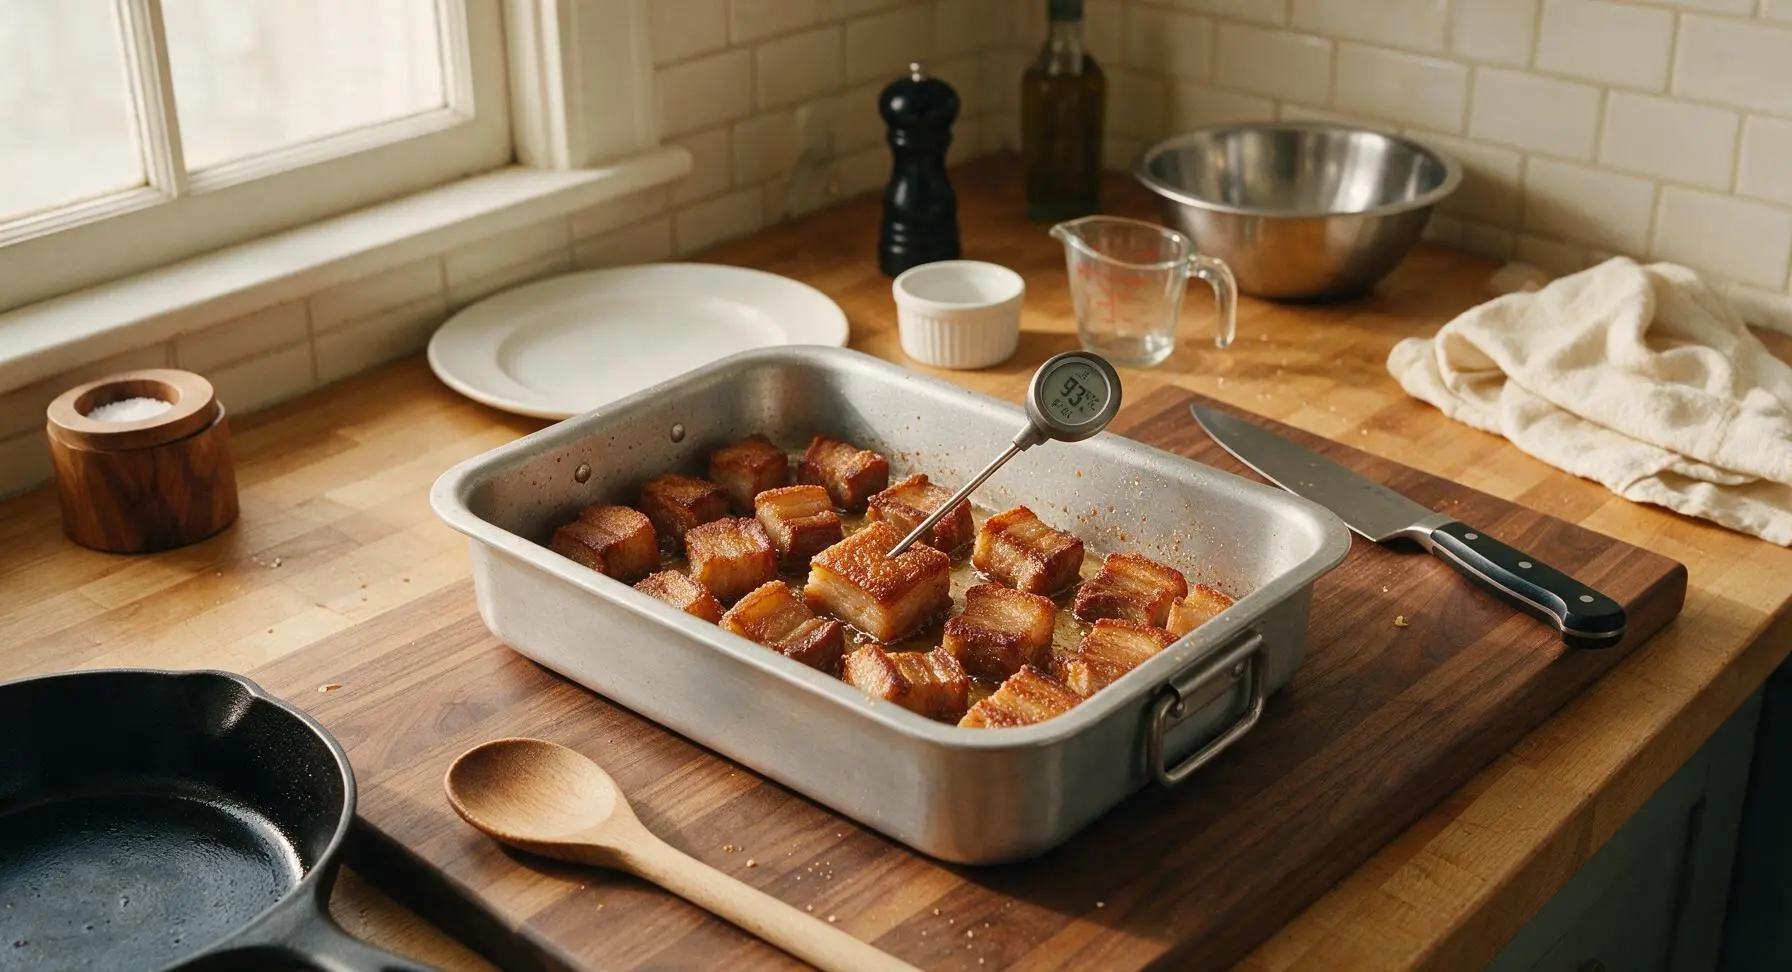
Step 3
step3:Slow Roast Cubes
Step 3
step3:Slow Roast Cubes
4

Simmer Teriyaki Glaze

While the pork cooks for the first slow roast, place the 1L polished stainless steel saucepan over medium-low heat. Add soy sauce, mirin, sake, packed light brown sugar, grated ginger, and minced garlic to the pan. Stir constantly until the sugar fully dissolves, then bring to a gentle, low simmer, and cook for 8-10 minutes, until the glaze is reduced by roughly one third, coats the back of a spoon, and has a thick, syrupy deep amber consistency. Remove from heat and set aside.
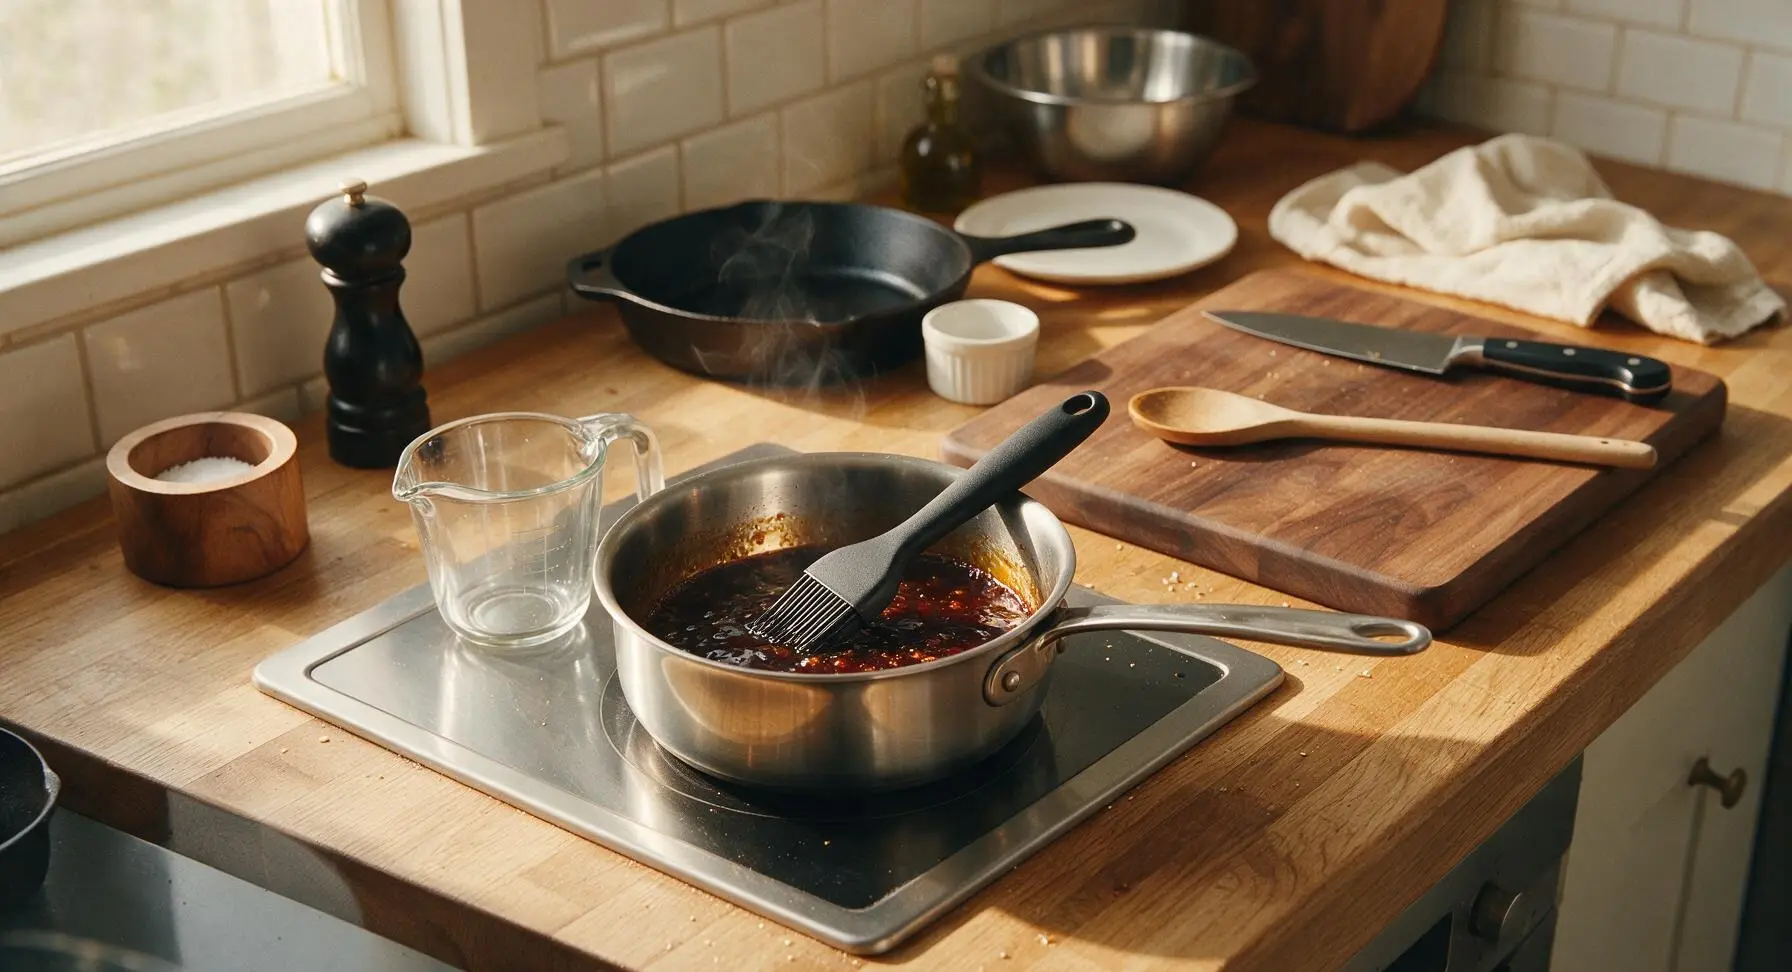
Step 4
step4:Simmer Teriyaki Glaze
5

Coat in Teriyaki Glaze

Once the pork cubes finish the first slow roast, carefully remove the roasting pan from the oven/grill (pan will be very hot). Pour ¾ of the prepared teriyaki glaze over the hot cubes, use the silicone-tipped tongs to toss thoroughly until every cube is fully coated in sticky glaze, reserving the remaining ¼ of glaze for basting during the final cook.
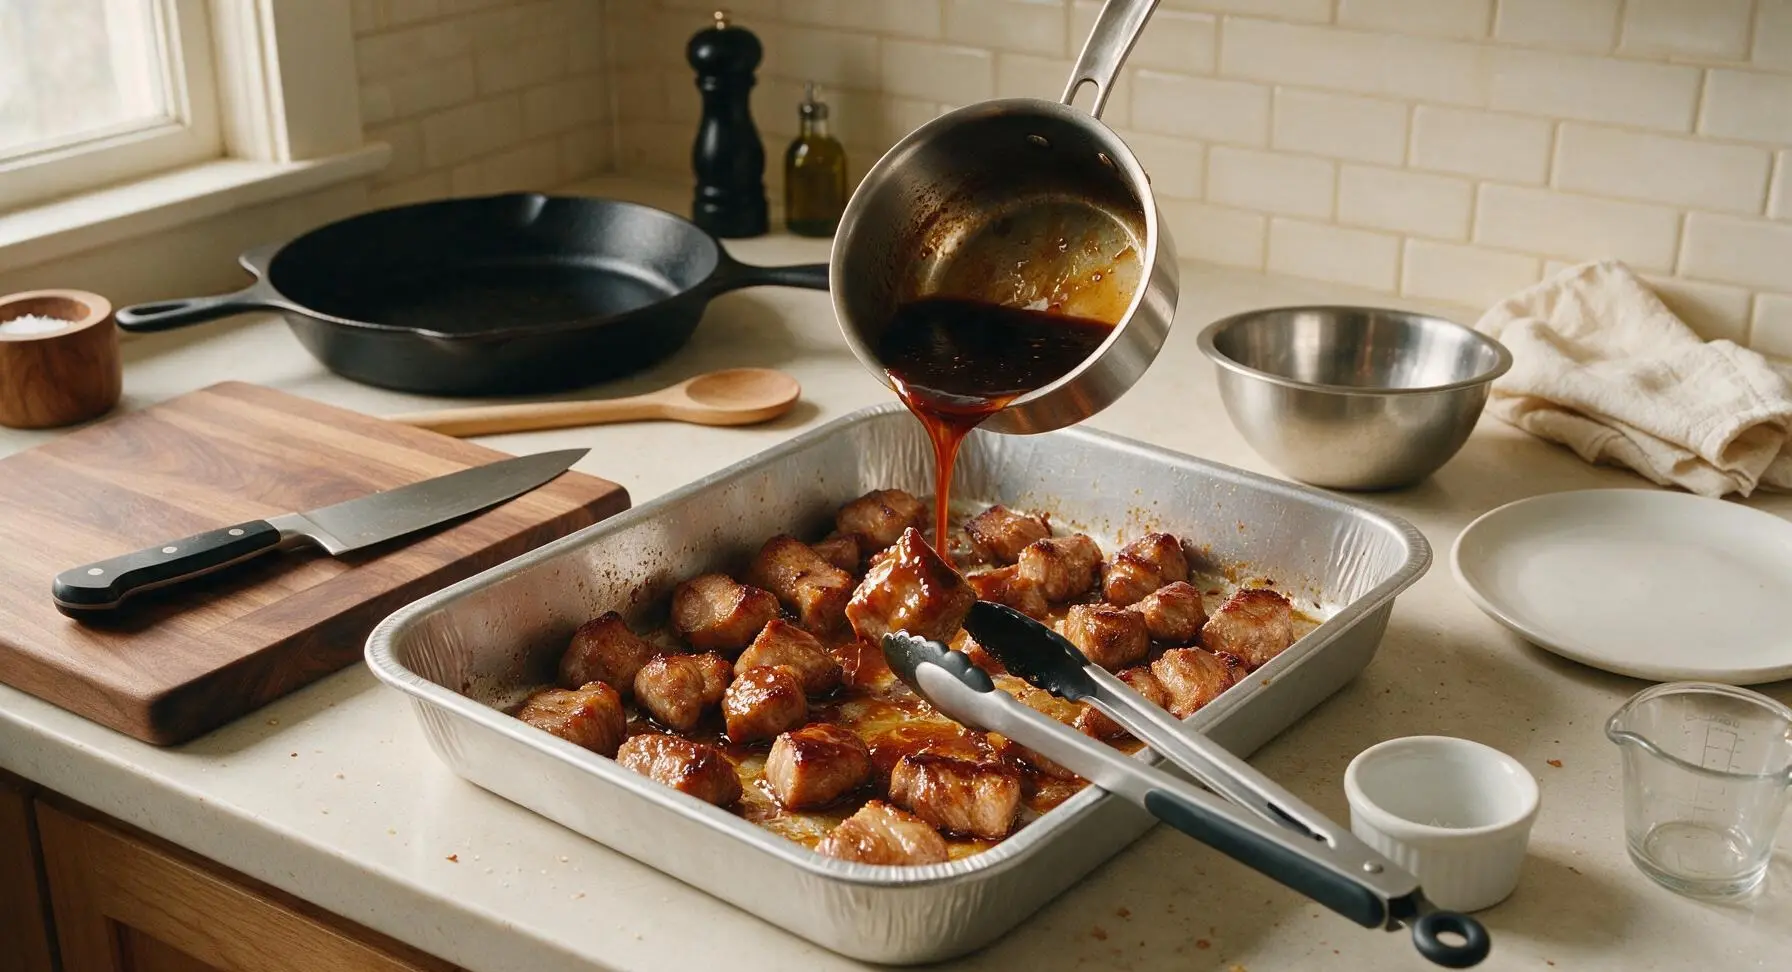
Step 5
step5:Coat in Teriyaki Glaze
6

Caramelize Glazed Cubes

Return the pan of glazed pork cubes to the oven/grill, increase temperature to 200C (400F), and cook for an additional 25-30 minutes, basting the cubes with the remaining reserved teriyaki glaze using the silicone basting brush every 10 minutes. Cook until the glaze is dark, sticky, and slightly charred (the 'burnt' signature of burnt ends) at the cube edges, with a glossy deep mahogany finish. Watch closely during the final 10 minutes to prevent the high sugar content in the glaze from burning and turning bitter.
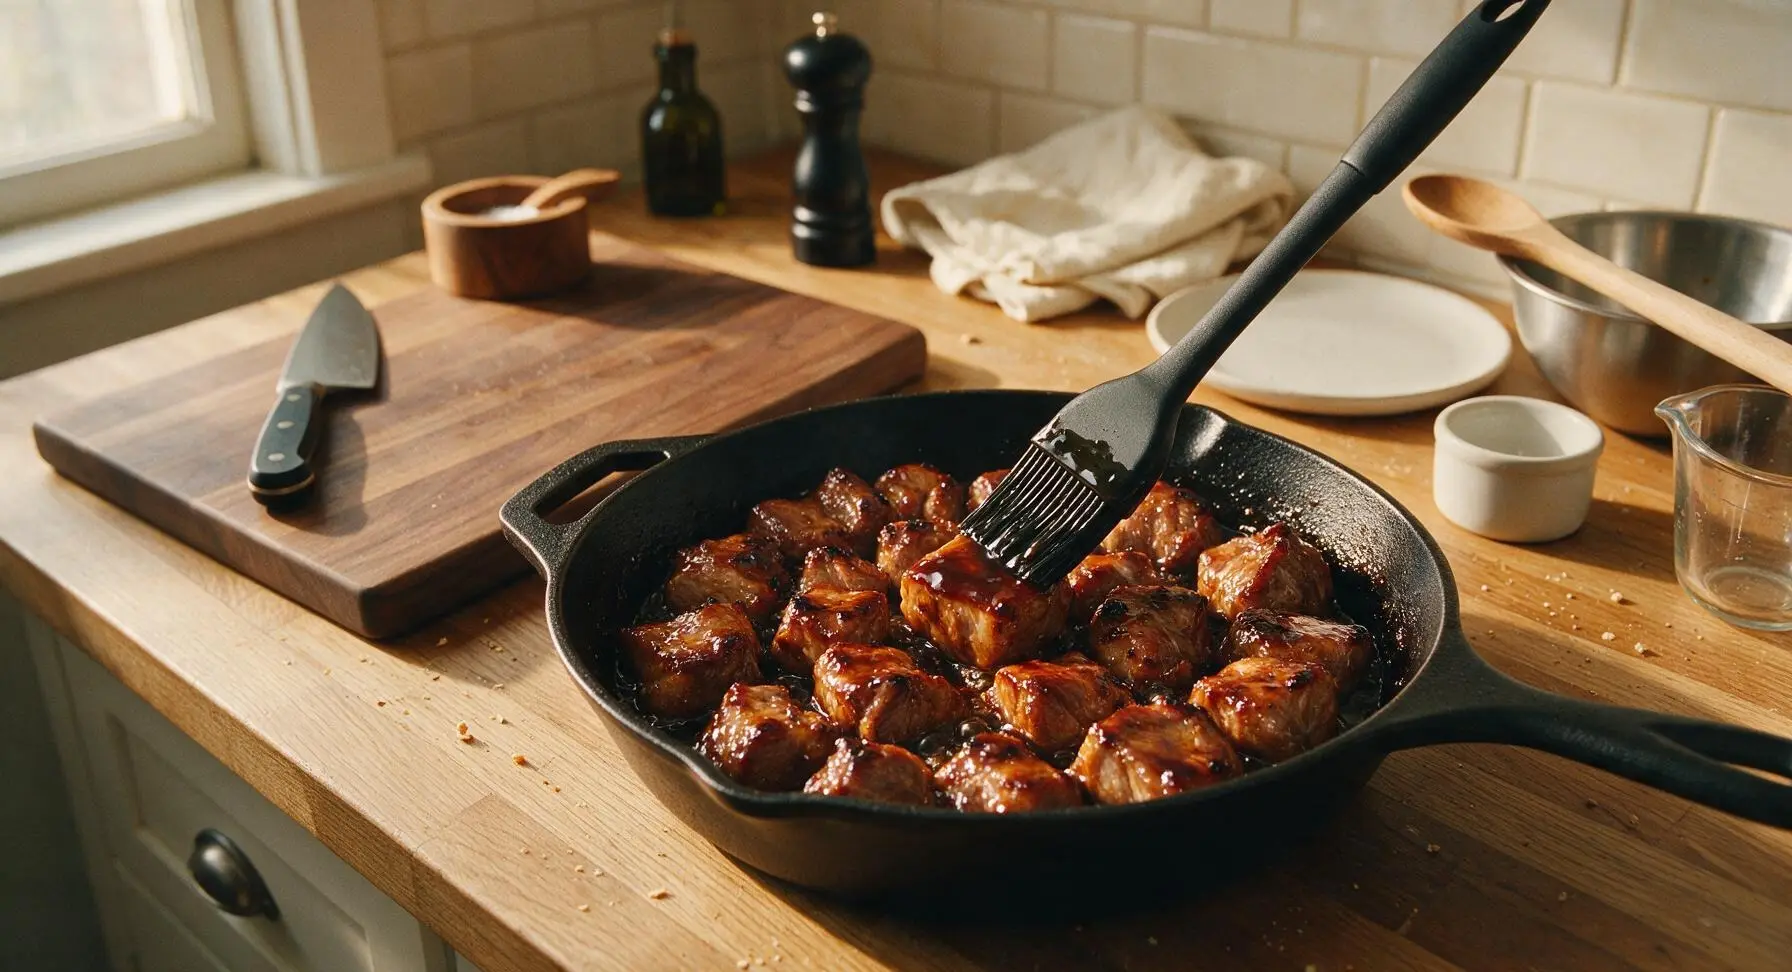
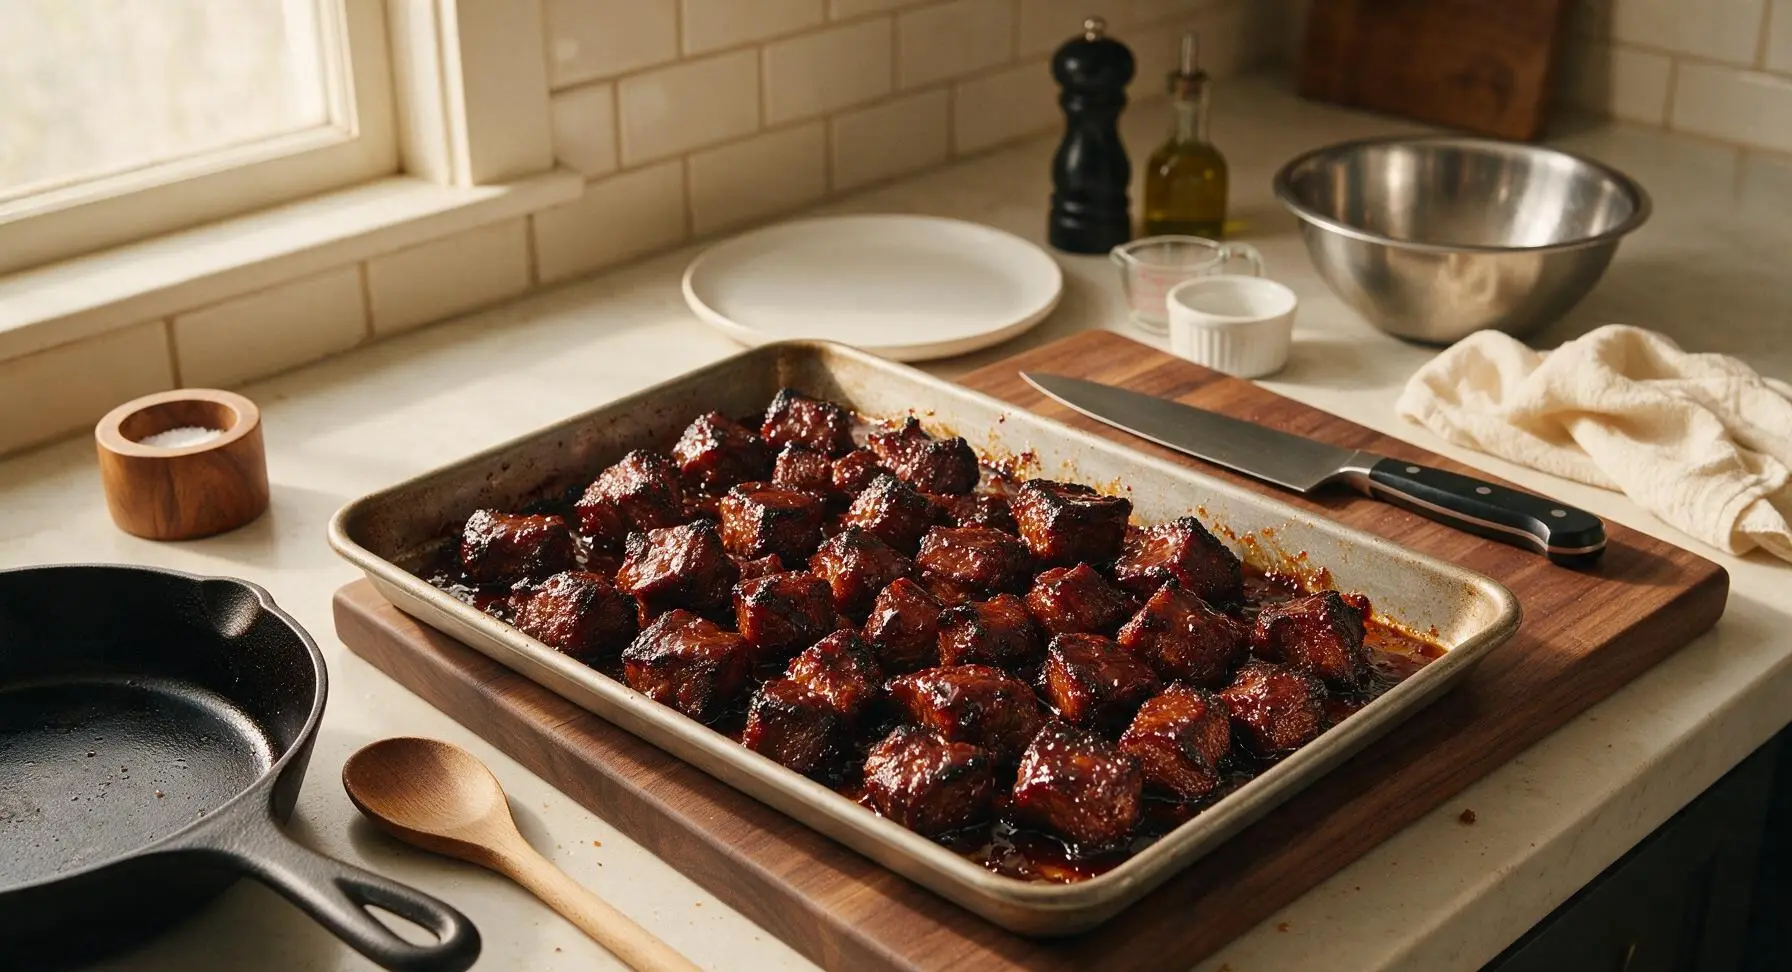
Step 6
step6:Caramelize Glazed Cubes
Step 6
step6:Caramelize Glazed Cubes
7

Plate and Garnish

Use the silicone-tipped tongs to transfer the hot burnt ends to the warm off-white matte stoneware dinner plate, piling them loosely in the center. Drizzle any remaining thick glaze from the roasting pan over the top of the pile, then scatter thinly sliced scallion greens and toasted white sesame seeds evenly over the burnt ends. Let rest for 3 minutes before serving to allow the glaze to set slightly to a perfect sticky consistency.
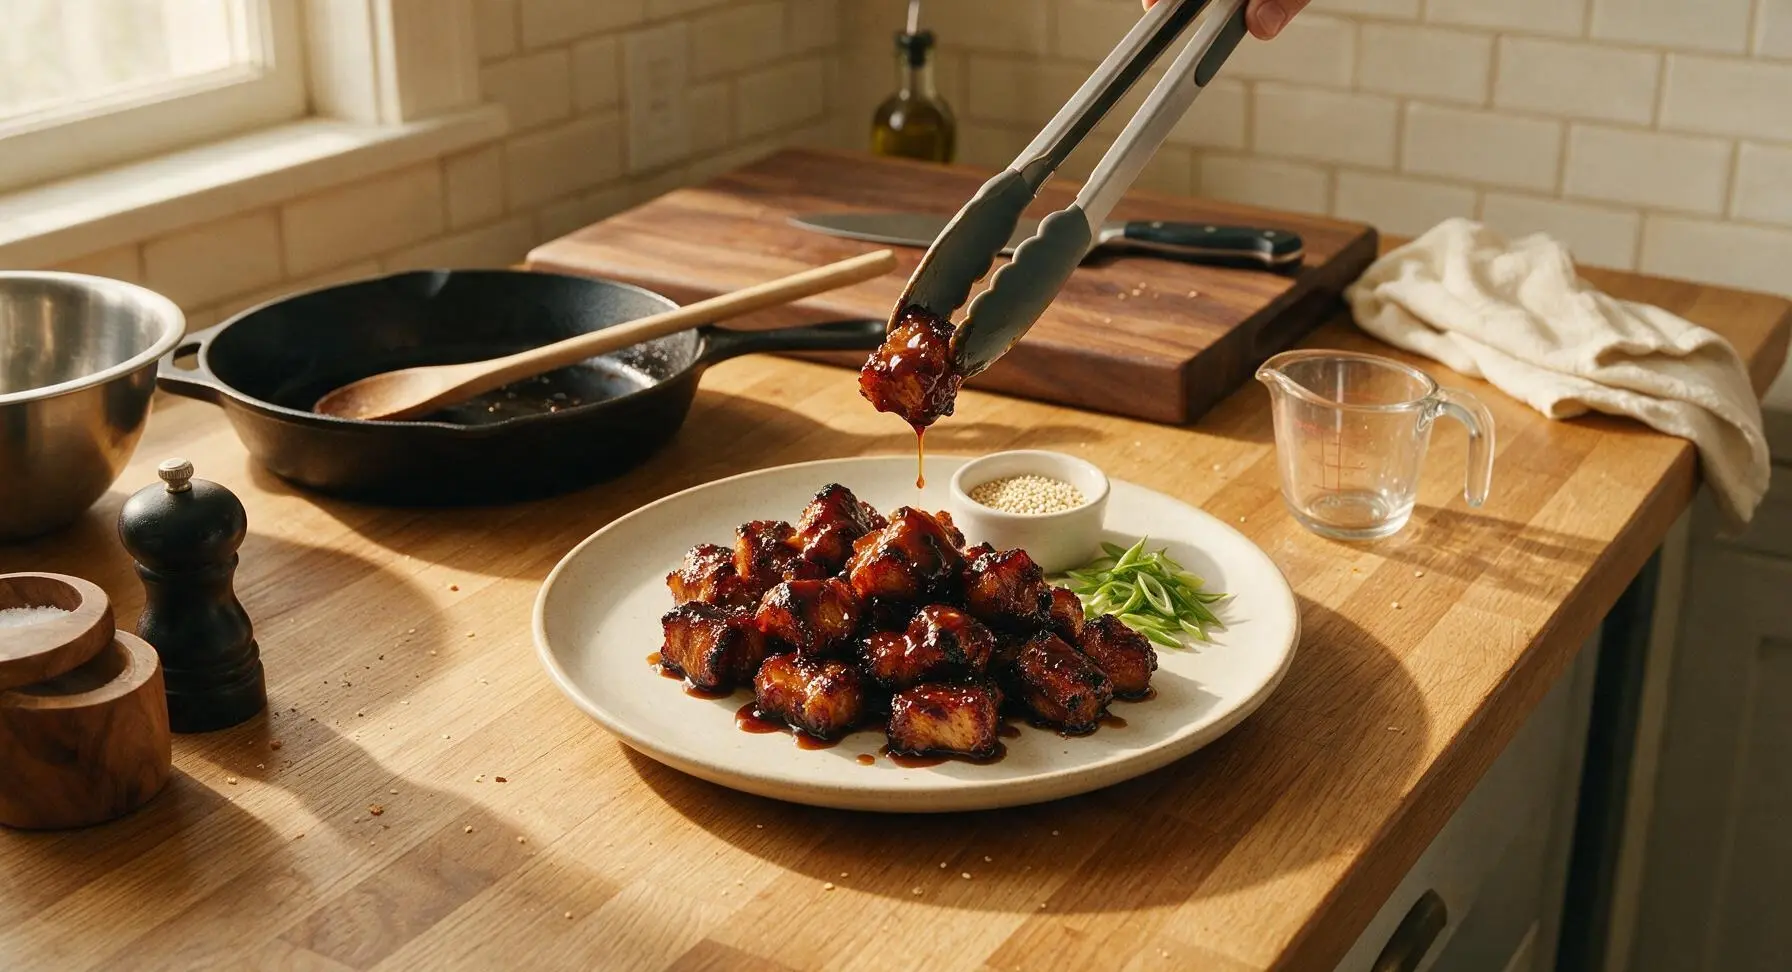
Step 7
step7:Plate and Garnish

Tips

1.Do not skip drying the pork belly cubes thoroughly with paper towels before applying the dry rub: surface moisture will prevent fat from rendering properly and cause the teriyaki glaze to slide off instead of forming a sticky, caramelized crust.
2.If using a grill instead of an oven, keep the cubes on the indirect heat side for the entire cook time: direct open flame will burn the sugar in the teriyaki glaze quickly, leading to bitter, acrid black spots instead of the desired slightly sweet, charred 'burnt' edges.
3.Cut pork belly into uniform 3.5cm (1.5 inch) cubes: unevenly sized pieces will cook at different rates, resulting in some overcooked, tough cubes and others with under-rendered, chewy fat. This size creates the perfect juicy center and crispy outer edge.


✨ You May Also Like

BBQ & Grilling
🍜 United States

Tender, melt-in-your-mouth beef brisket with a crisp, spiced bark, slow-smoked to deep smoky perfection, the iconic centerpiece of Texas backyard barbecue.

⏱️ 12 hours BBQ & Grilling ★ 4.4
BBQ & Grilling
🍜 Korea

Tender, sweet-savory marinated beef short ribs, a beloved Korean BBQ staple with caramelized, slightly charred edges and deep umami flavor, perfect for outdoor summer gatherings.

⏱️ 4 hours 2BBQ & Grilling ★ 4.8
BBQ & Grilling
🍜 United States

Juicy grilled beef patties topped with smoky homemade chili, melted cheddar, and tangy pickles on toasted brioche buns for a hearty, flavor-packed handheld meal.

⏱️ 40 minuteBBQ & Grilling ★ 4.7
BBQ & Grilling
🍜 United States

A sweet, smoky, tangy BBQ sauce brightened with peak-season dark cherries, ideal for glazing grilled ribs, chicken, pork, or summer roasted veggies.

⏱️ 35 minuteBBQ & Grilling ★ 4.7
BBQ & Grilling
🍜 United States

Rich, smoky, slightly sweet homemade bourbon BBQ sauce with deep caramel notes, ideal for glazing grilled ribs, chicken, and burgers at cookouts.

⏱️ 25 minuteBBQ & Grilling ★ 4.7
BBQ & Grilling
🍜 United States

Iconic Alabama-style BBQ featuring tender hickory-smoked chicken slathered in tangy creamy white sauce, a beloved regional Southern cookout staple.

⏱️ 3 hoursBBQ & Grilling ★ 5

Japanese Teriyaki Burnt Ends:Frequently Asked Questions

1.What cut of pork works best for Japanese Teriyaki Burnt Ends? ▾
Skinless pork belly is the ideal pick here, thanks to its even, rich marbling that renders down into melt-in-your-mouth tender bites with crispy, charred edges. Trim off any extra-thick, tough hard fat patches, but leave most of the marbling intact, and cut it into uniform cubes for even cooking. Skip super lean cuts, which will turn dry and tough.
2.Can I use regular soy sauce instead of low-sodium soy for the glaze? ▾
You can, but cut the kosher salt in your initial dry rub by about half if you make that swap. Regular soy sauce has nearly double the sodium of low-sodium varieties, which can make your finished burnt ends unpleasantly salty once the glaze reduces and caramelizes, especially paired with the savory seasoning on the pork.
3.Do I need a dedicated smoker to make these burnt ends? ▾
No fancy smoker is required! You can make fantastic burnt ends in a regular home oven set to 275°F, or on a standard pellet grill if you have one. For a subtle smoky note without a smoker, add a tiny pinch of smoked paprika to your black pepper and garlic powder dry rub, no special equipment needed.
4.What size should I cut my pork belly cubes for the best texture? ▾
Aim for uniform 1.5-inch cubes every time. Pork belly shrinks significantly as fat renders out during cooking, so cutting cubes smaller than 1 inch will leave you with over-shrunken, tough, dry bits. Uniform sizing ensures every cube cooks at the same rate, so you get consistent crispy edges and tender centers across the whole batch.
5.Why do I need to apply a dry rub before adding the teriyaki glaze? ▾
That simple dry rub of kosher salt, freshly ground black pepper, and garlic powder builds a savory base layer that helps the sweet, umami teriyaki glaze stick to the pork, instead of sliding off smooth, unseasoned surfaces. The salt also draws out tiny bits of surface moisture to help form those craveable crispy, charred edges as the cubes cook.
6.How do I keep my burnt ends from getting soggy instead of crispy? ▾
Two easy, actionable tricks will fix soggy burnt ends every time: first, don’t douse the cubes in glaze too early—wait until they’re nearly tender and starting to crisp on the edges before tossing. Second, don’t crowd the pan; leave space between cubes so steam can escape, and crank heat to 400°F for the last 8-10 minutes to set the glaze.
7.Can I prep these burnt ends ahead of time for a party or game day? ▾
You can absolutely cut the pork belly and toss it in the dry rub a full day ahead, stored covered in the fridge, to cut down on day-of work. For the best sticky-crispy texture, though, toss with glaze and finish cooking right before serving—these taste best fresh, and lose their crisp edge about 20 minutes after coming off the heat.
8.What’s a good substitute if I can’t find skinless pork belly? ▾
If skinless pork belly is hard to track down at your grocery store, your closest swap is skinless, boneless pork shoulder cut into the same 1.5-inch cubes. It won’t have quite the same melt-in-your-mouth fat richness, but it will still get tender, charred edges and hold the teriyaki glaze beautifully; just add 10 minutes of cook time to break down its connective tissue.
9.How do I tell when the burnt ends are fully done and ready to eat? ▾
Skip relying solely on internal temp and look for three clear cues: the cubes should be fork-tender with no tough, chewy resistance, the edges should be deep golden and slightly charred (not pale and soft), and the teriyaki glaze should be thick, glossy, and caramelized, not runny and pooling at the bottom of your pan.
10.Why does the recipe call for kosher salt instead of regular table salt? ▾
Kosher salt has larger, flakier grains that distribute much more evenly across the pork belly cubes than fine table salt, so you don’t end up with random overly salty bites. If you only have table salt on hand, use half the measured amount of kosher salt called for, since table salt is far denser and more concentrated by volume.
11.What toppings or add-ins work well with these burnt ends? ▾
You have tons of flexible topping options! Right after pulling the cubes from the heat, toss them with toasted white sesame seeds, thinly sliced green onion, a pinch of shichimi togarashi for gentle heat, or crispy fried garlic for extra crunch. Just skip adding wet toppings early, as they will break down the crispy caramelized glaze.
12.How do I keep the teriyaki glaze from burning during caramelization? ▾
The low-sodium soy sauce in the glaze helps cut down on quick burning, since it has fewer added preservatives that scorch fast, but you still need to watch closely during the high-heat finish. Stir the cubes every 2 to 3 minutes once glazed, and pull them as soon as the glaze turns deep glossy amber—if it smells acrid, you’ve cooked it too long.
13.What sides pair best with these rich teriyaki burnt ends? ▾
These sticky, umami-heavy bites pair perfectly with bright, light sides that cut through the pork fat: try steamed short-grain white rice, quick rice-vinegar pickled cucumbers, a simple crunchy cabbage slaw, or even grilled pineapple chunks. For casual game day spreads, you can also serve them straight up with toothpicks as a handheld appetizer.
14.Can I make these burnt ends in an air fryer for faster cooking? ▾
You sure can, and you’ll get extra crispy edges in less time! Toss the dry-rubbed cubes in your air fryer basket at 375°F for 18 to 20 minutes, shaking the basket halfway, until tender and starting to crisp. Toss with teriyaki glaze, then air fry for 3 more minutes to set the sticky coating before serving.
15.How should I store leftovers, and what’s the best way to reheat them? ▾
Store leftover burnt ends in an airtight container in the fridge for up to 3 days. To reheat without sogginess, spread cubes on a foil-lined baking sheet and warm in a 375°F oven for 8 to 10 minutes, until the glaze is sticky again and edges crisp up. Skip the microwave, as it turns crispy edges rubbery and makes the glaze runny.

Comments (17)

2 days ago

OMG these teriyaki burnt ends are a GAME CHANGER for our weekend cookouts! I swapped the pork belly for chuck roast last minute because that's all I had in the fridge, and it still came out sticky, sweet, perfectly charred. My kids devoured half the tray before I even got the sides on the table 😂 SO good, already adding this to our regular rotation.

yesterday

So glad your family loved them, Liz! The chuck roast swap is such a great call—we love how versatile this recipe is for whatever cut you have on hand. Pro tip: toss a little toasted sesame seed on top next time for extra crunch!

1 week ago

Made these for our neighborhood potluck last weekend and people were begging me for the recipe before they even finished their first bite! I will say the medium difficulty rating is totally accurate—you really have to watch the glaze the last 10 minutes so it doesn't burn instead of caramelize. Worth every second of the 2 hour cook time though, 10/10.

3 days ago

Oh thank you for the heads up about the glaze! I'm making these for my office potluck next week and I definitely would've walked away to grab a drink and burned the whole batch 😅

2 days ago

Great callout about the glaze, Jake! That high sugar content in teriyaki can go from perfect to charred fast, so staying close at the end is key. So stoked these were a potluck hit!

5 days ago

These are perfect for my weekly meal prep! I portion them out with steamed rice and roasted broccoli, and the flavor holds up so well even after 4 days in the fridge. Only thing I added was a little extra ginger to the teriyaki because I'm obsessed with that zing. 10/10 will make again.

3 days ago

First time ever making burnt ends of any kind, and I was so nervous I'd mess this up! The instructions were super clear though, and even though I over-reduced the glaze a tiny bit, they still came out amazing. My roommate said they're better than the ones we get at our local BBQ spot.

2 days ago

Wait till you make them a second time! I messed up the glaze my first go too, now I can nail it without even looking at the recipe. These are addictive.

3 days ago

Made these for family dinner last night and my super picky 8 year old asked for seconds! That's basically a Michelin star in my book. I did use low-sodium soy sauce for the teriyaki because we watch our salt intake, and it didn't take away from the flavor at all.

2 days ago

Thanks for the low-sodium soy tip! My husband has high blood pressure so I'm always looking for ways to cut salt without killing the flavor, can't wait to try this.

yesterday

Love the low-sodium swap, Sarah! We're so glad your picky eater approved—there's no better endorsement than a kid asking for seconds. The fresh ginger and garlic in the glaze do a great job carrying flavor even with less salt!

2 weeks ago

I threw these on my offset smoker instead of the oven like the recipe says, used a little hickory wood, and oh my LORD. The smokiness paired with the sweet teriyaki is unbeatable. Don't sleep on adding a pinch of togarashi to the glaze for a little heat, trust me.

1 week ago

The smoker + togarashi hack is genius, thanks for sharing! We've tested these on a smoker a handful of times and that hickory smoke takes them to a whole new level. We might have to add that variation to the recipe notes!

1 week ago

Made these for date night with my partner and they were obsessed! We paired them with pickled cucumbers and cold sake, felt like we were at a fancy izakaya without the $100 bill. The 2 hour cook time gave us just enough time to watch an episode of our show while they baked, total win.

5 days ago

Wait, burnt ends but Japanese teriyaki? I was skeptical at first because I'm a traditional BBQ purist, but my wife begged me to make these and wow. I get the hype now. The sticky umami glaze is the perfect contrast to the crispy, fatty pork belly. I'll definitely be making these again, even if my BBQ crew gives me grief for 'fusion food'.

3 days ago

LMAO I feel this, I'm a KC style burnt ends diehard and I side-eyed this recipe hard when my sister sent it to me. Now I make it at least once a month, don't tell my BBQ club.

2 days ago

Fusion is where it's at! All the traditionalists are missing out. I did a gochujang-teriyaki mix last time I made these and it slapped.

yesterday

I live in a tiny dorm with just a toaster oven, and I was able to make these! I cut the pork belly into smaller cubes so they cooked faster, kept a close eye on the glaze, and they turned out so good. My entire hall smelled like teriyaki and half my floor knocked on my door asking for a bite 😂

2 hours ago

This is such an awesome win, Carly! We love hearing when people adapt the recipe to work with their setup, and the toaster oven hack is brilliant. Just wait till you make these for your first apartment potluck—you'll be the most popular person on the floor.

1 week ago

Pro tip: if you have leftovers, chop these up and throw them in a fried rice the next day. Game. Changer. I thought they were good fresh, but the leftover burnt ends fried rice might be even better. Don't @ me.

5 days ago

OH MY GOD why didn't I think of that? I have a whole container of these left in my fridge right now, I'm making fried rice for dinner tonight. You're a genius!

3 days ago

That leftover hack is elite, Lou! We've done the same thing with leftover burnt ends in fried rice, breakfast hash, even tossed in ramen—they're so versatile. Thanks for sharing the tip with everyone!

30 minutes ago

I added a tablespoon of chili crisp to the teriyaki glaze and it gave the perfect little kick without overpowering that classic sweet-savory teriyaki flavor. If you love heat like I do, do not skip that addition. So good I almost ate the whole batch standing up over the kitchen counter.

2 days ago

Tried making these for my husband's birthday cookout and I was so stressed they wouldn't turn out, but they were the star of the show! The only misstep I made was not cutting the pork belly into uniform cubes, so some were crispier than others, but no one even cared because the flavor was so on point.

yesterday

Uniform cubes are so tricky! I bought a cheap meat cube cutter on Amazon after my first batch turned out uneven, total game changer for consistent crispiness. You'll nail it next time!

2 weeks ago

I was worried this would be a super expensive recipe to make, but pork belly was on sale at my local grocery store for $3 a pound, and I already had most of the teriyaki ingredients in my pantry. Total cost for the whole batch was under $12, which fed me and my three roommates. Absolute steal for how good it tastes.

1 week ago

Thanks for the cost breakdown! I feed a family of 5 on a tight grocery budget, so I'm always looking for cheap but delicious meals that don't skimp on flavor. Gonna grab pork belly when it goes on sale next week!

5 days ago

We love that this recipe is accessible no matter your budget, Ben! Catching pork belly on sale is such a great move—you can even freeze extra cubes for the next time you're craving these burnt ends.

2 hours ago

Made this gluten free by swapping the regular soy sauce for tamari, and it worked perfectly! I was worried the glaze wouldn't get that same sticky consistency, but it was perfect. Finally, a fun BBQ-adjacent recipe I can serve to my gluten free friends without worry.

5 days ago

We added these to our weekly Sunday supper spread last week, paired with mac salad, grilled corn, and edamame, and it was the best meal we've had all month. There's something about that sweet, savory, sticky glaze that just makes everyone gather around the table and dig in. 10/10, new family favorite.

3 days ago

The mac salad pairing is chef's kiss! I made these last month and served them with creamy pineapple coleslaw, the tangy cut through the rich glaze was unreal.

5 minutes ago

Wait, why did I wait so long to make these? I kept seeing them pop up on my feed and I thought 'teriyaki burnt ends can't be that good'—boy was I wrong. The edges get all crispy and caramelized, the inside is melt-in-your-mouth tender, I'm actually mad I didn't try this sooner.

just now

So glad you finally gave them a try, Bella! That crispy caramelized edge is our favorite part too—there's nothing quite like it. Hope these become a regular for you!

1 week ago

Made these for our college football tailgate last weekend and they were gone in 10 minutes flat. I kept them warm in a crockpot after glazing them, and they stayed sticky and delicious the whole time. Already got plans to make a double batch for the homecoming game next month. SO good!



