
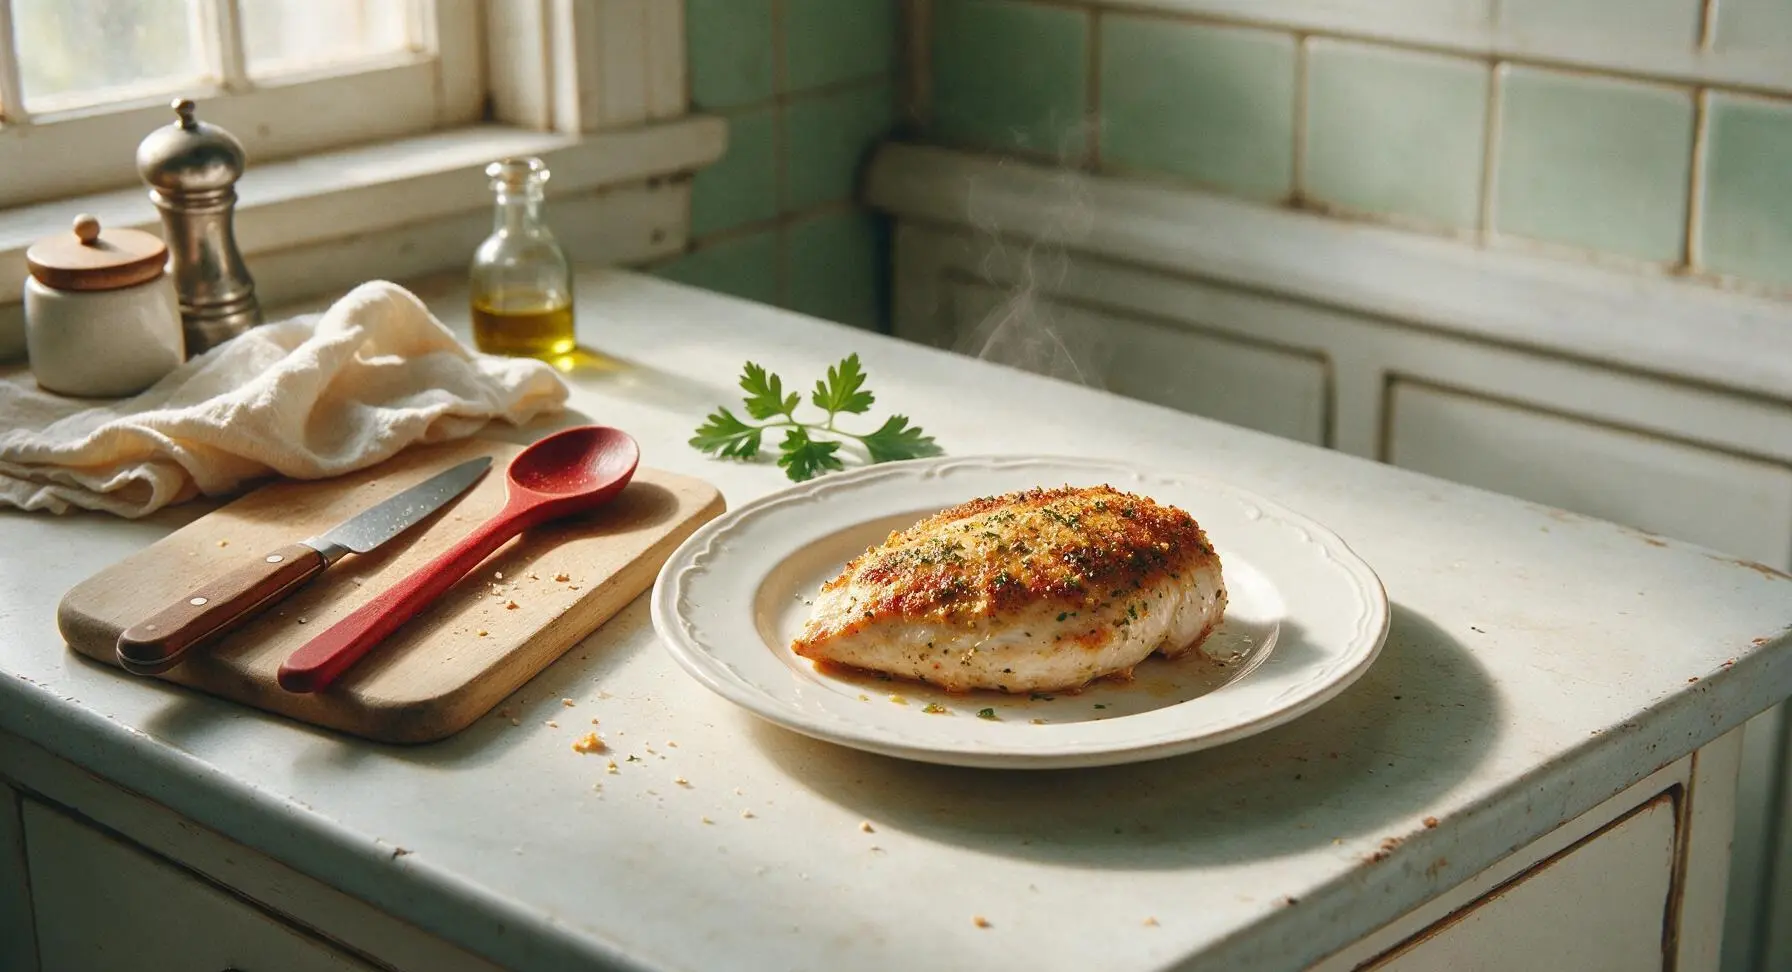
keto chicken breast

title 1
keto chicken breast
⏱️ cook time 15 minutes
🍽️ servings 4
⚡ Difficulty easy

intro

Juicy, tender pan-seared chicken breast with a crisp golden herb crust, zero added carbs, and rich buttery flavor. This fast, satisfying keto main course comes together in under 30 minutes for easy weeknight meals.

Ingredients
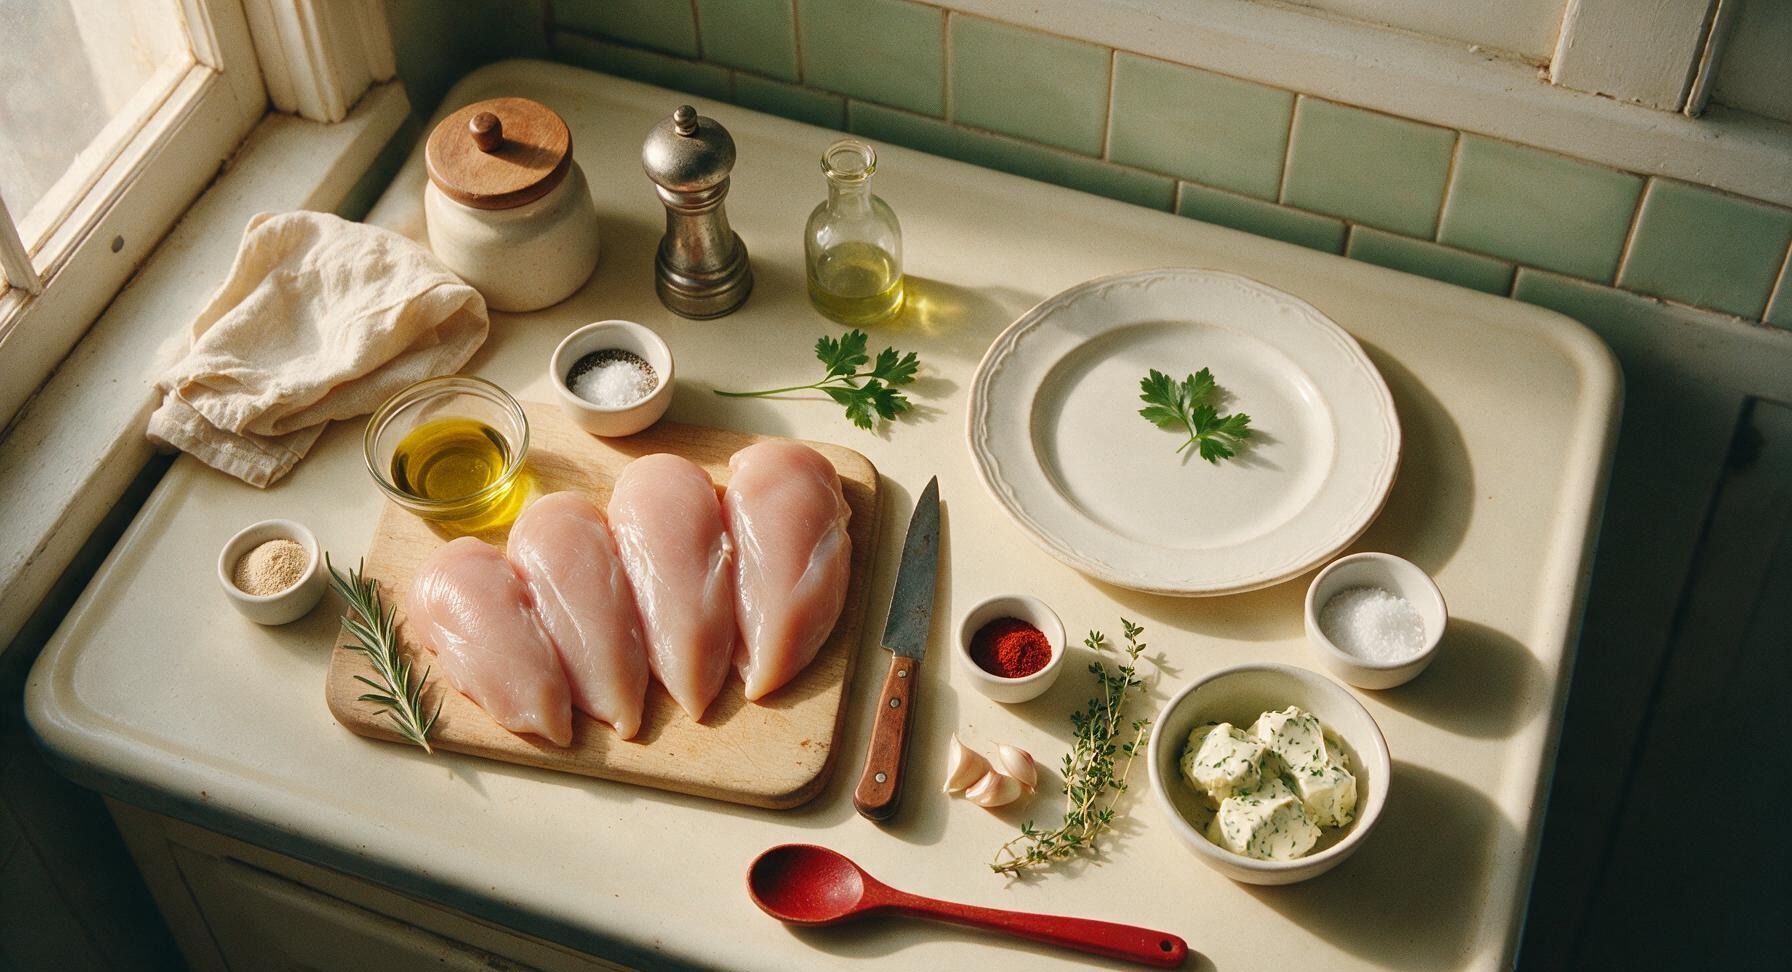
Boneless, skinless chicken breasts 4 pieces (≈170g each, 680g total)
Extra-virgin olive oil 2 tbsp
Coarse kosher salt 1.5 tsp
Freshly ground black pepper 1 tsp
Garlic powder 1 tsp
Smoked paprika 0.5 tsp
Fresh garlic cloves 2, crushed
Fresh rosemary 2 sprigs
Fresh thyme 3 sprigs
Unsalted garlic-herb compound butter (no added sugar) 4 tbsp

Steps

1

Pound chicken evenly

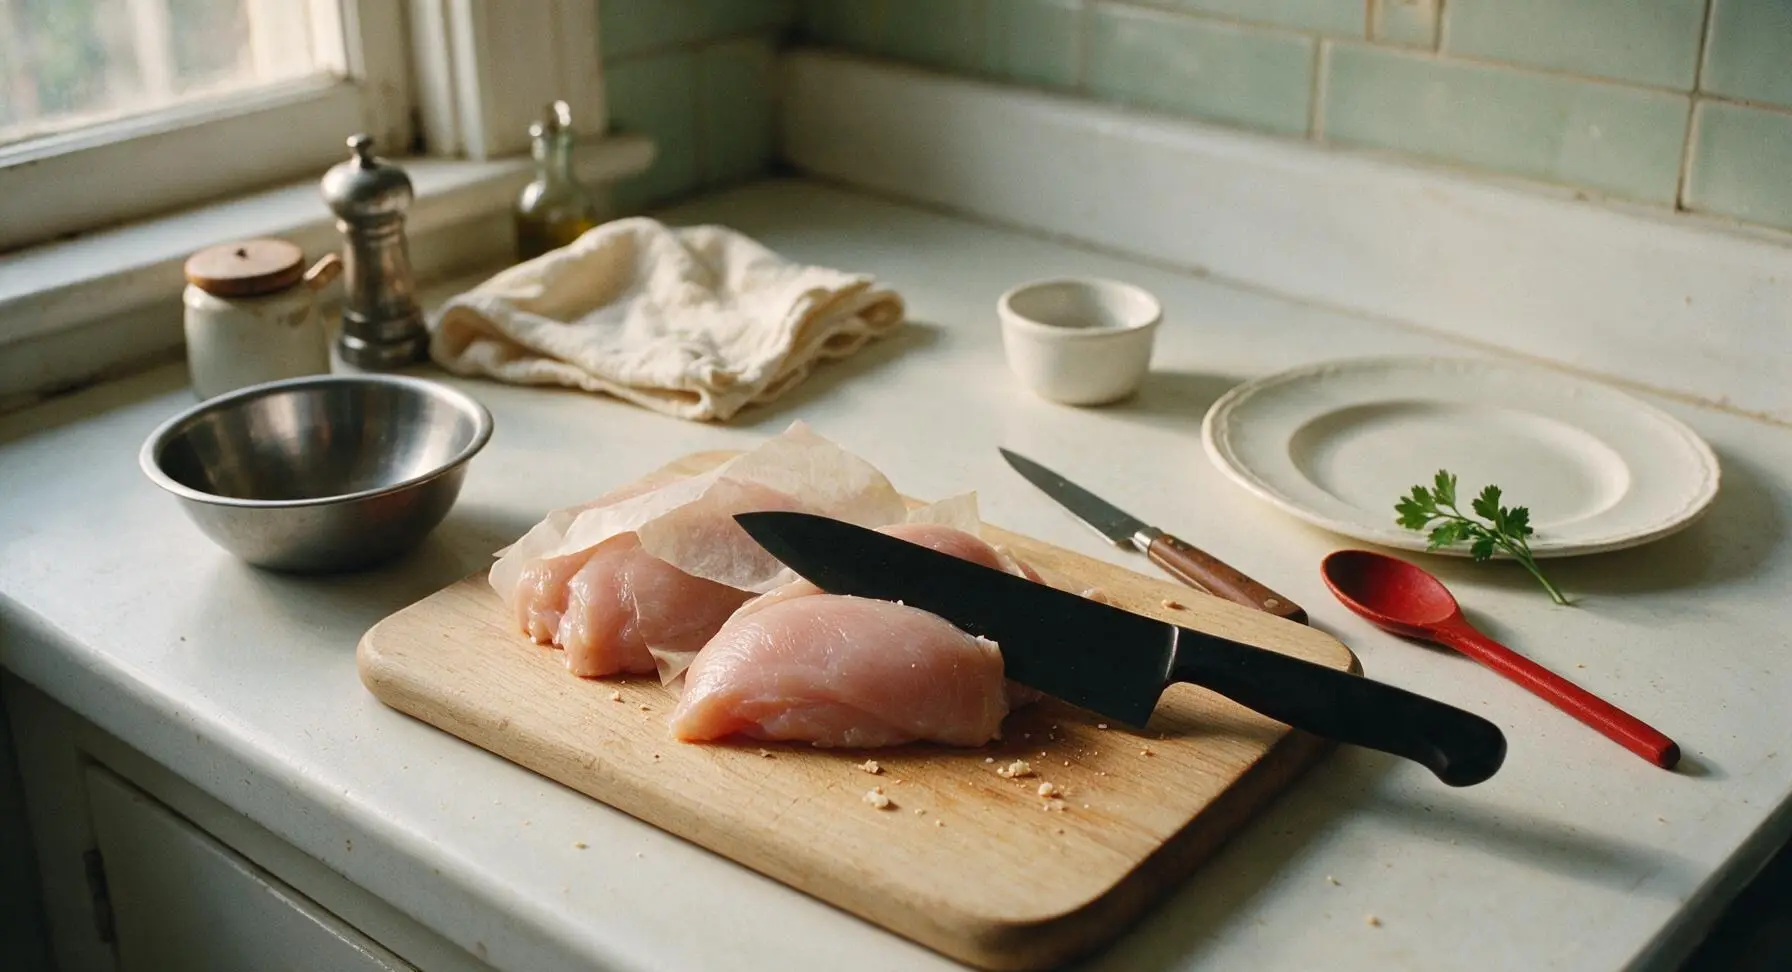
Place each boneless, skinless chicken breast between two sheets of parchment paper on the matte black cutting board. Using the flat side of the 8-inch chef knife, gently pound the thicker tapered end of each breast to a uniform 2.5cm thickness across the entire cut. This eliminates uneven cooking where thin edges overcook and dry out before the thick center is done. Pat all chicken surfaces completely dry with paper towels to remove excess surface moisture.
Step 1
step1:Pound chicken evenly
2

Season chicken generously

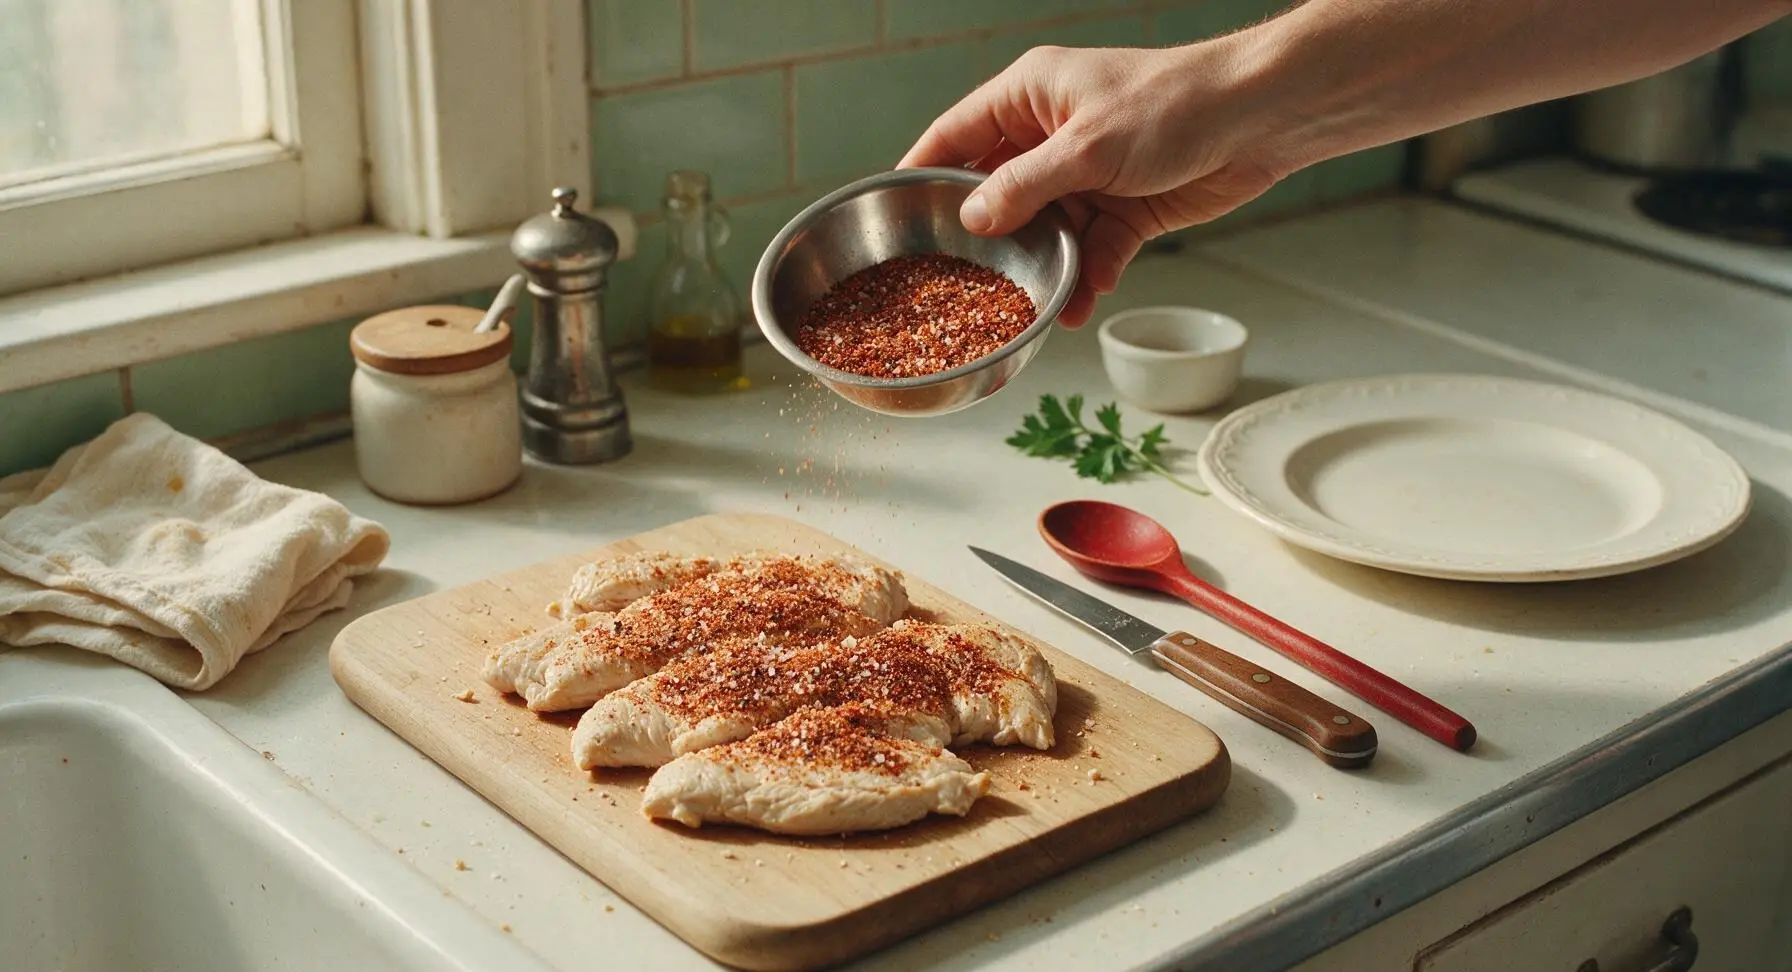
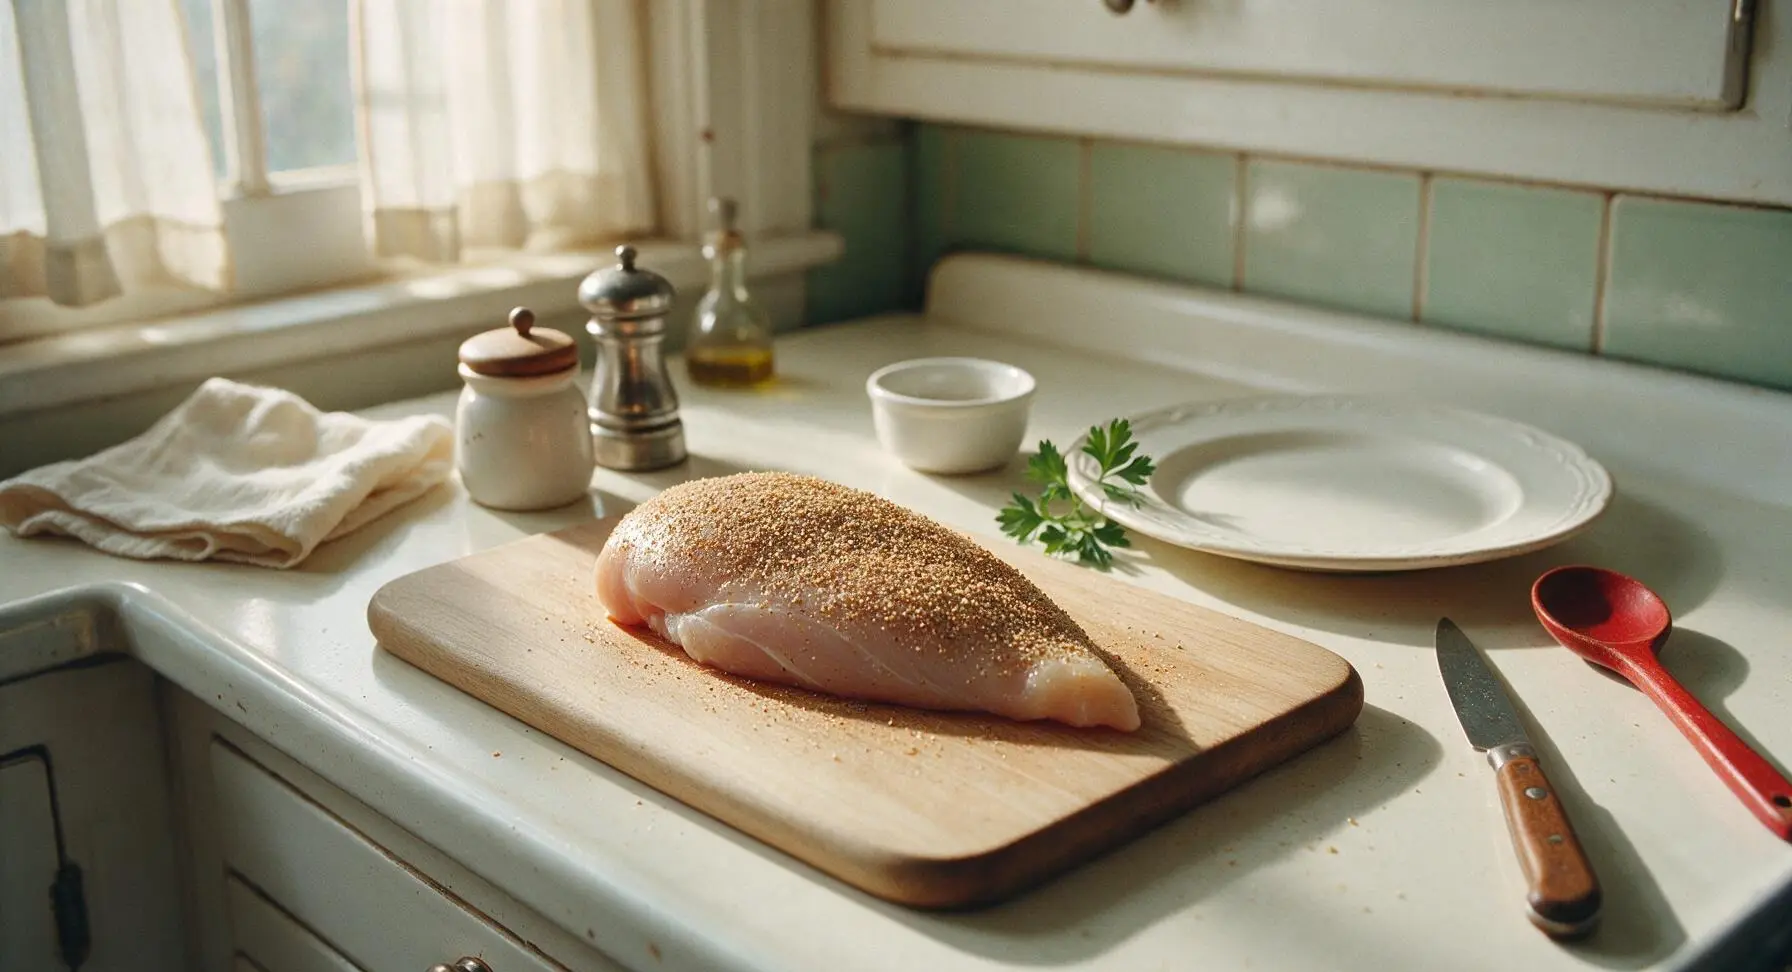
In the small stainless steel mixing bowl, combine 1.5 teaspoons coarse kosher salt, 1 teaspoon freshly ground black pepper, 1 teaspoon garlic powder, and 0.5 teaspoon smoked paprika, stirring to blend into an even spice mix. Sprinkle the blend evenly over all sides of the dried, pounded chicken breasts, pressing gently with clean fingers to help the spices adhere to the meat surface. Let seasoned chicken rest for 5 minutes at room temperature to allow salt to penetrate the meat for deeper flavor.
Step 2
step2:Season chicken generously
Step 2
step2:Season chicken generously
3

Preheat skillet properly

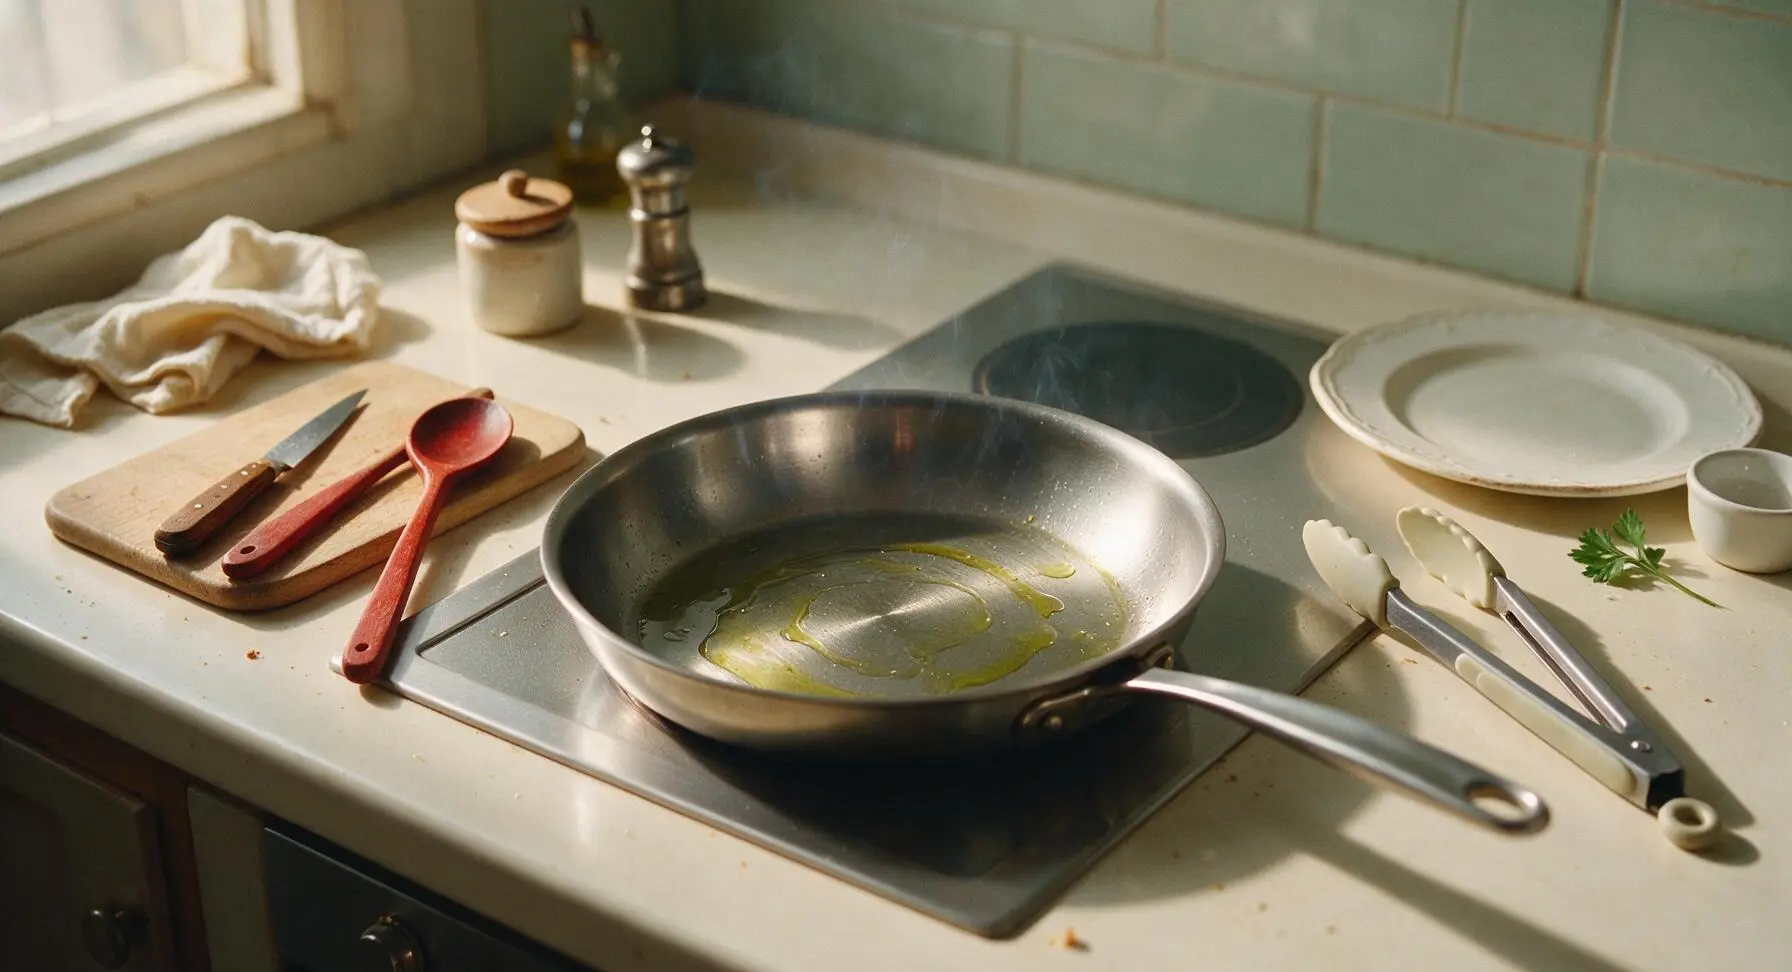
Place the 26cm stainless steel skillet on the center burner of the flush induction stovetop over medium-high heat. Add 2 tablespoons of extra-virgin olive oil to the pan, and heat for approximately 3 minutes until the oil shimmers across the pan surface and sends up thin, wispy trails of smoke. A fully preheated pan prevents chicken from sticking and creates a crisp, flavorful seared crust.
Step 3
step3:Preheat skillet properly
4

Sear first chicken side

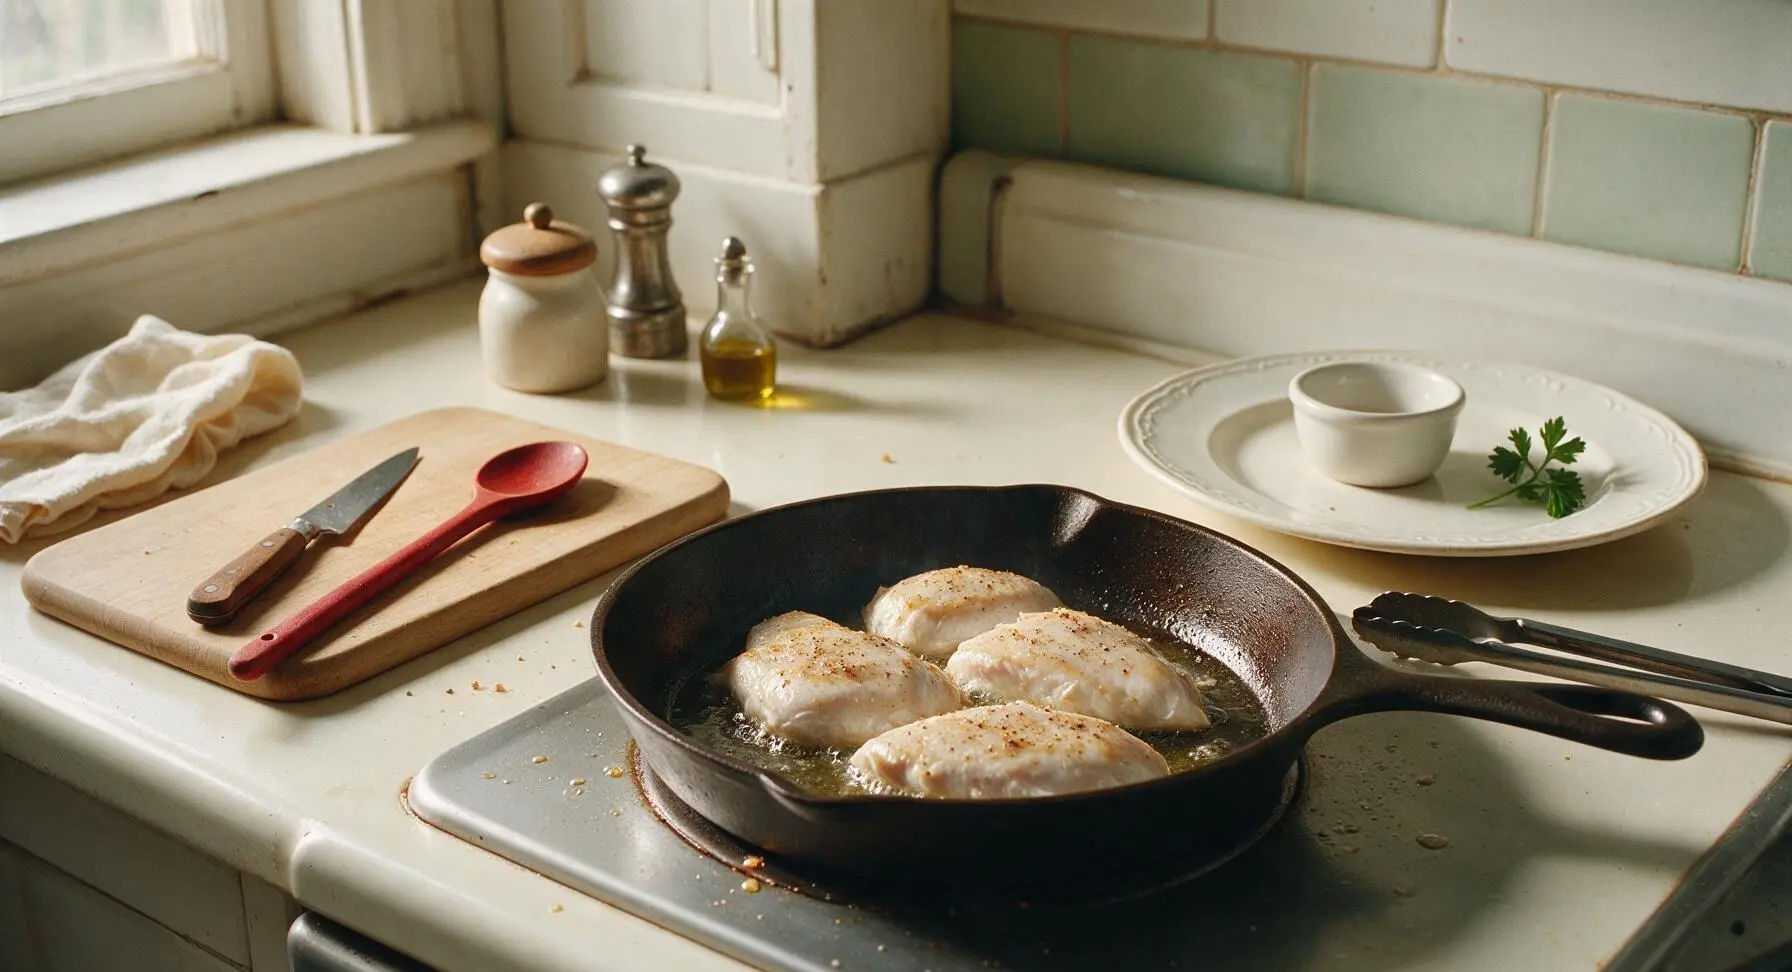
Carefully lay the seasoned chicken breasts in the hot skillet in a single layer, placing them away from your body to avoid hot oil splatter. Do not move, lift, or press the chicken for 6 full minutes, until the bottom surface develops a deep golden-brown, crisp crust. If the chicken resists when nudged gently with tongs, let it cook 30-60 seconds longer until it releases easily from the pan.
Step 4
step4:Sear first chicken side
5

Flip and baste chicken

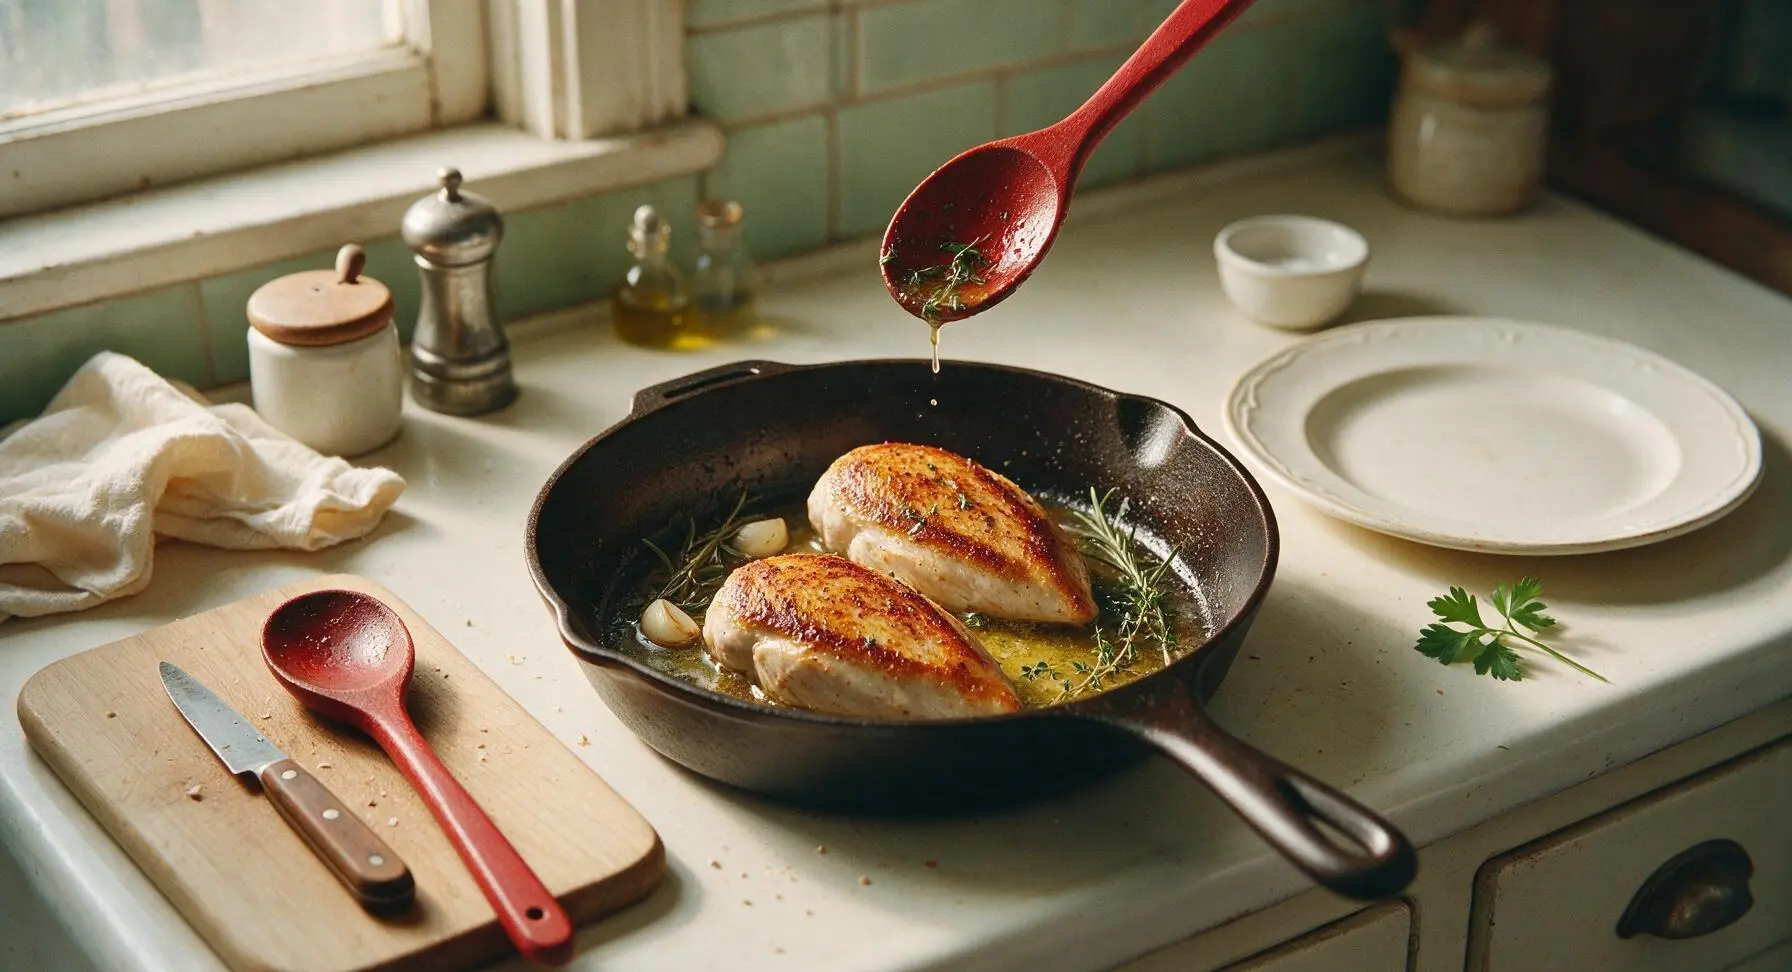
Use the silicone-tipped tongs to flip each chicken breast to its second side. Immediately add the 2 crushed garlic cloves, 2 rosemary sprigs, 3 thyme sprigs, and 2 tablespoons of garlic-herb compound butter to the skillet. As the butter melts into a golden, fragrant pool, tilt the pan slightly and repeatedly spoon the herb-infused butter over the top of the chicken for 2 minutes, building rich, aromatic flavor.
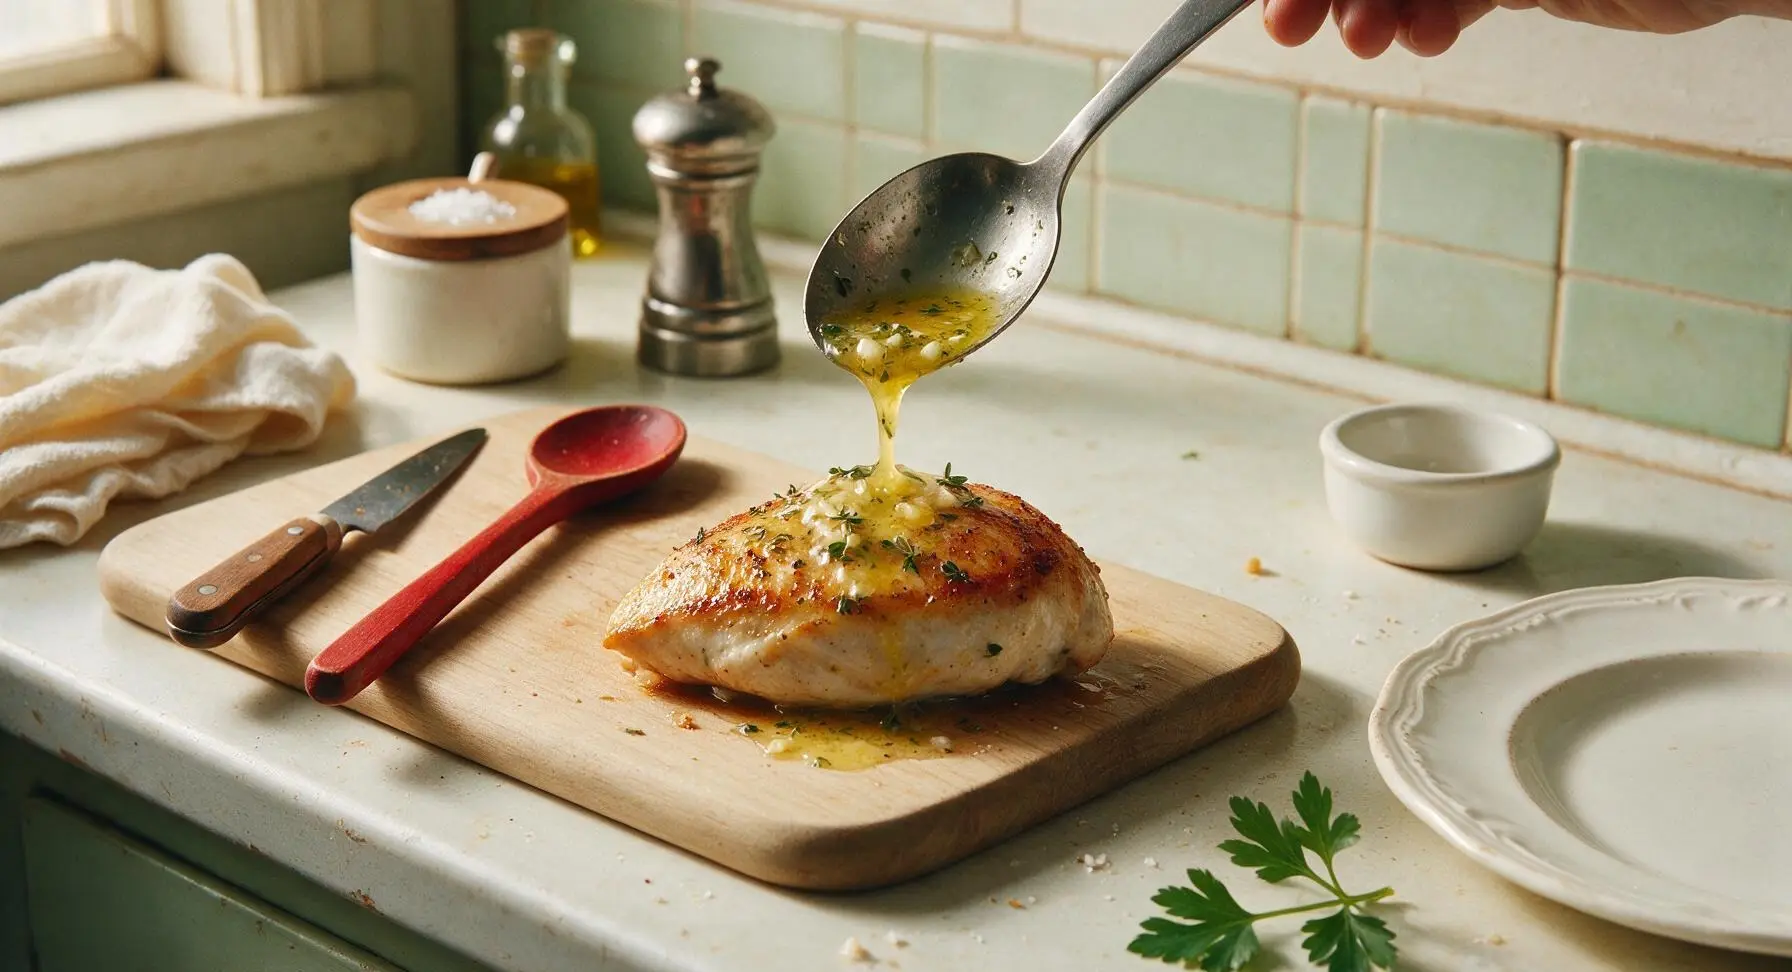
Step 5
step5:Flip and baste chicken
Step 5
step5:Flip and baste chicken
6

Check internal temperature

After 5 minutes of cooking on the second side, insert the digital instant-read meat thermometer probe into the thickest part of the largest chicken breast, avoiding contact with the pan. The chicken is fully cooked when it reaches an internal temperature of 74°C (165°F). If the temperature reads lower, continue cooking for 1-2 minutes before rechecking to avoid overcooking.
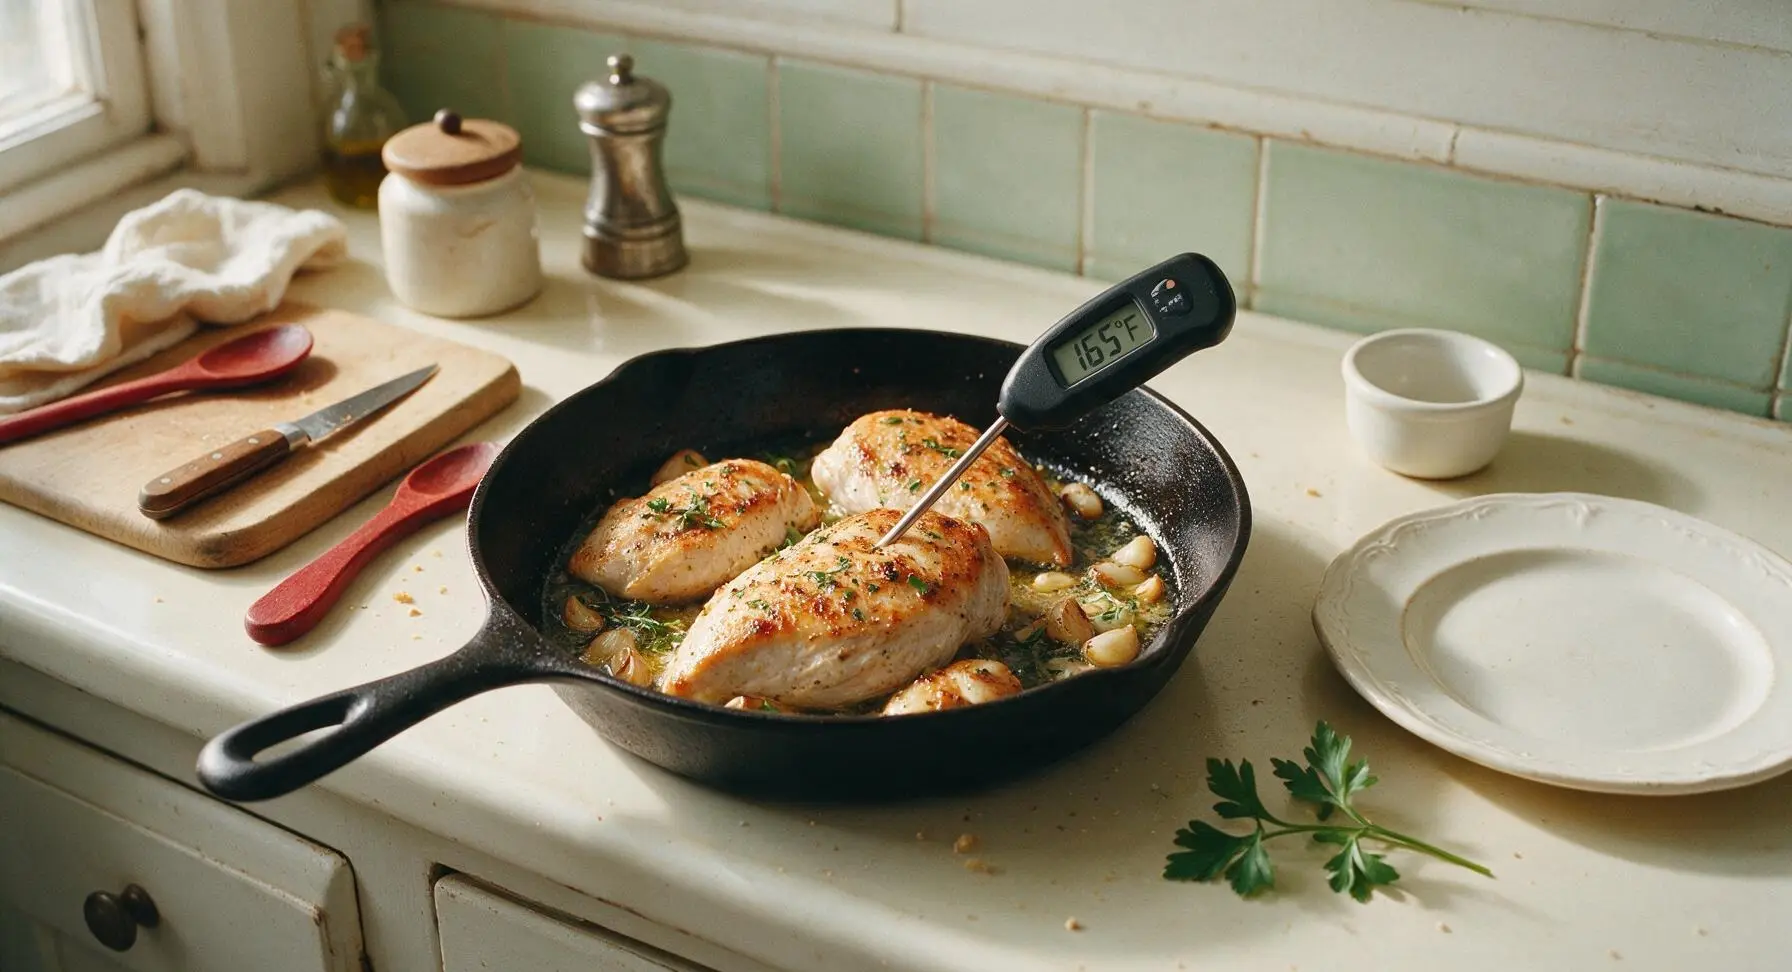
Step 6
step6:Check internal temperature
7

Rest cooked chicken

Use the tongs to transfer the fully cooked chicken breasts from the skillet to the matte cream stoneware dinner plate. Top each breast with a 0.5 tablespoon pat of the remaining compound butter, then loosely tent the plate with a small sheet of aluminum foil. Let the chicken rest for 5 full minutes to allow muscle fibers to relax and juices to redistribute through the meat.
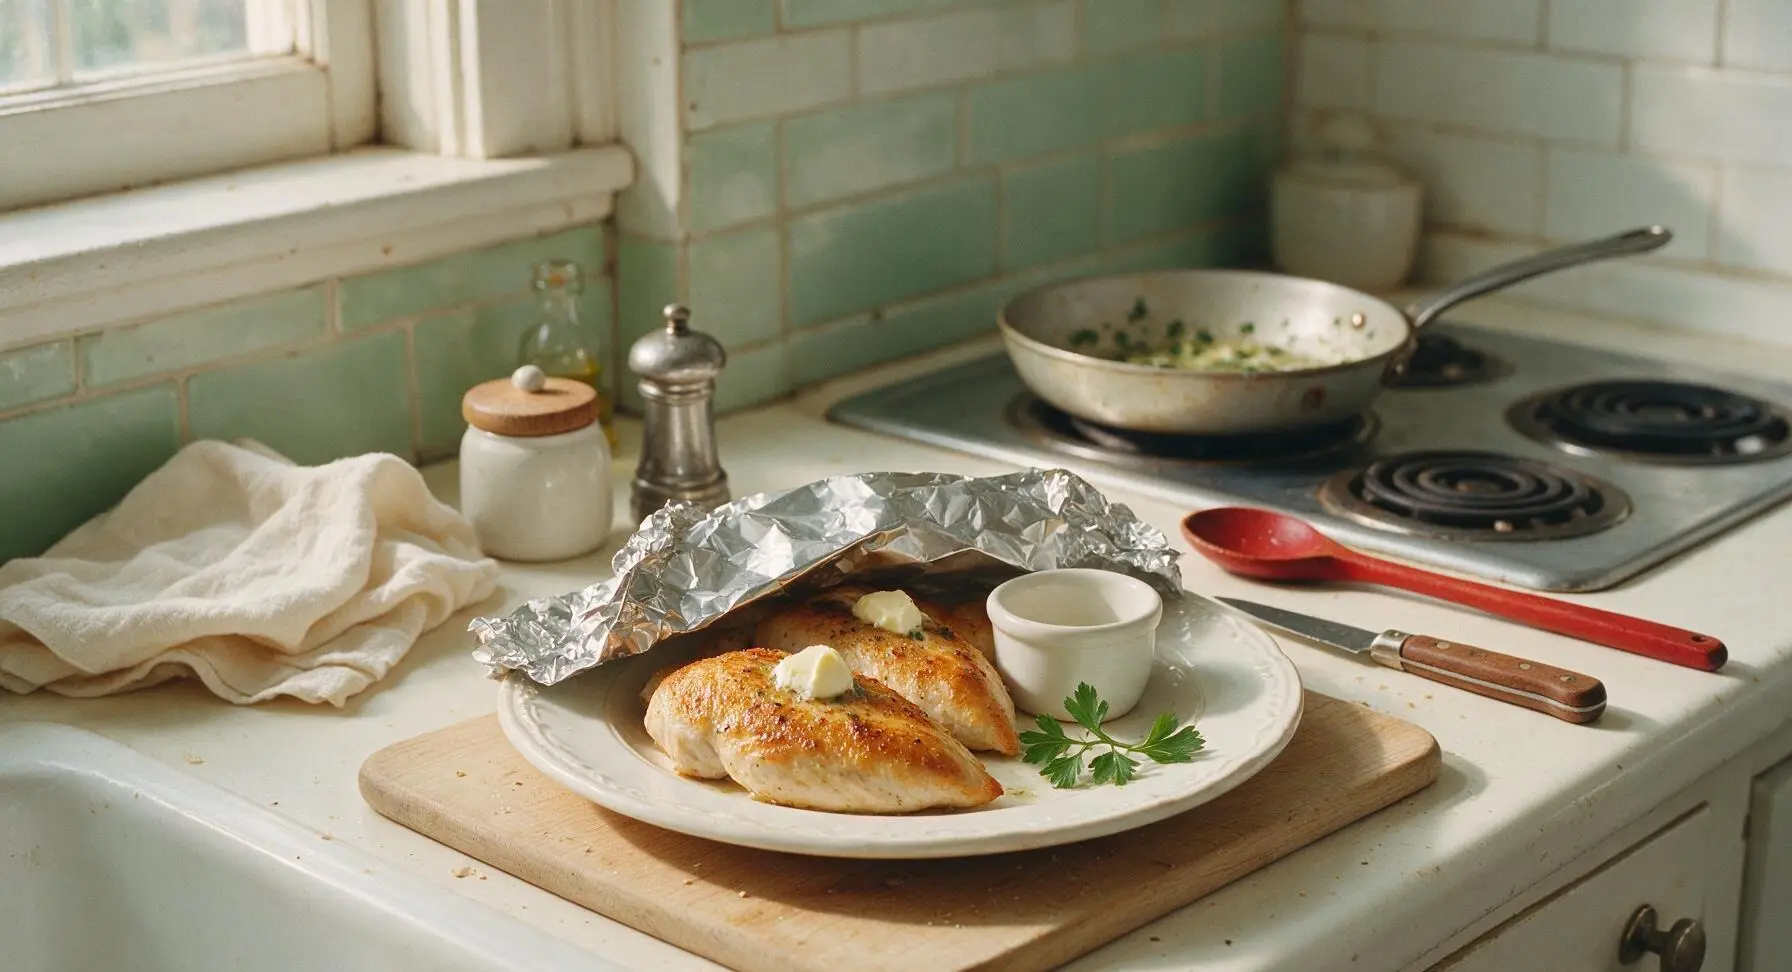
Step 7
step7:Rest cooked chicken
8

Slice and plate to serve

After the rest period, transfer the chicken breasts back to the matte black cutting board. Use the chef knife to slice each breast against the grain into 1.5cm thick slices, revealing juicy, opaque white interior with no trace of pink. Arrange the sliced chicken in a gentle fanned arc back on the matte cream stoneware plate, drizzle with 1 teaspoon of reserved herb-infused pan butter, and garnish with a single fresh thyme sprig. Serve immediately.
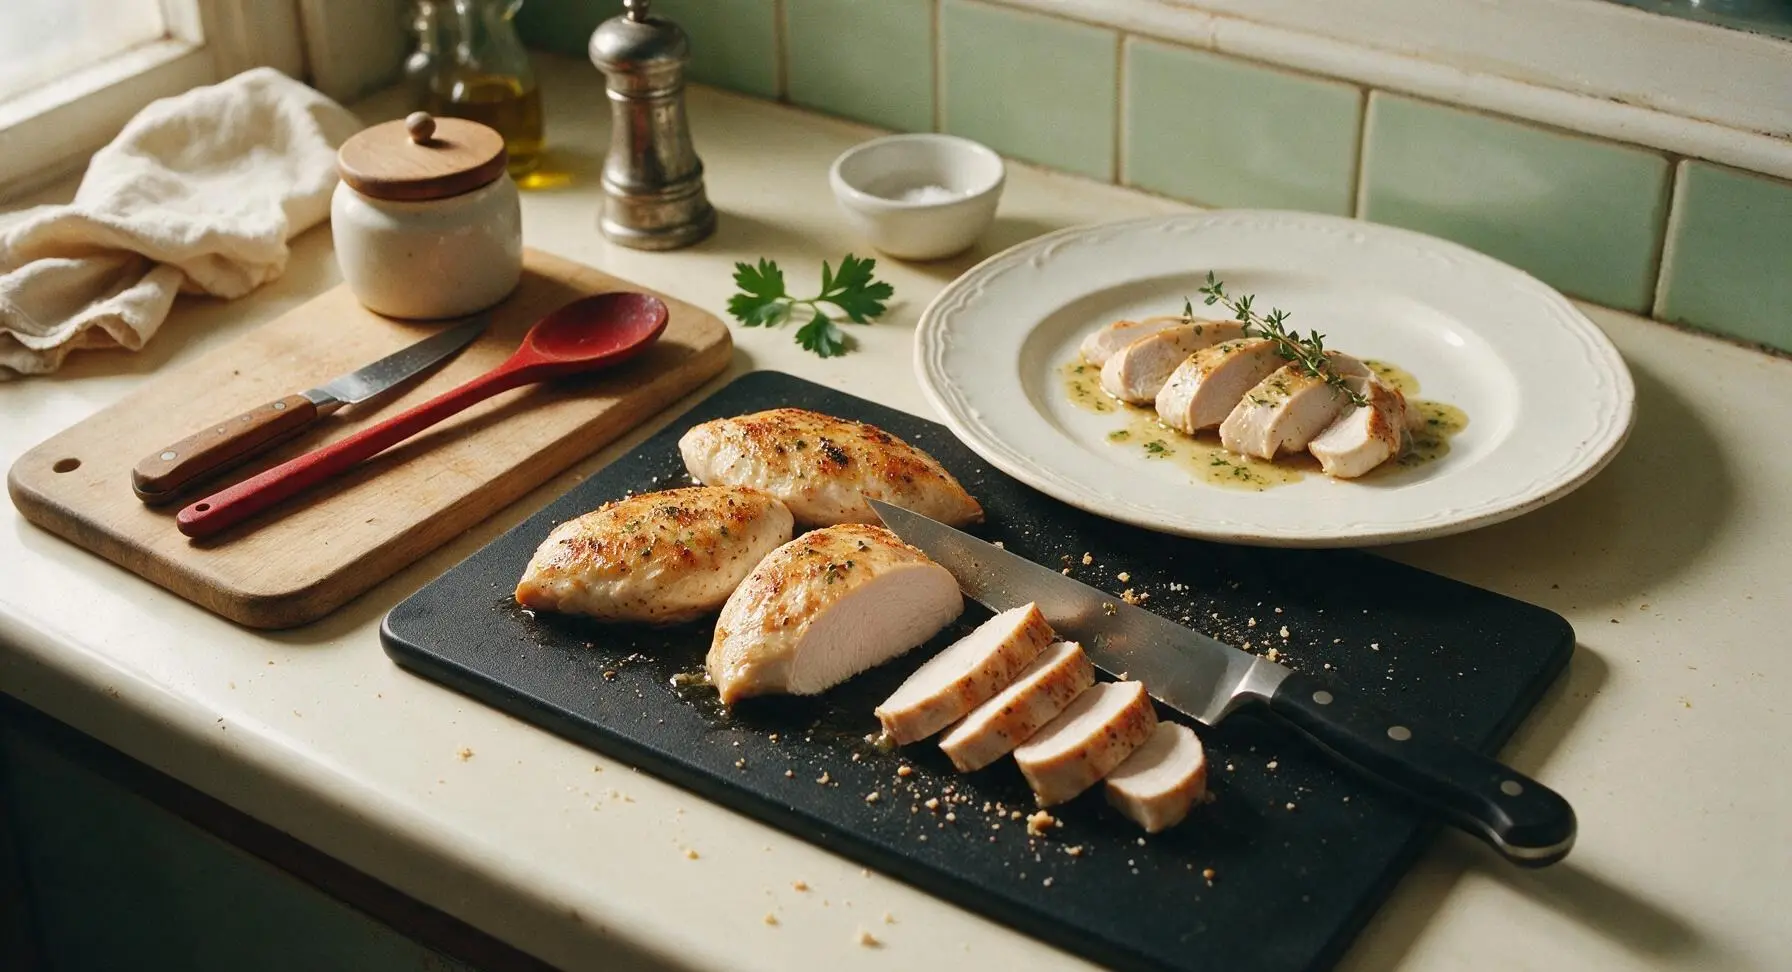
Step 8
step8:Slice and plate to serve

Tips

1.Pat chicken completely dry before searing: Any surface moisture from packaging or washing will create steam in the hot pan, preventing a crisp, golden-brown crust and increasing the chance the chicken sticks to the skillet.
2.Do not move chicken during the first 6 minutes of searing: Lifting or shifting the chicken too early breaks the forming crust, stops the Maillard reaction that creates deep savory flavor, and causes juices to leak out into the pan.
3.Always let chicken rest 5 minutes before slicing: Cutting into hot chicken immediately after cooking causes all the flavorful, juicy liquid to run out onto the plate, leaving the meat dry and bland even if it was cooked perfectly.


✨ You May Also Like

Main Course
🍜 United Kingdom

A showstopping classic of tender seared beef, savory mushroom duxelles, and crisp prosciutto wrapped in flaky golden puff pastry, baked to juicy perfection.

⏱️ 2 hours 1Main Course ★ 4.7
Main Course
🍜 India

Tender charred marinated chicken simmered in a rich, spiced creamy tomato sauce, this iconic Anglo-Indian curry pairs perfectly with basmati rice or warm naan.

⏱️ 50 minuteMain Course ★ 4.6
Main Course
🍜 Thailand

Classic tangy, sweet, and savory Thai stir-fried rice noodles with shrimp, tofu, and crunchy garnishes, balancing all five core Thai flavor profiles.

⏱️ 30 minuteMain Course ★ 4.5
Main Course
🍜 United Kingdom

Crispy golden beer-battered cod and fluffy double-fried chips, served with tangy tartar sauce and malt vinegar: the timeless, beloved British pub comfort classic.

⏱️ 45 minuteMain Course ★ 4.7
Main Course
🍜 Mexico

Smoky, chile-marinated pork tacos with caramelized pineapple, fresh cilantro, and lime: a beloved classic Mexican street food perfect for casual summer gatherings.

⏱️ 1 hour 45Main Course ★ 4.8
Main Course
🍜 United States

Crunchy Fritos corn chips layered with savory beef chili and melted cheddar, topped with cool, zesty fixings for a beloved, cozy Tex-Mex comfort food.

⏱️ 35 minuteMain Course ★ 4.8

keto chicken breast:Frequently Asked Questions

1.How do I make sure my chicken breast stays juicy instead of drying out? ▾
Start by pounding breasts to an even 1-inch thickness so they cook uniformly, with no thin, overcooked edges. Let them sit 5 minutes at room temperature before searing, avoid moving them around the pan for the first 4 minutes to build a proper crust, and let them rest 3 minutes post-cook to lock in every bit of juice.
2.Why can’t I get a crisp, golden crust on my pan-seared chicken? ▾
Make sure you pat the chicken completely dry with paper towels before seasoning—any leftover surface moisture will make the chicken steam instead of sear. Heat your oil until it shimmers (not smokes) before adding the chicken, and don’t overcrowd the pan; cook in batches if needed to keep pan temperature high enough for crisping.
3.Can I use regular table salt instead of coarse kosher salt for this recipe? ▾
You can, but cut the measurement by half—table salt is much denser and saltier per volume than coarse kosher salt. Using the same amount of table salt will leave your chicken overly salty. For best flavor, salt the chicken 15 minutes before cooking to let the salt penetrate the meat evenly.
4.How do I tell when the chicken is done without cutting into it and losing juice? ▾
Use an instant-read meat thermometer inserted into the thickest part of the breast, and pull it from the pan when it hits 160°F. It will rise 5°F during resting to reach the food-safe 165°F internal temp, and you won’t spill all those delicious, juicy drippings by slicing into it early.
5.Can I add extra seasonings without adding carbs that break keto guidelines? ▾
Absolutely! Stick to low-carb options like dried thyme, rosemary, smoked paprika, oregano, or a tiny pinch of cayenne for heat—all have less than 1g of carb per serving. Skip sugary add-ins like honey, brown sugar, or pre-made blends with hidden added sugar or maltodextrin to keep it strictly keto.
6.What quick keto sides pair well with this chicken for busy weeknight meals? ▾
Pair it with fast, low-carb sides like roasted broccoli, sautéed spinach, creamy cauliflower mash, buttered asparagus, or a crisp arugula salad tossed in olive oil and lemon. All of these come together in the same 30-minute window as the chicken for a full, satisfying meal.
7.Is it really necessary to let the chicken rest after cooking? ▾
It absolutely is! As chicken cooks, its muscle fibers tighten and push moisture toward the center. If you slice it right off the heat, all that juicy liquid will run out onto your plate. A short 3-minute rest, tented loosely with foil, lets fibers relax and reabsorb moisture for tender bites.
8.Can I meal prep this chicken to eat throughout the week without it getting dry? ▾
Yes, this chicken holds up well for 3–4 days in the fridge when stored in an airtight container. Let it cool completely before storing, and don’t slice it until you’re ready to eat to prevent moisture loss. Reheat gently over low skillet heat with a tiny pat of butter, or at 50% microwave power to avoid rubbery texture.

Comments (17)

1 week ago

Game changer for my Sunday meal prep! I used to hate cooking chicken breast because it always dried out by Wednesday, but this method kept it juicy all week. Paired it with roasted broccoli and cauliflower rice for my work lunches, zero complaints.

3 days ago

Super easy, even for someone who burns toast half the time. Threw this together last night after work, my wife thought I ordered takeout from that fancy keto spot downtown. Will be making this on repeat.

1 week ago

Took this to my neighborhood potluck last weekend and everyone was asking for the recipe! Even the non-keto folks went back for seconds. The crust gets so perfectly crispy without any weird breading, obsessed.

5 days ago

Tasted really good! Only reason I’m not giving 5 stars is I accidentally burned the first side because I had the heat a little too high, user error for sure. Second batch came out perfect, though. Great base recipe to add different seasonings to.

30 minutes ago

Perfect post-workout meal! High protein, zero weird additives, cooks so fast I can have it on the table before my post-run shower even cools off. Tossed some garlic butter on top at the end, chef’s kiss.

2 hours ago

Wait, do you have to use avocado oil for this? I only have olive oil on hand right now and don’t feel like running to the store.

30 minutes ago

Great question! Olive oil works totally fine as long as you don’t heat it past its smoke point—just keep the burner on medium-high instead of high, and you’ll get that same perfect crispy crust without any burnt taste. Enjoy!

yesterday

My kids loved it! I was worried the plain seasoned chicken would be too boring for them, but they ate every last bite and asked if we could have it for dinner again tomorrow. Win for keto family meals!

2 hours ago

Same! My twins are super picky and they devoured it. I added a little parmesan to the seasoning blend for mine, the kids ate theirs with a side of ranch, total hit.

2 days ago

Wait, no oven needed? I live in a tiny studio with no oven access so I’ve been surviving on microwave meals and takeout, this is a total lifesaver. Turned out so juicy I almost thought I did something wrong.

2 days ago

No oven required at all! This recipe is made 100% on the stovetop, which makes it perfect for small kitchens, dorms, or even travel setups with a hot plate. So glad it worked out for you!

3 days ago

Added a pinch of cayenne and some smoked paprika to the seasoning rub and WOW, that kicked it up so good. Great base recipe that you can tweak to match whatever flavor vibe you’re going for.

2 days ago

I did something similar! Threw a little chili powder and garlic powder on mine, tasted like restaurant quality blackened chicken without all the carbs. 10/10

5 minutes ago

Wait, how thick should the chicken breasts be? I got some really thick ones from the grocery store and I’m worried they won’t cook all the way through in 15 minutes.

just now

Great question! If your chicken breasts are over 1.5 inches thick, I recommend pounding them to an even thickness first, or adding 2-3 minutes of cook time covered with a lid to make sure the center reaches 165°F without burning the outside. Hope that helps!

1 week ago

I’ve been scared to try pan-seared chicken because every time I make it, it’s either raw in the middle or so dry I can barely swallow it. This method worked first try!!! I’m actually shocked how juicy it was, no fancy tools needed.

5 days ago

I had the exact same problem before this recipe! The tip about not flipping the chicken too soon is what changed everything for me, no more sticking or dry spots.

2 weeks ago

Does this reheat well? I want to make a big batch for work lunches but I hate when reheated chicken gets that weird rubbery texture.

2 weeks ago

It reheats beautifully! I recommend reheating it in a skillet over low heat for 2-3 minutes, or in the microwave at 50% power for 60-90 seconds to keep it from getting rubbery. It stays juicy for up to 4 days in the fridge!

yesterday

OMG SO good! I made this for our Sunday family dinner last night and everyone cleaned their plates. The only thing I did different was top it with a little keto ranch dressing after cooking, and my youngest said it’s his new favorite food.

2 hours ago

Ranch on chicken is such a vibe! I did that too, and even my husband who swears he “hates diet food” went back for a second piece. Who knew 15 minutes of cooking could taste this good?

30 minutes ago

Love that ranch hack! It’s such an easy way to add extra fat (perfect for keto) and flavor without any extra work. So glad the whole family enjoyed it!

3 days ago

Wait, is there a cheaper alternative to avocado oil? I love how this recipe works but avocado oil is so expensive at my local grocery store right now, I’m trying to keep my grocery bill down.

2 days ago

I use refined coconut oil for mine! It has a super high smoke point, no weird coconut taste if you get the refined kind, and it’s way cheaper per ounce than avocado oil at my Walmart. Works exactly the same!

yesterday

Great recommendation from Kim! Refined coconut oil, canola oil, or even light olive oil all work perfectly here—you just need an oil with a high smoke point to get that crispy outer crust without burning. No need to splurge on specialty oils if it doesn’t fit your budget!

2 days ago

Made this for my date night last night and my partner was so impressed! He thought I spent an hour cooking, nope, 15 minutes total. Paired it with some asparagus and a keto creamy garlic sauce, 10/10 date night meal that doesn’t leave you stuffed and sluggish.

yesterday

Wait that creamy garlic sauce sounds insane, do you have a quick recipe for it? I’m making this for my anniversary next week and want to step it up a little!

yesterday

Super easy! Just melt 2 tbsp butter in the pan after you take the chicken out, add 2 minced garlic cloves, 1/3 cup heavy cream, a little parmesan, salt and pepper. Stir for 2 minutes and pour it over the chicken, zero carbs!

5 days ago

Macros per serving? I track every gram for my competition prep and this looks perfect, I just need to plug the numbers into my app before I make a big batch.

3 days ago

If you use a 6oz chicken breast, 1 tsp of oil, and the seasoning blend listed, it’s around 280 calories, 38g protein, 12g fat, and less than 1g net carbs! I plugged it in last week when I made it.

3 days ago

That’s spot on! Full nutrition info is listed at the bottom of the recipe card too, if you want to adjust for different portion sizes or oil amounts. Good luck with your competition!

1 week ago

Wait, why does my chicken always stick to the pan when I try to sear it? I followed the directions exactly but the first side stuck a little, even with oil in the pan. Still tasted amazing, just didn’t get that perfect crust everyone is talking about.

5 days ago

You have to let the pan get really hot before you put the chicken down! I used to make that mistake all the time—if the pan isn’t fully preheated, the chicken will stick every time. Wait until the oil is shimmering, not smoking, before adding the breast.

5 days ago

That’s exactly the tip! Also, resist the urge to move the chicken around for the first 4-5 minutes of cooking. Once the crust forms, it will release from the pan easily on its own. Give that a try next time and you’ll get that perfect crispy crust!



