
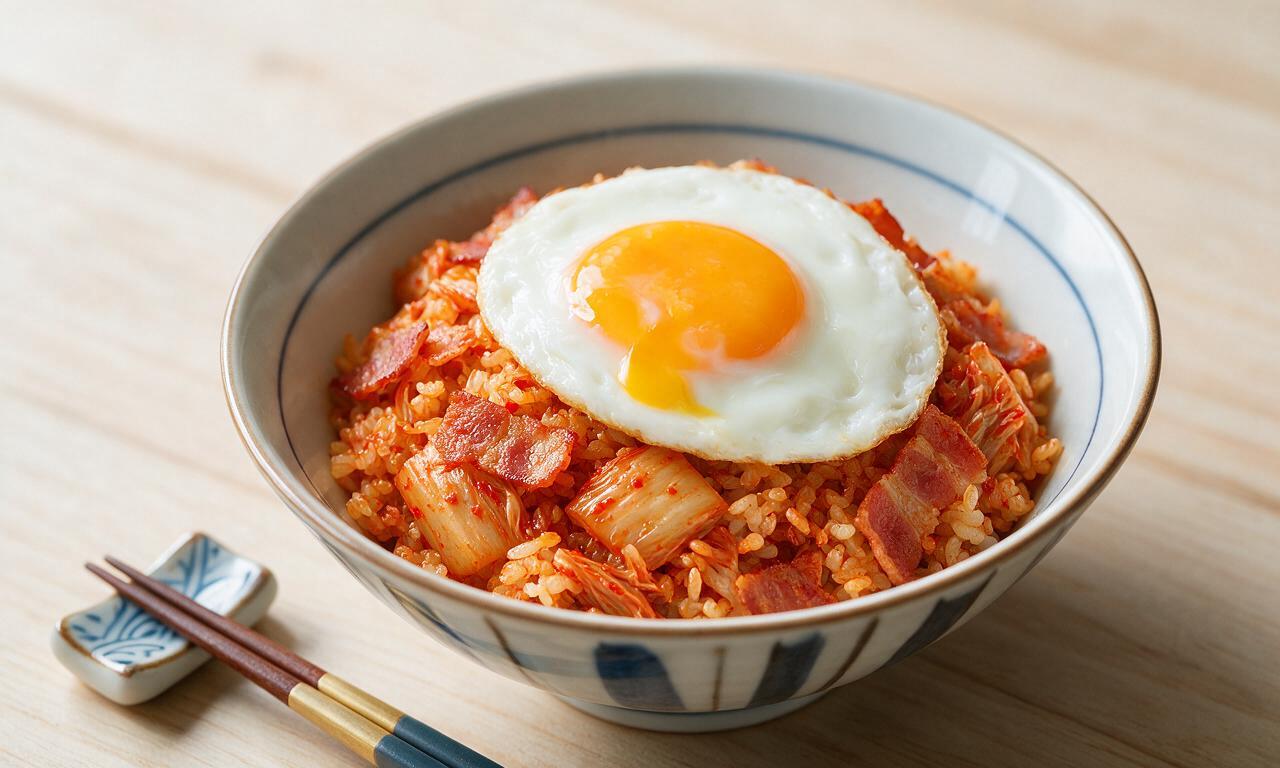
Kimchi Fried Rice

Kimchi Fried Rice
⏱️ cook time 20 minutes
🍽️ servings 4
⚡ Difficulty easy

intro

Savory, tangy Korean comfort food made with fermented kimchi, chewy chilled rice, and crispy bacon, topped with a runny egg for a fast, umami-rich, satisfying meal.

Ingredients

Cooked chilled short-grain white rice (day-old) 4 cups (680g)
Ripe napa cabbage kimchi (with reserved brine) 1.5 cups (225g, chopped, plus 2 tbsp reserved brine)
Thick-cut bacon 4 slices (120g, 1cm diced)
Small yellow onion 1 unit (100g, finely diced)
Scallions 3 stalks (75g, sliced, green and white parts separated)
Large eggs 4 units
Neutral canola oil 2 tablespoons (30ml)
Low-sodium soy sauce 1 tablespoon (15ml)
Gochugaru (Korean chili flakes) 1 teaspoon (3g)
Toasted sesame oil 1 teaspoon (5ml)
Toasted white sesame seeds 1 teaspoon (3g, for garnish)

Steps

1

Prep all ingredients

Chop 225g ripe kimchi into 1cm pieces, reserving 2 tablespoons of its brine; dice 120g bacon, finely dice 100g yellow onion, separate sliced scallion whites and greens, and break up 680g chilled day-old rice with clean hands to remove all clumps. Arrange all prepped items within arm’s reach of the stovetop; this prep takes roughly 5 minutes with no heat applied.
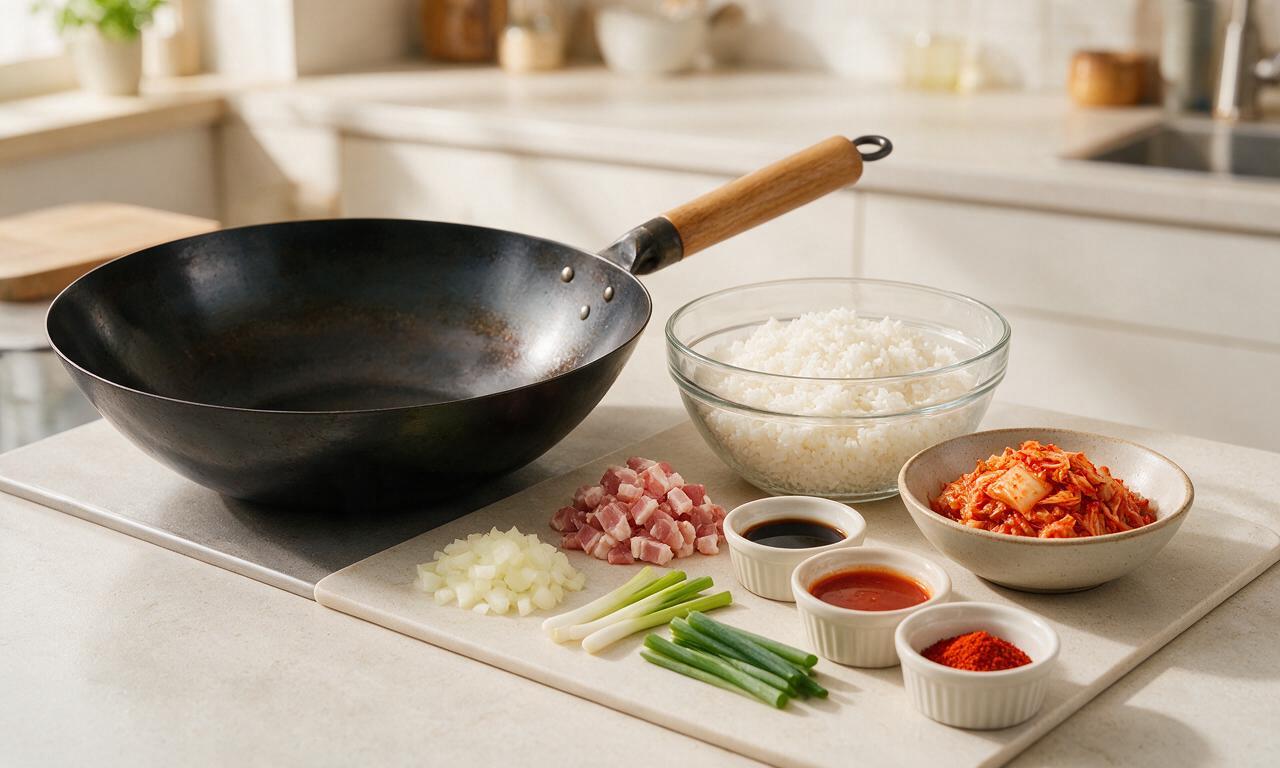
Step 1
step1:Prep all ingredients
2

Sear bacon and aromatics

Place the wok or deep 12-inch skillet over medium-high heat (375°F/190°C), add 1 tablespoon (15ml) canola oil, then toss in the diced bacon. Stir-fry for 3 minutes until bacon edges turn golden and render 2-3 tablespoons of fat, then add diced onion and scallion whites, sautéing for 2 additional minutes until onion is soft and translucent.
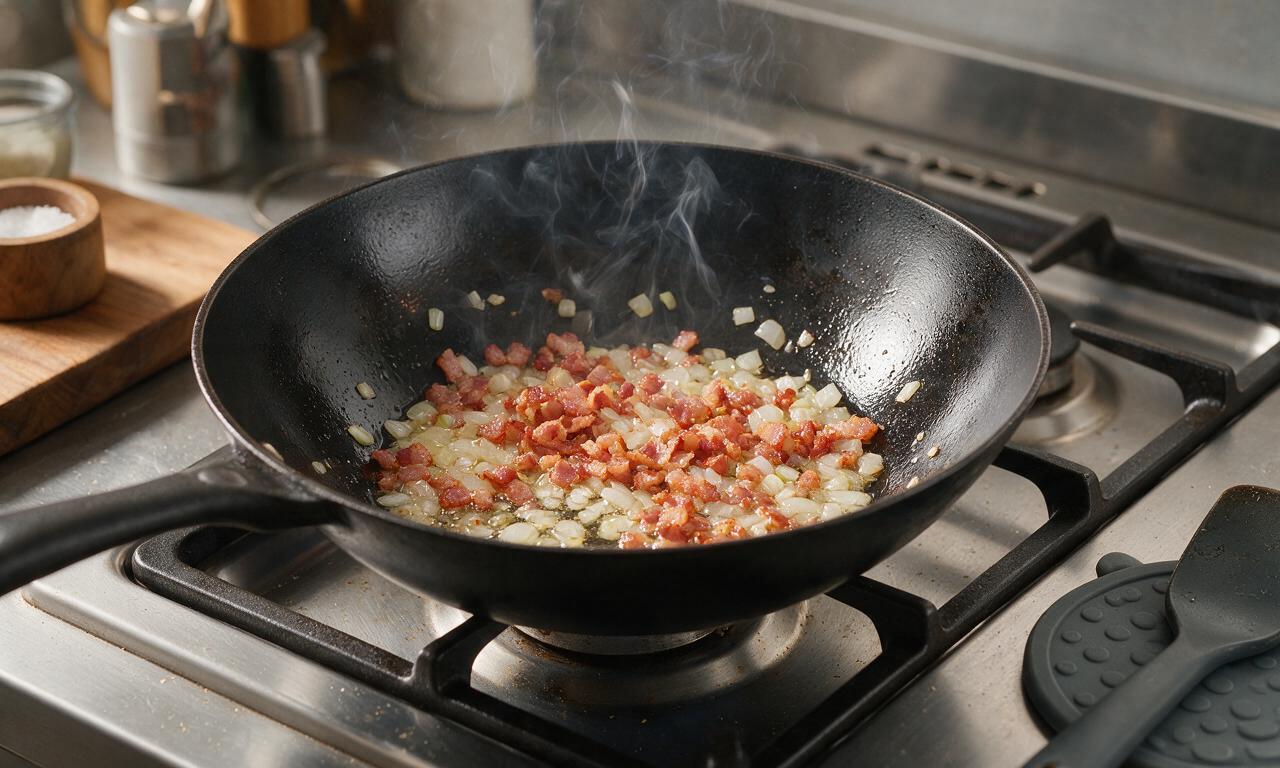
Step 2
step2:Sear bacon and aromatics
3

Sauté kimchi for depth

Add the chopped kimchi and 1 teaspoon (3g) gochugaru to the wok, stirring continuously to coat all ingredients in the rendered bacon fat. Cook for 2 minutes over medium-high heat until the kimchi softens slightly, deepens to a rich ruby red, and releases its bright, tangy fermented aroma.
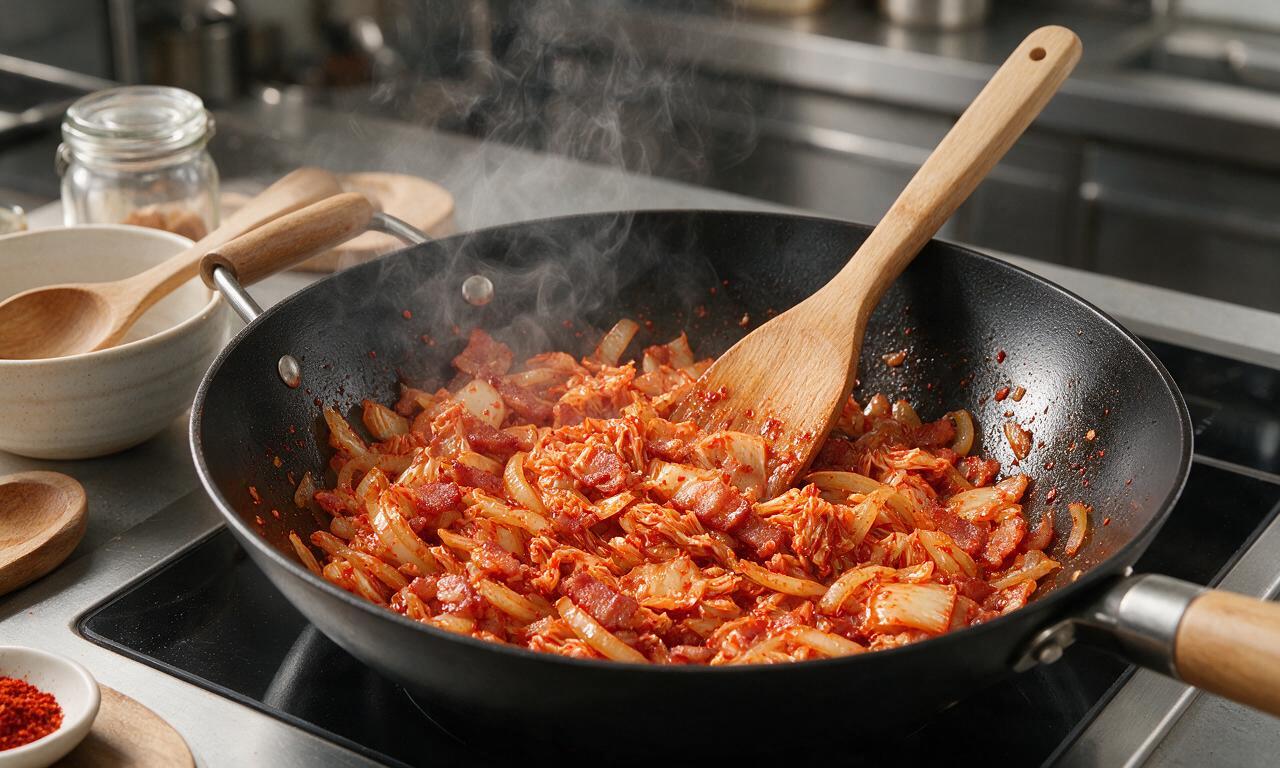
Step 3
step3:Sauté kimchi for depth
4

Stir-fry the rice

Add all clump-free chilled rice to the wok, pour in 1 tablespoon (15ml) soy sauce and the reserved 2 tablespoons kimchi brine. Use a flat wooden spatula to press and toss the rice continuously for 4 minutes over medium heat (350°F/175°C), breaking any remaining small clumps, until every grain is evenly coated in red sauce, slightly toasty, and no dry unseasoned white rice patches remain.
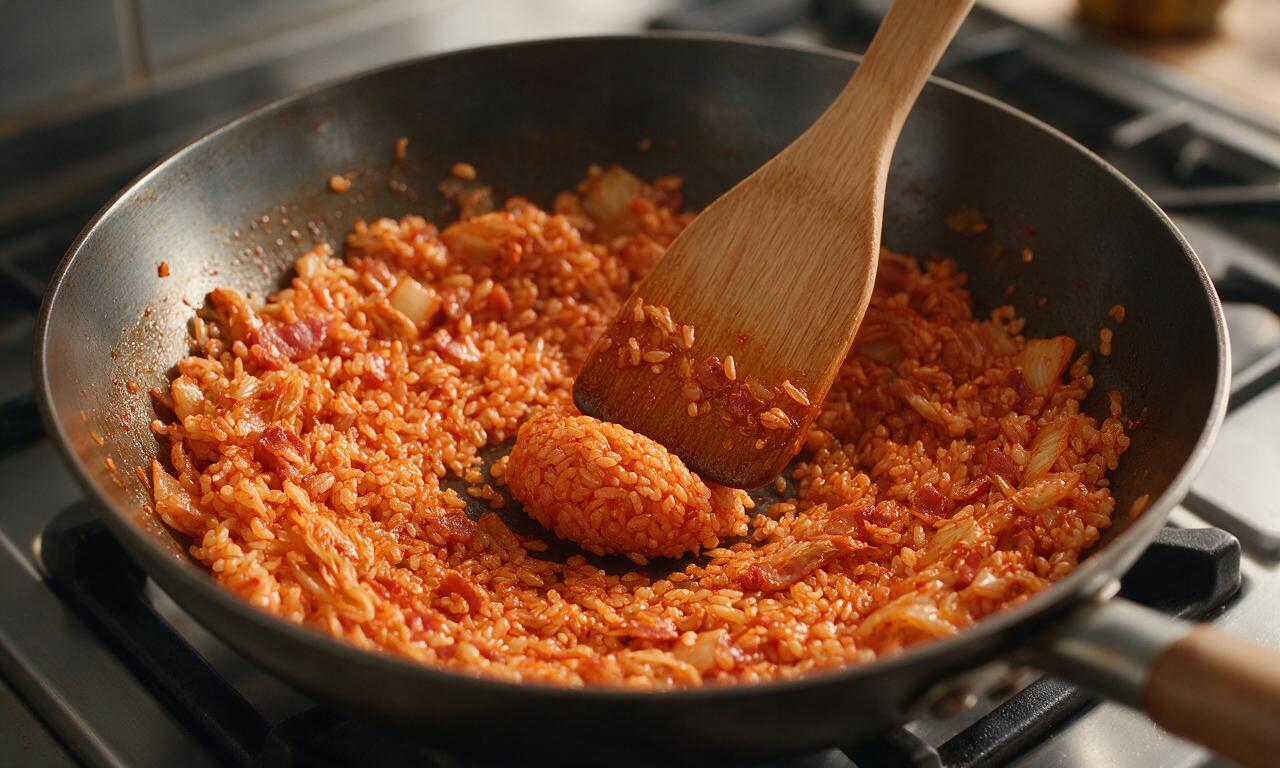
Step 4
step4:Stir-fry the rice
5

Fry the sunny eggs

Push the finished fried rice to one half of the wok, add the remaining 1 tablespoon (15ml) canola oil to the empty half, and crack 4 eggs directly onto the oiled surface. Fry for 2 minutes over medium heat until egg whites are fully set and opaque, but yolks remain bright golden and runny; add a tiny pinch of salt to egg whites if desired.
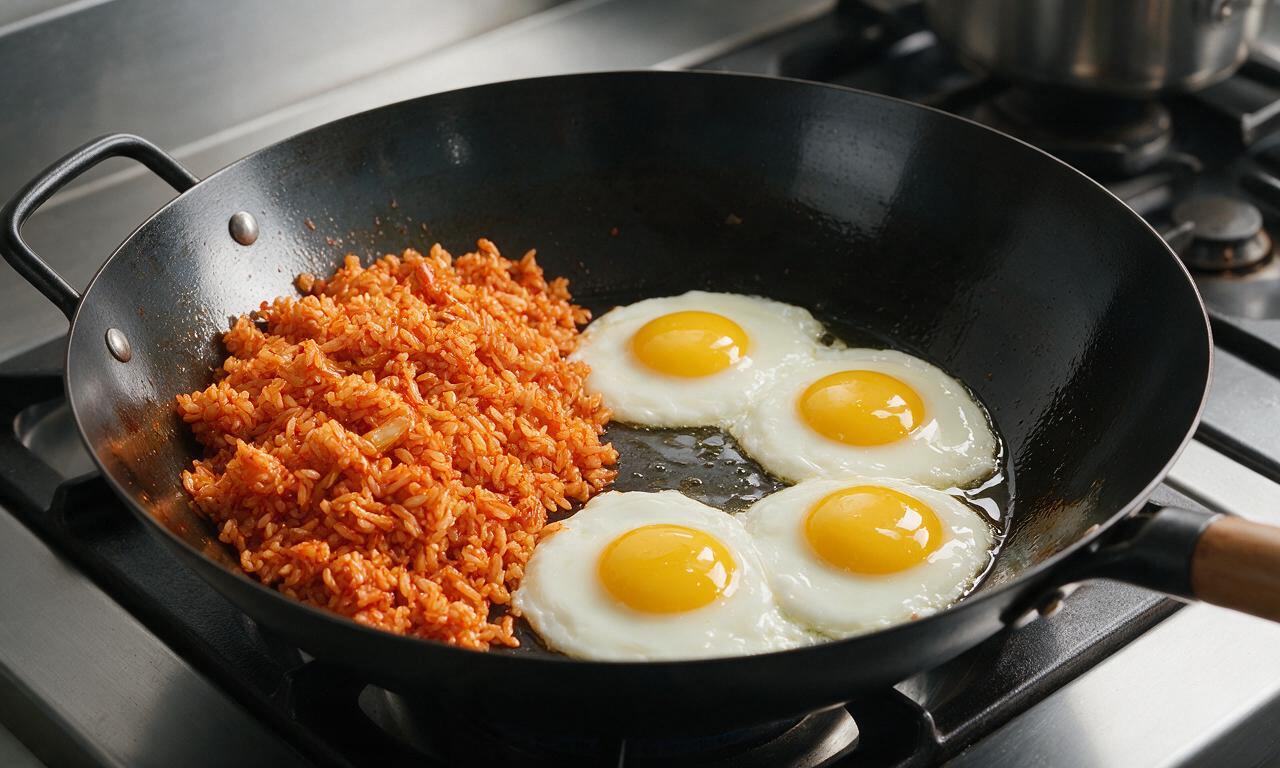
Step 5
step5:Fry the sunny eggs
6

Garnish and serve hot

Turn off the stovetop heat, drizzle 1 teaspoon (5ml) toasted sesame oil over the rice, and toss lightly to combine. Portion the fried rice onto 4 warm plates, top each portion with one fried egg, sprinkle evenly with sliced scallion greens and 1 teaspoon total toasted sesame seeds, and serve immediately while piping hot.
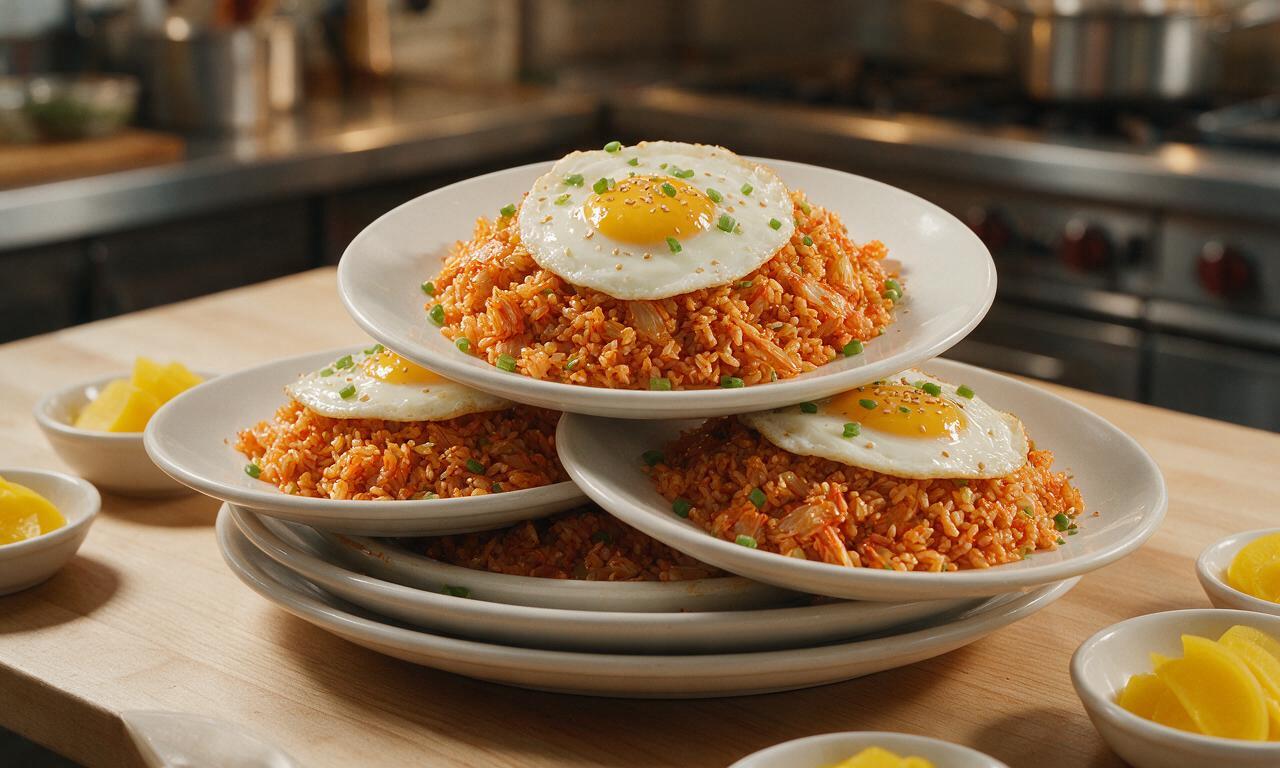
Step 6
step6:Garnish and serve hot

Tips

1.Always use day-old, fully chilled cooked rice instead of freshly made hot rice: fresh rice has high moisture content that leads to mushy, sticky fried rice, while cold, dry grains separate easily and develop a chewy, slightly crisp texture when stir-fried.
2.Opt for fully ripe, sour kimchi (fermented for 2+ weeks in the refrigerator) for the most authentic, tangy flavor; freshly made, mild kimchi will taste flat and lack the signature deep umami of classic kimchi fried rice.
3.Resist the urge to stir the rice constantly once coated in sauce: let it rest undisturbed for 10-15 seconds between tosses to allow small bits of rice to crisp up on the hot wok surface, adding welcome textural contrast.


✨ You May Also Like

Main Course
🍜 United Kingdom

A showstopping classic of tender seared beef, savory mushroom duxelles, and crisp prosciutto wrapped in flaky golden puff pastry, baked to juicy perfection.

⏱️ 2 hours 1Main Course ★ 4.7
Main Course
🍜 India

Tender charred marinated chicken simmered in a rich, spiced creamy tomato sauce, this iconic Anglo-Indian curry pairs perfectly with basmati rice or warm naan.

⏱️ 50 minuteMain Course ★ 4.8
Main Course
🍜 Thailand

Classic tangy, sweet, and savory Thai stir-fried rice noodles with shrimp, tofu, and crunchy garnishes, balancing all five core Thai flavor profiles.

⏱️ 30 minuteMain Course ★ 4.6
Main Course
🍜 United Kingdom

Crispy golden beer-battered cod and fluffy double-fried chips, served with tangy tartar sauce and malt vinegar: the timeless, beloved British pub comfort classic.

⏱️ 45 minuteMain Course ★ 4.9
Main Course
🍜 Mexico

Smoky, chile-marinated pork tacos with caramelized pineapple, fresh cilantro, and lime: a beloved classic Mexican street food perfect for casual summer gatherings.

⏱️ 1 hour 45Main Course ★ 4.7
Main Course
🍜 United States

Crunchy Fritos corn chips layered with savory beef chili and melted cheddar, topped with cool, zesty fixings for a beloved, cozy Tex-Mex comfort food.

⏱️ 35 minuteMain Course ★ 4.9

Kimchi Fried Rice:Frequently Asked Questions

1.Why do I need to use day-old chilled short-grain rice instead of fresh-cooked rice for this recipe?
Freshly cooked rice is overly moist and high in surface starch, which will turn your fried rice mushy and clumpy instead of light, chewy, and slightly crisp at the edges. Day-old chilled rice dries out just enough so grains separate easily during stir-frying. If you’re short on time, spread fresh cooked rice on a baking sheet and chill it for 1–2 hours before using.
2.My kimchi is still pretty fresh and not super tangy—will it work for this fried rice?
Underripe kimchi won’t have the deep, tangy umami that defines this dish, but you can easily tweak it to work. Stir 1 teaspoon of unseasoned rice vinegar and a tiny pinch of white sugar into your reserved kimchi brine, and let the chopped kimchi sauté for 1–2 extra minutes to soften its raw, crisp edge before adding your rice.
3.Can I make this recipe vegetarian by leaving out the thick-cut bacon?
You absolutely can! Swap the bacon for 1 tablespoon of toasted sesame oil to replace that rich, fatty depth, and add ½ cup diced shiitake mushrooms or pressed, cubed extra-firm tofu for a hearty, chewy texture. Add a tiny pinch of smoked paprika if you want to mimic bacon’s subtle smokiness, and adjust salt to taste before serving.
4.How do I make the perfect runny sunny-side up egg to top my kimchi fried rice?
Heat a small nonstick pan over medium-low heat, add a thin layer of neutral canola or avocado oil, and crack your egg in once the oil shimmers gently. Let it cook undisturbed for 2–3 minutes, until the whites are fully opaque and set but the yolk is still soft and jiggly. Slide it straight onto your rice without flipping for that ideal runny yolk to mix in.
5.Should I drain all the liquid off my kimchi, or is the brine important for the recipe?
Don’t pour that brine down the drain—it’s packed with concentrated tangy, umami fermented flavor that coats every rice grain, but too much will make your dish soggy. Stick to 2–3 tablespoons of reserved brine per 4 cups of rice, adding it gradually as you stir-fry. Taste as you go, and add an extra splash only if you want more bright, tangy kick.

Comments (8)

2 days ago

OMG this kimchi fried rice is a total weeknight game changer! I threw it together in 18 minutes flat after my kid’s soccer practice, used that overripe kimchi I had in the back of the fridge, and even my super picky 8-year-old asked for seconds. Added a fried egg on top like the recipe suggested, *chef’s kiss*.

yesterday

Wait, overripe kimchi is better for this? I always throw mine out when it gets super sour, I’ll have to save it next time! My toddler hates new foods so I’m crossing my fingers this works for us.

yesterday

So glad it was a hit for your family! Sour, fully fermented kimchi is actually ideal here—it adds so much depth of flavor that younger, fresher kimchi doesn’t have. Hope your toddler loves it too!

3 days ago

SO good and cheap to make! I’m a broke college student living in a tiny dorm with just a hot plate, and I pulled this off without any fancy tools. Used leftover rice from the takeout I got last night, a jar of kimchi from the campus market, and a little spam I had stashed. 10/10 will be adding this to my weekly meal prep rotation.

2 days ago

Love that you made this work with dorm cooking tools and leftover takeout rice—day-old rice is actually perfect for fried rice because it doesn’t get mushy! Great call adding spam, that’s such a classic tasty add-in.

1 week ago

Made this for our family potluck last weekend and everyone was begging for the recipe! I doubled the batch, added a handful of frozen corn and diced carrots to sneak in some veggies, and it was gone in 10 minutes. Even my sister who swears she hates kimchi went back for a third helping. No notes, this is a new staple!

5 days ago

Made this last week and it was so tasty! Giving it 4 stars only because I wish there was a note on vegan swaps— I want to make it for my partner who’s dairy free and vegan, but I’m not sure if I need to swap anything out besides the butter? Thinking of adding crispy marinated tofu for protein too.

3 days ago

I made it vegan last week! Swapped the butter for vegan butter, used tamari instead of regular soy sauce, and added crispy tofu like you’re thinking, it turned out incredible. I also tossed in some chopped scallions at the end for extra zing!

3 days ago

Great question! Those swaps Paige mentioned work perfectly. You can also skip any optional meat add-ins and load up on veggies or tofu, no other adjustments needed. Hope you and your partner love it!

yesterday

Took this to my buddy’s football watch party yesterday and it was a massive hit. I added a little crumbled bacon on top for extra savoriness, and a drizzle of sriracha mayo for anyone who wanted a little kick. Cook time was exactly what the recipe said, super straightforward even for someone like me who burns toast half the time lmao.

2 hours ago

The sriracha mayo drizzle is such a good call! I never thought to add that, I’m definitely stealing that trick when I make this next week. Bacon sounds chef’s kiss too.

2 weeks ago

I make a big batch of this every Sunday for my work lunches and it holds up so well all week! The flavor gets even better after a day or two in the fridge, honestly. I portion it out into 5 containers, top each with a pre-fried egg when I’m ready to eat, and it saves me so much money on takeout during the week. Cannot recommend enough.

30 minutes ago

First time ever cooking with kimchi and this recipe made me look like a pro! I was worried it would be too spicy for my taste, but the balance of the rice, a little sesame oil, and the runny yolk from the egg mellowed it out perfectly. Only thing I did wrong was use fresh rice instead of day-old, so it was a tiny bit mushy, but still delicious.

5 minutes ago

Yay, so glad your first kimchi cooking experience was a win! Next time if you don’t have day-old rice, you can spread fresh cooked rice on a baking sheet and pop it in the fridge for 20-30 minutes to dry it out a bit—it works almost as well for fried rice!

5 minutes ago

Made this for brunch today with my roommates and we are all obsessed! We added a little diced avocado on top, a sprinkle of furikake, and paired it with iced matcha lattes. It’s way easier than the fancy brunch spot downtown that charges $18 for a tiny plate of kimchi fried rice, and tastes 10x better. Will be making this every weekend from now on.

just now

Wait furikake on kimchi fried rice? That’s genius! I have a jar in my pantry I’ve been trying to use up, I’m absolutely throwing that on when I make this tomorrow. How did I never think of that?

just now

Love the creative brunch upgrades! Furikake adds such a great nutty, salty kick, and avocado is the perfect creamy contrast to the tangy kimchi. So glad you and your roommates enjoyed it!



