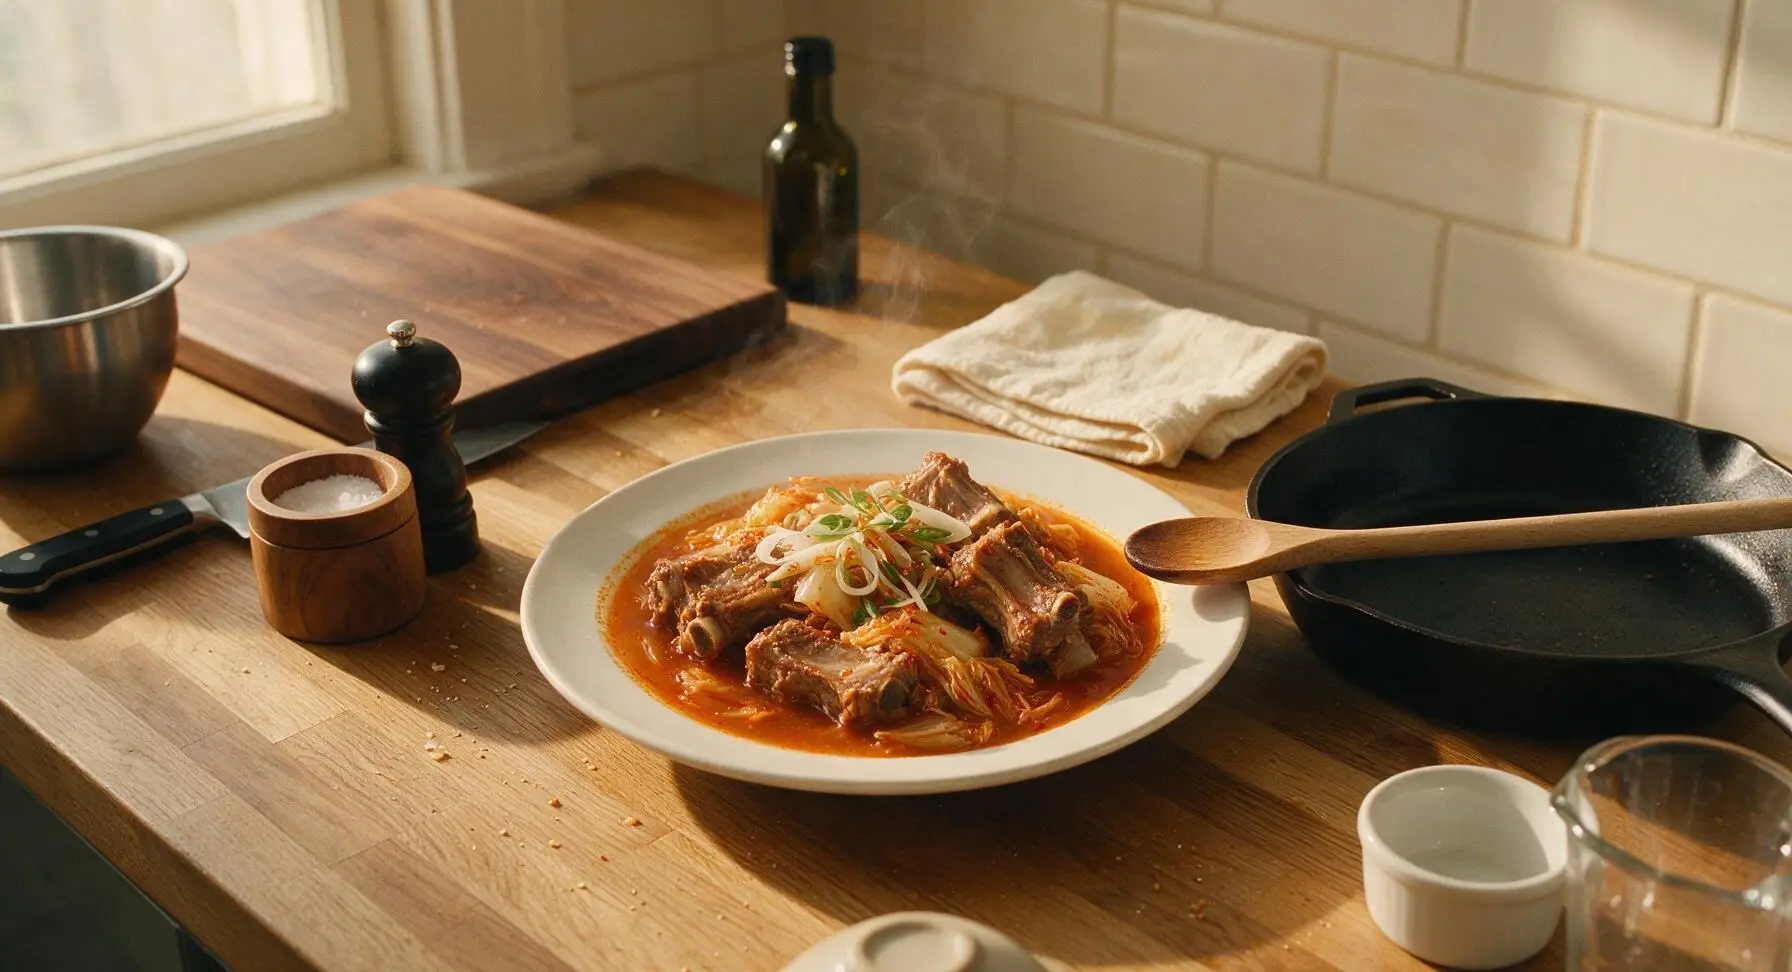
Kimchi Jjigae Ribs

title 1
Kimchi Jjigae Ribs
⏱️ cook time 1 hour 10 minutes
🍽️ servings 4
⚡ Difficulty medium

intro

Tender fall-off-the-bone pork ribs simmered in tangy, umami-rich fermented kimchi broth; a cozy, deeply flavorful Korean home-style stew perfect for cold winter days.

Ingredients
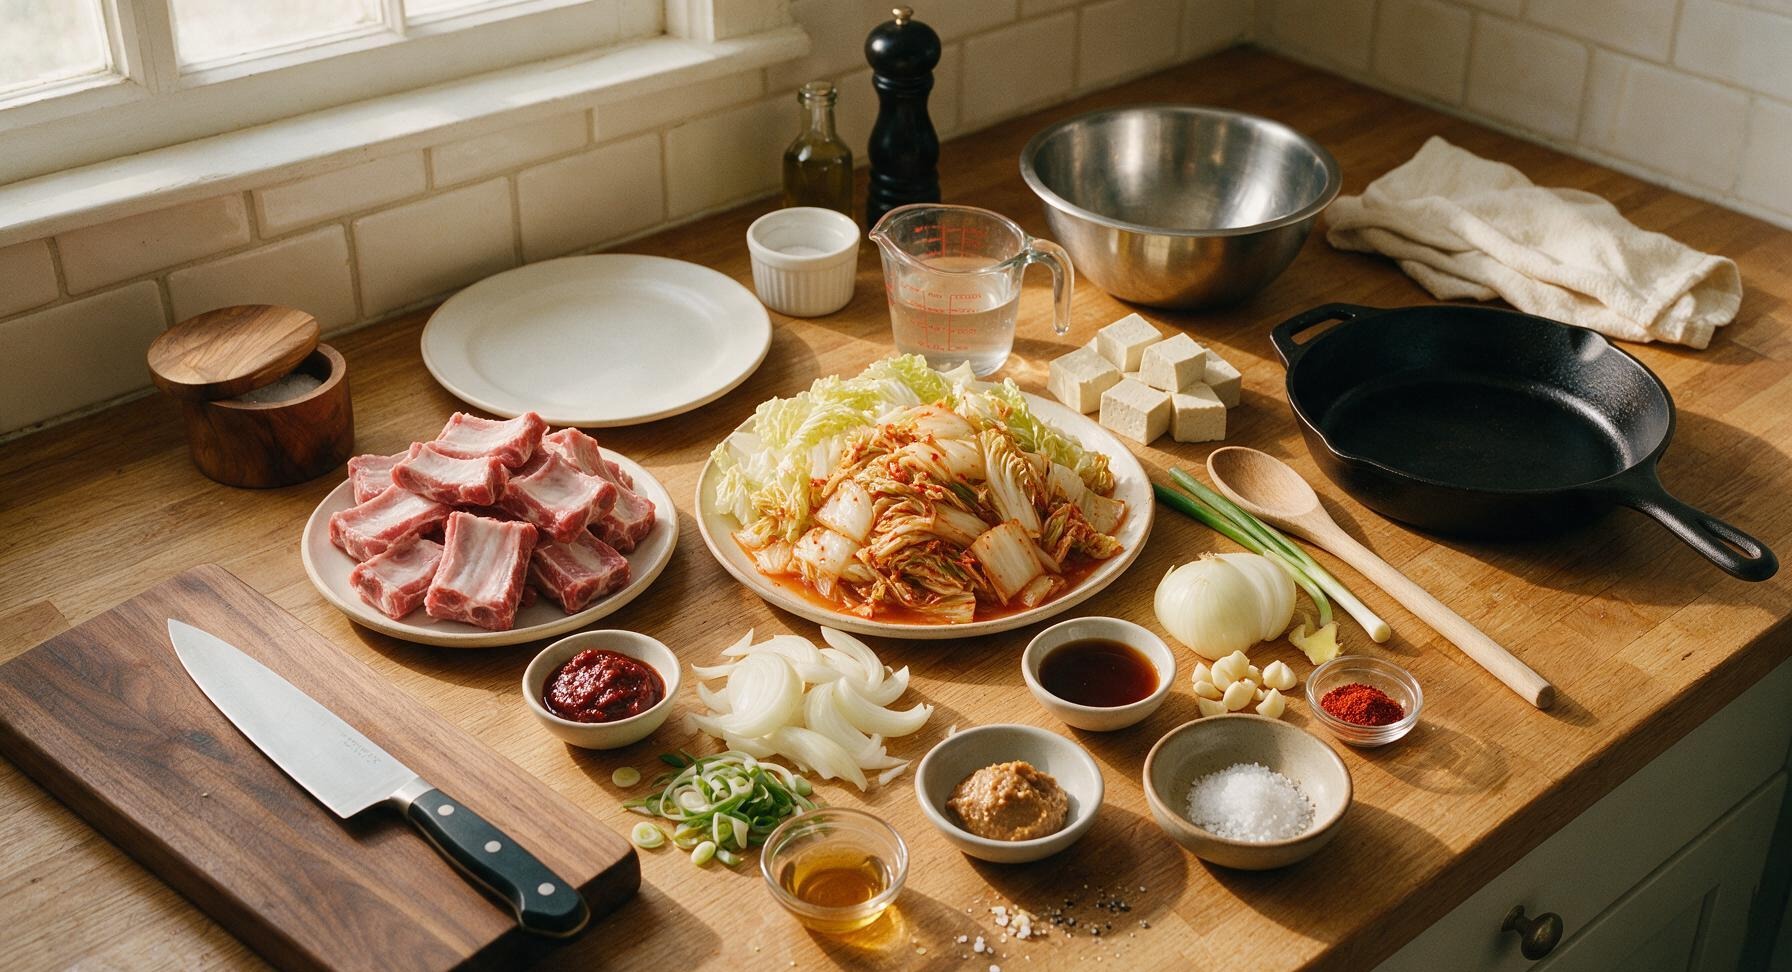
Pork back ribs (cut into single-rib pieces) 800g
Ripe napa cabbage kimchi (with reserved brine, chopped into 5cm pieces) 500g
Firm tofu (cut into 3cm cubes) 300g
Yellow onion (sliced into half-moons) 1 medium (150g)
Garlic cloves (minced) 6 cloves (18g)
Fresh ginger (grated) 1 tbsp (15g)
Scallions (2 sliced for cooking, 1 thinly sliced for garnish) 3 stalks
Gochujang (Korean chili paste) 2 tbsp
Doenjang (Korean soybean paste) 1 tbsp
Gochugaru (Korean chili flakes) 1 tsp
Fish sauce 1 tbsp
Toasted sesame oil 1 tsp
Water (or low-sodium anchovy broth) 4 cups (960ml)
Coarse sea salt 1 tsp
Ground black pepper 1/2 tsp

Steps

1

Rinse and Pat Ribs Dry

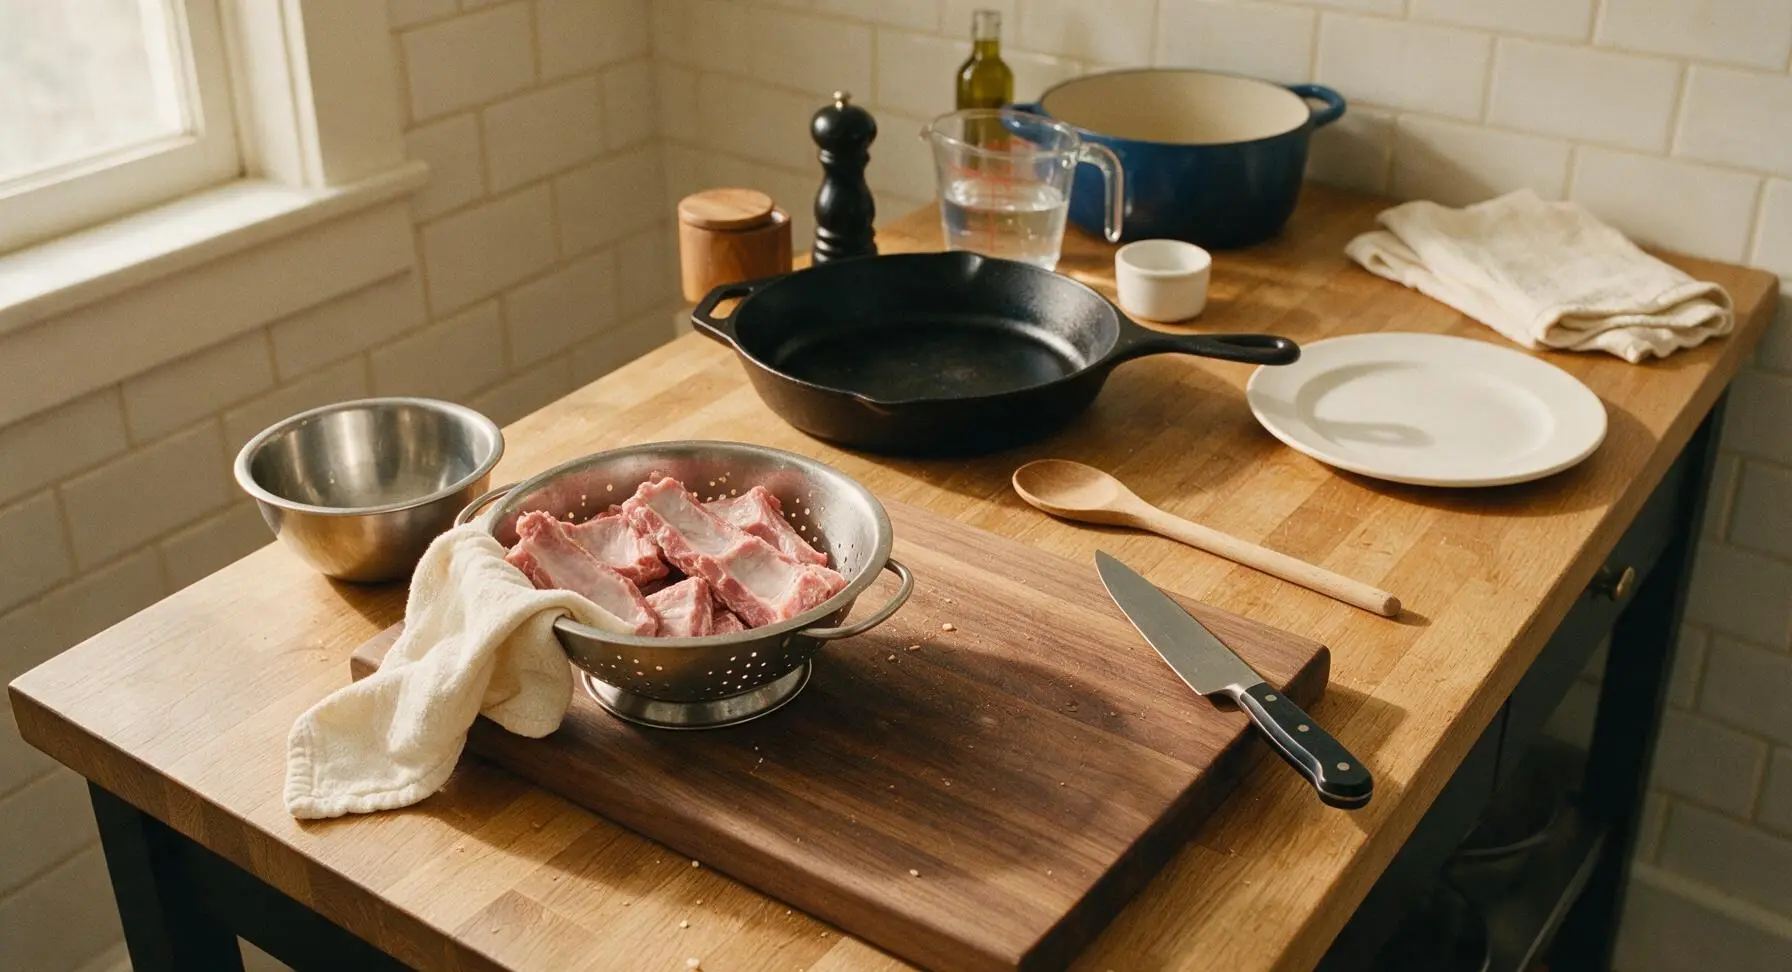
Place individual pork rib pieces in the stainless steel colander, rinse under cold running water for 2 minutes to wash away bone fragments and residual blood. Pat ribs completely dry with the edge of the cream cotton kitchen towel until no surface moisture remains; dry meat ensures even, crisp browning later. Season all sides lightly with 1/2 tsp coarse sea salt and 1/4 tsp ground black pepper.
Step 1
step1:Rinse and Pat Ribs Dry
2

Sear Ribs Until Golden

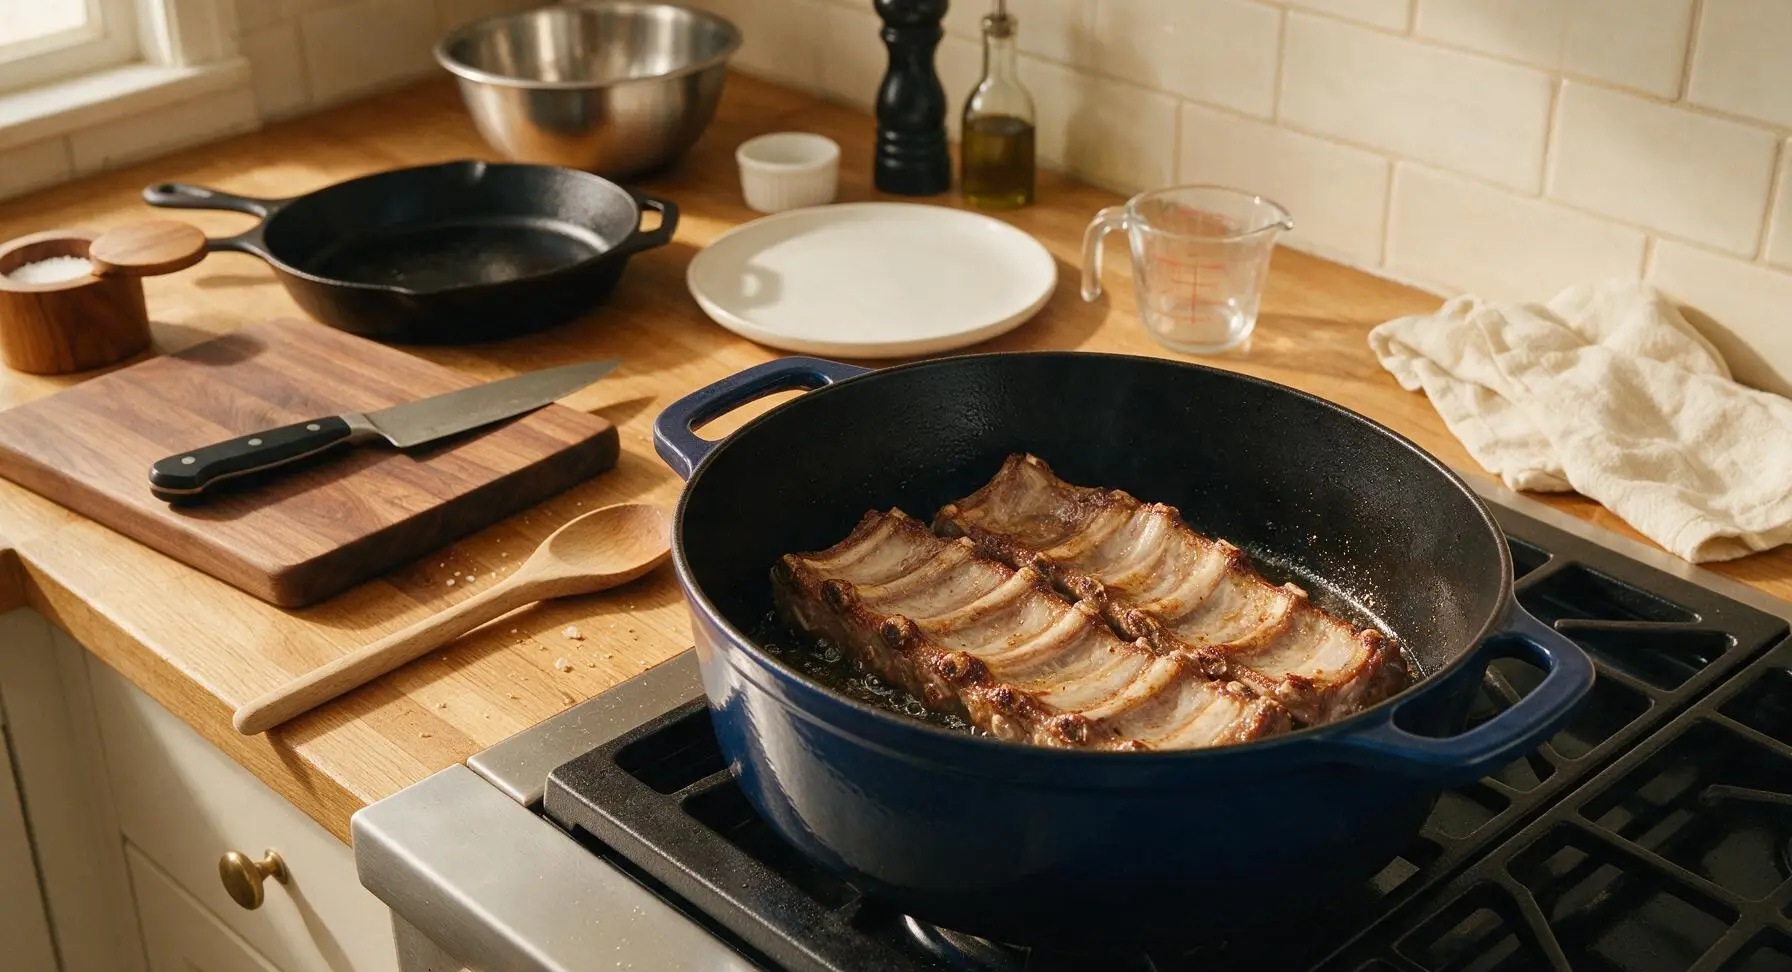
Place the indigo enameled cast iron Dutch oven over medium-high heat; no extra oil is needed, as rib fat will render as it cooks. Once the pot is hot, arrange dried ribs in a single layer, working in 2 batches if needed to avoid crowding. Sear for 3-4 minutes per side until deep golden brown on all surfaces, rendering excess fat. Transfer seared ribs to a clean plate temporarily, leave 1 tbsp of rendered fat in the pot, and pour off any excess.
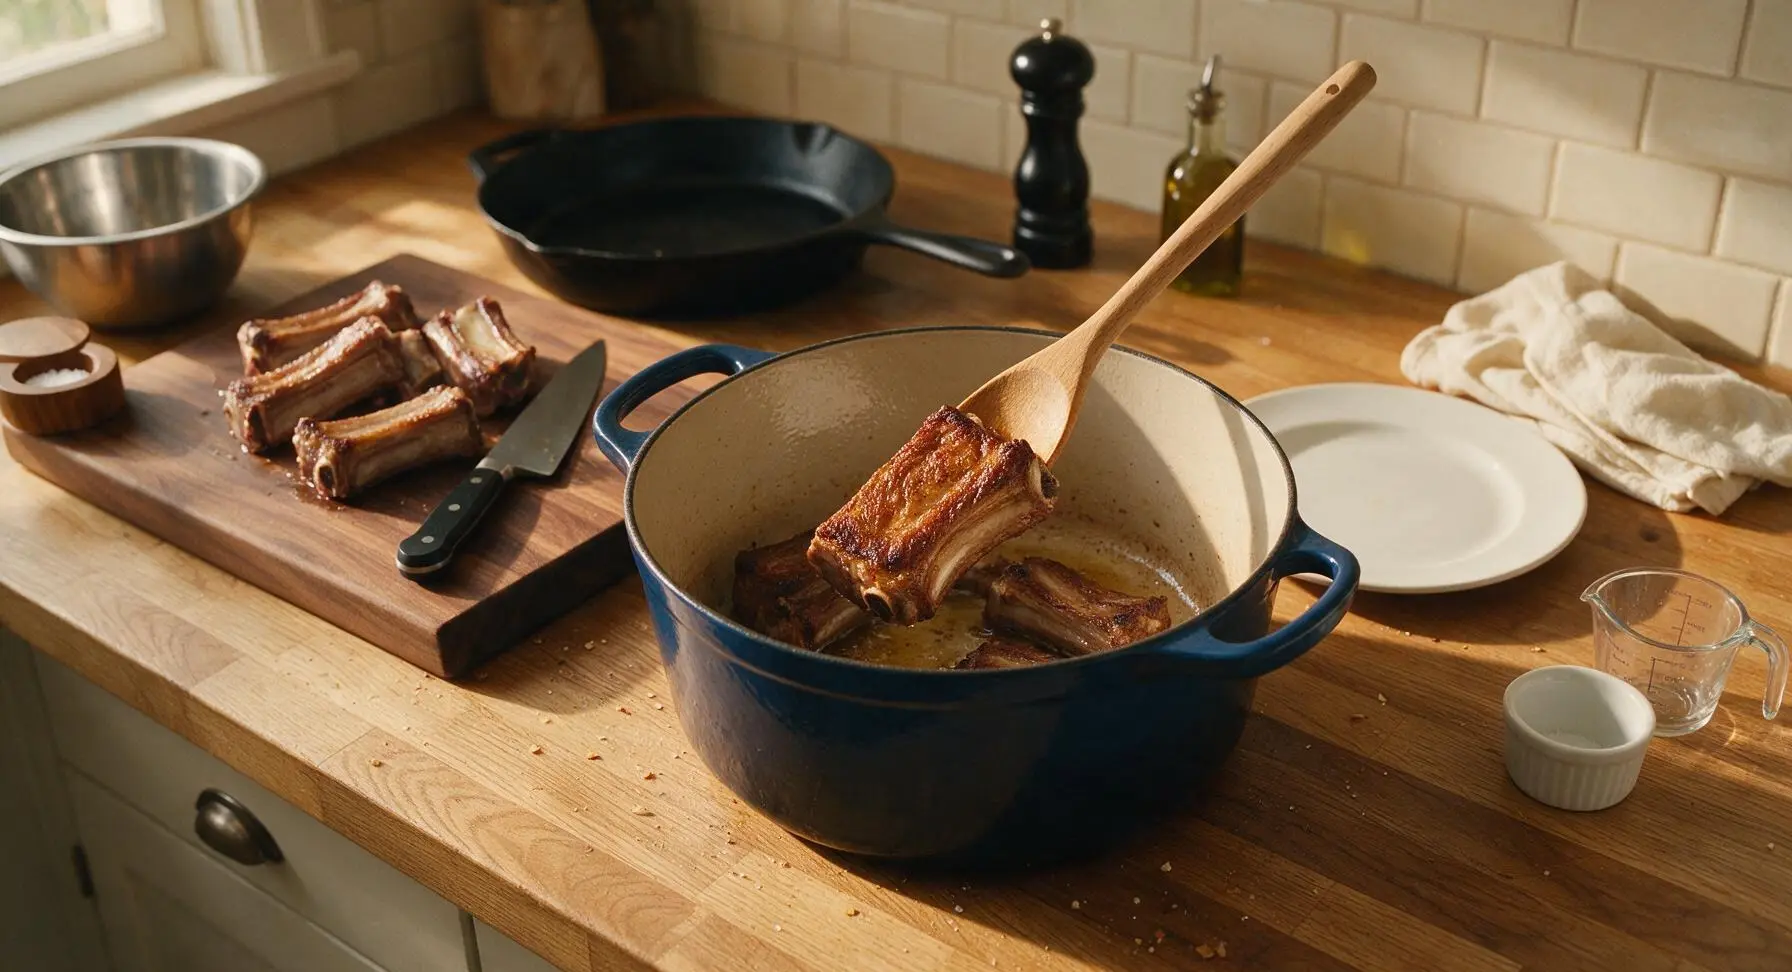
Step 2
step2:Sear Ribs Until Golden
Step 2
step2:Sear Ribs Until Golden
3

Sauté Aromatics and Kimchi

Reduce heat to medium, add sliced yellow onion to the rendered fat in the Dutch oven. Sauté for 3 minutes until soft and translucent, then add minced garlic, grated ginger, and chopped kimchi (reserving all brine for later). Stir continuously with the beech wood spoon for 4-5 minutes until kimchi softens slightly, releases a deep tangy aroma, and its edges turn slightly translucent.
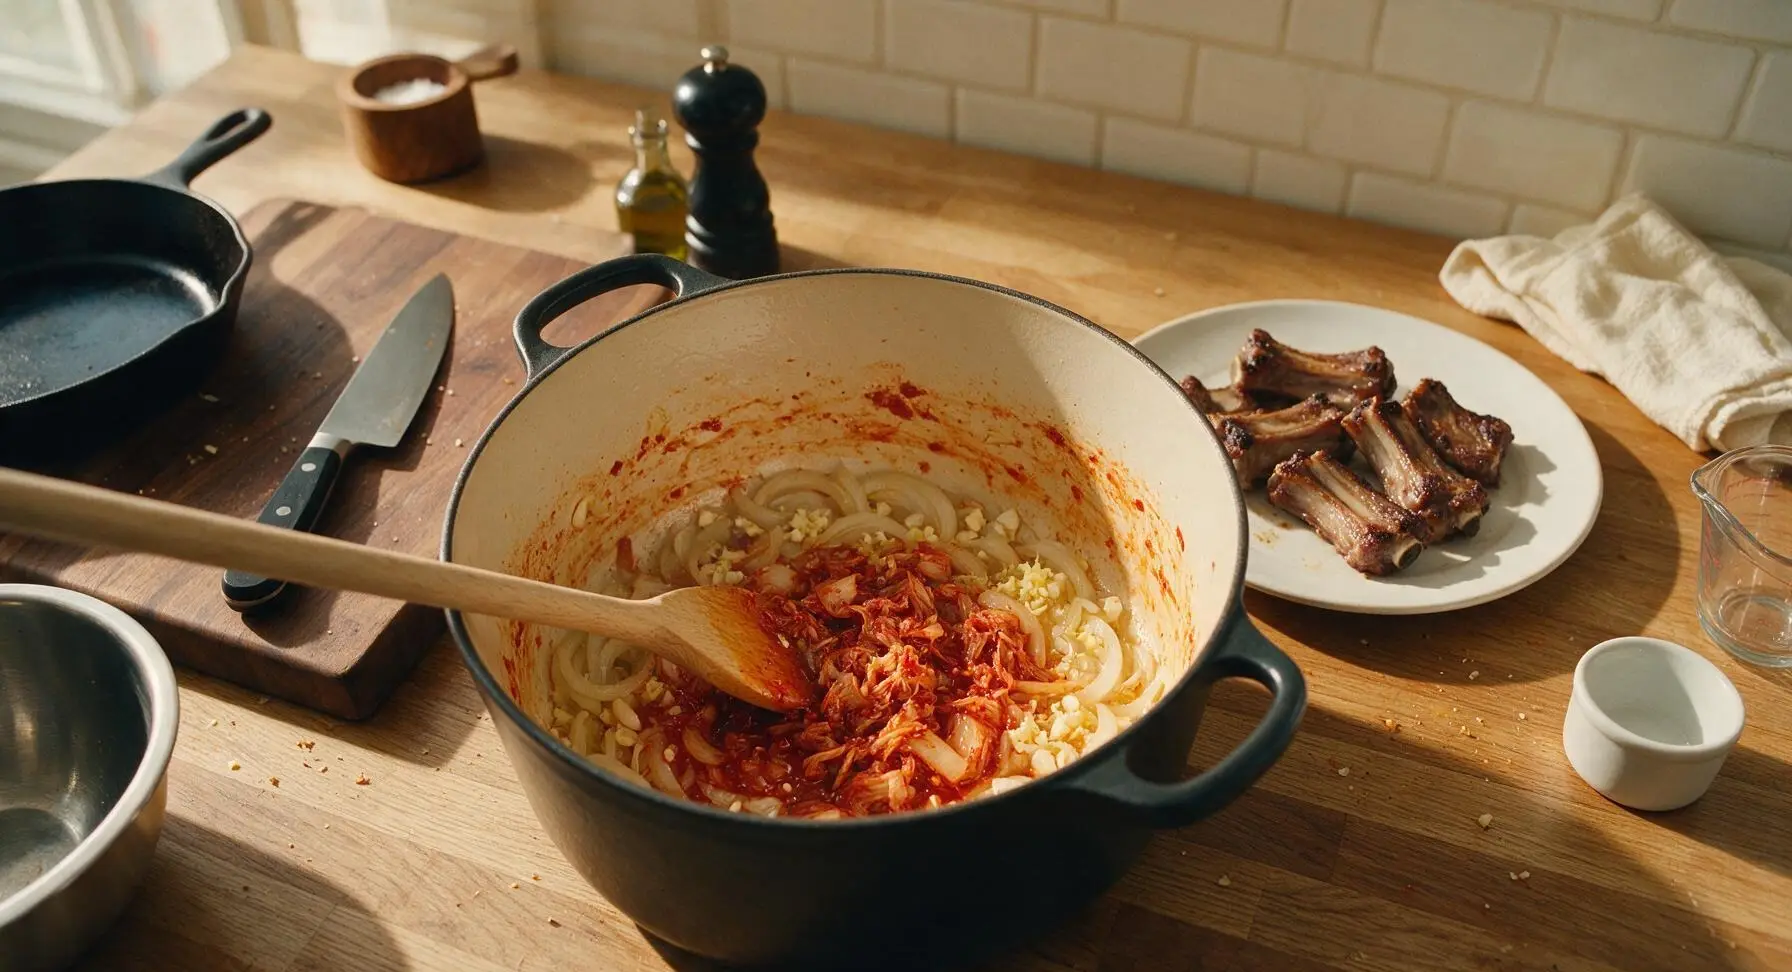
Step 3
step3:Sauté Aromatics and Kimchi
4

Stir in Seasoning Pastes

Add gochujang, doenjang, gochugaru, and fish sauce to the pot with the sautéed kimchi and aromatics. Stir constantly for 1 minute until the pastes fully dissolve and evenly coat the kimchi and onion mixture, creating a deep rust-red base. Keep heat at medium to avoid burning the pastes, which will turn bitter and ruin the stew flavor.
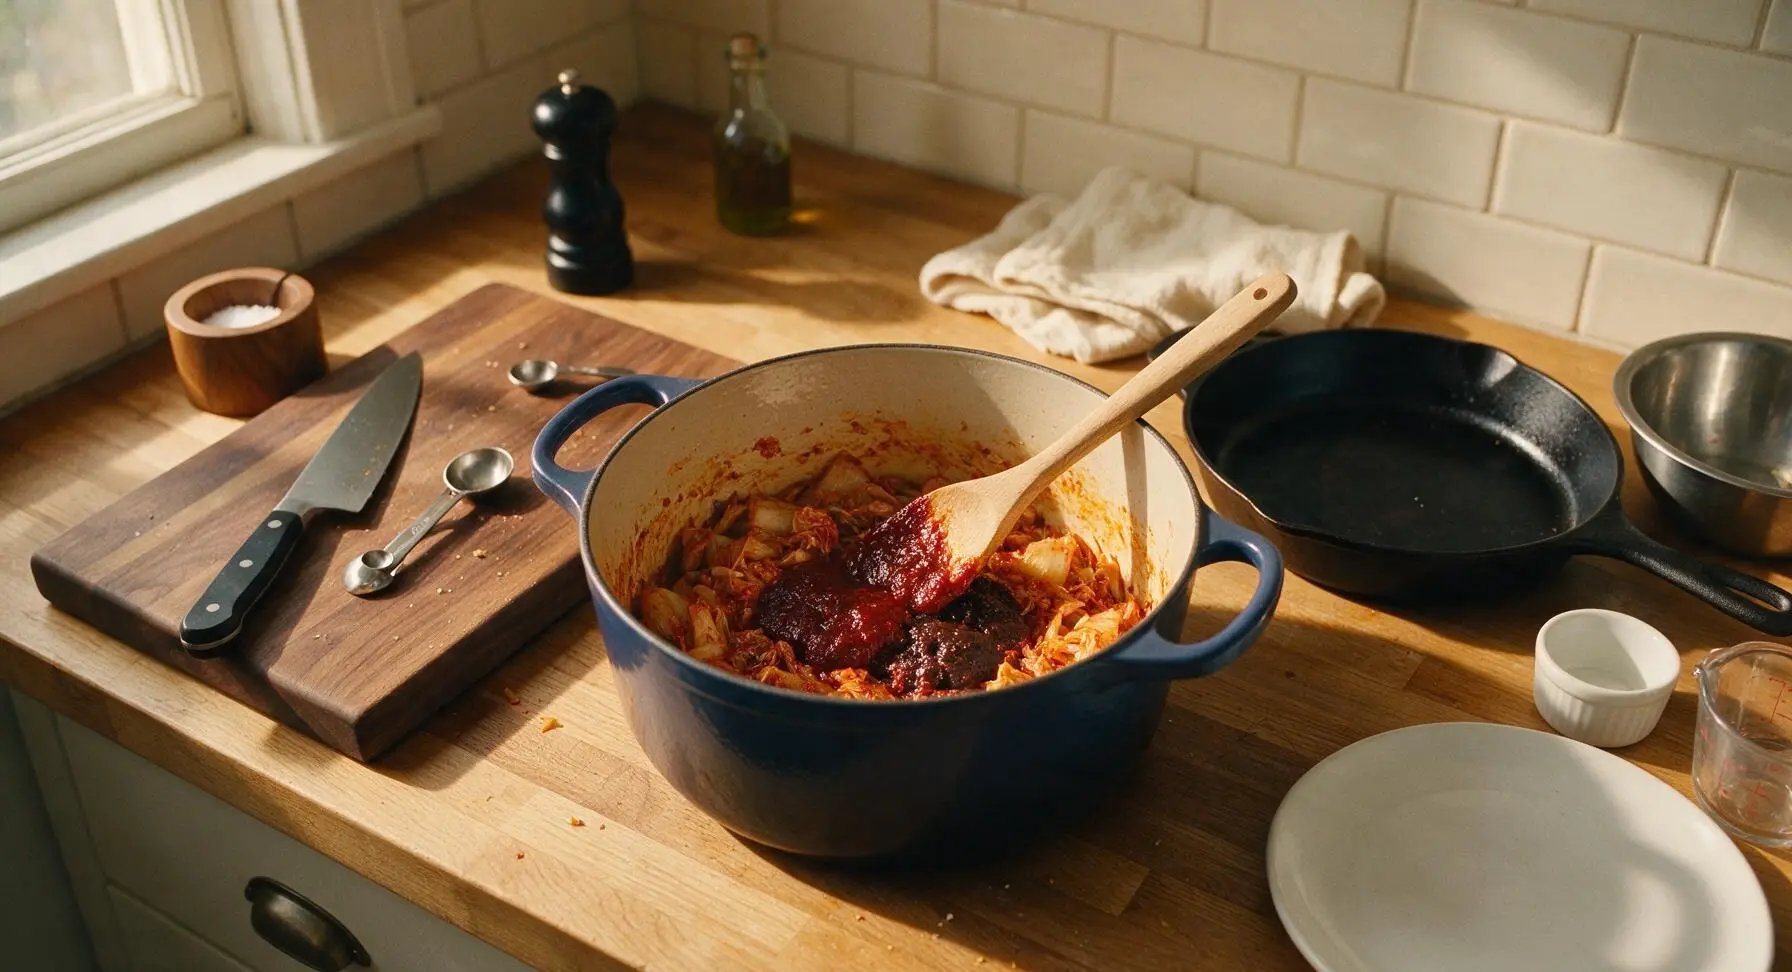
Step 4
step4:Stir in Seasoning Pastes
5

Simmer Ribs in Broth

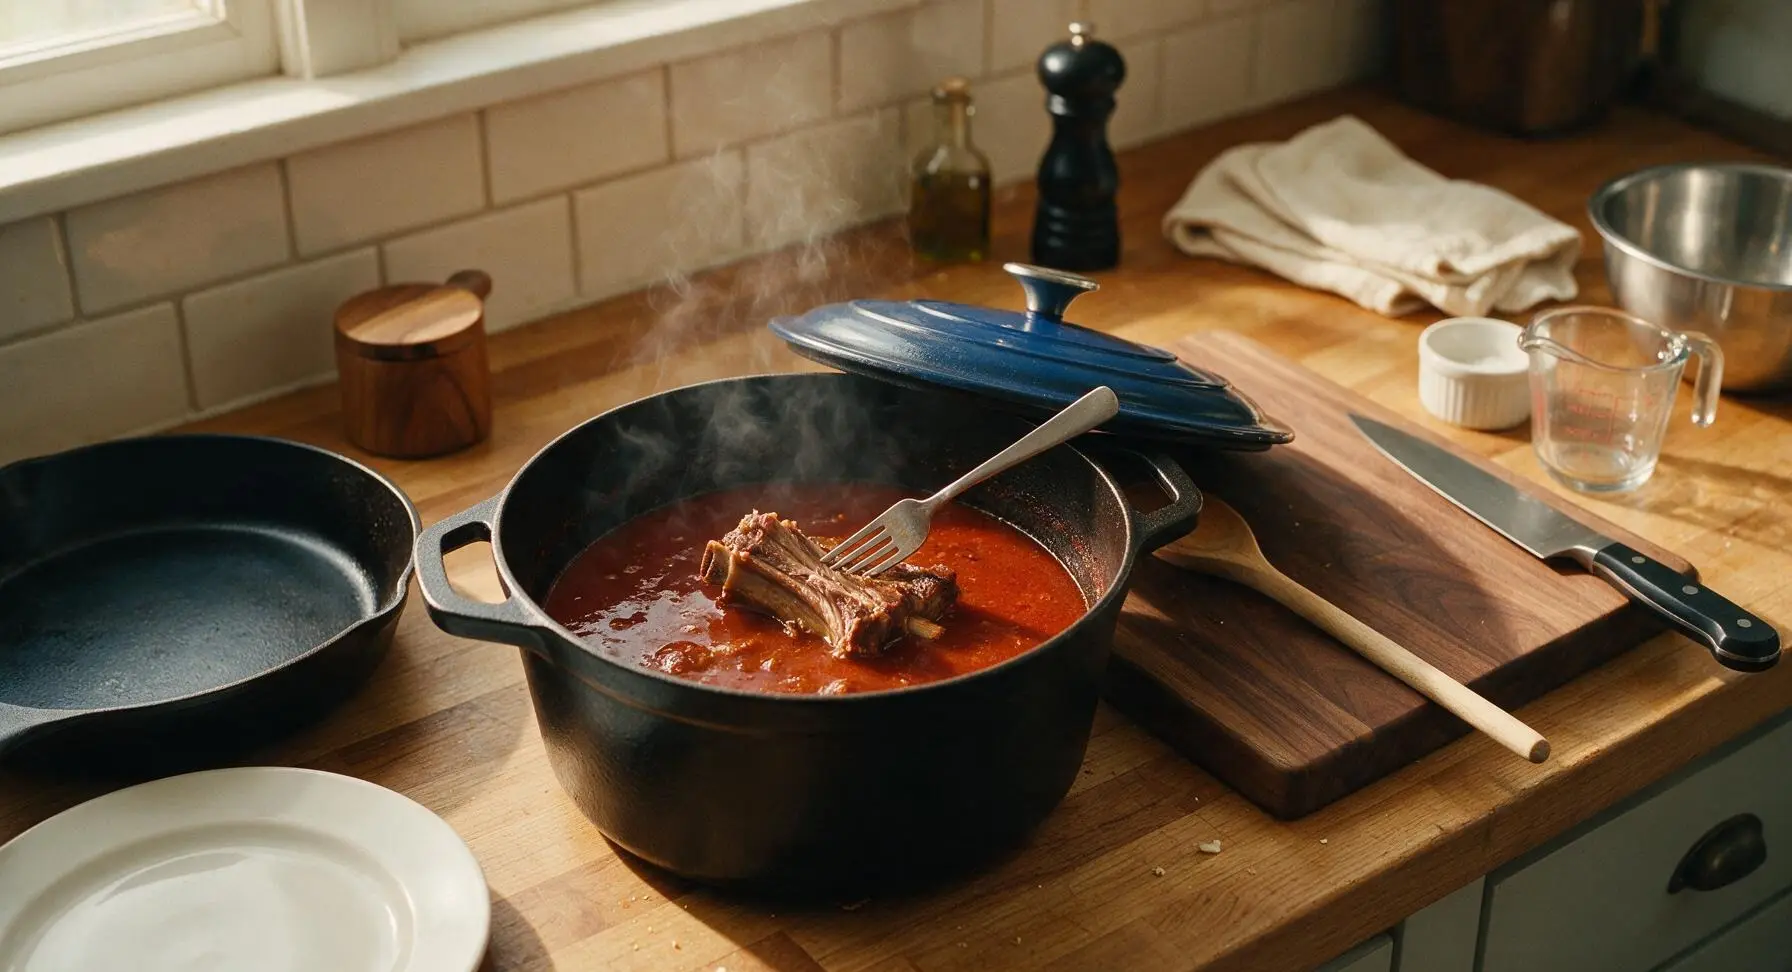
Return seared ribs to the Dutch oven, pour in 4 cups of water (or low-sodium anchovy broth) and reserved kimchi brine, stirring to combine. Bring liquid to a rolling boil, then reduce heat to medium-low, cover the pot with the matching indigo lid, and simmer for 50 minutes. Check occasionally to keep the liquid at a gentle bubble, not a hard rolling boil; ribs are ready for the next step when a fork pierces the meat easily but it does not yet fall off the bone.
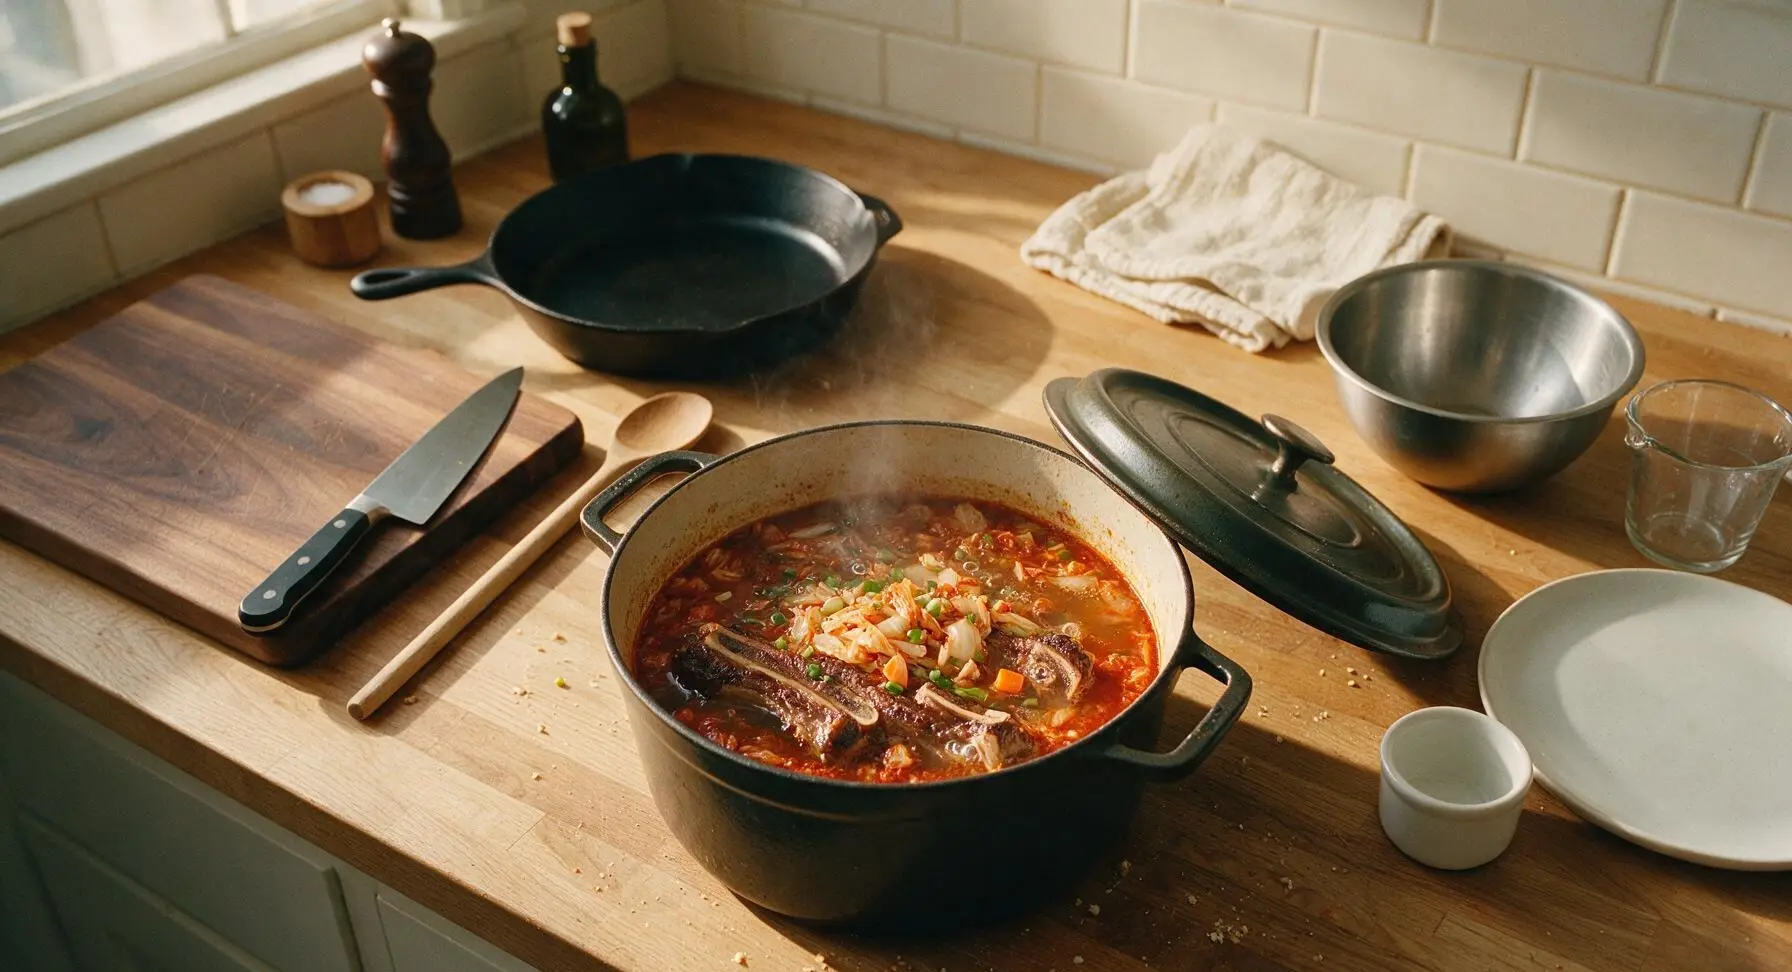
Step 5
step5:Simmer Ribs in Broth
Step 5
step5:Simmer Ribs in Broth
6

Add Tofu and Finish Cooking

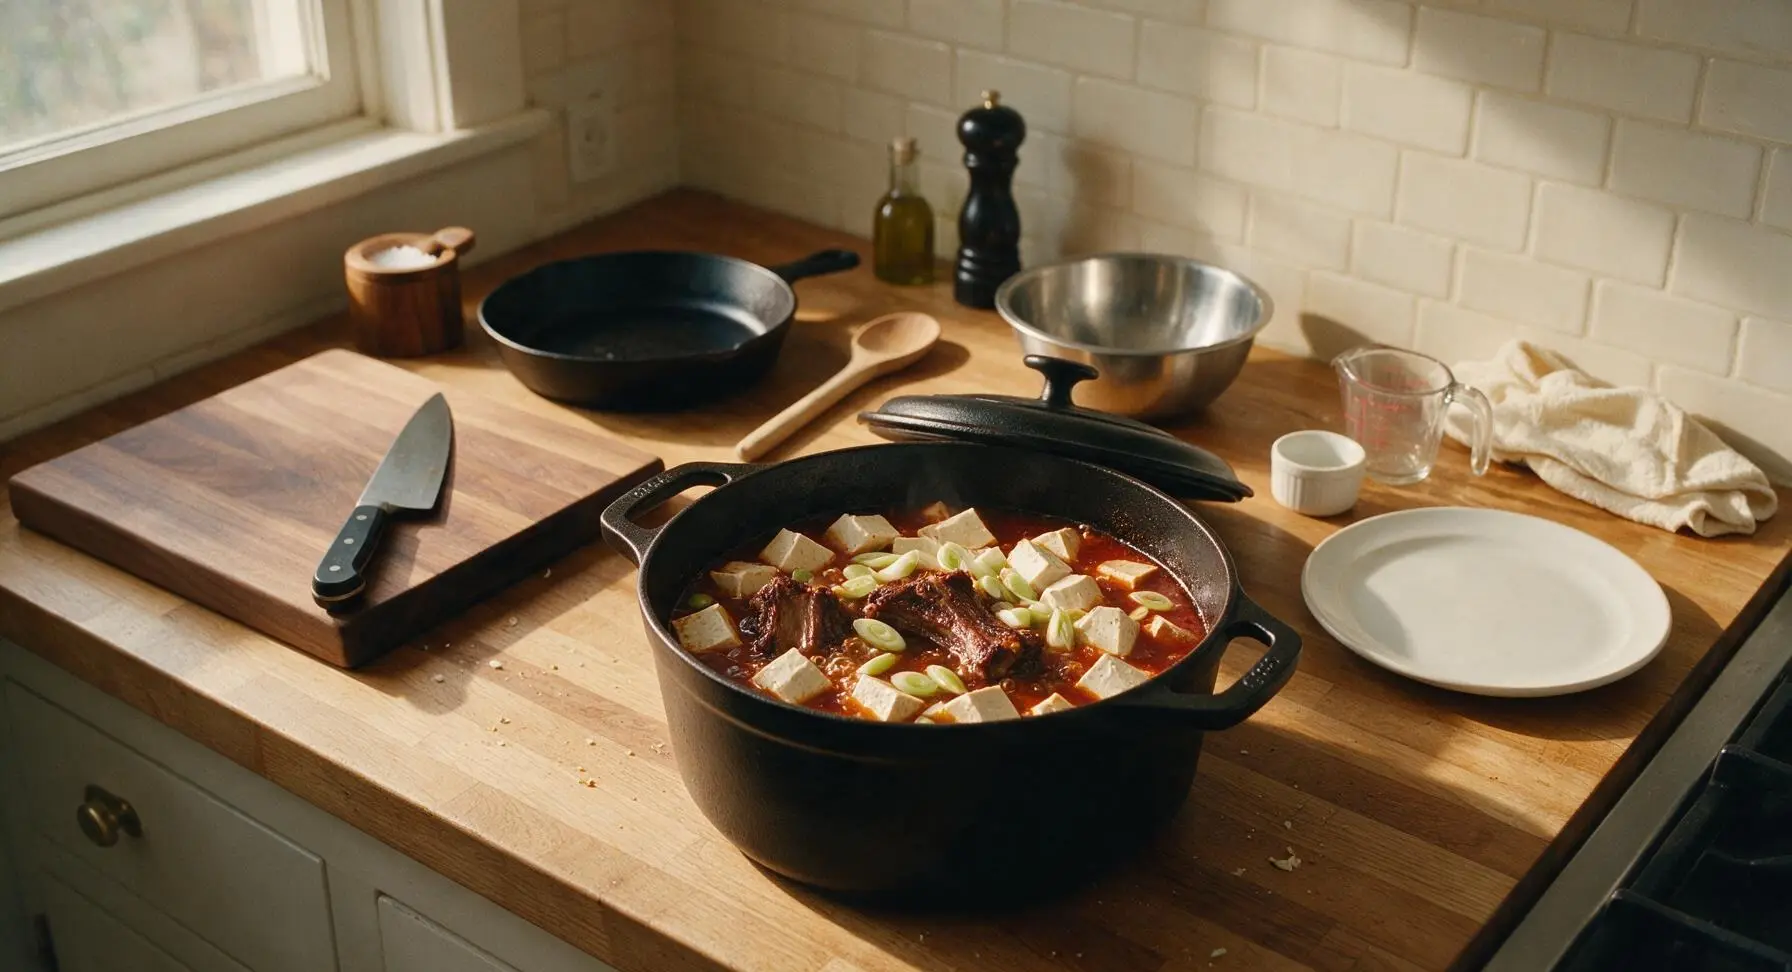
Remove the pot lid, gently nestle cubed firm tofu and sliced scallion whites and light green parts into the simmering broth around the ribs, taking care not to break the soft tofu cubes. Cover again and simmer for an additional 10 minutes, until tofu is heated through and has absorbed some stew flavor, and ribs are fall-off-the-bone tender. Taste the broth, adjust seasoning with a pinch more salt or fish sauce if needed.
Step 6
step6:Add Tofu and Finish Cooking
7

Garnish and Plate Stew

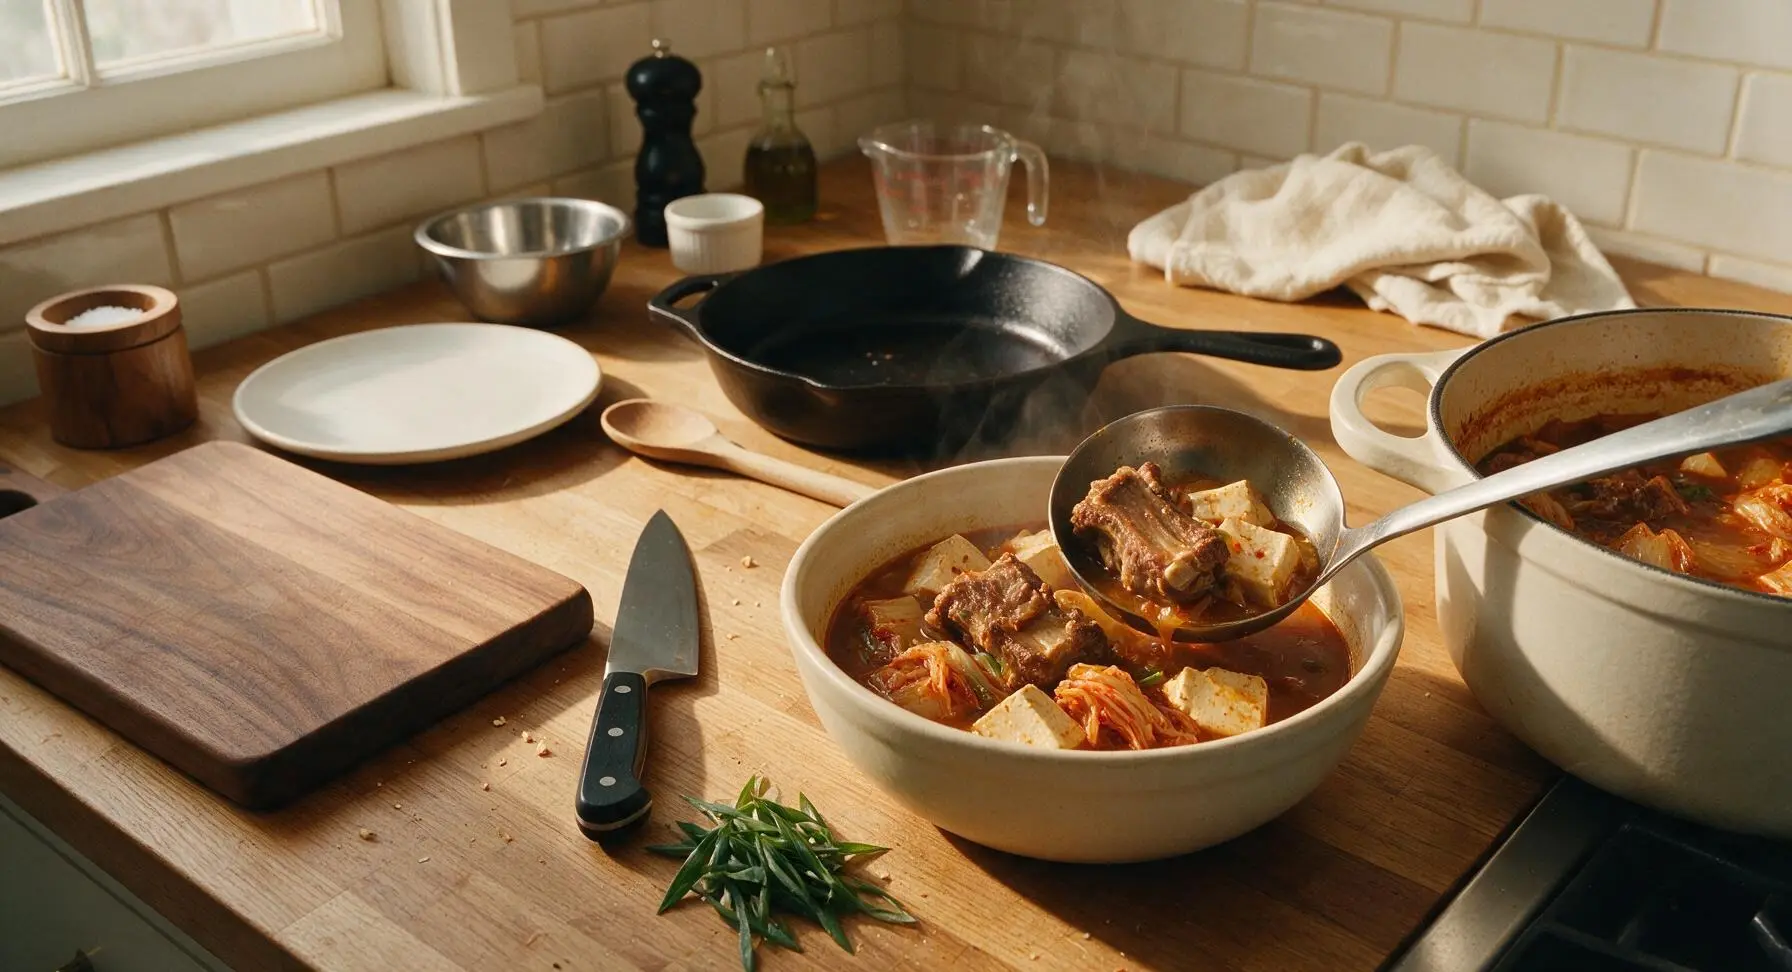
Turn off the heat, drizzle 1 tsp of toasted sesame oil over the top of the stew. Use the stainless steel ladle to portion 2 ribs per serving, plus a generous scoop of kimchi, tofu, and broth into the matte cream ceramic stew bowl. Garnish with thinly sliced fresh scallion greens on top. Serve hot with steamed short-grain white rice on the side.
Step 7
step7:Garnish and Plate Stew

Tips

1.Use well-fermented, slightly sour kimchi (minimum 2 weeks old, with bubbly, tangy brine) for the best flavor; fresh, newly made kimchi lacks the deep umami tang that defines this stew, resulting in a bland, flat broth.
2.Avoid crowding the Dutch oven when searing ribs; cook in 2 batches if your pot is small, as overcrowding causes ribs to steam instead of developing a golden, flavorful crust that enriches the final broth.
3.Nestle tofu gently into the stew instead of stirring it in; firm tofu breaks apart easily if handled roughly, and a 10-minute gentle simmer is enough for it to absorb broth flavor without falling apart.
✨ You May Also Like

Soups & Stews
🍜 Japan

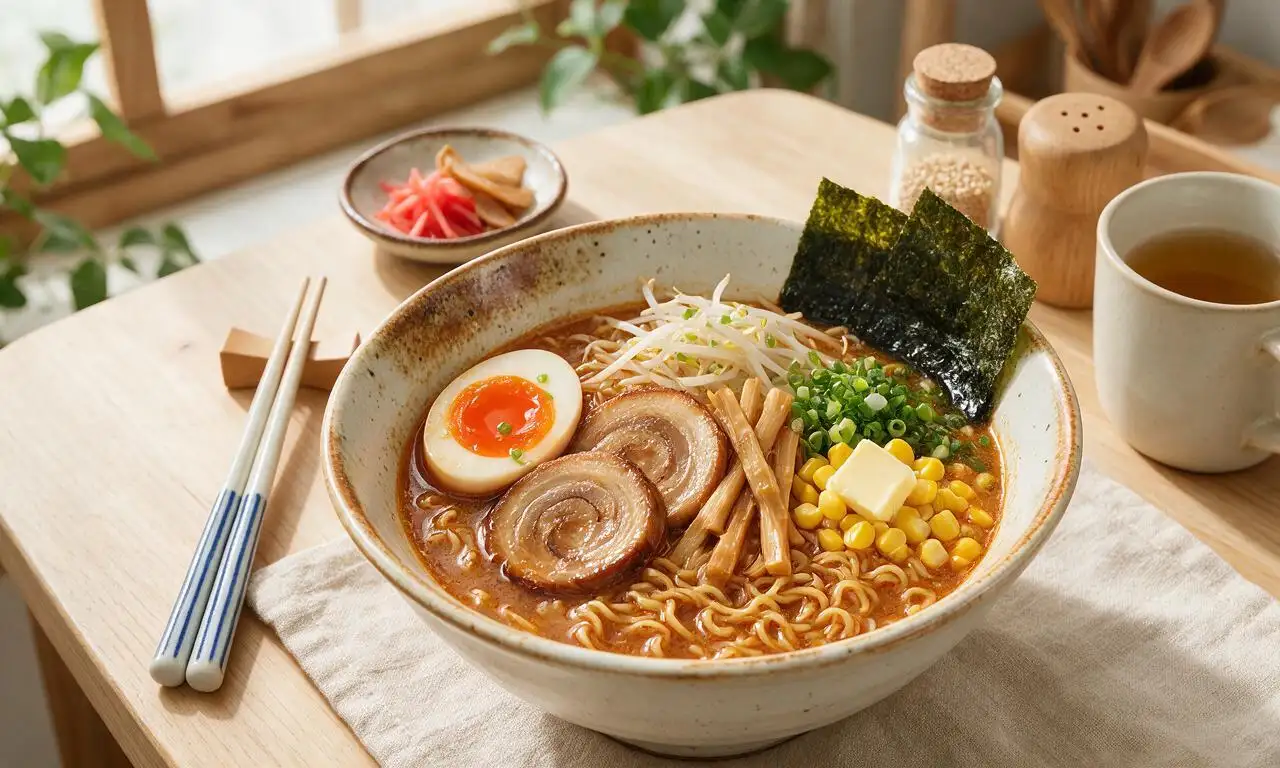
Rich, umami-dense Hokkaido-style miso ramen with chewy noodles, savory fermented broth, and classic toppings, a cozy, deeply satisfying warm meal.

⏱️ 45 minuteSoups & Stews ★ 4.5
Soups & Stews
🍜 United States

A hearty, peppery tripe and root vegetable stew with colonial Philadelphia roots, thick, warming, and packed with bold savory flavor for cold winter days.

⏱️ 2 hours 3Soups & Stews ★ 4.6
Soups & Stews
🍜 Mexico

Hearty, warming red pork posole loaded with tender hominy, slow-simmered in a rich smoky chile broth, served with zesty fresh garnishes for a deeply comforting, satisfying meal.

⏱️ 2 hours 3Soups & Stews ★ 4.7
Soups & Stews
🍜 United States

Warm, soothing classic chicken noodle soup loaded with tender chicken, soft egg noodles, and savory veggies, perfect for chasing chills and feeding the whole family.

⏱️ 40 minuteSoups & Stews ★ 4.9
Soups & Stews
🍜 France

Deeply savory caramelized onion broth topped with crusty bread and bubbly melted Gruyère, a timeless French bistro comfort food ideal for cold days.

⏱️ 1 hour 25Soups & Stews ★ 4.8
Soups & Stews
🍜 United States

Hearty, briny Maryland crab soup loaded with sweet blue crab, tender summer vegetables, and zesty Old Bay, a beloved Chesapeake Bay coastal comfort staple.

⏱️ 55 minuteSoups & Stews ★ 4.9

Kimchi Jjigae Ribs:Frequently Asked Questions

1.What cut of pork ribs works best for kimchi jjigae ribs? ▾
Pork back ribs, as called for in the recipe, are ideal because their even marbling stays tender through long simmering without turning greasy. If you only have spare ribs, trim thick excess hard fat first and cut 10 minutes off simmer time to avoid mushy meat. Baby back ribs work too, but check for tenderness 15 minutes early as they can dry out faster.
2.How ripe should my kimchi be for this stew? ▾
Use fully fermented, sour, slightly translucent kimchi that’s been stored in the fridge for 2–3 weeks, not fresh, crisp newly made kimchi. Fresh kimchi lacks the deep tang that balances rich ribs, and won’t build that signature umami broth even with long cooking. Don’t discard the reserved brine—it adds critical, bright depth to the final stew.
3.Can I make kimchi jjigae ribs ahead of time? ▾
Absolutely! This stew actually tastes better the second day, as the ribs absorb more kimchi tang and all the flavors meld together fully. Let it cool completely, store in an airtight container in the fridge for up to 4 days, and reheat gently on the stovetop over low heat, adding a splash of water if the broth thickens too much.
4.Do I need to pre-boil the ribs before adding them to the stew? ▾
You don’t need a full pre-boil, but a quick 5-minute blanch in boiling water with a splash of rice vinegar will skim off excess surface blood and impurities, leading to a cleaner, less cloudy broth. Drain and rinse the ribs well after blanching before adding them to the kimchi base to simmer for tender results.
5.Can I use soft tofu instead of firm tofu for this recipe? ▾
I don’t recommend soft or silken tofu here, as it will break apart into tiny crumbles during the long simmer and leave your broth grainy. Firm tofu holds its 3cm cube shape perfectly, soaks up savory broth flavor, and adds a nice creamy, substantial bite that stands up to the rich ribs and tangy kimchi.
6.How long do I simmer the ribs to get that fall-off-the-bone texture? ▾
Simmer the ribs, covered, over low heat for 45 to 55 minutes once the stew reaches a gentle bubble. Resist the urge to crank the heat to speed this up—high heat makes rib meat tough and stringy instead of tender. Test doneness by poking a rib with a fork; it should slide in easily with no resistance.
7.What should I serve with kimchi jjigae ribs for a full meal? ▾
Serve this stew piping hot alongside steamed short-grain white rice, which cuts through the rich, tangy broth perfectly. You can add small classic Korean side dishes like pickled radish, blanched spinach tossed with sesame oil, or crispy seaweed snacks for a balanced, cozy home-style spread.
8.My kimchi isn’t very sour—how can I boost that signature tang? ▾
If your kimchi is still too fresh and mild, stir in 1 teaspoon of unseasoned rice vinegar or 1 tablespoon of gochujang mixed with a tiny pinch of sugar right at the start of simmering to amp up that classic tang. You can also add an extra 2 tablespoons of reserved kimchi brine to bump up fermented umami without making the stew watery.
9.Can I make this recipe in a slow cooker instead of on the stovetop? ▾
Definitely! After blanching the ribs, add all ingredients except tofu—sliced half-moon onion, minced garlic, kimchi, and brine—to your slow cooker, cook on LOW for 6 to 7 hours until ribs are fork-tender, then add the tofu cubes and cook for an extra 20 minutes so the tofu soaks up flavor without falling apart.
10.What’s a good substitute for pork ribs for non-pork eaters? ▾
If you don’t eat pork, swap the back ribs for bone-in beef short ribs cut into single pieces, and add 30 minutes to your stovetop simmer time (or 2 extra hours on slow cooker LOW) until the beef is tender. For a vegetarian version, use thick king oyster mushroom chunks instead of ribs, plus a splash of low-sodium soy sauce for extra umami.
11.Do I need to remove the silverskin from the ribs before cooking? ▾
Yes, take 2 minutes to peel the tough, papery silverskin off the bone side of the rib rack before cutting it into single-rib pieces. Silverskin never softens even with long simmering, and it will leave chewy, unpleasantly rubbery bits on your otherwise tender ribs if left on during cooking.
12.How spicy is kimchi jjigae ribs as written? ▾
The base recipe is mild to medium heat, since ripe napa cabbage kimchi usually has a gentle, rounded heat rather than a fiery kick. If you like extra spice, stir in 1 to 2 teaspoons of gochugaru (Korean red pepper flakes) or a sliced fresh green chili when you add the garlic to dial heat up to your preference.
13.Can I freeze leftover kimchi jjigae ribs? ▾
Yes, this stew freezes really well for up to 3 months. Let it cool fully, portion into airtight freezer-safe containers, leaving ½ inch of headspace for expansion, and freeze. Thaw in the fridge overnight before reheating gently on the stovetop; note that tofu will be slightly softer after freezing, but flavor stays just as rich.
14.Why did my rib meat turn out tough instead of tender? ▾
Tough rib meat almost always comes from cooking at too high a temperature, or not simmering long enough. Keep heat at the lowest setting once the stew reaches a gentle bubble—violent boiling makes meat proteins seize up and turn tough. If your ribs are chewy, just cover and simmer 10 to 15 more minutes until they soften.
15.Do I need to add extra stock or water to the stew? ▾
Start with 2 cups of low-sodium chicken or vegetable stock, plus all your reserved kimchi brine, to cover the ribs by about ½ inch. As the stew simmers covered, it won’t lose much liquid, so you won’t need extra unless you prefer a thinner, soupier consistency—stir in a splash more stock if it gets too thick for your taste.
16.Can I add other vegetables to this stew? ▾
Absolutely! Delicious complementary add-ins include sliced shiitake mushrooms, diced daikon radish, or chopped zucchini, added in the last 15 minutes of simmering so they don’t turn mushy. Skip starchy veggies like raw potato unless you parboil them first, as they can make the broth cloudy and overly starchy.
17.Is it normal for the kimchi to turn very soft during cooking? ▾
That’s totally expected and desired! Ripe kimchi breaks down and softens as it simmers, melting into the broth to create that deep, layered umami base instead of staying crisp like fresh kimchi. Chopping it into 5cm pieces as directed means you’ll still have distinct, tender kimchi bites in every spoonful.
18.Can I use canned kimchi if I don’t have refrigerated fresh kimchi? ▾
Canned kimchi works in a pinch, but drain off any overly vinegary brine first, and taste it before adding—canned kimchi is often more sour and salty than refrigerated kimchi, so you may need to cut back on added salt and stir in a tiny pinch of sugar to balance the sharp, processed tang before simmering.
19.When should I add the tofu so it doesn’t fall apart while cooking? ▾
Add your 3cm firm tofu cubes in the last 15 minutes of simmering, once the ribs are already fully fall-off-the-bone tender. Dropping tofu in too early means it will be jostled around by bubbling broth for too long, breaking into small pieces, and it can soak up so much brine that it becomes unpleasantly salty.
20.What makes this rib version different from classic kimchi jjigae? ▾
Classic kimchi jjigae often uses thinner, quicker-cooking pork belly or no meat at all, with a lighter, brighter broth. This rib version uses meaty back ribs that release rich, savory fat and collagen into the broth as they simmer, creating a heartier, more deeply flavored stew that works as a full one-pot meal.

Comments (18)

2 days ago

OMG this kimchi jjigae ribs recipe is a total game changer for our Sunday family dinners! I was worried it’d be too complicated for a medium skill level, but the steps were so straightforward, even my teen helped stir. The ribs were fall-off-the-bone tender, and the kimchi brine gave it the perfect tangy kick. My kids went back for seconds, even my picky 8 year old who says he “hates fermented stuff”. 10/10 will make again!

yesterday

That makes our day to hear! So glad your picky eater gave it a shot — the slow simmer really mellows out the kimchi tang just enough for new flavors to land well. Great call having your teen help, those are the best kitchen memories!

1 week ago

Wait a second, this is SO good — I made it for my potluck last weekend and people were begging for the recipe before they even finished their first bowl! Quick question though: can I use pre-cut short ribs instead of the whole rack the recipe calls for? I’m trying to cut down on prep time for my weekly meal prep.

5 days ago

I did that last week! Pre-cut short ribs worked perfectly, I just shaved 10 minutes off the simmer time so they didn’t get too mushy. Turned out chef’s kiss for my meal prep too, it reheats like a dream!

3 days ago

Great question! Pre-cut short ribs work totally fine — as the other commenter noted, just trim 10 minutes or so off the covered simmer time if your cuts are smaller than 2 inches. So stoked it was a potluck hit!

3 days ago

First time making kimchi jjigae of any kind, let alone with ribs, and I’m shocked how well it turned out. The only swap I made was adding a block of extra firm tofu at the end because I love tofu in my jjigae, and it soaked up all that savory, spicy broth so well. Cook time was right at 1 hour 10 minutes like the recipe said, no surprises. Will definitely be in my regular rotation.

30 minutes ago

Bro I live in a tiny dorm with just a hot plate and a Dutch oven and I still pulled this off??? Thought medium difficulty meant I’d mess it up for sure, but it was so easy to follow. My roommate walked in and thought I ordered takeout from the local Korean spot lmao. Only thing is I used slightly too ripe kimchi so it was extra sour, but that’s my bad not the recipe’s fault.

5 minutes ago

Hot plate Dutch oven meals hit different, nice work pulling this off in a dorm! Extra sour kimchi is actually a lot of people’s preference for jjigae, so that sounds like a happy accident to me.

1 week ago

Made this for my neighborhood block party last weekend and it was the first dish gone! I was a little nervous because not everyone in my Georgia neighborhood is super familiar with Korean food, but people were raving. I served it with steamed rice and little pickled radish sides, chef’s kiss. Wondering if anyone has tried making this in a slow cooker instead of on the stovetop?

5 days ago

I tested the slow cooker version last month! Cook on low for 4 hours, add the kimchi and veggies the last hour, it comes out so tender. I do it for work nights when I don’t have time to stand over the stove.

3 days ago

Thrilled it was a block party hit! The slow cooker method BusyDadMike shared works great — just make sure to brown the ribs first before tossing them in the slow cooker for that extra depth of flavor, you won’t regret it.

2 hours ago

Okay but why did I add extra gochugaru and almost blow my own head off lmao. Don’t be like me, stick to the spice amount the recipe says unless you’re actually a spice pro. Even with my overzealous spice addition, this was SO good. The ribs were so juicy, the broth was rich, I ate three servings in one sitting no shame.

30 minutes ago

LMAO I did the exact same thing last week! My nose was running the whole meal but I still couldn’t stop eating it. Next time I’m measuring my gochugaru instead of eyeballing it for sure.

yesterday

I know, I know, it’s ribs, I’m not fully vegan — I just mostly eat plants but when I saw this recipe I had to cave. Worth every single bite. The umami from the kimchi and the pork fat is unreal, I don’t even feel guilty. I paired it with some cold cucumber salad and it was the perfect cozy weekend meal. 10/10, no notes.

2 weeks ago

I’ve been making kimchi jjigae for my family for over 40 years, and I have to say, adding ribs the way this recipe does is such a nice upgrade! I always used pork belly before, but the ribs add such a nice meaty, rich texture. My grandkids kept saying this is the best version I’ve ever made, so I’ll be sticking to this method from now on. Quick note: I let my kimchi ferment for 3 weeks before using it, it gives the best flavor.

1 week ago

Three week fermented kimchi??? That’s the move, I always use week old kimchi and it’s good but I bet that extra tang is next level. Thanks for the tip!

1 week ago

What a compliment coming from someone who’s been making jjigae for 40 years! Extra fermented kimchi is absolutely the secret to deep, complex broth flavor, that’s such a great tip for new cooks too.

5 days ago

Meal prep win alert! I made a big batch of this on Sunday, portioned it out with rice, and it lasted me all work week. It actually tastes better the second and third day because the flavors have time to meld together. The only heads up is if you’re using a fattier cut of ribs, you might want to skim a little fat off the top before storing, otherwise it gets a little solid in the fridge. Still delicious though!

3 days ago

So glad it worked for meal prep! Great call about skimming excess fat before storage — that pro tip will help so many other people making big batches. You’re totally right that the flavors get even better after a day or two in the fridge!

2 days ago

I’m used to smoking ribs low and slow for hours, so I was skeptical that stovetop ribs in 1 hour 10 minutes would be tender enough. Color me impressed! The simmer in the kimchi broth broke down the connective tissue perfectly, and the flavor was way more interesting than my usual dry rub. I might even make this for my next BBQ hang to switch things up.

3 days ago

Wait why did I pay $28 for a tiny bowl of kimchi jjigae with ribs at that trendy K-town spot last week when I could make this giant pot at home for way cheaper??? This tastes exactly like the restaurant version, no cap. I added a handful of glass noodles at the end like they do at my favorite spot, and it was chef’s kiss. Anyone else add noodles to theirs?

2 days ago

Glass noodles are NON-NEGOTIABLE for me in jjigae! They soak up all that broth so well, I don’t know how people eat it without them. I also toss in a few sliced rice cakes sometimes for extra chew.

yesterday

Glass noodles and rice cakes are such great additions! We kept the recipe base simple so people could customize it with their favorite add-ins, and those are two of our go-tos too. Nothing beats homemade for a fraction of restaurant prices!

2 days ago

Made this last night for dinner after a long day of school drop offs and work meetings, and it was the perfect cozy meal. I didn’t have any gochujang on hand so I used a little extra gochugaru and a splash of soy sauce, and it still turned out amazing. My kids dipped the ribs in extra kimchi juice, which I thought was gross but they loved it, so win for mom!

yesterday

Love that quick swap when you don’t have all the ingredients on hand — that’s what home cooking is all about! Kids dipping ribs in kimchi juice is the ultimate win, sounds like you raised some little fermented food fans.

5 minutes ago

As a guy who eats instant noodles 4 nights a week, this felt like a major step up in my cooking game. I was nervous about the medium difficulty tag, but the steps were broken down so well I didn’t mess anything up! I did accidentally use low sodium soy sauce instead of regular, so I added a pinch of salt at the end and it was perfect. 10/10, will impress my next date with this for sure.

just now

Bro this is perfect date night food! I made it for my partner last month and they’re still talking about it. Way better than taking someone out for boring pasta, trust me.

2 days ago

Tried this last night when it was 20 degrees out in Chicago, and it warmed me right down to my bones. The portion size is huge, so I had enough for lunch today too. I added some sliced shiitake mushrooms with the onions, and they added such a nice earthy flavor to the broth. If you’re on the fence about making this, just do it, you won’t regret it.

3 days ago

Quick heads up for anyone making this in a dry climate like Arizona: you might need to add a little extra broth or water during the simmer! I followed the recipe exactly and my liquid evaporated a little faster than expected, so the broth was super concentrated. It was still delicious, just a little thicker than the photos showed. Next time I’ll add an extra half cup of anchovy broth.

2 days ago

Oh that’s such a good tip! I’m in Colorado which is also super dry and I noticed the same thing when I made it, added extra water and it turned out perfect. Thanks for saving other people the panic of their broth drying up!

yesterday

That’s such a helpful tip for high altitude/dry climate cooks! Evaporation rates are so different depending on where you live, so keeping a little extra broth on hand to top up during simmer is a great call. We’ll add that note to the recipe tips soon!

1 week ago

So happy this recipe is easy to make gluten free! I swapped the regular soy sauce for tamari, used gluten free gochujang, and it didn’t taste “modified” at all. My whole family ate it without even noticing it was GF, which is a win because my husband usually complains about GF swaps. This is going into our monthly dinner rotation for sure.

5 days ago

Used leftover ribs from my weekend BBQ to make this, and it might be the best leftover hack I’ve ever tried. I just tossed the already cooked ribs in with the kimchi and broth, simmered for 20 minutes, and it tasted like I spent hours on it. Game changer for not letting leftover ribs go to waste!

3 days ago

What a brilliant leftover hack! That’s such a smart way to repurpose leftover smoked or grilled ribs — the kimchi broth cuts through the smoky richness so well. We might have to test that method and add it as a variation note!

2 weeks ago

This tastes exactly like how my halmeoni used to make it when I was little, I almost cried when I took the first bite. I’ve tried so many kimchi jjigae recipes that are too bland or too spicy, but this one hits that perfect balance of savory, tangy, and spicy. The ribs are such a nice touch, she always used pork ribs too, so it felt like a little hug in a bowl. Thank you so much for sharing this recipe.