
Korean Braised Turkey

title 1
Korean Braised Turkey
⏱️ cook time 1 hour 30 minutes
🍽️ servings 4
⚡ Difficulty medium

intro

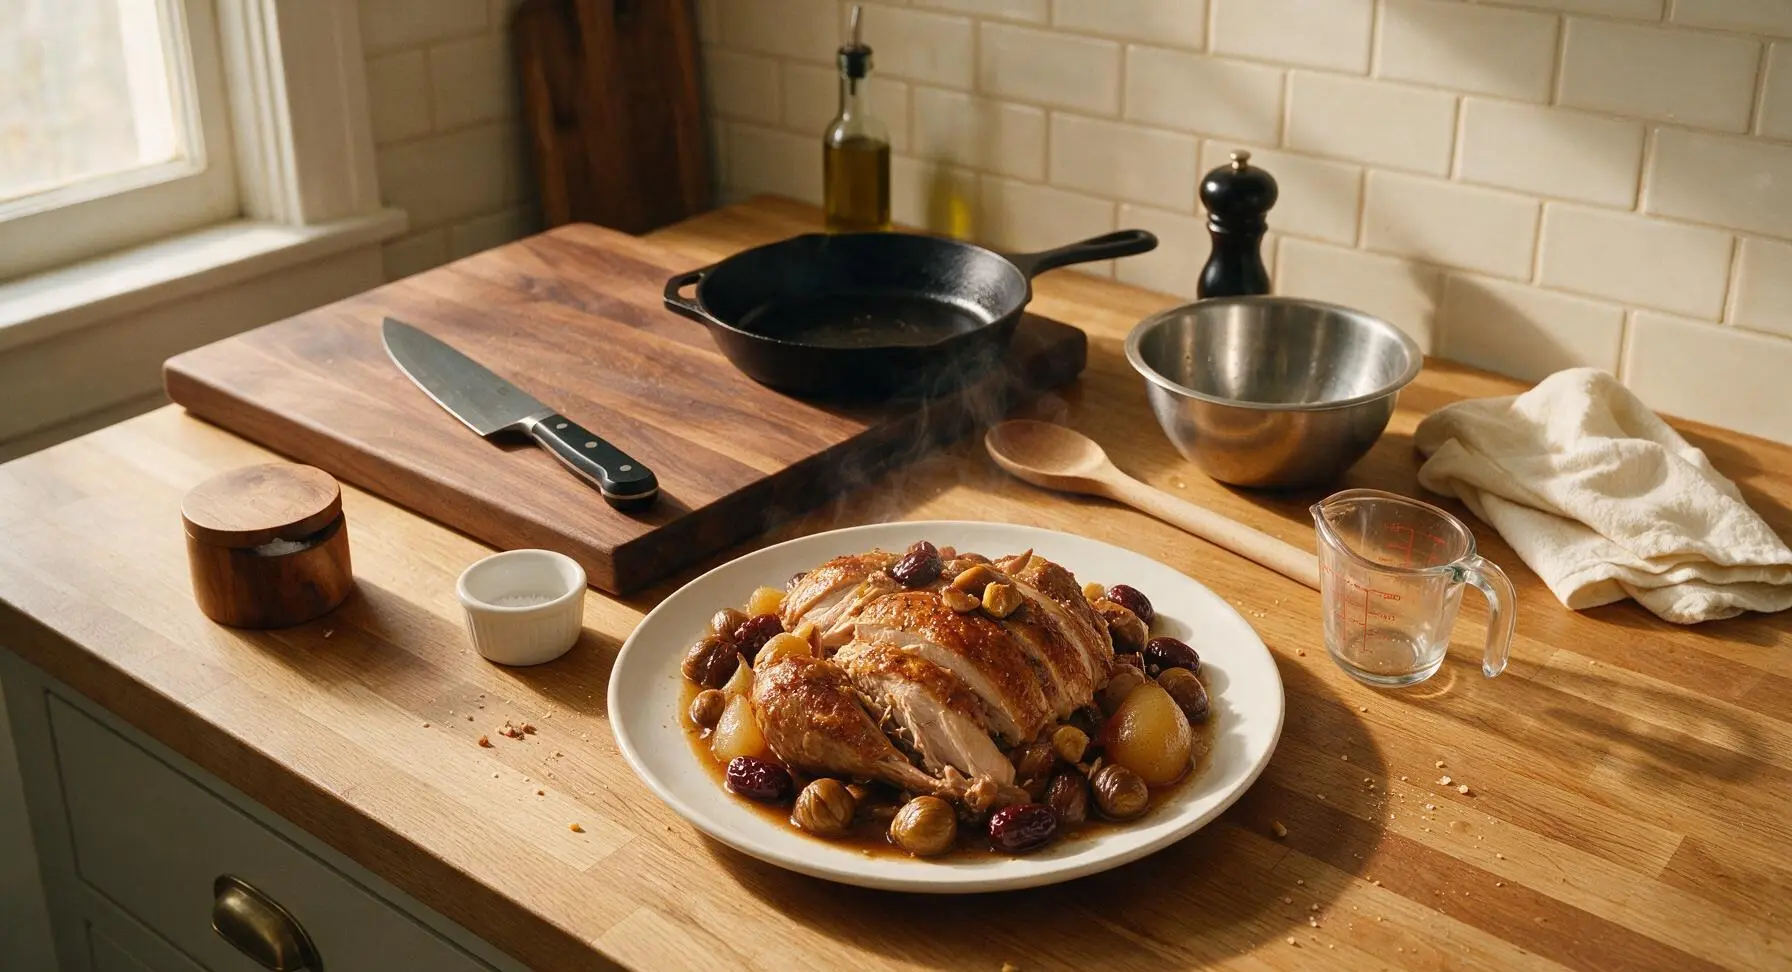
Tender, juicy turkey braised in sweet-savory soy, ginger, and pear sauce, studded with chestnuts and jujubes — a cozy, flavor-packed Korean twist on holiday turkey.

Ingredients
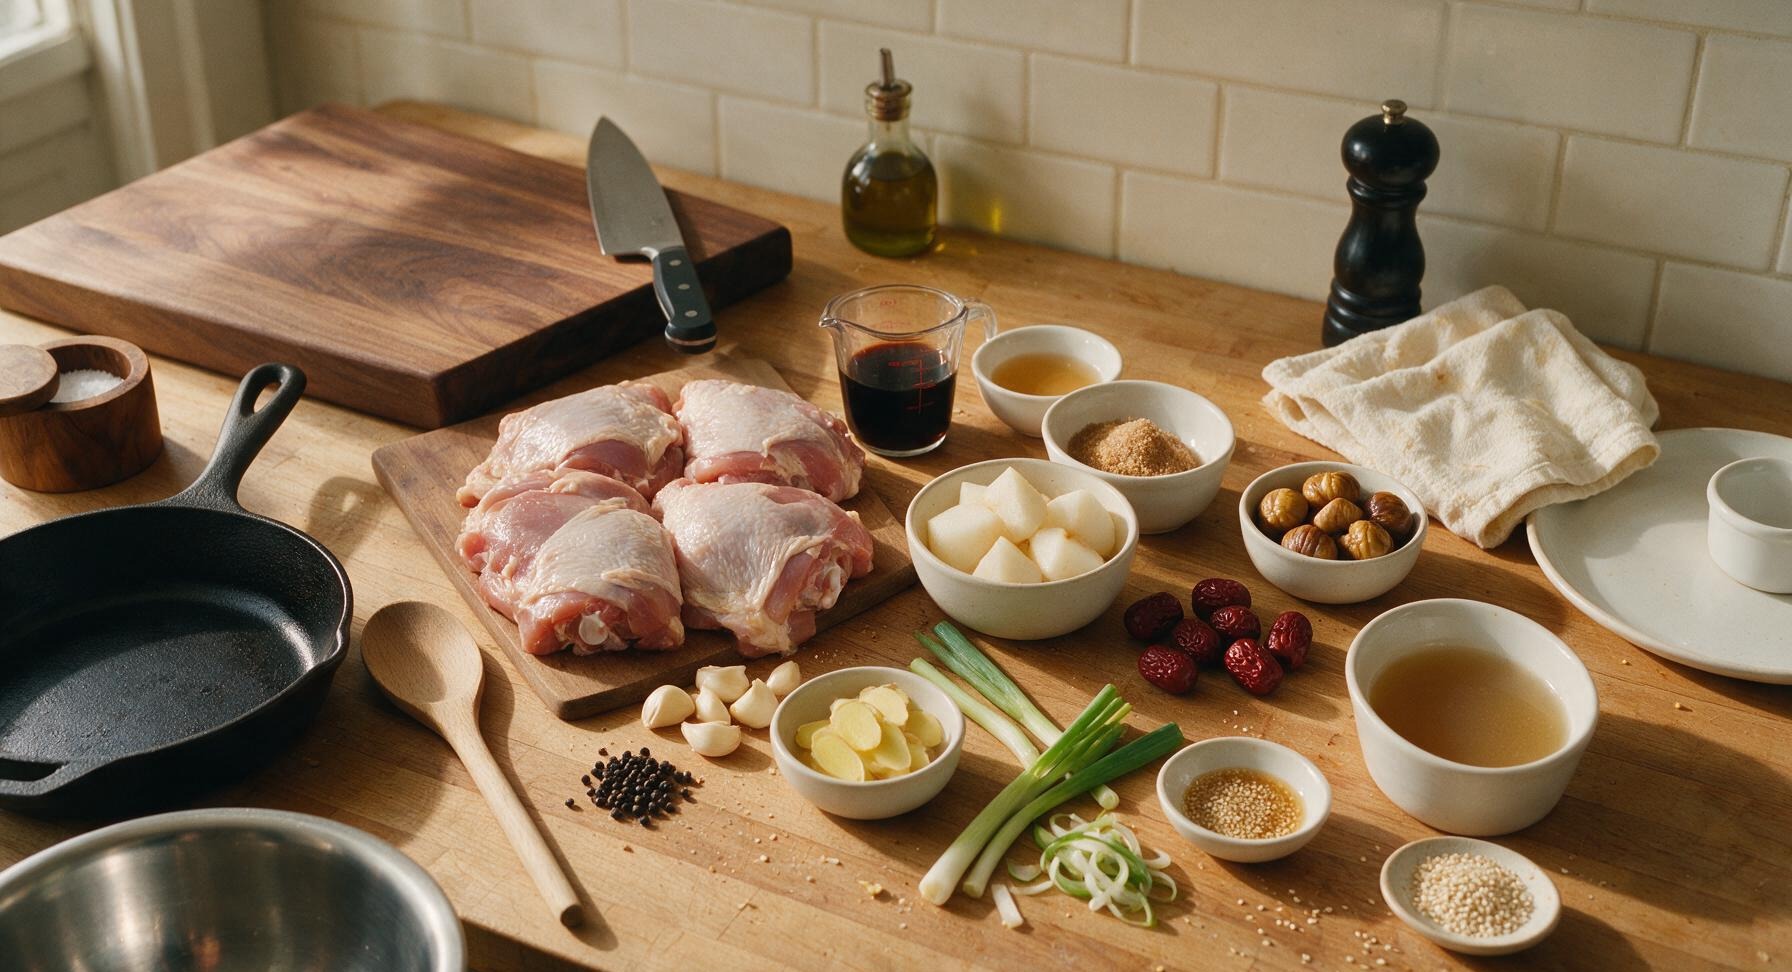
Bone-in skin-on turkey thighs 1.2kg (4 pieces, ~300g each)
Low-sodium soy sauce 120ml
Dry rice wine (cheongju or dry sherry) 60ml
Light brown sugar 3 tbsp
Korean pear 1 medium (250g, peeled, cored, cut into 5cm chunks)
Garlic cloves 8 cloves, lightly crushed
Fresh ginger 5cm knob, peeled and thinly sliced
Scallions 4 stalks (2 cut into 5cm lengths, 2 thinly sliced for garnish)
Dried pitted jujubes (red dates) 8 pieces
Peeled roasted chestnuts 120g
Whole black peppercorns 1 tsp
Toasted sesame oil 1 tbsp
Low-sodium chicken broth 240ml
Toasted white sesame seeds 1 tsp (for garnish)

Steps

1

Prep Turkey and Aromatics

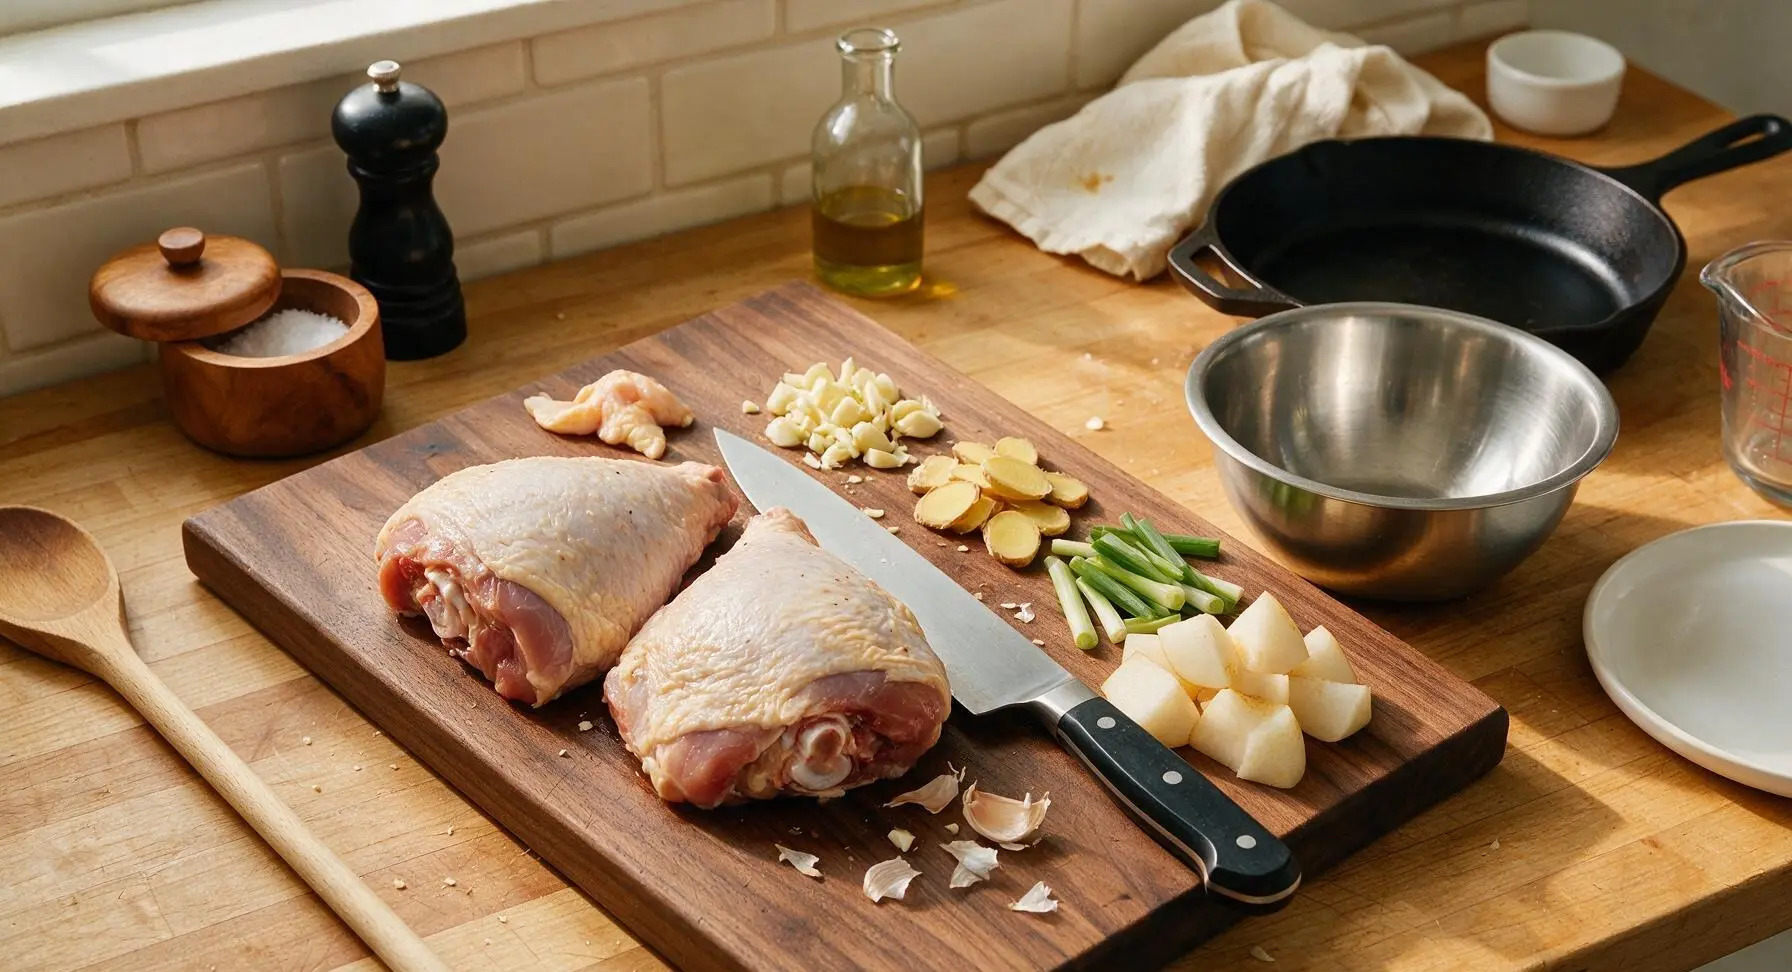
Pat turkey thighs completely dry with paper towels, then place on the acacia wood cutting board. Use the chef knife to trim any loose, hanging skin or thick, hard fat deposits, leaving a thin, even layer of skin on each piece. Prep all aromatics: lightly crush garlic cloves, slice ginger into 3mm thick rounds, cut 2 scallions into 5cm lengths, peel and core the Korean pear and cut into 5cm chunks, and ensure jujubes are fully pitted. Set prepped ingredients aside.
Step 1
step1:Prep Turkey and Aromatics
2

Mix Braising Sauce

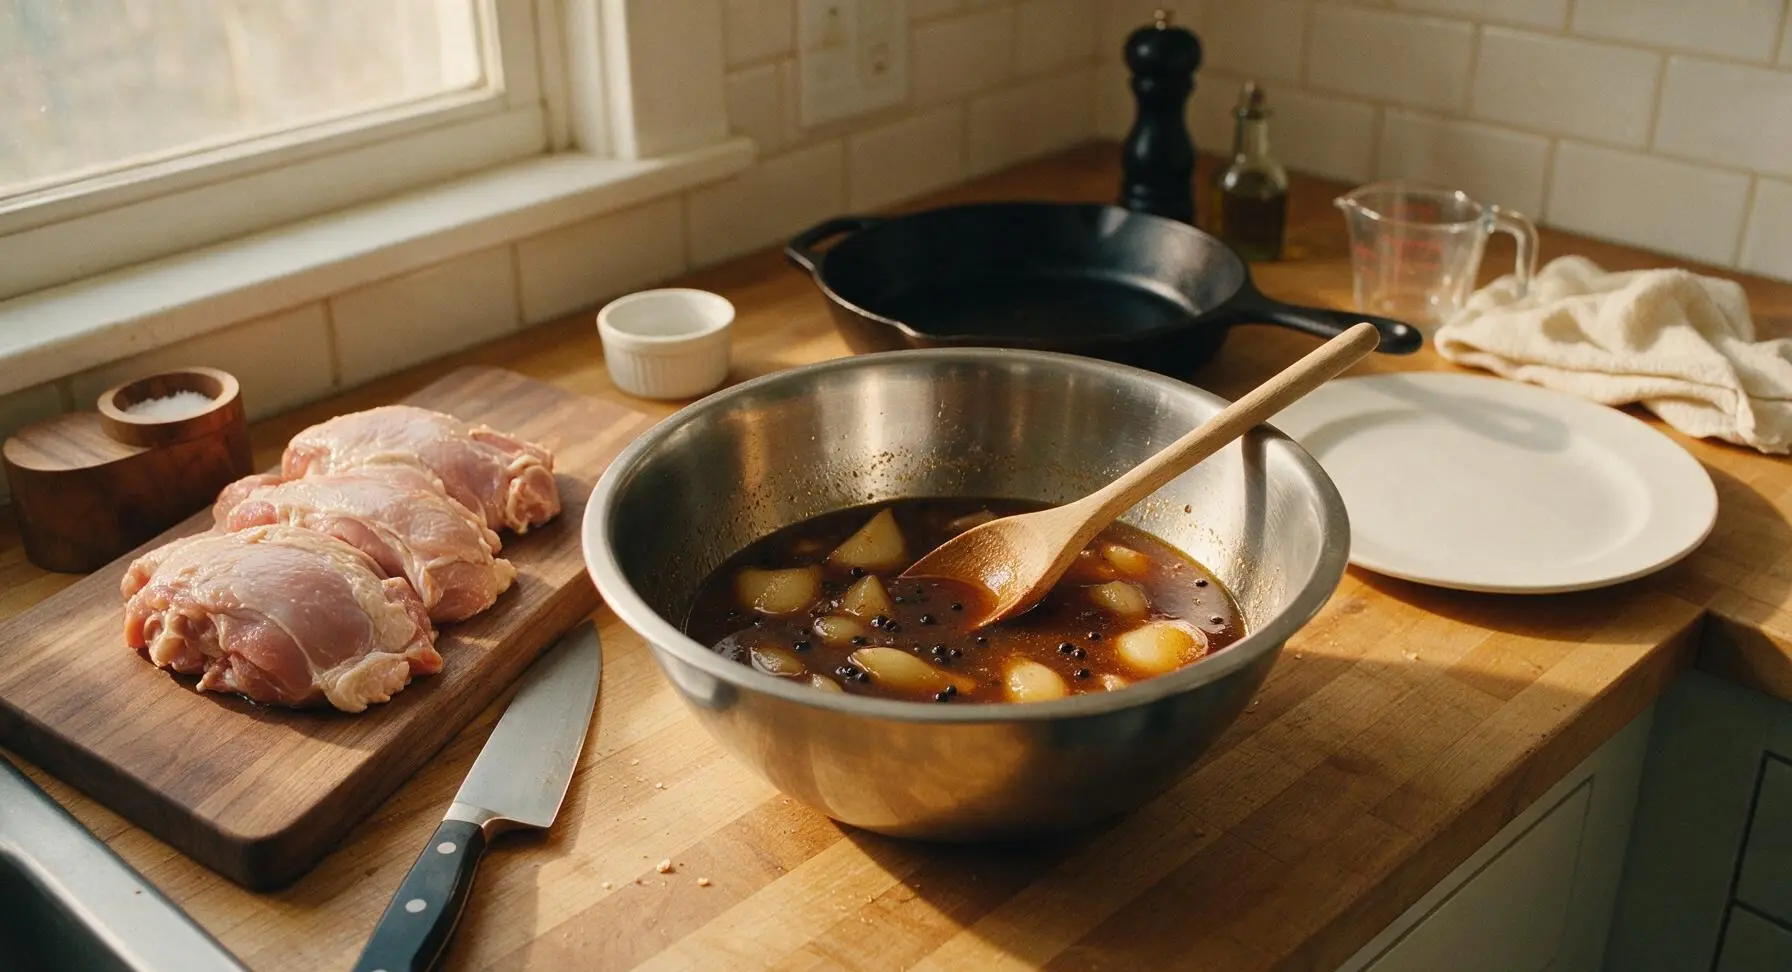
In the stainless steel mixing bowl, combine measured low-sodium soy sauce, dry rice wine, light brown sugar, whole black peppercorns, and chicken broth. Stir with the beech wood cooking spoon until brown sugar is fully dissolved, with no gritty granules left at the bowl bottom. Stir in half of the Korean pear chunks, reserving the remaining half for later in the cook.
Step 2
step2:Mix Braising Sauce
3

Sear Turkey Thighs

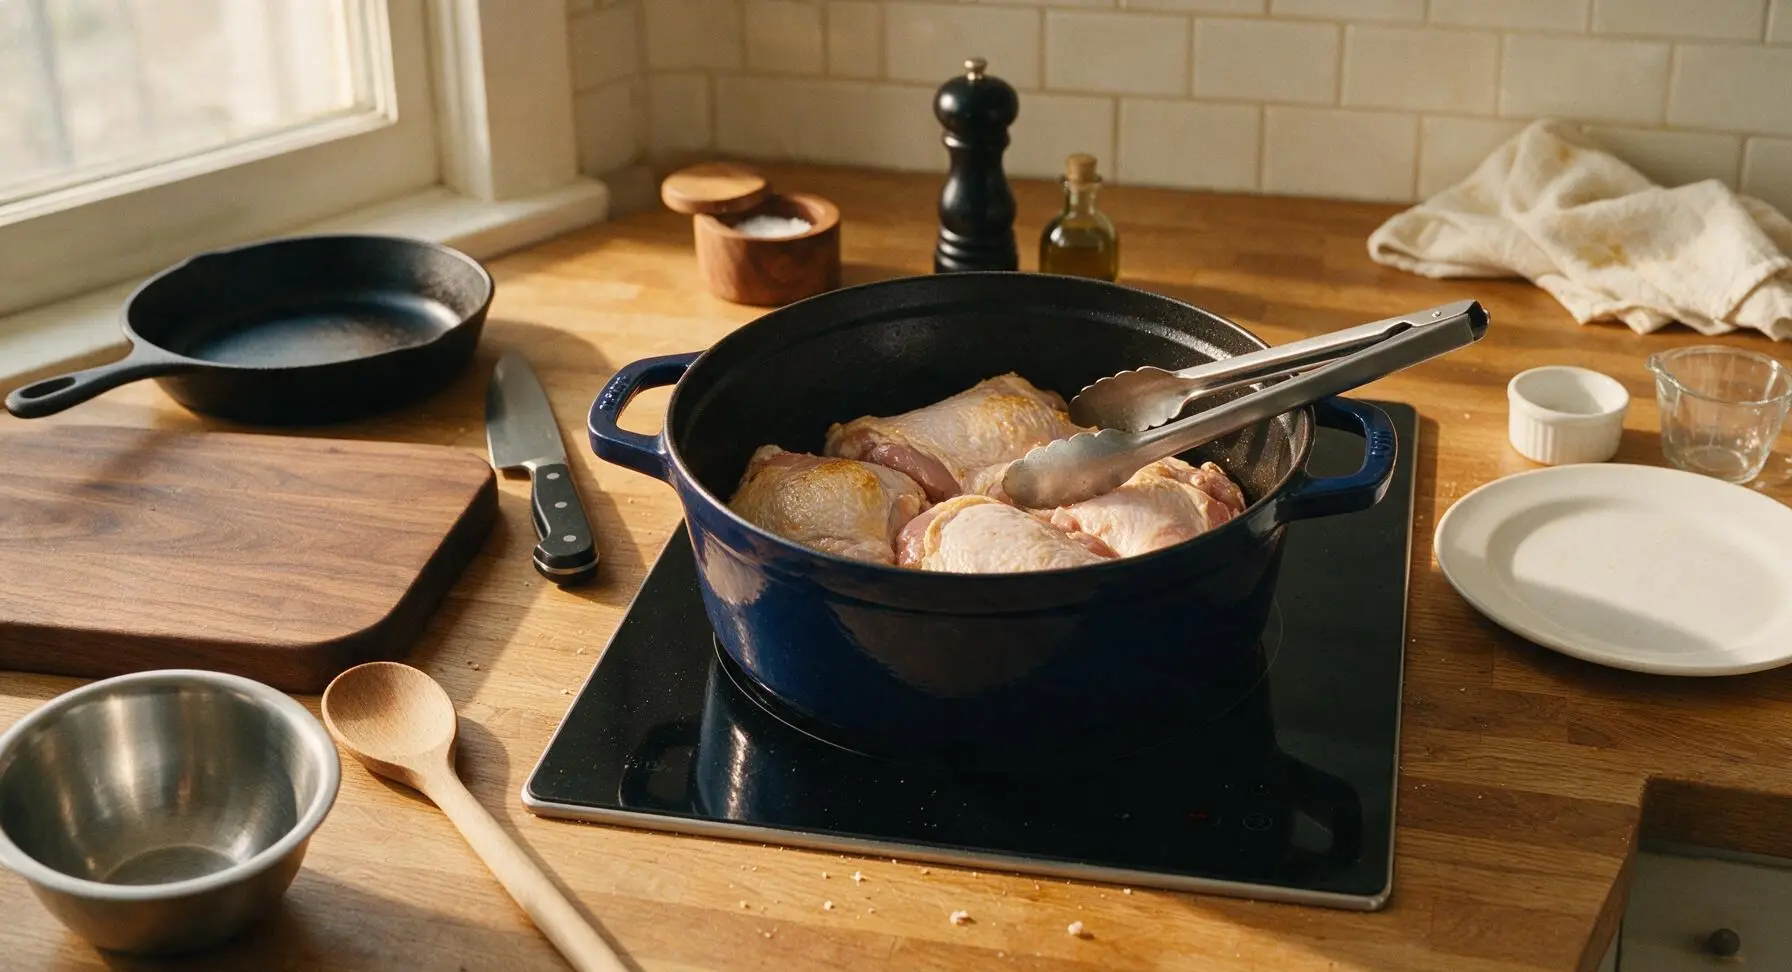
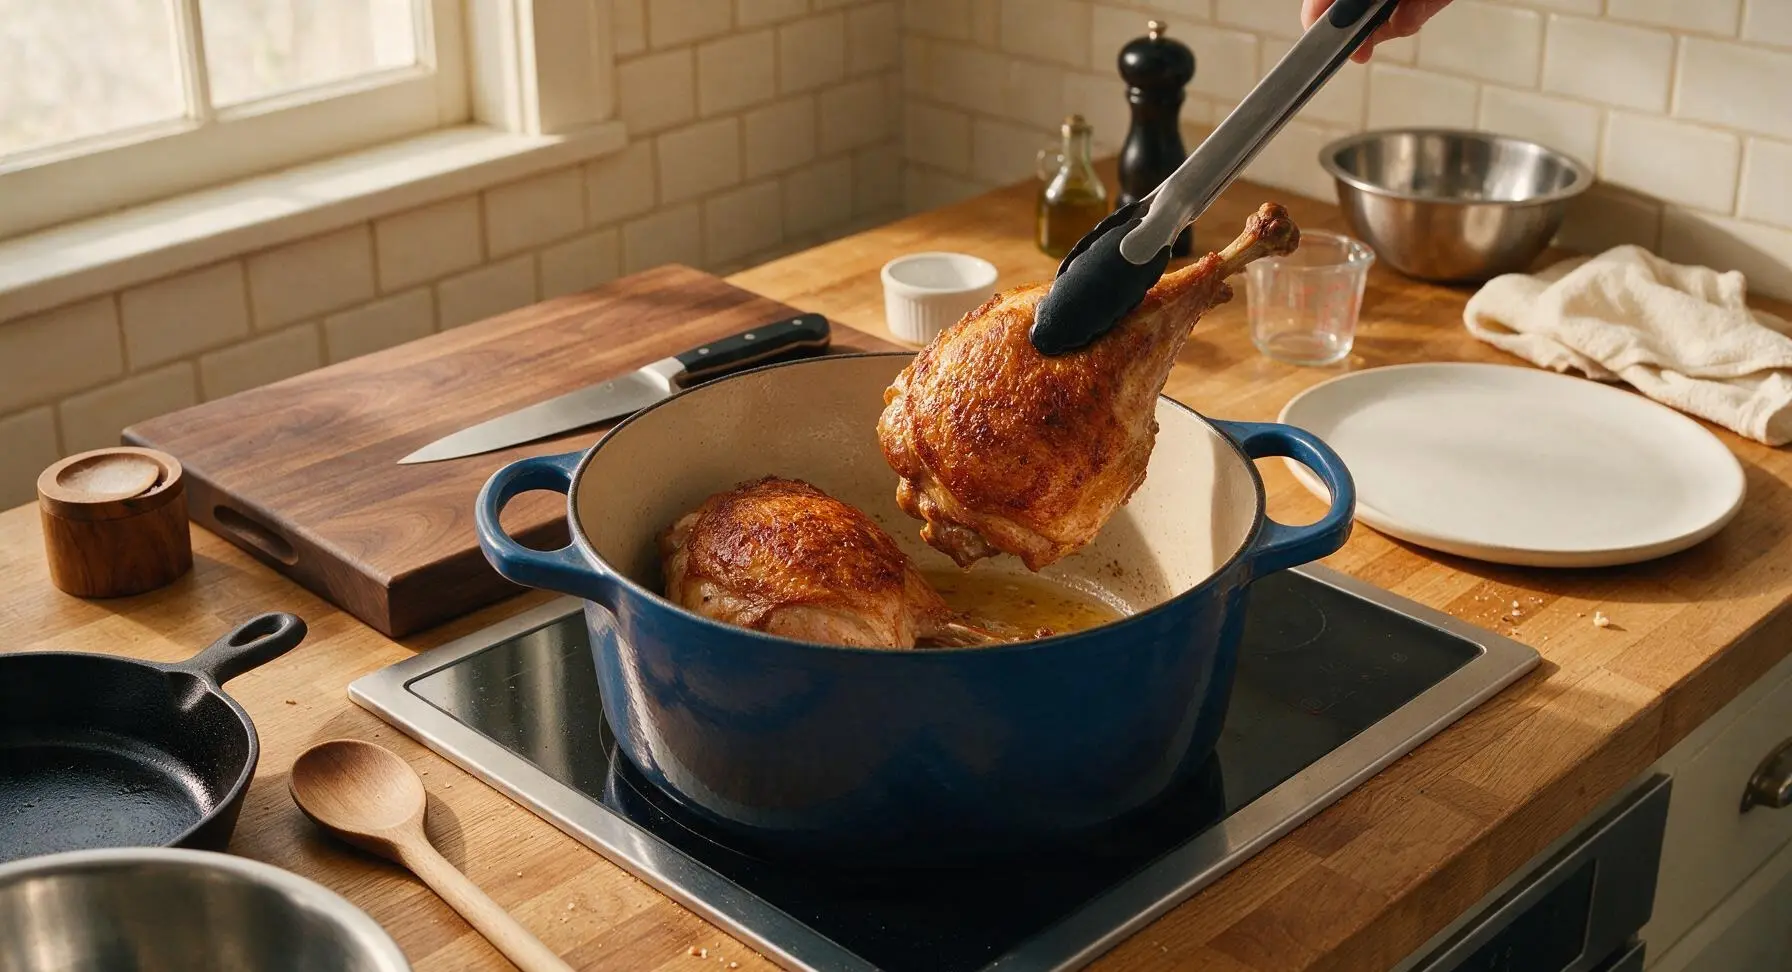
Place the enameled indigo Dutch oven on the integrated induction cooktop over medium heat (175C/350F). Once hot, add turkey thighs skin-side down, working in two batches if needed to avoid crowding the pot. Sear 5-6 minutes per side, until skin is deep golden brown and crisp, releasing easily from the pot when lifted with the silicone-tipped tongs. Transfer seared turkey temporarily to a clean plate.
Step 3
step3:Sear Turkey Thighs
Step 3
step3:Sear Turkey Thighs
4

Simmer Aromatic Base

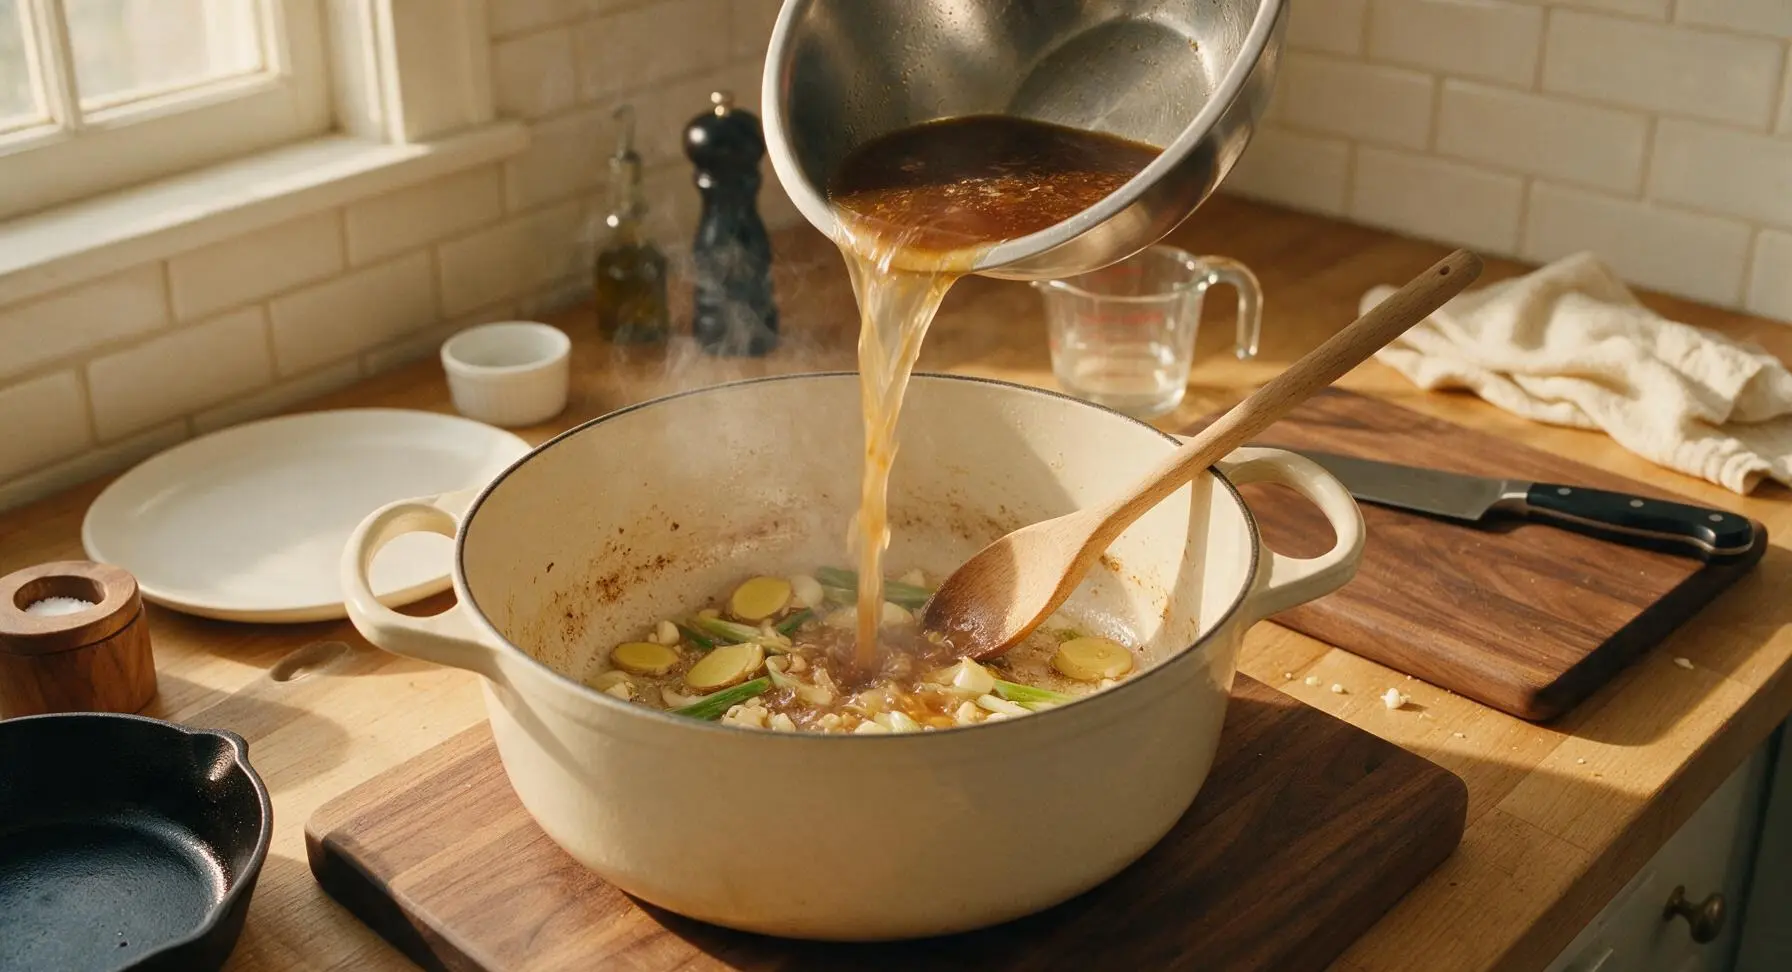
Reduce stovetop heat to medium-low (150C/300F). To the rendered turkey fat in the Dutch oven, add crushed garlic, sliced ginger, and 5cm scallion lengths. Sauté for 1 minute until fragrant, taking care not to burn the garlic (it should turn pale golden, not dark brown). Pour the prepared braising sauce into the pot, bringing to a gentle simmer while scraping up all browned fond bits from the pot bottom with the wooden spoon.
Step 4
step4:Simmer Aromatic Base
5

Braise Turkey Slowly

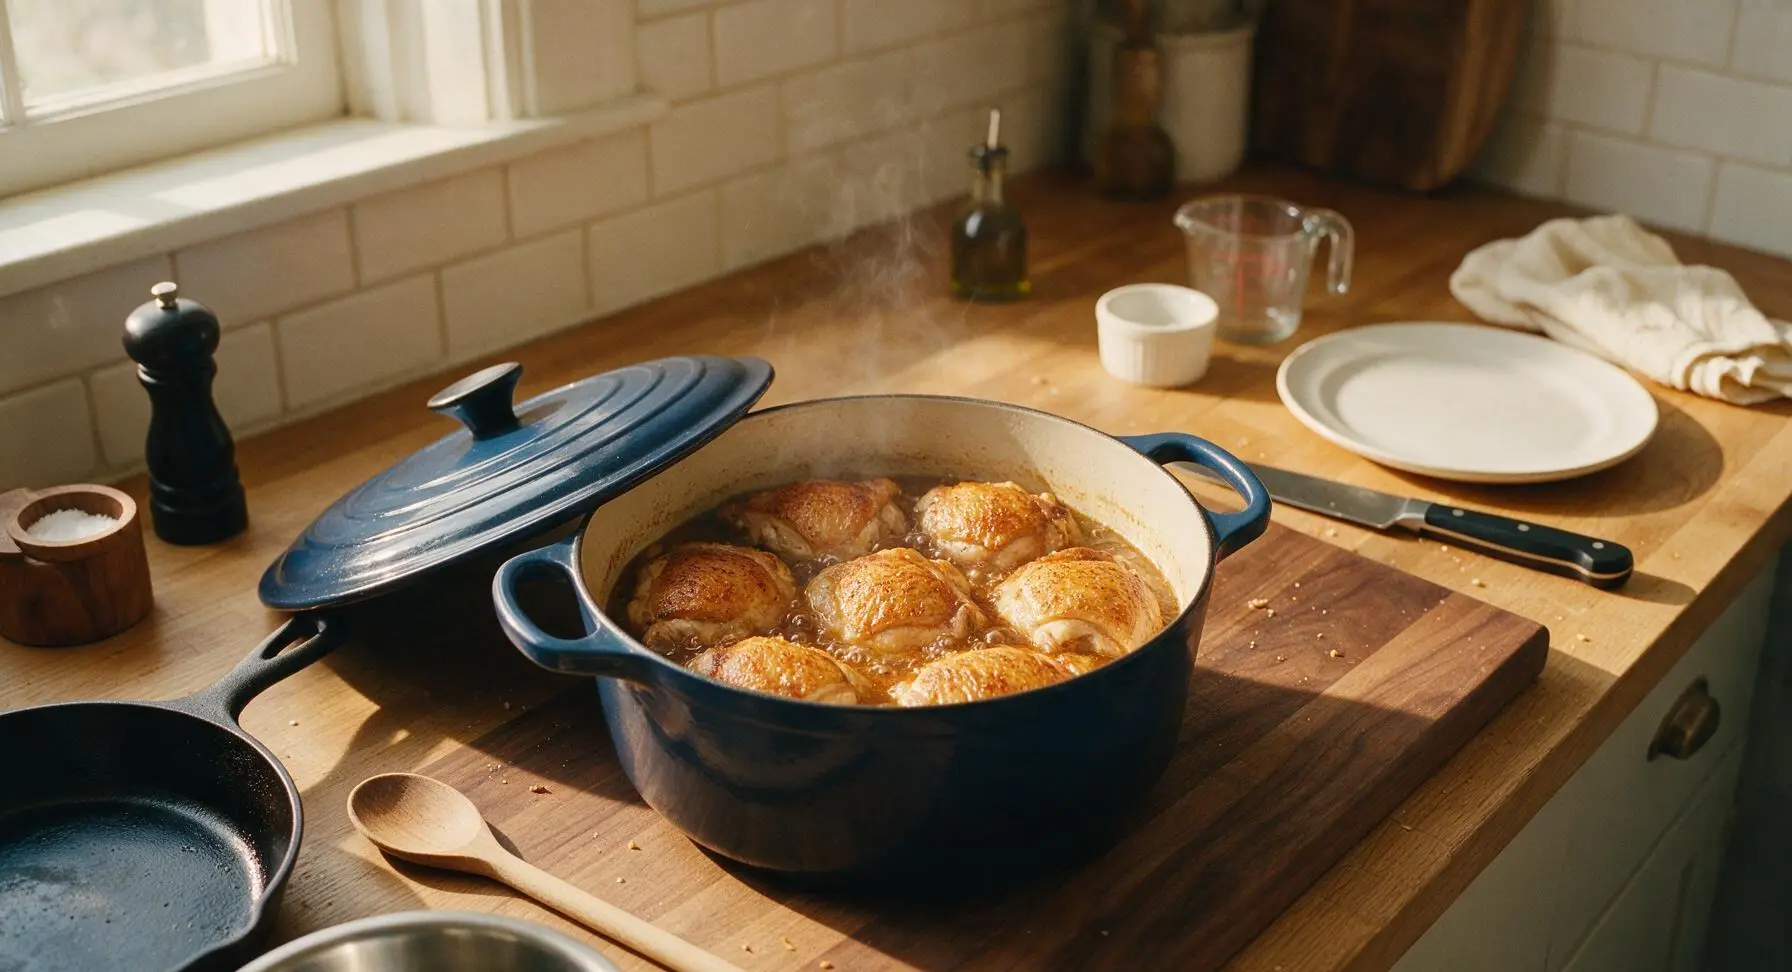
Return seared turkey thighs to the Dutch oven, arranging them in a single layer skin-side up, so braising liquid comes 2/3 of the way up the meat (add 2-3 tbsp extra broth if liquid is too low). Bring to a low simmer, then cover with the tight-fitting indigo lid. Reduce heat to low (120C/250F), and braise for 45 minutes, until turkey is tender when pierced with a fork, with meat starting to pull slightly away from the bone.
Step 5
step5:Braise Turkey Slowly
6

Add Chestnuts and Jujubes

After 45 minutes of covered braising, lift the pot lid. Add the reserved Korean pear chunks, pitted jujubes, and peeled roasted chestnuts to the pot, tucking them into the braising liquid around the turkey pieces. Spoon a small amount of sauce over the turkey skin to baste, then re-cover the pot. Continue braising for an additional 20 minutes, until chestnuts are fork-tender and turkey reaches an internal temperature of 74C/165F.
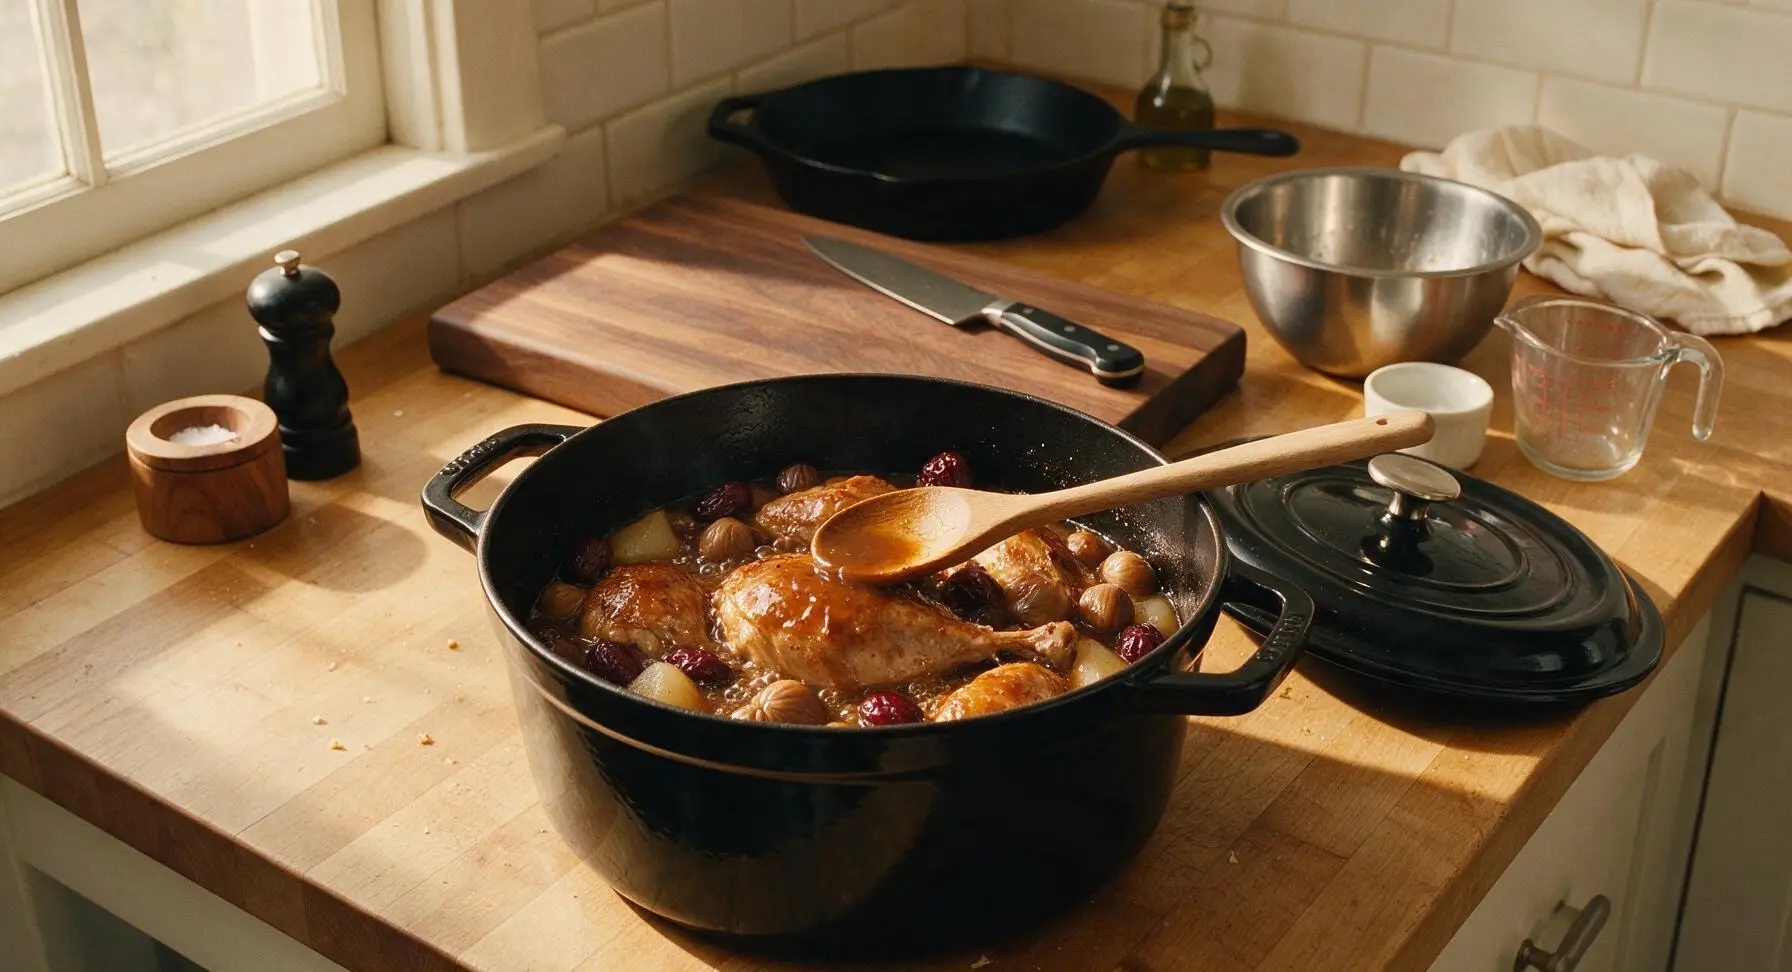
Step 6
step6:Add Chestnuts and Jujubes
7

Finish Braising Sauce

Remove the pot lid, increase heat to medium-low, and simmer uncovered for 8-10 minutes to reduce the sauce, until it thickens enough to coat the back of the wooden spoon. Stir in toasted sesame oil, and skim any excess surface fat if desired. Turn off heat, and let turkey rest in the sauce for 5 minutes before plating.
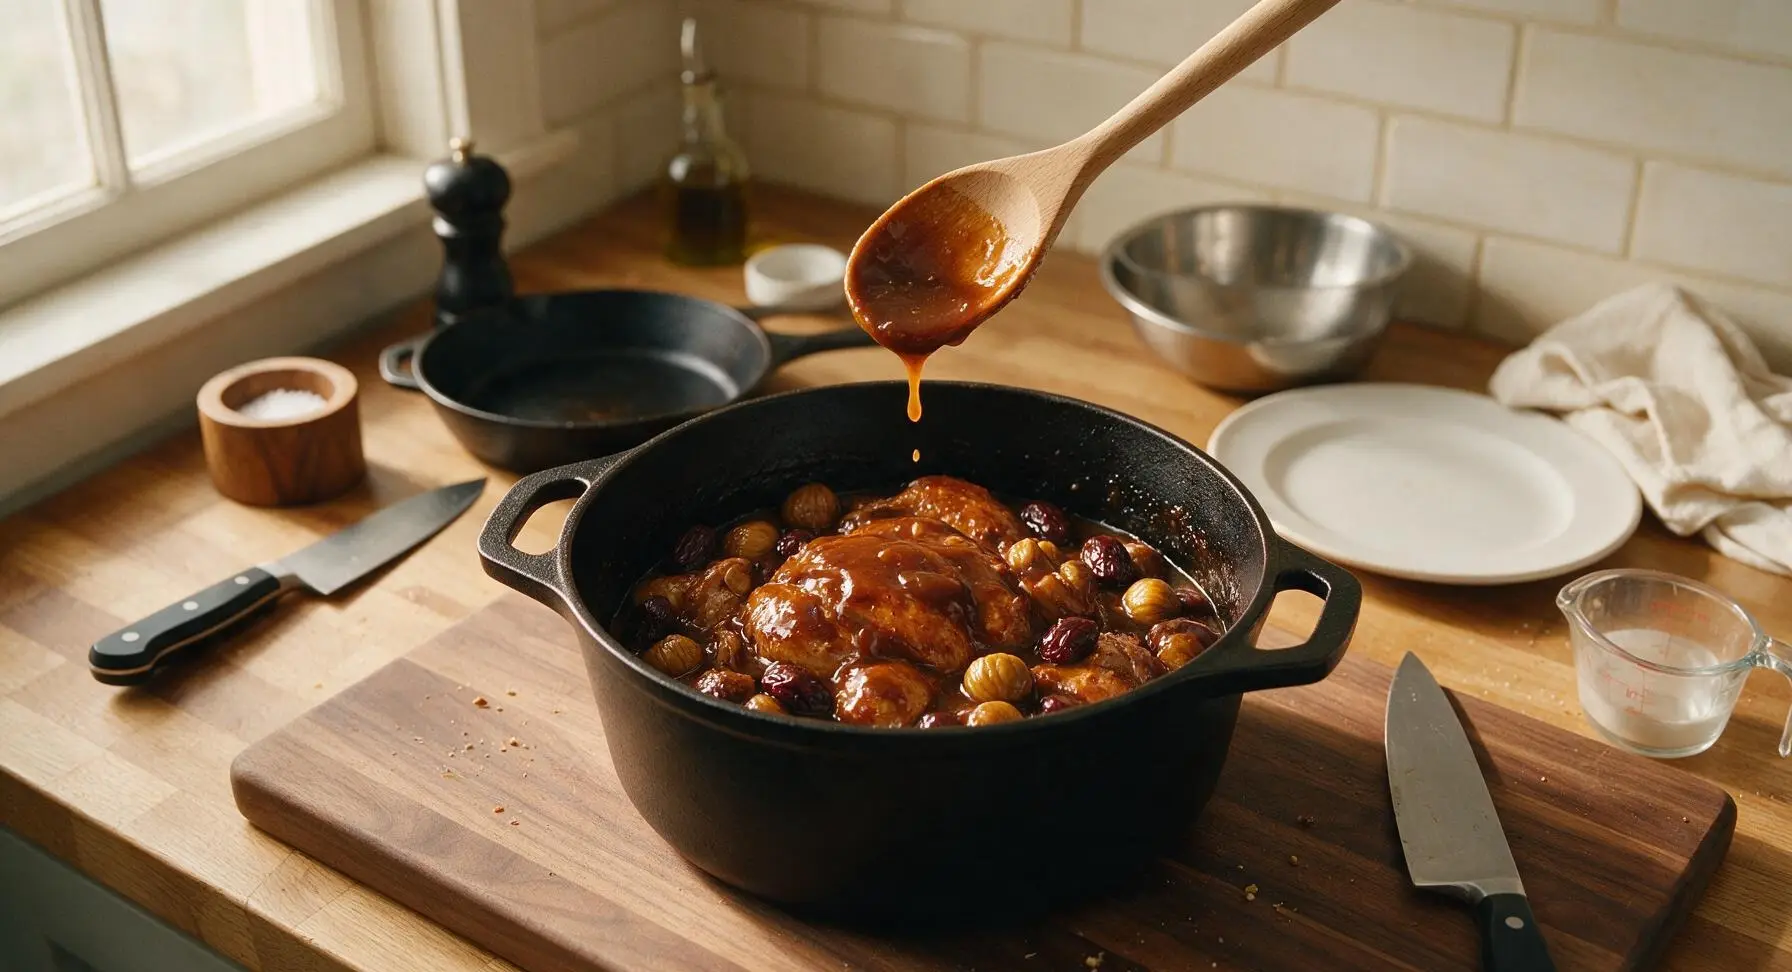
Step 7
step7:Finish Braising Sauce
8

Plate and Garnish

Use tongs to transfer one turkey thigh to the matte off-white ceramic dinner plate. Arrange 3-4 chestnuts, 2 jujubes, and 2 pear chunks alongside the turkey, then spoon thickened braising sauce generously over the top. Garnish with thinly sliced scallion greens and a light sprinkle of toasted white sesame seeds, and serve immediately.
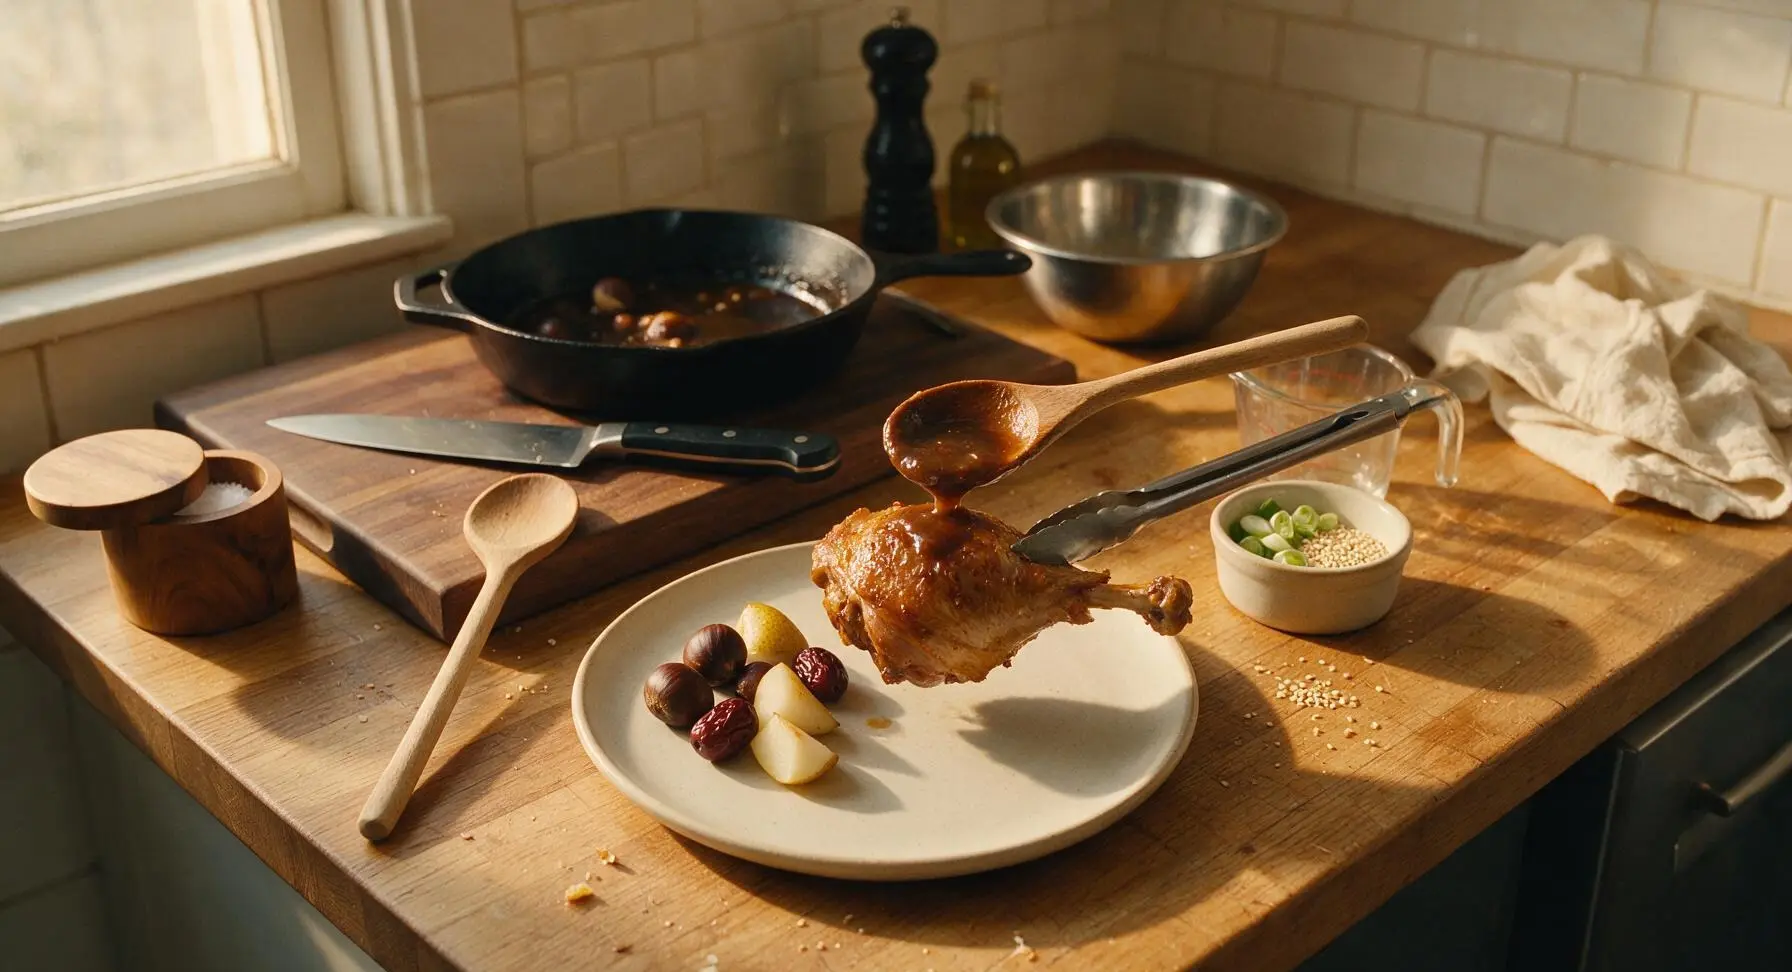
Step 8
step8:Plate and Garnish

Tips

1.Pat turkey skin completely dry with paper towels before searing: Any residual moisture on the skin will cause it to steam instead of crisp, leading to pale, soggy skin rather than the deep golden crust that adds rich, caramelized flavor to the braising liquid.
2.Keep the braise at a gentle, low simmer rather than a rolling boil: High heat will cause the turkey muscle fibers to seize up, resulting in tough, stringy meat, while low, slow cooking breaks down connective tissue for melt-in-your-mouth tender results.
3.Reserve half the Korean pear for the final 20 minutes of cooking: Adding all pear at the start will cause it to break down completely into the sauce, while adding half later leaves soft, sweet, intact chunks that add bright textural contrast to the rich dish.


✨ You May Also Like

Main Course
🍜 United Kingdom

A showstopping classic of tender seared beef, savory mushroom duxelles, and crisp prosciutto wrapped in flaky golden puff pastry, baked to juicy perfection.

⏱️ 2 hours 1Main Course ★ 4.7
Main Course
🍜 India

Tender charred marinated chicken simmered in a rich, spiced creamy tomato sauce, this iconic Anglo-Indian curry pairs perfectly with basmati rice or warm naan.

⏱️ 50 minuteMain Course ★ 4.6
Main Course
🍜 Thailand

Classic tangy, sweet, and savory Thai stir-fried rice noodles with shrimp, tofu, and crunchy garnishes, balancing all five core Thai flavor profiles.

⏱️ 30 minuteMain Course ★ 4.5
Main Course
🍜 United Kingdom

Crispy golden beer-battered cod and fluffy double-fried chips, served with tangy tartar sauce and malt vinegar: the timeless, beloved British pub comfort classic.

⏱️ 45 minuteMain Course ★ 4.7
Main Course
🍜 Mexico

Smoky, chile-marinated pork tacos with caramelized pineapple, fresh cilantro, and lime: a beloved classic Mexican street food perfect for casual summer gatherings.

⏱️ 1 hour 45Main Course ★ 4.8
Main Course
🍜 United States

Crunchy Fritos corn chips layered with savory beef chili and melted cheddar, topped with cool, zesty fixings for a beloved, cozy Tex-Mex comfort food.

⏱️ 35 minuteMain Course ★ 4.8

Korean Braised Turkey:Frequently Asked Questions

1.Why does this recipe call for bone-in, skin-on turkey thighs instead of a whole turkey? ▾
Bone-in, skin-on turkey thighs are ideal for braising because they stay incredibly juicy and tender through the long, slow cook, unlike lean turkey breast that easily dries out. The bone adds rich, deep savoriness to the braising sauce, and rendered skin creates a silky, luxurious texture without extra oil. They also cook far more evenly than a whole bird, with zero guesswork around doneness.
2.What can I use if I can’t find fresh Korean pear for the sauce? ▾
If you can’t track down a fresh Korean pear, swap in an equal amount of ripe Bosc or crisp, sweet Anjou pear, plus 1 teaspoon of grated kiwi to mimic the natural meat-tenderizing enzymes Korean pear is known for. Avoid soft, mushy pears like Bartletts, as they’ll break down too much during braising and make the sauce overly cloudy instead of bright and balanced.
3.Can I use boneless, skinless turkey thighs to cut down on fat? ▾
You can absolutely use boneless, skinless turkey thighs, but make two small adjustments: add 1 tablespoon of neutral canola oil to the pot when searing, and reduce total braising time by 10 to 12 minutes since there’s no bone to slow heat transfer. The final sauce will be a little less rich without rendered skin fat, so taste and adjust salt as needed before serving.
4.What’s the best substitute for cheongju or dry sherry if I don’t have either on hand? ▾
If you don’t have Korean dry rice wine (cheongju) or dry sherry, use an equal amount of dry vermouth, or a mix of 3 parts sake to 1 part water to cut sake’s slightly sweeter profile. Skip salted, artificially flavored “cooking rice wine” from grocery store Asian aisles, as those will make the final braising sauce taste harsh and overly salty.
5.Do I need to prep the chestnuts and jujubes before adding them to the braise? ▾
Yes, prep both before adding them to the pot. For chestnuts, score the flat side, boil for 5 minutes, then peel off the hard outer shell and thin papery inner skin while warm. For jujubes (dried red dates), rinse, pat dry, and poke 2 to 3 small holes in each with a toothpick so they absorb sauce without bursting during cooking.
6.How do I keep the braising sauce from tasting too sweet? ▾
Start with the listed amount of light brown sugar, then taste the sauce after it simmers for 10 minutes before adding the turkey back in. If it tastes too sweet, stir in 1 teaspoon of unseasoned rice vinegar or a tiny pinch of fine sea salt to balance flavors, rather than cutting sugar entirely—sugar helps the sauce form a beautiful glaze as it reduces.
7.Can I make this Korean braised turkey ahead for a holiday meal? ▾
This dish actually tastes better made 1 to 2 days ahead! Let the cooked turkey and sauce cool completely, store in an airtight container in the fridge, then gently reheat on the stovetop over low heat before serving. Flavors will meld and deepen as it rests, and excess fat will solidify on top for easy skimming if you prefer a lighter sauce.
8.Why do you recommend low-sodium soy sauce instead of regular soy sauce? ▾
Low-sodium soy sauce lets you control the braise’s salt level far better than regular soy sauce, since the sauce reduces and concentrates as it cooks. Regular soy often becomes overly salty by the time the turkey is tender, overpowering delicate sweet notes from pear and brown sugar, and warm ginger savoriness. If you only have regular soy, cut the amount by 25% and add extra water to compensate.
9.How do I tell when the turkey is finished braising? ▾
The turkey is done when it’s fork-tender, meaning a fork inserted into the thickest part of the thigh slides in with almost no resistance, and the internal temperature hits 180°F on an instant-read thermometer. Don’t rush the cook at high heat, or the turkey will turn tough and stringy instead of silky—keep the braise at a gentle, low simmer the whole time.
10.What side dishes pair best with this Korean braised turkey? ▾
This rich, sweet-savory turkey pairs beautifully with fluffy short-grain white rice, tangy quick pickled radishes to cut through richness, stir-fried garlic spinach, and steamed sweet potato. For a holiday fusion spread, it also works wonderfully alongside creamy mashed potatoes, since the glossy braising sauce makes a perfect, flavorful substitute for gravy.
11.Can I use turkey breast instead of thighs if I prefer white meat? ▾
If you strongly prefer white meat, use bone-in, skin-on turkey breast cut into 4-inch thick chunks, and reduce braising time by 20 to 25 minutes to avoid drying it out. Add an extra ¼ cup of low-sodium chicken broth to the braising liquid, since breast has far less fat to keep it moist, and check internal temperature often to pull it as soon as it hits 165°F.
12.My braising sauce turned out too thin—how do I get a nice, glossy glaze? ▾
If your sauce is too thin after the turkey finishes cooking, transfer the turkey, chestnuts, and jujubes to a serving platter, then turn heat to medium and simmer the sauce for 5 to 7 minutes, stirring often, until it reduces to a syrupy, glossy consistency. Avoid adding cornstarch slurry unless absolutely necessary, as it will mute the bright, fresh fruit and soy flavors.

Comments (16)

2 days ago

OMG this Korean braised turkey was the star of our Sunday family dinner! The sweet and savory glaze had everyone going back for seconds, even my super picky 7 year old. Cook time was right at 90 minutes like the recipe said, totally worth every minute. SO good!

3 days ago

Tried this for meal prep this week and it’s a total game changer! Only thing is I found it a touch spicier than I expected, did I accidentally overdo it with the gochujang?

2 days ago

So glad you enjoyed it for meal prep! The spice level can definitely vary by gochujang brand — next time try cutting the gochujang by 1 tablespoon and adding a splash more soy sauce to balance it out if you prefer milder flavor!

1 week ago

Made this for our neighborhood potluck last weekend and people were asking me for the recipe before I even finished serving! The turkey comes out so fall-off-the-bone tender, I was shocked how well the braising method works for turkey instead of the usual chicken.

5 days ago

Wait, did you use turkey breast or thighs? I’m worried breast will dry out during the braise!

3 days ago

Great question! I recommend bone-in, skin-on turkey thighs for the juiciest result, but if you use breast just check the internal temp 15 minutes early so it doesn’t overcook!

5 days ago

Medium difficulty my foot 😂 I’m a total beginner and I burned the glaze the first time I tried this. Gonna give it another go this weekend though because the little bit I tasted before ruining it was insane.

3 days ago

Pro tip! Turn the heat down to medium-low when you’re reducing the glaze, and stir it every couple minutes. I did that on my second try and it came out perfect, you’ve got this!

yesterday

Usually I only make turkey for Thanksgiving but this recipe has totally converted me. The depth of flavor from the garlic, ginger, and pear puree in the braise is unreal. My teenage son ate three servings last night, so there were zero leftovers for my lunch today — total bummer.

30 minutes ago

How well does this hold up in the fridge? I’m trying to prep 4 days of lunches for work and want to make sure it doesn’t get soggy or weird.

5 minutes ago

I make this every other week for meal prep! It holds up great for 4-5 days, the glaze actually soaks into the turkey more and gets better each day. I pair it with rice and roasted broccoli and it’s chef’s kiss.

just now

Totally agree! It stores beautifully in an airtight container in the fridge for up to 5 days, and you can even freeze portions for up to 3 months if you want to prep ahead longer!

2 weeks ago

Can I make this in a slow cooker instead of on the stovetop? I work long days and would love to throw it on before I leave so it’s done when I get home.

2 weeks ago

Absolutely! Brown the turkey first then toss all the braising ingredients in your slow cooker on low for 6-7 hours, then remove the turkey and reduce the glaze on the stovetop for 10 minutes before serving. It turns out just as tender!

1 week ago

My kids loved it! We did a little make-your-own rice bowl bar with this braised turkey, pickled veggies, kimchi, and sesame seeds, and it was such a fun weeknight dinner. Will definitely be adding this to our regular rotation.

2 hours ago

Wait the recipe says 1 hour 30 minute cook time but mine took almost 2 hours? Did I cut the turkey pieces too big? Not mad about it, just confused because I followed the directions otherwise.

30 minutes ago

I had the same thing happen! Turns out my stove runs super low, so I turned the heat up a tiny bit when braising and it was right on time the second go around.

5 minutes ago

That’s such a common quirk! Cook times can vary based on stove temperature, the size of your turkey chunks, and even how heavy your Dutch oven is. As long as the turkey is tender and hits 165°F internal temp, you’re good to go!

3 days ago

Bringing this to my friend’s Korean food themed potluck this weekend! Would it be weird to add rice cakes to the braise like they do in jjimdak?

2 days ago

I did that last time I made this and it was INCREDIBLE. Toss the rice cakes in the last 15 minutes of braising so they don’t get too mushy, everyone at your potluck is gonna lose their minds.

5 minutes ago

Game changer for people who get bored of plain roasted turkey. The glaze is perfectly balanced — not too sweet, not too salty, has that little umami kick that makes you keep eating. 10/10 would make again for a casual dinner party.

yesterday

I don’t eat gluten, is there a good swap for the regular soy sauce in this recipe? I really want to make this for my partner’s birthday dinner next week!

yesterday

You can easily swap regular soy sauce for low-sodium tamari to make this 100% gluten-free! It tastes almost identical, just be sure to adjust the salt level to taste at the end since tamari can be a little less salty than some soy sauce brands. Hope your partner loves it!

2 days ago

Tried making this last night and the flavor was on point but my turkey skin got super soggy? What did I do wrong? I wanted that crispy skin vibe to contrast the soft meat.

yesterday

Soggy skin usually happens if you don’t sear the turkey skin-side down for long enough before braising! Make sure you get it nice and crispy in the hot oil for 6-7 minutes per side first, and you can even pop it under the broiler for 2-3 minutes after braising to crisp it back up.

2 hours ago

The broiler trick is a lifesaver! I did that last time and the skin was perfectly crispy, just don’t walk away because it burns super fast under there lol.

just now

SO good. I was a little intimidated by the medium difficulty rating but the steps were super straightforward, even for someone who doesn’t cook a ton of Korean food. Served it with sticky rice and quick pickled cucumbers, restaurant quality.

1 week ago

Has anyone tried making this with turkey wings instead of thighs? I have a big pack of wings in the freezer I need to use up and I’m curious if they’d work here.

5 days ago

Made it with wings last week for football Sunday and it was a hit! They get so tender and the glaze sticks perfectly to the skin. Definitely give it a shot, you won’t regret it.

2 weeks ago

I cut the sugar in half because I don’t love super sweet savory dishes and it was still absolutely delicious! Such a flexible recipe, I’ll be playing around with the add-ins next time.

1 week ago

Thanks for the tip! I also don’t love sweet glazes, I was worried this would be too candy-like so I’m glad to know cutting the sugar works.

5 days ago

I swapped the brown sugar for honey last time and it was chef’s kiss, adds a little different floral sweetness that pairs so well with the gochujang!



