
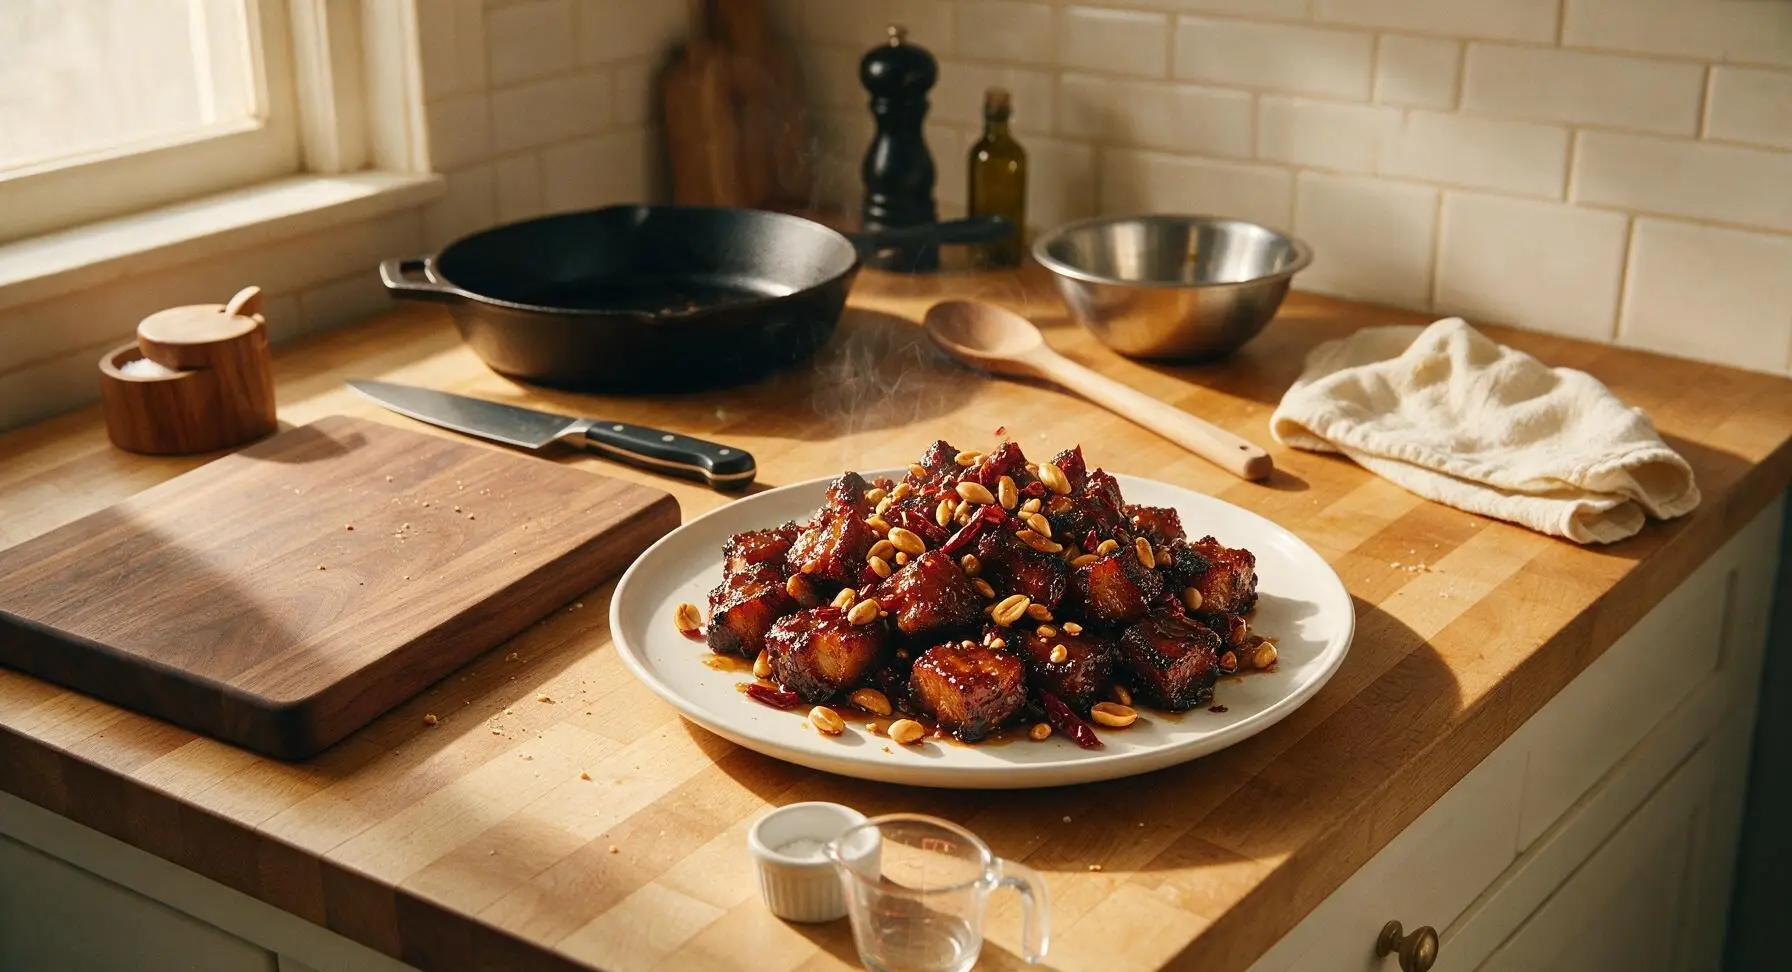
Kung Pao Burnt Ends

title 1
Kung Pao Burnt Ends
⏱️ cook time 2 hours 45 minutes
🍽️ servings 4
⚡ Difficulty medium

intro

Smoky, caramelized pork belly burnt ends tossed in sticky, numbing-spicy Kung Pao glaze, studded with peanuts and chilis: an irresistible fusion of American BBQ and Sichuan flavor.

Ingredients
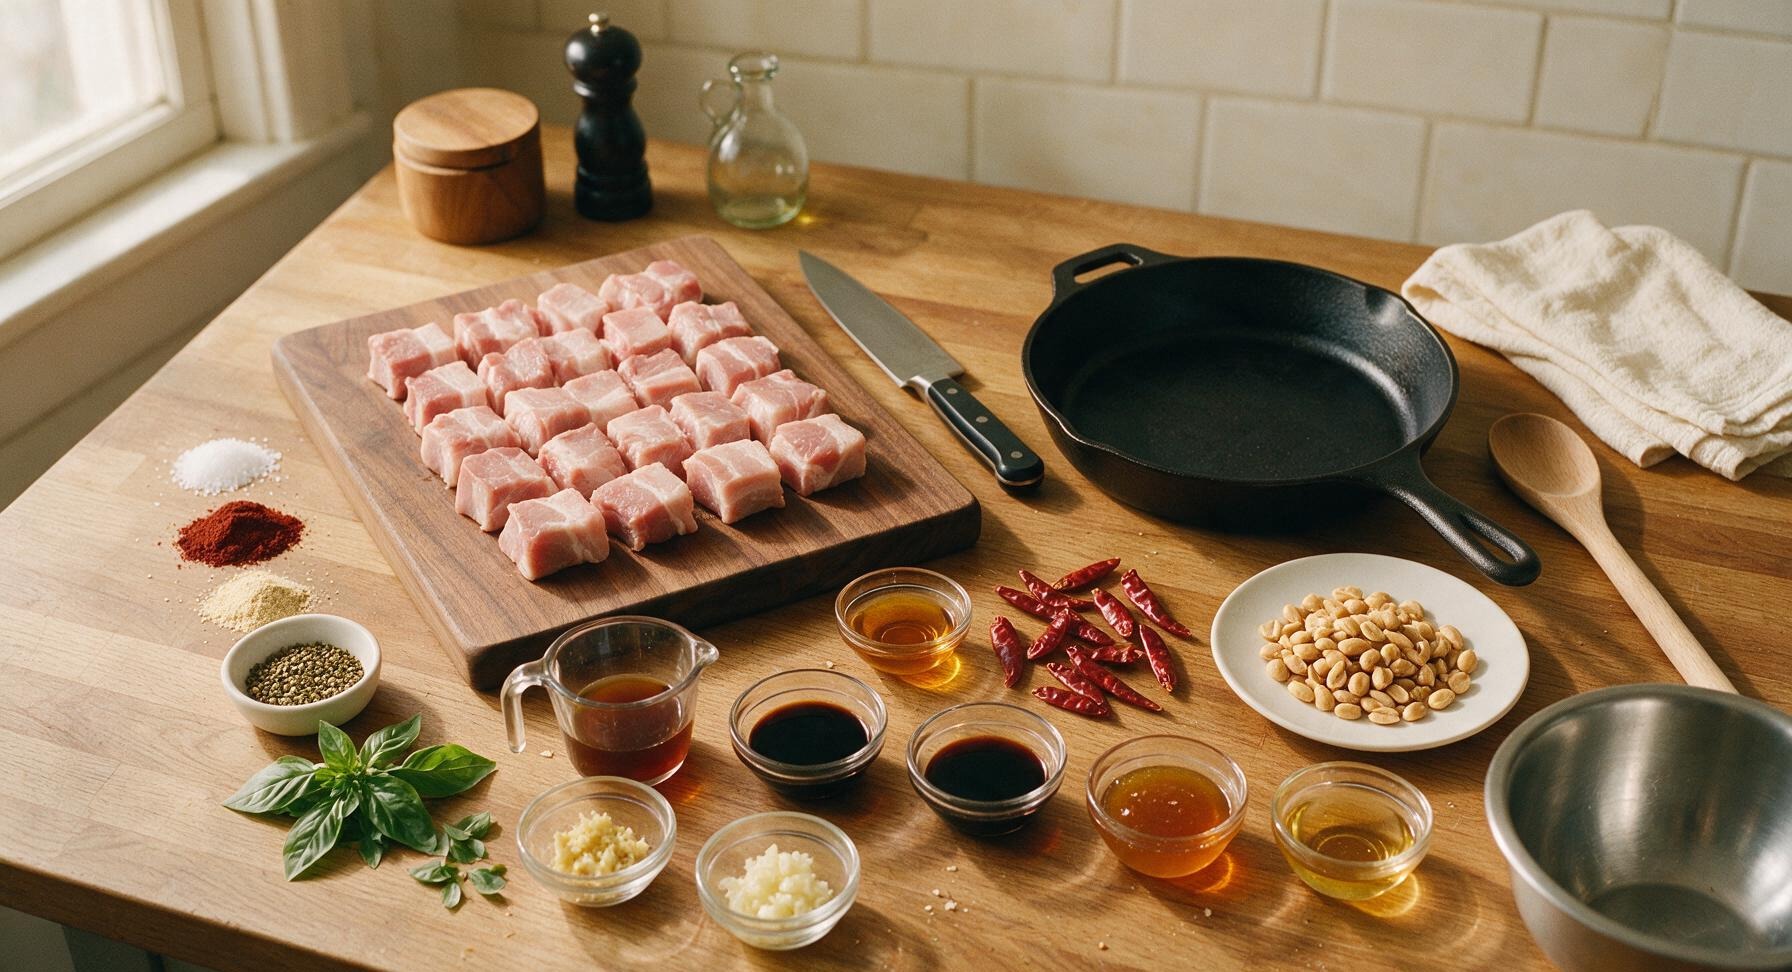
Skinless pork belly 1kg (2.2 lbs)
Kosher salt 1 tbsp
Smoked paprika 1 tbsp
Garlic powder 1 tsp
Ground Sichuan peppercorn 1 tsp
Light soy sauce 3 tbsp
Dark soy sauce 1 tbsp
Chinkiang black vinegar 2 tbsp
Honey 3 tbsp
Shaoxing wine 2 tbsp
Minced fresh ginger 1 tbsp
Minced fresh garlic 1 tbsp
Dried red arbol chilis 8 pieces, stemmed
Roasted salted peanuts 1/2 cup
Toasted sesame oil 1 tsp
Fresh Thai basil leaves 2 tbsp

Steps

1

Trim and Cube Pork

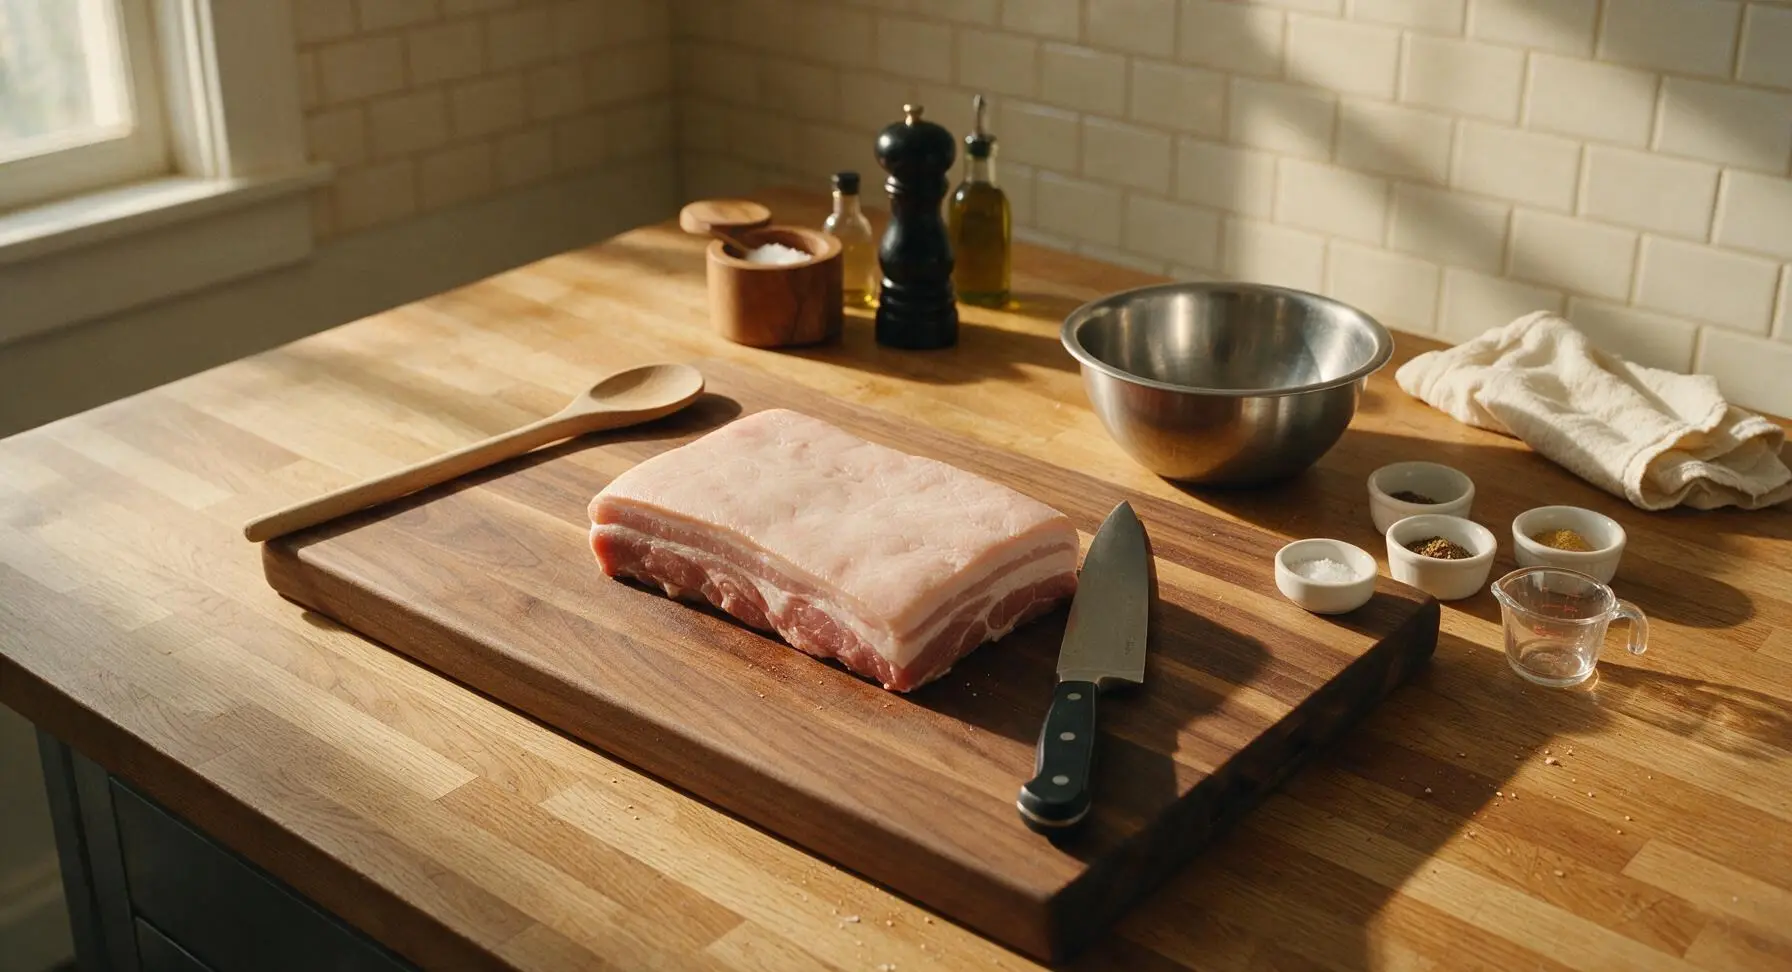
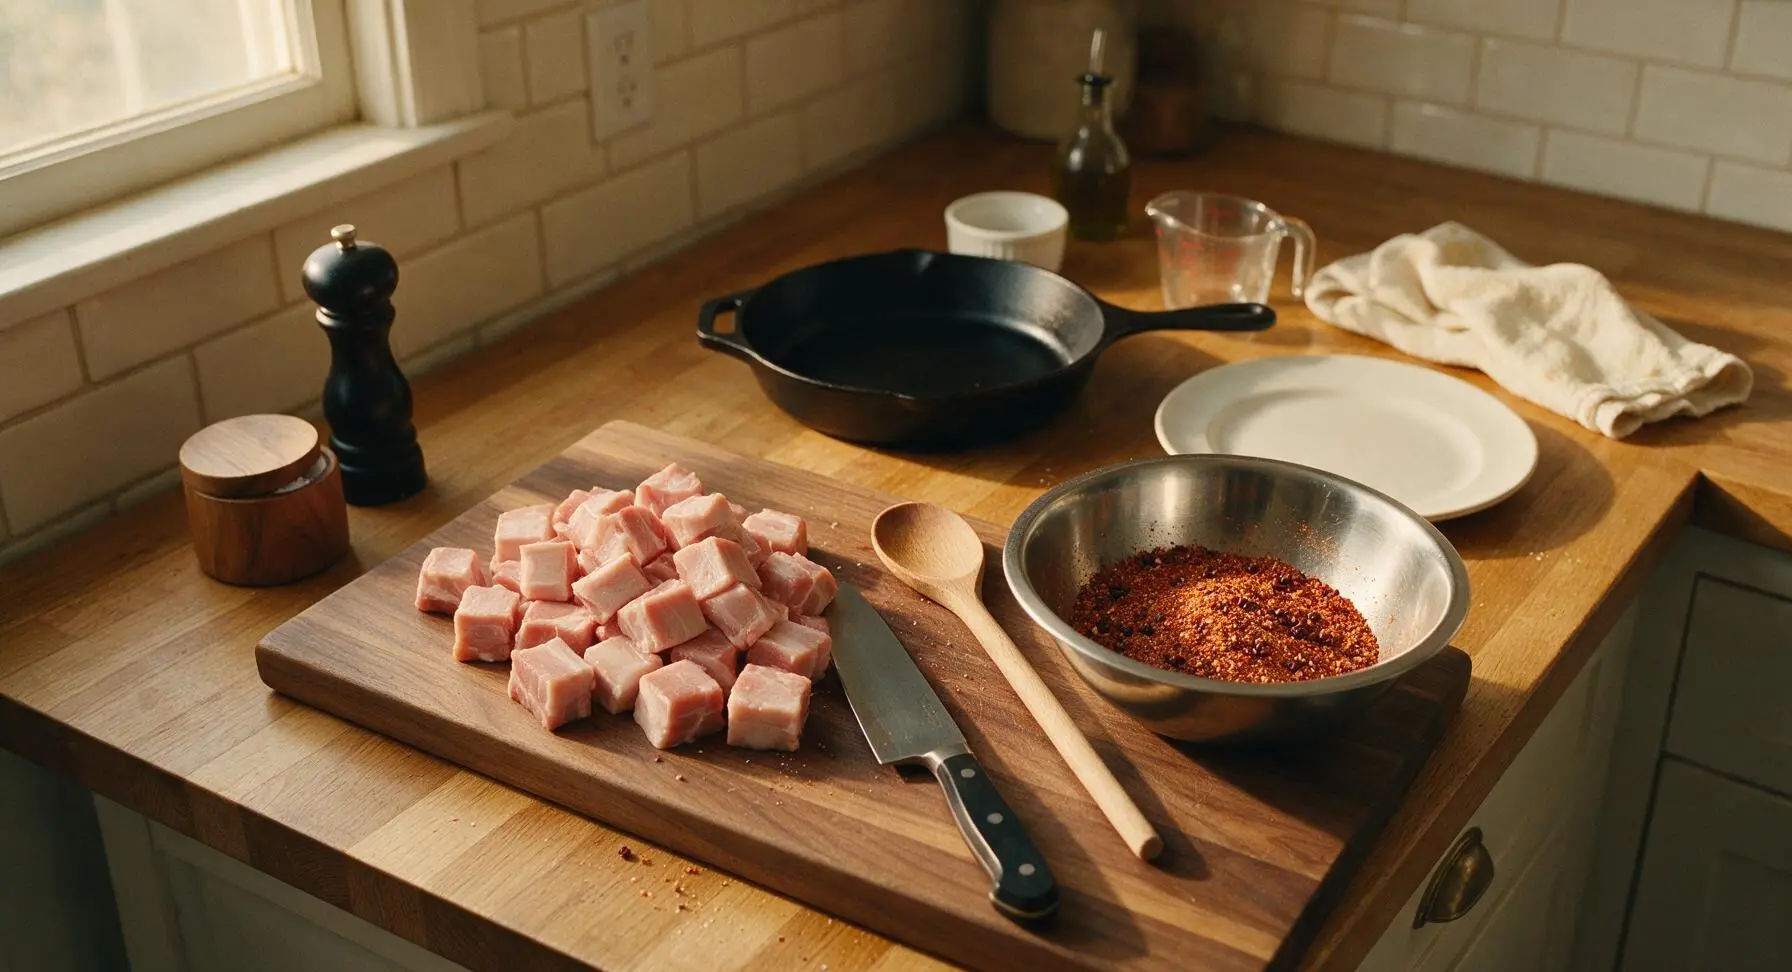
Place the 1kg skinless pork belly block on the acacia wood cutting board. Use the chef knife to trim any excess loose fat or thin silver skin from the pork surface, then cut the block into uniform 2.5cm (1-inch) cubes, ensuring all pieces are roughly the same size to cook at even rates. In the small stainless steel mixing bowl, combine 1 tbsp kosher salt, 1 tbsp smoked paprika, 1 tsp garlic powder, and 1 tsp ground Sichuan peppercorn, stirring to fully mix the dry rub.
Step 1
step1:Trim and Cube Pork
Step 1
step1:Trim and Cube Pork
2

Coat and Slow Smoke

Add the pork belly cubes to the small mixing bowl with the dry rub, tossing until every piece is evenly coated with spice, with no bare meat spots visible. Arrange the cubes in a single layer on the grates of a preheated smoker set to 135C (275F), using hickory or oak wood for mild smoke flavor. Smoke for 2 hours, until the cubes develop a firm, deep reddish-brown bark and reach an internal temperature of 93C (200F) when checked with the instant-read thermometer. Avoid opening the smoker lid unnecessarily to maintain consistent temperature.
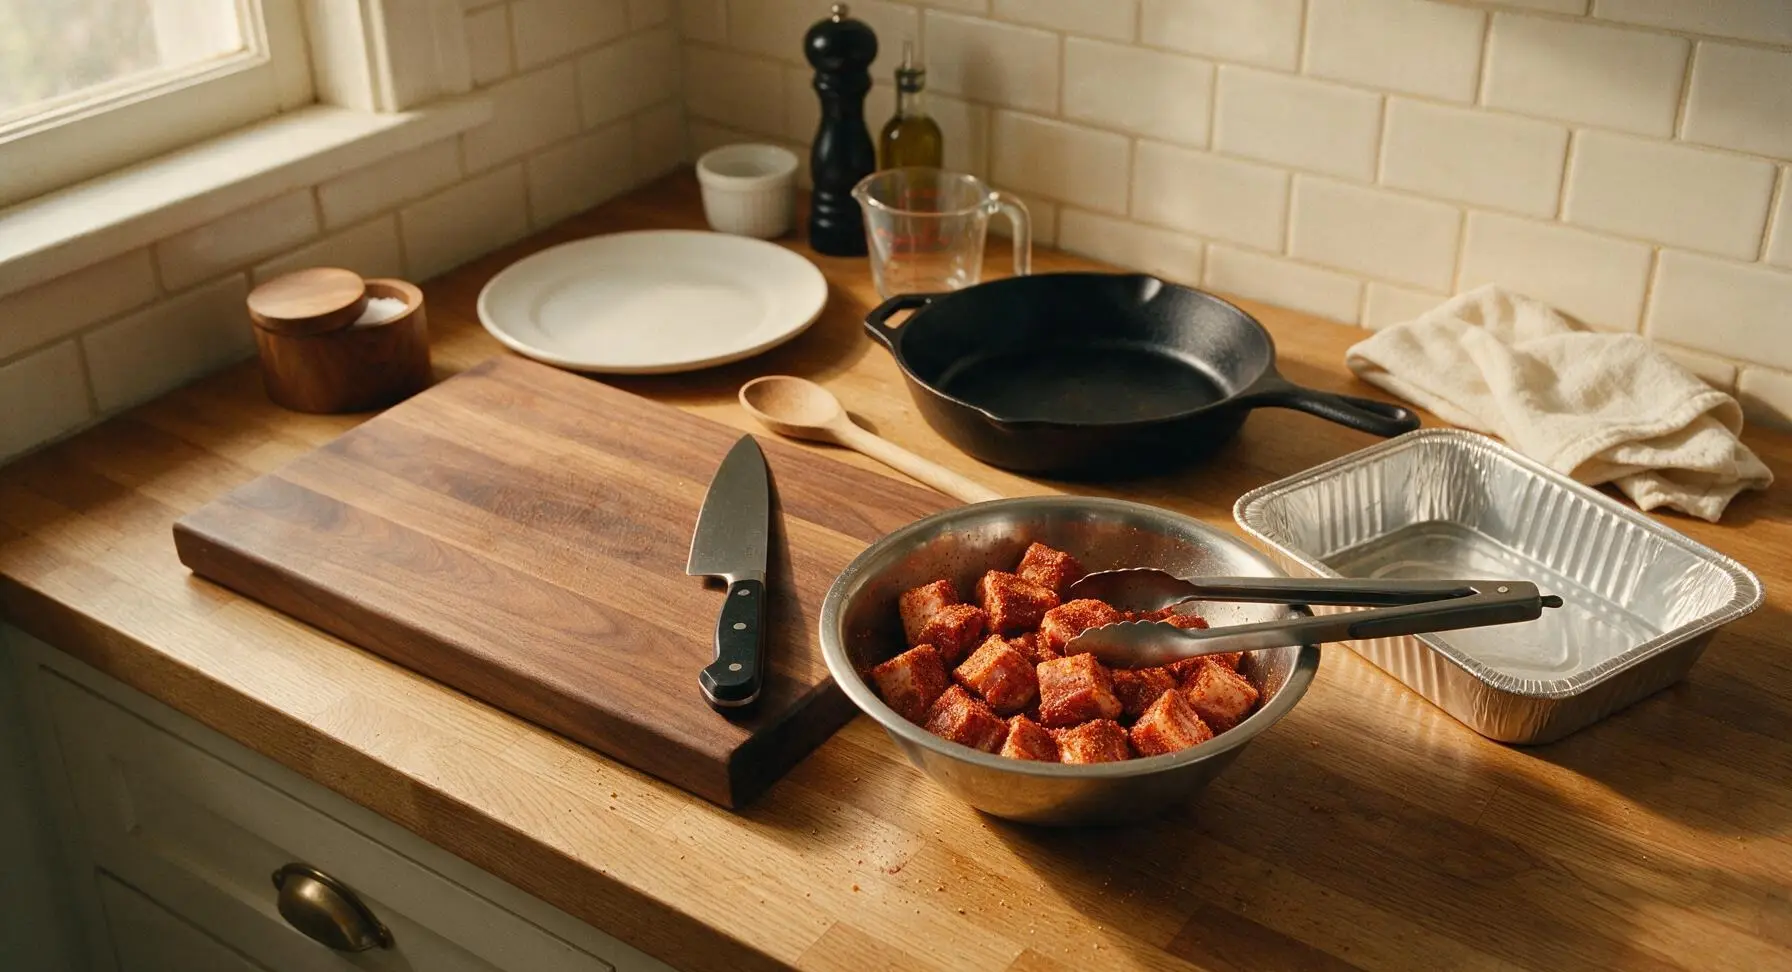
Step 2
step2:Coat and Slow Smoke
3

Whisk Kung Pao Glaze

While the pork smokes, combine 3 tbsp light soy sauce, 1 tbsp dark soy sauce, 2 tbsp Chinkiang black vinegar, 3 tbsp honey, 2 tbsp Shaoxing wine, 1 tbsp minced ginger, 1 tbsp minced garlic, and 1 tsp toasted sesame oil in the medium stainless steel mixing bowl. Use the stainless steel whisk to mix until the honey is fully incorporated and the glaze is smooth, with no separated pools of oil or vinegar. Tear 4 of the dried red chilis into small pieces and add them to the glaze, reserving the remaining 4 whole chilis for final tossing.
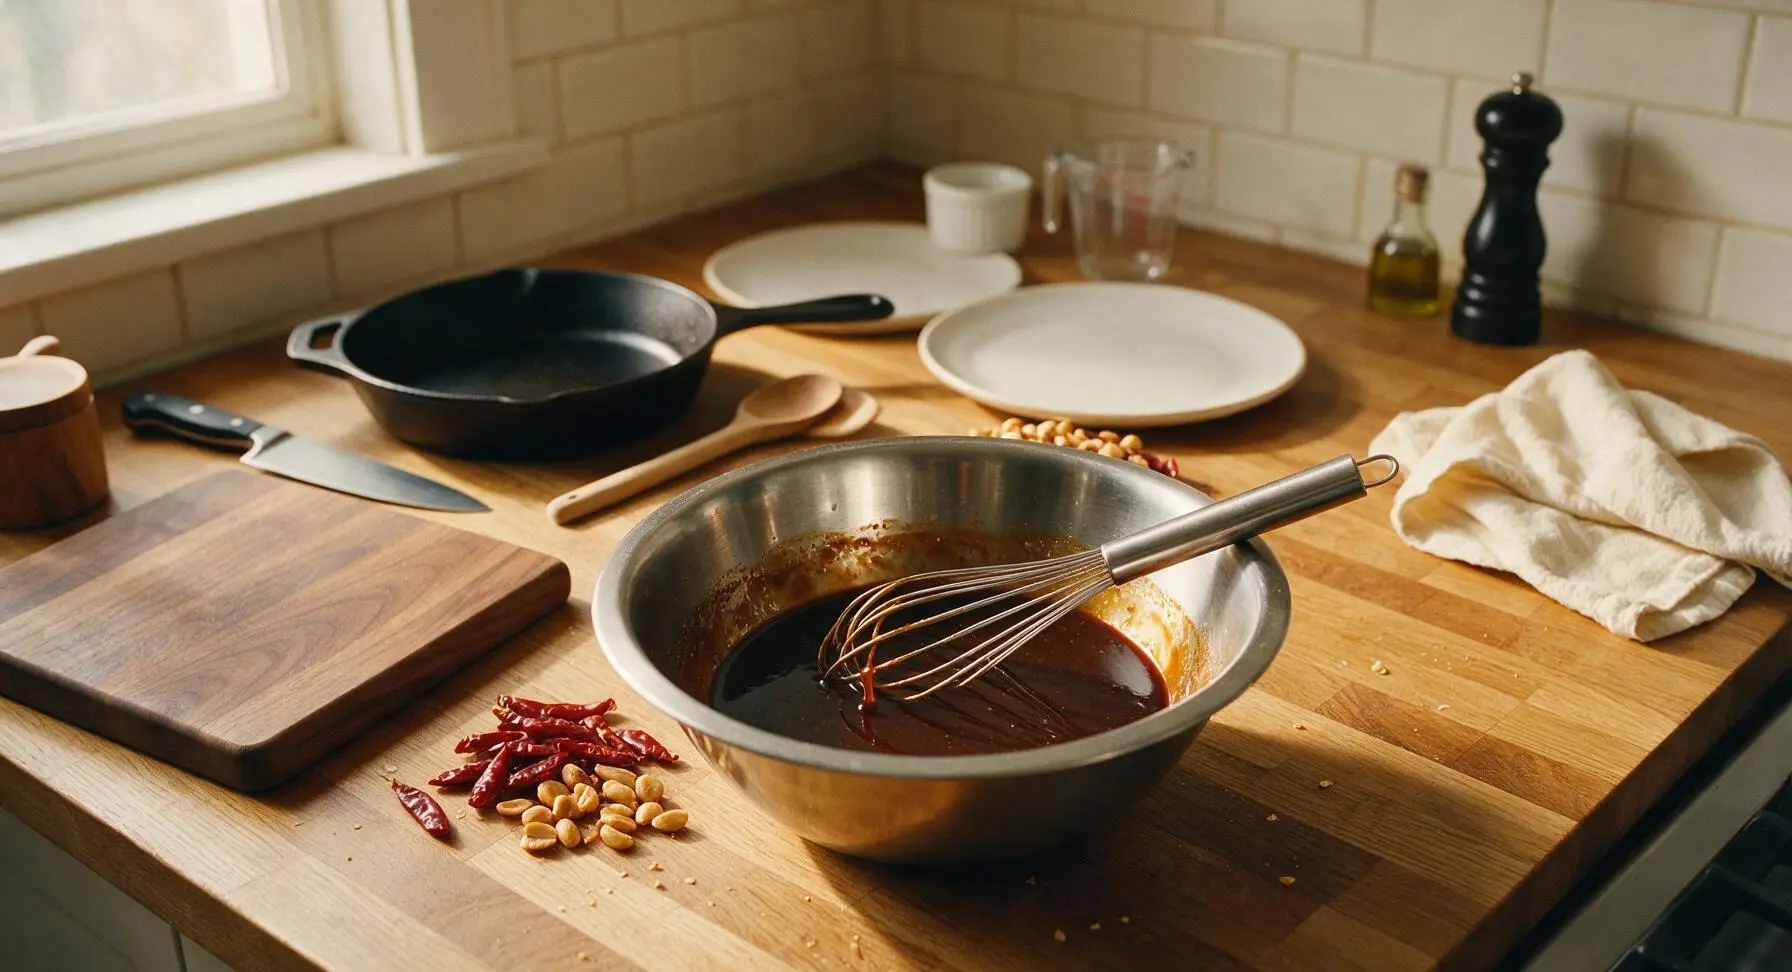
Step 3
step3:Whisk Kung Pao Glaze
4

Toss Pork in Glaze

Once the pork belly cubes finish smoking and develop a firm, dark bark, use the BBQ tongs to transfer all cubes to the aluminum foil tray. Pour half of the Kung Pao glaze over the cubes, using the silicone basting brush to toss and coat every piece evenly. Reserve the remaining half of the glaze in the medium bowl for the final toss after caramelization.
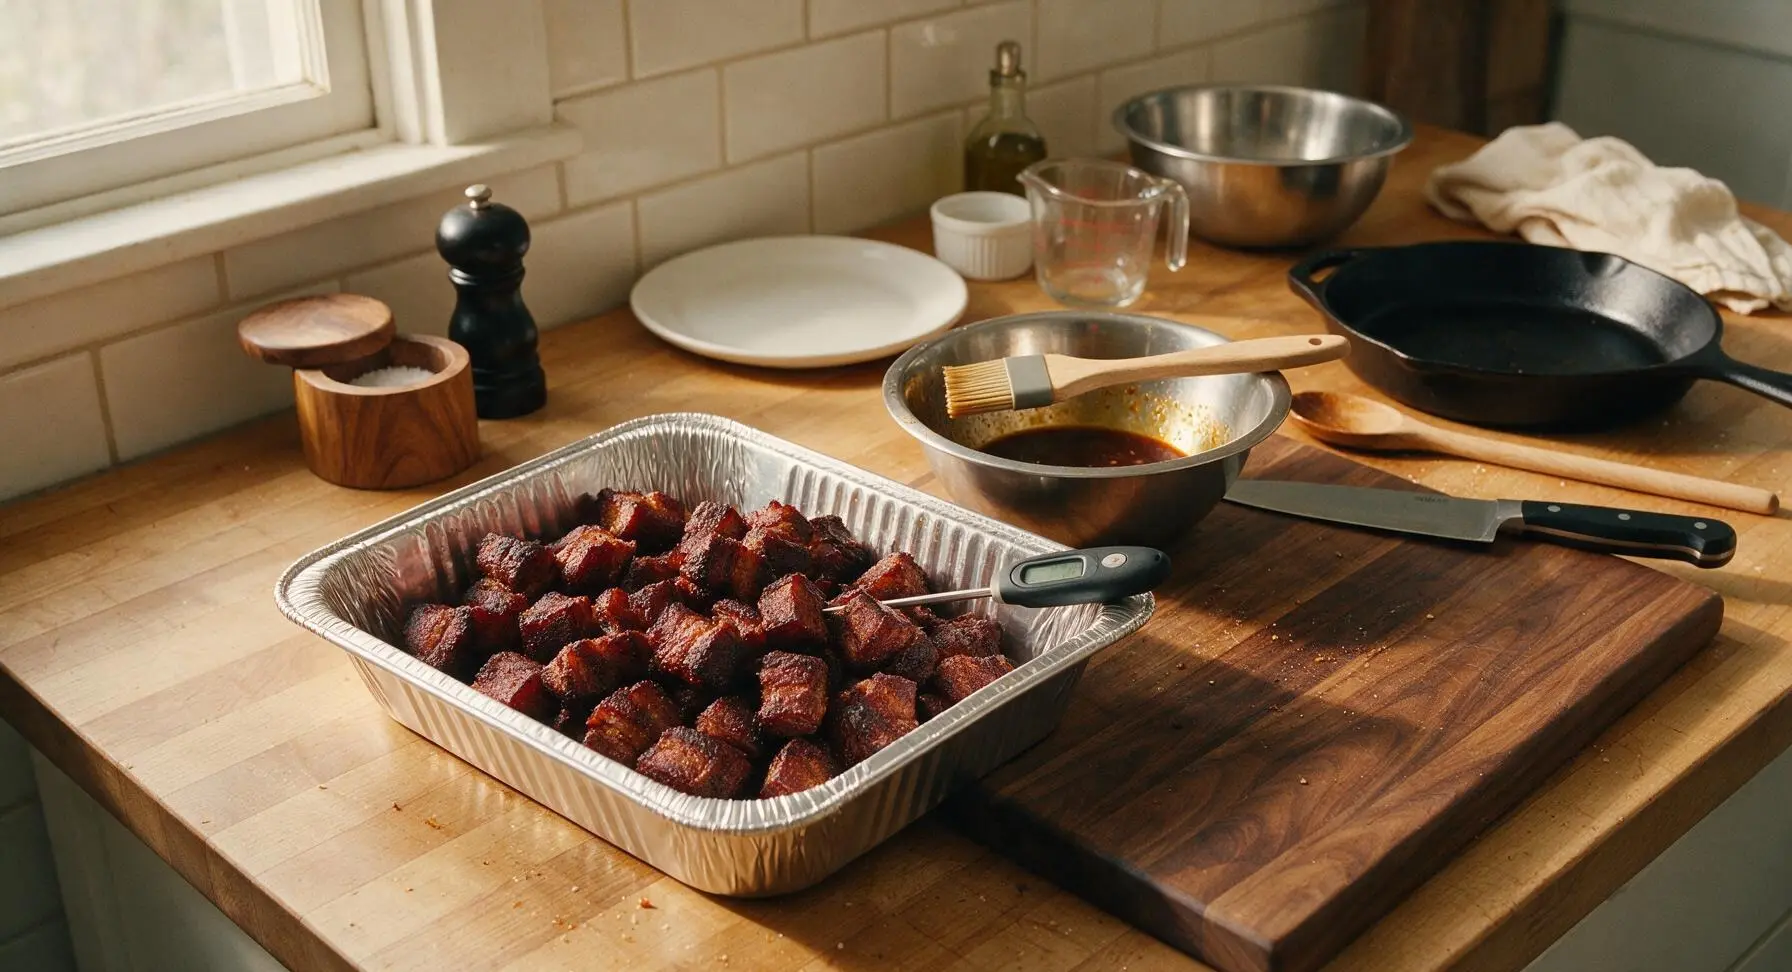
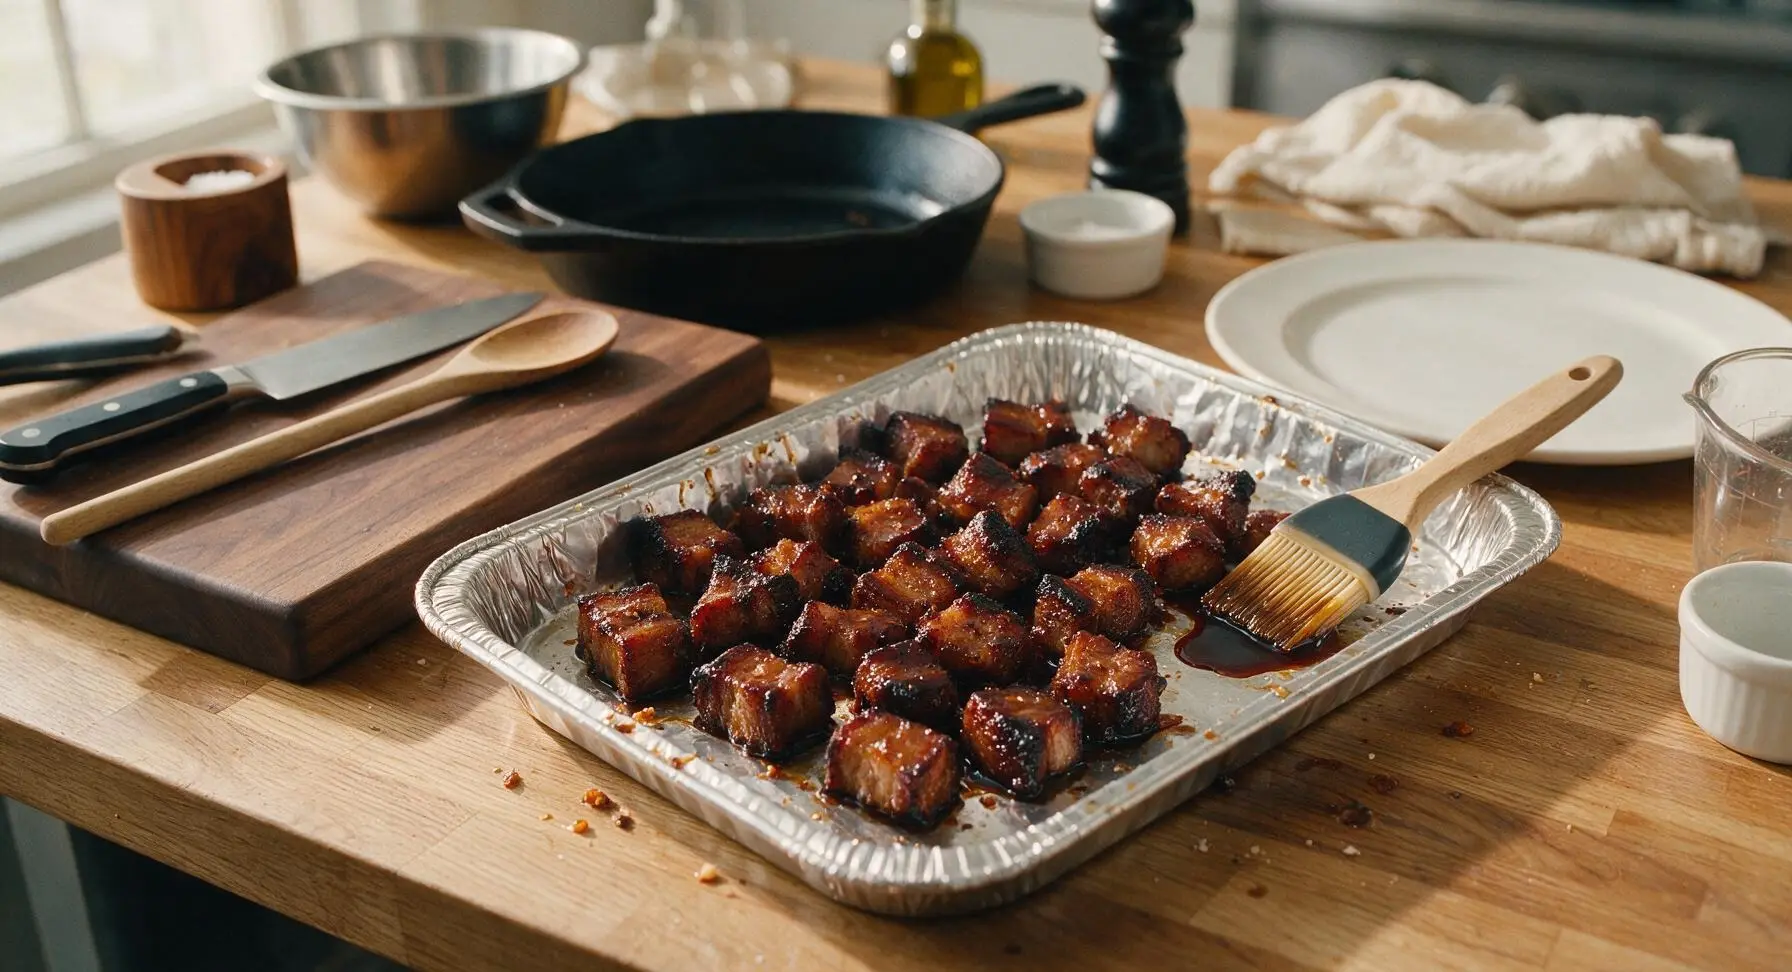
Step 4
step4:Toss Pork in Glaze
Step 4
step4:Toss Pork in Glaze
5

Caramelize Glazed Cubes

Return the foil tray with the glazed pork cubes to the smoker (or a 135C/275F home oven) and cook for an additional 45 minutes, basting the cubes with glaze that pools in the bottom of the tray every 15 minutes. The glaze will bubble and caramelize, forming a sticky, shiny coating on each cube, with slightly charred dark edges on the pork corners. Watch closely during the final 10 minutes to avoid burning the honey in the glaze, which will turn bitter.
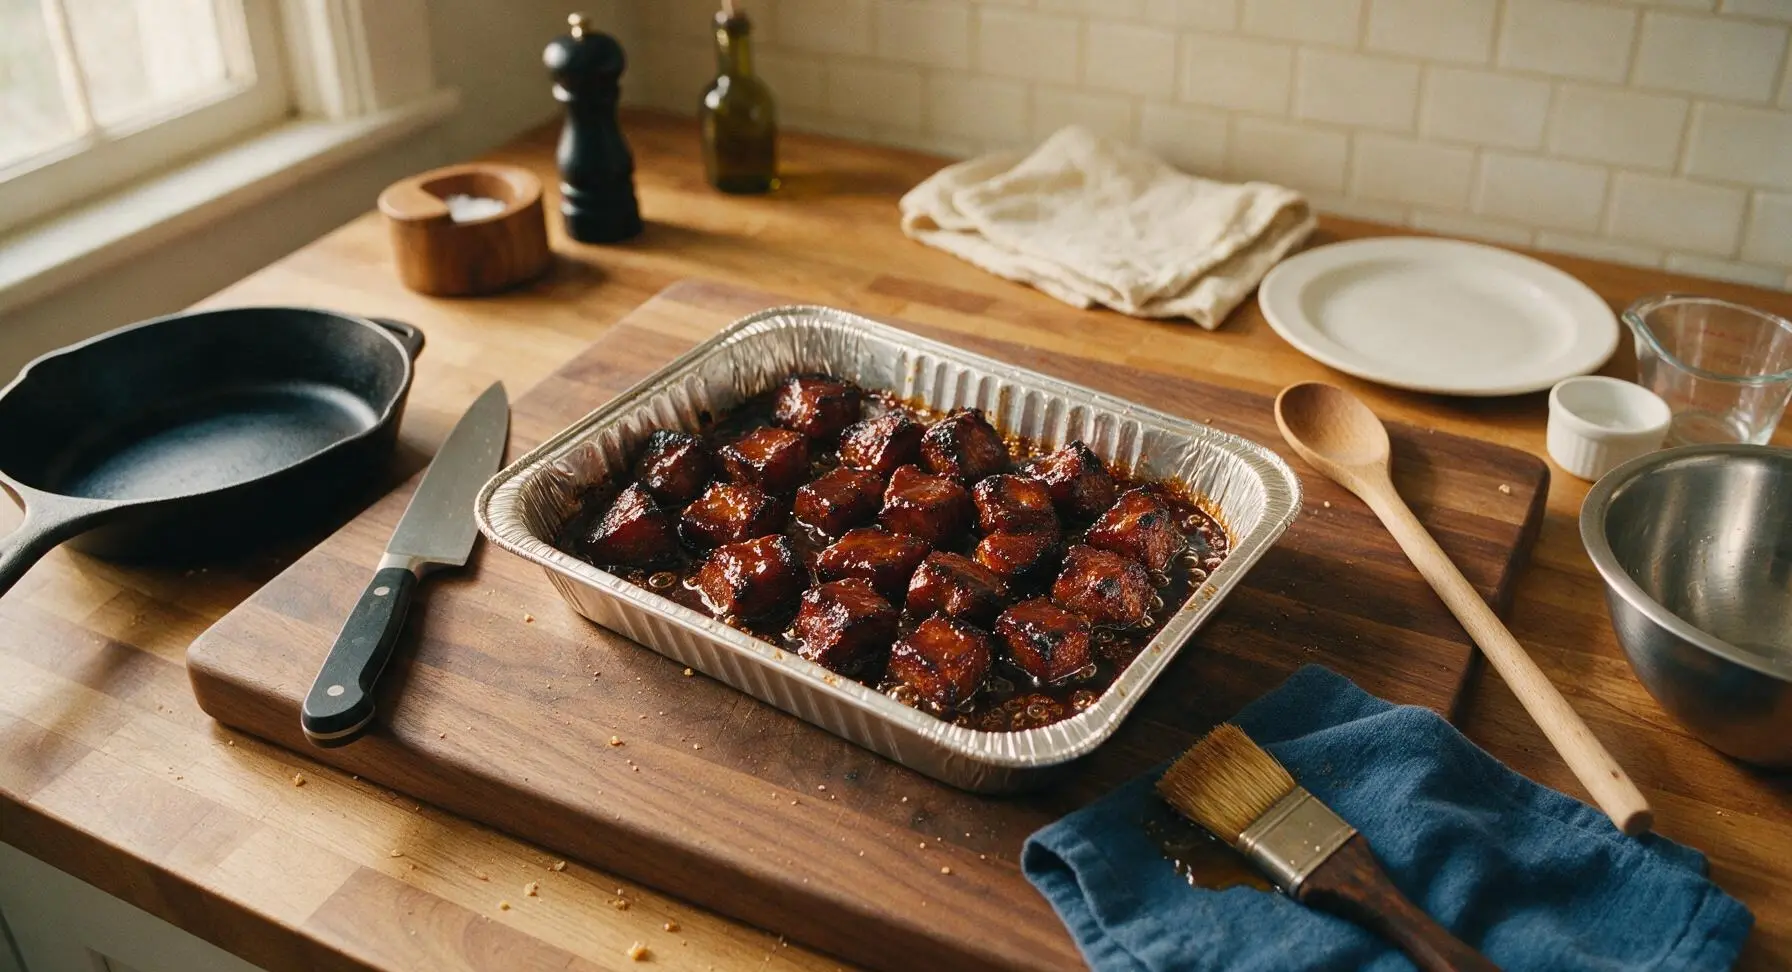
Step 5
step5:Caramelize Glazed Cubes
6

Add Peanuts and Chilis

Transfer the hot caramelized burnt ends from the foil tray to the medium stainless steel mixing bowl holding the remaining reserved Kung Pao glaze. Add the 1/2 cup roasted salted peanuts and the 4 reserved whole dried red chilis, tossing vigorously with the BBQ tongs until every cube is fully coated in sticky glaze, with peanuts and chilis evenly distributed throughout the mixture.
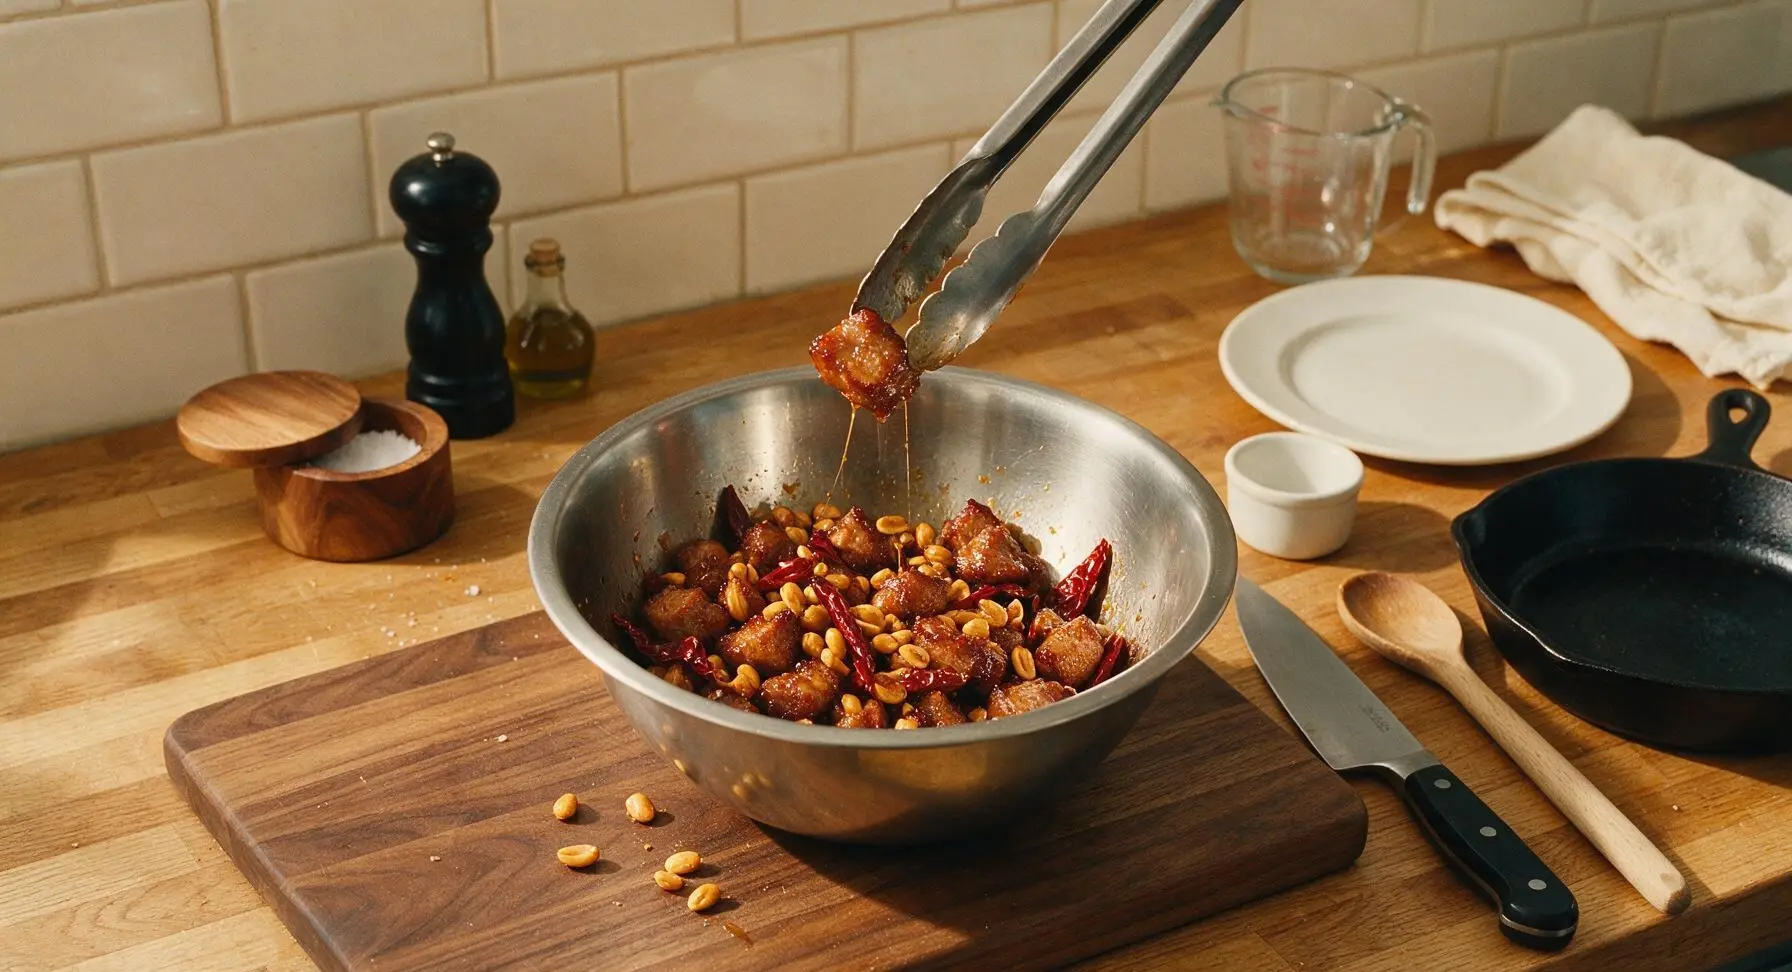
Step 6
step6:Add Peanuts and Chilis
7

Plate and Garnish

Transfer the tossed Kung Pao burnt ends to the matte off-white ceramic serving platter, piling them in a loose, generous mound. Scatter the fresh Thai basil leaves over the top for a bright, herbal contrast to the rich, spicy, smoky flavor. Serve immediately while hot, when the glaze is sticky and the pork is render-tender.
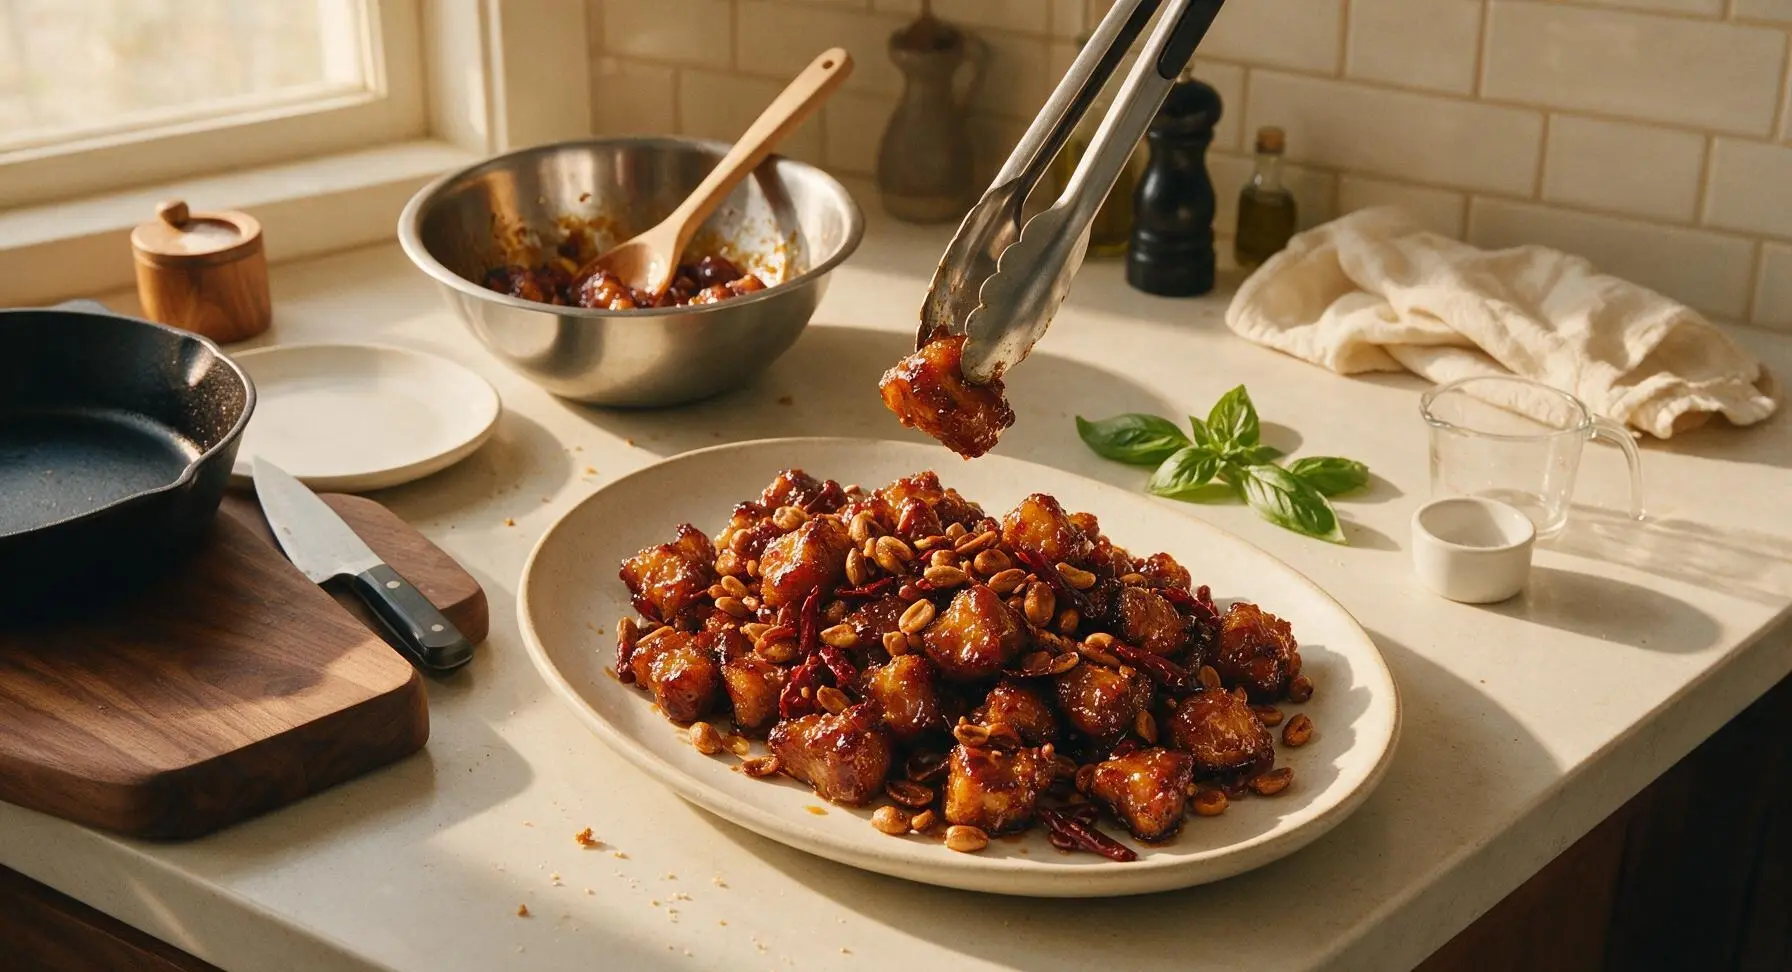
Step 7
step7:Plate and Garnish

Tips

1.Cut pork belly into uniformly sized 1-inch cubes: uneven pieces will cook at different rates, leading to some tough, over-charred cubes and others under-rendered, overly fatty pieces that lack a crisp bark.
2.Reserve half the glaze for the final toss: adding fresh, uncaramelized glaze at the end delivers bright, balanced Kung Pao tang instead of the flat, overly sweet, burnt taste that comes from cooking all the glaze for the full 45 minutes.
3.Toast Sichuan peppercorns for 1 minute in a dry skillet over medium heat before grinding for the rub: toasting unlocks their signature tingly, citrusy aroma, preventing a flat, dusty spice taste and making the Sichuan flavor feel intentional rather than an afterthought.


✨ You May Also Like

BBQ & Grilling
🍜 United States

Tender, melt-in-your-mouth beef brisket with a crisp, spiced bark, slow-smoked to deep smoky perfection, the iconic centerpiece of Texas backyard barbecue.

⏱️ 12 hours BBQ & Grilling ★ 4.4
BBQ & Grilling
🍜 Korea

Tender, sweet-savory marinated beef short ribs, a beloved Korean BBQ staple with caramelized, slightly charred edges and deep umami flavor, perfect for outdoor summer gatherings.

⏱️ 4 hours 2BBQ & Grilling ★ 4.8
BBQ & Grilling
🍜 United States

Juicy grilled beef patties topped with smoky homemade chili, melted cheddar, and tangy pickles on toasted brioche buns for a hearty, flavor-packed handheld meal.

⏱️ 40 minuteBBQ & Grilling ★ 4.7
BBQ & Grilling
🍜 United States

A sweet, smoky, tangy BBQ sauce brightened with peak-season dark cherries, ideal for glazing grilled ribs, chicken, pork, or summer roasted veggies.

⏱️ 35 minuteBBQ & Grilling ★ 4.7
BBQ & Grilling
🍜 United States

Rich, smoky, slightly sweet homemade bourbon BBQ sauce with deep caramel notes, ideal for glazing grilled ribs, chicken, and burgers at cookouts.

⏱️ 25 minuteBBQ & Grilling ★ 4.7
BBQ & Grilling
🍜 United States

Iconic Alabama-style BBQ featuring tender hickory-smoked chicken slathered in tangy creamy white sauce, a beloved regional Southern cookout staple.

⏱️ 3 hoursBBQ & Grilling ★ 5

Kung Pao Burnt Ends:Frequently Asked Questions

1.What size should I cut my pork belly cubes for the best Kung Pao burnt ends texture? ▾
Aim for uniform 1.5-inch cubes of skinless pork belly—that’s the perfect sweet spot. Smaller cubes will over-render and turn dry and crispy before they build enough smoky flavor, while larger cubes won’t caramelize evenly or absorb that sticky Kung Pao glaze all the way through. Pat cubes fully dry before seasoning for better bark formation.
2.Can I make this recipe if I don’t have a dedicated backyard smoker? ▾
Absolutely! You don’t need fancy equipment to get great smoky flavor. Use a charcoal grill set up for indirect heat at 275°F, toss a couple of hickory or apple wood chunks on the coals, and cook the pork the same way you would in a smoker. For indoor cooking, add 1/4 teaspoon of liquid smoke to your glaze and roast cubes on a wire rack in the oven.
3.How important is ground Sichuan peppercorn, and can I substitute it if I can’t find it? ▾
It’s non-negotiable for that signature tingly, numbing Kung Pao profile that sets this fusion dish apart from regular spicy BBQ burnt ends. If you can’t find pre-ground, toast whole Sichuan peppercorns in a dry pan for 30 seconds, grind them, and sift out the hard woody hulls. Don’t swap in regular black pepper—it won’t deliver that same bright, citrusy tingle.
4.What smoking wood pairs best with the bright Sichuan glaze flavors? ▾
Stick to mild, sweet fruit woods or light hardwoods so you don’t overpower the bright, spicy, nutty glaze. Apple, cherry, or a small amount of hickory work beautifully—skip heavy, pungent woods like mesquite, which adds an aggressively bitter, campfire-like smoke that clashes with the nuanced numbing-spicy profile of the Kung Pao coating.
5.How do I keep my burnt ends from turning tough or dry instead of tender and juicy? ▾
The biggest culprit is cooking at too high a temperature, which makes fat render out too fast and leaves meat stringy. Hold your cooking temp steady at 275°F, don’t toss cubes in glaze until the last 15 minutes of cook time, and pull them when they hit 205°F internal temp and give almost no resistance when poked with a toothpick.
6.I don’t eat peanuts—what can I swap in to keep that classic Kung Pao crunch? ▾
Roasted, salted cashews are the closest swap, with a rich, buttery flavor that pairs perfectly with smoky pork and spicy glaze. For a nut-free option, use roasted crispy chow mein noodles or toasted white sesame seeds to add that same textural contrast. Just stir your crunchy add-in right before serving so it doesn’t get soggy from the sticky glaze.
7.How spicy is this dish, and can I dial the heat up or down for my guests? ▾
The base recipe has a gentle, building numbing spice that’s not overwhelming for most people. To turn the heat up, add extra dried red chilis or a pinch of cayenne to the seasoning rub. To tone it down for milder palates, cut dried chilis in half and reduce Sichuan peppercorn by half, leaving a little for that signature tingle without the burn.
8.When do I add the Kung Pao glaze to the burnt ends for the best sticky coating? ▾
Wait until pork belly cubes are fully tender, have developed a nice smoky outer bark, and hit that 205°F internal temp before tossing them in glaze. Return glazed cubes to the heat for 10 to 15 minutes, just long enough for glaze to caramelize and tack up to the meat—adding it too early will cause glaze sugar to burn before pork finishes cooking.
9.Can I prep these burnt ends ahead of time for a party or cookout? ▾
Definitely! Smoke the pork belly cubes up to the point right before you add the glaze, let them cool completely, and store in an airtight container in the fridge for up to 3 days. When you’re ready to serve, toss them in Kung Pao glaze, pop them on a hot grill or in a 375°F oven for 15 minutes to caramelize, then top with peanuts and chilis.
10.What sides pair best with Kung Pao burnt ends for a full meal? ▾
These rich, sticky bites pair perfectly with bright, fresh sides that cut through the fat and spice. Serve them over steamed jasmine rice, with a side of quick pickled cucumbers, garlicky green beans, or a simple crunchy slaw dressed with rice vinegar and a touch of sesame oil. They also work great as a standalone game day or potluck appetizer.
11.Do I need to wrap my pork belly cubes in foil while cooking, like traditional brisket burnt ends? ▾
Unlike tough brisket, pork belly renders and tenderizes much faster, so you don’t need to wrap it in foil to get that melt-in-your-mouth texture. Wrapping will steam the meat and soften the crispy smoky bark you’ve built up, leaving you with mushy cubes that can’t hold onto glaze. Keep them unwrapped on a wire rack for the best texture.
12.How should I store leftover Kung Pao burnt ends, and how long will they keep? ▾
Let leftover burnt ends cool to room temperature within 2 hours of cooking, then transfer to an airtight container and keep in the fridge for up to 4 days. The glaze will thicken as it chills, so don’t worry if it seems extra tacky when you pull them out to reheat. Avoid freezing them, as pork fat will turn grainy and peanuts will lose their crunch when thawed.
13.What’s the best way to reheat leftover burnt ends so they don’t get soggy? ▾
Skip the microwave, which will turn tender pork rubbery and make glaze runny. Instead, spread cubes out on a wire rack set over a baking sheet and reheat in a 350°F oven for 8 to 10 minutes, until heated through and glaze is bubbly. Toss with a tiny splash of extra glaze and a sprinkle of fresh peanuts if you want to refresh the flavor.
14.The recipe calls for kosher salt—can I use regular table salt instead for the seasoning rub? ▾
Yes, but you’ll need to adjust the amount to avoid over-salting your pork. Table salt is much denser and saltier-tasting than flaky kosher salt, so use half the measured amount if you swap it in to mix with the smoked paprika, garlic powder, and Sichuan peppercorn rub. Season pork cubes evenly on all sides 30 minutes before cooking to let salt penetrate and draw out excess moisture for a better bark.

Comments (17)

2 days ago

OMG these Kung Pao burnt ends were the absolute star of my weekend cookout! Everyone kept asking for the recipe before they even finished their first plate. The balance of sweet, spicy, tangy from the kung pao sauce paired with that crispy, smoky burnt end texture is unreal. Worth every minute of the cook time, no cap.

1 week ago

Made these for my family’s Sunday dinner last night and my kids went back for seconds AND thirds! I was worried the Sichuan peppercorn kick would be too much for them, so I cut the amount in half and it was perfect. Only note is I wish I’d made extra peanuts for crunch, next time I’m doubling that portion.

5 days ago

So glad your family loved them! Cutting the Sichuan peppercorn for kid-friendly palates is such a smart swap, and extra peanuts are never a bad call — I do that half the time too!

3 days ago

Took me a second to nail the sauce consistency on my first try, but man, once it hit those crispy burnt ends? Game changer. Brought a batch to my neighbor’s potluck and people were hovering over the tray the whole night. 10/10 will be in my regular rotation now.

2 days ago

Same! I messed up the sauce thickness my first go round too, turned out I had the heat too high when I was simmering it. Turned it down to low the second time and it coated perfectly!

5 days ago

I prepped a big batch of these on Sunday for my work lunches this week and I’m already sad I only have one portion left. The flavor holds up so well even after reheating in the office microwave! I added a side of steamed rice and roasted broccoli to round it out, chef’s kiss.

yesterday

First time ever making burnt ends period, let alone this kung pao twist! I was super intimidated by the medium difficulty rating and almost bailed, but the step-by-step instructions were so easy to follow. Mine came out a little less crispy than the photos, but the flavor was still incredible. Any tips for getting that perfect char next time?

2 hours ago

I had the same issue my first batch! Turns out I was saucing them too early — wait to toss them in the kung pao glaze until the last 20 minutes of cook time and they’ll crisp up way more!

30 minutes ago

Great tip from Sara! Also, make sure your smoker (or oven!) is holding a steady 275°F before you put the cubed brisket on, and don’t crowd the pan — giving each piece space lets the edges crisp instead of steam. You’ve got this next time!

1 week ago

Made these for our office football watch party this past weekend and let me tell you, not a single piece was left. People were literally scraping the tray for the last bits of sauce and peanut crumbs. The only complaint I got was that I didn’t make a double batch! 😂

5 days ago

Wait I was at that party!!! I’ve been searching for this recipe all week, I knew I recognized that kung pao burnt end flavor. No wonder there were none left by the time I got up for a second serving lmao

3 days ago

That’s the highest compliment there is! Next time you’ll have to make a triple batch just to be safe — trust me, it’s worth the extra prep.

2 weeks ago

I made a quick swap to use tamari instead of regular soy sauce to keep this gluten free, and it worked perfectly! I was worried the sauce would taste off, but you honestly couldn’t tell the difference. My gluten-eating husband didn’t even notice I changed anything, that’s how good it was.

2 weeks ago

Love that swap! Tamari works so beautifully in this glaze, I’m glad it turned out great for you and your husband — thanks for sharing that tip for other gluten free cooks!

30 minutes ago

I didn’t have a smoker so I made these in my oven per the alternative instructions, and they still slapped. Used a cheaper cut of pork instead of brisket because it was on sale at the grocery store, and the flavor still went crazy. Great recipe for people who don’t have fancy BBQ equipment.

2 days ago

I upped the chili crisp and dried chili amount by 50% because I love that mouth-numbing, super spicy kung pao kick, and WOW. These are not for the faint of heart, but if you love spicy food like I do, this is the perfect twist on classic burnt ends. I served them with pickled veggies on the side to cut the heat a little.

yesterday

Oh thank god someone mentioned upping the spice! I made the original recipe and found the heat a little too mild for my taste, so I’m definitely adding extra chili crisp when I make these this weekend.

2 hours ago

The pickled veggie side is such a good call! I did quick pickled cucumbers and carrots with mine last time and it balanced the rich, smoky, spicy flavor so well.

yesterday

Made these for my date night last night and my boyfriend said they’re better than the burnt ends we got at that fancy BBQ spot downtown for our anniversary. Win for me! We paired them with garlic noodles and it was such a fun, messy, delicious meal.

2 hours ago

Garlic noodles with these?! That’s the combo I never knew I needed. I was just gonna make plain white rice next time, but garlic noodles sound insane. Stealing that idea!

5 days ago

I will say the 2 hour 45 minute cook time felt a little long for a weeknight, but I started prepping right when I got home from work and it was totally doable. My teen son said these are the best thing I’ve ever made on the grill, so that’s a massive win in my book.

3 days ago

So happy your son approved! If you want to cut down on weeknight cook time, you can smoke the cubed meat for the first 2 hours a day ahead, then finish it with the sauce in the oven for the last 45 minutes when you get home from work — game changer for busy schedules!

1 week ago

Made these for our tailgate before the college football game last Saturday, and people kept coming over from the neighboring tailgates to ask what smelled so good. Ended up sharing half the tray with the group next to us, and they gave us a round of beers as a thank you. Best tailgate recipe I’ve found in years.

30 minutes ago

Wait, has anyone made these without the peanuts? My kid has a severe peanut allergy so I need to swap them out for something else that adds crunch, but I don’t want to mess up the texture of the dish. Would toasted sesame seeds work, or maybe roasted cashews?

5 minutes ago

I have a tree nut and peanut allergy so I used toasted sunflower seeds last time I made these! They added the perfect crunch and didn’t distract from the sauce flavor at all, highly recommend.

just now

Sunflower seeds are a fantastic swap! Toasted sesame seeds work great too, or even crispy fried shallots if you want a little extra savoriness with that crunch. Just make sure to add them right at the end so they stay crispy!

2 hours ago

I used leftover smoked brisket from a weekend cookout to make these, and it cut the cook time down so much! I just cubed up the leftover brisket, tossed it in the kung pao sauce, and let it crisp up in the oven for 40 minutes. Tasted like a whole new meal, zero waste.

30 minutes ago

Oh that’s such a smart hack! I always have leftover brisket after weekend smokes and never know what to do with it besides make sandwiches. This is way more exciting, can’t wait to try it this weekend.

3 days ago

I followed the recipe exactly but my sauce came out way too sweet for my taste. I think next time I’ll cut back on the brown sugar a little and add a splash more rice vinegar to brighten it up. Otherwise the burnt ends themselves were perfectly tender, so it was an easy fix.

2 days ago

I did the exact same thing! Added an extra tablespoon of black vinegar and a pinch of extra soy to cut the sweetness, and it was perfect for my taste. Everyone’s sweet/salty balance is different, so tweaks are totally normal!

2 days ago

Great call adjusting the sauce to your taste! The recipe is written for a pretty balanced sweet/tangy profile, but adding extra vinegar or cutting the sugar by a tablespoon is such an easy way to tailor it to what you love — so glad the burnt end texture turned out for you!

2 weeks ago

Took these to a friend’s potluck a few days ago and multiple people told me I should start selling them. The kung pao glaze has that perfect umami kick that pairs so well with the smoky brisket, and the roasted peanuts add the best little crunch. 10/10, no notes.

just now

Wait, has anyone tried making these in an air fryer? I don’t have a smoker or a big outdoor grill, but my air fryer makes amazing crispy meats, so I’m curious if I can adapt this recipe for that! Would the cook time change much?

just now

Great question! You can absolutely make these in an air fryer — cube the brisket, air fry at 375°F for about 45 minutes to get crispy edges, then toss with the kung pao sauce and air fry for another 10 minutes to set the glaze. It cuts the cook time way down and still tastes incredible!



