
lemon chicken breast

title 1
lemon chicken breast
⏱️ cook time 18 minutes
🍽️ servings 4
⚡ Difficulty easy

intro

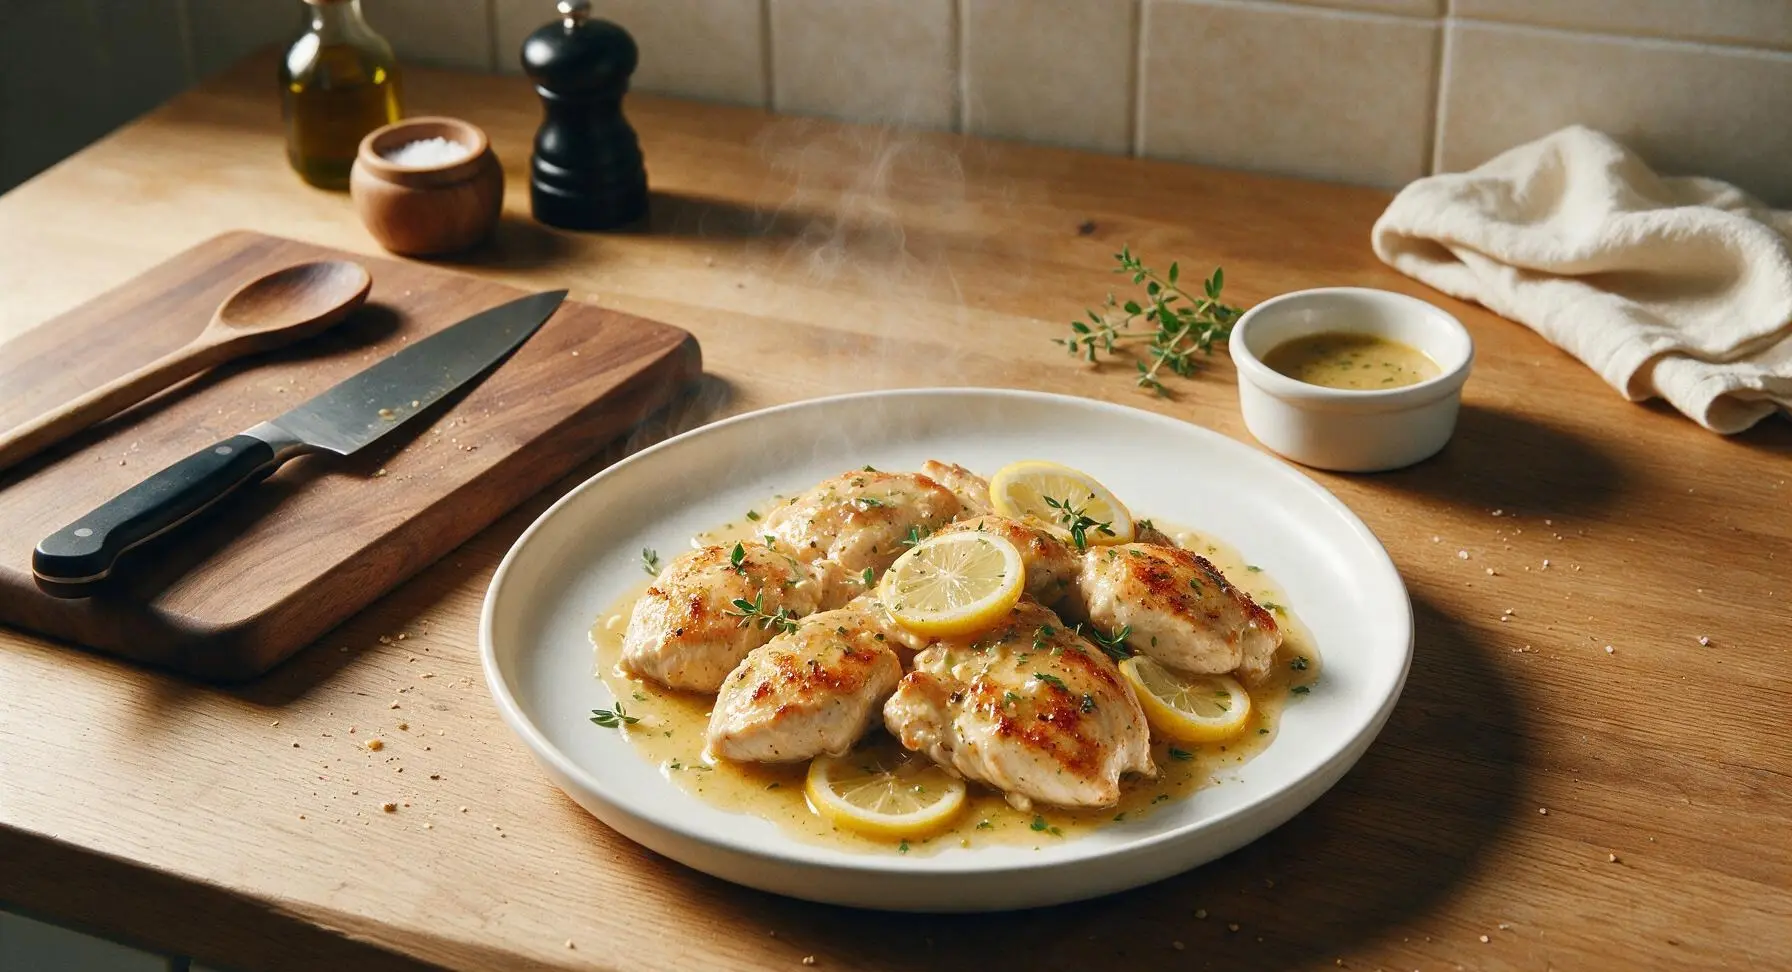
Juicy, evenly seared chicken breasts coated in a bright, zesty lemon butter pan sauce with subtle garlic and herb notes. Light, flavorful, and ready in under 30 minutes.

Ingredients
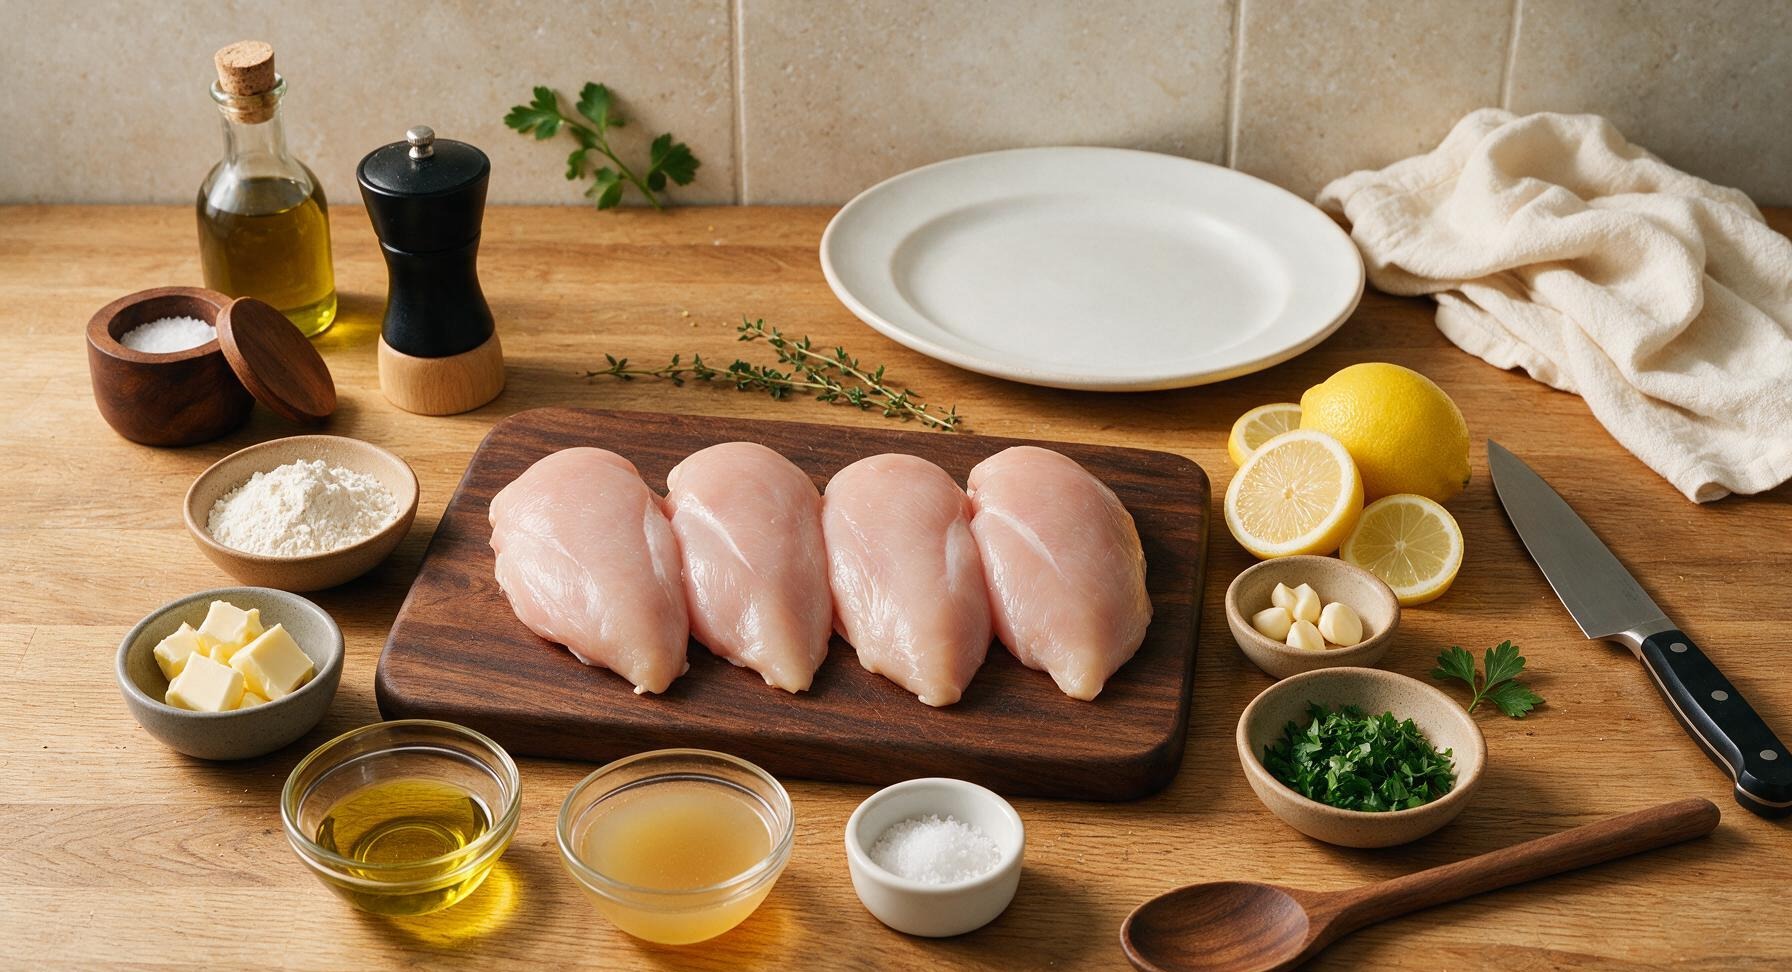
Boneless, skinless chicken breasts 600g (4 x 150g pieces, evenly sized)
Extra-virgin olive oil 2 tablespoons
Unsalted butter 30g, divided
All-purpose flour 2 tablespoons (optional, for crisp crust)
Garlic cloves 4, finely minced
Unwaxed lemons 3 medium (1 zested + juiced, 2 thinly sliced for garnish)
Low-sodium chicken broth 60ml (1/4 cup)
Fresh thyme sprigs 2
Fresh flat-leaf parsley 2 tablespoons, chopped
Flaky sea salt 1 teaspoon
Freshly ground black pepper 1/2 teaspoon

Steps

1

Pound and Season Chicken

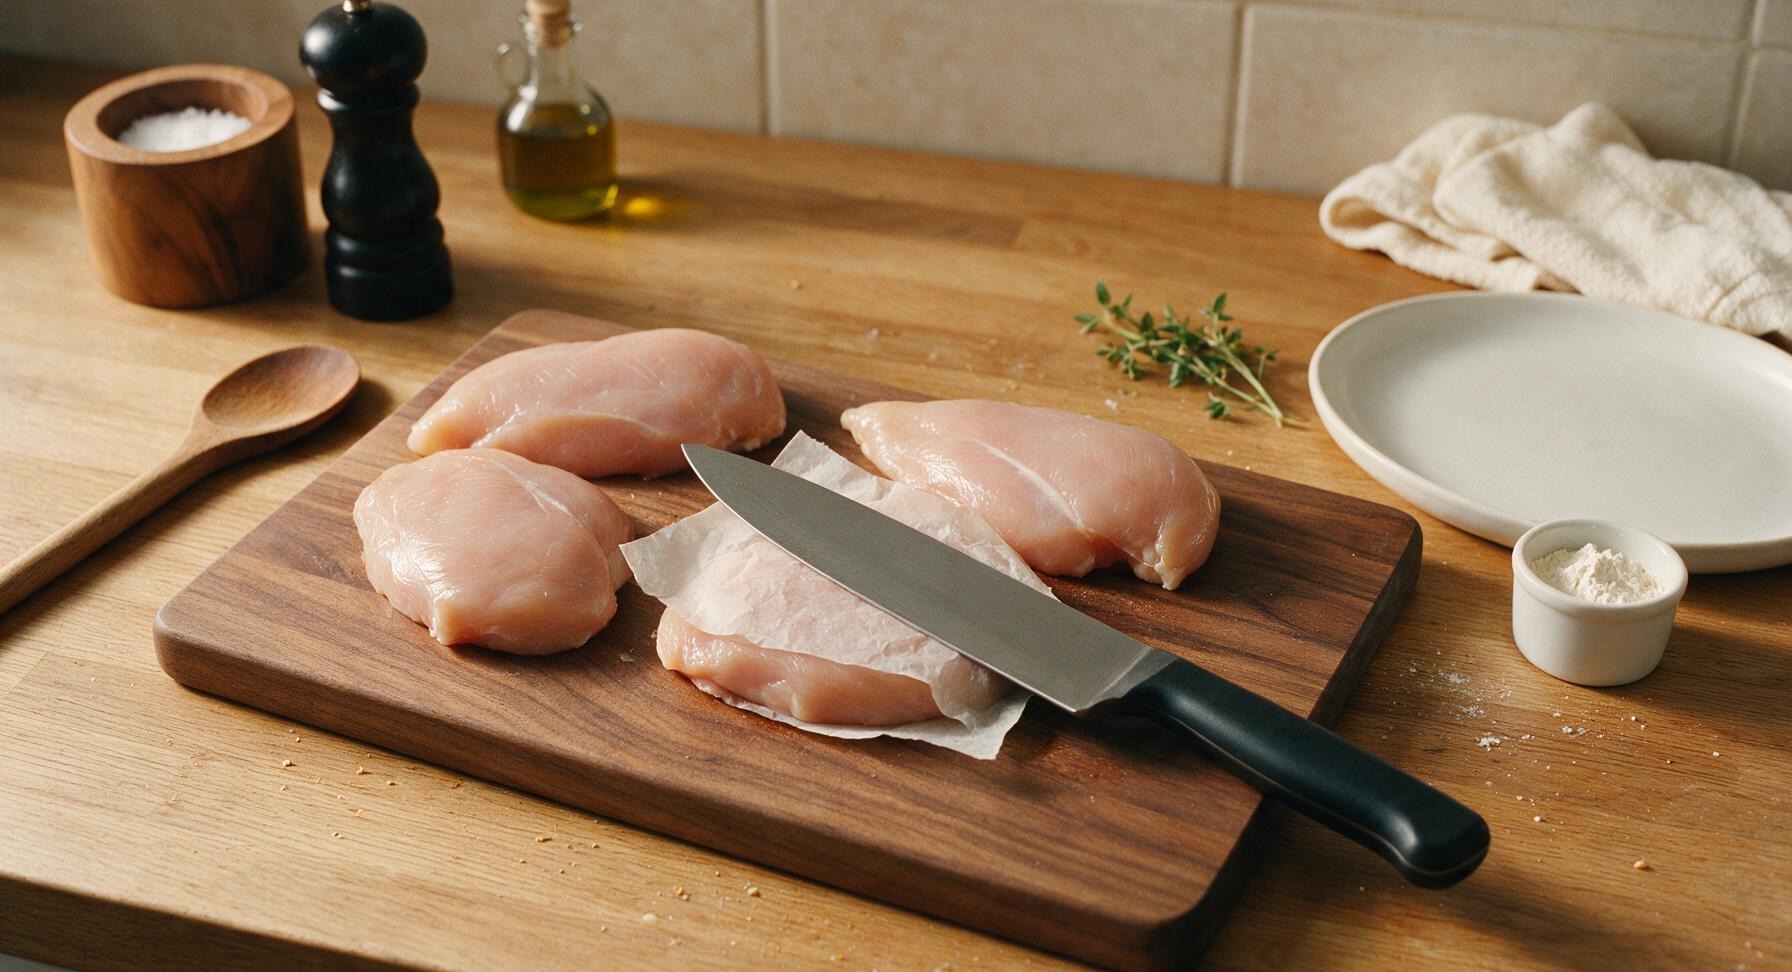
Place the 4 (150g each) chicken breasts on the acacia wood cutting board. Cover each breast with a small sheet of parchment paper to prevent meat tearing and cross-contamination. Use the flat side of the walnut-handled chef knife to gently pound the thickest tapered end of each breast until the entire piece is a uniform 2.5cm thick—this eliminates overcooked, dry edges while ensuring even doneness. Season both sides of every breast evenly with 3/4 teaspoon flaky sea salt and all 1/2 teaspoon freshly ground black pepper. If using the optional flour for a light crisp crust, lightly dredge each breast in the flour from the white ramekin, shaking off all excess to leave only a paper-thin, even coating.
Step 1
step1:Pound and Season Chicken
2

Prep Lemon and Aromatics

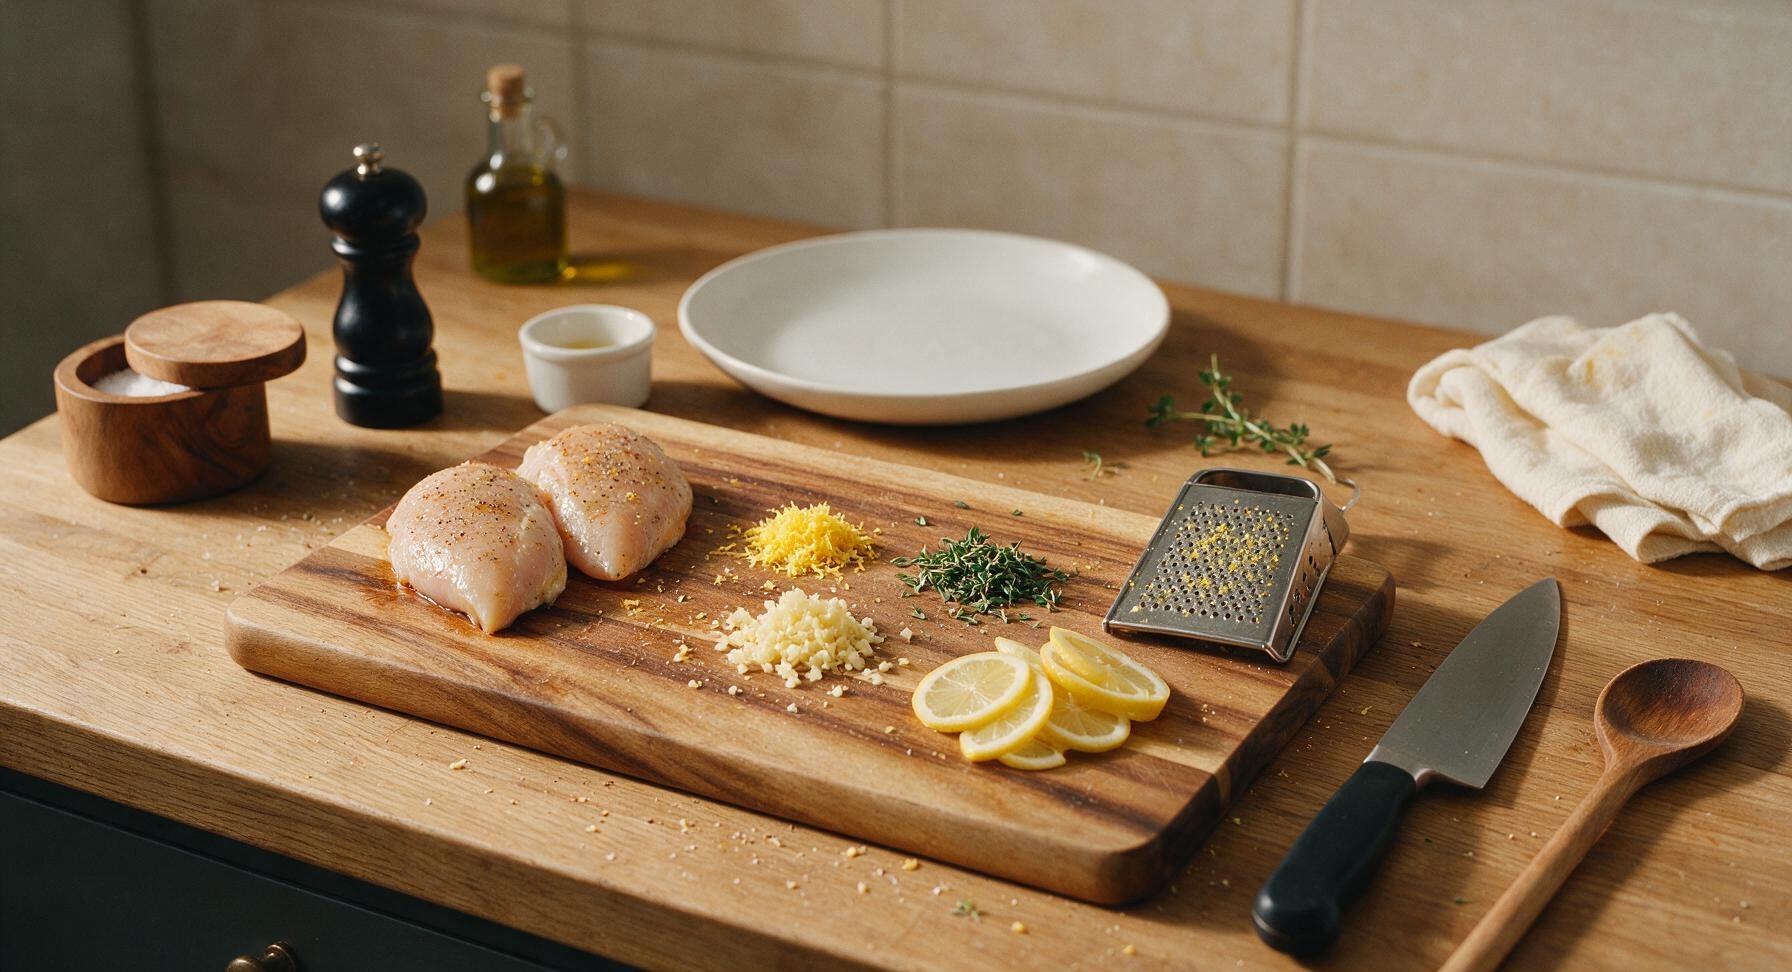
Move the seasoned chicken breasts to the left edge of the cutting board to make prep space. Use the fine holes of the stainless steel box grater to zest 1 unwaxed lemon, applying light pressure to only remove the bright yellow outer zest, avoiding the bitter white pith underneath. Juice the zested lemon to yield 60ml (1/4 cup) of fresh juice, picking out any stray seeds. Thinly slice the remaining 2 lemons into 3mm thick half-moon slices, discarding the hard stem ends. Finely mince the 4 garlic cloves with the chef knife, and pick the tiny leaves from the 2 fresh thyme sprigs, discarding the woody stems.
Step 2
step2:Prep Lemon and Aromatics
3

Sear Chicken Until Golden

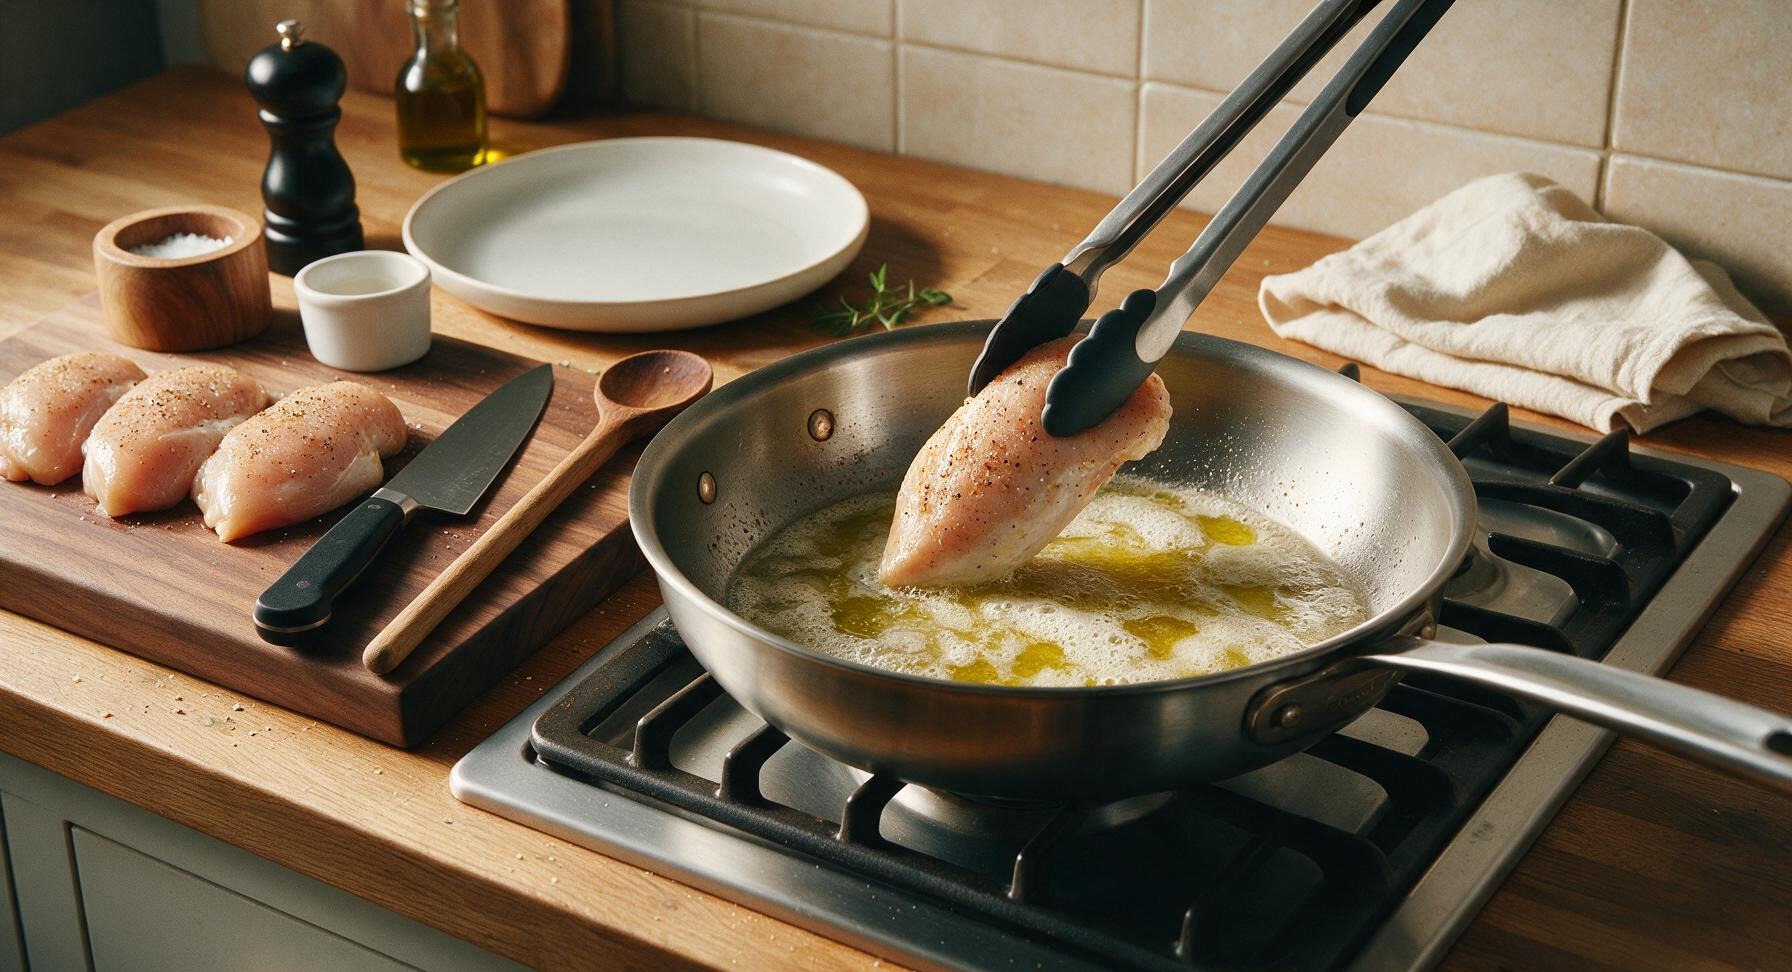
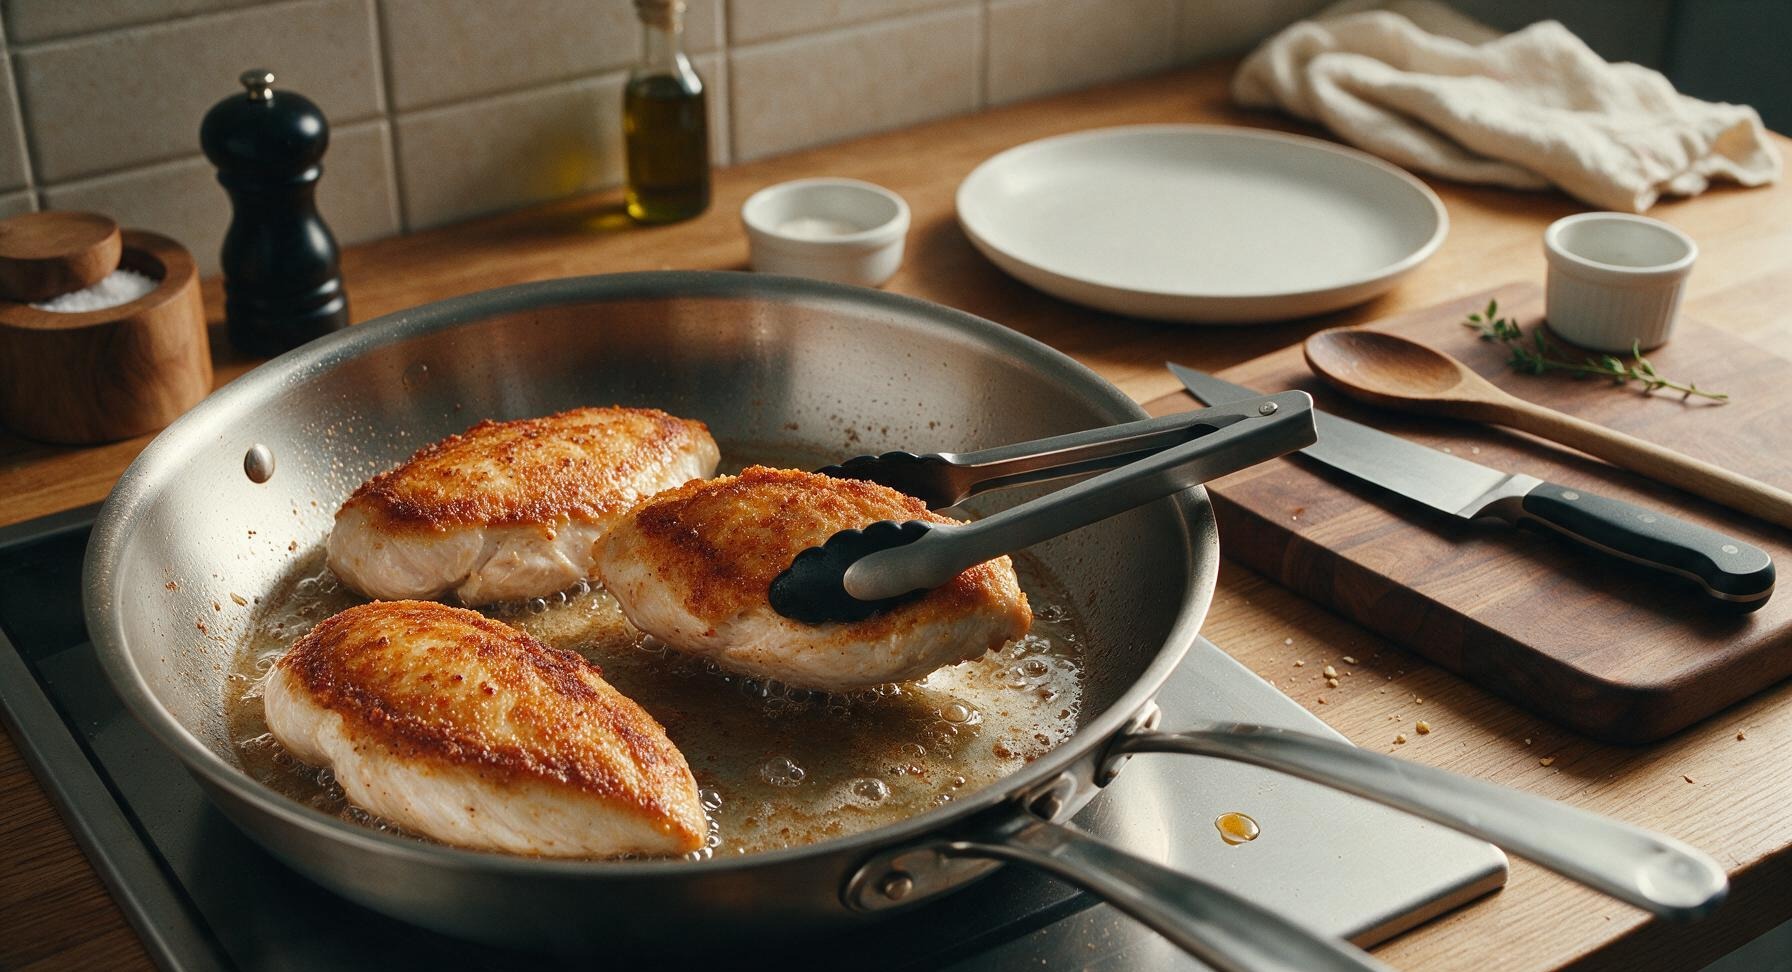
Place the 12-inch stainless steel skillet on the cooktop over medium-high heat. Add 2 tablespoons extra-virgin olive oil and 15g (1 tablespoon) of the unsalted butter. Wait 2 minutes until the butter is fully melted, foaming has subsided, and the oil shimmers slightly. Carefully lay each chicken breast in the skillet in a single layer, leaving 2cm of space between pieces to avoid steaming. Do not move or press the chicken for 5 full minutes, until the underside develops a deep golden-brown crust and releases easily from the pan when lifted gently with the silicone-tipped tongs.
Step 3
step3:Sear Chicken Until Golden
Step 3
step3:Sear Chicken Until Golden
4

Cook Chicken to Safe Temp

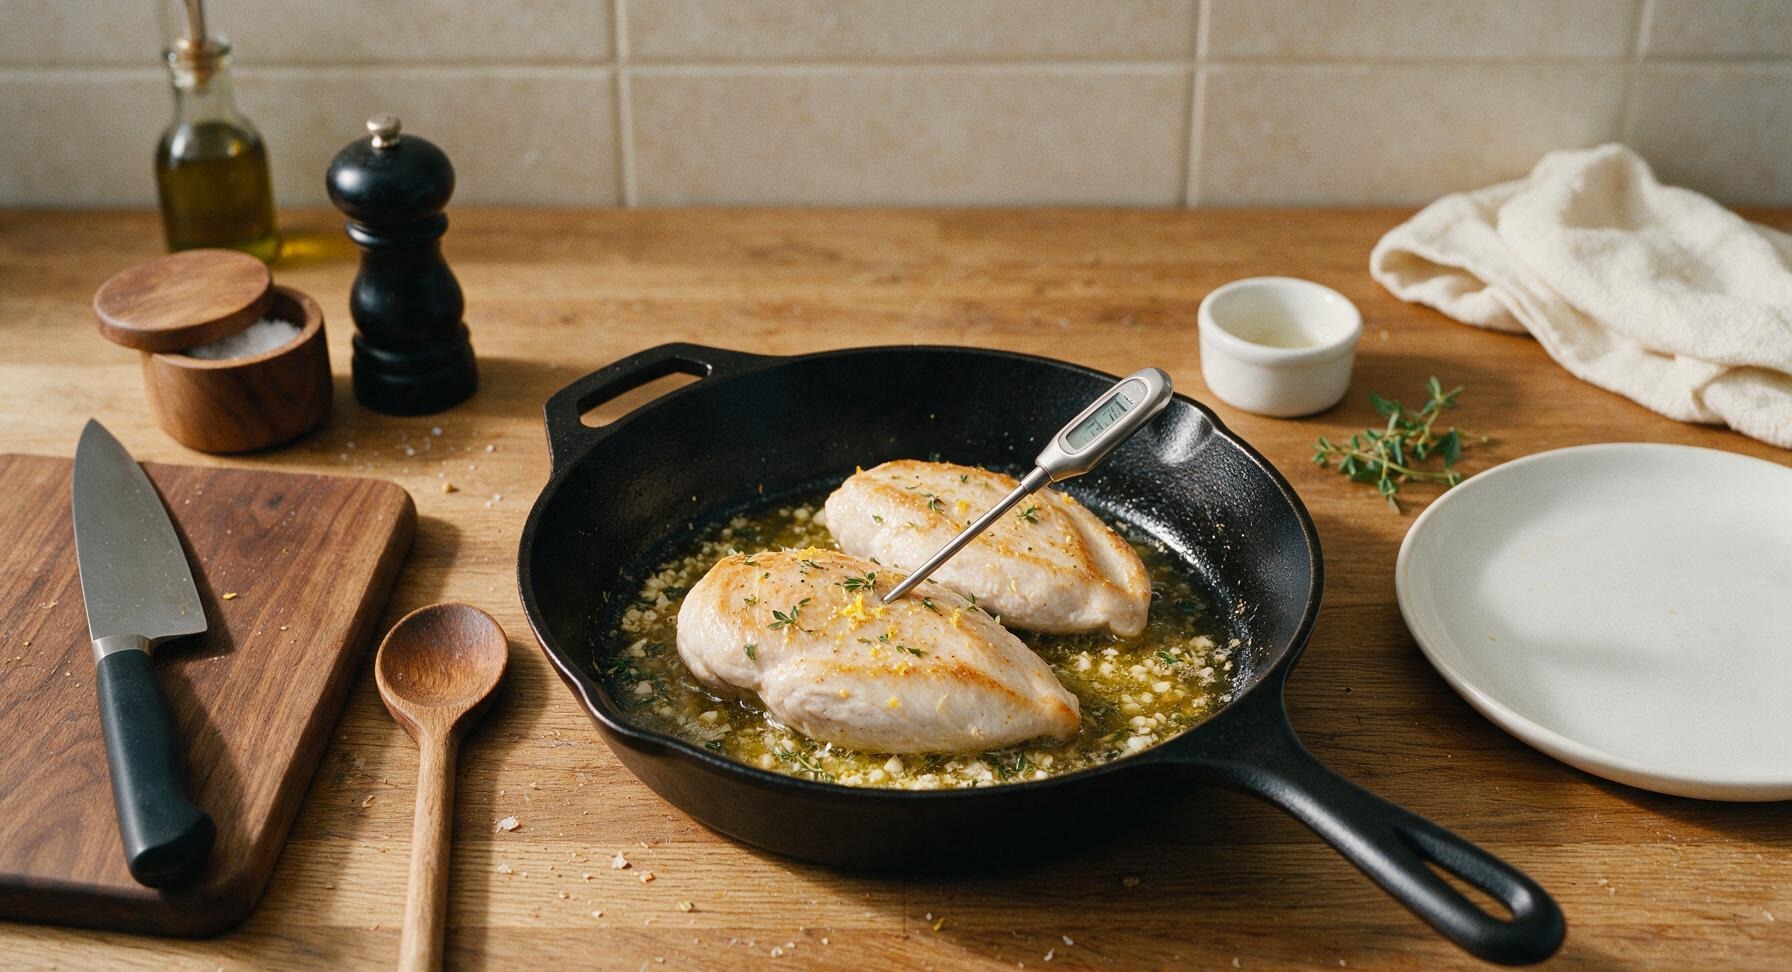
Use the tongs to flip each chicken breast to the second side, then reduce stovetop heat to medium. Scatter the minced garlic, picked thyme leaves, and lemon zest into the skillet around the chicken, letting them sizzle in the butter for 30 seconds until fragrant (do not let the garlic burn, as it will turn bitter). Cook the second side for 4-5 minutes, inserting the digital instant-read thermometer into the thickest part of the largest breast to confirm an internal temperature of 74°C (165°F). Use tongs to transfer the cooked chicken to the matte white side plate, tent loosely with a small sheet of aluminum foil, and let rest for 3 minutes to let juices redistribute.
Step 4
step4:Cook Chicken to Safe Temp
5

Make Lemon Pan Sauce

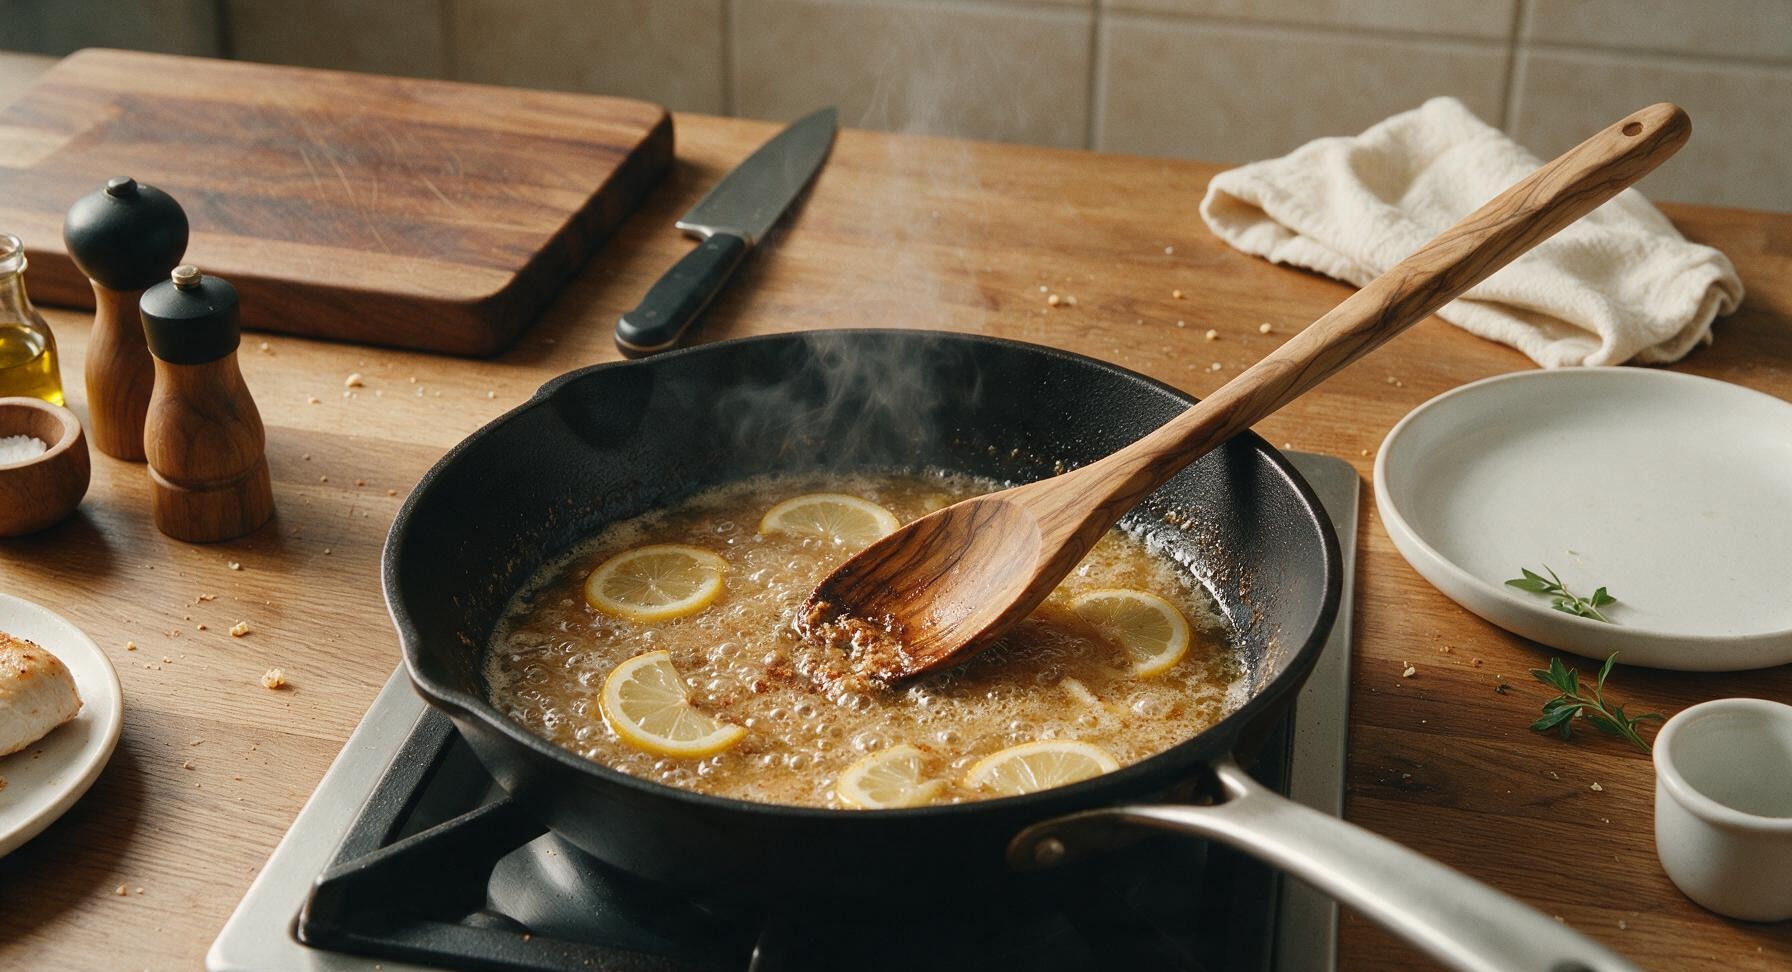
Leave the skillet on medium heat, with all the browned cooking bits (called fond) and aromatic butter remaining in the pan. Pour in the 60ml chicken broth and 60ml fresh lemon juice, using the long olive wood spoon to scrape all the browned fond from the bottom of the pan—these bits carry deep, savory flavor that makes the sauce taste rich. Simmer the sauce for 2 minutes until it is reduced by roughly one third, then stir in the remaining 15g (1 tablespoon) unsalted butter until fully melted, creating a smooth, glossy sauce. Add the thin lemon slices to the sauce, tossing to coat for 30 seconds until slightly softened.
Step 5
step5:Make Lemon Pan Sauce
6

Slice Rested Chicken

After the 3-minute rest period, transfer the chicken breasts back to the acacia wood cutting board. Hold the chef knife at a 45-degree angle to cut each breast diagonally into 2cm thick slices, cutting against the direction of the muscle grain to ensure every bite is tender. Do not saw at the meat—use smooth, even cuts to keep slices intact.
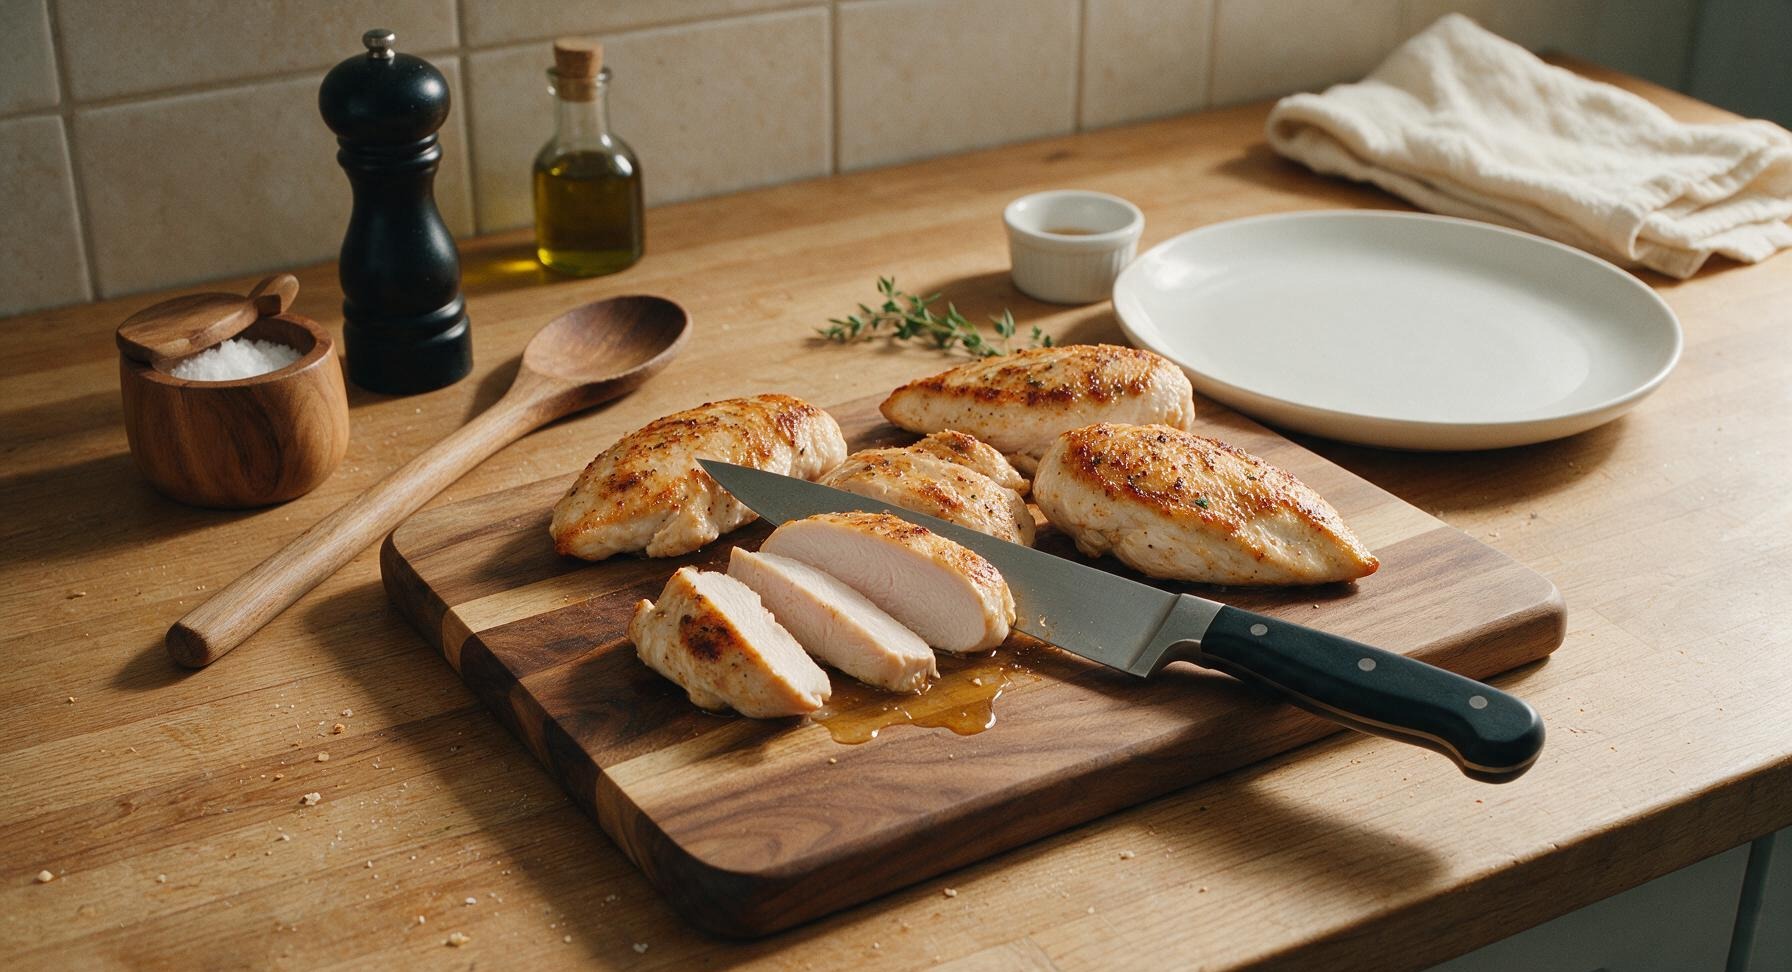
Step 6
step6:Slice Rested Chicken
7

Plate and Garnish Dish

Retrieve the cream stoneware dinner plate from the shelf. Arrange the sliced chicken in a gently fanned pattern across the center of the plate. Use the olive wood spoon to drizzle the warm lemon butter sauce evenly over the chicken slices, tucking the softened lemon slices between pieces for color and flavor. Sprinkle the 2 tablespoons of chopped fresh flat-leaf parsley evenly over the top, adding one light twist of black pepper if desired. Serve immediately while the chicken is hot and the sauce is glossy.
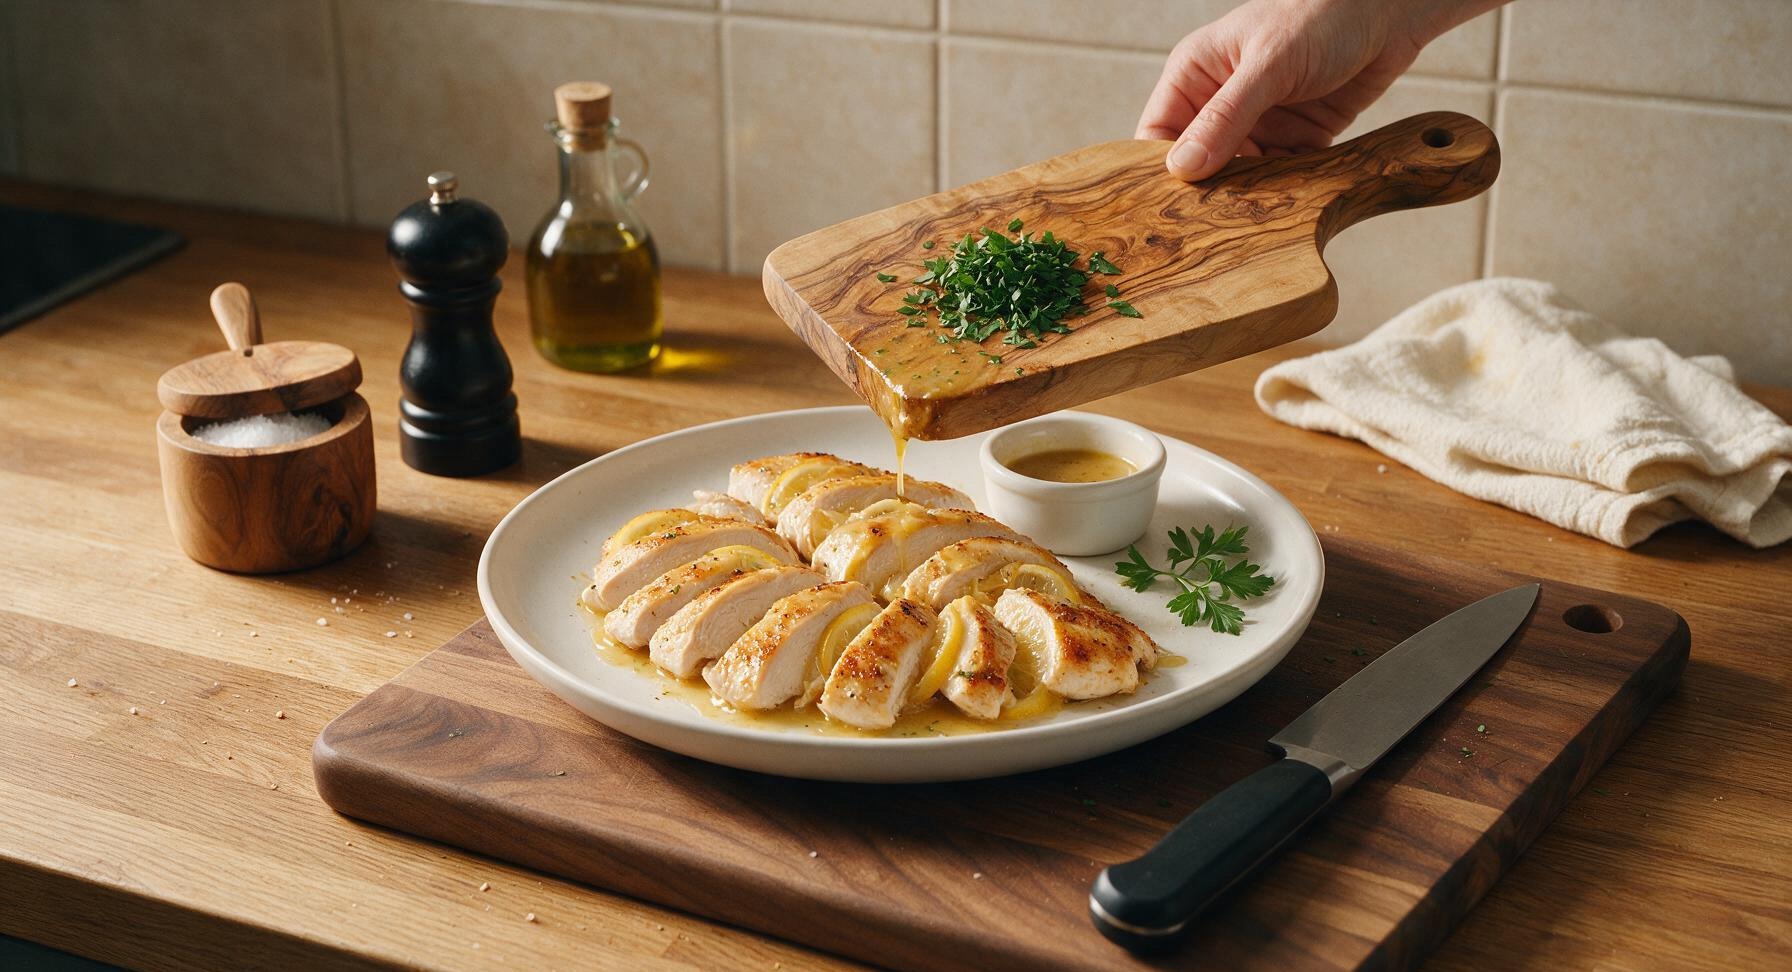
Step 7
step7:Plate and Garnish Dish

Tips

1.Pounding chicken to a uniform 2.5cm thickness is non-negotiable: uneven breasts will have dry, overcooked thin ends by the time the thick center reaches safe temperature, leading to inconsistent texture.
2.Let the chicken rest for 3 full minutes after cooking: slicing immediately causes all the hot, flavorful juices to run out onto the plate instead of staying in the meat, resulting in dry chicken.
3.Avoid scraping the white lemon pith when zesting: the pith contains bitter compounds that will make your pan sauce taste sharp and unpleasant, so only remove the thin, bright yellow outer zest layer.


✨ You May Also Like

Main Course
🍜 United Kingdom

A showstopping classic of tender seared beef, savory mushroom duxelles, and crisp prosciutto wrapped in flaky golden puff pastry, baked to juicy perfection.

⏱️ 2 hours 1Main Course ★ 4.7
Main Course
🍜 India

Tender charred marinated chicken simmered in a rich, spiced creamy tomato sauce, this iconic Anglo-Indian curry pairs perfectly with basmati rice or warm naan.

⏱️ 50 minuteMain Course ★ 4.6
Main Course
🍜 Thailand

Classic tangy, sweet, and savory Thai stir-fried rice noodles with shrimp, tofu, and crunchy garnishes, balancing all five core Thai flavor profiles.

⏱️ 30 minuteMain Course ★ 4.5
Main Course
🍜 United Kingdom

Crispy golden beer-battered cod and fluffy double-fried chips, served with tangy tartar sauce and malt vinegar: the timeless, beloved British pub comfort classic.

⏱️ 45 minuteMain Course ★ 4.7
Main Course
🍜 Mexico

Smoky, chile-marinated pork tacos with caramelized pineapple, fresh cilantro, and lime: a beloved classic Mexican street food perfect for casual summer gatherings.

⏱️ 1 hour 45Main Course ★ 4.8
Main Course
🍜 United States

Crunchy Fritos corn chips layered with savory beef chili and melted cheddar, topped with cool, zesty fixings for a beloved, cozy Tex-Mex comfort food.

⏱️ 35 minuteMain Course ★ 4.8

lemon chicken breast:Frequently Asked Questions

1.How do I keep my pan-seared lemon chicken breasts from drying out? ▾
First, pound your breasts to a uniform 1-inch thickness so thin edges don’t overcook before the center is done. Pat them completely dry before searing, cook to an internal temperature of 165°F at the thickest point, and let them rest 5 full minutes after cooking to lock in juices before slicing.
2.Do I really need to pound the chicken breasts to an even thickness? ▾
Absolutely! Most store-bought breasts are tapered, with a thin point and thick bulb end. Pounding to a consistent 1-inch thickness means every section cooks at the same rate, so you won’t end up with overcooked, rubbery thin bits and undercooked thick centers that ruin the dish.
3.Why do I need to pat the chicken dry before searing? ▾
Excess surface moisture on chicken creates steam when it hits the hot pan, which prevents that crispy, golden-brown sear we all want. Pat breasts firmly on all sides with paper towels right before seasoning and dredging, and you’ll get that perfect, evenly browned crust every time.
4.What’s the purpose of dredging the chicken in all-purpose flour? ▾
The thin flour coating does two key jobs: first, it creates a light, crisp outer layer that adheres to the chicken as it sears, and second, it helps thicken the bright lemon butter pan sauce just enough so it coats each bite beautifully, instead of running right off onto your plate.
5.Can I use boneless, skinless chicken thighs instead of breasts for this recipe? ▾
You absolutely can! Thighs have a slightly richer, more forgiving texture that’s hard to overcook, so they’re a great swap if you prefer dark meat. Keep the same 1-inch thickness, adjust cook time slightly to hit 165°F internal, and follow all the same searing and sauce steps.
6.How hot should my pan be to get a good sear without burning the butter? ▾
Heat your pan over medium-high first, add the olive oil, and wait until it shimmers before adding chicken. Save the butter for the sauce stage after searing both sides of the chicken—this keeps butter’s milk solids from burning at high heat, while still delivering that rich, creamy sauce flavor.
7.How long do I need to sear each side of the chicken? ▾
For 1-inch thick, evenly pounded breasts, sear 4 to 5 minutes per side without moving the chicken once you set it in the pan. Resist the urge to poke or lift it early to let the golden crust form properly, and always verify doneness with an instant-read thermometer.
8.What kind of lemon works best for the bright pan sauce? ▾
Fresh, ripe Eureka or Meyer lemons work perfectly here—skip bottled lemon juice, which has a flat, bitter aftertaste that doesn’t match fresh citrus zing. Zest the lemon first before squeezing for extra aromatic punch, and strain out any seeds to avoid bitter bites in the sauce.
9.How do I keep the garlic from burning when I make the pan sauce? ▾
After pulling the seared chicken out of the pan, turn the heat down to medium-low before adding minced garlic. Cook it for just 30 seconds, stirring constantly, until it smells fragrant. If it turns dark brown or smells acrid, it’s burnt and will make the sauce bitter, so start that step over.
10.Can I make this recipe gluten-free? ▾
Definitely! Simply swap the all-purpose flour for a 1:1 gluten-free all-purpose flour blend, or use a light coating of cornstarch if that’s what you have on hand. The coating will still create a nice sear and help thicken the lemon butter sauce just as well as regular wheat flour.
11.Why is my pan sauce coming out watery instead of coating the chicken? ▾
That usually happens if you don’t let the sauce simmer for 1 to 2 minutes after adding the lemon juice and butter. The residual flour from the chicken dredge will thicken the sauce as it simmers, so stir it and let it reduce slightly until it coats the back of a spoon before serving.
12.Do I need to use a cast iron skillet for this recipe? ▾
No, you don’t need special equipment! A heavy-bottomed stainless steel skillet works just as well, as long as it retains heat evenly. Avoid thin, flimsy nonstick pans for searing, since they often can’t hold the high heat needed for a crisp golden crust without steaming the chicken.
13.Can I prep this chicken ahead of time for quick weeknight meals? ▾
You can prep components ahead to cut down on cook time: pound the chicken, pat it dry, and store it covered in the fridge up to 24 hours in advance. Wait to dredge in flour until right before searing, though—coating it too early makes the flour gummy and ruins the crisp crust.
14.What herbs pair best with this lemon chicken if I want extra flavor? ▾
Soft, fresh herbs like chopped parsley, thyme, or a tiny bit of rosemary work beautifully with the bright lemon and butter flavors. Add them right at the end of making the pan sauce so their delicate flavor doesn’t cook off. Use 1/3 the amount if substituting dried herbs, since they’re more concentrated.
15.How do I know when the chicken is fully cooked without cutting into it? ▾
The most reliable method is an instant-read thermometer inserted into the thickest part of the breast, which should read 165°F. If you don’t have a thermometer, press the center gently: it should feel firm, not squishy, and any running juices should be clear, not light pink.
16.Can I add vegetables to the pan to make this a one-pan meal? ▾
Absolutely! Toss quick-cooking veggies like asparagus spears, thin green beans, or halved cherry tomatoes in a little olive oil, and add them to the pan during the last 6 to 8 minutes of chicken cook time. They’ll soak up all that delicious lemon, garlic, and butter flavor for minimal cleanup.
17.Why does my chicken stick to the pan when I try to sear it? ▾
Chicken usually sticks for one of three reasons: your pan isn’t hot enough, you tried to move the chicken too early before the crust formed, or you didn’t pat the chicken dry enough before adding it. Wait until oil shimmers, set chicken down, and don’t nudge it for 4 minutes—it will release on its own.
18.How should I store and reheat leftover pan-seared lemon chicken? ▾
Let leftover chicken cool completely, then store it in an airtight container in the fridge for up to 3 days. To reheat without drying it out, warm it gently in a skillet over low heat with a splash of chicken broth, covered, until it hits 165°F internal. Skip high-heat microwaving, which makes chicken rubbery.

Comments (8)

2 days ago

OMG this lemon chicken is SO good! I made it for family dinner last night and my picky 7 year old asked for seconds, which never happens. The pan sear gives the chicken such a perfect crispy edge and the lemon flavor is bright without being overpowering. Total weeknight win, especially since it only takes 18 minutes! I served it with roasted broccoli and rice, everyone cleaned their plates.

yesterday

Wait did you pound the chicken breasts to even thickness first? I always struggle with uneven cooking when I pan sear chicken!

2 hours ago

So happy your family loved it! Great question from Jake too - we definitely recommend pounding the thickest part of the breast to about 1-inch thickness so it cooks evenly without drying out the thinner edges!

1 week ago

Total game changer for my Sunday meal prep! I was so sick of dry, bland chicken breast for my work lunches, but this recipe stays juicy even after I reheat it in the office microwave. I tossed in a little extra garlic and a pinch of red pepper flakes for a tiny kick, and it’s chef’s kiss. Super easy too, no fancy equipment needed.

5 days ago

Love that this works for your meal prep! The red pepper flakes add such a nice subtle heat, great tweak. So glad you’re not stuck with dry chicken anymore!

yesterday

Really solid weeknight recipe! Only reason it’s 4 stars instead of 5 is I wished the lemon sauce was a little thicker, next time I might add a tiny pat of butter at the end to emulsify it a bit more. The chicken itself was perfectly juicy though, no dry bites at all, which I feel like is half the battle with chicken breast.

30 minutes ago

Just finished making this for a potluck at my church tomorrow and I almost ate half the pan while testing it lmao. The lemon aroma filled my whole kitchen, it smells like summer. I’m thinking of topping it with a little fresh parsley when I serve it, do you think that would work well?

5 minutes ago

I made this last week and added fresh parsley and a little lemon zest on top! It looked so pretty and added an extra pop of citrus, highly recommend

just now

Fresh parsley is such a great call, it adds such a bright, fresh contrast to the seared chicken! I know everyone at the potluck is going to rave about this, thanks for making it!

5 days ago

SO easy even I can’t mess it up, and I burn toast 90% of the time. My partner has been asking me to make it again every night since I made it last week. We paired it with roasted asparagus and mashed cauliflower, it felt like a fancy restaurant meal for half the effort and cost.

3 days ago

Wait how high did you have your heat for the sear? I keep setting my stove too high and burning the outside before the chicken is cooked through

just now

Made this after a long hike today and it hit the spot! Light, flavorful, and didn’t take forever to make after being out all day. I used Meyer lemons from my neighbor’s tree and it was chef’s kiss, will absolutely be adding this to my regular rotation.

2 hours ago

This is a really tasty base recipe! I added a little bit of fresh thyme from my garden and it paired so nicely with the lemon. My only note is that I needed to cook my breasts a couple minutes longer than the recipe said, probably because mine were a little thicker than average. Still turned out great though!

30 minutes ago

Fresh thyme sounds amazing with the lemon, what a delicious addition! You’re totally right that thicker breasts will need an extra couple of minutes - the best way to check is to make sure the internal temp hits 165°F at the thickest part. Thanks for the great note!

3 days ago

My kids loved this! I was worried the lemon would be too tart for them, but it’s the perfect balance of bright and savory. I’ve already shared the recipe with my whole mom group chat, everyone is always looking for quick weeknight dinners that don’t require a million ingredients. 10/10!

2 days ago

That makes me so excited to try this! My twins are super sensitive to tart flavors too, so I’ve been holding off on lemon chicken recipes. Quick question - does bottled lemon juice work okay here? I don’t have time to run to the store for fresh lemons tonight!

yesterday

So glad your kids enjoyed it! Bottled lemon juice works totally fine in a pinch - you’ll still get that great lemon flavor, fresh just gives it a little extra zing. Hope BusyMomofTwins and her twins love it too when they make it! Thanks so much for sharing the recipe with your group.



