
Mac and Cheese Grilled Cheese

title 1
Mac and Cheese Grilled Cheese
⏱️ cook time 20 minutes
🍽️ servings 4
⚡ Difficulty easy

intro

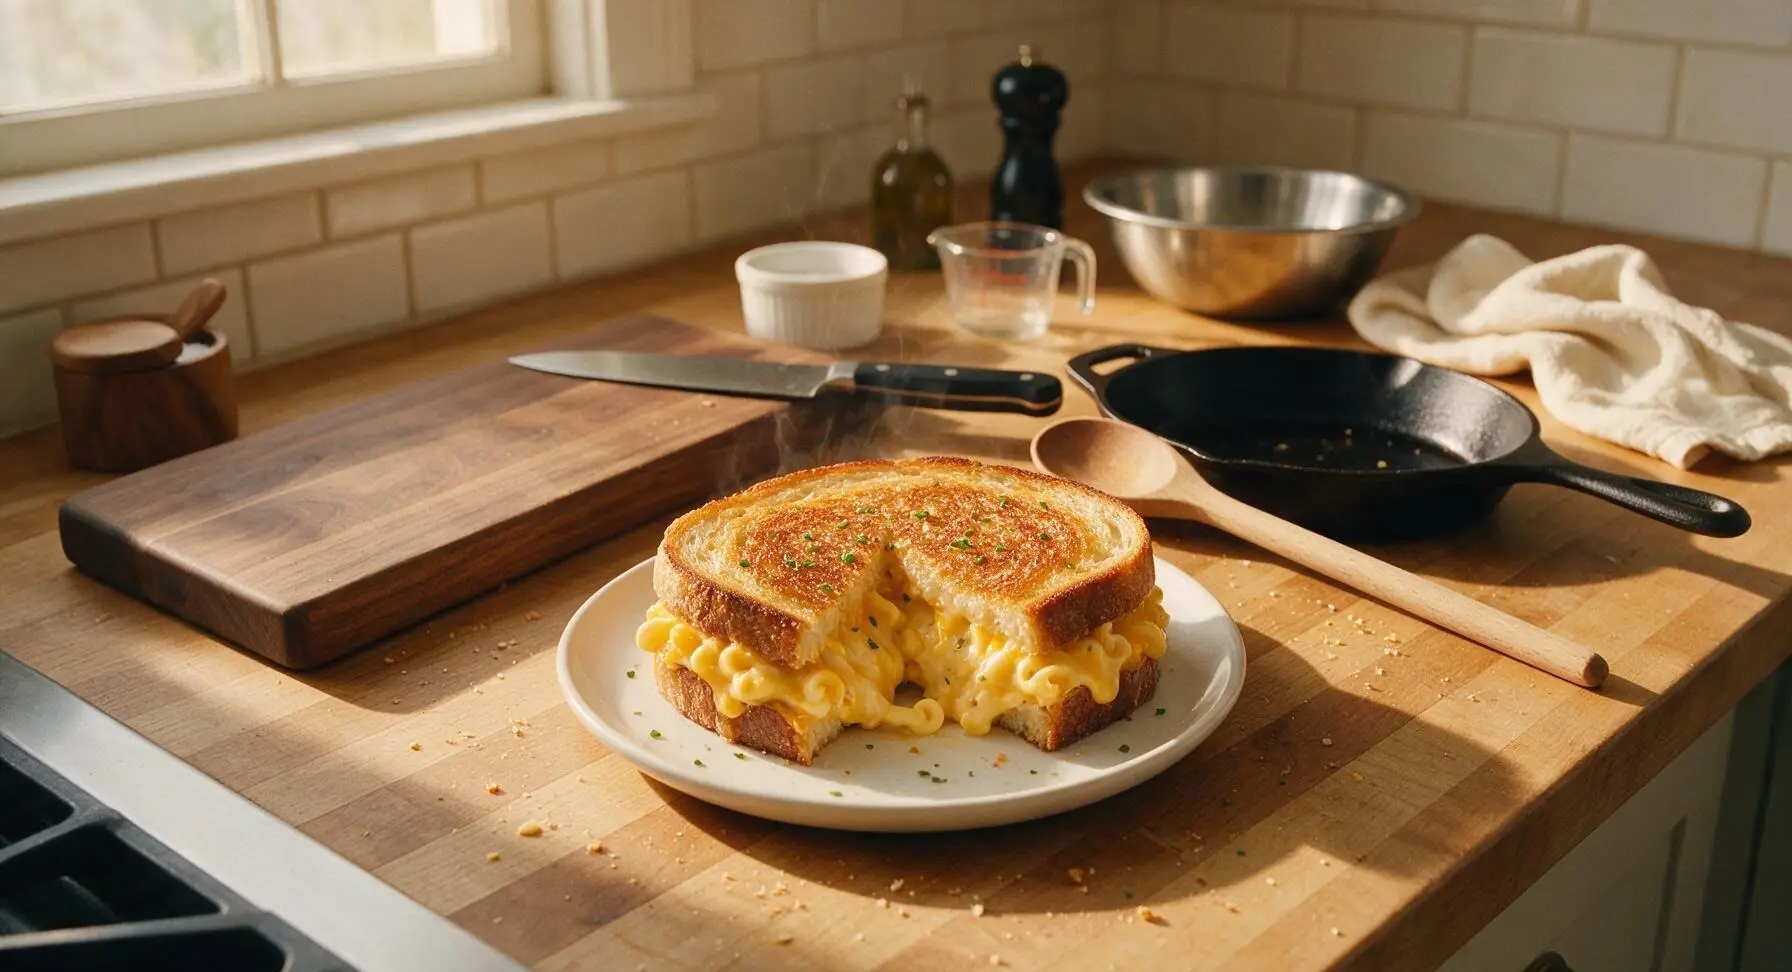
The ultimate indulgent American comfort food mashup: creamy, gooey stovetop mac and cheese sandwiched between buttery, crispy toasted sourdough with melted sharp cheddar in every bite.

Ingredients
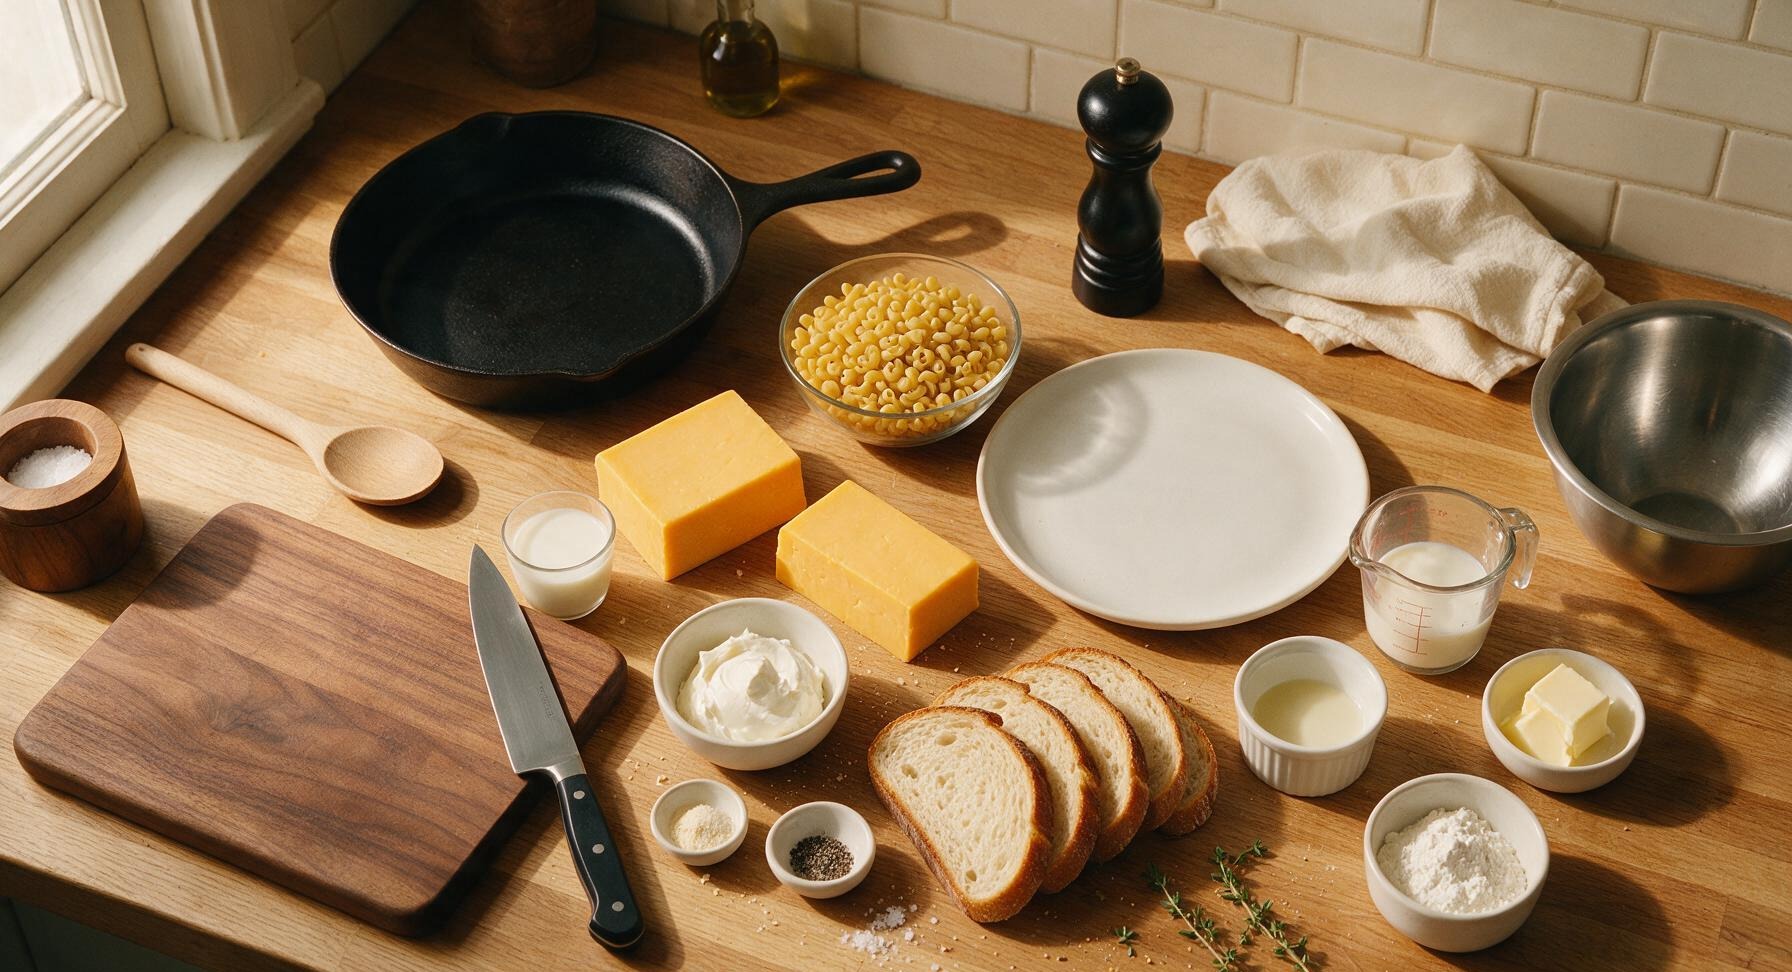
Dry elbow macaroni 115g (1 cup)
Sharp yellow cheddar cheese 225g (8 oz, divided)
Thick-cut sourdough bread 8 slices (1.5cm thick)
Whole milk 120ml (1/2 cup)
Cream cheese, softened 55g (2 oz)
Unsalted butter 55g (4 tbsp, divided)
All-purpose flour 1 tbsp
Garlic powder 1/4 tsp
Flaky sea salt 1 tsp, divided
Freshly ground black pepper 1/4 tsp
Fresh thyme sprigs 4 small sprigs (for garnish)

Steps

1

Cook Elbow Macaroni

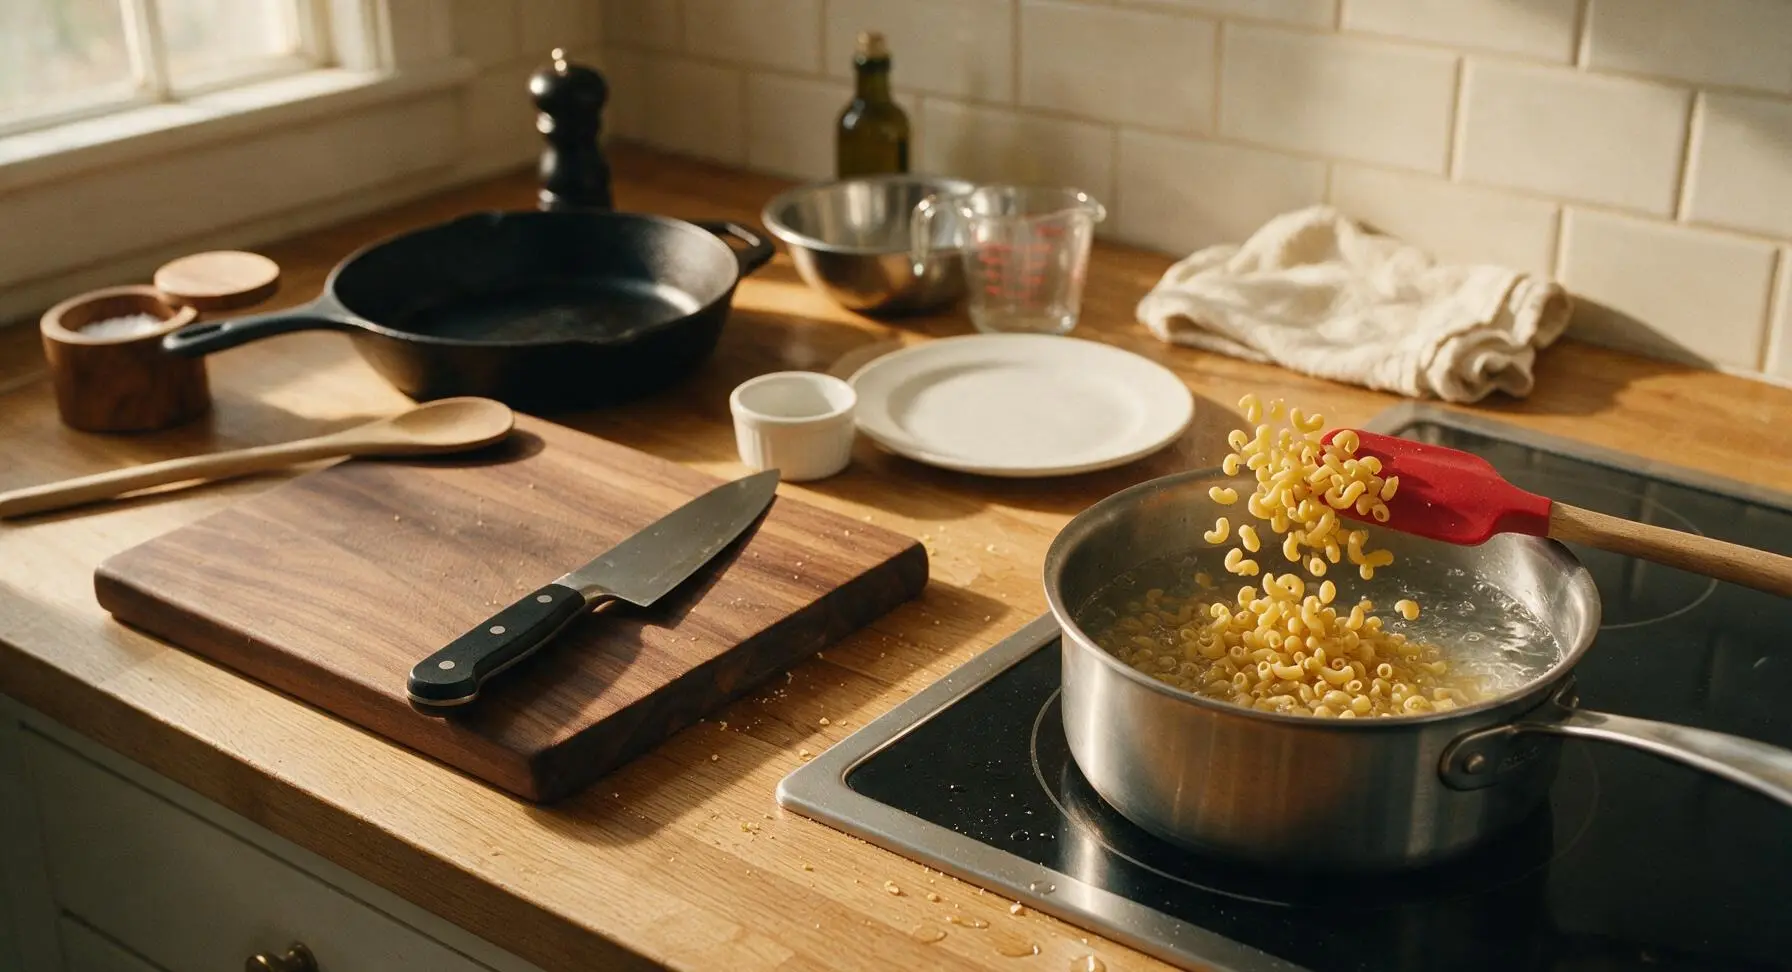
Fill the 1-quart brushed stainless steel saucepan with 500ml water, add 1/2 tsp flaky sea salt, and place on the induction burner over medium-high heat. Bring to a rolling boil, then add 115g dry elbow macaroni, stirring once with the red silicone spatula to prevent sticking. Cook for 7 minutes until al dente: the pasta will be firm to the bite with no raw white core when you bite into a piece. Drain thoroughly and set aside; do not rinse the pasta, as residual starch helps the cheese sauce cling.
Step 1
step1:Cook Elbow Macaroni
2

Make Creamy Cheese Sauce

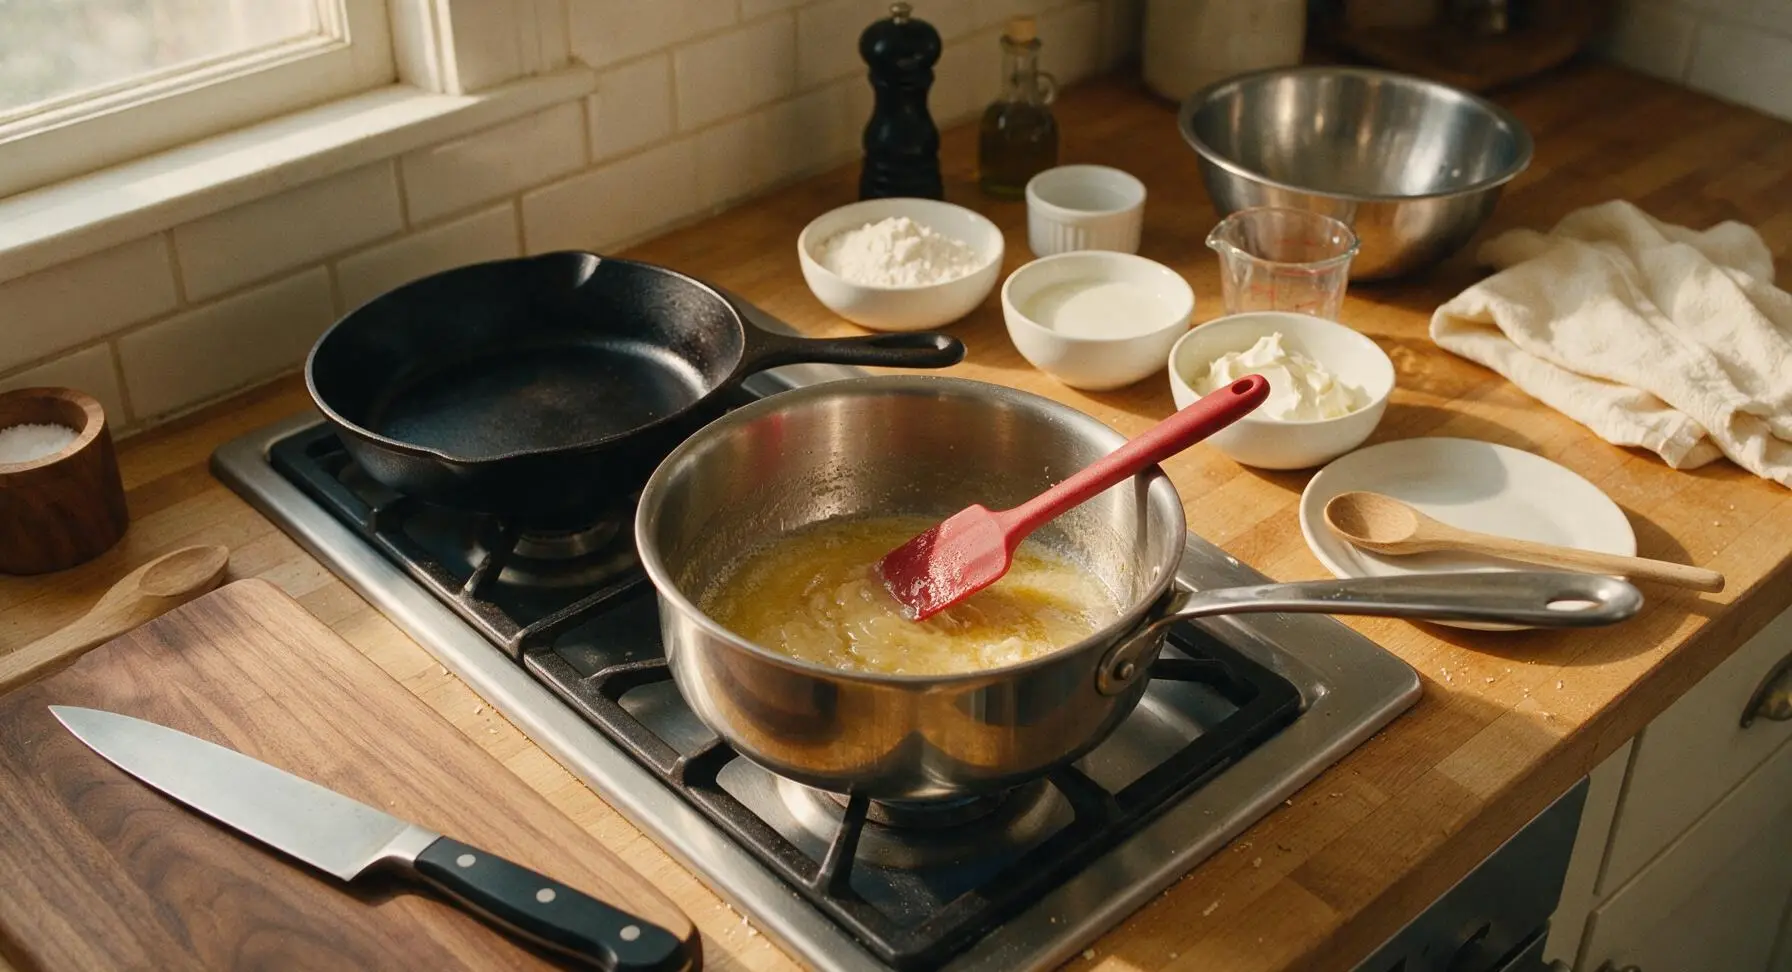
Return the empty stainless steel saucepan to the burner over medium-low heat. Melt 1 tbsp of unsalted butter in the pan, then whisk in 1 tbsp all-purpose flour, stirring constantly with the silicone spatula for 1 full minute to form a smooth, pale golden roux that smells faintly of toasted nuts. Slowly pour in 120ml whole milk, stirring continuously to prevent lumps, and cook for 3-4 minutes until the sauce thickens enough to leave a clear path when you run a finger across the spatula-coated back. Add 55g softened cream cheese, 115g of grated sharp cheddar, 1/4 tsp garlic powder, remaining 1/2 tsp flaky sea salt, and 1/4 tsp black pepper, stirring until completely smooth with no visible cheese lumps.
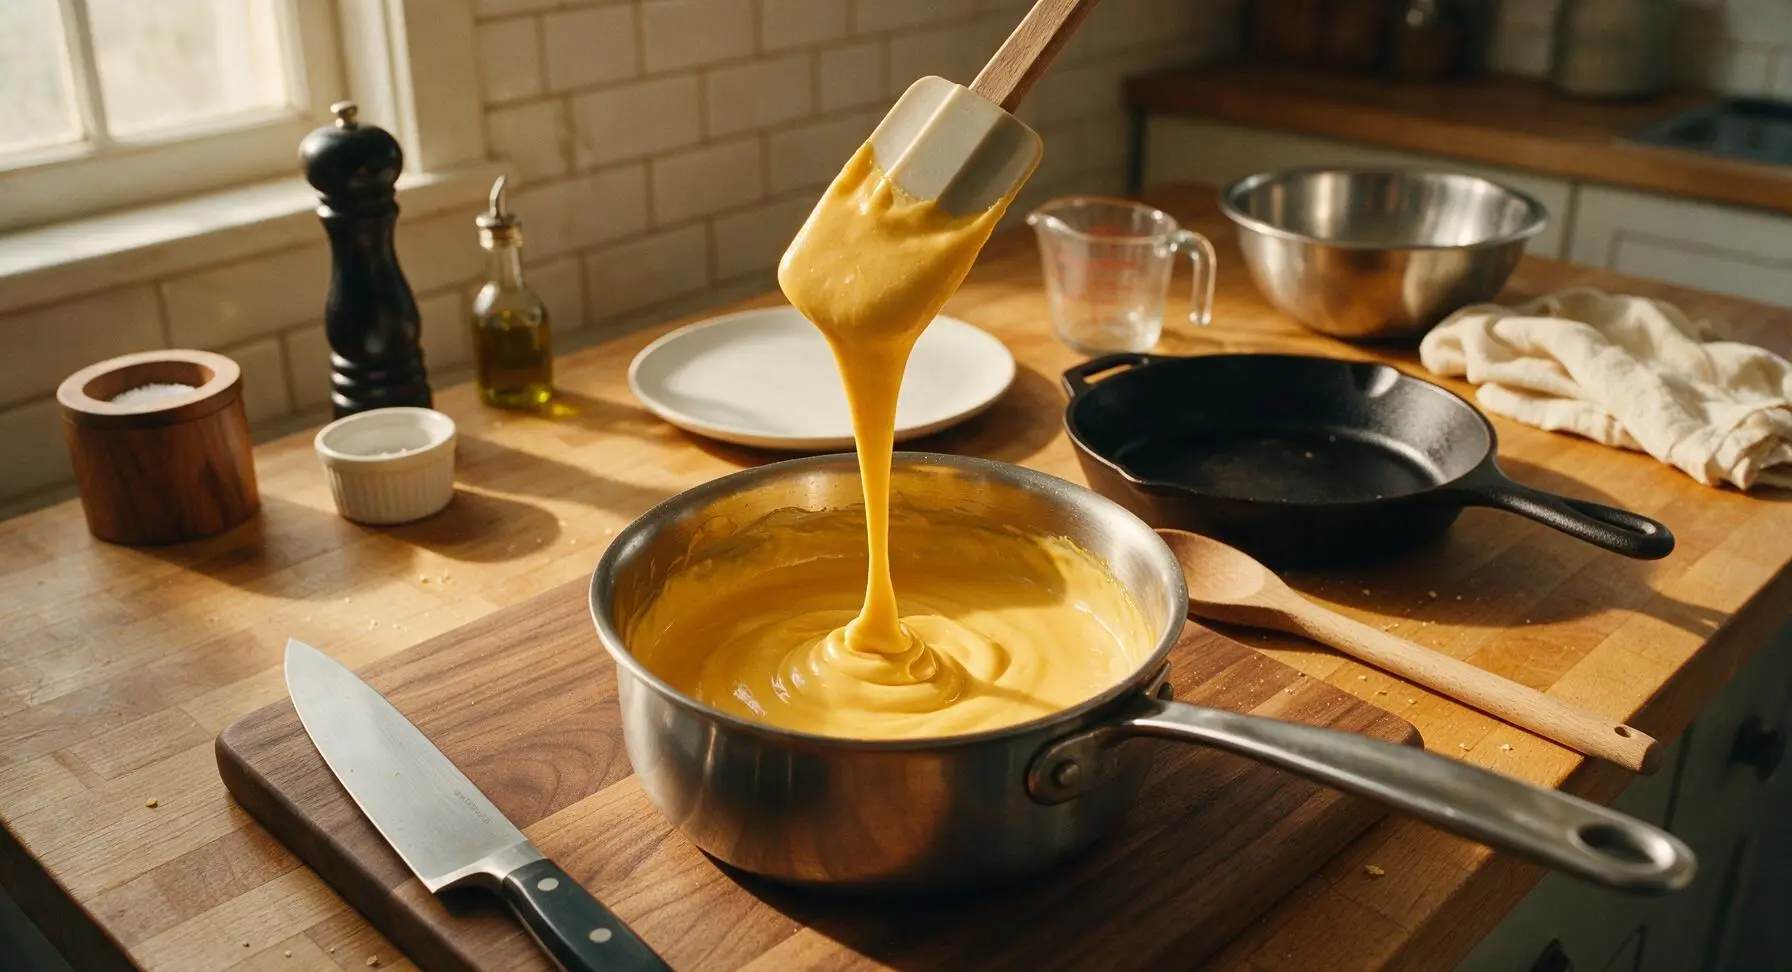
Step 2
step2:Make Creamy Cheese Sauce
Step 2
step2:Make Creamy Cheese Sauce
3

Combine Mac and Cheese

Add the fully drained, cooked elbow macaroni to the pan of finished cheese sauce, folding gently with the silicone spatula until every elbow noodle is evenly coated in thick cheese sauce. Pull the pan off the heated burner to the cool section of the counter, and let the mac and cheese rest for 5 minutes to thicken; this prevents runny filling from oozing out of the sandwiches during toasting.
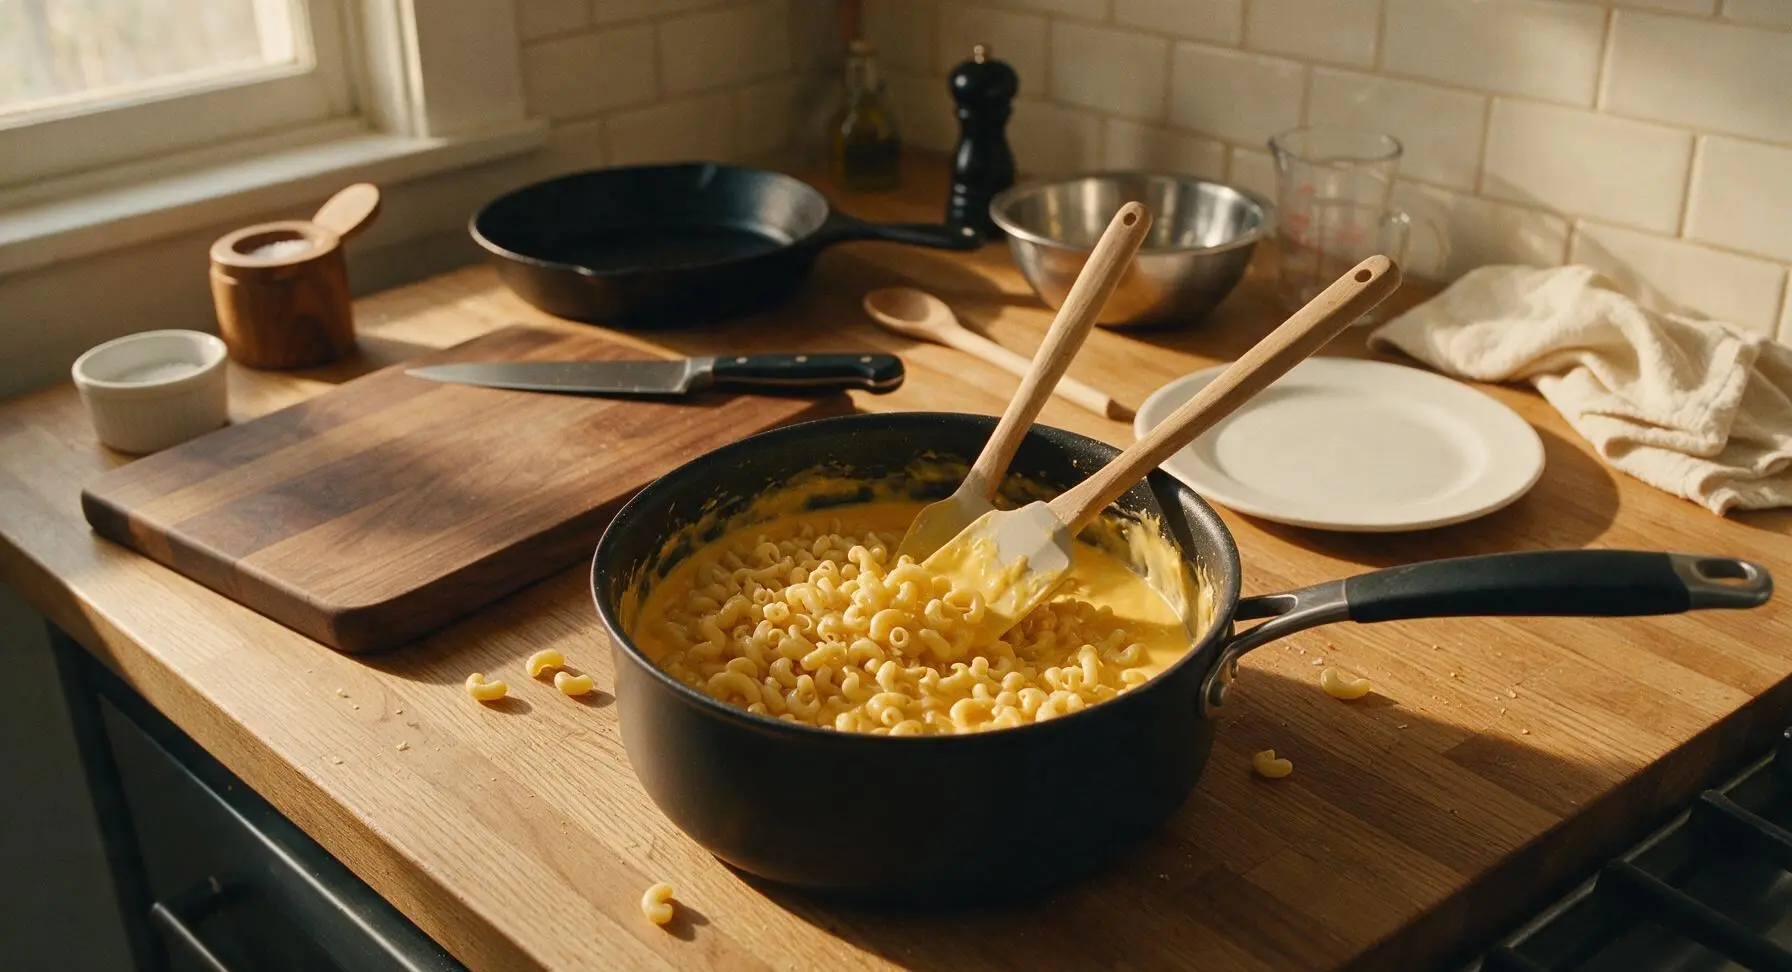
Step 3
step3:Combine Mac and Cheese
4

Prep Bread and Fillings

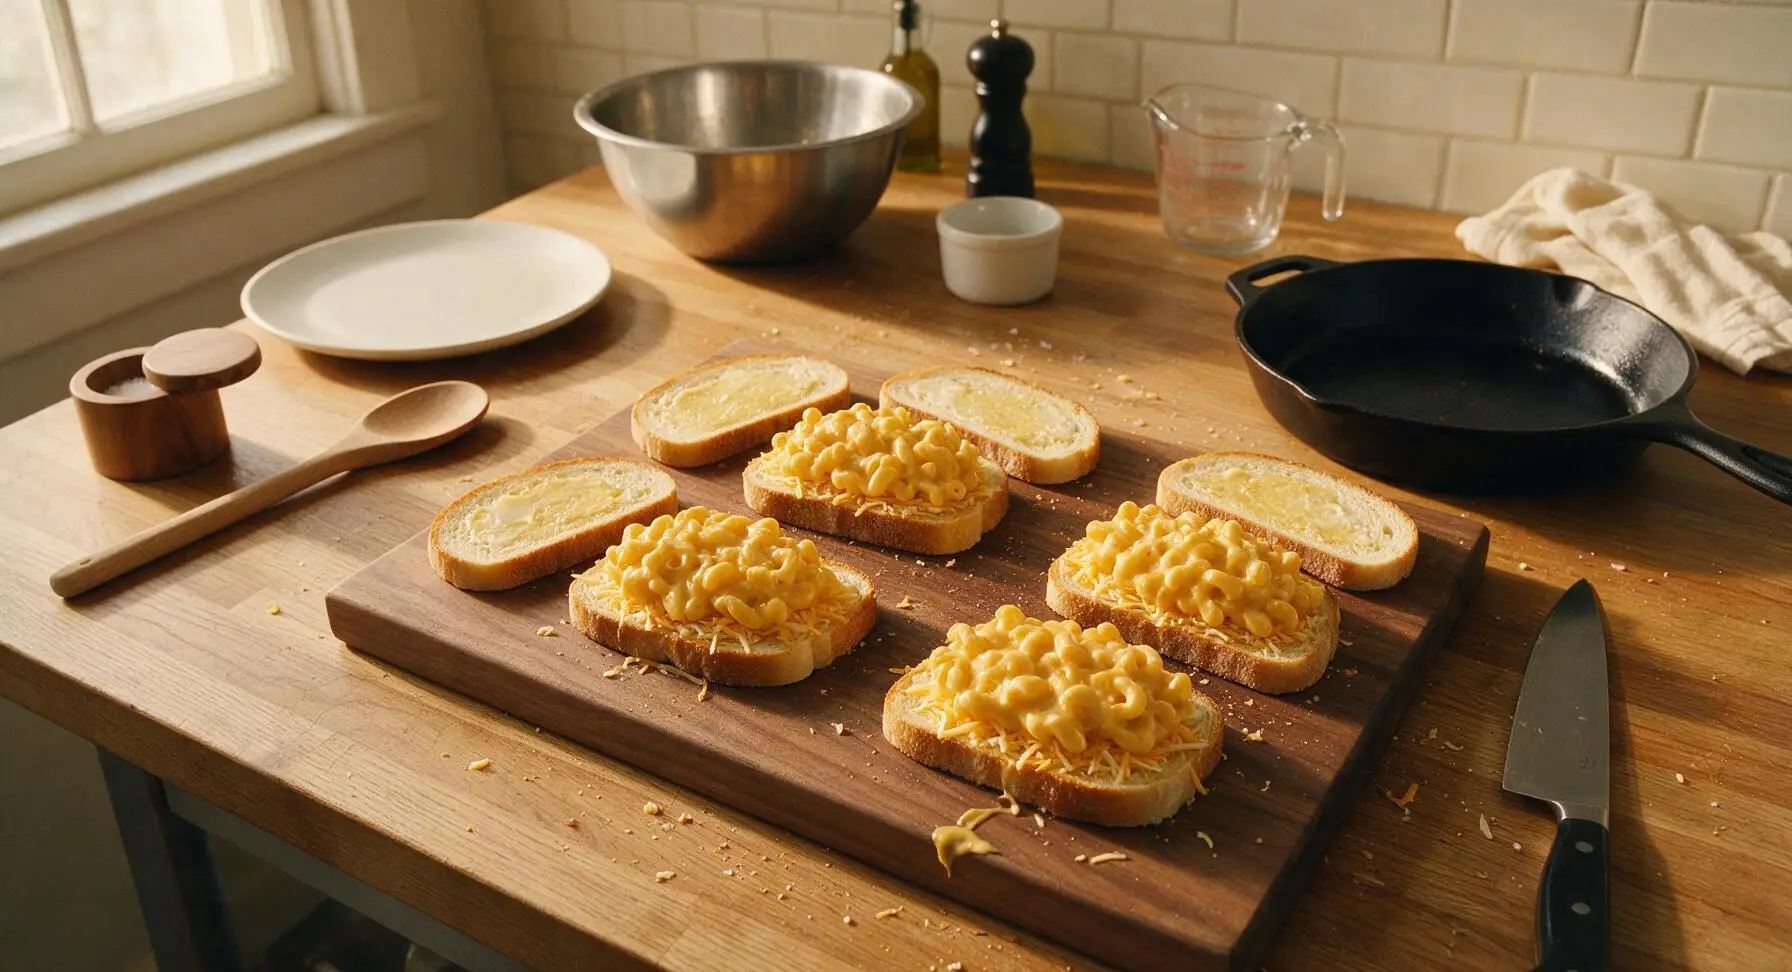
Place the large acacia wood cutting board in the center of the open counter workspace. Lay all 8 thick sourdough slices on the board in two neat rows. Use the 4-sided stainless steel box grater to grate the remaining 115g of sharp cheddar cheese, dividing the grated cheese into 8 equal small piles. Use the small stainless steel butter knife to spread 1/2 tbsp of softened unsalted butter across one outer side of every bread slice, coating edge to edge in a thin, even layer.
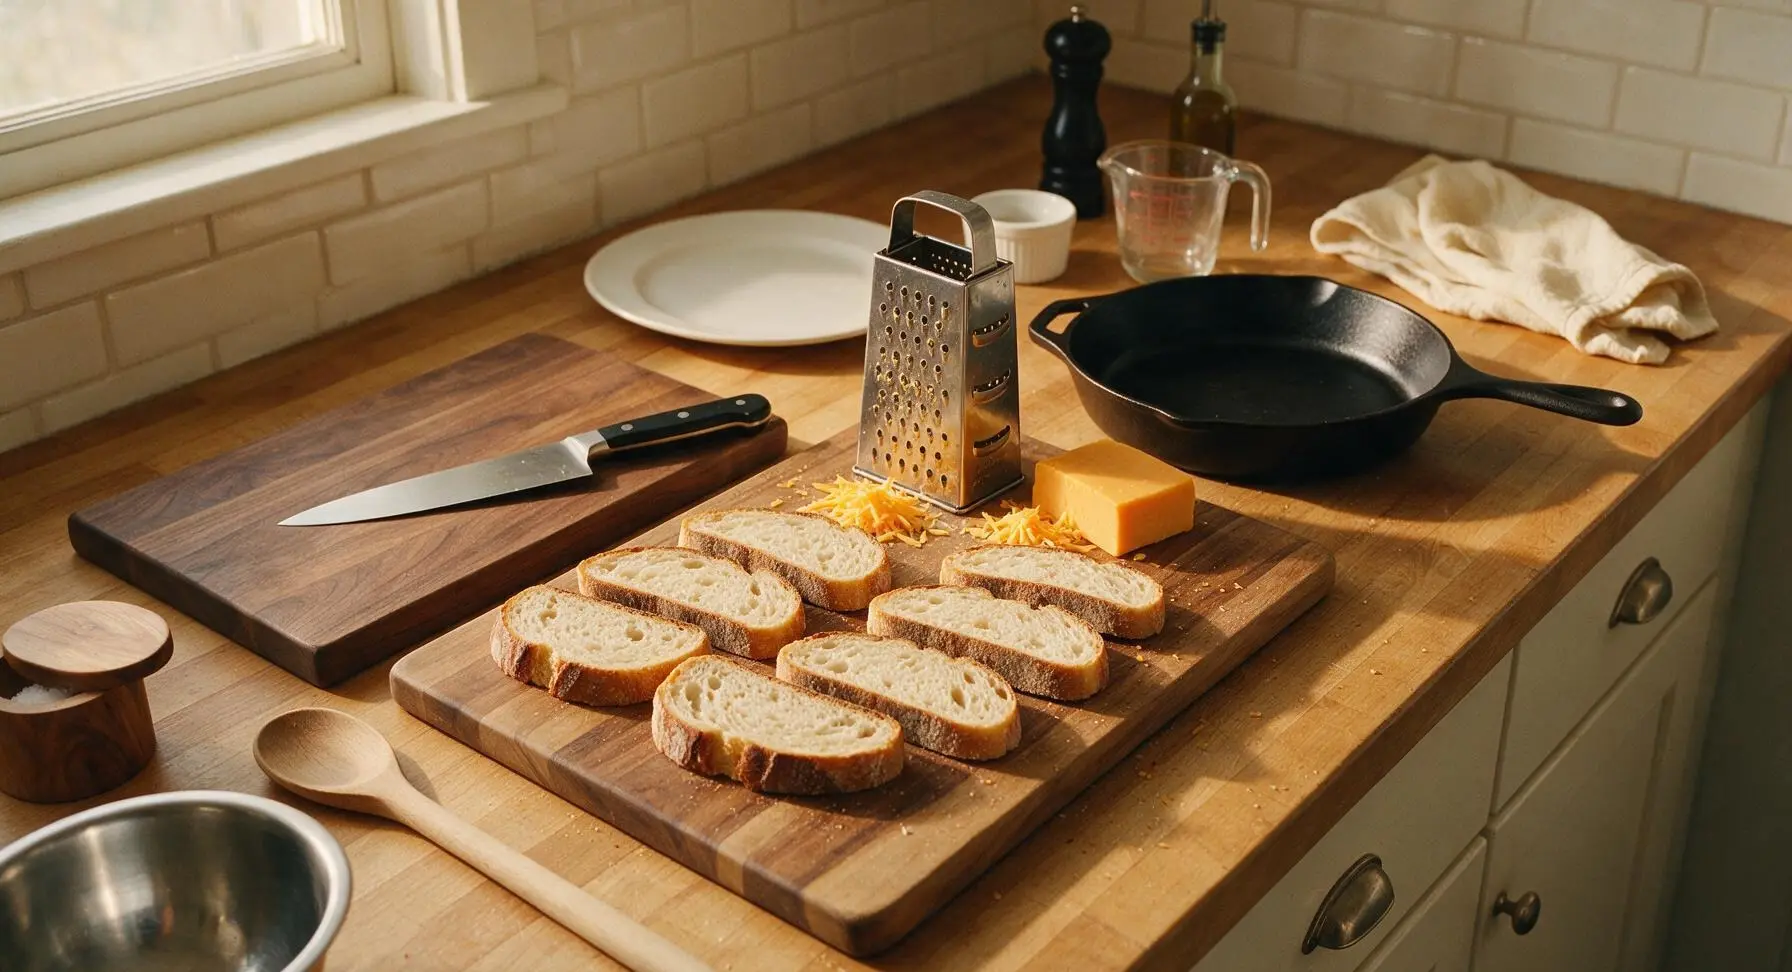
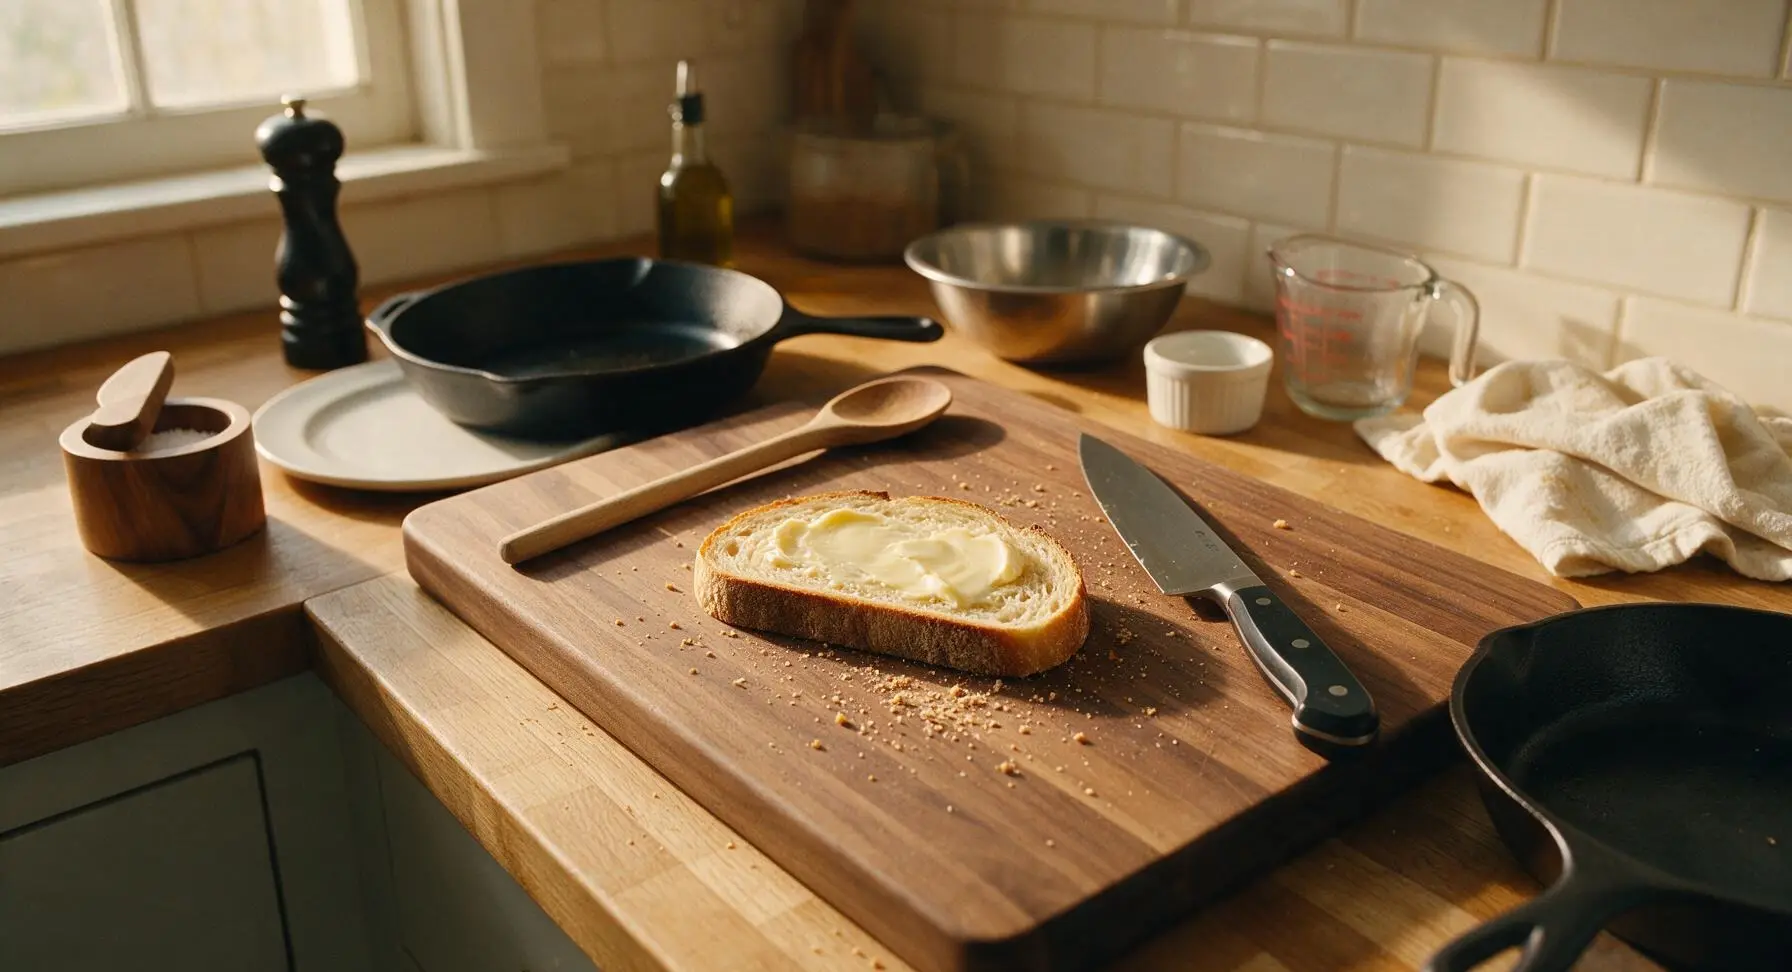
Step 4
step4:Prep Bread and Fillings
Step 4
step4:Prep Bread and Fillings
5

Assemble the Sandwiches

Flip 4 of the bread slices so their buttered sides face down against the cutting board. Top each of these base slices with one pile of grated cheddar, spreading it evenly to the edges. Scoop 1/4 of the thickened mac and cheese over the cheese layer, spreading it into a compact 1.5cm thick layer, then top with a second pile of grated cheddar. Place the remaining 4 bread slices on top, buttered side facing out, and press each sandwich firmly with the palm of your hand to seal the layers together.
Step 5
step5:Assemble the Sandwiches
6

Toast Sandwiches Until Crisp

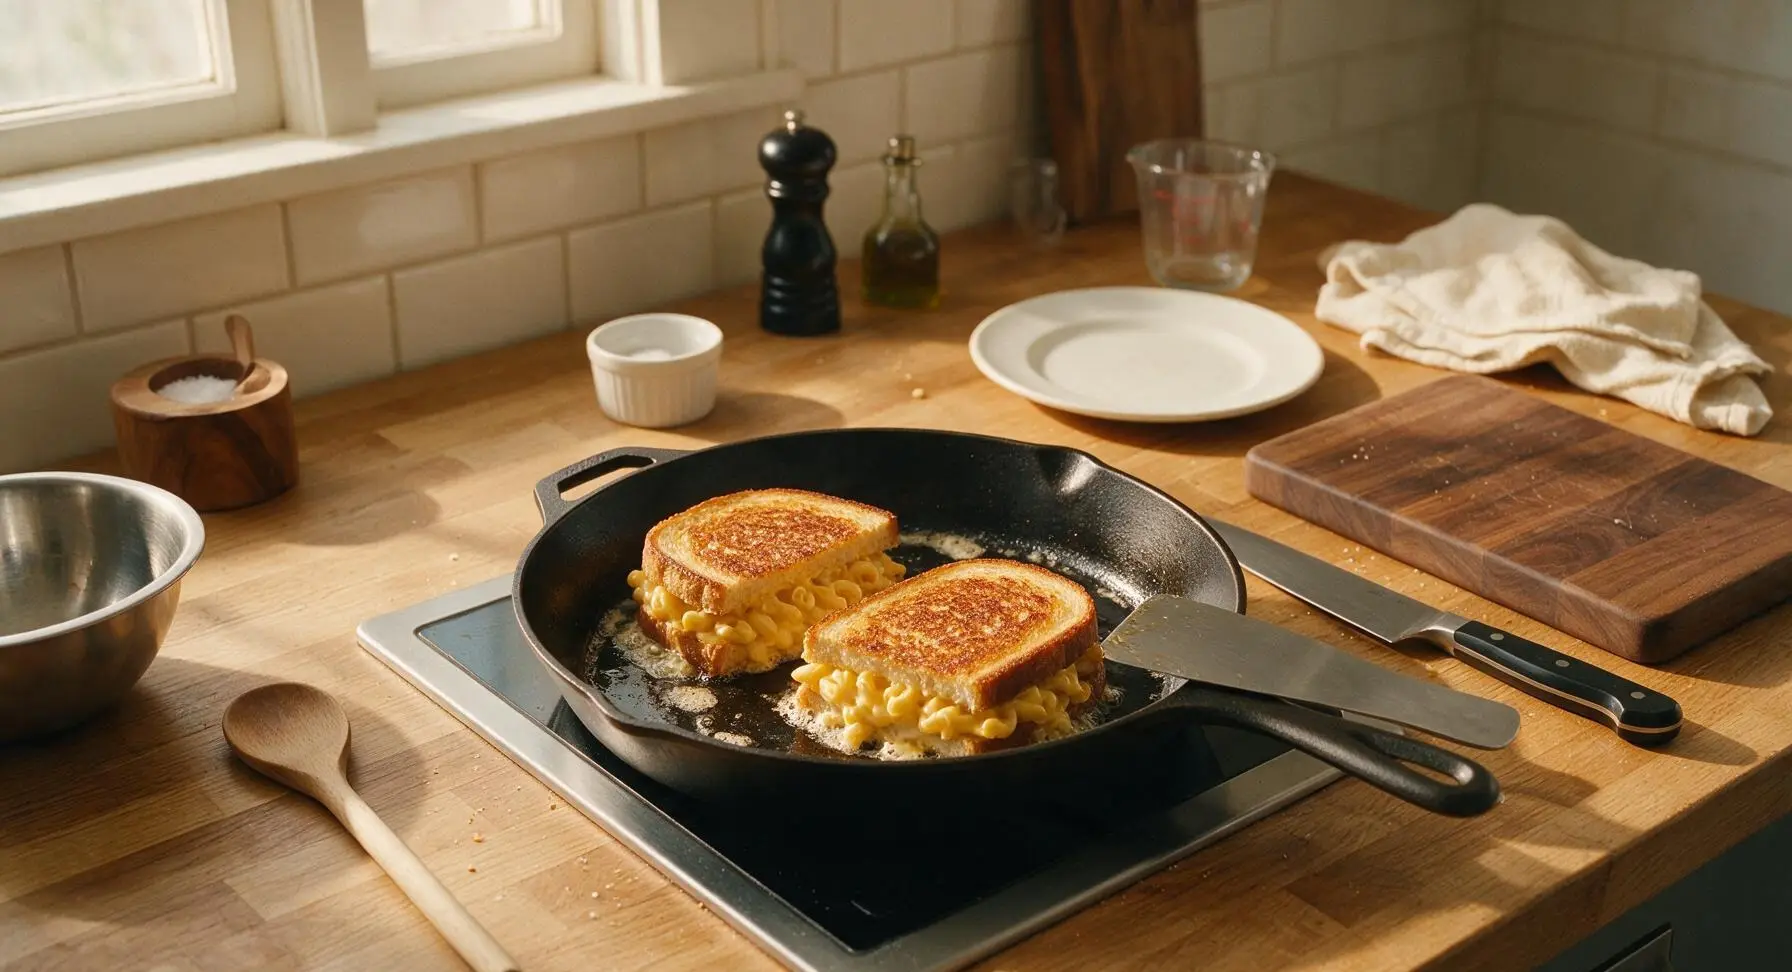
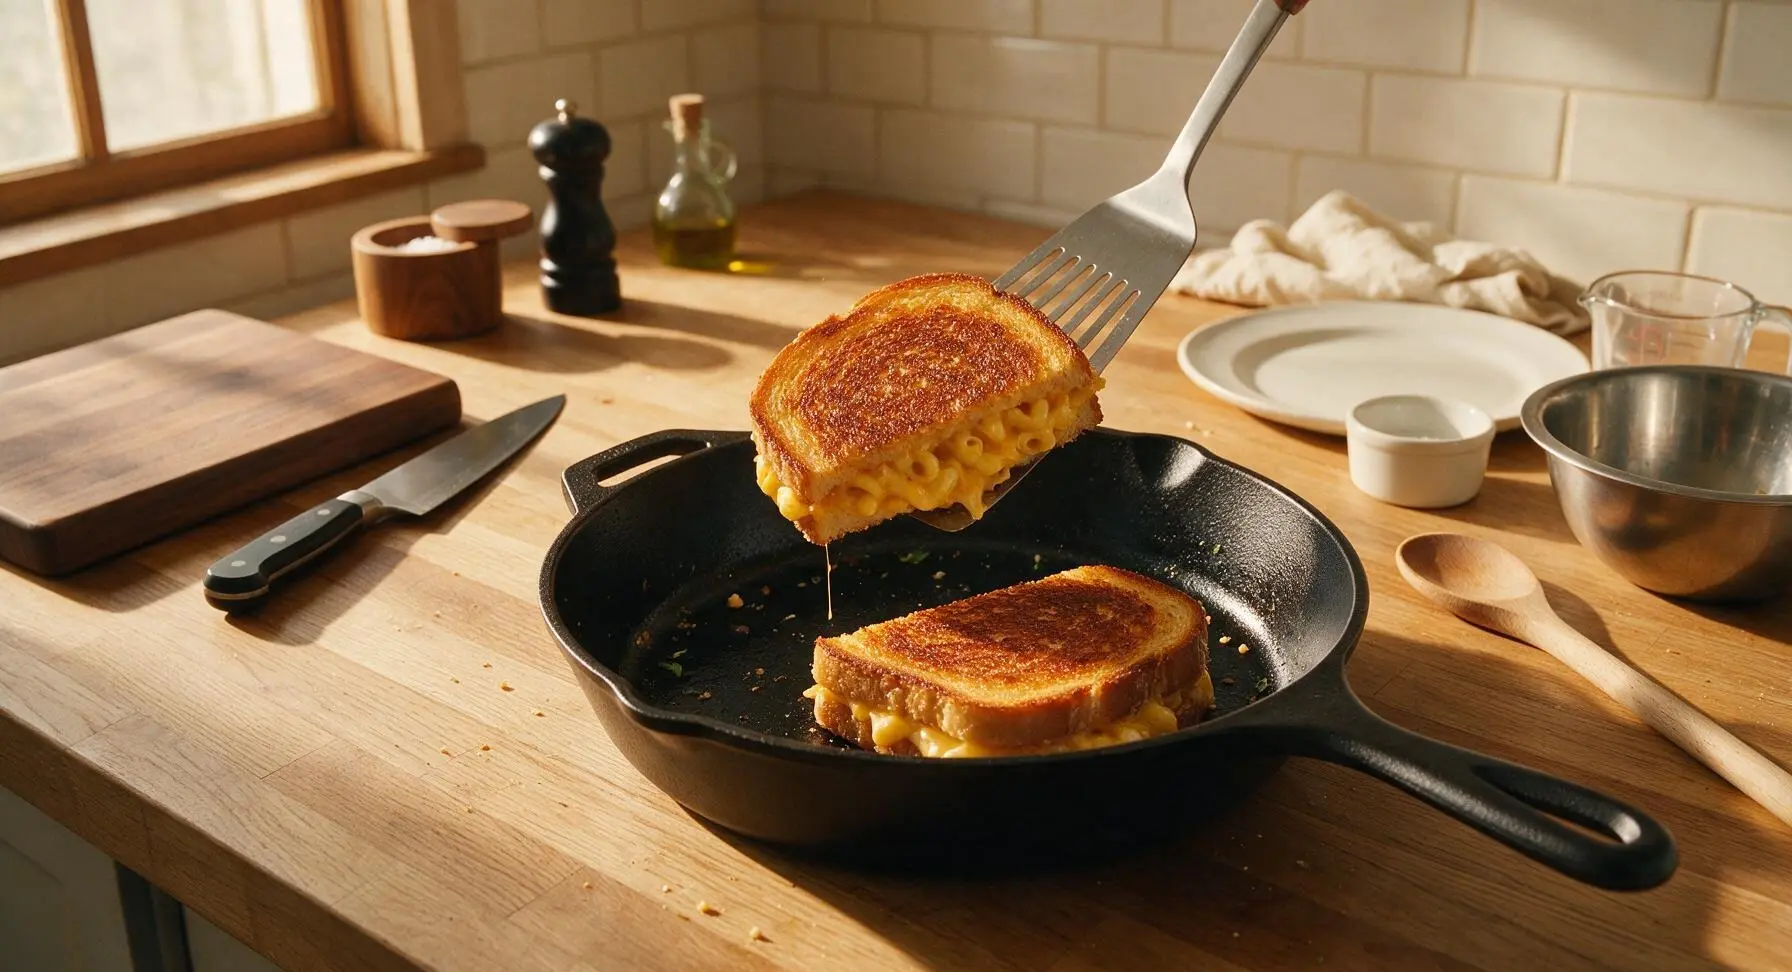
Place the 12-inch matte black carbon steel skillet on the second induction burner over medium-low heat. Test the pan temperature by sprinkling a single drop of water: it should sizzle and dance across the surface when ready. Place 2 assembled sandwiches in the pan, taking care not to crowd them. Cook for 4-5 minutes per side, using the flat stainless steel turner to flip once, until the bread is deep golden brown and crispy, and cheese is visibly oozing slightly from the sandwich edges. Add 1/2 tbsp of butter to the pan between batches if the surface looks dry, then repeat cooking with the remaining 2 sandwiches.
Step 6
step6:Toast Sandwiches Until Crisp
Step 6
step6:Toast Sandwiches Until Crisp
7

Rest, Cut, and Plate

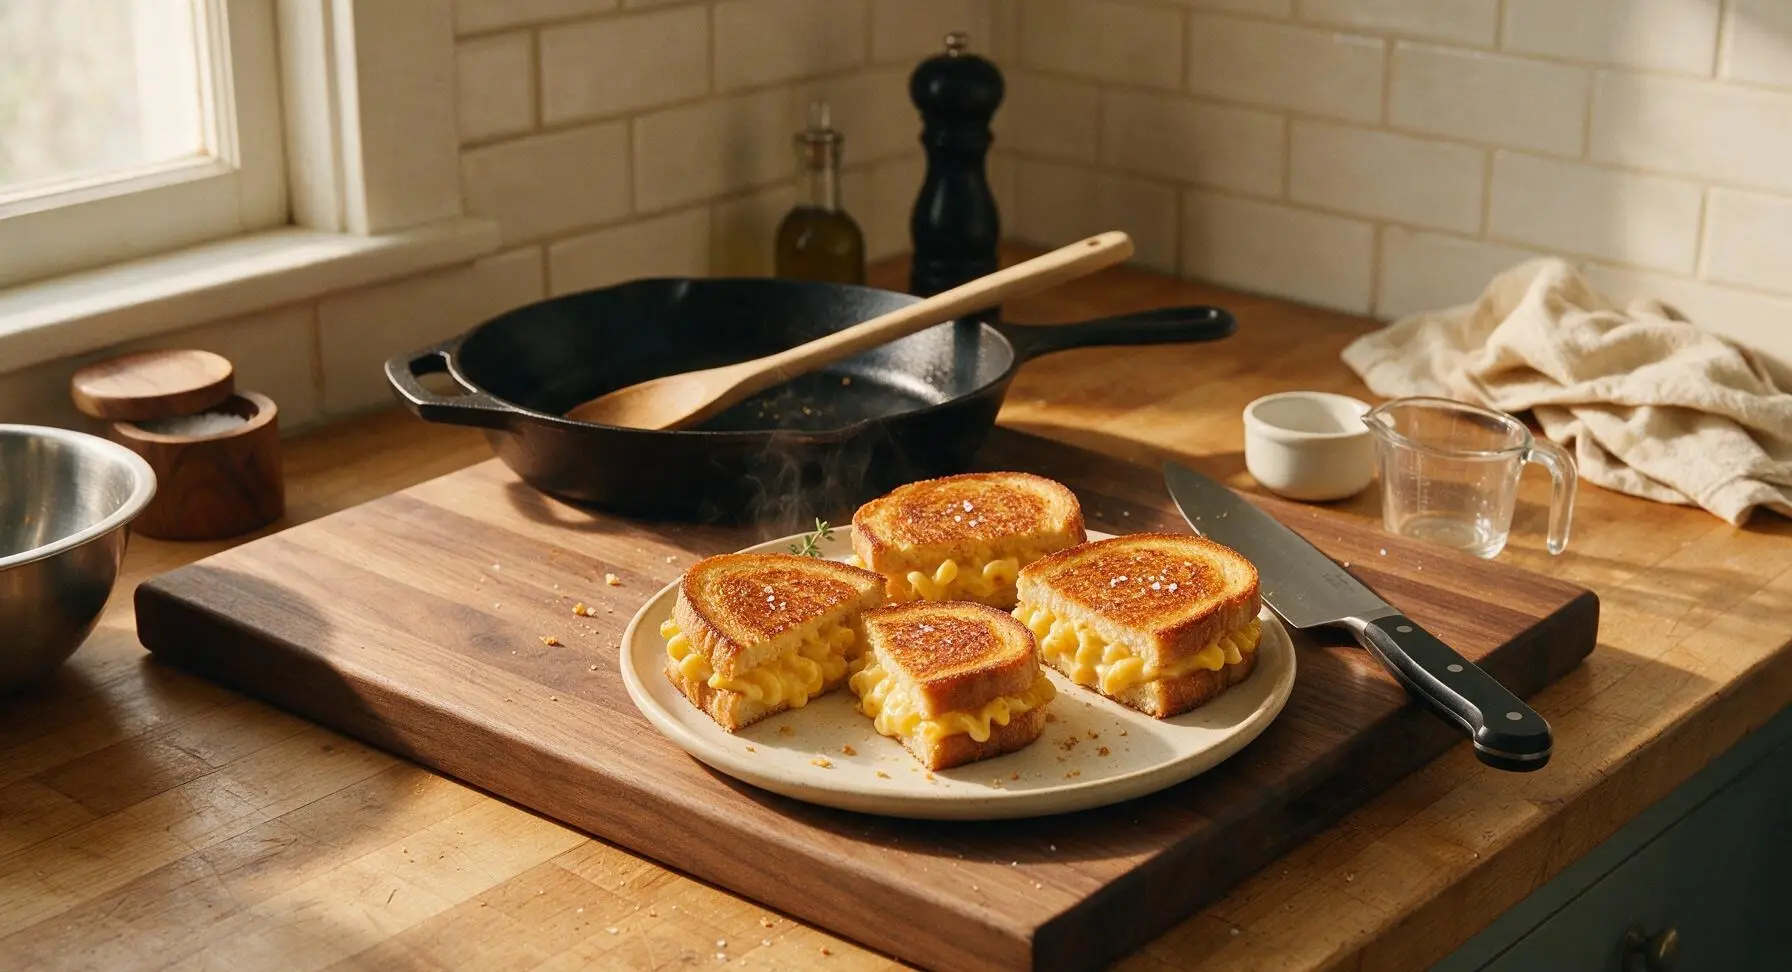
Transfer cooked sandwiches to the matte cream stoneware dinner plate as they finish, and let them rest for 2 full minutes. This short rest allows the cheese to set slightly, so the filling does not pour out when cut. Use the 8-inch chef knife to cut each sandwich diagonally into two equal triangles. Sprinkle the crispy crusts lightly with a tiny pinch of flaky sea salt, and tuck a small thyme sprig next to the sandwiches for garnish.
Step 7
step7:Rest, Cut, and Plate

Tips

1.Do not rinse your cooked pasta: the starchy coating on the noodles helps the cheese sauce cling tightly, preventing runny filling that slides out of the sandwich when you take a bite.
2.Cook the sandwiches over medium-low heat, not high: high heat will burn the bread before the cheese in the center melts, leading to a crispy outside but cold, un-melted filling.
3.Let the mac and cheese cool for 5 minutes before assembling sandwiches: hot, runny mac and cheese will squeeze out the sides of the sandwich during toasting, leaving you with a messy pan and less filling in each bite.


✨ You May Also Like

Main Course
🍜 United Kingdom

A showstopping classic of tender seared beef, savory mushroom duxelles, and crisp prosciutto wrapped in flaky golden puff pastry, baked to juicy perfection.

⏱️ 2 hours 1Main Course ★ 4.7
Main Course
🍜 India

Tender charred marinated chicken simmered in a rich, spiced creamy tomato sauce, this iconic Anglo-Indian curry pairs perfectly with basmati rice or warm naan.

⏱️ 50 minuteMain Course ★ 4.6
Main Course
🍜 Thailand

Classic tangy, sweet, and savory Thai stir-fried rice noodles with shrimp, tofu, and crunchy garnishes, balancing all five core Thai flavor profiles.

⏱️ 30 minuteMain Course ★ 4.5
Main Course
🍜 United Kingdom

Crispy golden beer-battered cod and fluffy double-fried chips, served with tangy tartar sauce and malt vinegar: the timeless, beloved British pub comfort classic.

⏱️ 45 minuteMain Course ★ 4.7
Main Course
🍜 Mexico

Smoky, chile-marinated pork tacos with caramelized pineapple, fresh cilantro, and lime: a beloved classic Mexican street food perfect for casual summer gatherings.

⏱️ 1 hour 45Main Course ★ 4.8
Main Course
🍜 United States

Crunchy Fritos corn chips layered with savory beef chili and melted cheddar, topped with cool, zesty fixings for a beloved, cozy Tex-Mex comfort food.

⏱️ 35 minuteMain Course ★ 4.8

Mac and Cheese Grilled Cheese:Frequently Asked Questions

1.Can I use leftover mac and cheese for this instead of making fresh stovetop mac? ▾
Absolutely—chilled leftover mac and cheese actually works even better for this sandwich, because its firmer, set texture is far less likely to ooze out while grilling. If your leftover mac is extra runny, stir in 2 tablespoons of shredded sharp cheddar to thicken it, and let it sit at cool room temp for 10 minutes before assembling so it melts evenly.
2.Why does all my filling ooze out of the sandwich while I cook it? ▾
This almost always happens if your mac and cheese is too warm or runny when you assemble, or if your pan heat is too high. Let fresh-cooked mac cool 10 minutes to firm up, don’t overstuff the bread slices, and cook over medium-low heat so cheese melts gradually, pressing gently with a spatula as it toasts to hold everything together.
3.Can I use a different type of bread if I don’t have thick-cut sourdough? ▾
Thick-cut sourdough is ideal because its sturdy crumb holds up to the heavy creamy filling, and its bright tang cuts through all the rich cheese. You can swap it for other hearty, ½-inch thick slices like country white, buttery brioche, or whole grain—just skip thin, soft sandwich bread, which will turn soggy and fall apart easily.
4.Do I really need to add extra shredded cheddar with the mac and cheese filling? ▾
Yes, that thin layer of extra sharp cheddar on each bread slice is non-negotiable for the perfect bite. It melts into a sticky, stretchy layer that binds the mac and cheese to the toasted bread, so your filling doesn’t slide out when you take a bite, and it adds that extra sharp, cheesy punch the recipe is known for.
5.How do I get perfectly crispy bread without burning it before the cheese melts? ▾
Skip the high-heat rush—medium-low is your sweet spot for even cooking. Butter the outer sides of the bread evenly, then cook 3-4 minutes per side, covering the pan with a lid for the first 2 minutes per side. The trapped steam melts all the cheese fully before the bread gets too dark, so you get golden crispness without burnt spots.
6.Can I make these sandwiches ahead for a party or weekly meal prep? ▾
These taste best fresh off the griddle, but you can prep all components ahead to cut down on day-of work. Make the mac and cheese up to 2 days in advance and store it chilled, and pre-shred your cheddar. Assemble and cook sandwiches right before serving—they only take 8 minutes total to cook, making them easy to batch for crowds.
7.What fun add-ins work well to customize this recipe? ▾
This rich mashup is super flexible for custom tweaks! Stir crumbled crispy bacon, diced pickled jalapeños, a pinch of smoked paprika, or chopped caramelized onions into your mac before assembling. Just keep add-ins to ¼ cup total per batch so you don’t overstuff the sandwich or make the filling too loose to hold together.
8.Why is cream cheese included in the mac and cheese filling? ▾
Cream cheese is the secret to that ultra-gooey, non-grainy mac filling that doesn’t separate or turn greasy when grilled. It creates a smooth, stable emulsion with the sharp cheddar and whole milk, adding a subtle tang and luxe creamy texture that you can’t get from using only shredded hard cheese for the mac base.
9.Can I adapt this recipe to be dairy-free or vegan? ▾
You can absolutely tweak this for dairy-free diets! Swap the whole milk for unsweetened oat milk, use a well-melting vegan sharp cheddar and vegan cream cheese (skip crumbly, non-melting brands), and use plant-based butter for toasting the bread. Cook it exactly as the original recipe directs for a similarly crispy, gooey final result.

Comments (11)

2 days ago

OMG this is a total game changer! Threw this together last night for family dinner after soccer practice and my three boys devoured every single bite. I used extra sharp cheddar for the mac and added a sprinkle of crispy bacon bits inside. 10/10 will be making this every other week for sure!

yesterday

Wait the bacon bit addition is genius! My kid is obsessed with all things bacon, I’m definitely stealing that hack this weekend.

yesterday

Love that bacon upgrade! Crispy pancetta works amazing too if you want to mix it up next time, so glad your crew enjoyed it!

3 days ago

SO good and so easy to make on a student budget! I used boxed mac and cheese (the cheap 99 cent kind) and whatever sliced cheese I had left in the fridge, and it tasted like something from a fancy food truck. Total win for late night study sessions.

2 days ago

That’s the beauty of this recipe – it works with whatever you have on hand! Pro tip: toss a pinch of garlic powder in your boxed mac for an extra flavor boost that costs basically nothing.

1 week ago

Made this for our neighborhood potluck last weekend and people were lined up for seconds! I cut the sandwiches into little slider sizes so they were easy to grab, and even the picky eaters went crazy for them. Will absolutely be adding this to my regular potluck rotation.

5 days ago

Wait, I was skeptical at first because I thought it’d be too heavy, but wow – the crispy buttery bread cuts through the creamy mac so perfectly. I made mine on sourdough and added a little hot honey drizzle inside, *chef’s kiss*. Only note: make sure your mac is a little cold before you put it on the sandwich or it oozes out everywhere when you flip it.

3 days ago

Oh thanks for the cold mac tip! I made this last week and had mac oozing all over my pan, made such a mess. Will definitely chill it a little next time!

3 days ago

Great call on the cold mac tip! I usually let my leftover mac chill in the fridge for an hour before assembling if I’m not making it fresh, it makes the grilling process so much less messy. That hot honey addition sounds incredible too!

yesterday

My kids loved it so much they asked for it for breakfast the next day! I used whole grain bread to make it feel a tiny bit healthier and no one even noticed. Total mom win.

2 hours ago

Wait whole grain bread is such a smart swap! I’ve been using white but I bet the nuttiness of whole grain pairs so well with the cheesy mac.

30 minutes ago

Made this for meal prep this week and it reheats way better than I thought it would! I wrapped each sandwich in parchment paper and stuck them in the fridge, then just tossed them in the air fryer for 3 minutes at lunch time to crisp the bread back up. Perfect quick work lunch.

2 weeks ago

Okay, why did I not think to combine these two comfort foods sooner? This tastes like childhood in a sandwich. I made it with the homemade baked mac recipe I’ve used for 10 years and it was pure perfection. Even my husband who ‘hates fancy grilled cheese’ had two sandwiches.

1 week ago

Right?! My husband is the exact same way, turns his nose up at anything that’s not plain American cheese on white, but he ate two of these too. Men are so predictable sometimes 😂

1 week ago

There’s nothing better than a recipe that wins over the ‘no fancy food’ crew! That homemade mac base sounds absolutely delicious, I bet it made the whole sandwich taste that much cozier.

2 hours ago

Okay full transparency, I’m mostly plant based but I had a major cheese craving this weekend and this recipe hit every single spot. I used a vegan cheddar for the mac and regular American slices for the melt, and it was so gooey and perfect. No regrets whatsoever.

30 minutes ago

So glad this satisfied your cheese craving! I’ve had a few readers test this with fully vegan cheese and say it works great too, for when you want to skip the dairy entirely next time.

5 minutes ago

Super easy to make even when I’m running on 3 hours of sleep after a night with the newborn. 20 minutes total, minimal cleanup, and my 4 year old said it’s ‘the best cheese sandwich ever’. High praise coming from a kid who only eats chicken nuggets 90% of the week.

just now

Took this to my friend’s game night last night and everyone was asking for the recipe by the end of the first quarter. I added a little pickled jalapeno to mine for a tiny kick and it was chef’s kiss. So easy to throw together even after work!

just now

Pickled jalapenos are such a good call! I did hot honey last time but I love a little tangy heat, gonna have to try that on my next batch.

2 days ago

Wait I messed up the first batch because I had the heat too high and the bread burned before the cheese was all melted, but the second batch on medium low was absolute perfection. Don’t rush the cook time y’all, low and slow is the move for that crispy bread and gooey center!

yesterday

Thanks for the heat warning! I always crank my stove too high for grilled cheese and end up with burnt bread, I’ll remember to turn it down when I make these tomorrow.

yesterday

You’re so right – low and slow is the secret to perfect grilled cheese every time! If you’re worried about melt, you can cover the pan with a lid for a minute to trap the heat and get that cheese perfectly gooey without burning the bread. So glad you gave it a second shot!



