
New Haven Style Pizza

New Haven Style Pizza
⏱️ cook time 2 hours 30 minutes
🍽️ servings 4
⚡ Difficulty medium

intro

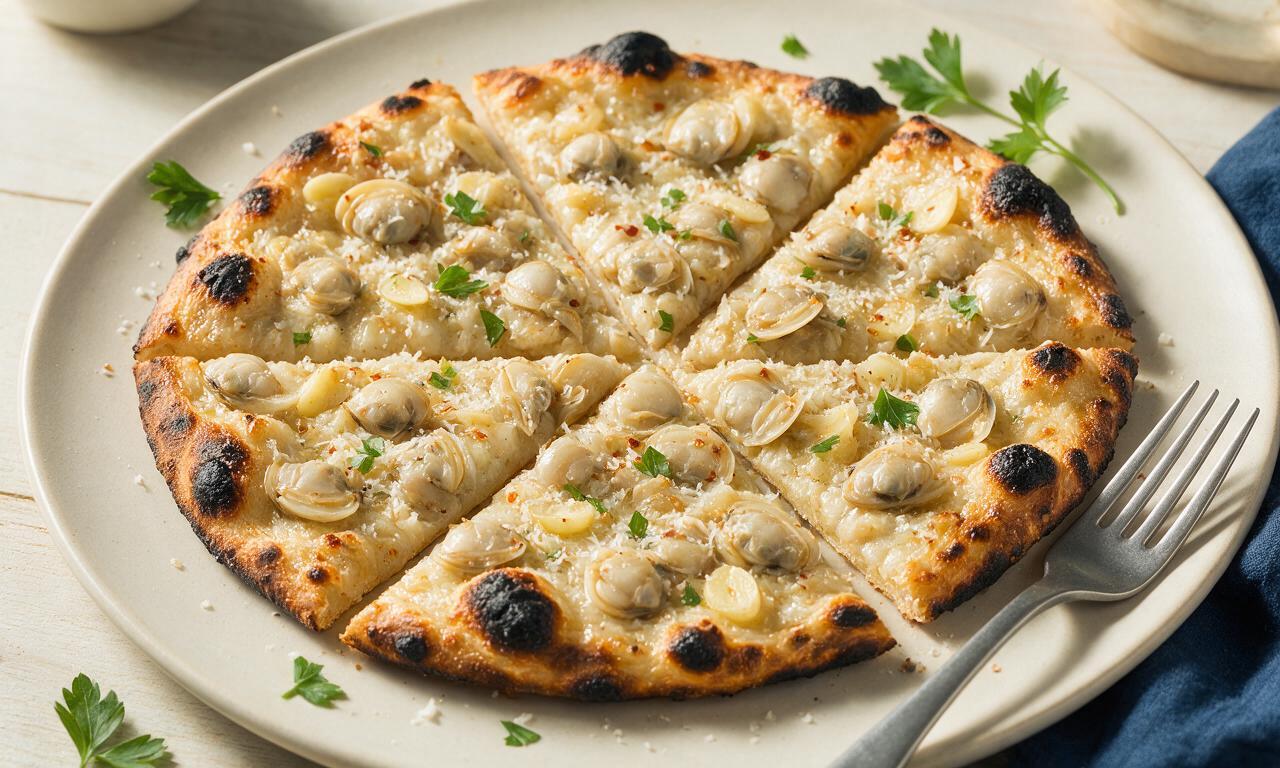
Iconic thin, blistered charred-crust apizza from New Haven, Connecticut, topped with briny clams, garlic, and Pecorino, baked at high heat for crisp, bold regional flavor.

Ingredients

High-gluten bread flour 400 grams (3 1/4 cups)
Instant dry yeast 2 grams (1/2 teaspoon)
Fine sea salt 8 grams (1 1/2 teaspoons)
Lukewarm filtered water 260 ml (1 cup + 1 tablespoon)
Extra-virgin olive oil (divided) 20 ml (1 tablespoon + 1 teaspoon)
Semolina flour (for dusting) 5 grams (1 teaspoon)
Shucked littleneck clams (with 30ml/2 tbsp reserved clam juice) 180 grams (approx. 12 medium clams)
Fresh garlic, minced 12 grams (4 cloves, ~2 tablespoons)
Freshly grated Pecorino Romano cheese 45 grams (1/2 cup)
Dried oregano 1 gram (1/2 teaspoon)
Crushed red pepper flakes 1 gram (1/4 teaspoon)

Steps

1

Mix Pizza Dough Ingredients

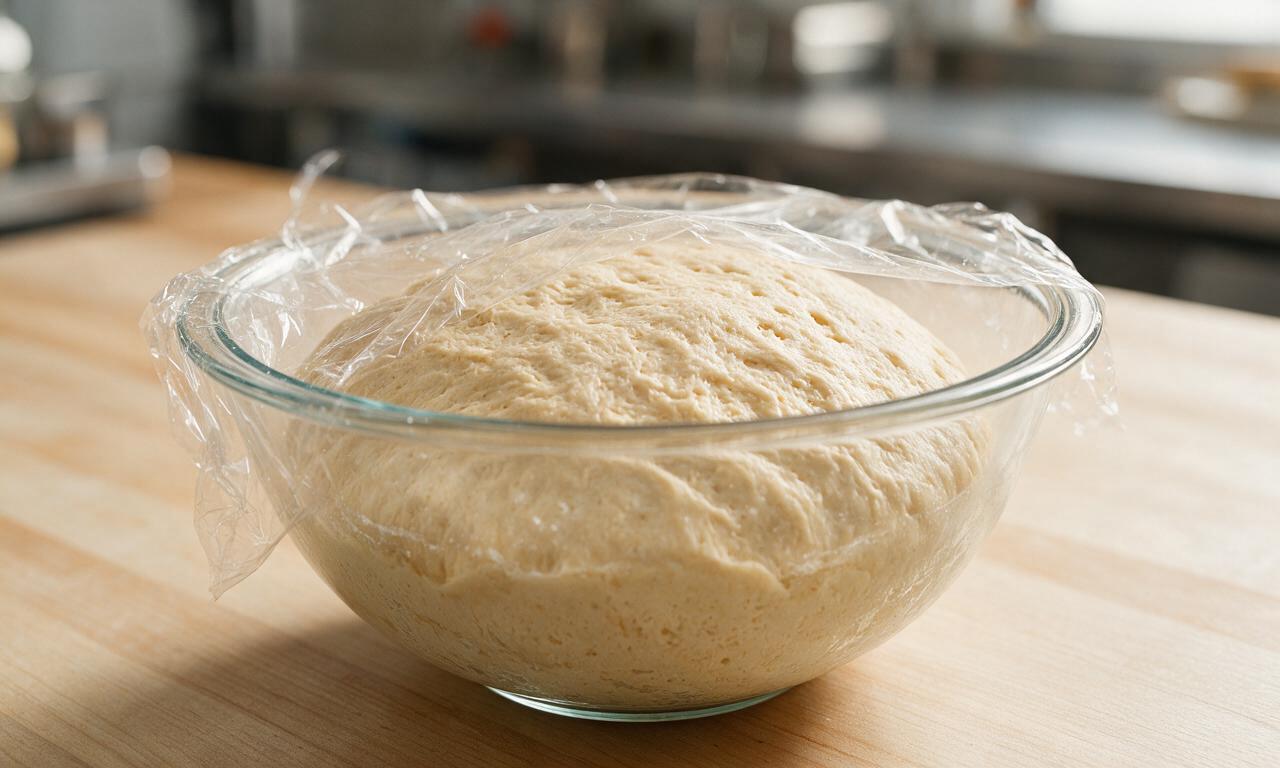
In a large mixing bowl, whisk together 400g high-gluten bread flour, 2g instant dry yeast, and 8g fine sea salt to evenly distribute dry ingredients. Pour in 260ml lukewarm (32°C/90°F) filtered water and 15ml (1 tablespoon) extra-virgin olive oil, then stir with a wooden spoon until a shaggy, sticky dough forms with no remaining dry flour pockets. Tightly cover the bowl with plastic wrap and let rest at room temperature (21°C/70°F) for 2 hours, until the dough doubles in size and is dotted with small air bubbles across its surface.
Step 1
step1:Mix Pizza Dough Ingredients
2

Preheat Oven and Baking Surface

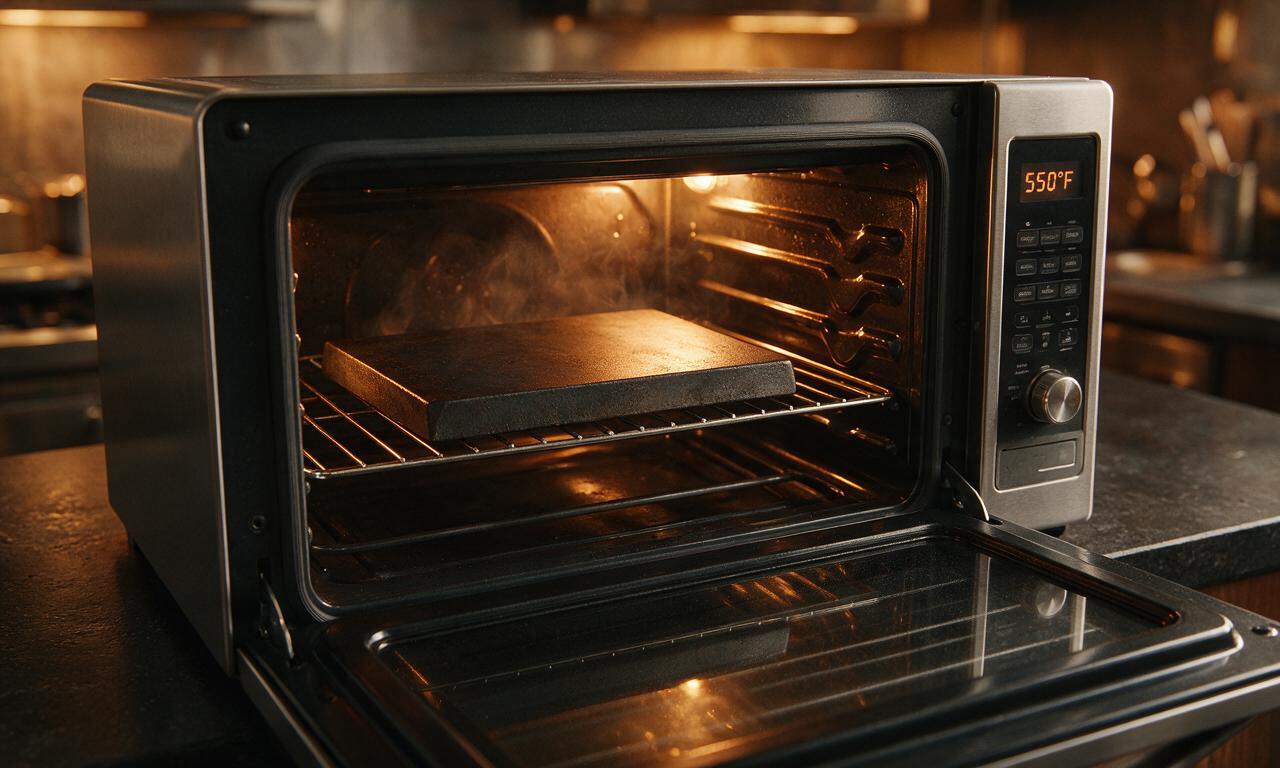
Forty-five minutes before the dough finishes rising, place a 14-inch baking steel or 1-inch thick cordierite pizza stone on the highest oven rack. Preheat the oven to 290°C/550°F (use convection bake if available) and let the baking surface heat for the full 45 minutes; thin baking sheets will not retain enough heat to create the signature charred New Haven crust.
Step 2
step2:Preheat Oven and Baking Surface
3

Prepare Pizza Peel and Dough

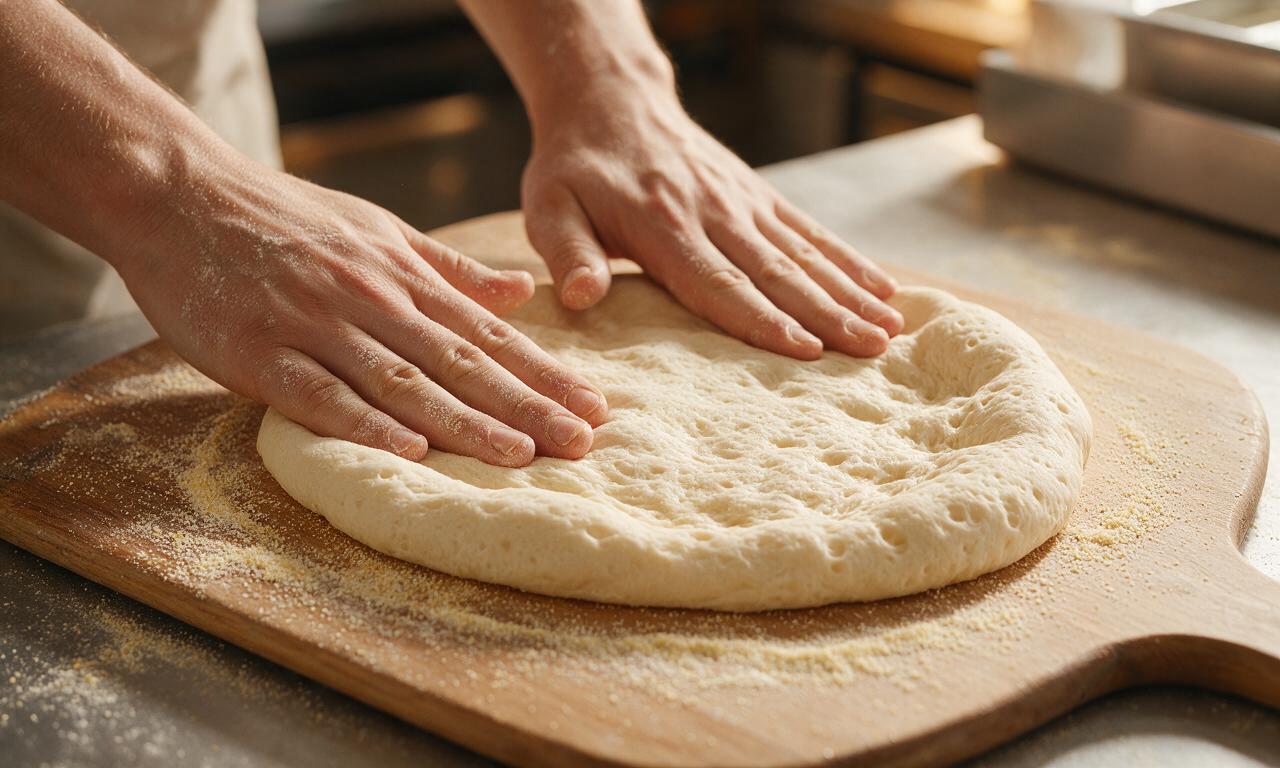
Once the dough is fully risen, lightly dust a wooden pizza peel (or parchment paper set on a cutting board) with 5g (1 teaspoon) semolina flour to prevent sticking. Turn the risen dough out onto the prepared peel, and gently press it outward from the center with your fingertips to form an irregular 13-inch oblong shape, leaving a 1/2-inch slightly thicker border for the crust edge. Do not use a rolling pin, as this will press out trapped air bubbles needed for a light, blistered crust.
Step 3
step3:Prepare Pizza Peel and Dough
4

Add Garlic and Clam Juice

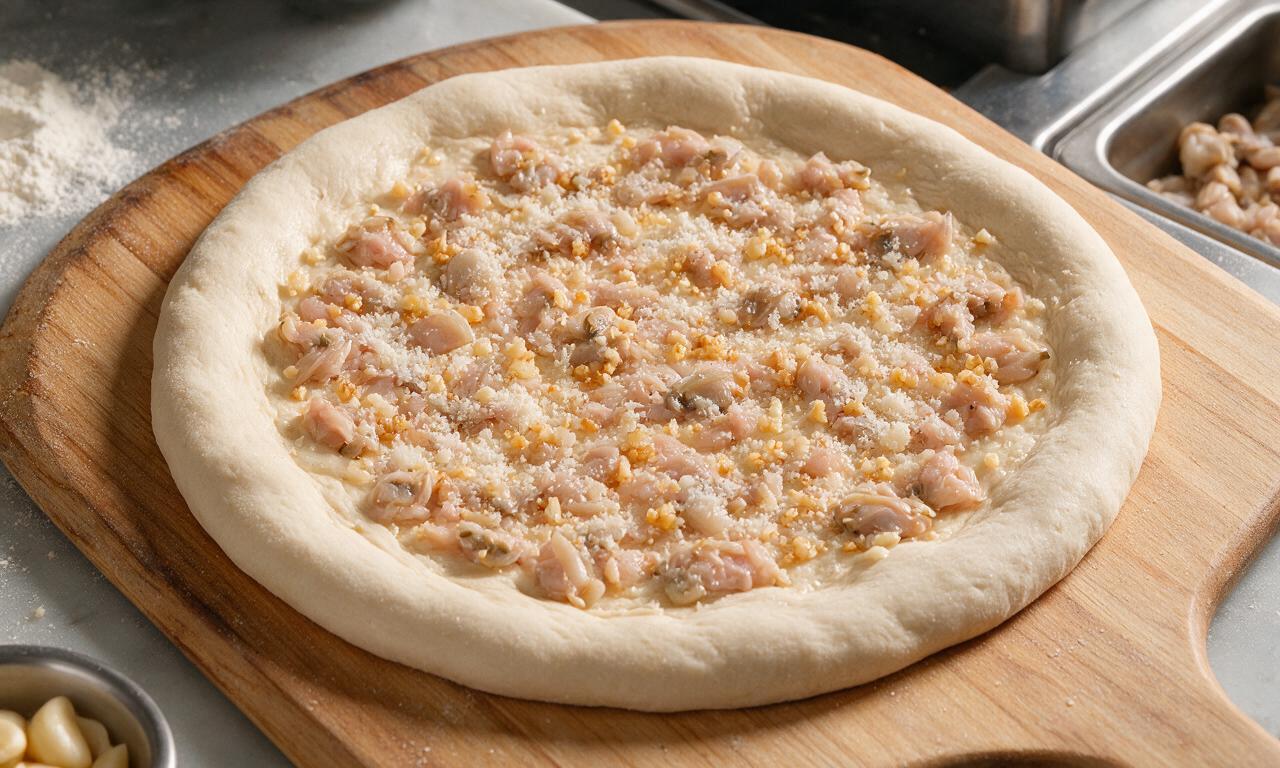
Evenly scatter 12g (4 cloves, ~2 tablespoons) minced garlic across the dough surface, leaving the 1/2-inch crust border completely bare. Drizzle 30ml (2 tablespoons) of reserved fresh clam juice over the garlic, then distribute 180g shucked littleneck clams evenly across the pie. Top with 45g freshly grated Pecorino Romano, 1g dried oregano, and 1g crushed red pepper flakes. Do not add mozzarella cheese, as it is not traditional for this style and will make the thin crust soggy.
Step 4
step4:Add Garlic and Clam Juice
5

Bake Pizza on Preheated Surface

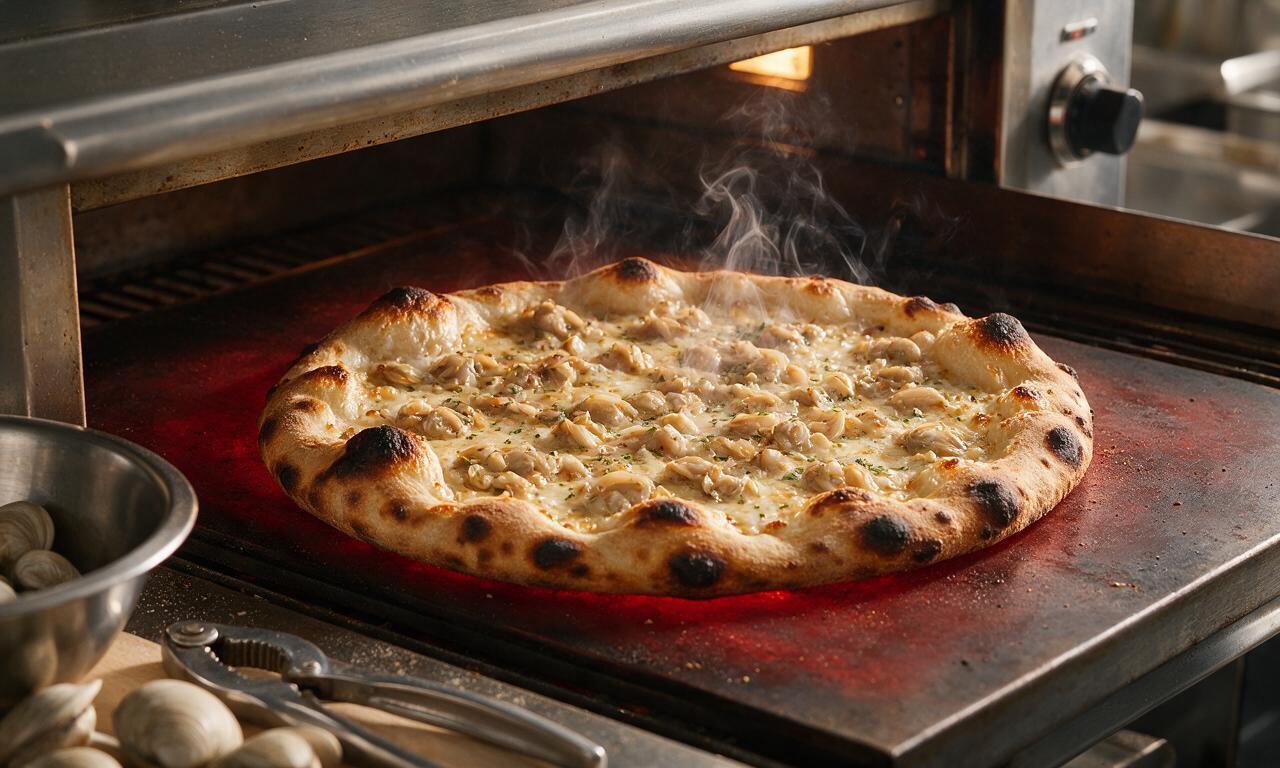
Carefully slide the topped pizza directly from the peel onto the preheated baking steel or stone. Bake for 7 to 9 minutes at 290°C/550°F, using a thin metal spatula to rotate the pizza 180 degrees at the 4-minute mark to ensure even charring. The pizza is done when the crust edges are deeply puffed and marked with dark, almost black blistered spots, the Pecorino is melted and lightly golden, and the clams are just opaque and cooked through.
Step 5
step5:Bake Pizza on Preheated Surface
6

Rest and Finish Pizza

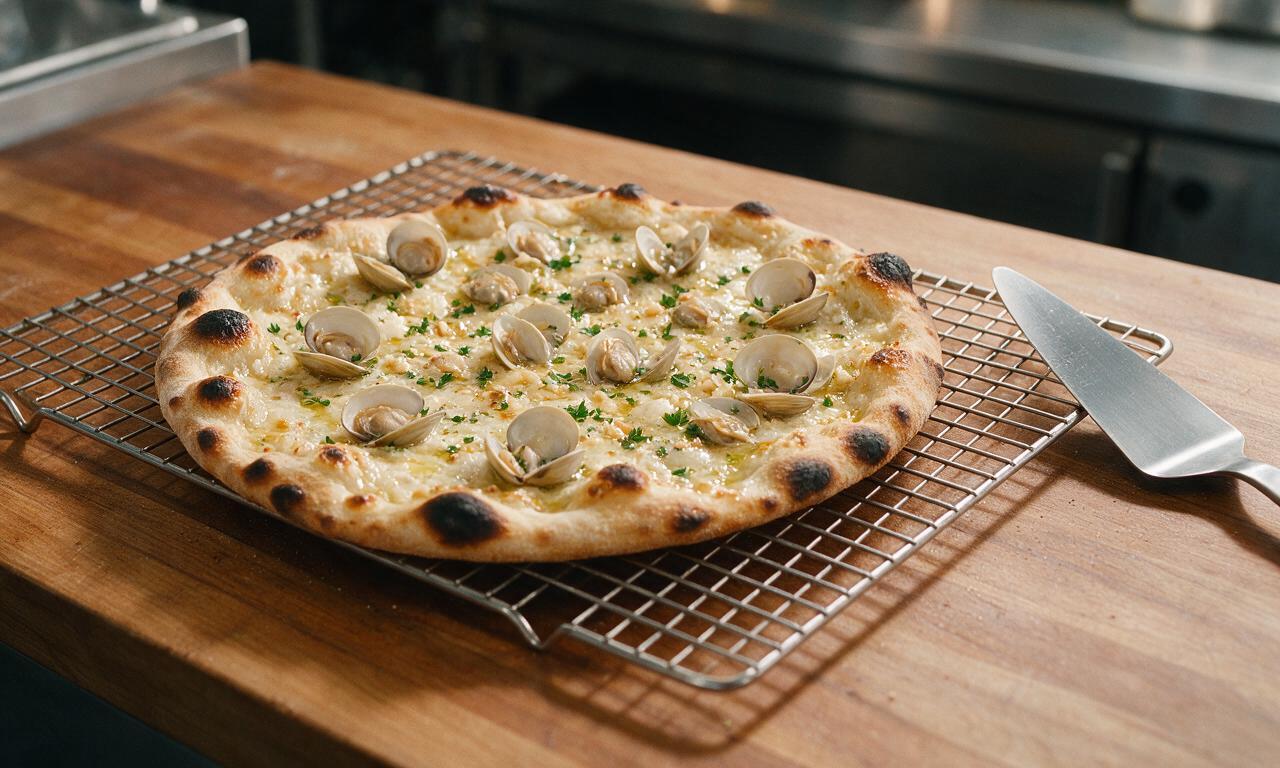
Use the pizza peel to lift the baked pizza out of the oven, and transfer it to a wire cooling rack to rest for 2 minutes to let the crust set and prevent sogginess. Drizzle the top with the remaining 5ml (1 teaspoon) extra-virgin olive oil, then slice into 6 irregular triangular slices with a sharp pizza cutter and serve immediately while hot and crispy.
Step 6
step6:Rest and Finish Pizza

Tips

1.For a deeper, tangier crust flavor matching classic apizza, skip the 2-hour room temperature rise and let mixed dough cold ferment in the refrigerator for 24–48 hours, letting it come to room temperature for 30 minutes before shaping.
2.If you do not own a baking steel or pizza stone, use an upside-down preheated cast iron skillet (preheated for the full 45 minutes) as a budget-friendly alternative to achieve the high-heat charred crust.
3.Avoid pre-shredded Pecorino Romano for this recipe—it is coated in anti-caking agents that prevent smooth melting and leave a grainy texture; always grate cheese fresh from a block right before topping.


✨ You May Also Like

Main Course
🍜 United Kingdom

A showstopping classic of tender seared beef, savory mushroom duxelles, and crisp prosciutto wrapped in flaky golden puff pastry, baked to juicy perfection.

⏱️ 2 hours 1Main Course ★ 4.7
Main Course
🍜 India

Tender charred marinated chicken simmered in a rich, spiced creamy tomato sauce, this iconic Anglo-Indian curry pairs perfectly with basmati rice or warm naan.

⏱️ 50 minuteMain Course ★ 4.8
Main Course
🍜 Thailand

Classic tangy, sweet, and savory Thai stir-fried rice noodles with shrimp, tofu, and crunchy garnishes, balancing all five core Thai flavor profiles.

⏱️ 30 minuteMain Course ★ 4.6
Main Course
🍜 United Kingdom

Crispy golden beer-battered cod and fluffy double-fried chips, served with tangy tartar sauce and malt vinegar: the timeless, beloved British pub comfort classic.

⏱️ 45 minuteMain Course ★ 4.9
Main Course
🍜 Mexico

Smoky, chile-marinated pork tacos with caramelized pineapple, fresh cilantro, and lime: a beloved classic Mexican street food perfect for casual summer gatherings.

⏱️ 1 hour 45Main Course ★ 4.7
Main Course
🍜 United States

Crunchy Fritos corn chips layered with savory beef chili and melted cheddar, topped with cool, zesty fixings for a beloved, cozy Tex-Mex comfort food.

⏱️ 35 minuteMain Course ★ 4.9

New Haven Style Pizza:Frequently Asked Questions

1.Do I really need high-gluten bread flour for the crust, or can I substitute all-purpose flour?
You’ll get the closest authentic, chewy-yet-crisp charred crust with high-gluten bread flour, as its 12-14% protein content stands up to ultra-high baking heat without turning soggy. If you only have all-purpose on hand, stir 1 tablespoon of vital wheat gluten into each cup of all-purpose to boost protein, though the crust will be slightly less chewy than the classic version.
2.How hot does my oven need to be to get that signature blistered, charred apizza crust?
Aim for a minimum of 500°F (260°C), and preheat your cooking surface for at least 45 minutes—this is non-negotiable for that iconic char. If your oven reaches 550°F, use that setting! A preheated pizza steel transfers heat faster than a stone, giving you those puffy, leopard-spotted blisters in just 6 to 8 minutes of bake time.
3.Do I have to use fresh clams, or are canned clams an acceptable substitute for this recipe?
Fresh shucked littleneck or cherrystone clams are the traditional pick, but high-quality canned whole baby clams (drained very well, with a splash of reserved juice saved for drizzling) work great for home cooks. Skip chopped canned clams, as they turn rubbery and overly briny, and always pat clams dry with paper towels first to prevent a soggy crust.
4.Wait, there’s no mozzarella cheese listed in the ingredients—is that correct for authentic white clam apizza?
That’s 100% correct for classic New Haven white clam apizza! The traditional version skips mozz entirely to let briny clam, sharp garlic, and nutty Pecorino flavors take center stage. Adding mozz would weigh down the thin crust, trap excess moisture, and muddle the bright, briny flavor profile that makes this regional pie so iconic.
5.How long should I let the pizza dough rest and rise for the best possible texture?
For the most extensible dough that stretches easily without shrinking and has deep, nutty wheat flavor, do a slow cold rise in the fridge for 24 to 48 hours after mixing. If you’re crunched for time, a 2-hour room-temperature rise works, but the cold ferment creates those irregular, puffy, charred blisters that are core to classic apizza texture.
6.My dough keeps shrinking back when I try to stretch it—what am I doing wrong?
Shrinking dough almost always means the gluten is too tight, usually because you skipped a rest step or didn’t let cold dough warm up before stretching. Let refrigerated dough sit on the counter for 30 minutes before stretching, and if it snaps back mid-stretch, set it down, cover it, and let it rest 10 more minutes for the gluten to relax.
7.What kind of Pecorino should I use, and can I swap it for Parmesan if that’s what I have?
Use good-quality imported Pecorino Romano for that sharp, salty, slightly sheepy kick that cuts through rich briny clams. You can swap for Parmigiano-Reggiano in a pinch, but it’s milder, nuttier, and less briny, so you’ll miss that signature sharp flavor balance. Always grate cheese fresh right before topping, skipping pre-grated options coated in anti-caking agents.
8.I don’t own a pizza stone or steel—can I still make this apizza at home?
You absolutely can! Grab a heavy-duty rimmed baking sheet, flip it upside down, and preheat it for the full 45 minutes at your oven’s highest temperature, just like you would a stone or steel. Slide the topped pie onto the hot pan using a floured peel or parchment paper; you’ll get a slightly less charred, but still crisp, delicious final crust.
9.How do I keep the thin crust from getting soggy from clam juice while baking?
Soggy crust is the #1 home cook mistake with this pie, so stick to two key guardrails: first, pat all clams completely dry with paper towels before adding them as a topping, and second, don’t overload the pie with toppings. A light hand with olive oil, thin layer of cheese, and dry clams will ensure your crust stays crisp all the way to the center.
10.What’s the best way to prep garlic for this pizza so it doesn’t burn in the high heat?
Slice garlic paper-thin instead of mincing it to avoid bitter burnt bits, since the pie bakes so fast at extreme heat. Thin slices mellow and turn golden in the 6-8 minute bake time, while minced garlic will burn and turn acrid in 60 seconds at 550°F. For extra mellow flavor, gently infuse your olive oil with garlic first, then strain out bits before brushing the crust.
11.Is the dark, slightly charred crust edge intentional, or does that mean I overbaked the pie?
That dark, slightly ashy char on the raised crust edges is 100% intentional and core to New Haven apizza’s identity! Unlike softer, lighter Neapolitan or New York-style crusts, apizza is baked hot enough to create deep, leopard-spotted char that adds subtle smoky, toasty flavor balancing the briny, bright toppings. Don’t pull the pie early before that char develops.
12.Do I need a specialty pizza peel to get the pie into the hot oven without messing it up?
A pizza peel makes the process much smoother, but you don’t need a fancy wooden or metal model if you don’t own one. A flat, rimless baking sheet, large piece of stiff cardboard, or even a clean cutting board dusted with coarse cornmeal or semolina flour works just as well to slide the topped pie onto your preheated cooking surface without deforming it.
13.Can I add extra toppings like oregano, red pepper flakes, or bacon to this traditional pie?
Classic New Haven white clam apizza is kept very simple, but you can add small amounts of complementary toppings without straying too far from the original. A light sprinkle of dried oregano, pinch of red pepper flakes, or handful of crispy chopped bacon works well, but skip heavy, wet toppings like tomatoes, mounds of cheese, or high-moisture veggies that will sog out the crust.
14.How long should I let the pizza rest after baking before I slice and serve it?
Let the pie rest for 2 to 3 minutes on a wire rack after pulling it from the oven before slicing. This short rest lets the cheese and oil set so toppings don’t slide off when you cut it, and it keeps the crust crisp instead of trapping steam against a cutting board that would turn that perfectly charred base soggy. Slice into irregular, oblong pieces for authentic service.

Comments (10)

2 days ago

OMG, I grew up going to Pepe’s in New Haven every summer with my grandpa and this recipe tastes EXACTLY like the real deal! The ratio of garlic to clam to cheese is perfect, no weird gloopy white sauce like the bad takeout versions near me. Made it for our Sunday family dinner and everyone went back for seconds, even my picky teen who swears he hates seafood. SO good.

3 days ago

This was so tasty! My only issue was I couldn’t find fresh littleneck clams last minute so I used high quality canned chopped clams, and it still turned out great, but I can tell fresh would be next level. How long do you recommend letting the dough rest if I make it a day ahead for meal prep?

2 days ago

So glad you enjoyed it, Mike! If making the dough ahead, let it do the first 1 hour rise at room temp, then tightly wrap it and store in the fridge for up to 24 hours. Pull it out 45 minutes before you plan to stretch it to let it come to room temp — it’ll be way easier to work with! Canned clams are a great swap in a pinch, just make sure to drain them really well so the crust doesn’t get soggy.

1 week ago

Total game changer! I brought this to our neighborhood block party potluck last weekend and people were hovering around the platter asking for the recipe before I even set it down. I added a tiny extra sprinkle of red pepper flakes on half for the people who like a little heat, and that version was gone first. 10/10, will be making this every other week from now on.

5 days ago

Wait, did you pre-bake the crust a little before adding the toppings? I’ve had white pizzas turn soggy on me at potlucks before and I want to make this for our next office potluck!

3 days ago

Great question from Sarah! For potlucks especially, I recommend par-baking the stretched crust for 3 minutes at 500°F before adding the clam and cheese toppings — that creates a little barrier so the crust stays crispy even if it sits out for a bit. So happy it was a block party hit!

5 days ago

Was a little nervous about the medium difficulty rating since I’m pretty new to making homemade pizza, but the step-by-step dough instructions were so easy to follow! My kids loved it so much they asked if we can have “clam pizza night” every Friday now. Who knew? I thought they’d turn their noses up at clams on pizza!

3 days ago

That makes me feel so much better about trying this! I’ve only made frozen pizza before and I was intimidated by making dough from scratch — if your kids loved it I know my crew will too.

yesterday

Flavor was absolutely spot on, but I messed up the dough stretch and ended up with a weird lumpy crust that was too thick in spots. Totally my fault, not the recipe’s! I’m gonna watch a couple quick pizza stretching tutorials before I try this again next weekend, because the topping combo is too good to give up on.

2 weeks ago

I’ve been homesick for New Haven apizza for literal years since I moved out west, and I screamed when this recipe popped up in my feed. I even bought a pizza stone specifically to make it, and let me tell you — it transported me right back to Wooster Street. The only thing missing was the little paper plate and the line out the door at Frank Pepe’s. Thank you for this!

1 week ago

Wait do you really need a pizza stone? I only have regular rimmed baking sheets, would that work or will the crust not get that crispy char I keep hearing about?

5 days ago

A pizza stone definitely helps get that signature charred, crispy New Haven crust, but if you don’t have one, flip a rimmed baking sheet upside down, preheat it for 30 minutes at 500°F, and slide the pizza right on top — it works almost as well! So glad this cured your homesickness, Mia!

30 minutes ago

This flavor combo is insane! I swapped the regular pizza dough for my go-to high protein gluten free dough, and it turned out so delicious. My only note is that the olive oil drizzle amount felt like a little much for my GF crust, which gets soggy faster than regular dough. Would love to see a GF specific variation note in the future!

5 minutes ago

Thanks so much for the feedback, Gail! That’s such a great call about gluten free crust holding up differently to oil. Next time, cut the olive oil drizzle by about half for GF dough, and par-bake it an extra 2 minutes before adding toppings to keep it crisp. I’ll make sure to add that note to the recipe tips section this week!

just now

Pro tip for anyone who has an outdoor pizza oven: this recipe cooks in 6 minutes flat at 700°F and gets that perfect charred edge just like the New Haven spots! I made three pies for my buddy’s birthday cookout and every single one was gone in 10 minutes. Will absolutely be adding this to my regular cookout rotation.

2 hours ago

Loved this! I’m a huge white pizza fan and usually load mine up with extra mozz, but I followed the recipe exactly and used just the pecorino and a little mozz like it said, and it was so much lighter and more flavorful than my usual version. The clam brine adds such a great salty kick, I didn’t even need to add extra salt.

30 minutes ago

Quick question — did the clams taste super fishy? I want to make this for my partner who’s sensitive to strong seafood flavors, but I’ve been nervous clam pizza will taste too “oceany” if that makes sense.

3 days ago

I was skeptical about a pizza without red sauce, but this completely won me over! I prepped all the toppings ahead on Sunday and made individual sized pies for my work lunches all week, and they reheated amazingly well in the office toaster oven. 10/10, way better than the sad takeout salads I usually bring for lunch.

2 days ago

Wait how did you store the prepped clams? I tried prepping fresh clams for a recipe once and they went bad super fast in the fridge!

yesterday

I shucked the clams and stored them in a sealed glass container with their strained juice in the coldest part of the fridge, and they stayed totally fresh for 3 days! Just make sure you don’t add them to the pizza until right before you bake it, even if you’re meal prepping components ahead.



