
original tater tot hotdish

title 1
original tater tot hotdish
⏱️ cook time 50 minutes
🍽️ servings 6
⚡ Difficulty easy

intro

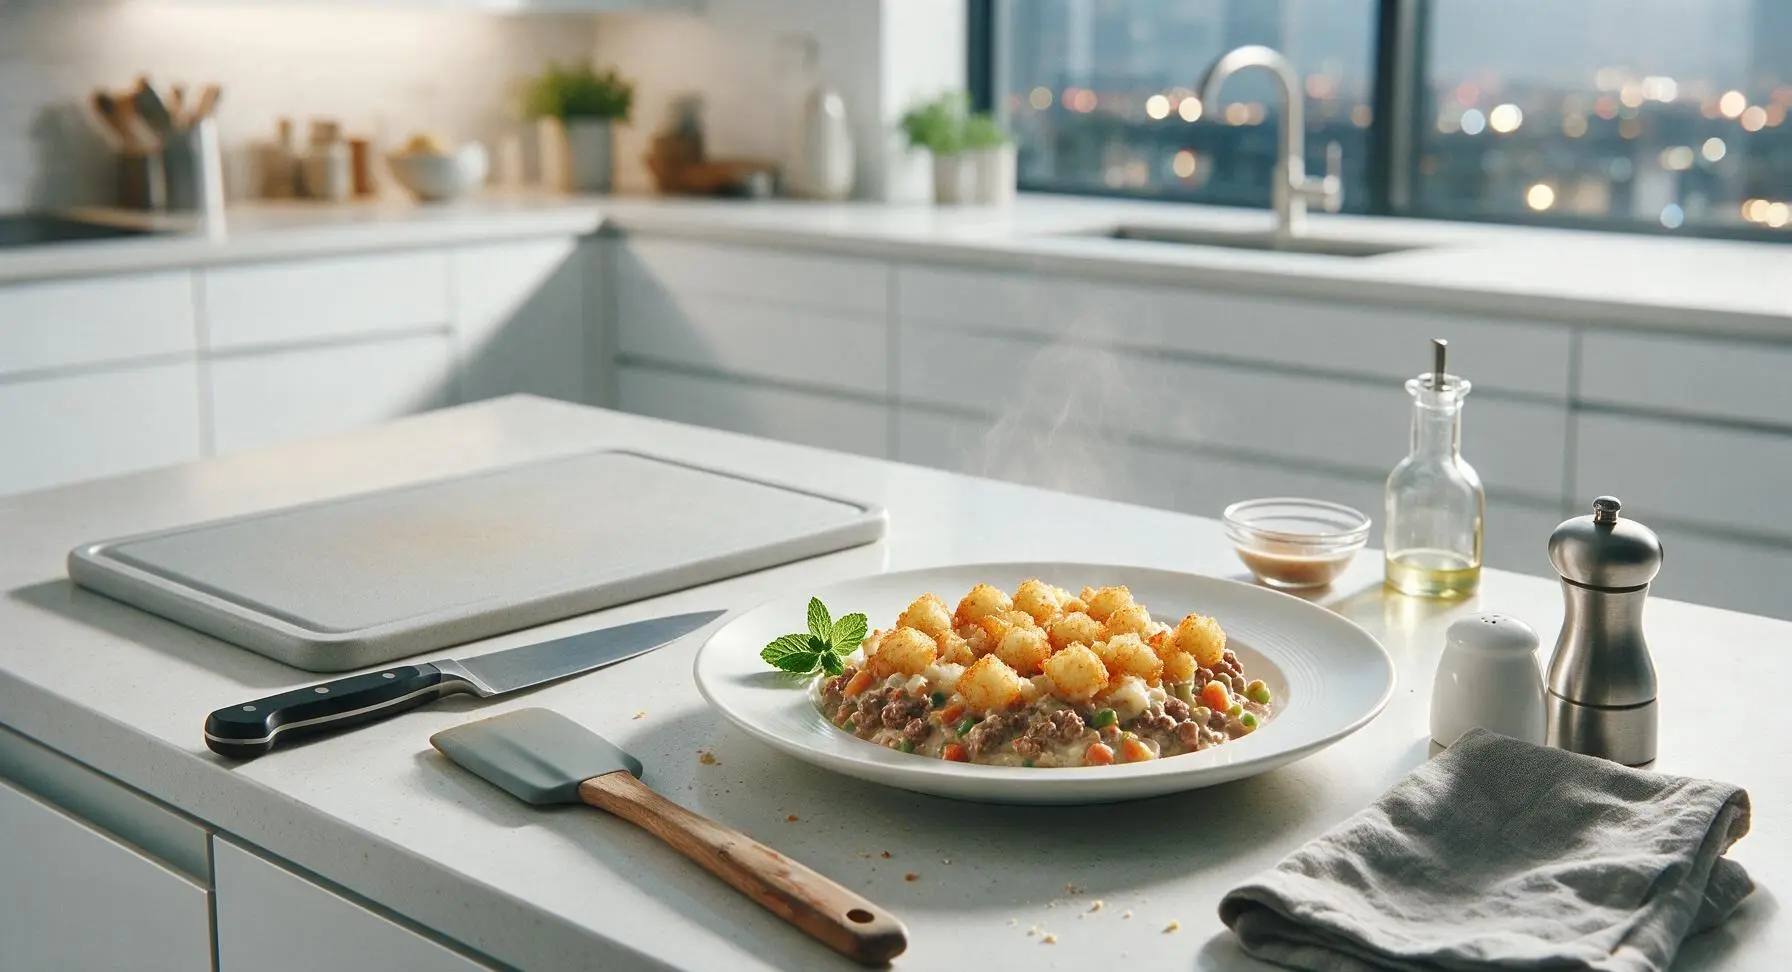
Creamy, savory ground beef and vegetable filling topped with crispy golden tater tots, this classic Midwestern comfort food is cozy, satisfying, and made for sharing.

Ingredients
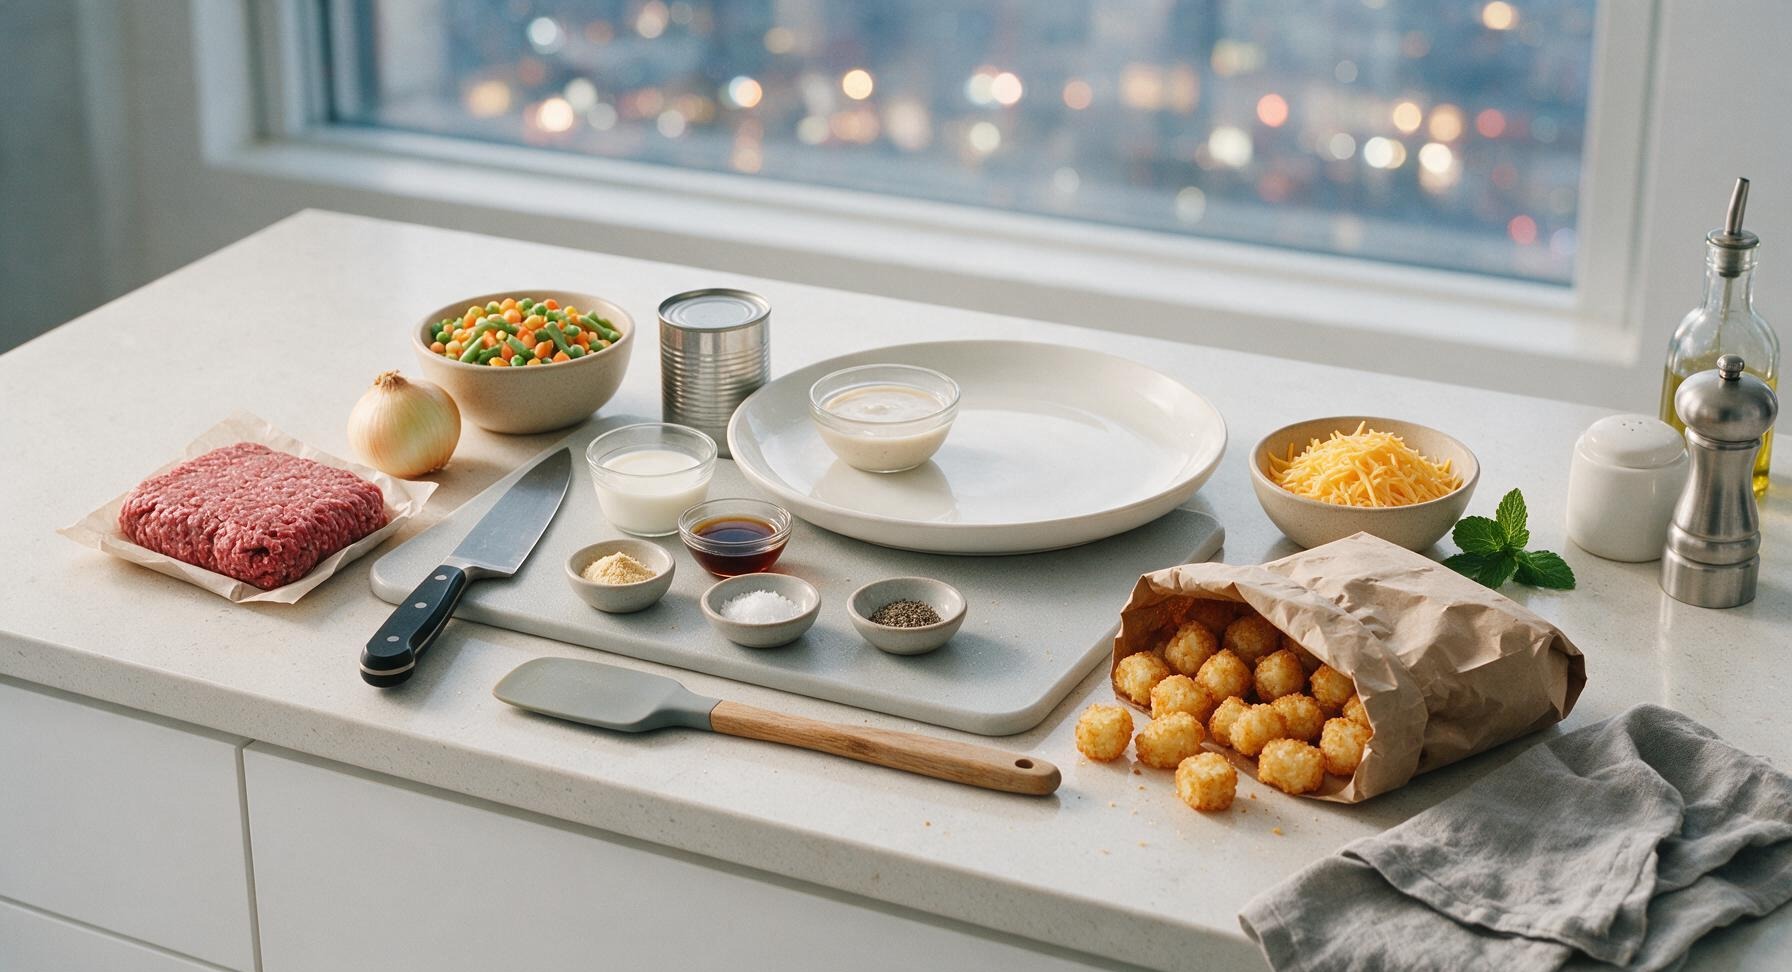
80/20 ground beef 1 lb (450g)
Yellow onion 1 small (150g)
Frozen mixed vegetables (peas, carrots, corn, green beans) 2 cups (280g)
Condensed cream of mushroom soup 1 can (10.5 oz / 298g)
Whole milk 1/4 cup (60ml)
Worcestershire sauce 1 tbsp (15ml)
Garlic powder 1 tsp
Kosher salt 1/2 tsp
Ground black pepper 1/4 tsp
Frozen tater tots 1 bag (32 oz / 900g)
Shredded sharp cheddar cheese 1 cup (113g)

Steps

1

Preheat Oven, Dice Onion

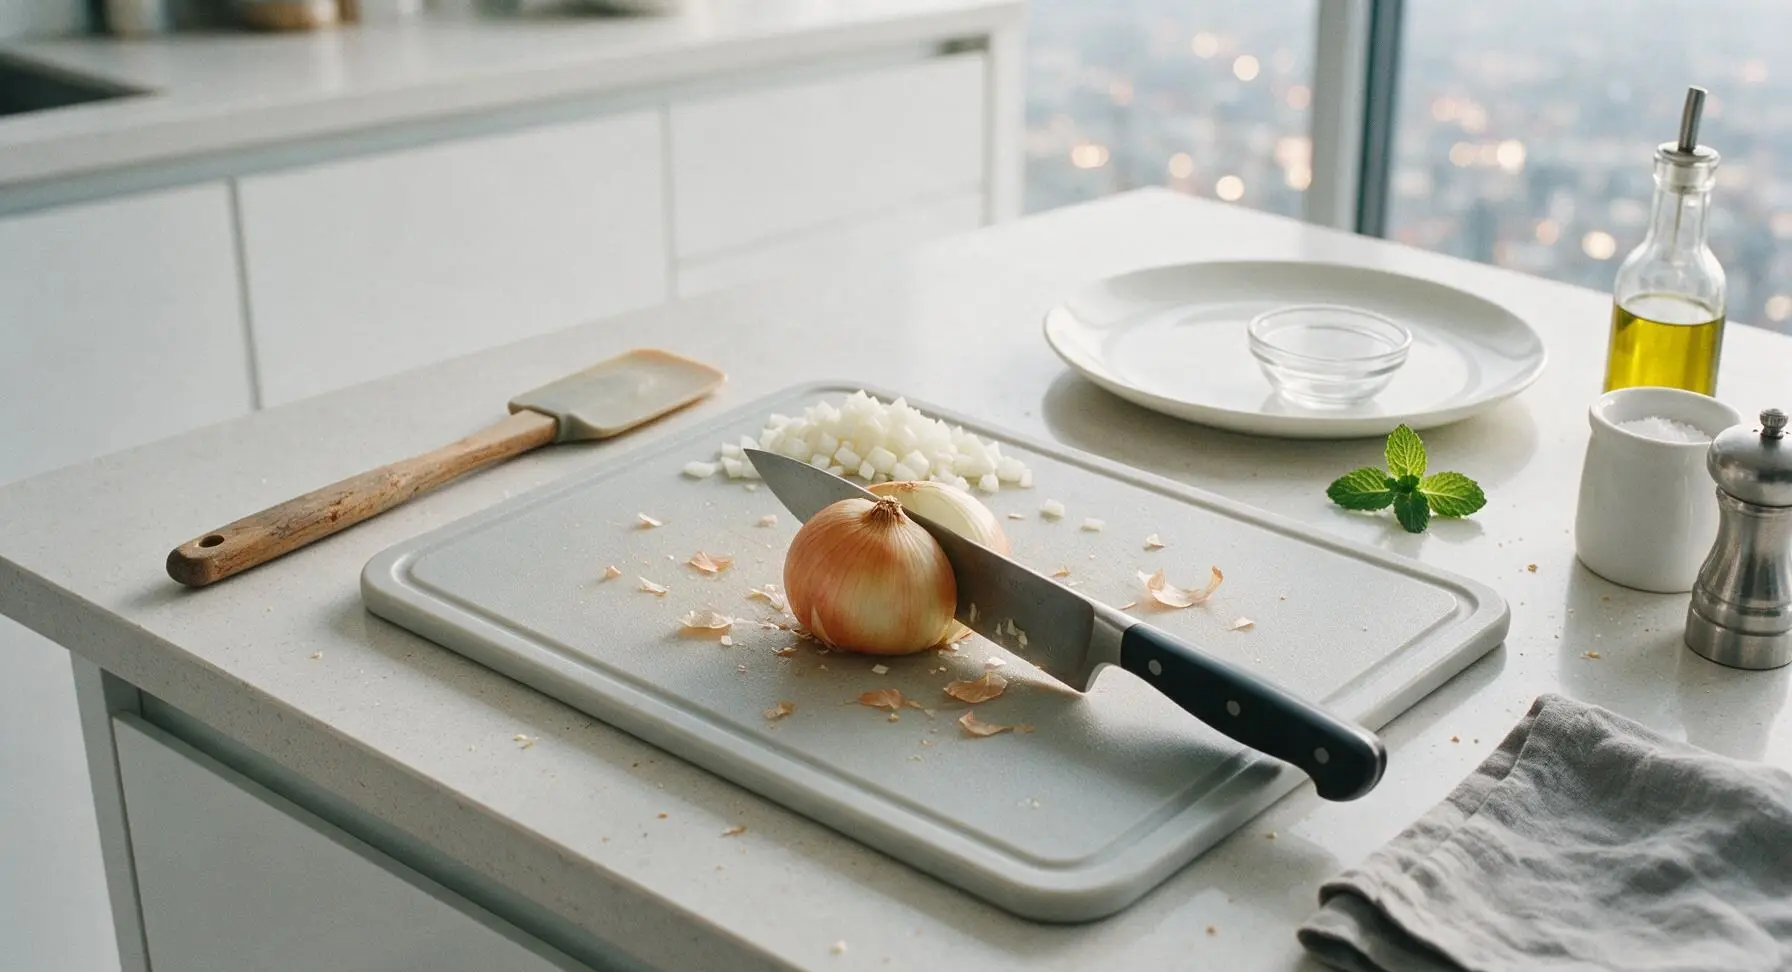
Adjust your oven rack to the middle position and preheat to 375°F (190°C). Place the small yellow onion on the dark maple cutting board, trim the root and stem ends with the chef knife, peel off the papery outer skin, and dice the onion into uniform 1/4-inch pieces. Pile the diced onion on the corner of the cutting board to set aside.
Step 1
step1:Preheat Oven, Dice Onion
2

Brown Ground Beef

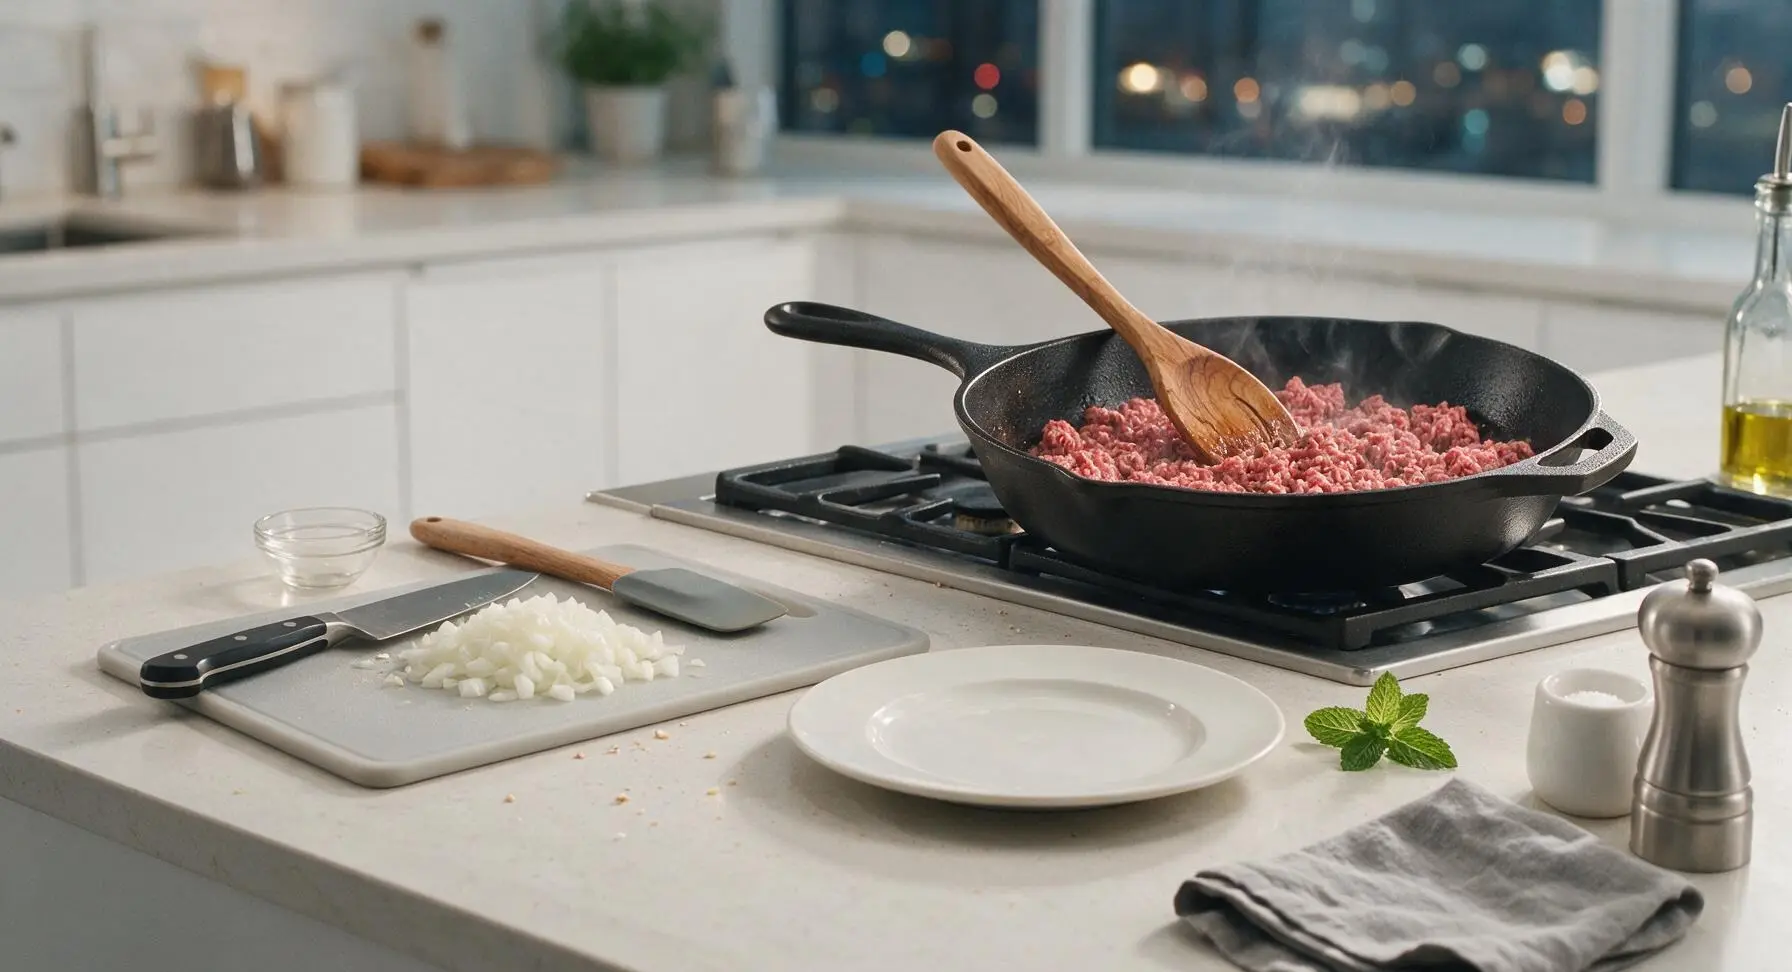
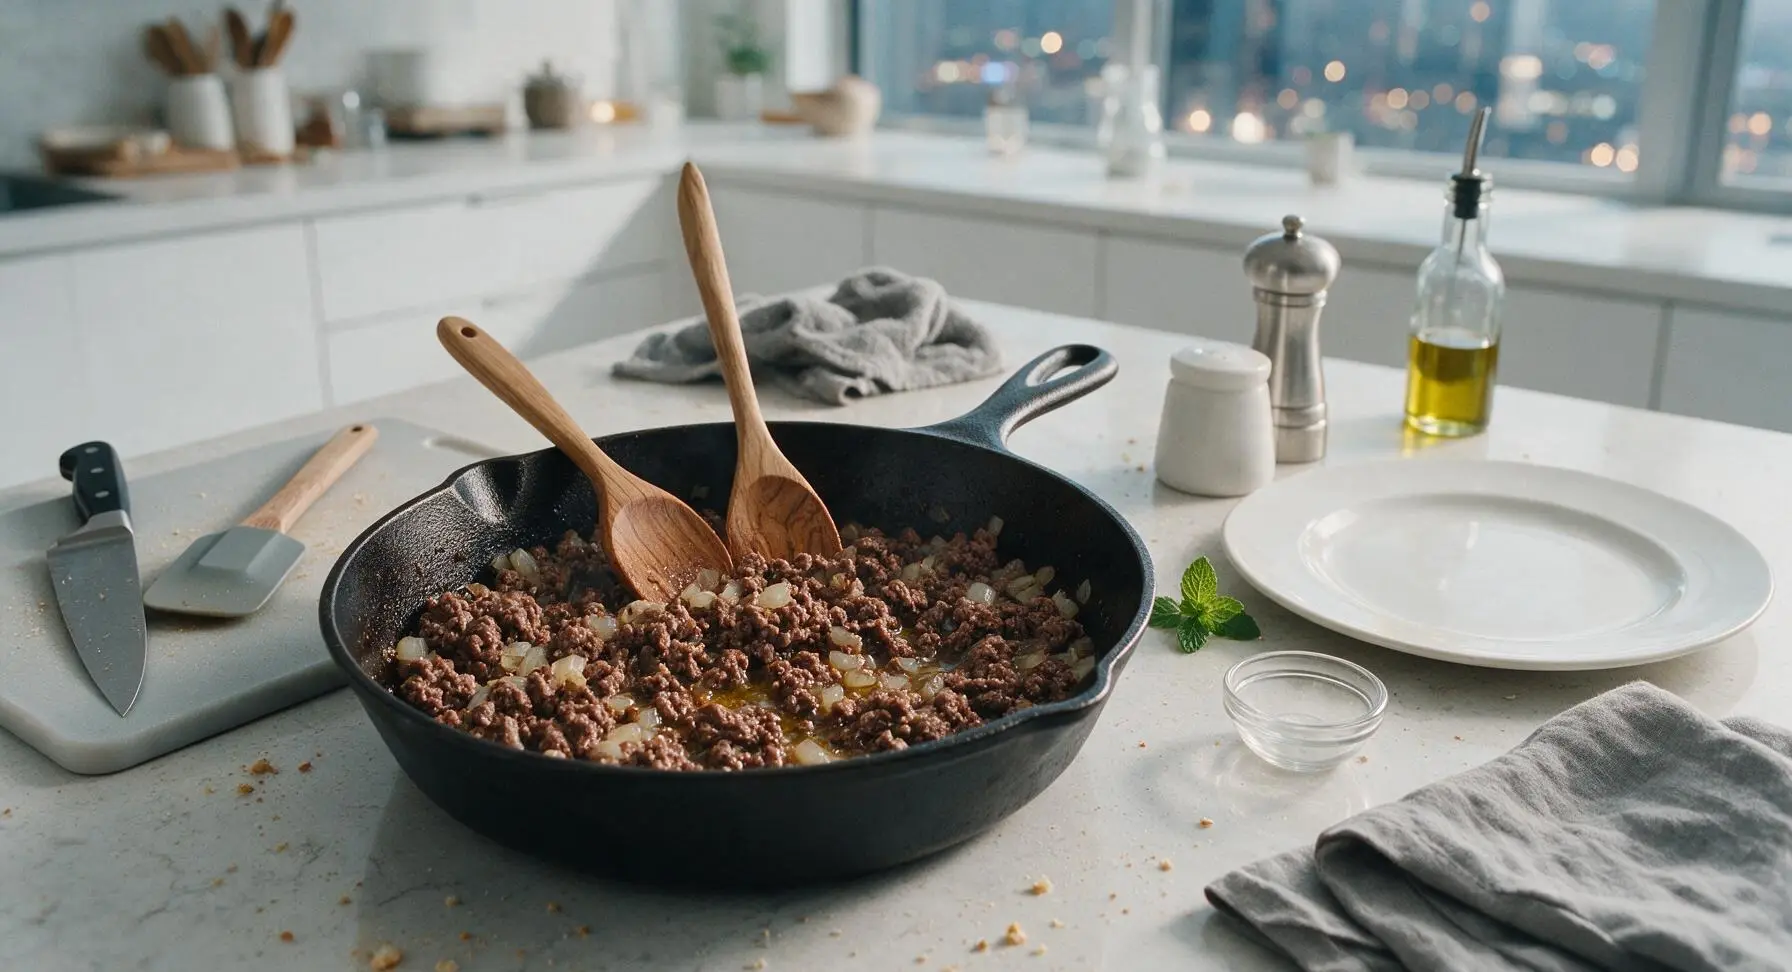
Place the 10-inch cast iron skillet on the stovetop burner over medium heat. Add the 1lb 80/20 ground beef to the skillet, breaking it apart into small crumbles with the carved maple wooden spoon as it cooks. Cook for 6-7 minutes, until the beef is fully browned with no pink remaining, and the fat has rendered out into the pan. Add the reserved diced onion to the skillet and cook for 3 more minutes, until the onion is soft and translucent.
Step 2
step2:Brown Ground Beef
Step 2
step2:Brown Ground Beef
3

Drain Excess Fat

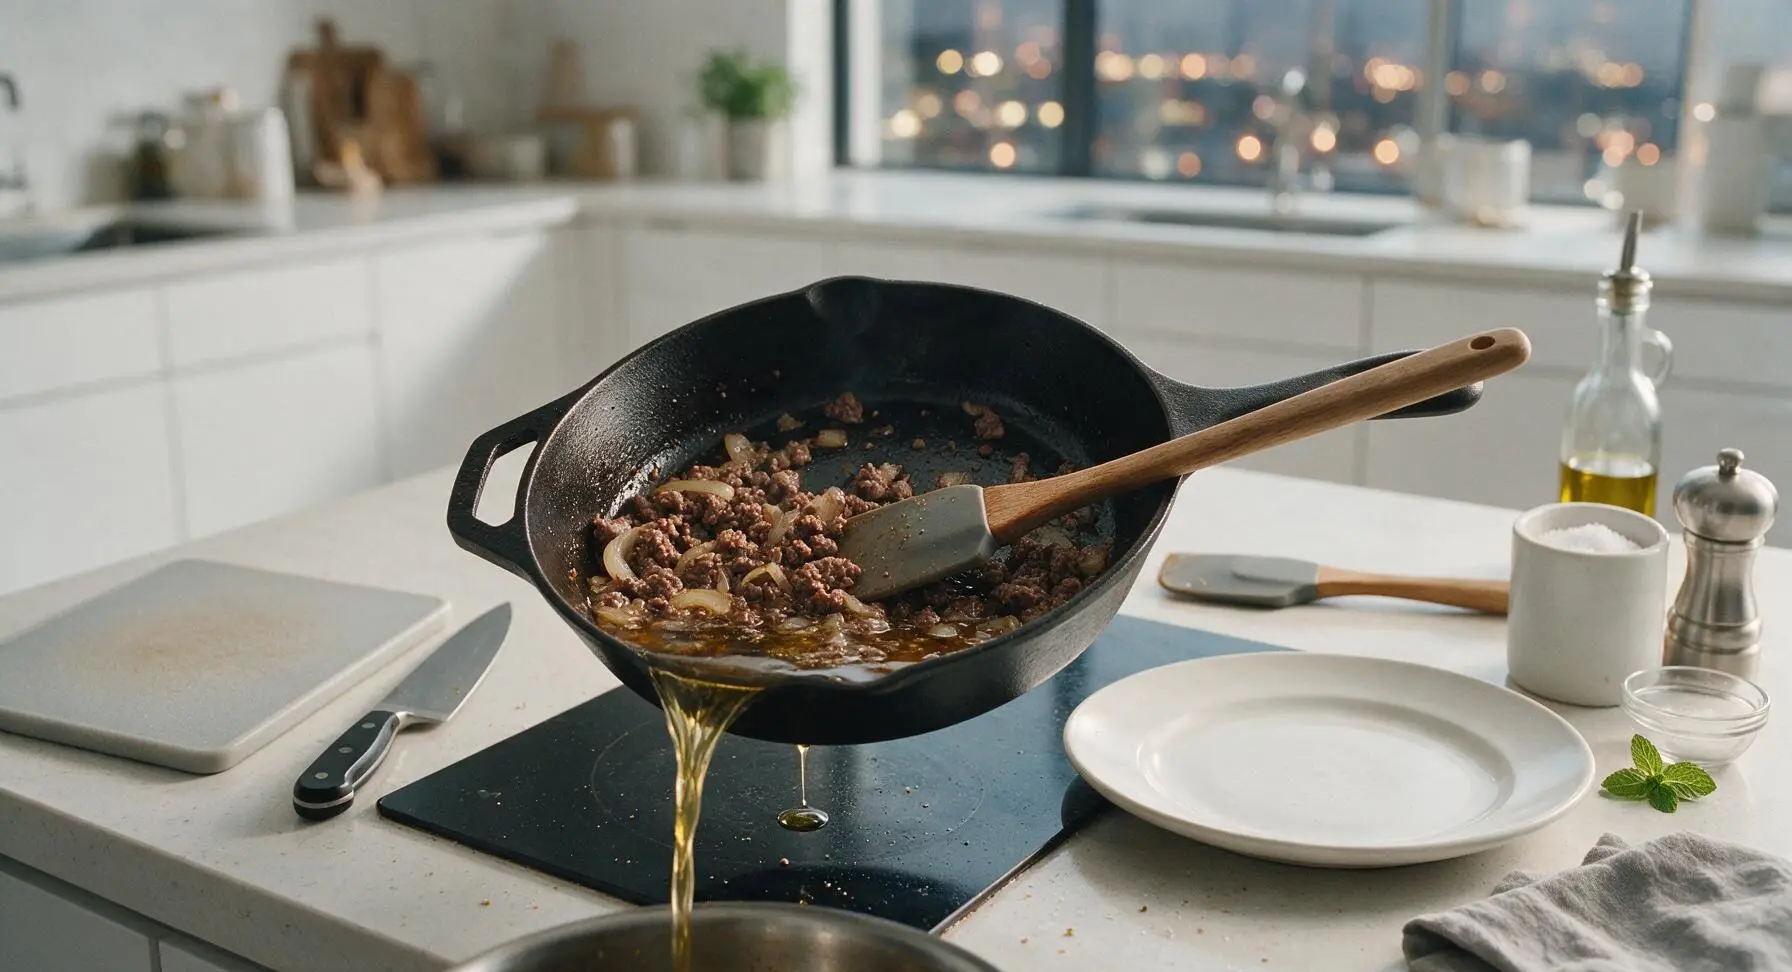
Carefully tilt the cast iron skillet over a heatproof container, pouring off all but 1 teaspoon of rendered beef fat to keep the finished hotdish from becoming greasy. Leave the browned beef and softened onion in the skillet to return to heat.
Step 3
step3:Drain Excess Fat
4

Mix Creamy Filling

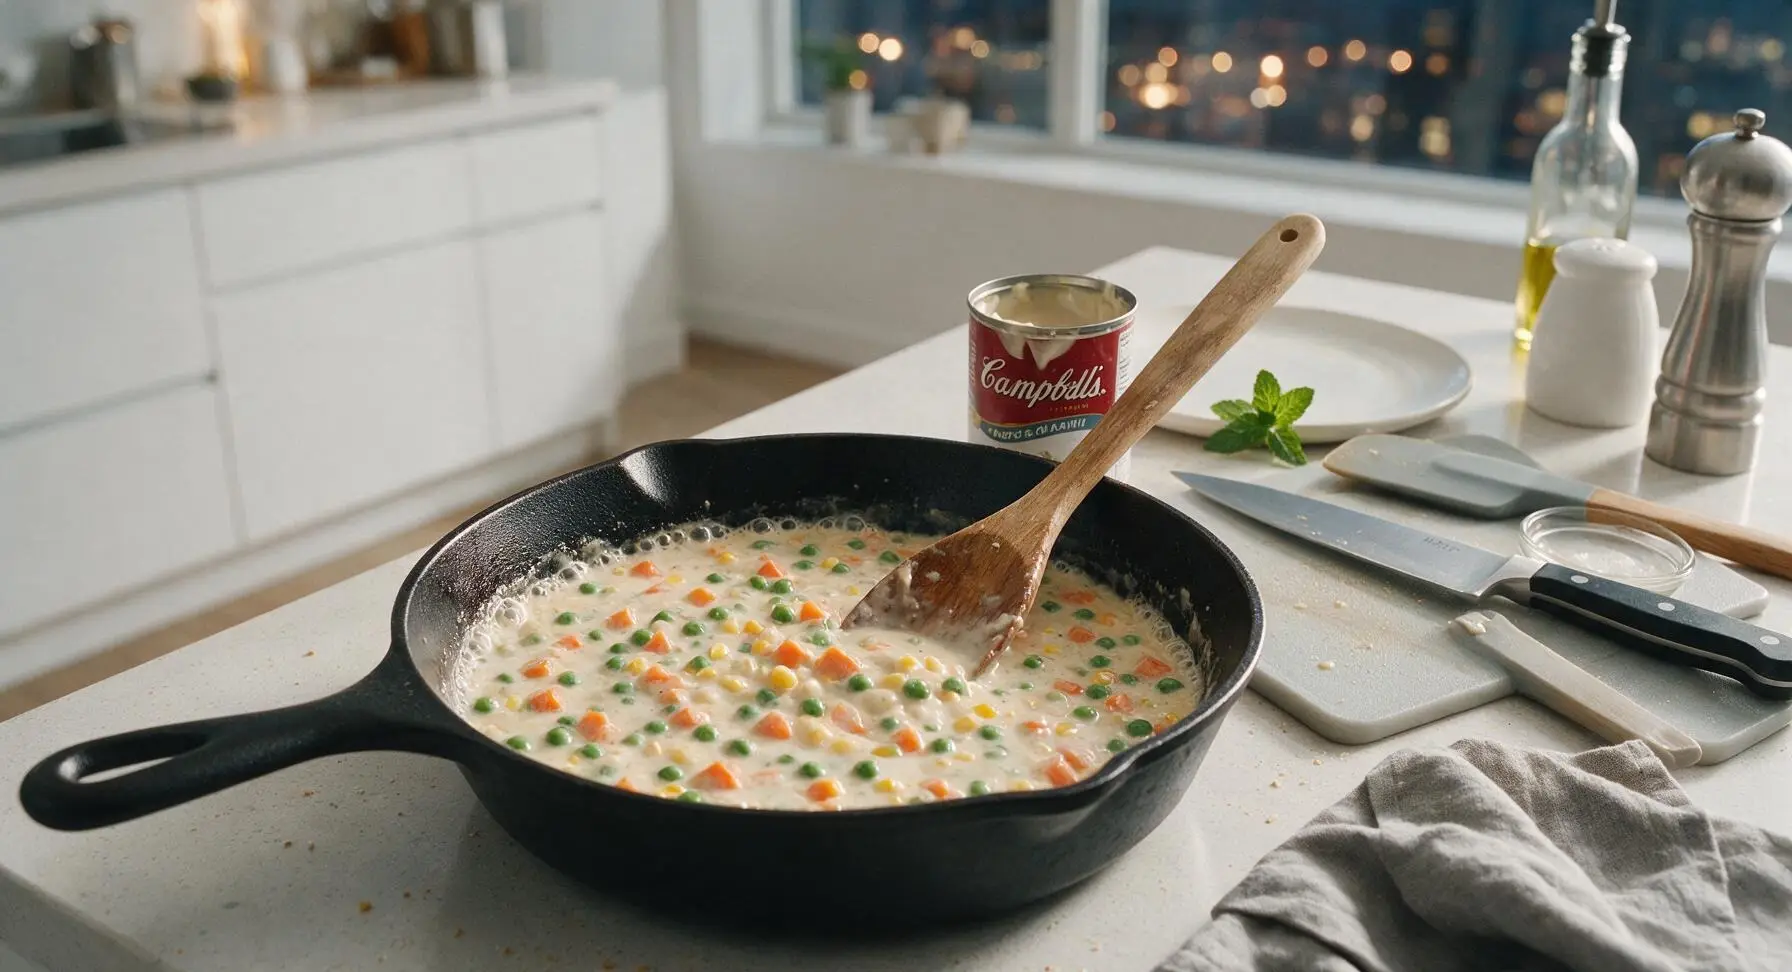
Return the skillet with beef and onion to medium-low heat. Use the stainless steel can opener to open the can of condensed cream of mushroom soup. Add the 2 cups of frozen mixed vegetables, opened cream of mushroom soup, 1/4 cup whole milk, 1 tablespoon Worcestershire sauce, 1 teaspoon garlic powder, 1/2 teaspoon kosher salt, and 1/4 teaspoon ground black pepper to the pan. Stir thoroughly with the maple wooden spoon until all ingredients are fully combined, and the mixture comes to a gentle simmer (about 3 minutes). The filling will be thick but pourable, with vegetables evenly distributed throughout the creamy sauce.
Step 4
step4:Mix Creamy Filling
5

Layer Filling in Dish

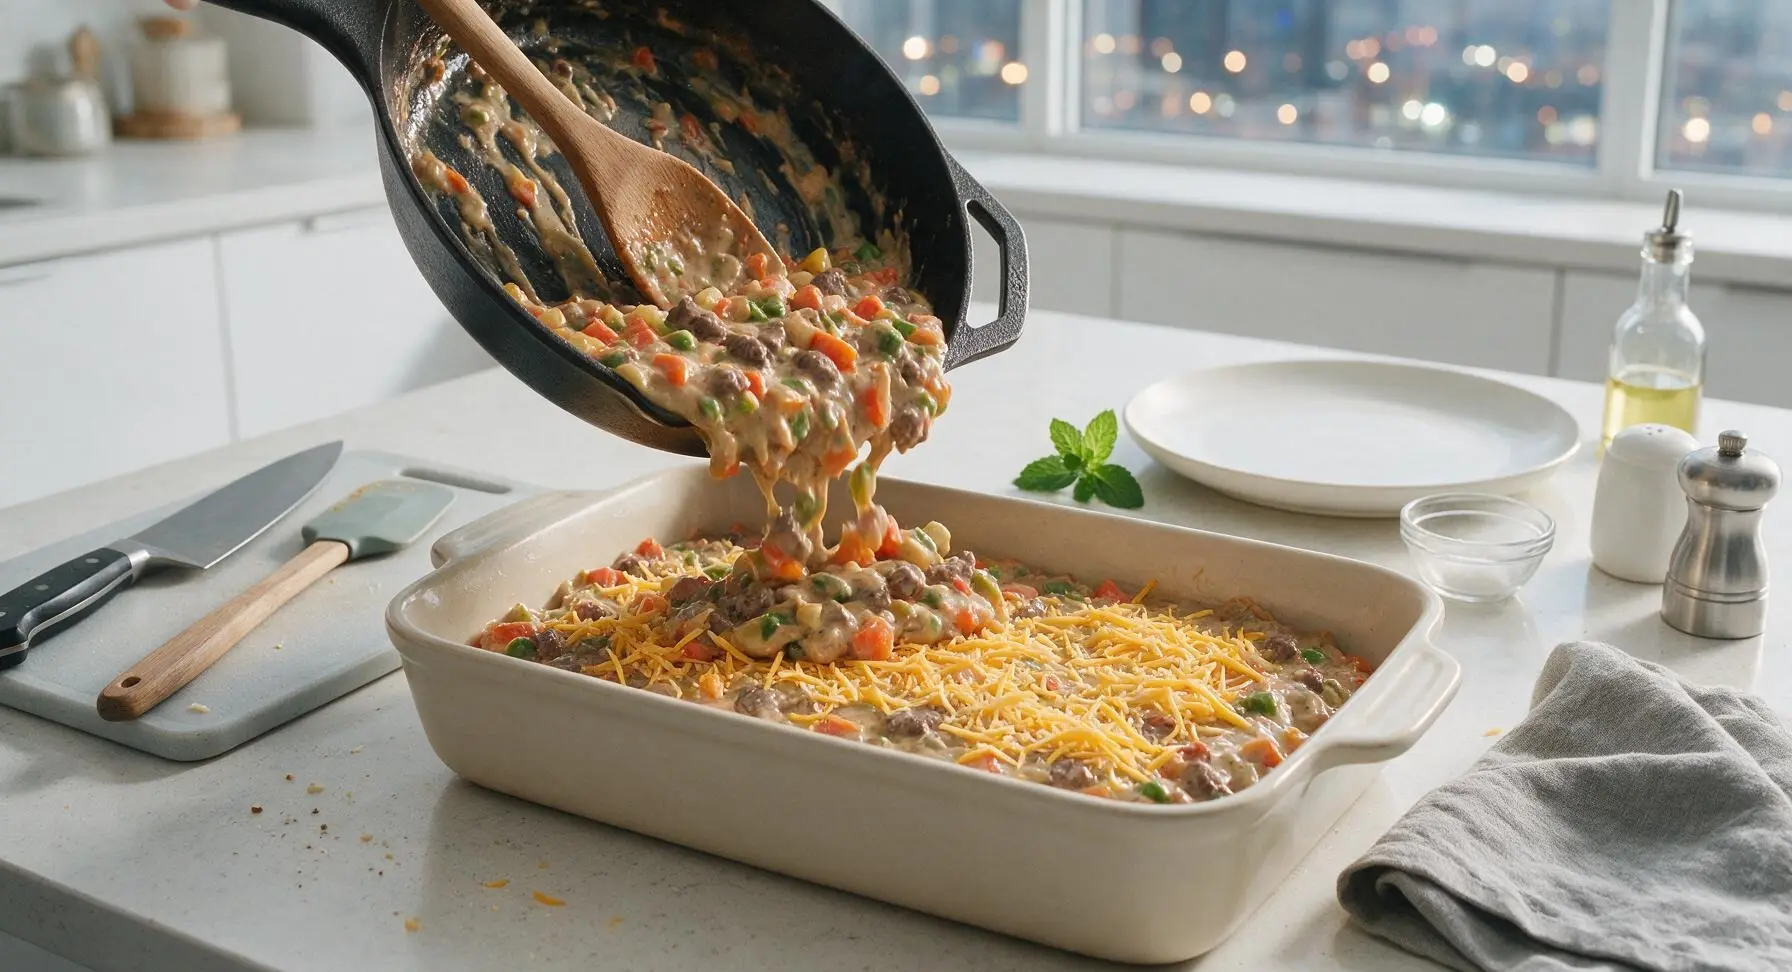
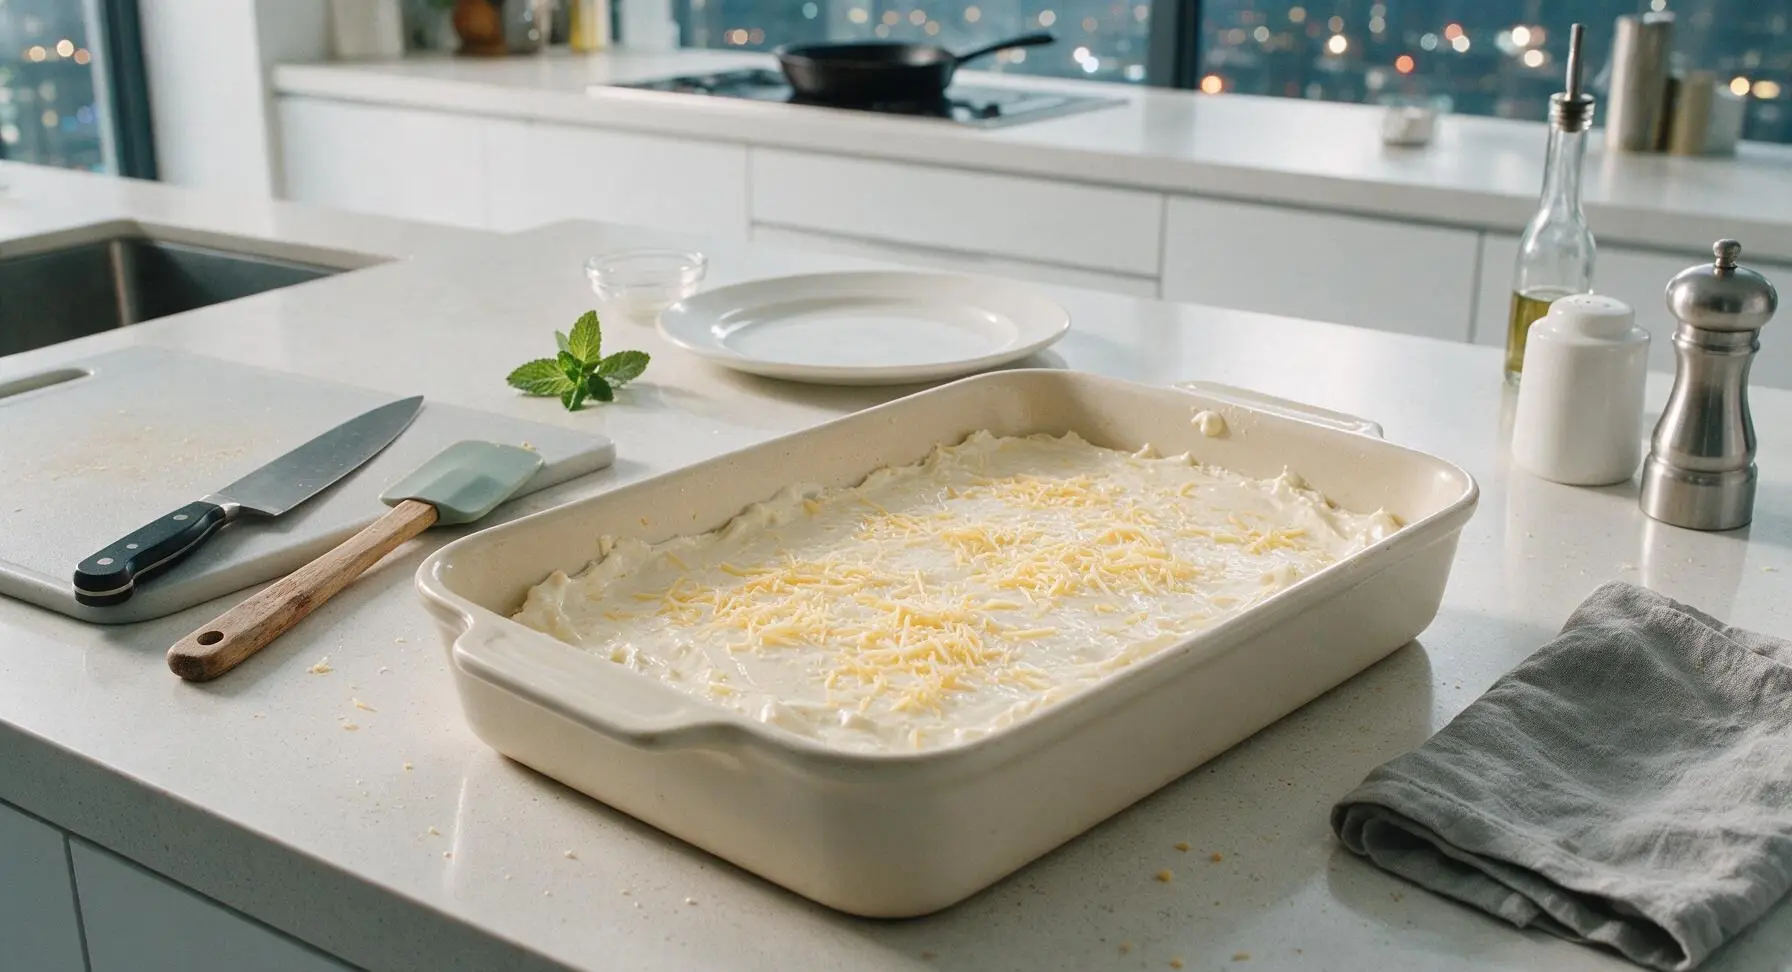
Pour the entire hot creamy filling mixture from the cast iron skillet into the 9x13 inch matte cream ceramic baking dish, spreading it into an even, flat layer across the bottom of the dish with the back of the wooden spoon. Sprinkle 1/2 cup of the shredded sharp cheddar cheese evenly over the top of the filling layer.
Step 5
step5:Layer Filling in Dish
Step 5
step5:Layer Filling in Dish
6

Arrange Tater Tot Topping

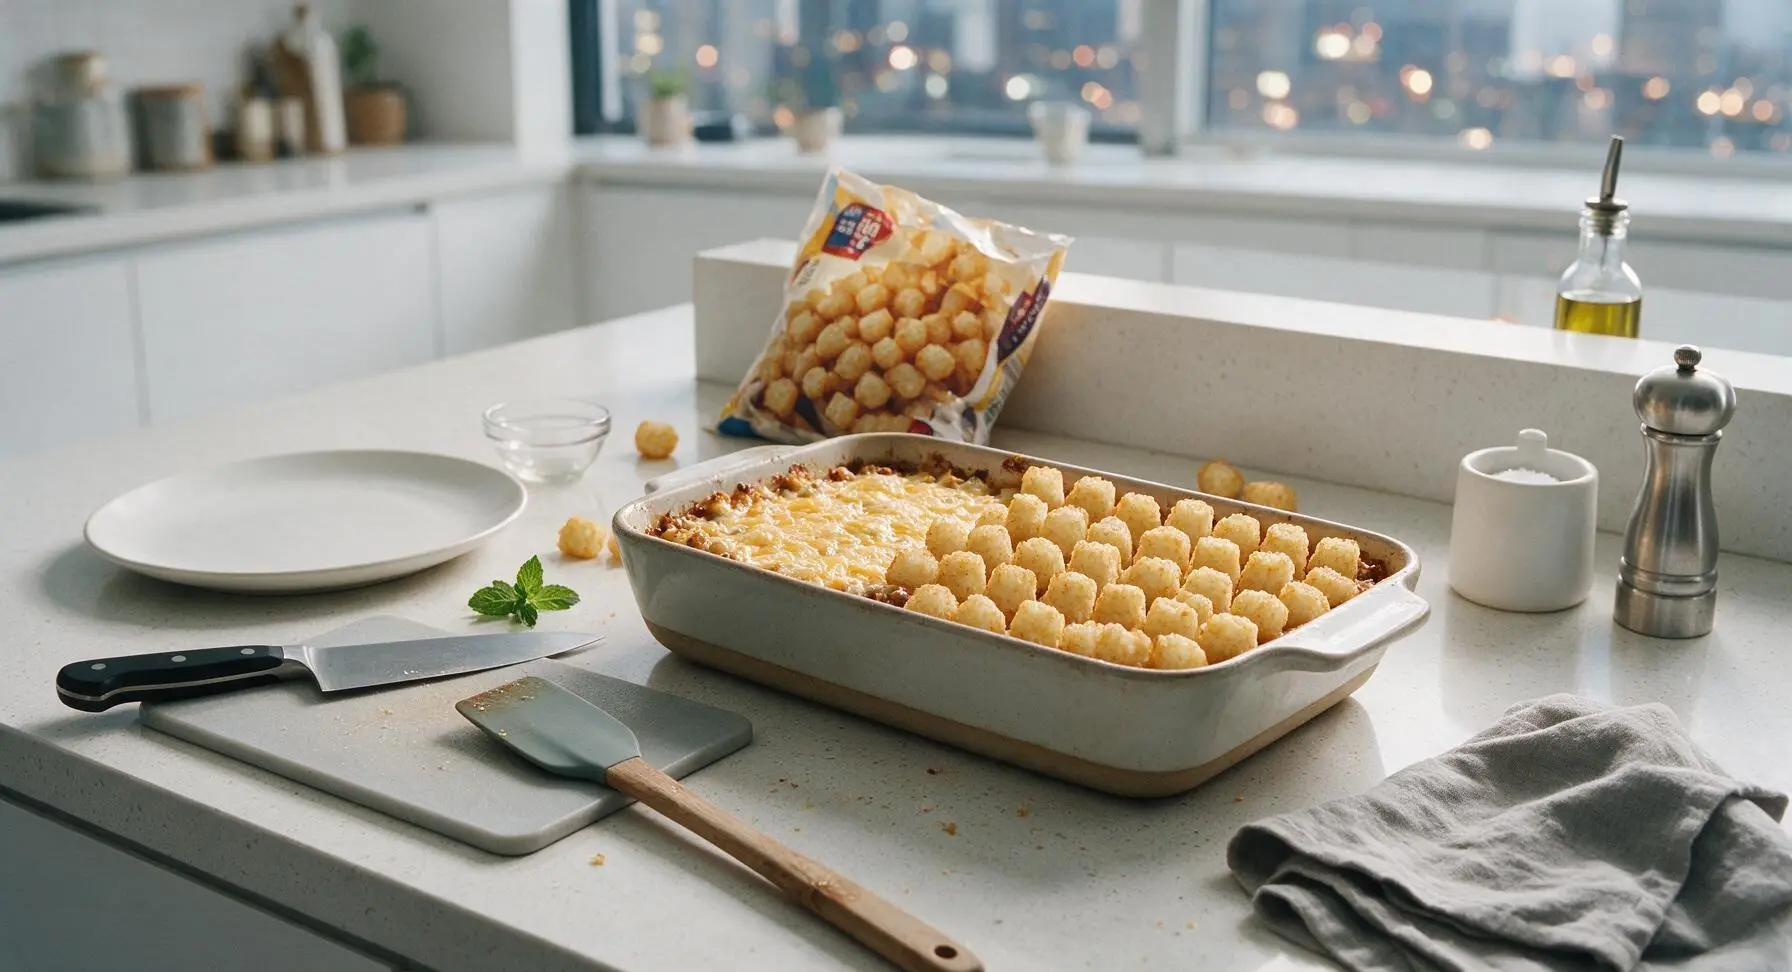
Remove the frozen tater tots from the bag, arranging them in tight, even rows across the entire surface of the filling, standing each tot on its narrow end so the cut sides face up for maximum crispiness. Do not thaw the tots first—frozen tots will get crispier in the oven without getting soggy from absorbing filling moisture.
Step 6
step6:Arrange Tater Tot Topping
7

Bake Until Golden

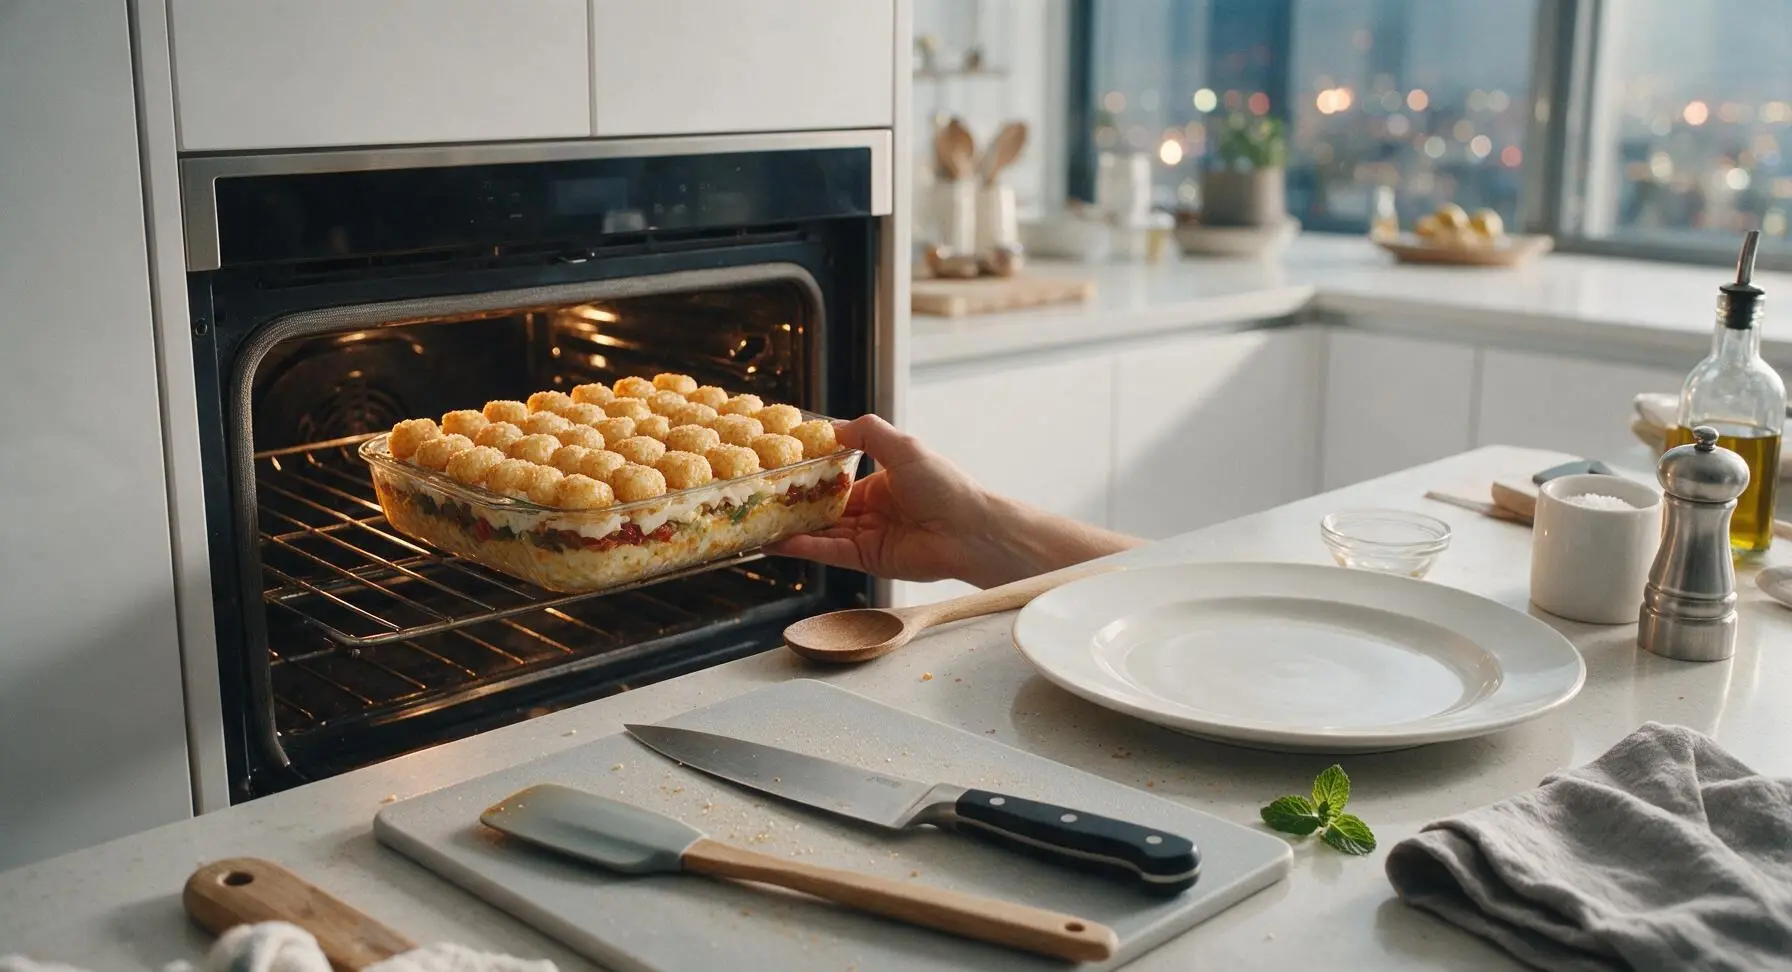
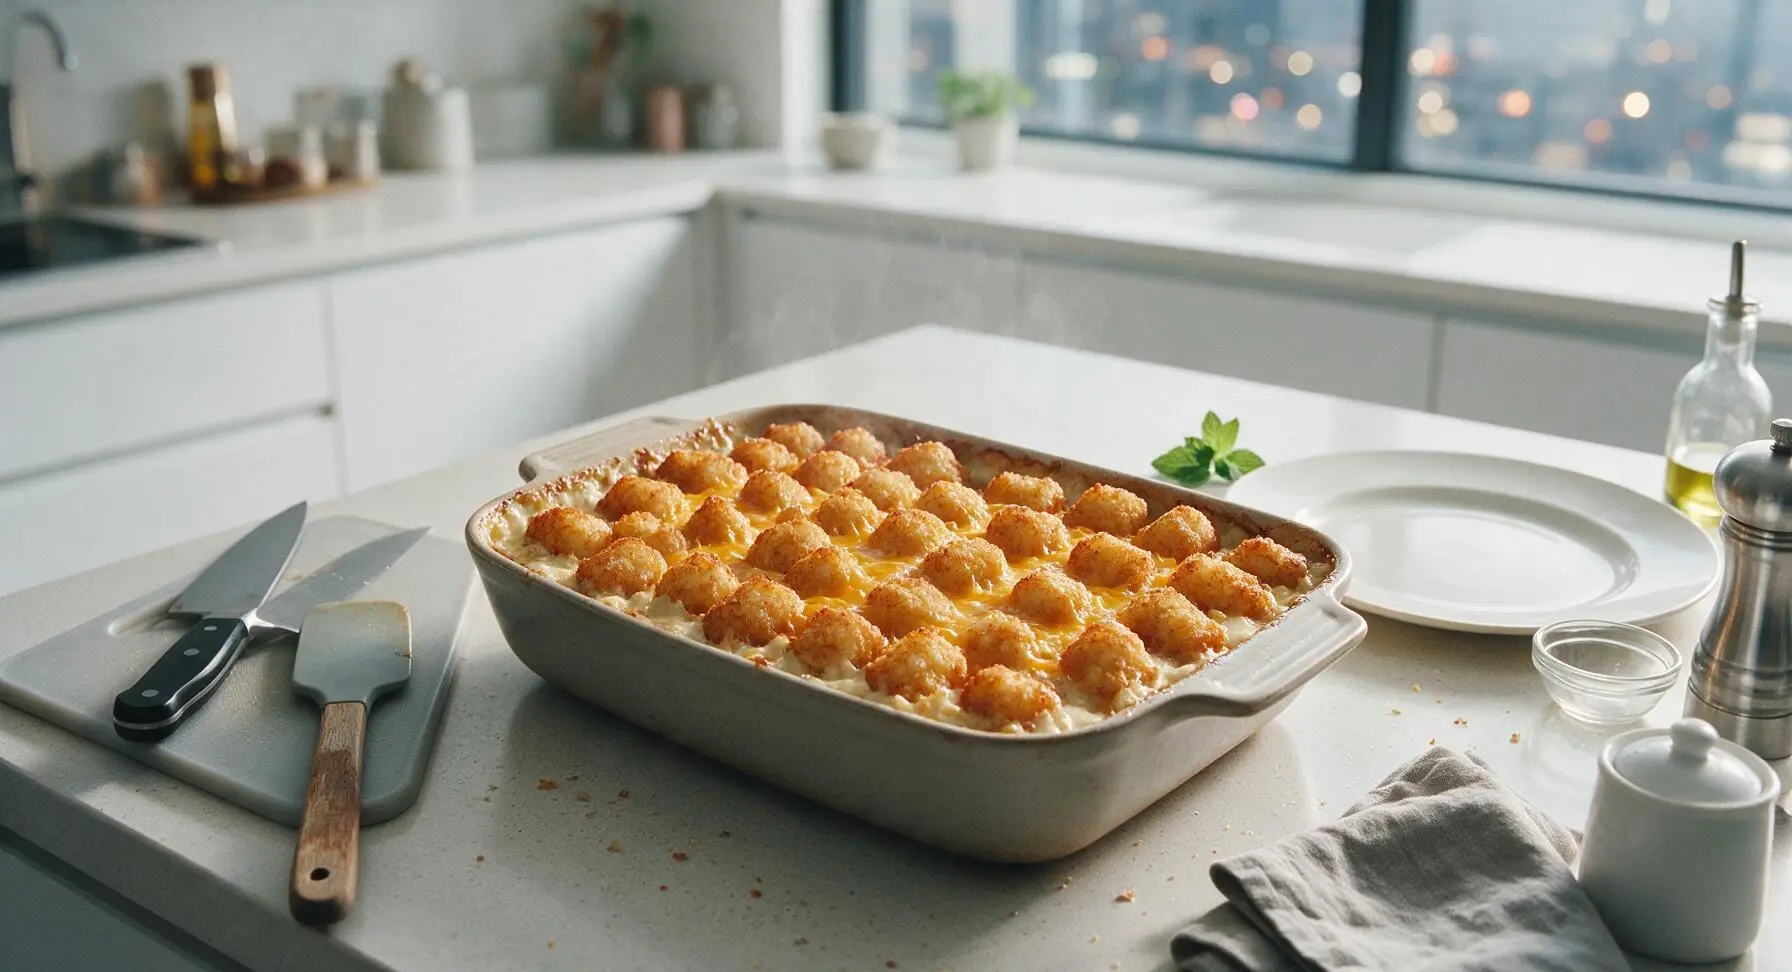
Carefully place the assembled baking dish on the middle oven rack. Bake uncovered for 40 minutes at 375°F (190°C), until the filling around the edges of the dish is bubbling vigorously, and the tater tots are deep golden brown and crispy on top. During the last 5 minutes of baking, pull the oven rack out slightly and sprinkle the remaining 1/2 cup of shredded cheddar cheese over the tater tots, letting it melt into the gaps between the tots as it finishes baking.
Step 7
step7:Bake Until Golden
Step 7
step7:Bake Until Golden
8

Rest and Serve

Let the hotdish rest for 10 minutes at room temperature after removing it from the oven, so the filling sets and does not run when scooped. Use the carved maple wooden spoon to scoop a generous portion onto the matte cream ceramic dinner plate, garnish with a tiny sprig of fresh thyme plucked from the potted plant if desired.
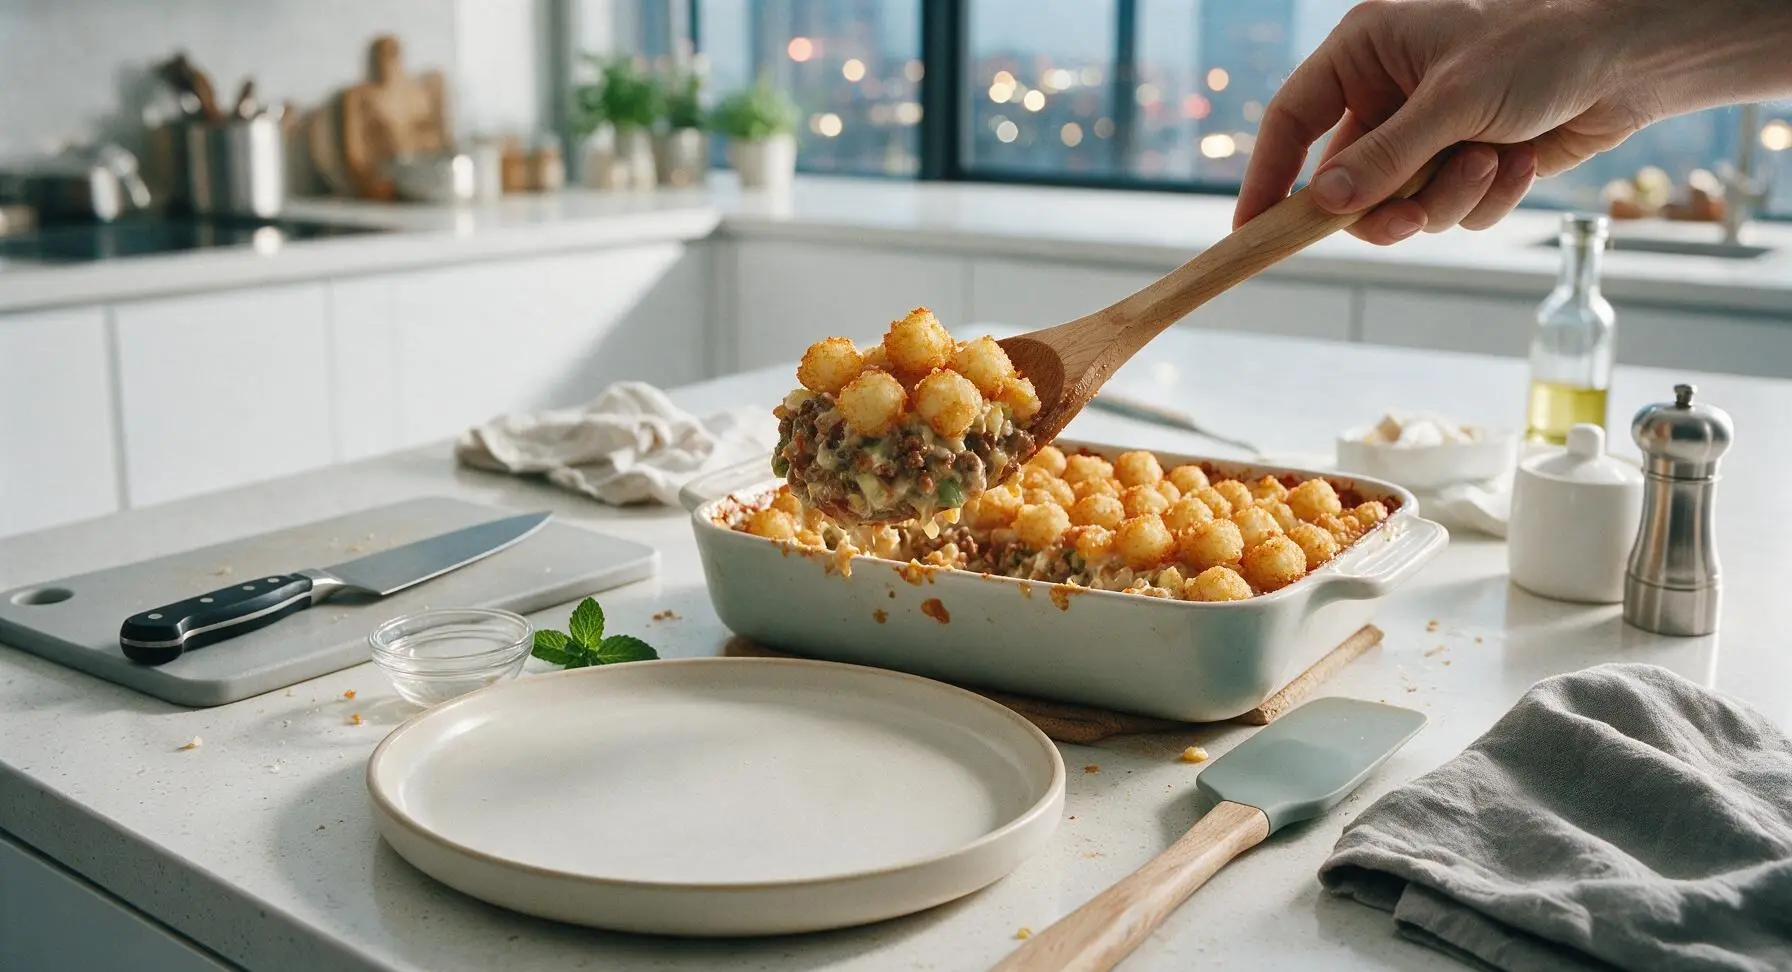
Step 8
step8:Rest and Serve

Tips

1.Always use frozen, unthawed tater tots: tots arranged straight from the freezer develop a shatteringly crisp crust in the hot oven, while thawed tots absorb moisture from the filling and turn soggy.
2.Stick to 80/20 ground beef for the best texture: the 20% fat content adds rich flavor without making the dish greasy, as you will pour off all but 1 teaspoon of rendered fat after browning.
3.Don’t skip the 10-minute rest after baking: the creamy filling needs time to set as it cools slightly, so scoops hold their neat shape instead of sliding apart into a runny mess on the plate.


✨ You May Also Like

Main Course
🍜 United Kingdom

A showstopping classic of tender seared beef, savory mushroom duxelles, and crisp prosciutto wrapped in flaky golden puff pastry, baked to juicy perfection.

⏱️ 2 hours 1Main Course ★ 4.7
Main Course
🍜 India

Tender charred marinated chicken simmered in a rich, spiced creamy tomato sauce, this iconic Anglo-Indian curry pairs perfectly with basmati rice or warm naan.

⏱️ 50 minuteMain Course ★ 4.6
Main Course
🍜 Thailand

Classic tangy, sweet, and savory Thai stir-fried rice noodles with shrimp, tofu, and crunchy garnishes, balancing all five core Thai flavor profiles.

⏱️ 30 minuteMain Course ★ 4.5
Main Course
🍜 United Kingdom

Crispy golden beer-battered cod and fluffy double-fried chips, served with tangy tartar sauce and malt vinegar: the timeless, beloved British pub comfort classic.

⏱️ 45 minuteMain Course ★ 4.7
Main Course
🍜 Mexico

Smoky, chile-marinated pork tacos with caramelized pineapple, fresh cilantro, and lime: a beloved classic Mexican street food perfect for casual summer gatherings.

⏱️ 1 hour 45Main Course ★ 4.8
Main Course
🍜 United States

Crunchy Fritos corn chips layered with savory beef chili and melted cheddar, topped with cool, zesty fixings for a beloved, cozy Tex-Mex comfort food.

⏱️ 35 minuteMain Course ★ 4.8

original tater tot hotdish:Frequently Asked Questions

1.Why do you recommend 80/20 ground beef for this hotdish instead of a leaner blend? ▾
The 20% fat content in 80/20 ground beef adds rich, savory depth to the filling, eliminates the need for extra cooking oil, and keeps the meat tender instead of dry after baking. You only need to drain off any pooled excess grease after browning—no rinsing required—so all that beefy, umami flavor stays locked in the dish.
2.Do I need to thaw the frozen mixed vegetables before adding them to the filling? ▾
No need to thaw them first! Tossing frozen peas, carrots, corn, and green beans straight into the beef mixture cuts down on prep time, and they cook perfectly through during the bake. Thawing them first can lead to mushy, waterlogged veggies that make the filling runny, so keep them frozen until you’re ready to mix.
3.Can I use a different cream soup instead of condensed cream of mushroom for this original recipe? ▾
While this classic original relies on cream of mushroom for that iconic earthy, creamy base, you can swap in condensed cream of celery or cream of chicken if you have a mushroom aversion. Just be sure to use undiluted condensed soup, not ready-to-eat varieties, to keep the filling the right thick, cozy consistency.
4.How do I keep the tater tot topping crispy instead of soggy? ▾
Arrange frozen tater tots in a single, even layer on top of the filling right before baking—don’t thaw them first! Resist the urge to press the tots down into the creamy filling, and bake the hotdish uncovered on the middle oven rack so hot air can circulate around every tot to crisp them golden.
5.What temperature and bake time works best for this hotdish? ▾
Bake it at 375°F for 40 to 45 minutes total. You’ll know it’s done when the filling is bubbling hot around the edges of the dish, and the tater tots on top are deep golden and crispy all over. Let it rest 5 minutes after pulling it from the oven so the filling sets a little before serving.
6.Do I need to cook the ground beef all the way through before assembling the hotdish? ▾
Yes, brown the ground beef fully with diced yellow onion on the stovetop first, until no pink remains, before mixing in the veggies, soup, and milk. Since the bake time is focused on crisping tots and heating the filling through, pre-cooking beef ensures it’s food-safe and has that nice caramelized savoriness from browning.
7.How much whole milk should I add to the soup to get the right filling consistency? ▾
Start with ½ cup of whole milk stirred into the condensed cream of mushroom soup, then adjust if needed. The mixture should be thick enough to coat the beef and veggies without being runny—whole milk adds a richer, creamier texture than skim or 2% that perfectly matches the classic cozy profile of this Midwestern staple.
8.Can I make this hotdish ahead of time for a potluck? ▾
Absolutely! Assemble the beef and veggie filling in your baking dish, cover it tightly, and store it in the fridge for up to 24 hours. Wait to add the frozen tater tots until right before you bake it, though—adding them too early can make them soggy as they thaw in the cold fridge.
9.What size baking dish do I need for the standard recipe yield? ▾
A 9x13 inch glass or ceramic baking dish is ideal for this classic recipe, yielding about 8 generous servings perfect for family dinners or potlucks. Glass dishes heat evenly to prevent the bottom of the filling from burning, while the wide surface area fits a single, even layer of tater tots.
10.My filling came out runny the last time I made tater tot hotdish—what did I do wrong? ▾
Runny filling usually comes from adding too much milk, skipping draining excess grease from browned beef, or using thawed frozen veggies that leach extra water. Stick to the ½ cup whole milk measurement, drain pooled grease after browning beef, and use frozen (not thawed) veggies for that perfect thick, creamy texture.
11.Can I add extra seasonings to the original recipe without ruining the classic flavor? ▾
The original is intentionally mild and comforting, but you can add a pinch of garlic powder, black pepper, or a dash of Worcestershire sauce to the beef filling for extra depth without straying too far from the classic taste. Skip heavy, bold seasonings like spicy chili powder that will overpower the familiar, cozy flavor.
12.Do I need to cover the hotdish with foil while it bakes? ▾
Skip the foil for the majority of the bake time! Covering the dish traps steam, which will make your tater tot topping soft and soggy instead of crispy. If you notice the tots getting too dark before the filling is bubbly, you can tent a loose piece of foil over the top for the last 10 minutes of baking.
13.Can I freeze leftover tater tot hotdish for later meals? ▾
Yes, let the cooked hotdish cool completely, then portion it into airtight, freezer-safe containers for up to 3 months. Reheat portions in the oven or microwave until they reach 165°F internally—note that tots will be a little less crispy after freezing, but the rich, savory flavor will stay fully intact.
14.Why is this dish called a hotdish instead of a casserole? ▾
Hotdish is the classic Midwestern term for this style of hearty, one-dish baked meal, traditionally made with a starch topping, creamy condensed soup base, protein, and veggies, built to feed a crowd affordably. It’s a longstanding staple at church potlucks, family holidays, and casual weeknight dinners across the Upper Midwest.
15.Can I use fresh vegetables instead of frozen mixed veggies in this recipe? ▾
You can, but you’ll need to par-cook firmer veggies like carrots and green beans first so they’re tender by the time the tots are crisp. Frozen mixed veggies are picked and frozen at peak ripeness, so they’re convenient, affordable, and have that classic familiar texture people expect from the original recipe.
16.What are classic side dishes to serve with this hotdish? ▾
Keep it simple and true to the Midwestern vibe! Serve tangy dill pickle spears, a crisp side salad tossed with creamy ranch dressing, or soft buttered dinner rolls alongside the hotdish. The bright, tangy pickles and fresh salad cut through the rich, creamy filling to balance every bite perfectly.
17.Can I substitute ground turkey for the ground beef to make a lighter version? ▾
You can swap in ground turkey, but opt for an 85/15 blend instead of extra-lean ground turkey breast to keep the filling moist and flavorful. Keep in mind this will change the classic rich, beefy flavor of the original, so you may want to add an extra pinch of salt and pepper to amp up savoriness.

Comments (4)

1 week ago

Game changer for Sunday meal prep! I made this last weekend, portioned it out into containers for the work week, and it held up perfectly all 5 days. Super simple to throw together even when you’re half asleep on meal prep day, and it’s way more satisfying than the sad salads I usually force myself to eat. The crispy tater tot top with the creamy ground beef and veggie filling? *Chef’s kiss* Not too salty, not too bland, exactly what I crave in cold weather comfort food.

30 minutes ago

Made this for my family dinner last night and my kids loved it! I brought the leftovers to my office potluck today and three people asked for the recipe. Quick question though — can I swap the ground beef for ground turkey to make it a little lighter? My husband is watching his red meat intake for his cholesterol and I want to make sure it still turns out good if I make that swap.

5 minutes ago

Hi Sarah! So glad your kids enjoyed the hotdish! Absolutely you can swap in ground turkey — I recommend using 93/7 lean ground turkey so it doesn’t dry out, and you might want to add an extra pinch of garlic powder and onion powder to bump up the flavor since turkey is milder than beef. It works beautifully, I make that swap for my own family all the time!

3 days ago

OMG SO good, I made this for our college football watch party this past weekend and the whole pan was gone before halftime! I added a little extra shredded sharp cheddar on top the last 10 minutes of baking because who doesn’t love extra cheese, and it was chef’s kiss. Only heads up I’ll give is my oven runs super hot so I turned the temp down 25 degrees and the tater tots got perfectly crispy without burning on the bottom.

2 days ago

Wait that extra cheese hack is genius! I made this last month and thought it was good but felt like it was missing a little something, I’m definitely adding that cheddar layer next time I make it for my buddy’s bonfire next weekend.

yesterday

Love the extra cheese hack, Mia! That’s such a great upgrade — I’ve had readers add crumbled bacon or a dash of hot sauce to the filling too, if you ever want to mix it up. So glad it was a hit at your watch party!

yesterday

I was so skeptical about hotdish since I grew up in California and never had it before, but my partner is from Minnesota and begged me to make this for his birthday dinner. It was so easy even for someone who burns toast half the time! The whole thing came together in like 10 minutes of prep, I popped it in the oven, and we had the coziest dinner. He said it tasted exactly like what his grandma used to make, which is the highest compliment I could possibly get. Will be adding this to our regular weeknight rotation for sure!

2 hours ago

Welcome to the hotdish fan club, Jessie! Once you start making it you’ll wonder how you ever lived without it. Pro tip: add a can of drained sweet corn next time if you love extra veggies, it’s *so* good.



