
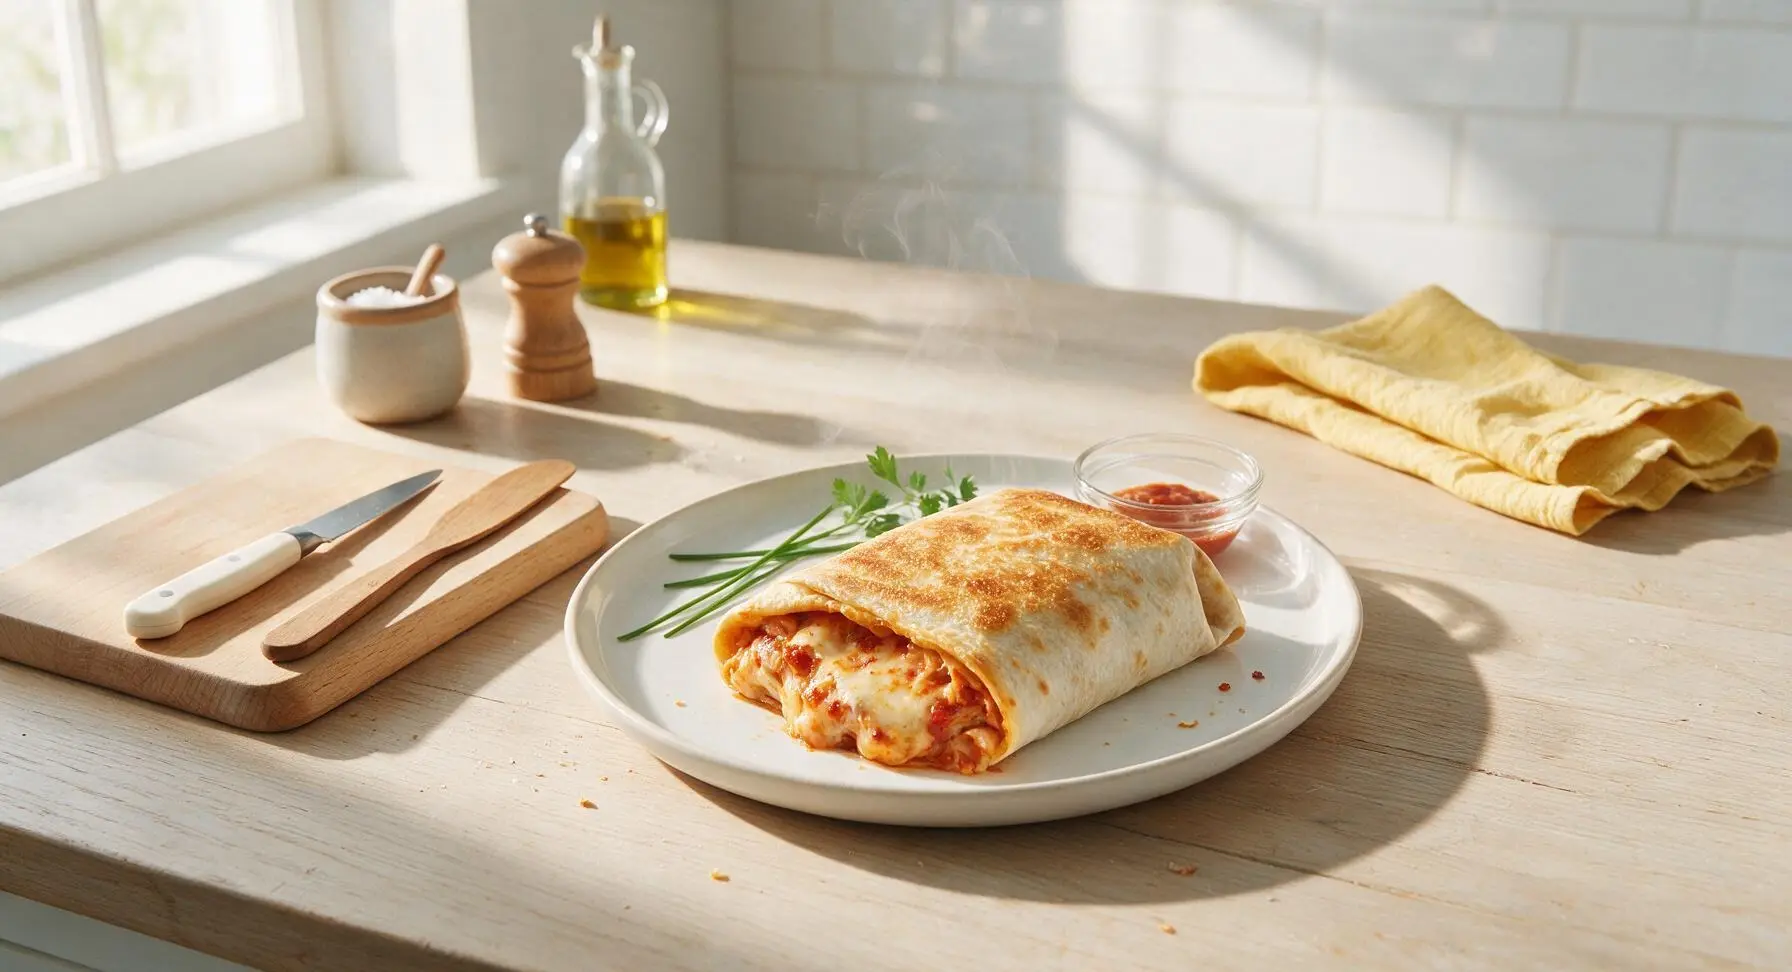
pizza burrito

title 1
pizza burrito
⏱️ cook time 12 minutes
🍽️ servings 4
⚡ Difficulty easy

intro

A gooey, handheld fusion of classic pizza fillings wrapped in a soft flour tortilla, crisped to golden perfection—faster than delivery, infinitely customizable.

Ingredients
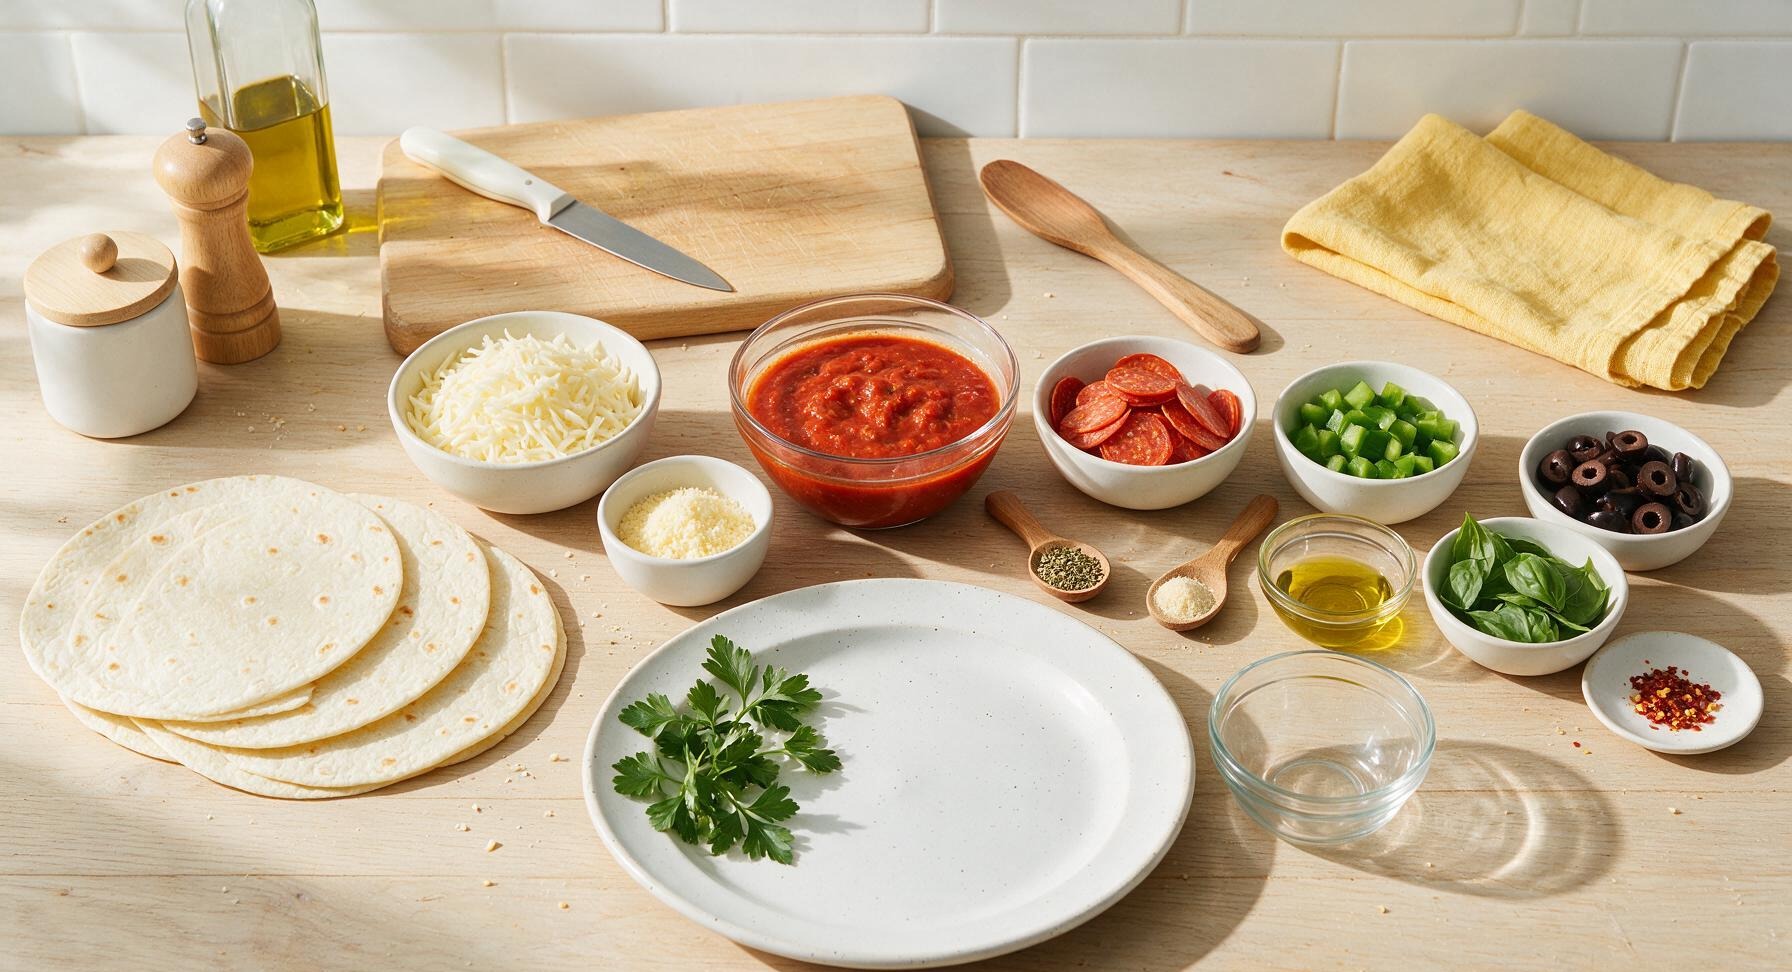
Large (12-inch) flour tortillas 4 each
Low-moisture mozzarella cheese 2 cups (226g), shredded
Marinara sauce, divided 1.5 cups (360ml)
Sliced pepperoni 1 cup (113g)
Diced green bell pepper ½ cup (75g)
Sliced black olives ¼ cup (35g)
Grated parmesan cheese 2 tbsp (15g)
Dried oregano 1 tsp (1g)
Garlic powder ½ tsp (1.5g)
Extra-virgin olive oil 1 tbsp (15ml)
Fresh basil leaves 8 each
Red pepper flakes (optional) ¼ tsp (0.5g)

Steps

1

Prep Pizza Fillings

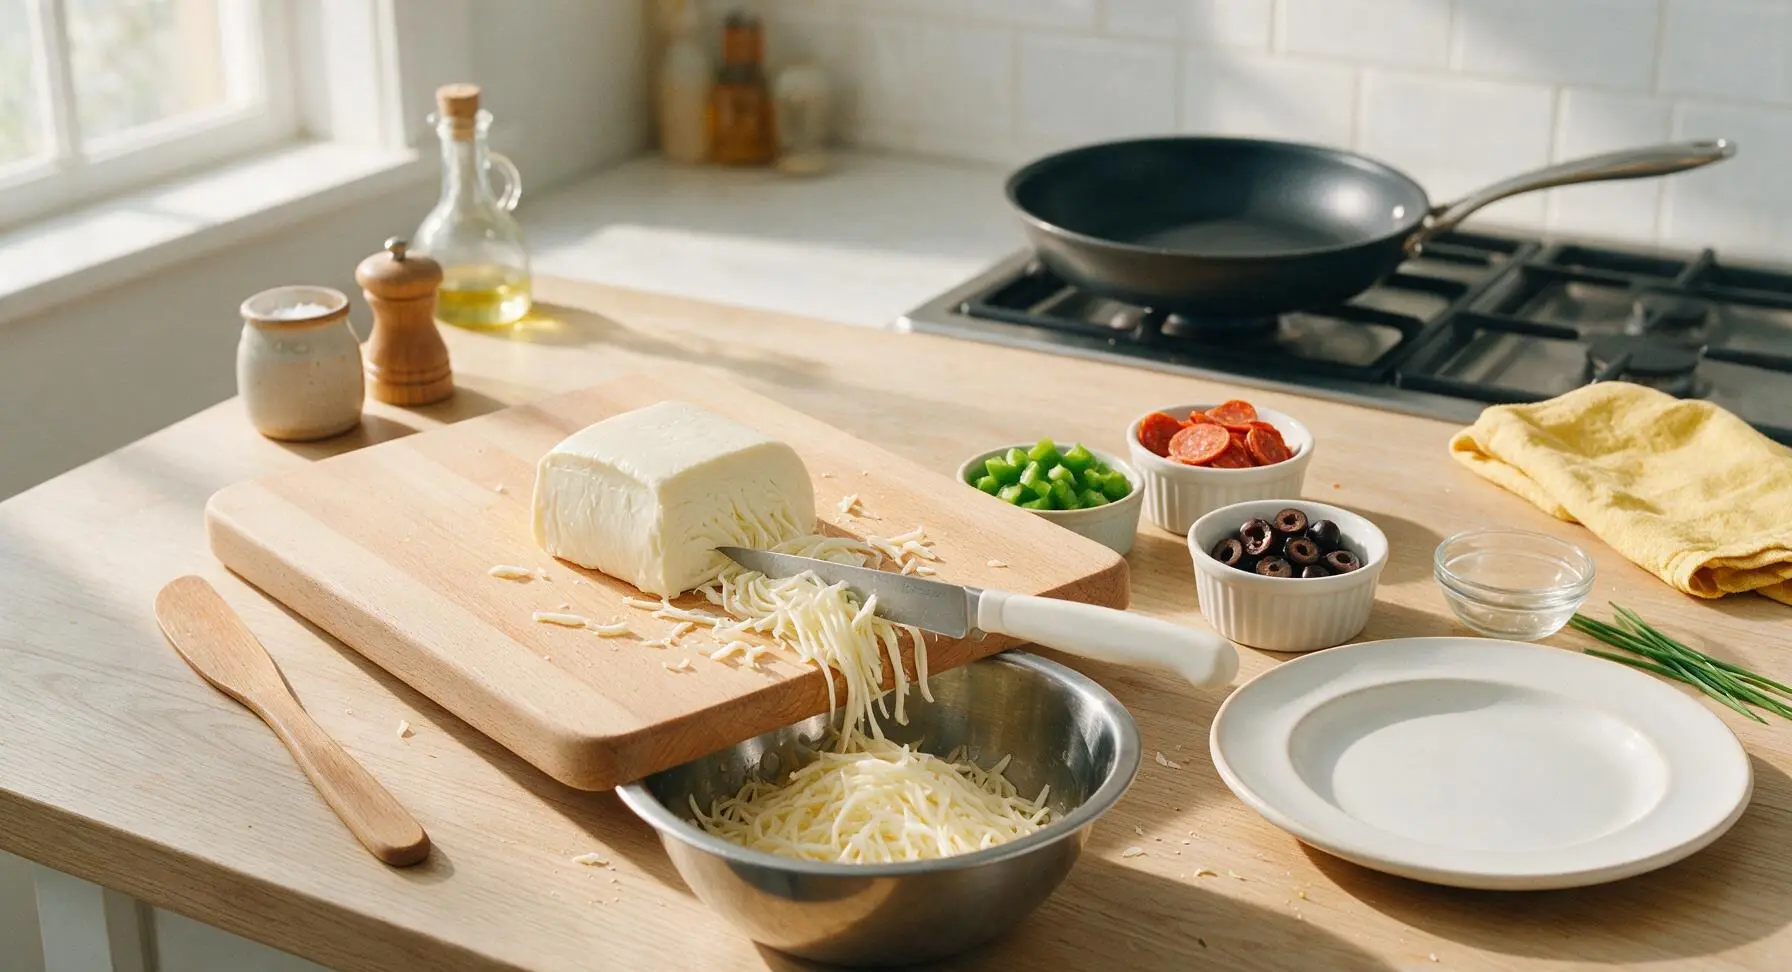
Set the large birch cutting board in its fixed center-left position. Shred the low-moisture mozzarella into the stainless steel mixing bowl, dice the green bell pepper into uniform ½cm pieces, and portion pepperoni, sliced black olives, grated parmesan, dried oregano, and garlic powder into the two small white ramekins. Turn the stovetop to medium heat to preheat the 28cm non-stick skillet to 350°F (175°C) as you work; set aside ½ cup of marinara for dipping, leaving 1 cup for burrito fillings.
Step 1
step1:Prep Pizza Fillings
2

Warm Tortillas for Folding

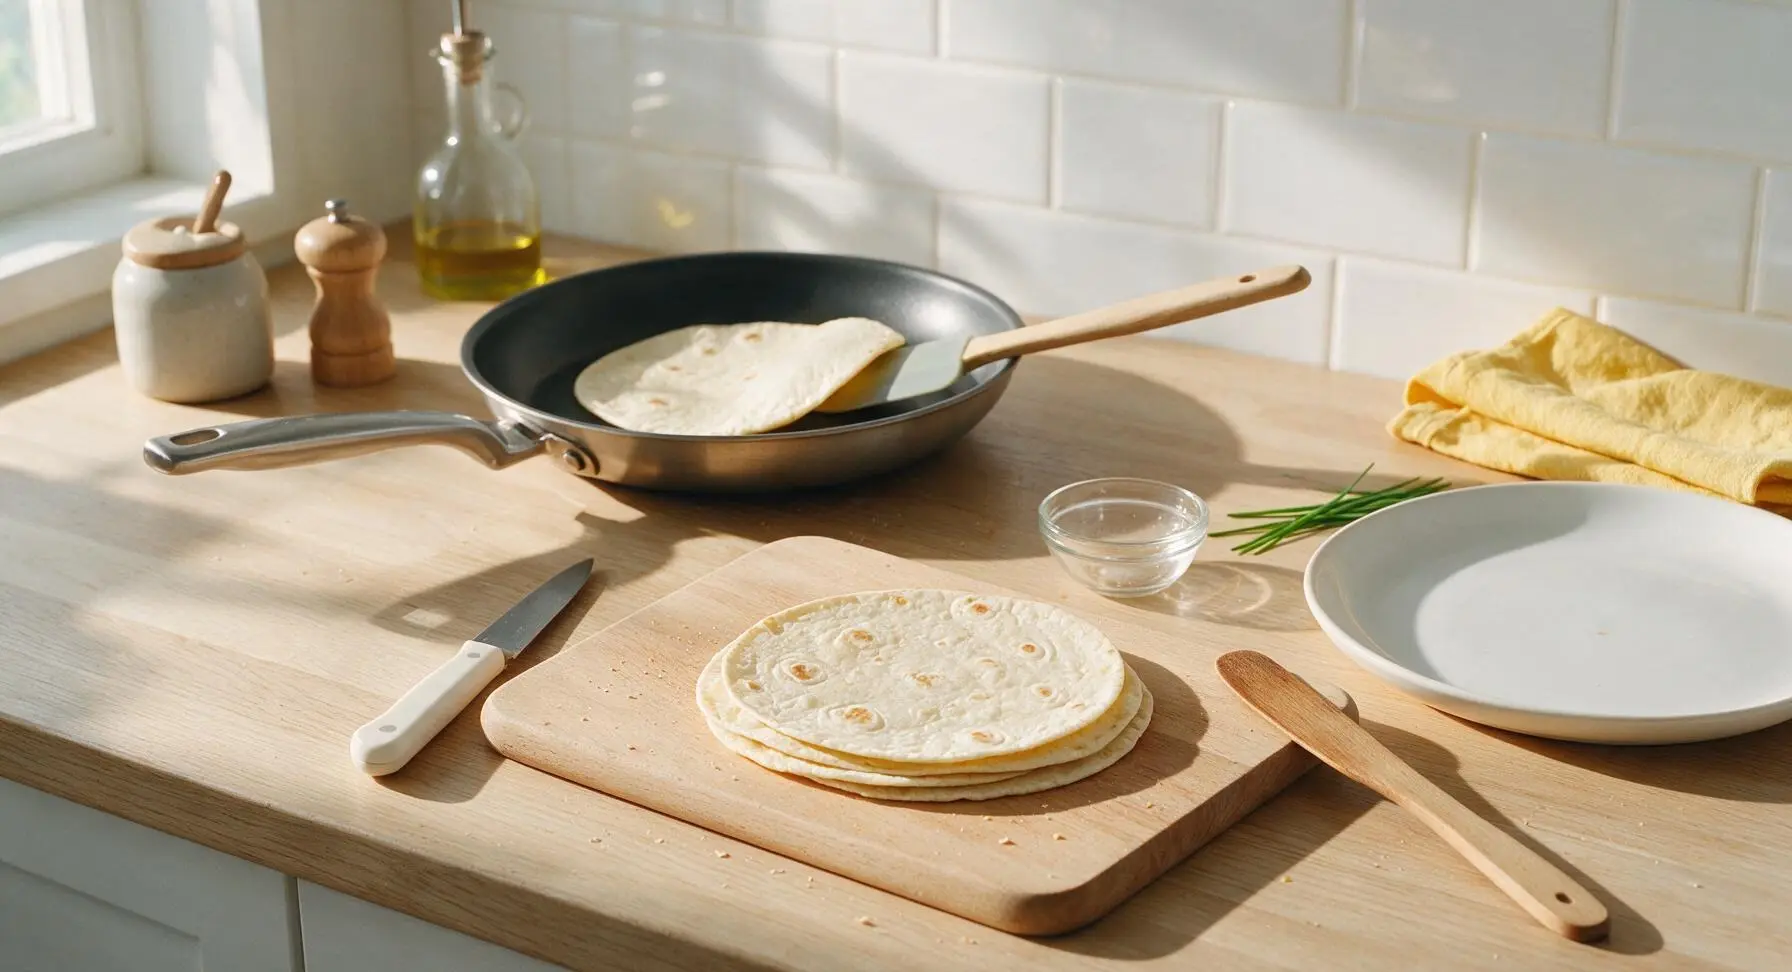
One at a time, place each flour tortilla in the preheated dry skillet for 10 seconds per side, just until soft and pliable (do not brown or crisp them at this stage). Transfer warmed tortillas to the cutting board as you go, stacking them loosely to retain heat. Warming prevents tortillas from cracking when folded tight around fillings.
Step 2
step2:Warm Tortillas for Folding
3

Layer Burrito Fillings

Lay one warm tortilla flat on the cutting board. Spread ¼ cup of the reserved filling marinara in a 4-inch wide strip down the center of the tortilla, leaving a 2-inch border on the top, bottom, and sides to prevent leaking. Top the sauce with ½ cup shredded mozzarella, ¼ cup pepperoni slices, 2 tablespoons diced bell pepper, 1 tablespoon sliced olives, a pinch of oregano, garlic powder, and ½ tablespoon parmesan. Do not overfill—excess filling will burst out during searing.
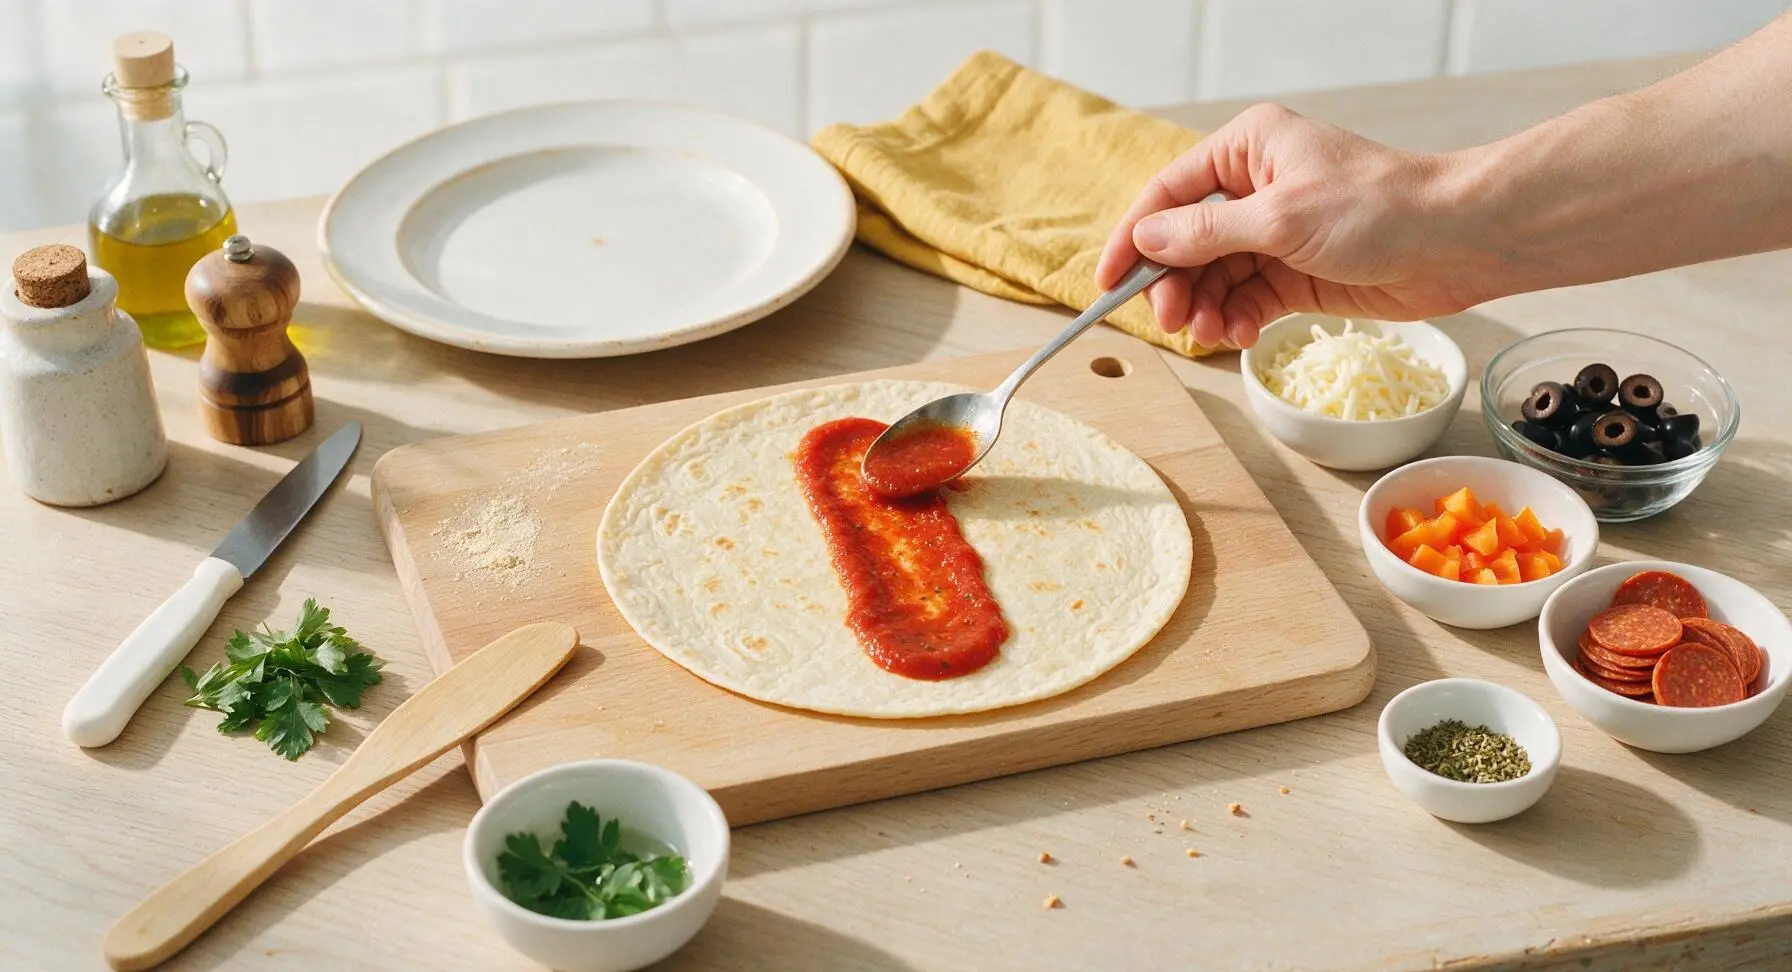
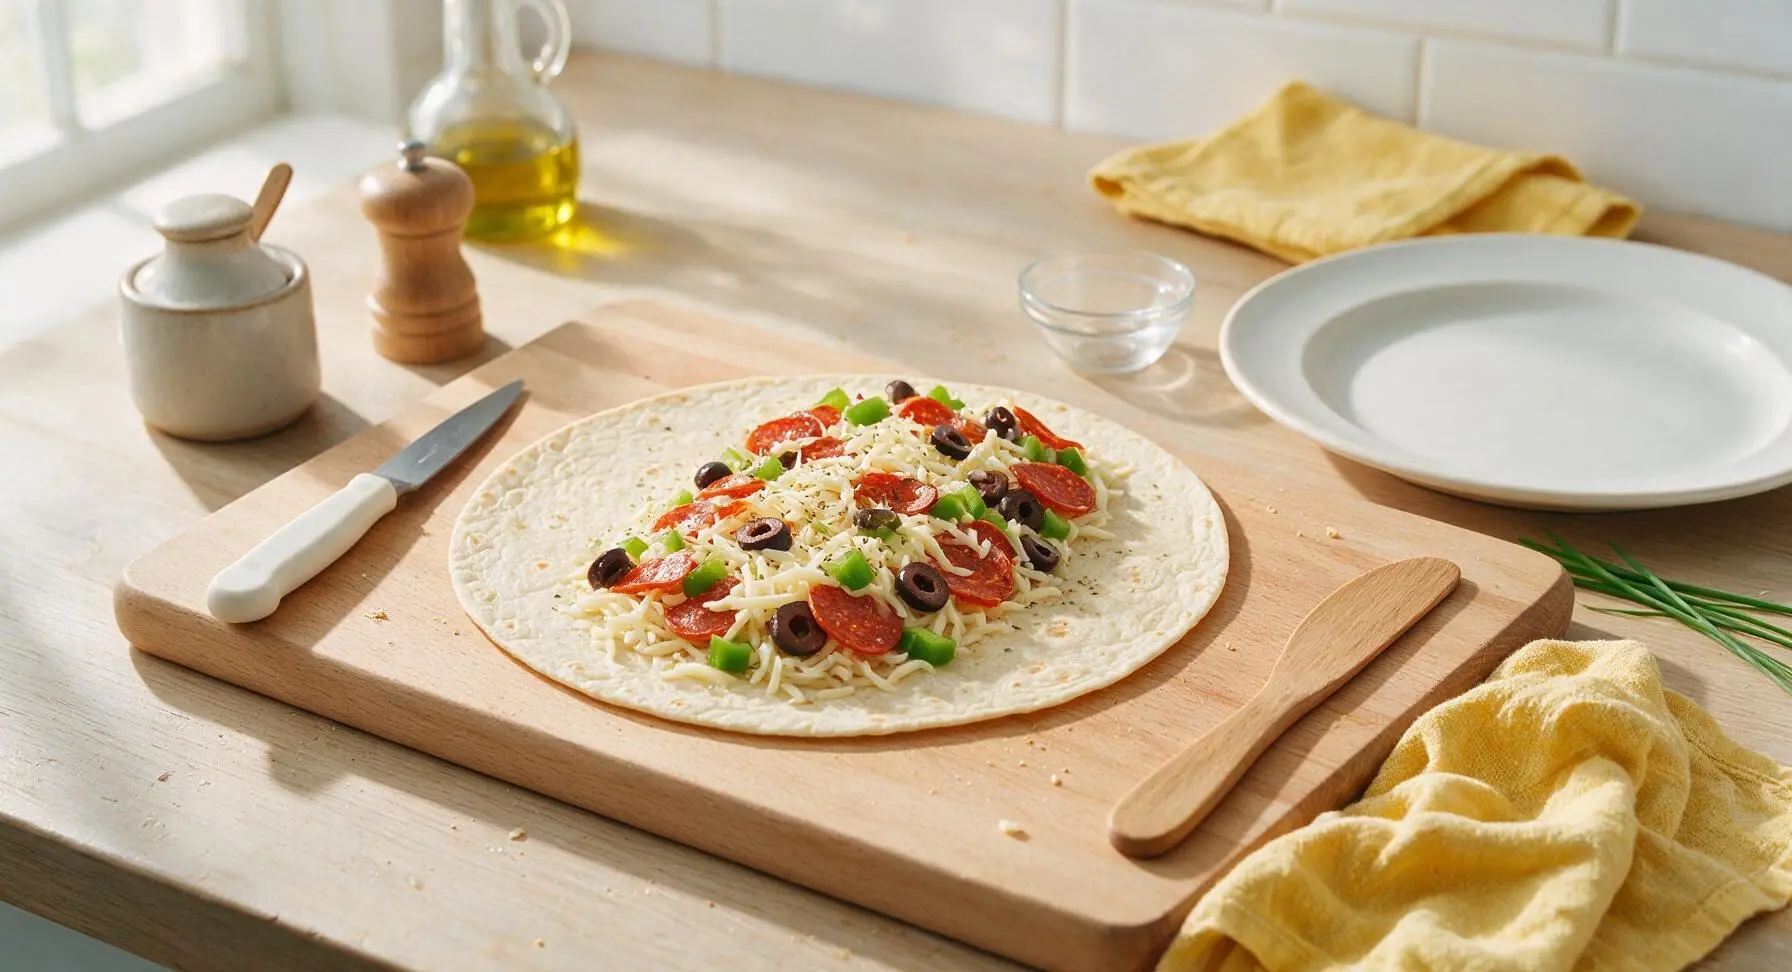
Step 3
step3:Layer Burrito Fillings
Step 3
step3:Layer Burrito Fillings
4

Fold Burritos Tightly

Fold the 2-inch top and bottom (short end) borders of the tortilla in over the filling first, pressing gently to hold them in place, then roll the tortilla tightly from one long side to the other, creating a sealed, cylindrical wrap. Make sure the seam side faces down to keep the burrito closed as it cooks. Repeat the filling and folding process for all 4 tortillas.
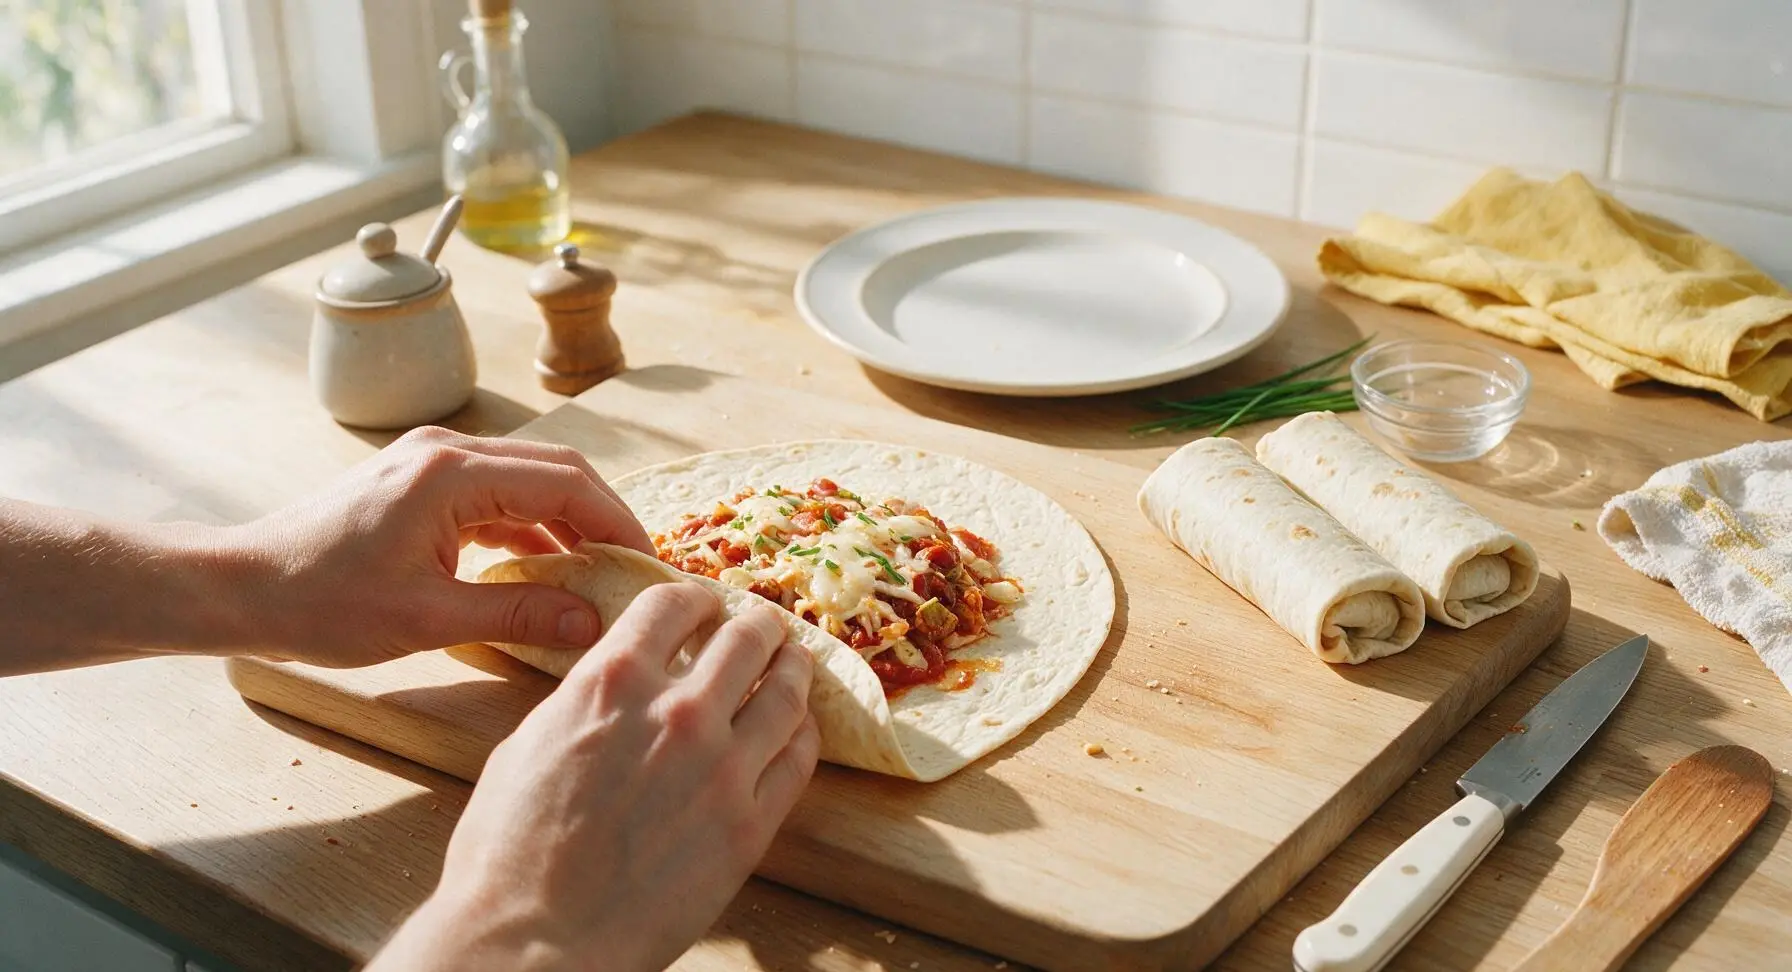
Step 4
step4:Fold Burritos Tightly
5

Sear Burritos Until Crisp

Add 1 tablespoon of olive oil to the preheated skillet, swirling to coat the surface evenly. Place 2 burritos in the skillet seam-side down first, cooking for 2-3 minutes per side, until the tortilla is deep golden brown and crisp on all sides, and the cheese inside is fully melted (you will see a tiny bit of melted cheese oozing from the burrito ends when it is ready). Transfer cooked burritos to the cutting board to rest for 2 minutes, and repeat with the remaining 2 burritos.
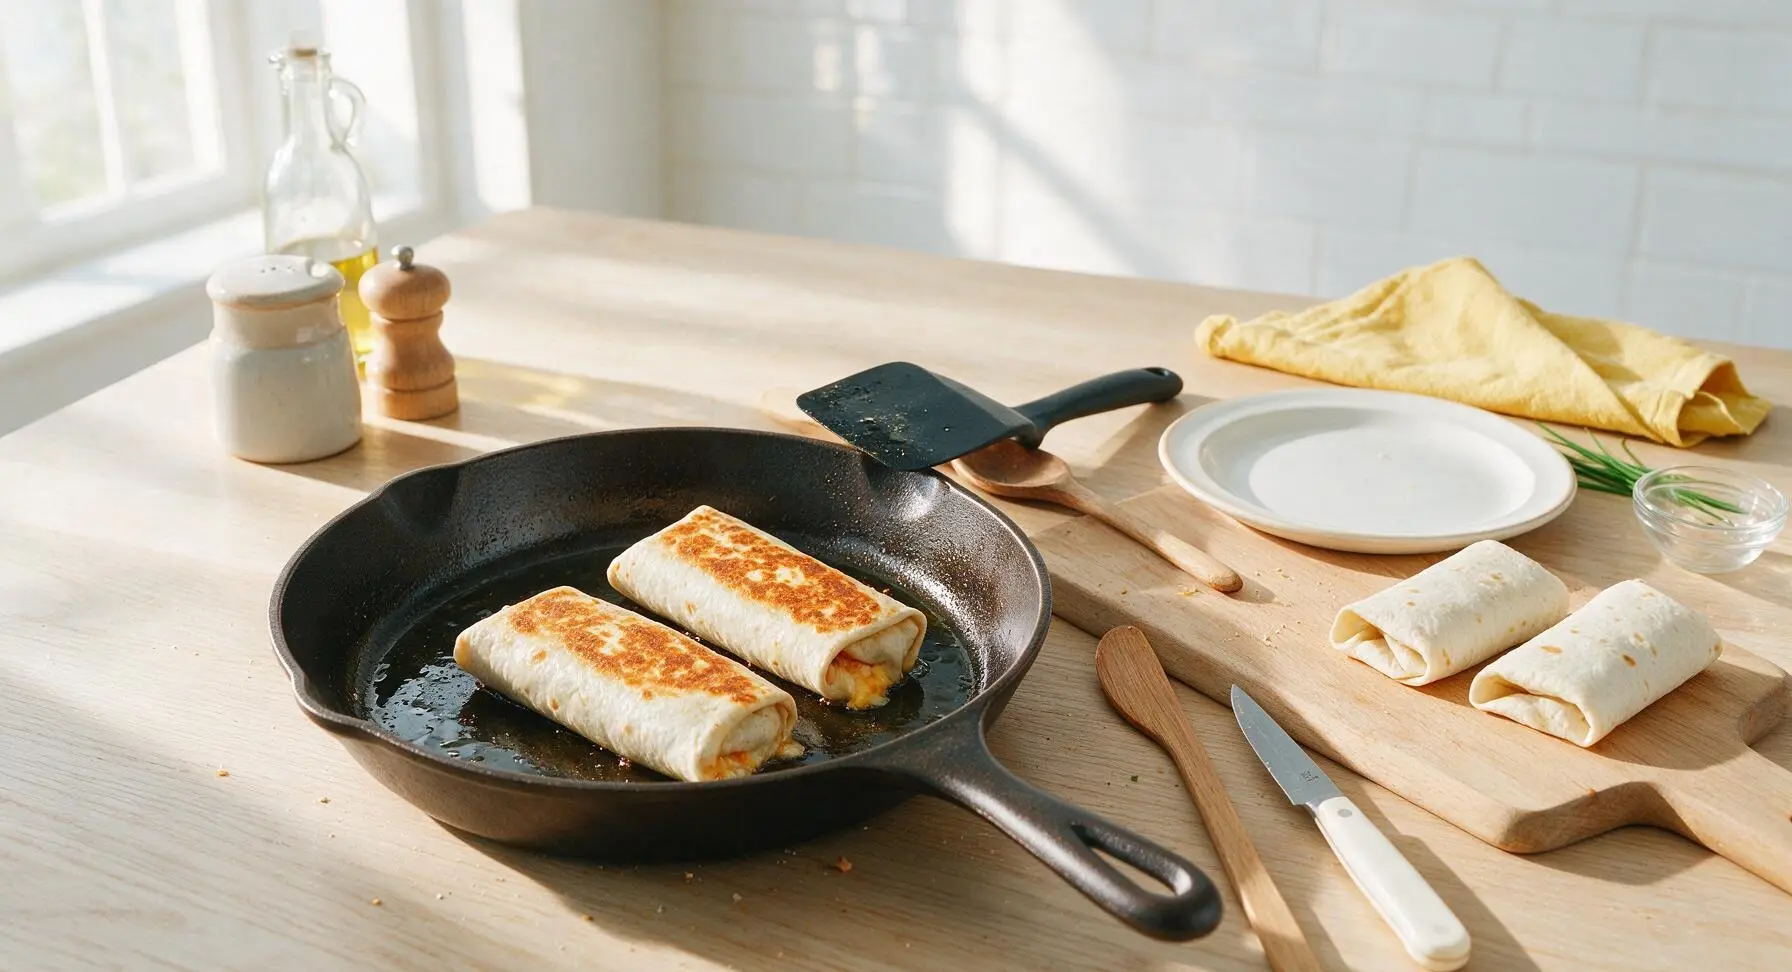
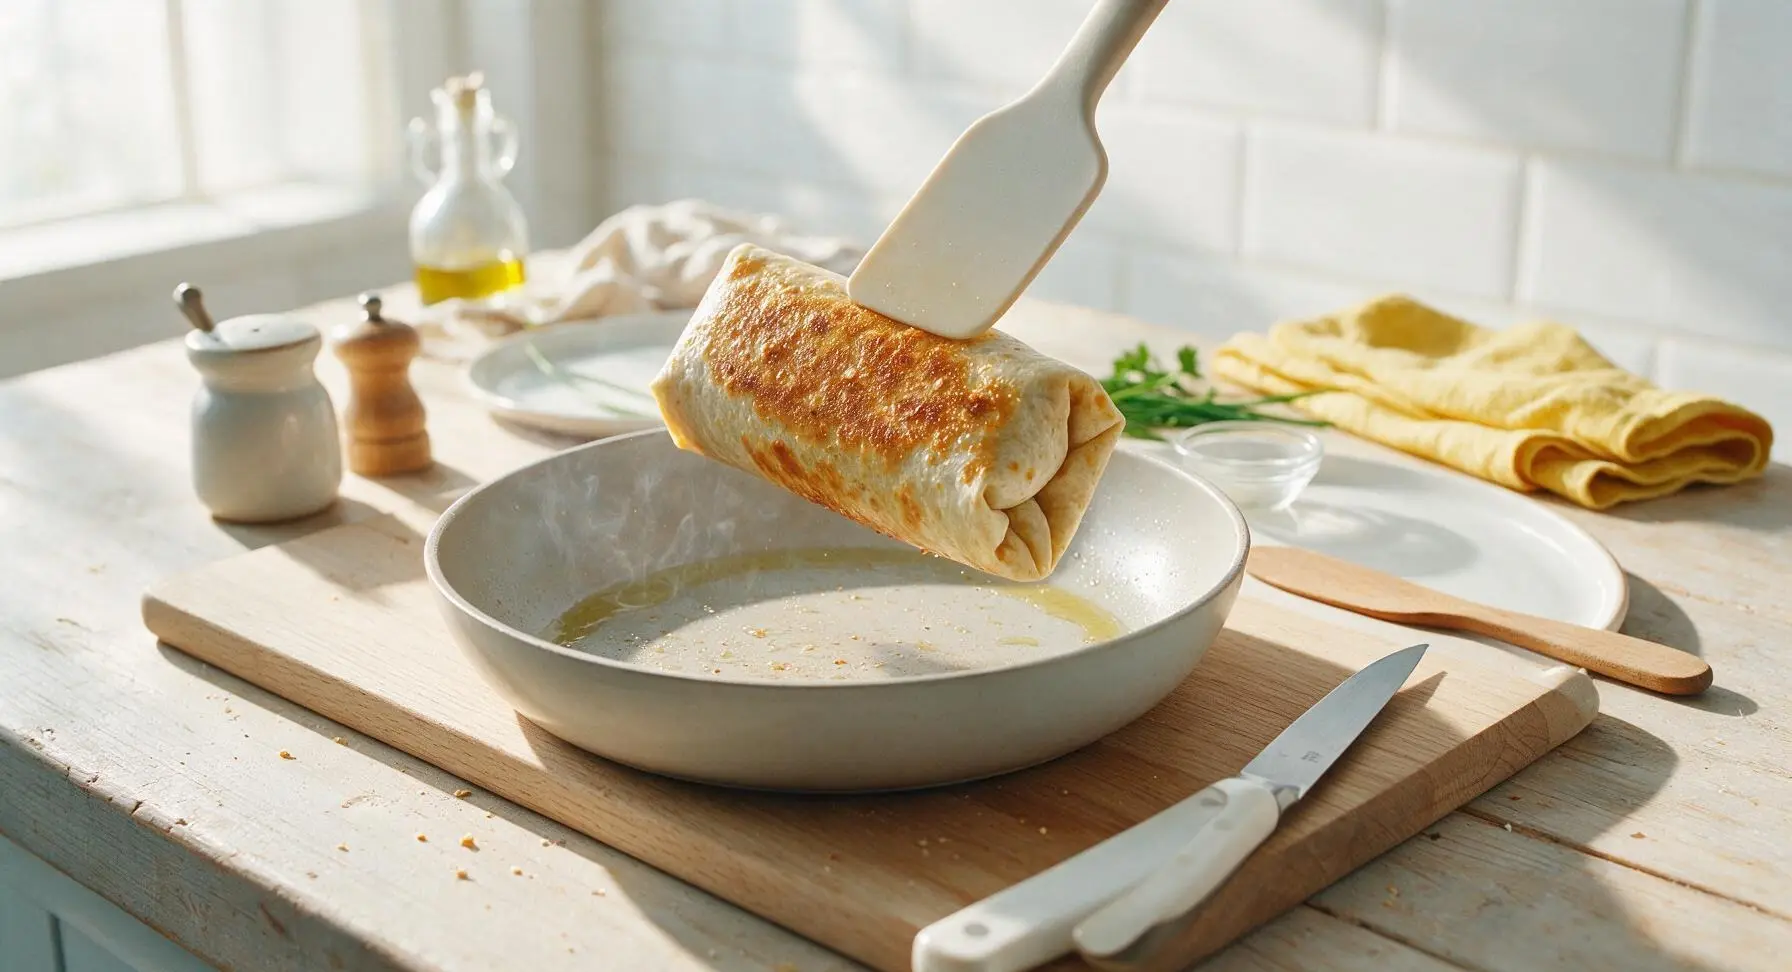
Step 5
step5:Sear Burritos Until Crisp
Step 5
step5:Sear Burritos Until Crisp
6

Rest and Slice Burritos

Let the seared burritos rest on the cutting board for 2 full minutes to allow the melted cheese to set slightly (this prevents all the filling from pouring out when you cut). Using the chef knife, slice each burrito in half diagonally at a 45-degree angle for the classic presentation.
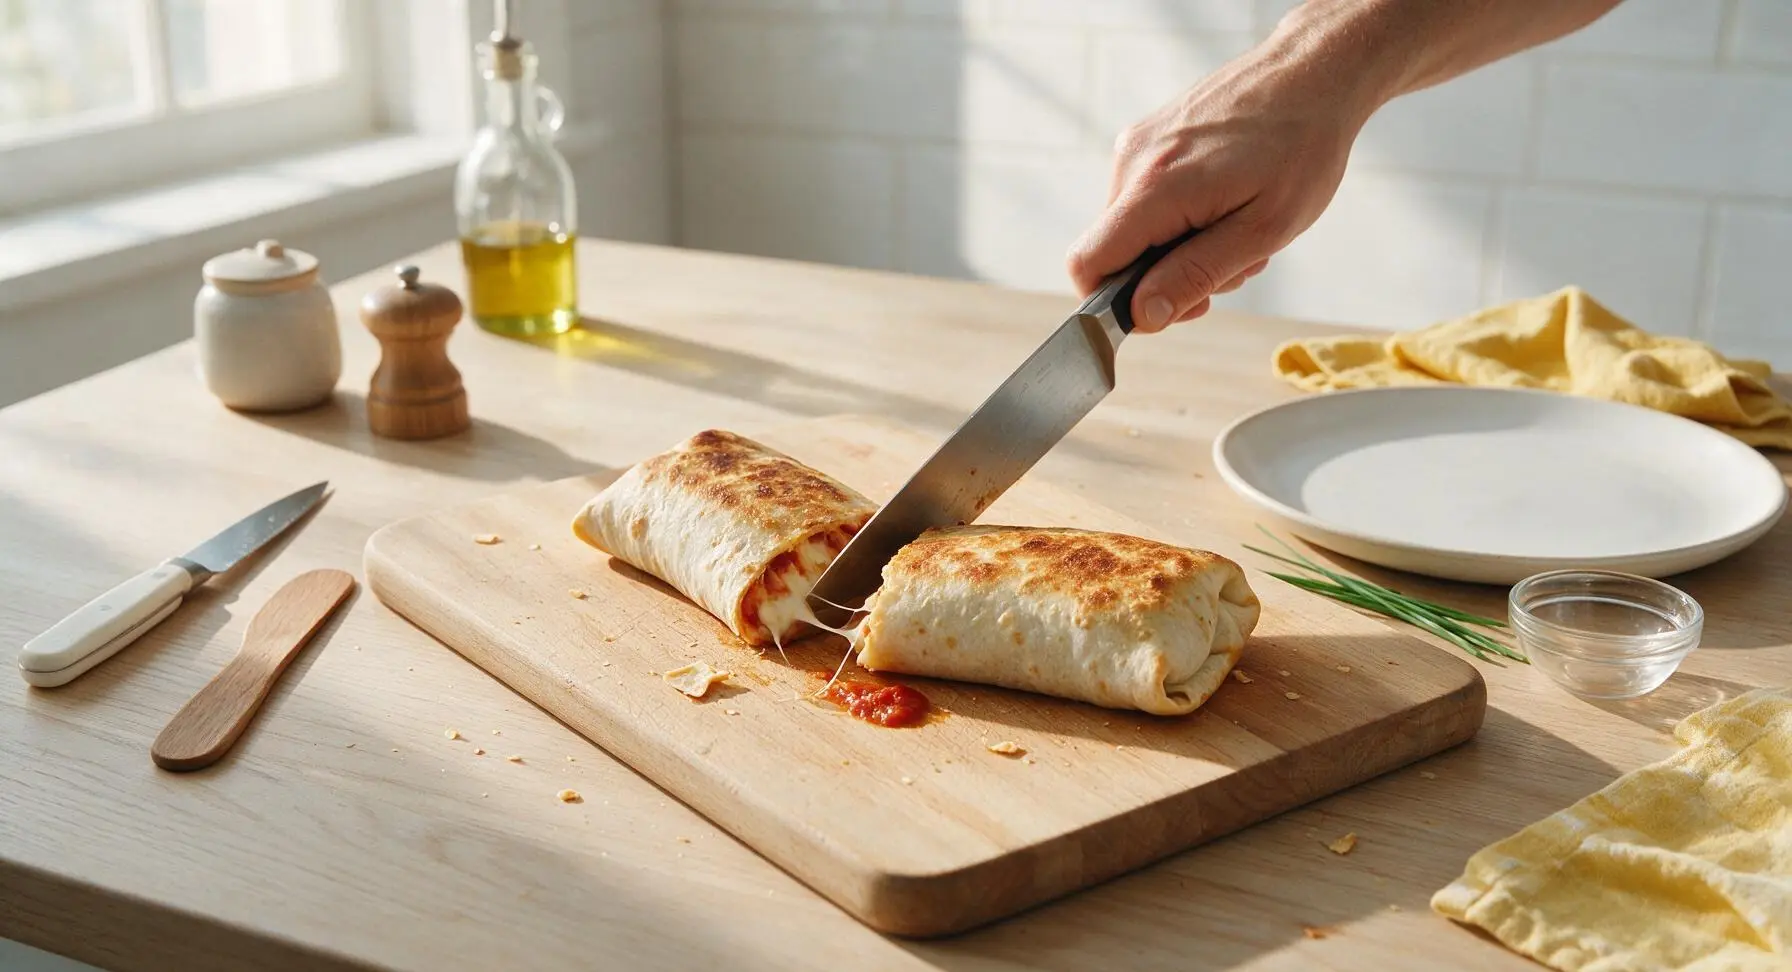
Step 6
step6:Rest and Slice Burritos
7

Plate and Garnish

Arrange two sliced burrito halves per serving on the matte off-white ceramic dinner plate, propping the cut sides up to show the layered filling. Spoon 2 tablespoons of the reserved dipping marinara into one small white ramekin to place on the plate, tuck 2 fresh basil leaves next to the burritos, and add a light sprinkle of parmesan and optional red pepper flakes on top.
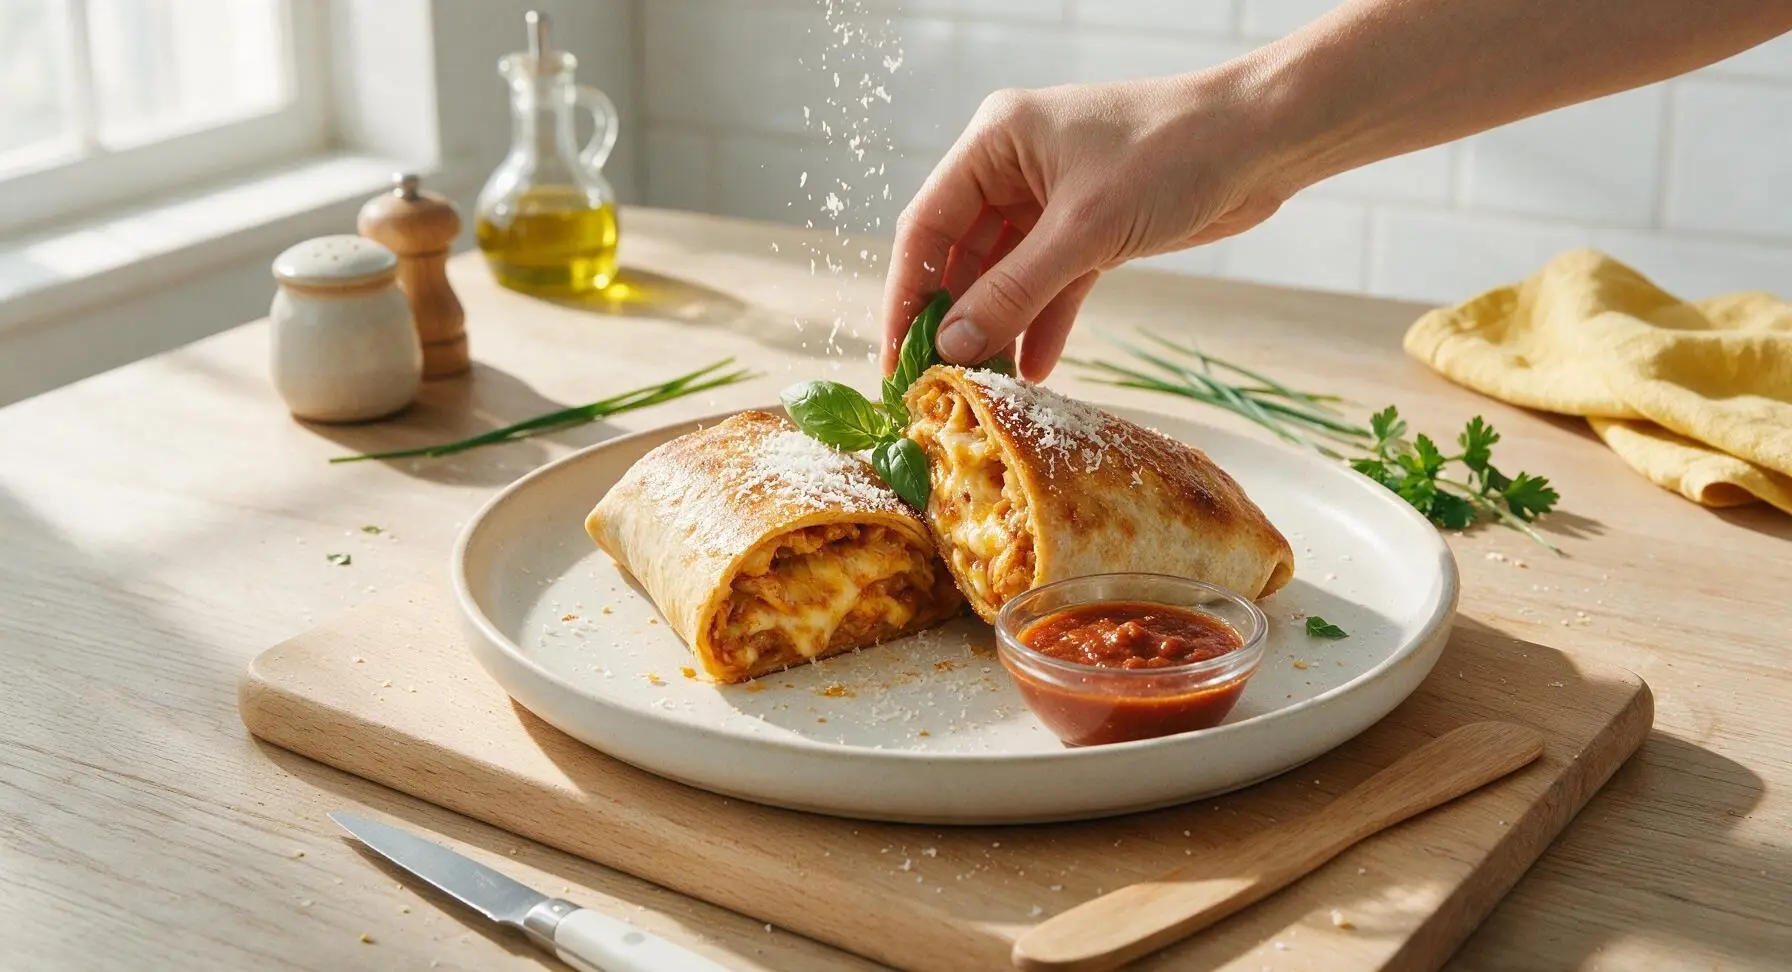
Step 7
step7:Plate and Garnish

Tips

1.Use only low-moisture mozzarella for fillings: Fresh mozzarella has a high water content that releases as it melts, leading to soggy tortillas and leaking fillings. Low-moisture mozzarella melts smoothly into the perfect gooey texture without excess moisture.
2.Never overstuff your burritos: It can be tempting to pile on extra cheese and pepperoni, but fillings thicker than 2 inches will make tight rolling impossible, and will burst out of the tortilla during searing, leaving you with a mess in the pan.
3.Always cook burritos seam-side down first: The direct heat from the skillet will melt the tortilla layers at the seam together, creating a natural seal that prevents the burrito from unrolling as you flip it, and keeps all the melted cheese and sauce contained inside.


✨ You May Also Like

Main Course
🍜 United Kingdom

A showstopping classic of tender seared beef, savory mushroom duxelles, and crisp prosciutto wrapped in flaky golden puff pastry, baked to juicy perfection.

⏱️ 2 hours 1Main Course ★ 4.7
Main Course
🍜 India

Tender charred marinated chicken simmered in a rich, spiced creamy tomato sauce, this iconic Anglo-Indian curry pairs perfectly with basmati rice or warm naan.

⏱️ 50 minuteMain Course ★ 4.6
Main Course
🍜 Thailand

Classic tangy, sweet, and savory Thai stir-fried rice noodles with shrimp, tofu, and crunchy garnishes, balancing all five core Thai flavor profiles.

⏱️ 30 minuteMain Course ★ 4.5
Main Course
🍜 United Kingdom

Crispy golden beer-battered cod and fluffy double-fried chips, served with tangy tartar sauce and malt vinegar: the timeless, beloved British pub comfort classic.

⏱️ 45 minuteMain Course ★ 4.7
Main Course
🍜 Mexico

Smoky, chile-marinated pork tacos with caramelized pineapple, fresh cilantro, and lime: a beloved classic Mexican street food perfect for casual summer gatherings.

⏱️ 1 hour 45Main Course ★ 4.8
Main Course
🍜 United States

Crunchy Fritos corn chips layered with savory beef chili and melted cheddar, topped with cool, zesty fixings for a beloved, cozy Tex-Mex comfort food.

⏱️ 35 minuteMain Course ★ 4.8

pizza burrito:Frequently Asked Questions

1.What size tortilla do I need to use to keep my pizza burrito from splitting open while cooking? ▾
Stick to the 12-inch large flour tortillas specified in the recipe for best results. Smaller tortillas won’t have enough surface area to tuck around fillings without oozing, and ultra-thin specialty tortillas tear easily. Let tortillas rest at room temperature for 5 minutes before folding to make them extra pliable and reduce splits.
2.Why does the recipe call for low-moisture mozzarella instead of fresh mozzarella? ▾
Low-moisture mozzarella is key for that perfect gooey, stretchy melt without making your burrito soggy. Fresh mozzarella holds tons of extra water that leaks out as it cooks, turning your crispy tortilla shell mushy and diluting classic pizza flavor. If you only have fresh, pat it completely dry with paper towels before using.
3.How do I keep my burrito from getting soggy instead of crispy? ▾
The biggest culprit for soggy burritos is overloading on wet fillings, especially too much marinara. Stick to the measured sauce amount, reserve a portion for dipping instead of piling it all inside, and pat juicy add-ins like diced bell pepper dry before adding. Cook over medium heat to crisp the tortilla without burning it before cheese melts.
4.Can I make these pizza burritos in an air fryer instead of on the stovetop? ▾
Absolutely! Air frying makes for an extra-crispy shell with way less oil. Lightly spritz the folded burrito with cooking spray, then cook at 375°F for 6 to 8 minutes, flipping halfway through, until the tortilla is golden all over and cheese is fully melted inside. Don’t overstuff it, or fillings will bubble out into the basket.
5.Do I have to use pepperoni, or can I swap in other pizza toppings? ▾
Pepperoni is a classic pick, but these burritos are infinitely customizable, just like regular pizza. Try cooked crumbled sausage, sliced black olives, sautéed mushrooms, diced ham, or even pineapple if that’s your vibe. Just make sure raw, high-moisture toppings are cooked and patted dry first to avoid a soggy shell.
6.How much marinara should I put inside the burrito vs. saving for dipping? ▾
The recipe calls for divided marinara for a reason: use roughly one-third of your measured sauce spread thin across the tortilla center, and reserve the remaining two-thirds for warm dipping on the side. Spreading too much sauce inside will make the tortilla soggy and cause messy oozing when you take your first bite.
7.What’s the best way to fold the burrito to keep fillings from leaking out? ▾
Start by piling fillings in a tight line down the tortilla center, leaving a 2-inch border on the top and bottom. Fold those two short ends in over the fillings first, then tuck one long side tight over the fillings and roll firmly all the way to the other edge. Keep the seam side down while cooking to help it seal as cheese melts.
8.Can I prep these pizza burritos ahead of time for quick weeknight meals? ▾
You can prep and assemble them up to 2 days ahead if stored properly! Wrap each assembled, uncooked burrito tightly in plastic wrap and keep them in the fridge until you’re ready to crisp them up. Skip adding extra sauce inside ahead of time, or the tortilla will get mushy as it sits; save extra sauce for dipping at serving time.
9.Are these freezable for long-term meal prep? ▾
Yes, they freeze beautifully for up to 3 months. Assemble the burritos (skip extra interior sauce to prevent sogginess), wrap each tightly in plastic wrap then foil, and stash in a labeled freezer bag. Cook from frozen on the stovetop over low heat, in the air fryer, or oven for 12 to 15 minutes until heated through and crispy.
10.My cheese never fully melts in the center before the tortilla gets too dark—what am I doing wrong? ▾
This usually happens if your heat is too high, or you’re using cheese cut too thick. Use shredded low-moisture mozzarella (not thick slices) for faster, even melting, and turn your stovetop or air fryer down to medium heat so the tortilla crisps slowly, giving cheese time to turn gooey without burning the shell.
11.Do I need to cook the diced green bell pepper before adding it to the burrito? ▾
You don’t have to! Diced small, raw green bell pepper adds a nice fresh, crisp-tender bite that pairs perfectly with melty cheese and pepperoni, and it cooks just enough while the burrito crisps up. If you prefer softer, caramelized pepper, sauté it for 2 to 3 minutes first, just pat off excess moisture before adding it in.
12.What kind of oil should I use to crisp the tortilla on the stovetop? ▾
Reach for a neutral, high-smoke-point oil like canola, vegetable, or avocado oil for stovetop cooking. You only need about a teaspoon per burrito—swirl it in the pan, then add the burrito seam-side down. Avoid extra-virgin olive oil for higher-heat cooking, as it can burn easily and leave a bitter, off flavor on your crispy shell.
13.Can I add extra cheese for a more dramatic gooey cheese pull? ▾
Go for it, just don’t go overboard! Adding an extra ¼ cup of low-moisture mozzarella per burrito will give you that epic, stretchy cheese pull without causing massive oozing out the sides. Skip extra soft, high-moisture cheeses like brie or ricotta inside, as they will make your crispy shell turn soggy fast.
14.How do I reheat leftover pizza burritos so they stay crispy instead of rubbery? ▾
Skip the microwave—it will turn your tortilla rubbery and make fillings soggy. Instead, reheat leftovers in a dry skillet over medium-low heat for 3 to 4 minutes per side, in the air fryer at 350°F for 4 minutes, or in a toaster oven for 5 minutes, until the shell is crisp again and the center is heated through.
15.My pepperoni gets too crispy and greasy when I cook the burrito—how do I fix that? ▾
If you find your pepperoni is getting too charred or releasing too much grease, give it a quick pat with paper towels before adding it to the burrito, and tuck it between layers of cheese instead of laying it directly against the tortilla. This buffers it from direct heat, so it heats through without burning or leaking excess grease.
16.Can I make these gluten-free for friends with dietary restrictions? ▾
Absolutely! Swap the regular 12-inch flour tortilla for a large, pliable gluten-free flour tortilla—look for blends made with rice and tapioca starch, which fold without cracking. Double check that your marinara, pepperoni, and cheese are labeled gluten-free to avoid cross-contamination, then cook as normal for the same crispy, gooey result.
17.What’s the best stovetop heat level to get the perfect crispy shell? ▾
Stick to medium heat for stovetop cooking, which hits the perfect sweet spot: high enough to turn the tortilla golden and crispy in 2 to 3 minutes per side, but low enough that the cheese has time to fully melt inside before the shell burns. If your pan is smoking before you add the burrito, turn the heat down a touch.
18.Can I use other sauces besides marinara for a fun flavor twist? ▾
Definitely! While marinara is the classic pizza pick, you can swap a portion of it for thin-spread garlic butter, a drizzle of hot honey, ranch, or even barbecue sauce for a BBQ pizza twist. Just remember to go light on sauce inside the burrito—reserve extra for dipping to keep that crispy shell intact.
19.How do I know when the pizza burrito is fully done cooking? ▾
You’ll know it’s perfect when the entire tortilla is an even golden brown, crispy to the touch on all sides, and you see tiny bubbles of melted cheese starting to seep out the edges slightly. If you’re unsure, peek inside the folded end: all the cheese should be fully stretchy and melted, with no cold, solid clumps left in the center.
20.What are good side dishes to serve with these pizza burritos? ▾
These handhelds pair perfectly with classic casual pizza sides! Serve them with a crisp green salad tossed in Italian dressing, crispy garlic bread bites, roasted veggie sticks, extra warm marinara for dipping, or even a handful of potato chips or tater tots for a fun, fast weeknight meal that beats pizza delivery every time.

Comments (16)

2 hours ago

OMG this is such a game changer!!! I threw these together for my kid’s after school snack and they begged for seconds before they even finished the first one. The crispy outside with that melty cheese pull? *Chef’s kiss* So easy to whip up on a busy weeknight too, 12 minutes flat no joke.

30 minutes ago

So happy your kids loved them! That cheese pull is my favorite part too — pro tip: sprinkle a little extra parmesan on the tortilla before searing for even more crispy, cheesy goodness.

3 days ago

Made these in my dorm room air fryer last night and wow, way better than the late night pizza delivery I usually order. Only thing is mine oozed a little cheese out the side when I folded it — did I stuff it too full? Tasted amazing regardless.

2 days ago

LOL I had the same issue my first time! I started tucking the ends in tighter like a regular burrito and seaming it down when I put it in the pan, way less ooze now. Worth the messy fingers though tbh

yesterday

Great question! Overstuffing is usually the culprit — stick to about 1/4 cup of each filling max per large burrito-sized tortilla, and make sure to tuck those ends in tight like BurritoBabe22 said. A little cheese oozing out just makes for extra crispy cheese bits though, no harm done!

1 week ago

Added these to my weekly meal prep rotation! I pre-assemble them on Sunday and keep them in the fridge, then just crisp them up in a pan for 3 minutes per side when I’m ready for lunch. They reheat so much better than regular pizza leftovers, no soggy crust at all. 10/10

2 days ago

Brought these to our neighborhood potluck last weekend and they were gone in 10 minutes flat. People kept asking me for the recipe all night! I added a little sliced pepperoni and pickled jalapeno to mine for an extra kick, chef’s kiss.

yesterday

The pickled jalapeno addition sounds insane, I’m definitely trying that next batch! I did pepperoni last time and it was perfect, can’t imagine how good the tang from the jalapenos is.

5 days ago

These were good, but I wish I’d read the cook time note first — I cooked mine on too high heat and the tortilla burned before the cheese inside was fully melted. Flavor combo is genius though, I’ll definitely give it another go with lower heat next time.

3 days ago

Same thing happened to me my first try! Medium-low heat is the move, that way the tortilla gets crispy slow while the cheese gets all gooey inside. No more burnt edges for me now.

2 days ago

So sorry about the burnt tortilla! Medium-low heat is definitely key here — since the fillings are already mostly pre-cooked (like the sauce, cheese, any pre-cooked meats you add) you just need enough time to crisp the tortilla and melt the cheese, which takes about 2-3 minutes per side. Hope your next batch turns out perfect!

30 minutes ago

Why did the pizza burrito win the dinner award? It was wrap-star quality! 😂 But for real, my teen son who lives off frozen pizza and energy drinks said this is the best thing I’ve ever made. I’m calling that a massive parenting win.

5 minutes ago

Haha that pun is fantastic, and getting a stamp of approval from a teen is the highest possible praise if you ask me! Way to go on the parenting win — feel free to test that joke out on your son when you serve these next time.

2 weeks ago

Swapped the regular flour tortilla for a gluten-free cassava flour tortilla and these turned out amazing! I was worried it wouldn’t get as crispy, but a quick spray of olive oil before pan-searing did the trick. Perfect for my gluten sensitive kiddo who misses pizza nights.

1 week ago

Eh, this was fine? It just tasted like a quesadilla with pizza sauce inside to me. I don’t really get the hype, maybe I did something wrong? I used regular shredded mozzarella, store bought pizza sauce, flour tortilla like the recipe said.

5 days ago

Wait did you add the garlic butter brush on the outside before searing? That’s what makes it taste different from a regular quesadilla for me, gives it that buttery pizza crust vibe. I thought the same thing my first bite until I realized I forgot that step!

3 days ago

Sorry these didn’t wow you! The garlic butter brush on the outside of the tortilla is definitely a key step for that classic pizza crust flavor, as CheesePullConnoisseur mentioned. You can also add a sprinkle of Italian seasoning to the butter for extra depth if you want it to taste more pizza-like! Hope that helps for next time.

2 days ago

For my fellow air fryer girlies: these cook PERFECTLY in the air fryer at 400F for 8 minutes, flip halfway. No need to stand over the pan, comes out crispy all around and so gooey in the middle. Game changer for weeknights when I don’t want to do dishes.

yesterday

THANK YOU for the air fryer tip!!! I hate cleaning my frying pan, I was just about to ask if anyone tried it in the air fryer. Making these tonight for dinner now, can’t wait.

3 days ago

Made a veggie version with sauteed mushrooms, bell peppers, black olives, and vegan mozzarella, and even my meat-loving boyfriend went back for a second one! So customizable, this is going to be a regular in our dinner rotation for sure.

2 days ago

Ooh the veggie version sounds so good! I’ve been looking for more easy vegan weeknight meals, this is going straight to the top of my list. Did you notice if the vegan cheese got as gooey as regular mozz?

yesterday

Love that veggie twist! To answer your question PlantBasedBabe, we’ve tested this with a few different vegan mozzarella brands and the block-style low-moisture ones melt the gooiest, just like regular dairy mozz. So glad your meat-loving partner approved, Sam!

5 days ago

Made these for our football watch party last Sunday, cut them into 2 inch pinwheels, and served with a side of warm marinara for dipping. Absolute touchdown, everyone was raving. Way easier to eat than regular pizza slices when you’re juggling a beer and watching the game.

5 minutes ago

These are so good! I only wish I’d made extra marinara on the side for dipping, because the little bit inside is great but I’m a sauce fiend. Next time I’m doubling the sauce and adding a side of ranch too, don’t judge.

just now

No judgment here — ranch and marinara dipping sauce is always a good call! I actually keep a little warm ramekin of each on the side every time I make these too, perfect for dipping every crispy bite.

2 weeks ago

Wait a second, hear me out: I added a scrambled egg and crumbled breakfast sausage to these, cooked them up for breakfast on Saturday, and my whole family lost their minds. It’s like a breakfast pizza burrito hybrid, 10/10 would recommend experimenting with fillings.

1 week ago

That is genius!!! I would have never thought to make a breakfast version. I’m making these for our next brunch with friends, adding a little maple syrup drizzle on the side? Don’t knock it till you try it.

5 days ago

I did the breakfast version too! Added some crispy hash brown bits inside for extra crunch, life changing. This recipe is so versatile it’s insane.

yesterday

As a mom working 9-5 with zero extra time for elaborate dinners, this recipe is a lifesaver. 12 minutes total cook time, minimal cleanup, and both my 4 year old and 7 year old clean their plates every time I make it. I don’t know how I ever did weeknights without this.

2 days ago

Really solid recipe! The only tweak I made was adding a thin layer of cream cheese under the pizza sauce, just like I do on my homemade pizza, and it added that extra creamy tang that took it over the top. Definitely recommend giving that a shot if you’re a cream cheese on pizza person.

yesterday

OH the cream cheese addition is speaking my language! I put cream cheese on literally everything, I can’t believe I didn’t think to add it here. Running to the grocery store after work to grab supplies for round two tonight.

1 week ago

This is the perfect use for leftover pizza toppings! I had leftover Canadian bacon and pineapple from pizza night last week, stuffed it in these burritos, and it was better than the original pizza. Zero food waste and maximum flavor, what more could you ask for?



