
pizza roll casserole

title 1
pizza roll casserole
⏱️ cook time 35 minutes
🍽️ servings 6
⚡ Difficulty easy

intro

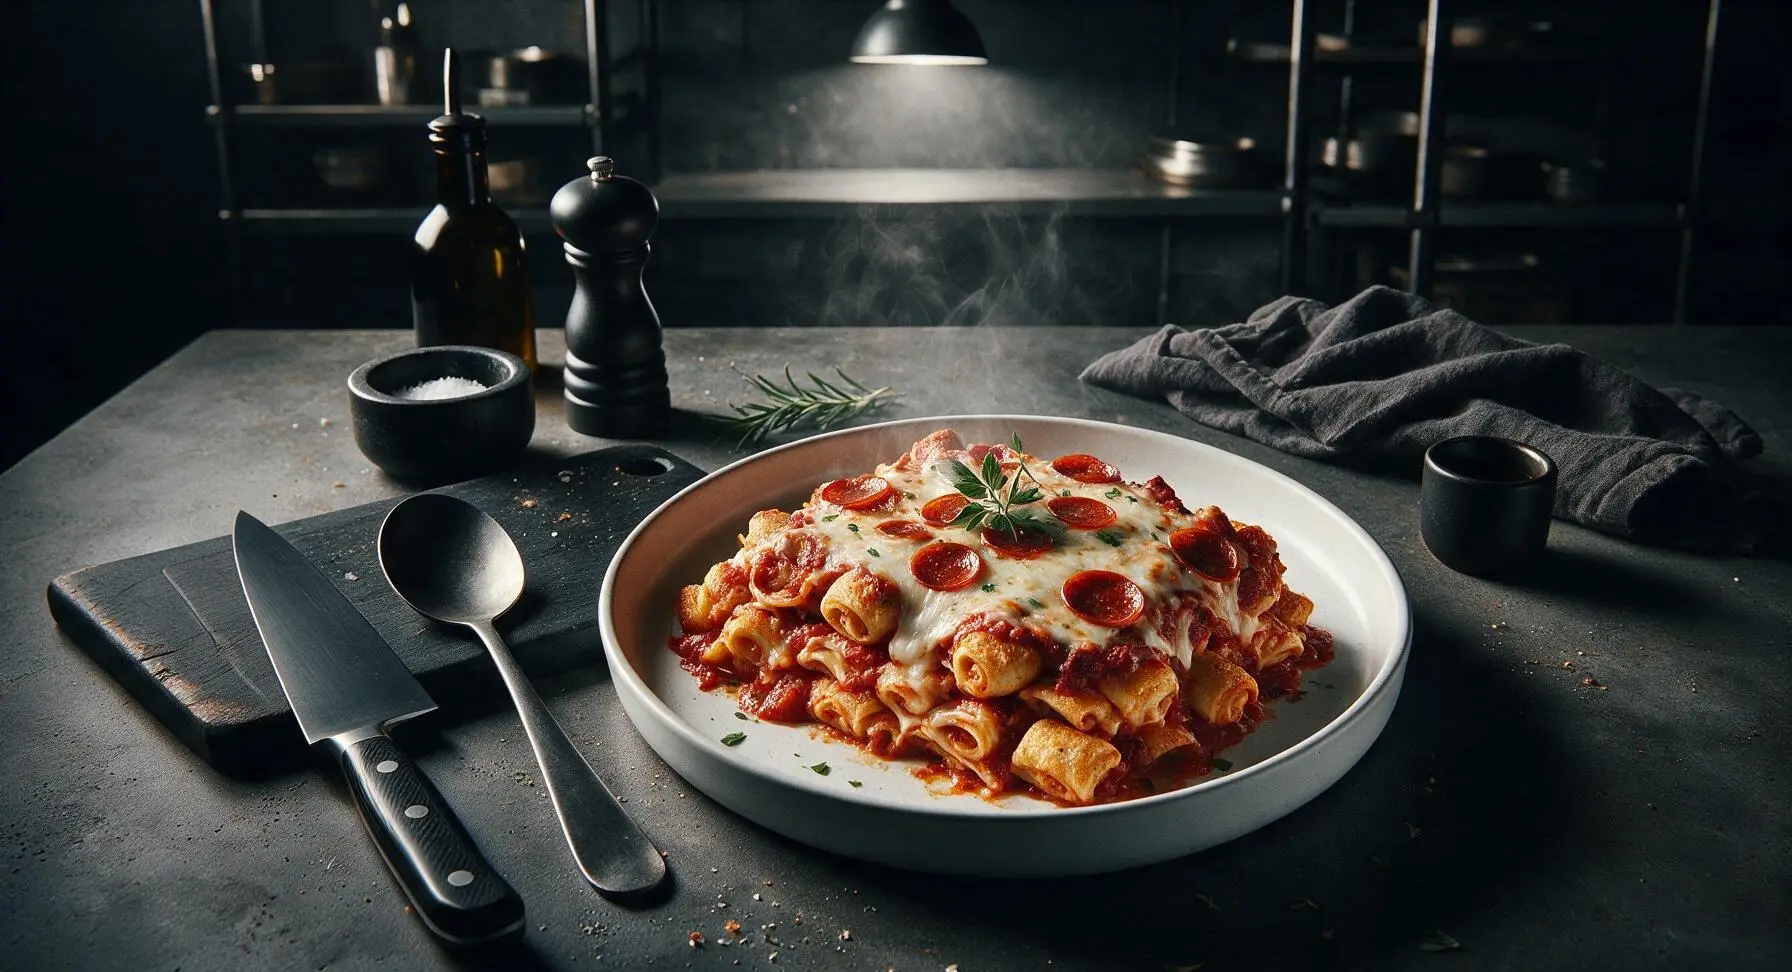
Gooey, pepperoni-studded pizza roll casserole layers crisp frozen pizza rolls with marinara and melted cheese for a nostalgic, crowd-pleasing comfort bake.

Ingredients
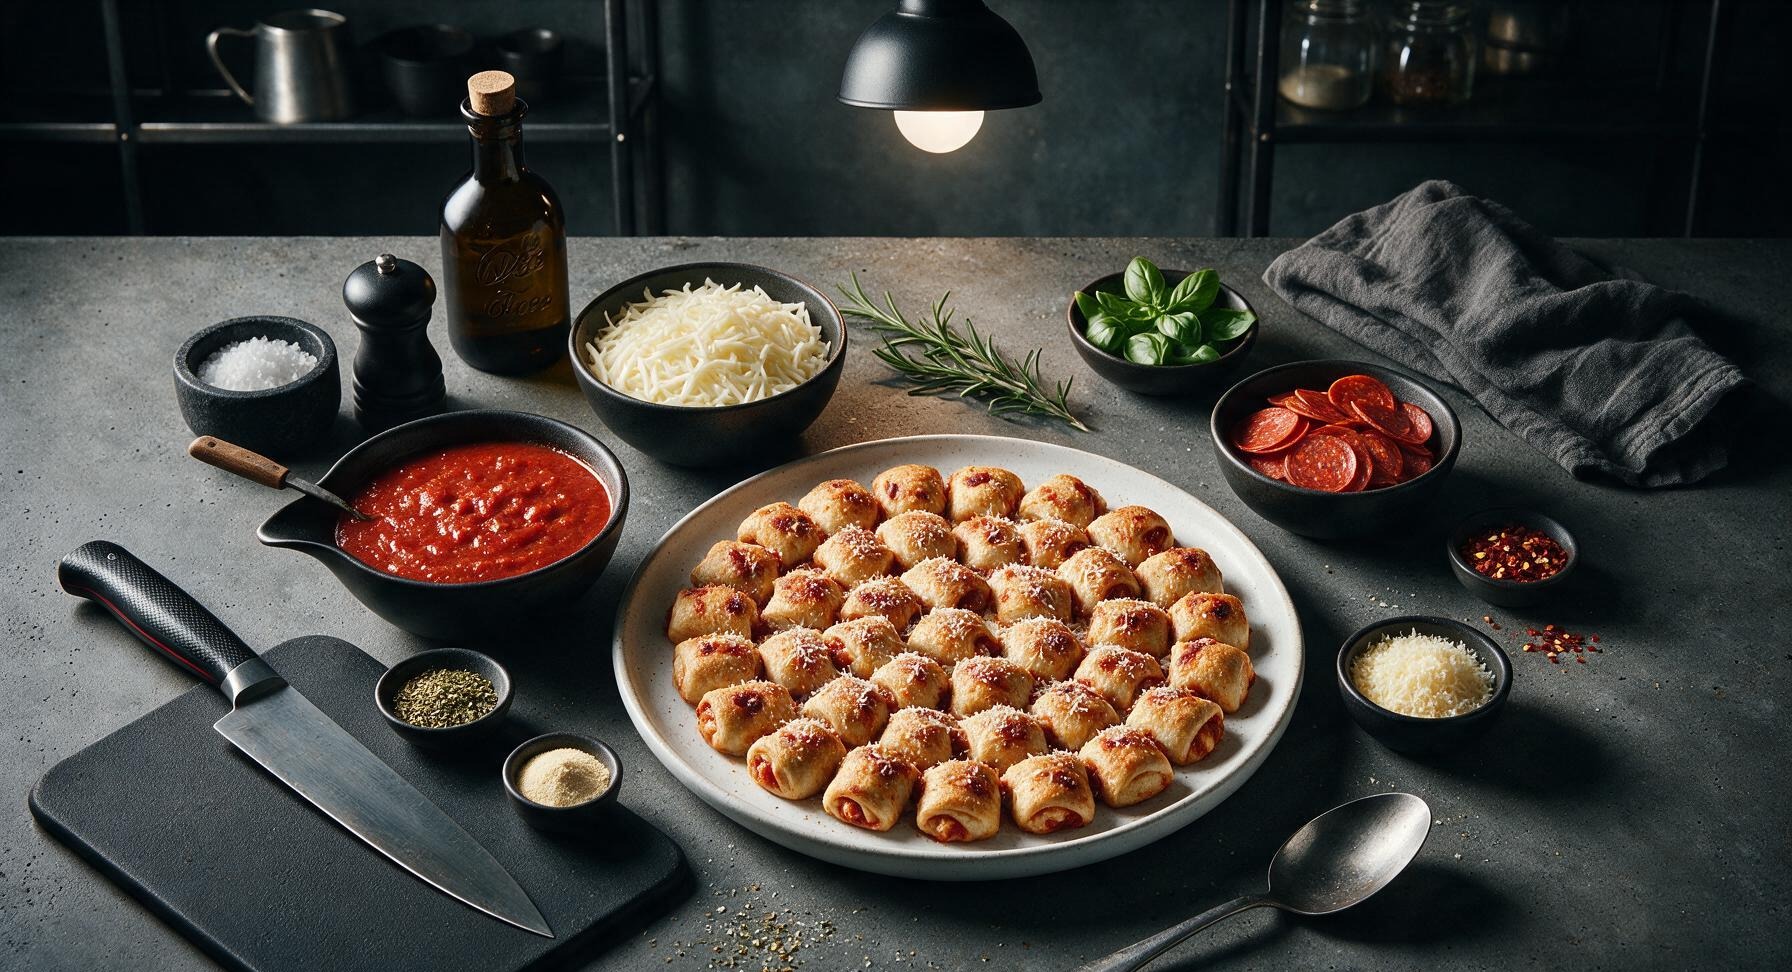
Frozen pepperoni pizza rolls 48 count (1.36kg / 48oz)
Low-moisture shredded mozzarella cheese 2 cups (226g)
Marinara sauce 2 cups (480ml)
Thin-sliced pepperoni 1 cup (60g)
Grated parmesan cheese ¼ cup (25g)
Italian seasoning 1 teaspoon
Garlic powder ½ teaspoon
Fresh basil leaves ¼ cup (10g)
Crushed red pepper flakes ½ teaspoon (optional, for serving)

Steps

1

Preheat and Prep Dish

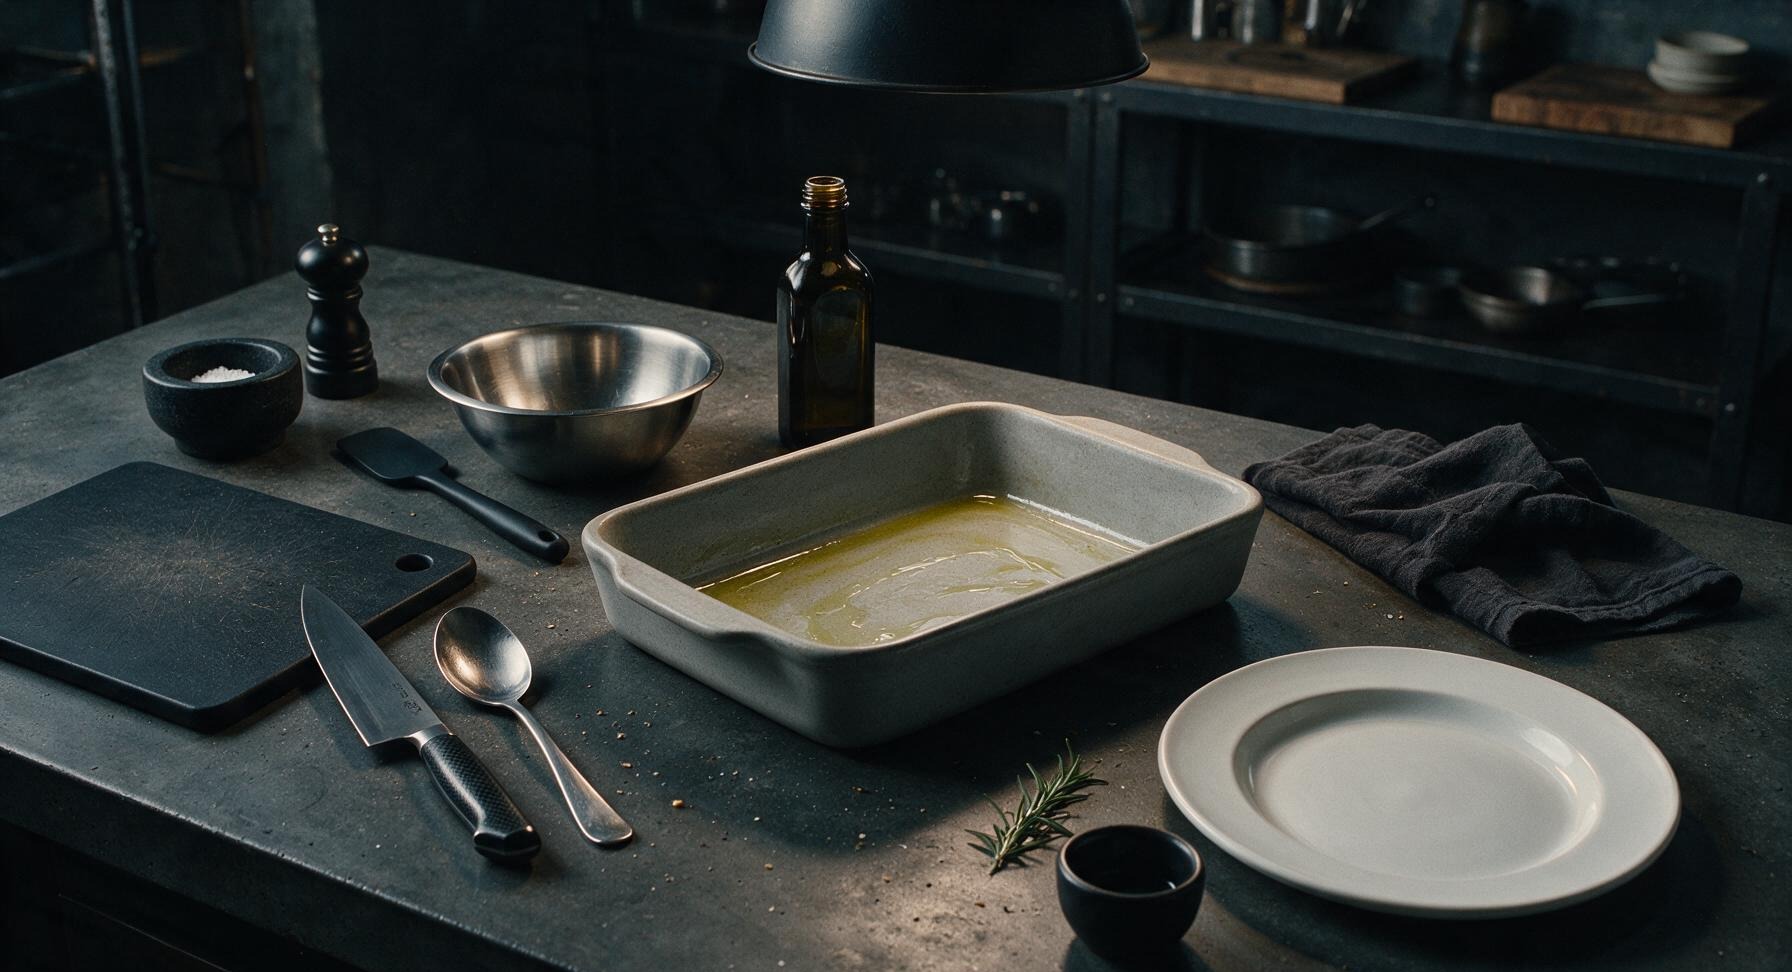
Adjust your oven rack to the middle position, then preheat the oven to 375°F (190°C). Place the 9x13 inch matte light gray stoneware baking dish in its center counter position, and lightly coat the bottom and interior sides with a thin layer of olive oil from the fixed counter oil bottle to prevent sticking. No need to grease heavily — a thin sheen is all that’s required.
Step 1
step1:Preheat and Prep Dish
2

Layer Pizza Roll Base

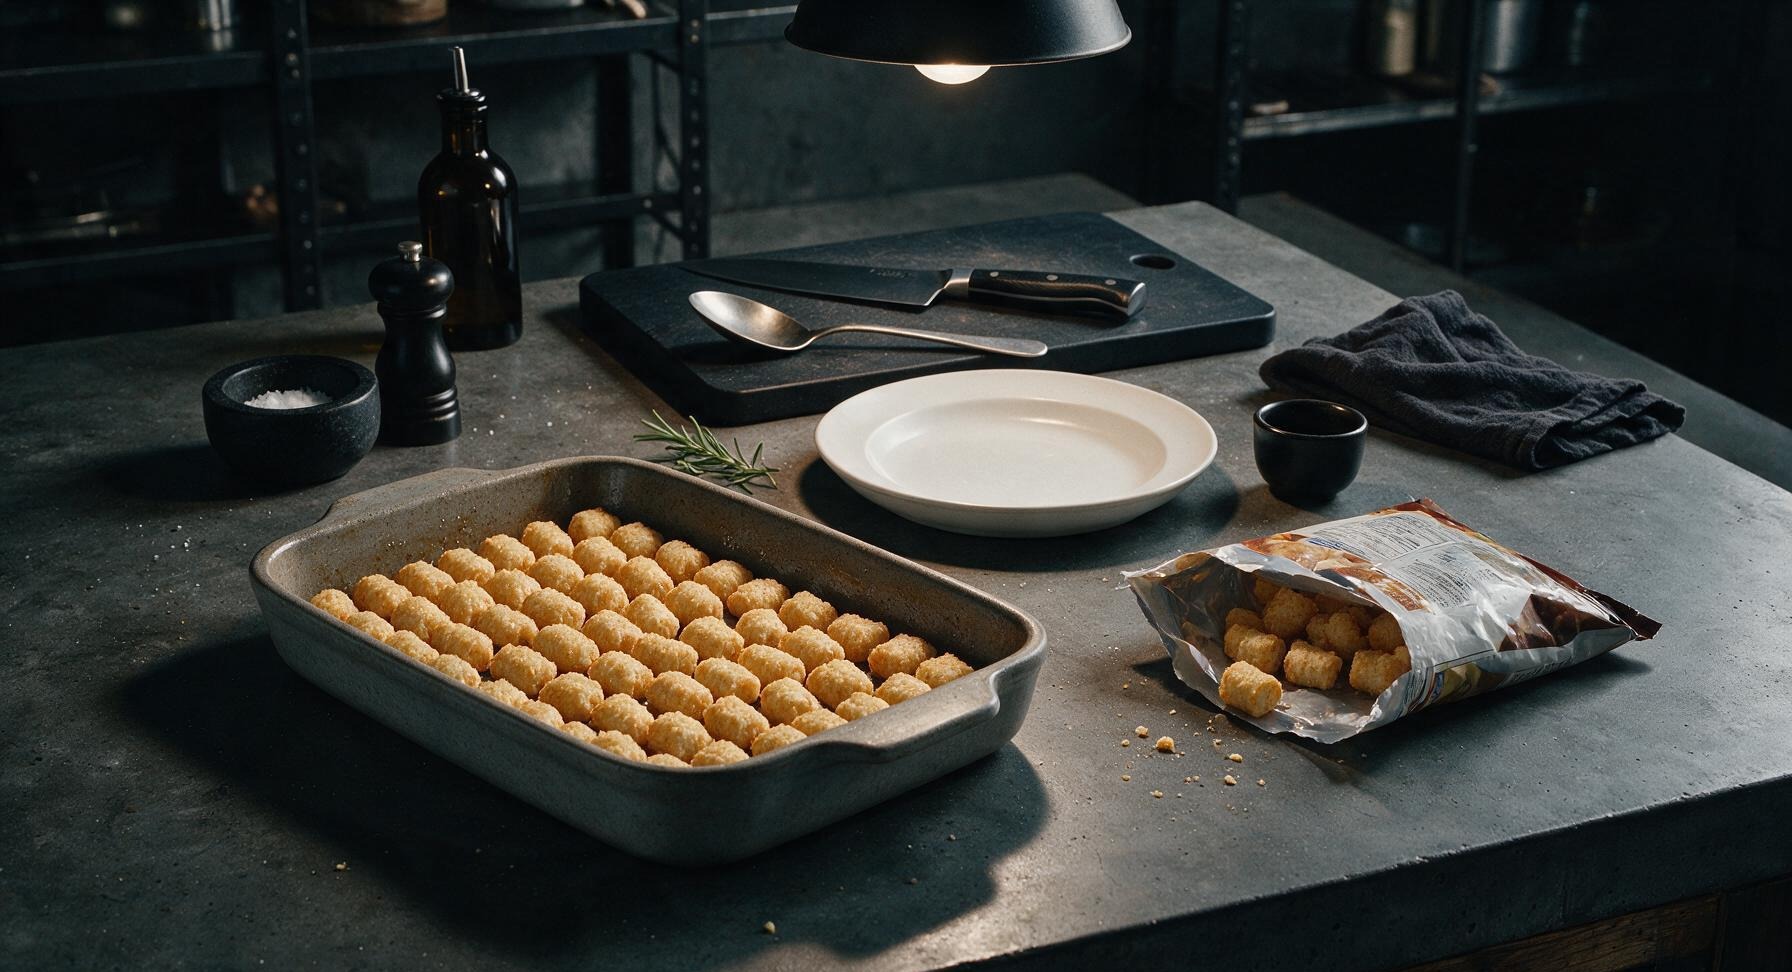
Open the bag of frozen pepperoni pizza rolls, and arrange 24 of the frozen rolls in a tight, single even layer across the entire bottom of the oiled baking dish. Do not thaw the rolls first — cooking directly from frozen prevents sogginess and ensures crisp edges as the casserole bakes.
Step 2
step2:Layer Pizza Roll Base
3

Add Sauce and Cheese

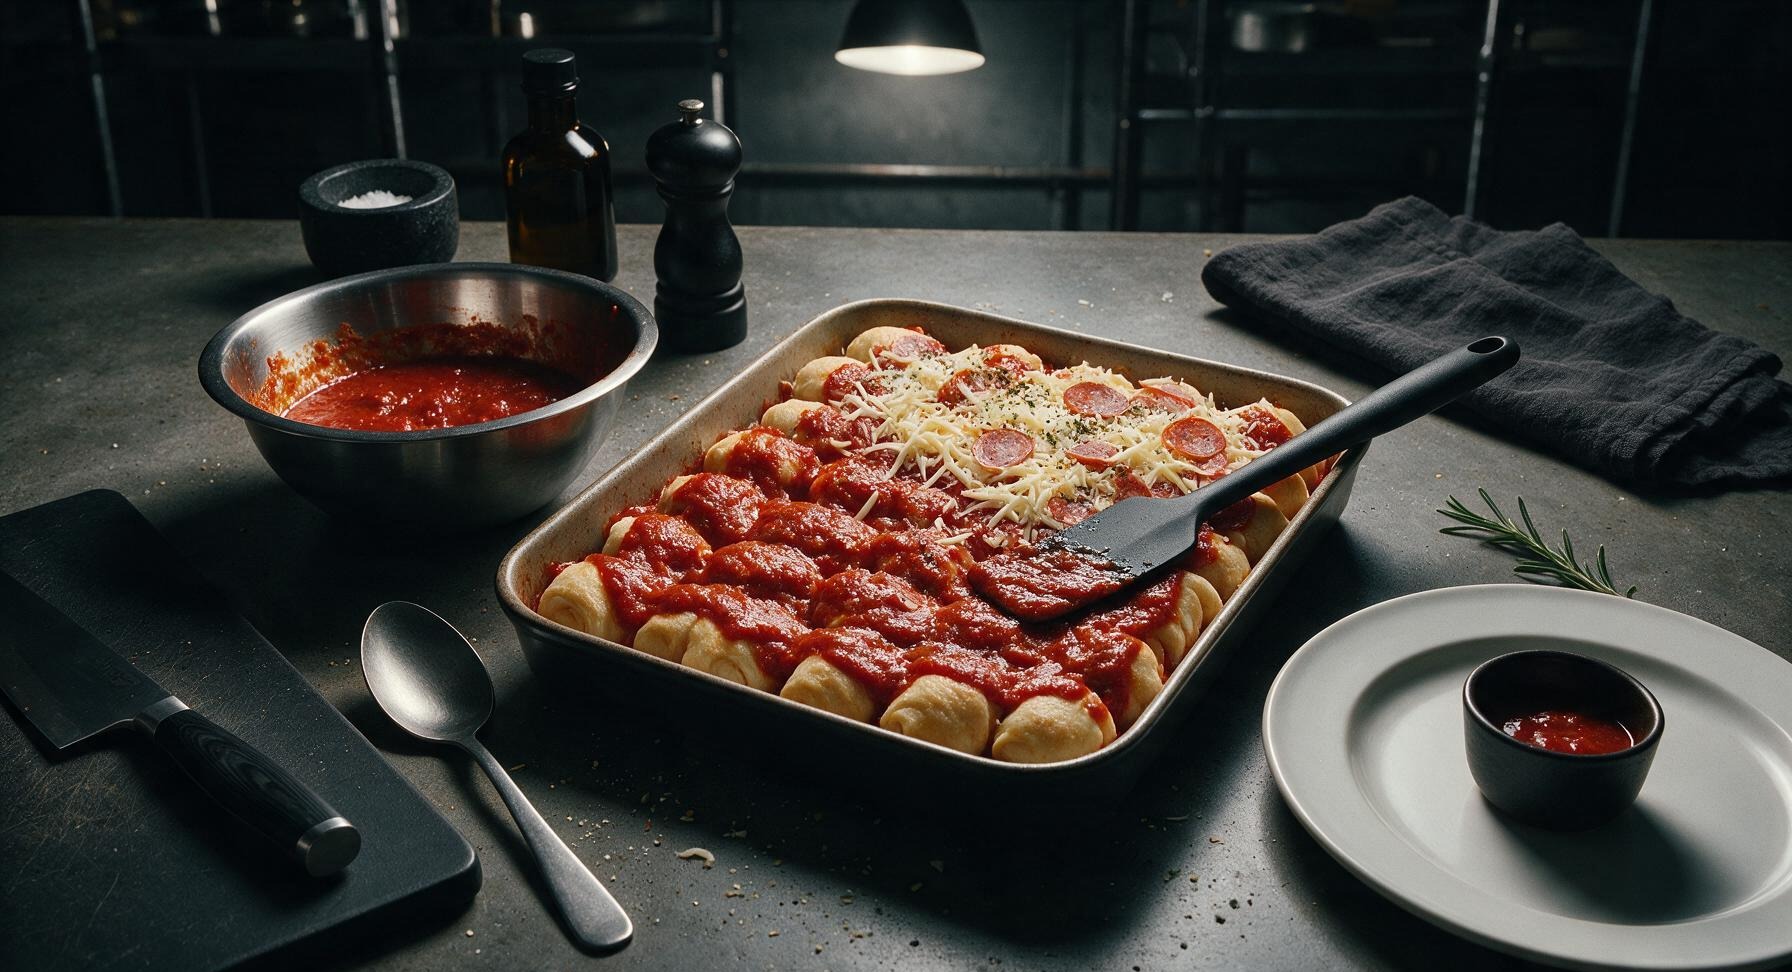
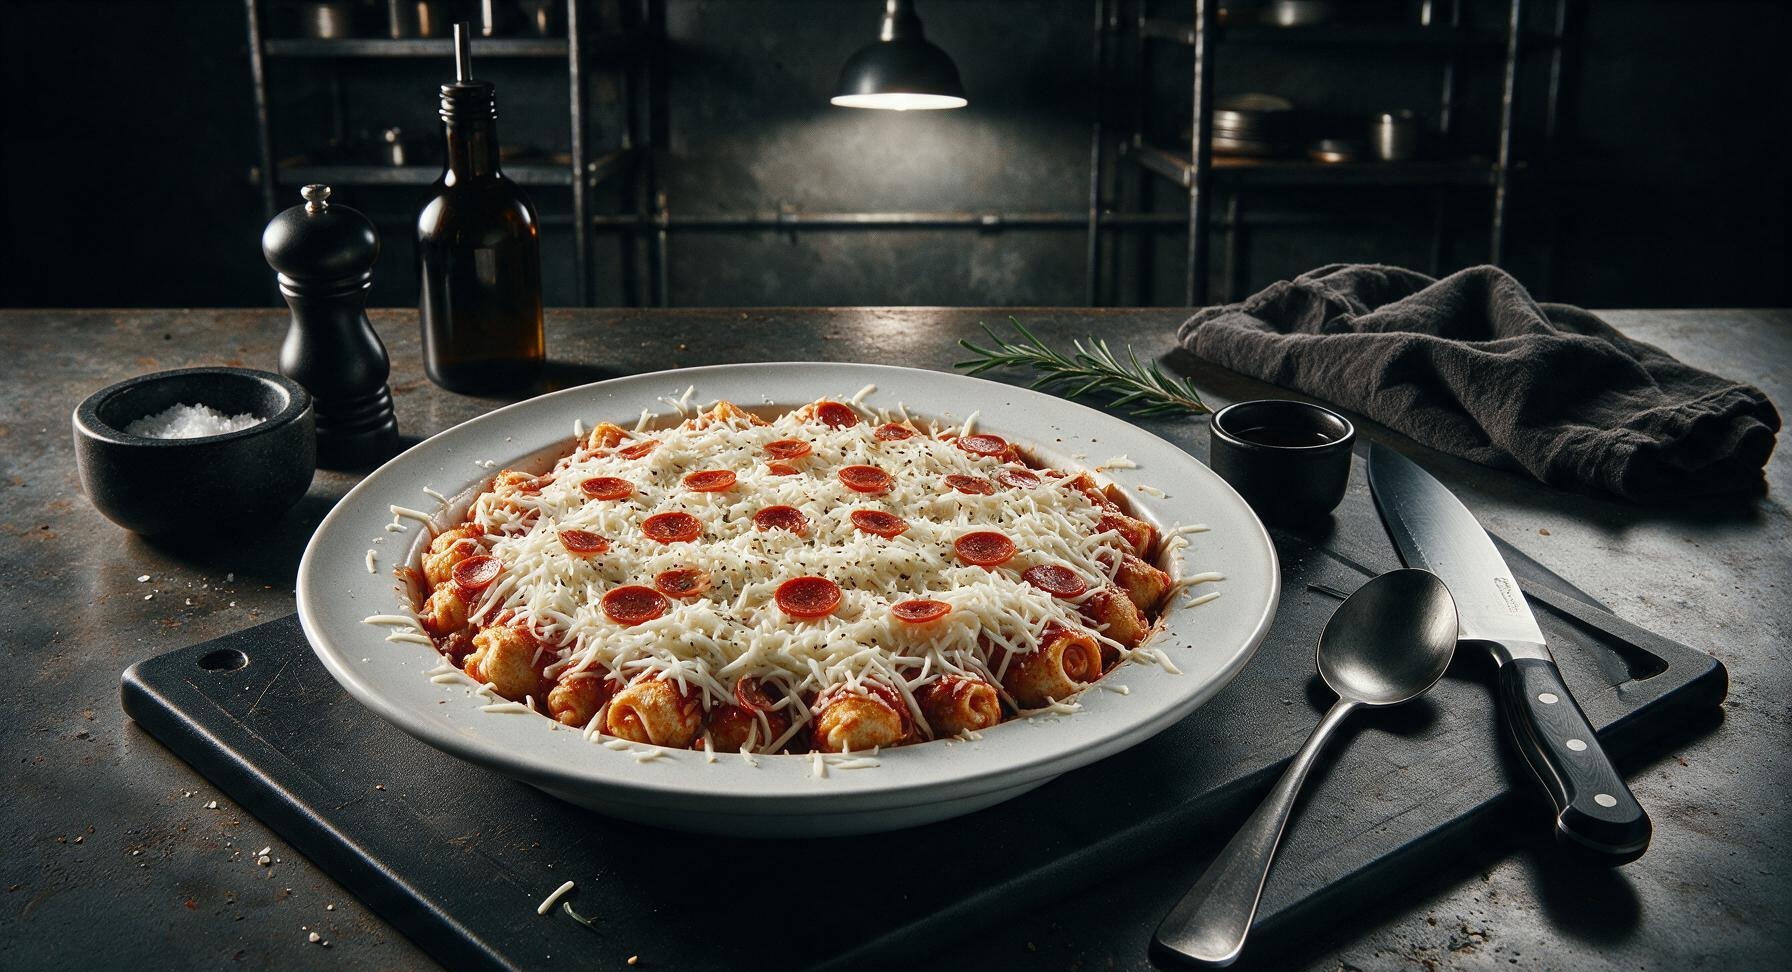
Measure 1 cup of marinara sauce into the stainless steel mixing bowl, then pour it evenly over the first layer of pizza rolls. Use the black silicone spatula to spread the sauce gently across the roll tops, taking care not to press down hard enough to crush the frozen rolls. Sprinkle 1 cup of shredded mozzarella, 2 tablespoons of grated parmesan, ½ teaspoon Italian seasoning, and ¼ teaspoon garlic powder evenly over the sauce, then top with half the sliced pepperoni arranged in a loose even layer.
Step 3
step3:Add Sauce and Cheese
Step 3
step3:Add Sauce and Cheese
4

Repeat Casserole Layers

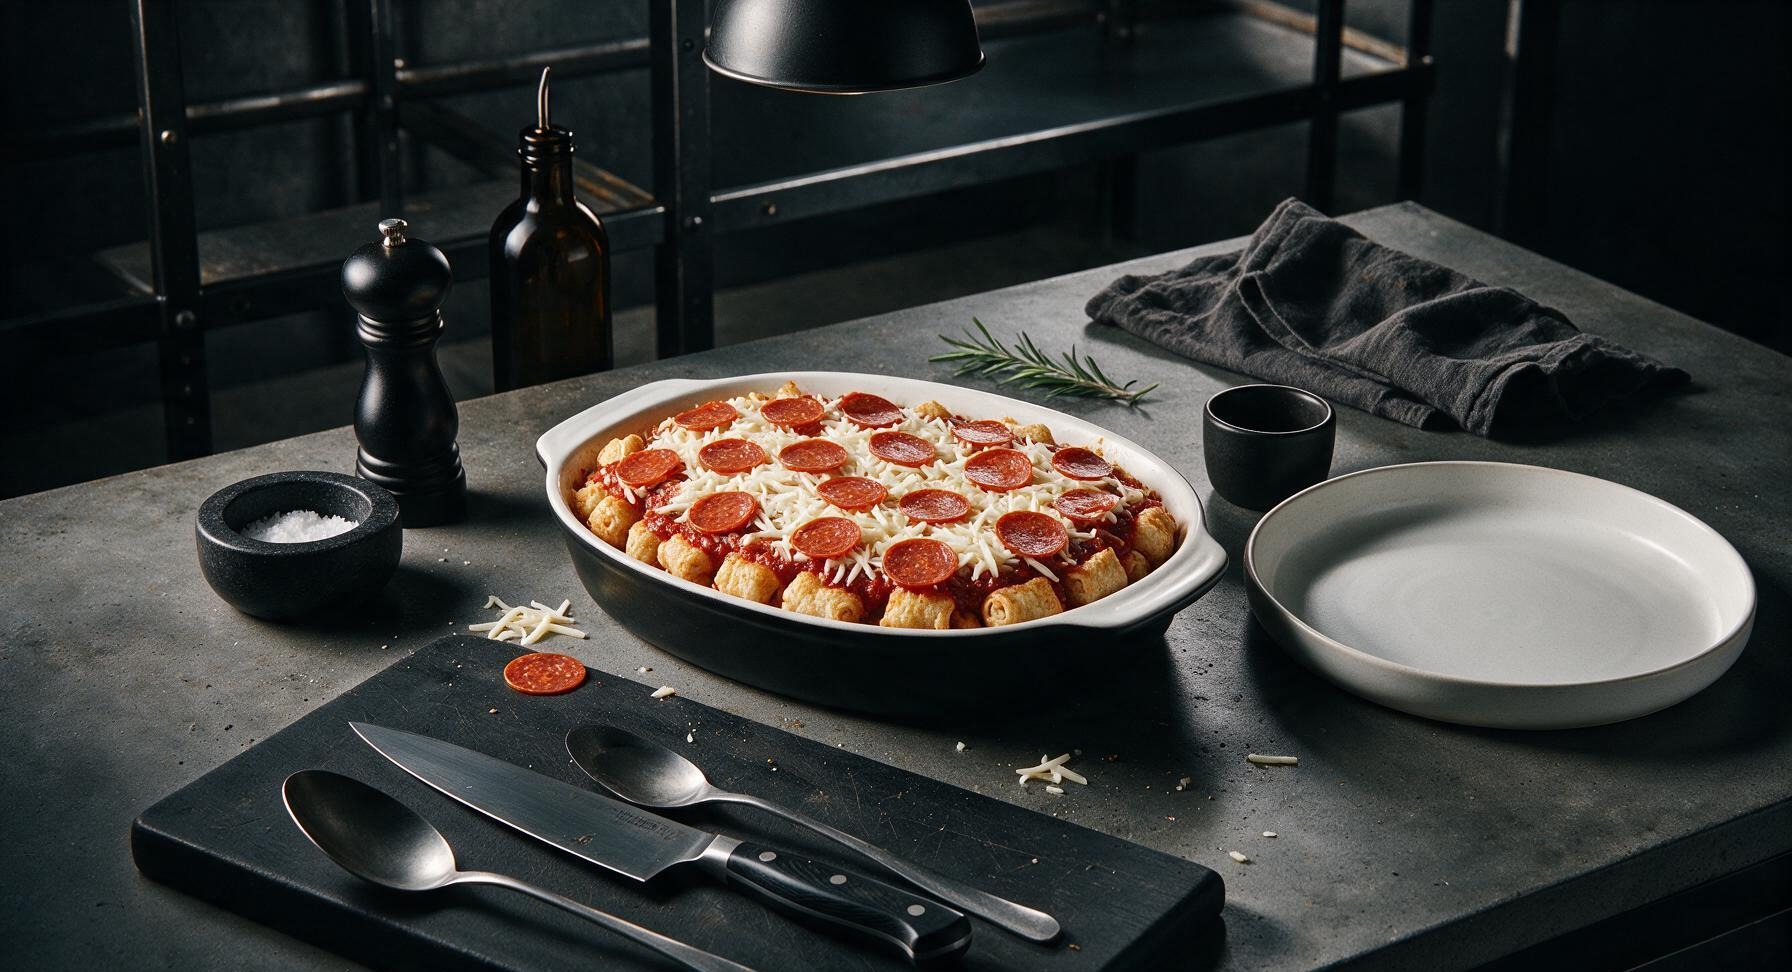
Arrange the remaining 24 frozen pizza rolls in a second even layer directly on top of the first cheese and pepperoni layer. Top with the remaining 1 cup of marinara, spread gently with the spatula, then add the remaining 1 cup shredded mozzarella, remaining 2 tablespoons parmesan, remaining Italian seasoning and garlic powder. Finish by arranging the last of the pepperoni slices across the top in an even pattern, leaving small gaps between slices so cheese can bubble through as it bakes.
Step 4
step4:Repeat Casserole Layers
5

Bake to Perfection

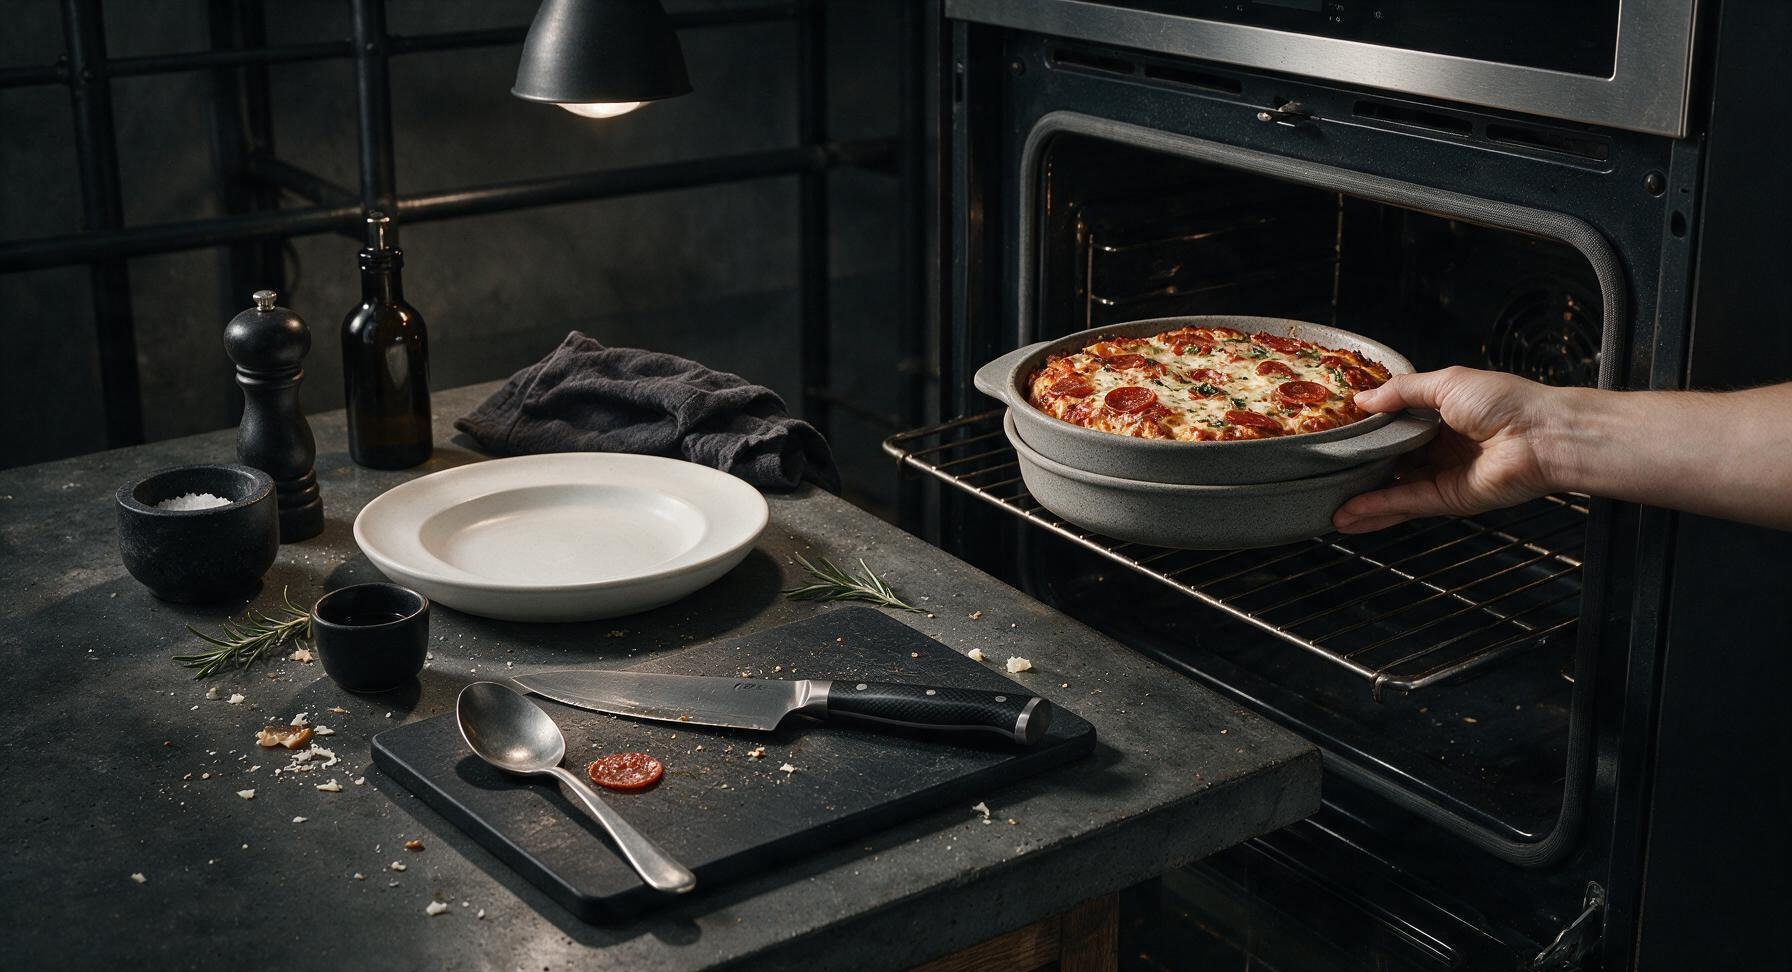
Carefully transfer the assembled baking dish to the preheated middle oven rack. Bake uncovered for 30 to 35 minutes, until the cheese is fully melted and bubbling golden around the dish edges, the top pepperoni slices have crisped into small cups, and the pizza rolls reach an internal temperature of 165°F (74°C). If the top cheese begins to darken too quickly before the rolls are cooked through, tent the dish loosely with a sheet of aluminum foil for the final 10 minutes of baking.
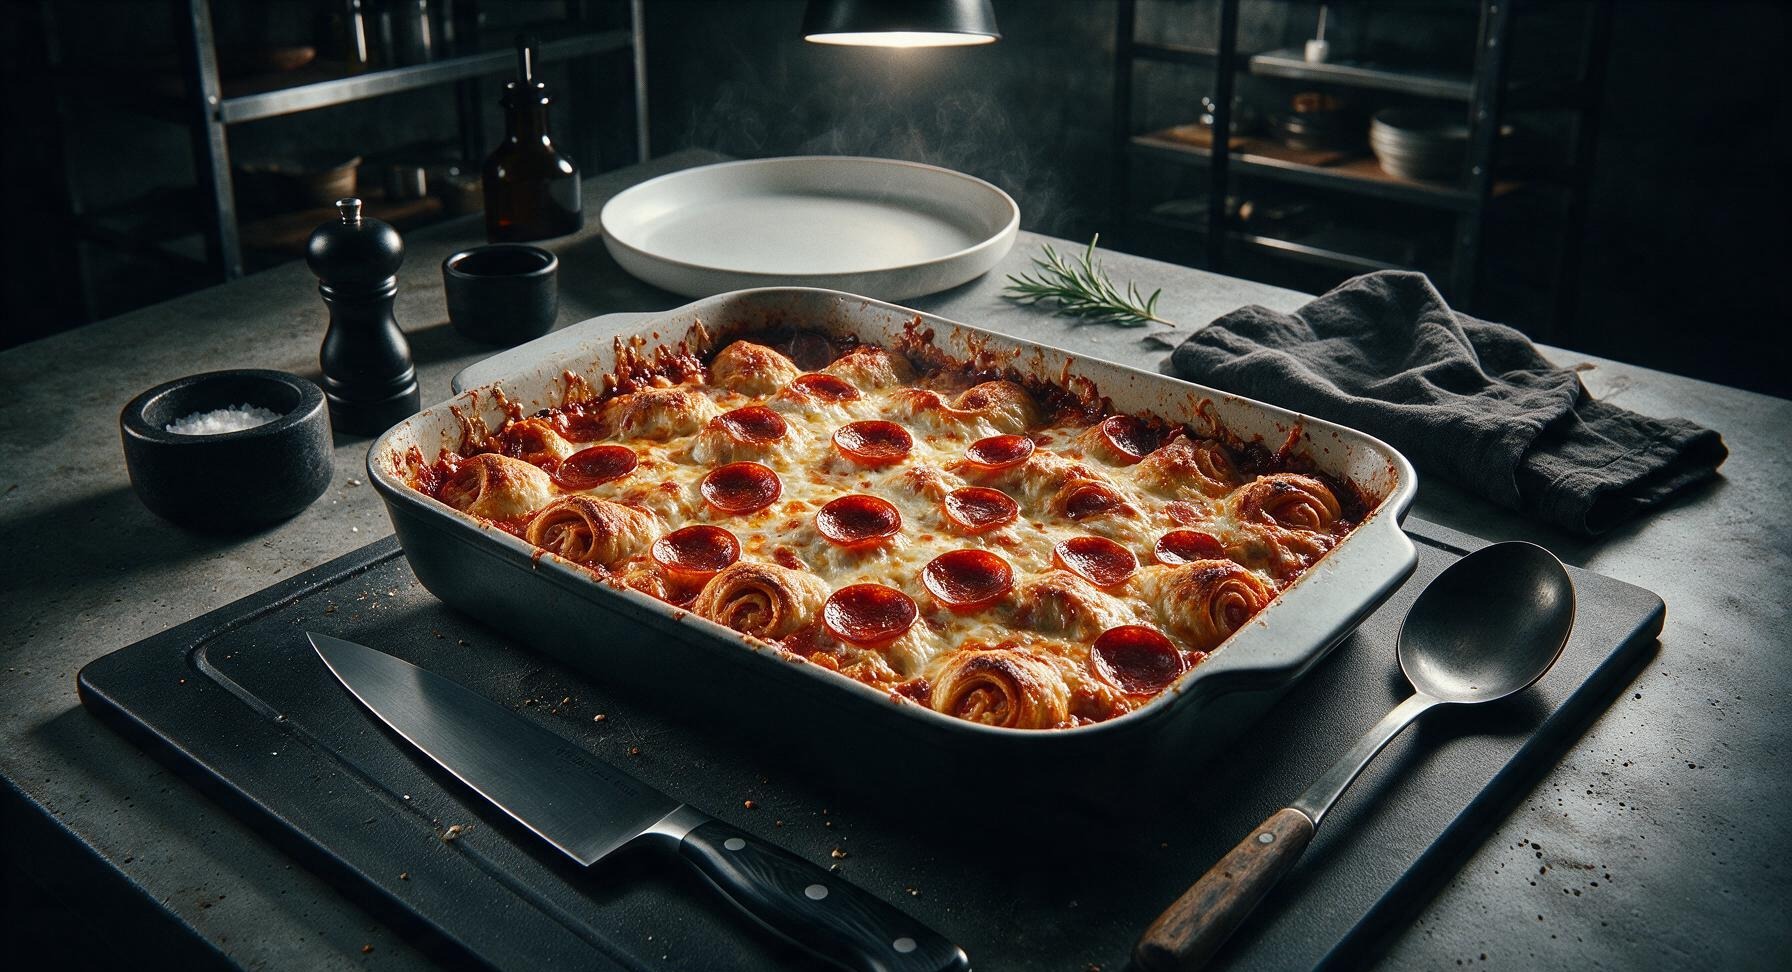
Step 5
step5:Bake to Perfection
Step 5
step5:Bake to Perfection
6

Let Casserole Rest

Allow the hot baked casserole to rest undisturbed on the counter for 5 full minutes. This short rest lets the melted cheese set slightly so portions hold their shape when scooped, rather than sliding apart, and gives the extremely hot filling inside the pizza rolls time to cool slightly to avoid burnt mouths.
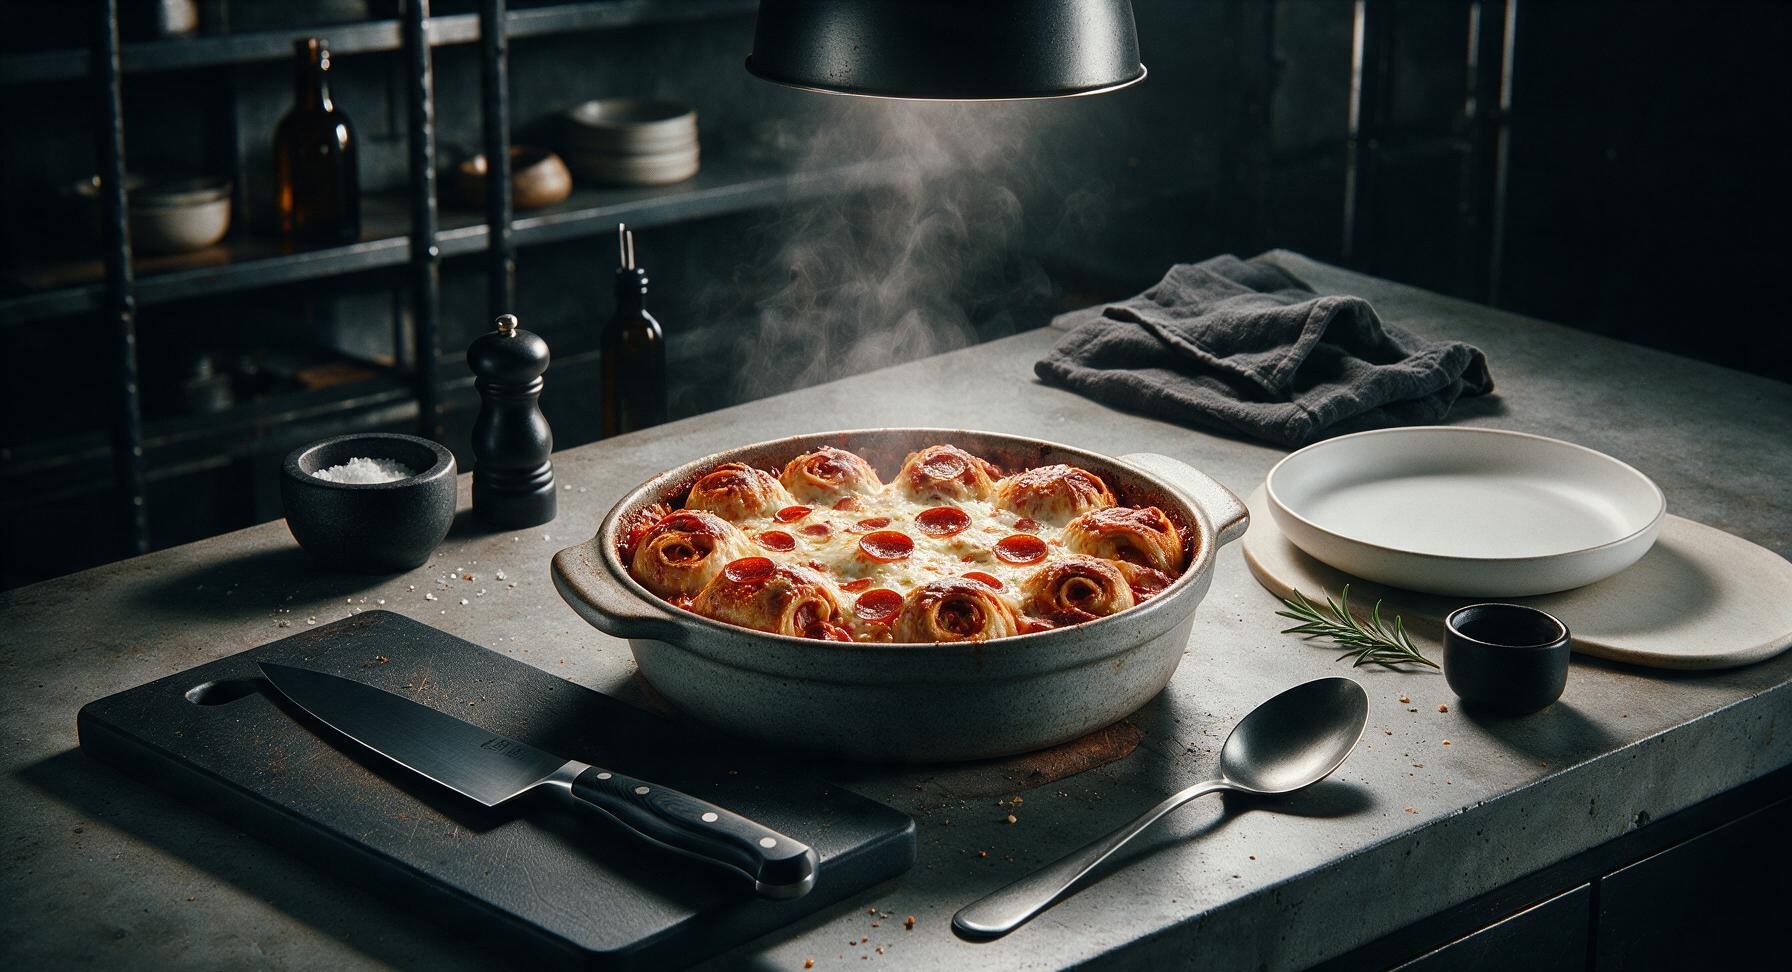
Step 6
step6:Let Casserole Rest
7

Plate and Garnish

Use a large serving spoon to scoop generous, even portions of the rested casserole onto the matte off-white rectangular serving platter, arranging pieces so crispy roll edges and crisp pepperoni cups face up for visual appeal. Tear a handful of fresh basil leaves from the fixed potted basil plant on the counter, scatter them across the top of the plated casserole, and sprinkle with a light dusting of extra parmesan cheese. Fill the three small clear glass condiment cups with red pepper flakes, extra parmesan, and warmed extra marinara for serving.
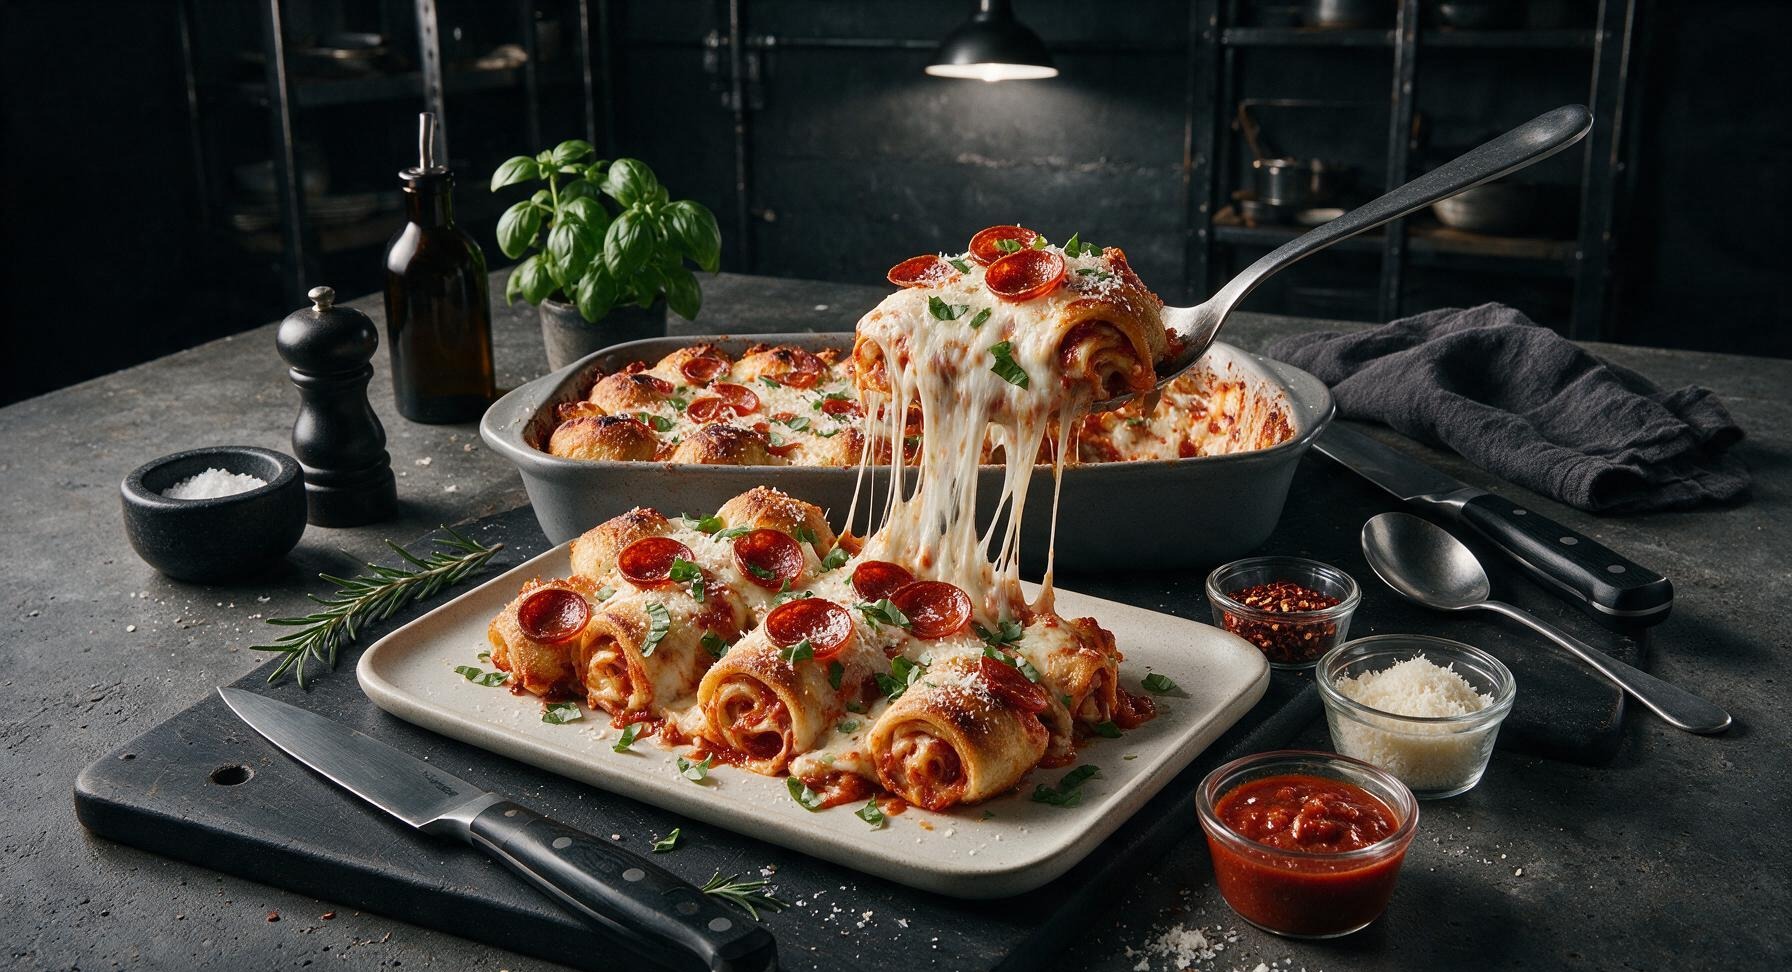
Step 7
step7:Plate and Garnish

Tips

1.Never thaw frozen pizza rolls before layering: Thawed rolls absorb excess marinara and release extra moisture as they bake, leading to a soggy, mushy casserole instead of one with crisp, golden roll edges.
2.Stick to low-moisture shredded mozzarella for this recipe: Fresh mozzarella has a very high water content that will make the casserole watery, while low-moisture mozzarella melts into the perfect stretchy, bubbly layer without making the dish soggy.
3.For extra-crispy pepperoni cups, avoid overlapping top-layer pepperoni slices: Overlapped slices trap steam and stay soft, while slices placed with small gaps between them crisp up into grease-glistened, crunchy cups that add great texture contrast to the soft cheese and rolls.


✨ You May Also Like

Main Course
🍜 United Kingdom

A showstopping classic of tender seared beef, savory mushroom duxelles, and crisp prosciutto wrapped in flaky golden puff pastry, baked to juicy perfection.

⏱️ 2 hours 1Main Course ★ 4.7
Main Course
🍜 India

Tender charred marinated chicken simmered in a rich, spiced creamy tomato sauce, this iconic Anglo-Indian curry pairs perfectly with basmati rice or warm naan.

⏱️ 50 minuteMain Course ★ 4.6
Main Course
🍜 Thailand

Classic tangy, sweet, and savory Thai stir-fried rice noodles with shrimp, tofu, and crunchy garnishes, balancing all five core Thai flavor profiles.

⏱️ 30 minuteMain Course ★ 4.5
Main Course
🍜 United Kingdom

Crispy golden beer-battered cod and fluffy double-fried chips, served with tangy tartar sauce and malt vinegar: the timeless, beloved British pub comfort classic.

⏱️ 45 minuteMain Course ★ 4.7
Main Course
🍜 Mexico

Smoky, chile-marinated pork tacos with caramelized pineapple, fresh cilantro, and lime: a beloved classic Mexican street food perfect for casual summer gatherings.

⏱️ 1 hour 45Main Course ★ 4.8
Main Course
🍜 United States

Crunchy Fritos corn chips layered with savory beef chili and melted cheddar, topped with cool, zesty fixings for a beloved, cozy Tex-Mex comfort food.

⏱️ 35 minuteMain Course ★ 4.8

pizza roll casserole:Frequently Asked Questions

1.Do I need to thaw the frozen pepperoni pizza rolls before baking the casserole? ▾
No, absolutely do not thaw your frozen pizza rolls first! Baking them straight from the freezer keeps their crisp, snappy outer crust and prevents them from turning mushy as the casserole bakes. Thawing leads to excess moisture seeping out, which will make your final casserole soggy instead of having that perfect contrast of crisp bite and gooey center.
2.Can I use a different flavor of frozen pizza rolls if I don’t have pepperoni? ▾
Absolutely! You can swap in cheese, Italian sausage, supreme, or even three-cheese frozen pizza rolls if that’s what you have on hand. Just note that pepperoni rolls pair best with the added pepperoni and marinara layers here. If you pick a different base, add a pinch of dried Italian seasoning to keep that classic pizza flavor, and tweak extra toppings to match your preference.
3.What kind of marinara works best for this casserole? ▾
Skip watery, fresh refrigerated marinara for this bake—opt for a thick, jarred shelf-stable marinara or homemade slow-simmered marinara with low excess moisture. Watery sauce will seep into the pizza rolls and make the casserole soggy. If your marinara is on the thin side, simmer it for 10 minutes first to thicken it up before layering.
4.Can I make this casserole ahead of time for a party? ▾
You can prep the layers up to 24 hours in advance for easy party serving, just hold off on adding the final top layer of cheese and pepperoni until right before baking, and keep the dish tightly wrapped in the fridge. Don’t assemble it more than a day ahead, as the frozen rolls will thaw and turn mushy against the sauce. Let the cold dish sit on the counter 10 minutes before popping it in the oven.
5.Why is my casserole coming out soggy every time I make it? ▾
Sogginess almost always stems from three common missteps: thawing pizza rolls before baking, using thin, watery marinara, or covering the dish for the full bake time. Stick to frozen rolls, use thick, low-moisture marinara, and bake uncovered for the last 15 minutes to let excess moisture evaporate. For extra bottom crisp, set your baking dish on a preheated sheet pan as it cooks.
6.Can I add extra veggies to this casserole? ▾
You absolutely can, but you’ll need to pre-cook high-moisture veggies first to avoid a soggy final dish. Sauté bell peppers, onions, or mushrooms until all their released liquid evaporates, then pat them dry before layering. Skip raw veggies entirely, as they leach water as they bake. Low-moisture add-ins like sliced black olives or cooked, crumbled sausage need no extra prep.
7.What temperature and bake time works best for this casserole? ▾
Bake the casserole at 375°F (190°C) for a total of 35 to 40 minutes for perfect results. Keep it tightly covered with aluminum foil for the first 20 minutes to let the rolls cook through and the initial cheese layers melt, then remove the foil for the last 15 to 20 minutes to crisp the top and let pepperoni curl into those craveable crispy cups. Let it rest 5 minutes before serving.
8.Do I need to grease my baking dish before adding layers? ▾
Yes, give your 9x13-inch baking dish a light coating of nonstick cooking spray or a thin rub of butter before building your layers. Melted cheese and marinara will stick to uncoated glass or ceramic as it bakes, especially during the uncovered final crisping stage, and that quick prep step makes serving slices easy and cuts down on scrubbing at cleanup.
9.Can I use fresh mozzarella instead of low-moisture shredded mozzarella? ▾
Fresh mozzarella has very high moisture content, so using it as your primary cheese will leave you with a soggy, watery casserole. If you love its creamy, mild flavor, pat it extremely dry, dice it small, and mix a small amount in with mostly low-moisture shredded mozzarella. Never use fresh mozz as the only cheese here, or you’ll lose that perfect stretchy, non-watery melt.
10.How do I get the pepperoni on top extra crispy? ▾
For perfect crispy, curled pepperoni cups on top, reserve half of your thin-sliced pepperoni to add during the last 10 minutes of baking, instead of layering all of it at the start. If pepperoni sits under melted cheese for the full bake, it will stay soft and chewy. For extra crunch, run the casserole under the broiler for 1 minute at the very end—watch it closely to avoid burning.
11.Can I make this in a slow cooker instead of the oven? ▾
You can make this in a slow cooker, though you won’t get the same crisp top and chewy edges as the oven-baked version. Spray your insert well, layer as directed, and cook on low for 2 to 2.5 hours, checking often to avoid mushy overcooked rolls. Add your final pepperoni and parmesan layer in the last 15 minutes, and expect a softer, less crisp final texture overall.
12.How should I store leftover casserole? ▾
Let leftover casserole cool completely to room temperature within 2 hours of coming out of the oven, then transfer slices to an airtight container or wrap your baking dish tightly in plastic wrap. Leftovers will keep well in the fridge for up to 4 days. Never leave it sitting out at room temperature for more than 2 hours, as the dairy and cured meat components are perishable.
13.What’s the best way to reheat leftovers so they don’t get soggy? ▾
Skip the microwave if you want to bring back that signature crisp texture instead of soggy, chewy rolls. Reheat individual portions in a toaster oven or air fryer set to 350°F for 5 to 7 minutes, until the cheese is bubbly and the edges crisp up. If you do use a microwave, heat in 30-second bursts, and expect a softer, less snappy crust overall.
14.Can I freeze this casserole for later meals? ▾
You can freeze an unbaked assembled casserole (hold off on the top cheese and pepperoni layer) wrapped tightly in two layers of plastic and one layer of foil for up to 3 months. Bake straight from frozen, covered, at 375°F for 55 minutes, then uncover, add top cheese and pepperoni, and bake 20 more minutes. Baked leftovers also freeze well for up to 2 months.
15.Do I need to add any extra seasonings to the recipe? ▾
The base recipe is calibrated for that nostalgic, familiar pizza flavor, but you can add small extras if you’d like! A half teaspoon of dried oregano, a pinch of garlic powder, or a light sprinkle of red pepper flakes mixed into the marinara adds nice depth without overpowering the classic taste. Skip extra salt, though—pepperoni, parmesan, and jarred marinara already have plenty of sodium.
16.What size baking dish is best for this recipe? ▾
A standard 9x13-inch glass or ceramic baking dish is ideal for this recipe, as it gives you enough space to layer rolls, sauce, and cheese evenly without messy bubbling over as it bakes. If you use a smaller dish, cheese and sauce will spill over the sides in the oven, while a too-large dish spreads layers too thin and leads to dry, overcooked pizza rolls.
17.Can I make this recipe for a kid’s birthday party or potluck? ▾
This casserole is made for potlucks, kids’ birthday parties, and game day gatherings! It serves 8 to 10 people as a hearty main dish, or you can cut it into smaller 2-inch squares to serve 12 to 15 as a shareable appetizer. It holds up well for 2 hours on a low warming tray, and its nostalgic, gooey pizza flavor is a hit with both kids and adults.
18.Is it normal for the pizza rolls to release some grease as they bake? ▾
Yes, it’s completely normal for frozen pizza rolls and thin-sliced pepperoni to release a small amount of orange-tinted grease as they cook. If you notice excess grease pooling on the top when the bake time is up, just dab the surface gently with a paper towel before serving. That small amount of grease is part of the classic pizza roll flavor, and won’t ruin your final dish.
19.Can I add a dipping sauce on the side for serving? ▾
Absolutely! Extra warm marinara is the classic side dip for this casserole, but you can also serve it with creamy ranch, garlic butter dip, or even spicy hot honey for a fun sweet-savory twist. You don’t need a dip to enjoy it, though—the layers of marinara and melted cheese baked right in give it plenty of moisture and bold pizza flavor on its own.

Comments (19)

2 days ago

OMG this was such a game changer for our weeknight family dinner! I was scrambling to find something my 3 picky kids would actually eat without complaining, and they went back for SECONDS. The pepperoni gets all crispy on top and the cheese pull is insane. So easy to throw together after work too, only took me like 10 minutes to prep. 10/10 will be making this every other week for sure!

1 day ago

Same here! My 7 year old usually turns his nose up at anything that’s not chicken nuggets and he ate two full servings. Wild.

1 day ago

So glad this was a hit with your kids! It’s such a great low-fuss weeknight pick, and the crispy pepperoni top is definitely our favorite part too.

1 week ago

Brought this to our neighborhood block party potluck last weekend and it was GONE in 15 minutes. People kept coming up to ask for the recipe, I felt like a celebrity! I added a little extra Italian seasoning and a sprinkle of parmesan on top before baking, chef’s kiss.

5 days ago

Love the extra parmesan and Italian seasoning hack! So happy it was a potluck hit — this dish is always a crowd pleaser for groups.

3 days ago

Made this for my Sunday meal prep this week and it reheats SO good! I was worried the pizza rolls would get soggy after a few days in the fridge but they stayed perfectly crispy on the edges. Knocked a star off only because I wish there was a little more sauce, but that’s an easy fix for next time.

2 days ago

I had the same thought! I stir an extra half cup of marinara into the pizza roll mix before baking and it’s perfect, no dry bites at all.

2 days ago

Great tip about the extra marinara! We also love adding a side of warm marinara for dipping if you don’t want to mix it in, works like a charm.

5 minutes ago

Bro this is the ultimate dorm meal hack. I didn’t even have to chop anything, just dumped the frozen pizza rolls, sauce, cheese and pepperoni in my little casserole dish and baked it. My roommate stole half the pan lmao, 10/10

2 weeks ago

I swapped the regular pizza rolls for the gluten free version and it turned out amazing! My whole family (none of whom are gluten free) didn’t even notice a difference. Super easy to adapt for dietary needs, which is a huge win for me.

2 weeks ago

That’s such a fantastic swap! We’re so glad it worked out for you — adaptable recipes are the best for when you need to cater to different dietary needs at the table.

yesterday

Made this for our game day watch party yesterday and it was the perfect snack. Way less messy than regular pizza, everyone could just grab a scoop and head back to the couch. Paired it with some ranch for dipping and people were raving.

yesterday

Ranch dip with this is non-negotiable! I put out a little bowl of garlic butter too for people who want extra, it goes so hard.

30 minutes ago

As someone who burns toast 50% of the time, this recipe was foolproof. No fancy skills needed, no weird ingredients, just straight up good comfort food. I ate half the pan straight out of the oven no shame.

5 days ago

It was good, but I followed the cook time exactly and the edges were a little more burnt than I like. Maybe my oven runs hot? Flavor was great though, just wish I’d checked it a few minutes earlier.

3 days ago

Oven temps vary so much! I always set my timer 5 minutes less than what recipes say for that exact reason, works every time.

3 days ago

Sorry to hear the edges got a little crispy! All ovens definitely run a little different, so checking 5-7 minutes early is a great tip. Next time you can also cover the edges with foil halfway through baking if they’re browning too fast!

1 week ago

I cannot sing this recipe’s praises enough. Between work, school drop offs and soccer practice I barely have time to cook most nights, and this came together so fast. My twins asked if we can have it for their birthday dinner next month, that’s the highest possible compliment in my book.

1 week ago

That’s the best review we could ask for! Nothing beats a meal that’s quick enough for busy weeknights and tasty enough to be requested for a birthday. Hope the birthday dinner turns out perfect!

2 hours ago

Threw in some diced bell peppers and black olives with the pepperoni to sneak some veggies in, and it turned out delish! The recipe is such a great base to customize however you like, no rules just good pizza flavor.

2 weeks ago

I made a double batch and froze half of it for busy nights, and it freezes like a DREAM. Just pop it in the oven for 20 minutes when you need a quick meal and it tastes just as fresh as the day you made it. Game changer for my busy schedule.

1 week ago

Oh that’s such a good idea! I was wondering if this freezes well, definitely gonna make a double batch next Sunday for my freezer stash.

3 days ago

Added a handful of sliced spicy pepperoni and a sprinkle of red pepper flakes before baking and OH MY GOD it was so good. Gave it that little kick I love without being too much for my partner who hates super spicy food. Perfect balance.

2 days ago

I did the same thing! Drizzled a little hot honey on top of my serving too, sweet and spicy combo is unreal.

2 days ago

The spicy pepperoni and red pepper flake addition sounds incredible! Hot honey drizzle is such a chef’s level next step, we’ll have to try that next time we make it ourselves.

2 days ago

This is the first thing I’ve ever made that didn’t come out a total disaster! I was so nervous to cook for my girlfriend when she came over, and she loved it. Said it tasted like something she’d order at a casual restaurant. Confidence is through the roof right now lmao

1 day ago

That’s amazing to hear! We love that this recipe is approachable enough for first time cooks but tastes totally delicious. Great job pulling off a win for your girlfriend’s visit!

just now

Made this last night while we were having friends over for board game night, and everyone kept reaching for more bites between turns. Super shareable, super tasty, zero stress to make. 10/10 will be a regular in our game night rotation.

5 days ago

Loved the flavor, but I found the bottom layer a little dry when I pulled it out of the oven. Next time I’ll put a thin layer of sauce on the bottom of the dish before adding the pizza rolls, I think that’ll fix it right up!

3 days ago

I did that exact thing last time I made it! Game changer, no dry bottom at all, and it makes the first layer extra flavorful.

1 week ago

This is so budget friendly! I already had most of the stuff in my freezer and pantry, I only had to pick up a bag of shredded cheese on my grocery run. Feeds 4 people for like $8 total, can’t beat that right now with grocery prices so high.

2 days ago

Wait y’all, hear me out: I added a layer of sliced dill pickles between the cheese and pepperoni on top, and it was insane. The tangy pickle cuts through all the rich cheese and pepperoni so perfectly. Don’t knock it till you try it!

1 day ago

Wait that sounds absolutely wild but I’m weirdly intrigued? My partner loves pickles on pizza so I might have to test this out next time, I’ll report back.

1 day ago

We love a creative twist! Pickles on pizza is such a fun, underrated combo — we might just have to test that dill pickle version ourselves, it sounds delicious.

yesterday

Made this for my kids’ after school snack when they had friends over yesterday, and all the moms texted me asking for the recipe. It’s way more filling than regular chips or cookies, and the kids thought it was the coolest snack ever.

yesterday

That makes us so happy! It’s the perfect hearty after-school snack for hungry kids, and it’s way easier to make than a bunch of separate snacks for a group of kids.

30 minutes ago

I had a bunch of random leftover pizza rolls in my freezer from a few different bags and used those up for this, plus leftover marinara from takeout pizza last weekend. Tasted incredible, and I got to clean out my freezer at the same time. Win win.



