
Ramen Pizza

title 1
Ramen Pizza
⏱️ cook time 25 minutes
🍽️ servings 4
⚡ Difficulty easy

intro

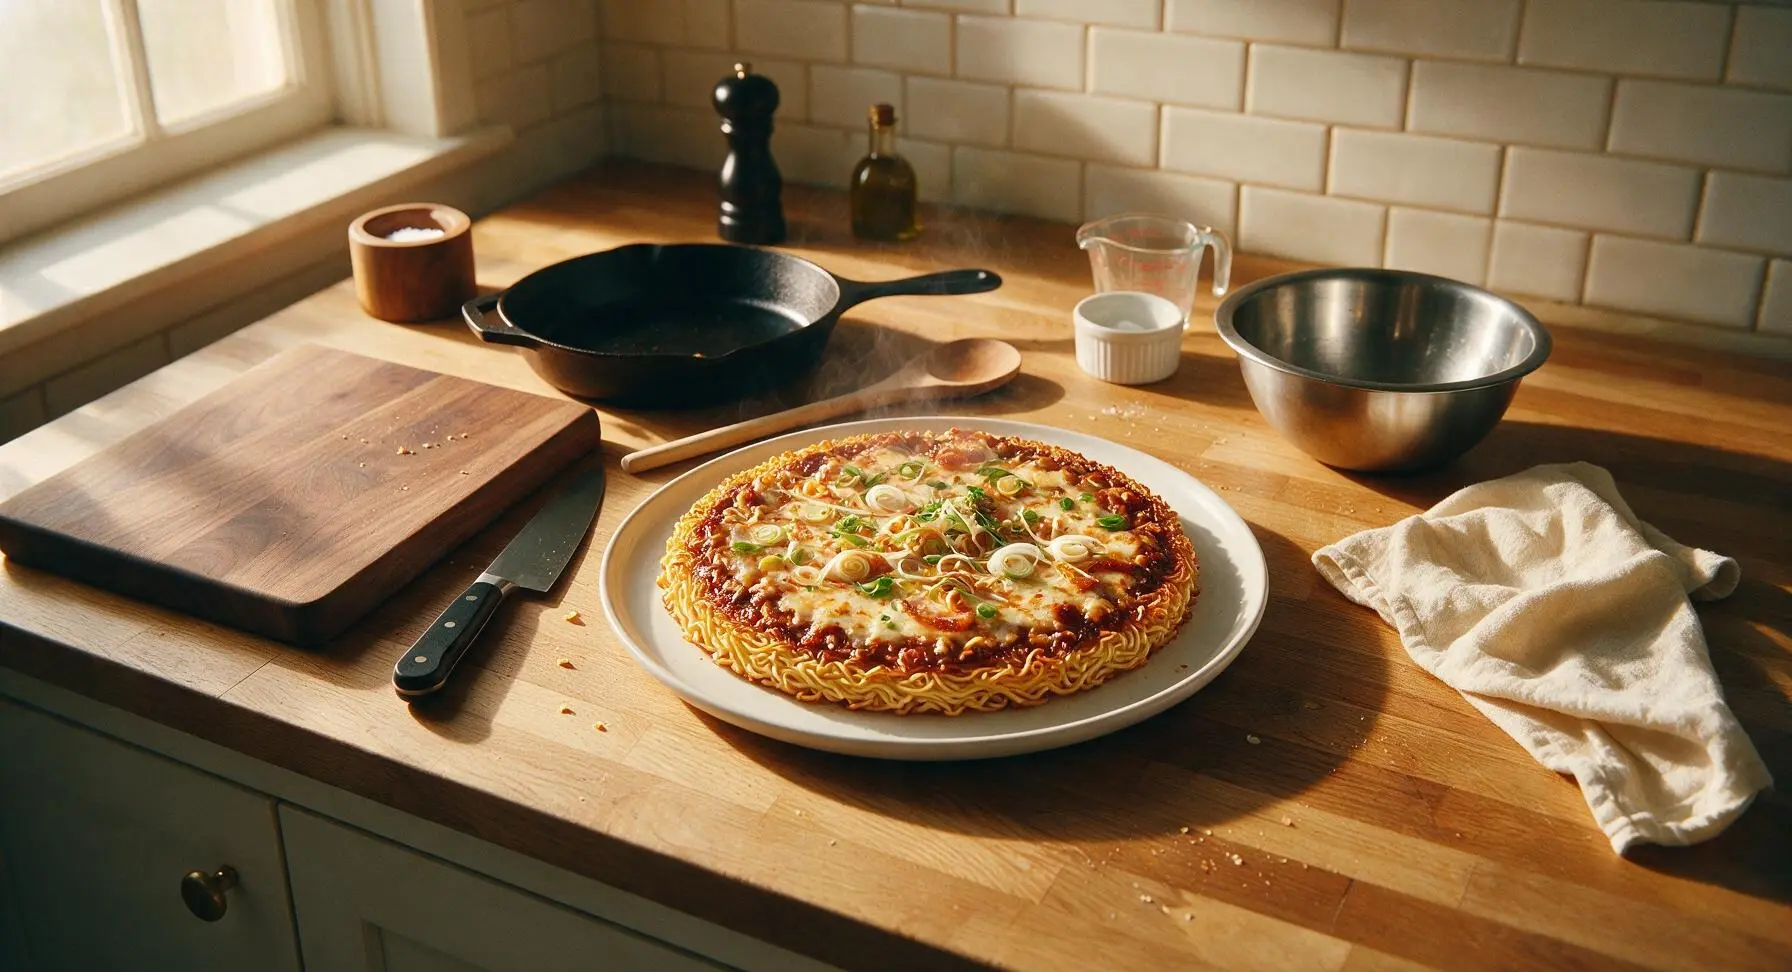
Crispy pressed ramen noodle crust layered with umami ramen sauce, melted cheese, and classic ramen toppings—this playful, shareable fusion is made for fun, casual meals.

Ingredients
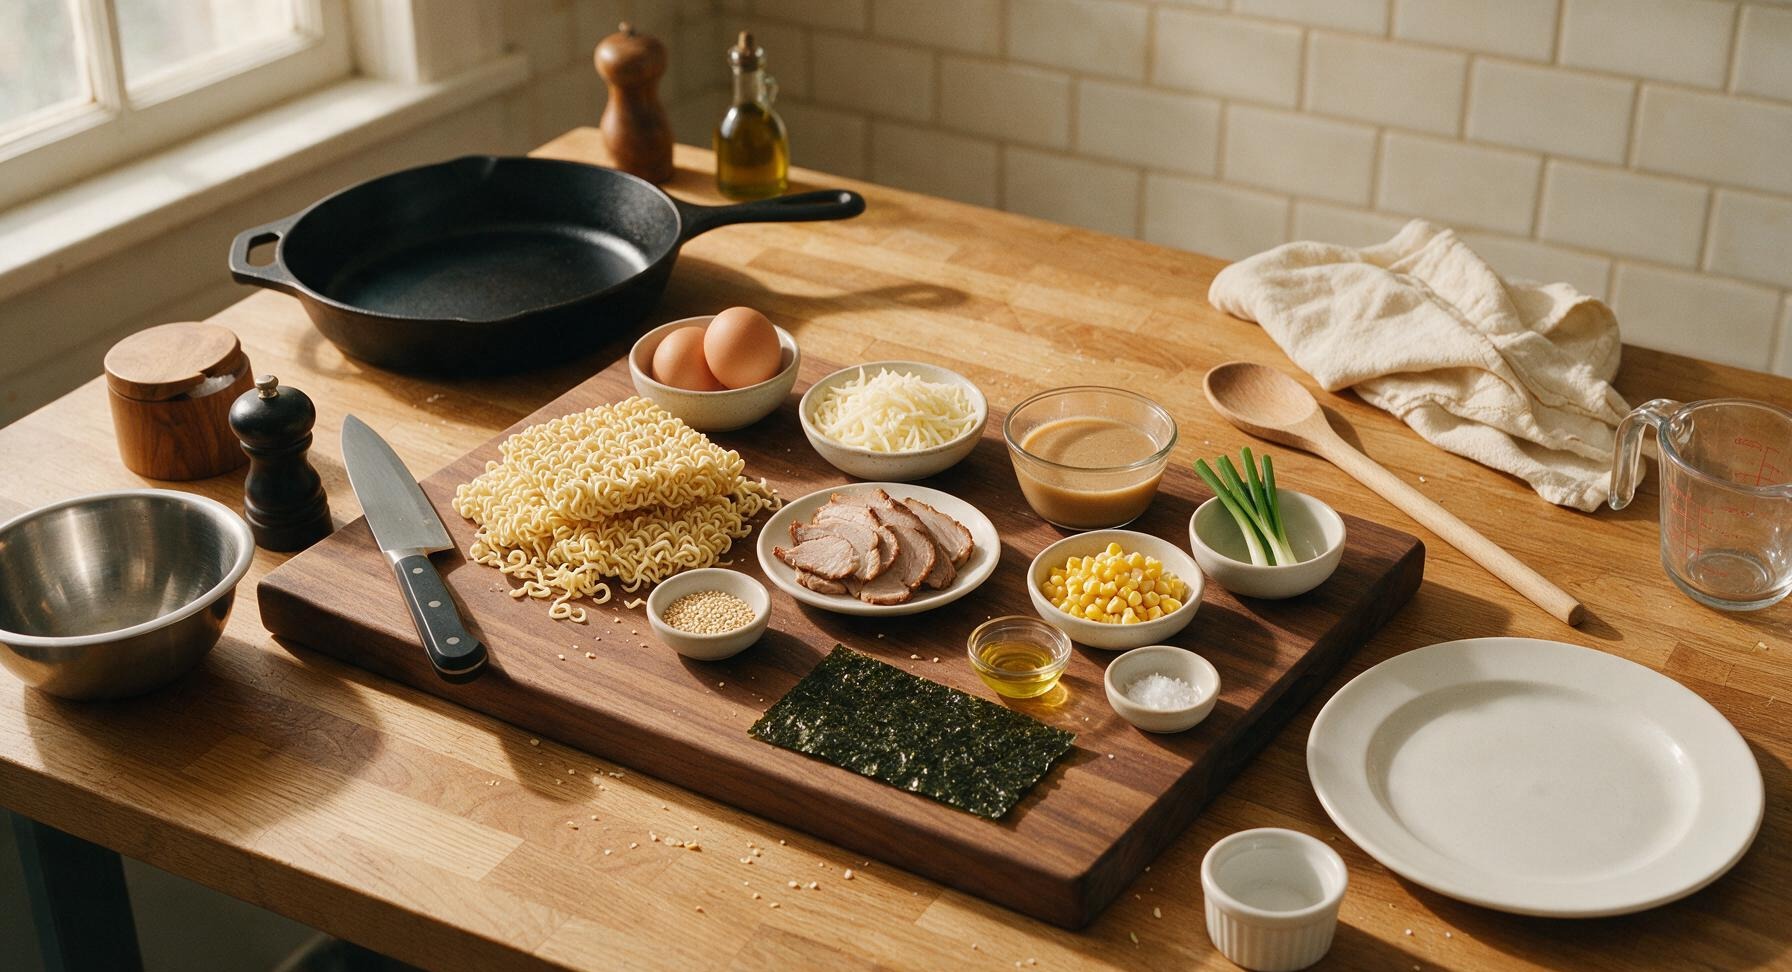
Dried instant ramen noodles (seasoning packets not used) 200g (2 standard portions)
Large eggs 2
Low-moisture shredded mozzarella cheese 120g (1 cup)
Thick concentrated ramen broth (tonkotsu or shoyu flavor) 120ml (1/2 cup)
Cooked chashu pork, thinly sliced 70g (1/2 cup)
Fresh scallions 3 stalks
Frozen sweet corn kernels, thawed and patted dry 35g (1/4 cup)
Toasted white sesame seeds 1 tablespoon
Toasted sesame oil 1 teaspoon
Dried nori sheet 1/2 sheet
Flaky sea salt 1/4 teaspoon

Steps

1

Cook Ramen Noodles

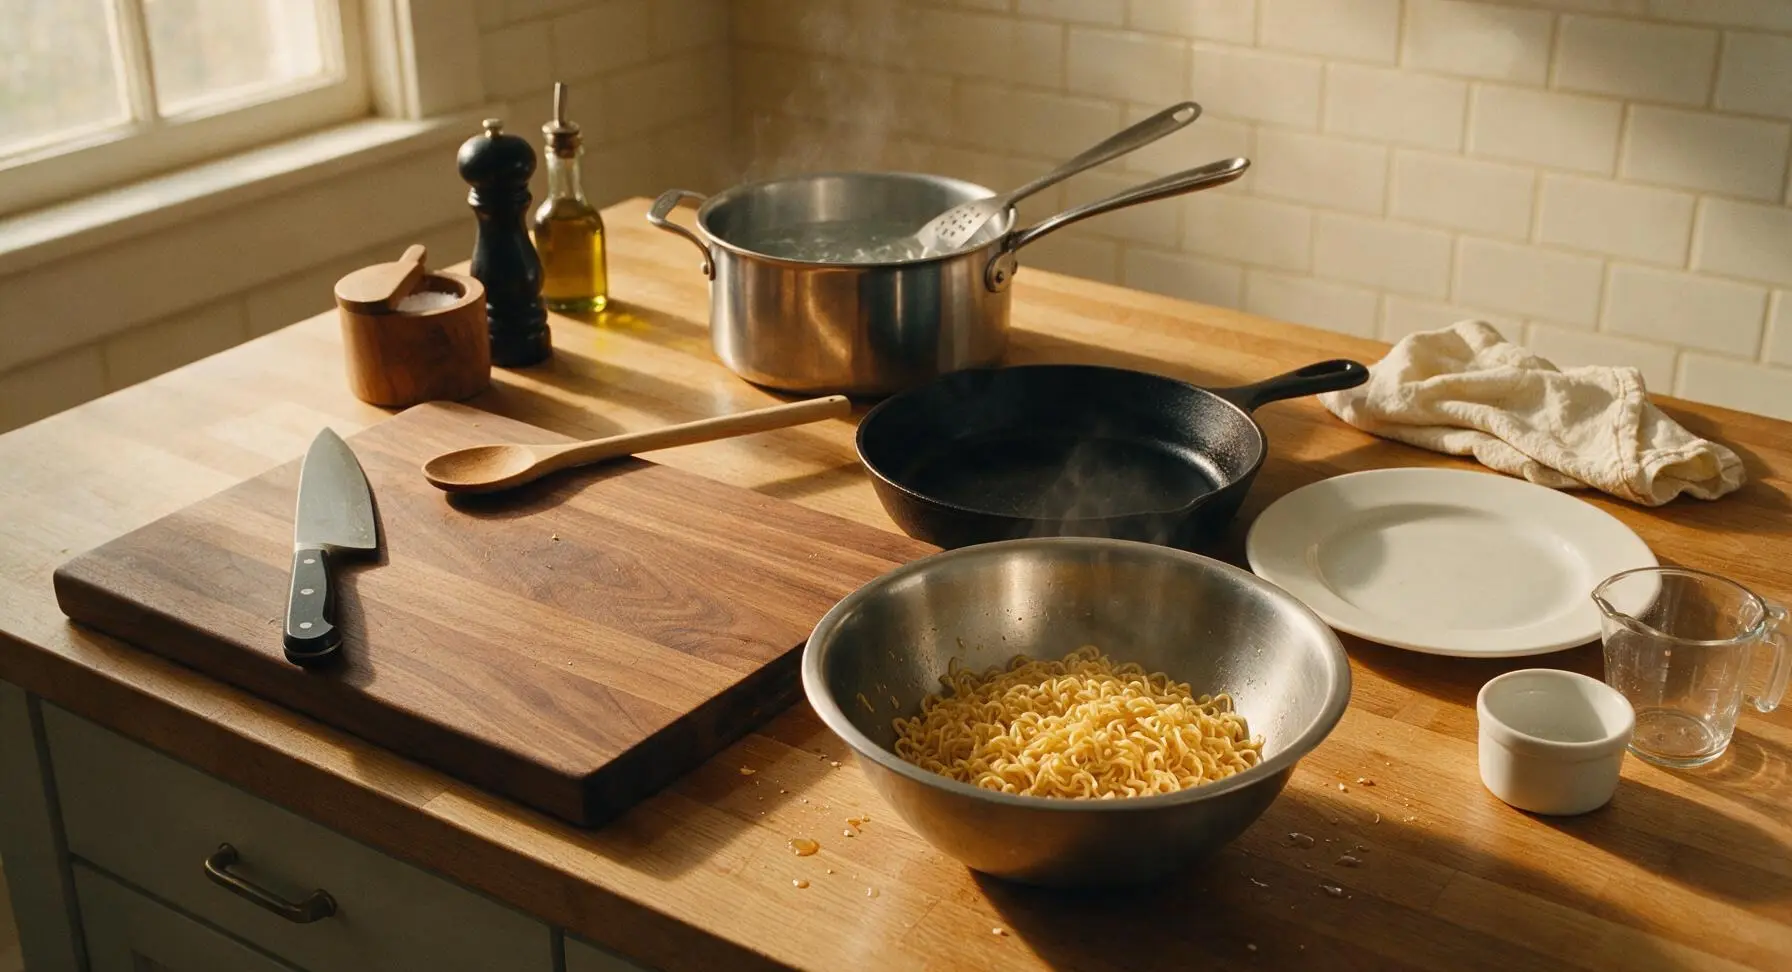
Fill the 3-quart polished stainless steel stock pot with 1.5L of water, bring to a rolling boil over high heat. Add 200g dried instant ramen noodles (do not add included seasoning packets), cook for exactly 3 minutes until al dente—overcooked noodles will turn mushy and fail to form a crisp crust. Use the long-handled matte stainless steel slotted spoon to lift noodles from the water, shaking thoroughly to drain all excess cooking water, then transfer to the large brushed stainless steel mixing bowl. Let noodles cool for 2 minutes until safe to handle.
Step 1
step1:Cook Ramen Noodles
2

Bind Ramen Crust

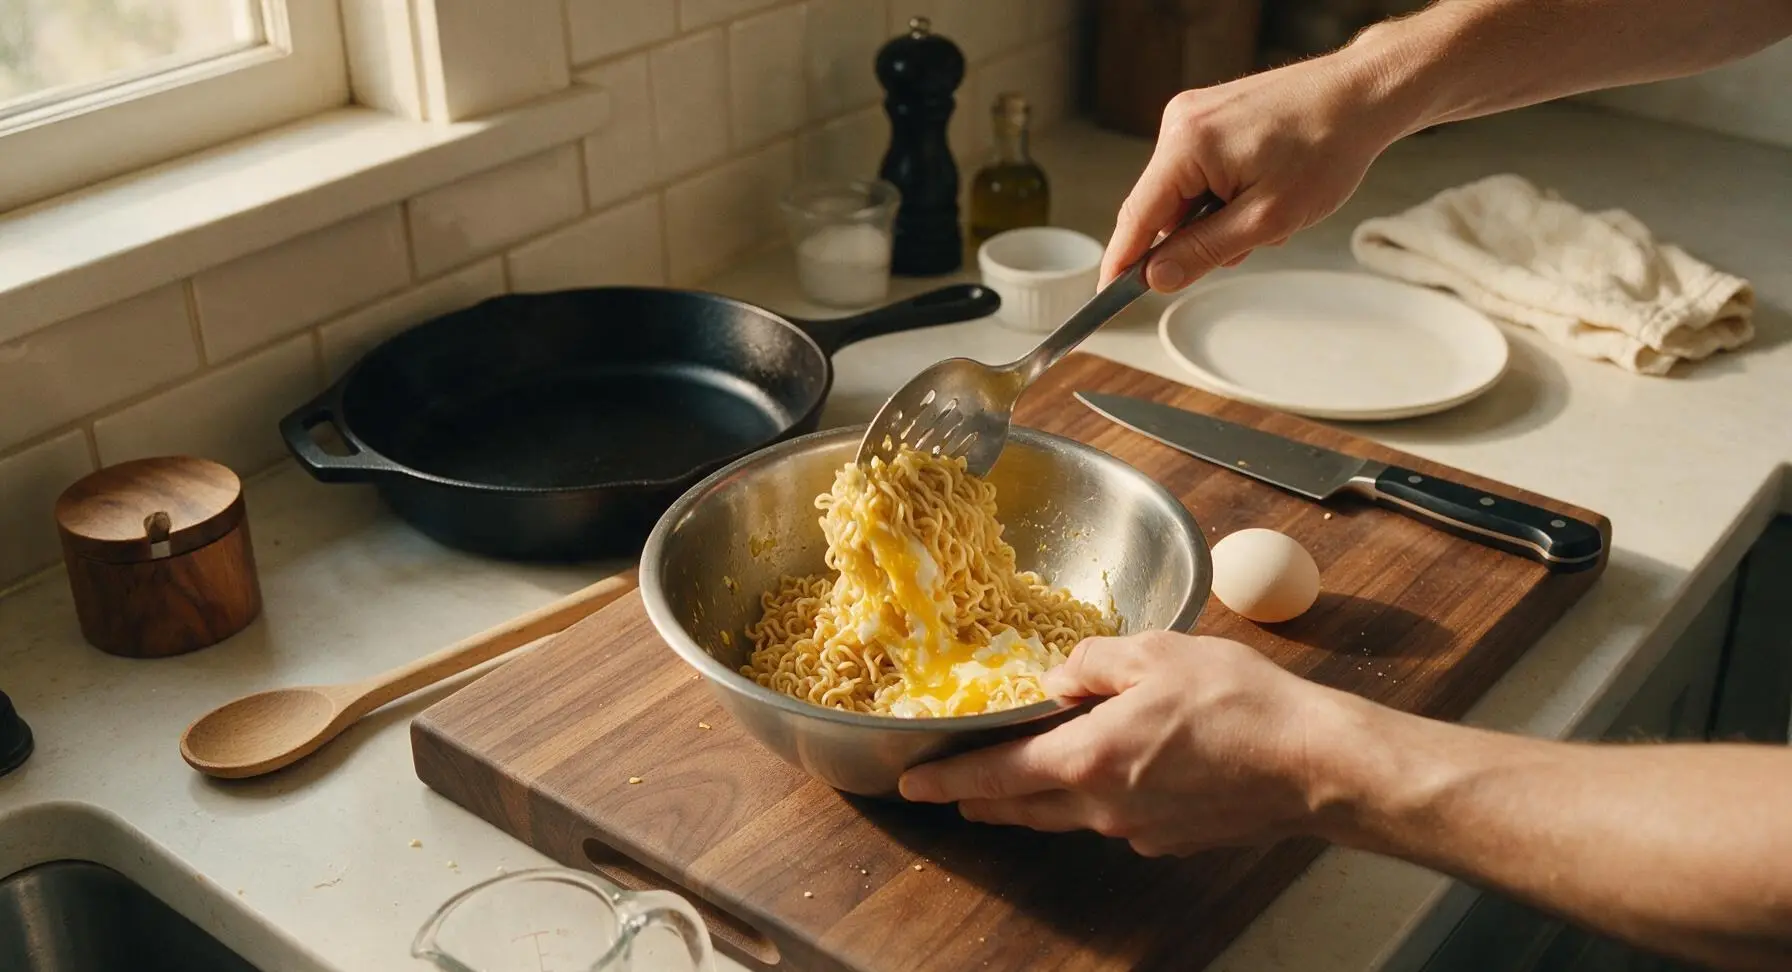
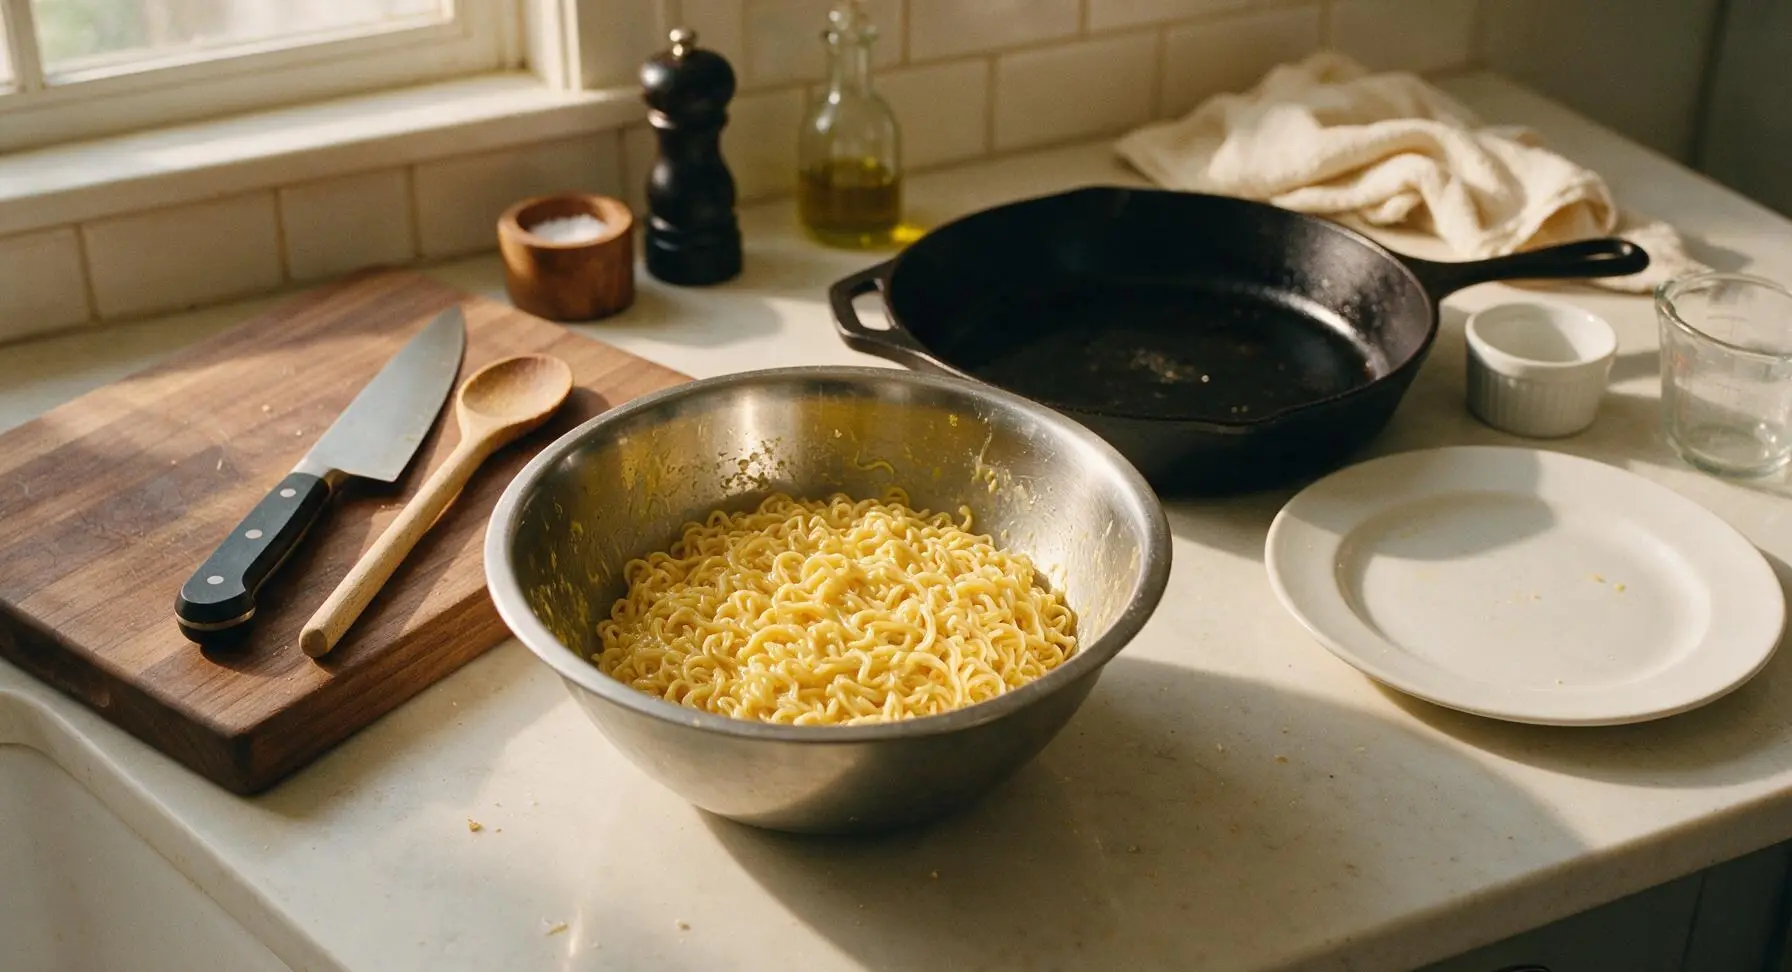
Crack 1 large egg into the mixing bowl with the cooled noodles, add 1/4 teaspoon flaky sea salt. Toss thoroughly with the slotted spoon until every noodle strand is evenly coated in thin beaten egg, which acts as the binder to hold the crust shape during baking. Break up any tight noodle clumps to ensure even egg distribution, with no dry uncoated noodles left in the bowl.
Step 2
step2:Bind Ramen Crust
Step 2
step2:Bind Ramen Crust
3

Press Crust Evenly

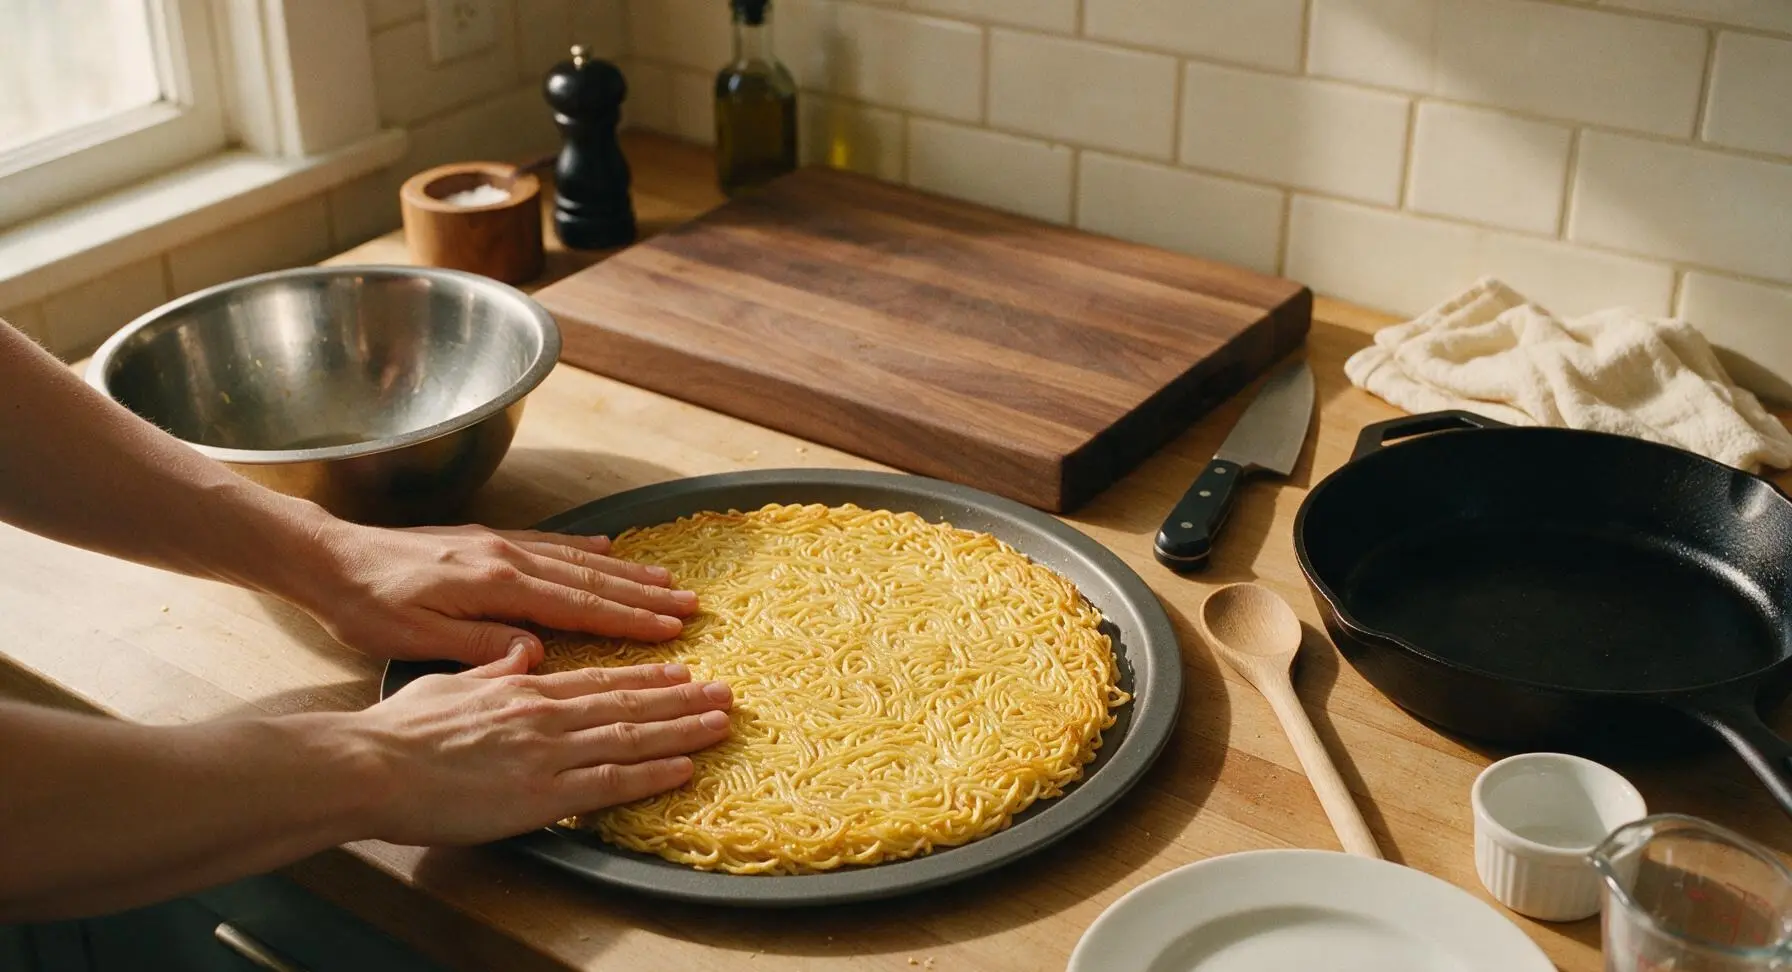
Transfer all egg-coated noodles to the 12-inch matte dark gray non-stick pizza pan. Use clean fingertips or the flat back of the slotted spoon to press noodles very firmly into an even, compact 12-inch round layer covering the entire pan surface. Build a slight 1cm raised edge around the pan rim to contain sauce and toppings, mimicking the raised crust of traditional pizza. Press firmly enough that no loose noodle strands shift when the pan is gently jiggled.
Step 3
step3:Press Crust Evenly
4

Par-Bake Ramen Crust

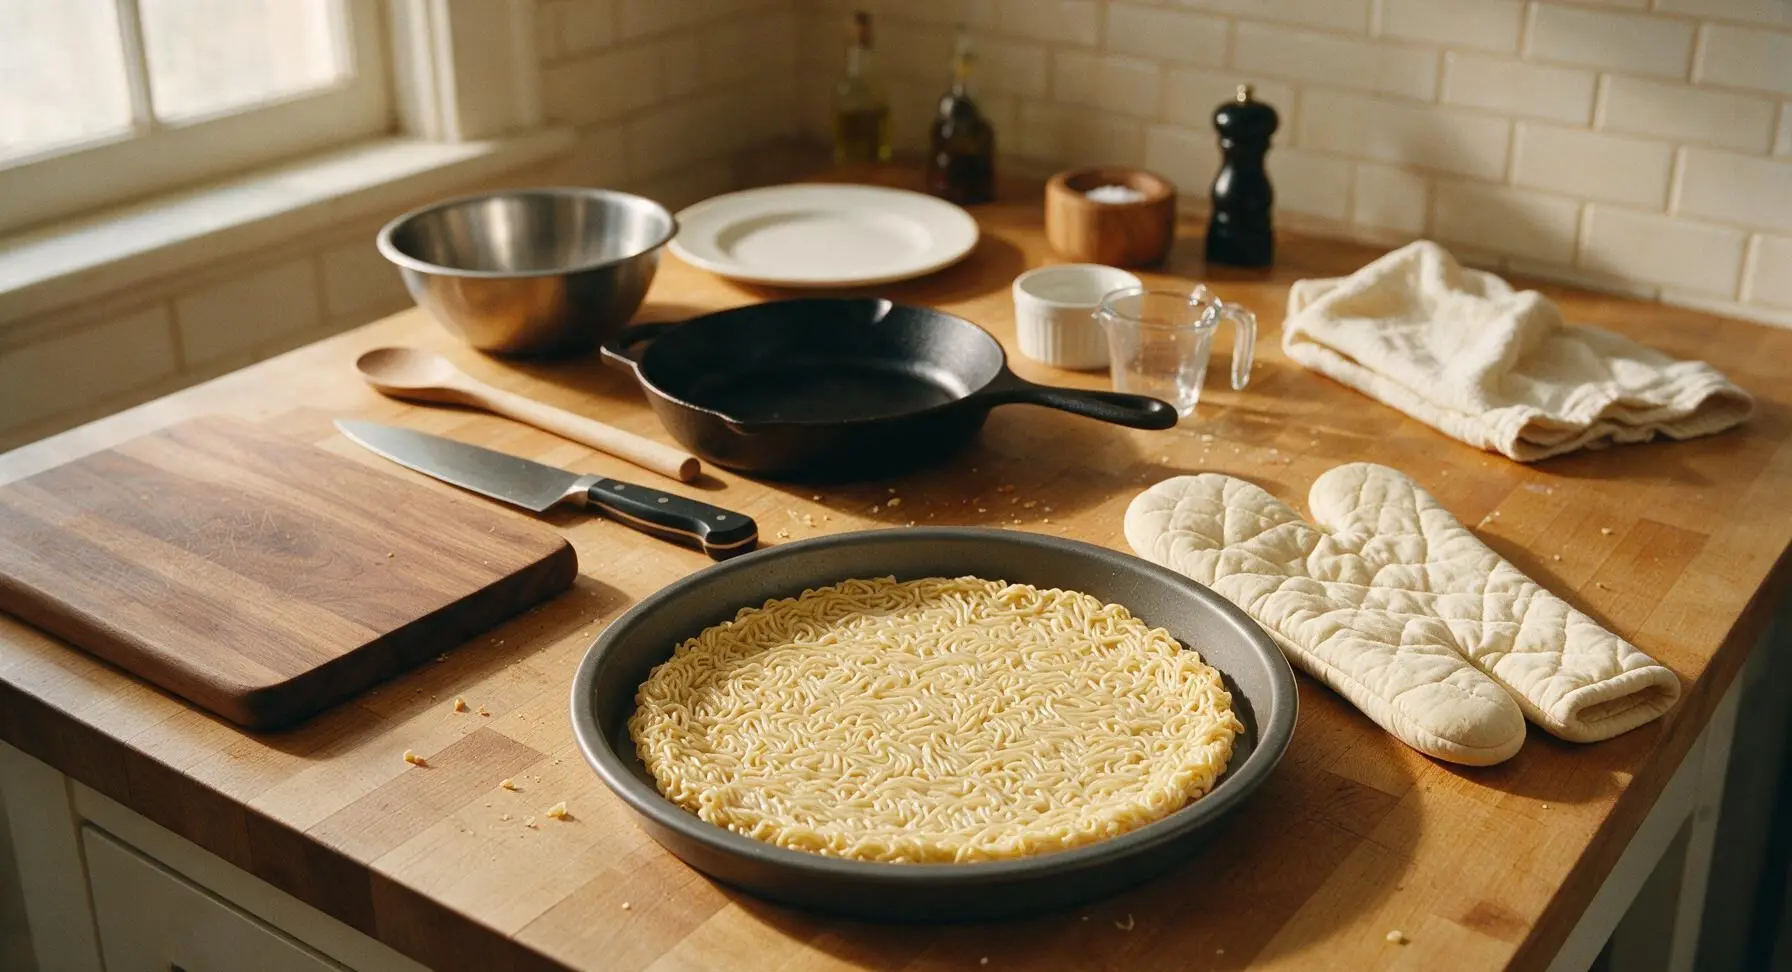
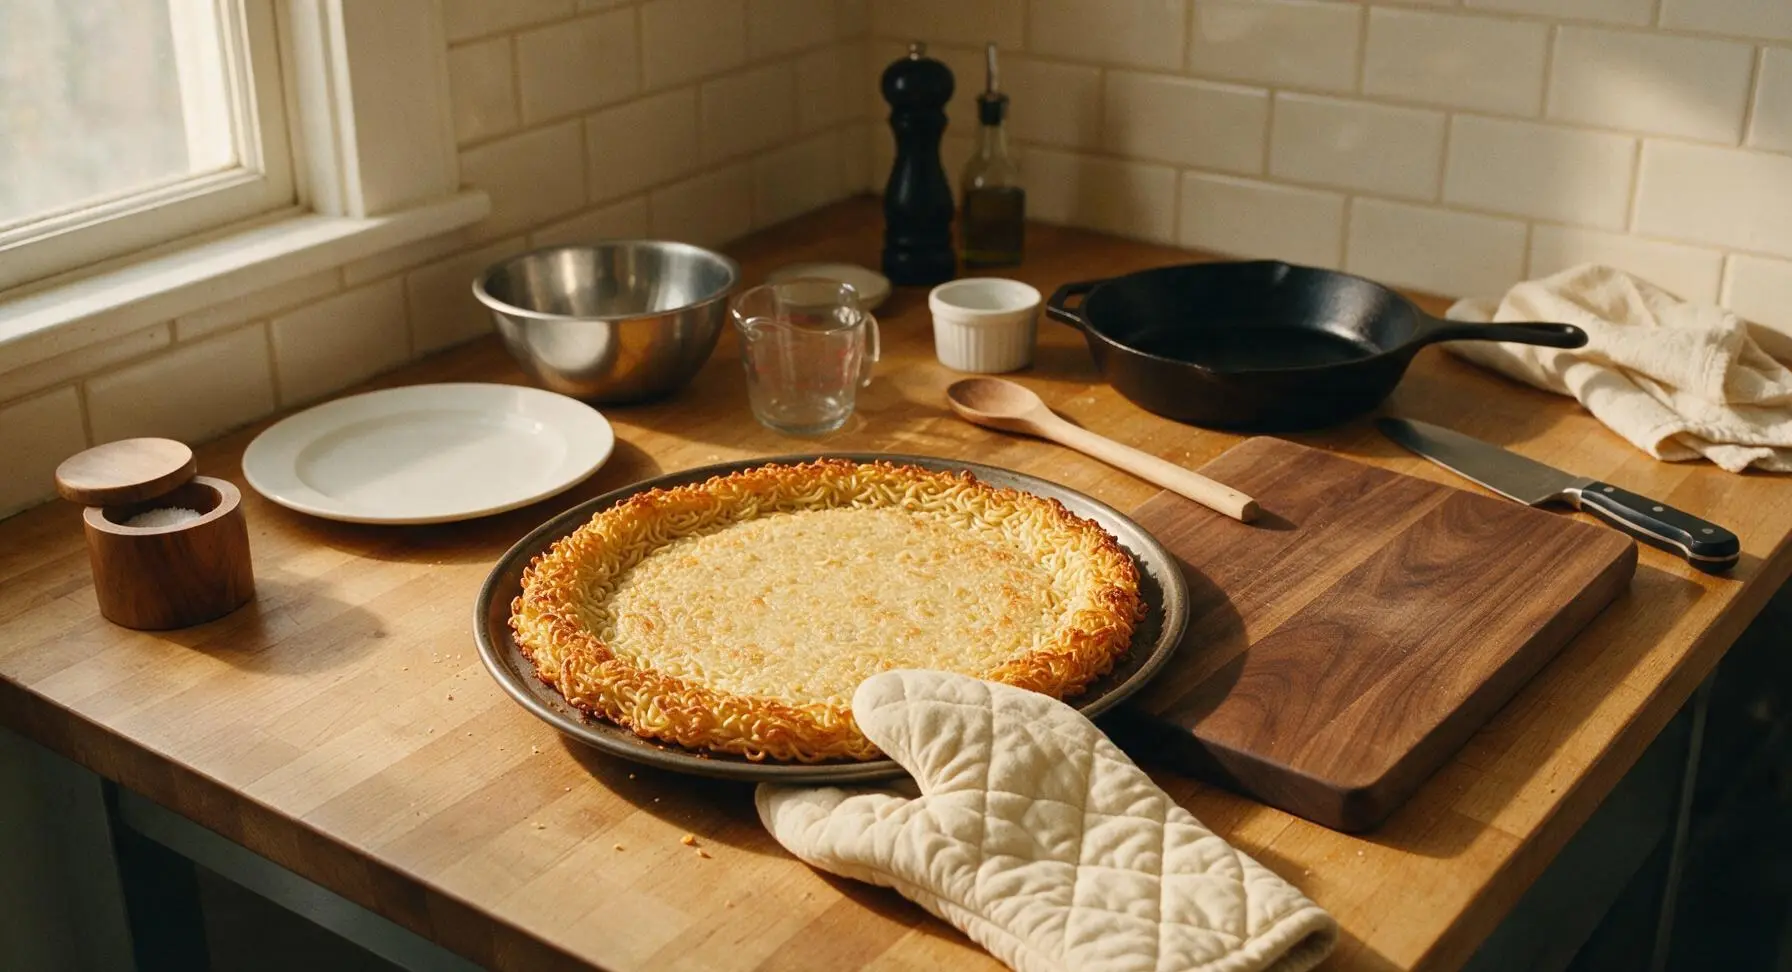
Place the pizza pan with pressed noodle crust into a preheated 200C (400F) oven on the middle rack. Bake for 12 minutes until the crust surface is firm to the touch and edges are starting to turn deep golden and crispy. Use the quilted cream cotton oven mitts to carefully remove the hot pan from the oven, set on the counter to cool for 3 minutes before adding toppings. Leave the oven turned on for the final bake.
Step 4
step4:Par-Bake Ramen Crust
Step 4
step4:Par-Bake Ramen Crust
5

Add Sauce and Cheese

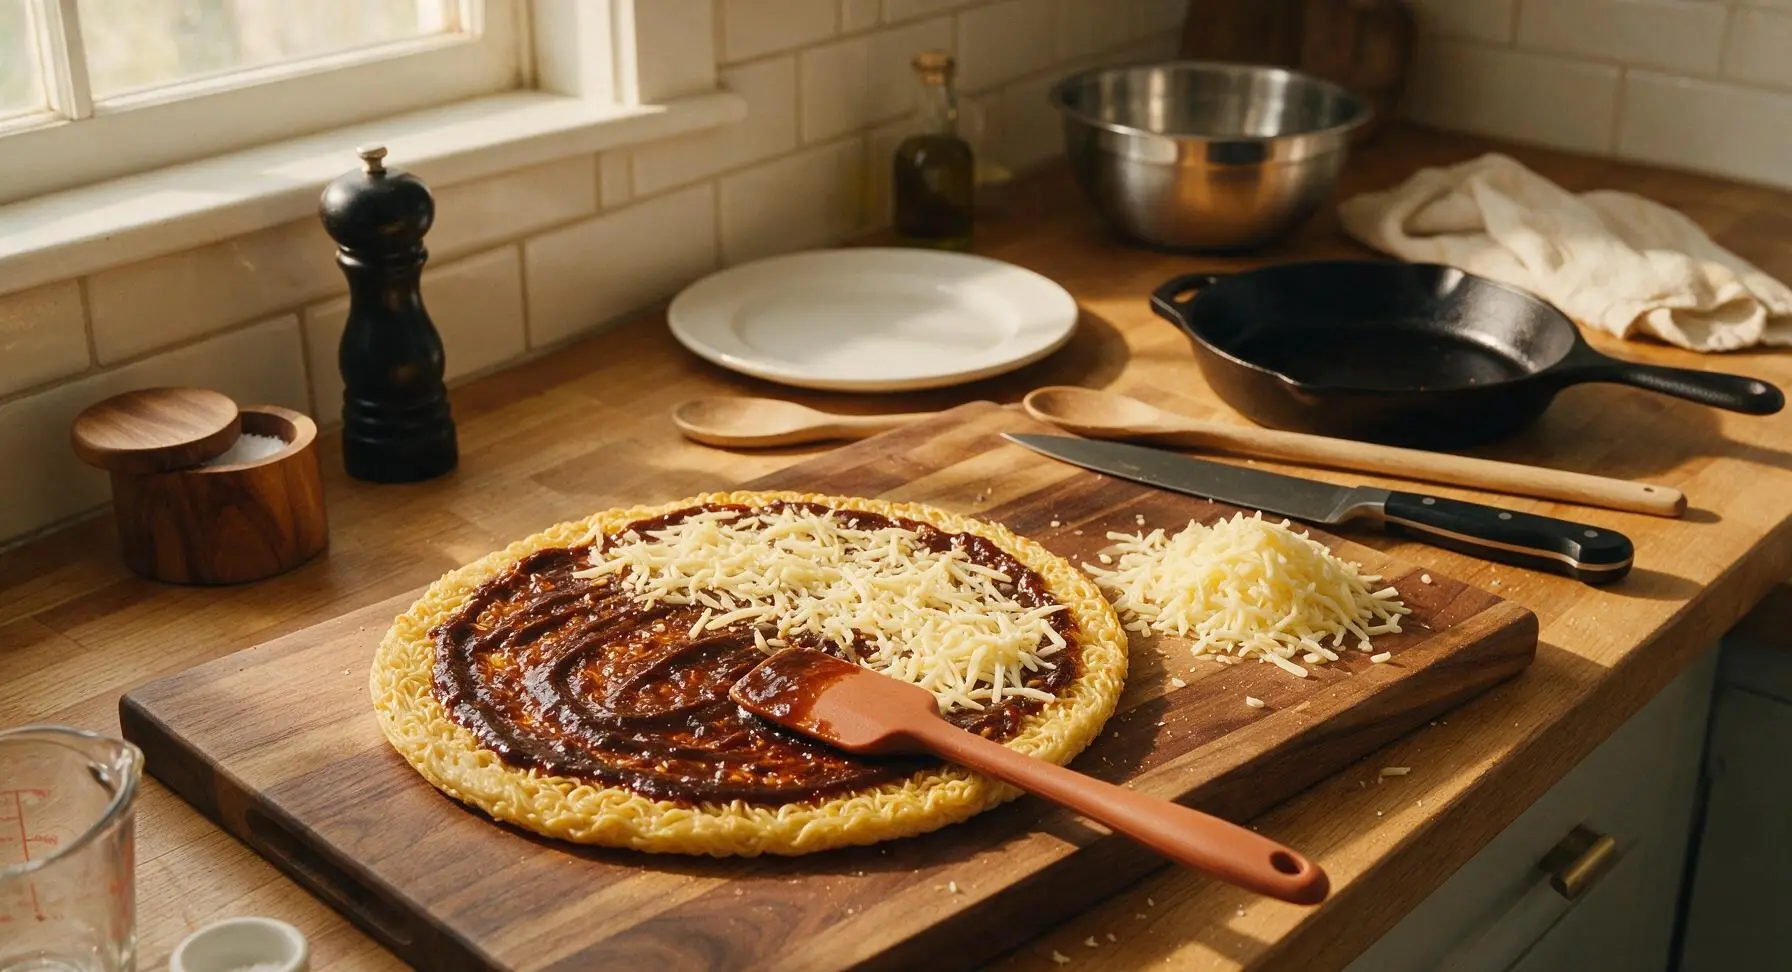
Use the muted terracotta silicone spatula to spread 120ml of thick concentrated ramen broth evenly across the cooled par-baked crust, leaving the 1cm raised edge bare (just like traditional pizza crust). Sprinkle 3/4 of the shredded low-moisture mozzarella evenly over the sauce, reserving the remaining 1/4 to sprinkle over toppings. Spread cheese right up to the edge of the sauce line for even melting.
Step 5
step5:Add Sauce and Cheese
6

Layer Ramen Toppings

Distribute solid toppings evenly over the cheese layer: thinly sliced chashu pork, thawed and thoroughly patted-dry sweet corn kernels, and the remaining 1/4 of reserved shredded mozzarella. Slice the pre-cooked soft-boiled egg into 4 even wedges, tucking the wedges gently into the cheese around the pizza so they stay in place during baking. Set aside scallions, sesame seeds, nori, and sesame oil for post-bake garnish.

Step 6
step6:Layer Ramen Toppings
7

Bake Pizza Fully

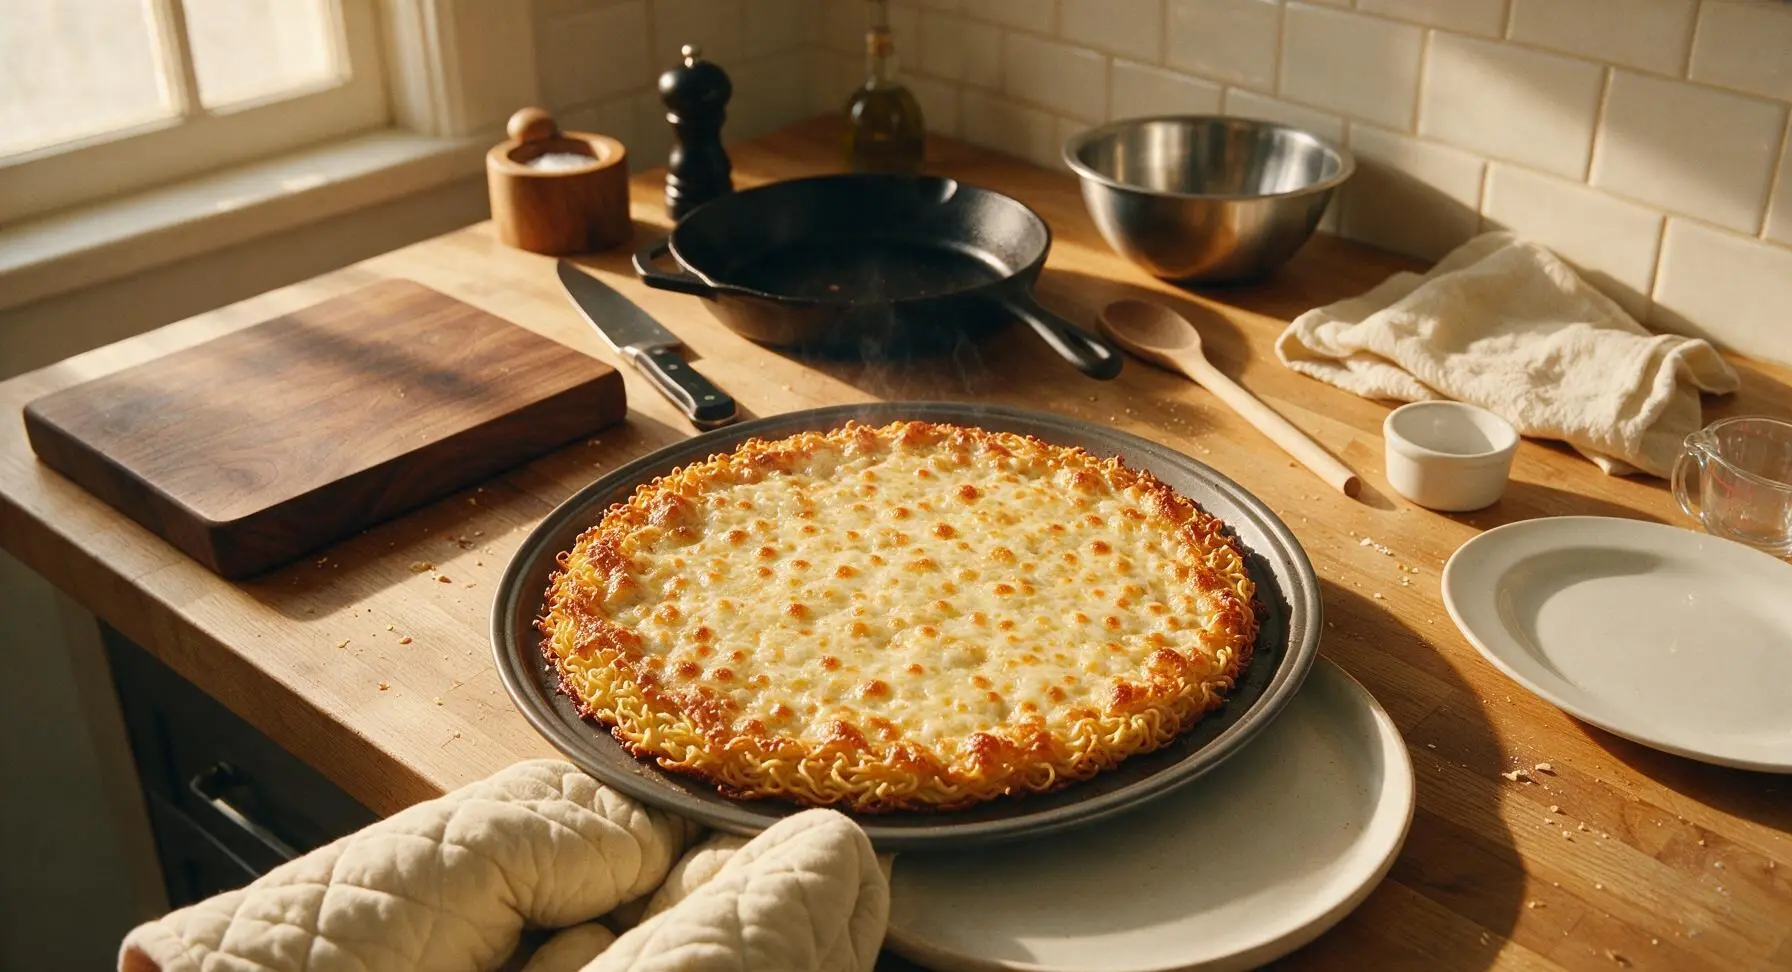
Carefully return the topped pizza to the 200C (400F) oven, bake for 8-10 minutes until the cheese is fully melted, bubbly, and dotted with small golden brown spots, and the crust edges are deep golden and crisp. Use the quilted oven mitts to remove the hot pizza from the oven, then slide the pizza carefully from the pan onto the matte warm white ceramic serving platter.
Step 7
step7:Bake Pizza Fully
8

Garnish and Slice

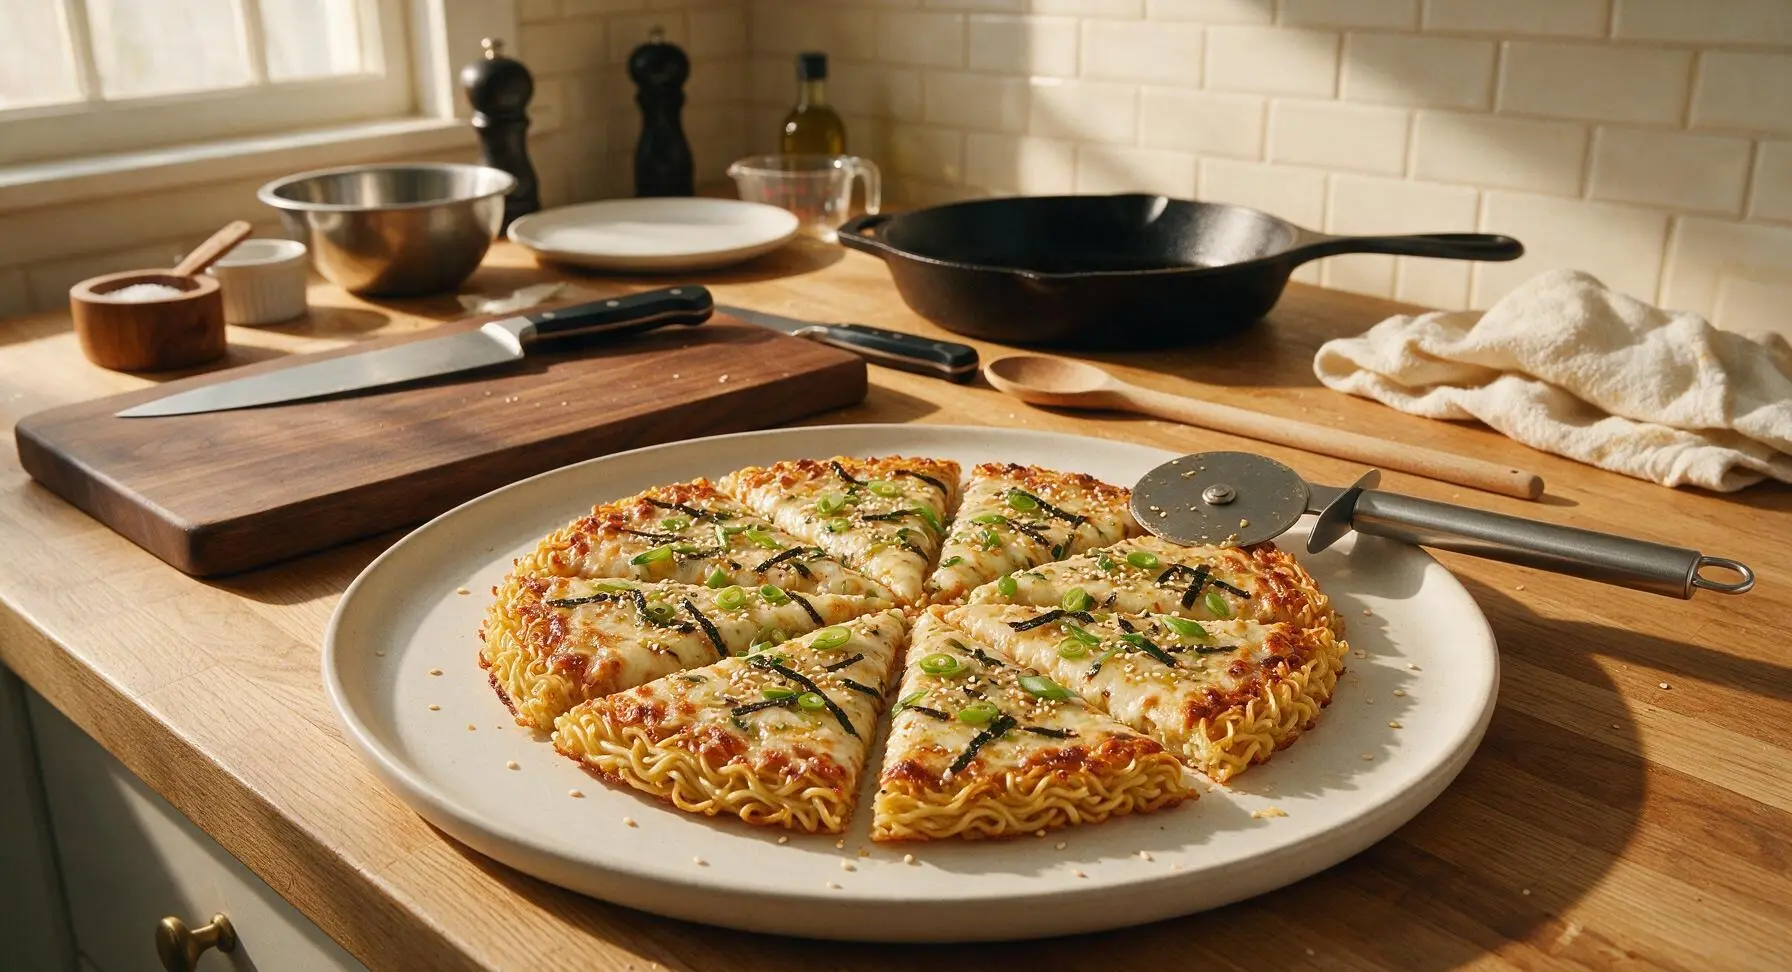
Drizzle the hot pizza with 1 teaspoon of toasted sesame oil, then sprinkle evenly with 1 tablespoon toasted white sesame seeds, thinly sliced fresh scallions, and thin strips of dried nori. Let the pizza rest for 2 minutes to set the crust, then use the 10-inch stainless steel pizza cutter to slice into 8 even wedges. Serve immediately while the crust is crisp and cheese is stretchy.
Step 8
step8:Garnish and Slice

Tips

1.Do not overcook ramen noodles, and shake off as much cooking water as possible before mixing with egg: excess moisture from waterlogged noodles will create a soggy, floppy crust instead of the desired crispy, sliceable texture.
2.Use only thick, concentrated ramen broth (straight from the concentrate packet, no added water) for your pizza sauce: diluted, watery broth will soak into the noodle crust and turn it soft, just like over-watery sauce ruins traditional pizza dough.
3.Pat all moist toppings (chashu, corn, soft-boiled egg) dry with a paper towel before adding them to the pizza: trapped moisture from wet toppings is the number one cause of a non-crispy crust in this fusion recipe.


✨ You May Also Like

Main Course
🍜 United Kingdom

A showstopping classic of tender seared beef, savory mushroom duxelles, and crisp prosciutto wrapped in flaky golden puff pastry, baked to juicy perfection.

⏱️ 2 hours 1Main Course ★ 4.7
Main Course
🍜 India

Tender charred marinated chicken simmered in a rich, spiced creamy tomato sauce, this iconic Anglo-Indian curry pairs perfectly with basmati rice or warm naan.

⏱️ 50 minuteMain Course ★ 4.6
Main Course
🍜 Thailand

Classic tangy, sweet, and savory Thai stir-fried rice noodles with shrimp, tofu, and crunchy garnishes, balancing all five core Thai flavor profiles.

⏱️ 30 minuteMain Course ★ 4.5
Main Course
🍜 United Kingdom

Crispy golden beer-battered cod and fluffy double-fried chips, served with tangy tartar sauce and malt vinegar: the timeless, beloved British pub comfort classic.

⏱️ 45 minuteMain Course ★ 4.7
Main Course
🍜 Mexico

Smoky, chile-marinated pork tacos with caramelized pineapple, fresh cilantro, and lime: a beloved classic Mexican street food perfect for casual summer gatherings.

⏱️ 1 hour 45Main Course ★ 4.8
Main Course
🍜 United States

Crunchy Fritos corn chips layered with savory beef chili and melted cheddar, topped with cool, zesty fixings for a beloved, cozy Tex-Mex comfort food.

⏱️ 35 minuteMain Course ★ 4.8

Ramen Pizza:Frequently Asked Questions

1.Can I use the included instant ramen seasoning packets for this pizza? ▾
Skip those seasoning packets for this recipe! They’re overly salty and have a powdery, gritty texture that will make your ramen crust soggy instead of crisp. Save them to season popcorn, quick stir-fries, or simple broths later, and stick to thick concentrated ramen broth for that deep, balanced umami flavor.
2.How do I keep the ramen noodle crust from turning soggy? ▾
Two easy tricks prevent soggy crust: First, toss cooked ramen with beaten egg, then press it very firmly into an even, compact layer in your oiled pan before par-baking for 8 minutes. Second, stick to low-moisture mozzarella instead of fresh mozzarella, which releases excess water as it melts and softens the crust.
3.Can I make this crispy ramen pizza gluten-free? ▾
Absolutely! Swap standard wheat instant ramen for your favorite gluten-free instant rice or millet ramen, just double-check it doesn’t have gluten-containing added seasonings. Make sure your concentrated tonkotsu or shoyu ramen broth is certified gluten-free too, as many traditional versions use wheat-based soy sauce as a core ingredient.
4.What’s a good substitute for chashu pork for non-pork eaters? ▾
Thinly sliced cooked chicken thigh, pan-seared shiitake mushrooms, crispy baked marinated tofu, or even crumbled cooked spicy Italian sausage all work beautifully as chashu swaps. Just pat any pre-cooked toppings dry with a paper towel before adding to keep excess moisture from softening your crispy crust.
5.Do I need a special pan to get an extra-crispy ramen crust? ▾
You don’t need fancy equipment! A heavy-bottomed 10- to 12-inch cast iron skillet works best, as it retains even, consistent heat and crisps the bottom of the ramen crust perfectly. If you don’t have cast iron, an oven-safe non-stick skillet works too—just add 1 extra minute to the initial par-bake time for the crust.
6.Can I prep the ramen crust ahead of time for casual parties? ▾
You sure can! Par-bake the pressed ramen crust fully, let it cool completely to room temperature, then wrap it tightly in plastic wrap and store it in the fridge for up to 2 days. When you’re ready to serve, top it with sauce, cheese, and toppings, then bake for 10–12 minutes until cheese is bubbly and the crust re-crisps.
7.What purpose do the eggs serve in the ramen crust? ▾
Beaten eggs act as a critical binder to hold cooked ramen noodles together into a solid, sliceable crust that won’t fall apart when you pick up a piece. They also add subtle richness and help the crust edges turn golden and extra crispy as it bakes, rather than leaving dry, brittle loose noodle bits.
8.How much ramen sauce should I spread on the crust? ▾
Treat the thick concentrated ramen broth like you would standard pizza sauce: spread a thin, even layer (about ¼ cup for a 12-inch pizza) across the par-baked crust, leaving a ½-inch bare border for the crust edge. Too much sauce will soak into the noodles and make the center soggy, even with a perfect par-bake.
9.Can I add regular pizza toppings like pepperoni or veggies to this? ▾
Go for it! This fusion recipe is built for playful customization. Just stick to low-moisture toppings: pat veggies like bell peppers or mushrooms dry before adding, and skip watery picks like fresh tomato or raw pineapple to keep the crust crisp. Pepperoni, jalapeños, and corn all pair beautifully with the umami ramen base.
10.How do I store and reheat leftovers to keep the crust crispy? ▾
Store leftover slices in an airtight container lined with paper towels (to absorb excess moisture) in the fridge for up to 3 days. Reheat slices in a skillet over medium heat for 3–4 minutes, or in a 400°F oven for 5 minutes, to crisp the crust back up—microwaving will leave the crust rubbery, soft, and disappointing.

Comments (19)

2 days ago

OMG this was such a game changer for my chaotic weeknight dinners! My 3 boys devoured the whole pan in 10 minutes flat. I added extra pepperoni and a sprinkle of parm on top, chef’s kiss. So easy to throw together after soccer practice, no fancy ingredients needed.

1 day ago

Wait did you use the instant ramen seasoning packet in the crust? I’m making this tonight for my kid’s team dinner and don’t wanna mess it up!

1 day ago

So glad your family loved it! You can absolutely use the seasoning packet mixed into the crushed ramen for extra savoriness, just skip adding extra salt if you do! Perfect for team dinners, hope it’s a hit.

3 days ago

No oven? No problem! I made this in my tiny dorm air fryer and it came out SO crispy. Total late night study snack win, cost me like $3 total to make. 10/10 would make again instead of ordering expensive delivery.

2 days ago

Love the air fryer hack! We’ve tested it at 375F for 12 minutes in an air fryer and it comes out perfectly crispy every time, so glad you found a way to make it work in your dorm!

1 week ago

Made a vegan version of this with dairy-free cheese, tofu crumbles, and veggie ramen, and it slapped! The crust got so crunchy I couldn’t believe it was just ramen. Perfect quick meal for when I don’t feel like cooking something fancy.

5 days ago

Brought this to our weekly game night potluck and everyone was begging for the recipe before halftime. The sweet and savory combo of the crispy ramen crust with pizza toppings is unreal. Who knew cheap ramen could taste this fancy?

4 days ago

Wait did you pre-bake the ramen crust at all before adding toppings? Mine got soggy last time I tried a ramen pizza hack!

3 days ago

Great question! We recommend pressing the crushed ramen and egg mixture firmly into the pan and baking it for 10 minutes first before adding sauce and toppings to keep it extra crispy and avoid sogginess!

1 week ago

I was skeptical at first but this is actually perfect for meal prep? I cut it into squares and kept it in the fridge for 3 days, crisped it up in the toaster oven for lunches and it held up so well. Way more fun than regular boring meal prep pizza.

5 days ago

Wait how did you store it? Airtight container? I wanna try this for my work lunches next week!

2 hours ago

Made this after a morning surf when I was raiding my pantry and had literally nothing else. Turned out way better than I expected, the crunch is insane. I added some pineapple and ham for Hawaiian style, no regrets.

yesterday

Y’all, I swapped the regular pizza sauce for BBQ sauce, added pulled pork and red onions, and this might be my new go-to weekend snack. The salty ramen crust pairs so good with sweet BBQ, I’m mad I didn’t think of this sooner.

yesterday

That BBQ twist sounds incredible! We love seeing fun customizations, we might have to test that version ourselves for the site, thanks for the idea!

30 minutes ago

Wait this is genius. I grew up eating those cheap ramen noodles in college and never thought to turn them into pizza. Made it last night for my roommate and she thought I ordered it from a fancy fusion spot. Crispiest crust I’ve ever made at home, no lie.

15 minutes ago

Right?! I used to eat ramen every night my first year of college, this is making me feel so nostalgic. Did you use chicken or soy sauce ramen for the crust?

5 minutes ago

Any flavor of instant ramen works here! We usually use chicken for that classic savory flavor, but soy sauce or even spicy ramen adds a great little kick if you like heat!

2 weeks ago

As someone who burns toast 50% of the time, I can confirm this recipe is actually easy enough for total beginners. 25 minutes total, no weird skills required, and it looks impressive enough to serve to guests. 10/10 for us lazy folks.

1 week ago

Oh thank god, I’m the same way! I’ve been looking for easy recipes that don’t require a million steps, this is going on my list for this weekend.

5 minutes ago

Added a whole packet of spicy ramen seasoning, some hot honey, and jalapeños on top and my mouth is ON FIRE in the best way possible. The crunch from the crust holds up to all the wet toppings way better than regular pizza crust somehow. Will be making this every Friday from now on.

1 week ago

I’ve made this for three different potlucks in the last month and every single time people are crowded around the pan asking where I got the recipe. It’s so cheap to make for a crowd, travels well, and stands out from all the boring casseroles everyone else brings. Total potluck MVP.

5 days ago

How well does it travel? I need something to bring to our office potluck next week that doesn’t get soggy on the 30 minute commute!

4 days ago

It travels great if you let it cool completely before packing it in an airtight container, and you can crisp it up for 5 minutes in an oven or toaster oven when you get to your destination if you want it extra crunchy!

3 days ago

Told my kids we were having ramen pizza for dinner and they thought I was making a bad dad joke. Joke’s on them because they ate three slices each and asked when we can make it again. The crust is so crispy they didn’t even complain about 'weird food' for once.

2 days ago

Love that! We’ve found this recipe is the ultimate kid-pleaser, even for the pickiest eaters. Nothing beats a meal that gets the whole family excited, right?

2 days ago

Used gluten-free instant ramen for this and it worked perfectly! I was worried the crust wouldn’t hold together, but the egg binder did the trick, and it got just as crispy as regular ramen. Finally a fun quick meal I can eat without my stomach hurting later.

just now

Made this at 1am after a night out with friends and it hit DIFFERENT. Way better than the greasy pizza place down the street that charges $20 for a pie. All ingredients I already had in my pantry, no delivery wait time, perfect drunchie food.

just now

LMAO drunchie MVP right here! I’m saving this for next weekend when I get home from the bar, this sounds way better than my usual frozen burrito.

2 weeks ago

I’ve tried every viral ramen hack on the internet and this one is hands down the best. The ratio of egg to ramen is perfect so the crust doesn’t fall apart when you pick up a slice, and it gets that perfect golden crunch around the edges. Pro tip: add a little garlic powder to the crust mixture, game changer.

1 week ago

Oh the garlic powder tip sounds *chef’s kiss* I’m definitely doing that when I make this tomorrow! Do you think garlic butter brushed on the crust would be too much?

1 week ago

Garlic butter on the crust would be amazing! We’d recommend brushing it on during the last 5 minutes of baking so it doesn’t burn, that would take the flavor to a whole new level. Thanks for the garlic powder tip too!

yesterday

Loaded this up with four different kinds of cheese – mozzarella, cheddar, provolone, and a little feta crumble – and it was the cheesiest, crispiest pizza I’ve ever made. The salty ramen cuts through the richness of the cheese so well, it doesn’t feel heavy like regular pizza.

yesterday

Feta on pizza is so underrated! I’m definitely adding that when I make this this weekend, that salty tang is gonna go so good with the ramen crust.

5 days ago

This recipe saved me during the last week of the month when my grocery budget was basically zero. I had a couple packs of ramen in the pantry, a jar of pizza sauce, and some leftover cheese in the fridge, and it made a whole meal for two people for under $4. Can’t beat that.

3 days ago

That’s what we love to hear! This recipe is perfect for tight budgets because it uses mostly pantry staples, no fancy expensive ingredients required. So glad it helped you out!

3 days ago

Wait hear me out – I made this for breakfast with sausage, scrambled eggs, and a little maple syrup drizzle on top and it was insane. The crispy ramen crust works for sweet and savory toppings, who knew? 10/10 will be experimenting with more breakfast versions soon.

1 week ago

I followed the recipe exactly and the crust was perfectly crispy on the edges but a little soft in the middle, so next time I’ll press it thinner and bake it a few minutes longer before adding toppings. Still really tasty though, will definitely be making it again with that small tweak.



