
Snake Mac and Cheese

title 1
Snake Mac and Cheese
⏱️ cook time 35 minutes
🍽️ servings 4
⚡ Difficulty easy

intro

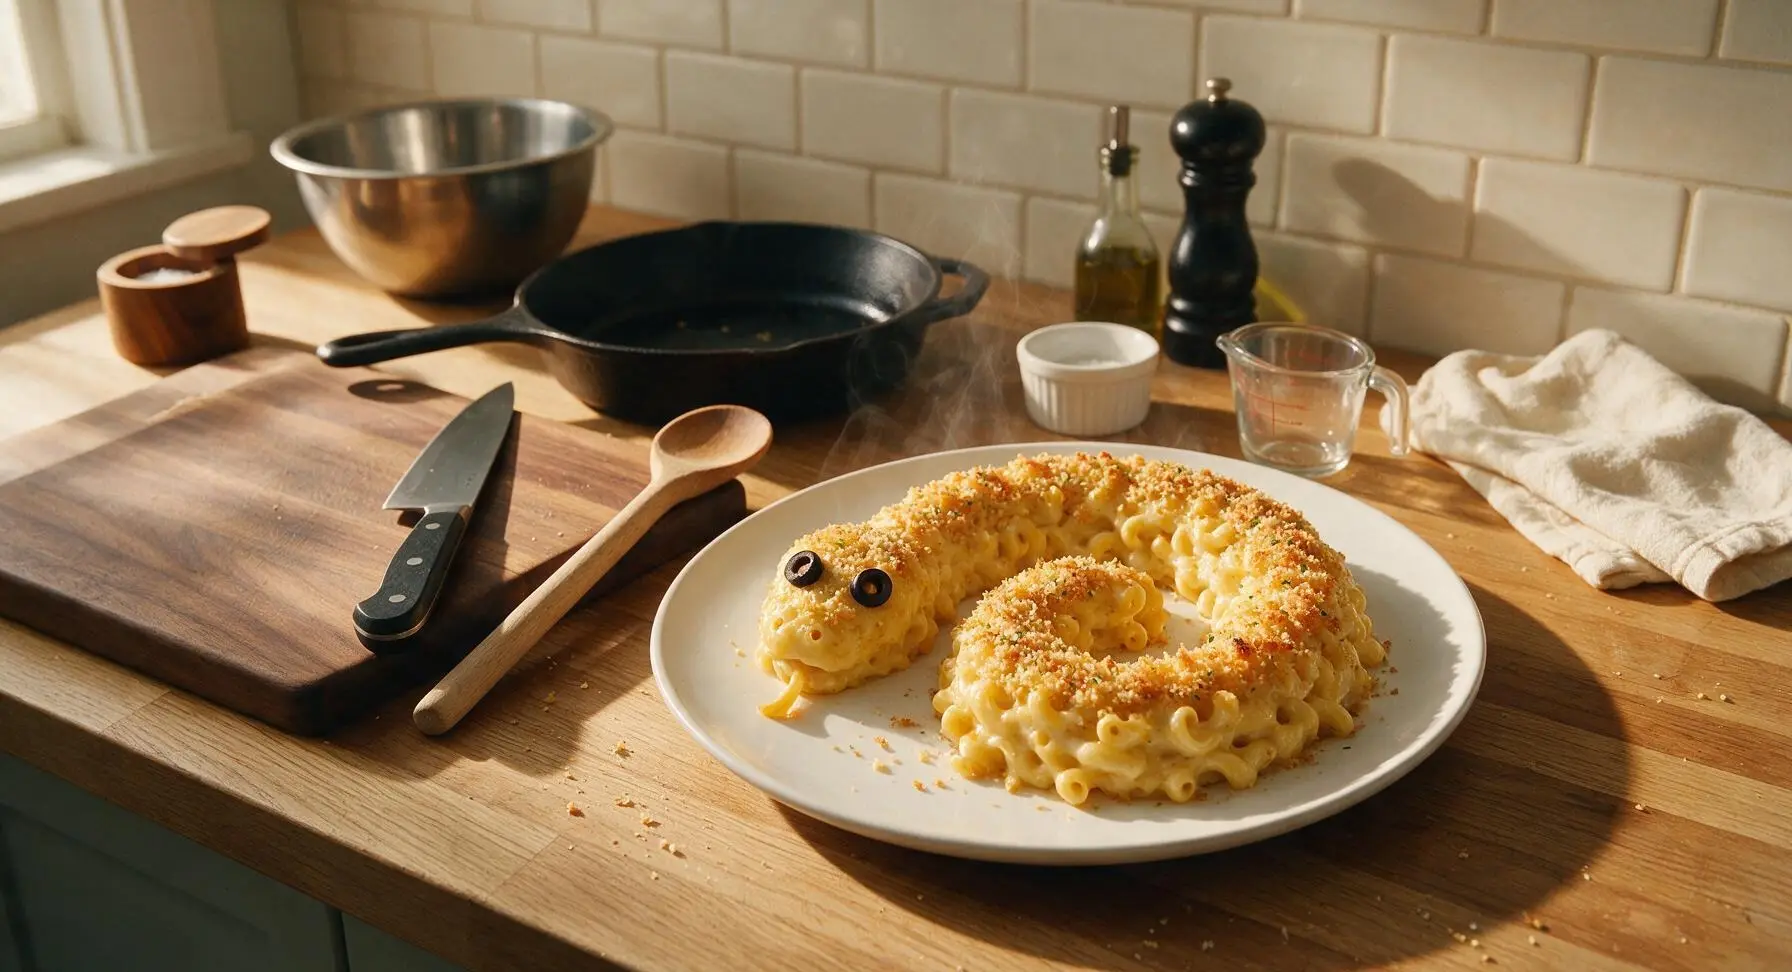
Creamy, cheesy baked macaroni shaped like a coiled spooky snake, with crisp panko scales and olive eyes— a playful, crowd-pleasing Halloween comfort food for all ages.

Ingredients
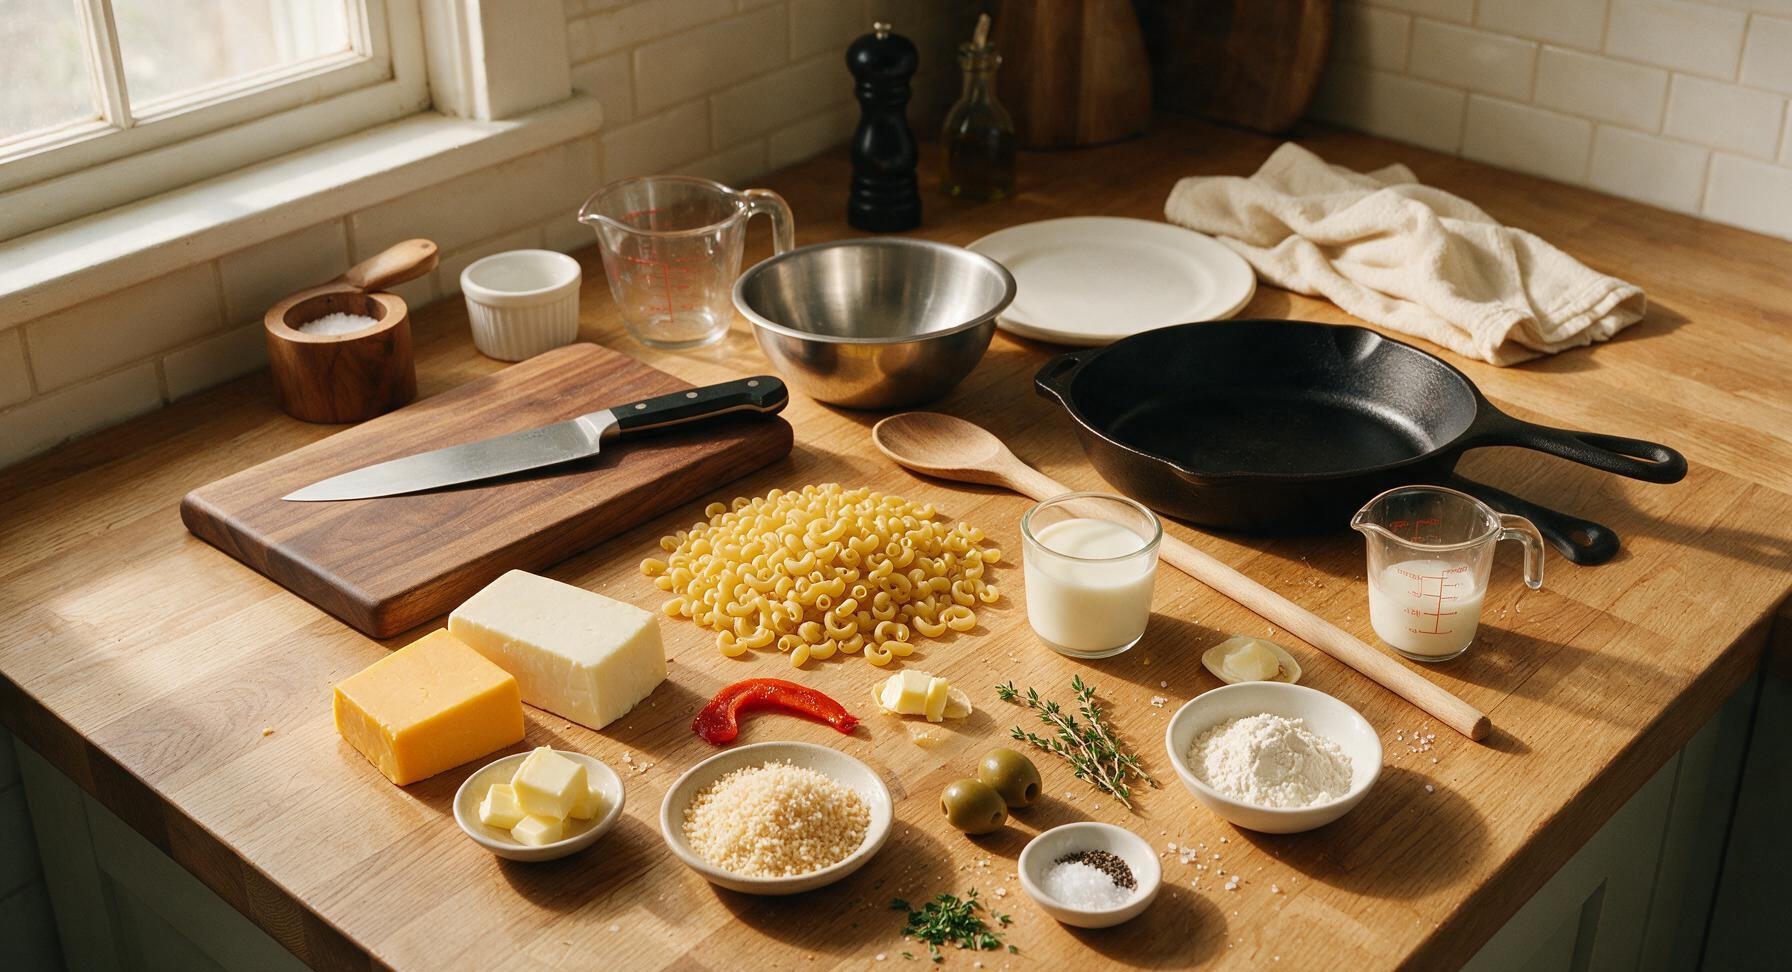
Dry elbow macaroni 225g (8oz)
Sharp yellow cheddar cheese 225g (8oz), block form
Low-moisture mozzarella cheese 110g (4oz), block form
Whole milk 480ml (2 cups)
Unsalted butter 3 tablespoons (42g), divided
All-purpose flour 2 tablespoons (16g)
Panko breadcrumbs 60g (1/2 cup)
Large pitted green olives 2 pieces
Roasted red pepper 1 thin 5cm strip
Fresh thyme 3 sprigs, plus 1 teaspoon chopped leaves
Kosher salt 1.5 teaspoons, divided
Freshly ground black pepper 1/2 teaspoon

Steps

1

Boil Pasta Al Dente

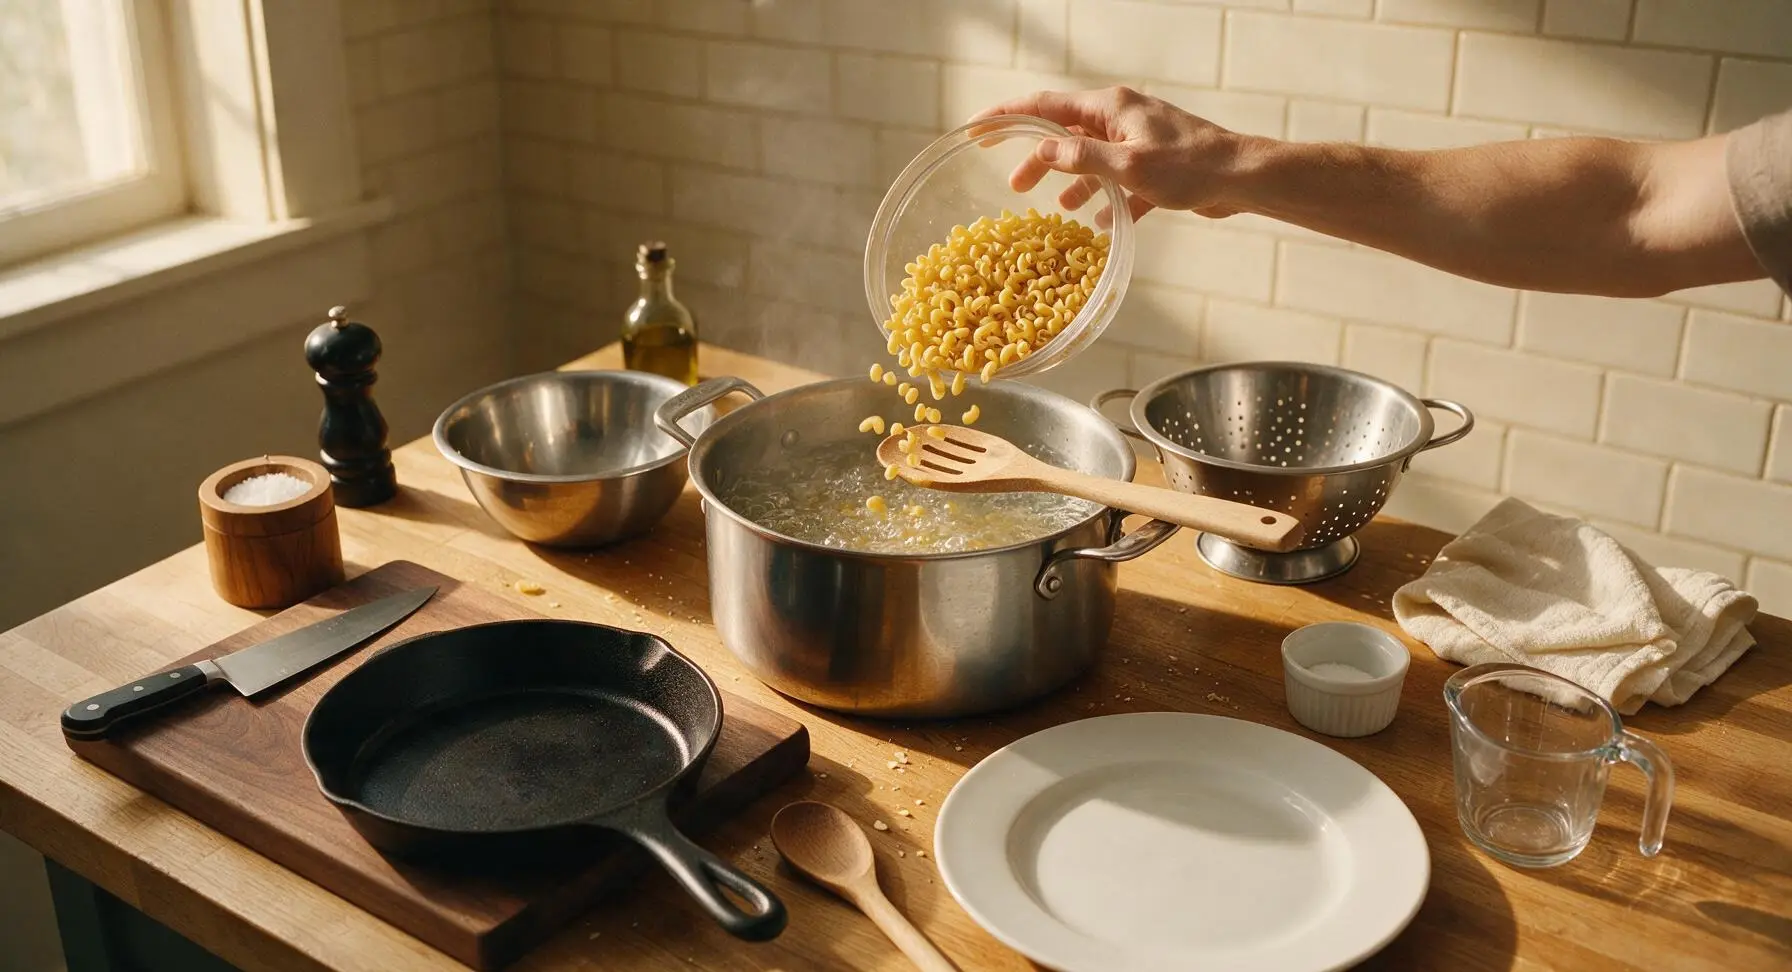
Fill the 4-quart stainless steel stock pot with 3 liters of water, add 1 teaspoon kosher salt, and bring to a rolling boil over high heat. Add 225g dry elbow macaroni, stir once with the slotted beech wood spoon to prevent sticking, and cook for 7 minutes until just al dente (pasta will have a tiny firm white core when bitten, as it will cook further in the oven). Drain thoroughly in the stainless steel colander, and set aside. Do not rinse the pasta, as residual starch helps the cheese sauce cling.
Step 1
step1:Boil Pasta Al Dente
2

Grate Fresh Cheeses

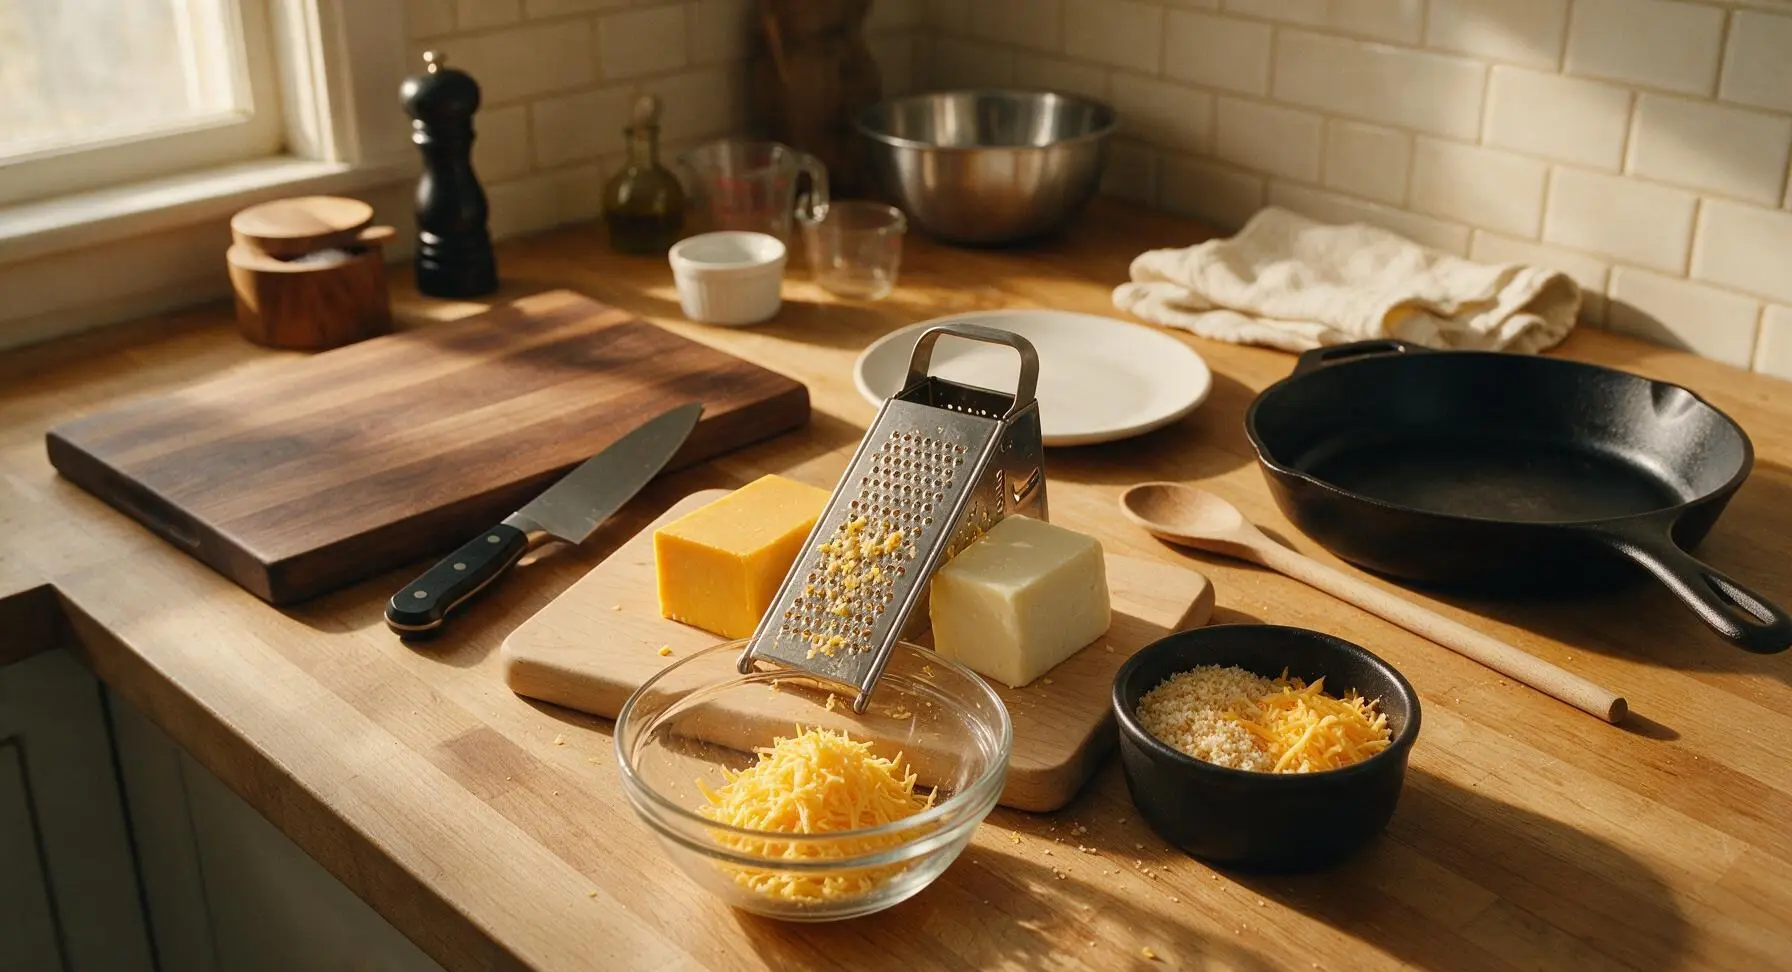
Place the box cheese grater on the light maple wood cutting board. Grate the sharp yellow cheddar and low-moisture mozzarella into separate clear glass prep bowls, discarding any hard rind edges. Toss 2 tablespoons of the grated cheddar with the panko breadcrumbs in the small matte black ceramic ramekin, and set aside for the crisp topping. Pre-shredded cheese is not recommended, as anti-caking coatings prevent a smooth, creamy sauce.
Step 2
step2:Grate Fresh Cheeses
3

Build Creamy Roux Base

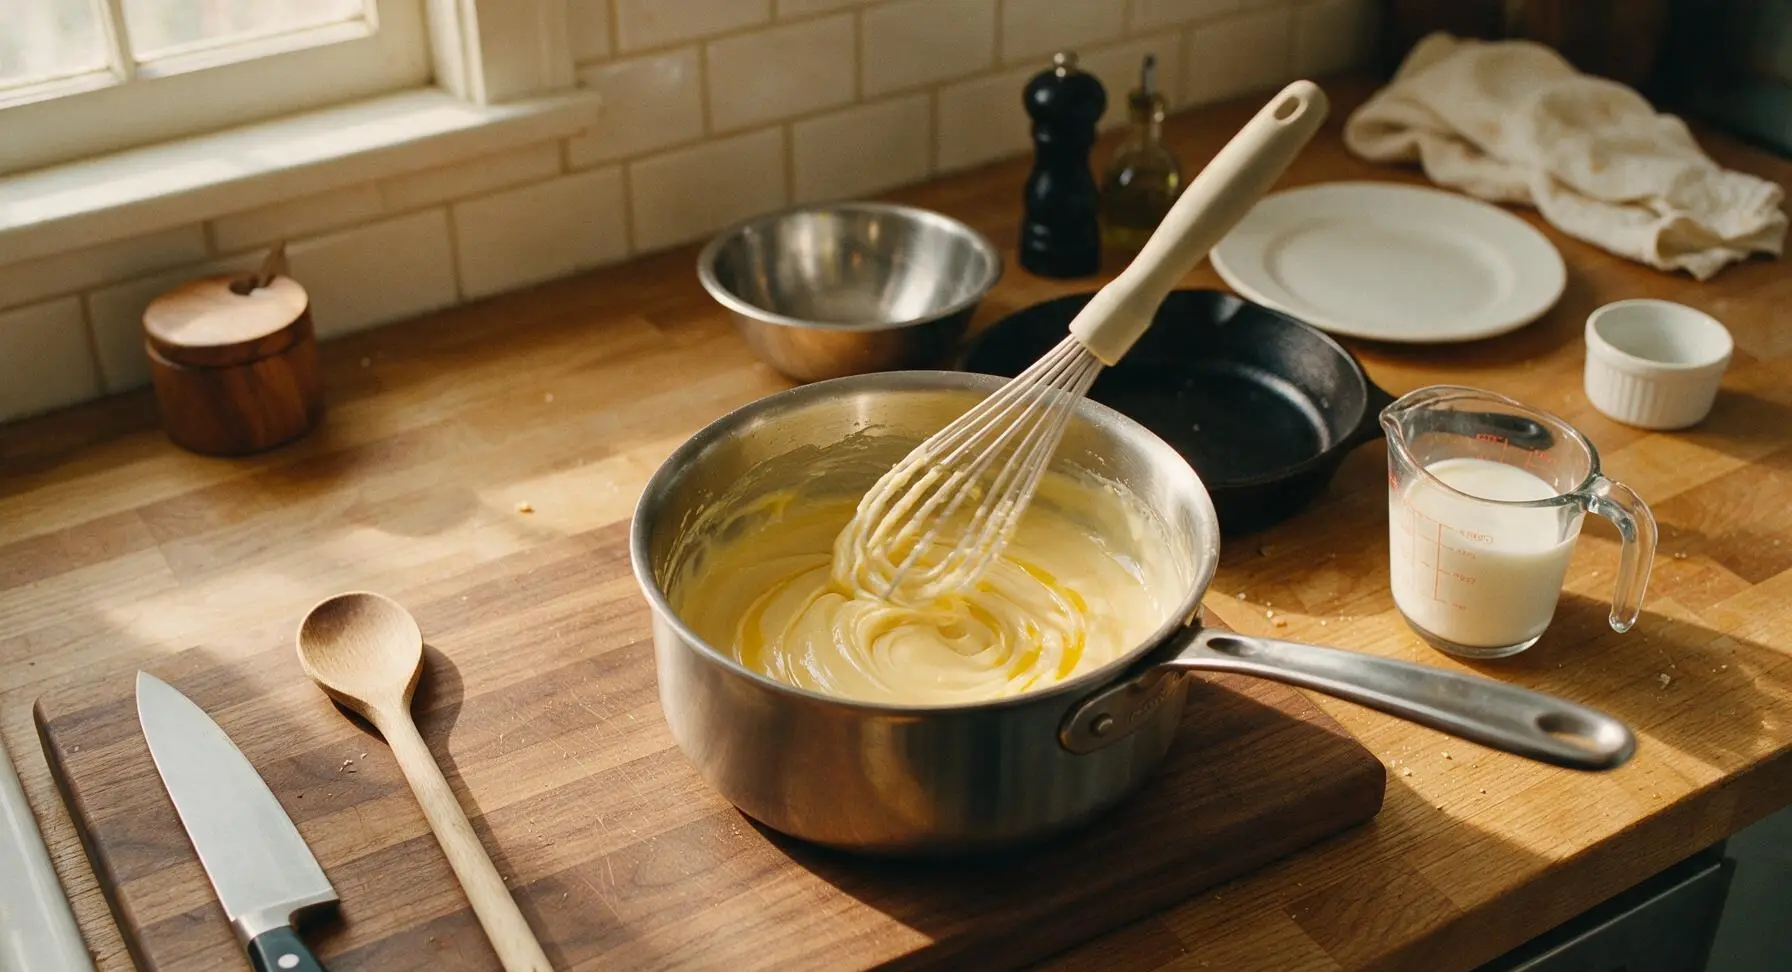
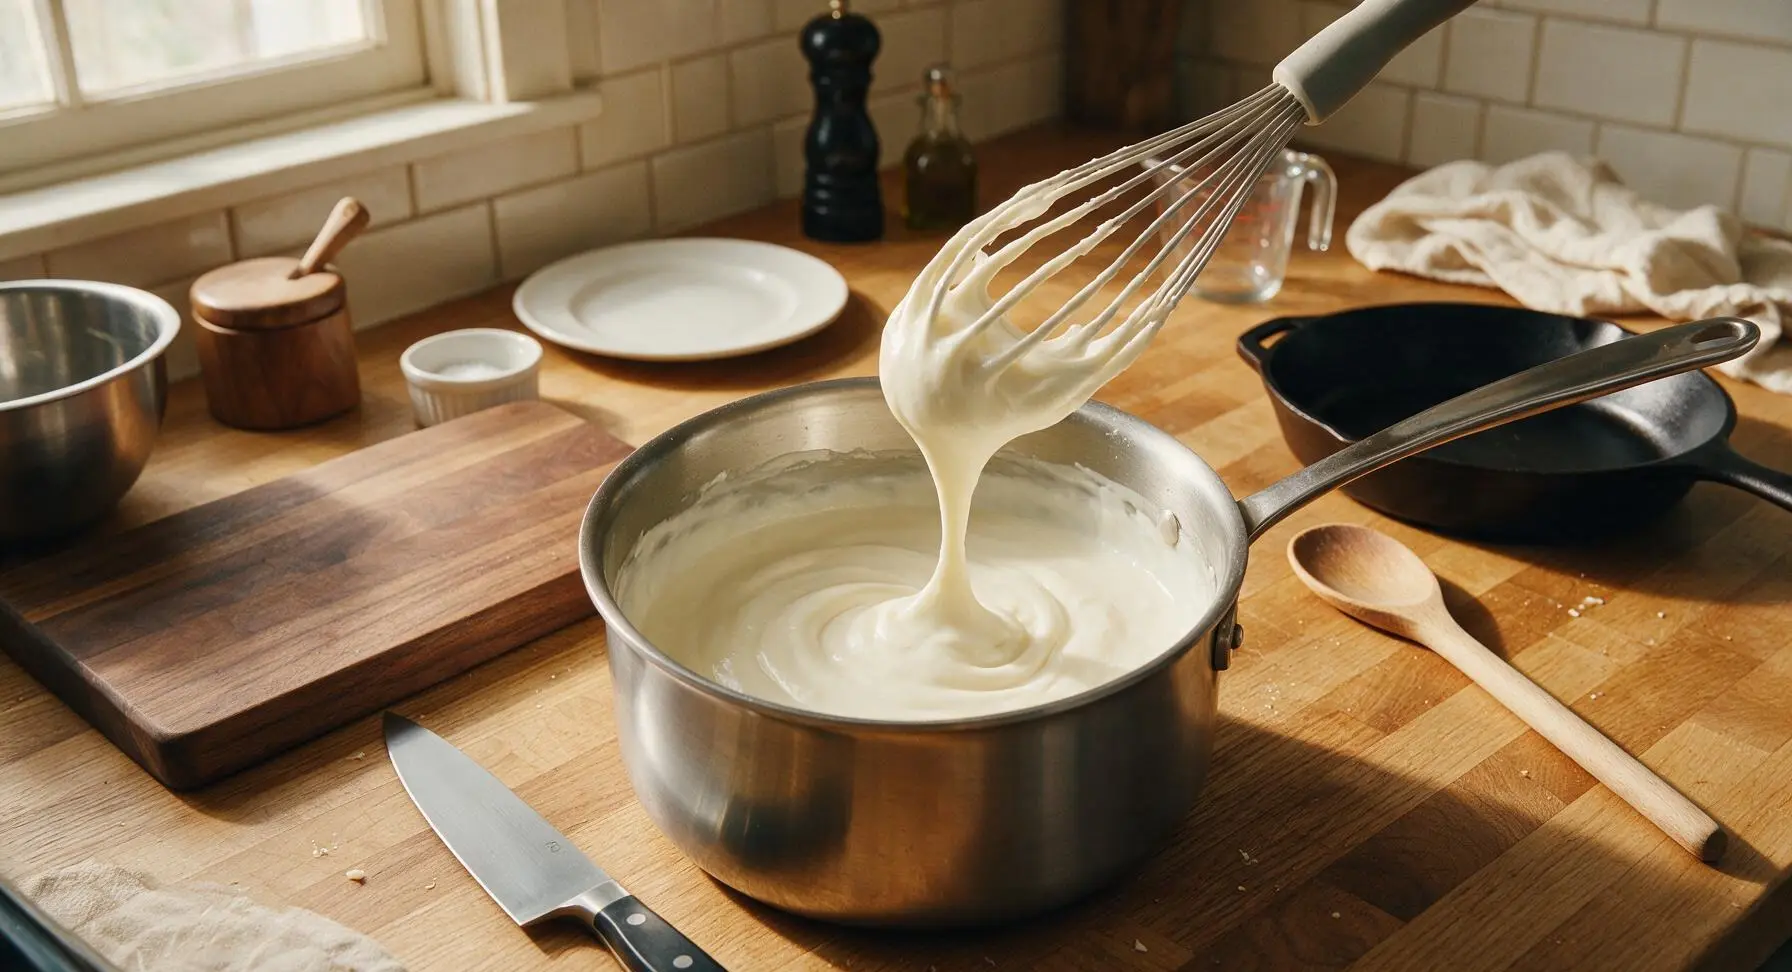
Place the 3-quart stainless steel saucepan over medium heat. Melt 2 tablespoons of unsalted butter, then whisk in 2 tablespoons all-purpose flour with the silicone whisk, stirring constantly for 2 minutes until the roux is pale golden and smells faintly nutty, with no raw flour taste remaining. Slowly pour in 2 cups of whole milk, 1/4 cup at a time, whisking constantly to avoid lumps, until the sauce thickens to a coat-the-back-of-a-spoon consistency (about 4 minutes; the sauce will leave a clear, unbroken line when you run your finger across the coated whisk).
Step 3
step3:Build Creamy Roux Base
Step 3
step3:Build Creamy Roux Base
4

Mix Pasta and Cheese

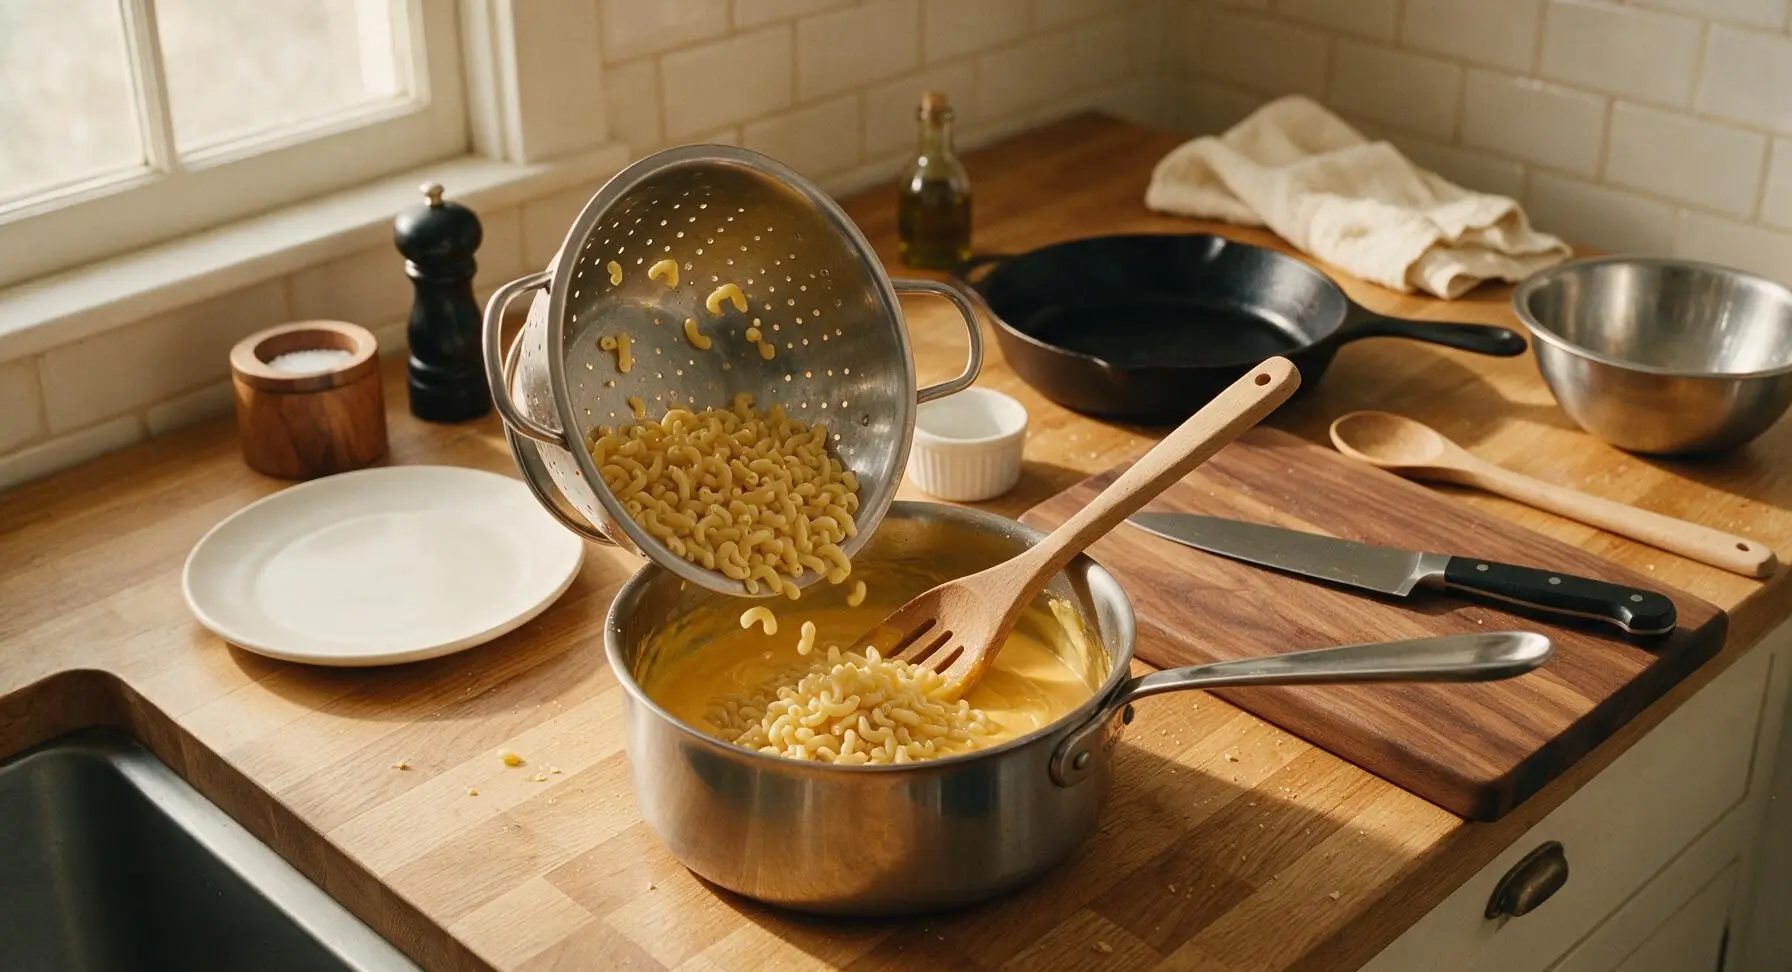
Reduce heat under the saucepan to low. Add the remaining grated cheddar and mozzarella a handful at a time, stirring with the slotted beech wood spoon until fully melted and smooth. Season with 1/2 teaspoon kosher salt, 1/2 teaspoon freshly ground black pepper, and 1 teaspoon chopped fresh thyme. Add the drained cooked macaroni to the cheese sauce, stirring gently until every pasta noodle is evenly coated in thick, glossy golden cheese sauce. Remove from heat.
Step 4
step4:Mix Pasta and Cheese
5

Form Coiled Snake Shape

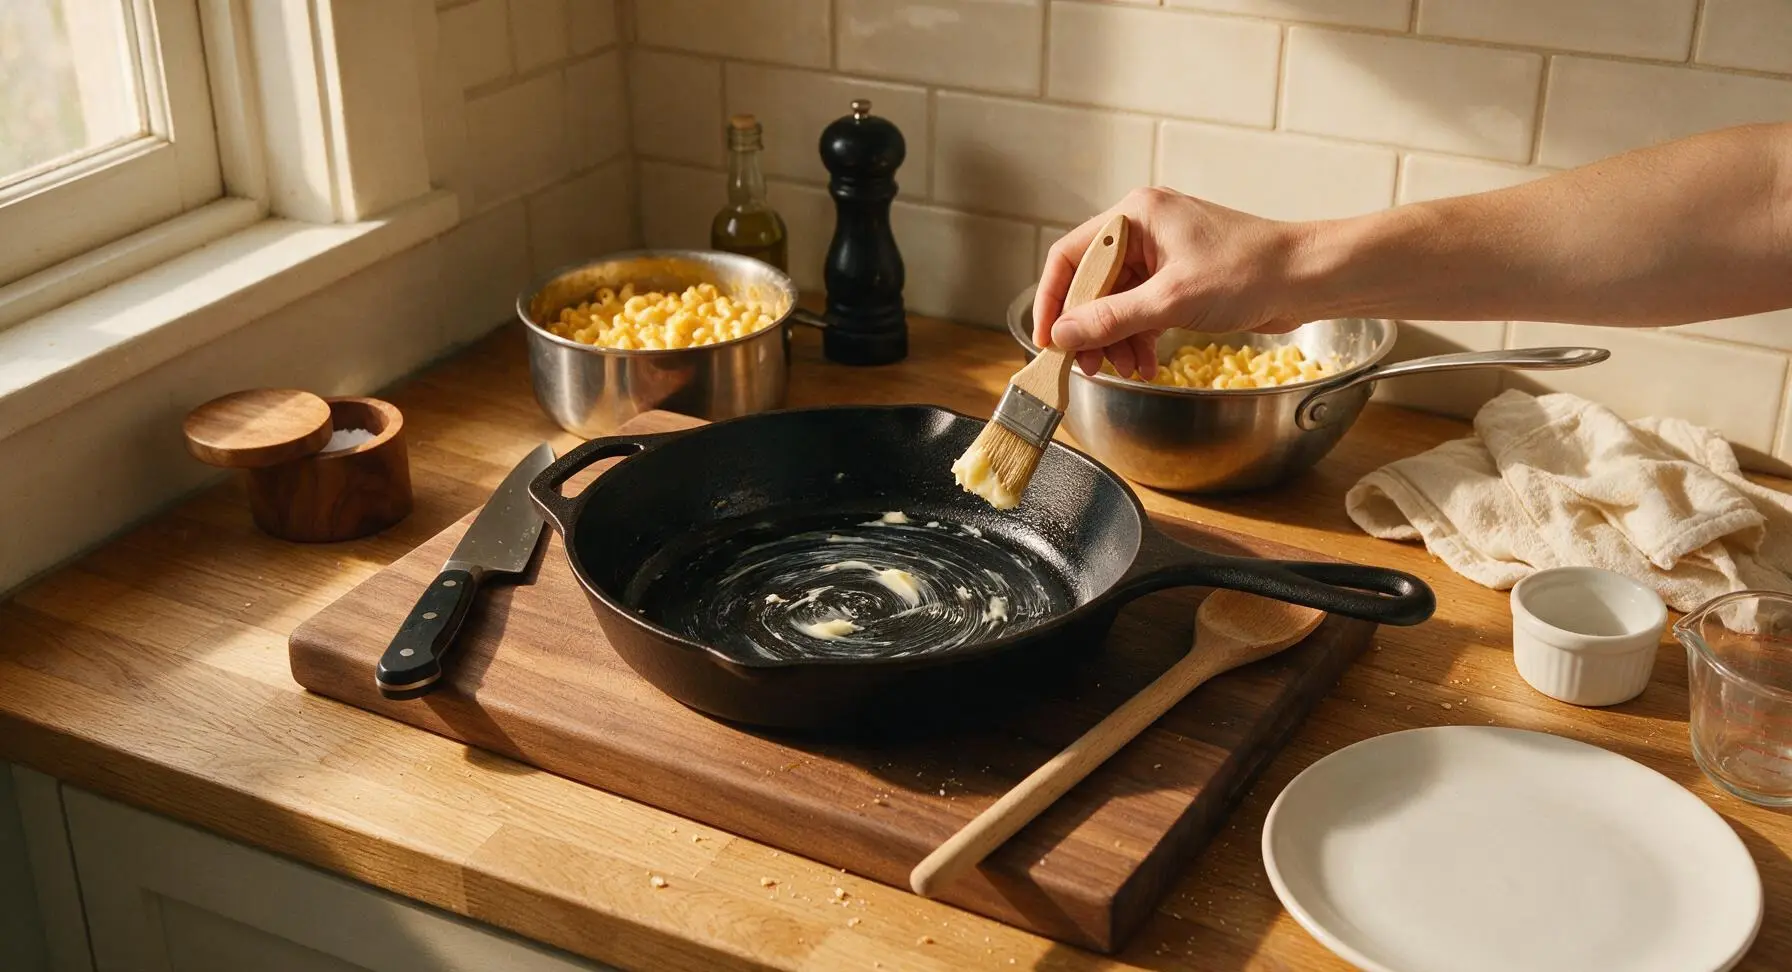
Use 1/2 tablespoon of softened butter to grease the entire interior surface of the 10-inch cast iron skillet with the small natural bristle pastry brush. Transfer the cheese-coated macaroni to the greased skillet, shaping it into a thick, compact coiled S-shape that resembles a resting snake: form a slightly wider, triangular head at one end, and taper the opposite end to a thin point for the tail. Press the noodles gently to ensure the shape is tight and will hold together after baking, with no loose noodles scattered across the skillet surface.
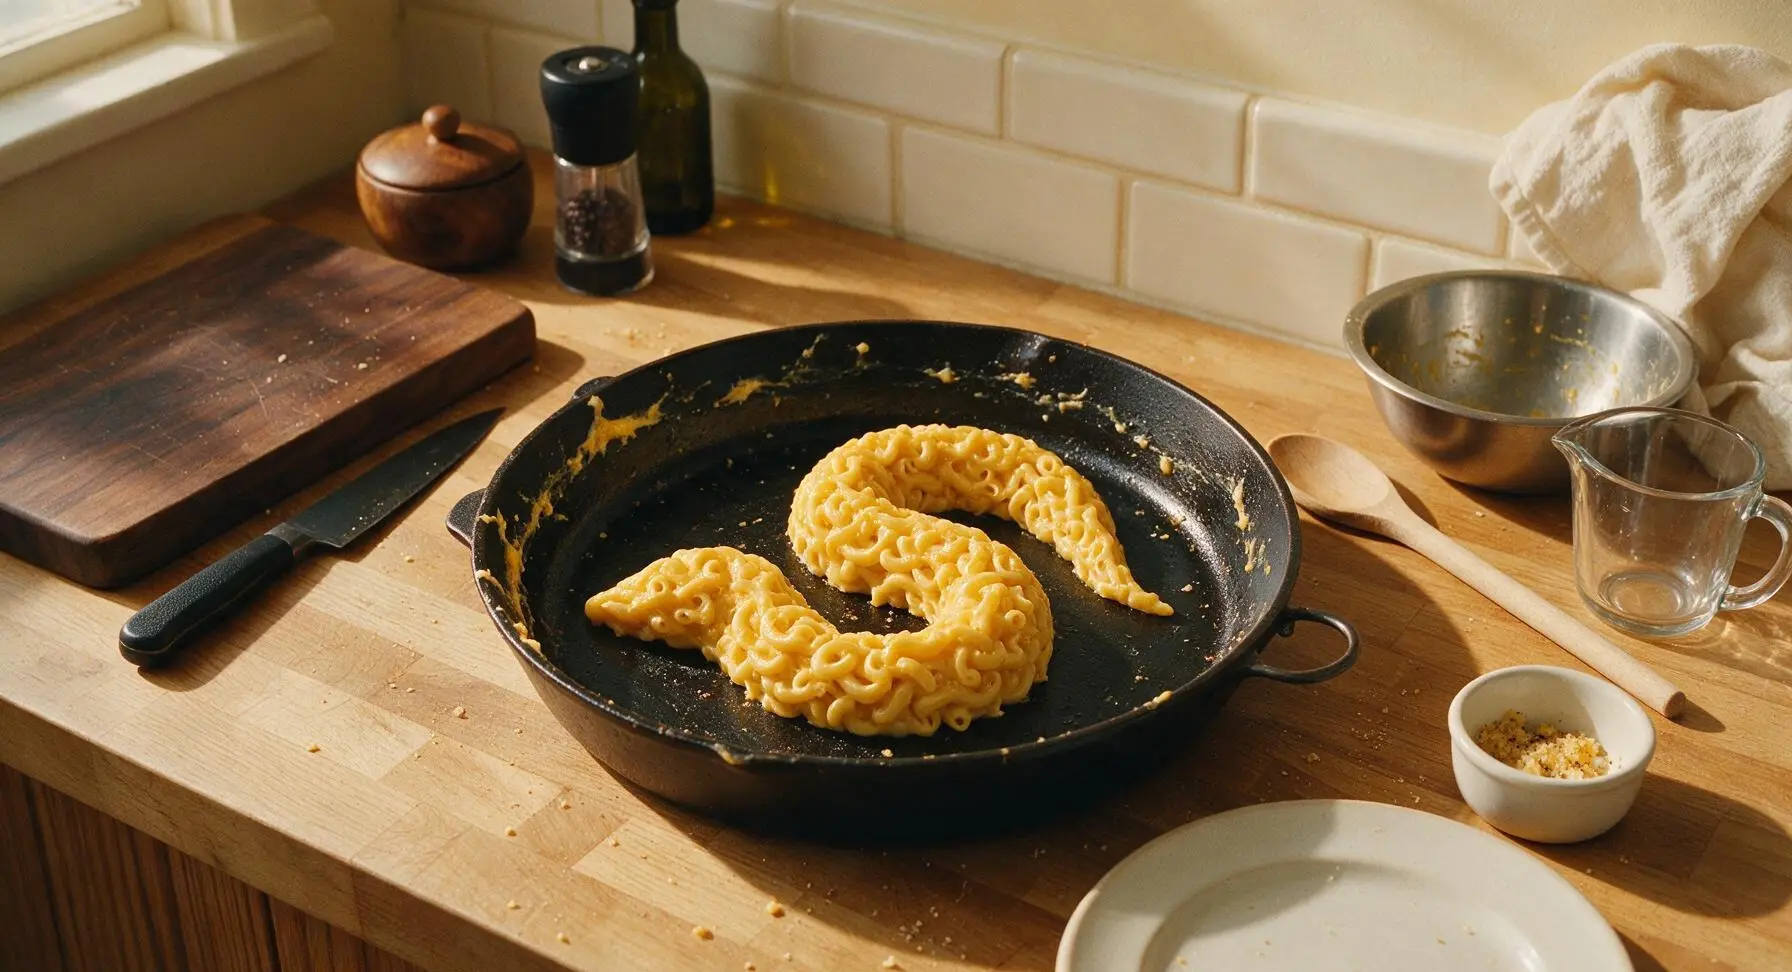
Step 5
step5:Form Coiled Snake Shape
Step 5
step5:Form Coiled Snake Shape
6

Top and Bake Until Golden

Melt the remaining 1/2 tablespoon of unsalted butter, and toss with the reserved cheddar-panko mixture. Sprinkle the buttered breadcrumb mixture evenly over the entire surface of the snake-shaped macaroni to create textured, scale-like coverage. Place the skillet in a 190C (375F) oven, and bake for 25 minutes until the cheese is bubbling around the edges and the panko topping is deep golden and crisp. Remove from the oven using the cream canvas oven mitts, and let rest 5 minutes to set.
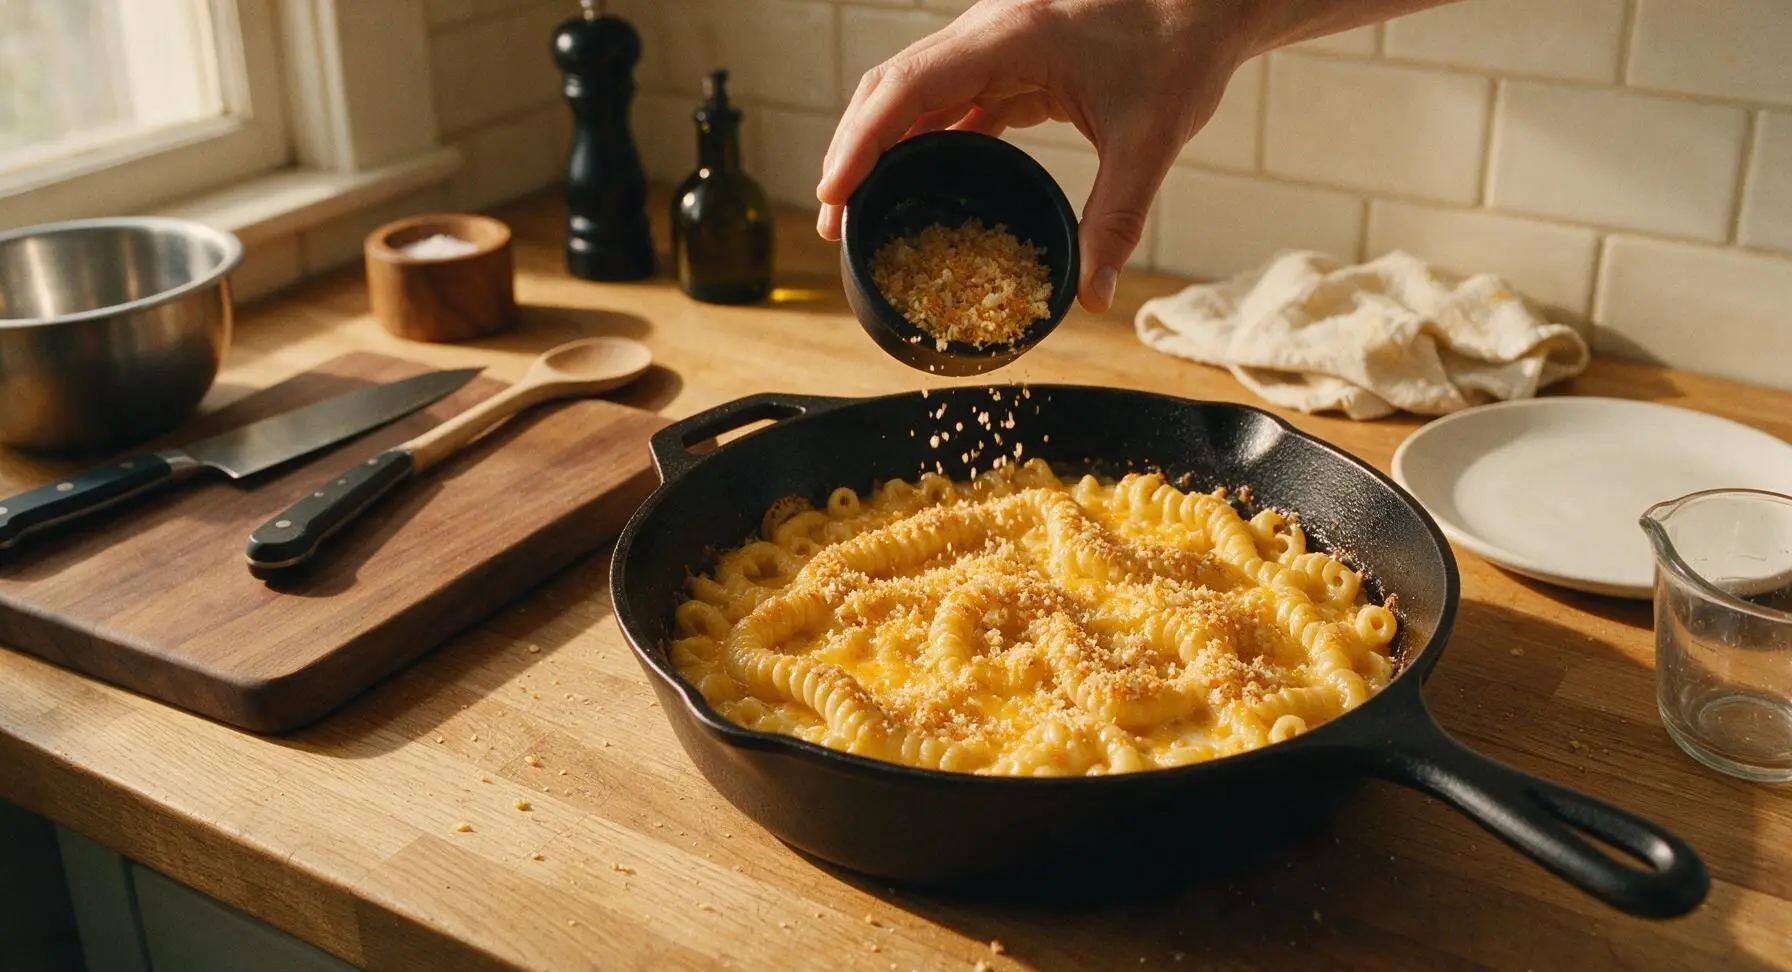
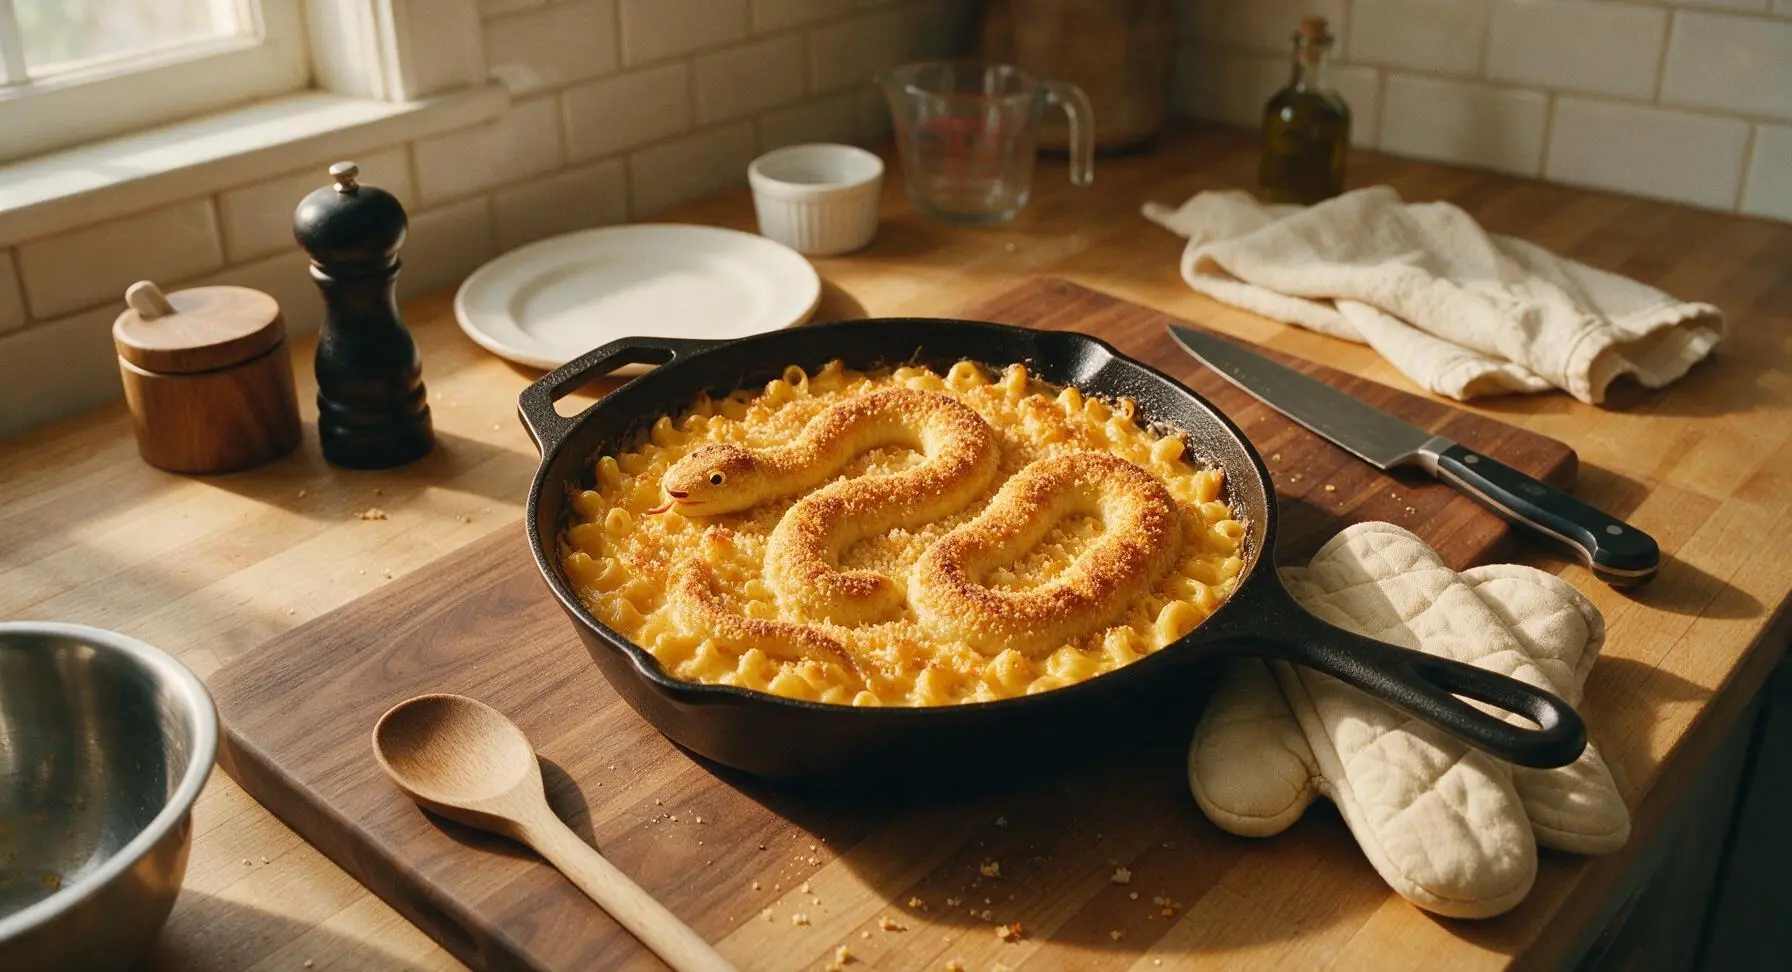
Step 6
step6:Top and Bake Until Golden
Step 6
step6:Top and Bake Until Golden
7

Add Features and Serve

Use the wide slotted stainless steel spatula to carefully lift the set snake mac and cheese from the skillet, transferring it to the large matte black ceramic serving platter. Press two sliced green olive rounds into the wide head end to make eyes, then tuck the thin roasted red pepper strip just below the eyes to create a forked snake tongue. Sprinkle a pinch of fresh thyme leaves over the top for garnish, and serve warm.
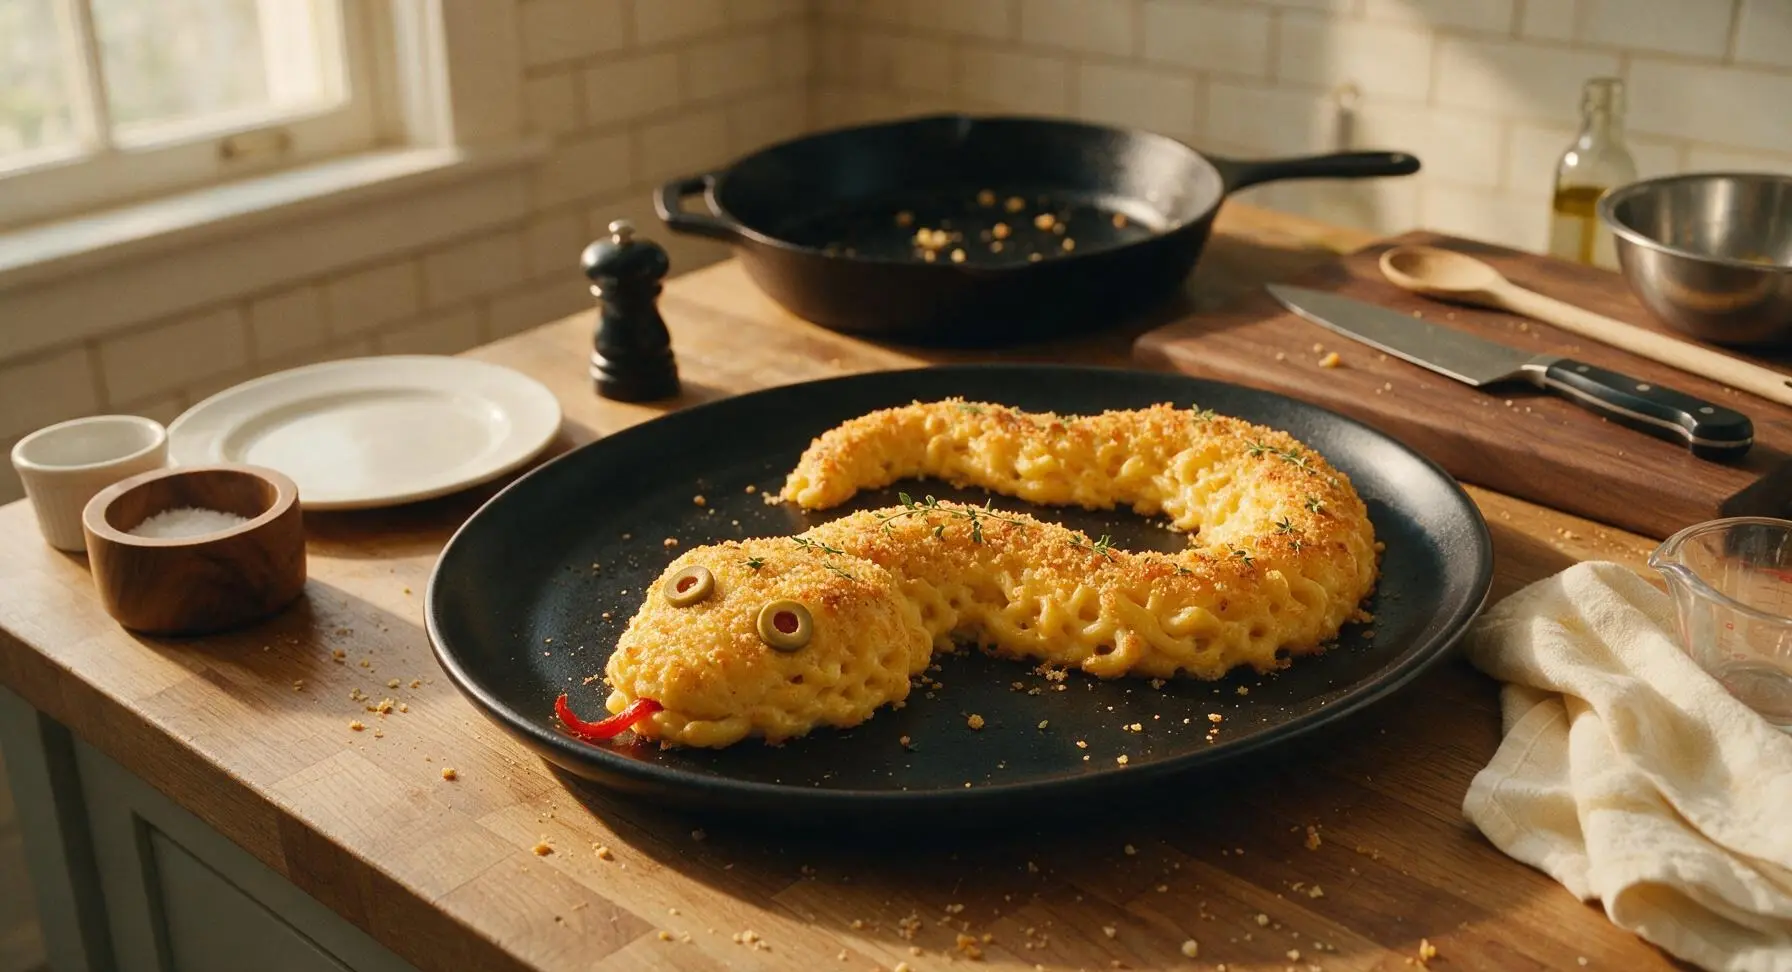
Step 7
step7:Add Features and Serve

Tips

1.Grate your own cheese instead of using pre-shredded store-bought bags: pre-shredded cheese is coated in potato starch and natamycin to prevent caking, which creates a grainy, lumpy cheese sauce instead of the smooth, creamy texture ideal for mac and cheese.
2.Do not rinse pasta after draining: the starchy coating on cooked pasta helps the cheese sauce cling tightly to each noodle, preventing the sauce from sliding off and leaving dry patches in the finished dish.
3.Let the baked mac rest for a full 5 minutes after removing it from the oven: this resting time lets the melted cheese set slightly, so the coiled snake shape holds together cleanly when transferred to the platter instead of breaking apart into loose noodles.


✨ You May Also Like

Main Course
🍜 United Kingdom

A showstopping classic of tender seared beef, savory mushroom duxelles, and crisp prosciutto wrapped in flaky golden puff pastry, baked to juicy perfection.

⏱️ 2 hours 1Main Course ★ 4.7
Main Course
🍜 India

Tender charred marinated chicken simmered in a rich, spiced creamy tomato sauce, this iconic Anglo-Indian curry pairs perfectly with basmati rice or warm naan.

⏱️ 50 minuteMain Course ★ 4.6
Main Course
🍜 Thailand

Classic tangy, sweet, and savory Thai stir-fried rice noodles with shrimp, tofu, and crunchy garnishes, balancing all five core Thai flavor profiles.

⏱️ 30 minuteMain Course ★ 4.5
Main Course
🍜 United Kingdom

Crispy golden beer-battered cod and fluffy double-fried chips, served with tangy tartar sauce and malt vinegar: the timeless, beloved British pub comfort classic.

⏱️ 45 minuteMain Course ★ 4.7
Main Course
🍜 Mexico

Smoky, chile-marinated pork tacos with caramelized pineapple, fresh cilantro, and lime: a beloved classic Mexican street food perfect for casual summer gatherings.

⏱️ 1 hour 45Main Course ★ 4.8
Main Course
🍜 United States

Crunchy Fritos corn chips layered with savory beef chili and melted cheddar, topped with cool, zesty fixings for a beloved, cozy Tex-Mex comfort food.

⏱️ 35 minuteMain Course ★ 4.8

Snake Mac and Cheese:Frequently Asked Questions

1.Why is sharp yellow cheddar recommended instead of mild cheddar for this recipe? ▾
Sharp yellow cheddar brings a bold, tangy cheese flavor that cuts through the rich creaminess of the sauce, and its bright golden color gives the snake its perfect spooky, vibrant hue. Mild cheddar will taste bland and look paler, so stick to sharp if you can for the best flavor and visual pop.
2.How do I shape the mac and cheese into a stable coiled snake that won’t fall apart when served? ▾
Let your finished cheese sauce and cooked macaroni cool for 5 minutes first so the mixture thickens slightly, then mound it in a gentle S-shaped coil on a parchment-lined baking sheet, tapering one end for the head and the other for a pointed tail. Pack it lightly so it holds shape without getting dense, then add panko right before baking.
3.Can I use pre-shredded cheese instead of shredding my own blocks of cheddar and mozzarella? ▾
I recommend shredding your own cheese for the silkiest sauce! Pre-shredded cheese is coated in anti-caking agents that make the sauce grainy and prevent it from melting smoothly. If you’re short on time, pre-shredded works in a pinch, but your sauce won’t be quite as creamy or cohesive for holding the snake shape.
4.What’s the best way to get crisp, evenly browned panko 'scales' on the snake? ▾
Toss your panko crumbs with a tablespoon of melted unsalted butter first, then press them gently but firmly all over the outside of the coiled mac and cheese right before baking. Bake at 375°F for 20-25 minutes, and if the top isn’t golden enough after baking, broil for 1-2 minutes, watching closely to avoid burning.
5.How do I attach the olive eyes so they don’t sink or fall off the finished snake? ▾
Don’t add the olive eyes before baking! Press sliced black olive halves into the tapered head of the snake during the last 5 minutes of baking, so the melted cheese around them acts as a gentle glue. Adding them too early makes them sink; adding them after cooling means they’ll roll right off the surface.
6.Can I make this Snake Mac and Cheese ahead of time for a Halloween party? ▾
Absolutely! You can assemble the coiled snake (hold off on adding the panko coating and olive eyes) up to 24 hours in advance, cover it tightly with plastic wrap, and store it in the fridge. When you’re ready to bake, add the buttered panko, tack on 5-7 minutes of bake time to account for the cold mixture, then add olives near the end.
7.Why is low-moisture mozzarella used instead of fresh mozzarella in this recipe? ▾
Low-moisture mozzarella melts into that perfect stretchy, stringy cheese pull everyone loves, without adding extra water that would make your sauce runny and cause your snake shape to slump. Fresh mozzarella releases too much whey as it bakes, leading to a soggy, misshapen final dish that won’t hold its coil.
8.What can I use if I don’t have whole milk for the cheese sauce? ▾
Whole milk gives the sauce its rich, creamy, smooth texture without being too heavy. If you don’t have it, 2% milk works as a swap, but avoid skim milk which will make the sauce thin and watery. For extra indulgence, swap 1/4 cup of milk for heavy cream, but don’t use more or the sauce will be too thick.
9.My mac and cheese came out dry after baking—what did I do wrong? ▾
Dry mac and cheese usually happens if you overcooked your pasta before mixing it with sauce, didn’t make enough cheese sauce to fully coat every noodle, or baked it uncovered for too long. Cook pasta just to al dente (it keeps cooking in the oven), make sure sauce coats noodles easily, and don’t bake longer than 25 minutes total.
10.Can I add extra mix-ins like bacon or jalapeños without ruining the snake shape? ▾
You can add small, finely chopped mix-ins like crumbled cooked bacon, diced pickled jalapeños, or mini pepperoni bits, just keep them to 1/2 cup total and stir them evenly into the cheese sauce before shaping. Large, chunky add-ins will create gaps in the pasta structure that make the coiled snake fall apart when served.
11.How do I transport this dish to a Halloween party without ruining the snake shape? ▾
Assemble and pre-bake the snake for 15 minutes on a rigid, rimmed baking sheet lined with parchment, let it cool completely at room temperature, then cover it loosely with foil for transport. When you arrive, pop it back in the oven for 10 minutes to crisp the panko and rewarm, then add olive eyes right before serving.
12.Is this recipe kid-friendly, or is it too spooky for young kids? ▾
This is designed to be playful, not scary, so it’s perfect for kids of all ages! The mild, creamy cheese flavor is familiar even to picky eaters, and you can let kids help add panko scales and olive eyes for a fun pre-Halloween activity. Add a cute red pepper tongue if you want to make it extra silly instead of spooky.
13.What’s the best way to store leftover Snake Mac and Cheese? ▾
Let any leftovers cool completely within 2 hours of baking, then transfer them to an airtight container and store in the fridge for up to 4 days. You won’t keep the perfect snake shape once you scoop servings, but the mac and cheese reheats beautifully in the microwave or oven, with a splash of milk to loosen the sauce.
14.Can I make a gluten-free version of this Halloween mac and cheese? ▾
Definitely! Swap regular elbow macaroni for your favorite sturdy, rice-based gluten-free elbow pasta that holds its shape when cooked, use gluten-free panko crumbs for the scales, and double check that your cheese and butter have no hidden gluten additives. The shaping and baking steps stay exactly the same.
15.Do I need any special pans or molds to make the coiled snake shape? ▾
No special molds are required at all! All you need is a standard rimmed baking sheet lined with parchment paper to shape the snake freehand. You don’t need a fancy cake pan or snake mold—just mound the sauced pasta into a gentle coil, taper the head and tail, and the stretchy cheese will help it hold shape as it bakes.

Comments (13)

2 hours ago

OMG y’all, I made this for my 7 and 9 year old’s after school snack and they went absolutely feral for it! The snake pasta shape is so fun, they kept wiggling the noodles at each other and didn’t even complain about the extra sharp cheddar I used. Total win for a weeknight, 35 minutes is no time at all!

1 hour ago

So glad your kids loved it! The fun pasta shape is such an easy hack to get little ones excited about dinner, right? Pro tip: toss in a handful of steamed broccoli next time if you want to sneak in some veggies, they won’t even notice with all that cheesy goodness!

yesterday

Wait hold up—snake mac and cheese??? I fully clicked this thinking there was actual rattlesnake meat in it lmao. Turns out it’s just fun snake shaped pasta? Color me relieved, honestly. Made it last night for my roommates, we added hot sauce and crispy bacon bits on top, slapped. Only reason it’s not 5 stars is I burned the breadcrumb topping a tiny bit because I got distracted playing video games.

20 hours ago

Dude I did the EXACT same thing! I was over here like ‘am I about to eat exotic game mac? No way’ and then saw it’s just pasta shaped like snakes. My kind of recipe honestly, no weird meat required.

12 hours ago

Haha we get that reaction a lot! No actual snake here, just silly squiggly pasta that’s way more fun than regular elbows. Pro tip: watch the breadcrumbs closely under the broiler, they go from golden to burnt in like 30 seconds!

3 days ago

Game changer for my Sunday meal prep! This holds up so well in the fridge all week, I just portion it out into containers and add a little splash of milk when I reheat it at work. So creamy, way better than the boxed stuff I used to buy every week. The easy difficulty rating is no lie, even I can’t mess this up.

1 week ago

Brought this to our neighborhood block party potluck last weekend and people were scraping the dish clean! I made a double batch, added a little cajun seasoning to the cheese sauce for a kick, and everyone was asking for the recipe. Total crowd pleaser, even the picky teens went back for seconds.

6 days ago

Love that it was a potluck hit! The cajun seasoning addition sounds chef’s kiss, I’ll have to try that next time I make it for a group. So happy your neighbors enjoyed it!

2 days ago

It was fine? I don’t get what all the hype is about. I couldn’t find snake shaped pasta at my local grocery store so I used regular elbows, maybe that’s why? The cheese sauce was a little grainy for my taste too, I think I heated the milk too fast when I was making the roux.

1 day ago

Oh you have to get the pasta shape! It makes the whole thing feel way more fun, my grocery store had it in the kids’ pasta section by the mac and cheese boxes. And yeah, low and slow for the milk, no high heat or the cheese gets clumpy for sure.

18 hours ago

Sorry the sauce came out grainy! You’re totally right that high heat when adding cheese can cause that—try turning the burner all the way down before you stir in the shredded cheese next time, it’ll come out super smooth. If you can’t find snake pasta, rotini works as a fun swirly substitute too!

30 minutes ago

SO good!!! I’m a broke college student with basically zero cooking skills and this came out perfect on my first try. I used a pre-shredded cheese blend I had on hand and it still tasted gourmet. 10/10 will be making this every week until further notice.

5 days ago

Made this as a post-hike carb load for me and my trail crew last weekend, it hit so hard after 8 miles out in the cold. Only change I made was adding a can of diced green chiles for a little southwestern flair, it was chef’s kiss. Wish I’d made more, everyone was eyeing the last serving.

4 days ago

Dude the green chile addition is genius! I’m doing a 10 mile hike next weekend and already planning to make a batch for the group. Thanks for the tip!

2 weeks ago

Oh my goodness, I made this for my grandson’s birthday party and all the little ones thought the snake noodles were the silliest thing ever! I used my go-to three cheese blend (sharp cheddar, gouda, and a little cream cheese for extra creaminess) and it turned out so rich and delicious. Even the other grandparents asked for the recipe!

12 days ago

The three cheese blend sounds amazing! I’ve only been using plain cheddar, I need to try adding gouda next time, that sounds so nutty and good. My twins are obsessed with anything snake themed right now, they’re gonna lose their minds over this.

10 days ago

Your three cheese blend sounds absolutely incredible, cream cheese is my secret weapon for ultra silky cheese sauce! So glad the birthday crew loved it, fun themed food always makes a party feel extra special.

5 minutes ago

Just pulled this out of the oven and wow, that cheese pull is insane! I mixed in some pickled jalapeños and a sprinkle of chili flakes for heat and it’s perfect. Easy enough to make on a random Tuesday night but tasty enough to serve to guests, no notes.

2 minutes ago

That cheese pull is the best part, right? Love the pickled jalapeño addition, the tang pairs so perfectly with the rich creamy cheese. Enjoy every bite!

just now

Just finished making this for dinner tonight and the whole house smells amazing. The cook time is exactly 35 minutes like it says, which is perfect for our chaotic weeknights between soccer practice and piano lessons. No fancy ingredients, no complicated steps, exactly what I need in a weeknight recipe.

3 days ago

This was so easy to make gluten free! I swapped the regular snake pasta for a gluten free rice pasta version I found online, and used GF all purpose flour for the roux, and you literally couldn’t tell the difference. Only complaint is my gluten free pasta got a little mushy because I boiled it a minute too long, totally my bad though.

2 days ago

Thanks for the GF tip! My youngest has celiac so I’m always hunting for easy GF meals the whole family will eat. I’ll make sure to undercook the pasta a little before baking so it doesn’t turn mushy!

1 day ago

So glad this worked for your gluten free swap! Great call on the pasta tip—undercooking GF pasta by a minute or two before baking helps it hold its texture perfectly once it’s mixed with the sauce. Thanks for sharing your modification!

1 week ago

Made this for our spooky movie night last weekend (we did a snake/reptile themed movie marathon, duh) and it was the perfect thematic snack! I added little olive slice “eyes” on top of the breadcrumb crust for extra silly snake vibes, everyone was taking photos before we dug in. So fun, so tasty.

6 days ago

The olive slice eyes are such a cute idea! I’m hosting a Halloween party next month and already adding this to the menu, that’s gonna be such a hit with the costume crowd. Thanks for the inspo!

2 days ago

Total budget win! All the ingredients cost me under $10 total at the grocery store, and it made enough for 4 big servings. Way cheaper than takeout, and tastes better too. I added a little garlic powder and paprika to the sauce to amp up the flavor without extra cost, will be making this on repeat for busy weeks.



