
Sous Vide Pulled Pork

title 1
Sous Vide Pulled Pork
⏱️ cook time 18 hours 15 minutes
🍽️ servings 6
⚡ Difficulty medium

intro

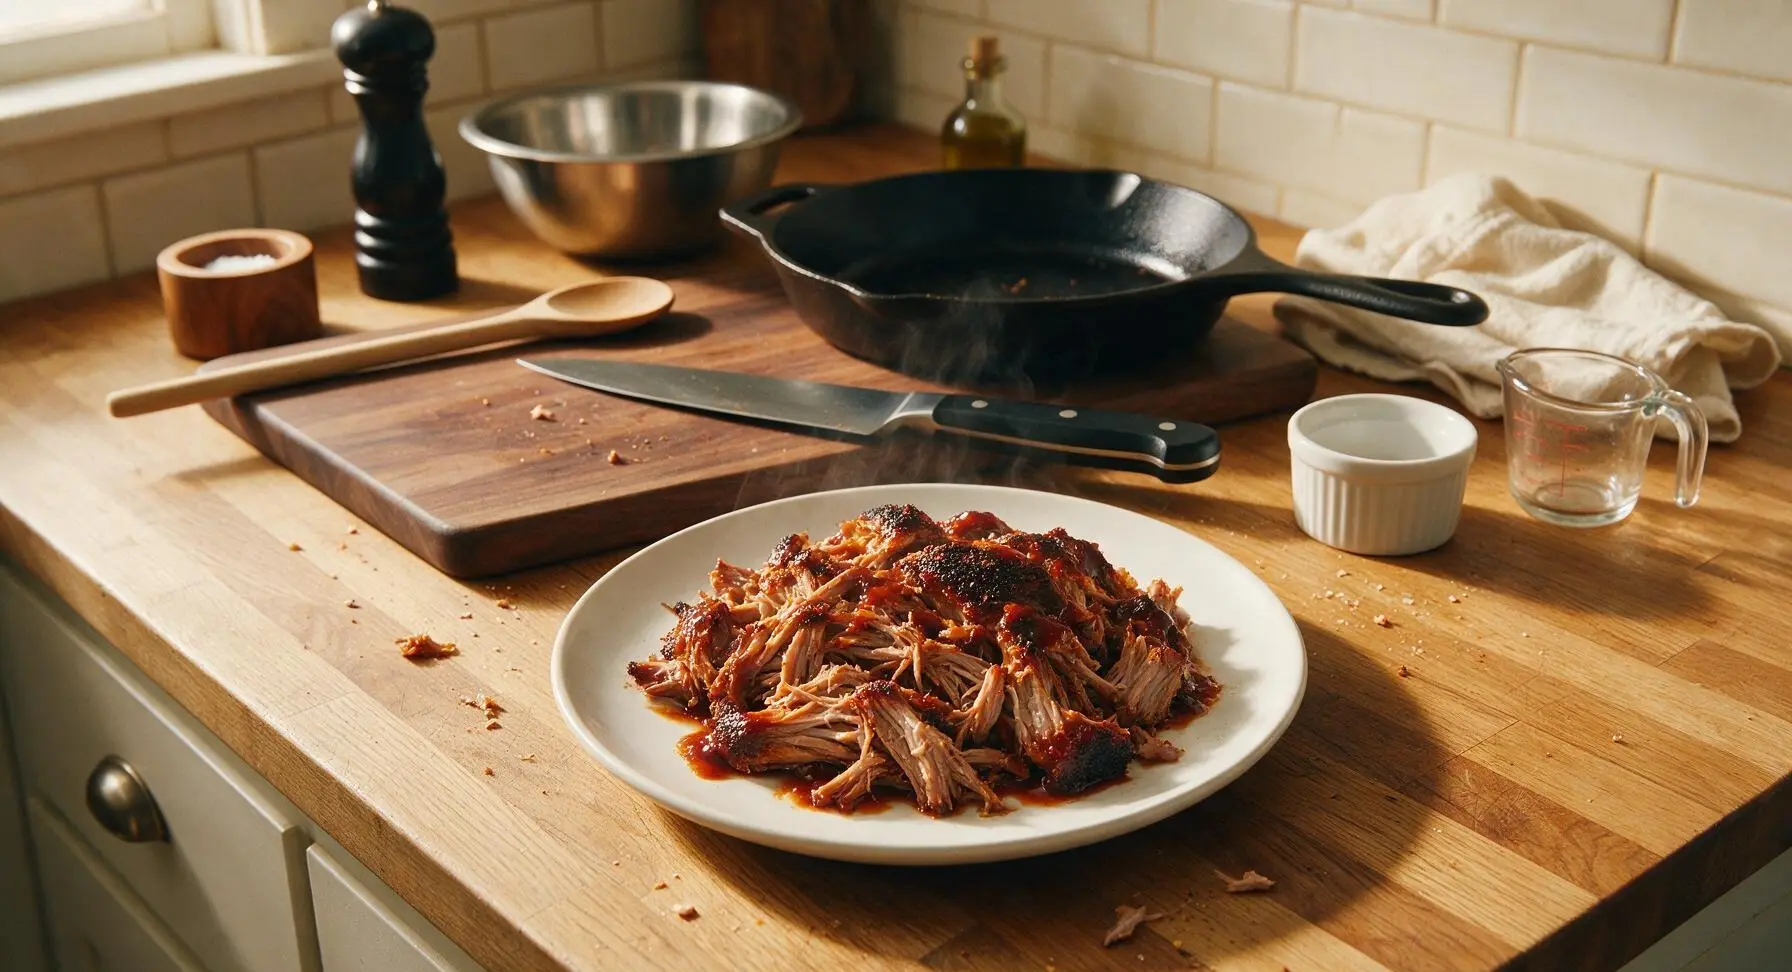
Fall-apart tender, smoky Southern-style pulled pork cooked low and slow via sous vide, finished with a crisp spice bark and tangy BBQ sauce, perfect for summer gatherings.

Ingredients
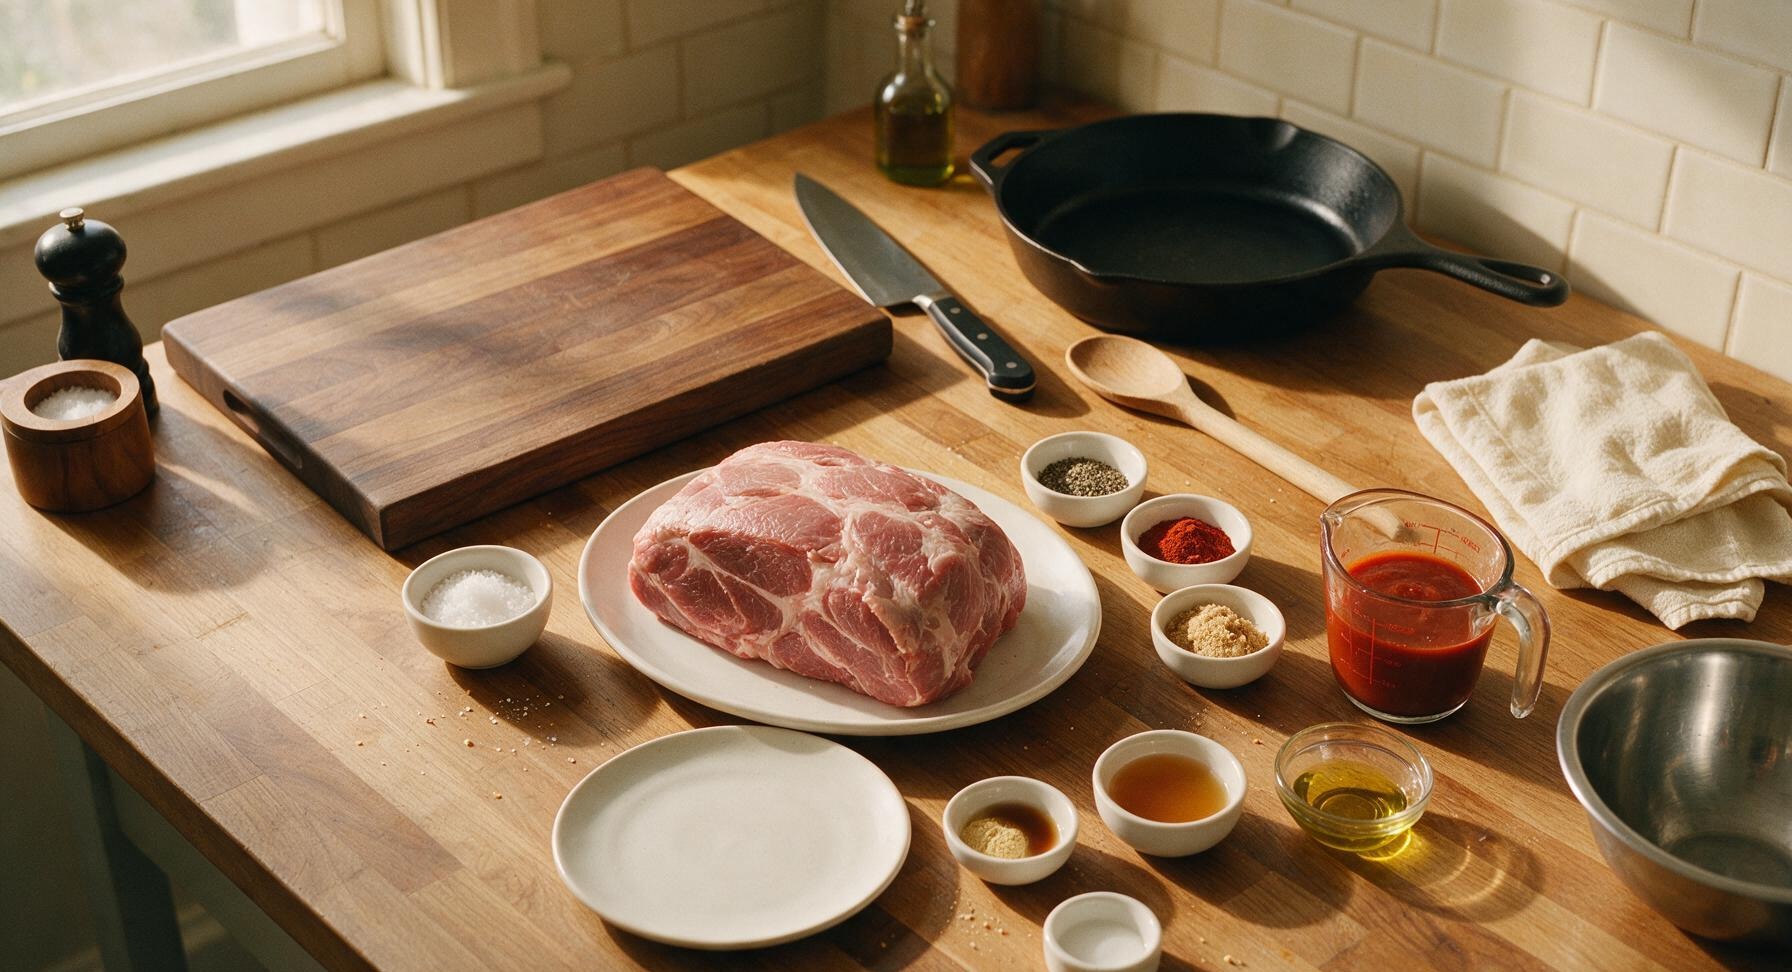
Boneless pork shoulder (Boston butt) 2.5 lbs (1.1kg)
Kosher salt 2 tbsp
Coarsely ground black pepper 1 tbsp
Smoked paprika 1 tbsp
Garlic powder 1 tsp
Light brown sugar 1 tbsp
Dry mustard powder 1 tsp
Liquid smoke 1 tsp
Apple cider vinegar 2 tbsp
Tangy tomato-based BBQ sauce 1 cup, divided
Avocado oil (high smoke point) 1 tbsp

Steps

1

Prep the Pork Shoulder

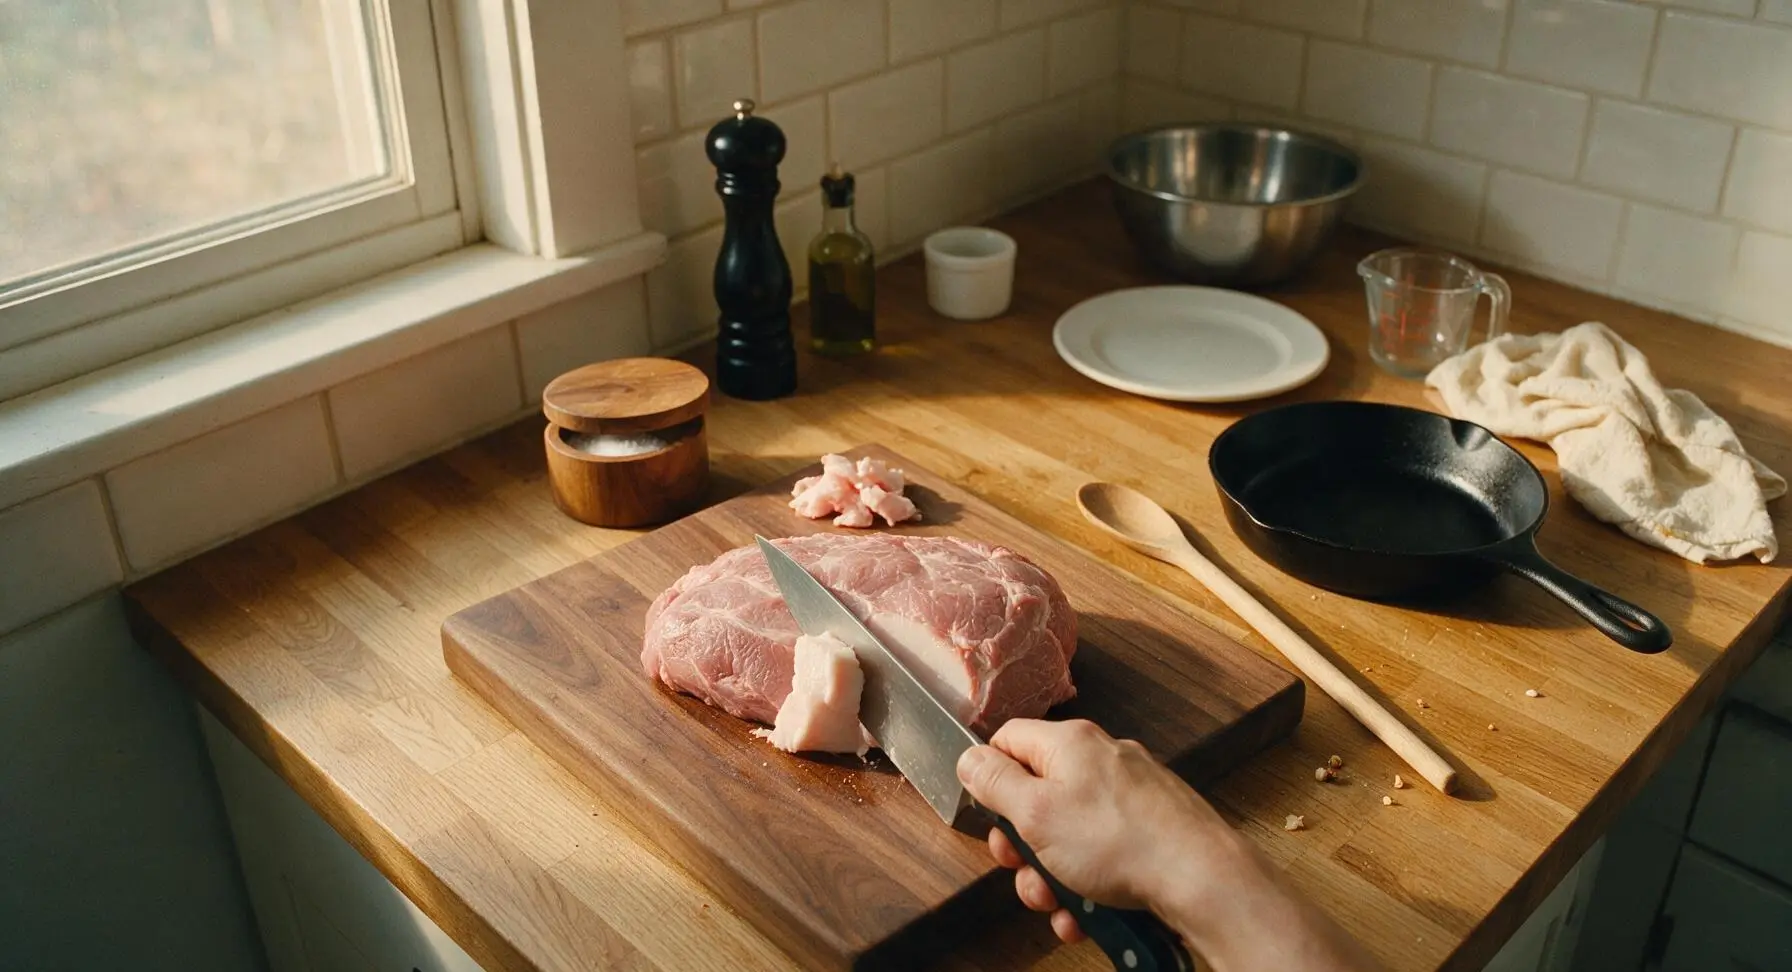
Remove the 2.5lb boneless pork shoulder from packaging, pat completely dry on all sides using the linen kitchen towel. Place it on the central maple cutting board. Use the 8-inch chef knife to trim any excessively thick hard fat deposits, leaving a uniform 1/4-inch fat cap across one side of the roast; discard trimmed fat chunks. The meat surface should be dry to the touch with no ragged loose edges.
Step 1
step1:Prep the Pork Shoulder
2

Mix the Dry Rub

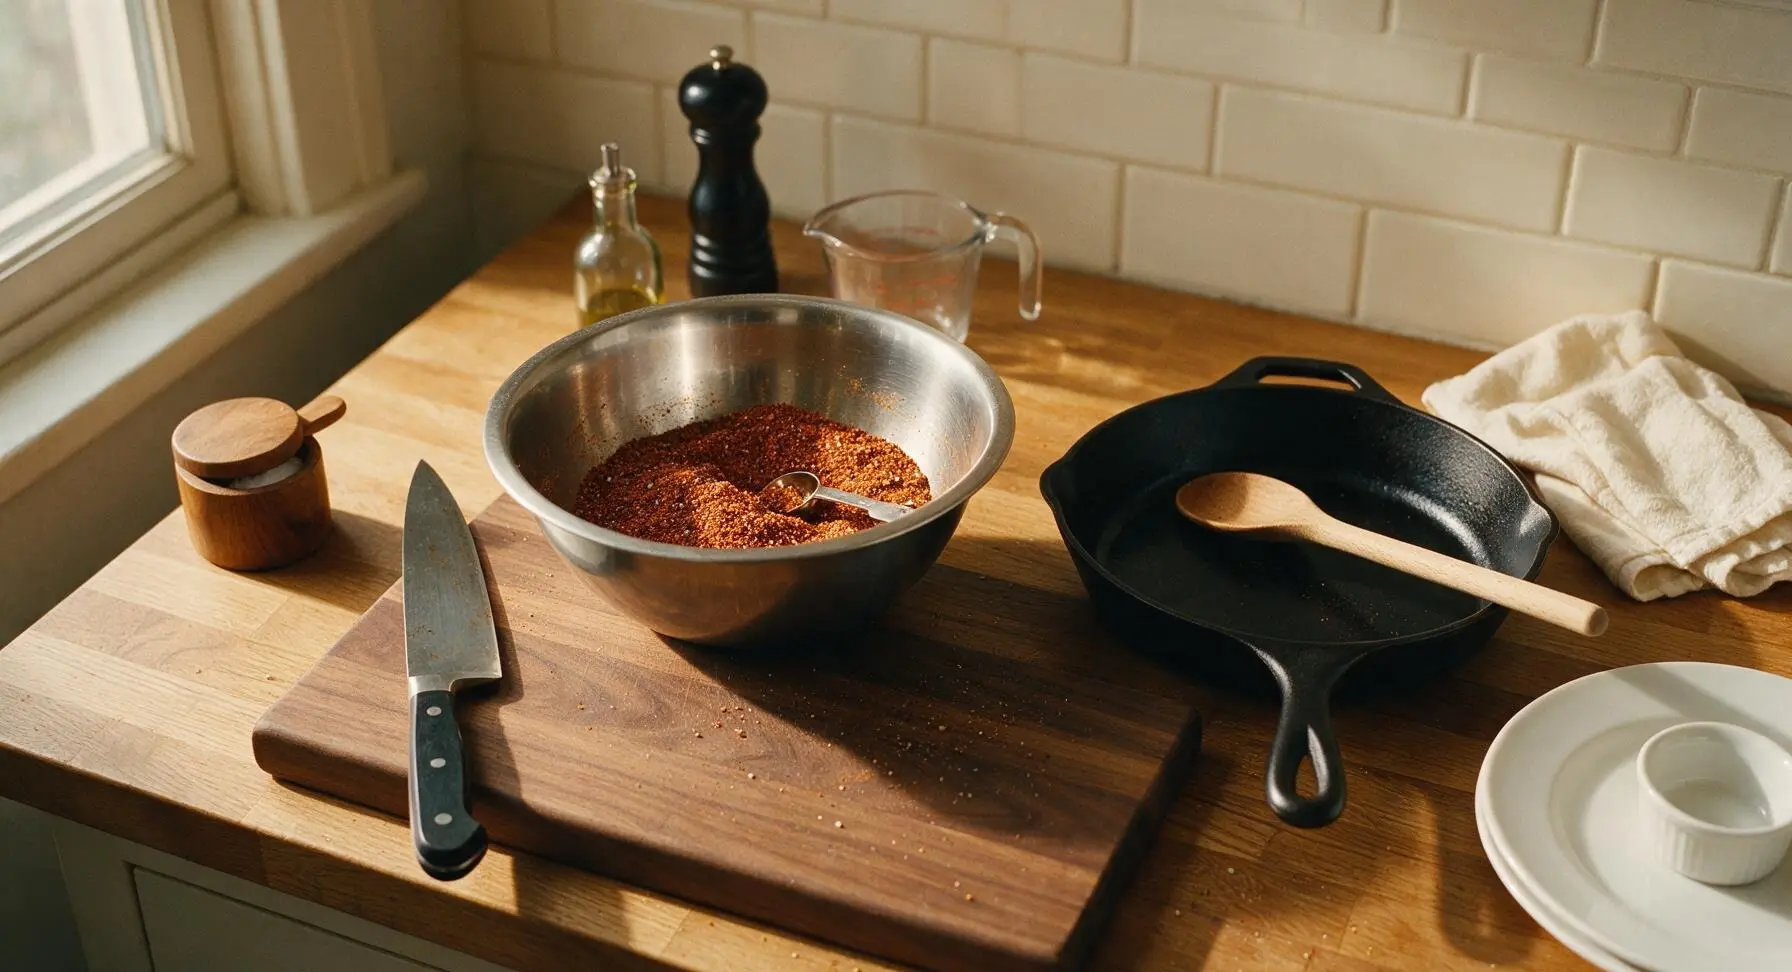
In the 3-quart stainless steel mixing bowl, combine 2 tbsp kosher salt, 1 tbsp coarse black pepper, 1 tbsp smoked paprika, 1 tsp garlic powder, 1 tbsp light brown sugar, and 1 tsp dry mustard powder. Stir with a measuring spoon until fully combined, with no clumps of brown sugar remaining. The rub will be a deep rusty brown color with visible coarse salt and pepper flecks.
Step 2
step2:Mix the Dry Rub
3

Season and Bag Pork

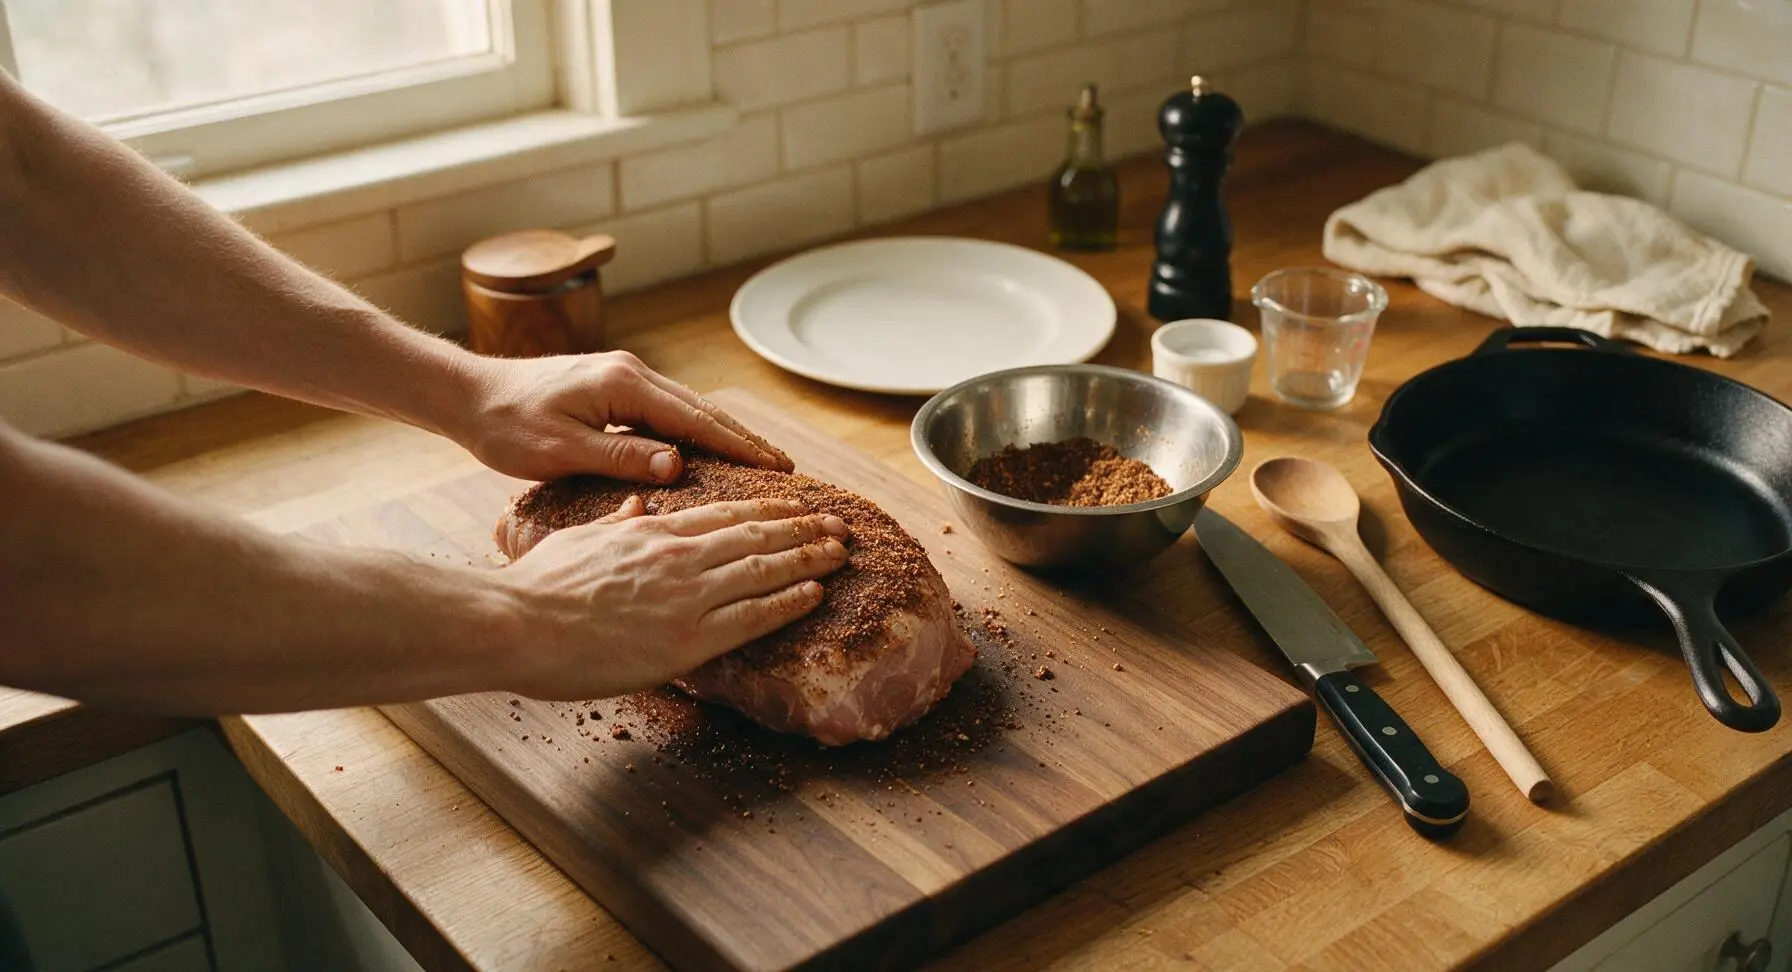
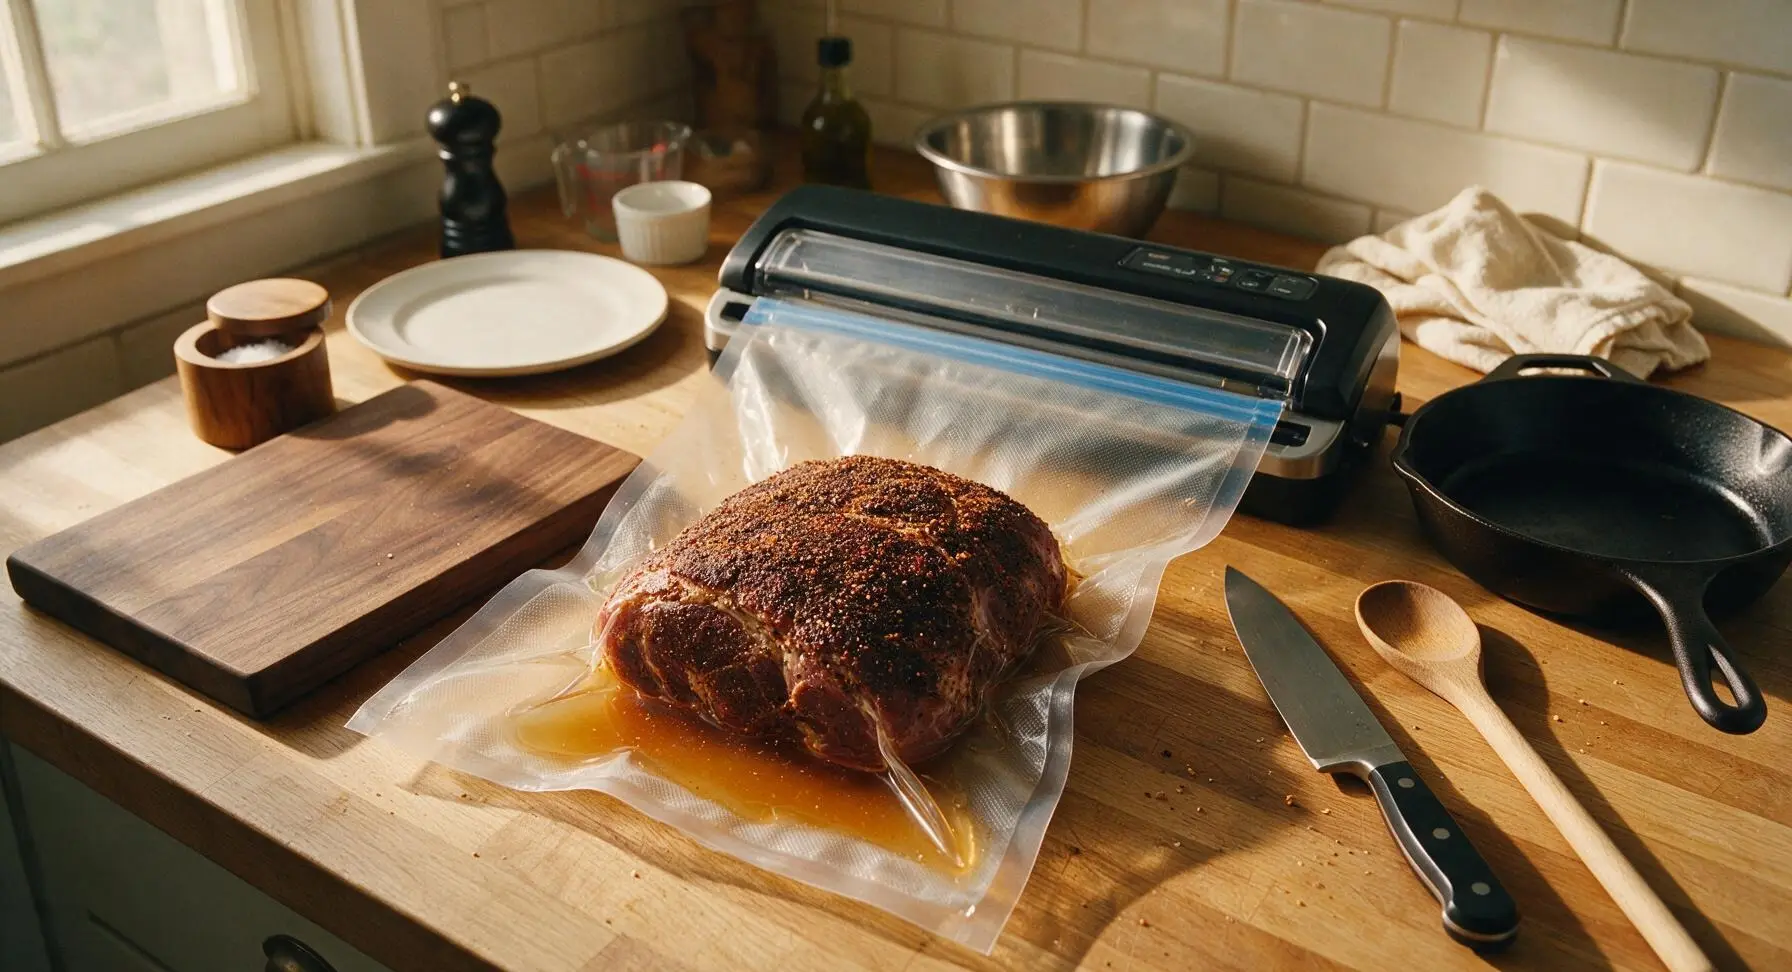
Rub the entire surface of the trimmed pork shoulder with 1 tsp liquid smoke, then generously coat every side with the dry rub mixture, pressing firmly so the spice adheres to the meat. Place the seasoned pork into a heavy-gauge 11x16 inch vacuum sealer bag, pour in 2 tbsp apple cider vinegar, and arrange the bag so the pork lies flat. Do not add BBQ sauce to the bag at this stage, as it can break down and develop bitter notes during long cooking.
Step 3
step3:Season and Bag Pork
Step 3
step3:Season and Bag Pork
4

Seal and Preheat Bath

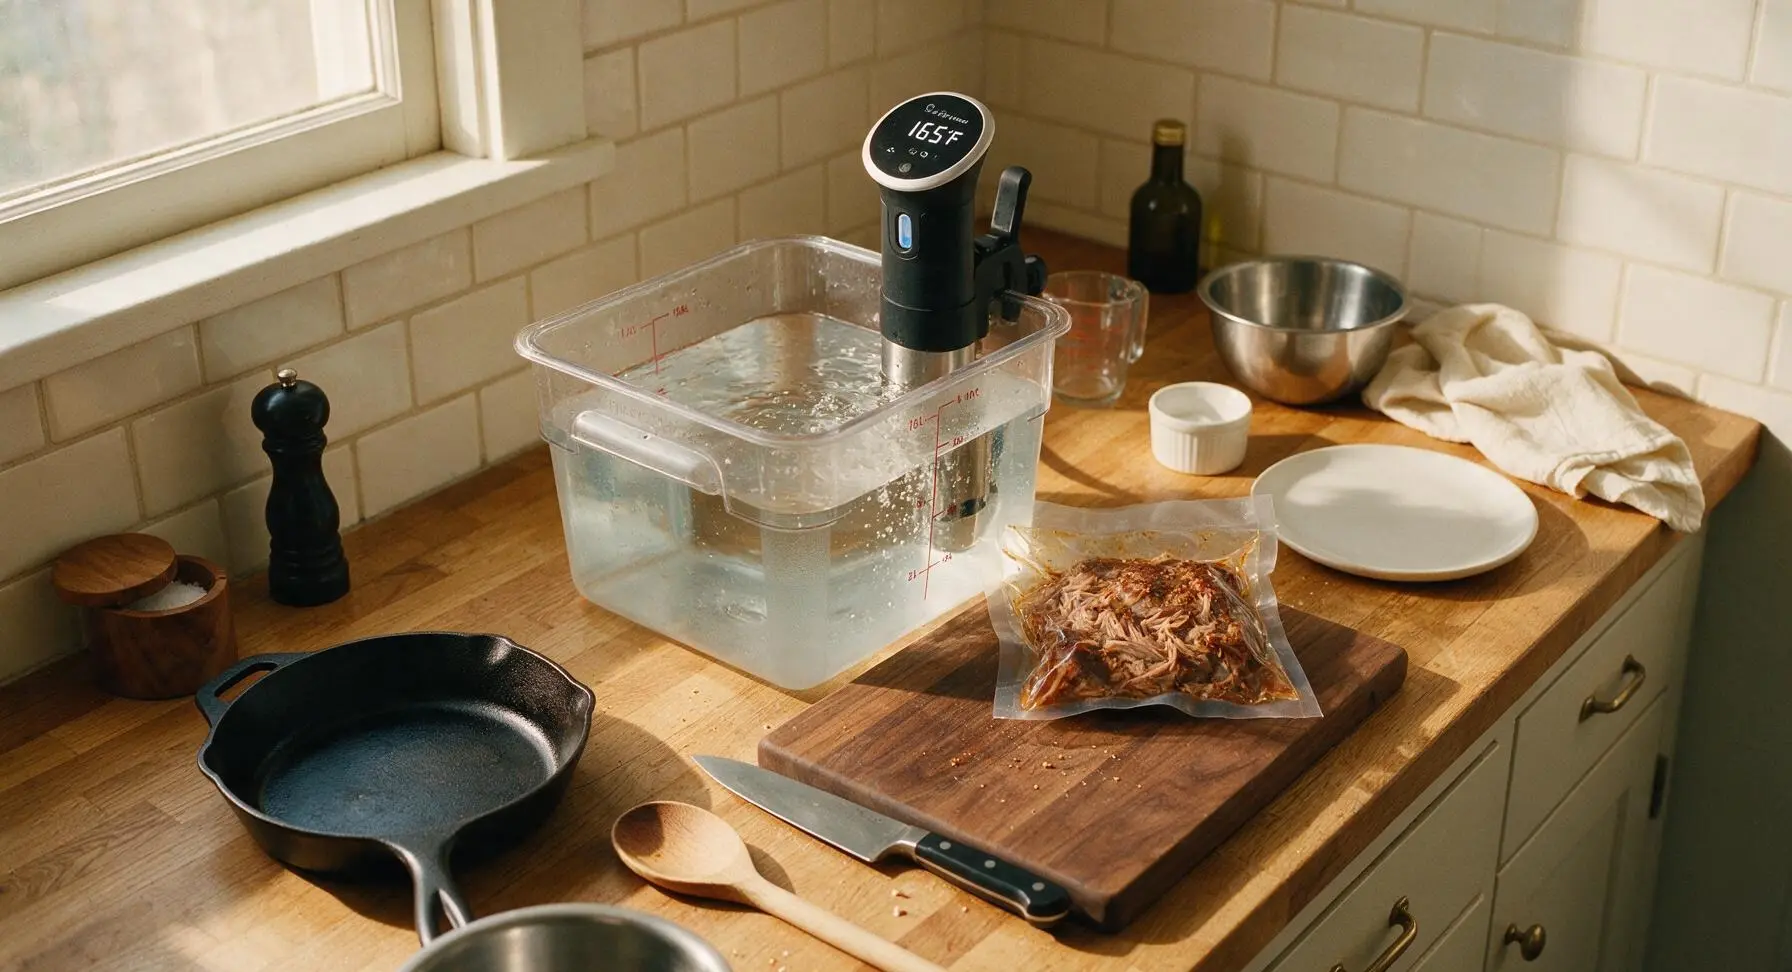
Place the open end of the vacuum bag into the vacuum sealer, run a full seal cycle to remove all air and create an airtight closure, checking that no liquid seeped into the seal channel to prevent breakage during cooking. Fill the 12-quart polycarbonate container with tap water, attach the matte black immersion circulator, and set the temperature to 165°F (74°C). Wait for the water to come to full temperature before adding the bag.
Step 4
step4:Seal and Preheat Bath
5

Cook Sous Vide Low Slow

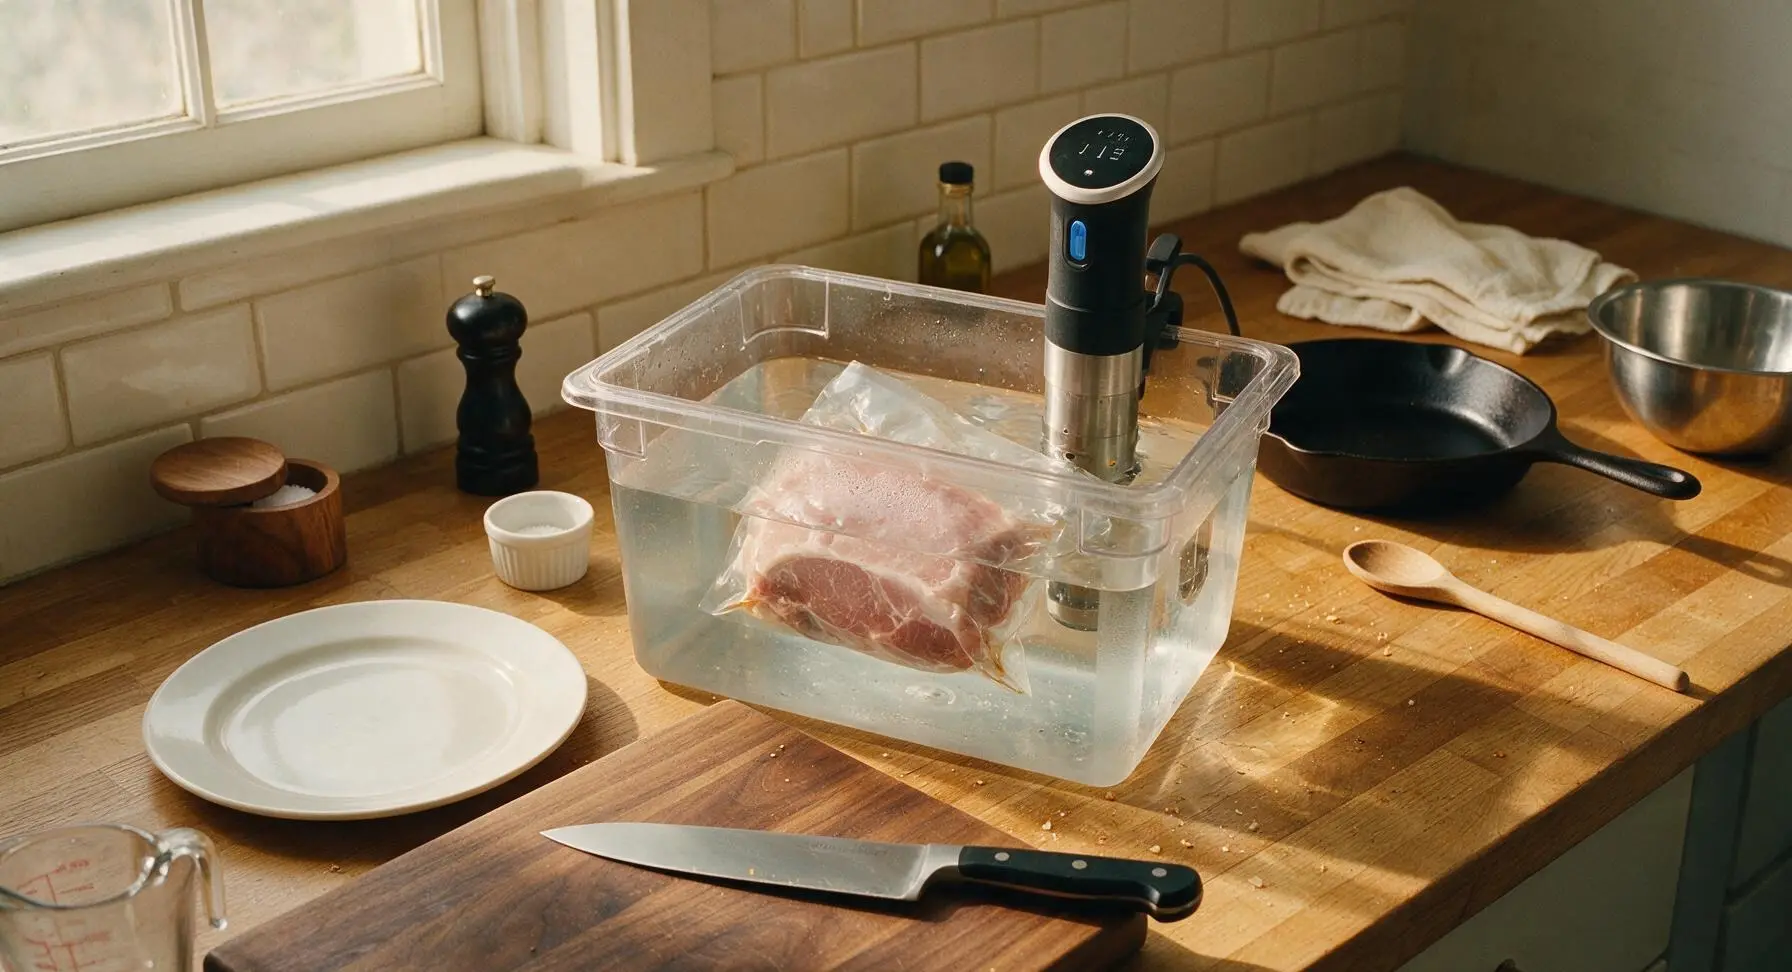
Lower the sealed pork bag fully into the preheated 165°F water bath, ensuring no part of the bag is above the water line (add a small stainless steel weight if the bag floats to prevent uneven cooking). Cook for 18 hours, checking the water level every 6 hours and topping off with warm water if needed to keep the pork fully submerged. The meat will become fork-tender and pull apart easily with no resistance when done.
Step 5
step5:Cook Sous Vide Low Slow
6

Sear to Build Bark

After 18 hours, use the silicone-tipped tongs to remove the pork bag from the water bath. Carefully cut the bag open, reserve 2 tbsp of the savory cooking juices, and transfer the pork to a clean plate. Pat the pork surface completely dry with paper towels. Heat 1 tbsp avocado oil in the 12-inch carbon steel skillet over high heat until shimmering. Sear the pork on all sides for 1-2 minutes per side, until a deep mahogany crisp bark forms; take care not to burn the sugar in the spice rub, which will turn bitter.
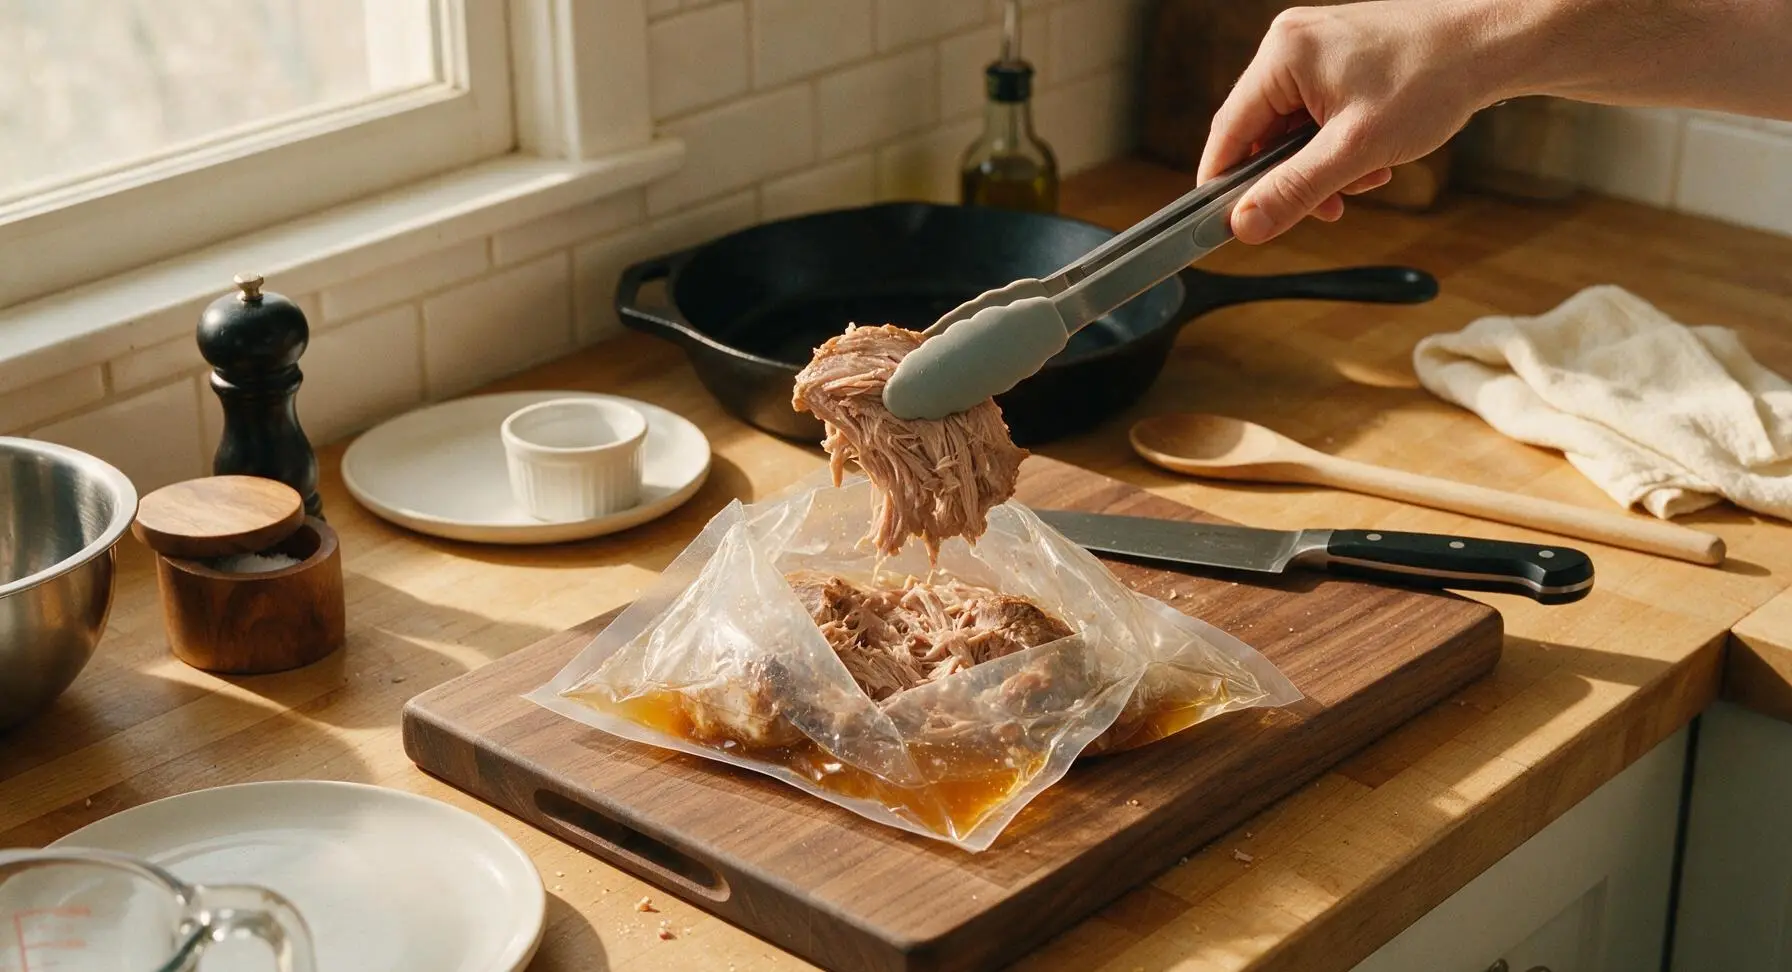
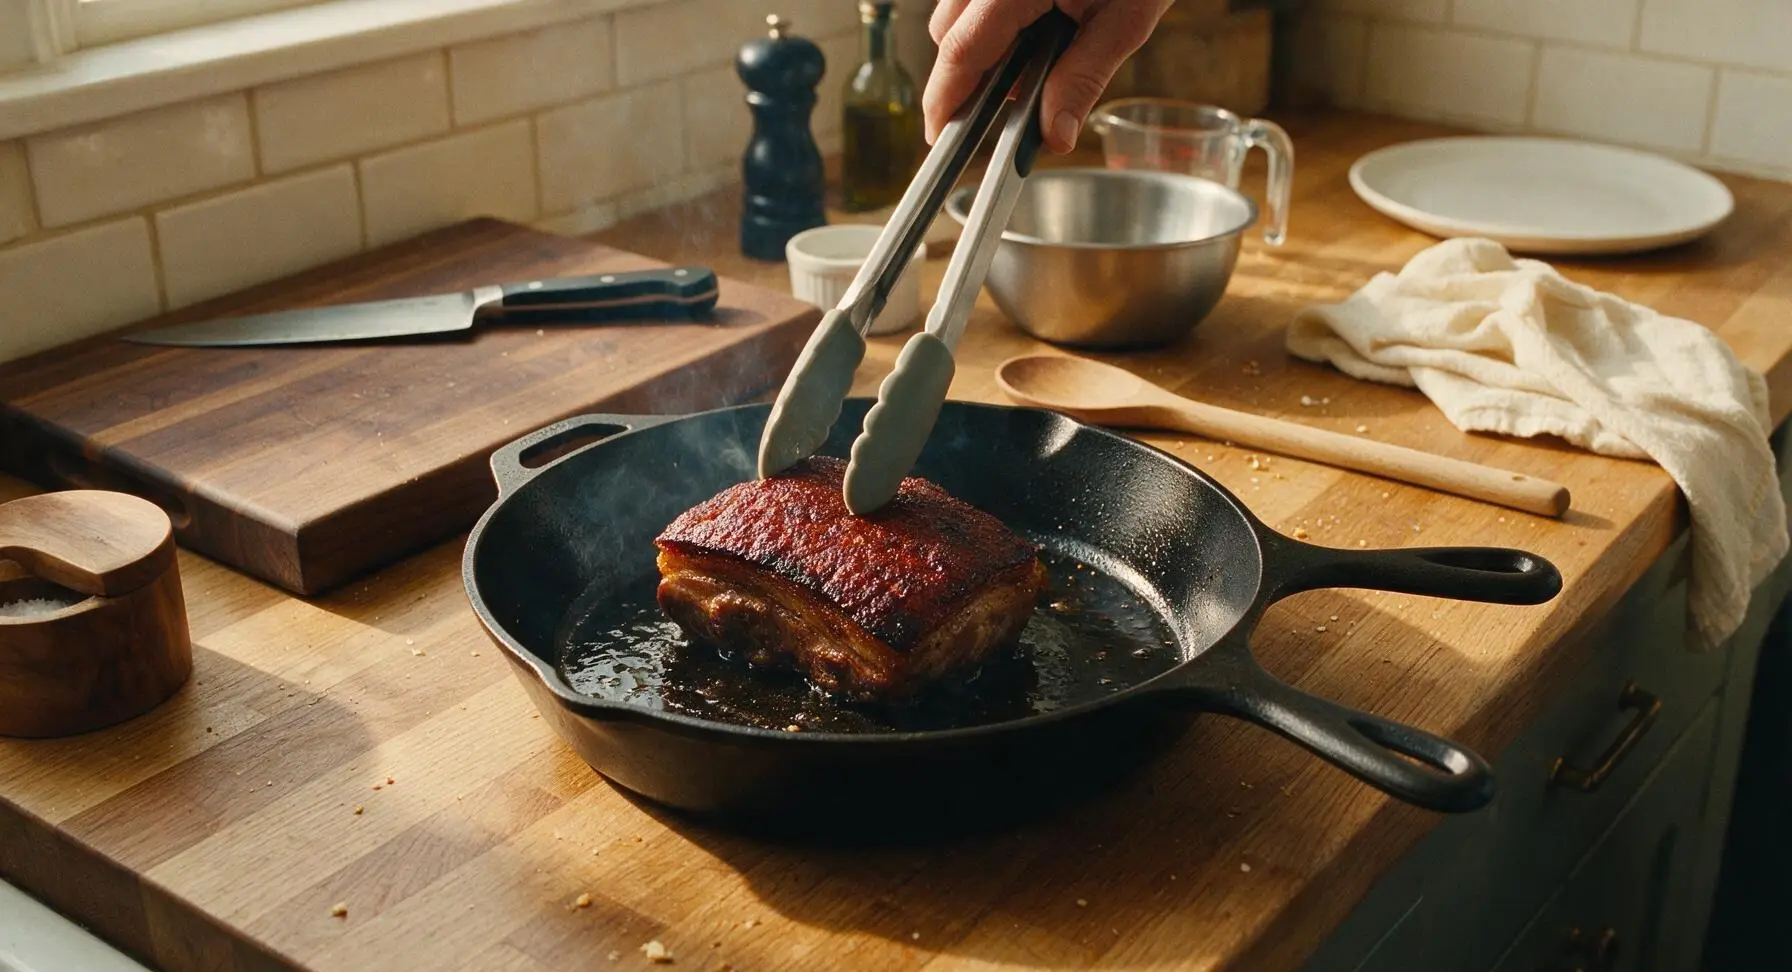
Step 6
step6:Sear to Build Bark
Step 6
step6:Sear to Build Bark
7

Pull the Tender Pork

Transfer the seared pork back to the central maple cutting board. Let it rest for 5 minutes to allow juices to redistribute, which will keep the meat moist. Use the two stainless steel meat forks to pull the pork apart into thin, bite-sized shreds, discarding any remaining large chunks of unrendered hard fat. Drizzle the reserved 2 tbsp of cooking juices over the shredded pork and toss lightly to coat.
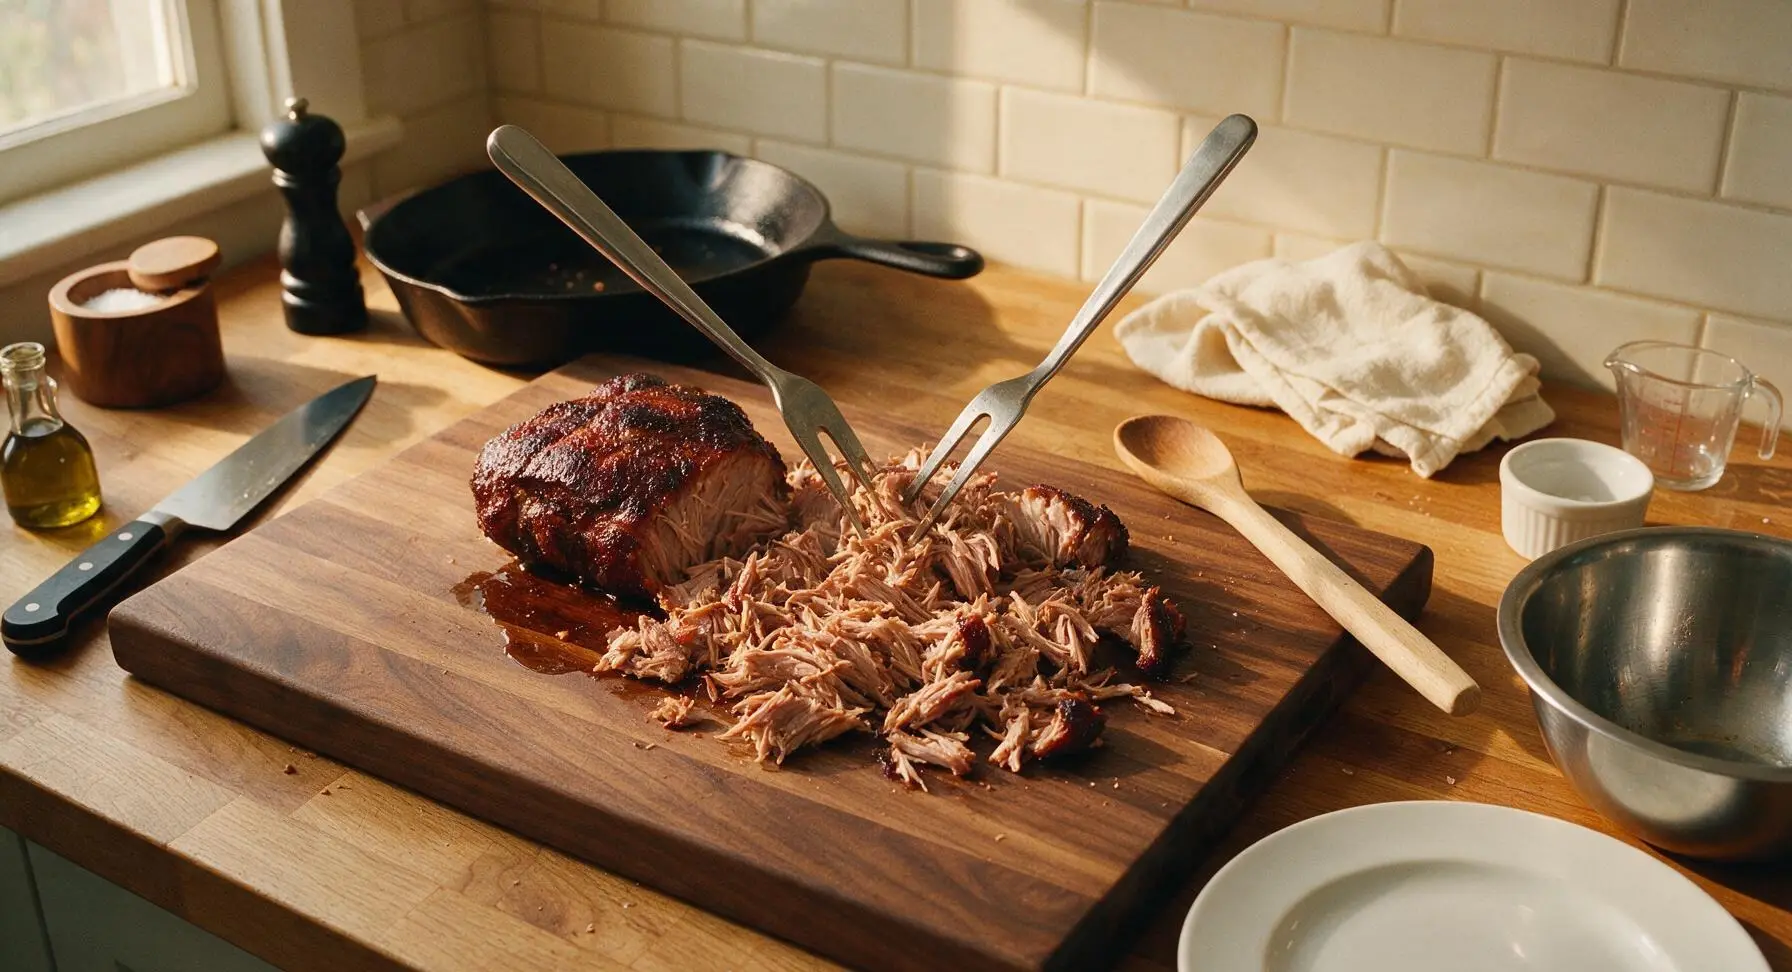
Step 7
step7:Pull the Tender Pork
8

Toss and Sauce to Serve

Add 3/4 cup of the BBQ sauce to the shredded pork, tossing gently to coat every strand evenly, leaving some pieces of crisp bark exposed for texture contrast. Pile the sauced pulled pork onto the matte cream dinner plate, drizzle with a small amount of extra sauce, and serve the remaining BBQ sauce in the small cream ramekin on the side.
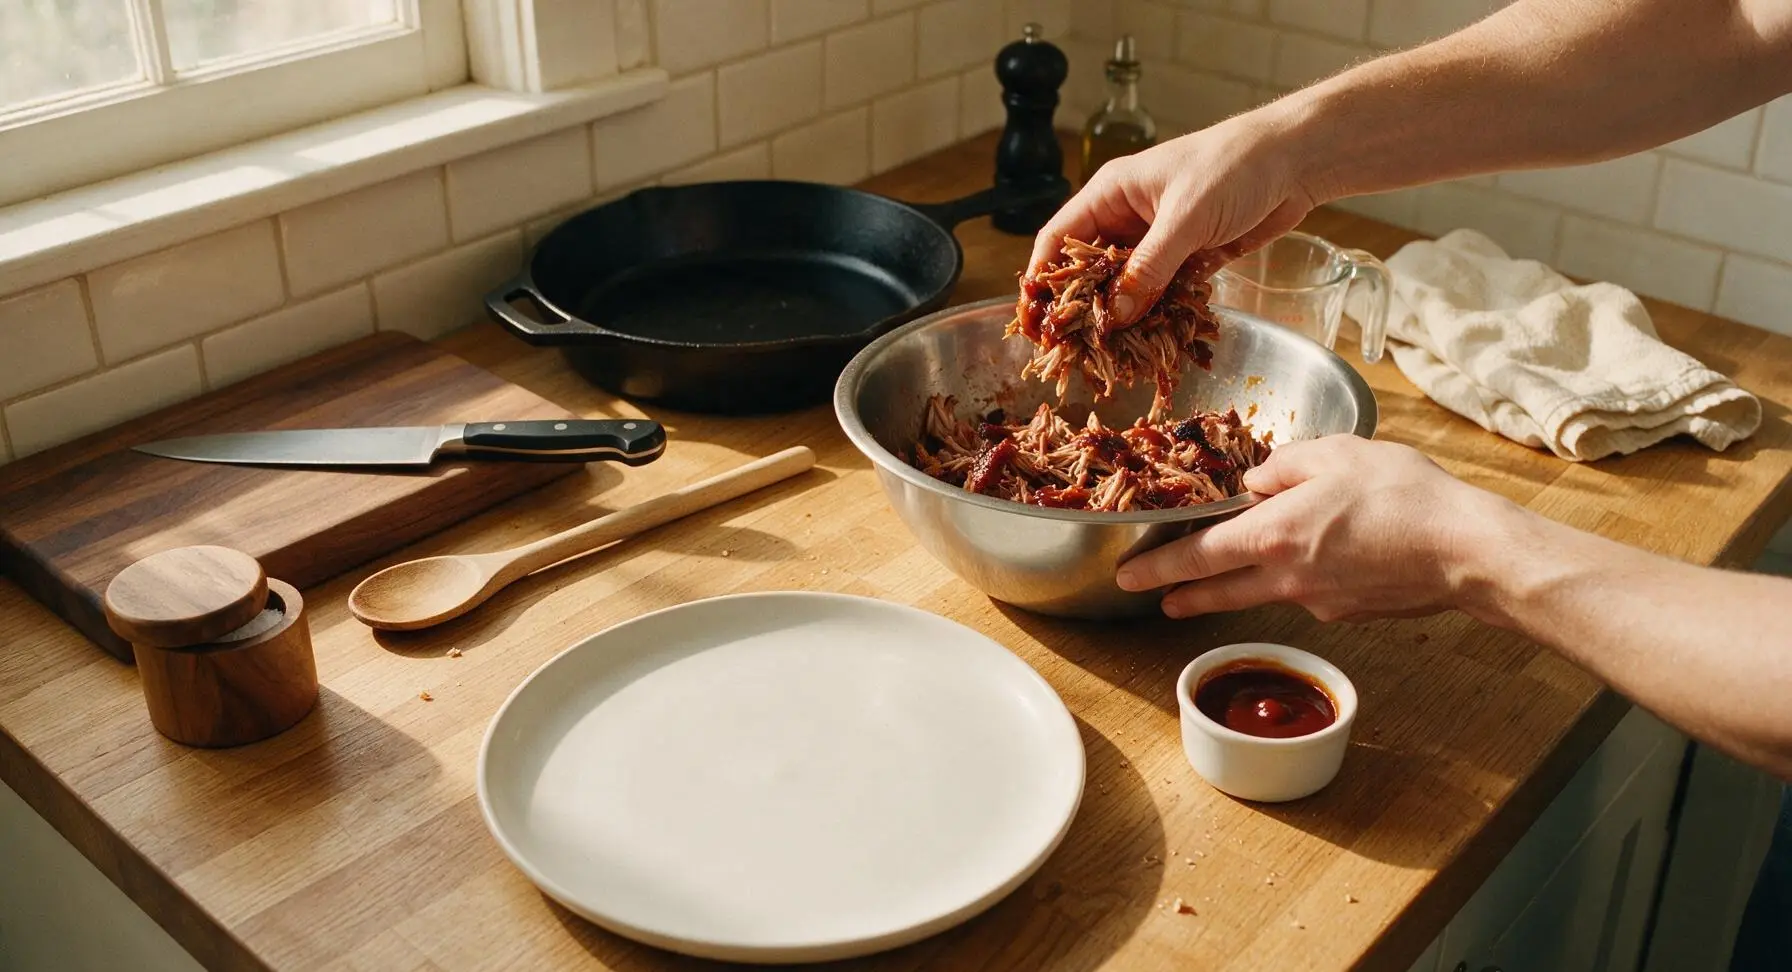
Step 8
step8:Toss and Sauce to Serve

Tips

1.Do not cook the pork at a temperature lower than 160°F for pulled pork: lower temperatures will leave connective tissue tough and chewy, while 165°F breaks down collagen into silky gelatin without turning the meat mushy, even over the full 18-hour cook time.
2.Patting the pork completely dry before searing is non-negotiable: residual surface moisture will cause the meat to steam instead of forming a crisp, flavorful bark, and may cause hot oil to splatter out of the skillet.
3.You can chill the fully cooked pork in its sealed vacuum bag in the refrigerator for up to 5 days before searing and pulling, making this an ideal make-ahead dish for parties—just reheat the bag in a 140°F water bath for 45 minutes before searing to crisp the bark.


✨ You May Also Like

BBQ & Grilling
🍜 United States

Tender, melt-in-your-mouth beef brisket with a crisp, spiced bark, slow-smoked to deep smoky perfection, the iconic centerpiece of Texas backyard barbecue.

⏱️ 12 hours BBQ & Grilling ★ 4.4
BBQ & Grilling
🍜 Korea

Tender, sweet-savory marinated beef short ribs, a beloved Korean BBQ staple with caramelized, slightly charred edges and deep umami flavor, perfect for outdoor summer gatherings.

⏱️ 4 hours 2BBQ & Grilling ★ 4.8
BBQ & Grilling
🍜 United States

Juicy grilled beef patties topped with smoky homemade chili, melted cheddar, and tangy pickles on toasted brioche buns for a hearty, flavor-packed handheld meal.

⏱️ 40 minuteBBQ & Grilling ★ 4.7
BBQ & Grilling
🍜 United States

A sweet, smoky, tangy BBQ sauce brightened with peak-season dark cherries, ideal for glazing grilled ribs, chicken, pork, or summer roasted veggies.

⏱️ 35 minuteBBQ & Grilling ★ 4.7
BBQ & Grilling
🍜 United States

Rich, smoky, slightly sweet homemade bourbon BBQ sauce with deep caramel notes, ideal for glazing grilled ribs, chicken, and burgers at cookouts.

⏱️ 25 minuteBBQ & Grilling ★ 4.7
BBQ & Grilling
🍜 United States

Iconic Alabama-style BBQ featuring tender hickory-smoked chicken slathered in tangy creamy white sauce, a beloved regional Southern cookout staple.

⏱️ 3 hoursBBQ & Grilling ★ 5

Sous Vide Pulled Pork:Frequently Asked Questions

1.What cut of pork works best for sous vide pulled pork? ▾
Boneless pork shoulder, often labeled Boston butt, is the ideal choice. It has the perfect marbling and tough connective tissue that breaks down slowly during low-temperature sous vide cooking to create that signature fall-apart, juicy texture. Lean cuts like pork loin will turn out dry and tough, even with long cook times, so stick to shoulder for authentic results.
2.What temperature should I set my sous vide for pulled pork? ▾
For classic tender, shreddable Southern-style pulled pork, set your sous vide circulator to 165°F. This temperature is hot enough to fully break down the tough collagen in pork shoulder into silky gelatin over time, without overcooking the lean meat to a mushy, stringy mess. For a firmer, sliceable texture, drop the temp to 155°F for a longer cook.
3.How long do I need to cook sous vide pulled pork? ▾
Plan for a minimum of 18 hours, and up to 24 hours, at 165°F. That long, steady low heat is what melts all the chewy connective tissue without drying out the meat. The beauty of sous vide is you can hold it at that temp for an extra 2-3 hours if your summer gathering plans shift, with zero negative impact on texture.
4.Do I need to season the pork before sealing it for sous vide? ▾
Absolutely! Coat the pork generously with kosher salt, coarsely ground black pepper, smoked paprika, and garlic powder before vacuum sealing. The long cook time lets those seasonings penetrate deep into the meat, rather than just sitting on the surface. Save a small portion of the spice mix to rub on before searing for an extra crisp bark.
5.Can I use a regular zip-top bag instead of a vacuum sealer for this recipe? ▾
Yes, you don’t need a fancy vacuum sealer for this recipe. Use a heavy-duty freezer-safe zip-top bag, lower the seasoned pork into the water slowly to push all air out through the top, then seal it right before the water line reaches the zipper. Just confirm no water gets inside, and the bag stays fully submerged during cooking.
6.How do I get that crispy, smoky bark if I’m cooking sous vide? ▾
That craveable crisp spice bark is totally achievable with sous vide—you just build it after the water bath. Pat the pork completely dry with paper towels, rub it with your reserved spice mix, then sear hard on a screaming hot cast iron skillet, high-heat grill, or under the broiler for 3-4 minutes per side before shredding.
7.Should I reserve the juices that collect in the sous vide bag? ▾
Definitely don’t pour those collected bag juices out! They’re packed with concentrated pork flavor and silky melted gelatin. Strain them, skim off a touch of excess fat if you prefer, then mix them right into your shredded pork along with tangy BBQ sauce to keep the meat extra moist, even if it sits out at a cookout.
8.Can I freeze sous vide pulled pork for later use? ▾
It freezes beautifully, which makes it perfect for meal prep or make-ahead party food. Let the shredded pork cool completely, portion it into airtight freezer bags with a little reserved cooking juice and BBQ sauce, and freeze for up to 3 months. Thaw in the fridge overnight, then reheat gently before serving.
9.Why is my sous vide pulled pork coming out mushy? ▾
Mushy pulled pork almost always comes from cooking at too high a temperature for too long, or using a lean cut without enough fat and connective tissue to hold its structure. Stick to 165°F for 18-24 hours with a well-marbled Boston butt, and you’ll get tender, shreddable meat instead of unpleasantly soft paste.
10.Do I need to add liquid smoke to get that classic smoky pulled pork flavor? ▾
You don’t need liquid smoke for that classic smoky flavor! The smoked paprika in the base spice rub adds a deep, warm smoky note without the artificial aftertaste some liquid smoke brings. If you love extra smokiness, finish the pork on a charcoal grill for 10 minutes after sous vide to get real wood-fired flavor.
11.How far in advance can I prep this pulled pork for a summer gathering? ▾
You can cook the pork in the sous vide bath 2-3 days before your summer gathering, then chill it (still sealed in its bag) in the fridge until party day. When you’re ready to serve, reheat it in a 140°F sous vide bath for 45 minutes, pat dry, sear to build crisp bark, shred, and toss with BBQ sauce.
12.How much pulled pork should I make per person for a party? ▾
Plan for about ⅓ to ½ pound of raw boneless pork shoulder per guest. The meat will shrink roughly 40% during cooking as fat renders out, so that portion gives each person 3-4 ounces of finished pulled pork, the perfect serving size when paired with buns, coleslaw, and other classic BBQ sides.
13.Can I cook the pork shoulder with the bone in instead of boneless? ▾
You absolutely can use a bone-in pork shoulder if that’s what you have on hand. Just add 2-3 extra hours of cook time to make sure the connective tissue right around the bone fully breaks down. Use a larger bag to fit the bone-in cut, and double check the entire piece stays fully submerged for even cooking.
14.What’s the best way to reheat leftover sous vide pulled pork? ▾
For the juiciest leftovers, reheat gently in a covered skillet over low heat with a splash of reserved cooking juice or extra spoonful of tangy BBQ sauce, stirring occasionally until warmed through. Skip microwaving on high, as that will make the edges tough and dry out the meat, even with all the rendered pork fat.

Comments (19)

2 days ago

OMG this pulled pork was an absolute game changer for our neighborhood potluck! I was so skeptical of the 18 hour cook time at first, but I set the sous vide before I went to bed Friday night and by Saturday afternoon it was fall-apart perfect. Tossed it with my go-to vinegar based sauce and people were coming back for thirds. My picky 7 year old even asked for seconds! Will absolutely be adding this to my regular rotation.

yesterday

Wait did you sear it after taking it out of the bag? I’ve had issues with sous vide pork being too mushy on the outside before

yesterday

So glad it was a hit at your potluck! A quick 2-3 minute sear per side on a ripping hot cast iron after sous vide is the perfect trick to get that crispy, caramelized outside without overcooking the meat. Hope that helps for next time!

3 days ago

Really solid recipe! I made a 4lb shoulder on Sunday to portion out for work lunches all week, and it held up perfectly in the fridge. The only reason I’m not giving 5 stars is I wish there was a note about how much rub to use for larger cuts — I ended up under-seasoning the first 2lb and had to add extra sauce to compensate. Otherwise SO good, way better than the crockpot pulled pork I used to make.

2 days ago

Great feedback, Mitch! We’ll add a note with rub measurements for larger cuts in the next recipe update. Glad it worked out for your meal prep — that’s one of our favorite ways to use this recipe too!

1 week ago

Made this for game day with the guys and it was gone in 20 minutes flat. Used it for sliders with coleslaw on top, chef’s kiss. Zero complaints, will make again.

5 days ago

This was my first time ever using my new sous vide machine and I was so nervous I’d mess it up! The instructions were super straightforward though, even for a medium difficulty recipe. The pork came out so juicy I couldn’t believe it — I was convinced I’d overcooked it when I saw how easily it shredded. My roommate said it’s better than the BBQ place down the street!

3 days ago

Same! I got my sous vide for Christmas and was too scared to try a big cut until this recipe, it’s totally foolproof even for beginners

1 week ago

Flavor was great, but I found the cook time a little misleading? My 3lb pork shoulder was still a little tough around the edges at 18 hours, so I had to leave it in for an extra 2 hours before it shredded easily. Maybe I cut my roast too big? Not sure, but once it was done it tasted amazing, just took longer than expected.

5 days ago

Oh I had that happen too! Turns out my circulator was running 5 degrees lower than the readout said, I calibrated it and my next batch was perfect right at 18 hours

3 days ago

Sorry to hear the cook time was off for you! A lot of factors can impact this, including the exact size/shape of your roast and how cold it is when it goes into the water bath. We recommend checking for fork-tenderness starting at 17 hours if you have a particularly thick cut, and adding time as needed. Calibrating your circulator regularly like Hannah mentioned is also a great tip!

2 weeks ago

I’ve made a lot of pulled pork recipes over the years for family dinners and church potlucks, and this is hands down the most consistent one I’ve ever tried. No more dried out edges, no more guessing if it’s done enough, every bite is perfectly juicy. I smoked the rub for 10 minutes before applying it for an extra layer of flavor and it was *chef’s kiss*.

yesterday

So happy I found this recipe! I swapped the regular soy sauce in the rub for coconut aminos to keep it gluten free, and it turned out incredible. Served it over roasted sweet potatoes for a weeknight dinner and my husband asked when we can have it again. Worth every minute of wait time, even if it felt like forever!

2 hours ago

Love that coconut aminos swap! That’s such a great tip for folks with gluten sensitivities, we’ll be sure to mention that as a variation in the recipe notes. So glad you and your husband enjoyed it!

3 days ago

This recipe is so worth the long cook time! I bought a pork shoulder on sale for $1.99/lb and got 8 meals out of it, which is such a win for my grocery budget. Quick question though — has anyone frozen the finished pulled pork? I have a ton leftover and don’t want it to go bad before I can eat it.

2 days ago

I freeze mine all the time! Portion it into freezer bags with a little extra sauce, squeeze all the air out, and it stays good for 3-4 months. Tastes just as good when you reheat it low and slow on the stove

2 days ago

Frank’s tip is spot on! Frozen pulled pork from this recipe reheats beautifully — we recommend thawing it in the fridge overnight then warming it in a covered pan over low heat with a splash of apple juice to keep it moist. Perfect for stocking the freezer for busy weeks!

1 week ago

Brought this to our college football tailgate last weekend and people were asking me for the recipe before we even hit halftime. I mixed a little bourbon into the BBQ sauce I tossed it with and it was insane. 10/10, no notes. Best pulled pork I’ve ever made at home.

30 minutes ago

Wait why is this listed as medium difficulty? I’m literally the worst cook I know and I pulled this off without a single issue! Set it, forgot about it, seared it for a few minutes, shredded it, done. SO good, I put it on tacos for dinner tonight and my roommate thought I ordered takeout.

5 minutes ago

Ha, we list it as medium mostly because of the long cook time and equipment requirement, but it really is super hands-off! Love the taco idea, that’s one of our favorite non-traditional ways to serve this pulled pork too

5 days ago

I was really excited for this but I used pork loin instead of shoulder by accident and it came out so dry, total bummer. Wasted like 3lb of meat because I didn’t read the recipe close enough. Bummed because everyone says it’s amazing.

3 days ago

Oh no, that’s such an easy mix up! Pork loin is way too lean for this long cook time, shoulder has all the fat that keeps it juicy. Give it another shot with the right cut, I promise it’s worth it

2 days ago

We’re so sorry that happened! Pat is totally right — pork shoulder’s marbled fat is what makes this recipe so juicy after the long sous vide cook. We’ll add a big note at the top of the recipe emphasizing which cut to use to help other folks avoid the same mistake. If you give it another go with shoulder, we think you’ll love it!

2 weeks ago

I added an extra tablespoon of smoked paprika and a teaspoon of cayenne to the rub for a little extra heat, and it was perfect! Not too spicy, just enough kick to keep people coming back for more. Made this for my dad’s birthday dinner and he said it’s better than the BBQ he gets on his annual trip to Memphis. High praise!

1 week ago

The cayenne addition sounds chef’s kiss! I’m definitely stealing that for my next batch, my family loves a little heat with their BBQ

2 days ago

Really great flavor, just wish the cook time was shorter! I get that sous vide takes time, but 18 hours is so hard to plan for when you work full time. I ended up starting it at 6pm the night before and it was done right at noon the next day, which worked for a Saturday lunch, but I can’t make this on a regular school night. Taste was 10/10 though!

just now

Just finished shredding this and had to pop in to leave a review before I even served it. The smell alone is enough to make this a 5 star recipe, I’ve been hovering over the cutting board picking at pieces for 10 minutes. Can’t wait to serve these sliders to my friends when they get here for the fight tonight!

just now

Love that enthusiasm! We won’t tell if you sneak a few more bites before your friends show up — we do the same thing every time we make this. Hope everyone loves it!

3 days ago

Flavor was incredible, but I was a little weirded out about cooking plastic bags in 160 degree water for 18 hours. I used a silicone sous vide bag instead of a regular ziplock and it worked great, just wanted to share for anyone else who has the same concern. Would be nice if the recipe mentioned silicone bag alternatives!

2 days ago

Thanks for the tip! I’ve been nervous about plastic leaching too, I’ll grab a silicone bag for my first batch next weekend

yesterday

Great call using a silicone bag! We always recommend BPA-free freezer bags or reusable silicone bags for this recipe, and we’ll add that note to the equipment section to make it clearer for folks who prefer to avoid single use plastic. Glad it turned out well for you!

1 week ago

I was a diehard smoked pulled pork guy for years, swore sous vide could never match the texture, but my wife got me a circulator for our anniversary so I gave this a shot. Color me impressed! I finished it on the smoker for 45 minutes after the sous vide bath to get that smoke ring and wood flavor, and it was the best of both worlds. Juiciest pork I’ve ever had, with that classic smoke taste. I’m a convert.

5 minutes ago

Made this in my tiny apartment kitchen with my cheap Amazon sous vide and it turned out perfect! I don’t have a cast iron so I seared it in my non-stick pan on the highest heat and it still got that nice crispy crust. Served it with mac and cheese for a little house warming party and all my roommates were obsessed. So worth the wait, even if my whole apartment smelled like pork for 2 days lol.

just now

Omg the smell is so real! I made this last month and my neighbors texted me asking what I was cooking because it smelled so good in the hallway

2 weeks ago

This is my go-to pulled pork recipe now. I don’t even bother with other methods anymore. It comes out exactly the same every single time, no guesswork, no burnt bits, no dry spots. Perfect for when I’m hosting because I don’t have to babysit it all day. 10/10.

5 days ago

Used a bone-in pork shoulder for this instead of boneless because that’s what my grocery store had, and it came out amazing! The bone slid right out when it was done, no effort at all. I saved the bone to make pork stock later, zero waste. Such a great recipe, my whole extended family loved it at our Sunday dinner.

3 days ago

Great idea saving the bone! I never thought to do that, I usually just toss it. Next time I make this I’ll grab a bone-in roast just for the stock

2 days ago

Bone-in shoulder works so well for this recipe — we’re glad it turned out for you! That pork stock from the bone is such a smart bonus, it adds so much flavor to beans and soups. Thanks for sharing that tip!



