
squash mac and cheese

title 1
squash mac and cheese
⏱️ cook time 45 minutes
🍽️ servings 6
⚡ Difficulty easy

intro

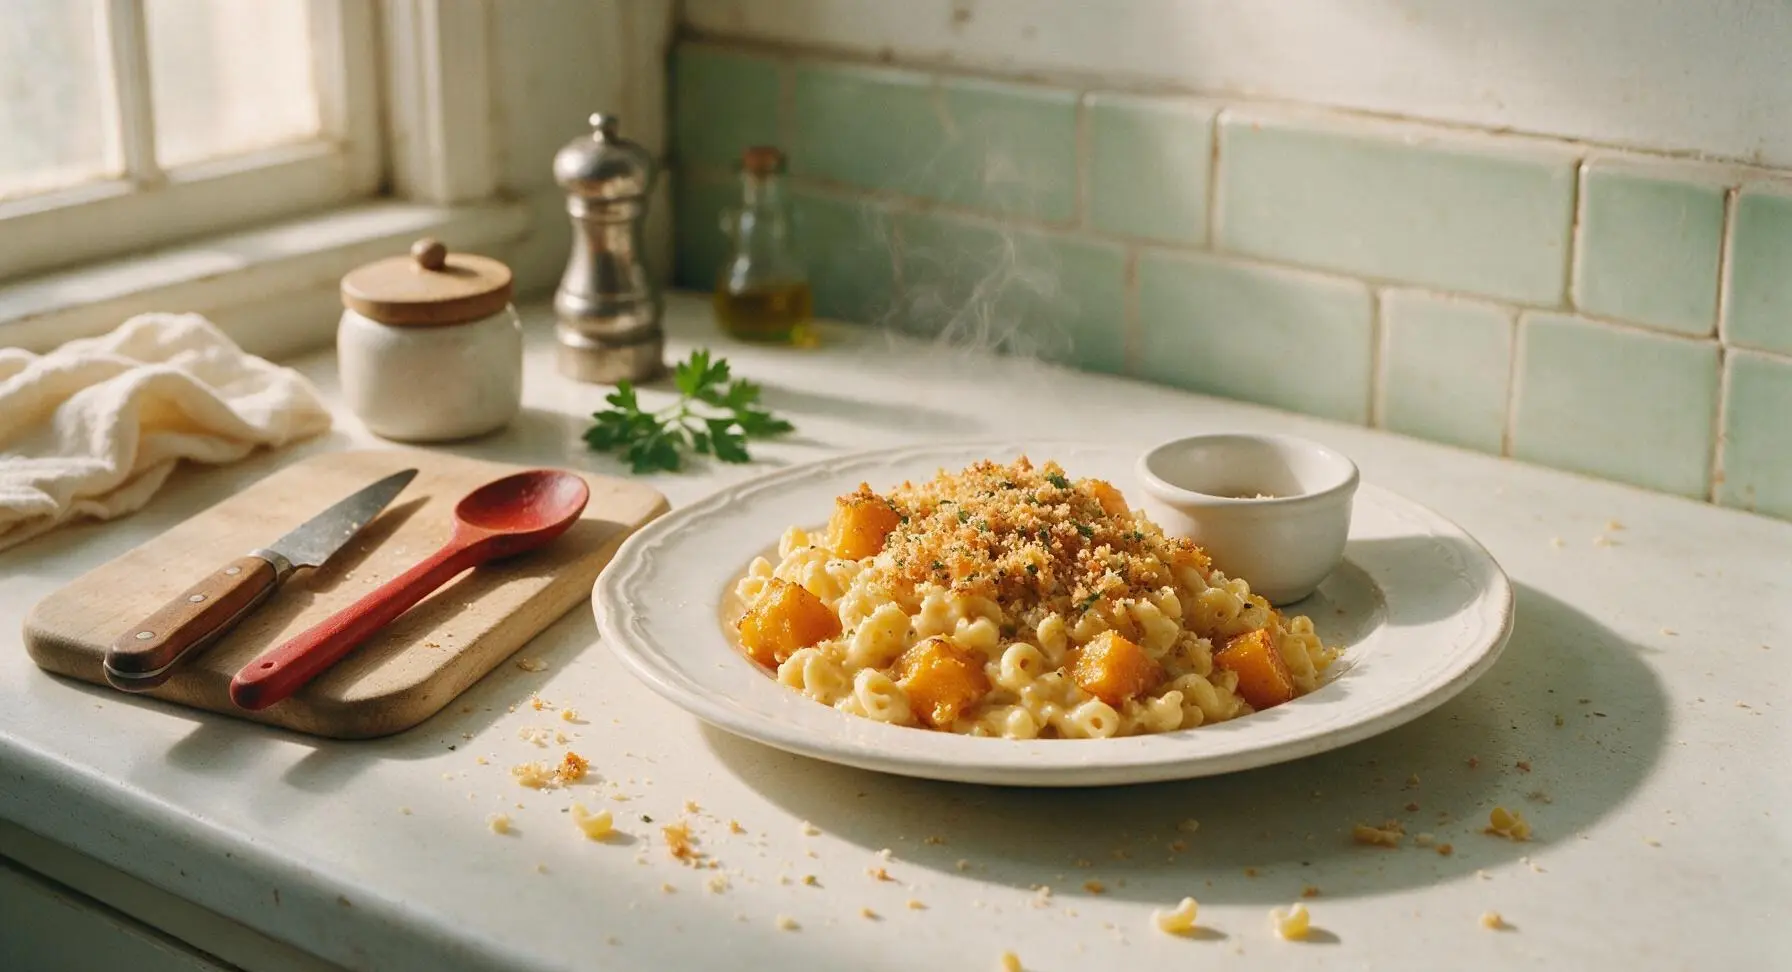
Creamy, veggie-packed twist on classic baked mac and cheese, with roasted butternut squash adding gentle sweetness and a golden, crispy sage-panko top.

Ingredients
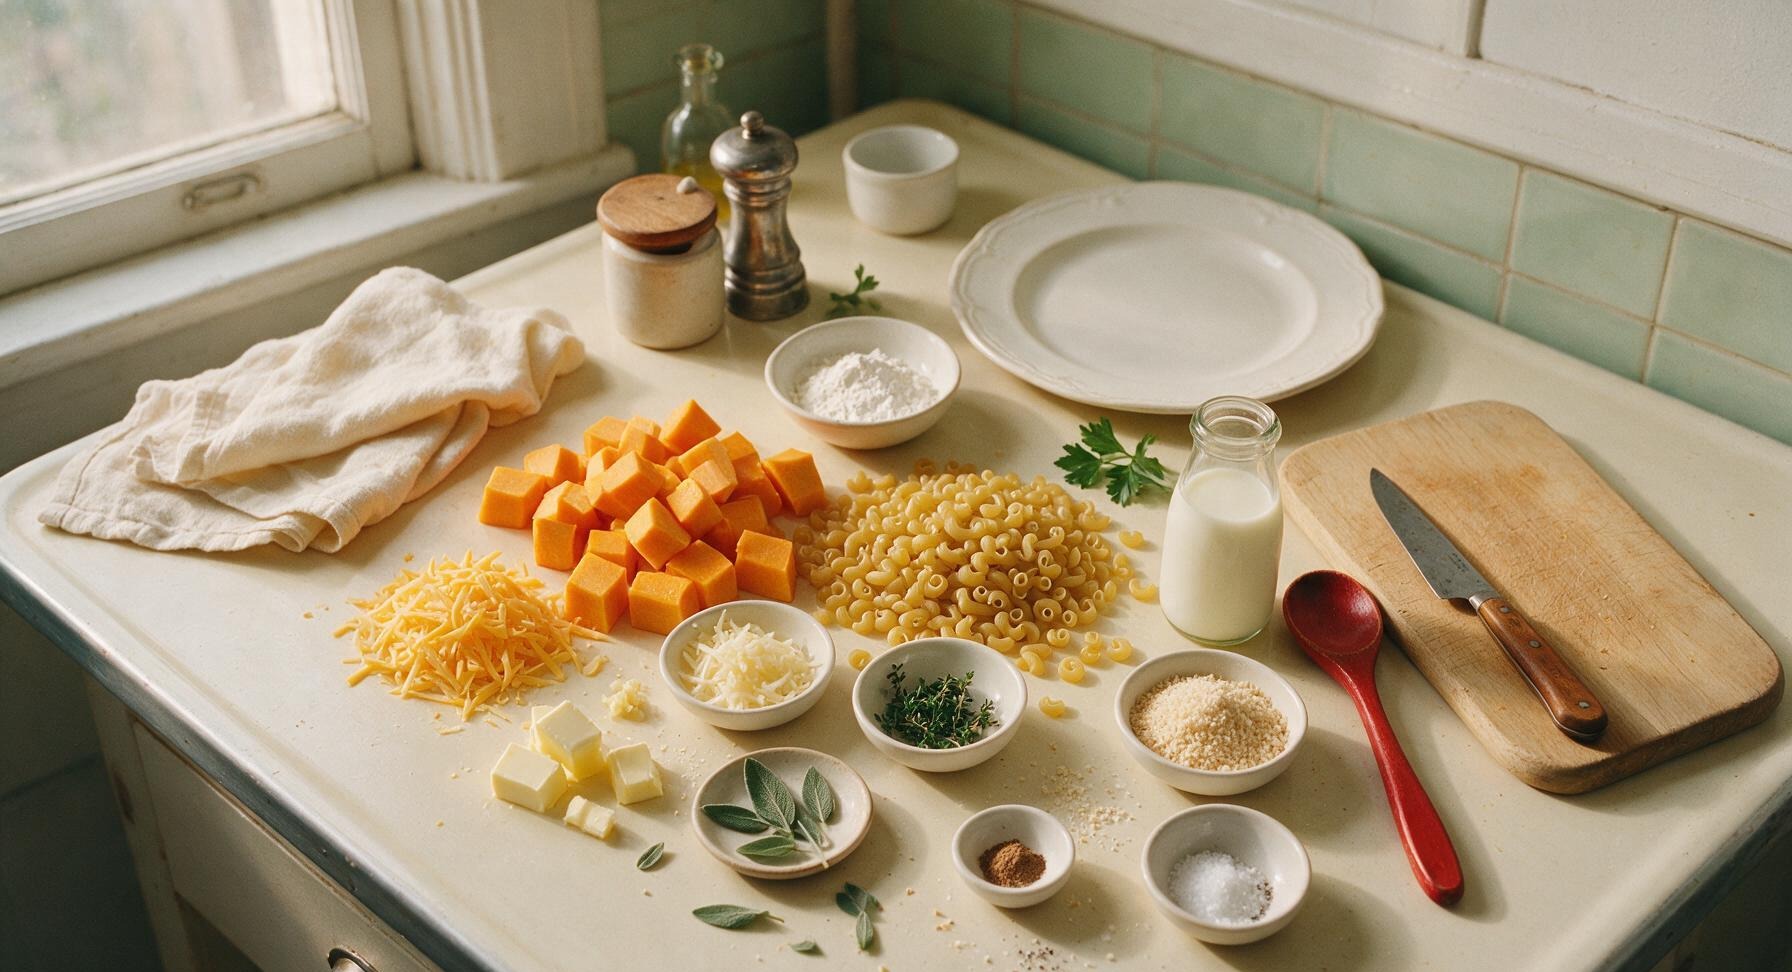
Butternut squash 450g (1 small, peeled and cubed)
Dry elbow macaroni 225g (8oz)
Sharp cheddar cheese 170g (1.5 cups, shredded)
Gruyère cheese 85g (3/4 cup, shredded)
Whole milk 480ml (2 cups)
Unsalted butter 4 tbsp (56g, divided)
All-purpose flour 2 tbsp (16g)
Garlic cloves 2, minced
Fresh sage 8 leaves, divided
Fresh thyme 1 tsp, chopped
Panko breadcrumbs 1/3 cup (30g)
Ground nutmeg 1/4 tsp
Kosher salt 1 tsp, plus extra for pasta water
Freshly ground black pepper 1/2 tsp

Steps

1

Roast Butternut Squash

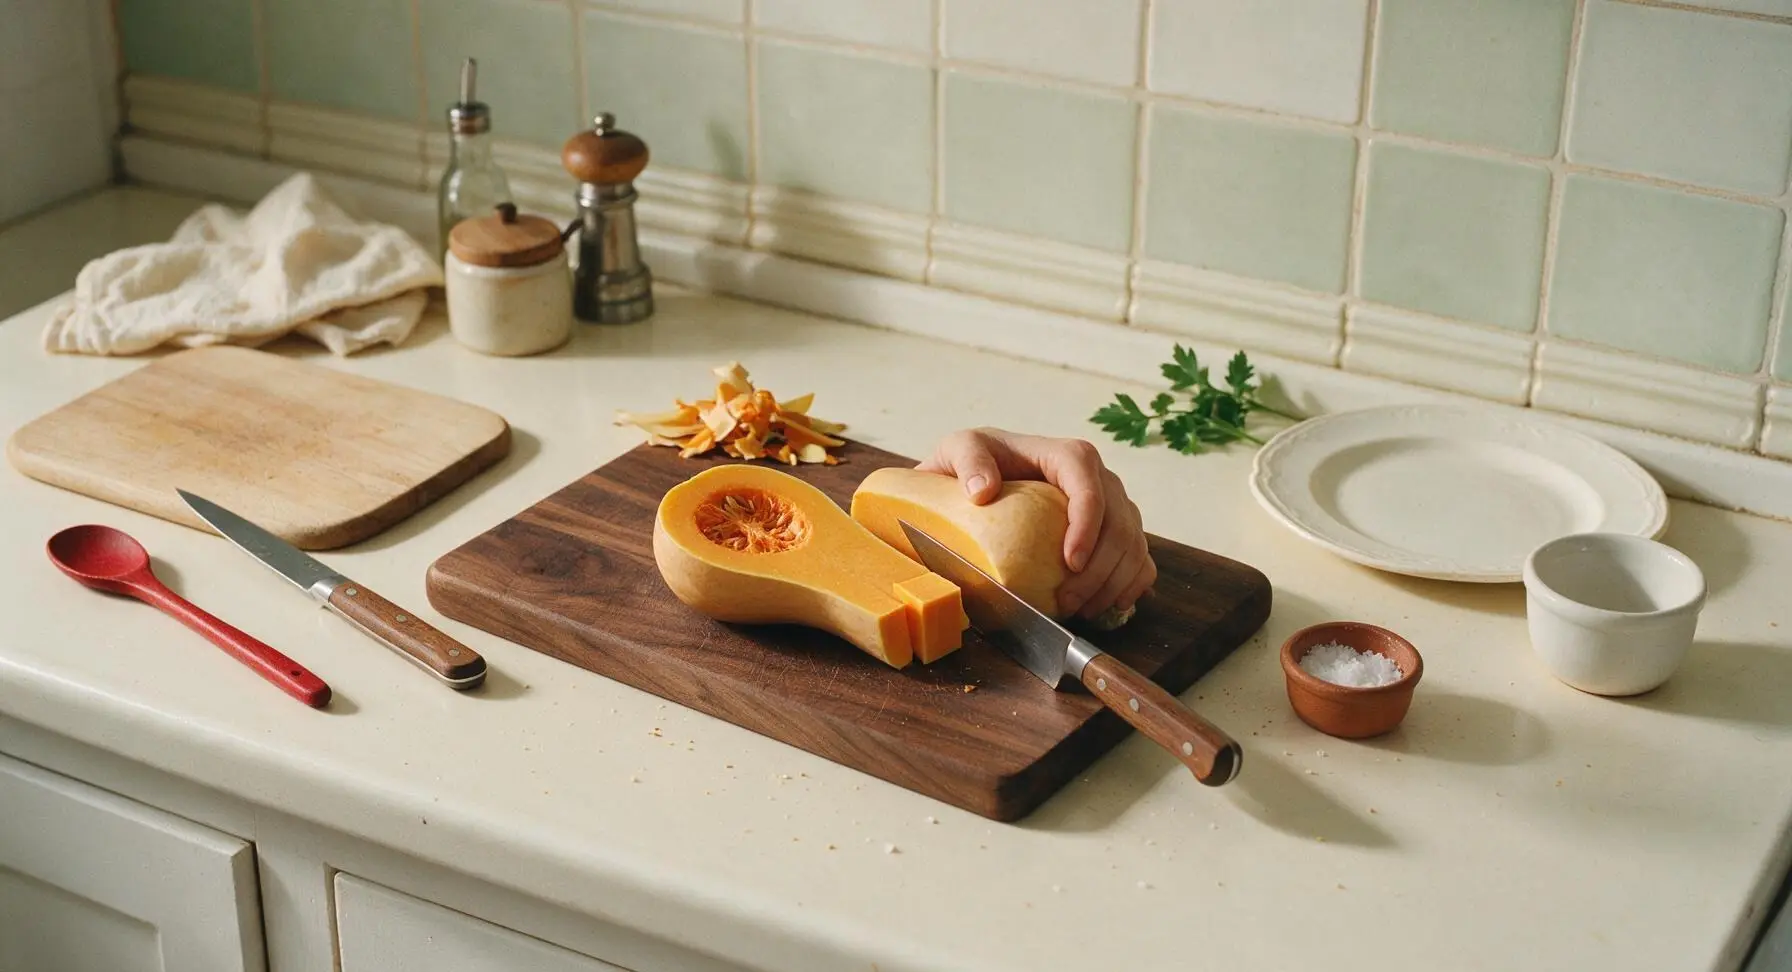
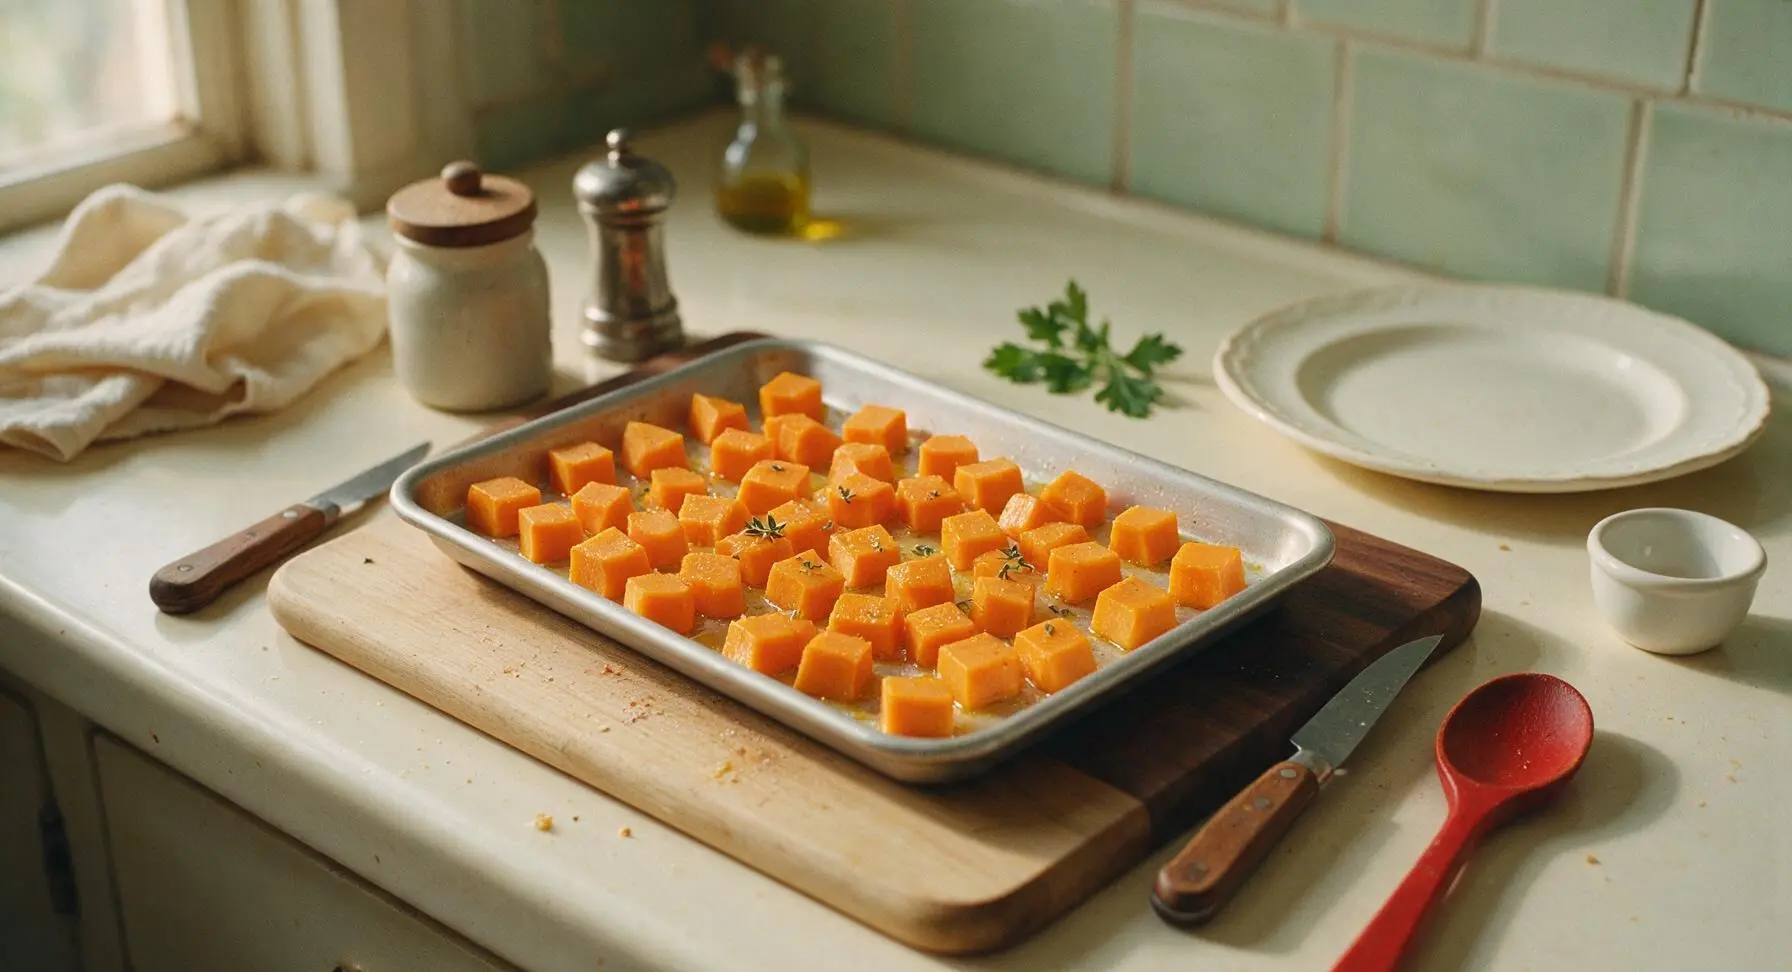
Preheat oven to 200C (400F). Place the dark maple cutting board at center counter, use the chef knife to peel the butternut squash, scoop out seeds, and cut into 2cm (3/4-inch) uniform cubes. Toss cubes with 1 tablespoon melted butter, 1/4 teaspoon kosher salt, and chopped fresh thyme, spread in a single layer on the small rimmed aluminum baking sheet. Roast for 20-25 minutes until fork-tender and lightly caramelized at the edges.
Step 1
step1:Roast Butternut Squash
Step 1
step1:Roast Butternut Squash
2

Boil Pasta Al Dente

While squash roasts, fill the 3-quart stainless steel saucepan 3/4 full of heavily salted water (it should taste like sea water), bring to a rolling boil over high heat. Add dry elbow macaroni, stir once with the maple wooden spatula to prevent sticking, and cook 2 minutes less than the package directions for al dente (pasta will finish cooking in the oven). Reserve 1/4 cup pasta water, then drain pasta in the stainless steel colander at the right edge of the counter, and set aside.
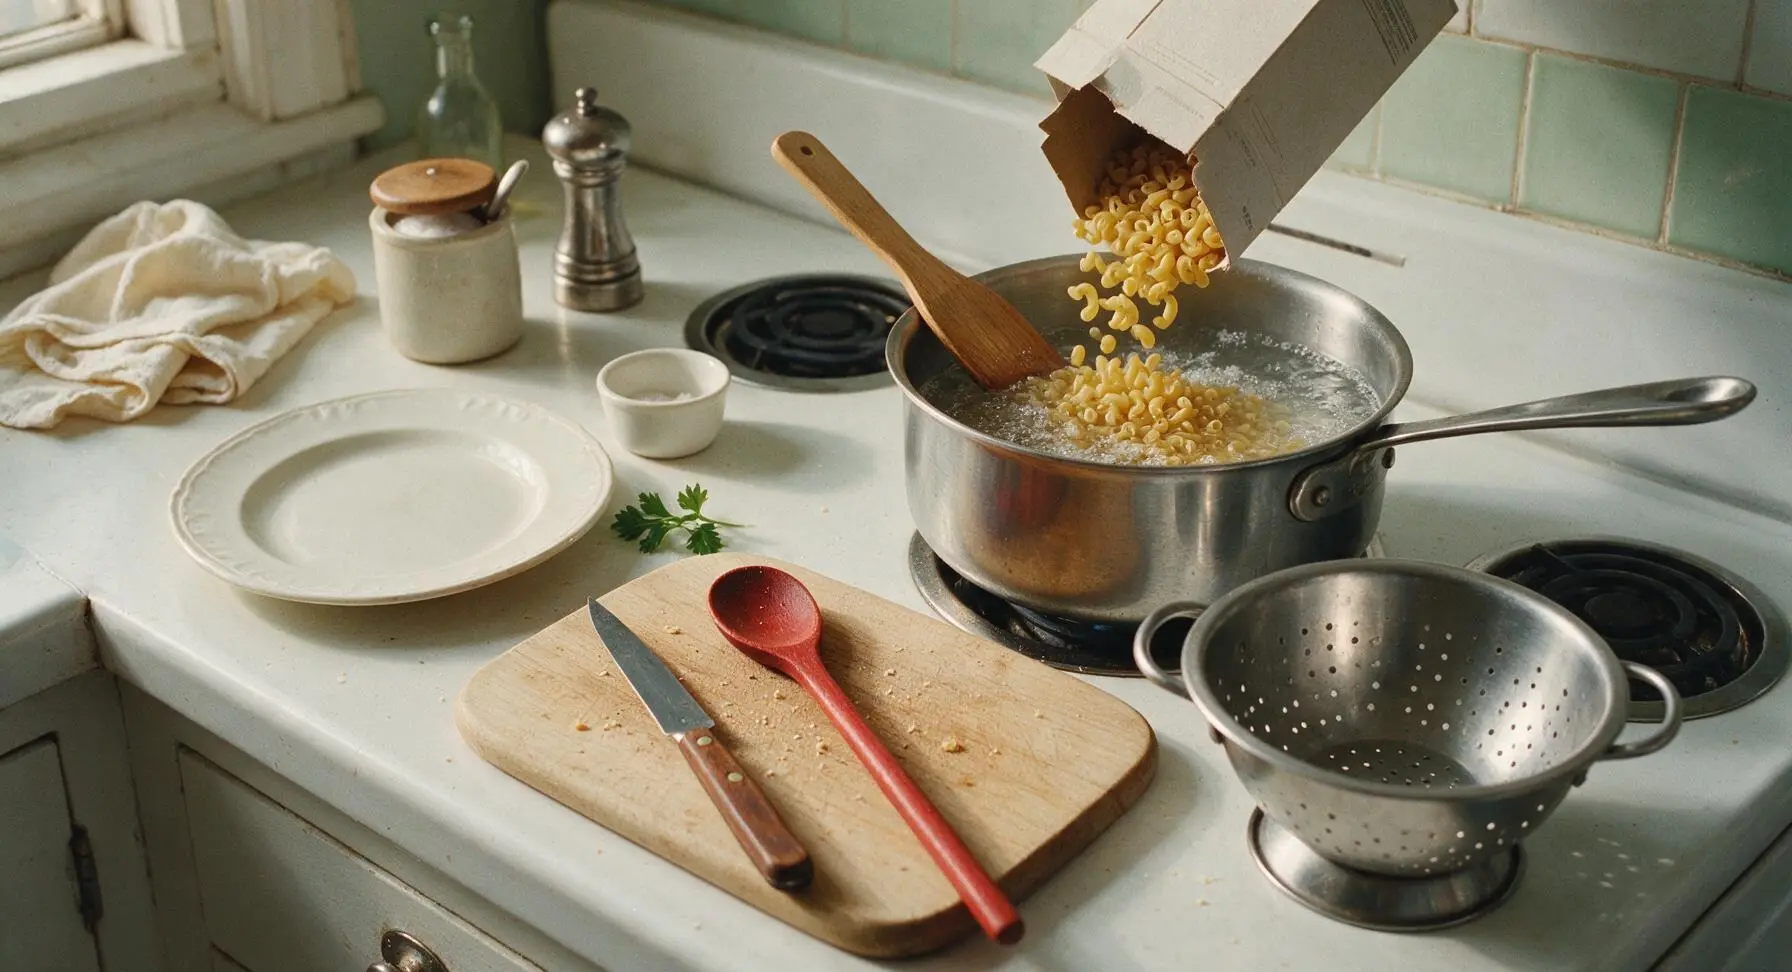
Step 2
step2:Boil Pasta Al Dente
3

Shred Cheese Blend

While pasta cooks, place the stainless steel box grater on the right side of the maple cutting board. Shred sharp cheddar and Gruyère cheese into a loose pile, combining the two cheeses evenly. Set aside 2 tablespoons of the shredded cheese mix to top the bake later.
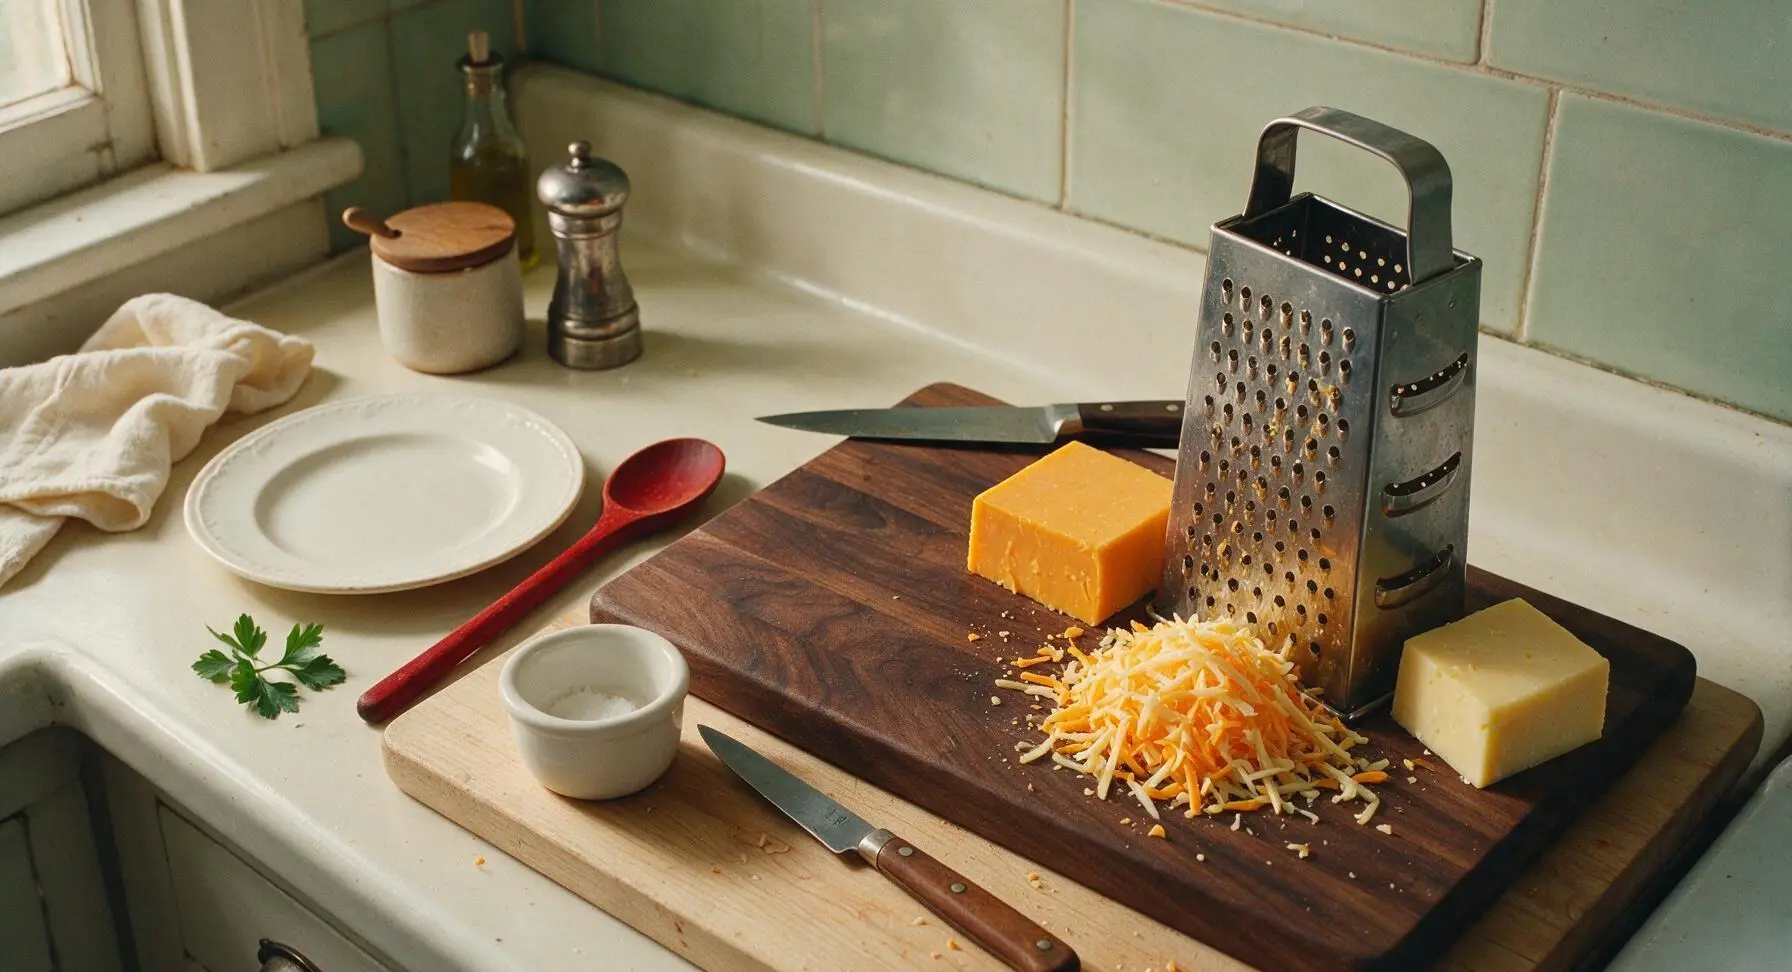
Step 3
step3:Shred Cheese Blend
4

Make Cheese Sauce Base

In the same 3-quart stainless steel saucepan used for pasta, melt 2 tablespoons of butter over medium heat. Add minced garlic, sauté for 30 seconds until fragrant (do not let it brown). Whisk in all-purpose flour, stirring constantly for 1 minute to form a smooth, golden roux that smells nutty. Slowly pour in whole milk, whisking constantly to avoid lumps, and cook for 3-4 minutes until the sauce thickens enough to coat the back of a spoon (when you run a finger through the sauce on the spoon, it leaves a clear line). Stir in ground nutmeg, remaining 3/4 teaspoon salt, and black pepper.
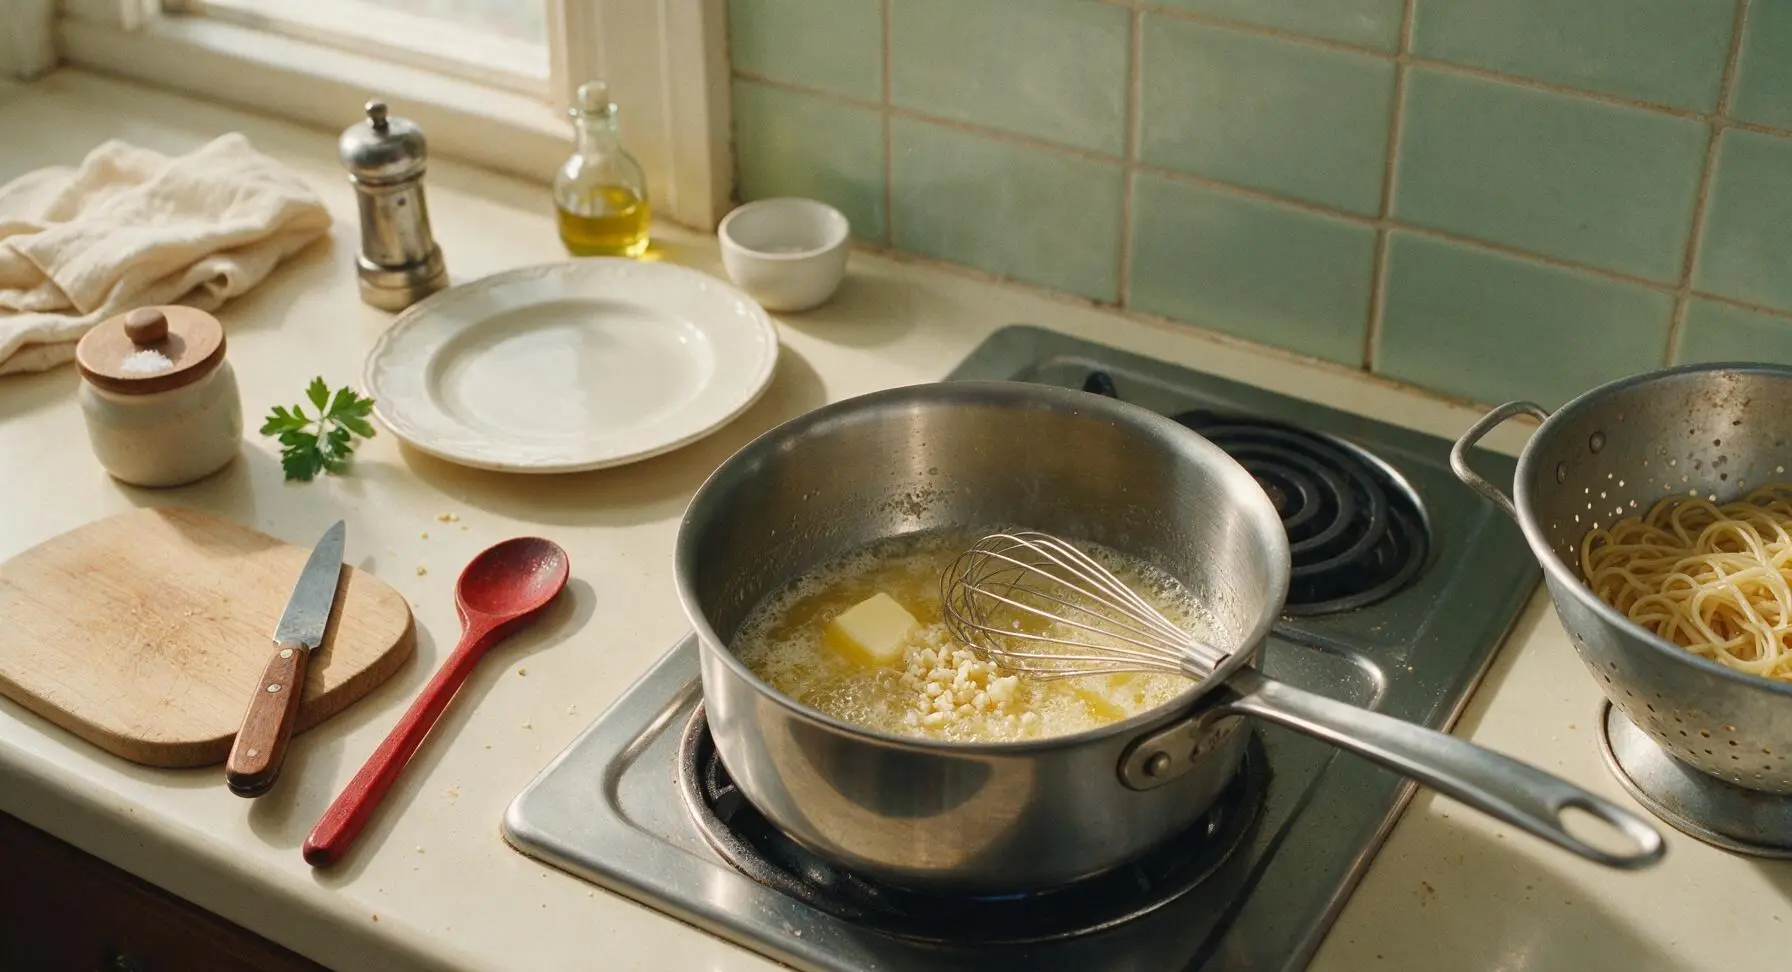
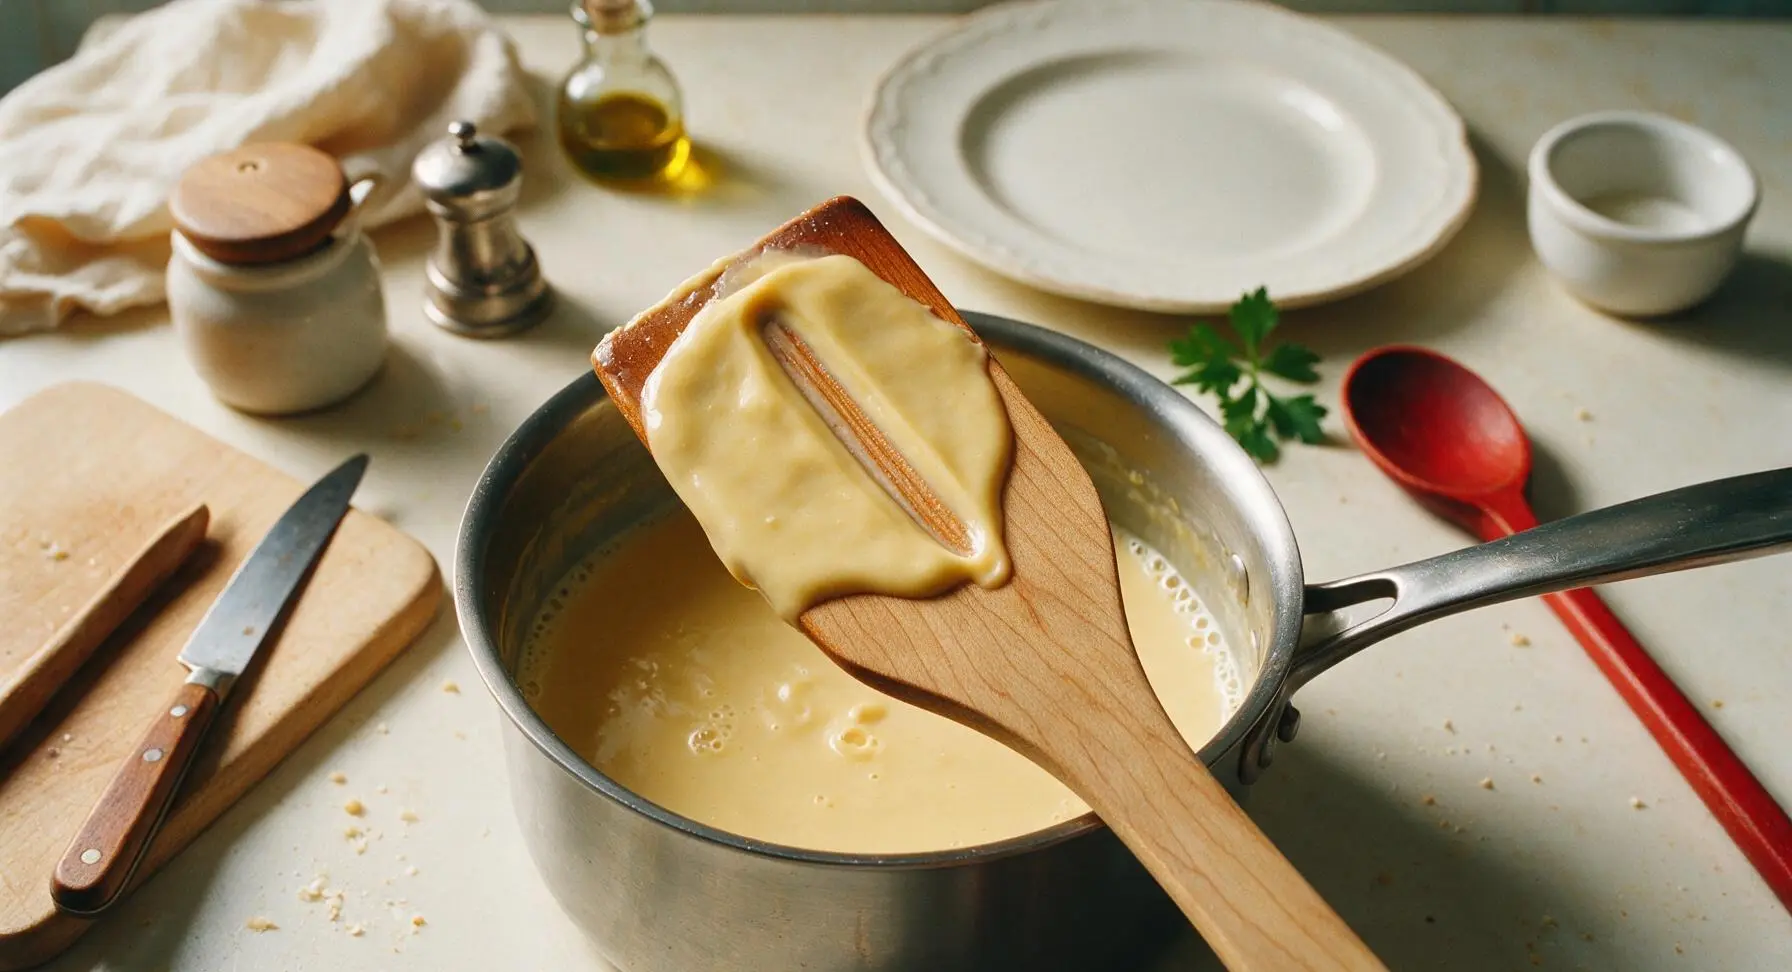
Step 4
step4:Make Cheese Sauce Base
Step 4
step4:Make Cheese Sauce Base
5

Blend Squash Into Sauce

Once squash is done roasting, transfer 3/4 of the roasted cubes to the saucepan with the white sauce, use the immersion blender to blend until completely smooth, creating a pale orange, velvety base. Stir in the shredded cheese blend (reserving the 2 tablespoons for topping) until fully melted and smooth; if sauce feels too thick, stir in a splash of the reserved pasta water to reach a creamy, pourable consistency. Fold in the remaining whole roasted squash cubes for texture.
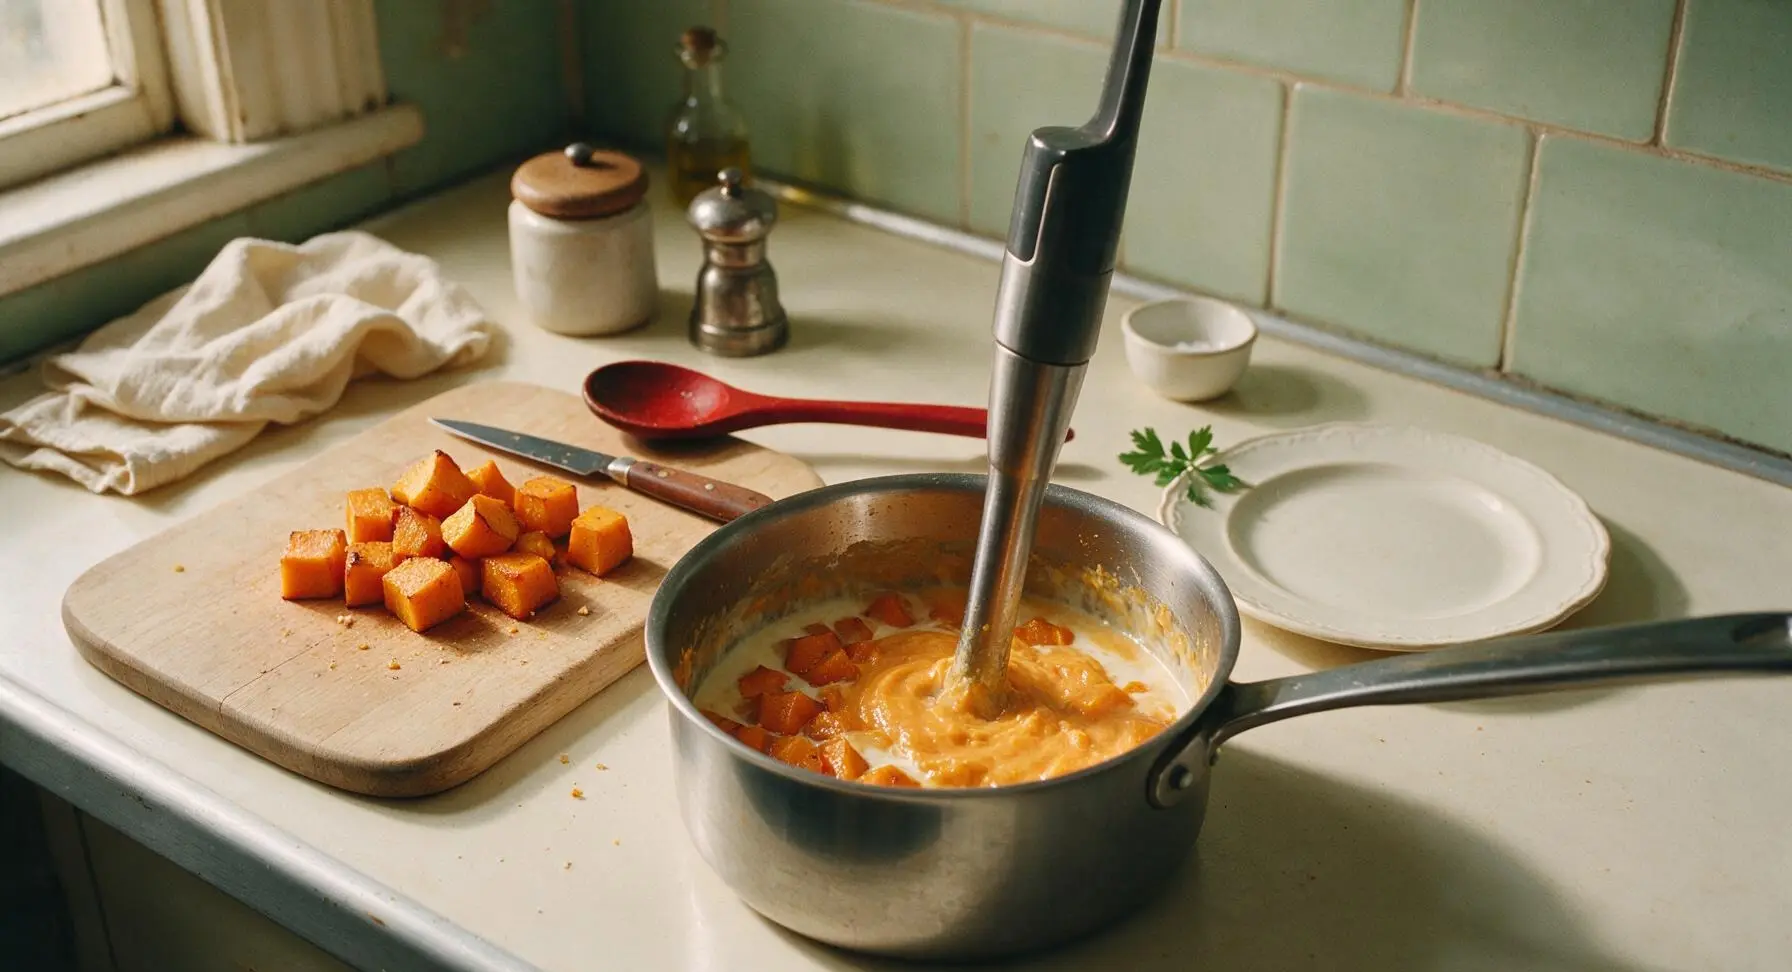
Step 5
step5:Blend Squash Into Sauce
6

Combine Pasta and Sauce

Add the drained elbow macaroni to the saucepan with the squash cheese sauce, use the maple wooden spatula to stir gently until every pasta noodle is evenly coated in sauce, taking care not to mash the whole squash cubes. The mixture should be thick but creamy, with no dry pasta patches visible.
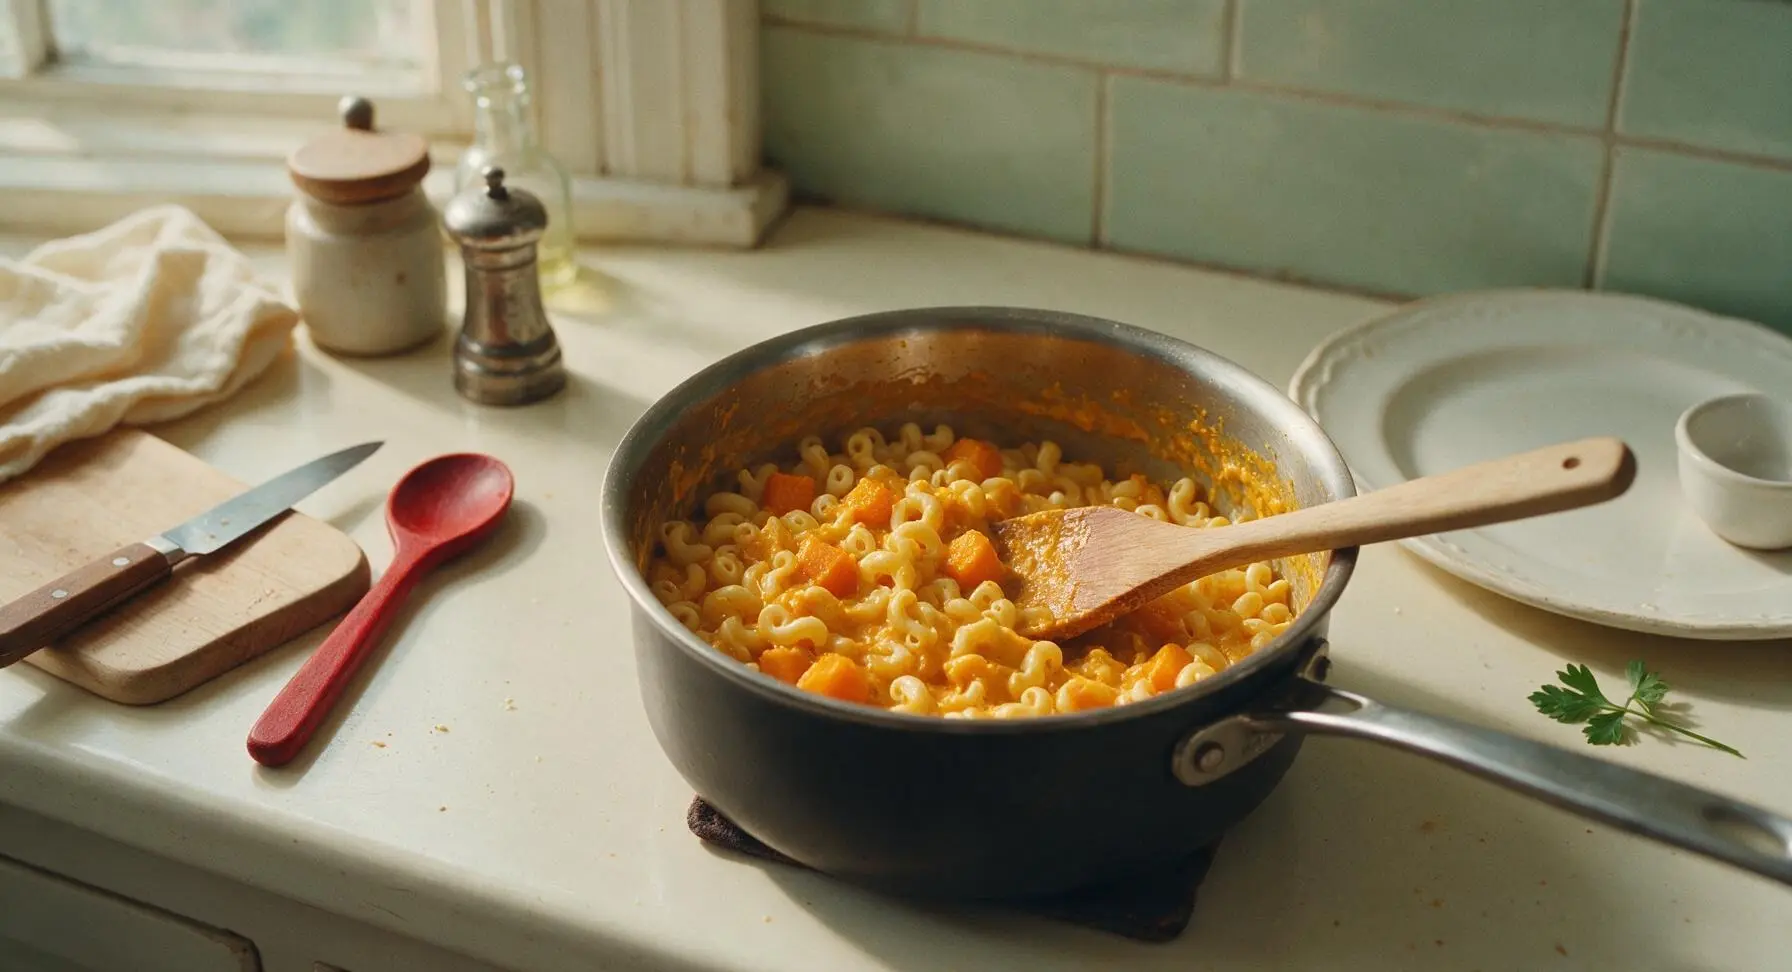
Step 6
step6:Combine Pasta and Sauce
7

Add Crispy Topping

Pour the sauced pasta mixture into the 9x13 inch matte white ceramic baking dish, spread into an even layer. Melt the remaining 1 tablespoon of butter, toss with panko breadcrumbs, the reserved 2 tablespoons of shredded cheese, and 4 chopped sage leaves. Sprinkle this topping evenly over the entire surface of the mac and cheese. Tuck the remaining whole sage leaves on top of the breadcrumb layer, where they will crisp as it bakes.
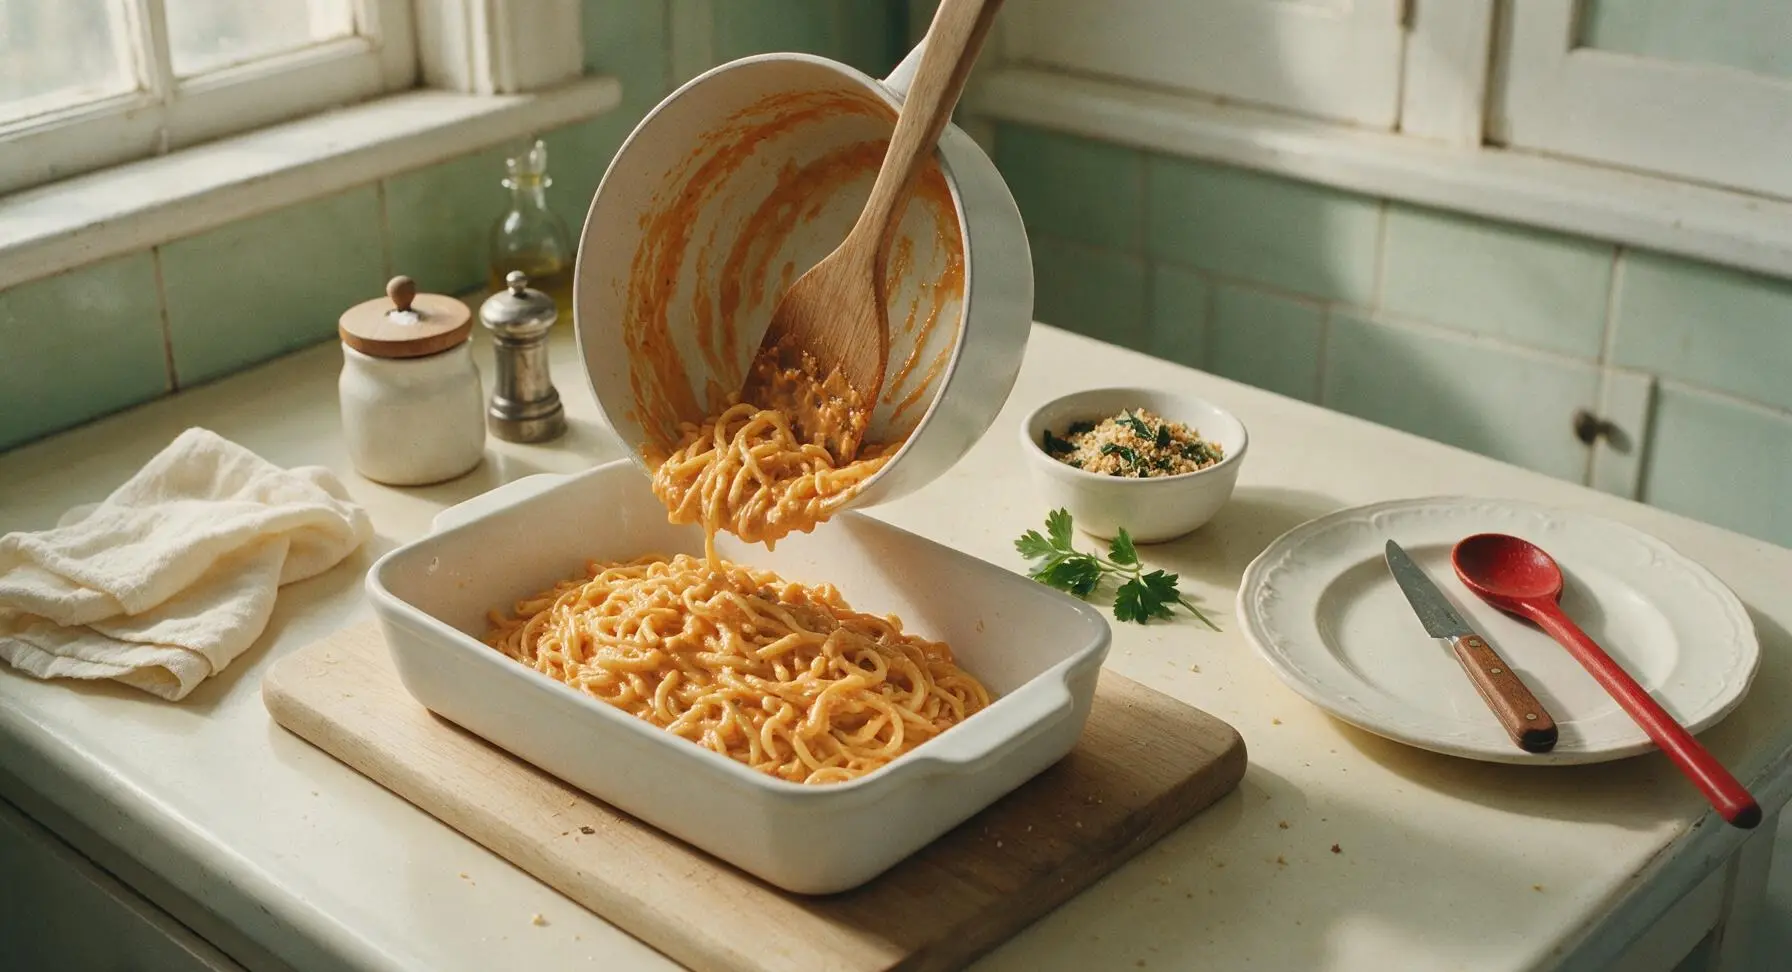
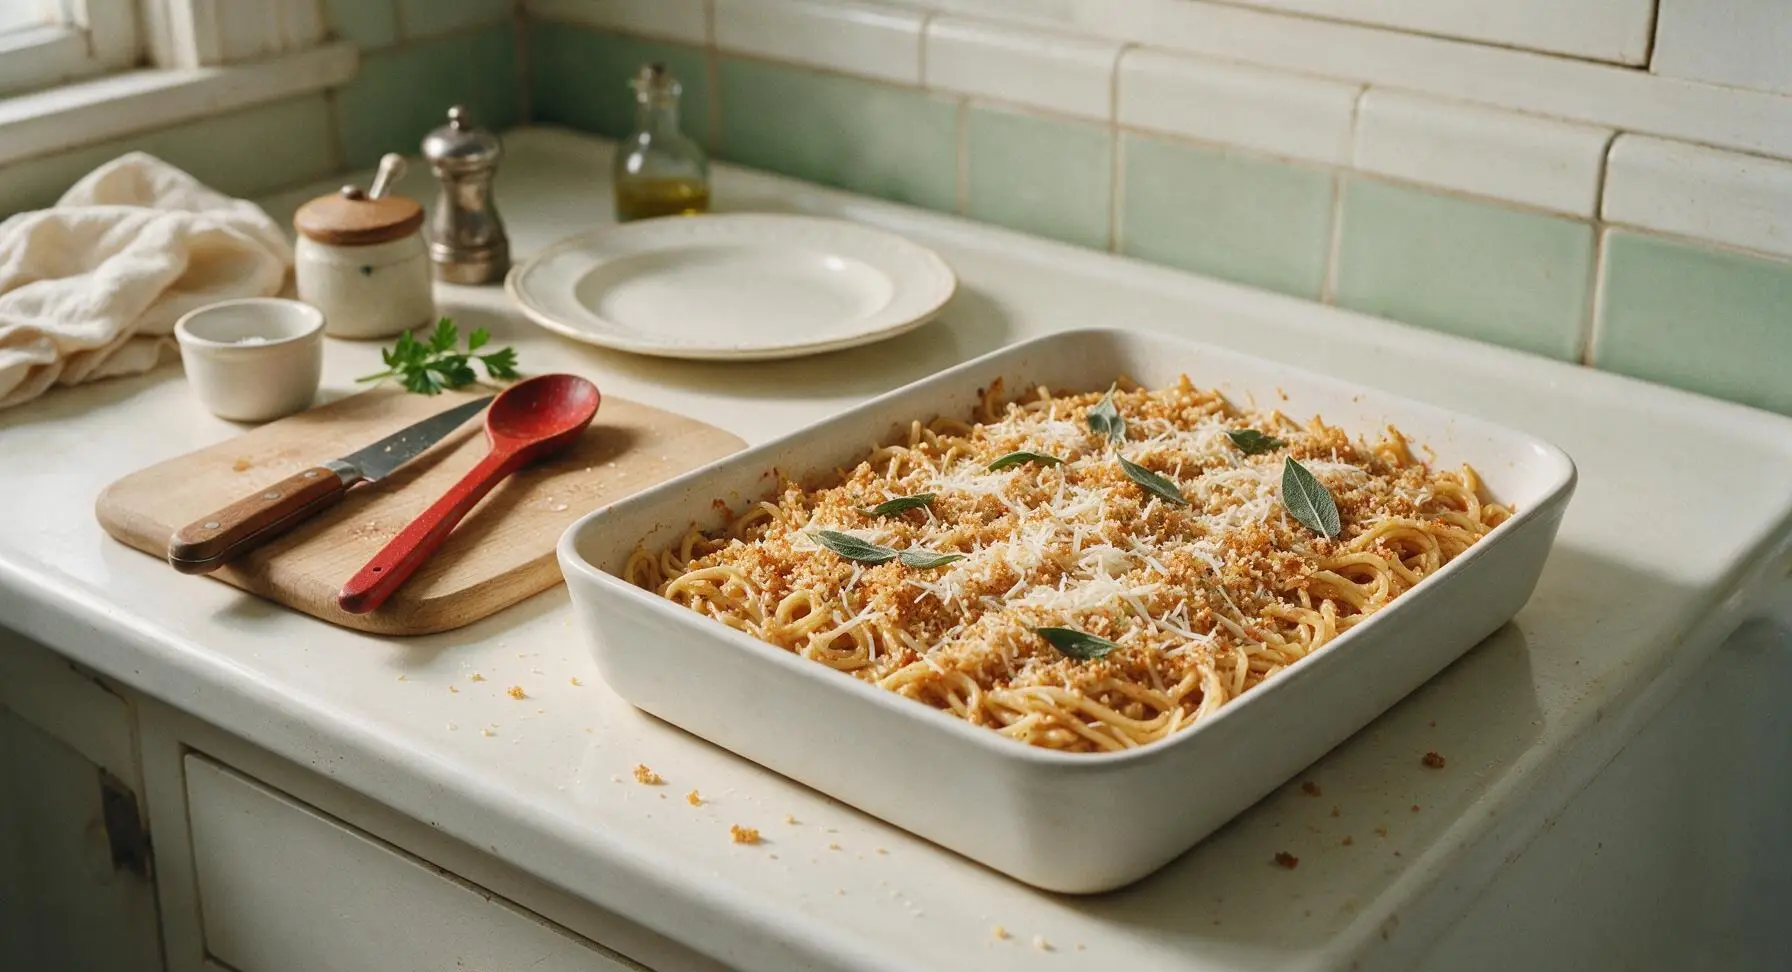
Step 7
step7:Add Crispy Topping
Step 7
step7:Add Crispy Topping
8

Bake Until Bubbly

Place the baking dish in the 200C (400F) oven, bake for 20-22 minutes until the sauce is bubbling around the edges, and the panko topping is deep golden and crispy. Let rest 5 minutes before serving to allow the sauce to set.
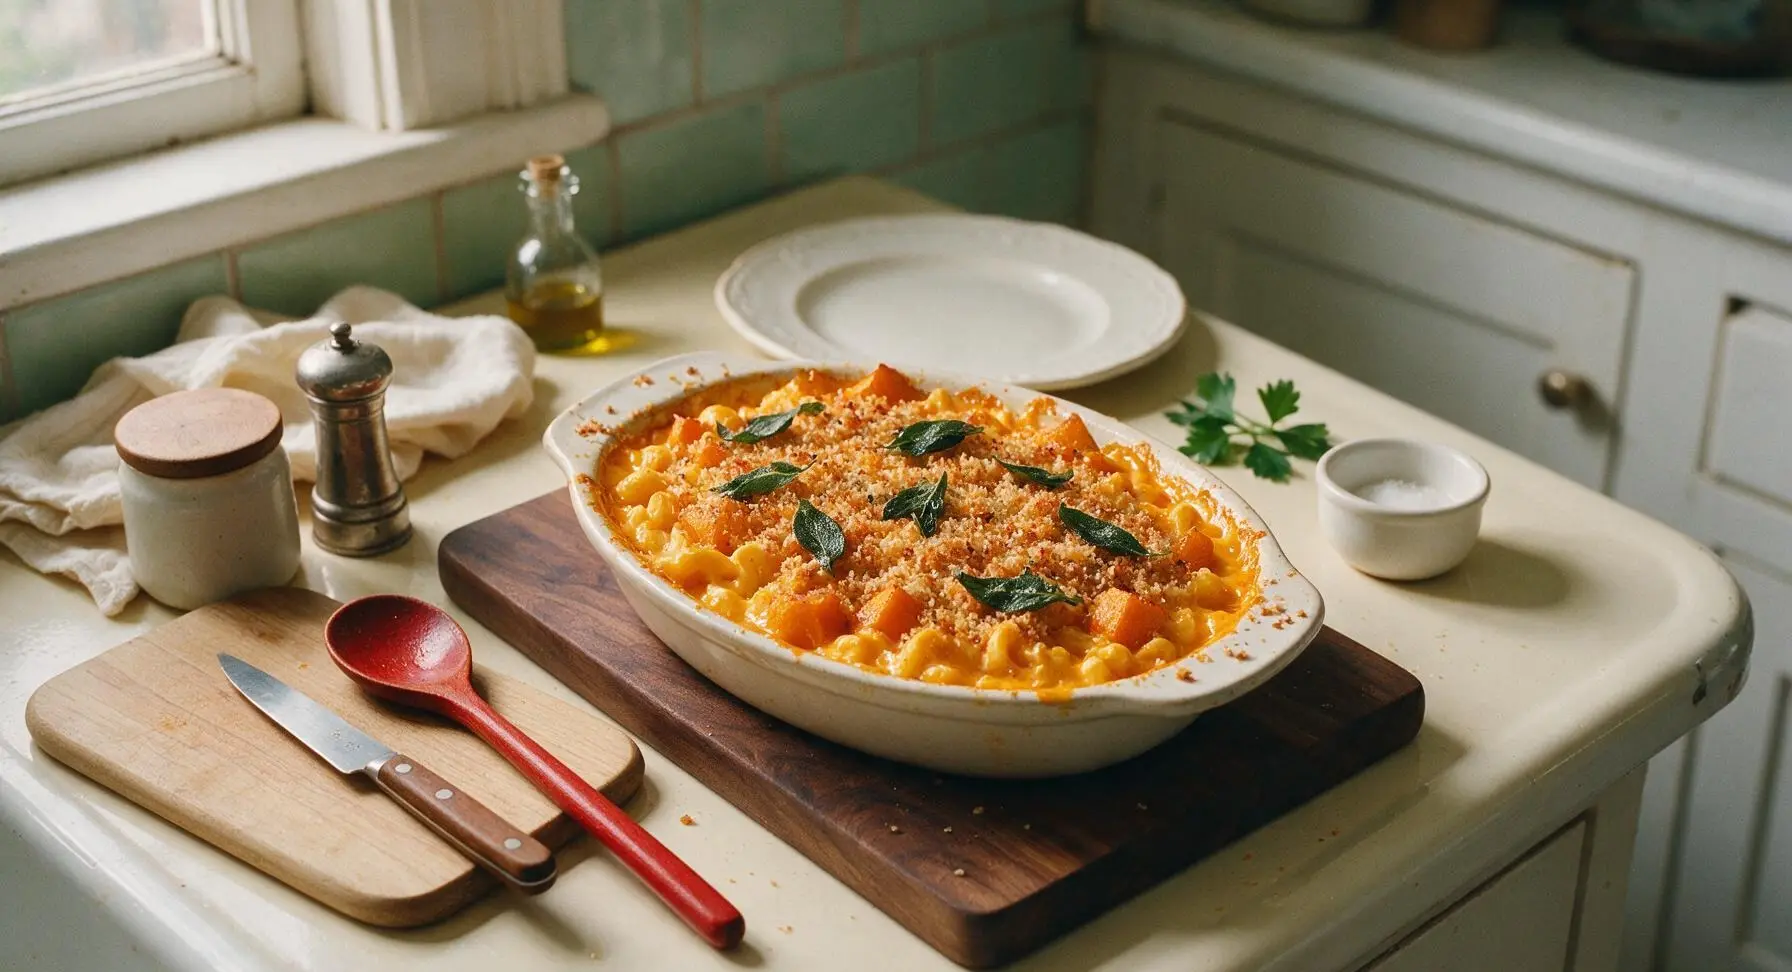
Step 8
step8:Bake Until Bubbly

Tips

1.Cook pasta 2 minutes short of the package’s al dente direction: Noodles continue to absorb sauce and cook through during baking, so undercooking them prevents mushy, over-soft mac and cheese.
2.Reserve 1/4 cup starchy pasta water before draining: The starchy water thins the cheese sauce without making it watery, and helps the sauce cling tightly to pasta noodles better than plain milk or water.
3.Leave 1/4 of the roasted squash cubes whole instead of blending them: These soft, caramelized squash chunks add sweet, textural contrast to every bite, rather than making the dish feel like a uniform puree.


✨ You May Also Like

Main Course
🍜 United Kingdom

A showstopping classic of tender seared beef, savory mushroom duxelles, and crisp prosciutto wrapped in flaky golden puff pastry, baked to juicy perfection.

⏱️ 2 hours 1Main Course ★ 4.7
Main Course
🍜 India

Tender charred marinated chicken simmered in a rich, spiced creamy tomato sauce, this iconic Anglo-Indian curry pairs perfectly with basmati rice or warm naan.

⏱️ 50 minuteMain Course ★ 4.6
Main Course
🍜 Thailand

Classic tangy, sweet, and savory Thai stir-fried rice noodles with shrimp, tofu, and crunchy garnishes, balancing all five core Thai flavor profiles.

⏱️ 30 minuteMain Course ★ 4.5
Main Course
🍜 United Kingdom

Crispy golden beer-battered cod and fluffy double-fried chips, served with tangy tartar sauce and malt vinegar: the timeless, beloved British pub comfort classic.

⏱️ 45 minuteMain Course ★ 4.7
Main Course
🍜 Mexico

Smoky, chile-marinated pork tacos with caramelized pineapple, fresh cilantro, and lime: a beloved classic Mexican street food perfect for casual summer gatherings.

⏱️ 1 hour 45Main Course ★ 4.8
Main Course
🍜 United States

Crunchy Fritos corn chips layered with savory beef chili and melted cheddar, topped with cool, zesty fixings for a beloved, cozy Tex-Mex comfort food.

⏱️ 35 minuteMain Course ★ 4.8

squash mac and cheese:Frequently Asked Questions

1.Why do you roast the butternut squash instead of boiling it for this recipe? ▾
Roasting caramelizes the squash’s natural sugars, bringing out its warm, nutty sweetness instead of the watery, muted flavor you get from boiling. It also cooks off excess moisture, so your cheese sauce stays rich and thick, not runny. Roast cubed squash at 400°F for 25–30 minutes until fork-tender for the best results.
2.Can I use pre-cut butternut squash from the grocery store to cut down on prep time? ▾
Absolutely! Pre-cubed butternut squash is a huge time-saver and works perfectly here. Just spread the cubes in a single layer on your baking sheet, toss with a tiny bit of olive oil and salt, and roast as directed. Skip any pre-cut packages that look mushy or have excess liquid in the bag for the best texture.
3.What if I don’t have Gruyère cheese? Can I substitute it with something else? ▾
You bet! Gruyère adds a nutty, melty smoothness, but great swaps include fontina for that same creamy melt, extra sharp white cheddar for a tangier bite, or even a small amount of smoked gouda for a cozy, deep flavor. Avoid crumbly cheeses like feta or high-moisture fresh mozzarella, since they won’t melt into a smooth sauce.
4.My cheese sauce turned out grainy—what did I do wrong, and can I fix it? ▾
Grainy sauce almost always comes from overheating the cheese, or adding it too quickly to a too-hot base. Fix it by pulling the pan off the heat immediately, stirring in a splash of cold whole milk, and whisking vigorously until smooth. Next time, take your sauce off the burner before adding shredded cheese, and stir in small handfuls at a time.
5.Can I make this recipe gluten-free? ▾
Definitely! Swap the regular dry elbow macaroni for your favorite gluten-free elbow pasta (look for a rice-corn blend for the closest texture to traditional), and replace the regular panko topping with gluten-free panko or crushed gluten-free rice crackers. All other core ingredients are naturally gluten-free, so the final flavor will be nearly identical.
6.How do I get that extra crispy panko-sage top? ▾
For the crunchiest topping, toss panko with melted butter, finely chopped fresh sage, and a tiny pinch of salt before sprinkling it evenly over the mac and cheese. Bake uncovered for the last 10–12 minutes of cook time, and if you want extra browning, broil on low for 1–2 minutes at the very end—watch it closely so it doesn’t burn!
7.Is there a way to make this dish lower in dairy without losing that creamy texture? ▾
You can swap up to half the whole milk for unsweetened plain oat milk, which has a neutral, creamy flavor that pairs beautifully with the squash. For the cheese, you can use reduced-fat sharp cheddar, but keep a small amount of full-fat Gruyère or fontina to keep the sauce smooth and avoid the rubbery texture common with low-fat cheeses.
8.Can I prep this mac and cheese ahead of time to bake later? ▾
Absolutely! Assemble the cooked pasta, cheese-squash sauce, and topping in your baking dish, cover tightly, and refrigerate for up to 2 days before baking. Add 5–7 minutes to the bake time since it will be cold going into the oven, and keep it covered for the first 20 minutes to prevent the topping from burning before the center is hot.
9.Why does my sauce end up runny after I mix in the butternut squash? ▾
Runny sauce usually comes from excess moisture in your roasted squash. Make sure you don’t overcrowd the baking sheet when roasting the squash—give cubes space so steam can escape, and let roasted squash rest for 5 minutes before pureeing to let extra moisture evaporate. If your puree is still watery, simmer it for 2–3 minutes to thicken it first.
10.Can I use a different pasta shape instead of elbow macaroni? ▾
Of course! Elbows are classic because their ridges hold cheese sauce beautifully, but other short, ridged shapes work wonderfully too. Try cavatappi, rotini, small shells, or campanelle—just avoid long, thin pasta like spaghetti or linguine, which won’t hold the thick, creamy sauce and squash bits evenly across every bite.
11.How long does leftover roasted butternut squash mac and cheese last in the fridge? ▾
Stored in an airtight container, leftovers will stay fresh for 3–4 days in the refrigerator. Reheat individual portions in the microwave at 50% power, stirring every 30 seconds, or reheat the whole batch in a 350°F oven covered with foil for 15–20 minutes until heated through. Add a tiny splash of milk if the sauce feels thick when reheating.
12.Can I freeze this mac and cheese for later meals? ▾
Yes! Freeze it either as a whole baked dish or in individual portions for quick weeknight meals. Let it cool completely, wrap tightly in plastic wrap and foil, and freeze for up to 3 months. Thaw in the fridge overnight before reheating in a 350°F oven, and add a sprinkle of extra cheese and panko to refresh the crispy top.
13.Do I need to peel the butternut squash before roasting it? ▾
Yes, you’ll want to peel the tough outer skin off before cubing and roasting, since it stays chewy and fibrous even after cooking. Use a sharp Y-shaped vegetable peeler (the best tool for hard winter squash) to remove the skin, and scoop out all the seedy, stringy pulp from the center of the squash before cubing it into 1-inch pieces.
14.The sage in my panko topping tastes bitter—what caused that? ▾
Bitter sage usually happens when you cook the sage for too long at too high a heat, which burns its delicate, aromatic oils. For the best flavor, use fresh sage leaves chopped finely, and don’t toast the panko-sage mix ahead of time—just toss it with melted butter and add it straight to the top of the mac before baking, so it crisps without burning.
15.Can I add protein to this dish to make it a more filling meal? ▾
Absolutely! Great mix-ins include crispy crumbled bacon, diced roasted chicken, cooked crumbled mild Italian sausage, or even a can of rinsed cannellini beans for a plant-based protein boost. Fold your protein of choice into the pasta and sauce before adding the panko topping, so it’s evenly distributed throughout every bite.
16.Should I undercook the pasta before baking it, and if so, why? ▾
Yes! Cook your elbow macaroni 2 minutes less than the package directs for al dente, so it’s very firm to the bite. The pasta will continue to cook as it bakes in the creamy sauce, and undercooking it prevents mushy, overdone noodles by the time the dish is hot and bubbly and the topping is crispy. Don’t forget to salt your pasta water well for depth of flavor.
17.Is there a vegan version of this recipe that still tastes rich and creamy? ▾
You can easily make a vegan swap! Use a firm, block-style vegan cheddar and vegan Gruyère-style cheese that melts well, swap whole milk for unsweetened oat milk, use vegan butter for the panko topping, and add a tablespoon of nutritional yeast to the sauce for extra cheesy depth. The roasted squash’s natural creaminess does a lot of heavy lifting to keep the texture lush.
18.Why use sharp cheddar instead of mild cheddar for this recipe? ▾
Sharp cheddar has a more concentrated, tangy cheese flavor that stands up beautifully to the sweet, earthy butternut squash, so your dish won’t taste bland or overly sweet. Mild cheddar has a higher moisture content and softer flavor, which can make the sauce taste watery and muted next to the bold squash and crispy sage topping.
19.How do I know when the mac and cheese is done baking? ▾
It’s ready when the sauce is bubbling around the edges of the baking dish, the center is hot all the way through (it should hit 165°F on an instant-read thermometer), and the panko-sage top is deep golden brown and crispy. That usually takes 25–30 minutes at 375°F, with foil removed for the last 10 minutes to crisp the topping.

Comments (5)

3 days ago

OMG this is the best mac and cheese I’ve ever made for our Sunday family dinner! The roasted butternut squash adds such a cozy, sweet depth that even my super picky 7-year-old asked for thirds. I swapped regular breadcrumbs for panko for extra crunch and it was *chef’s kiss*. Will 100% be bringing this to our neighborhood fall potluck next weekend, total game changer!

2 days ago

Wait quick question—did you roast the squash ahead of time? I’m trying to meal prep this for the work week and wondering if roasted squash keeps well in the fridge for 3-4 days without getting mushy?

yesterday

So thrilled your whole family loved it! Roasted butternut squash stays perfect in an airtight container in the fridge for up to 4 days, so it’s ideal for meal prep. Pro tip: undercook your pasta just a minute or two less than the package says if you’re reheating later, so it doesn’t turn soft!

1 week ago

This was so easy to throw together on a random busy weeknight! The 45 minute cook time is no joke, I didn’t even have to do a ton of advance prep. The only small tweak I made was adding a pinch of nutmeg and a little extra sharp cheddar because that’s how my partner likes his mac. SO good, even the leftovers hit different for lunch all week.

5 days ago

Love the nutmeg addition! It pairs so perfectly with the sweet squash and sharp cheddar, I’m going to add that as a suggested variation in the recipe notes. So happy this worked out for your busy schedule!

2 days ago

I was so skeptical about putting squash in my mac and cheese but wow, it makes the sauce so creamy without having to dump a ton of extra cheese in! My roommate who hates literally all vegetables ate two servings and didn’t even realize there was squash in it until I told him lmao. Knocked off a star because I felt the bake time was a little long for my oven — the top got a touch darker than I wanted after 15 minutes, but I’ll just cover it with foil next time. Still will be making this on repeat all fall and winter.

yesterday

Made this for my office potluck yesterday and people were literally coming up to ask me for the recipe before I even left! I topped half the pan with crispy crumbled bacon for the meat lovers and left the other half as written, and both pans were completely scraped clean. Only regret is I didn’t make a double batch!

2 hours ago

Oh the bacon addition sounds incredible! Did you cook the bacon first and crumble it on top before baking, or mix it right into the sauce?

1 week ago

I’m a super broke college student and this was so easy to make in my tiny apartment oven! I used frozen pre-cubed butternut squash to save time and it still turned out amazing. My roommates and I ate the whole pan in one sitting, will absolutely be making this again when we need a cozy study break meal.

5 days ago

Wait how long did you roast the frozen squash for? I always burn frozen veggies when I try to roast them straight from the bag!

3 days ago

Great question! If using frozen cubed squash, you can toss it with a little olive oil and roast at 400°F for 25-30 minutes, flipping halfway through, no need to thaw first. So glad this worked out for you and your roommates!



