
Stovetop Mac and Cheese

title 1
Stovetop Mac and Cheese
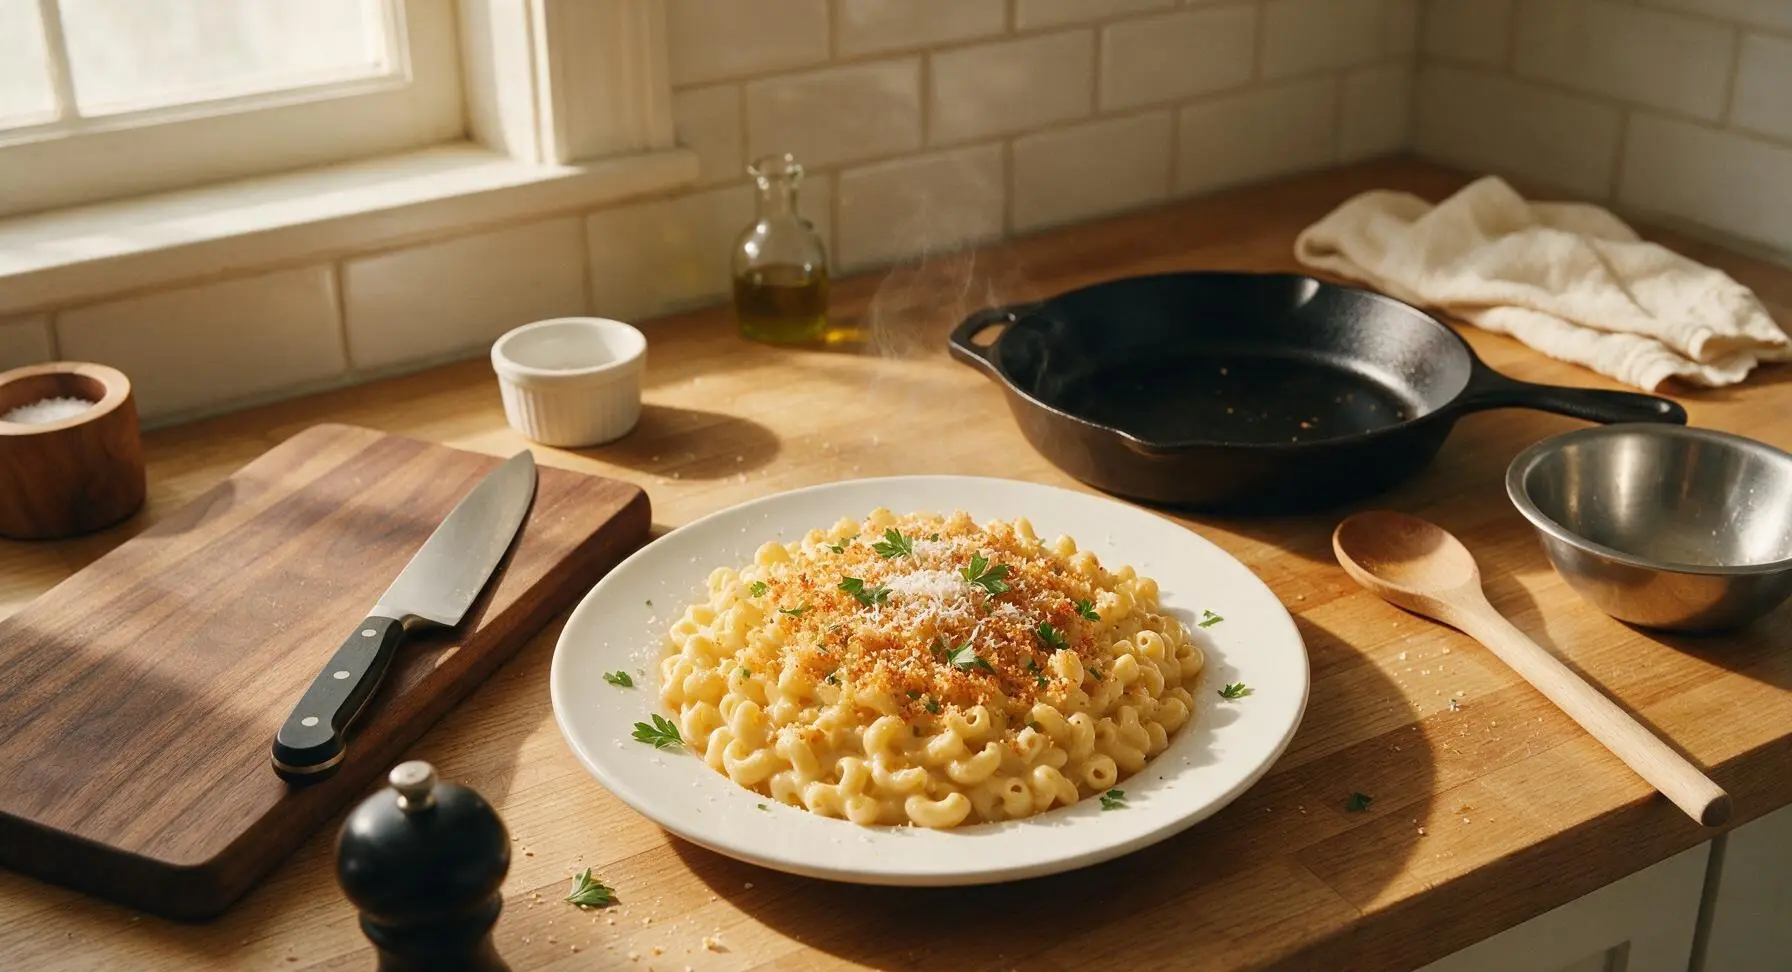
⏱️ cook time 20 minutes
🍽️ servings 4
⚡ Difficulty easy

intro

Velvety, lump-free stovetop mac and cheese with crisp toasted panko topping, ready in 30 minutes. Nostalgic, ultra-creamy, no oven required for the ultimate cozy weeknight dinner.

Ingredients
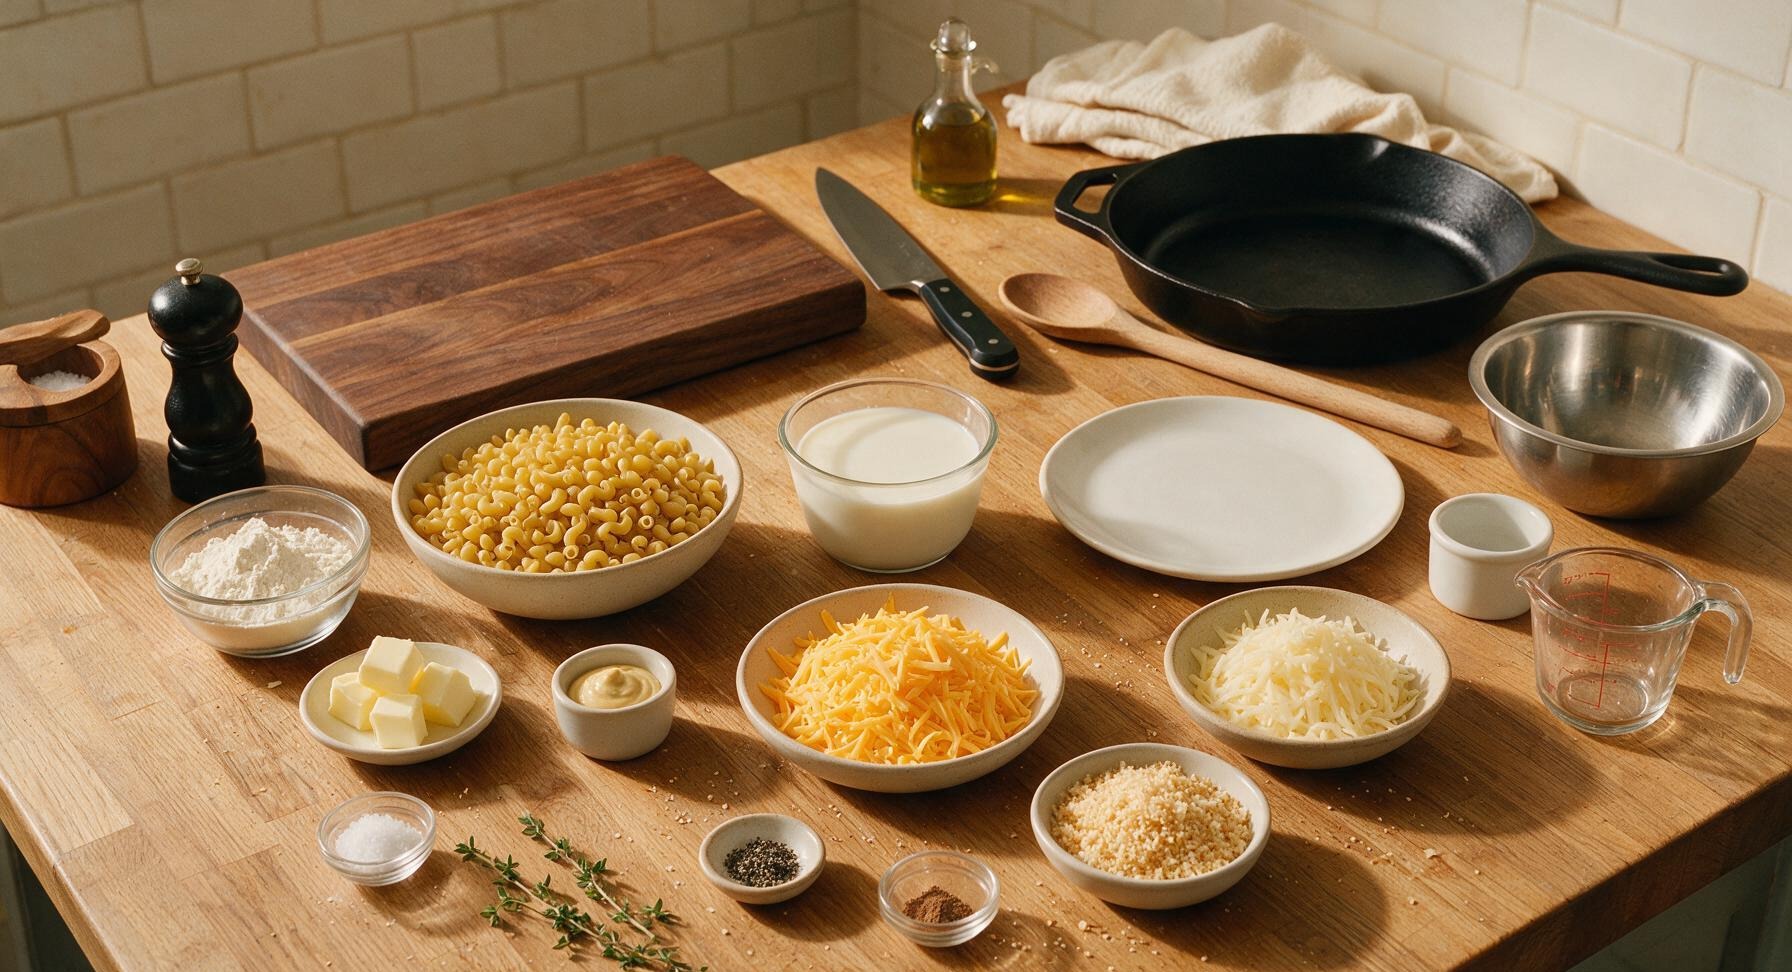
Elbow macaroni 225g (8oz)
Unsalted butter 3 tbsp (42g)
All-purpose flour 2 tbsp (16g)
Whole milk 2 cups (480ml), warmed
Sharp cheddar cheese 225g (8oz), freshly grated
Gruyère cheese 55g (2oz), freshly grated
Dijon mustard 1 tsp
Kosher salt 1 tsp (plus 1 tbsp for pasta water)
Freshly ground black pepper 1/2 tsp
Ground nutmeg 1/8 tsp
Panko breadcrumbs 1/4 cup (15g)
Fresh thyme sprigs 4 small sprigs (for garnish)

Steps

1

Grate Fresh Cheeses

Place the 4-sided stainless steel box grater in the medium brushed stainless steel mixing bowl. Grate the sharp cheddar and Gruyère cheese using the large holes of the grater, stopping to avoid grating your fingers on the last nub of cheese. Toss the grated cheese lightly to combine; set aside. Do not use pre-shredded cheese, as it contains anti-caking agents that create a grainy, dull sauce.
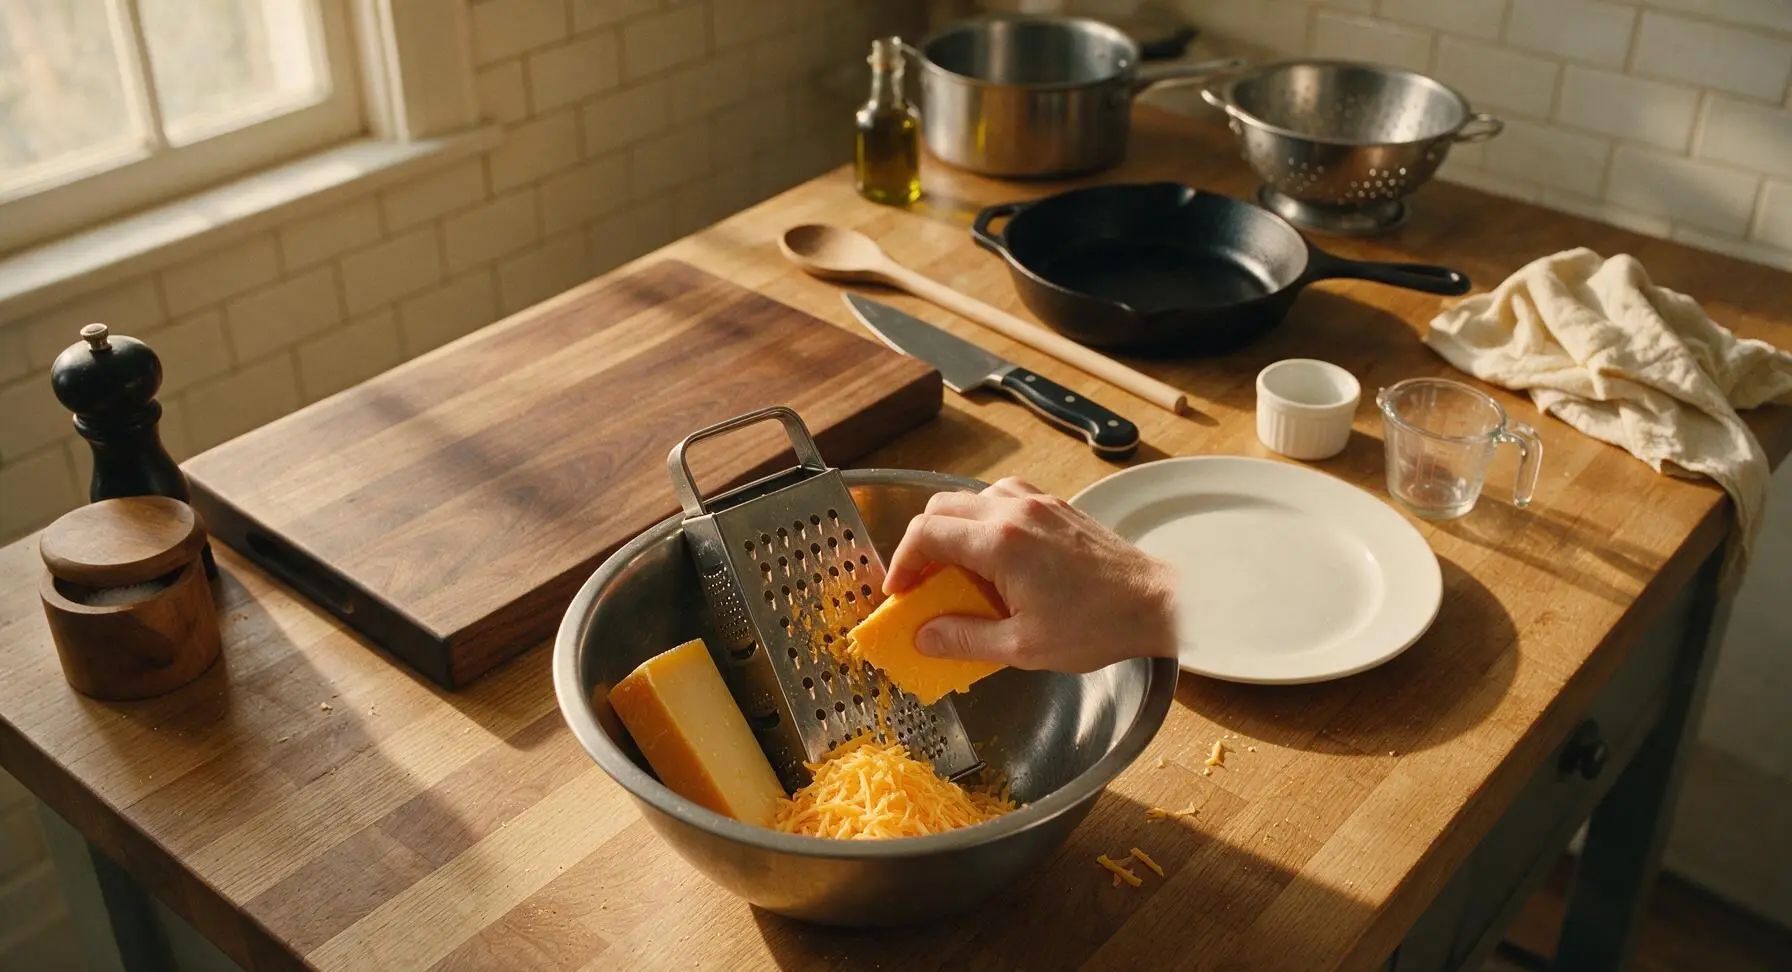
Step 1
step1:Grate Fresh Cheeses
2

Cook Pasta Al Dente

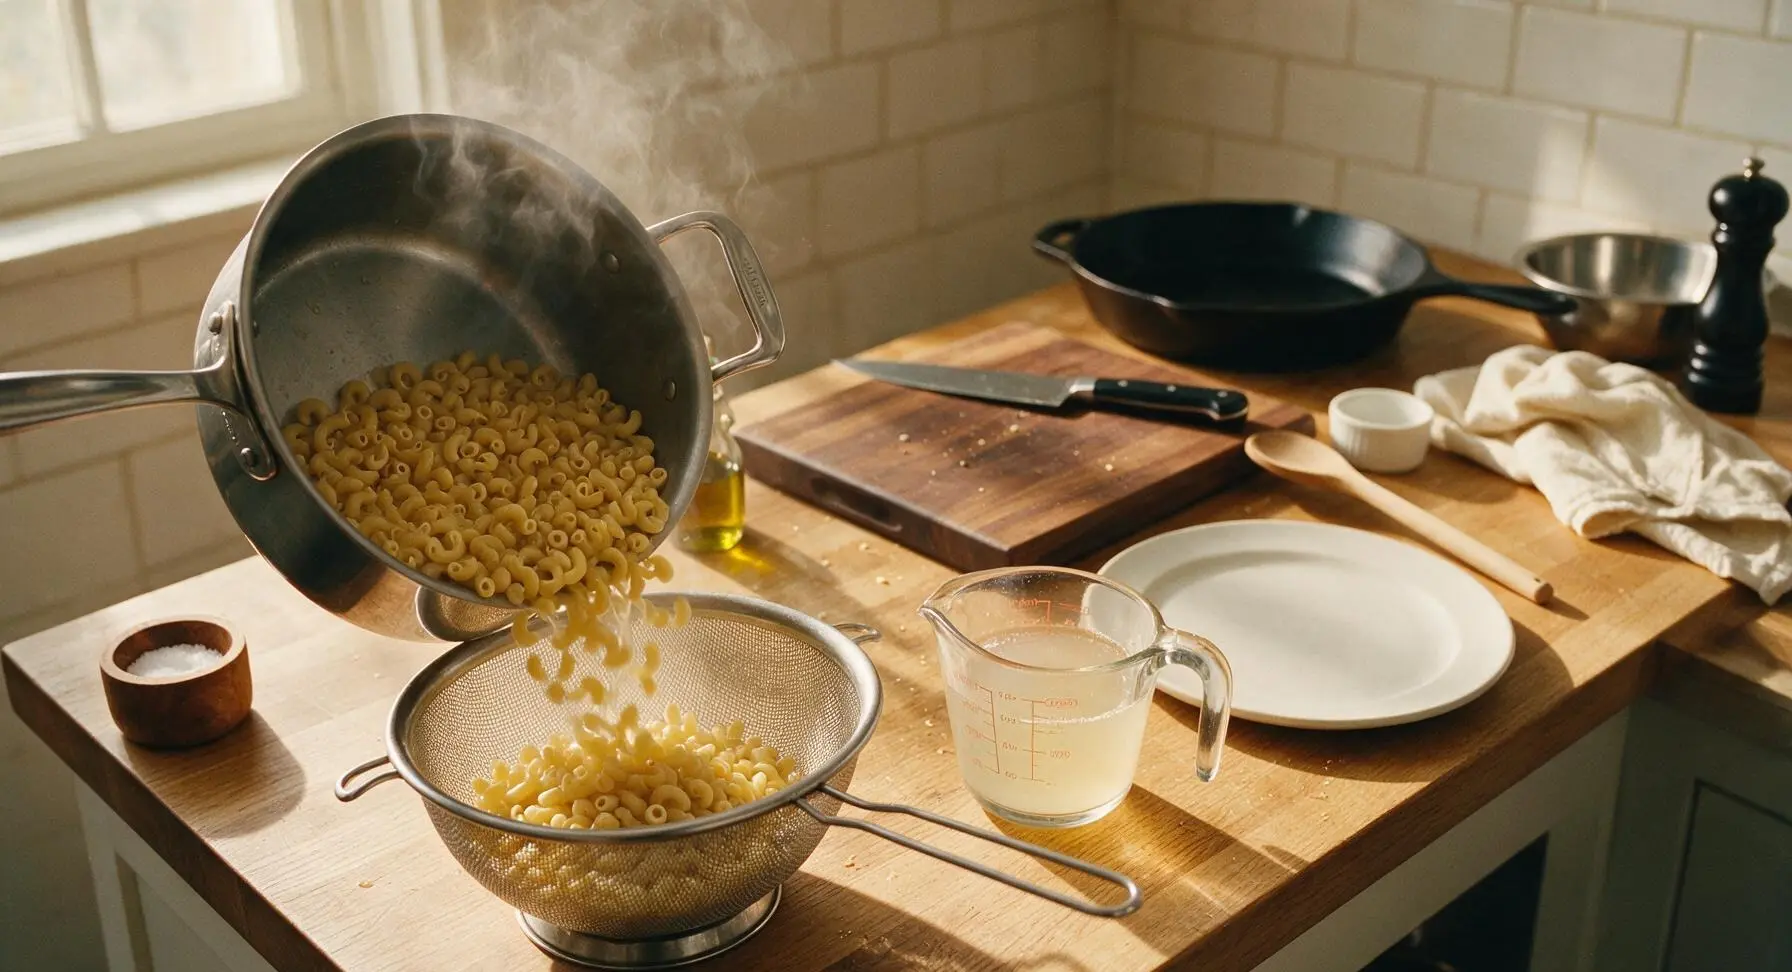
Fill the 4-quart stainless steel stock pot with 3 liters of cold water, add 1 tablespoon of kosher salt (water should taste as salty as seawater), and bring to a rolling boil over high heat. Add the elbow macaroni, stir once with the beech wood spoon to prevent sticking, and cook 1 minute less than the package instructions for al dente (typically 7 minutes). Reserve 1/2 cup of starchy pasta water in the clear glass measuring cup before draining the pasta fully in the fine-mesh stainless steel colander; do not rinse the pasta, as surface starch helps sauce cling to noodles.
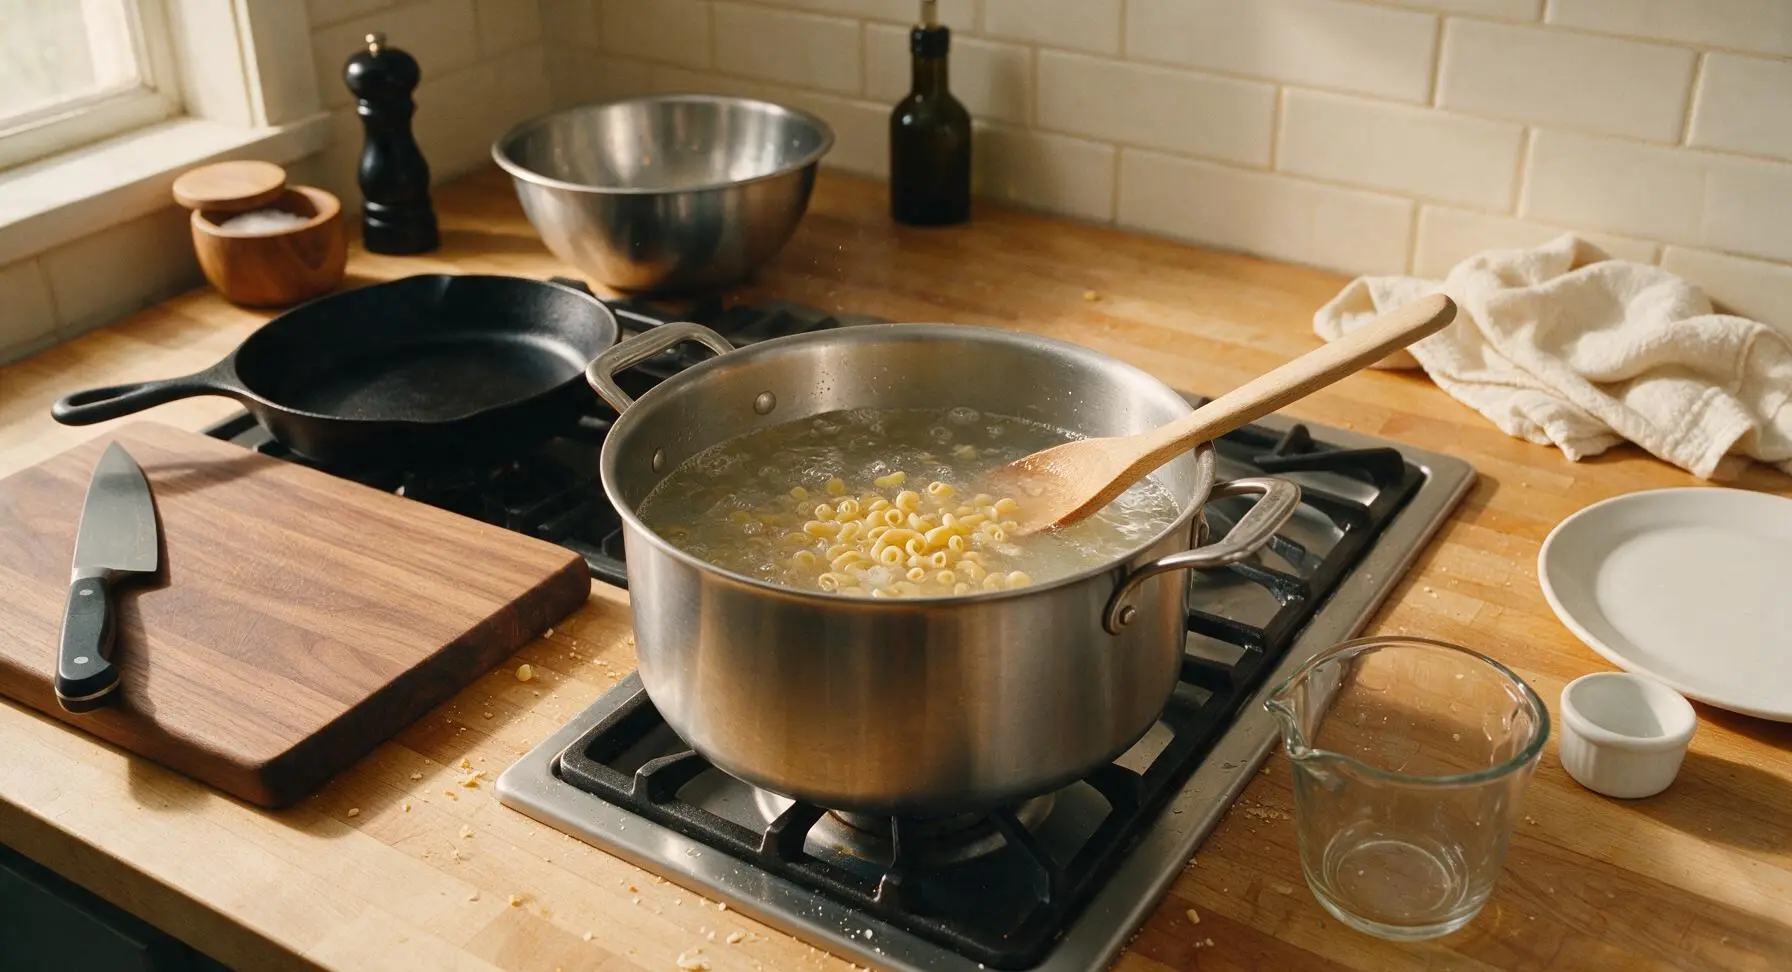
Step 2
step2:Cook Pasta Al Dente
Step 2
step2:Cook Pasta Al Dente
3

Toast Panko Topping

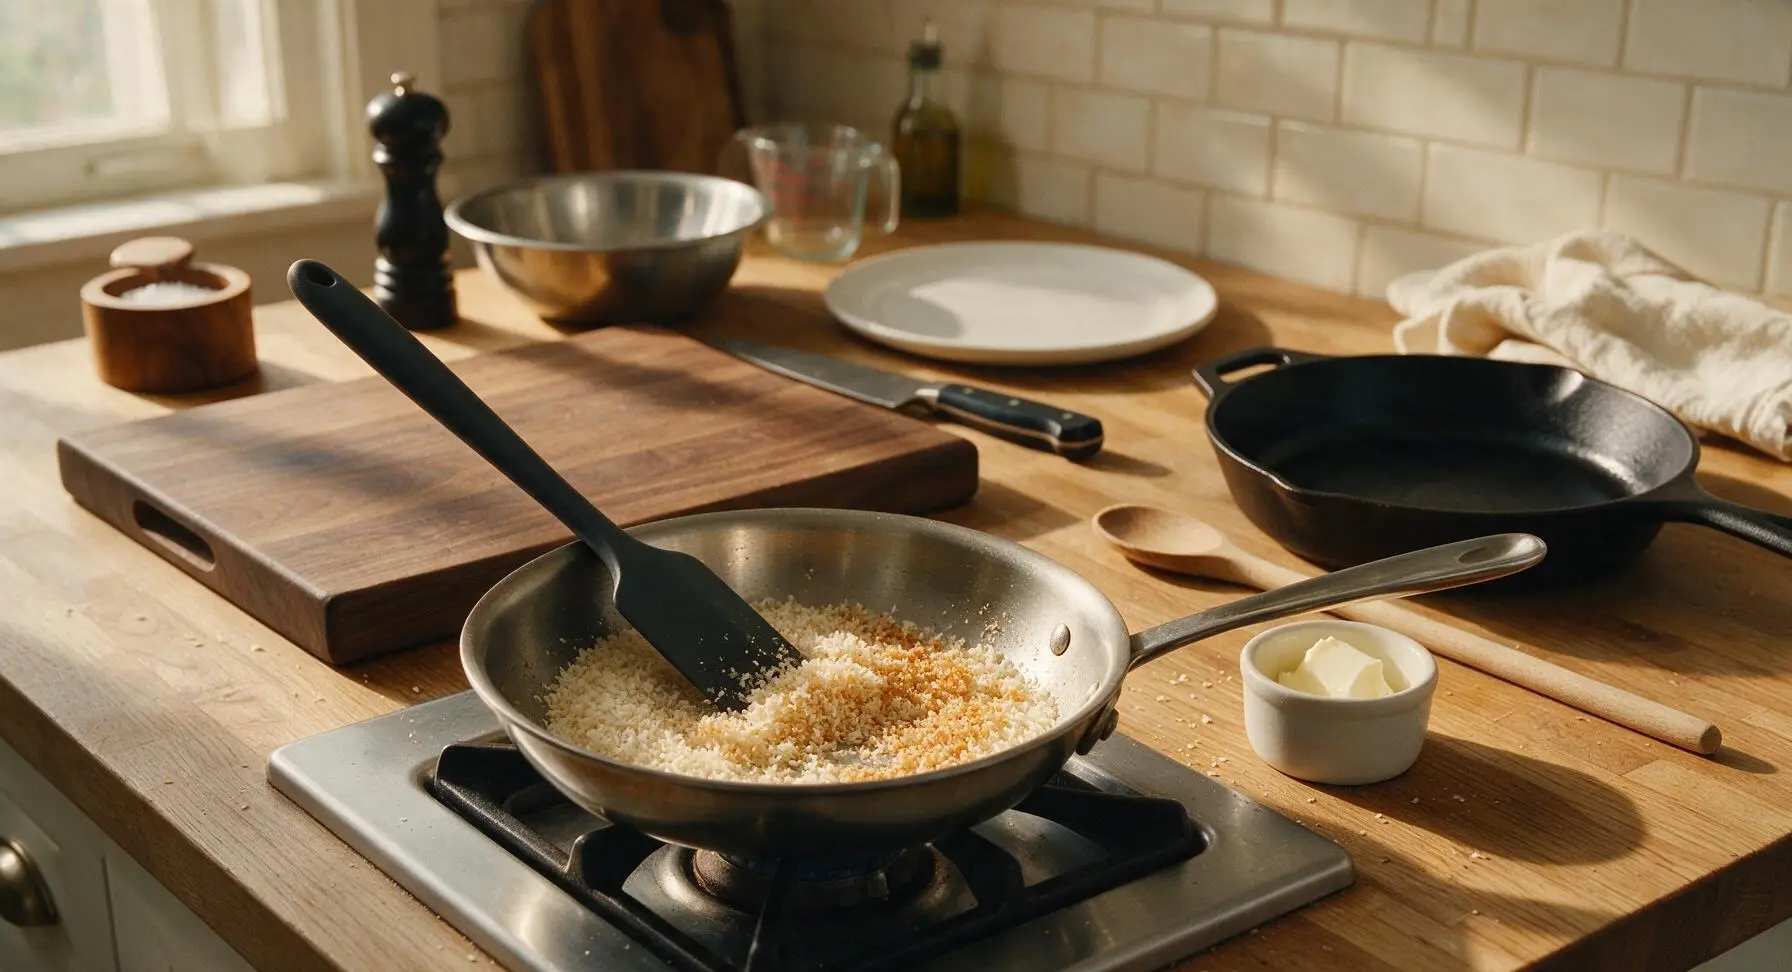
Place the small 20cm stainless steel skillet over medium-low heat. Melt 1/2 tablespoon of the measured unsalted butter, then add the panko breadcrumbs. Stir constantly with the matte black silicone spatula for 2-3 minutes until crumbs are evenly golden brown and nutty smelling. Immediately transfer crumbs to a small matte white ramekin to prevent burning; set aside.
Step 3
step3:Toast Panko Topping
4

Build Sauce Roux

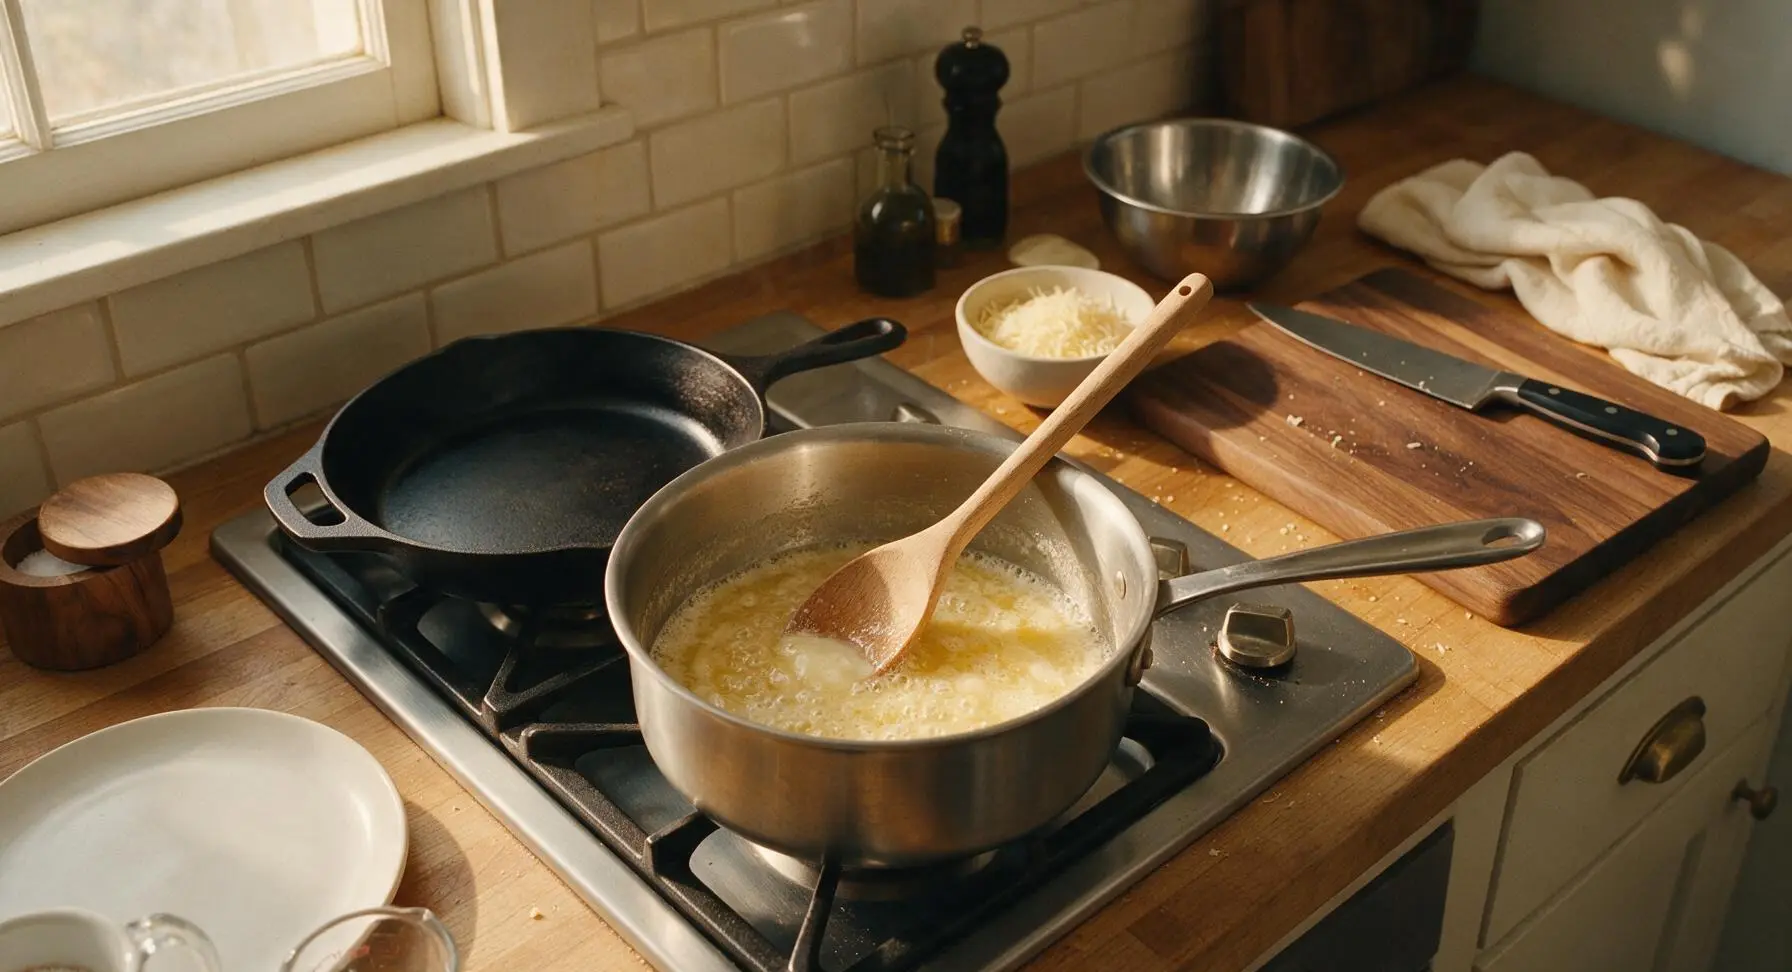
Place the 3-quart heavy-bottomed matte stainless steel saucepan over medium heat. Add the remaining 2.5 tablespoons of unsalted butter, and melt until foaming subsides (about 1 minute). Whisk in the all-purpose flour, stirring constantly with the beech wood spoon for 2 minutes, until the roux is pale golden and smells like cooked pastry, with no raw flour taste remaining. Do not let the roux turn dark brown, as this will create a nutty, overpowering flavor that clashes with the mild cheese.
Step 4
step4:Build Sauce Roux
5

Whisk in Warm Milk

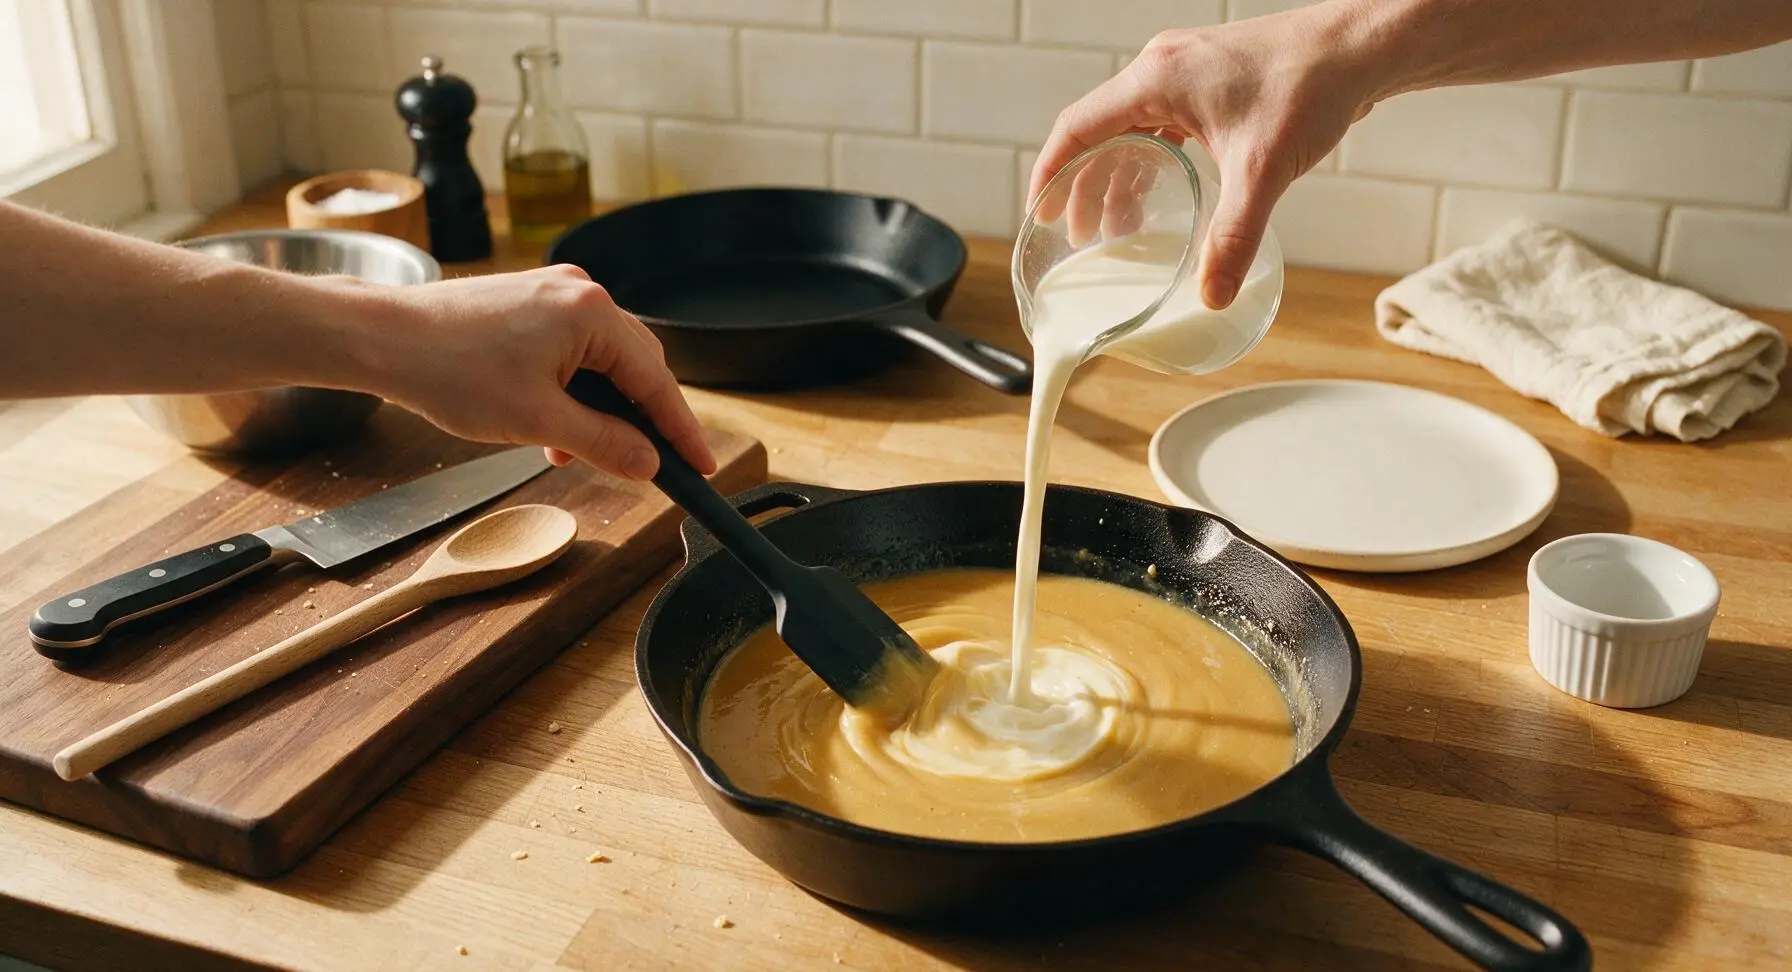
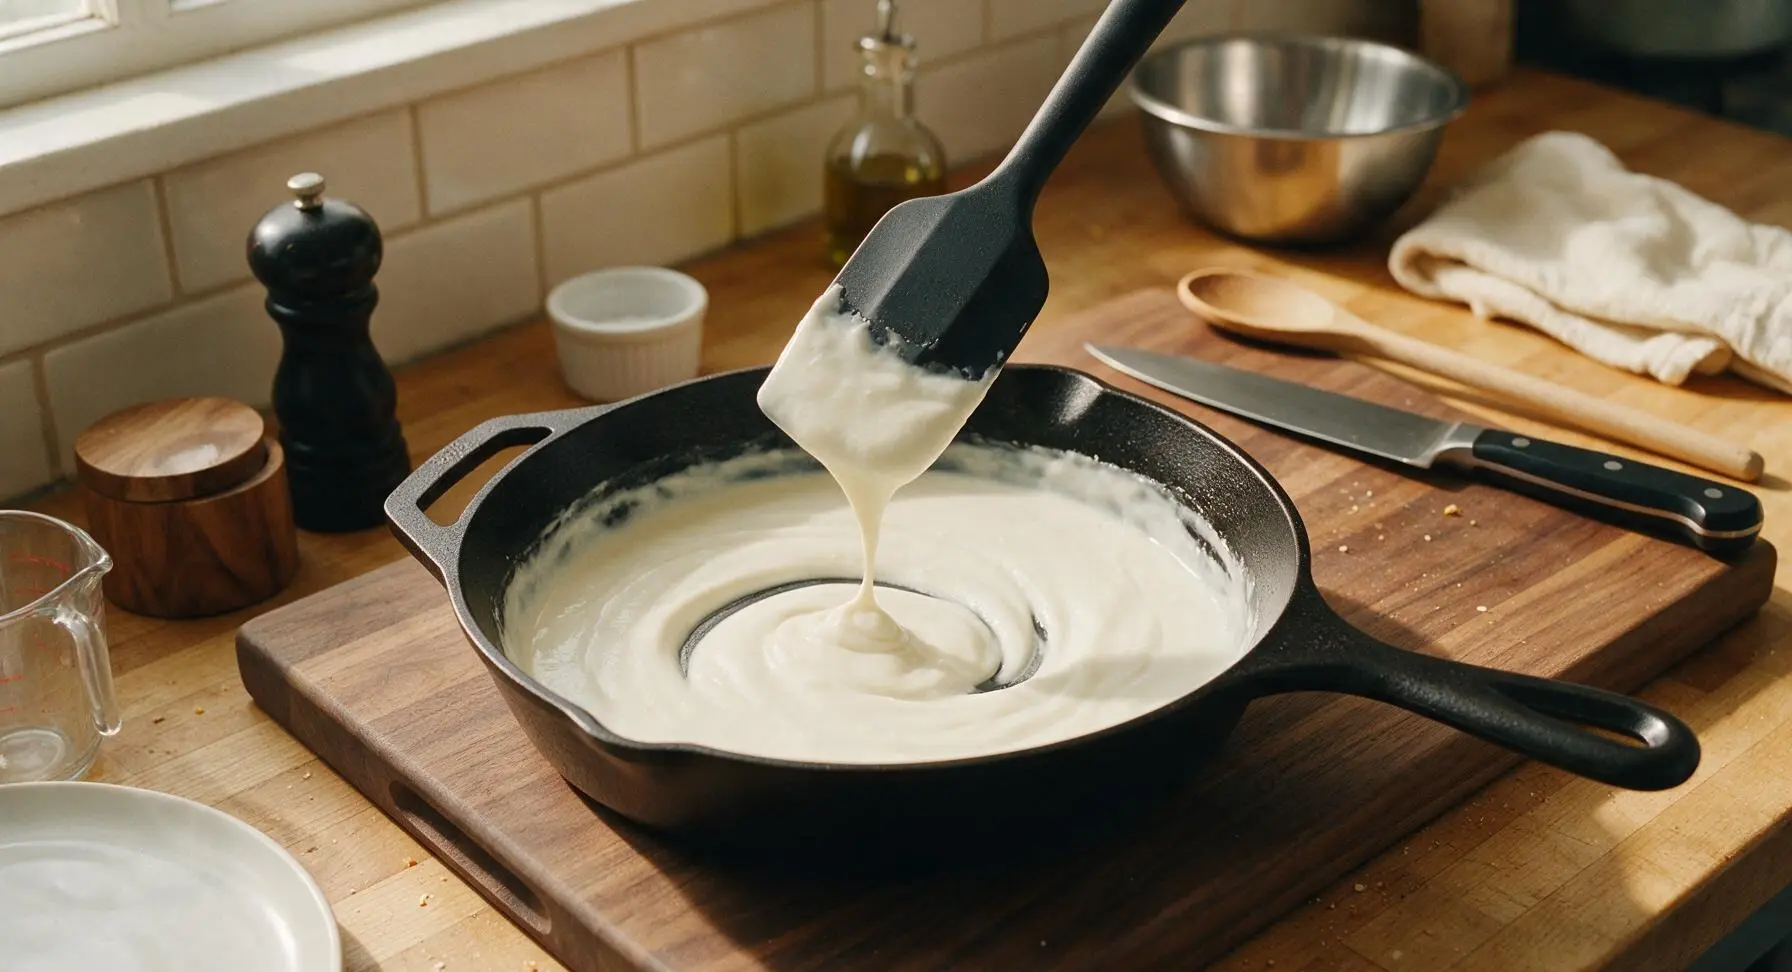
Slowly pour the warmed whole milk into the roux 1/4 cup at a time, stirring constantly with the matte black silicone spatula to eliminate lumps. Once all milk is added, stir in the Dijon mustard, 1 teaspoon kosher salt, black pepper, and pinch of nutmeg. Bring the sauce to a gentle simmer, cooking for 3-4 minutes until it thickens enough to coat the back of a spoon: run your finger across the coated spoon, and the line should hold without running.
Step 5
step5:Whisk in Warm Milk
Step 5
step5:Whisk in Warm Milk
6

Melt Cheese Into Sauce

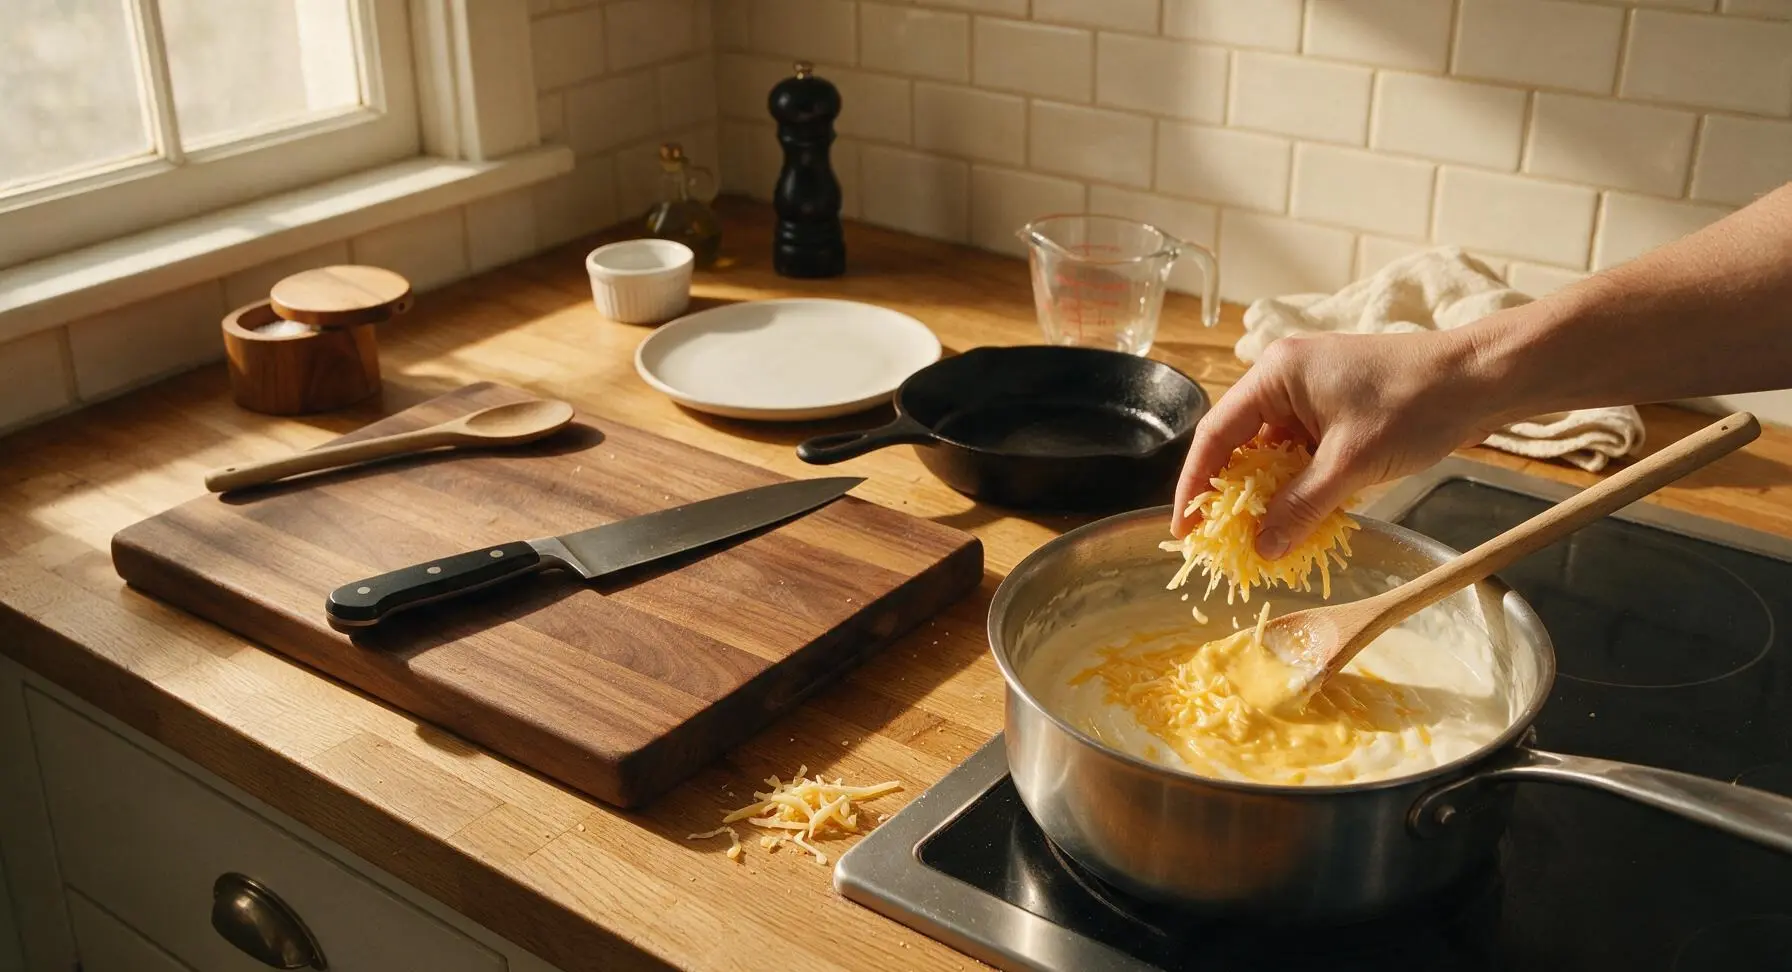
Turn the stovetop heat to the lowest setting. Add the grated cheddar and Gruyère one handful at a time, stirring gently with the beech wood spoon, waiting for each handful to fully melt before adding the next. Once all cheese is melted, taste the sauce and adjust salt or pepper if needed. Do not boil the sauce after adding cheese, as high heat will cause cheese proteins to separate and create a grainy, greasy sauce.
Step 6
step6:Melt Cheese Into Sauce
7

Toss Pasta in Sauce

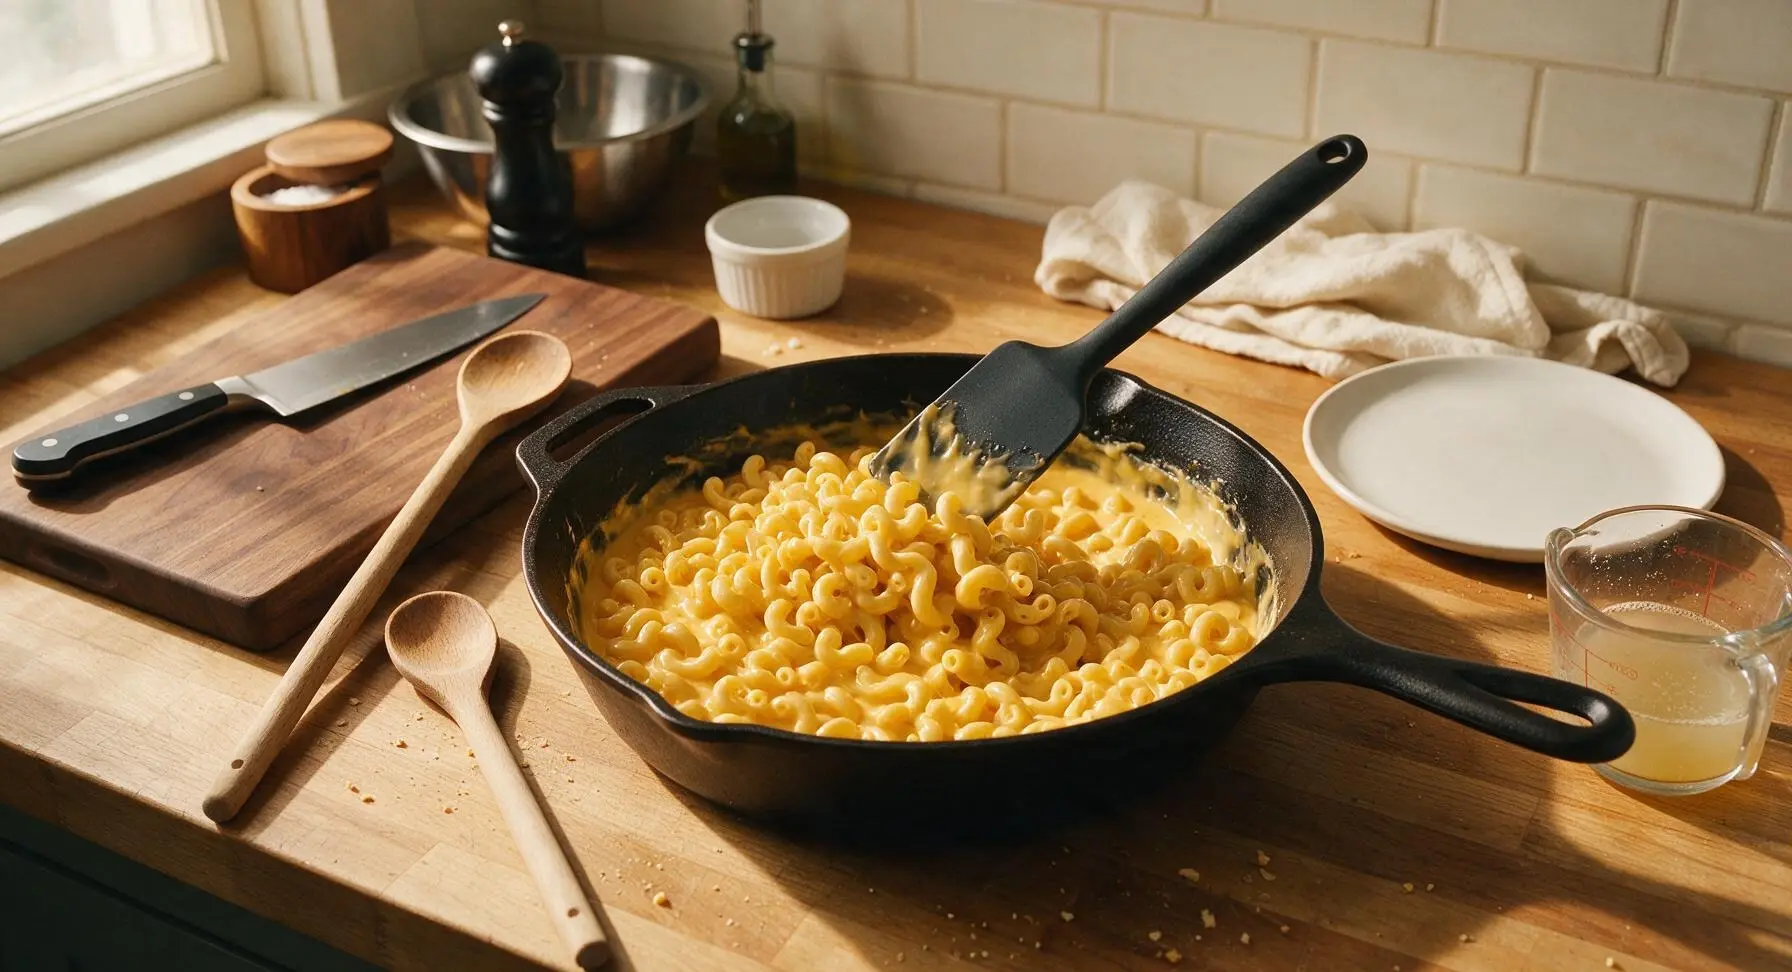
Add the drained elbow macaroni directly from the colander to the cheese sauce in the saucepan. Stir gently with the matte black silicone spatula to coat every noodle evenly, adding 1-2 tablespoons of reserved pasta water as needed to thin the sauce to a silky, pourable consistency that clings to noodles without clumping. Let the pasta rest in the sauce for 1 minute to absorb flavor before serving.
Step 7
step7:Toss Pasta in Sauce
8

Plate and Garnish

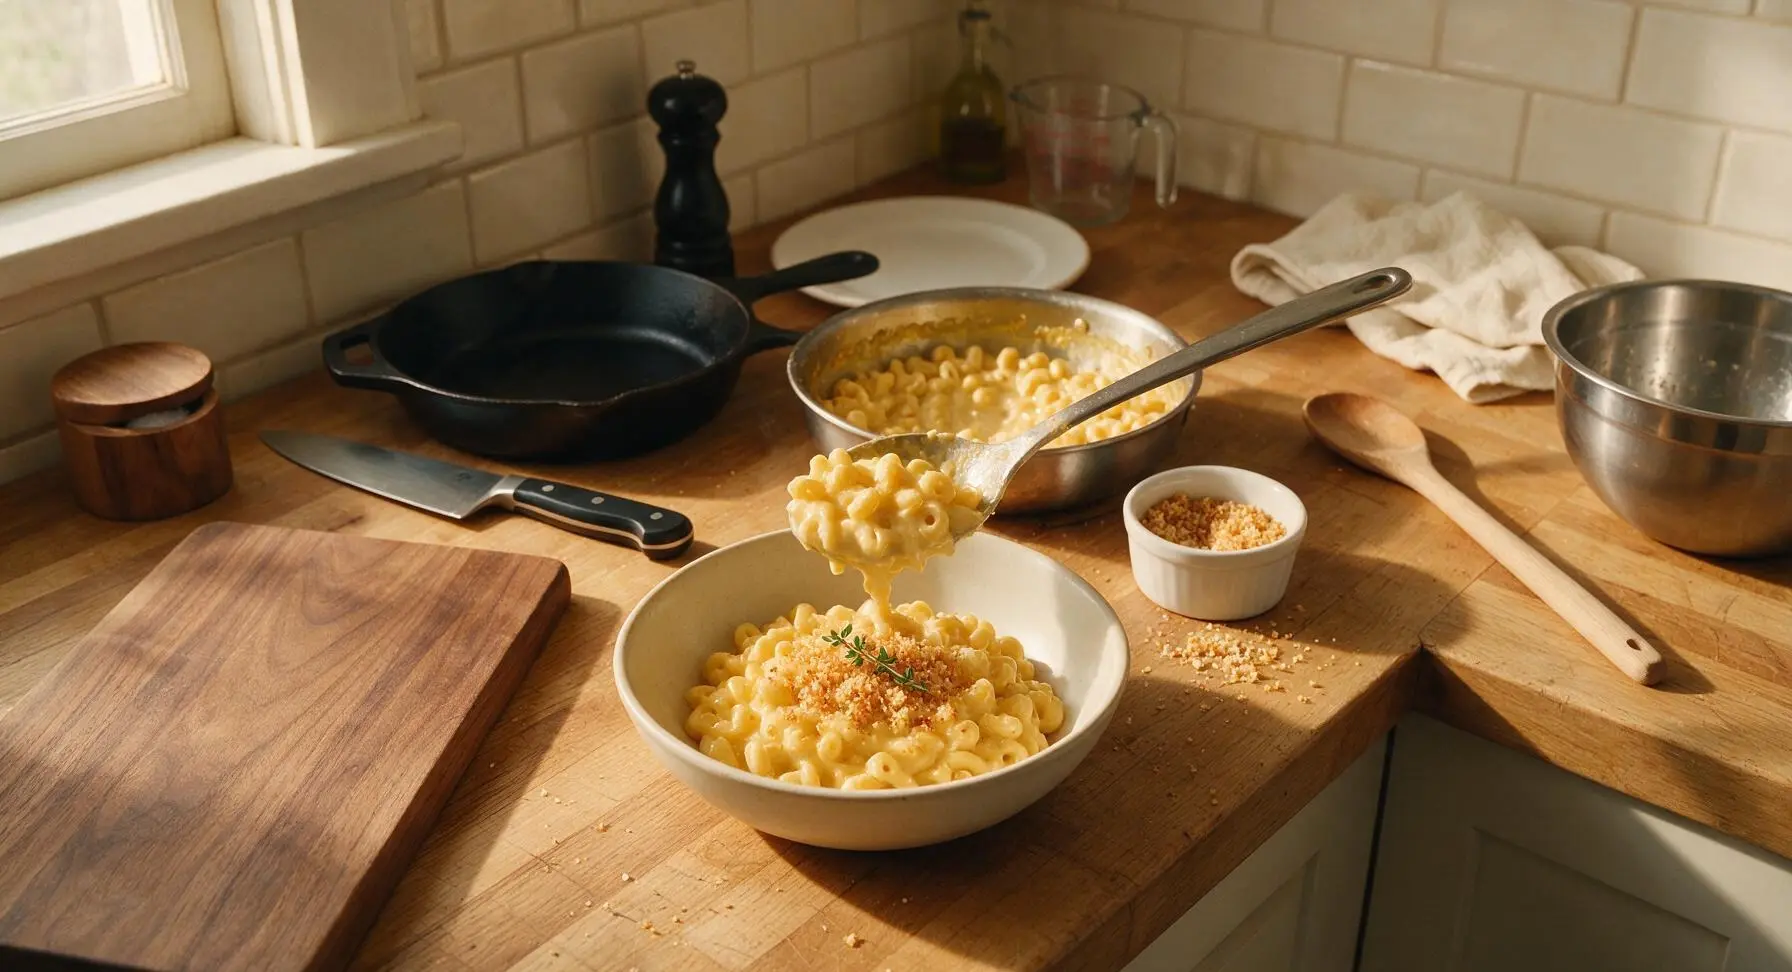
Scoop the sauced mac and cheese into the off-white ceramic pasta bowl. Top the serving with a light sprinkle of the toasted panko breadcrumbs and a single small fresh thyme sprig for garnish. Serve immediately while hot, before the sauce thickens as it cools.
Step 8
step8:Plate and Garnish

Tips

1.Always grate your own cheese instead of using pre-shredded store-bought cheese: pre-shredded cheese is coated in potato starch and anti-caking agents that prevent smooth melting, resulting in a grainy, dull-tasting sauce.
2.Warm your milk for 90 seconds in the microwave before adding it to the roux: cold milk shocks the cooked flour-butter mixture, causing lumps to form instantly, while warm milk mixes smoothly for a silky sauce with minimal stirring.
3.Cook pasta 1 minute less than package directions and never rinse it after draining: the slightly undercooked pasta will finish cooking in the warm cheese sauce, and the starchy noodle surface helps sauce cling tightly instead of sliding off to the bottom of the bowl.


✨ You May Also Like

Main Course
🍜 United Kingdom

A showstopping classic of tender seared beef, savory mushroom duxelles, and crisp prosciutto wrapped in flaky golden puff pastry, baked to juicy perfection.

⏱️ 2 hours 1Main Course ★ 4.7
Main Course
🍜 India

Tender charred marinated chicken simmered in a rich, spiced creamy tomato sauce, this iconic Anglo-Indian curry pairs perfectly with basmati rice or warm naan.

⏱️ 50 minuteMain Course ★ 4.6
Main Course
🍜 Thailand

Classic tangy, sweet, and savory Thai stir-fried rice noodles with shrimp, tofu, and crunchy garnishes, balancing all five core Thai flavor profiles.

⏱️ 30 minuteMain Course ★ 4.5
Main Course
🍜 United Kingdom

Crispy golden beer-battered cod and fluffy double-fried chips, served with tangy tartar sauce and malt vinegar: the timeless, beloved British pub comfort classic.

⏱️ 45 minuteMain Course ★ 4.7
Main Course
🍜 Mexico

Smoky, chile-marinated pork tacos with caramelized pineapple, fresh cilantro, and lime: a beloved classic Mexican street food perfect for casual summer gatherings.

⏱️ 1 hour 45Main Course ★ 4.8
Main Course
🍜 United States

Crunchy Fritos corn chips layered with savory beef chili and melted cheddar, topped with cool, zesty fixings for a beloved, cozy Tex-Mex comfort food.

⏱️ 35 minuteMain Course ★ 4.8

Stovetop Mac and Cheese:Frequently Asked Questions

1.Can I use a different pasta shape instead of elbow macaroni? ▾
Absolutely! Short, ridged, bite-sized shapes work best to trap the creamy cheese sauce—try cavatappi, small shells, rotini, or campanelle. Cook whatever shape you pick to al dente per package directions, and reserve ½ cup of starchy pasta water to thin the sauce if needed. Skip long, thin shapes like spaghetti that won’t hold the thick cheese coating well.
2.Why do you recommend unsalted butter instead of salted butter for this recipe? ▾
Unsalted butter lets you control the exact sodium level in your dish, so you don’t end up with overly salty mac and cheese. Salted butter varies widely in salt content between brands, which can throw off the sauce’s flavor balance. If you only have salted butter on hand, cut added salt by half and taste as you go to adjust seasoning before serving.
3.How do I make sure my cheese sauce stays completely lump-free? ▾
The trick is to whisk your roux (melted butter and flour mixture) constantly for 1 to 2 minutes over medium heat before adding milk, then stream in warm milk slowly while whisking nonstop. Don’t add cheese until the milk base is smooth and thickened, and take the pan off heat before stirring in shredded cheese to avoid clumping from overheated dairy.
4.Can I use pre-shredded cheddar cheese instead of shredding my own? ▾
I don’t recommend it for the creamiest results. Pre-shredded cheese is coated in anti-caking agents like potato starch that keep it from clumping in the bag, but those additives make sauce grainy and prevent smooth melting. Shredding your own sharp cheddar with a box grater takes 2 to 3 minutes and makes a huge difference in final texture.
5.How do I make the crisp toasted panko topping without an oven? ▾
It’s super easy entirely on the stovetop! Melt 1 tablespoon of butter in a small skillet over medium heat, toss in the panko crumbs, and stir constantly for 2 to 3 minutes until crumbs turn light golden brown and smell nutty. Sprinkle toasted panko over servings right before eating so it stays crisp instead of getting soggy in the sauce.
6.Can I use lower-fat milk instead of whole milk for the sauce? ▾
You can, but know your sauce won’t be as rich and velvety. 2% milk will work if that’s what you have, but skim milk produces a thin, watery sauce that lacks classic creamy mouthfeel. If using lower-fat milk, add an extra tablespoon of flour to your roux to boost thickening, and stir in an extra ounce of cheese for richness.
7.Why did my cheese sauce turn out grainy, and how do I prevent that? ▾
Grainy sauce almost always happens from overheating the cheese. If you add shredded cheese to a boiling or very hot milk base, milk proteins can curdle and cheese can separate, creating that gritty texture. Fix this by taking the pan completely off heat before adding cheese, stirring gently until it melts, and never boiling the finished sauce.
8.What swaps work to make this recipe gluten-free? ▾
Swap all-purpose flour for a 1:1 gluten-free all-purpose baking blend with xanthan gum to make a smooth roux, or use 2 tablespoons of cornstarch mixed with cold milk (a slurry) instead of the roux to thicken sauce. Pair it with gluten-free elbow macaroni and gluten-free panko for the topping to keep the entire dish gluten-free.
9.My sauce turned out too thick—how do I fix it? ▾
Thin it out a tablespoon at a time with reserved starchy pasta water saved from cooking the macaroni, stirring gently between additions until it reaches your desired creamy consistency. Starchy pasta water emulsifies perfectly with cheese sauce, so it won’t make it watery the way plain tap water would. Avoid adding cold milk, which cools sauce too quickly.
10.My sauce is too runny—what went wrong, and how do I fix it? ▾
A runny sauce usually means your roux didn’t cook long enough, you added too much milk, or you added cheese before the milk base fully thickened. Fix it by letting the sauce simmer gently over medium-low heat for 3 to 4 minutes, stirring often, until it coats the back of a spoon. Don’t boil it, as that can cause cheese to separate.
11.What mix-ins work well with this basic mac and cheese recipe? ▾
This recipe is a perfect, neutral base for custom add-ins! Stir in crispy cooked bacon bits, sautéed garlic, roasted broccoli, diced ham, a pinch of smoked paprika, a dash of hot sauce, or caramelized onions after mixing pasta and sauce. Just make sure wet add-ins are well-drained so they don’t thin out your creamy sauce.
12.How should I store leftover stovetop mac and cheese? ▾
Let leftovers cool completely to room temperature within 2 hours of cooking, then transfer to an airtight container and keep in the fridge for up to 4 days. I don’t recommend freezing this mac and cheese, because the dairy-based sauce will separate and turn grainy when thawed, leaving a watery, unappetizing texture after reheating.
13.What’s the best way to reheat leftovers so they stay creamy? ▾
Reheat portions in a small saucepan over low heat, stirring often, and add 1 to 2 tablespoons of whole milk per serving to loosen the sauce back up as it warms. You can also reheat single servings in the microwave in 30-second bursts, stirring between each, and adding a splash of milk. Top with fresh toasted panko for crunch.
14.Can I make this recipe ahead of time for busy weeknights? ▾
You can prep components ahead to cut down on cook time: shred your cheese, measure out flour and butter, and toast your panko up to 3 days in advance. I don’t recommend making the full sauce ahead, as it will thicken, form a skin, and separate when reheated. The whole dish comes together in 30 minutes, so it’s fast enough to make fresh.
15.Can I use other types of cheese instead of sharp cheddar? ▾
Absolutely! Sharp cheddar delivers that classic tangy, nostalgic flavor, but you can swap up to half the cheddar for other melty cheeses like Gruyère, Monterey Jack, fontina, or smoked gouda for extra depth. Avoid crumbly, non-melting cheeses like feta as your base, since those won’t create a smooth, velvety sauce.
16.Do I really need to reserve pasta water, or can I skip that step? ▾
Don’t skip it! The starchy, salty water left from cooking pasta is the secret to adjusting sauce to the perfect consistency without making it watery. It emulsifies with cheese and roux to create a silky sauce that clings to every noodle, rather than sliding off. Scoop out ½ cup right before draining pasta so you have it on hand.
17.How much salt should I add to my pasta cooking water? ▾
Salt your pasta water until it tastes as salty as seawater—usually about 1 tablespoon of kosher salt per 4 quarts of water. This seasons noodles from the inside out, so you don’t end up with bland pasta even if your cheese sauce is well-seasoned. Don’t add oil to pasta water, as that makes noodles slippery and keeps sauce from sticking.
18.Can I double this recipe to serve a larger group or crowd? ▾
Definitely! Just double all ingredient amounts, and use a large enough stockpot so you don’t overcrowd pasta while it cooks, plus a large enough saucepan to make the roux and sauce without boiling over. Keep heat at medium when making sauce for a double batch, and whisk constantly to avoid lumps, as larger batches take slightly longer to thicken.
19.Is this stovetop version less creamy than baked mac and cheese? ▾
It’s actually creamier than most baked mac and cheese recipes! Baked versions often use eggs or extra-thick sauce that sets up in the oven, which can create a denser texture. This stovetop version stays silky and pourable because it never goes in the oven, and toasted panko adds that same craveable crunch you love without extra cook time.

Comments (20)

3 days ago

OMG, made this last night for my teen son’s post-soccer practice dinner and he ate THREE helpings. My kid loved it! So much better than the boxed stuff, and it was actually done faster than waiting for water to boil for the blue box? Wild. Total game changer, 10/10 will be in our weekly meal prep rotation now.

2 hours ago

Wait, does this reheat well? I want to make a big batch on Sunday for weekday lunches for me and the girls but I hate when mac and cheese gets all grainy after microwaving.

30 minutes ago

Great question! It reheats beautifully if you stir in a tiny splash of milk before microwaving, covered, for 60-90 seconds. It stays just as creamy as day one, perfect for meal prep!

1 week ago

Y’all I messed up the first time I made this and used pre-shredded cheese (you know, the kind with the anti-caking powder?) and it came out a little clumpy. Second time I shredded my own sharp cheddar straight from the block? *Chef’s kiss* SO good, even my picky partner asked for seconds.

3 days ago

Oh thank you for the pre-shredded cheese warning! I almost grabbed a bag from the fridge tonight to make this, I’ll shred fresh instead.

2 days ago

That’s such a great tip! Pre-shredded cheese does have that starch coating that can mess with the silky sauce, so fresh shredded is always worth the extra 2 minutes of effort.

1 week ago

Brought this to our neighborhood block party potluck last weekend and people were begging for the recipe before I even set the dish down! I topped mine with a little toasted panko for crunch and it was chef’s kiss. No one believed it only took 20 minutes to make.

yesterday

As someone who can barely boil water without burning it, this recipe was so easy to follow! I didn’t have heavy cream so I used half and half and it still came out super creamy. Saved my late night study snack run.

5 minutes ago

Wait the half and half swap is genius! I never have heavy cream in my mini fridge either, I’m definitely trying that tonight.

3 days ago

Has anyone tried this with gluten free elbow pasta? My daughter has celiac and I’m always on the hunt for easy weeknight meals that don’t taste like “diet food” for her.

2 days ago

I made it with brown rice GF elbows last week! Just cooked the pasta a minute less than the box said so it didn’t get mushy, worked perfectly.

yesterday

Great tip from Liz! I’ve tested this with chickpea and brown rice gluten free pastas too, just hold a little extra pasta water to thin the sauce if it gets too thick, and it turns out great.

5 days ago

Okay I was skeptical that stovetop mac could be better than baked, but this converted me. No waiting 40 minutes for it to bake, zero roux panic, just cheesy, gooey perfection on a weeknight. I added a dash of hot sauce on top and it was unreal.

2 days ago

How long does this keep in the fridge for? I usually prep 5 days of lunches for work and want to add this to the rotation if it holds up.

yesterday

This will keep well in an airtight container in the fridge for up to 4 days! Just remember that splash of milk when you reheat to bring the creaminess back.

2 weeks ago

My 7 year old turned her nose up at every homemade mac and cheese I’ve ever made, saying it “doesn’t taste like the school lunch one”. I made this last night and she said it’s better than school lunch. I feel like I won parent of the year.

1 week ago

This is the exact review I needed to see! My son is the same way, he swears only school cafeteria mac counts. I’m making this tomorrow night for sure.

5 days ago

Pro tip to make it taste extra like school lunch: add a tiny pinch of dry mustard powder! I used to work in a school cafeteria and that’s the secret ingredient no one talks about.

just now

Added a handful of pickled jalapeños and a sprinkle of cajun seasoning to mine for a little kick and it was *chef’s kiss*. The base recipe is so easy to customize, I already have a list of mix-ins to try next time: bacon bits, broccoli, buffalo chicken, you name it.

1 week ago

This was the first real recipe I made in my new apartment after moving last week! My roommate walked in and thought I ordered takeout from that fancy mac and cheese place downtown. Win for adulting!

3 days ago

This is so relatable! I made this for my first apartment housewarming and all my friends thought I was secretly a good cook. Don’t tell them how easy it is.

30 minutes ago

I only have mozzarella and a little parm in the fridge right now, will that work instead of sharp cheddar? I really don’t want to run to the grocery store in the rain tonight.

5 minutes ago

I did that last month! It was a little more stringy than cheddar but still totally tasty, added a little extra salt to make up for the mild mozz.

just now

Mozzarella and parm works great! If you want a little extra tang, you can stir in a tiny spoonful of cream cheese if you have it on hand, but it’ll be delicious even without it. Enjoy!

yesterday

Made this after a 12 hour work shift when I had zero energy to cook and it was still so simple to throw together. No fancy equipment, no weird ingredients I had to track down at a specialty store, just pure comfort food. Exactly what I needed.

2 weeks ago

I steamed some broccoli florets and stirred them right in at the end to get some veggies in for my kids, and they didn’t even complain! Total win for sneaking in greens without a fight.

1 week ago

That’s such a smart hack! Steamed cauliflower, roasted cherry tomatoes, or even diced cooked chicken all mix in beautifully here for a full one-pot meal.

5 days ago

Wait, has anyone tried making this with oat milk and dairy free cheese? My son is dairy intolerant and I miss having mac and cheese nights with him.

3 days ago

I made it with unsweetened oat milk and a block of dairy free sharp cheddar last week! It was way creamier than I expected, just make sure you don’t boil the sauce too hard or it might separate a little.

2 days ago

Dani, we’ve tested this with unsweetened oat milk and dairy free cheddar too, and it works great! Just keep the heat low once you add the cheese, and it’ll turn out super silky for your mac and cheese nights.

1 week ago

Made a double batch of this for our football tailgate last weekend, kept it warm in the slow cooker on the low setting, and it was gone before the first quarter ended. Absolute crowd pleaser.

2 days ago

Perfect, I was looking for an easy tailgate recipe for this weekend’s game! I was gonna do chili but this is way easier, thanks for the slow cooker tip.

2 days ago

This is so much cheaper than buying frozen mac and cheese or takeout! Pasta, cheese, a little milk and butter – I already had all the ingredients in my pantry and fridge, no extra grocery run needed. Saved me like $15 this week, will be making this on repeat.

yesterday

I’ve avoided homemade mac and cheese for years because I always mess up the roux and end up with lumpy, weird sauce. This recipe was so forgiving! I didn’t get a single lump, even when I got distracted by my dog barking mid-stir. 10/10 for us cooking disaster people.

30 minutes ago

That makes me so happy to hear! I designed this recipe to be super low-fuss and forgiving for new cooks, no fancy roux skills required, so you can get creamy mac without the stress.

3 days ago

I stirred in some leftover pulled pork I had in the fridge from last night’s dinner and it was the best bbq mac and cheese I’ve ever had. No lie, better than the restaurant version I pay $18 for.

yesterday

Oh my god the pulled pork addition is genius! I have leftover brisket in the freezer right now, I’m defrosting it tonight to add in, that sounds incredible.

5 days ago

I’ve been a diehard baked mac and cheese fan my whole life, I thought stovetop was always mushy and bland. My partner made this for me when I was sick last week and I ate the entire pot. I’m a convert, no cap.

2 days ago

Wait this is the review I didn’t know I needed. I’m team baked mac all the way but I don’t have time to bake it on weeknights, I’m giving this a shot tomorrow.

yesterday

We love a baked mac convert! If you want that baked crispy top without the oven time, you can toast some breadcrumbs in a little butter on the stovetop and sprinkle it over top before serving, you get the best of both worlds.



