
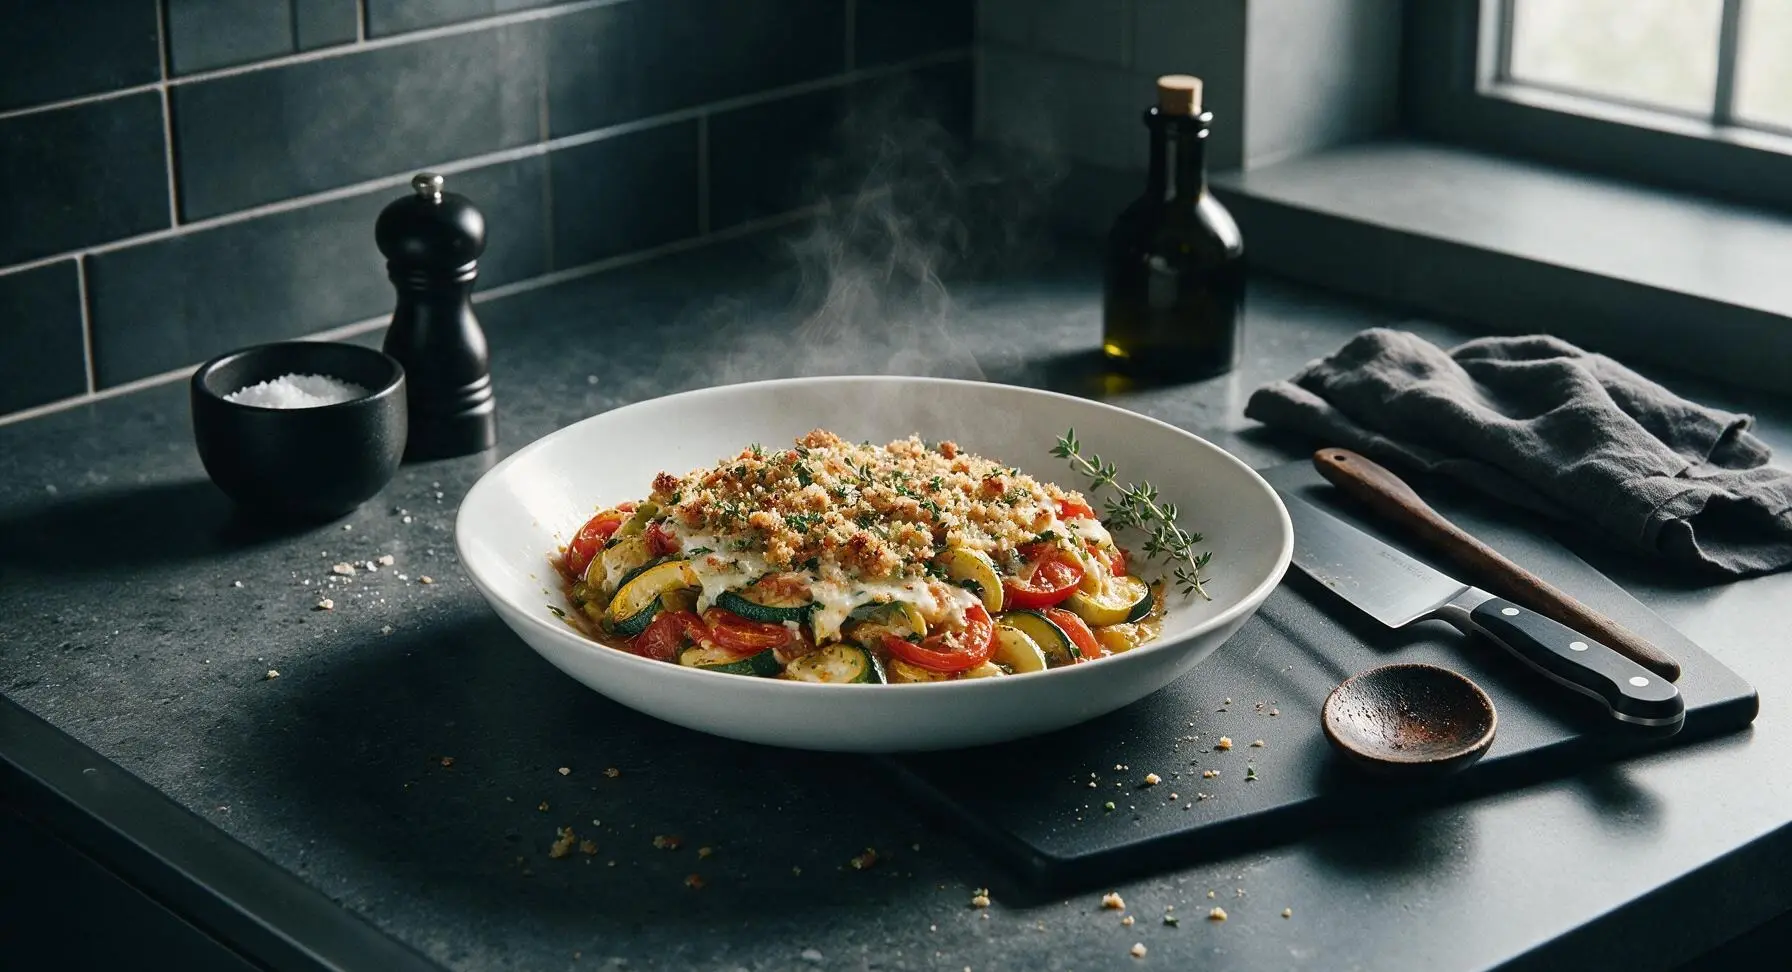
summer casserole

title 1
summer casserole
⏱️ cook time 35 minutes
🍽️ servings 6
⚡ Difficulty easy

intro

Bright, veggie-packed summer casserole layers tender seasonal squash, ripe tomatoes, melted cheese, and crispy herbed breadcrumbs for a light, crowd-pleasing warm-weather bake perfect for sharing.

Ingredients
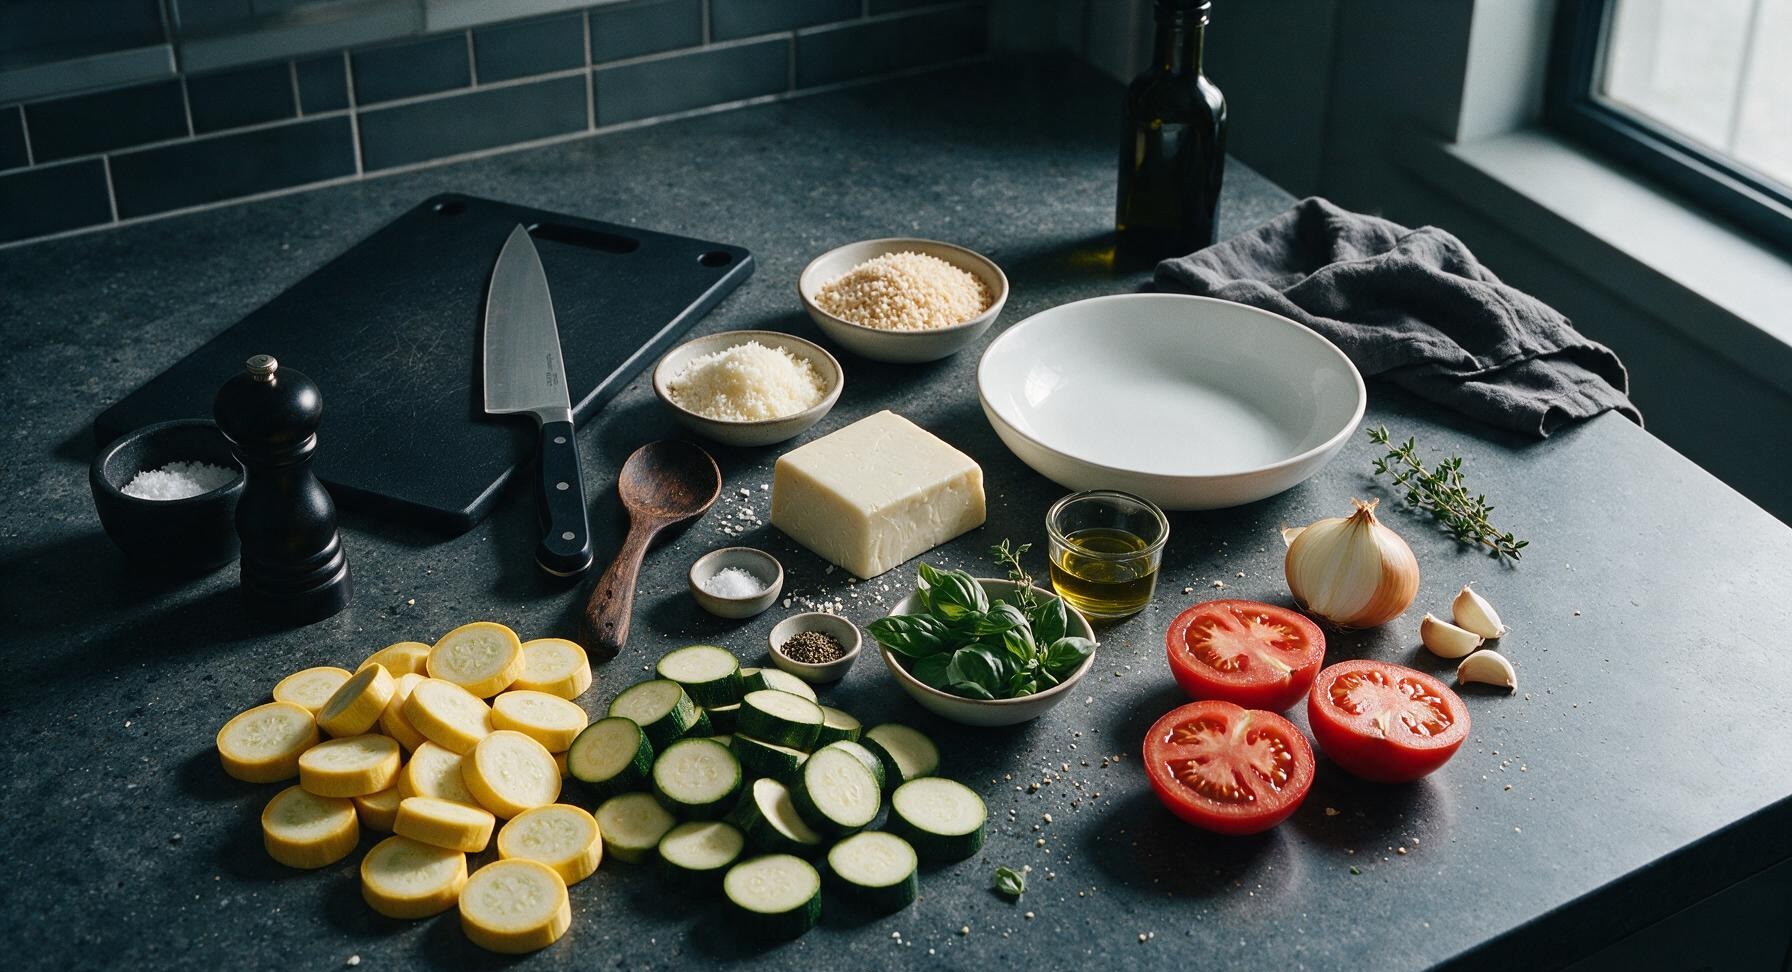
Yellow summer squash 2 medium (≈1 lb total)
Zucchini 2 medium (≈1 lb total)
Ripe beefsteak tomatoes 3 medium (≈1.25 lbs total)
Yellow onion 1 small (≈4 oz)
Garlic cloves 2
Low-moisture mozzarella cheese 8 oz, block for shredding
Grated parmesan cheese 1/2 cup (≈2 oz)
Panko breadcrumbs 1 cup
Fresh sweet basil 1/4 cup packed leaves, plus extra for garnish
Extra-virgin olive oil 2 tbsp, divided
Kosher salt 1 tsp, divided
Freshly ground black pepper 1/2 tsp
Dried oregano 1/2 tsp

Steps

1

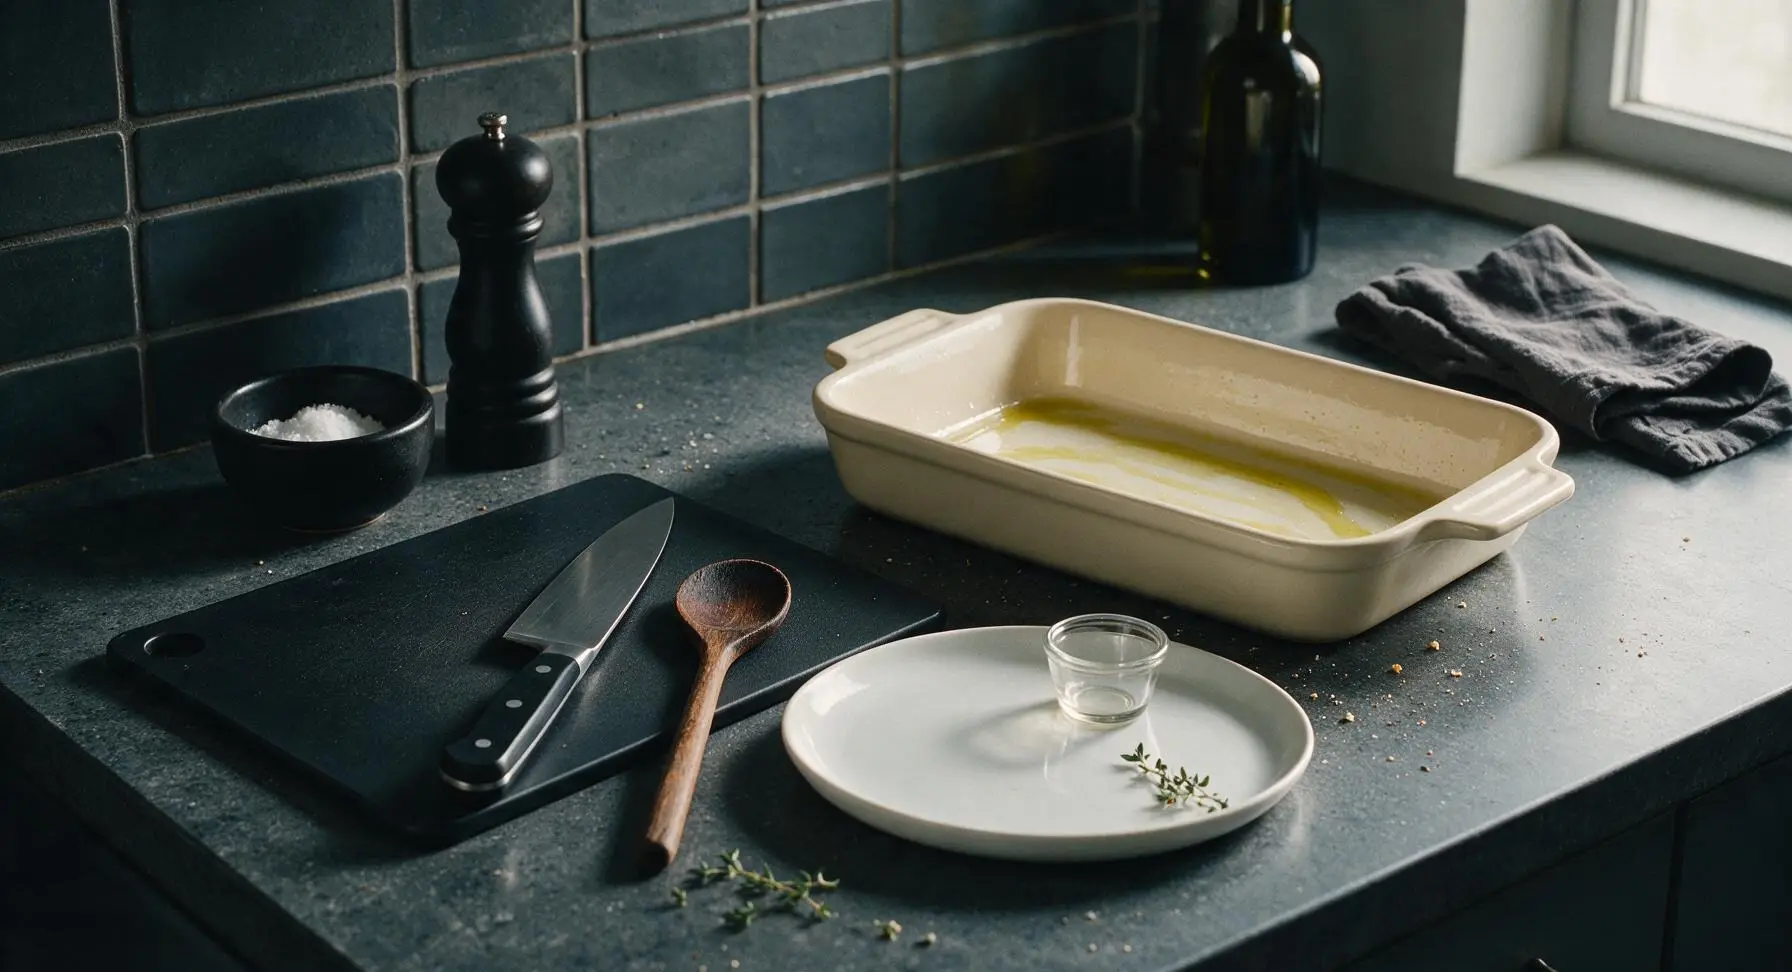
Preheat and Prep Bakeware

Preheat your oven to 375°F (190°C). Use about 1/4 tsp of olive oil to lightly grease the interior of the matte cream 9x13 inch ceramic casserole dish, wiping any excess oil with a clean corner of the linen tea towel. Set the prepared dish on the back-right section of the counter while you prep vegetables, leaving the central work area open for cutting.
Step 1
step1:Preheat and Prep Bakeware
2

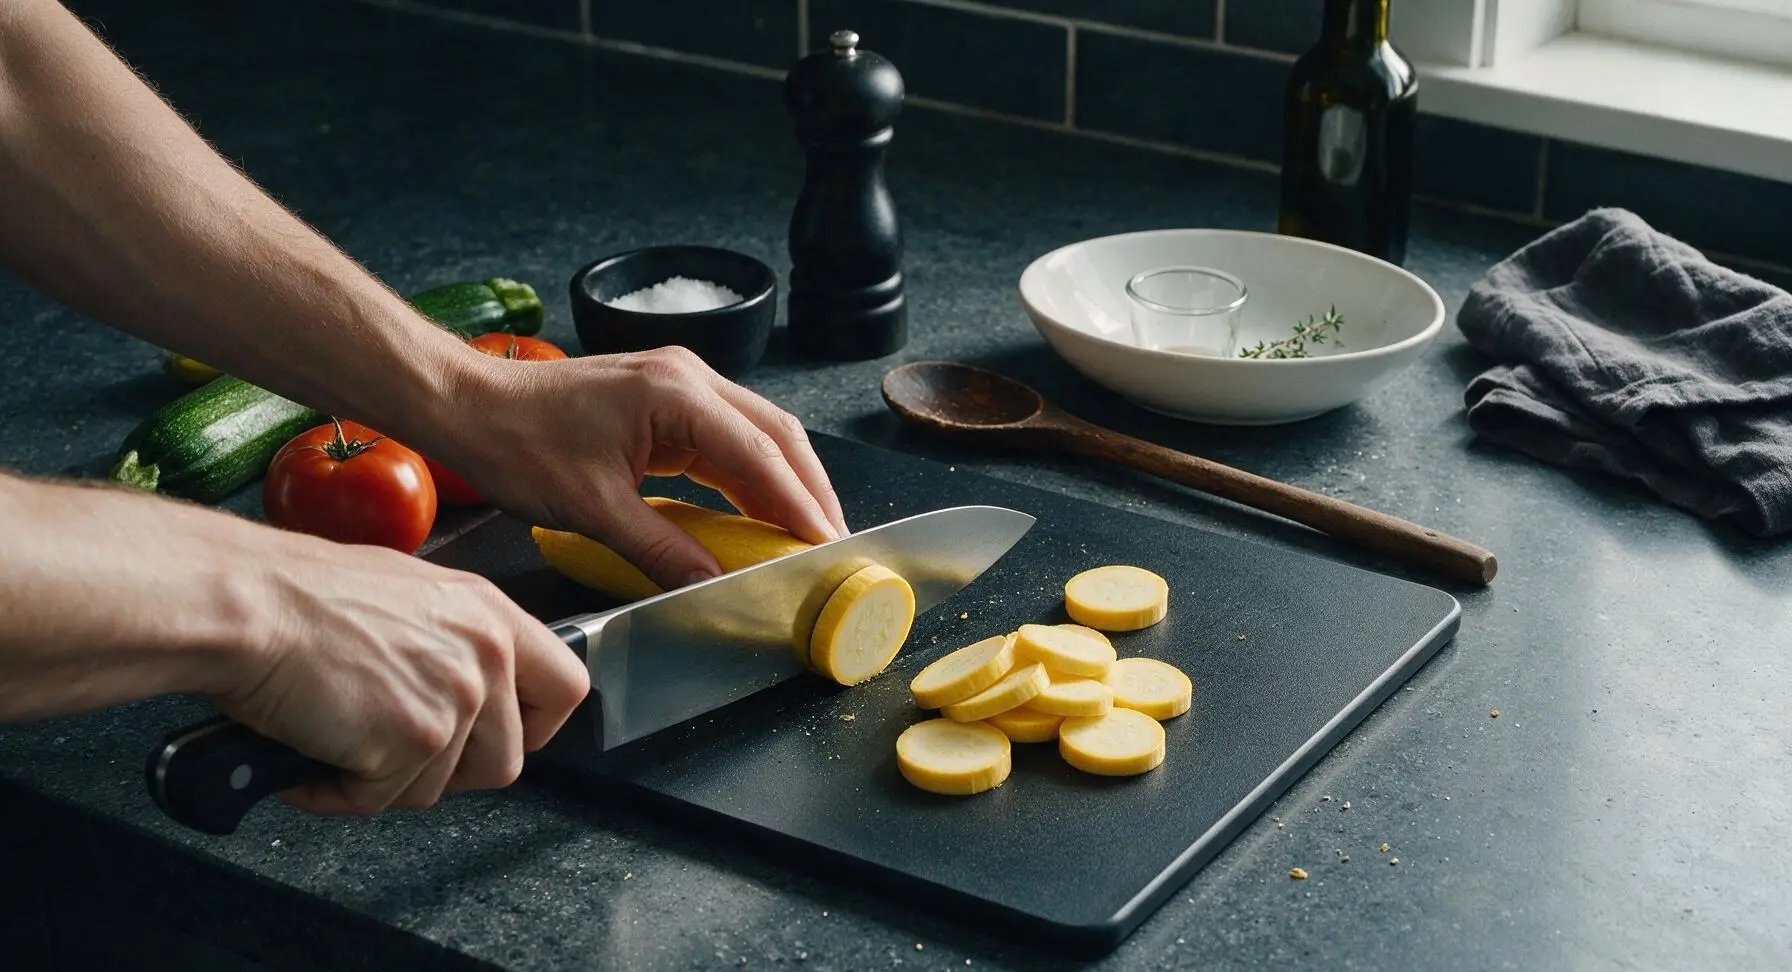
Slice Summer Vegetables

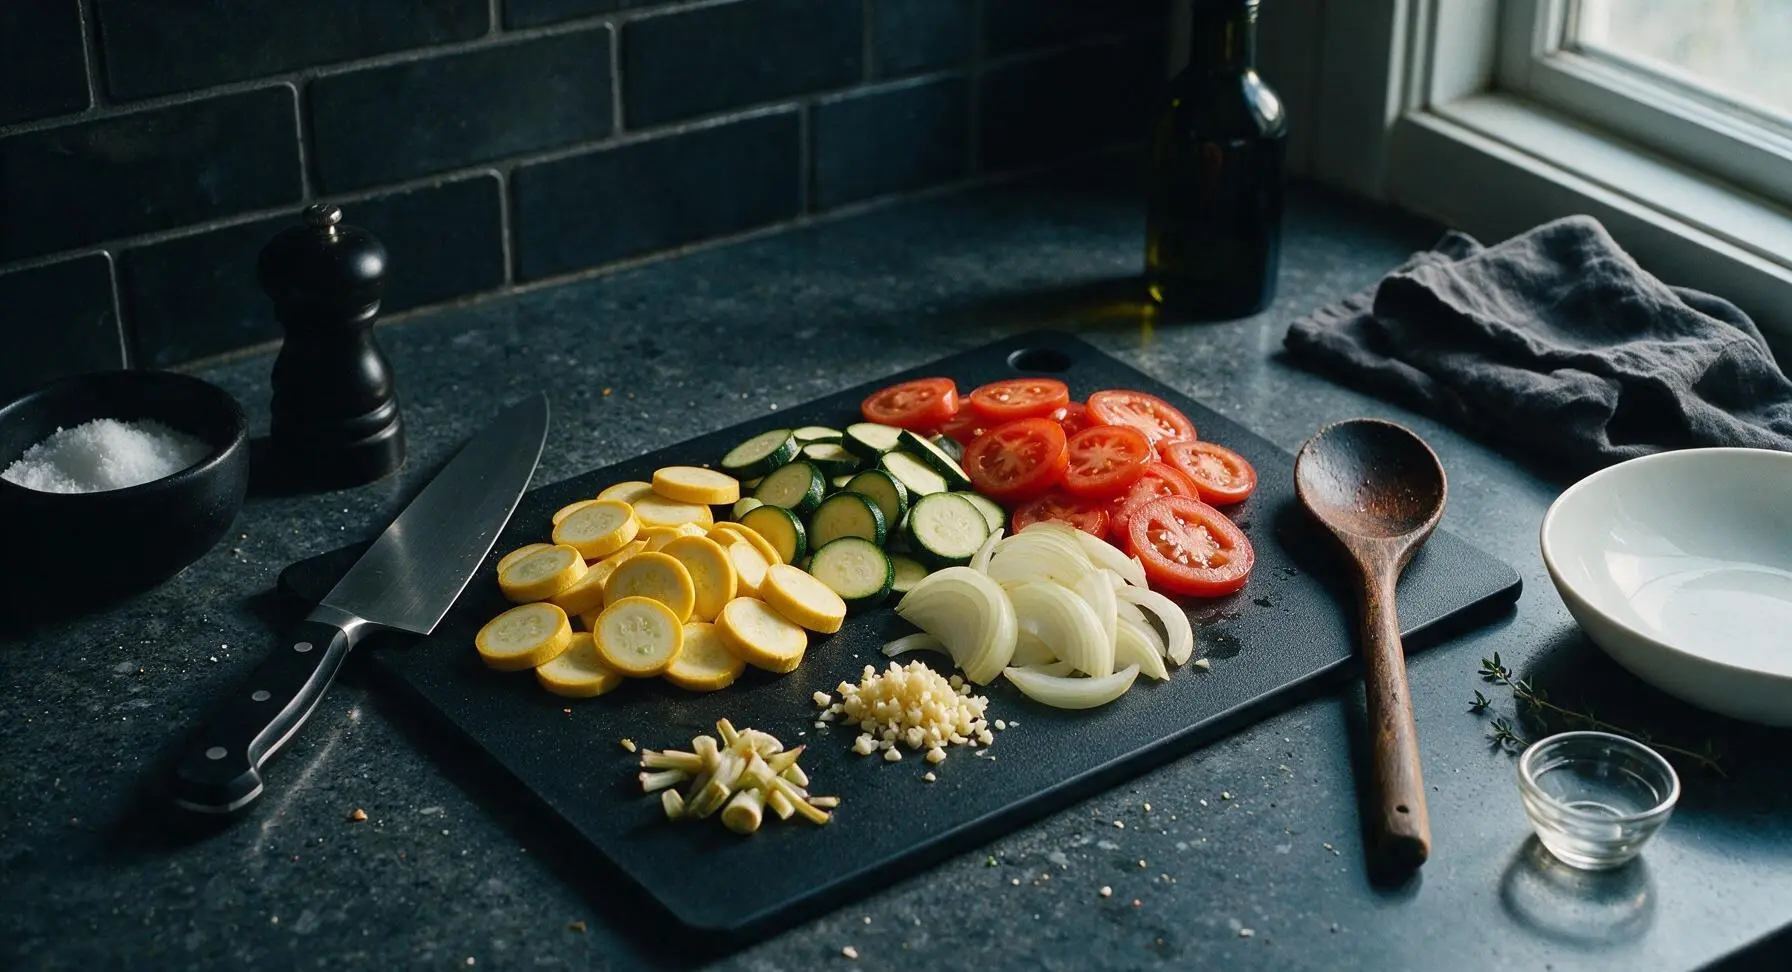
Place the yellow squash, zucchini, and tomatoes on the maple cutting board. Using the chef’s knife, slice all into uniform 1/4-inch thick rounds. Thinly slice the yellow onion into half-moons, and mince the 2 garlic cloves finely. Keep each vegetable in separate small piles on the cutting board to make layering easy; discard any tough stem ends into a small scrap pile at the edge of the board.
Step 2
step2:Slice Summer Vegetables
Step 2
step2:Slice Summer Vegetables
3

Mix Breadcrumb Topping

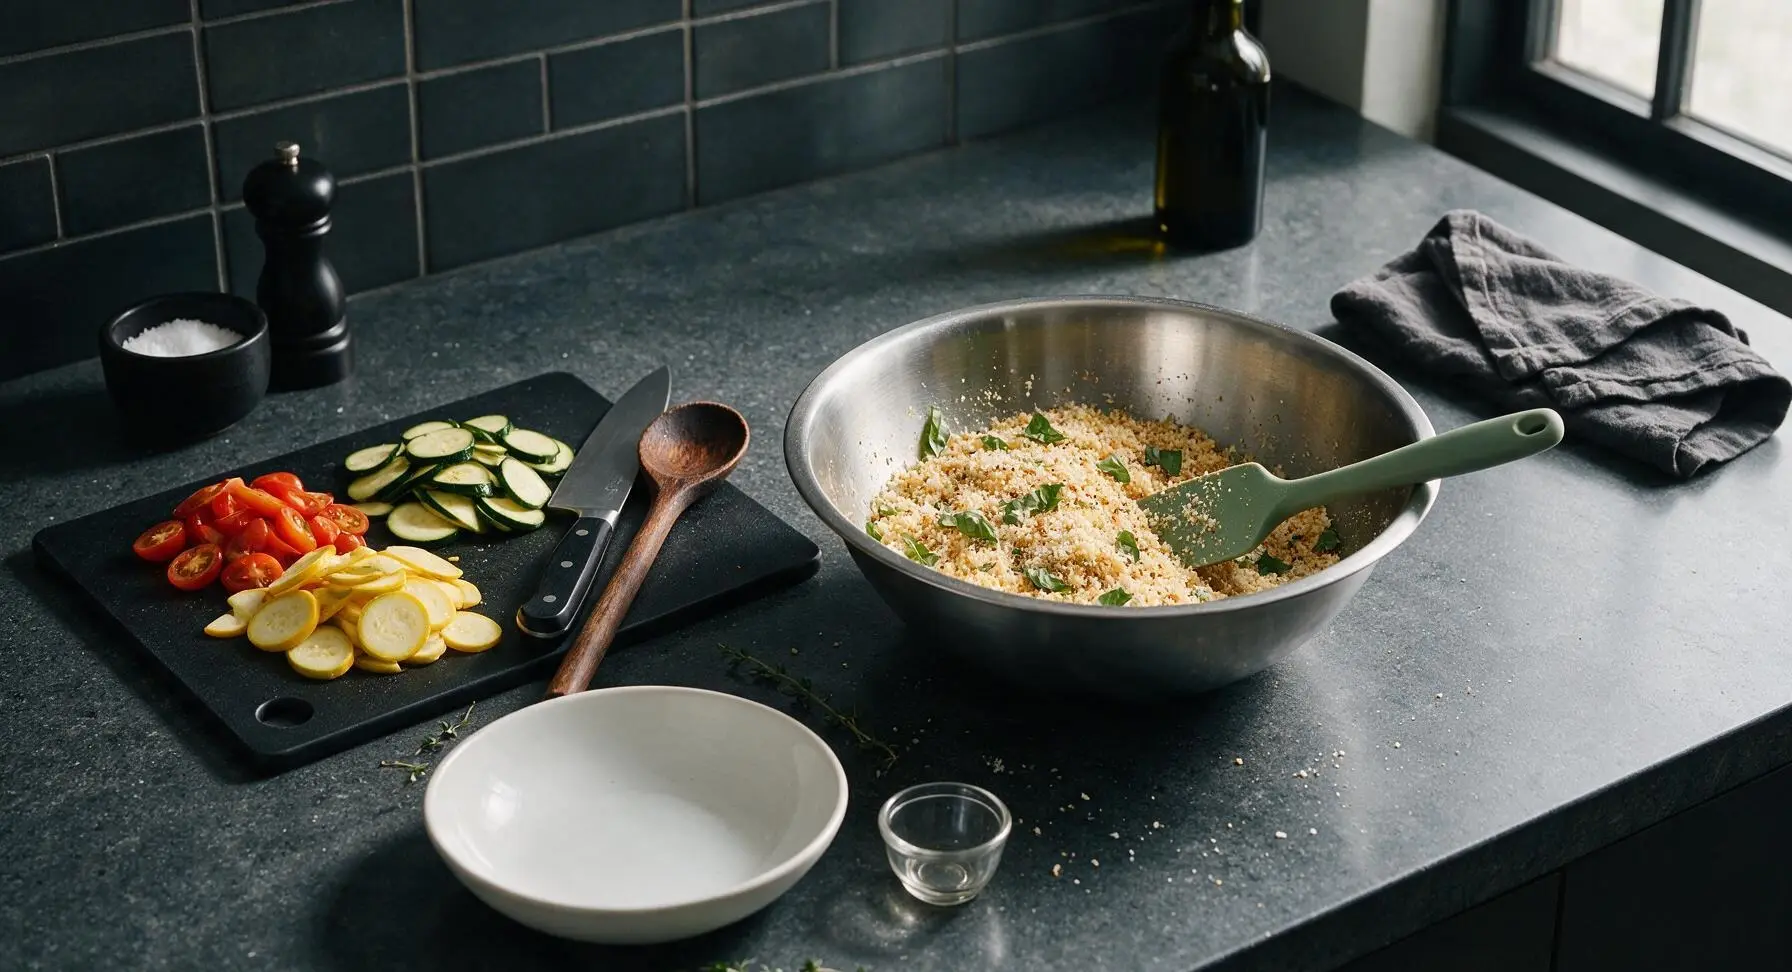
Set the brushed stainless steel 3-quart mixing bowl on the center-right section of the counter. Combine 1 cup panko breadcrumbs, 1/4 cup grated parmesan, 1 tbsp olive oil, 1/4 tsp kosher salt, 1/4 tsp black pepper, and 1/2 tsp dried oregano in the bowl. Stir with the sage green silicone spatula until the panko is evenly coated with oil and spices, forming a light golden, crumbly texture. Tear half of the fresh basil leaves into small pieces and fold into the topping mixture; set the bowl aside.
Step 3
step3:Mix Breadcrumb Topping
4

Shred Mozzarella Cheese

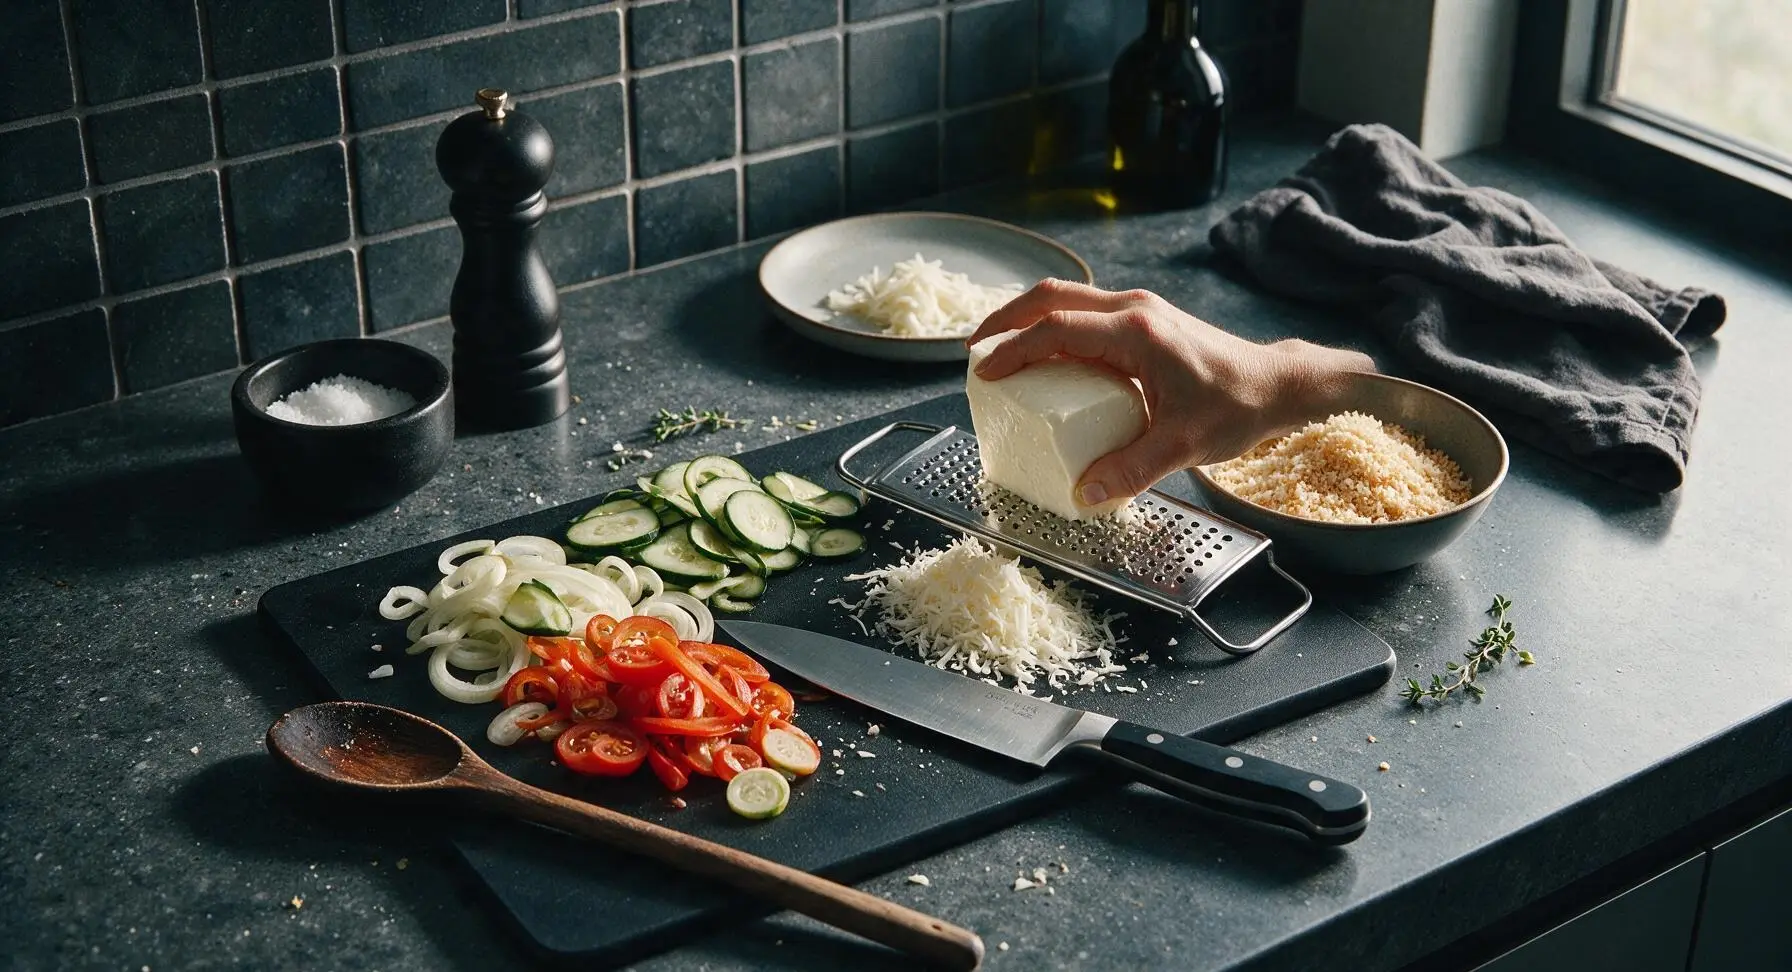
Place the stainless steel box grater on the right edge of the maple cutting board for stability. Grate the 8oz block of low-moisture mozzarella into large, fluffy shreds, collecting the shreds in a neat pile on the empty section of the cutting board. Discard any small hard end pieces of the cheese block into the scrap pile; set the shredded cheese aside for layering.
Step 4
step4:Shred Mozzarella Cheese
5

Layer Casserole Ingredients

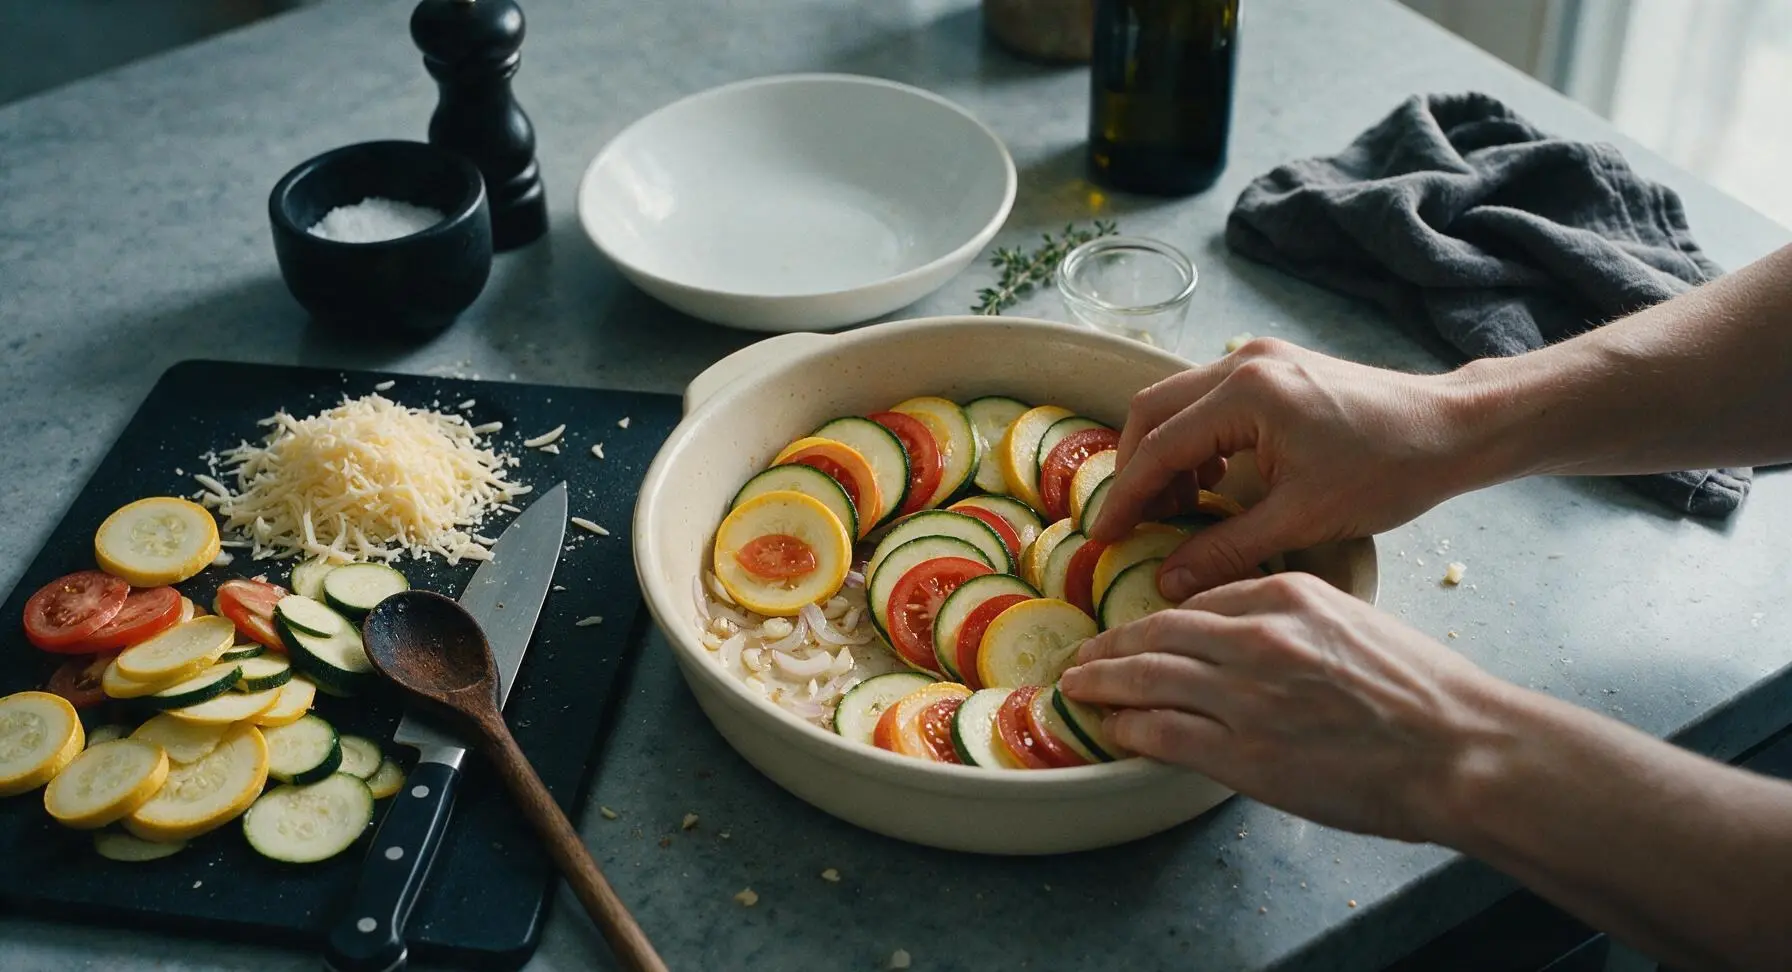
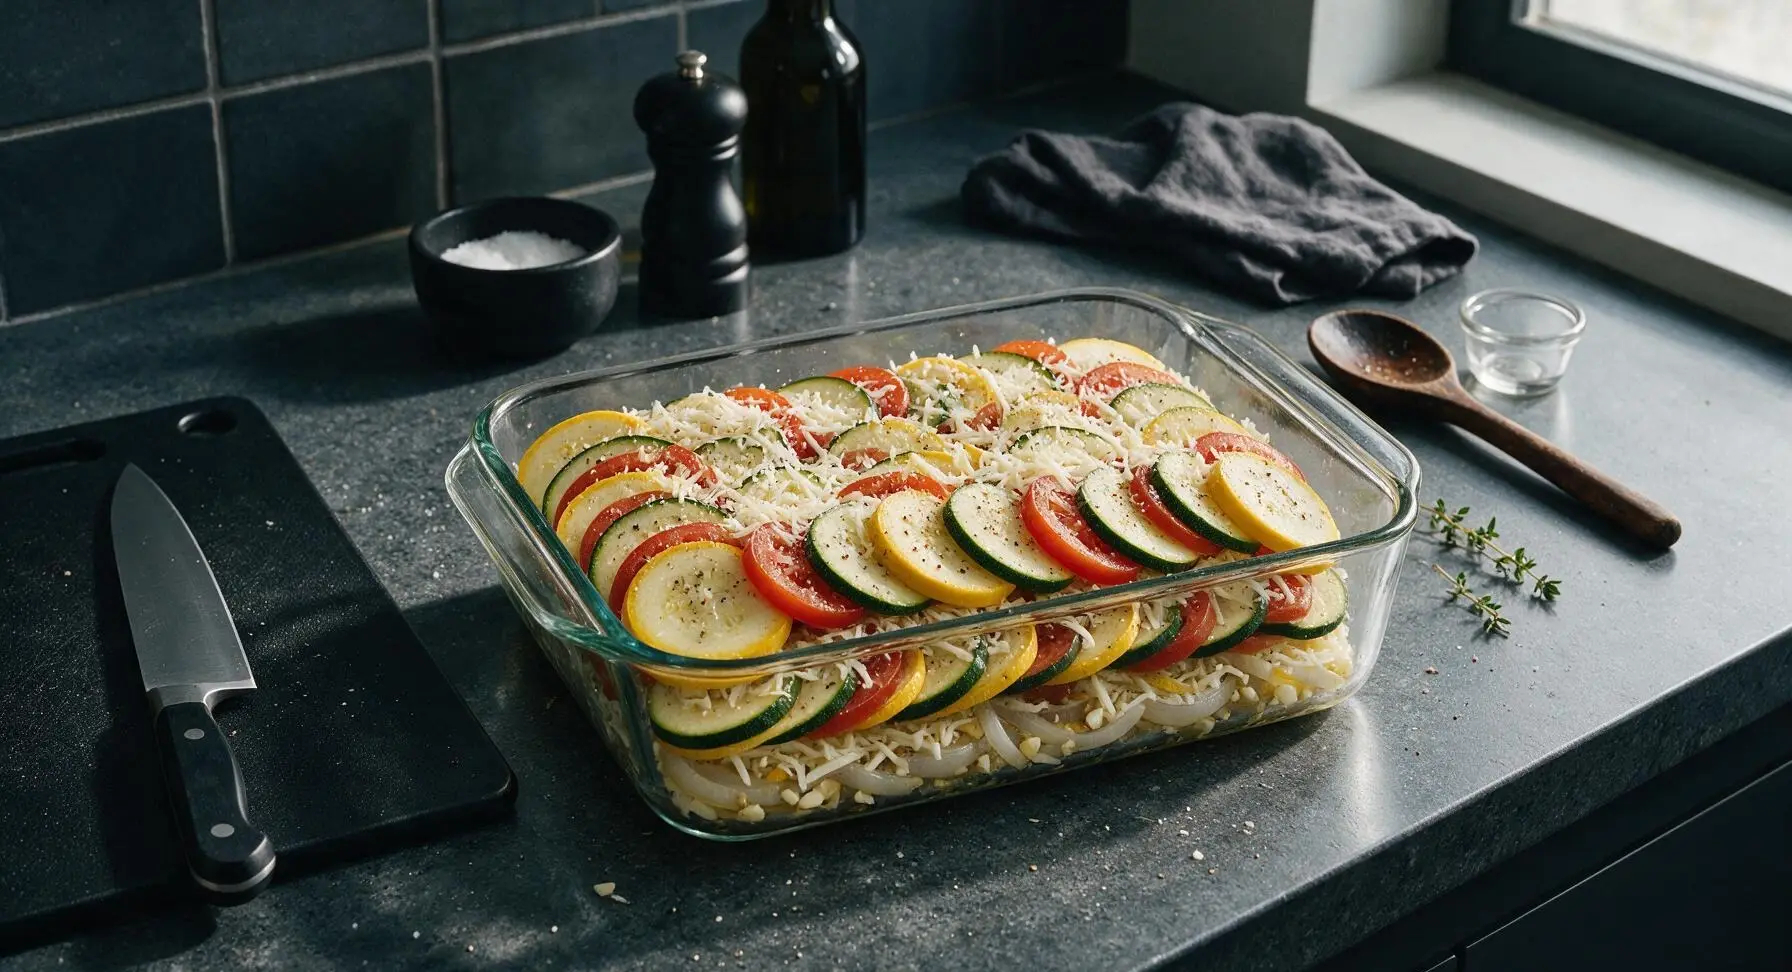
Arrange ingredients in the prepared casserole dish in even, overlapping layers: start with a thin scatter of onion and garlic across the bottom of the dish, then alternate rows of squash, zucchini, and tomato rounds, slightly overlapped like roof shingles. Lightly season each vegetable layer with a pinch of remaining salt and pepper, then sprinkle a third of the shredded mozzarella and a third of the remaining parmesan over the layer. Repeat for 2 more full vegetable and cheese layers, finishing with a final top layer of vegetables.
Step 5
step5:Layer Casserole Ingredients
Step 5
step5:Layer Casserole Ingredients
6

Add Breadcrumb Topping

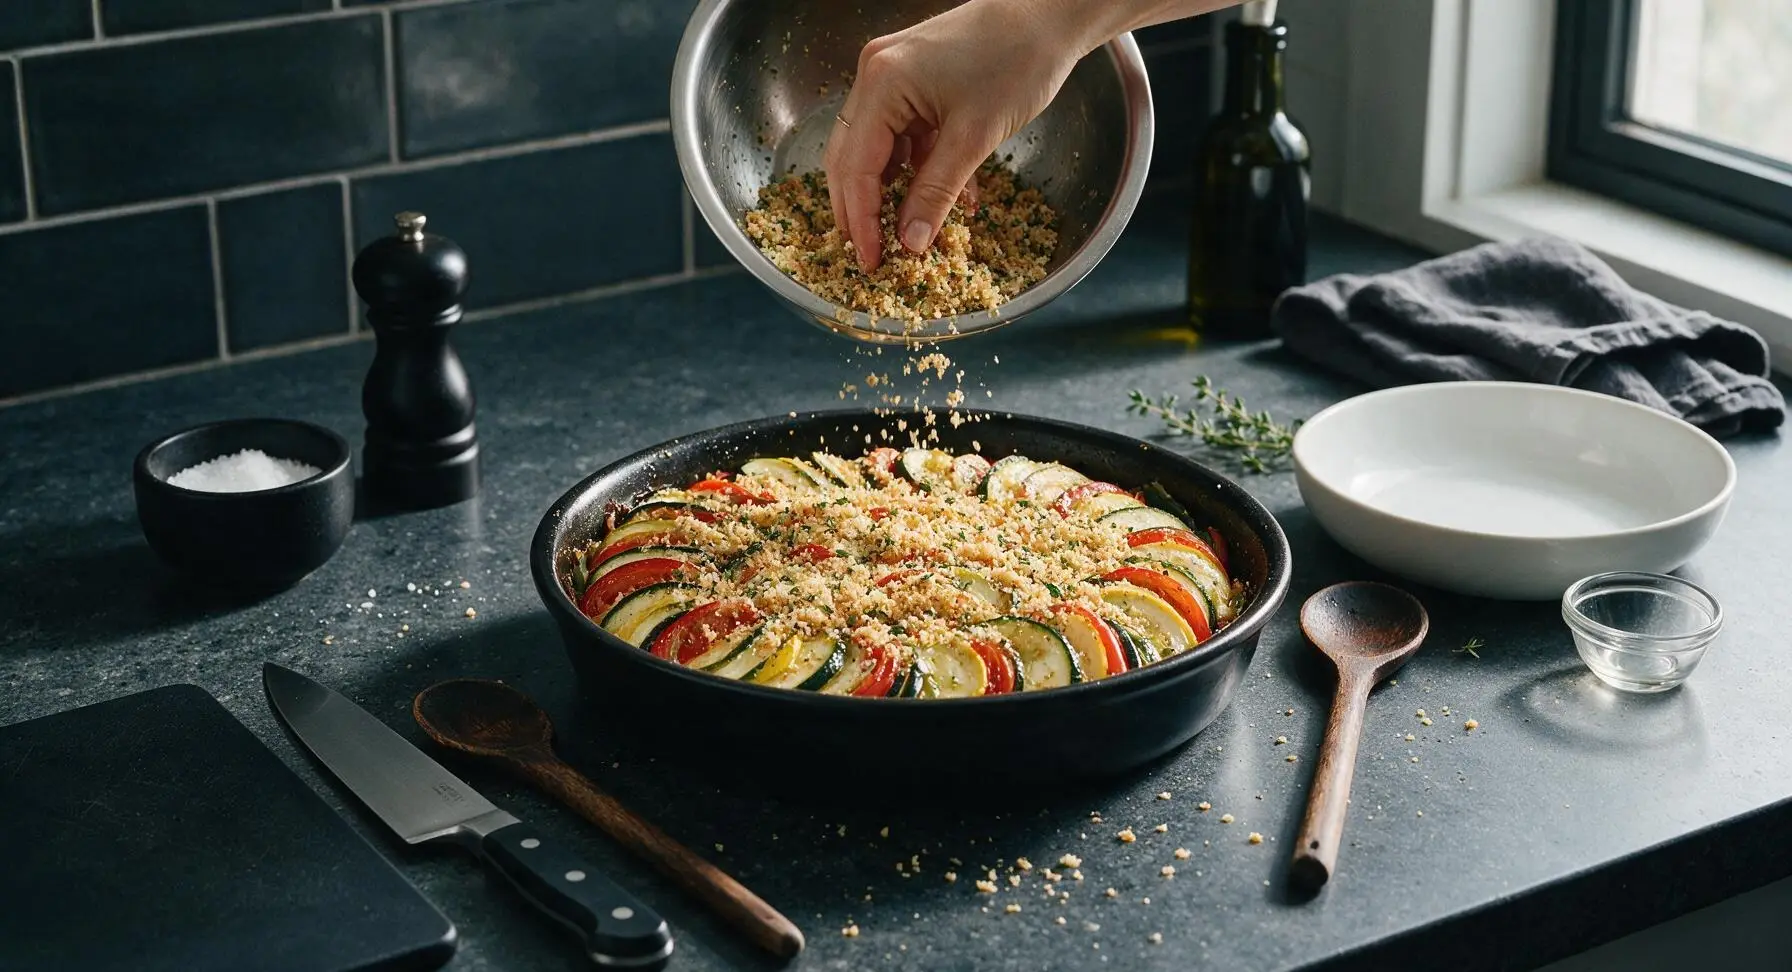
Sprinkle the reserved panko breadcrumb mixture evenly over the top of the layered vegetables, covering the entire surface in a thin, uniform layer. Do not press the crumbs down—keep them loose to crisp up fully in the oven. Drizzle the remaining 1 tbsp olive oil lightly over the top of the breadcrumbs to encourage even browning.
Step 6
step6:Add Breadcrumb Topping
7

Bake Until Golden Bubbly

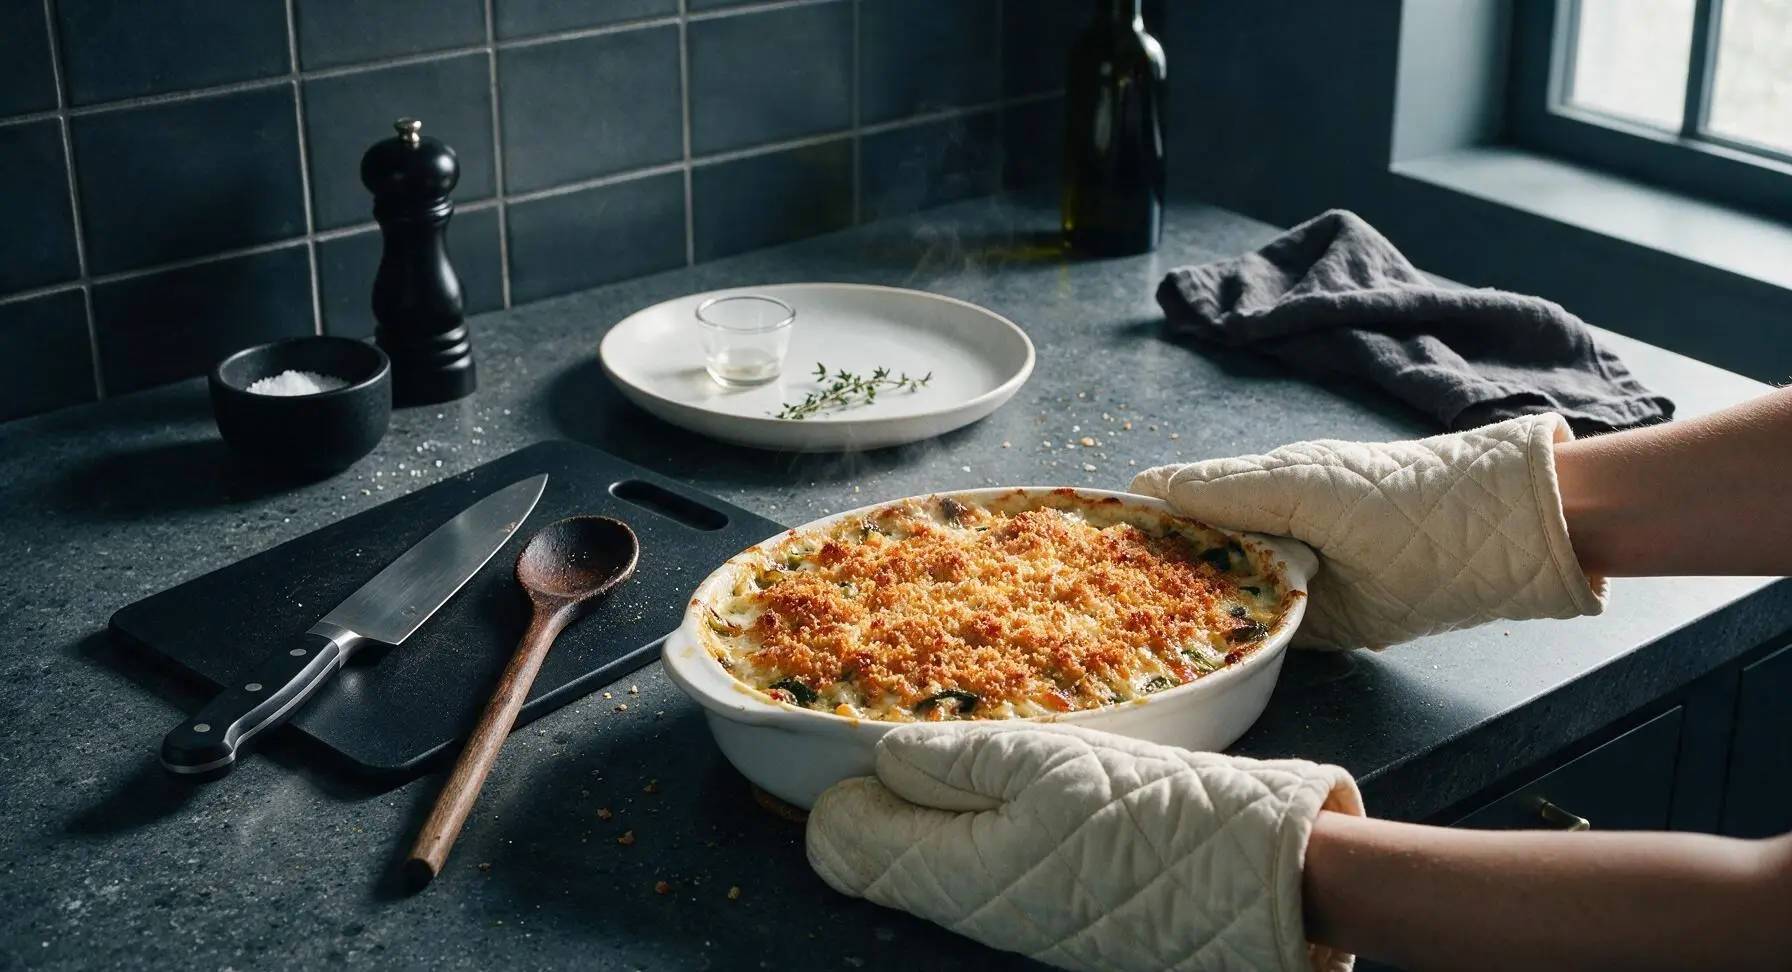
Carefully transfer the assembled casserole to the middle rack of the preheated 375°F (190°C) oven. Bake for 35 minutes, until the edges are actively bubbling, the vegetable layers are tender when pierced with a fork, and the breadcrumb topping is deep golden brown and crispy. If the topping browns too quickly before the vegetables are tender, tent loosely with a sheet of aluminum foil for the last 10 minutes of baking.
Step 7
step7:Bake Until Golden Bubbly
8

Rest and Garnish

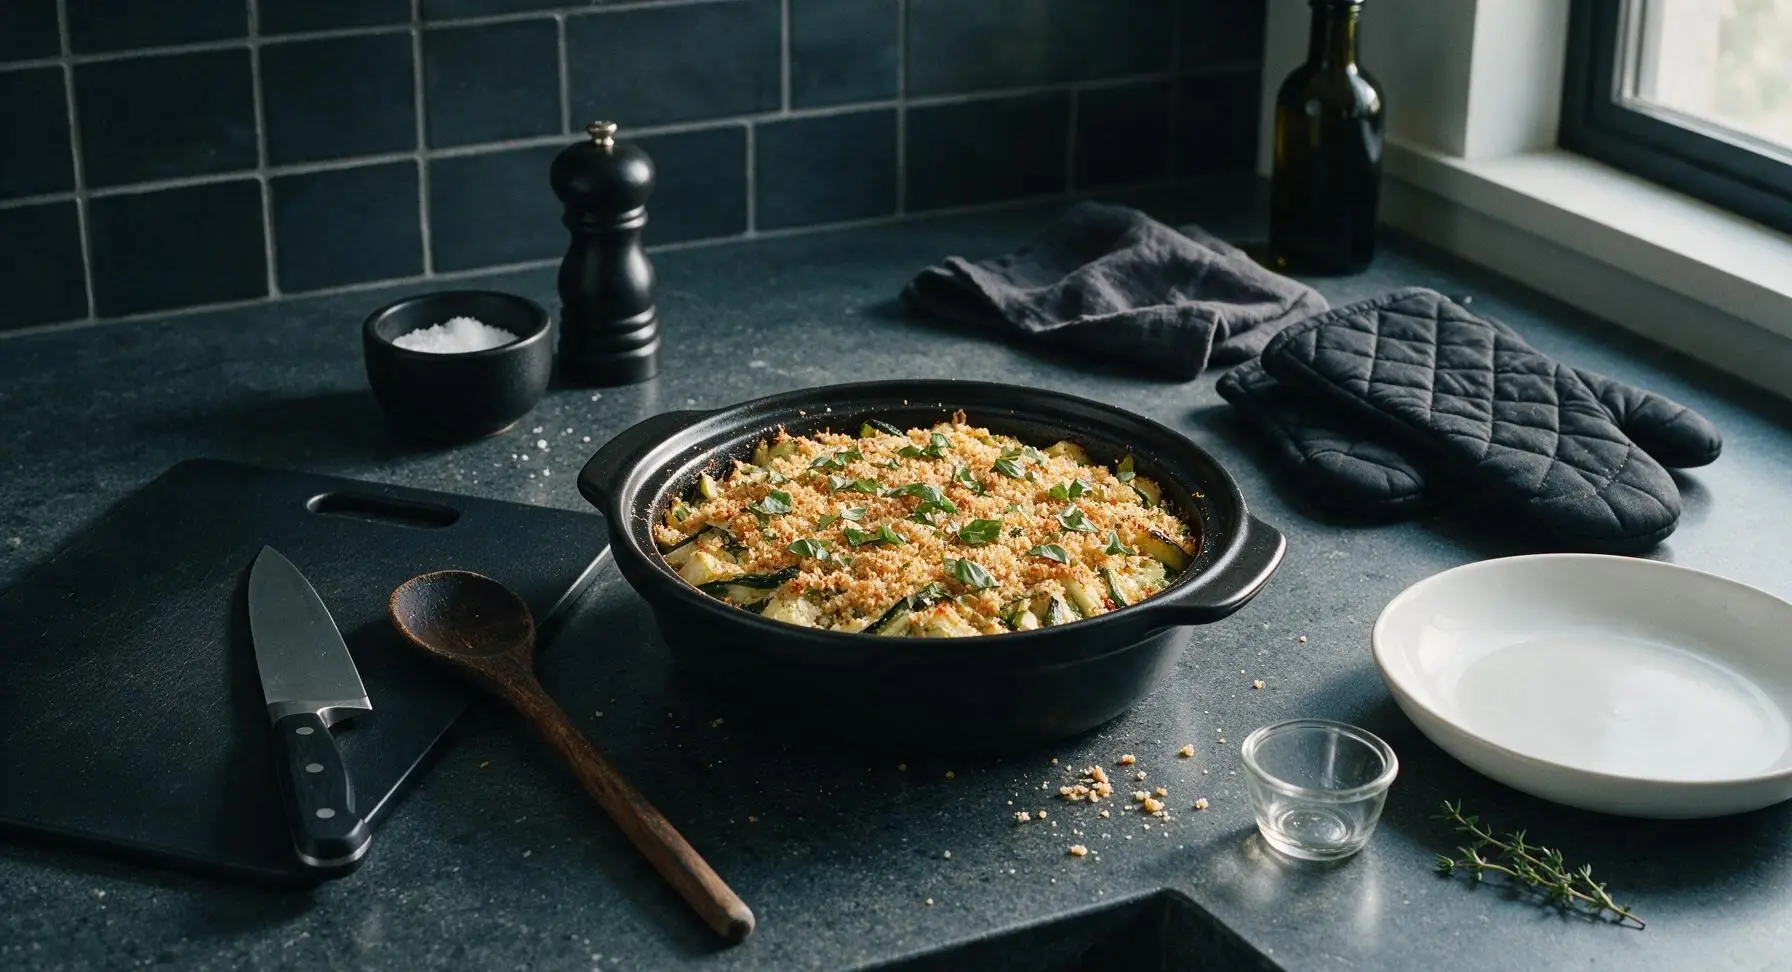
Let the casserole rest for 10 minutes at room temperature to allow the layers to set, which makes for clean, neat servings. Tear the remaining fresh basil leaves into small pieces and scatter them over the top of the warm casserole as a bright, fresh garnish before serving.
Step 8
step8:Rest and Garnish

Tips

1.Pat sliced summer squash and tomatoes dry with paper towels before layering: these summer vegetables have very high water content, and excess moisture will lead to a soggy, watery casserole instead of a tender, cohesive bake.
2.Stick to low-moisture, part-skim mozzarella for this recipe instead of fresh mozzarella: fresh mozzarella is packed in water and releases large amounts of liquid as it melts, which will soak the breadcrumb topping and make layers slide apart when served.
3.Resist the urge to cut into the casserole immediately after baking: the 10-minute rest period lets melted cheese set and vegetable juices thicken, so you get clean, intact portions instead of a runny, messy scoop, ideal for passing at a potluck.


✨ You May Also Like

Main Course
🍜 United Kingdom

A showstopping classic of tender seared beef, savory mushroom duxelles, and crisp prosciutto wrapped in flaky golden puff pastry, baked to juicy perfection.

⏱️ 2 hours 1Main Course ★ 4.7
Main Course
🍜 India

Tender charred marinated chicken simmered in a rich, spiced creamy tomato sauce, this iconic Anglo-Indian curry pairs perfectly with basmati rice or warm naan.

⏱️ 50 minuteMain Course ★ 4.6
Main Course
🍜 Thailand

Classic tangy, sweet, and savory Thai stir-fried rice noodles with shrimp, tofu, and crunchy garnishes, balancing all five core Thai flavor profiles.

⏱️ 30 minuteMain Course ★ 4.5
Main Course
🍜 United Kingdom

Crispy golden beer-battered cod and fluffy double-fried chips, served with tangy tartar sauce and malt vinegar: the timeless, beloved British pub comfort classic.

⏱️ 45 minuteMain Course ★ 4.7
Main Course
🍜 Mexico

Smoky, chile-marinated pork tacos with caramelized pineapple, fresh cilantro, and lime: a beloved classic Mexican street food perfect for casual summer gatherings.

⏱️ 1 hour 45Main Course ★ 4.8
Main Course
🍜 United States

Crunchy Fritos corn chips layered with savory beef chili and melted cheddar, topped with cool, zesty fixings for a beloved, cozy Tex-Mex comfort food.

⏱️ 35 minuteMain Course ★ 4.8

summer casserole:Frequently Asked Questions

1.Why does my summer vegetable casserole always turn out watery? ▾
Watery casserole almost always comes from skipping the veggie draining step! Toss sliced zucchini, yellow squash, and tomato slices with a light sprinkle of kosher salt, let them rest in a colander for 25–30 minutes, then pat thoroughly dry with paper towels before layering to cut excess moisture without losing bright, fresh flavor.
2.What’s the best cheese to use for this classic summer vegetable casserole? ▾
I recommend a blend of low-moisture, part-skim mozzarella for that perfect melty pull and a sprinkle of freshly grated parmesan for nutty, salty depth. Skip ultra-soft fresh mozzarella packed in water unless you drain and pat it extremely dry, as it will add extra unwanted moisture to your bake.
3.Can I prep this casserole the night before I plan to bake it? ▾
Absolutely! Assemble all the layered veggies, cheese, and seasonings in your baking dish, cover tightly with plastic wrap, and store it in the fridge for up to 24 hours. Wait to add the herbed breadcrumb topping until right before baking to keep it crispy instead of soggy from absorbing veggie moisture overnight.
4.How thick should I slice the squash, zucchini, and tomatoes for even cooking? ▾
Aim for uniform ¼-inch thick slices across all your veggies. If slices are too thick, you’ll end up with undercooked, crunchy chunks in the middle; if they’re paper-thin, they’ll break down completely into mushy texture during baking, losing that nice distinct layered bite the classic recipe is known for.
5.Do I need to peel the zucchini or yellow summer squash for this recipe? ▾
Nope, no peeling required! The thin, tender skin on summer squash and zucchini softens beautifully during baking, adds nice subtle color contrast to your layers, and holds extra fiber and nutrients. Just give the skins a good scrub under cool running water to remove any dirt or residual waxy coating before slicing.
6.What temperature should I bake this casserole at for the best results? ▾
Bake at 375°F (190°C) for the perfect balance. Start with the dish covered in foil for the first 25 minutes to let the veggies soften and flavors meld, then remove the foil, add your breadcrumb topping, and bake uncovered for 15–20 more minutes until the top is golden crispy and cheese is bubbly.
7.Can I make this casserole vegan to accommodate dietary restrictions? ▾
Definitely! Swap the dairy cheese for your favorite meltable vegan mozzarella blend, use olive oil instead of any butter in the herbed breadcrumb topping, and double-check that your breadcrumbs are dairy-free. You’ll still get that bright, veggie-forward, crispy-topped bake that tastes just like the classic summer version.
8.What’s the easiest way to make crispy herbed breadcrumbs for the topping? ▾
Toss 1 cup of panko breadcrumbs with 2 tbsp melted unsalted butter, 1 tsp dried Italian seasoning, ¼ tsp garlic powder, and a pinch of salt and black pepper. Spread them in an even layer over the top of the casserole during the last 15 minutes of baking so they crisp up without burning.
9.Should I seed the beefsteak tomatoes before adding them to the casserole? ▾
Yes, I recommend scooping out the seedy, juicy inner pulp from your beefsteak tomato slices before layering. That gel-like seed center holds a huge amount of excess moisture that can make your casserole soggy, and removing it leaves the sweet, firm tomato flesh that holds its shape perfectly while baking.
10.How do I keep the yellow onion and garlic from tasting harsh in the finished bake? ▾
Sauté your thinly sliced yellow onion and minced garlic in a tiny bit of olive oil over medium heat for 3–4 minutes first, until the onion is soft and translucent and the garlic is fragrant, before layering them into the casserole. This takes the raw, sharp edge off and brings out their sweet, savory depth.
11.How long does leftover summer vegetable casserole last in the fridge? ▾
Cooled leftovers will stay fresh stored in an airtight container in the refrigerator for 3–4 days. Let the casserole cool completely to room temperature (within 2 hours of baking) before sealing it up to prevent trapped condensation from making the breadcrumb topping soggy as it stores.
12.What’s the best way to reheat leftover casserole without making it mushy? ▾
Reheat individual portions or the whole dish in a 350°F oven, covered loosely with foil, for 10–15 minutes until heated through. Skip the microwave if you can—it will turn the crispy breadcrumb topping chewy and make the veggie layers mushy from fast, uneven steam heating.
13.Can I add protein to this casserole to make it a more filling main dish? ▾
Absolutely! Great add-ins include cooked, crumbled Italian sausage, shredded rotisserie chicken, or a layer of rinsed, patted-dry canned white beans between the veggie and cheese layers. Just make sure any cooked protein is well-drained so you don’t add extra moisture that makes the casserole watery.
14.Can I use regular fine breadcrumbs instead of panko for the topping? ▾
You can, but panko gives a lighter, crispier, crunchier top that holds its texture better than fine dry breadcrumbs, which can turn dense or pasty. If you only have regular breadcrumbs, toss them with a tiny drizzle of olive oil and toast them for 2 minutes in a dry pan first to boost their crunch before topping the casserole.
15.Is it okay to use other summer veggies in this casserole besides squash, zucchini, and tomatoes? ▾
Of course! Thinly sliced bell pepper, salted and drained eggplant, or fresh corn cut off the cob all work beautifully as mix-ins. Just keep total veggie volume consistent with the recipe, and drain any high-moisture add-ins the same way you prep the squash and tomatoes.
16.How do I know when the casserole is fully done baking? ▾
You’ll know it’s ready when the cheese is fully melted and bubbling around the edges of the dish, the breadcrumb topping is deep golden brown and crispy, and you can easily pierce all the veggie layers with a paring knife with no tough, crunchy resistance. Let it rest 10 minutes before serving so layers set.
17.Do I need to grease my baking dish before assembling the casserole? ▾
Yes, give your 9x13 inch baking dish a light coating of nonstick spray or a thin rub of olive oil before layering ingredients. This prevents melted cheese and veggie bits from sticking to the bottom and sides of the dish, making serving much easier and cutting down on scrubbing after your meal.
18.Can I freeze this summer vegetable casserole for later use? ▾
I don’t recommend freezing the fully assembled or baked casserole, as summer squash and tomatoes have very high water content that turns mushy and grainy when frozen and thawed. If you want to prep ahead, stick to refrigerating the assembled, unbaked casserole for up to 24 hours for the best texture.
19.What should I serve with this summer vegetable casserole? ▾
It pairs perfectly with grilled chicken, burgers, brats, or grilled shrimp for a classic summer cookout spread. It’s also substantial enough to serve as a light vegetarian main with a side of crusty garlic bread to soak up any leftover cheesy, veggie-infused juices from the baking dish.
20.Why is my breadcrumb topping burning before the veggies are fully cooked? ▾
That usually means you added the breadcrumbs too early in the baking process. Keep the casserole covered with foil for the first 25 minutes to let veggies cook through, then add the breadcrumb topping and bake uncovered for the final 15–20 minutes. If your oven runs hot, tent the top loosely with foil for the last 5 minutes if crumbs darken too fast.

Comments (6)

2 days ago

OMG this was such a hit at our neighborhood potluck last weekend! I threw it together in 10 minutes flat, tossed in some extra zucchini from my backyard garden, and every single person asked for the recipe. The 35 minute cook time is no joke—so quick for how rich and flavorful it turns out! My picky 7 year old even went back for seconds, which is basically a miracle in our house. 10/10 will be making this all summer long.

yesterday

Same! I brought this to my family’s 4th of July cookout and even my uncle who hates veggies ate two helpings. I added a little sprinkle of parmesan on top for the last 5 minutes of baking, *chef’s kiss*

yesterday

So glad it was a hit, Molly! Love that you added homegrown zucchini—nothing beats fresh summer produce. The extra parmesan sprinkle Jake mentioned is such a great hack too, adds the perfect salty kick!

3 days ago

Perfect easy weeknight meal prep staple! I made a big pan on Sunday, portioned it out for lunches all week, and it held up so well in the fridge. I swapped in yellow squash for half the zucchini since that’s what I had on hand, and it still turned out SO good. No mushy veggies, just the right amount of seasoning.

2 hours ago

Wait, has anyone tried making this with a little breadcrumb topping? I’m thinking it might add a nice crunch, but I don’t want to mess up the recipe since it’s my first time making it. Also, can I prep all the chopped veggies the night before?

30 minutes ago

Hi Lila! A panko breadcrumb topping (tossed with a little melted butter and parmesan) sprinkled on for the last 10 minutes of baking is absolutely delicious—no recipe ruin here! You can absolutely chop all your veggies the night before and store them in an airtight container in the fridge to cut down on prep time even more. Hope you love it!

1 week ago

Total game changer for quick summer dinners when it’s too hot to fire up the grill. I used veggies from my local farmers market, and the whole thing tasted like summer in a dish. Super easy even for someone like me who burns toast half the time, no fancy skills required.

yesterday

Made this for my kids’ last soccer team dinner and it was gone in 10 minutes flat! My kids loved it, too—even my oldest who swears he hates all veggies. So many parents came up to ask where I found the recipe, I felt so fancy. Only thing I did different was add a layer of sliced tomatoes on top because we had a ton ripe on the counter.

30 minutes ago

The sliced tomato addition sounds amazing! I’m drowning in ripe tomatoes from my plant right now, definitely adding those when I make this tomorrow night for date night.

1 week ago

Wait, is this freezable? I love making big batches of casseroles to stock my freezer for busy work weeks, but I’ve had veggie bakes turn mushy on me before when I freeze them. Also, does this reheat well in the microwave?

5 days ago

I froze half of mine last month! I let it cool completely first, wrapped it tight in plastic wrap and foil, and it reheated perfectly in the oven at 350 for 20 minutes. Microwave works okay too but the oven keeps the veggies from getting too soggy for sure.

3 days ago

Great question Ryan! Beth is spot on—this casserole freezes really well if you let it cool fully before wrapping tightly to avoid freezer burn. For meal prep, we actually recommend reheating in the oven or toaster oven for the best texture, but the microwave works in a pinch if you’re short on time!



