
tik tok breakfast burrito

title 1
tik tok breakfast burrito
⏱️ cook time 10 minutes
🍽️ servings 4
⚡ Difficulty easy

intro

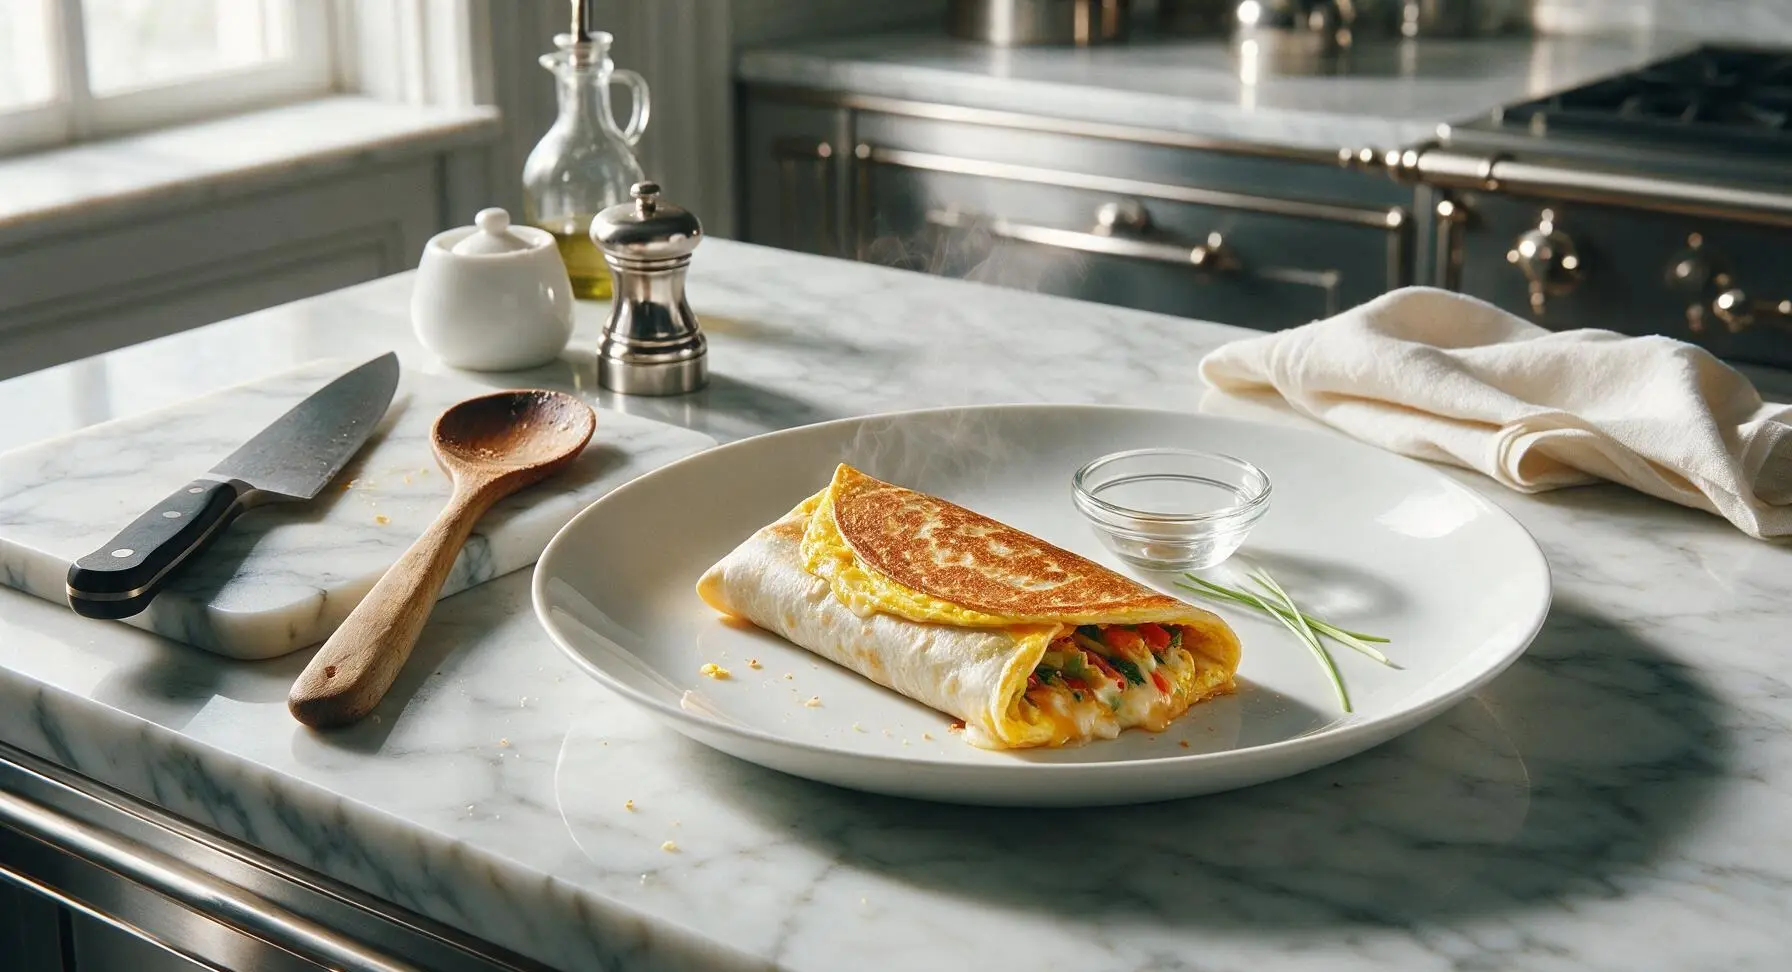
The viral folded breakfast burrito with a crispy tortilla, egg-bonded seal, melted cheese, and fresh zesty fillings—ready in 15 minutes, perfectly portable, and endlessly customizable.

Ingredients
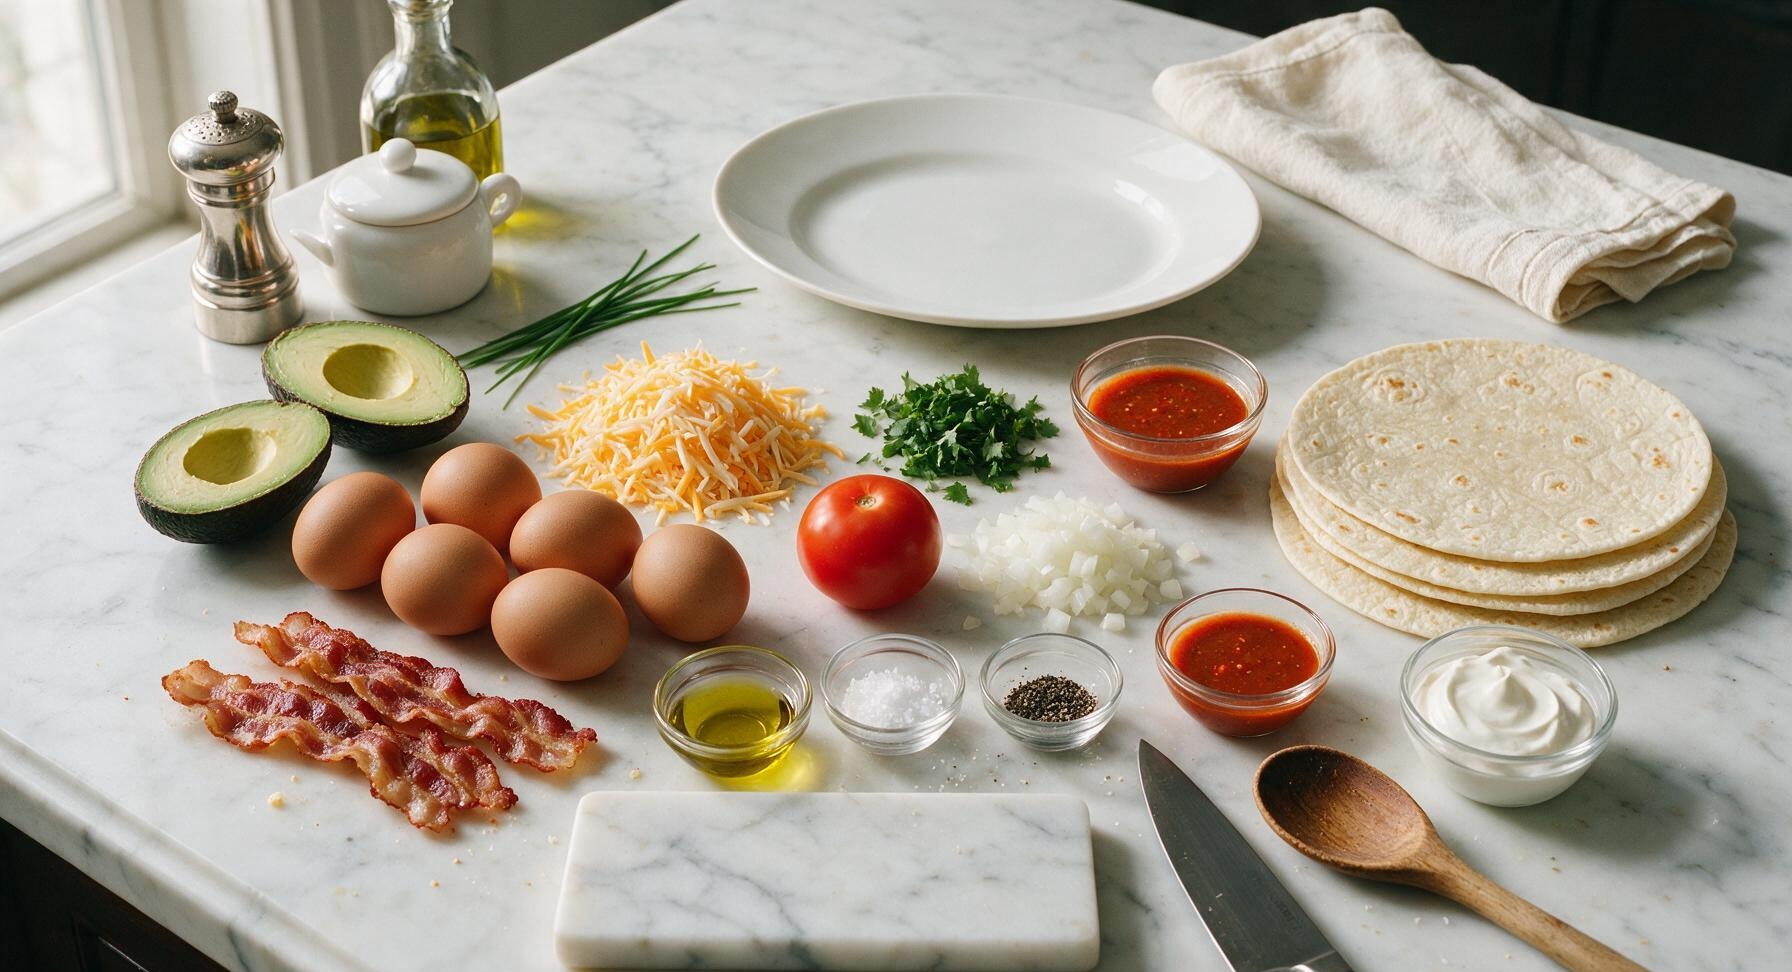
10-inch burrito-size flour tortillas 4 each
Large eggs 8 each
Shredded sharp cheddar cheese 1 cup
Crispy cooked bacon 4 slices
Ripe avocado 1 whole
Small Roma tomato 1 each
White onion 1/4 cup, finely diced
Fresh cilantro 2 tbsp, chopped
Olive oil 1 tbsp
Flaky sea salt 1/2 tsp
Freshly ground black pepper 1/4 tsp
Hot sauce (Tapatio or Tabasco) 2 tbsp, plus extra for serving
Sour cream 1/4 cup, for serving

Steps

1

Prep Filling Components

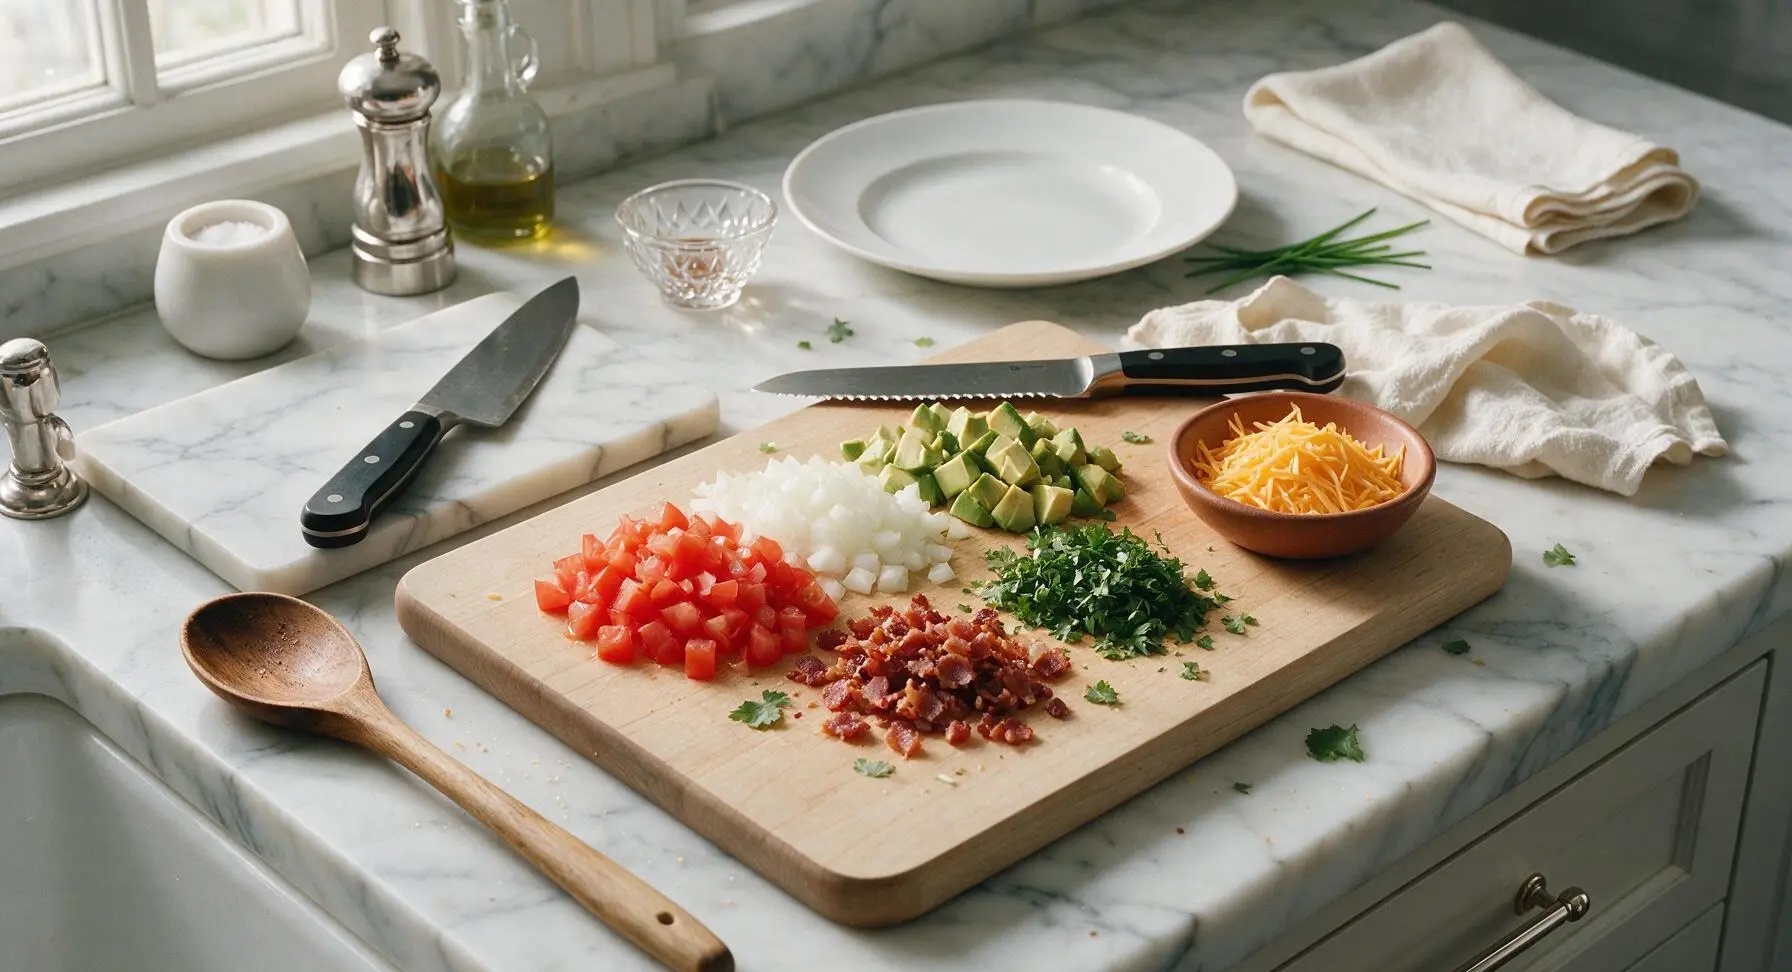
Place the light maple cutting board in the center prep area. Using the serrated utility knife, dice the Roma tomato, white onion, and peeled avocado into uniform 1/4-inch pieces, and chop the fresh cilantro into fine bits. Crumble the pre-cooked crispy bacon into small, bite-sized pieces. Portion the shredded sharp cheddar into one of the small terracotta pinch bowls. All fillings should be fully prepped and within arm’s reach before heating the pan, as the cooking process moves very quickly once started. This step takes approximately 4 minutes.
Step 1
step1:Prep Filling Components
2

Whisk Seasoned Eggs

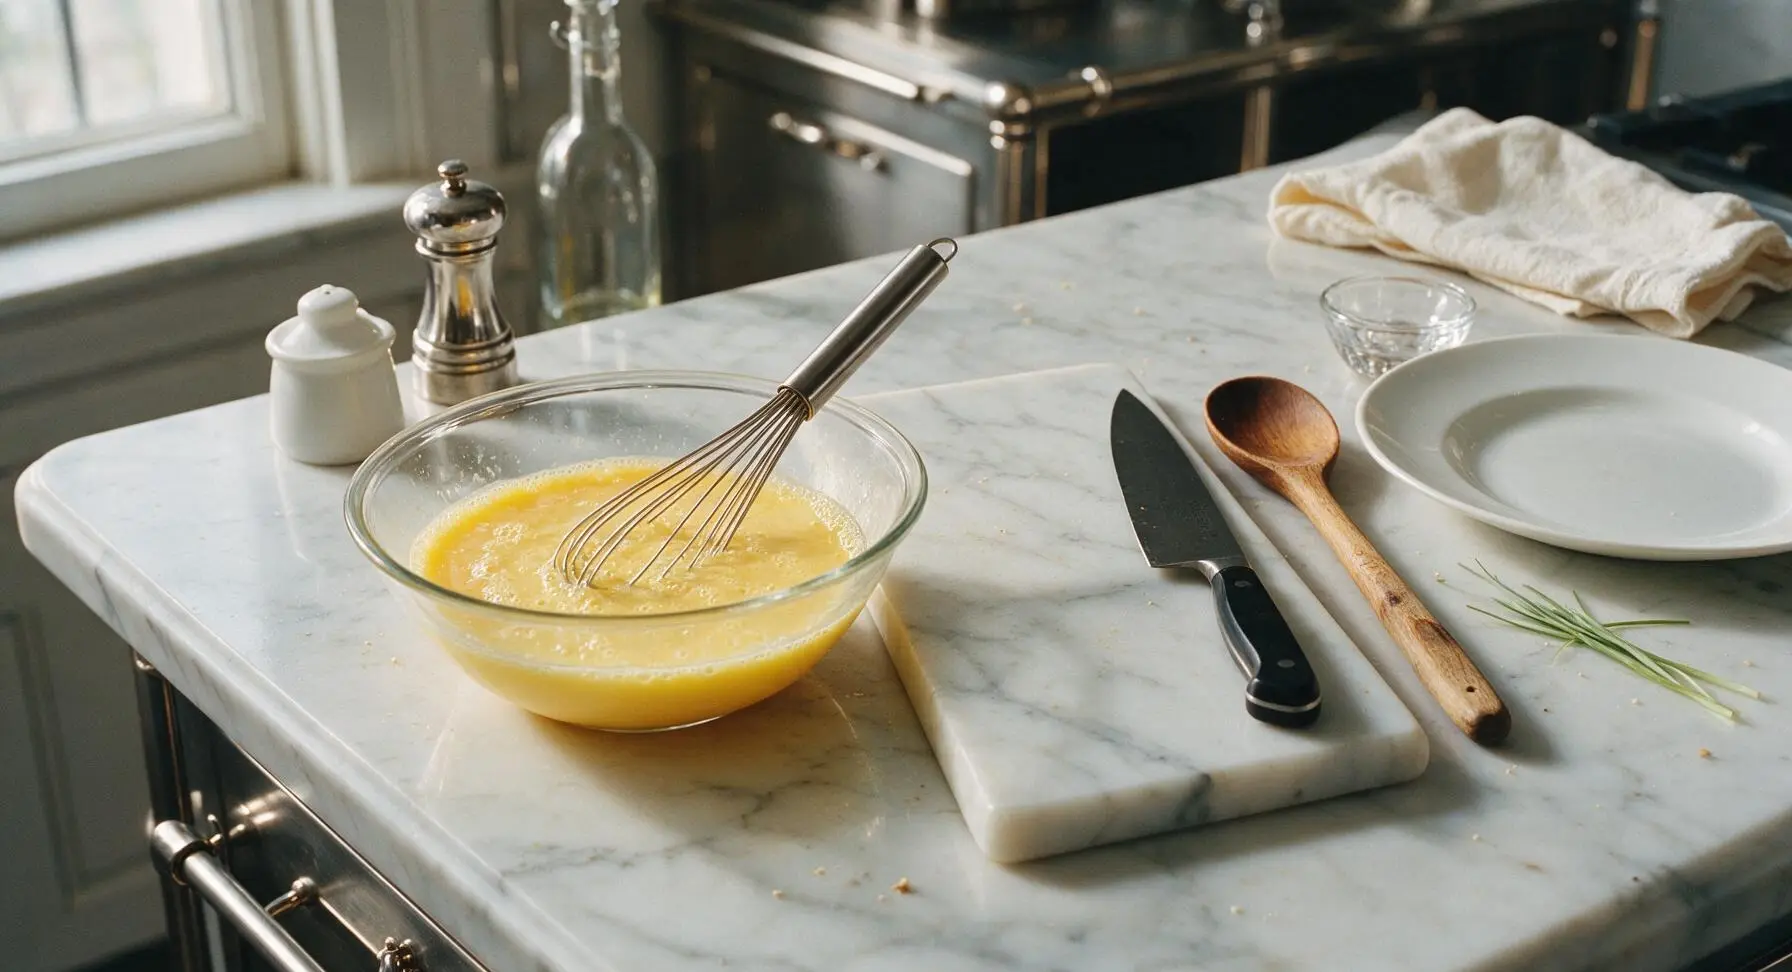
Crack all 8 large eggs into a wide, shallow glass bowl, add 1/2 tsp flaky sea salt and 1/4 tsp freshly ground black pepper. Use the stainless steel wire whisk to beat the eggs continuously for 30 seconds, until yolks and whites are fully combined with no streaks of clear white remaining. The finished egg mixture should be pale, uniform yellow with a thin layer of small frothy bubbles across the top.
Step 2
step2:Whisk Seasoned Eggs
3

Cook Thin Egg Base

Place the 10-inch non-stick carbon steel skillet on the stovetop burner over medium heat (350°F / 175°C). Add 1 tbsp olive oil and swirl the pan to coat the entire bottom surface evenly. Once the oil shimmers (about 1 minute of heating), pour 1/4 of the beaten egg mixture into the pan, tilting the pan in a circular motion to spread the egg into a thin, even circle slightly wider than the 10-inch tortilla. Let the egg cook for 45 seconds, until it is mostly set on the bottom but still slightly soft and runny across the top surface.
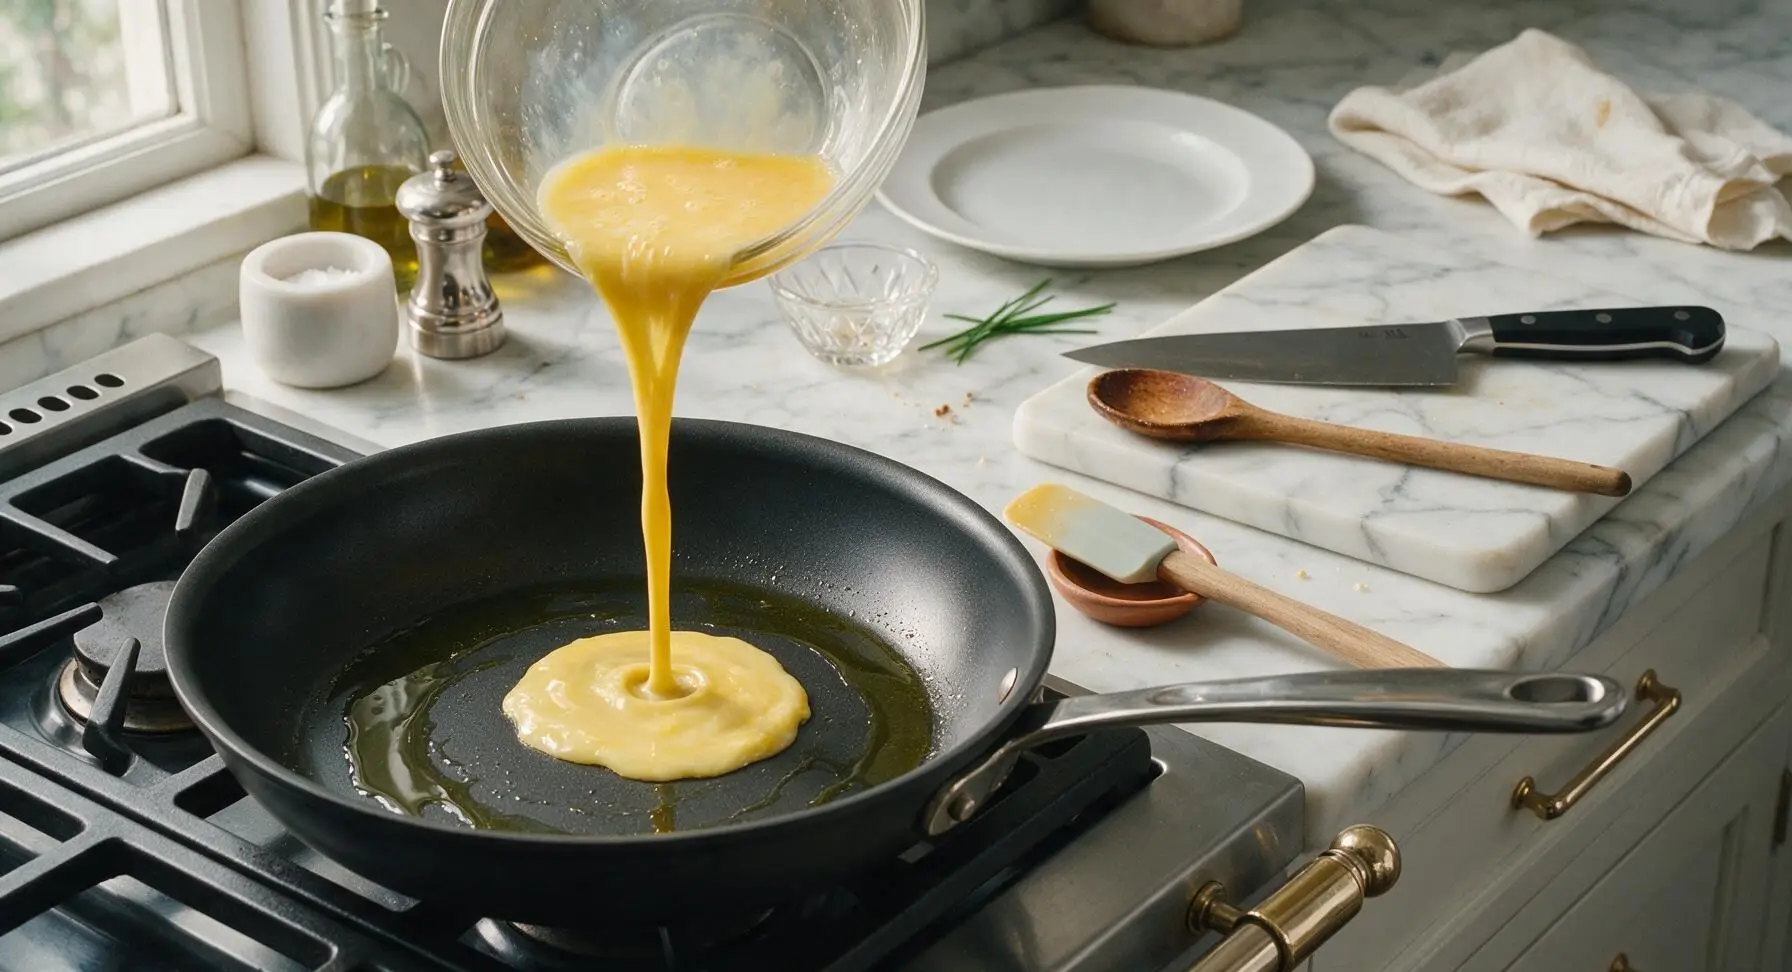
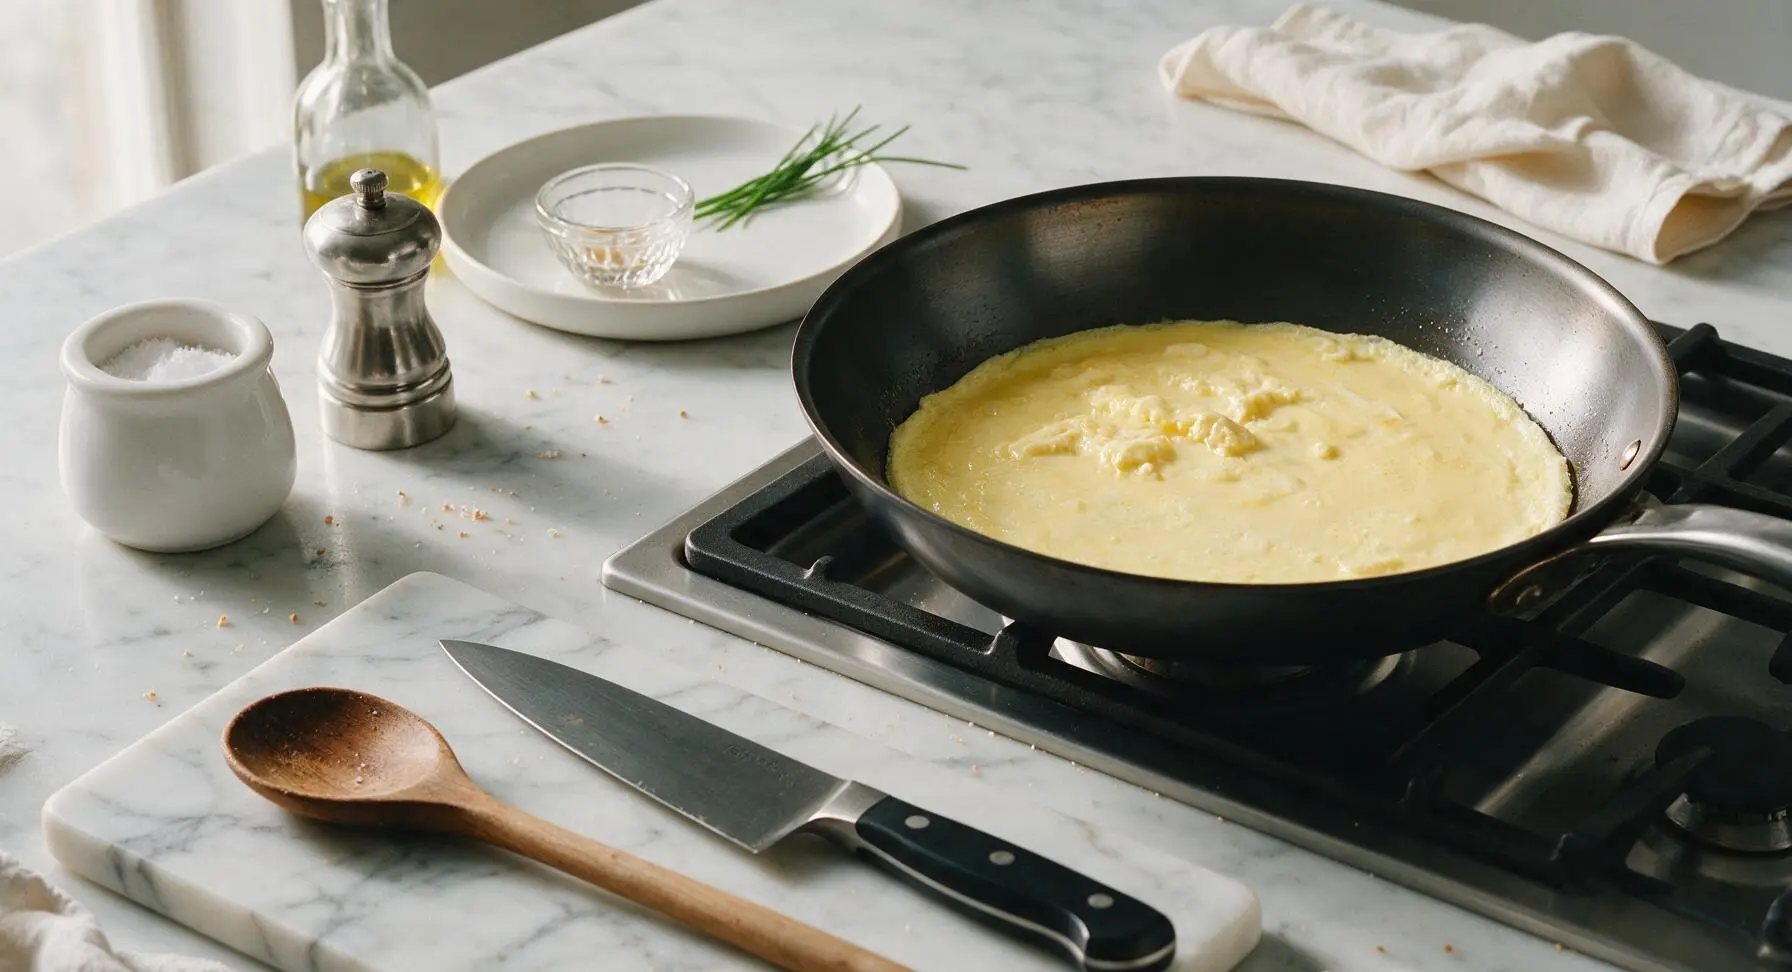
Step 3
step3:Cook Thin Egg Base
Step 3
step3:Cook Thin Egg Base
4

Seal Tortilla to Egg

Immediately place one 10-inch flour tortilla directly on top of the partially set egg layer, pressing gently with the silicone spatula to ensure full, even contact between the tortilla and egg. Cook for 30 seconds more, until the egg is fully set and adheres completely to the tortilla surface. Use the spatula to carefully flip the entire egg-tortilla stack in one smooth, confident motion, so the tortilla is now touching the pan surface and the cooked egg layer is facing upward.
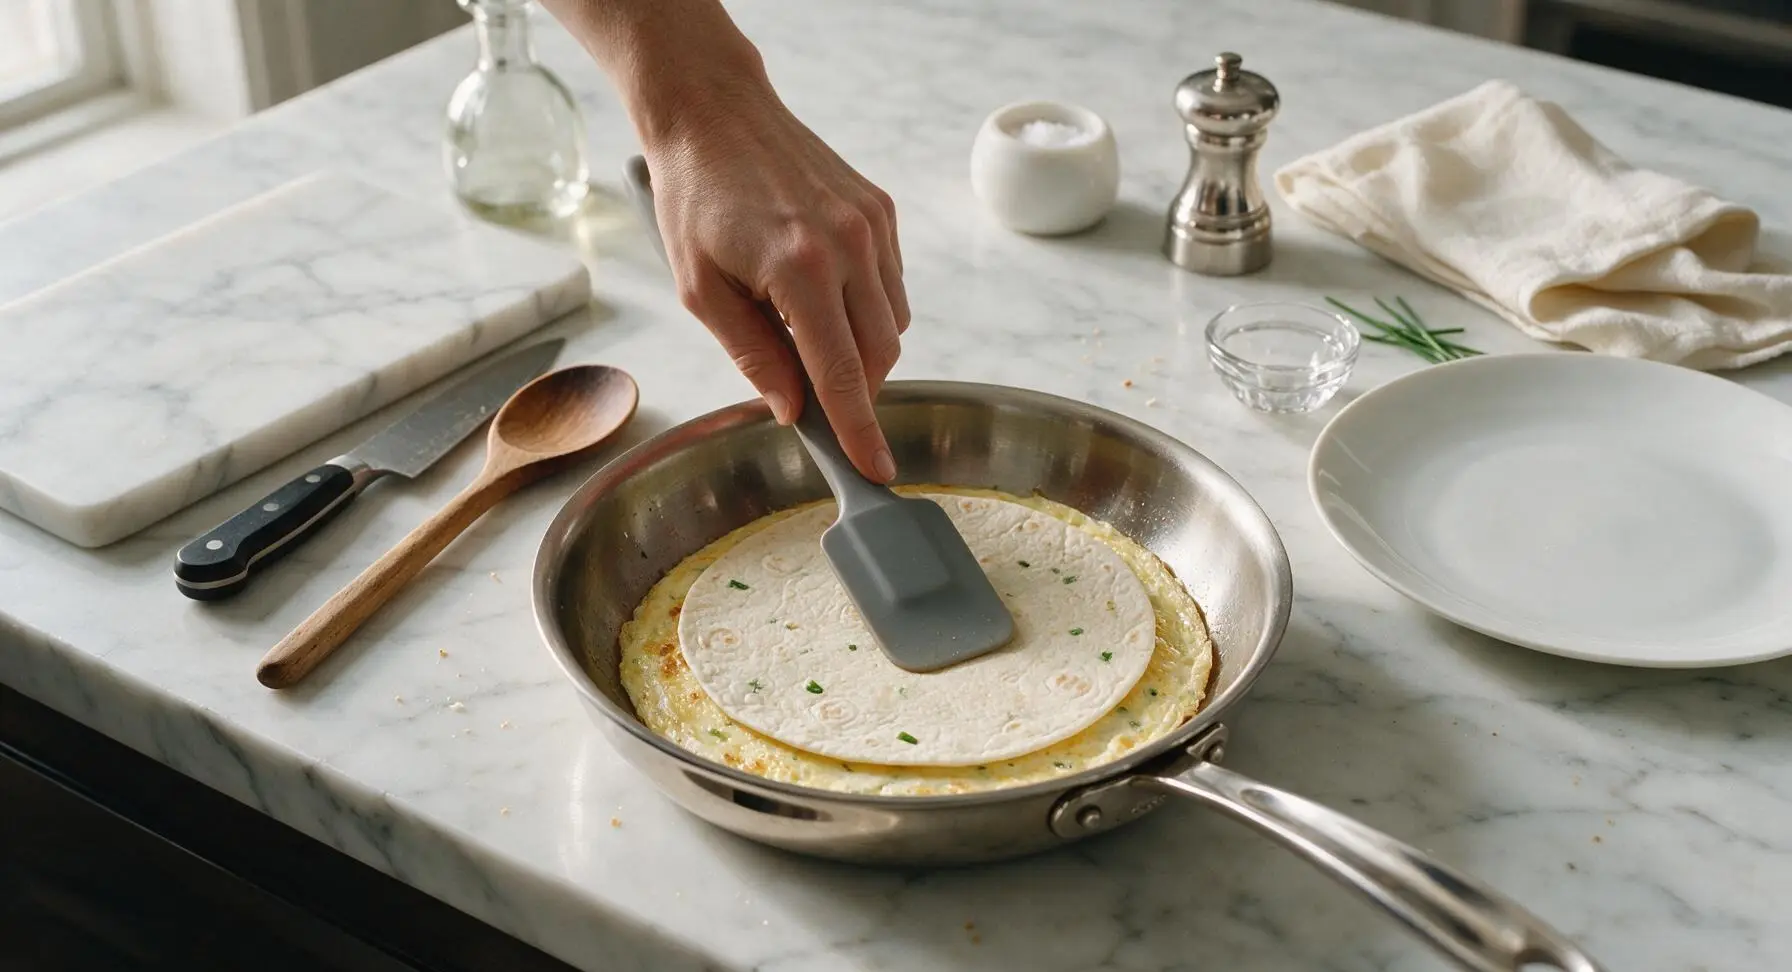
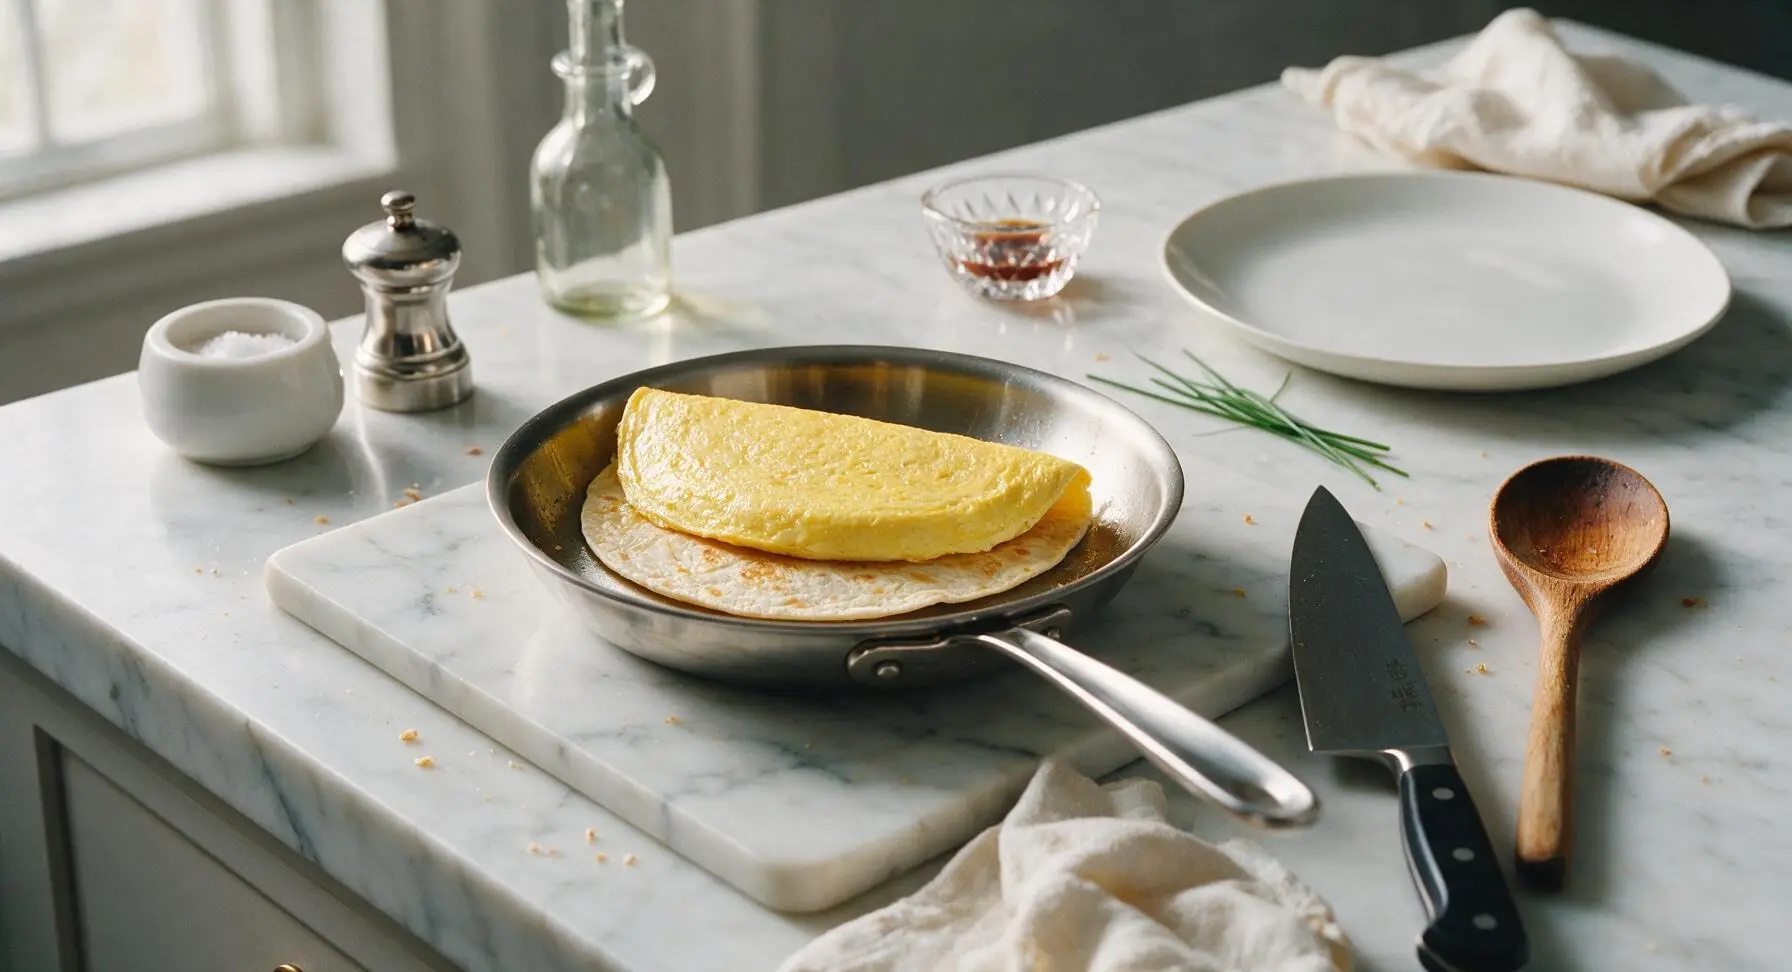
Step 4
step4:Seal Tortilla to Egg
Step 4
step4:Seal Tortilla to Egg
5

Layer Fillings Evenly

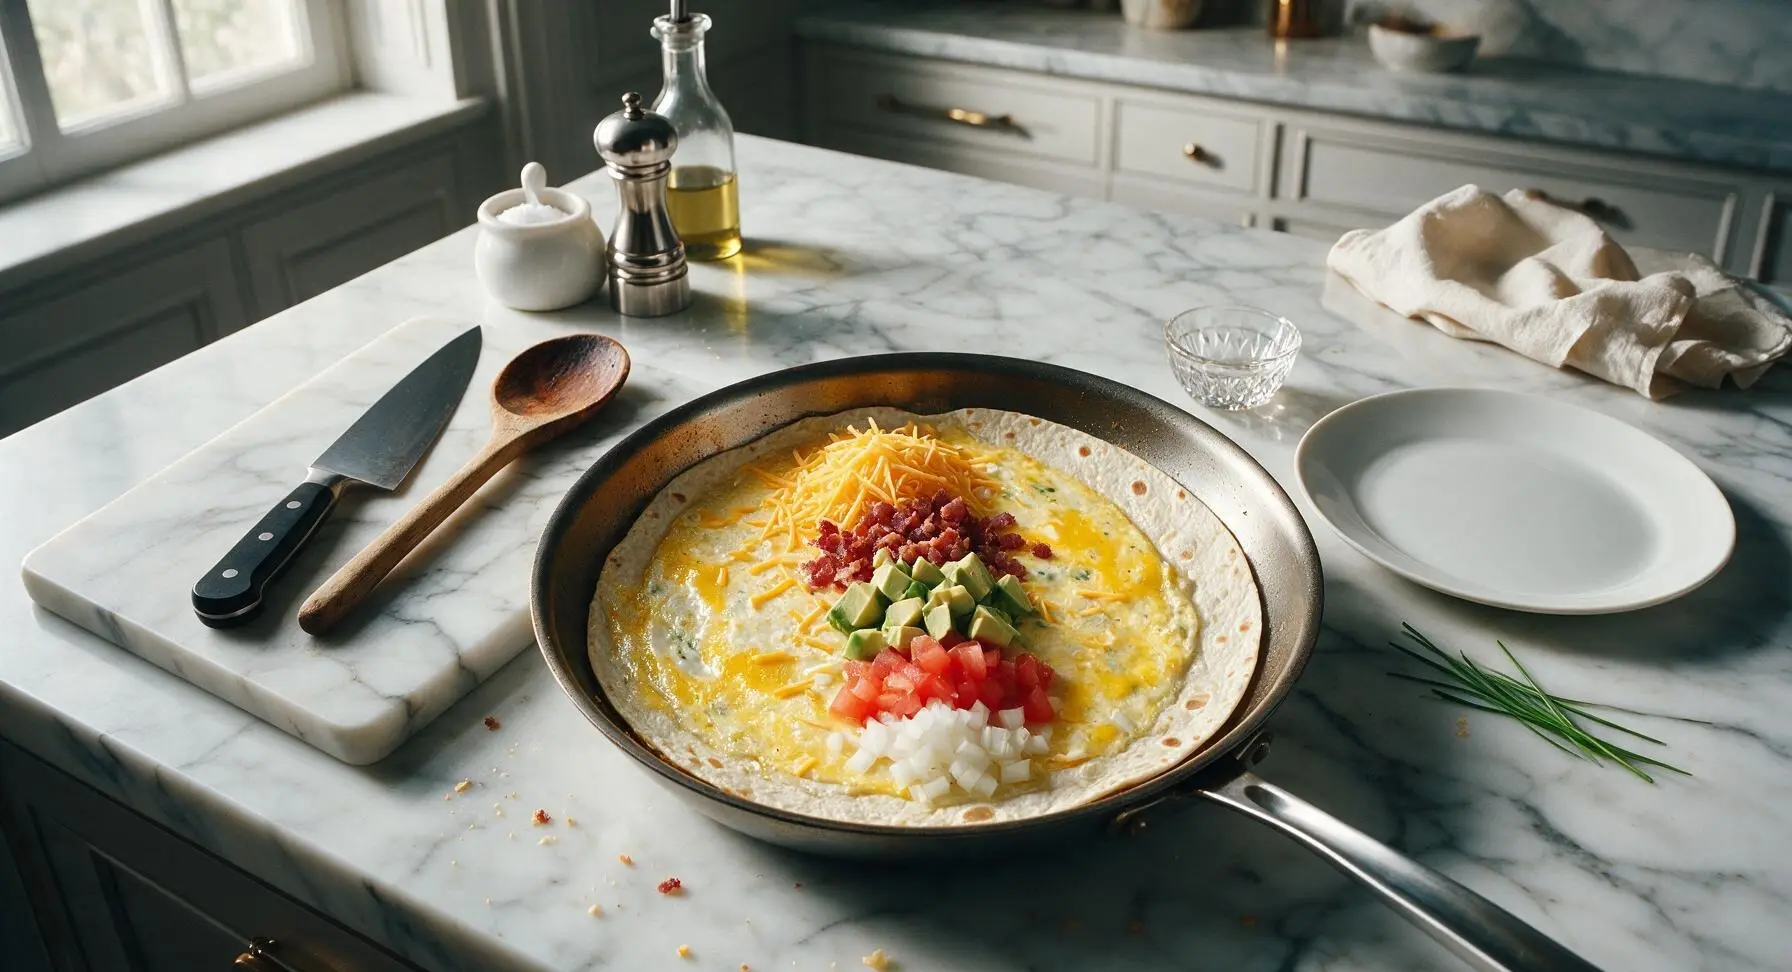
Lower the stovetop heat to medium-low. Sprinkle 1/4 cup of the shredded cheddar in a straight line down the center third of the exposed egg layer, then top with one crumbled bacon slice, 1/4 of the diced avocado, tomato, onion, and a light pinch of chopped cilantro. Add a dash of hot sauce if desired. Avoid overfilling: fillings should take up no more than 1/3 of the tortilla surface to allow for tight, clean folding.
Step 5
step5:Layer Fillings Evenly
6

Fold and Crisp Burrito

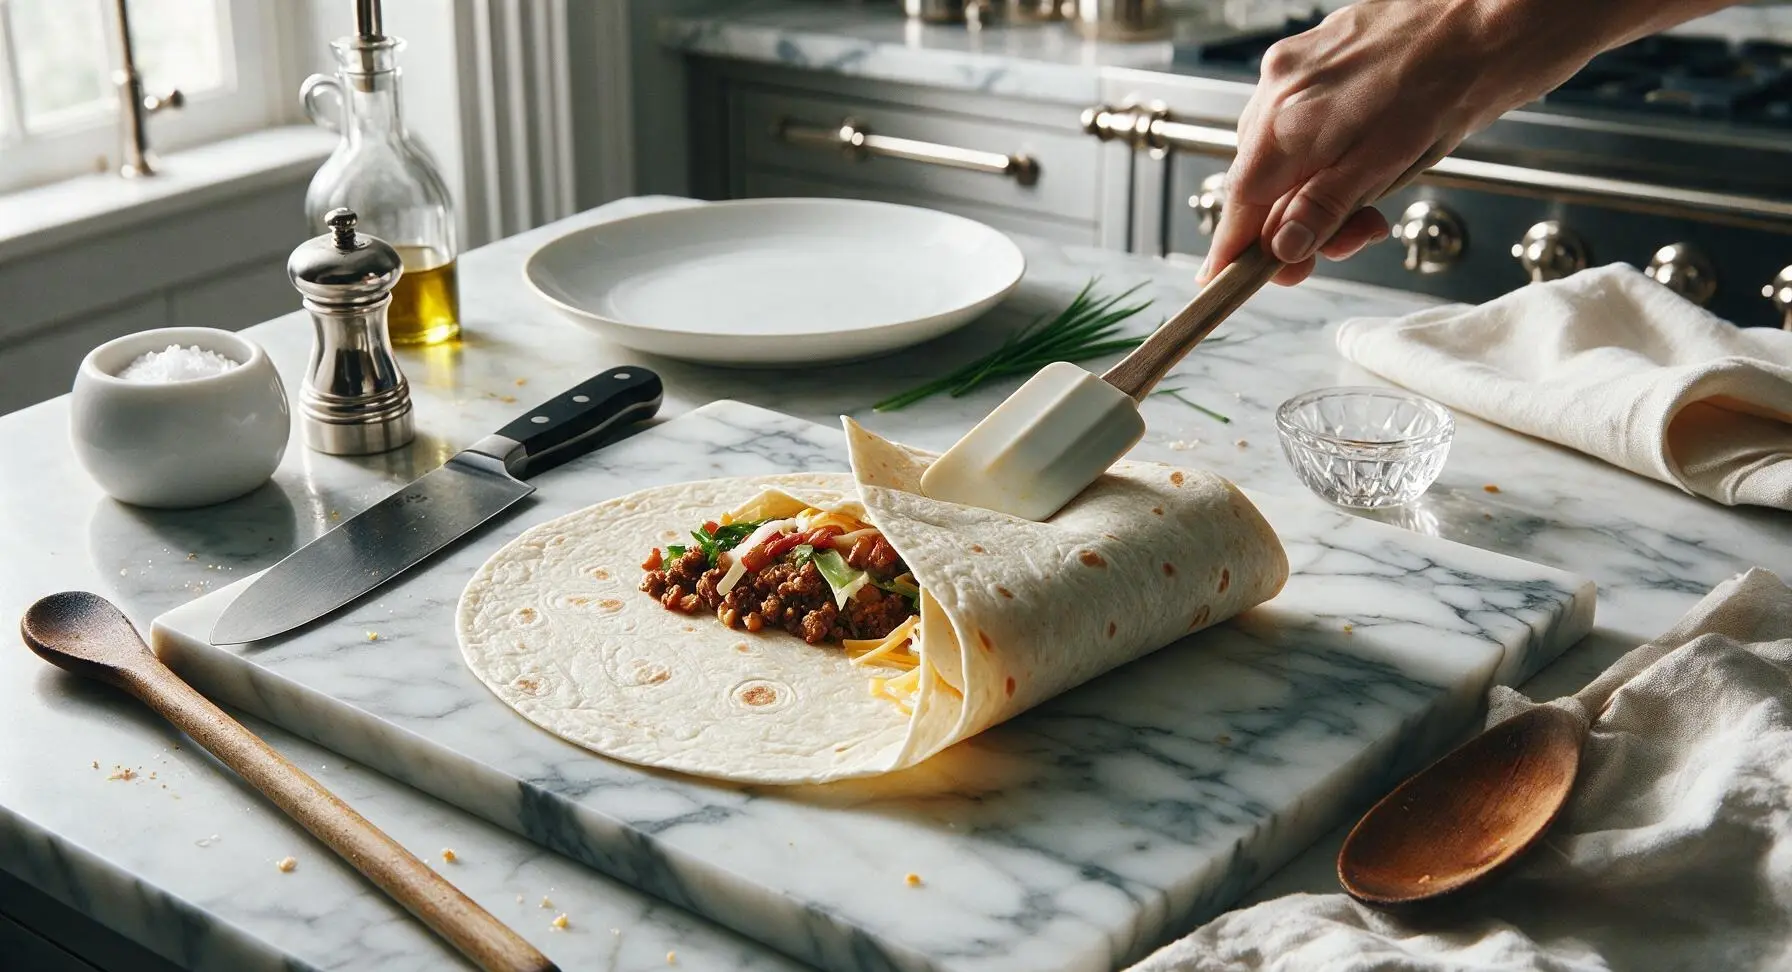
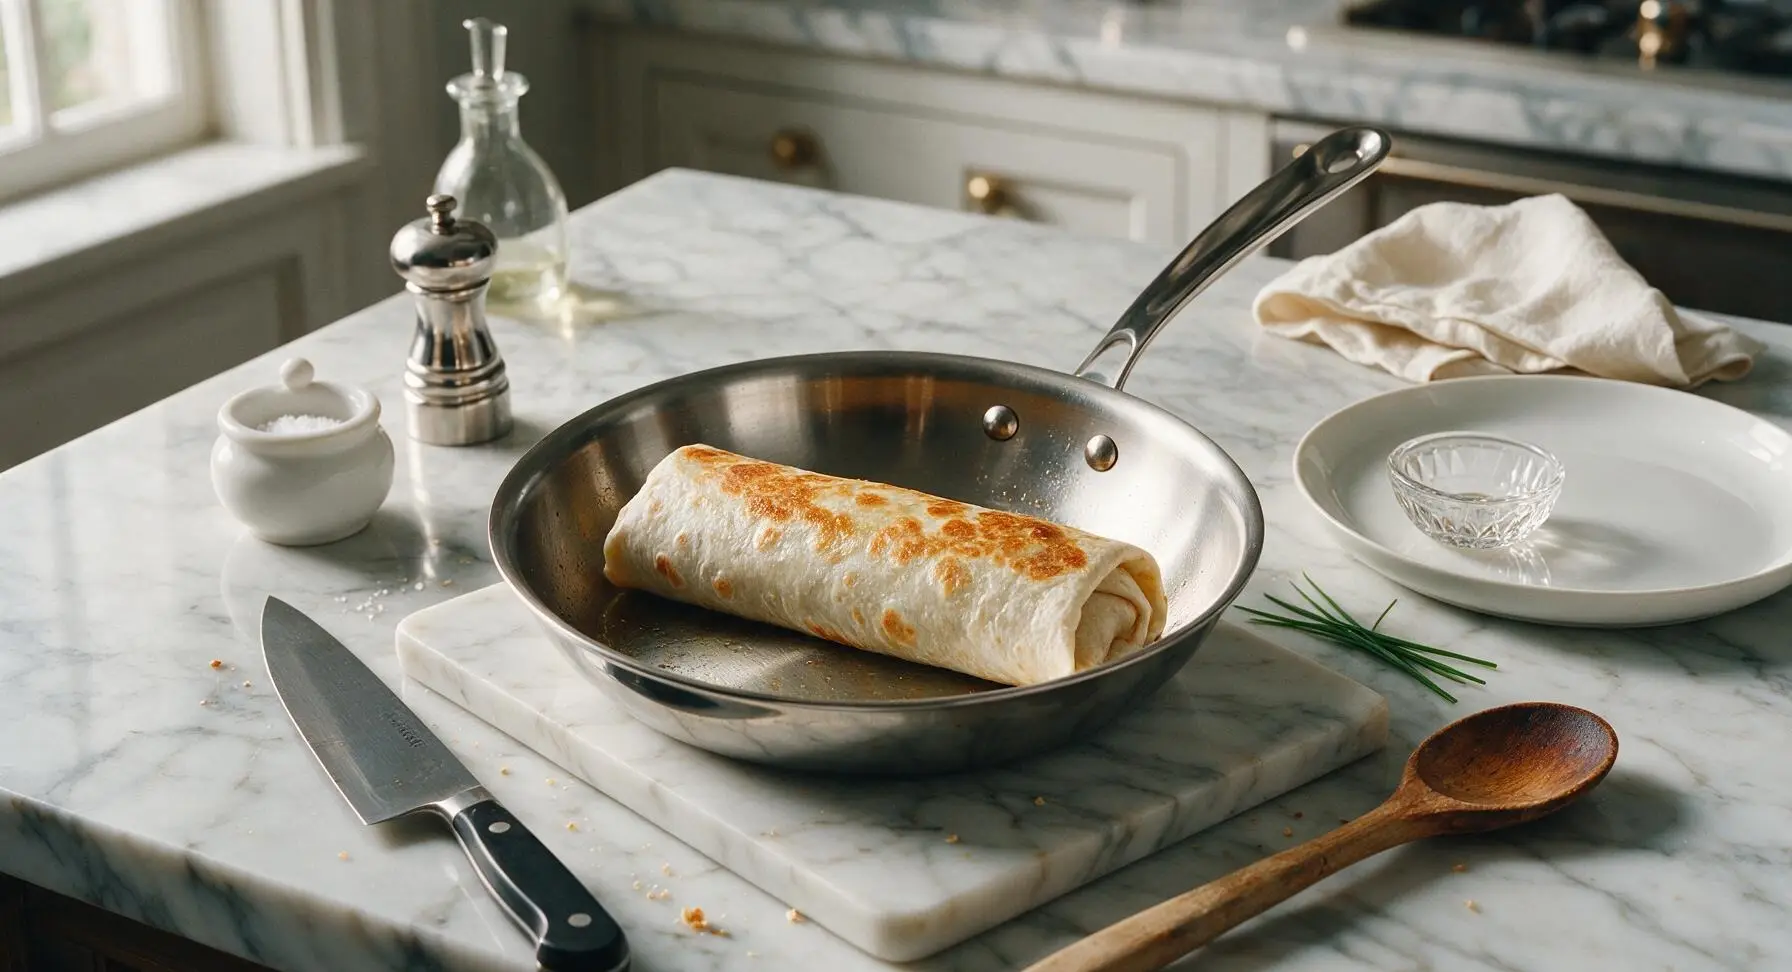
Use the silicone spatula to fold the two short, open sides of the tortilla in over the fillings, then roll the burrito tightly from the long edge farthest from you to form a fully sealed log shape. Let the burrito cook seam-side down for 1 minute, until the tortilla at the seam is golden and crispy, then flip and cook the opposite side for 1 more minute until the entire exterior has light golden crispy patches. Transfer the cooked burrito to the cutting board to rest for 1 minute, then repeat the cooking process for the remaining 3 burritos, using 1/4 of the egg and fillings per burrito.
Step 6
step6:Fold and Crisp Burrito
Step 6
step6:Fold and Crisp Burrito
7

Slice and Plate Burritos

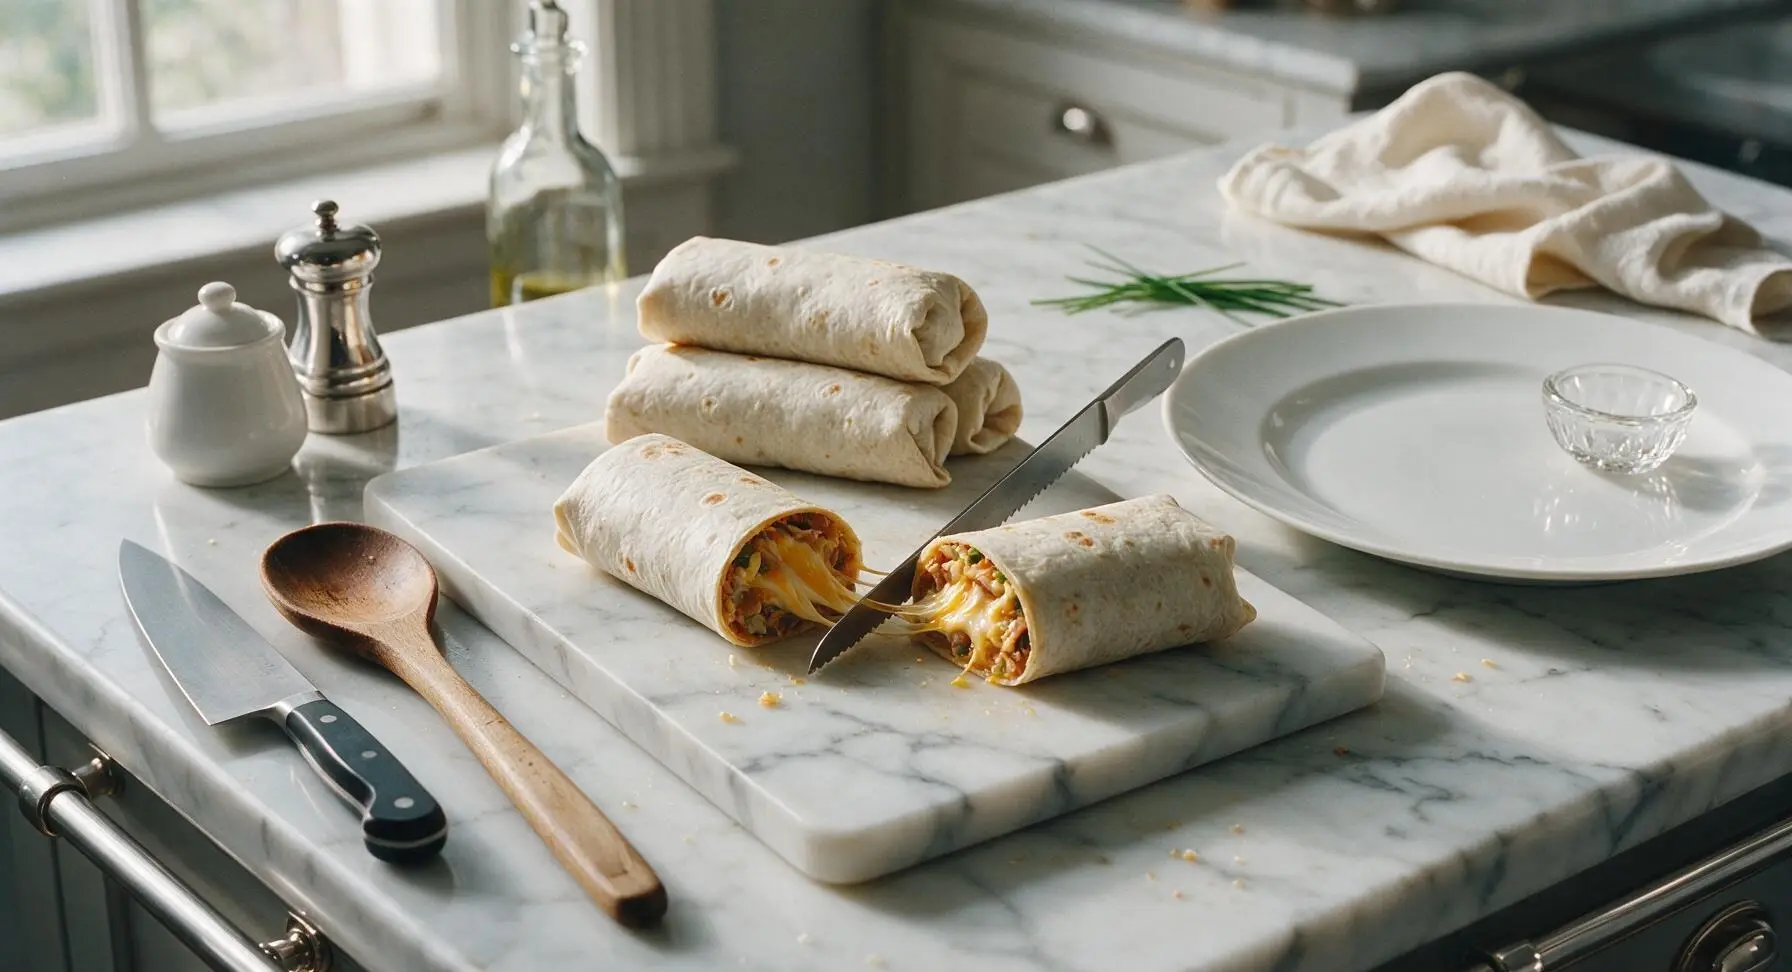
Once all burritos are cooked and have rested for 1 minute to allow cheese to set, use the serrated utility knife to slice each burrito in half on a slight diagonal. Arrange two halves per serving on the matte cream ceramic dinner plate, cut-side up to show the layered cross-section of fillings. Top with a small dollop of sour cream, a light drizzle of hot sauce, and a sprinkle of remaining chopped cilantro to serve.
Step 7
step7:Slice and Plate Burritos

Tips

1.Prep all fillings before turning on the stovetop: the egg-tortilla layer cooks in less than 2 minutes total, so pausing to chop ingredients mid-cook will lead to overcooked, rubbery eggs or burnt, crispy tortilla spots that crack when folding.
2.Use room-temperature tortillas: cold tortillas straight from the refrigerator are stiff and prone to cracking when rolled; letting them sit on the counter for 10 minutes before cooking relaxes the gluten, making them flexible enough to fold tightly without tearing.
3.Resist the urge to overstuff: more than 1/2 cup of total fillings per burrito will break the egg seal, cause fillings to spill out into the pan, and make it impossible to roll a tight, neat burrito. Any extra diced veggies or bacon can be served on the side as a fresh topping.


✨ You May Also Like

Breakfast
🍜 United States

Crisp-edged, fluffy lard griddle cakes are a nostalgic homestyle staple, with rich savoriness from rendered lard, perfect topped with maple syrup or savory gravy.

⏱️ 25 minuteBreakfast ★ 4.8
Breakfast
🍜 United States

Flaky, buttery homemade buttermilk biscuits smothered in creamy, peppery pork sausage gravy: a beloved, hearty Southern American comfort food classic.

⏱️ 35 minuteBreakfast ★ 4.8
Breakfast
🍜 United States

Golden, custardy brioche stuffed with sweet cream cheese and fresh berries, pan-fried to crisp perfection. An indulgent, cozy breakfast perfect for slow weekend mornings.

⏱️ 30 minuteBreakfast ★ 4.7
Breakfast
🍜 United States

Flaky, buttery Southern-style biscuits stuffed with savory salty country ham, a portable, satisfying classic perfect for casual on-the-go meals.

⏱️ 25 minuteBreakfast ★ 4.8
Breakfast
🍜 United States

Iconic puffy baked pancake popularized in Seattle, with crisp golden edges and soft custardy center, served warm with classic sweet toppings.

⏱️ 35 minuteBreakfast ★ 4.6
Breakfast
🍜 United States

Fluffy, golden pancakes studded with juicy peak-summer mixed berries, drizzled with maple syrup for a bright, comforting, crowd-pleasing family breakfast.

⏱️ 25 minuteBreakfast ★ 4.7

tik tok breakfast burrito:Frequently Asked Questions

1.What makes this viral TikTok breakfast burrito different from a regular rolled breakfast burrito? ▾
The biggest difference is the signature quadrant fold and egg-bonded seal, which eliminates the messy filling spills that plague regular rolled burritos. You sear it on both sides for a crispy, golden tortilla exterior and perfectly melted cheese, and the whole thing comes together in 15 minutes flat with no long, fussy prep required.
2.Can I use a smaller tortilla instead of the recommended 10-inch burrito size? ▾
I don’t recommend using anything smaller than 9 inches, honestly. A 10-inch tortilla gives you enough room to make the signature quadrant fold without overstuffing and causing tears or leaks. If you only have 8-inch tortillas on hand, scale back fillings by about a third to avoid messy blowouts while cooking.
3.How do I pull off that signature folded seal everyone uses for this burrito? ▾
Lay your tortilla flat, then cut a single slit from the center straight out to one edge. Add a portion of fillings to each of the four quadrants, pour a thin layer of beaten egg over the top, then fold each quarter up clockwise into a neat triangle. Cook seam-side down first to set the no-slip egg seal.
4.Do I have to use bacon, or can I swap out the protein? ▾
You absolutely don’t have to stick to bacon! This recipe is endlessly customizable. Swap in crumbled cooked sausage, diced ham, sautéed soyrizo for a vegetarian kick, or even crispy hash brown patties for extra crunch. Just make sure any protein you use is fully cooked before adding it, since total cook time is only a few minutes per side.
5.My burrito always leaks fillings when I cook it—what am I doing wrong? ▾
Leaks almost always come from one of two easy fixes: either you overstuffed the tortilla, or you didn’t cook the seam side first. Stick to the recommended filling amounts for 10-inch tortillas, and place the folded burrito seam-side down on a hot skillet for 1-2 minutes first to set the egg and cheese seal tight before flipping.
6.Can I make these burritos ahead of time for weekly meal prep? ▾
Definitely! These hold up great for meal prep. Let cooked burritos cool completely, then wrap each tightly in plastic wrap or aluminum foil and store in the fridge for up to 4 days, or the freezer for up to 3 months. Reheat in a skillet over medium-low to bring back the crispy tortilla, instead of relying on the microwave which makes it soggy.
7.What kind of cheese works best if I don’t have sharp cheddar? ▾
Shredded pepper jack is my go-to swap for sharp cheddar, since it melts perfectly and adds a subtle spicy kick. You can also use Monterey Jack, a pre-mixed Mexican cheese blend, or even crumbled queso fresco if you prefer a brighter, saltier flavor. Just avoid pre-sliced cheese, which doesn’t melt as evenly as freshly shredded for that gooey pull.
8.How do I keep the tortilla from getting soggy? ▾
Sogginess happens when you add too many wet fillings, or cook on too low of heat. Pat diced avocado lightly dry before adding it, don’t douse fillings in runny sauce before folding, and cook your burrito on medium-high heat to crisp the tortilla fast. Cooking seam-side first also locks in moisture instead of letting it seep into the tortilla.
9.Can I use corn tortillas to make a gluten-free version? ▾
Corn tortillas are a little too brittle and small for the signature quadrant fold, unfortunately. If you need a gluten-free option, grab a 10-inch gluten-free flour tortilla, which has the same flexibility and size as regular flour tortillas. Warm it for 10 seconds in the microwave first to make it extra pliable so it doesn’t crack when folding.
10.Do I need to cook the eggs separately before adding them to the burrito? ▾
Nope, that’s the genius hack of this viral recipe! You don’t pre-scramble the eggs. Instead, pour a thin layer of beaten egg directly over the fillings on your tortilla right before folding. As the burrito cooks on the skillet, the egg cooks fully and acts as a binding glue to hold all fillings together with zero mess.
11.What extra fillings pair well with the base recipe? ▾
The base recipe is a perfect jumping off point! I love adding a dollop of sour cream, a spoonful of fresh pico de gallo, pickled jalapeños for tang, crispy tater tots, or a light drizzle of hot honey. Just stick to 1-2 extra add-ins max so you don’t overstuff the tortilla and break the seal while cooking.
12.How long do I cook the burrito on each side? ▾
Cook the folded burrito seam-side down first for 1.5 to 2 minutes over medium heat, until the egg seal is fully set and the tortilla is golden and crispy. Flip it and cook the second side for another 1 to 1.5 minutes, until the cheese is fully melted and the tortilla is evenly crisp. Don’t press down too hard while cooking, or you’ll squeeze out fillings.
13.My avocado always turns brown when I prep these ahead—how do I stop that? ▾
Avocado browning is totally normal from oxidation, but you can slow it way down. If you’re prepping burritos for the week, either leave the avocado out and add it fresh right before eating, or toss diced avocado in a tiny squeeze of lime juice before adding it. The citric acid slows browning for 2-3 days in the fridge without overpowering the flavor.
14.Can I make this recipe without dairy? ▾
Absolutely! Swap the shredded sharp cheddar for your favorite dairy-free shredded melting cheese—look for a brand formulated for melting, not just cold sprinkling—and use dairy-free bacon or plant-based sausage if you’d like. The egg seal works exactly the same, so you’ll still get that crispy, gooey, no-mess burrito texture without any dairy.
15.Why does my tortilla tear when I try to fold it? ▾
Tortilla tears almost always happen because the tortilla is too cold, or you’re overstuffing it. Cold flour tortillas are stiff and crack easily, so pop yours in the microwave for 10 seconds wrapped in a paper towel before you start building to make it soft and pliable. If it still tears, cut back on filling by about a quarter to give yourself extra fold room.
16.Is this burrito actually portable enough to eat on the go? ▾
That’s one of its biggest perks! Unlike regular rolled burritos that can unspool and leak fillings all over your hands or car seat, the egg and cheese sealed quadrant fold locks everything in tight. Let it cool for 1 minute after cooking, wrap it in a paper towel or parchment, and you can eat it one-handed on commutes, hikes, or school runs without mess.
17.Can I add raw veggies to the filling? ▾
You can add thin, tender raw veggies like thinly sliced spinach or diced red onion, but skip hard, dense raw veggies like raw bell pepper or raw potato, since they won’t have time to cook through in the 3-4 minutes the burrito spends on the skillet. If you want those veggies, sauté them for 2-3 minutes first to soften them up before adding them.
18.What’s the best pan to use to get that perfectly crispy tortilla? ▾
A cast iron skillet is my top pick, since it holds even, consistent heat and gives the tortilla that perfect, evenly crisp, golden exterior without random hot spots. If you don’t have cast iron, a regular non-stick skillet works just fine too—just make sure it’s fully preheated before adding the burrito, so the tortilla crisps instead of steaming.
19.Can I make a vegetarian version of this burrito? ▾
Of course! Ditch the bacon and swap in sautéed spinach and mushrooms, crispy hash browns, roasted corn, rinsed black beans, or crumbled soyrizo for a hearty, satisfying vegetarian filling. Keep the egg and cheese for the classic seal, or use plant-based egg and vegan cheese if you want a fully vegan version that still holds together perfectly.
20.How do I reheat a frozen burrito without it getting soggy? ▾
Skip the microwave if you can, since it steams the tortilla and makes it mushy. For frozen burritos, cook them straight from frozen in a skillet over medium-low heat for 5-6 minutes per side, covered, so the filling heats all the way through while the tortilla gets crispy. If you’re short on time, microwave for 1 minute first, then crisp in the skillet for 1 minute per side.

Comments (3)

2 days ago

OMG I made this for my teen boys before school this morning and they DEVOURED it!!! The 10 minute cook time is no joke, I was scrambling (pun totally intended) to get everyone out the door on time and this still came together so easy. I tossed in a little extra hot sauce and a handful of crispy leftover tater tots from last night's dinner, total game changer. Will 100% be adding this to my weekly meal prep rotation!

yesterday

Wait the tater tot addition is genius!!! I never thought to toss those in, my 7 year old is obsessed with tots so this is gonna make his whole weekend. Did you air fry the tots extra crispy first or just toss em in cold?

yesterday

Love the tater tot hack, Mia! Crispy little add-ins like that take these burritos over the top. Quick answer to Jake's question too — pre-cooked, crispy tots work best, cold ones will get soggy as the burrito cooks. For anyone prepping a batch for the week: wrap em tight in foil and they reheat perfectly in the oven or air fryer in 3-4 minutes!

3 days ago

SO good, I brought a platter of these to our neighborhood potluck last weekend and people kept tracking me down to ask for the recipe! I did a vegetarian swap with spicy plant-based sausage and it worked perfectly, even the self-proclaimed 'meat only' guys went back for seconds. Only tiny heads up: make sure you don't overstuff the tortilla or it'll split wide open when you fold it, learned that the hard way on my very first one lol.

2 days ago

So glad these were a hit at your potluck, Luna! Great tip about not overstuffing — pro move: warm the tortilla for 10 seconds in the microwave before folding, it makes it way more flexible and way less likely to split. That plant-based sausage swap sounds amazing, we'll have to test that version for the site soon!

1 week ago

Tried this this morning after seeing it pop up on my TikTok FYP nonstop for a week, and it totally lives up to the viral hype. It's so easy even for someone who burns toast half the time (read: me). My wife said it's better than the loaded breakfast burritos we get at our local diner, which is seriously high praise. Already added the ingredients to my grocery list to make a big batch next Saturday for our kid's post-soccer game team breakfast. Total household win!



