
Tillamook Ice Cream

title 1
Tillamook Ice Cream
⏱️ cook time 25 minutes active, 6 hours minimum chill/set time
🍽️ servings 6
⚡ Difficulty medium

intro

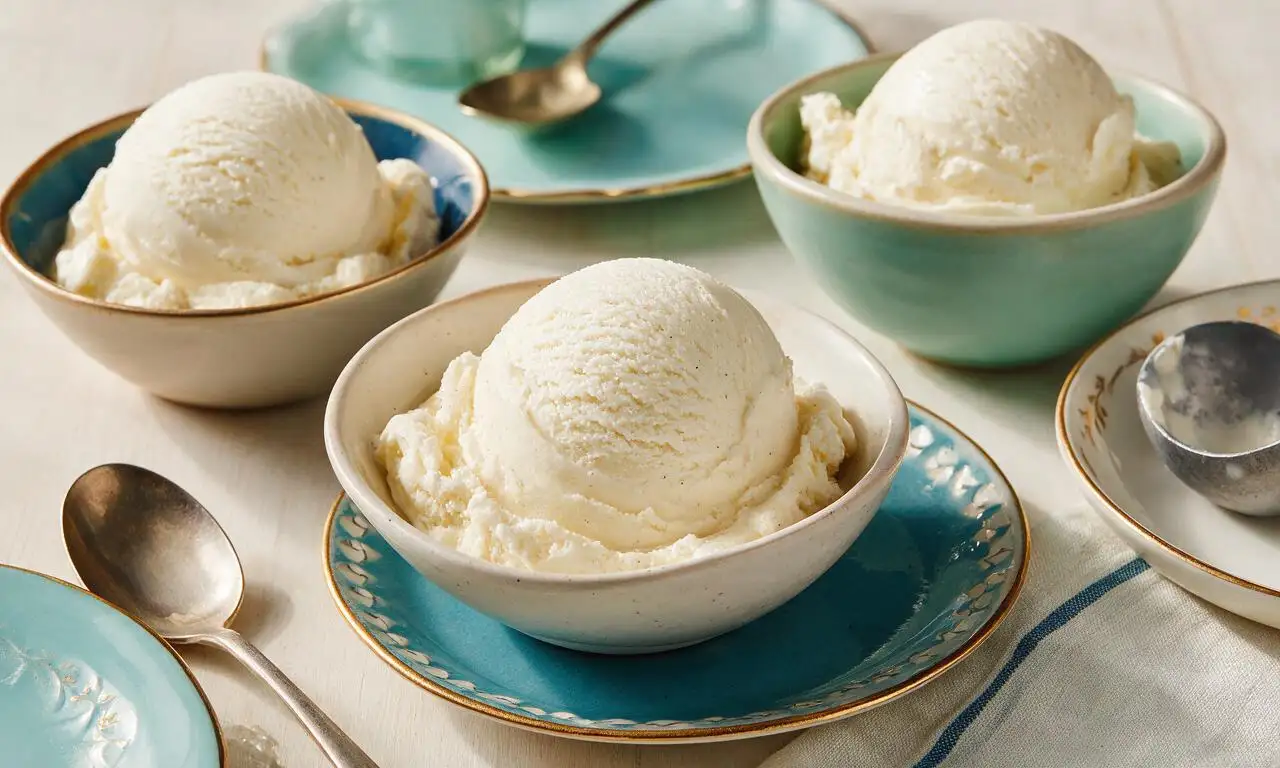
Ultra-creamy, dense old-fashioned vanilla ice cream in the signature Tillamook Pacific Northwest style, made with high-butterfat dairy and minimal air for smooth, perfectly scoopable servings.

Ingredients

Heavy whipping cream (36% butterfat) 480 ml (2 cups)
Whole milk 240 ml (1 cup)
Large egg yolks 6 (120 grams)
Granulated sugar 150 grams (3/4 cup)
Pure vanilla extract 15 ml (1 tablespoon)
Fine sea salt 1 gram (1/8 teaspoon)

Steps

1

Prepare ice bath

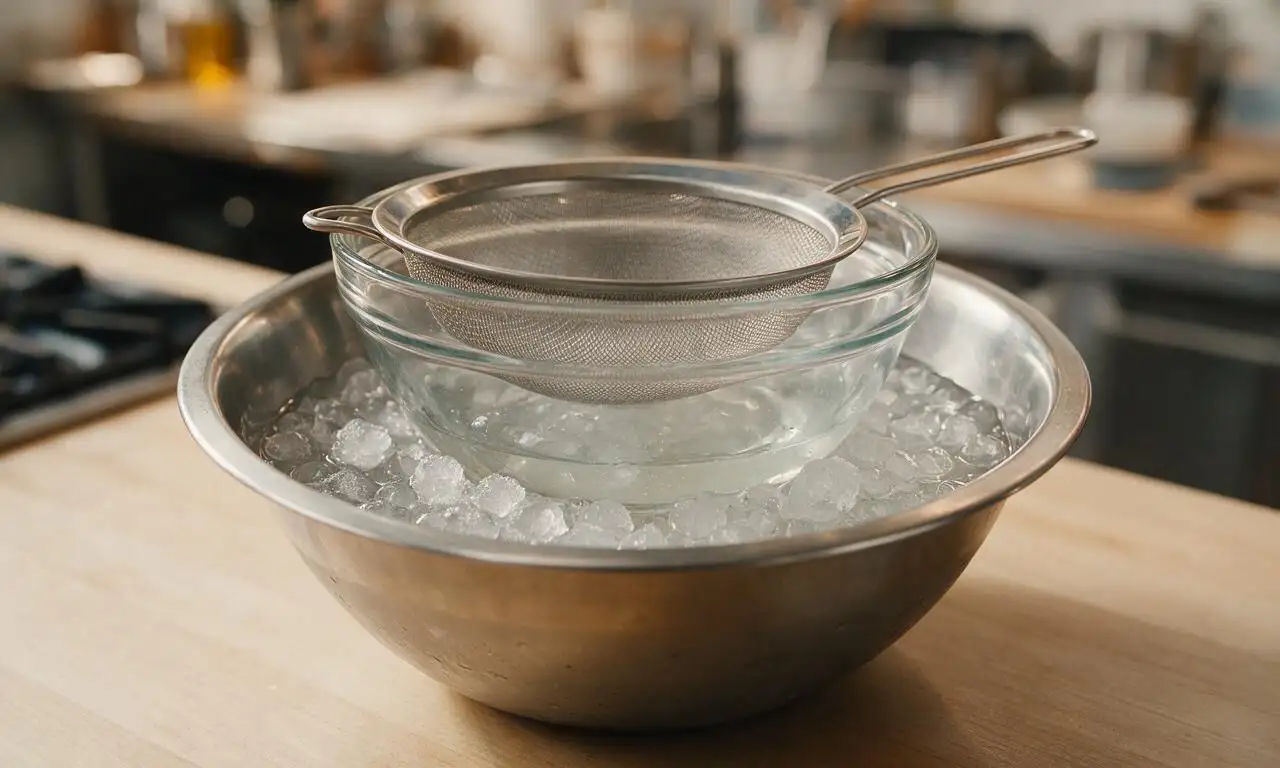
Set a medium 1.5L glass bowl in a large 3L bowl filled with 960ml (4 cups) ice water and 240g (1 cup) table salt, to rapidly cool the cooked ice cream base later. Place a fine-mesh sieve over the top of the inner glass bowl to strain the base as you pour it in.
Step 1
step1:Prepare ice bath
2

Warm dairy mixture

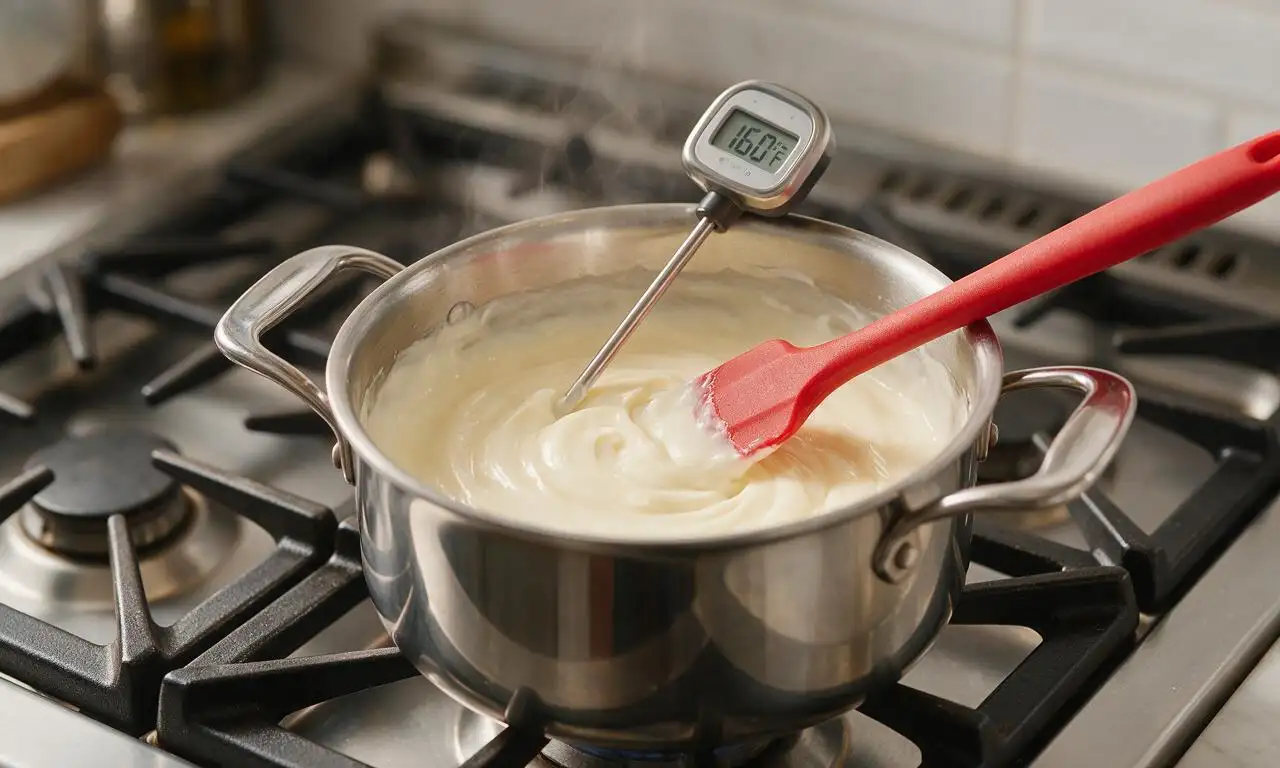
Combine 240ml (1 cup) of the heavy whipping cream, all 240ml (1 cup) whole milk, and 75g (1/3 cup) granulated sugar in a heavy-bottomed 2L saucepan over medium-low heat. Stir constantly with a silicone spatula for 4-5 minutes until the sugar fully dissolves and the mixture reaches 71°C (160°F), just before it begins to simmer—do not let it boil, as this can scald the dairy.
Step 2
step2:Warm dairy mixture
3

Temper egg yolks

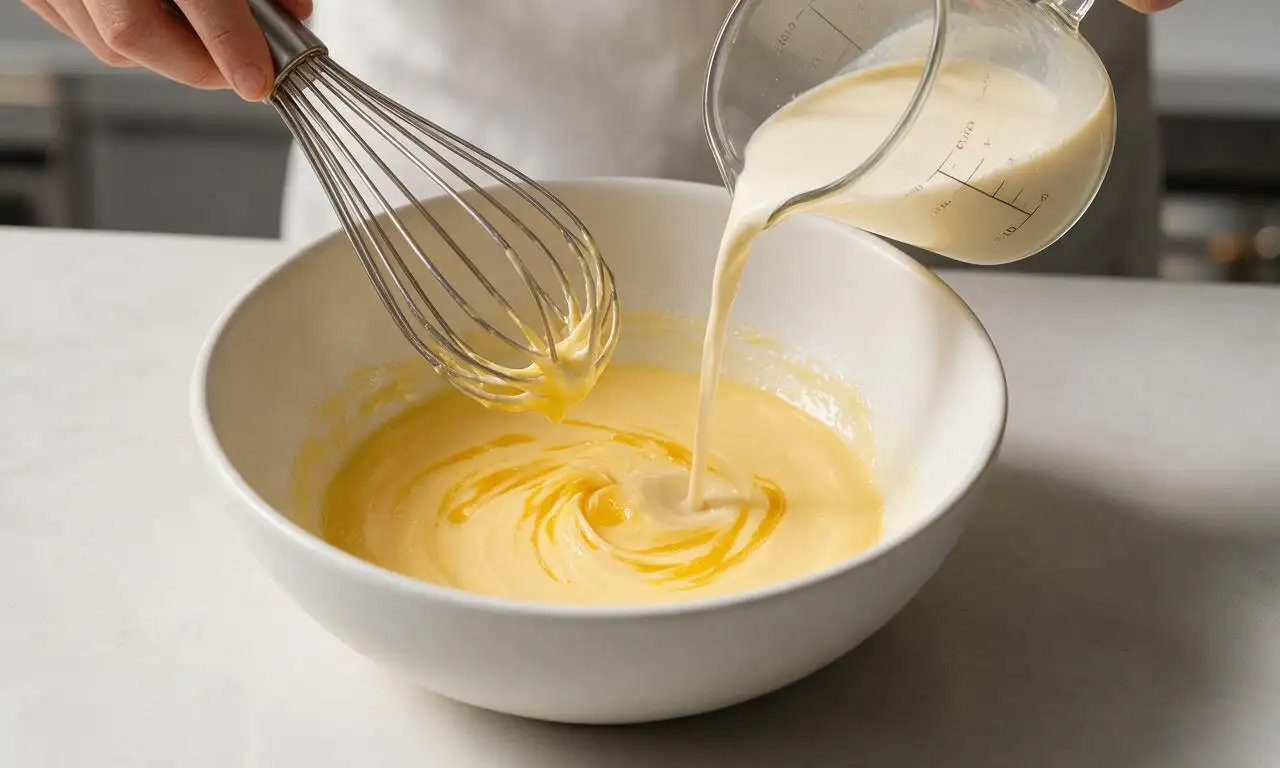
Whisk the 6 large egg yolks, remaining 75g (1/3 cup) granulated sugar, and 1g (1/8 tsp) fine sea salt in a separate 1L small bowl until smooth and pale lemon yellow. Slowly pour 120ml (1/2 cup) of the warm dairy mixture into the yolk mixture while whisking nonstop at a moderate pace, to prevent the eggs from curdling from sudden high heat.
Step 3
step3:Temper egg yolks
4

Cook custard base

Pour the tempered yolk mixture back into the saucepan with the remaining warm dairy, stirring constantly with the spatula over medium-low heat. Cook for 3-4 minutes until the custard thickens enough to coat the back of the spatula (reaching 77°C/170°F), taking care not to heat above 79°C/175°F, as higher heat will cause the eggs to curdle into lumps.
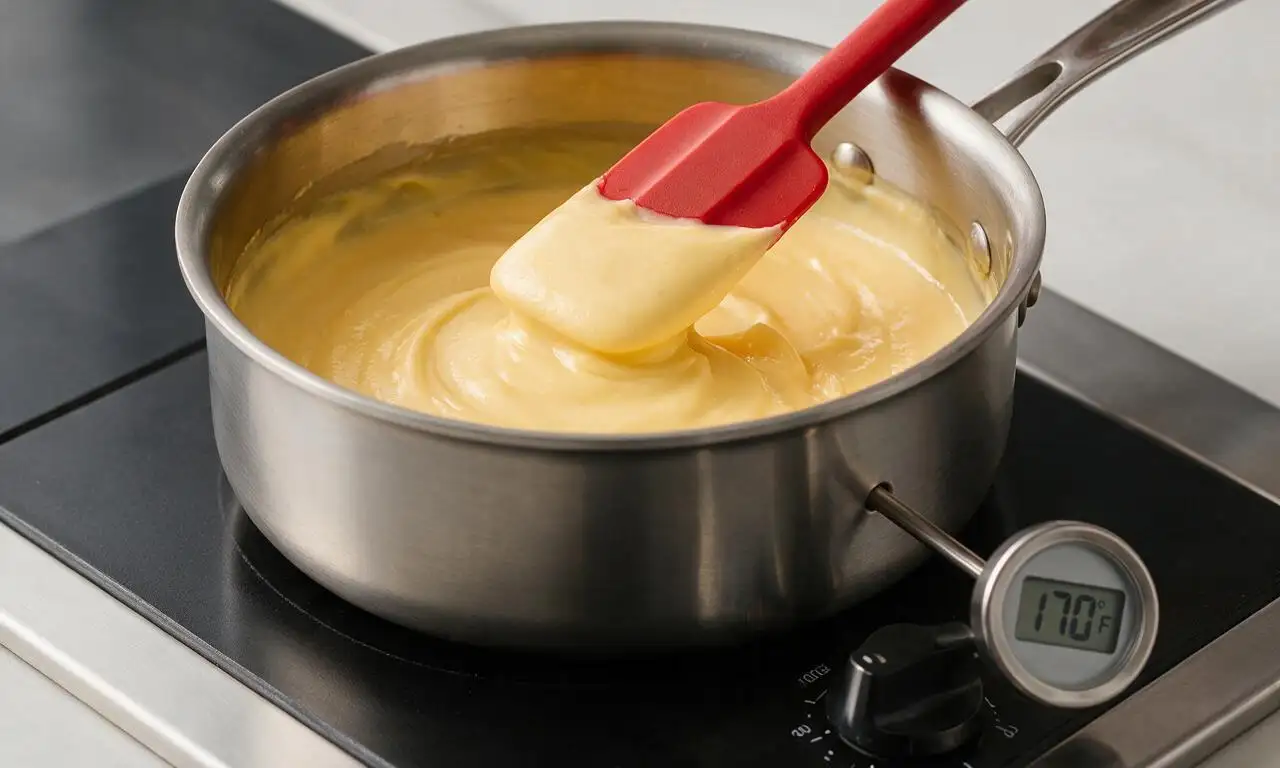
Step 4
step4:Cook custard base
5

Strain and chill base

Immediately pour the hot custard through the prepared sieve into the chilled bowl set in the ice bath. Stir in the remaining 240ml (1 cup) cold heavy cream and 15ml (1 tbsp) pure vanilla extract. Let the mixture cool for 30 minutes in the ice bath, stirring every 5 minutes, then cover tightly with plastic wrap and refrigerate for a minimum of 4 hours (or overnight) until it drops to 4°C (40°F) or colder.
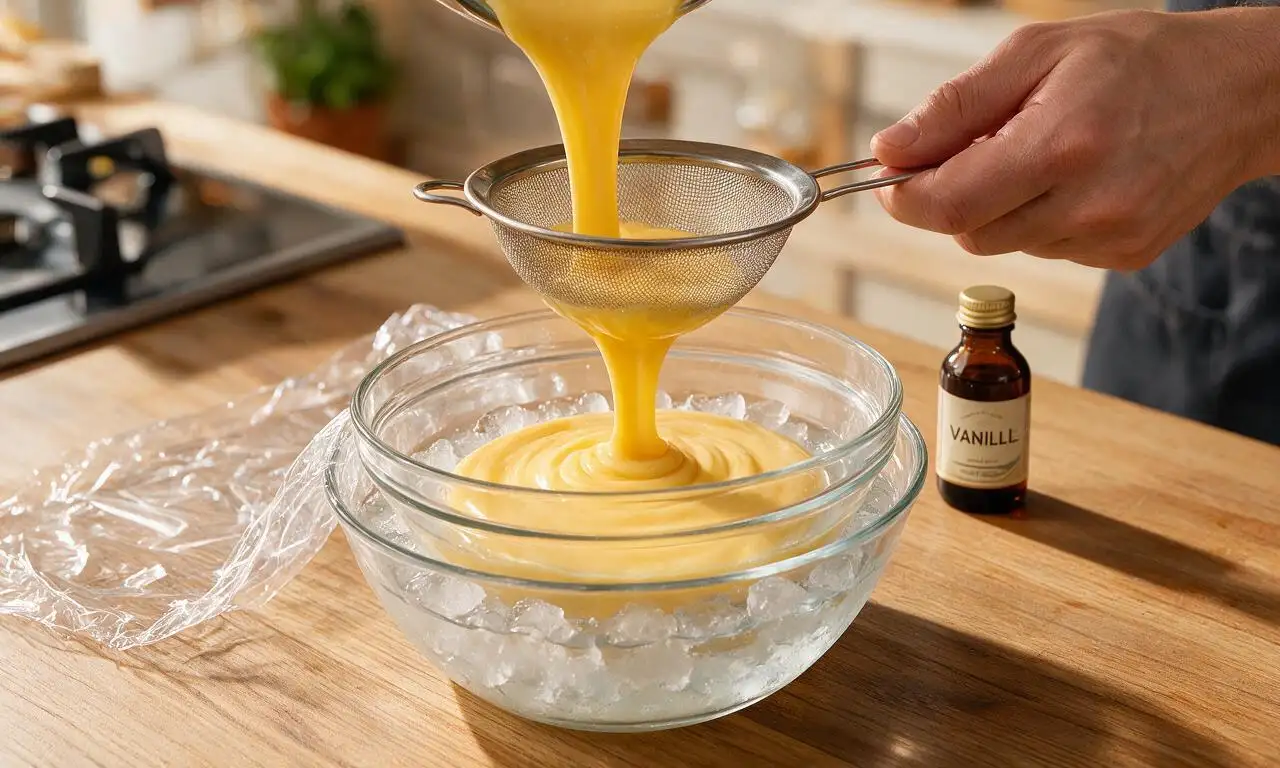
Step 5
step5:Strain and chill base
6

Churn ice cream

Pour the fully chilled custard base into a pre-frozen ice cream maker canister and churn according to manufacturer instructions for 20-25 minutes, until the mixture reaches the thick texture of soft-serve ice cream. Avoid over-churning past this point, as this will incorporate too much air and prevent the dense, creamy signature Tillamook texture.
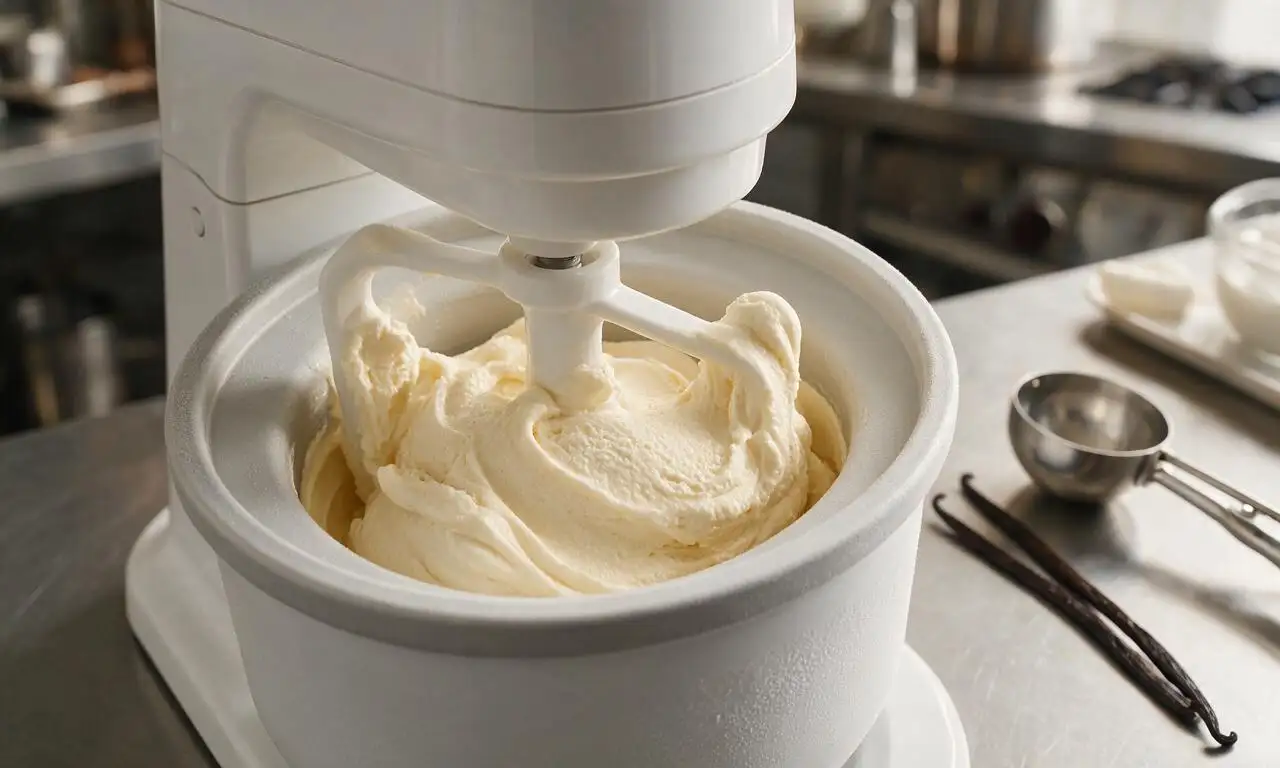
Step 6
step6:Churn ice cream
7

Freeze to set

Transfer the churned soft ice cream into a 1.5L (1.5 quart) airtight freezer-safe container, pressing a piece of parchment paper directly against the surface of the ice cream to block air exposure. Seal the lid tightly and freeze for 2+ hours until the ice cream is firm enough to scoop into dense, smooth, slow-melting scoops.
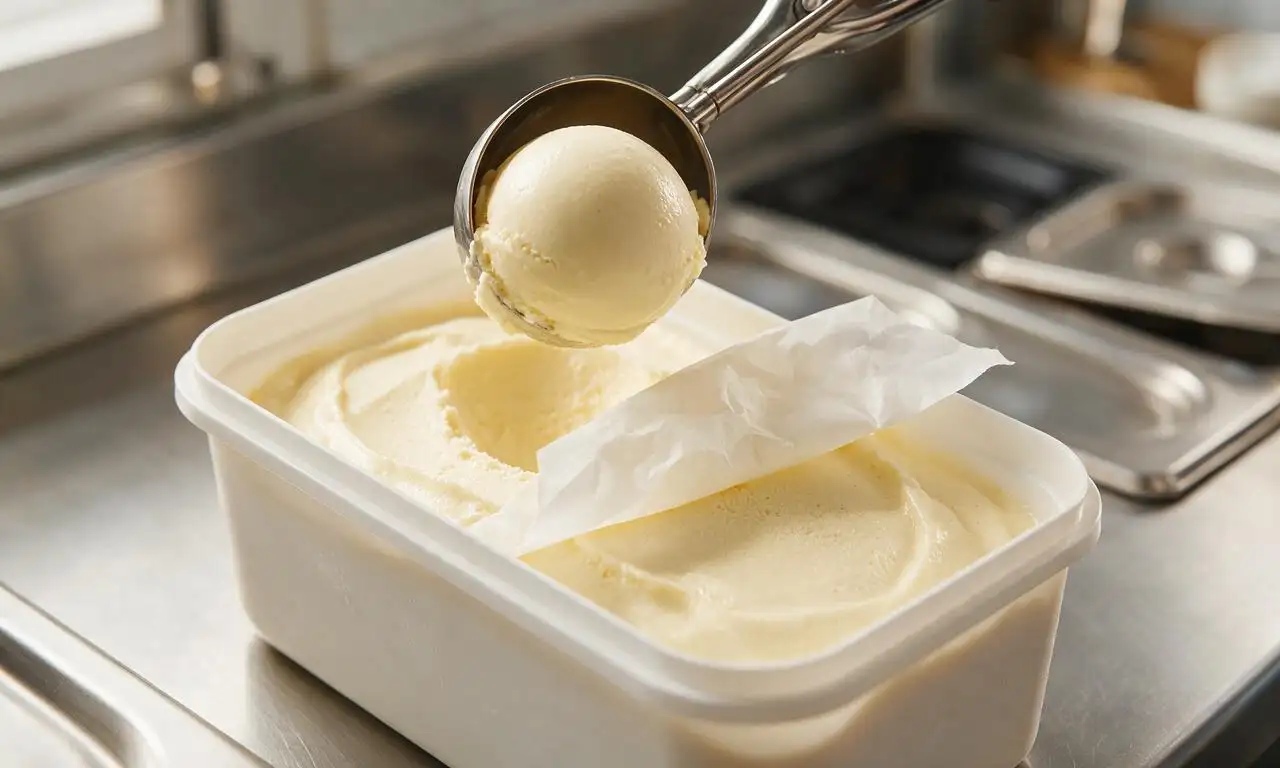
Step 7
step7:Freeze to set

Tips

1.Skip over-churning the base: excess incorporated air creates a light, fluffy texture instead of the signature dense, rich, slow-melting Tillamook consistency.
2.Ensure the custard base is fully chilled to 40°F (4°C) before churning; a warm base will melt the ice cream maker’s frozen canister too quickly, resulting in grainy, icy ice cream.
3.Press a sheet of parchment paper directly against the exposed surface of the churned ice cream before sealing the storage container; this blocks air contact and prevents grainy ice crystals from forming during freezer storage.


✨ You May Also Like

Desserts & Baking
🍜 Italy

Creamy, coffee-kissed classic Northern Italian no-bake dessert, with layers of rum-spiked mascarpone cream, soft ladyfingers, and a rich cocoa dusting.

⏱️ 4 hours 3Desserts & Baking ★ 4.7
Desserts & Baking
🍜 France

Flaky, shatteringly crisp, buttery French croissants with golden exteriors and soft, airy layered interiors, perfect for pairing with coffee for a special morning treat.

⏱️ 12 hours Desserts & Baking ★ 4.5
Desserts & Baking
🍜 United States

Warm, spiced baked apples topped with a fluffy golden biscuit crust, this cozy dessert pairs perfectly with vanilla ice cream for cool-weather comfort.

⏱️ 55 minuteDesserts & Baking ★ 4.6
Desserts & Baking
🍜 United States

A star-spangled classic American blueberry pie with buttery flaky crust and bright sweet-tart filling, perfect for summer patriotic gatherings.

⏱️ 1 hour 25Desserts & Baking ★ 4.7
Desserts & Baking
🍜 United States

A beloved no-bake regional Maine candy with a chewy coconut-potato center coated in rich dark chocolate, a New England holiday staple since the 1870s.

⏱️ 2 hours 3Desserts & Baking ★ 4.8
Desserts & Baking
🍜 France

Luxuriously creamy, floral frozen custard made with aromatic Tahitian vanilla beans, boasting a smooth, rich texture that melts slowly on the tongue.

⏱️ 3 hours 3Desserts & Baking ★ 4.5

Tillamook Ice Cream:Frequently Asked Questions

1.What makes this ice cream specifically Tillamook-style, rather than regular homemade vanilla? ▾
This recipe matches Tillamook’s signature Pacific Northwest profile with two core choices: 36% butterfat heavy cream for ultra-rich depth, and churning to keep overrun (trapped air) under 20% for a dense, slow-melting, perfectly scoopable texture. That’s a stark contrast to the light, fluffy, high-air texture common in many budget mass-produced ice creams.
2.Can I use lower-fat heavy cream or half-and-half to cut down on calories? ▾
I don’t recommend it if you want that authentic Tillamook texture. The 36% butterfat content creates that luxuriously smooth, dense mouthfeel and prevents icy, grainy batches. Lower-fat dairy or half-and-half will produce a lighter, icier result that melts too fast. If you must cut fat, only swap ¼ cup of heavy cream for whole milk, no more.
3.Do I really need to make a cooked custard base with egg yolks? ▾
Yes, for that authentic old-fashioned texture, the cooked egg yolk custard base is non-negotiable. Egg yolks add natural emulsifiers that create a silkier, less icy texture, add subtle rich depth that balances bright vanilla, and help the finished ice cream hold its smooth, scoopable consistency straight from the freezer, just like classic Tillamook batches.
4.How do I avoid scrambling the egg yolks when making the custard base? ▾
Take it slow with low, steady heat. Whisk egg yolks and sugar until pale first, then slowly drizzle in ½ cup of warm (not boiling) dairy while whisking constantly to temper the yolks before adding them back to the pot. Stir nonstop over medium-low heat until the base coats the back of a spatula, then strain immediately to catch any tiny cooked egg bits.
5.How long do I need to chill the custard base before churning it? ▾
For the densest, least icy Tillamook-style result, chill the fully cooked, strained custard for a minimum of 4 hours, and ideally 24 hours, in the fridge. A thoroughly cold base (aim for 40°F or colder) churns faster, traps less excess air, and produces smaller ice crystals for that signature smooth, thick texture. Don’t rush this step!
6.Why does my homemade ice cream get rock hard in the freezer, unlike store-bought Tillamook? ▾
Home freezers run much colder than commercial ice cream storage units, and this homemade version lacks the commercial stabilizers Tillamook uses for consistent softness. For perfect scoopability, store ice cream in a shallow, airtight container with parchment pressed directly to the surface, and let it sit on the counter for 5 to 7 minutes before scooping.
7.Can I use vanilla bean paste instead of pure vanilla extract here? ▾
Absolutely! Pure vanilla bean paste is a fantastic swap that adds those pretty, visible vanilla seed specks many people love in old-fashioned ice cream, for an extra premium look and flavor. Use the exact same measurement as you would pure vanilla extract—just skip imitation vanilla, which has a harsh, artificial aftertaste that clashes with the simple, rich dairy base.
8.How do I keep excess air out to get that signature dense Tillamook texture? ▾
First, make sure your base is fully chilled before churning, as warm bases whip in far more air. Stop churning as soon as the ice cream reaches soft-serve texture—over-churning whips in extra air and can even cause butter to separate from the high-fat cream. When transferring to storage, press ice cream firmly in layers instead of piling it loosely to knock out trapped air.
9.Can I make this ice cream if I don’t own an ice cream maker? ▾
You can, but you won’t get that perfectly dense, smooth Tillamook-style texture without mechanical churning. If you don’t have a machine, pour the chilled custard into a shallow freezer dish, stir it vigorously every 30 minutes for 3 to 4 hours as it freezes to break up ice crystals, and press it firmly between stirs to minimize trapped air for the closest result.
10.How long will this homemade ice cream stay fresh and good in the freezer? ▾
Stored properly in an airtight container with parchment pressed directly to the ice cream surface to block freezer burn, this ice cream will stay creamy and delicious for up to 2 weeks. After that, it will develop larger ice crystals and lose that fresh, rich dairy flavor, even if it stays safe to eat for a couple of months. It’s so tasty, you’ll likely finish it long before then!
11.Can I use this base to make other Tillamook-style ice cream flavors? ▾
Absolutely! This rich, high-butterfat, low-overrun base is the perfect starting point for all your favorite classic Tillamook-style flavors. Stir in mix-ins like cookie dough chunks, fudge swirls, chilled berry compote, or chopped salted nuts during the last 2 minutes of churning, making sure all add-ins are fully cold so they don’t melt the base or create ice crystals.
12.I thought modern Tillamook ice cream doesn’t use eggs—why does this recipe call for egg yolks? ▾
Many current Tillamook batches use vegetable-based stabilizers instead of egg yolks to keep texture smooth without custard, but old-fashioned Tillamook recipes from the co-op’s early 20th century decades relied on egg yolks as a natural emulsifier. This recipe leans into that original profile for a cleaner, richer flavor without added gums or stabilizers found in modern production batches.
13.What’s the best way to scoop this dense, high-butterfat ice cream into clean, smooth servings? ▾
Run your ice cream scoop under hot water for 10 seconds, then wipe it dry between scoops for perfect, round, smooth servings. The warm scoop cuts cleanly through the dense, high-fat ice cream without compressing it too much, and you won’t end up with crumbly, fractured scoops. Skip using a cold scoop, which will stick to the creamy base and leave messy, uneven bits.

Comments (15)

2 days ago

OMG this tastes EXACTLY like the Tillamook old fashioned vanilla I grew up buying on trips to the coast! I was worried I couldn’t nail that creamy, not-too-sweet vibe at home but this recipe is a total game changer. My kids begged for second scoops before we even finished dinner last night. 10/10 will be making this all summer long.

yesterday

Wait did you use the exact cream brand recommended? I have a hard time finding high butterfat cream where I live and I don’t want it to turn out icy!

2 hours ago

Great question! For the creamiest texture, aim for heavy whipping cream with at least 36% butterfat if you can find it—if your local store only carries lower fat cream, you can add 2 tbsp of softened cream cheese to the base to help cut down on ice crystal formation!

1 week ago

Made this for our neighborhood block party potluck last weekend and people were literally coming up to ask me for the recipe before they even finished their bowl! Only note is I wished I’d doubled the batch because it was gone in 20 minutes flat. So rich and creamy, no weird artificial aftertaste like store brand vanilla.

5 days ago

So glad it was a hit at the block party! Doubling is always a smart call with this recipe—we’ve never seen a batch last more than a day when there’s a crowd around!

3 days ago

Took a stab at this last night, followed the recipe exactly, and the vanilla flavor is so much deeper than any homemade ice cream I’ve made before. I did end up letting it chill in the fridge for 8 hours instead of 6 before churning and I think that made a huge difference in how smooth it turned out. Will definitely be adding this to my regular rotation.

5 days ago

Wait how icy is this if you don’t have a fancy countertop ice cream maker? I only have the old $30 hand-me-down churn from my college days and I’m nervous it won’t get that super creamy Tillamook texture.

3 days ago

I used my cheap old 2 quart churn too! Just make sure your base is super cold before you pour it in, and churn it for the full time the recipe says, it came out perfect for me! I did let it ripen in the freezer for an extra 2 hours after churning too.

2 weeks ago

Really solid vanilla ice cream! My only gripe is that I found it a tiny bit too sweet for my taste, so next time I’ll cut the sugar by a tablespoon or two. Otherwise, the texture was spot on and paired perfectly with the peach cobbler I made for Sunday dinner.

1 week ago

Oh that sounds amazing with peach cobbler! I made mine to go with apple pie last week and it was chef’s kiss, I didn’t think it was too sweet but I do have a massive sweet tooth lol.

5 days ago

Thanks for the feedback! The sugar level is calibrated to match Tillamook’s classic profile, but cutting 1-2 tbsp of granulated sugar is a totally easy adjustment if you prefer less sweet desserts—great call!

30 minutes ago

Game. Changer. I’ve been chasing that perfect old-fashioned vanilla texture for years after moving away from Oregon, and this is dead on. I splurged on real vanilla bean paste instead of extract and you can see those little vanilla specks just like the store bought stuff. Worth every penny.

5 minutes ago

Love that you used vanilla bean paste! It’s our favorite swap for that classic, premium look and flavor without having to scrape whole beans every time.

yesterday

Made this for my son’s birthday party and all the kids went crazy for it! We set up a little sundae bar with sprinkles, hot fudge, and caramel, and this vanilla was the perfect base. Even the picky eaters went back for more. SO good.

2 hours ago

Help! I made this last night and my base came out a little curdled when I was cooking it? Did I heat it too fast? It still tasted fine after churning but the texture was a little grainier than I wanted.

30 minutes ago

I did that the first time too! You have to whisk constantly while you’re heating the egg base and don’t let it get above 170F, I used a candy thermometer the second time and it came out perfectly smooth.

just now

Sorry to hear the base curdled on your first try! Low and slow is the name of the game with the custard base—keep the heat at medium-low, whisk nonstop, and pull it off the heat as soon as it coats the back of a spoon. A quick strain through a fine mesh sieve before chilling can also catch any small curdles if you catch them early!

2 days ago

Meal prepped a batch of this for the week and I’ve had a tiny bowl every night after dinner, no regrets. It’s so creamy even after a few days in the freezer, no weird icy layer on top like most homemade ice cream I make. 10/10.

yesterday

Wait how are you storing it? I always get that icy top layer no matter what I do, do you use a special container?

just now

Wow, this is way easier than I thought it would be for a medium difficulty recipe! I was intimidated by the custard base but the steps were super straightforward, and the end result tastes like something you’d pay $10 a pint for at the fancy grocery store. Absolutely worth the 6 hour chill time, don’t rush it!

1 week ago

This tastes exactly like the vanilla ice cream my grandma used to make back in the 50s! I’ve tried so many old fashioned recipes over the years and none of them hit that nostalgic note until this one. Brought me right back to summer visits to her farm as a kid.

5 days ago

That’s the highest compliment we could get! Old-fashioned recipes are all about that simple, high-quality ingredient list, no fancy add-ins needed to make something memorable.

3 days ago

Has anyone tried making this with a mix of heavy cream and half and half to cut the richness a little? I love Tillamook but sometimes the super high butterfat is a little too heavy for my stomach.

2 days ago

I did half half and half and half heavy cream last week! It was still really creamy, just a little less rich, perfect if you don’t want that super heavy mouthfeel. I wouldn’t go more than half and half though, it’ll get icy.

yesterday

That’s a great swap! As long as you keep the total fat content high enough to prevent ice crystals, swapping a portion of the heavy cream for half and half works perfectly for a lighter finished ice cream.

5 days ago

Made this last weekend for my roommates and we ate the entire batch in one sitting while we were studying for finals. It’s so much cheaper than buying fancy pints and tastes 10x better. Only issue is my apartment freezer is set a little too cold so it gets rock solid after a day, but leaving it out on the counter for 5 minutes before scooping fixes that right up.

3 days ago

Pro tip! Press a piece of parchment paper directly on the surface of the ice cream before you put the lid on, it keeps it from getting too icy and helps it stay a better scooping consistency even in super cold freezers.

2 weeks ago

Served this alongside my famous smoked ribs and coleslaw at last weekend’s cookout and it was the perfect sweet finish. Everyone was shocked it was homemade, they thought I picked it up from the Tillamook creamery! Will absolutely be making this for every backyard get together this summer.

1 week ago

That combo sounds insane! I’m making ribs for Father’s Day next weekend and I was trying to pick a dessert, this is definitely going on the menu now.

5 days ago

Smoked ribs and homemade vanilla ice cream? That’s the ultimate summer cookout spread, we’re stealing that idea for our next family gathering!

yesterday

I’ve been making old fashioned ice cream for 60 years and this recipe is spot on. The ratio of cream to milk to eggs is exactly right, and the vanilla doesn’t overpower the creamy dairy flavor. I taught my granddaughter how to make it last weekend and it turned out perfect on her first try. A real keeper.



