
top round london broil

title 1
top round london broil
⏱️ cook time 15 minutes
🍽️ servings 4
⚡ Difficulty medium

intro

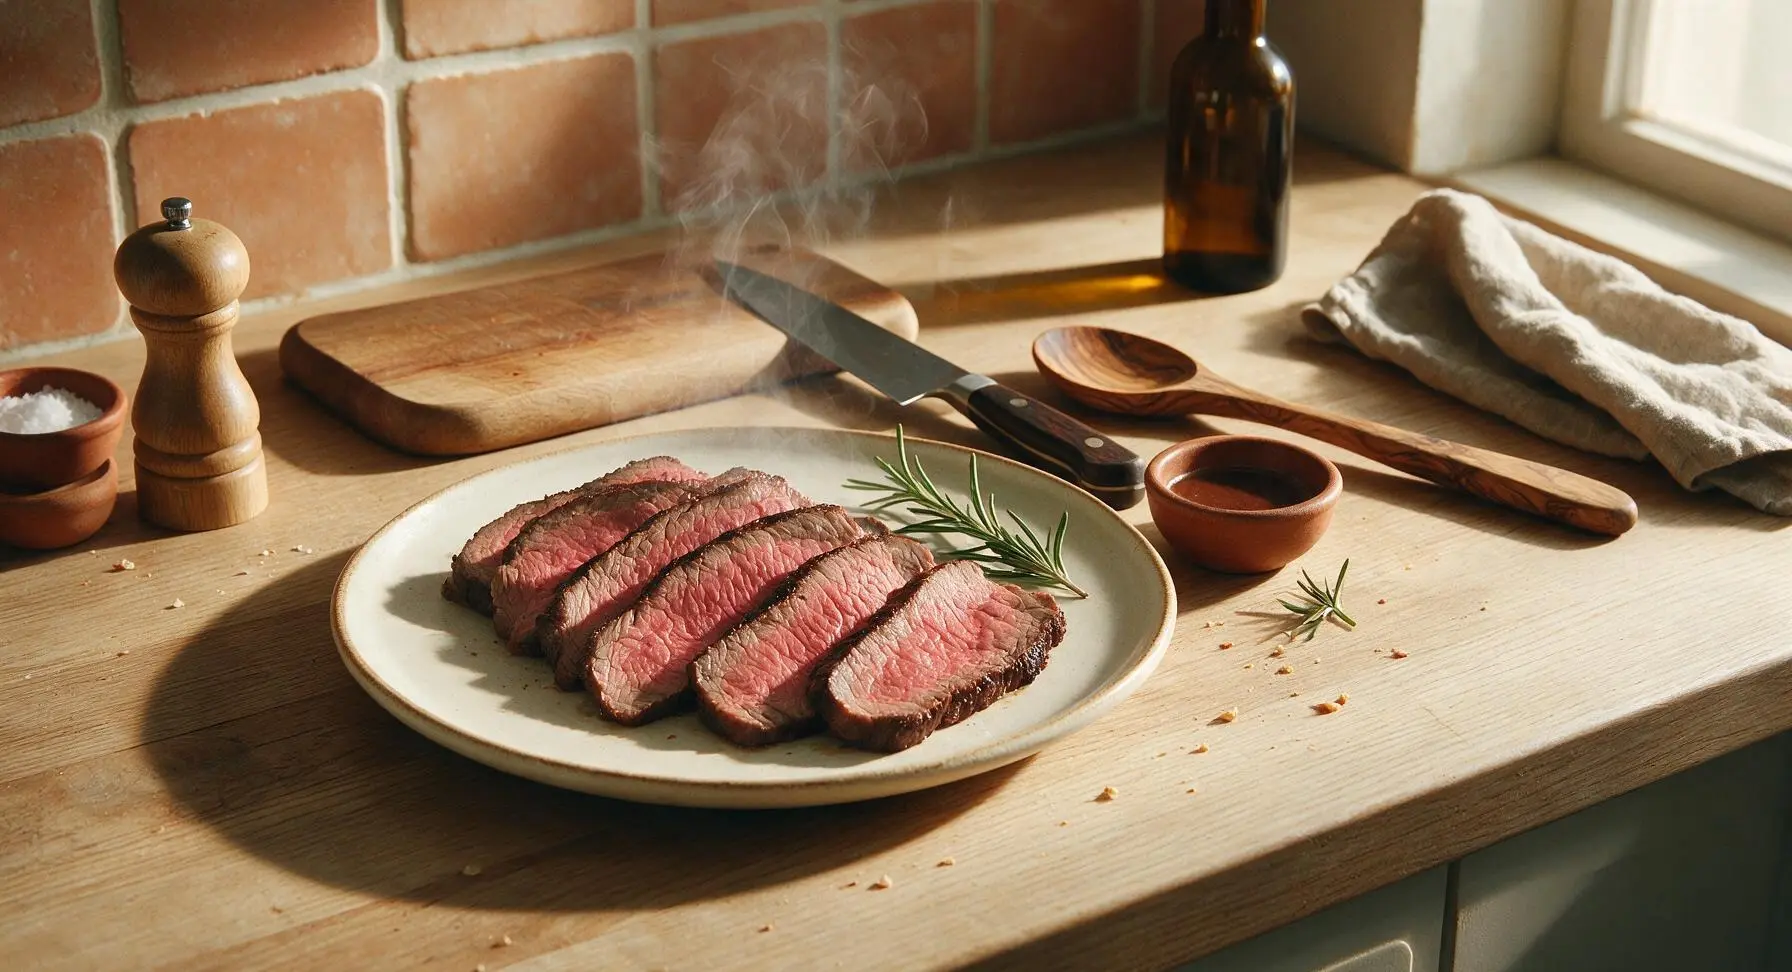
Juicy, tangy marinated top round London broil, seared to a crisp crust and rosy medium-rare, sliced thin for tender, flavorful bites perfect for casual family meals.

Ingredients
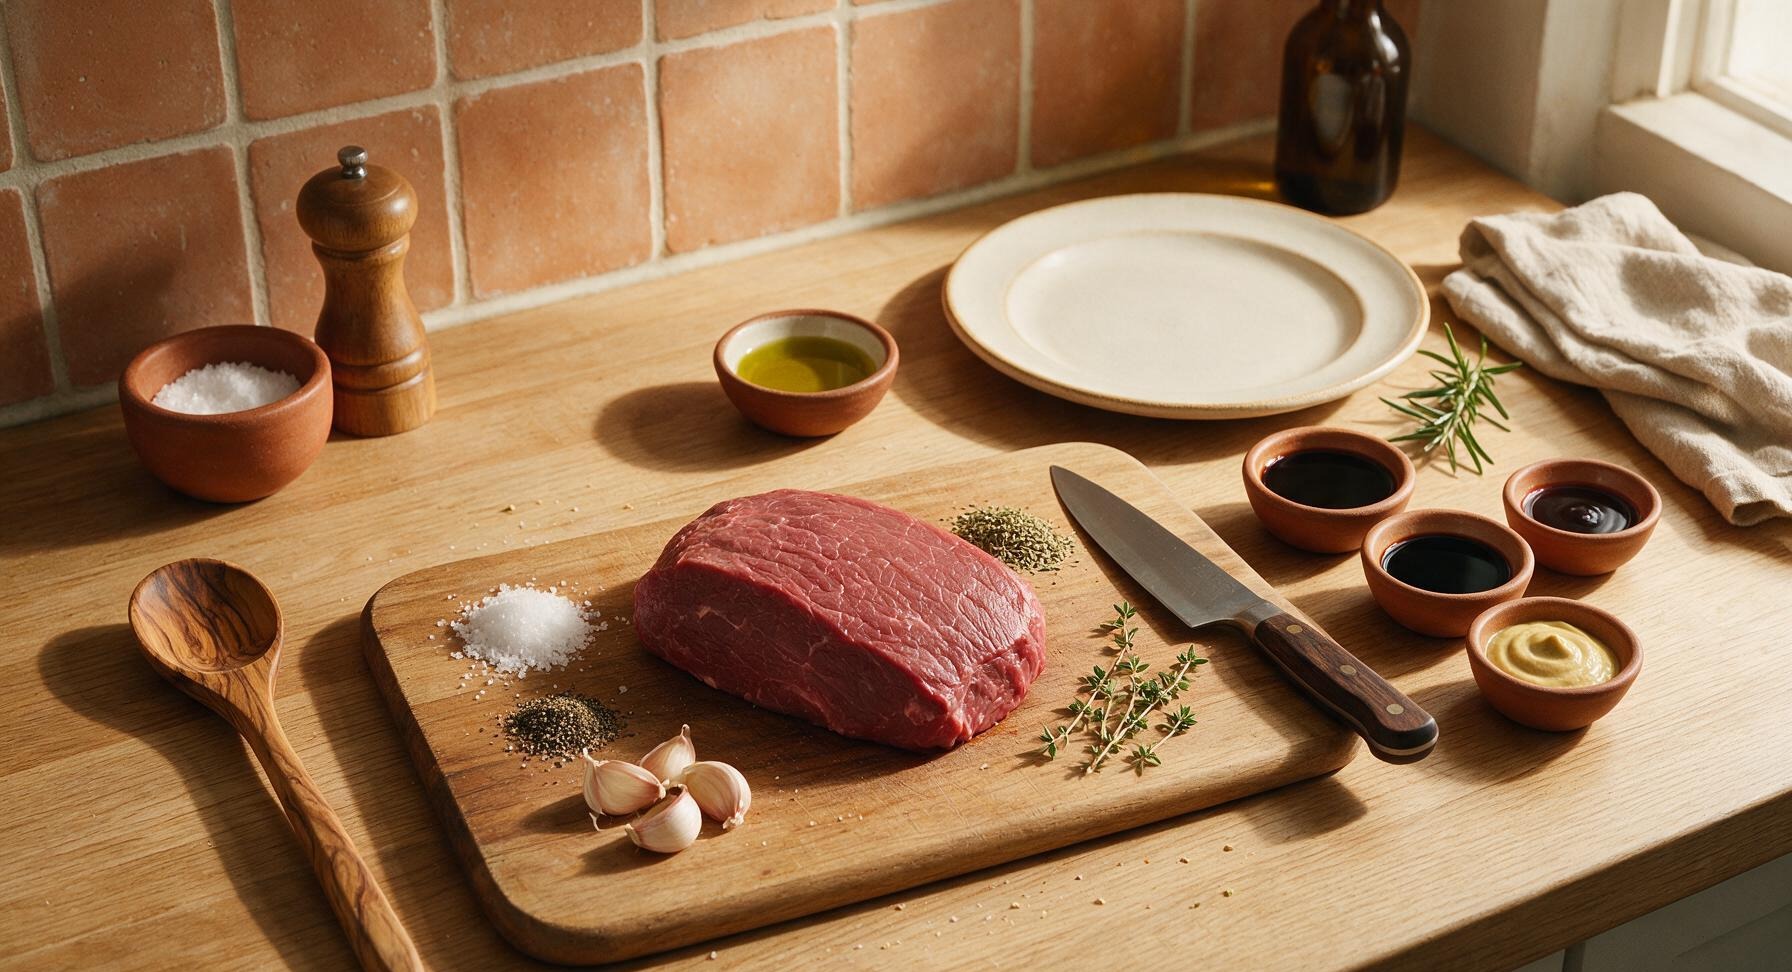
Top round beef roast (London broil cut) 2 lb (900g)
Coarse kosher salt 1.5 tsp
Freshly ground black pepper 1 tsp
Garlic cloves, crushed 3 cloves
Worcestershire sauce 2 tbsp
Low-sodium soy sauce 2 tbsp
Balsamic vinegar 1 tbsp
Dijon mustard 1 tbsp
Dried oregano 1 tsp
Extra-virgin olive oil 2 tbsp
Fresh thyme 4 sprigs

Steps

1

Mix Flavorful Marinade

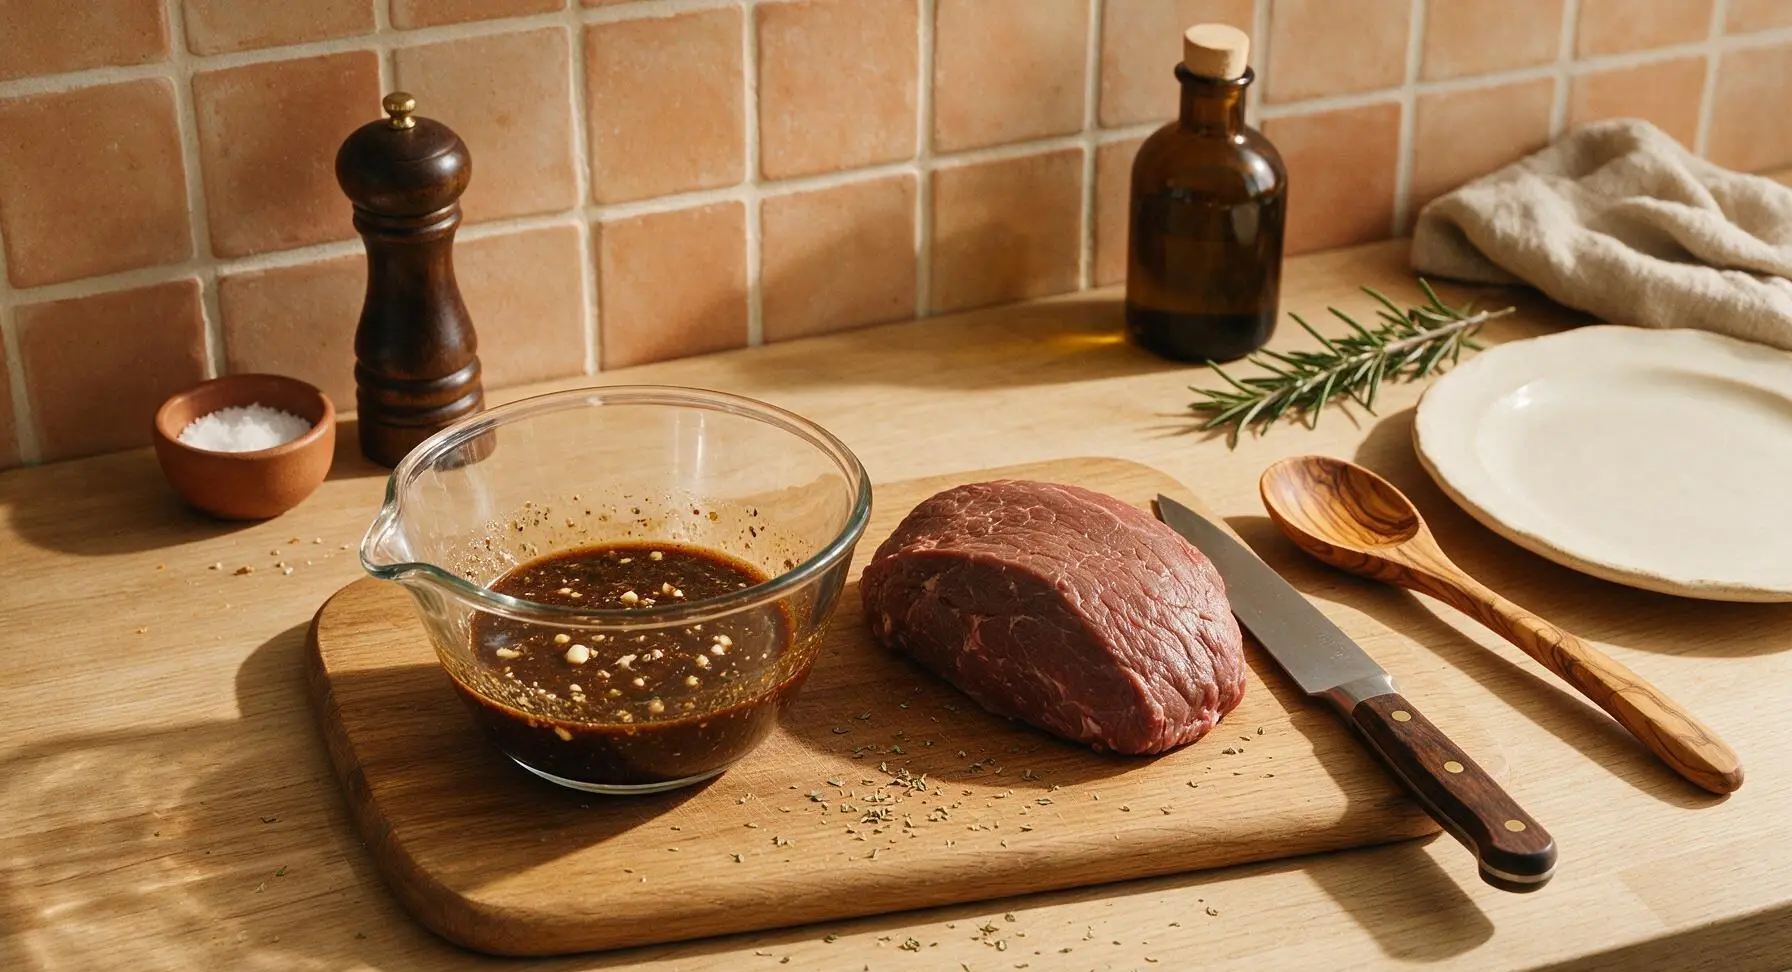
Place the clear glass mixing bowl on the left side of the maple cutting board. Add 2 tbsp Worcestershire sauce, 2 tbsp low-sodium soy sauce, 1 tbsp balsamic vinegar, 1 tbsp Dijon mustard, 2 tbsp olive oil, 3 crushed garlic cloves, 1 tsp dried oregano, 1/2 tsp kosher salt, and 1/2 tsp black pepper to the bowl. Stir thoroughly with the stainless steel meat fork until fully combined, with no streaks of mustard remaining. The mixture will be deep brown, glossy, and slightly thick.
Step 1
step1:Mix Flavorful Marinade
2

Marinate the Roast

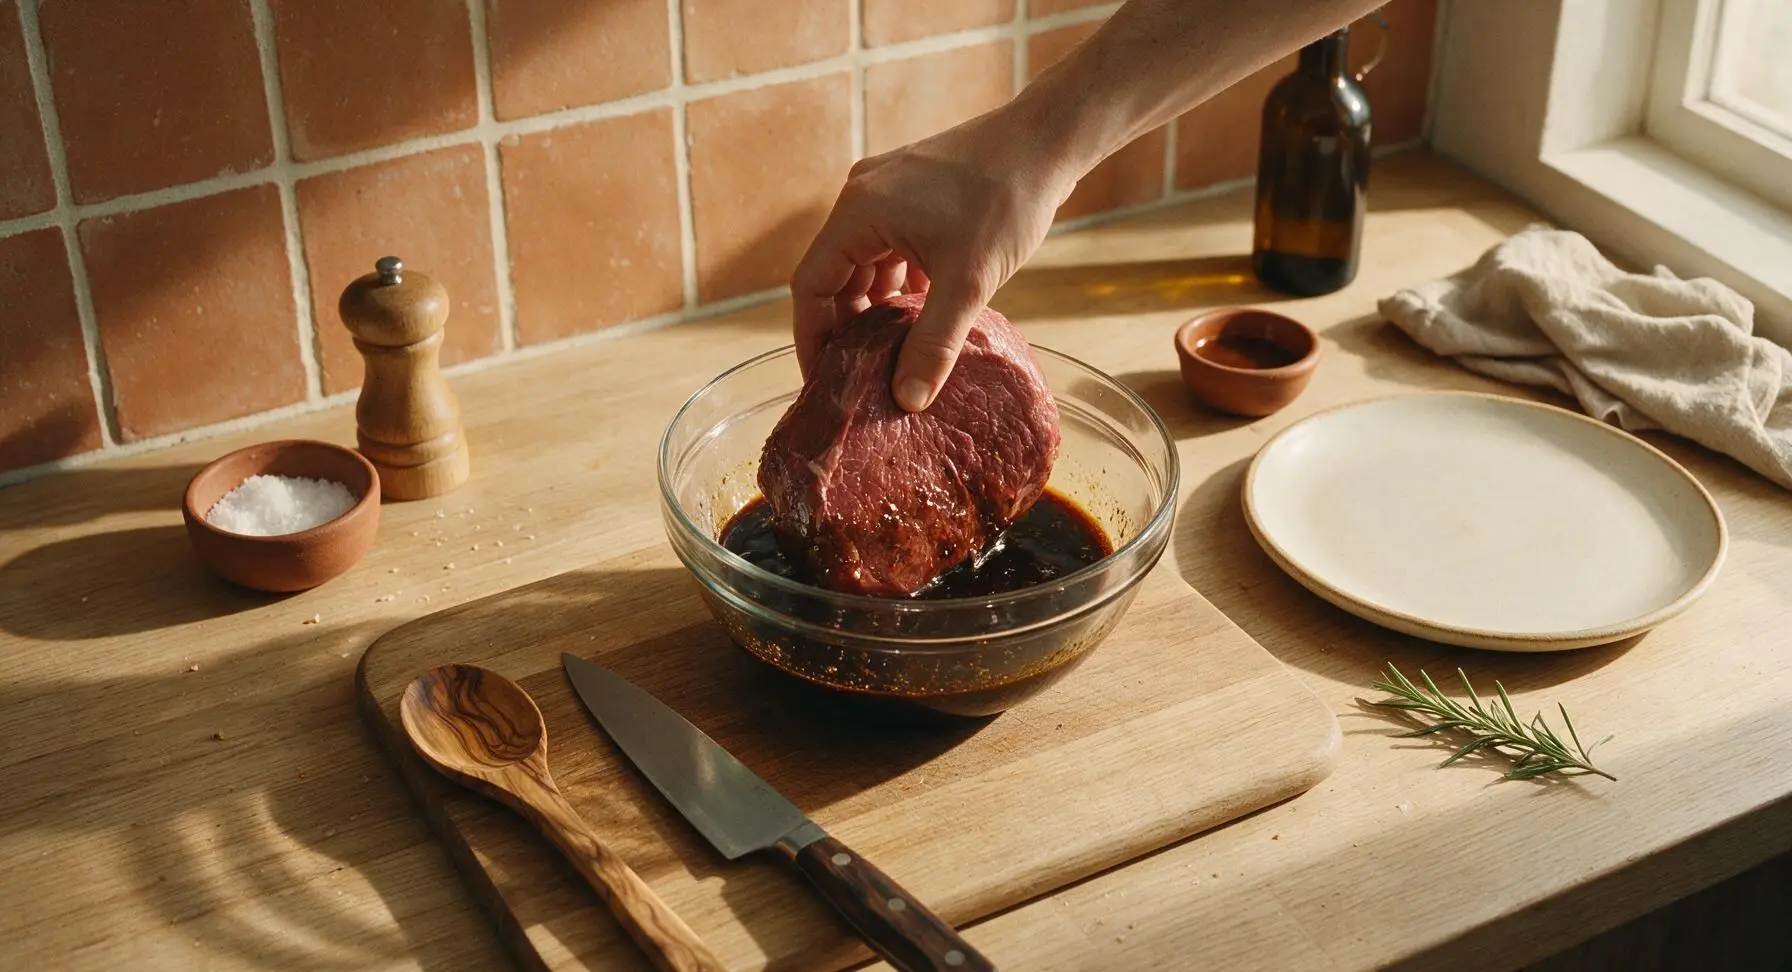
Pat the 2lb top round roast completely dry with paper towels, then place it in the glass mixing bowl with the marinade. Turn the meat to coat every surface fully, then tuck 2 fresh thyme sprigs under the meat. Cover the bowl tightly with plastic wrap, and refrigerate for a minimum of 2 hours (up to 8 hours) to let the flavors penetrate and the acid tenderize the meat. Turn the meat once halfway through marinating for even coverage.
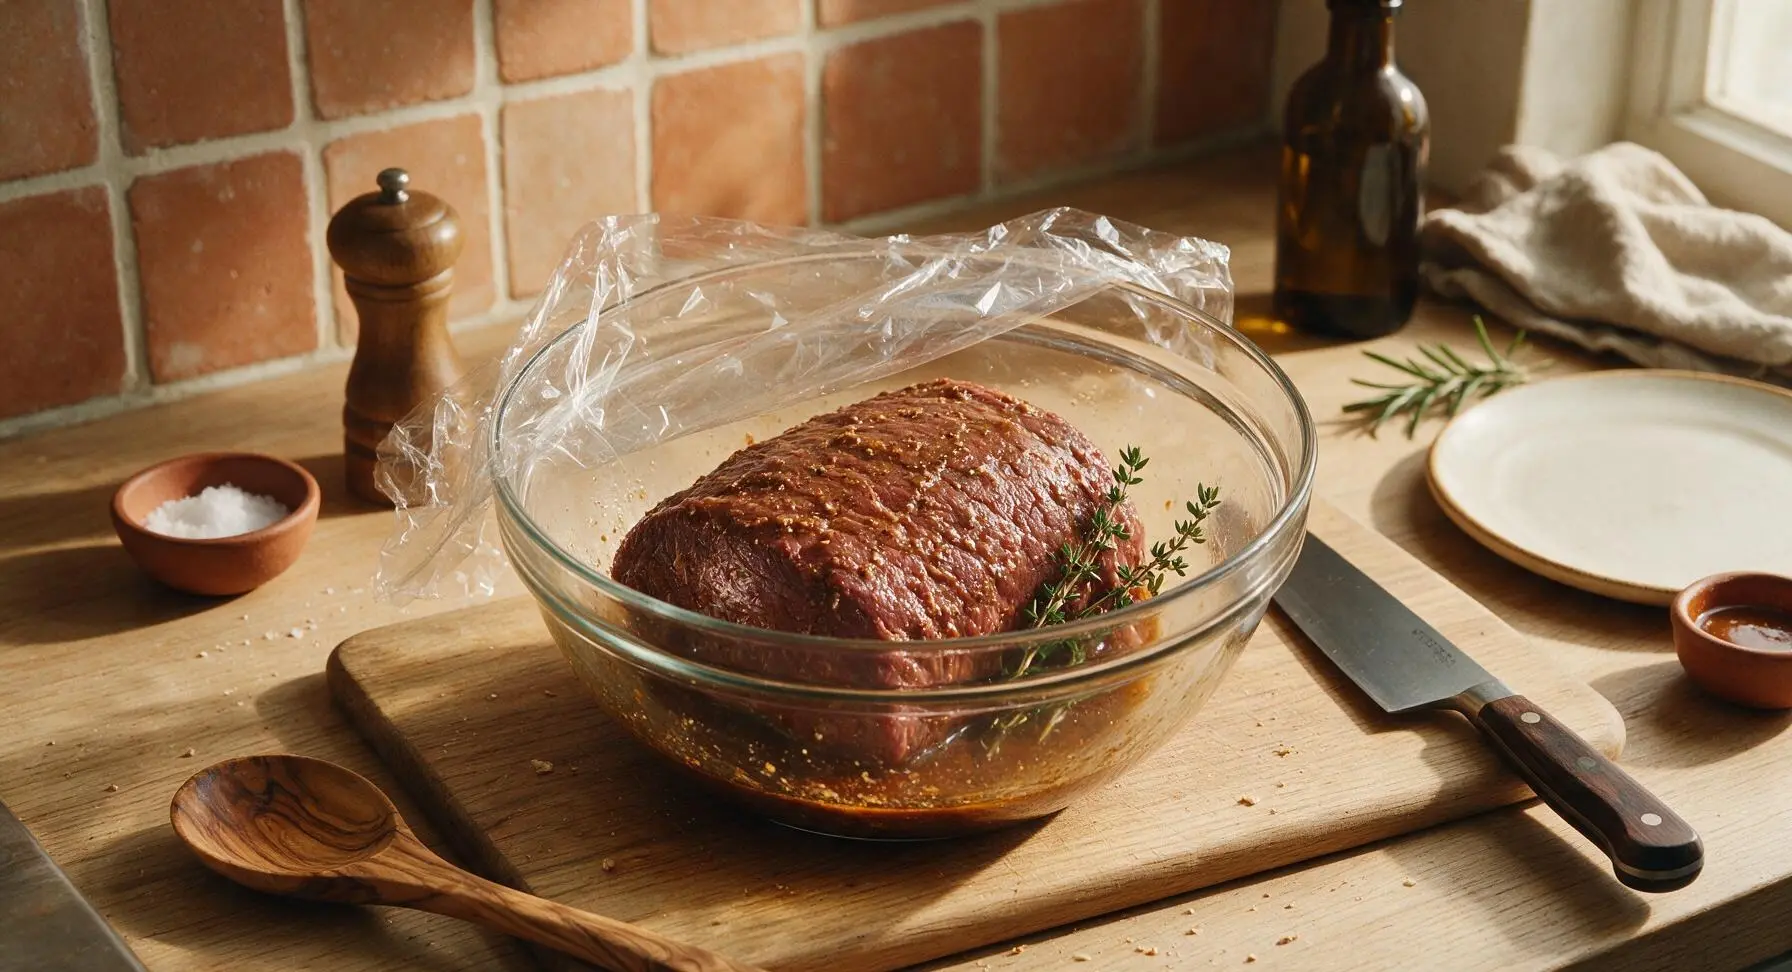
Step 2
step2:Marinate the Roast
Step 2
step2:Marinate the Roast
3

Bring Meat to Room Temp

Remove the marinated roast from the refrigerator 30 minutes before cooking, and let it rest uncovered on the maple cutting board to come to room temperature. This ensures even cooking across the entire cut, so you avoid a raw center and overcooked edges. Pat the surface of the meat lightly with a paper towel to remove excess marinade, which prevents steaming and helps build a crisp crust. Season all sides with the remaining 1 tsp kosher salt and 1/2 tsp black pepper.
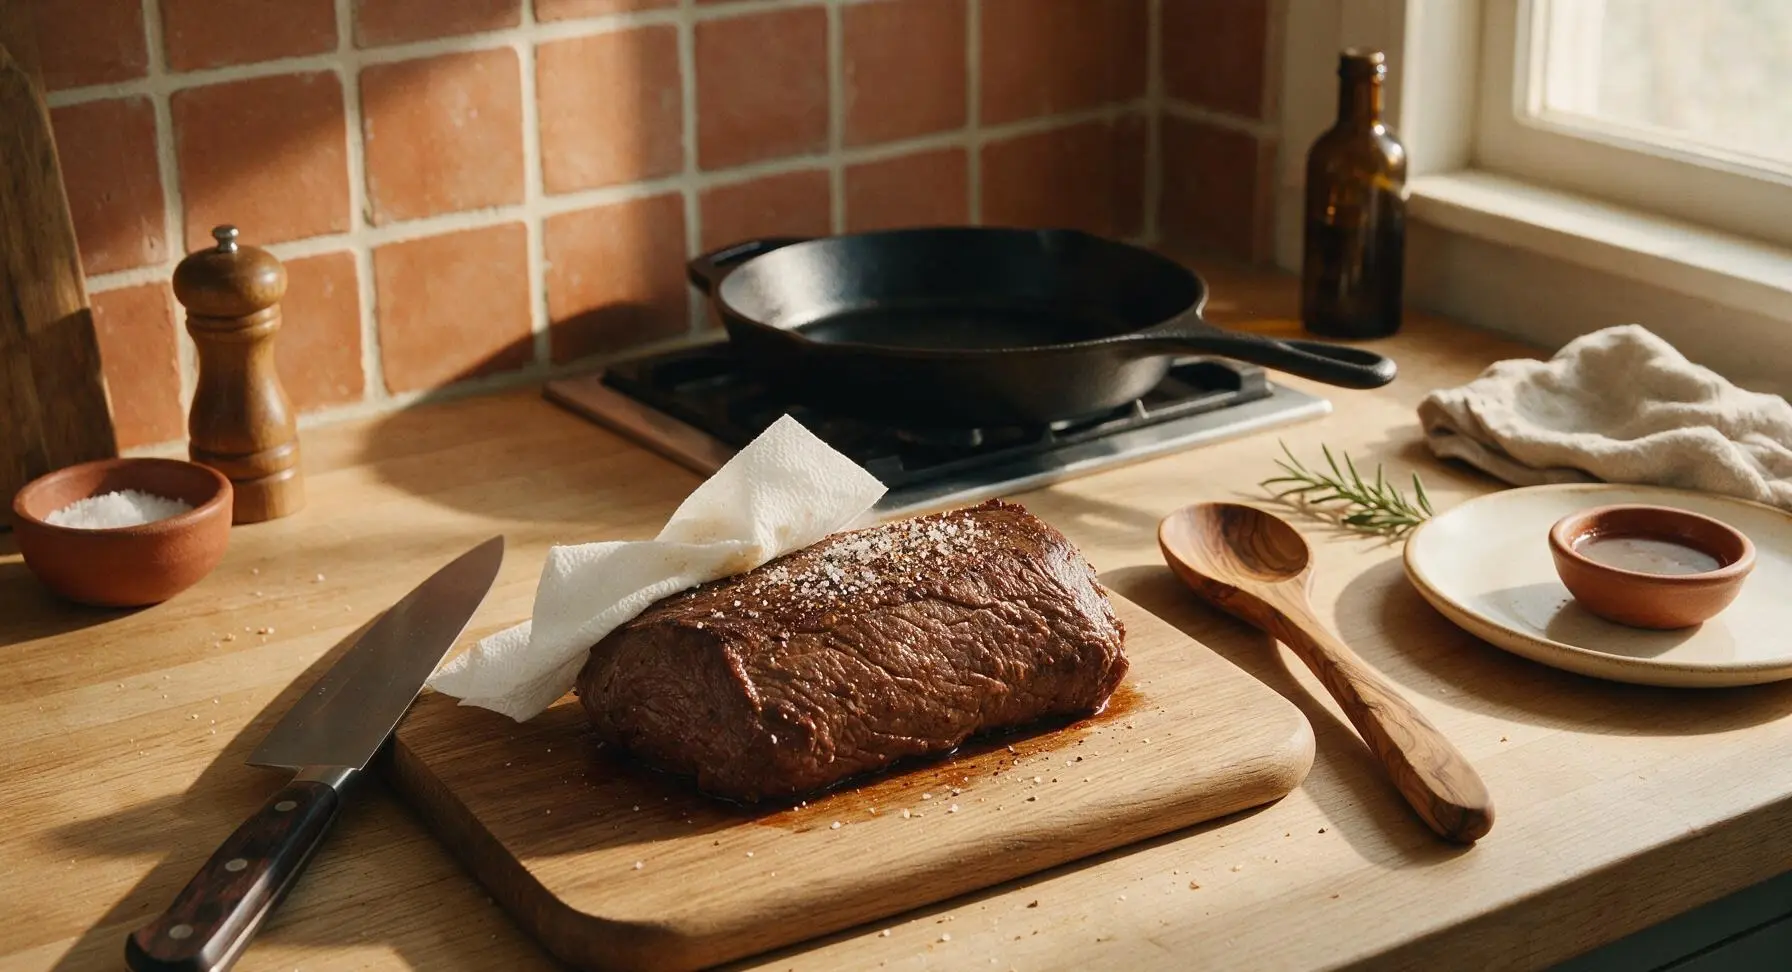
Step 3
step3:Bring Meat to Room Temp
4

Sear to Crisp Crust

Heat the 12-inch cast iron skillet over medium-high heat until it just starts to smoke, about 5 minutes. Add 1 tsp olive oil to the pan, then use the stainless steel tongs to carefully place the roast in the skillet. Sear for 3 minutes per side (top, bottom, and both thin edges) until a deep, rich mahogany crust forms on every surface, about 12 minutes total searing time. Do not move the meat while each side sears to build a uniform crust.
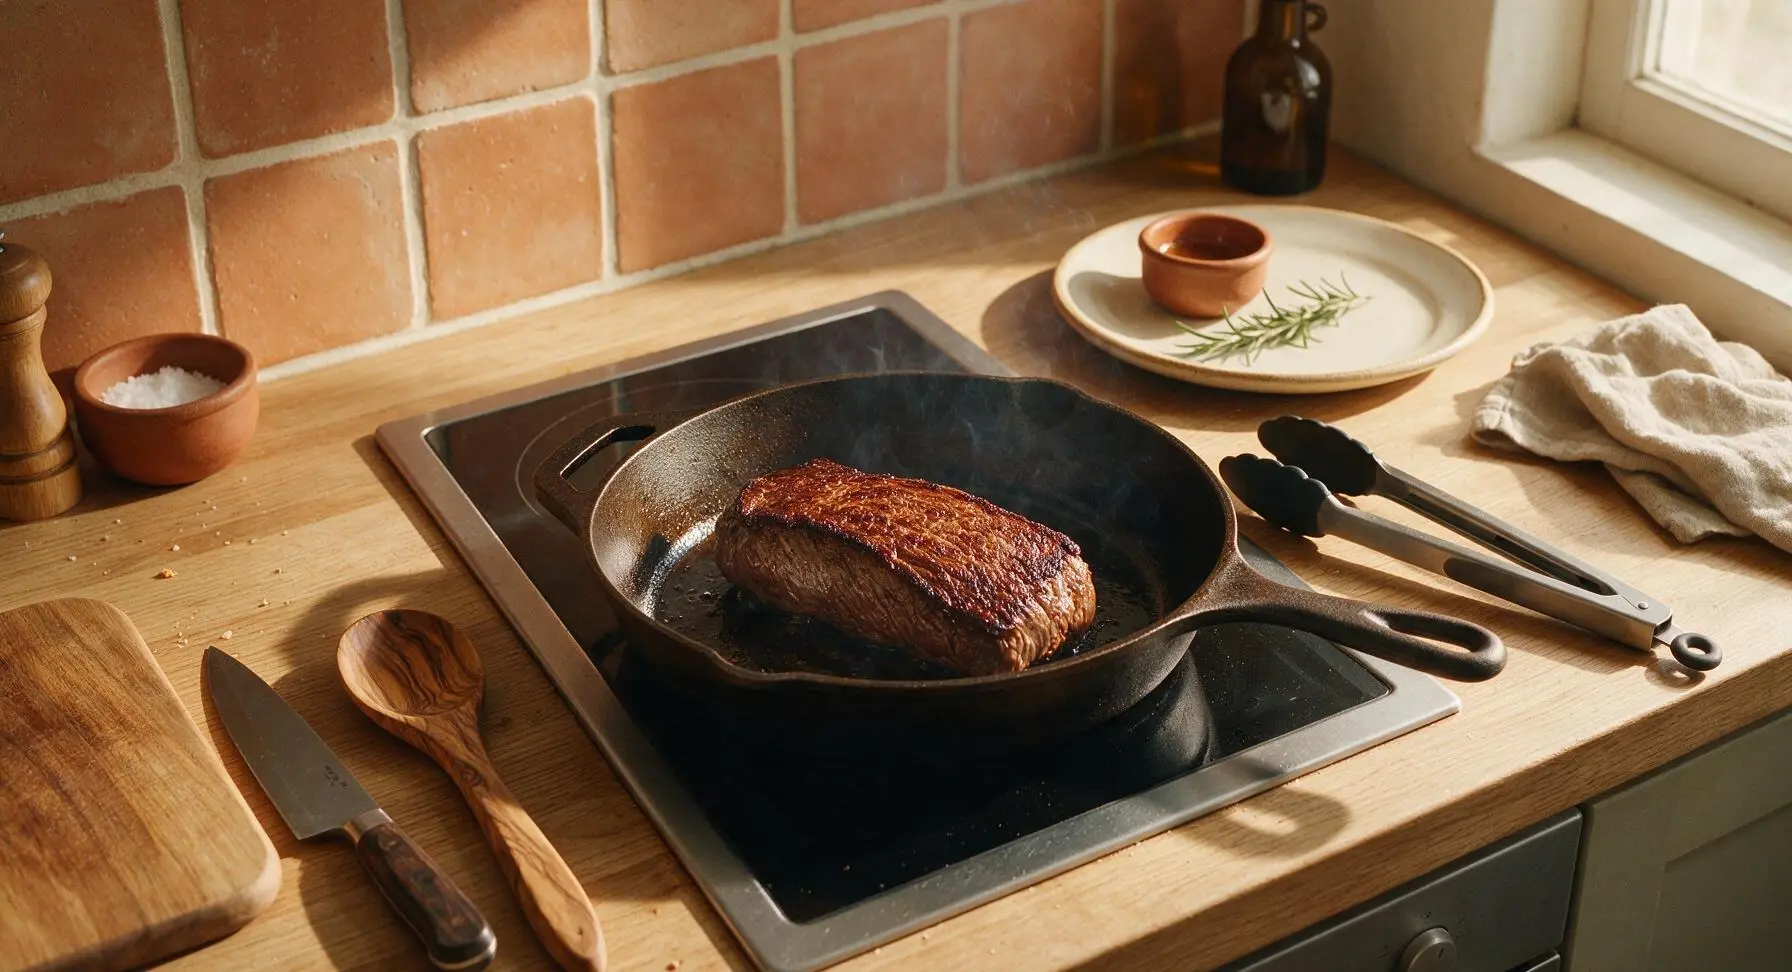
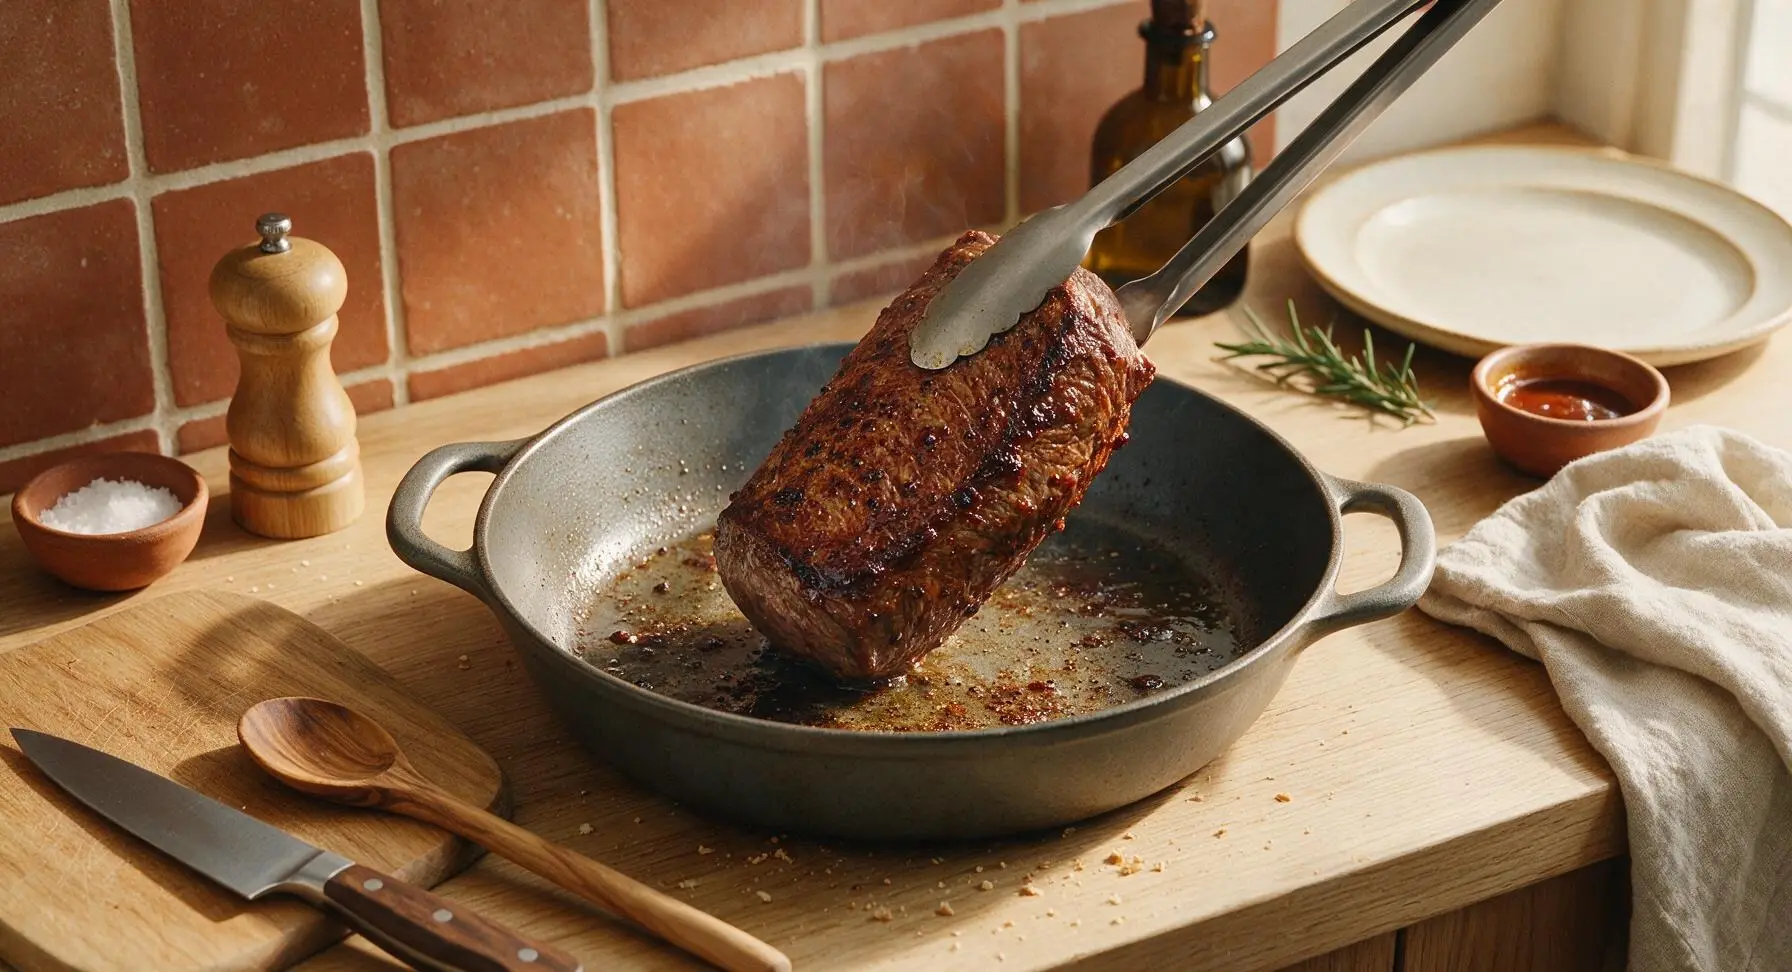
Step 4
step4:Sear to Crisp Crust
Step 4
step4:Sear to Crisp Crust
5

Check Doneness Accurately

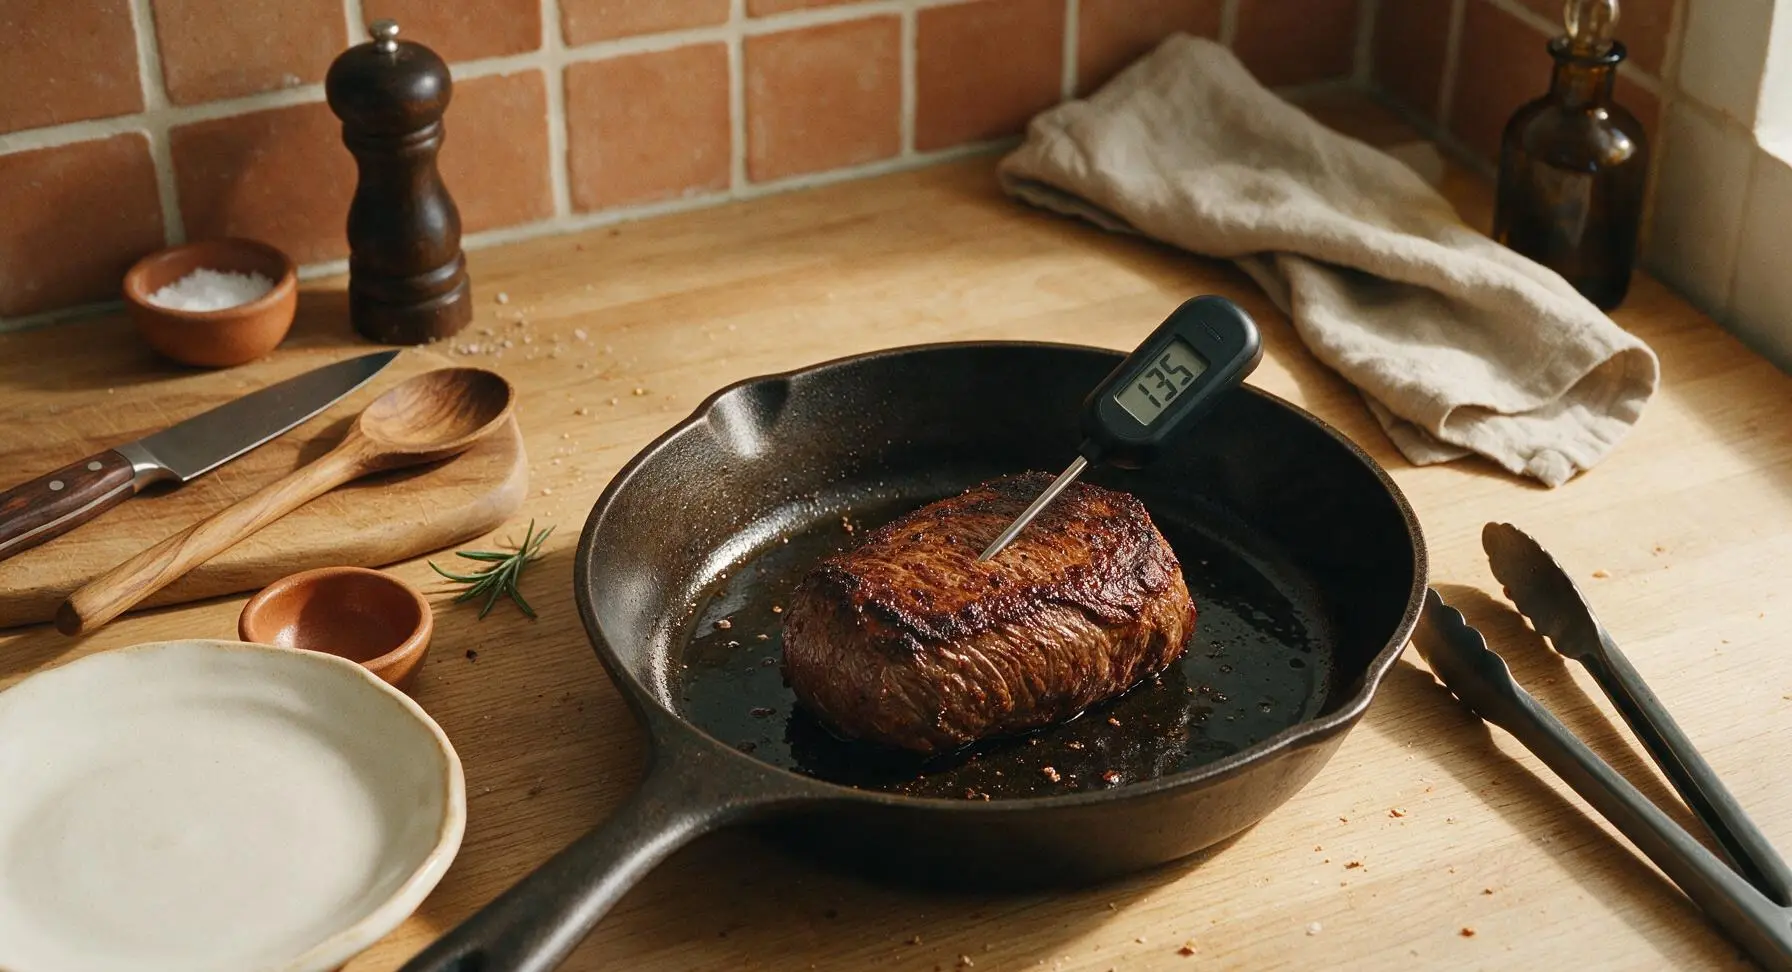
After searing all sides, reduce heat to medium. Insert the digital instant-read meat thermometer into the thickest part of the roast, avoiding any fat. Cook until the internal temperature reaches 135°F (57°C) for medium-rare, which will take 1-2 additional minutes per side if needed. Do not cook past 140°F (60°C), as top round is a very lean cut and will become tough and dry if overcooked.
Step 5
step5:Check Doneness Accurately
6

Rest Meat Properly

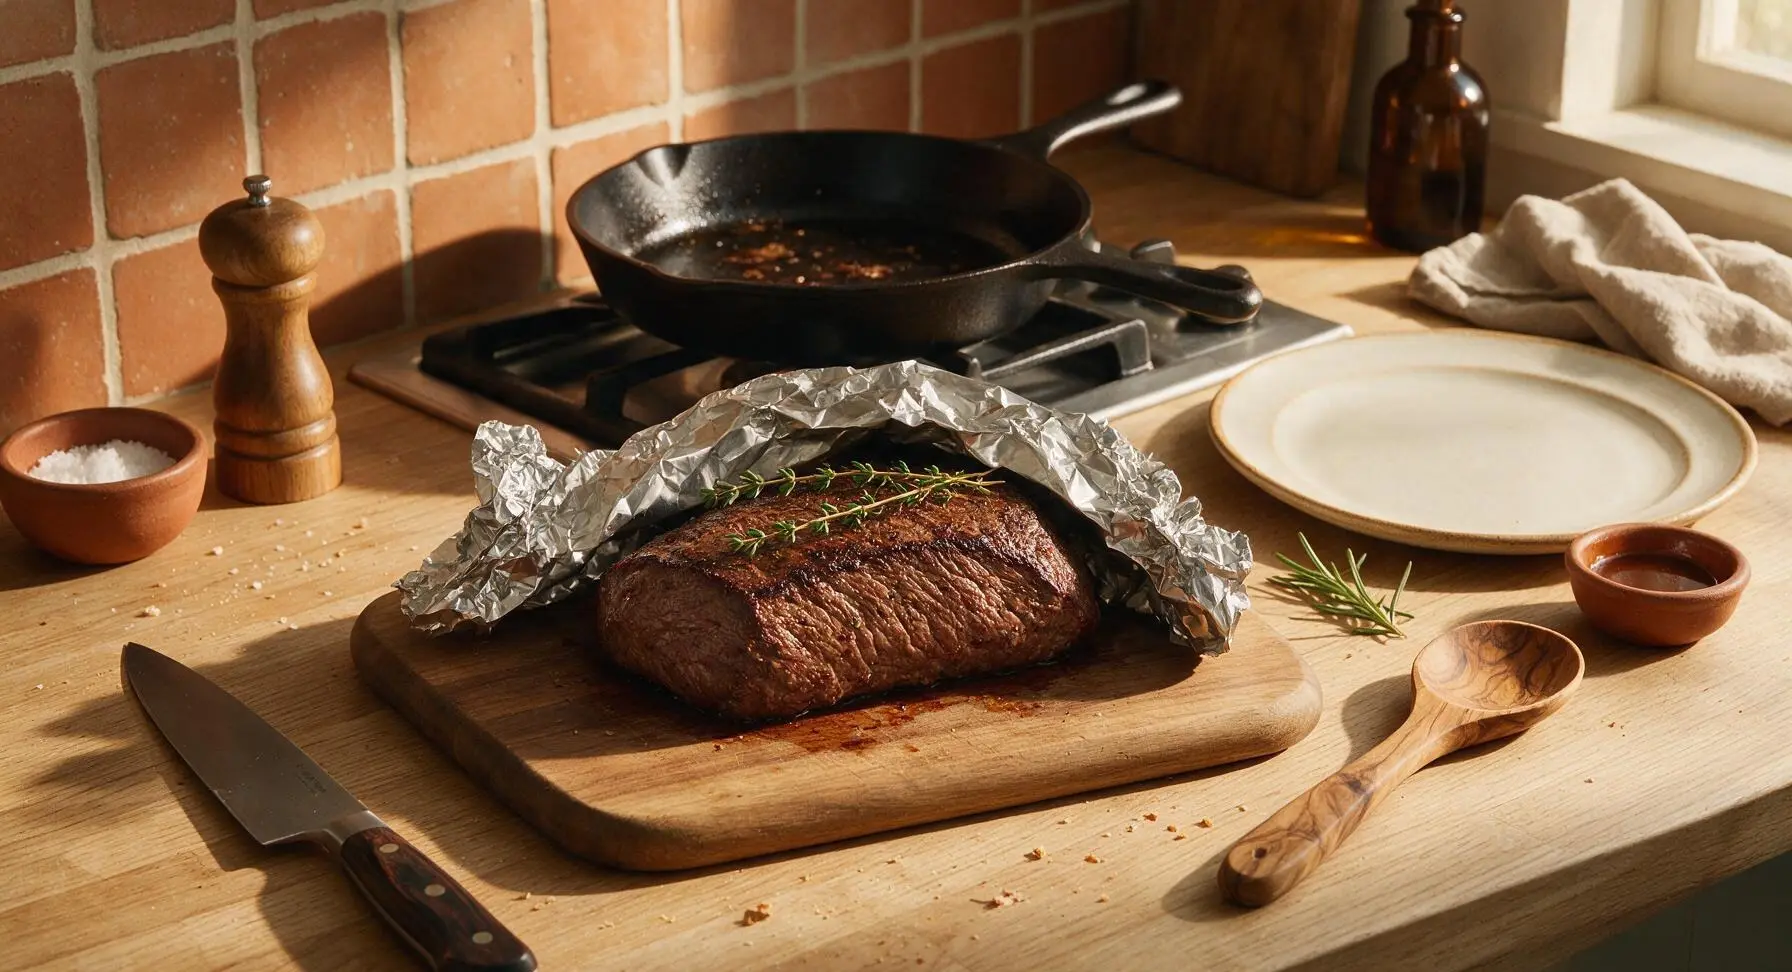
Use the stainless steel meat fork to transfer the cooked roast from the skillet back to the maple cutting board. Tuck the remaining 2 fresh thyme sprigs on top of the meat, then tent it loosely with a small piece of aluminum foil. Let it rest for 10 full minutes before slicing. This allows the muscle fibers to relax and reabsorb juices, so every bite is juicy instead of juice running out onto the board when sliced.
Step 6
step6:Rest Meat Properly
7

Slice Against Grain

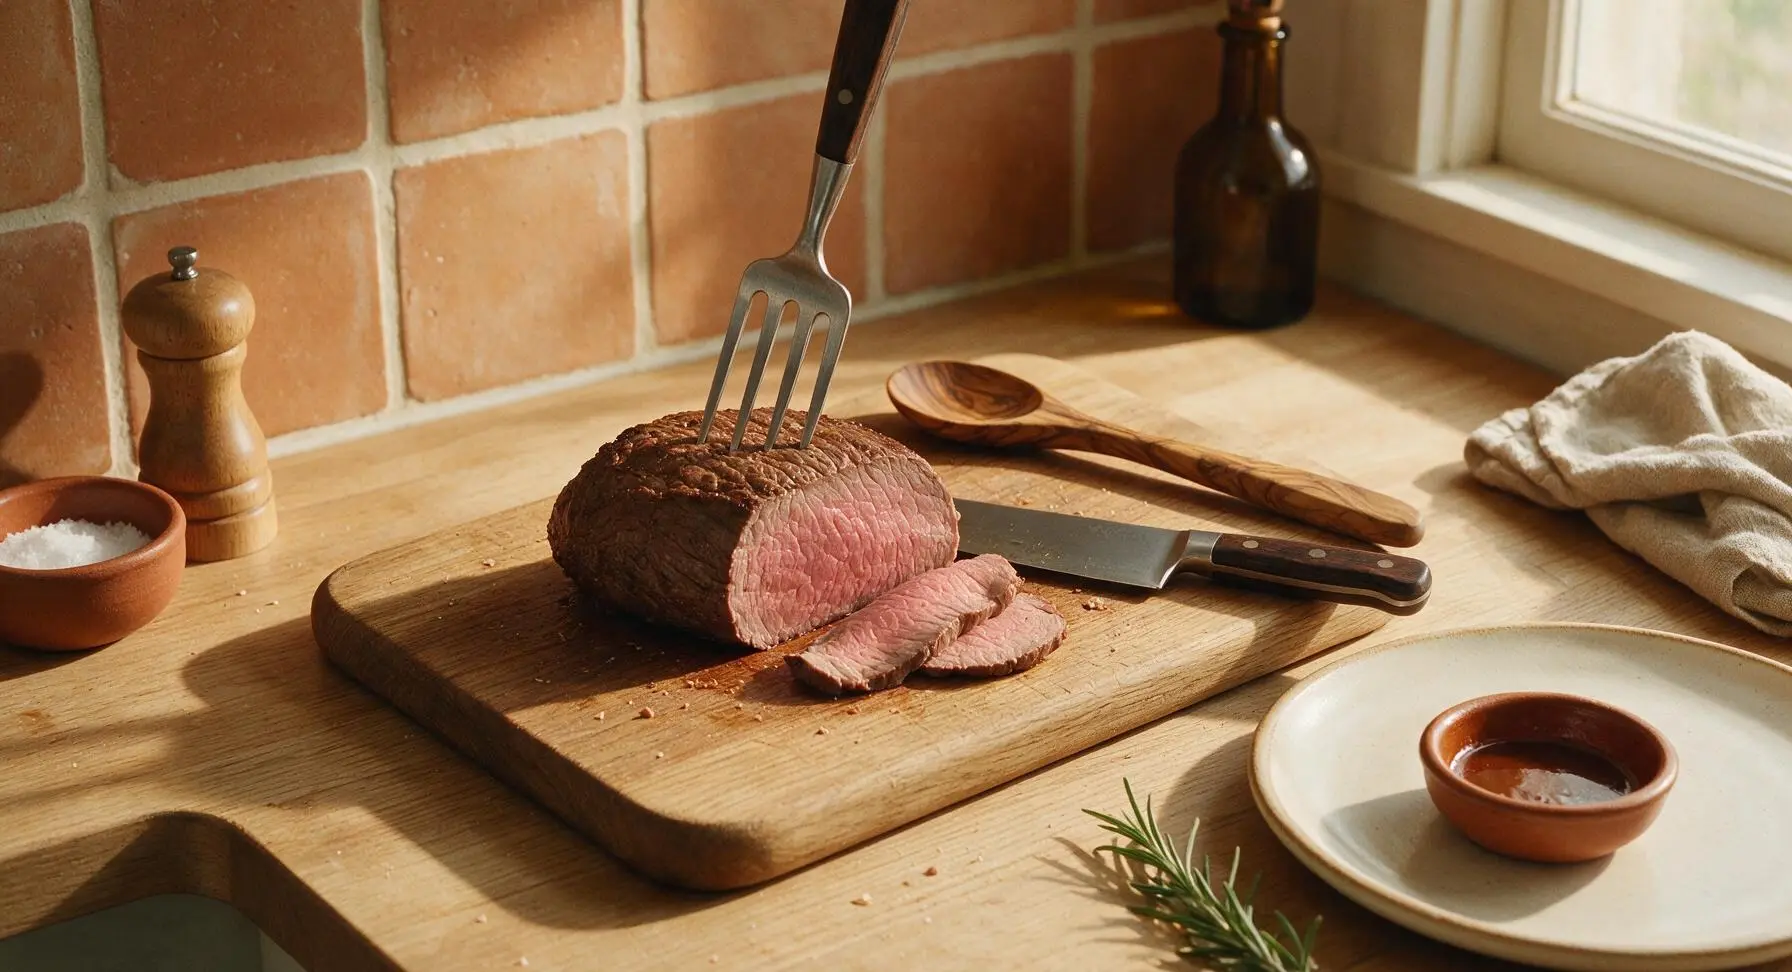
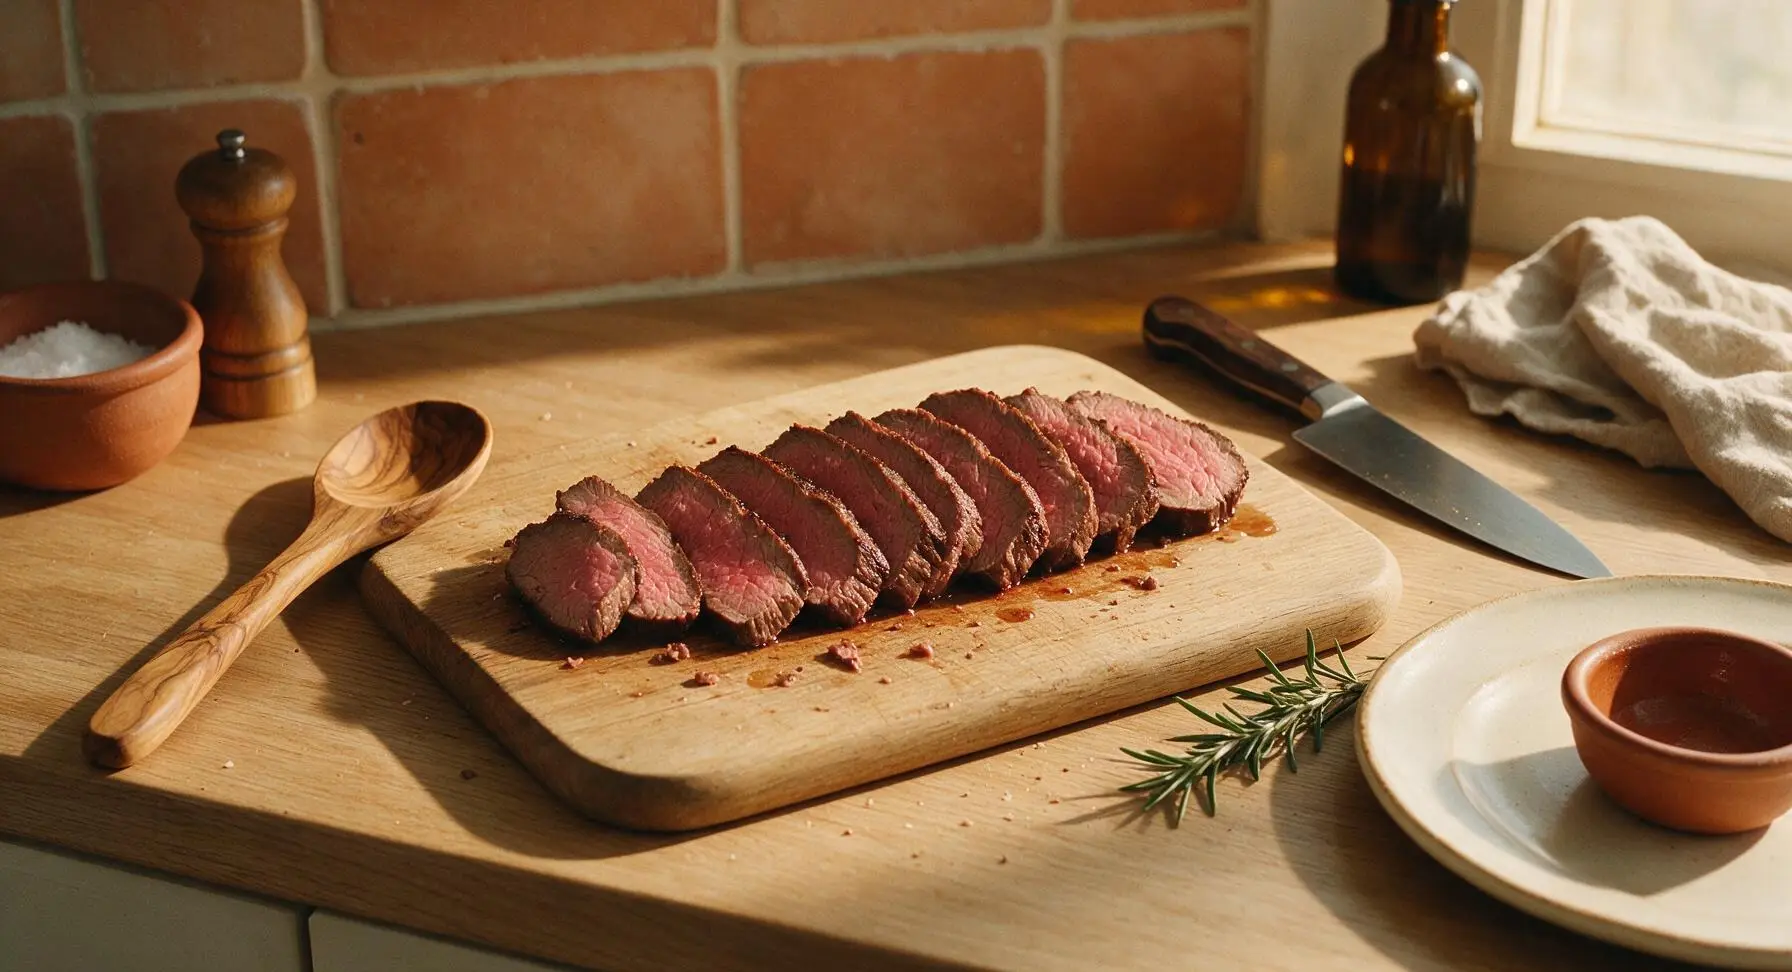
After resting, remove the foil. Use the 8-inch chef knife to slice the roast across the grain (perpendicular to the direction of the visible muscle fibers) into 1/4-inch thick slices. Slicing thin and against the grain shortens the tough muscle fibers, making this lean cut tender and easy to chew, even though it is cooked to medium-rare. Discard any large pieces of unrendered fat as you slice.
Step 7
step7:Slice Against Grain
Step 7
step7:Slice Against Grain
8

Plate and Serve

Arrange the sliced London broil in a slight fan across the matte cream speckled stoneware dinner plate. Drizzle 1 tsp of the collected pan juices from the cutting board over the top of the slices, and garnish with a few fresh thyme leaves pulled from the bunch on the back counter. Serve immediately, with your choice of roasted summer vegetables or potato salad on the side.
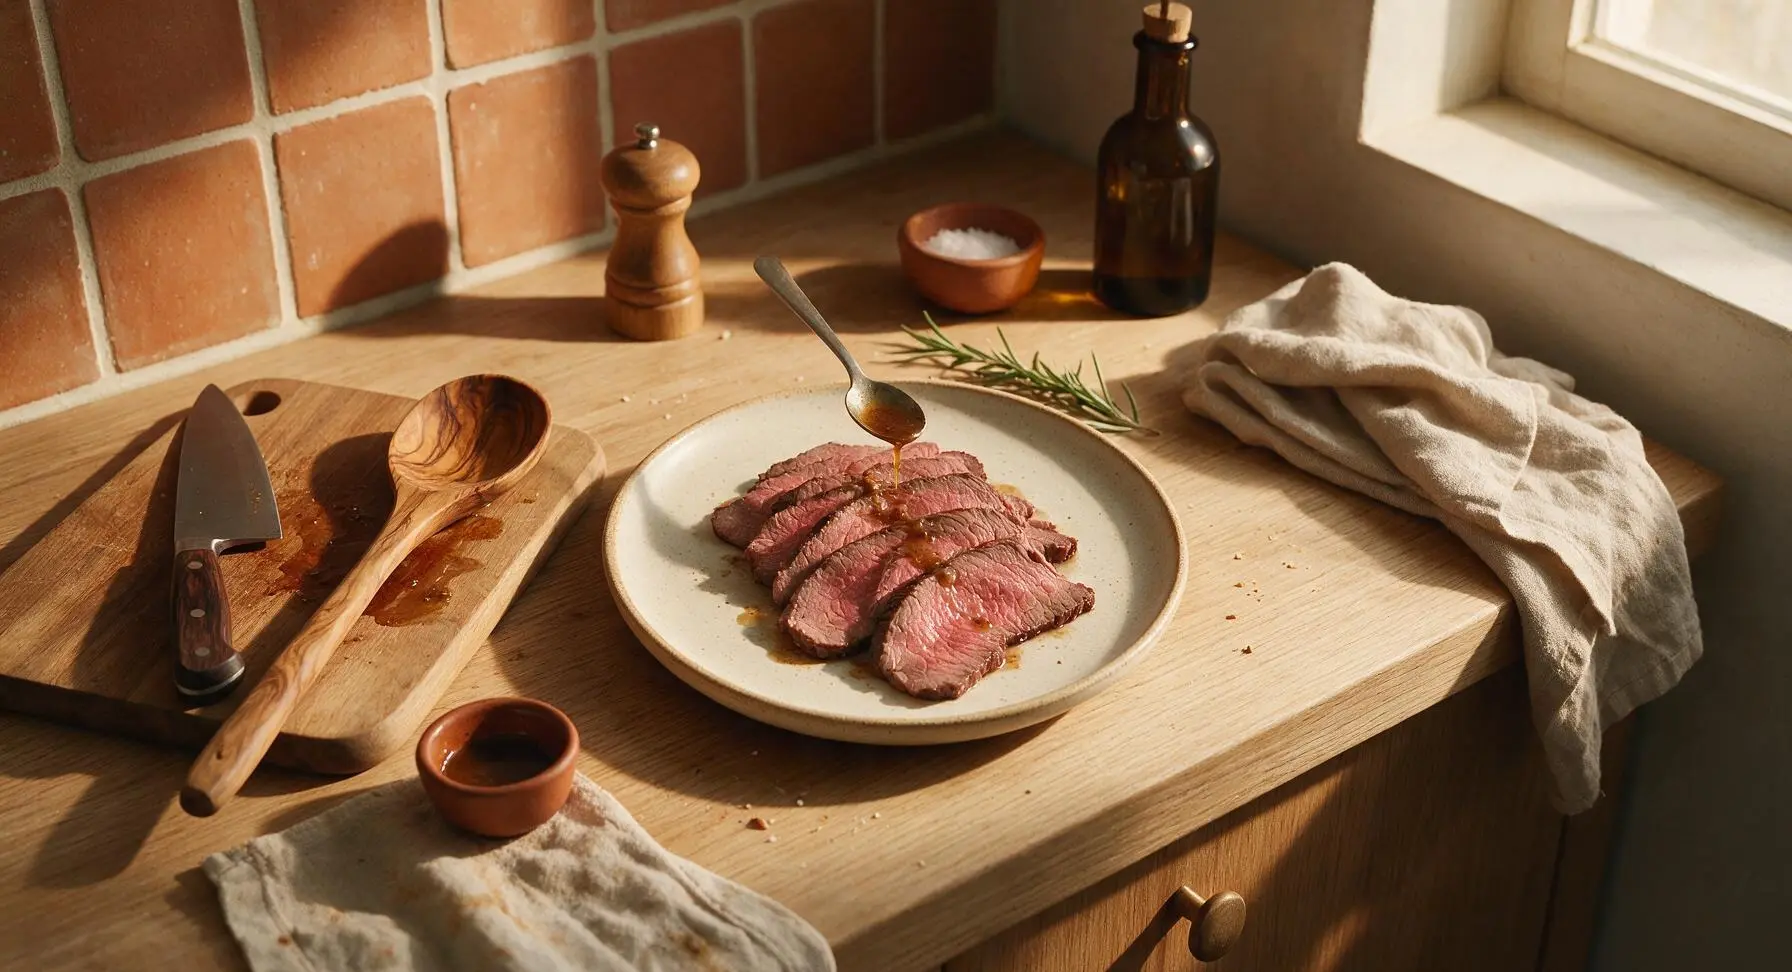
Step 8
step8:Plate and Serve

Tips

1.Avoid cooking London broil past 135°F (medium-rare): Top round is a lean, heavily worked muscle cut with almost no internal marbling, so higher temperatures will cause muscle fibers to seize, resulting in tough, dry, chewy meat.
2.Always slice 1/4-inch thick against the grain: This cut has long, tough lengthwise muscle fibers; cutting perpendicular to the grain shortens fibers to bite-sized lengths, creating a tender eating experience without needing long slow cooking.
3.Never skip the 10-minute rest period after cooking: Slicing meat immediately after searing causes hot, free-flowing juices to run out onto the cutting board, leaving you with dry, bland slices instead of juicy, flavorful bites.


✨ You May Also Like

Main Course
🍜 United Kingdom

A showstopping classic of tender seared beef, savory mushroom duxelles, and crisp prosciutto wrapped in flaky golden puff pastry, baked to juicy perfection.

⏱️ 2 hours 1Main Course ★ 4.7
Main Course
🍜 India

Tender charred marinated chicken simmered in a rich, spiced creamy tomato sauce, this iconic Anglo-Indian curry pairs perfectly with basmati rice or warm naan.

⏱️ 50 minuteMain Course ★ 4.6
Main Course
🍜 Thailand

Classic tangy, sweet, and savory Thai stir-fried rice noodles with shrimp, tofu, and crunchy garnishes, balancing all five core Thai flavor profiles.

⏱️ 30 minuteMain Course ★ 4.5
Main Course
🍜 United Kingdom

Crispy golden beer-battered cod and fluffy double-fried chips, served with tangy tartar sauce and malt vinegar: the timeless, beloved British pub comfort classic.

⏱️ 45 minuteMain Course ★ 4.7
Main Course
🍜 Mexico

Smoky, chile-marinated pork tacos with caramelized pineapple, fresh cilantro, and lime: a beloved classic Mexican street food perfect for casual summer gatherings.

⏱️ 1 hour 45Main Course ★ 4.8
Main Course
🍜 United States

Crunchy Fritos corn chips layered with savory beef chili and melted cheddar, topped with cool, zesty fixings for a beloved, cozy Tex-Mex comfort food.

⏱️ 35 minuteMain Course ★ 4.8

top round london broil:Frequently Asked Questions

1.What cut of beef is ideal for this London broil recipe? ▾
For this recipe, top round roast is the classic pick—it’s a lean, 1.5–2 inch thick cut from the beef’s hindquarter, with deep, beefy flavor that soaks up marinade beautifully. Skip overly tender, fatty cuts like ribeye here; they won’t hold up to the high-heat sear and bold seasoning the dish is known for.
2.How long should I marinate my top round London broil for the best flavor? ▾
Aim for 4 to 12 hours in the fridge, sealed in an airtight bag or dish with the garlic, Worcestershire, salt, and pepper. Don’t marinate longer than 24 hours, though—the salt in the mix can break down the meat’s muscle fibers too much, leaving you with a mushy texture instead of a juicy, firm bite.
3.Can I use table salt instead of coarse kosher salt for this recipe? ▾
I don’t recommend it. Coarse kosher salt has larger, flakier crystals that season the meat evenly and draw out just enough surface moisture to build that crisp, caramelized crust when searing. If you only have table salt, cut the measurement by half—its fine, dense grains will make the dish overly salty if you use a 1:1 swap.
4.What internal temperature should I cook London broil to for that perfect rosy medium-rare? ▾
Pull the roast off the heat when it hits 130–135°F on an instant-read thermometer inserted into the thickest part, away from any fat. It will rise 5–10°F from carryover cooking as it rests, landing you right at a juicy 135–145°F medium-rare, with no tough, gray overcooked edges.
5.How long do I need to let the London broil rest after searing? ▾
Let it rest for a full 10 minutes on a cutting board tented loosely with foil before slicing. This gives the muscle fibers time to relax and reabsorb all their juicy, flavorful juices, so you don’t end up with a puddle of liquid running all over your board the second you cut into the hot meat.
6.Why do I have to slice London broil thin, and against the grain? ▾
Top round is a well-exercised muscle with long, tough muscle fibers. Slicing it as thin as possible (1/8 to 1/4 inch thick) straight across those fibers shortens them, making every bite feel tender instead of chewy. Cut with the grain, and you’ll end up with stringy, tough bites no matter how well you cooked it.
7.Can I add other ingredients to the simple Worcestershire and garlic marinade? ▾
Absolutely! That base is totally customizable—try adding a splash of red wine vinegar, a spoonful of Dijon mustard, a pinch of smoked paprika, or a sprig of fresh rosemary to amp up the tang. Just skip adding extra salt until right before searing, to avoid drawing out too much moisture from the meat before it hits the pan.
8.What’s the best pan to use to get that crisp, dark crust on the London broil? ▾
Reach for a heavy-bottomed cast iron skillet or carbon steel pan if you have one—they hold high, even heat perfectly, which is non-negotiable for building that caramelized, crisp crust without steaming the meat. If you only have a stainless steel pan, make sure it’s fully preheated before adding the meat to prevent sticking.
9.Can I cook this London broil on an outdoor grill instead of searing it indoors? ▾
Definitely! Preheat your grill to high (450–500°F) and oil the grates well to prevent sticking. Cook the marinated roast 4–6 minutes per side, flipping once, until it hits that 130–135°F internal temp for medium-rare. The grill will add a delicious smoky note that pairs perfectly with the tangy seasoning.
10.My London broil always comes out tough—what am I doing wrong? ▾
The most common culprits are overcooking it past medium-rare, slicing it too thick, or cutting with the grain instead of against it. Remember, top round is lean, so it doesn’t have marbling to keep it tender at higher temps. Stick to the target temp, rest it properly, and slice thin across the grain for tender bites every time.
11.How far in advance can I prep the marinated London broil before cooking? ▾
You can season and marinate the roast up to 12 hours ahead of time, stored tightly covered in the fridge. I don’t recommend prepping it more than a day in advance, as the acid in Worcestershire and the salt will start to break down the meat’s surface, leading to a mushy texture and overly salty flavor.
12.Do I need to pat the marinated meat dry before searing it? ▾
Yes, this is a non-negotiable step for that perfect crisp crust. Pull the roast out of the marinade and pat it thoroughly dry all over with paper towels right before it hits the hot pan. Wet, marinade-coated meat will steam instead of sear, leaving you with a pale, soft exterior instead of that deep, crispy crust everyone loves.
13.What sides pair best with this top round London broil? ▾
It pairs beautifully with simple, hearty sides that complement its tangy, beefy flavor. Try roasted garlic potatoes, buttered green beans, a crisp green salad with tangy vinaigrette, or grilled summer vegetables. Leftover thin-sliced London broil also makes incredible steak sandwiches or salad toppers for quick weeknight meals.
14.Can I freeze leftover cooked London broil? ▾
Yes! Let the cooked, sliced meat cool completely, then wrap it tightly in plastic wrap and store it in a freezer-safe bag or container for up to 3 months. Thaw it in the fridge overnight, and use it for sandwiches, wraps, or quick steak salads—just don’t reheat it too hot, or it will turn tough and dry.
15.Should I bring the London broil to room temperature before searing it? ▾
Let it sit on the counter for 30–45 minutes after pulling it out of the marinade to take the chill off, before patting it dry. This helps it cook more evenly from edge to center, so you don’t end up with a thick band of overcooked gray meat around the edges while the center comes up to medium-rare.
16.Is it normal for the Worcestershire and garlic marinade to darken the meat before cooking? ▾
That’s totally normal! The deep, umami-rich Worcestershire sauce will tint the surface of the top round a deep reddish-brown as it marinates, and the crushed garlic will leave tiny flecks across the meat. That discoloration is just the marinade penetrating the surface, not a sign of spoilage, as long as you’ve stored it properly in the fridge.
17.How much London broil should I plan per person for a family meal? ▾
Plan for 6–8 ounces of raw top round per person, which works out to roughly 4–6 ounces of cooked meat per serving after resting and slicing. Top round doesn’t shrink as much as fattier cuts, but it’s always smart to cook a little extra—those tangy, thin slices are popular, and leftovers work perfectly for quick next-day meals.

Comments (4)

2 days ago

OMG this was such a game changer for our Sunday family dinner! I’ve always messed up London broil before, it always came out tough as shoe leather, but this 15 minute cook time? Perfect medium rare, my husband and two kids devoured every last bite. Served it with roasted garlic potatoes and steamed broccoli, will 100% be adding this to our weekly rotation!

yesterday

Same! I used to overcook top round every single time, I was shocked how juicy it came out following the exact timing here. Did you let it rest the full 10 minutes like the recipe says? I almost skipped that and I’m so glad I didn’t!

yesterday

So glad your whole family loved it! That rest time is non-negotiable for locking in all those juicy flavors, so great call not skipping it. Pro tip: save any leftover sliced steak for cheesesteak meal prep during the week, it works perfectly!

3 days ago

Super solid recipe, perfect for quick weeknights! I was skeptical that 15 minutes total cook time would be enough for top round but searing it on super high heat like the directions say worked like a charm. Only tweak: I added a little extra smoked paprika to the marinade because I love that smoky kick, turned out SO good. Brought the leftovers to work for lunch today and my coworker begged me for the recipe link immediately!

2 days ago

Love the smoked paprika addition, that sounds absolutely delicious! So happy this fit into your busy weeknight routine — quick, flavorful meals that work for meal prep are what we’re all about.

1 week ago

Made this for our neighborhood potluck last weekend and it was a total hit! I sliced it super thin against the grain like the recipe said, set out some creamy horseradish sauce on the side, and people went back for seconds and thirds. A couple people even said it was better than the steak they get at their favorite local steakhouse. 10/10, will be making this for every summer cookout from now on!

30 minutes ago

I’m so excited to try this for mine and my roommate’s dinner tonight! Quick question though — I’m still a pretty new cook, and I don’t own a meat thermometer yet. The recipe says it’s medium difficulty, will I be able to nail the doneness just by the touch test? I really don’t want to overcook it and turn it into tough, chewy jerky, lol! Giving it 4 stars for now because the directions look super clear, I’ll definitely come back and update once we eat!

5 minutes ago

You’ve got this! I made it last week without a thermometer too — just keep the heat cranked high, do 4-5 minutes per side for medium rare, and don’t cut into it right away when it comes off the heat. It’s way more forgiving than I thought it would be! My roommate still won’t stop talking about how good it was.



