
Velveeta Shells and Cheese

title 1
Velveeta Shells and Cheese
⏱️ cook time 15 minutes
🍽️ servings 4
⚡ Difficulty easy

intro

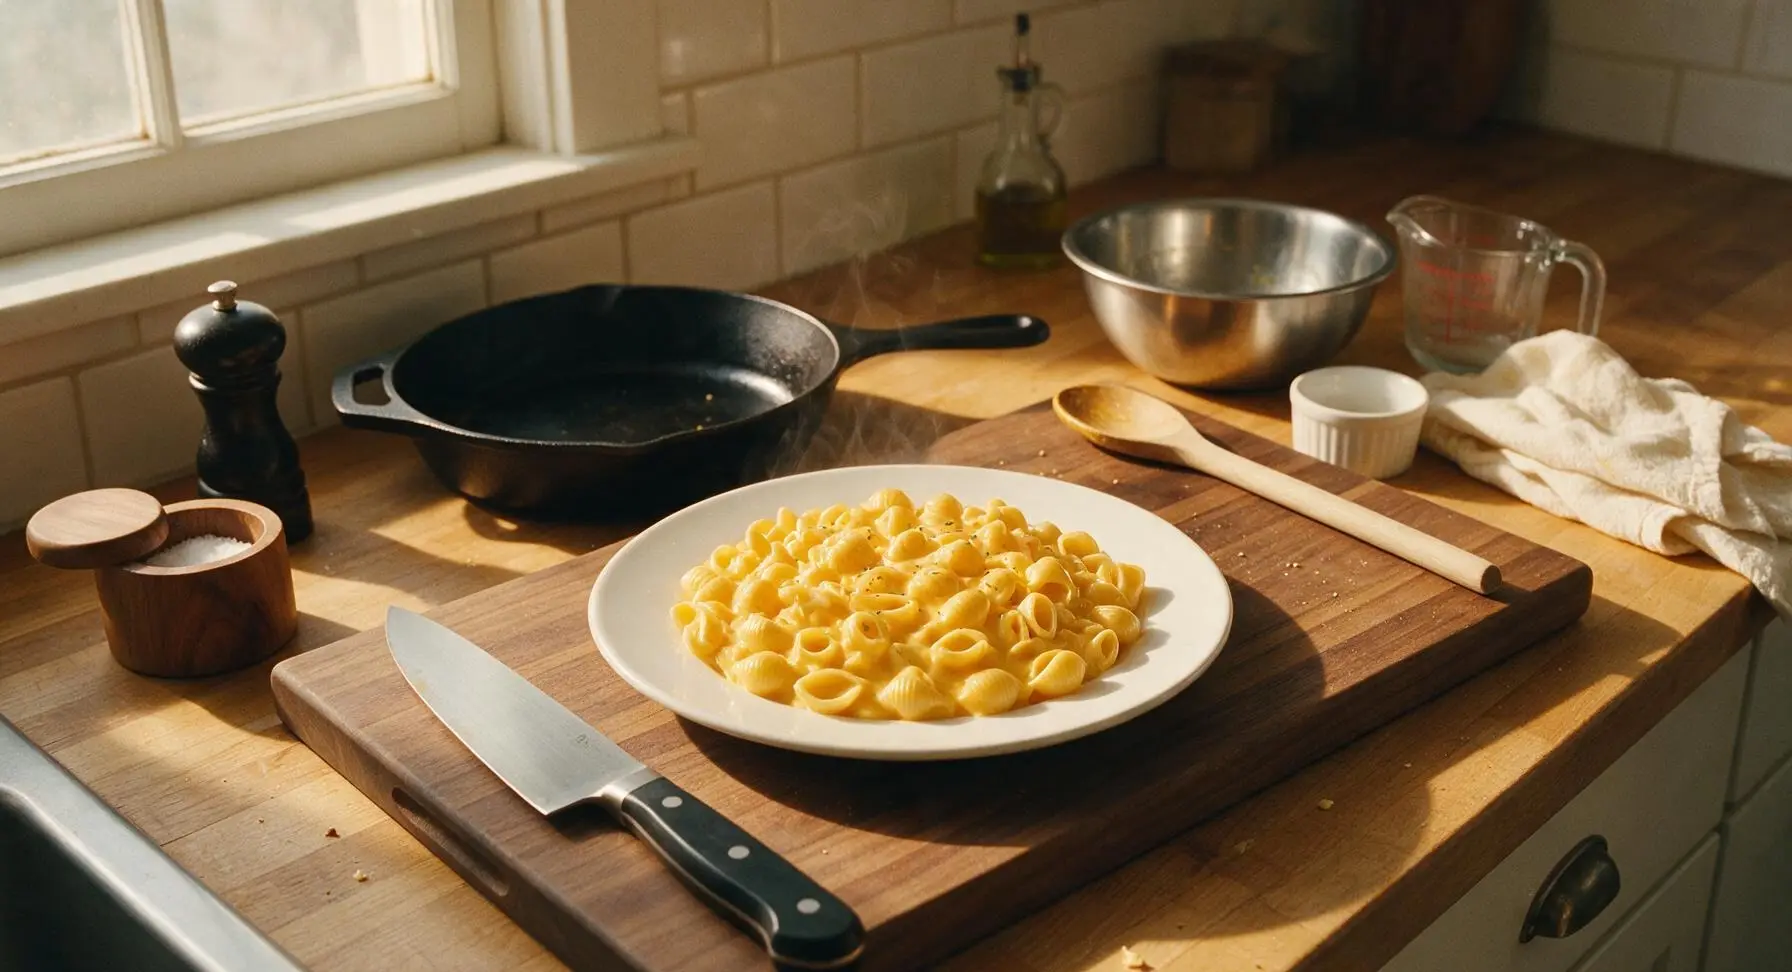
Ultra-creamy, nostalgic Velveeta shells and cheese: velvety smooth golden cheese sauce clinging to every tender pasta shell, the ultimate quick, cozy comfort food ready in under 20 minutes.

Ingredients
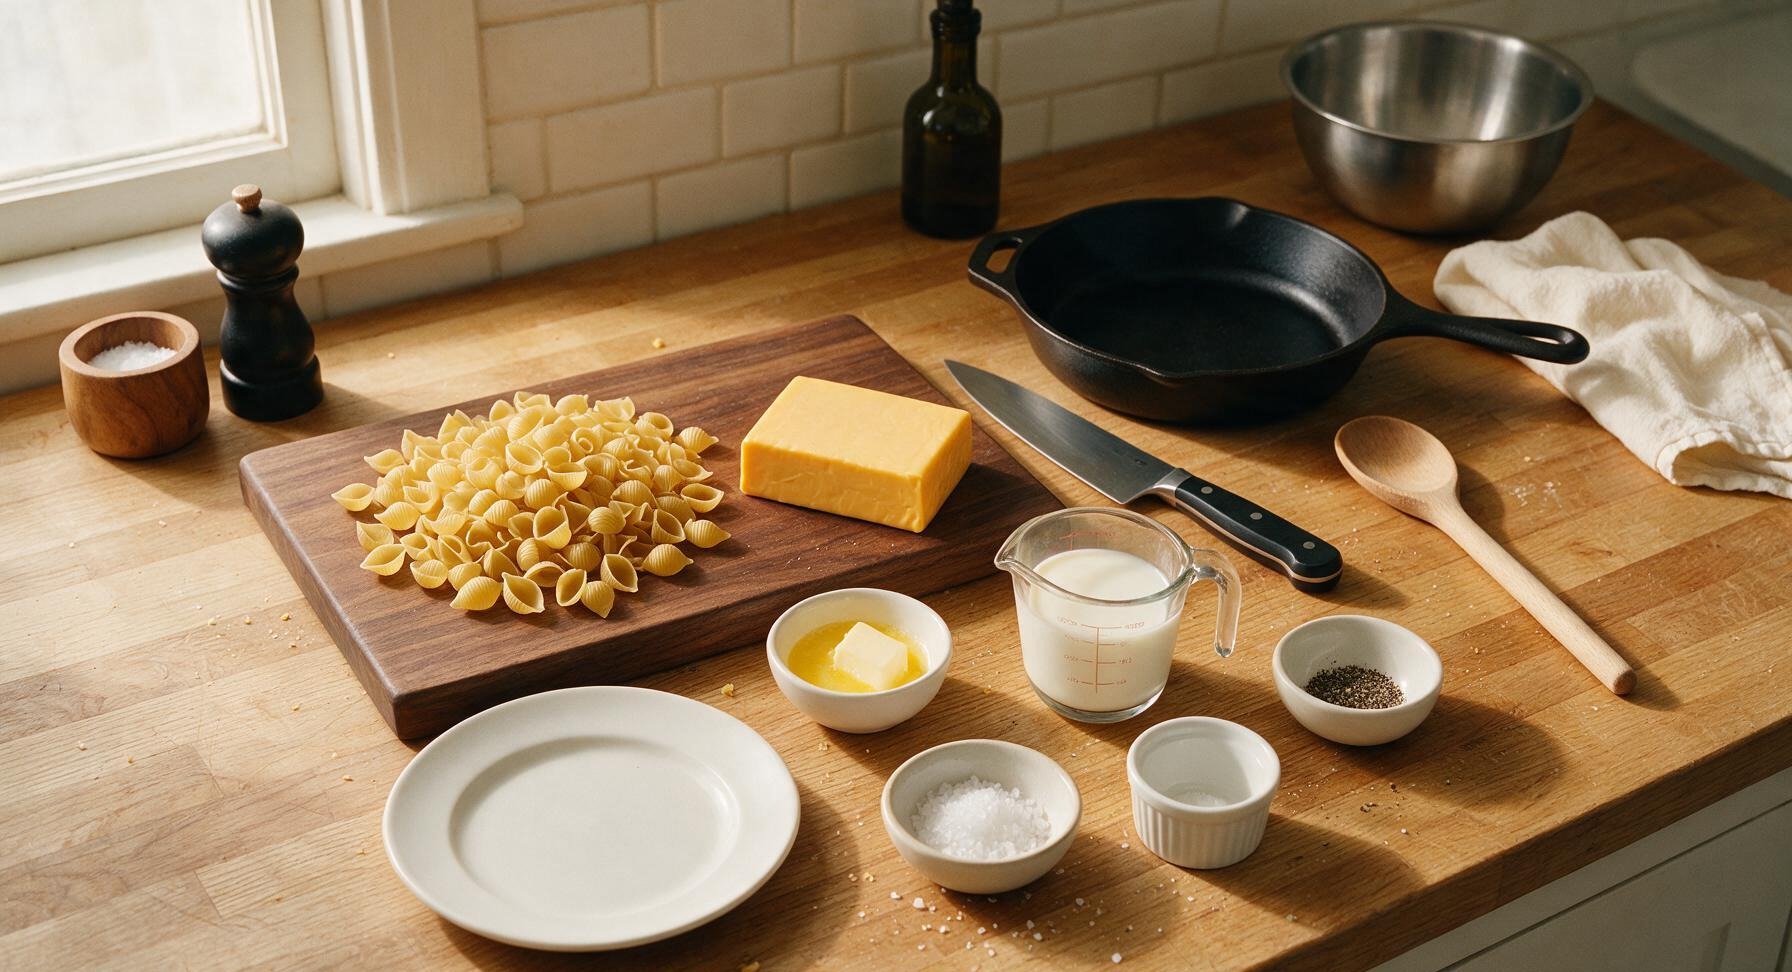
Dried medium shell pasta (conchiglie) 225g (8 oz)
Velveeta pasteurized cheese product 170g (6 oz)
Whole milk 120ml (1/2 cup, plus 1-2 tbsp extra as needed)
Unsalted butter 28g (2 tbsp)
Kosher salt 1 tbsp (for pasta water) + 1/4 tsp (for sauce)
Freshly ground black pepper 1/4 tsp (plus extra for garnish)

Steps

1

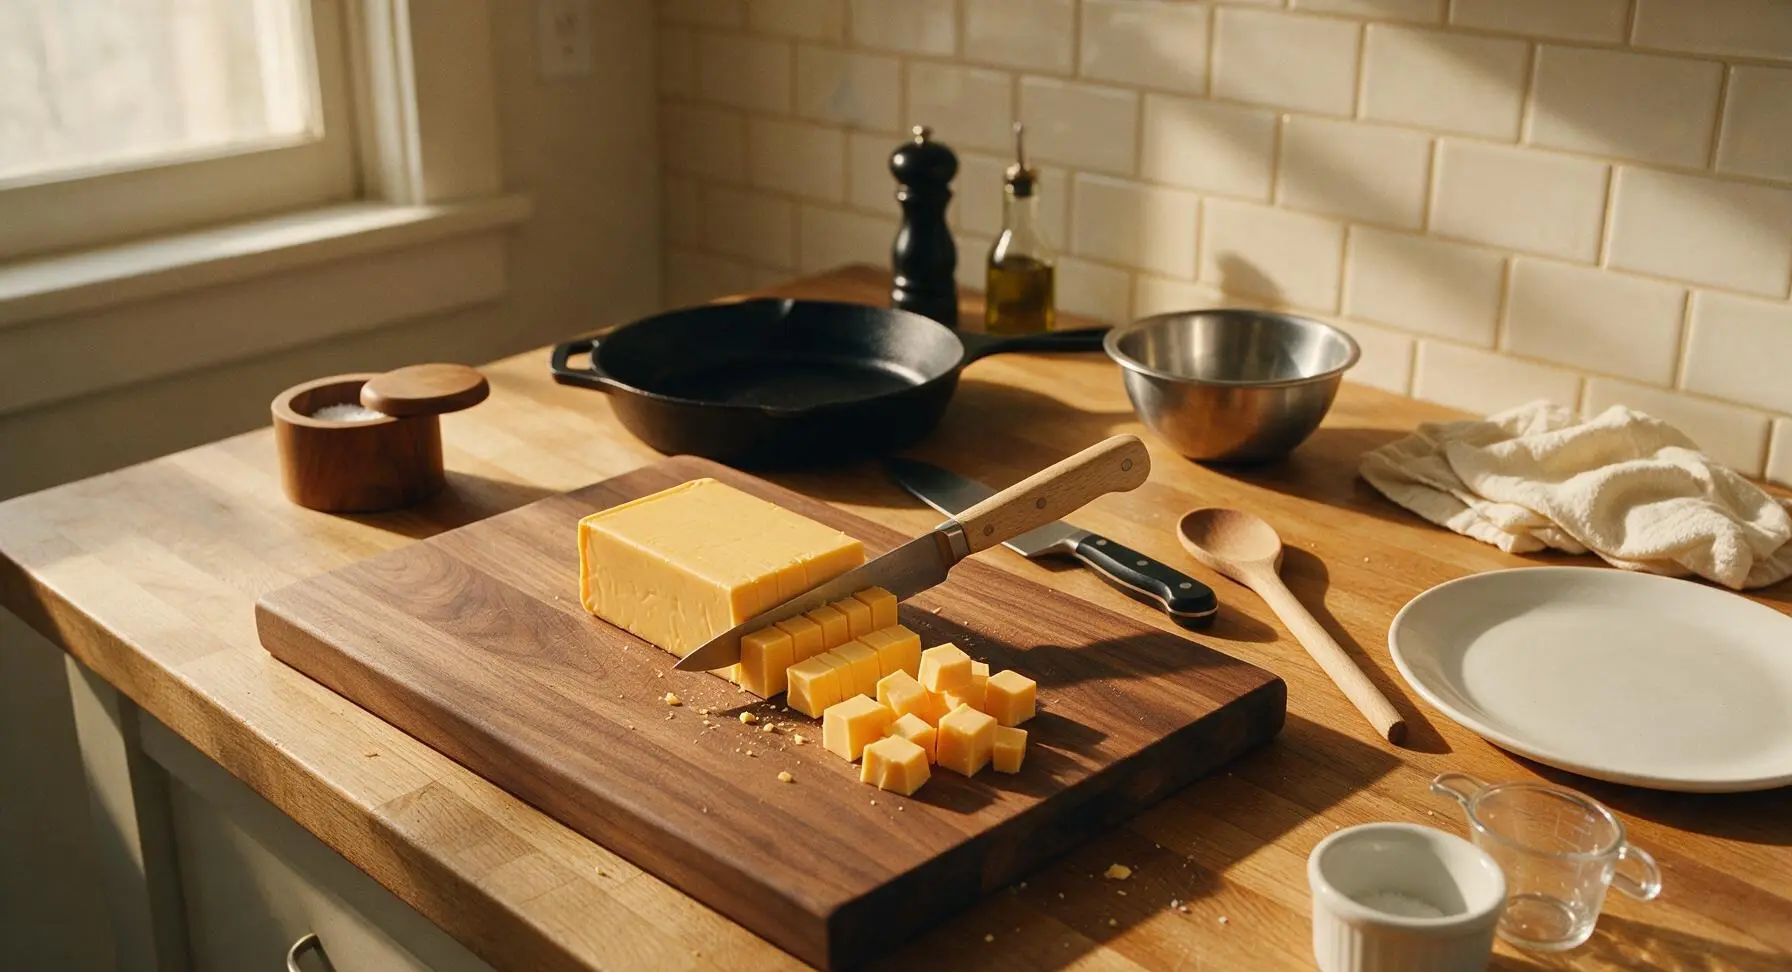
Cube the Velveeta Cheese

Unwrap the 6oz block of Velveeta and place it on the small bamboo cutting board. Use the paring knife to cut the block into uniform 1/2-inch cubes, which will melt quickly and evenly for a smooth sauce. Set the cubed cheese aside in a small pile on the corner of the cutting board.
Step 1
step1:Cube the Velveeta Cheese
2

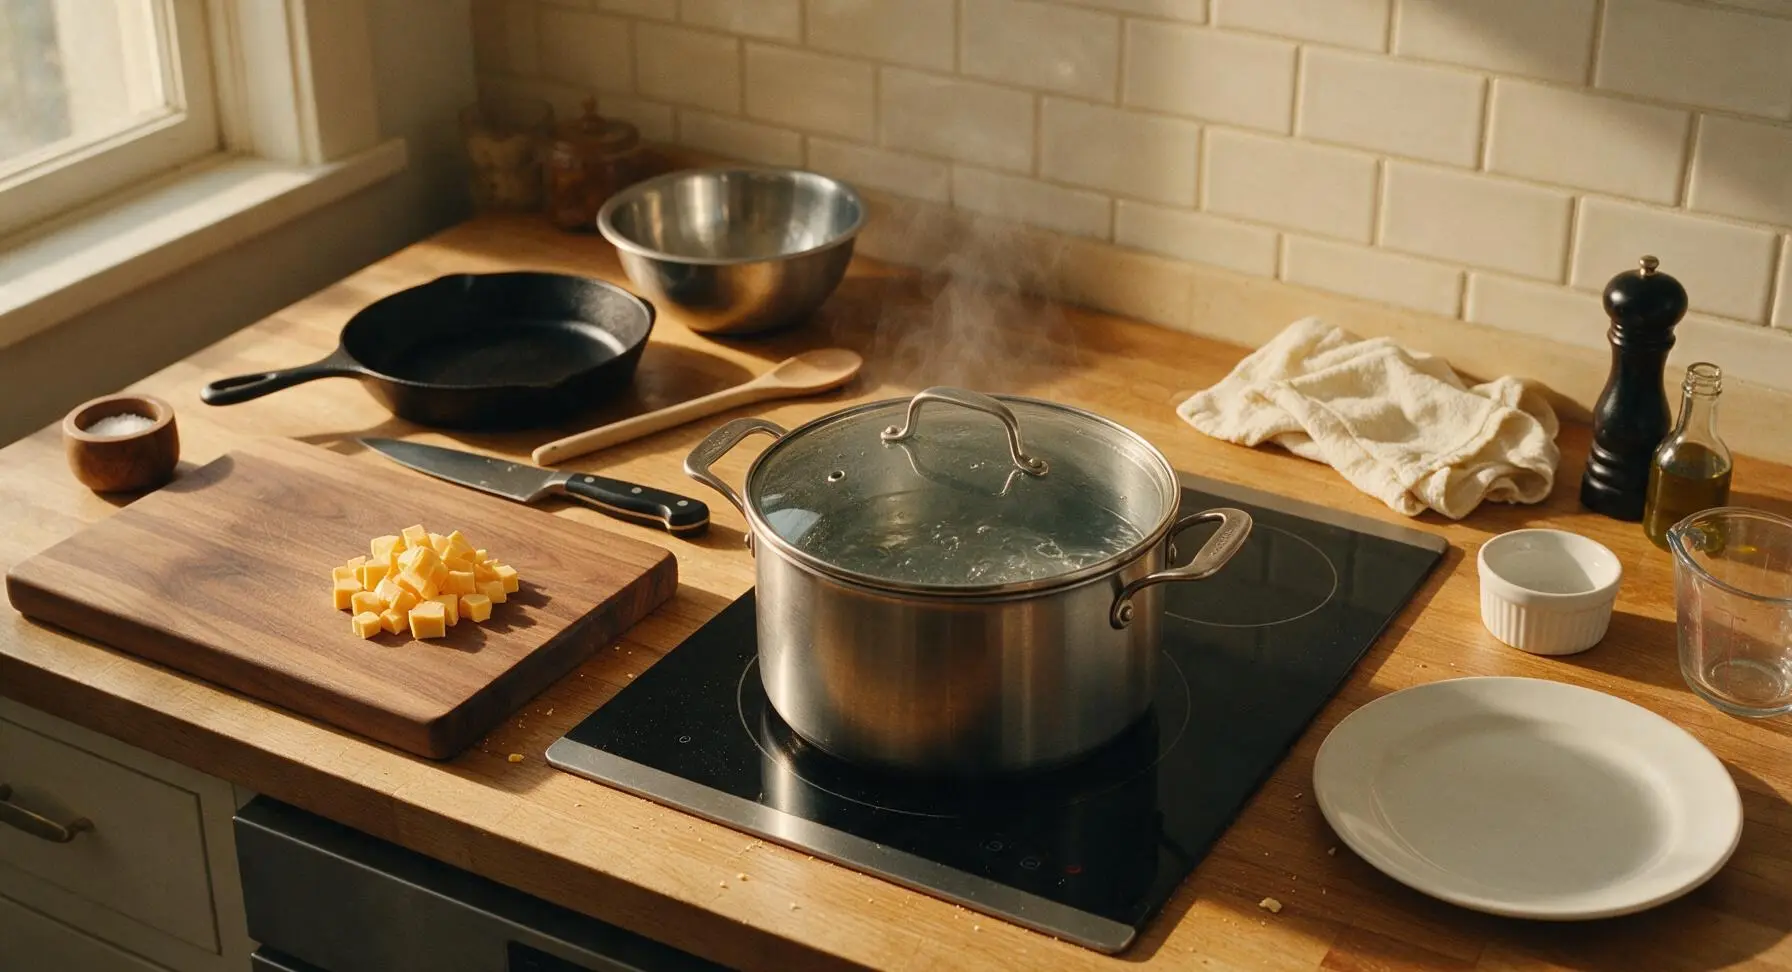
Boil Pasta Water

Place the 4-quart stainless steel stock pot on the black induction cooktop, fill it with 3 quarts of cold tap water, and add 1 tablespoon of kosher salt (water should taste as salty as seawater). Cover with the glass lid, set heat to high, and bring to a rolling boil (approximately 6-8 minutes), visible as steady steam escaping from the lid vent.
Step 2
step2:Boil Pasta Water
3

Cook Pasta Al Dente

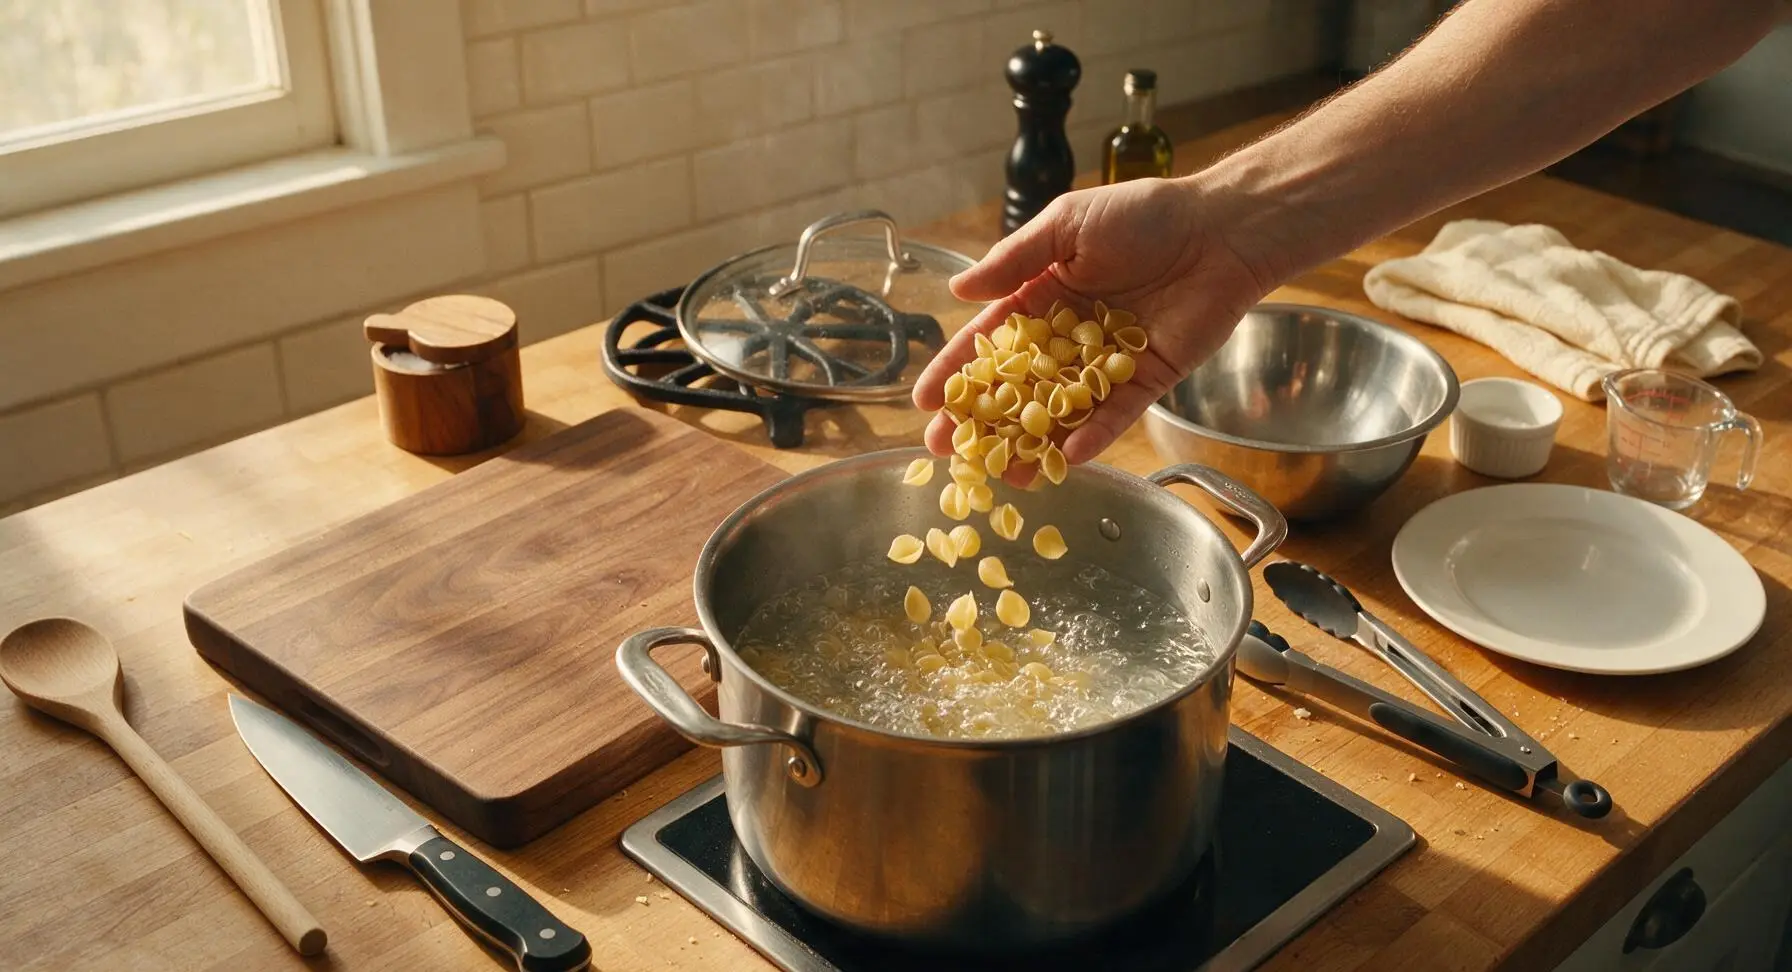
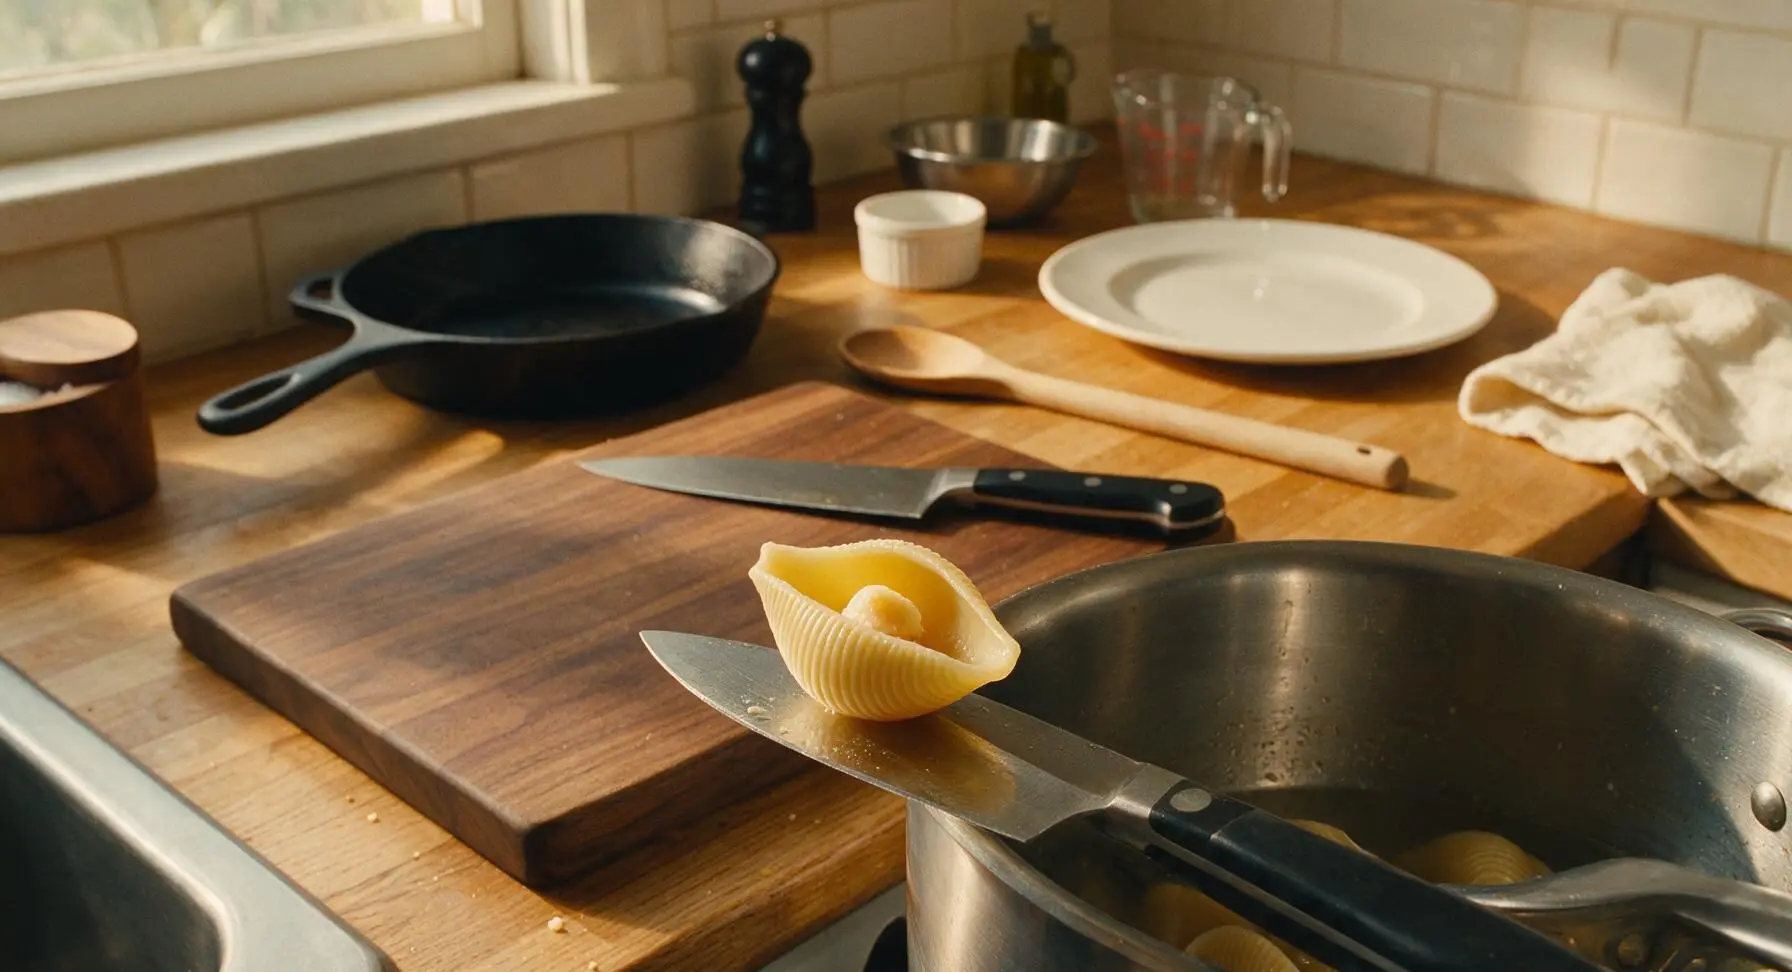
Once water reaches a rolling boil, remove the lid and add the 8oz of dried medium shell pasta. Stir briefly with the pasta tongs to prevent shells from sticking to the pot bottom. Cook for 9 minutes, stirring occasionally, until pasta is al dente: tender but with a slight firm bite at the center, no raw white core visible when a shell is cut open. Do not overcook, as mushy shells will break apart when tossed with sauce.
Step 3
step3:Cook Pasta Al Dente
Step 3
step3:Cook Pasta Al Dente
4

Drain Cooked Shells

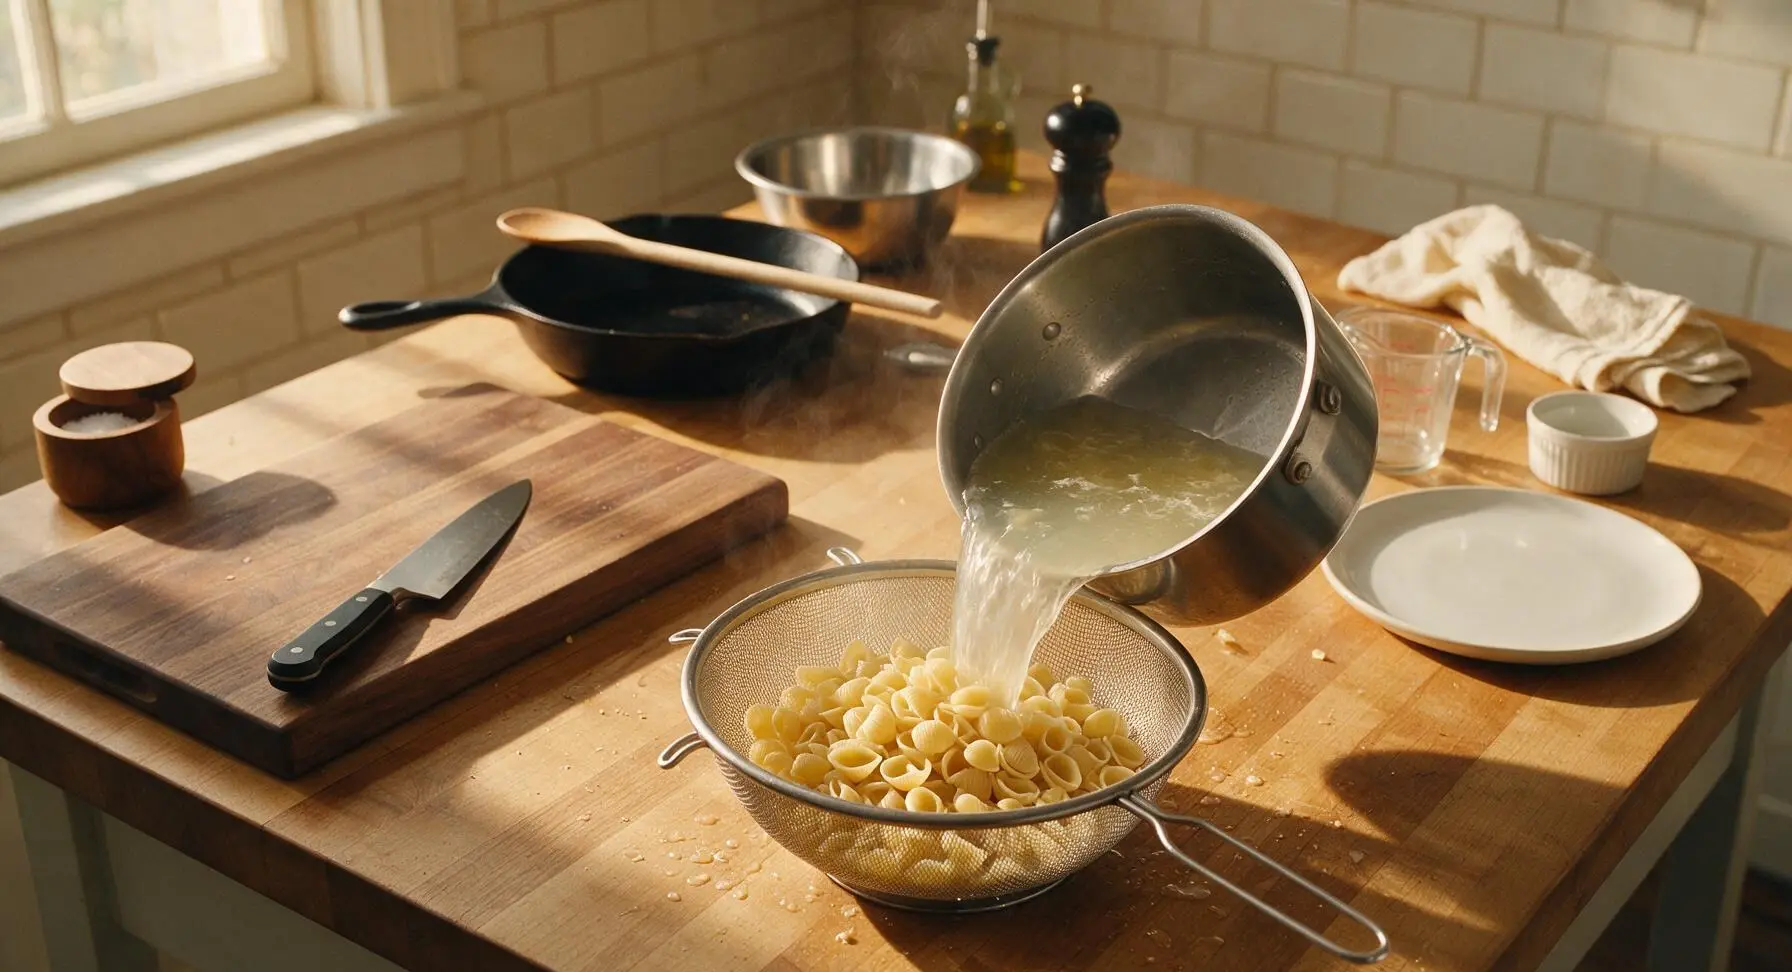
Once pasta reaches al dente, turn off the cooktop heat. Carefully lift the stock pot using both side handles, and pour the pasta and water into the fine-mesh stainless steel colander positioned at the right edge of the counter adjacent to the sink. Shake the colander gently to remove all excess starchy pasta water; do not rinse the pasta, as residual starch helps the cheese sauce cling to the shells. Set the colander with drained pasta on the black cast iron trivet at the back center of the counter.
Step 4
step4:Drain Cooked Shells
5

Melt Velveeta Sauce

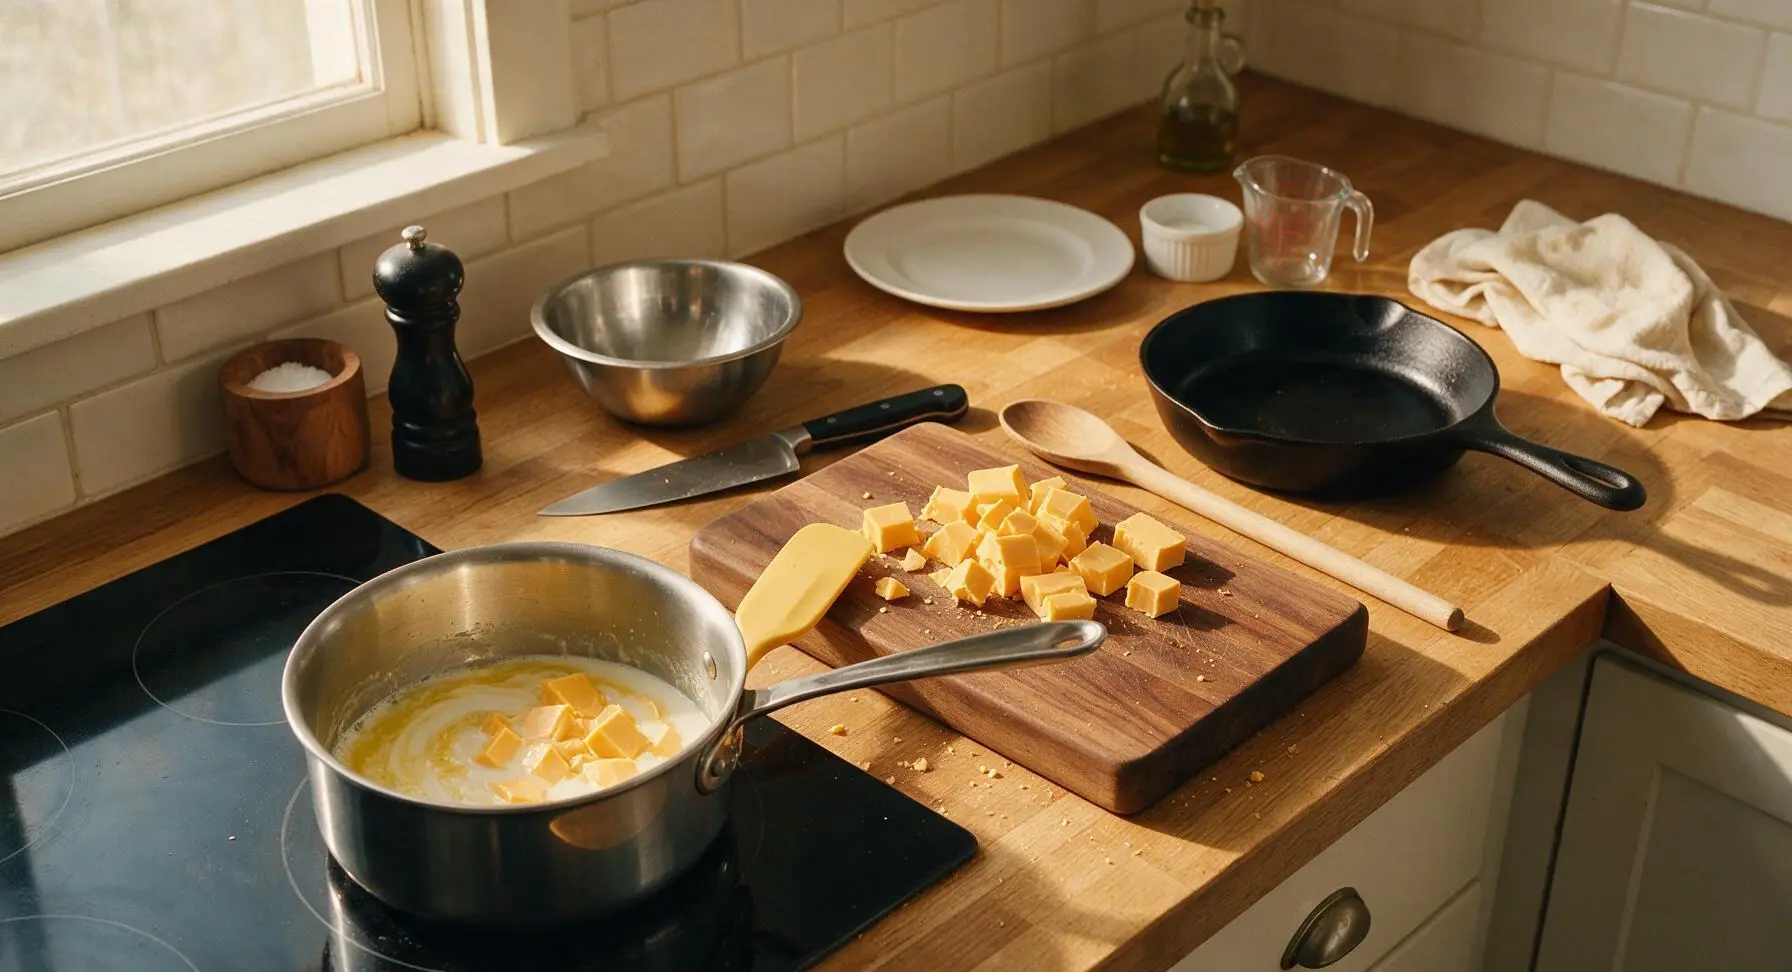
While pasta drains, place the 2-quart stainless steel saucepan on the induction cooktop over medium-low heat. Add the 2 tablespoons of unsalted butter and 1/2 cup of whole milk to the pan. Once butter is fully melted, add the cubed Velveeta to the pan. Stir continuously with the butter yellow silicone spatula for 3-4 minutes, until the cheese is fully melted into a smooth, pourable golden sauce with no lumps. Do not turn heat to high, as this will cause the cheese to scorch and turn grainy.
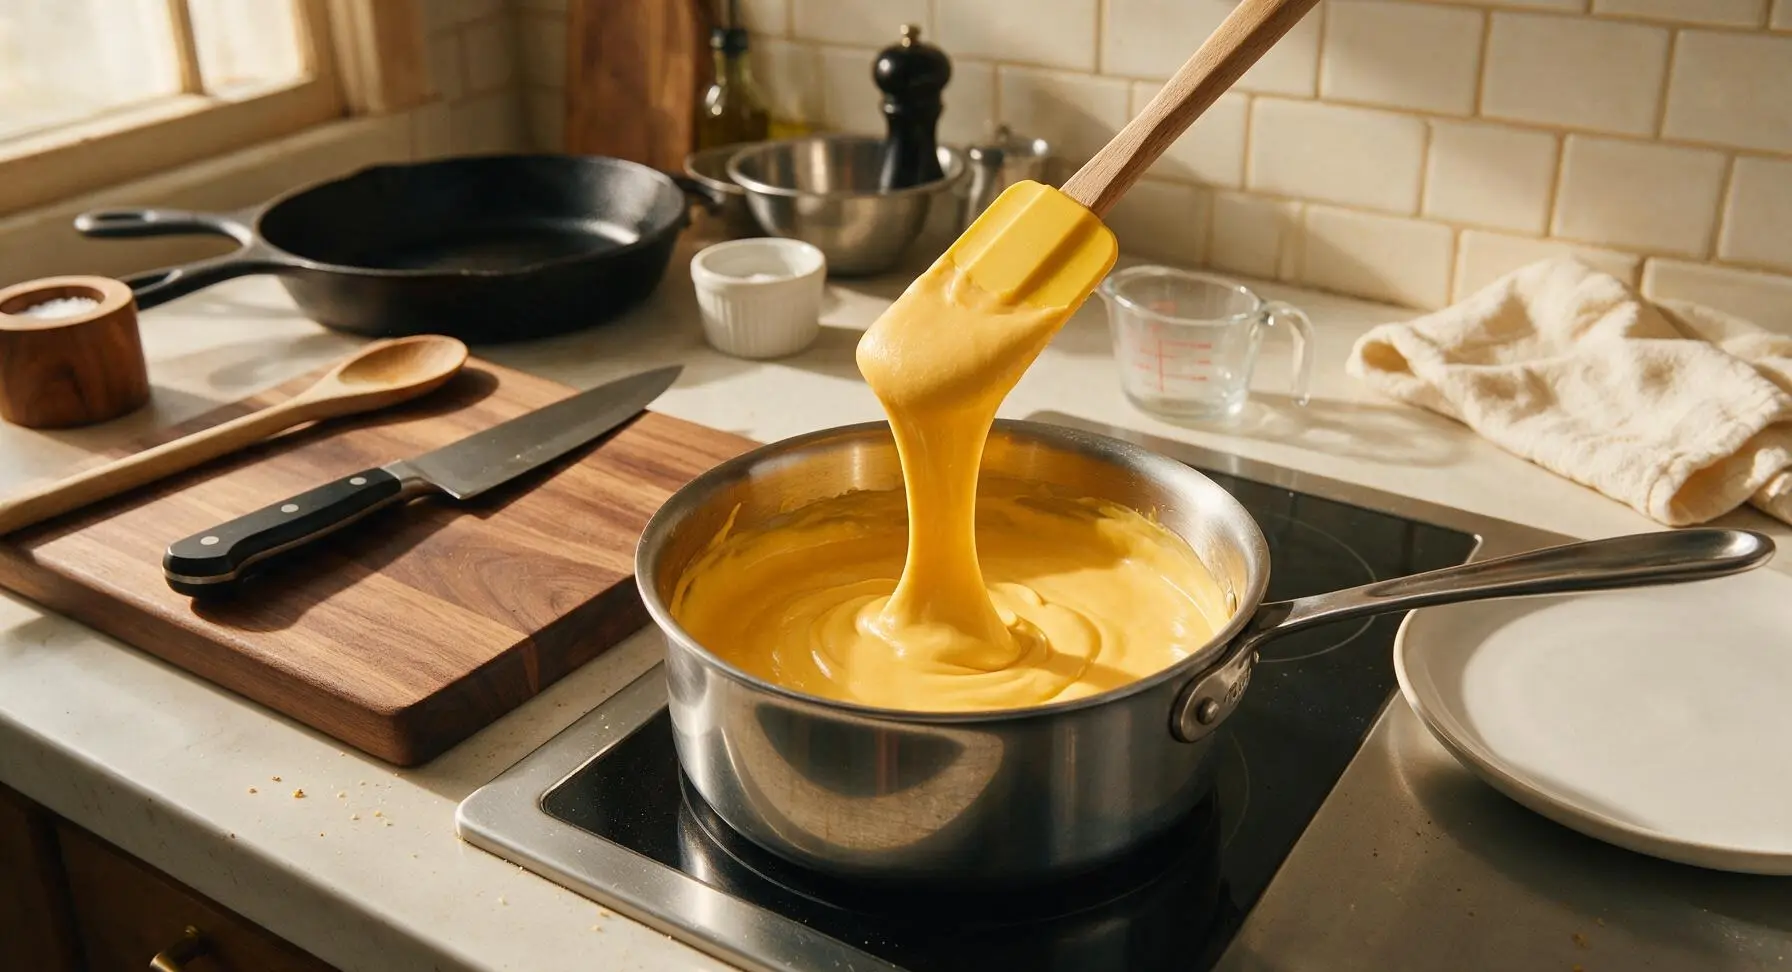
Step 5
step5:Melt Velveeta Sauce
Step 5
step5:Melt Velveeta Sauce
6

Toss Pasta with Sauce

Add all of the drained shell pasta directly into the saucepan with the melted cheese sauce. Use the silicone-tipped pasta tongs to toss the shells gently for 1-2 minutes, until every shell is evenly coated in the smooth golden sauce. Add 1-2 extra tablespoons of milk if the sauce feels too thick, until it coats each shell without clumping. Season with 1/4 teaspoon of freshly ground black pepper, and toss once more to distribute.
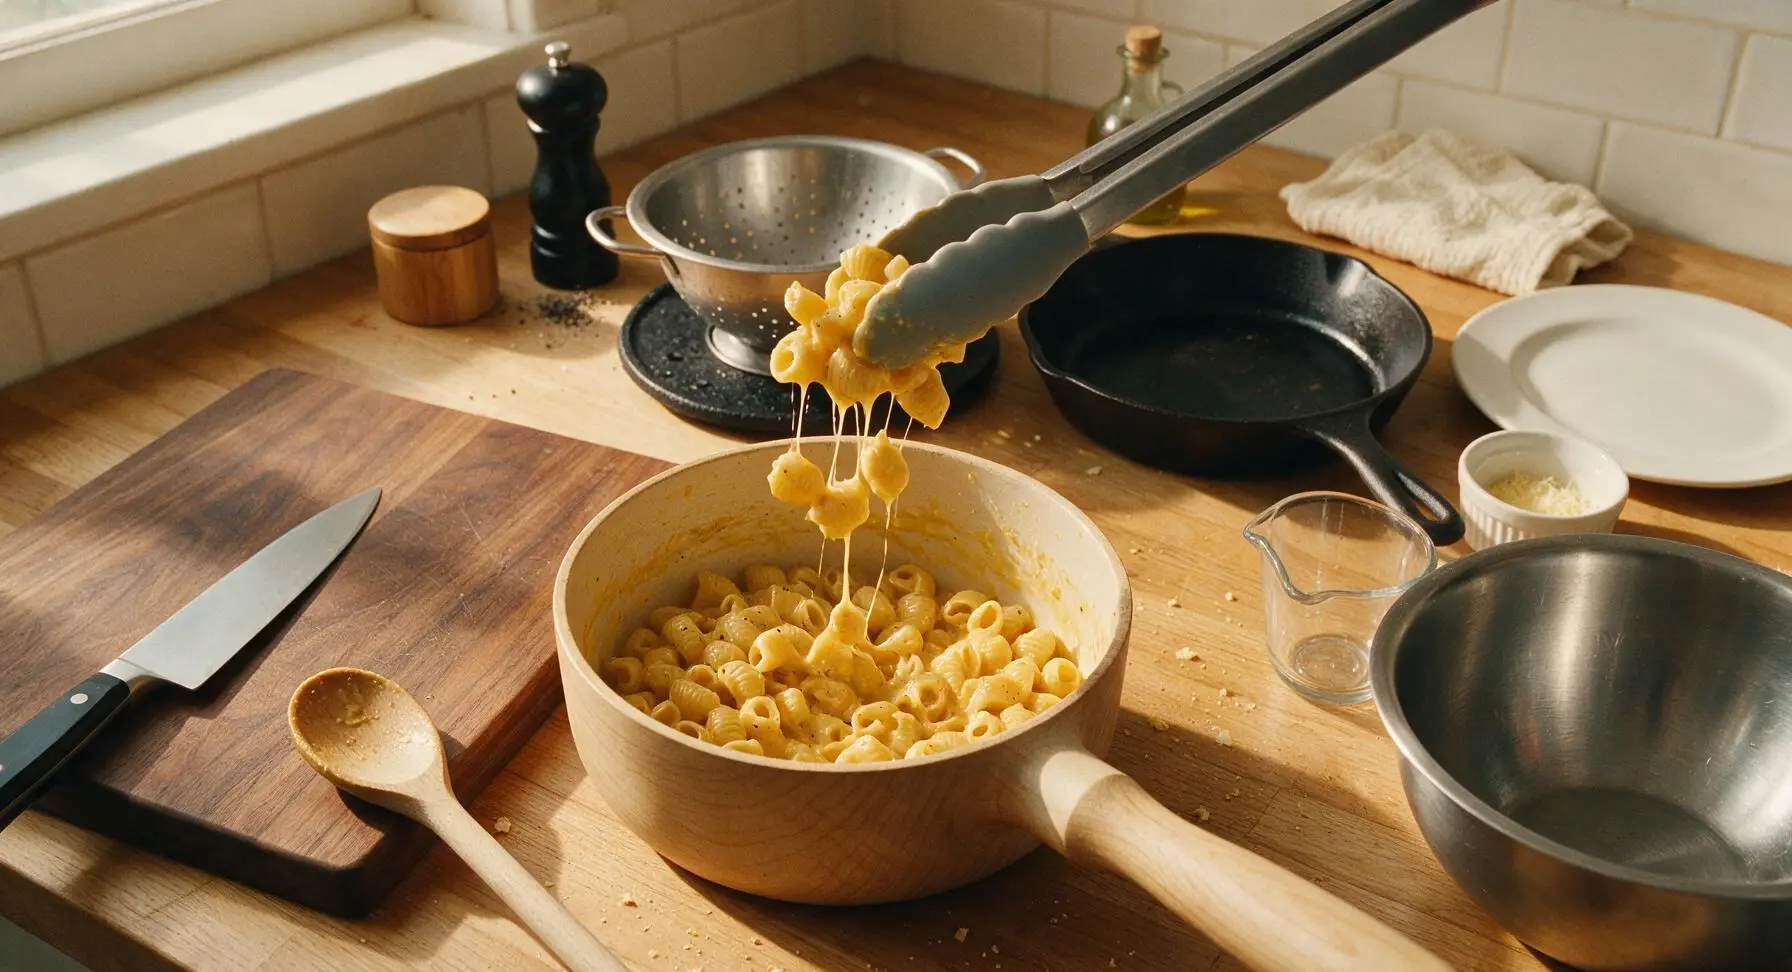
Step 6
step6:Toss Pasta with Sauce
7

Plate and Serve

Transfer the coated shells and cheese to the matte cream white ceramic pasta bowl, mounding it gently in the center. Top with a light sprinkle of extra freshly cracked black pepper, and a single tiny fresh thyme leaf for a subtle bright garnish. Let rest for 1 minute before serving, so the sauce sets slightly and clings to the shells.
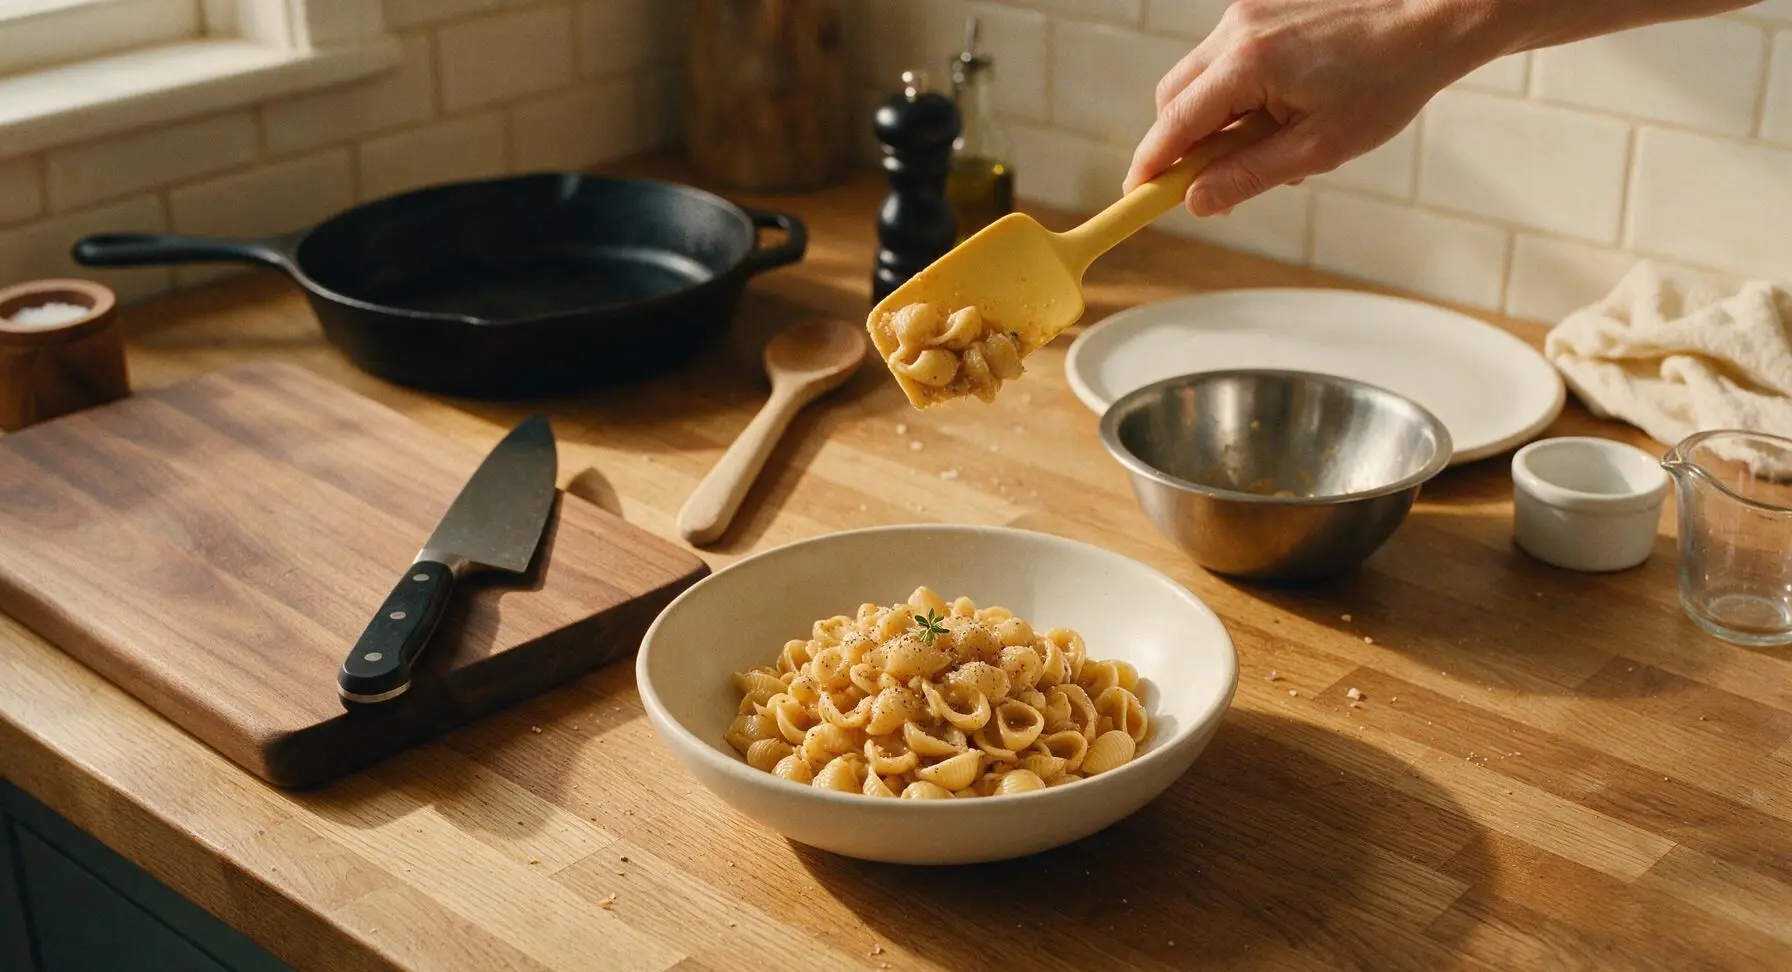
Step 7
step7:Plate and Serve

Tips

1.Skip rinsing drained pasta: the thin, starchy coating on cooked shells helps the Velveeta sauce cling evenly, preventing sauce from sliding off shells and pooling at the bottom of your bowl.
2.Cut Velveeta into uniform 1/2-inch cubes before melting: evenly sized pieces melt at the same rate, cutting down on cook time and eliminating stubborn lumps without needing to turn heat up high.
3.Keep sauce heat on medium-low: Velveeta melts at a low temperature, and high heat will cause milk proteins to separate, leading to a grainy, greasy sauce instead of the signature smooth, velvety texture.


✨ You May Also Like

Main Course
🍜 United Kingdom

A showstopping classic of tender seared beef, savory mushroom duxelles, and crisp prosciutto wrapped in flaky golden puff pastry, baked to juicy perfection.

⏱️ 2 hours 1Main Course ★ 4.7
Main Course
🍜 India

Tender charred marinated chicken simmered in a rich, spiced creamy tomato sauce, this iconic Anglo-Indian curry pairs perfectly with basmati rice or warm naan.

⏱️ 50 minuteMain Course ★ 4.6
Main Course
🍜 Thailand

Classic tangy, sweet, and savory Thai stir-fried rice noodles with shrimp, tofu, and crunchy garnishes, balancing all five core Thai flavor profiles.

⏱️ 30 minuteMain Course ★ 4.5
Main Course
🍜 United Kingdom

Crispy golden beer-battered cod and fluffy double-fried chips, served with tangy tartar sauce and malt vinegar: the timeless, beloved British pub comfort classic.

⏱️ 45 minuteMain Course ★ 4.7
Main Course
🍜 Mexico

Smoky, chile-marinated pork tacos with caramelized pineapple, fresh cilantro, and lime: a beloved classic Mexican street food perfect for casual summer gatherings.

⏱️ 1 hour 45Main Course ★ 4.8
Main Course
🍜 United States

Crunchy Fritos corn chips layered with savory beef chili and melted cheddar, topped with cool, zesty fixings for a beloved, cozy Tex-Mex comfort food.

⏱️ 35 minuteMain Course ★ 4.8

Velveeta Shells and Cheese:Frequently Asked Questions

1.How long does this Creamy Velveeta Shells and Cheese take to make from start to finish? ▾
It comes together in just 18 to 20 minutes total, with zero fancy prep required. Boiling the medium shell pasta takes 10 to 12 minutes, and you can stir up the silky cheese sauce in the 5 minutes it takes the pasta to drain, making it ideal for busy weeknights or last-minute comfort food cravings.
2.Can I use a different pasta shape if I don’t have medium conchiglie shells? ▾
You absolutely can, though medium shells are ideal because their curved, pocketed shape catches every bit of cheese sauce. Great swaps include elbow macaroni, rotini, cavatappi, or small farfalle—just cook whatever shape you use to al dente per package directions so it doesn’t turn mushy when tossed with sauce.
3.Why is my Velveeta cheese sauce coming out lumpy instead of smooth? ▾
Lumps usually happen if you heat the Velveeta too quickly, or add cold milk straight to melted hot butter and cheese. Fix this by cutting your Velveeta into ½-inch cubes so it melts evenly, warming your milk slightly before stirring it in, and whisking constantly over low heat until the sauce is fully uniform.
4.Can I use low-fat or skim milk instead of whole milk for this recipe? ▾
You can, but know that the sauce won’t be quite as rich, velvety, or clingy to the pasta shells. Whole milk’s higher fat content creates that luxe, nostalgic texture everyone loves. If you only have skim or 2% on hand, stir in an extra tablespoon of unsalted butter to make up for the missing fat and keep the sauce creamy.
5.How much kosher salt should I add when making this dish? ▾
Aim for 1 tablespoon of kosher salt per 4 quarts of boiling pasta water, which is the sweet spot for seasoning the pasta shells from the inside out. Skip adding extra salt to the cheese sauce at first—Velveeta has a fair amount of sodium already, so taste after tossing before adding more salt to avoid over-seasoning.
6.My cheese sauce got thick and gummy after tossing it with pasta—how do I fix that? ▾
That usually happens if the sauce sits too long before tossing, or if you overcooked the pasta so it released too much starchy water. Loosen it up by stirring in 1 to 2 tablespoons of reserved starchy pasta water a splash at a time, until the sauce is silky again and coats every shell without clumping.
7.Do I need to rinse my cooked pasta shells before tossing them with the cheese sauce? ▾
Skip the rinse entirely! The light, starchy coating on drained, unrinsed pasta is what helps the creamy Velveeta sauce cling tightly to every shell instead of sliding off. Just drain the pasta well, give the colander a quick shake to remove excess water, and toss it straight into the warm cheese sauce for the best texture.
8.Can I make this shells and cheese ahead of time for meal prep? ▾
It’s best eaten fresh right after making for that ideal silky texture, but you can store leftovers in an airtight container in the fridge for up to 3 days. When reheating, stir in a splash of whole milk to loosen the sauce back up, as it will thicken and solidify as it chills. Reheat in the microwave or on the stovetop over low heat.
9.Is there a way to make this recipe taste a little more grown-up without losing that nostalgic vibe? ▾
Definitely! Stir in a pinch of smoked paprika, a dash of garlic powder, a tiny grind of black pepper, or even a handful of crispy cooked bacon bits after tossing the pasta and sauce. These small add-ins boost depth of flavor without overpowering that classic, creamy Velveeta taste you remember from childhood.
10.How small should I cut the Velveeta to make sure it melts smoothly into the sauce? ▾
Cut your block of Velveeta into uniform ½-inch cubes before adding it to the melted butter and warm milk. Small, evenly sized pieces melt at the same rate over low heat, which prevents half-melted cheese blobs or a grainy sauce caused by overheating part of the cheese while waiting for larger chunks to melt.
11.Can I use salted butter instead of unsalted butter in this recipe? ▾
You can, just adjust your added salt accordingly. Unsalted butter lets you control exactly how much sodium goes into the dish, which is helpful since Velveeta is already fairly salty. If you use salted butter, hold off on adding extra kosher salt to the sauce until you’ve tasted the finished dish to avoid over-seasoning.
12.Why does the recipe call for medium shell pasta instead of jumbo or mini shells? ▾
Medium conchiglie hits the perfect texture and sauce-to-pasta ratio for this dish. Jumbo shells are too large and designed for stuffing, leading to uneven sauce coverage, while mini shells hold too much sauce per bite and turn mushy faster. Medium shells have just the right pocket size to trap a perfect amount of cheese in every bite.
13.Can I freeze leftover Creamy Velveeta Shells and Cheese? ▾
Freezing isn’t ideal, as the dairy-based sauce can separate and turn grainy when thawed, but it will work in a pinch. Store cooled leftovers in a freezer-safe airtight container for up to 2 months, then thaw in the fridge overnight before reheating. Stir in splashes of whole milk while reheating to help the sauce come back together smoothly.
14.Should I make the cheese sauce while the pasta boils, or wait until the pasta is fully drained? ▾
Multitask to save time! Start melting the butter and warming the milk in a large saucepan during the last 4 minutes the pasta cooks, then add the cubed Velveeta right as you drain the pasta. The sauce will be perfectly smooth and ready to toss the second the pasta is drained, so you won’t end up with sticky, clumped pasta.
15.My sauce is too runny and won’t stick to the shells—what went wrong? ▾
Runny sauce usually means you added too much milk, or didn’t let the cheese fully melt and thicken over low heat. Let the sauce simmer for 1 to 2 extra minutes, whisking constantly, to let it thicken up. If it’s still too thin, stir in a couple extra small cubes of Velveeta until it reaches a rich, coat-the-back-of-a-spoon consistency.
16.Can I add protein or veggies to this shells and cheese to make it a more filling meal? ▾
Absolutely! Stir in diced cooked ham, shredded rotisserie chicken, crispy cooked ground sausage, steamed broccoli florets, roasted peas, or sautéed spinach right after tossing the pasta and sauce. Just make sure any add-ins are warmed through first so they don’t cool the dish or make the sauce seize up when stirred in.
17.Do I need to make a roux to get that perfectly thick, creamy cheese sauce? ▾
No roux is required for this recipe! The smooth, meltable consistency of Velveeta creates a luxe, thick sauce when combined with melted butter and warm whole milk over low heat, no flour needed. Skipping the roux cuts down on prep time and gives the sauce that nostalgic, ultra-silky texture that makes this dish such a beloved comfort food.

Comments (17)

2 days ago

OMG this is SO good! I threw this together last night for our weekly family dinner when I forgot to plan a main side, and all three of my boys went back for seconds. My kids loved it so much they asked me to make it again tomorrow night! 15 minutes flat, no fancy ingredients, exactly the busy weeknight win I needed. Already added the ingredients to my regular grocery list!

1 week ago

Total game changer for potlucks! I made this for our neighborhood block party last weekend and people were asking me for the recipe before they even finished their first bite. I added a little sprinkle of paprika on top for color and it was chef’s kiss. Only note is I’d maybe double the batch next time because it was gone in 10 minutes!

5 days ago

So glad it was a block party hit! The paprika sprinkle is such a smart call for a little extra depth and presentation — I’ll have to add that tip to the recipe notes. Doubling is absolutely the right move for crowds, this stuff disappears fast!

3 days ago

Bro this is way better than the boxed mac I’ve been surviving on all semester. Super easy even with my tiny dorm hot plate, no weird fancy equipment needed. Used a little extra Velveeta because cheese is life, obviously. 10/10 will be making this every Sunday for meal prep for the week.

2 days ago

Wait hold up, does this actually work on a hot plate? My dorm doesn’t allow hot pots so I’ve been stuck on microwave meals, this might change everything

yesterday

This is exactly the creamy, no-grainy-texture mac and cheese I’ve been searching for my whole life. No roux, no fancy shredded cheese that separates, just smooth velveeta and perfectly cooked shells. I ate half the pan straight off the stove no shame.

30 minutes ago

This was so delicious when I made it last night! Quick question though: Can I make this ahead of time and reheat it for my kid’s lunch tomorrow? I’m worried the cheese sauce will get all clumpy when I microwave it at school.

5 minutes ago

I do this all the time! Just stir in a tiny splash of milk when you reheat it and it goes right back to that perfect creamy texture, no clumps at all. My kid takes it in a thermos too and it’s still great by lunchtime.

just now

Great tip from Liz! I recommend storing it in an airtight container in the fridge for up to 3 days, and adding 1-2 tsp of milk per serving when reheating to bring the sauce back to its original creaminess. It works perfectly for packed lunches!

2 weeks ago

Swapped the regular pasta shells for gluten-free shells and this still turned out amazing! I was worried the sauce wouldn’t stick right but it was perfectly creamy, even my non-gluten-free husband didn’t notice a difference. Will be making this on repeat.

1 week ago

Love that gluten-free swap! I’m so glad it worked out for you — the velveeta sauce is super forgiving with alternative pastas, which makes it such a great option for folks with dietary preferences. Thanks for sharing your tip!

5 days ago

Made this for our Sunday football watch party and it was the perfect side to go with brats and burgers. Everyone was raving about how creamy it was, no dry boring mac here. Way easier than the baked mac I usually slave over, and everyone liked it better tbh.

1 week ago

This recipe is so budget friendly! I already had half the ingredients in my pantry, total cost for the whole pan was like $4 which feeds 4 people. Cheaper than fast food and way tastier. 10/10 for anyone trying to cut down on grocery costs.

5 days ago

Wait for real? I’ve been dropping $12 a day on takeout for dinner, this would save me so much cash. How long does it keep in the fridge?

3 days ago

It’s such a great budget staple for sure! Stored in an airtight container, it’ll keep for 3-4 days in the fridge, making it perfect for meal prep to skip those expensive takeout runs. So glad you love it, Beth!

2 days ago

Threw in a handful of diced pickled jalapeños and a pinch of garlic powder when I stirred in the cheese, and wow. It gave it the perfect little kick without overpowering that classic creamy Velveeta taste. If you like a little heat, do not sleep on that add-in.

yesterday

Oh the jalapeño add-in sounds insane! I’m making this tonight and I’ve got a jar of pickled jalapeños in the fridge I’ve been trying to use up, can’t wait to try that hack.

3 days ago

My super picky 7 year old who refuses to eat almost anything ate two whole bowls of this, which is basically a miracle in my house. Only reason I’m not giving 5 stars is I wish there was a note about salting the pasta water, my first batch was a little bland until I added extra salt at the end.

2 days ago

Oh I always salt my pasta water like the sea! It makes such a difference, even with super cheesy sauces like this. Learned that the hard way too with my first ever mac and cheese attempt.

yesterday

Thank you so much for that feedback! I just added a note to the recipe reminding folks to salt their pasta water generously before boiling — that’s such an important step I’m glad you pointed it out. So happy your kiddo loved it, that’s the best win a parent can ask for!

yesterday

I’ve been a diehard boxed mac and cheese fan my whole life and swore no homemade version could compete, but this recipe made me eat my words. It’s so smooth and creamy, and it’s actually faster to make than waiting for the boxed stuff on the stove? Wild. 10/10, converted for life.

2 hours ago

Welcome to the non-boxed club! I’m right there with you — there’s a time and place for the classic blue box, but this velveeta version hits different when you’re craving that ultra-creamy texture without the wait. So glad you gave it a shot!

2 weeks ago

I make a big batch of this every Sunday to portion out for work lunches all week, and it never gets old. It reheats like a dream, it’s filling, and I don’t get that 2pm slump like I do when I eat takeout for lunch. Added some steamed broccoli last week to sneak in some veggies and it was chef’s kiss.

5 days ago

I tried making this last night with lactose-free Velveeta because I’m super sensitive to dairy, and it turned out amazing! I was so worried the texture would be off but it was just as creamy as the regular stuff. My stomach didn’t hurt at all after eating it, total win.

3 days ago

OH this is the news I needed! I’ve been skipping all the good mac recipes because regular Velveeta wrecks my stomach, I’m grabbing the lactose-free version on my grocery run tomorrow.

2 days ago

That’s such a fantastic swap to share! I’m so glad it worked out for you — I’ll add a note to the recipe about lactose-free Velveeta working perfectly for folks with dairy sensitivities, that’s a great tip for other readers!

2 hours ago

Made this at 1am after a late shift at the hospital, and let me tell you — there is no better comfort food after a 12 hour shift. It came together so fast I didn’t even have to wait long to eat, and it hit so much better than the vending machine chips I was gonna settle for.

30 minutes ago

As another night shift nurse, I feel this so hard. I’m keeping Velveeta and shells in my pantry from now on, way better than spending $15 on delivery when I get home exhausted.

1 week ago

Wait, I’m a diehard baked mac and cheese person who thinks stovetop is always watery and bland, but my roommate made this last night and I had two servings. It’s so rich and creamy, I might even make it for my family’s Thanksgiving dinner this year instead of my usual baked recipe.

5 days ago

Wait are you serious? I’ve been looking for an easier mac to make for Thanksgiving because my baked recipe takes 45 minutes in the oven and I never have enough oven space. This would be perfect!

3 days ago

It’s such a great holiday side when you’re short on oven space! I’ve had multiple readers tell me they’ve served it for Friendsgiving and Thanksgiving and gotten rave reviews, even from the baked mac purists. So glad your roommate converted you!

3 days ago

I’m usually the guy who’s in charge of grilling at every cookout and never makes sides, but my wife asked me to make this for our last cookout and I got more compliments on the mac than I did on my famous ribs. Rude, but fair, this stuff is insane. Even easier than grilling, tbh.

5 minutes ago

I stirred in a half cup of frozen peas and some diced ham when I mixed the cheese in, and it turned into a full one-pot meal! No extra pots or pans, done in 15 minutes, and it tasted like the fancy ham and cheese mac I pay $15 for at the restaurant downtown.

just now

That sounds like the perfect hearty one-pot meal! The peas and ham add such great protein and veggie balance without adding extra cook time — love that hack. Thanks for sharing!



