
air fry chicken time

title 1
air fry chicken time
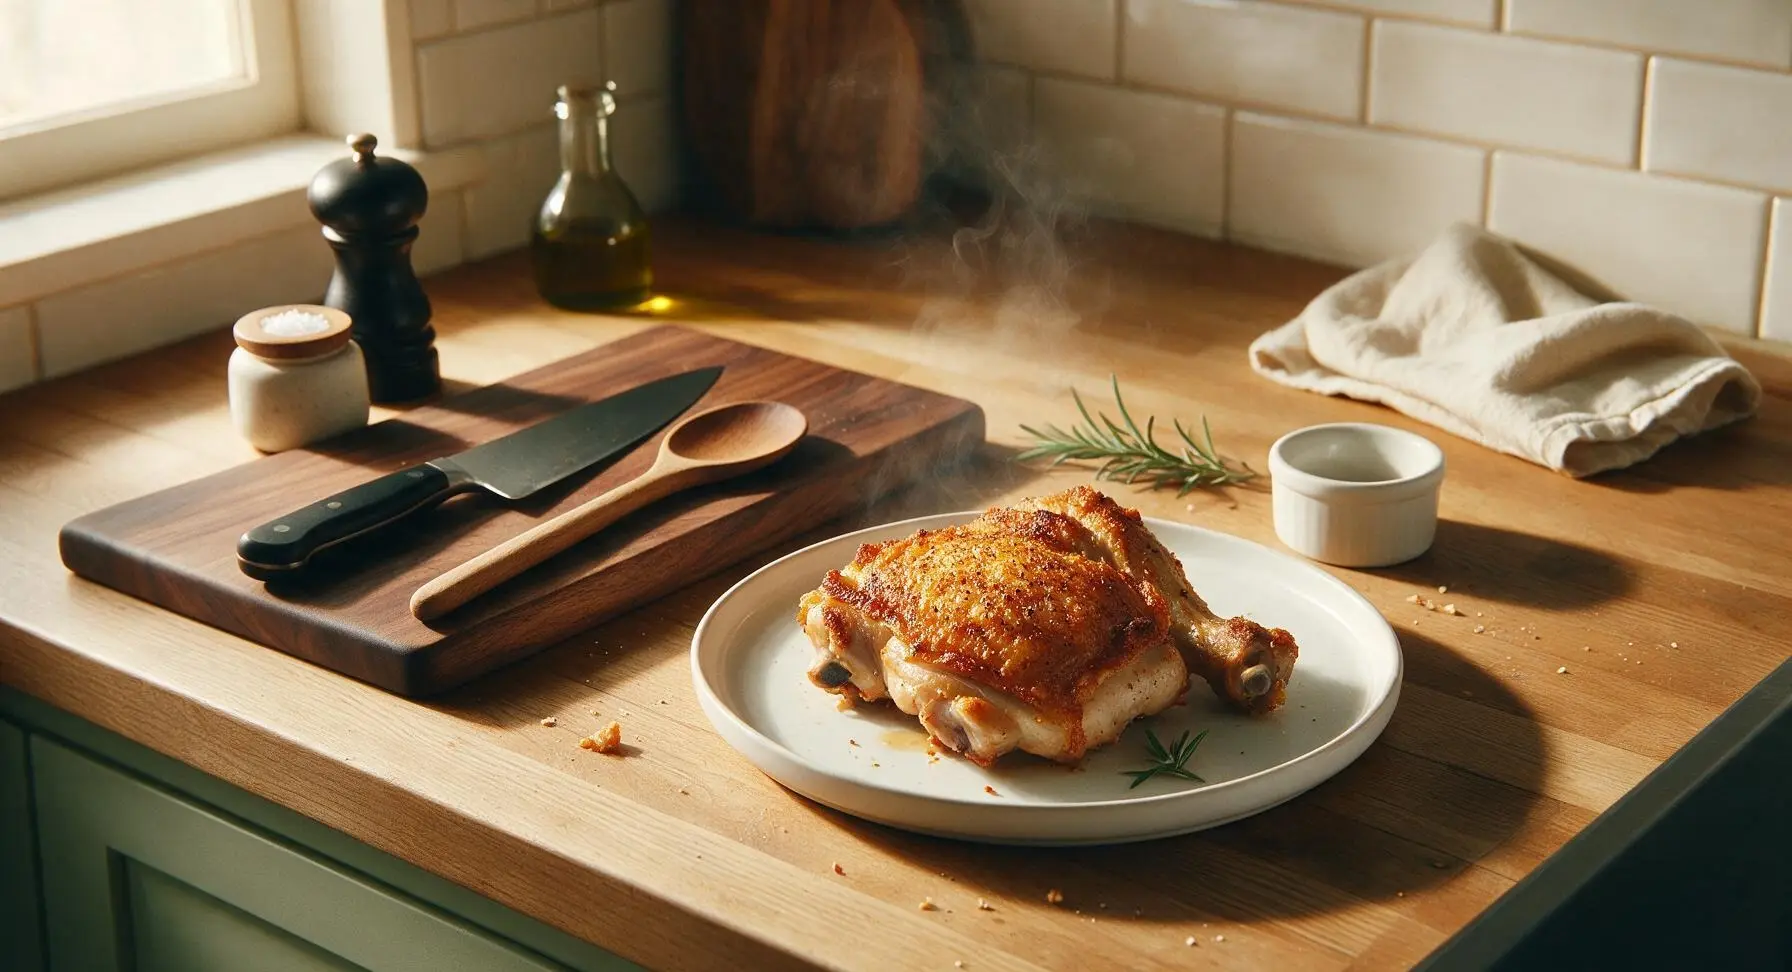
⏱️ cook time 22 minutes
🍽️ servings 4
⚡ Difficulty easy

intro

Shatteringly crisp, juicy bone-in chicken thighs made in the air fryer, with golden seasoned skin and zero deep-fry mess, ready in just over 30 minutes for easy weeknight meals.

Ingredients
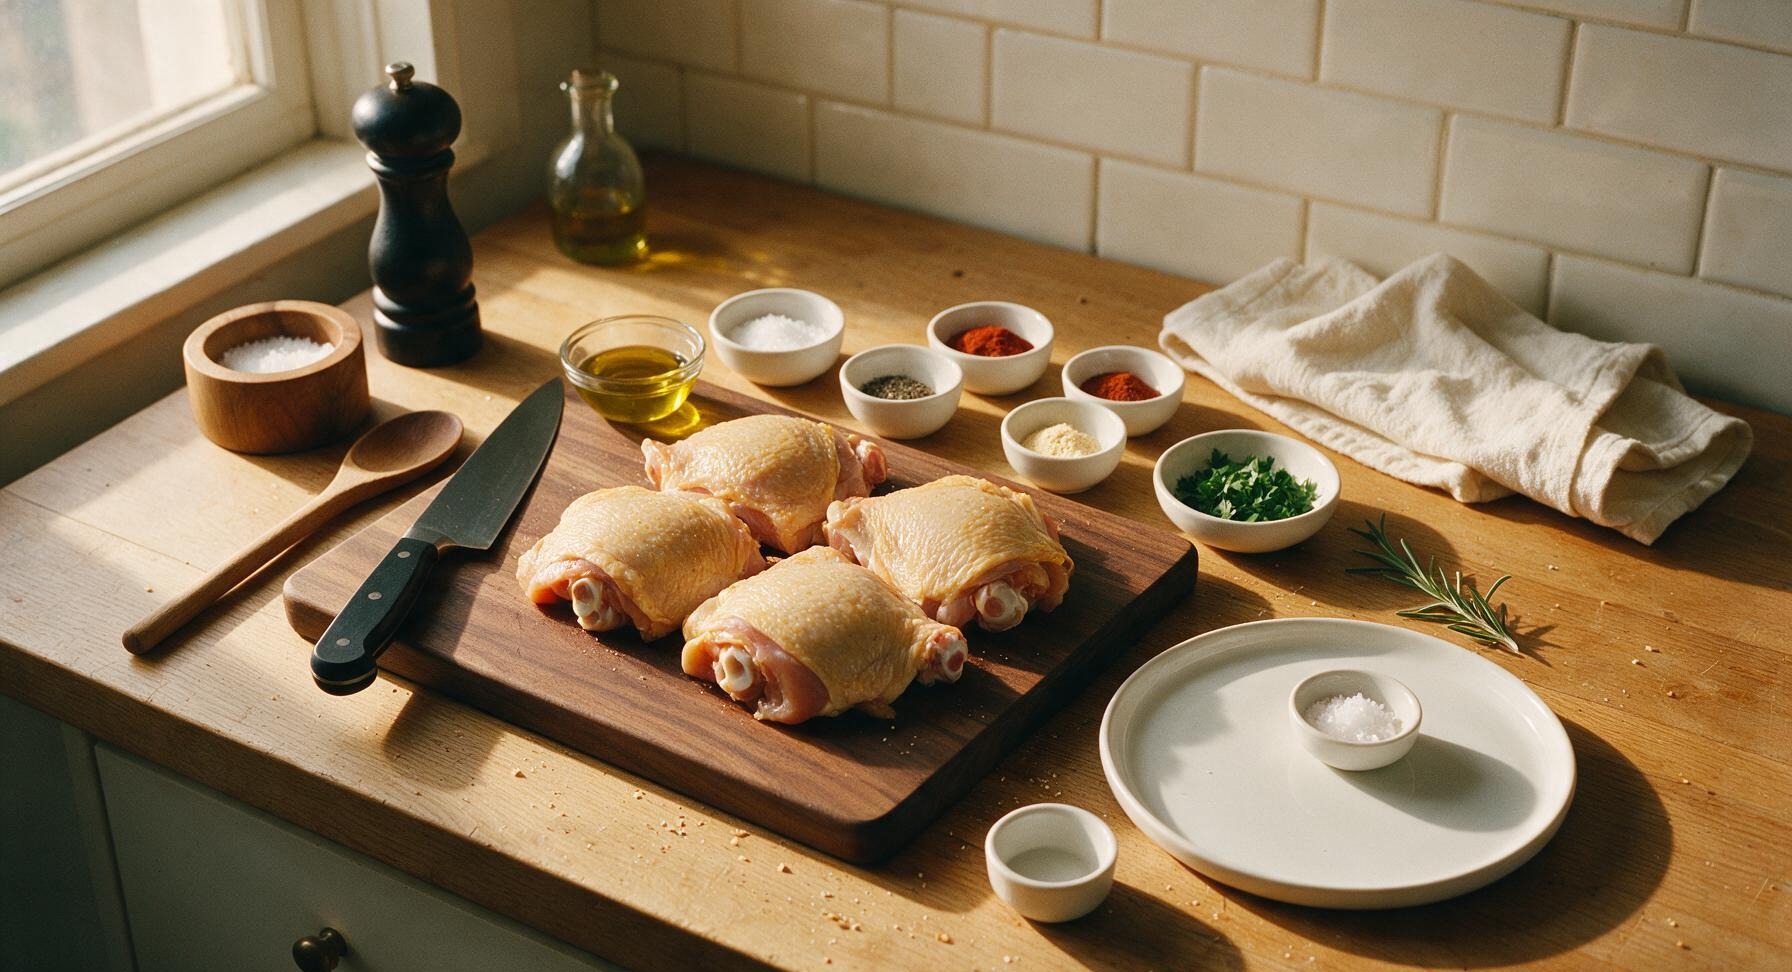
Bone-in skin-on chicken thighs 4 pieces (approx 1.2kg total)
Extra-virgin olive oil 1 tsp
Kosher salt 1 tsp
Freshly ground black pepper ½ tsp
Garlic powder ½ tsp
Smoked paprika ½ tsp
Onion powder ¼ tsp
Fresh flat-leaf parsley (chopped, for garnish) 1 tbsp
Fresh rosemary sprig (for garnish) 1 small
Flaky sea salt (for finishing) ¼ tsp

Steps

1

Pat Chicken Thighs Dry

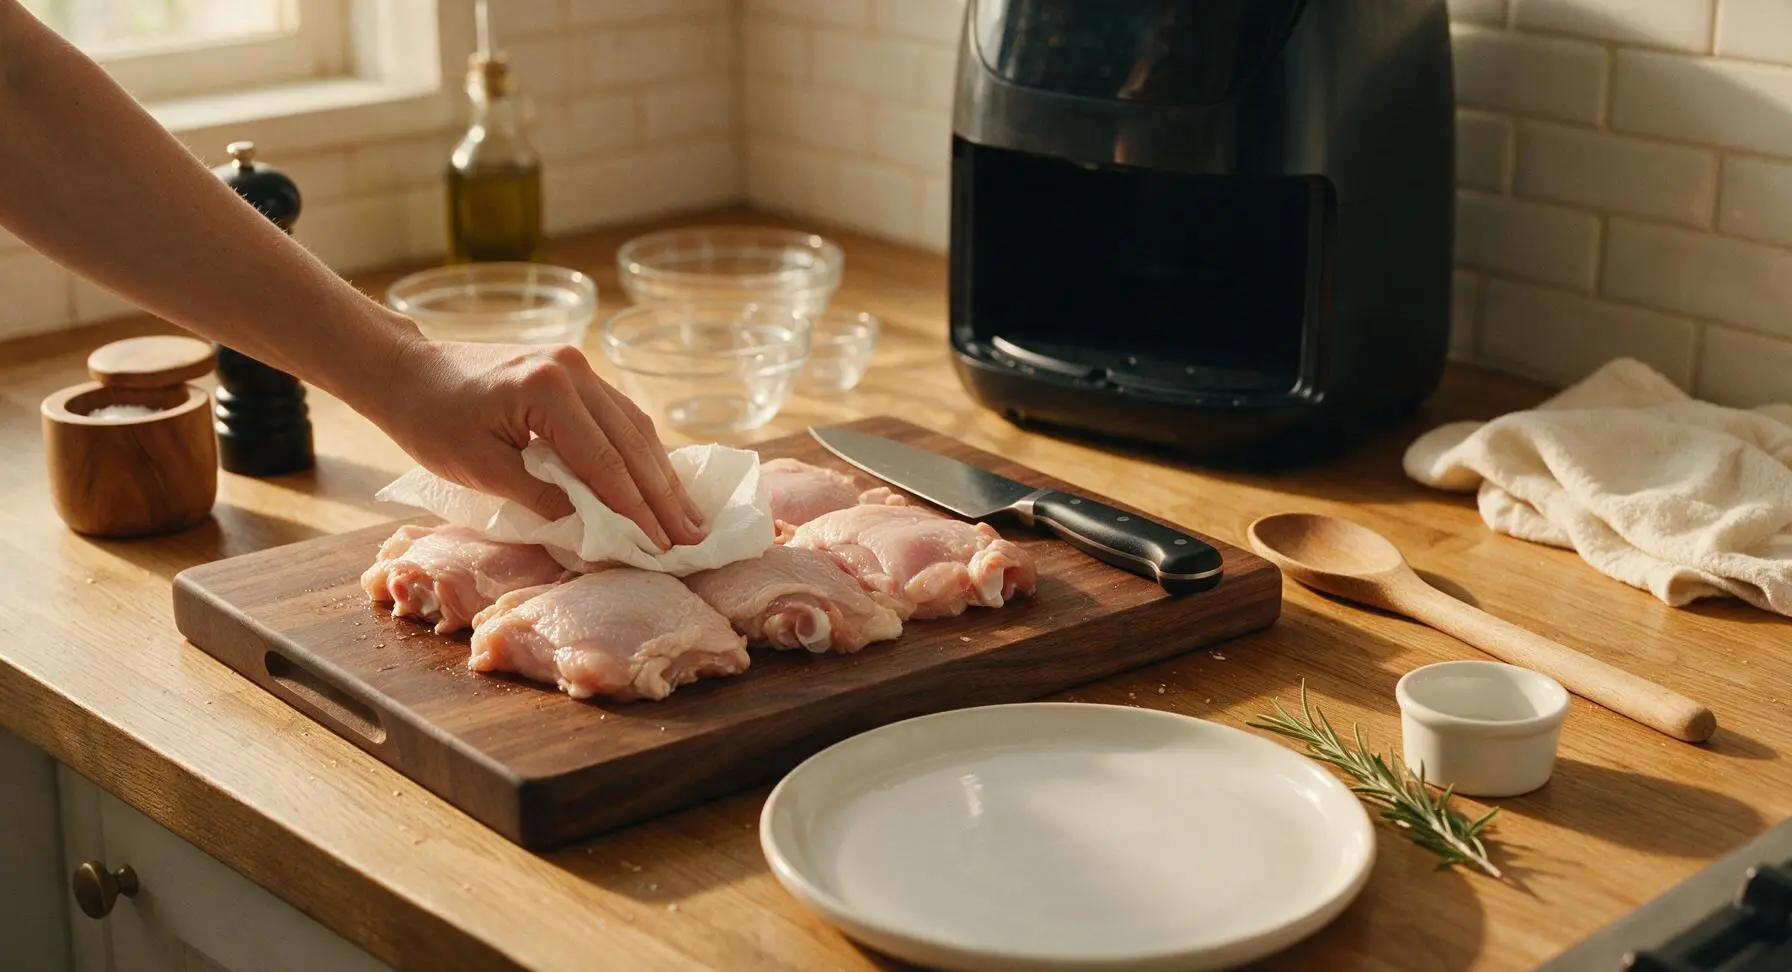
Remove 4 bone-in skin-on chicken thighs from packaging and place them on the dark walnut cutting board. Use plain white paper towels to thoroughly pat every surface of the chicken, especially the skin side, until completely dry to the touch with no remaining surface moisture. This is the most critical step to achieve shatteringly crisp skin rather than rubbery, soggy skin, as any residual moisture will steam instead of crisp in the air fryer.
Step 1
step1:Pat Chicken Thighs Dry
2

Mix Dry Seasoning Blend

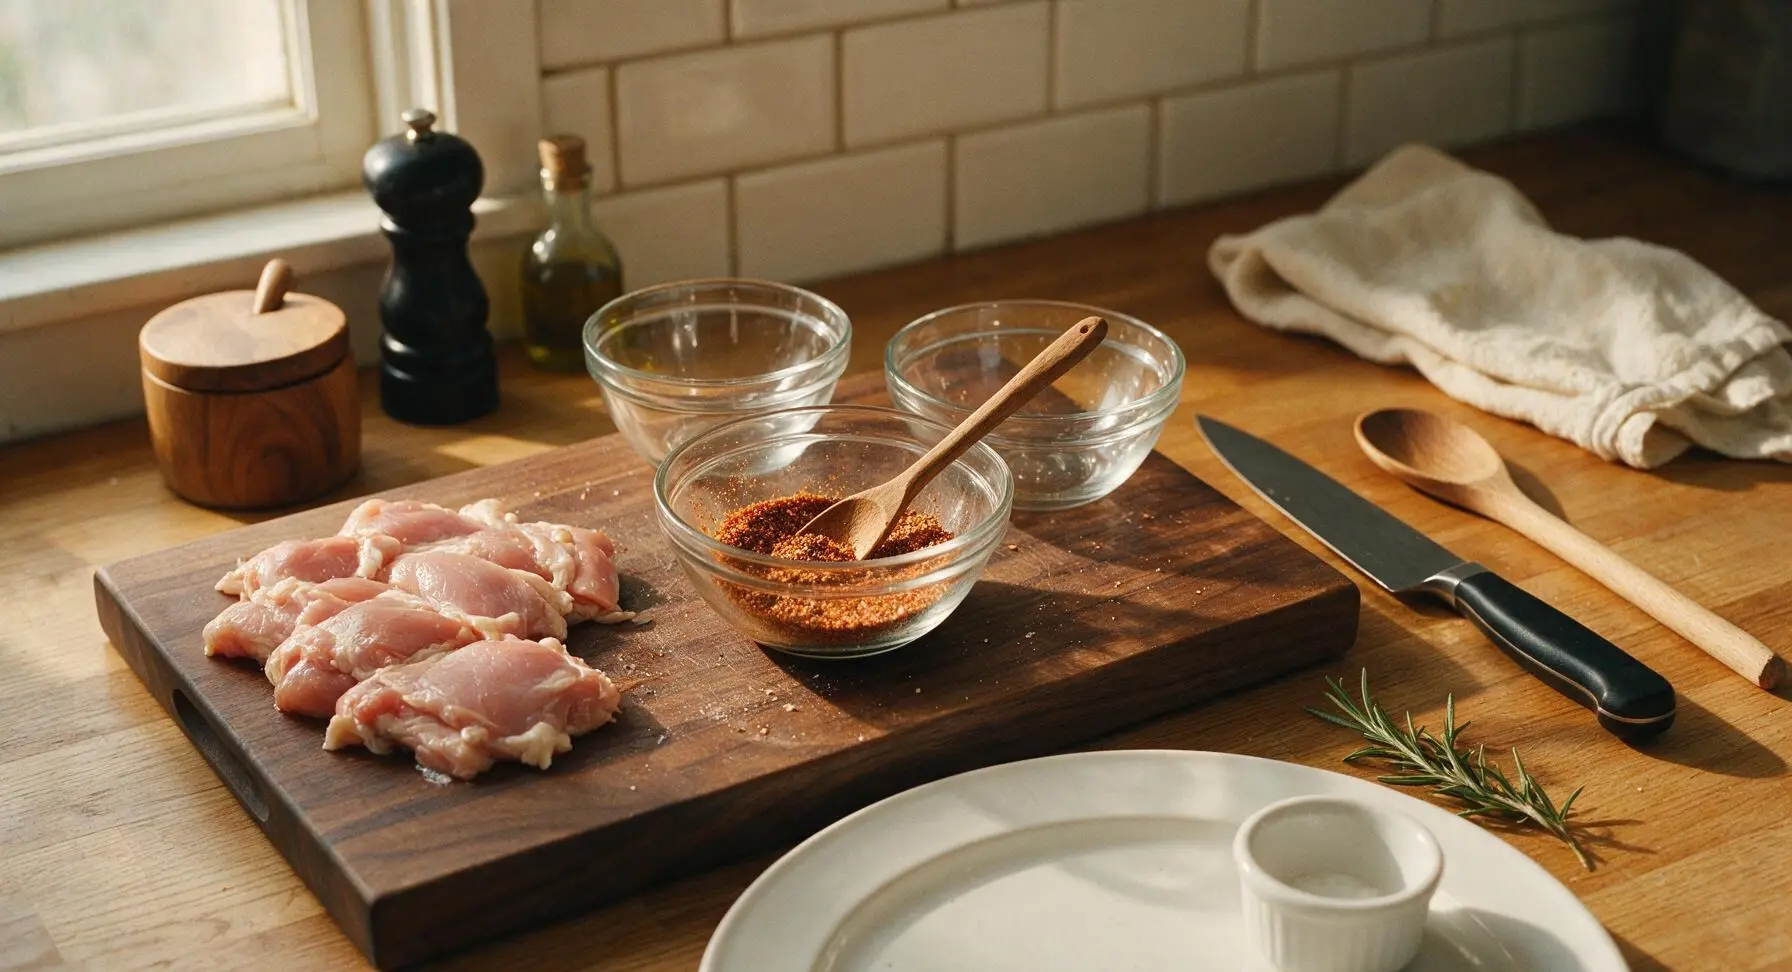
Measure 1 tsp kosher salt, ½ tsp freshly ground black pepper, ½ tsp garlic powder, ½ tsp smoked paprika, and ¼ tsp onion powder into one of the clear glass prep bowls. Stir the spices with the small carved wooden mixing spoon until fully and evenly blended, with no clumps of paprika or garlic powder remaining.
Step 2
step2:Mix Dry Seasoning Blend
3

Coat Chicken with Oil

Drizzle 1 tsp of extra-virgin olive oil over all surfaces of the dried chicken thighs. Use clean hands to rub the oil into a thin, even coating across the skin, underside, and edges of each piece. This thin oil layer helps seasoning adhere and encourages even crisping; do not use more than 1 tsp total, as excess oil will cause air fryer smoking and soggy skin.
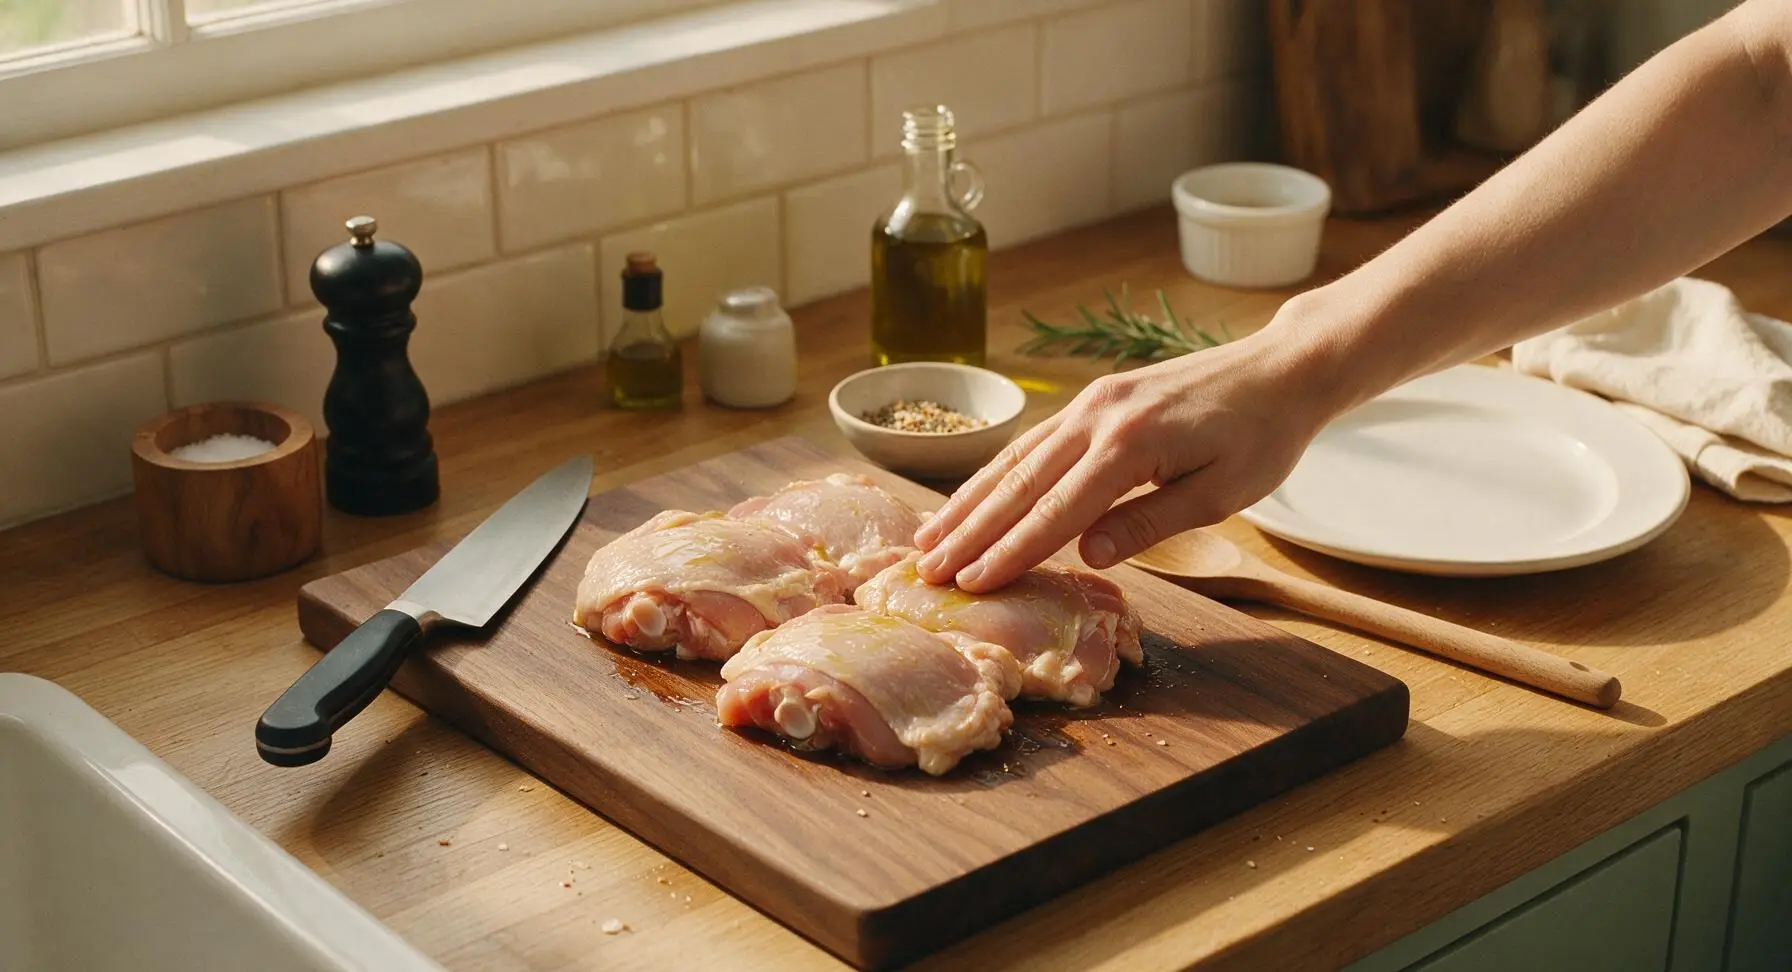
Step 3
step3:Coat Chicken with Oil
4

Season Chicken Evenly

Sprinkle the blended seasoning mix evenly over every oiled surface of the chicken thighs, including the skin, underside, and edges. Use your fingers to gently press the seasoning into the skin so it adheres rather than falling off during cooking. Each piece should have a light, uniform spice coating, with no bare patches or thick clumps of seasoning that would burn during cooking.
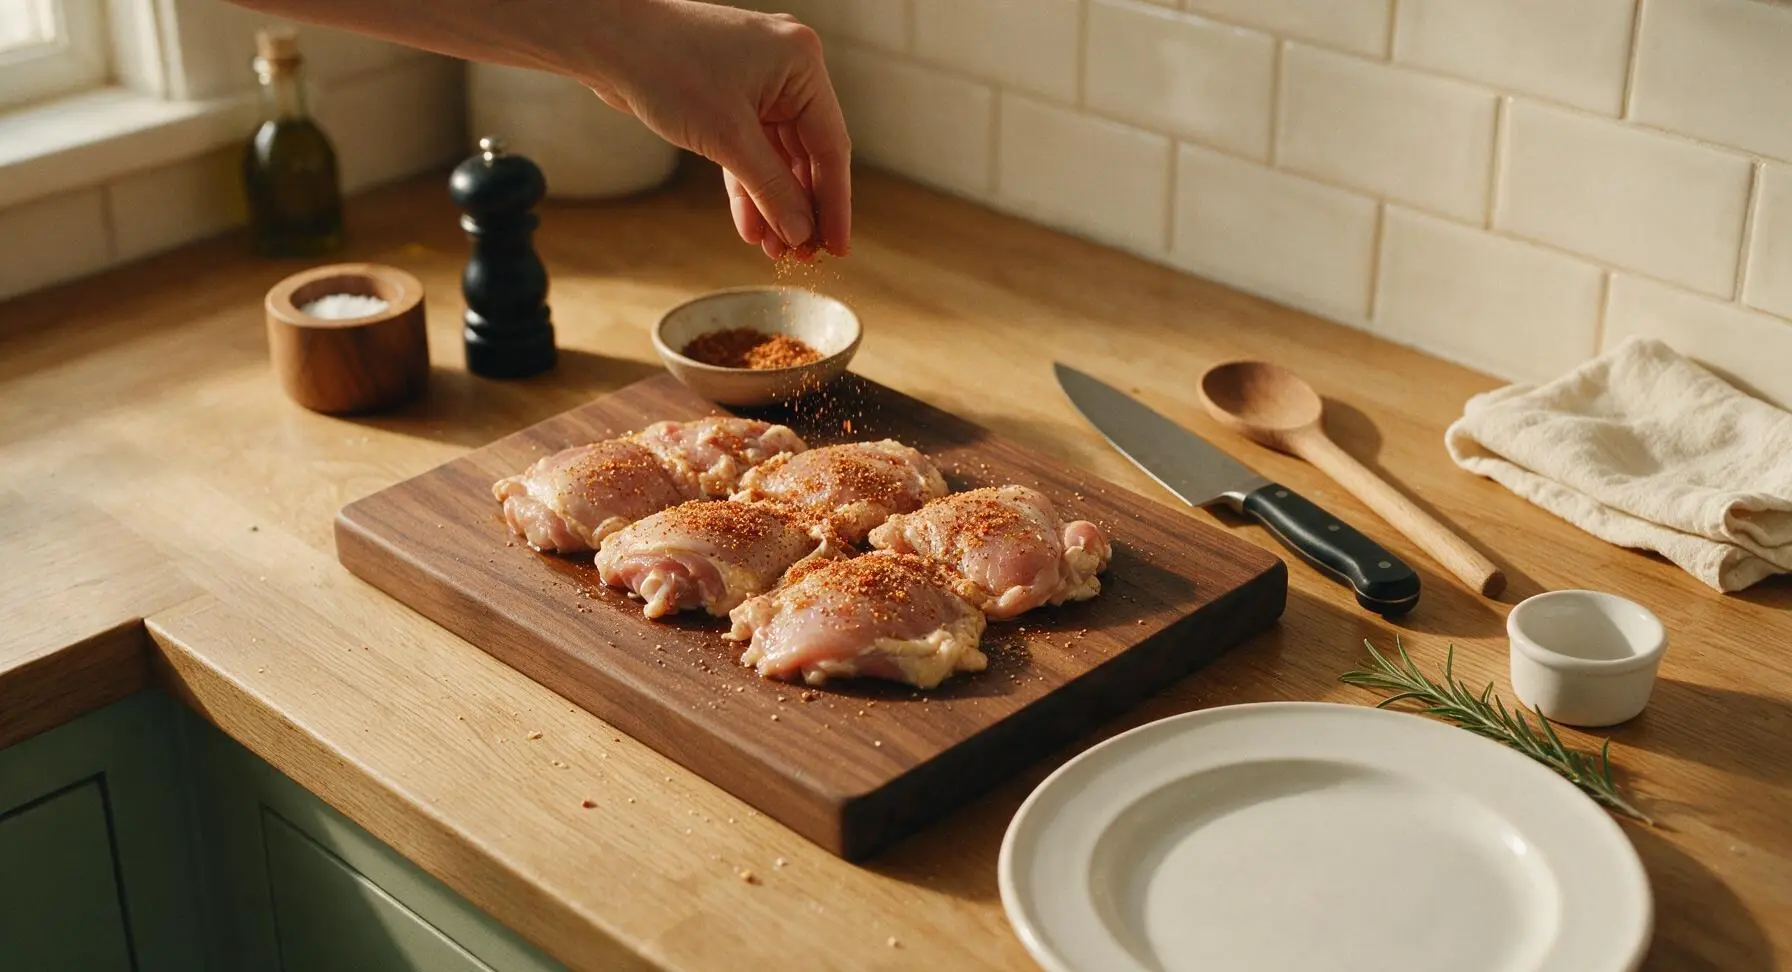
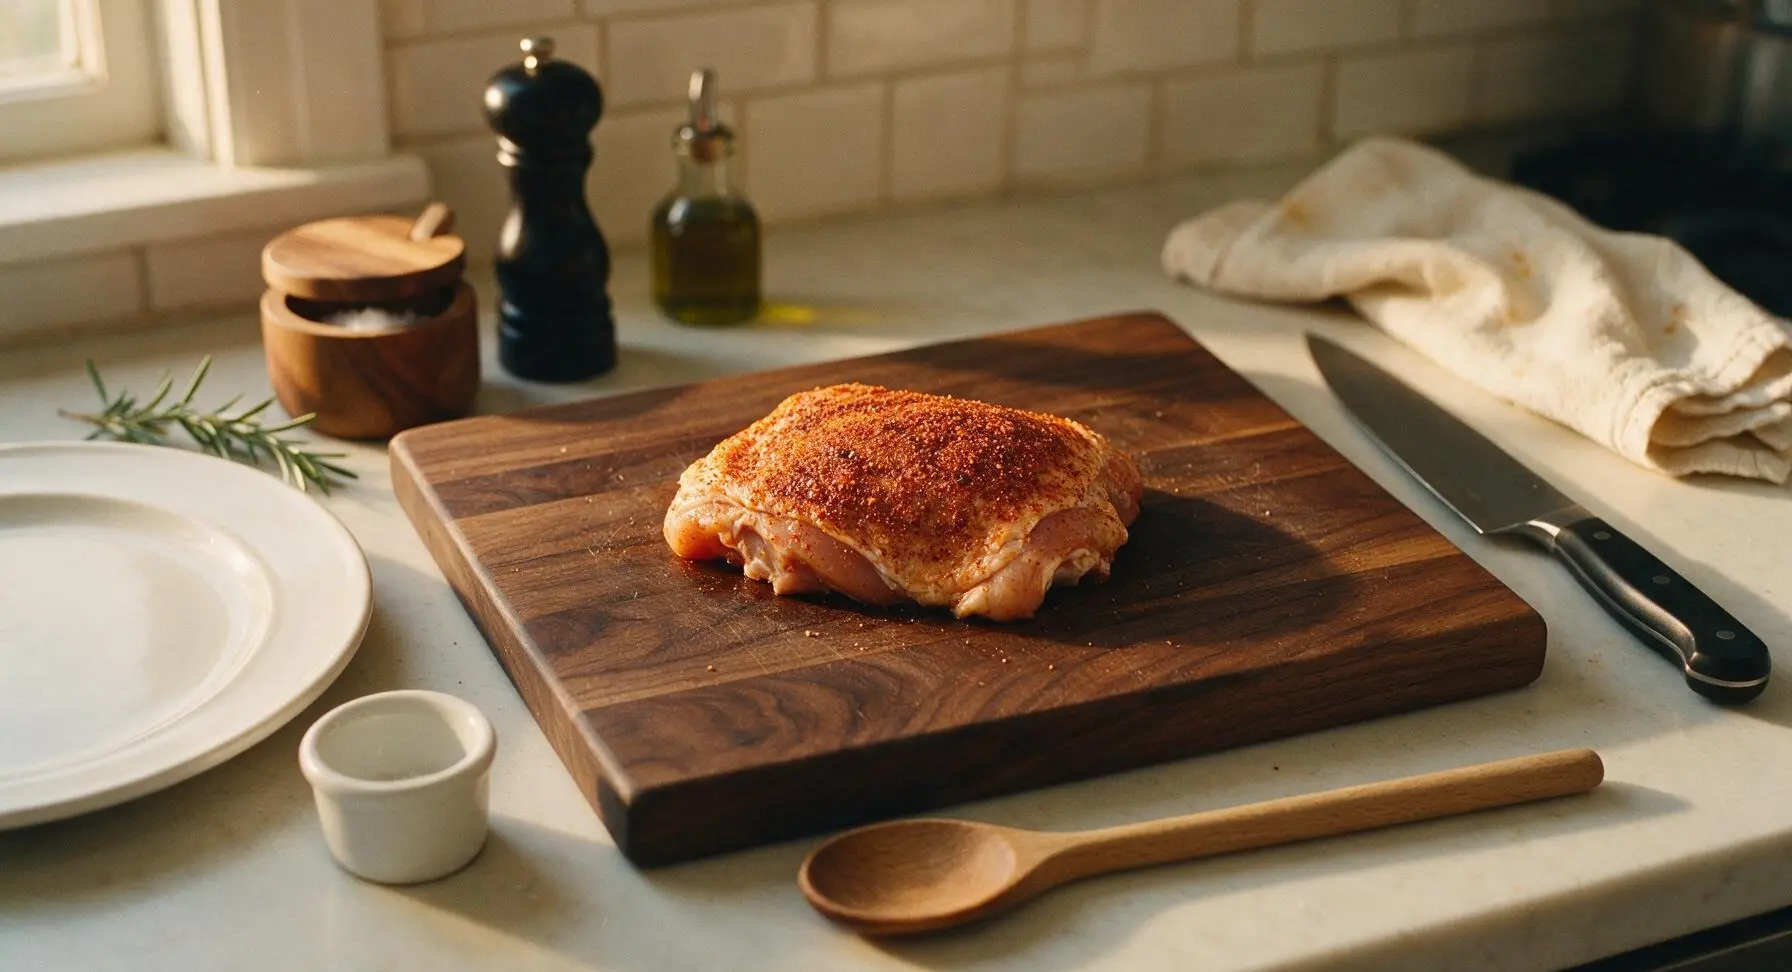
Step 4
step4:Season Chicken Evenly
Step 4
step4:Season Chicken Evenly
5

Arrange in Air Fryer

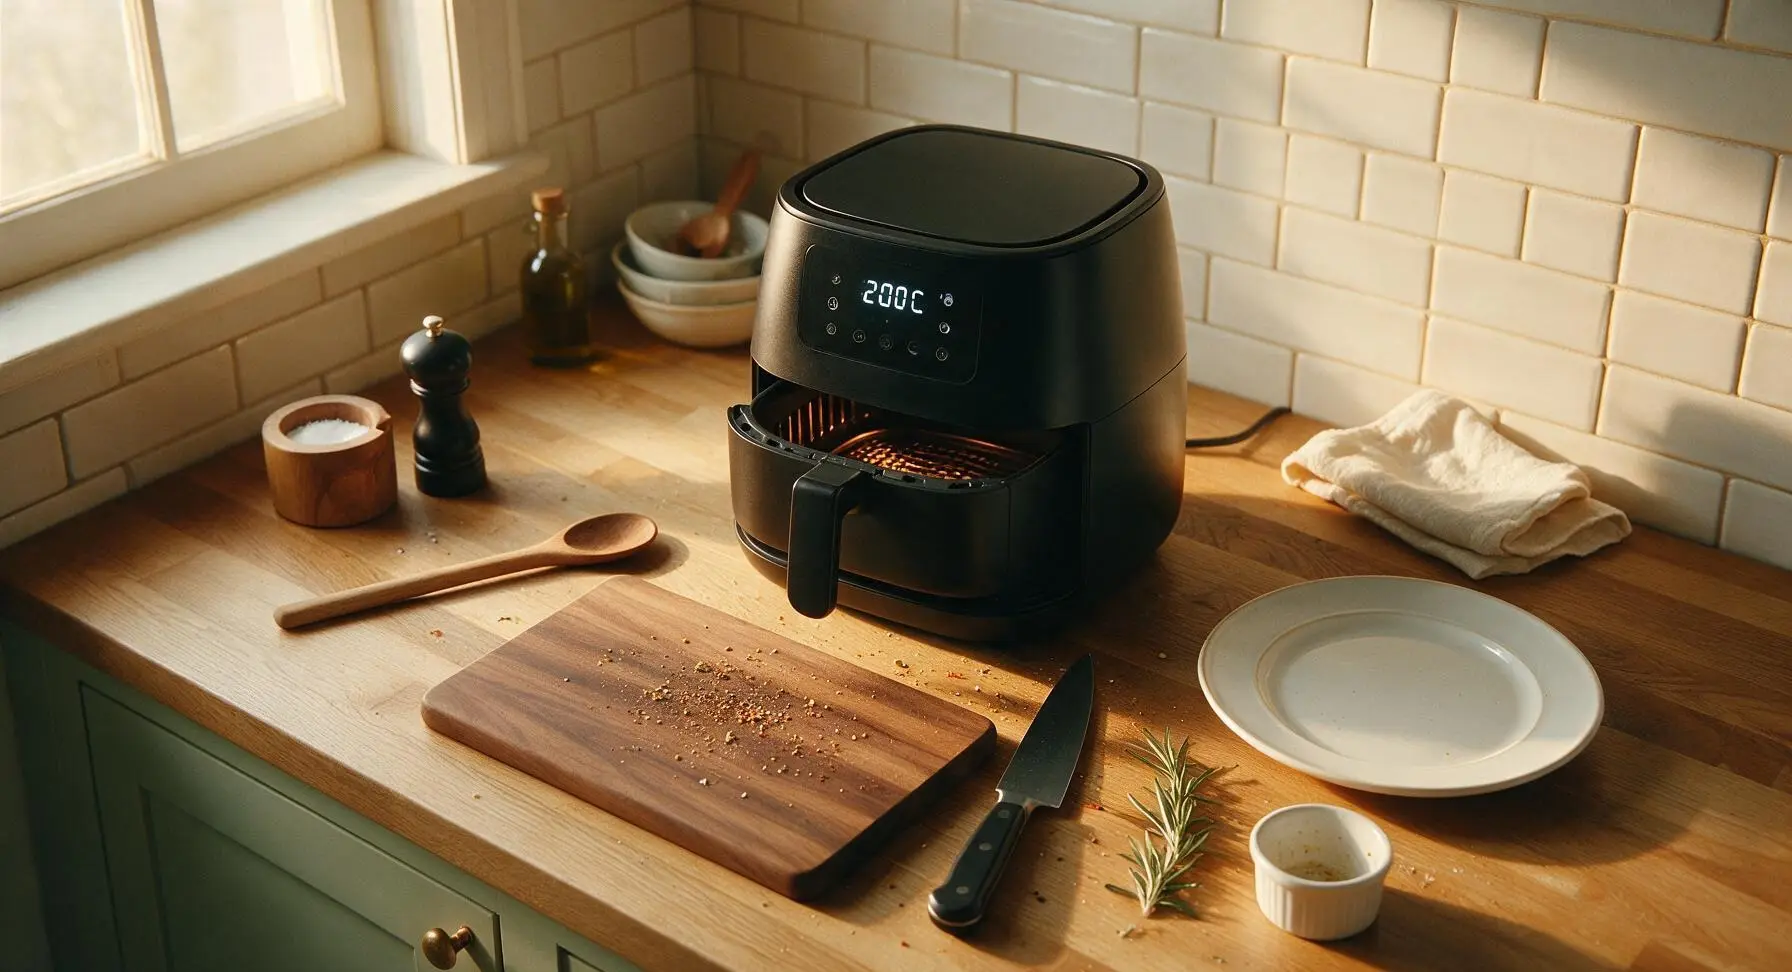
Pull the non-stick basket out from the matte black air fryer, resting it temporarily on the charcoal silicone mat. Arrange the seasoned chicken thighs in a single evenly spaced layer in the basket, skin-side up, leaving at least 1cm of space between each piece to allow unobstructed hot air circulation. Do not stack or overlap pieces, as trapped steam will prevent crisp skin. Slide the basket fully back into the air fryer and set the temperature to 200C (400F).
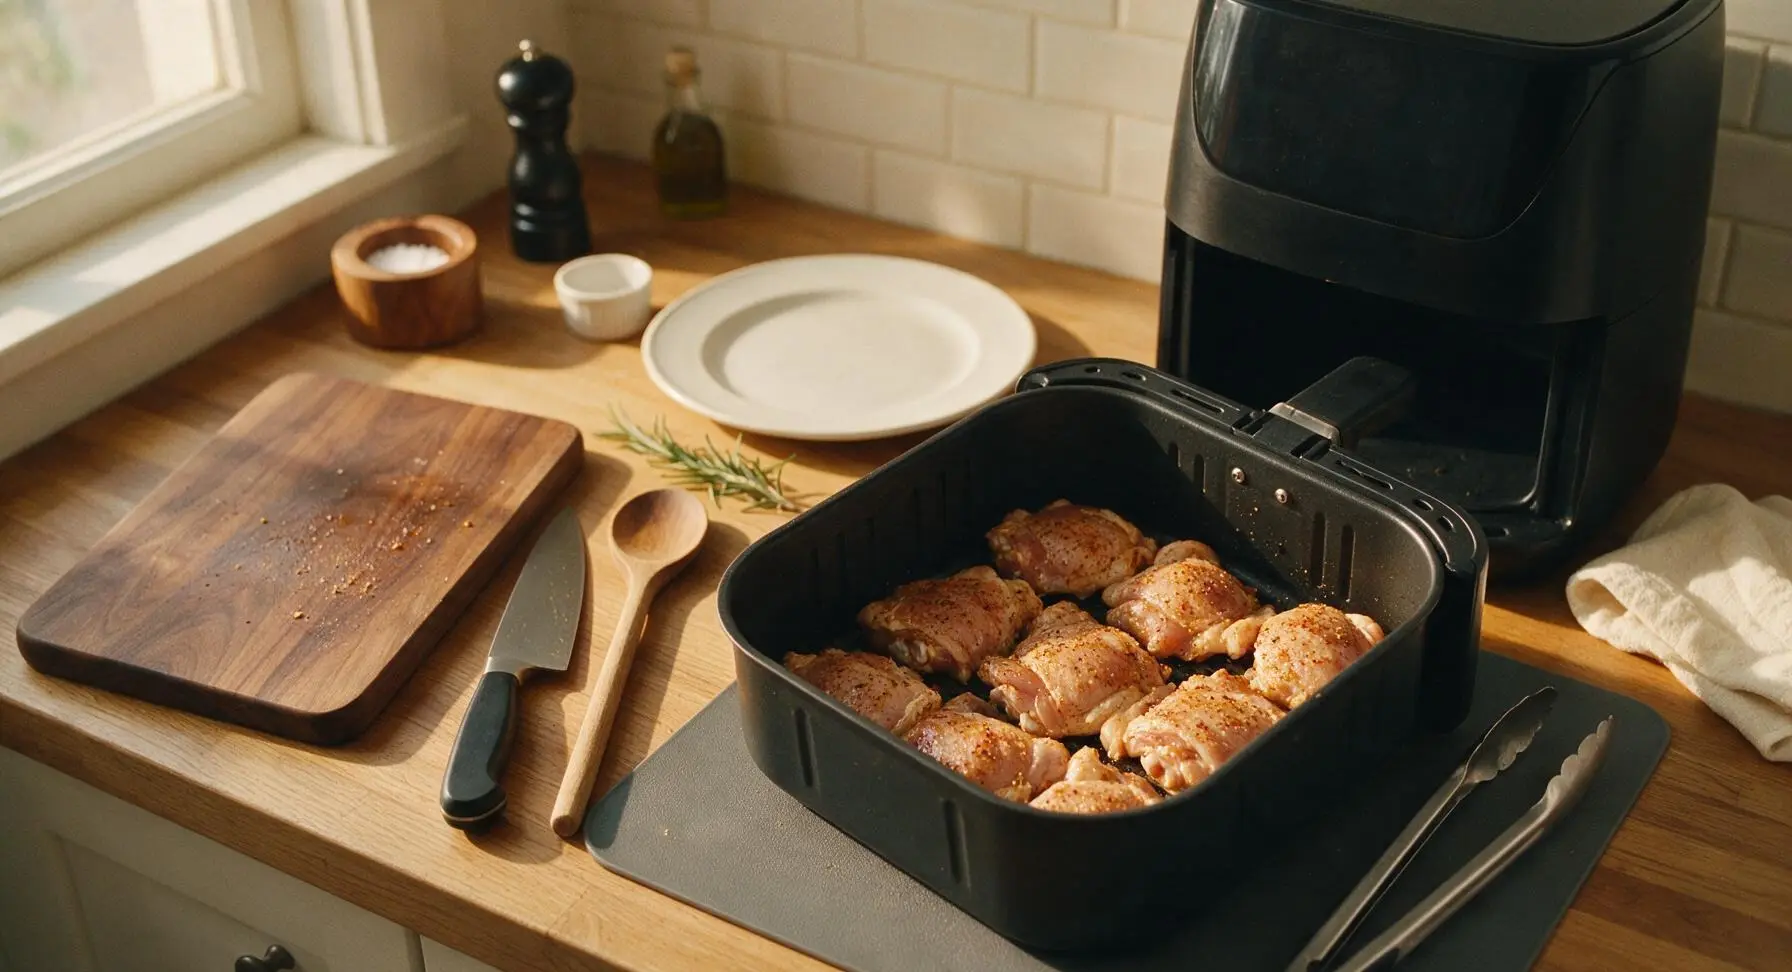
Step 5
step5:Arrange in Air Fryer
6

Air Fry First Stage

Cook the undisturbed chicken at 200C (400F) for 12 minutes. Do not open the air fryer basket during this time, as dropping the internal cavity temperature will slow fat rendering and crisping. During this stage, fat will begin to render out of the skin, and the top surface will turn a light golden color.
Step 6
step6:Air Fry First Stage
7

Flip Chicken Thighs

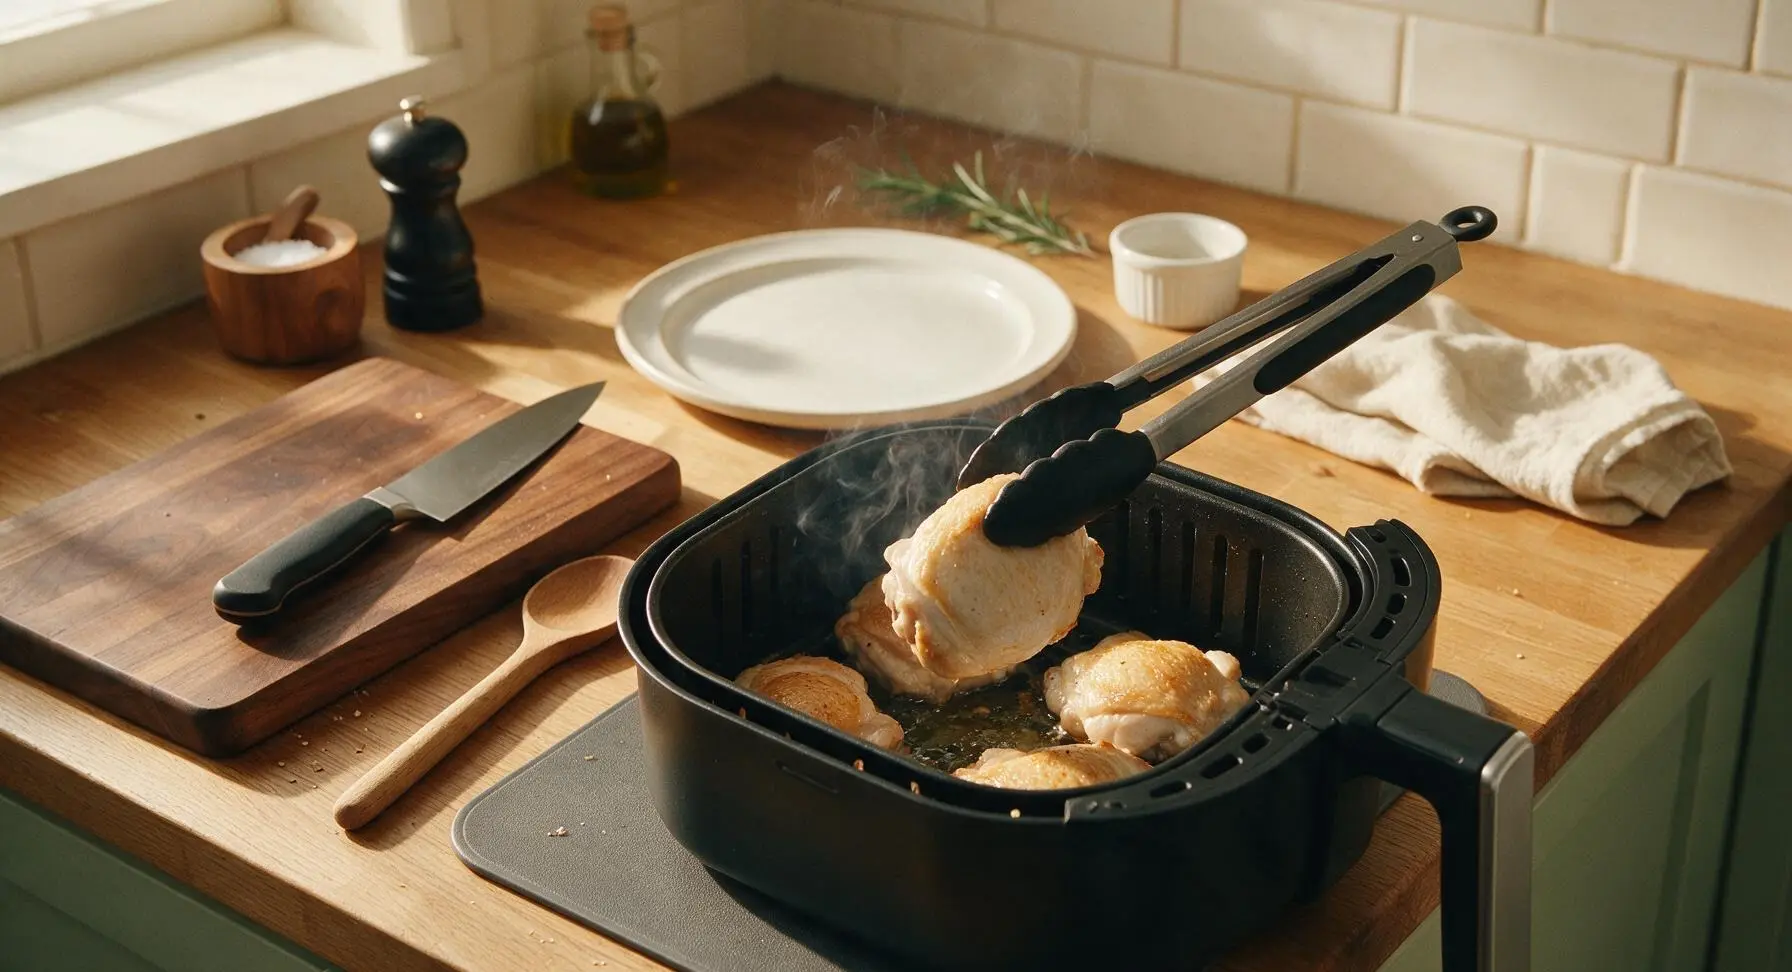
After the initial 12 minute cook time, carefully pull the hot air fryer basket out, resting it back on the silicone mat. Use the silicone-tipped tongs to flip each chicken thigh so the skin is now facing down against the non-stick basket surface. The cooked underside of the chicken will be opaque and light golden, with a small amount of clear rendered fat pooled in the bottom of the basket.
Step 7
step7:Flip Chicken Thighs
8

Finish Crisping Skin

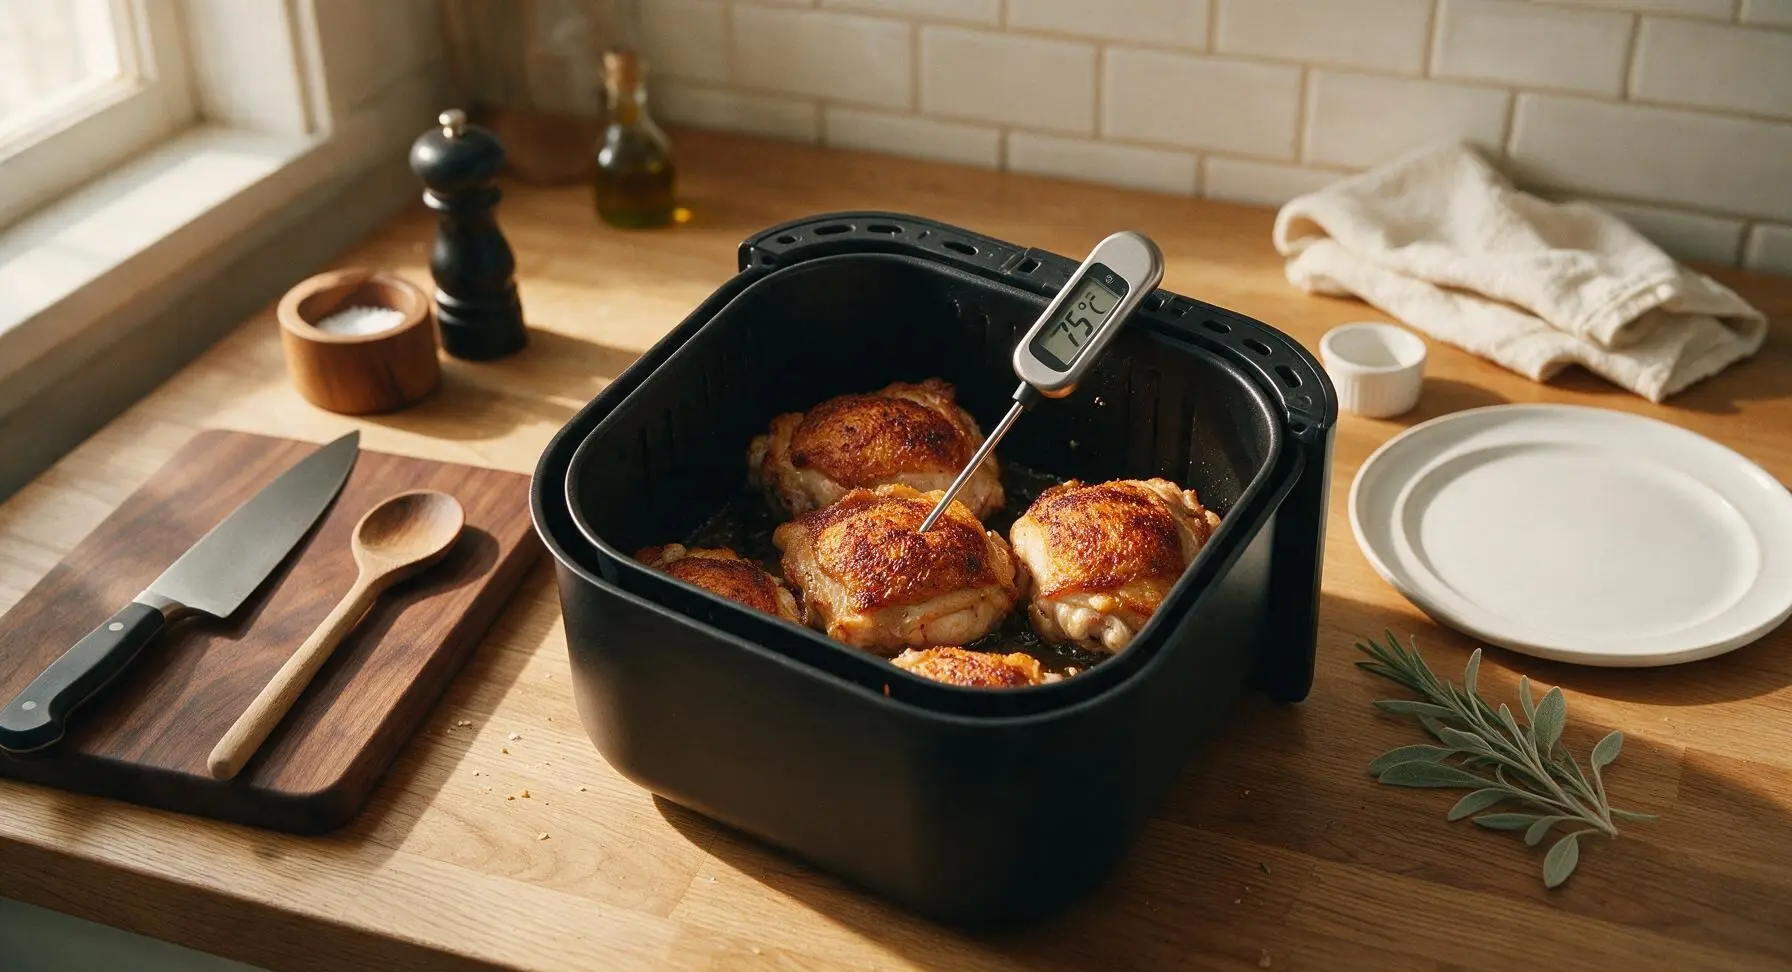
Slide the basket back into the air fryer and cook for a final 10 minutes at 200C (400F). When the timer expires, use the instant-read meat thermometer to confirm the thickest part of each thigh (not touching bone) reaches an internal temperature of 75C (165F). The skin, now pressed against the hot basket surface, will be deep golden, shatteringly crisp, and fully rendered of excess fat.
Step 8
step8:Finish Crisping Skin
9

Rest and Plate Chicken

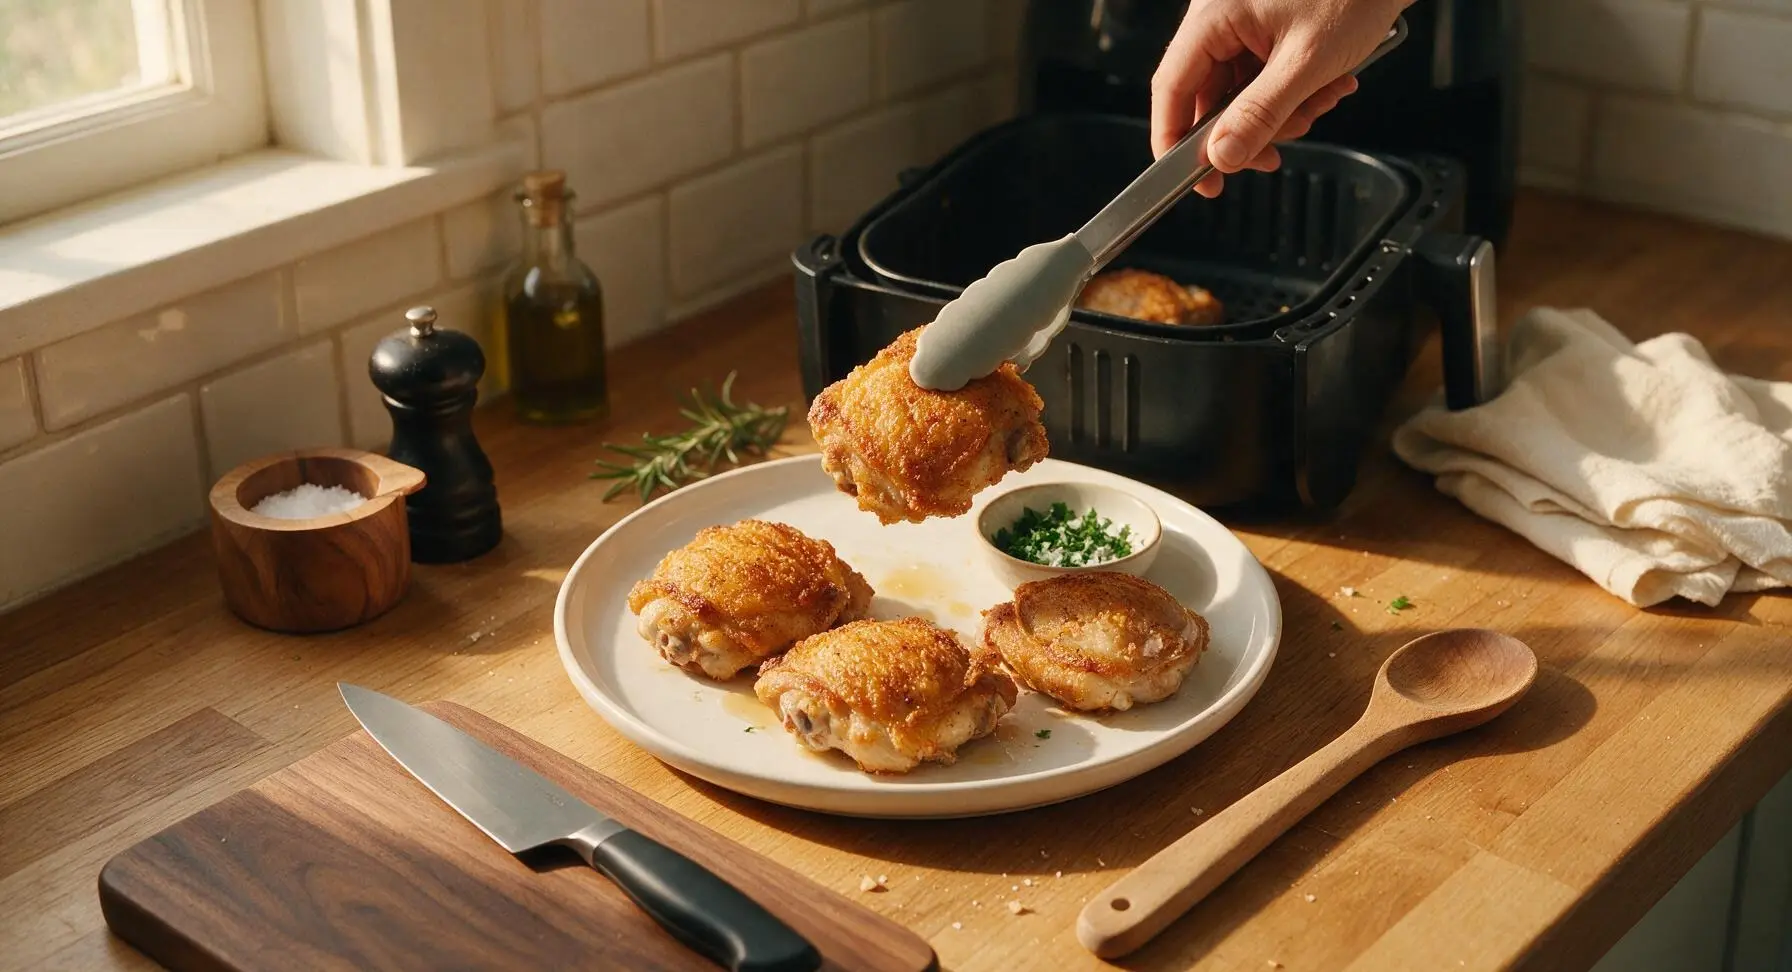
Use the silicone-tipped tongs to transfer the cooked chicken thighs from the air fryer basket to the cream speckled stoneware dinner plate. Let the chicken rest for 3 minutes to allow internal juices to redistribute, which prevents juice runoff when cutting or biting into the meat. Top with a light sprinkle of chopped fresh parsley and a pinch of flaky sea salt, and tuck a rosemary sprig on the plate for garnish. Serve with your preferred dipping sauce in the matching cream ramekin if desired.
Step 9
step9:Rest and Plate Chicken

Tips

1.Always pat chicken completely dry with paper towels before seasoning: any residual moisture on the skin will create steam in the air fryer, leading to rubbery, chewy skin instead of a shatteringly crisp texture. For extra-crisp results, you can leave uncovered chicken on a plate in the refrigerator for 1–2 hours before cooking to air-dry the skin further.
2.Never overcrowd the air fryer basket: leave at least 1cm of space between chicken thighs to allow unobstructed hot air circulation. If cooking for more than 4 people, work in batches rather than stacking pieces, as stacked chicken will steam instead of crisping.
3.Flip chicken skin-side down for the final 10 minutes of cook time: this presses the skin directly against the hot non-stick basket surface, crisping the entire skin evenly and eliminating the soggy skin patches that often occur when chicken cooks skin-up for the full duration. The thin oil coating prevents skin from sticking to the basket.


✨ You May Also Like

Main Course
🍜 United Kingdom

A showstopping classic of tender seared beef, savory mushroom duxelles, and crisp prosciutto wrapped in flaky golden puff pastry, baked to juicy perfection.

⏱️ 2 hours 1Main Course ★ 4.7
Main Course
🍜 India

Tender charred marinated chicken simmered in a rich, spiced creamy tomato sauce, this iconic Anglo-Indian curry pairs perfectly with basmati rice or warm naan.

⏱️ 50 minuteMain Course ★ 4.6
Main Course
🍜 Thailand

Classic tangy, sweet, and savory Thai stir-fried rice noodles with shrimp, tofu, and crunchy garnishes, balancing all five core Thai flavor profiles.

⏱️ 30 minuteMain Course ★ 4.5
Main Course
🍜 United Kingdom

Crispy golden beer-battered cod and fluffy double-fried chips, served with tangy tartar sauce and malt vinegar: the timeless, beloved British pub comfort classic.

⏱️ 45 minuteMain Course ★ 4.7
Main Course
🍜 Mexico

Smoky, chile-marinated pork tacos with caramelized pineapple, fresh cilantro, and lime: a beloved classic Mexican street food perfect for casual summer gatherings.

⏱️ 1 hour 45Main Course ★ 4.8
Main Course
🍜 United States

Crunchy Fritos corn chips layered with savory beef chili and melted cheddar, topped with cool, zesty fixings for a beloved, cozy Tex-Mex comfort food.

⏱️ 35 minuteMain Course ★ 4.8

air fry chicken time:Frequently Asked Questions

1.Do I have to use bone-in, skin-on chicken thighs for this recipe, or can I use boneless, skinless cuts? ▾
Bone-in, skin-on thighs are ideal for that signature shatteringly crisp skin and juicy, evenly cooked meat this recipe promises, but you can swap boneless, skinless thighs if you prefer. Just cut total cook time by 4 to 6 minutes, verify a 165°F internal temp, and note you won’t get that crispy skin without the skin layer.
2.Why is my chicken skin coming out soggy instead of crispy, even when I follow the listed cook time? ▾
The number one culprit is excess moisture on the chicken skin! Pat skin completely dry with paper towels before seasoning, don’t overcrowd the air fryer basket (leave ½ inch of space between thighs for air flow), and stick to the light, even olive oil coating called for—too much oil will make skin soggy instead of crisp.
3.What exact temperature and cook time should I use for perfectly juicy, not overcooked thighs? ▾
Cook seasoned thighs at 400°F for 28 to 32 minutes total, flipping them halfway through cook time to make sure skin crisps evenly on all sides. Always verify doneness with a meat thermometer stuck into the thickest part of the thigh (not touching bone) — it should read 165°F before resting.
4.Can I mix in other seasonings beyond the basic salt, pepper, and garlic powder in the recipe? ▾
Absolutely! That simple seasoning base is a perfect blank canvas for custom flavors. Try adding smoked paprika, onion powder, dried thyme, a pinch of cayenne for heat, or a light sprinkle of parmesan the last 2 minutes of cooking. Skip heavy, wet sauces until the last 3 to 4 minutes to avoid soggy skin.
5.Do I need to preheat my air fryer before adding the chicken thighs? ▾
Preheating is highly recommended for the crispiest, most even results, just like you’d preheat an oven for roasted chicken. Preheat your air fryer to 400°F for 3 to 5 minutes before adding seasoned thighs. If you skip preheating, add 2 to 3 minutes of total cook time to make up for the lower starting temperature.
6.How should I store leftovers, and how do I reheat them without making the skin rubbery? ▾
Store fully cooled leftover chicken thighs in an airtight container in the fridge for up to 4 days. Skip the microwave for reheating—it turns crispy skin rubbery fast. Instead, pop thighs back in the air fryer at 375°F for 4 to 6 minutes until heated through, and the skin will crisp right back up to fresh-cooked texture.
7.Can I cook these chicken thighs straight from frozen, or do I need to thaw them first? ▾
For the most even cook and crispiest skin, it’s best to thaw thighs fully in the fridge overnight before cooking. If you’re in a weeknight pinch, cook frozen thighs at 380°F for 10 minutes first to thaw the surface, pat dry, season, then finish at 400°F for 22 to 26 minutes, checking for 165°F internal temp.

Comments (18)

3 days ago

Made these last night for taco night, chopped the thighs up to put in street tacos and *chef’s kiss*. My kids loved it! The crisp held up even when I loaded them up with salsa and crema. So quick too, perfect for weeknights when I don’t have time to roast in the oven for 45 minutes.

1 week ago

Came out great! I added a little extra paprika and garlic powder to the seasoning rub and it slapped. Cook time was exactly spot on for my 6 quart air fryer, no undercooked spots, no burnt edges. Super easy.

5 days ago

As someone who burns literally everything I try to cook, this was foolproof! I didn’t even have to adjust the temp or time, just threw the seasoned thighs in and came back to perfectly crispy chicken. Saved me from ordering takeout for the third night in a row lmao

1 week ago

OMG, I brought a double batch of these to our neighborhood block party last weekend and people were asking me for the recipe before I even set the platter down! The skin stayed crispy even after sitting out for 45 minutes, which never happens with oven-baked thighs. Total potluck MVP move.

2 weeks ago

Great meal prep recipe! I made 8 thighs on Sunday to portion out for lunches all week, and even reheated in the air fryer for 3 minutes the skin gets crispy again, no sad rubbery chicken. 10/10 for anyone who hates boring meal prep proteins.

2 hours ago

Wait, do I need to pat the chicken dry first? I tried air fryer thighs a few months ago and the skin was so rubbery I almost gave up entirely. Hoping this one works better because 22 minute cook time is a dream for chaotic dinner nights.

30 minutes ago

Great question! Patting the chicken skin completely dry with paper towels before seasoning is one of the most important steps to get that ultra crispy skin—no moisture = no sogginess! Let us know how it turns out when you give it a try :)

yesterday

Game. Changer. I tossed mine with a little cayenne and honey the last 2 minutes of cook time for a hot honey twist and it was unreal. My partner said it’s better than the fried chicken we get at our local dive bar, which is high praise.

2 hours ago

Oh the hot honey twist sounds insane! I’m making these tomorrow and definitely stealing that idea, thank you for sharing!

30 minutes ago

Just got my first air fryer last week and this is the first recipe I’ve made that didn’t come out weirdly dry! The skin was shatteringly crisp and the meat was so juicy, I was shocked. I was convinced I’d messed up the seasoning but it was perfect even with just salt, pepper, and garlic powder.

just now

Love to hear this! So glad this recipe worked out as a win for your new air fryer—once you nail crispy thighs, the air fryer recipe world is your oyster!

2 days ago

So happy this is naturally gluten free! I didn’t have to swap any weird ingredients, just used my regular seasoning blend and it turned out perfect. My whole family has gluten sensitivities so quick weeknight recipes like this are a lifesaver.

yesterday

Same here! It’s so hard to find easy chicken recipes that don’t call for breading or weird flour mixes, this one is going on our permanent list for sure.

5 minutes ago

Wait, do I need to flip these halfway through? My air fryer tends to cook super unevenly on the top rack so I usually flip everything but wanted to check if that messes up the crisp.

just now

Great question! We do recommend flipping halfway through the cook time to make sure both sides crisp evenly, especially if your air fryer runs hot or has uneven airflow. It won’t mess up the skin at all as long as you’re gentle with the flip!

2 weeks ago

Made these for my dad’s birthday dinner since he’s obsessed with crispy chicken and he raved about them the whole meal. Said they tasted like the fried chicken his grandma used to make but without all the greasy mess. Total hit.

1 week ago

Aww that’s so sweet! I made these for my grandpa’s visit last month and he said the exact same thing! Something about that crispy skin hits different for that generation, right?

3 days ago

Perfect for low carb/keto eating! No breading, no weird fillers, just crispy juicy chicken. I paired mine with roasted broccoli and it was the most satisfying low effort dinner I’ve made in months. SO good.

2 days ago

So glad this fits your low carb needs! It’s such a versatile base that pairs with literally any side, from veggies to rice to salads, so it works for so many different eating styles.

yesterday

Okay I need to vent—every time I make air fryer chicken thighs the skin is chewy and rubbery no matter what I do. I’ve tried higher temp, longer cook time, oil, no oil, nothing works. Is this recipe actually going to give me crispy skin? I’m this close to giving up on air fryer chicken entirely.

2 hours ago

Girl I was in the exact same boat! I made these last week and the skin was literally so crispy it crunched when I bit into it. The trick is patting them SO dry, like, use 3 or 4 paper towels per thigh, don’t be shy. Don’t douse them in oil either, just a light spray.

30 minutes ago

Couldn’t have said it better! Dry skin is non-negotiable for that crisp, and a light coating of oil (not drenching) helps the seasoning stick and the skin render properly. Give it a shot, we promise it works!

5 days ago

How well do these reheat? I usually make 10-12 thighs at a time for work lunches and hate when the skin gets all rubbery after a minute in the microwave. Would these hold up for meal prep?

3 days ago

Don’t microwave them! I reheat mine in the air fryer at 375 for 3 minutes and the crisp comes right back, even after 4 days in the fridge. I do this every week and they’re just as good as day 1.

2 days ago

Jess is totally right! Microwaving will make the skin soggy, but a quick 2-3 minute blast in the air fryer (or even a toaster oven) brings back all that crispness while keeping the meat juicy. They hold up great for 4-5 days in the fridge for meal prep!

2 hours ago

Wait a second—can I make these with boneless skinless thighs? I know the crispy skin is the whole point but my kid refuses to eat anything with bones in it and I don’t want to waste a whole pack of chicken testing it out.

30 minutes ago

I did this last week! I used boneless skinless thighs, sprayed them with a little oil, added a tiny bit of panko for crunch, and cooked them for 16 minutes instead of 22 and they came out perfect. My 5 year old ate two!

5 minutes ago

Love that hack! Boneless thighs work great, just reduce the cook time to 15-18 minutes depending on thickness so they don’t dry out. The panko trick is chef’s kiss for extra crunch without the skin!

30 minutes ago

I’m literally 19 and have never cooked chicken in my life, how hard is this actually? The easy difficulty tag is making me feel like I can do it but I’m scared I’ll give myself salmonella lmao. Do I need a meat thermometer?

5 minutes ago

Dude you got this! I’m a sophomore in college and I made these last week in my tiny dorm air fryer, no thermometer needed. Just make sure the juices run clear when you cut into the thickest part, no pink = good. It’s so easy I promise.

just now

Kai is spot on! This recipe is designed for total beginners, so you’ve absolutely got this. If you do have a meat thermometer, chicken is safe at 165°F internal temp, but if you don’t, checking for clear juices and no pink in the center works perfectly. You’ve got this!

2 weeks ago

Made these for our Super Bowl watch party last month and they were gone in 10 minutes flat! I served them with ranch and buffalo dip on the side and people were going back for thirds. Way better than ordering a bunch of greasy wings, honestly.

1 week ago

Wait that’s such a good idea! I was trying to figure out what to make for our fantasy football draft party next month and this is perfect. Way cheaper than buying wings too.

5 days ago

We love these for game day! You can even toss them in buffalo sauce right when they come out of the air fryer for a wing-adjacent vibe that’s way juicier than traditional wings. Perfect for a crowd!

2 hours ago

Is the seasoning blend in the recipe actually good? I usually hate recipe seasoning because it’s either too bland or way too salty, so I’m wondering if I should adjust before making these tonight. Don’t want to ruin a whole pack of thighs!

30 minutes ago

I’m super sensitive to salty food and I thought the seasoning was perfect as written! I did add a little extra smoked paprika because I love that smoky flavor, but the salt level was totally on point, no adjustments needed.

5 minutes ago

So glad the seasoning worked for you, Hank! We designed the blend to be well-balanced so it’s not too salty or bland right out the gate, but it’s totally customizable—add more paprika, a little cayenne, some Italian seasoning, whatever sounds good to you! Enjoy your dinner tonight.



