
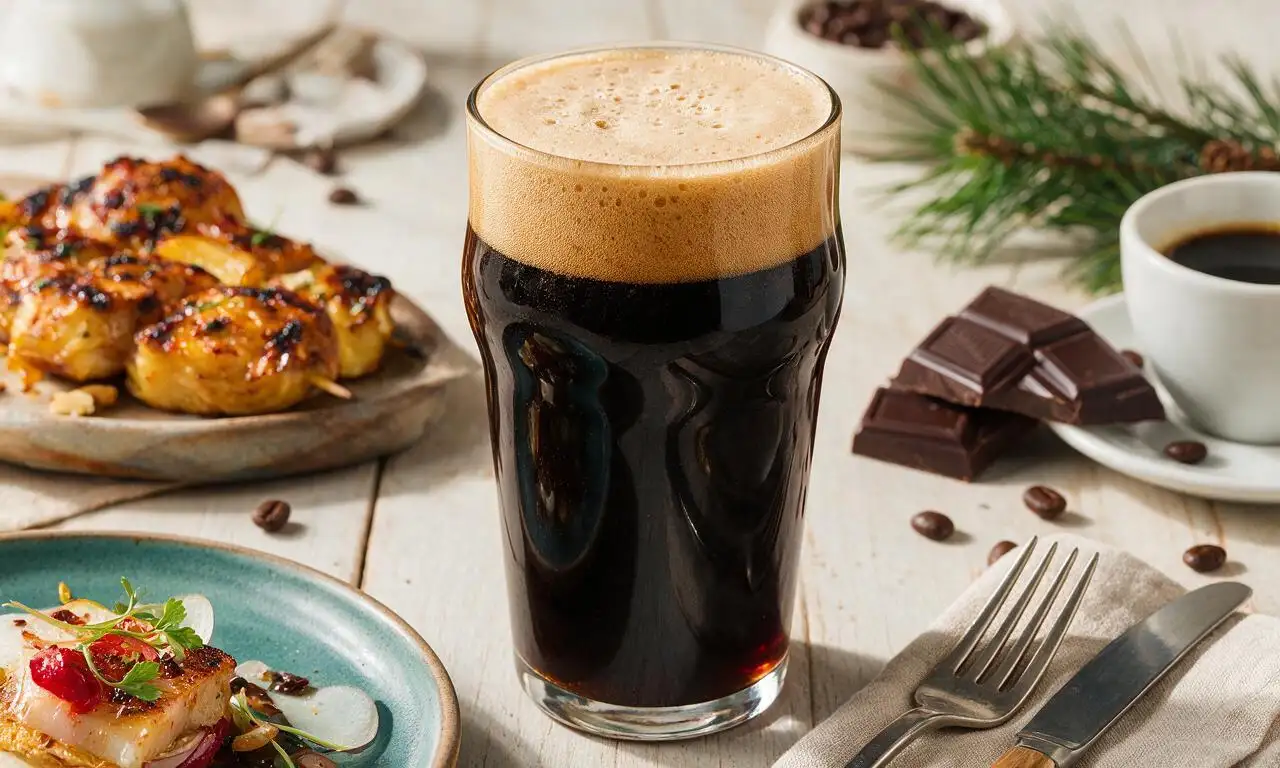
American Porter

title 1
American Porter
⏱️ cook time 2 hours active prep, 3 weeks total from brew to serve
🍽️ servings 8
⚡ Difficulty medium

intro

A smooth, roasty dark American craft beer with rich chocolate, coffee, and subtle piney hop notes, balanced to pair perfectly with hearty grilled foods.

Ingredients

Crushed 2-row pale malt 1.1 kg (2.4 lbs)
Crushed chocolate malt 113 g (4 oz)
Crushed 60L crystal malt 57 g (2 oz)
Crushed black patent malt 28 g (1 oz)
Cascade hop pellets 14 g (0.5 oz)
American ale yeast (US-05) 5 g (1 standard packet)
Corn sugar (priming sugar) 28 g (1 oz)
Filtered water 4.5 L (1.2 gallons)

Steps

1

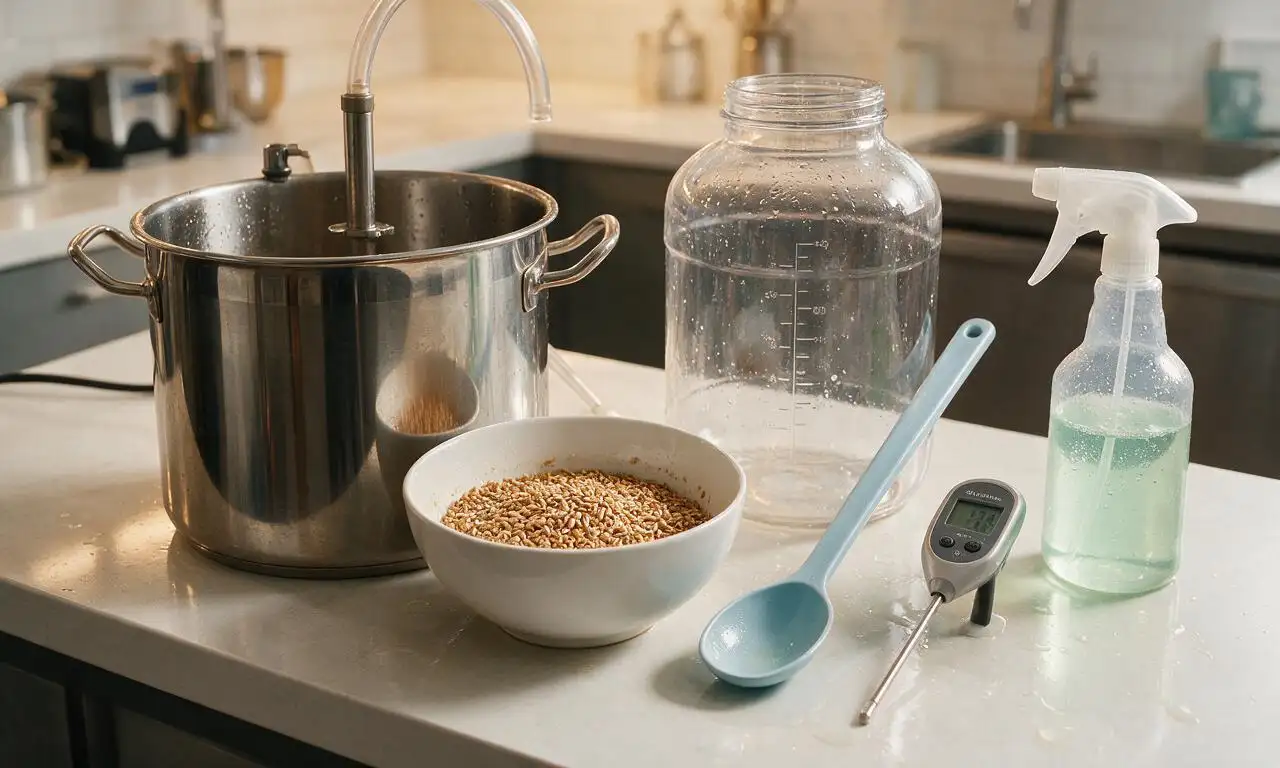
Sanitize Brewing Equipment

First, thoroughly wash all brewing equipment (5 L stainless steel brew pot, 4 L glass fermenter, airlock, stirring spoon, thermometer, siphon) before mixing 1 tablespoon of no-rinse brewing sanitizer per 4 L of cool water. Soak all equipment that will touch cooled beer for 2 full minutes at room temperature to eliminate wild yeast and bacteria that cause off-flavors.
Step 1
step1:Sanitize Brewing Equipment
2

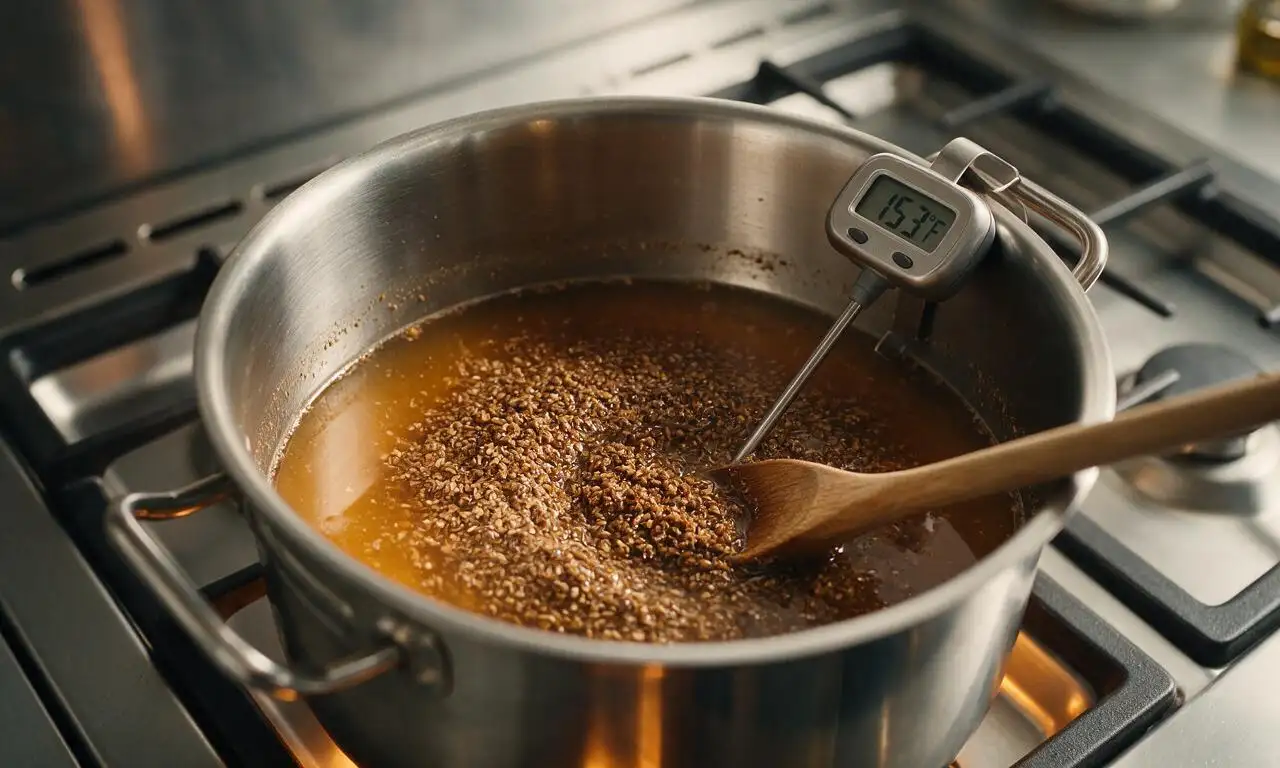
Mash the Grain Bill

Heat 3.8 L (1 gallon) of filtered water in the brew pot to 67°C (153°F) over medium-low heat. Add all crushed malts (2-row pale, chocolate, crystal, black patent) to the water, stirring thoroughly to break up dry clumps. Hold the temperature steady at 65-68°C (149-154°F) for 60 minutes, adjusting heat to low as needed, to convert grain starches into fermentable sugar.
Step 2
step2:Mash the Grain Bill
3

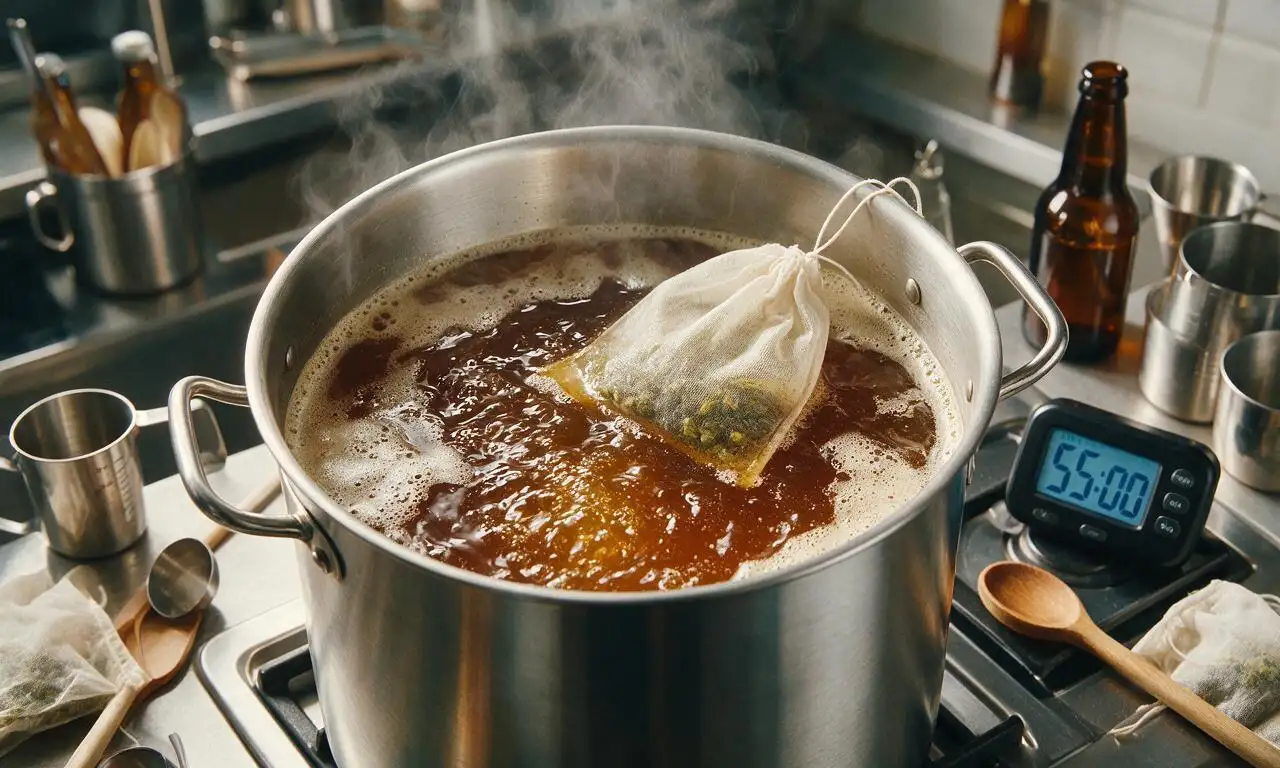
Boil Wort and Add Hops

After the 60-minute mash, strain out the grains and raise stovetop heat to high to bring the sweet amber liquid (wort) to a gentle rolling boil (100°C/212°F). Once boiling, add 7 g (0.25 oz) of Cascade hops, adjust heat to medium-high to prevent boil-overs, and set a timer for 55 minutes. When the timer expires, add the remaining 7 g (0.25 oz) of Cascade hops, and boil for 5 final minutes for a total 60-minute boil.
Step 3
step3:Boil Wort and Add Hops
4

Cool Wort and Pitch Yeast

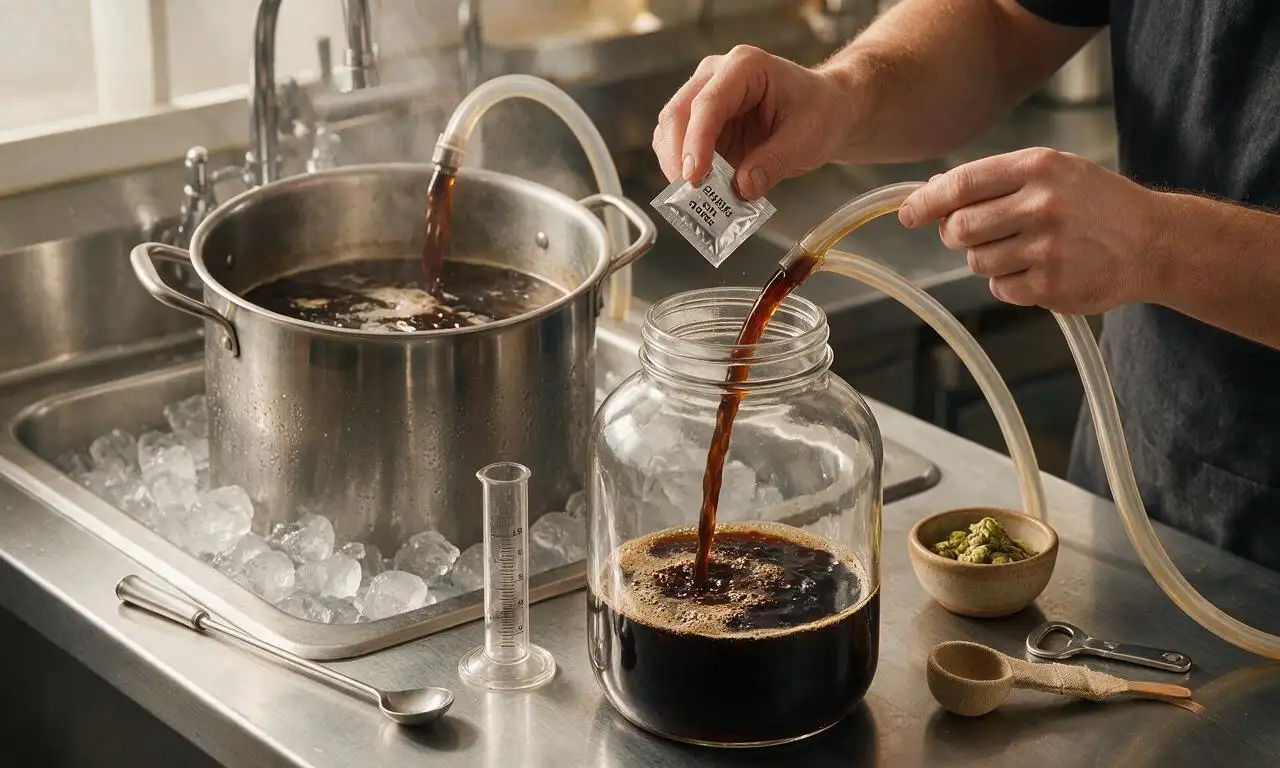
Turn off heat immediately after the boil ends. Set the covered brew pot in a kitchen sink filled with ice water to rapidly cool the wort to 21°C (70°F), which takes approximately 20 minutes. Pour the cooled wort into the sanitized fermenter, top up with extra filtered water to reach 3.8 L (1 gallon) total volume, then sprinkle the full 5 g packet of American ale yeast over the wort surface. Seal the fermenter, fill the attached airlock with sanitizer, and move the fermenter to a dark space held at 18-22°C (65-72°F).
Step 4
step4:Cool Wort and Pitch Yeast
5

Ferment the Porter

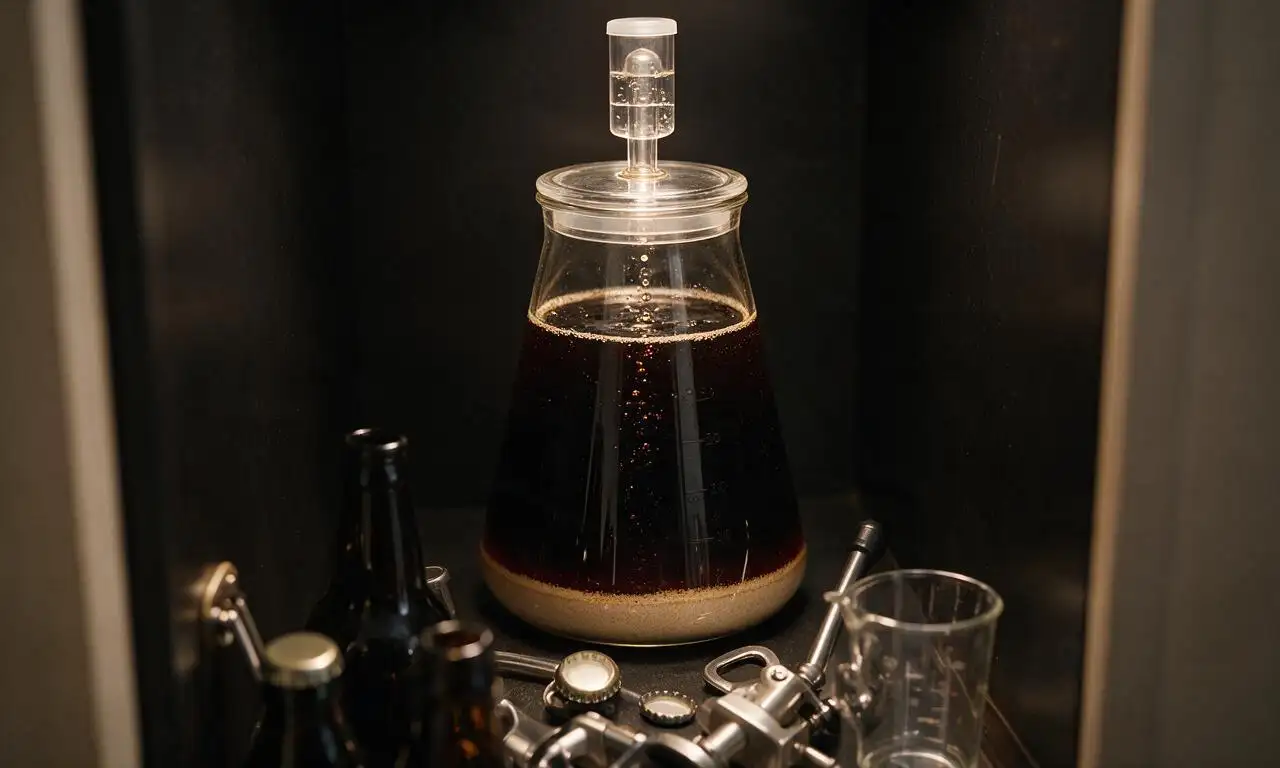
Leave the sealed fermenter undisturbed in the dark, temperature-stable space for 14 full days. Bubbles will rise through the airlock for the first 3-7 days as yeast converts sugar to alcohol and carbon dioxide; do not open the fermenter during this period to avoid contamination. Fermentation is complete when airlock bubbling stops entirely, the beer appears dark and clear, and a thin pale layer of yeast sediment settles at the fermenter bottom.
Step 5
step5:Ferment the Porter
6

Bottle and Carbonate

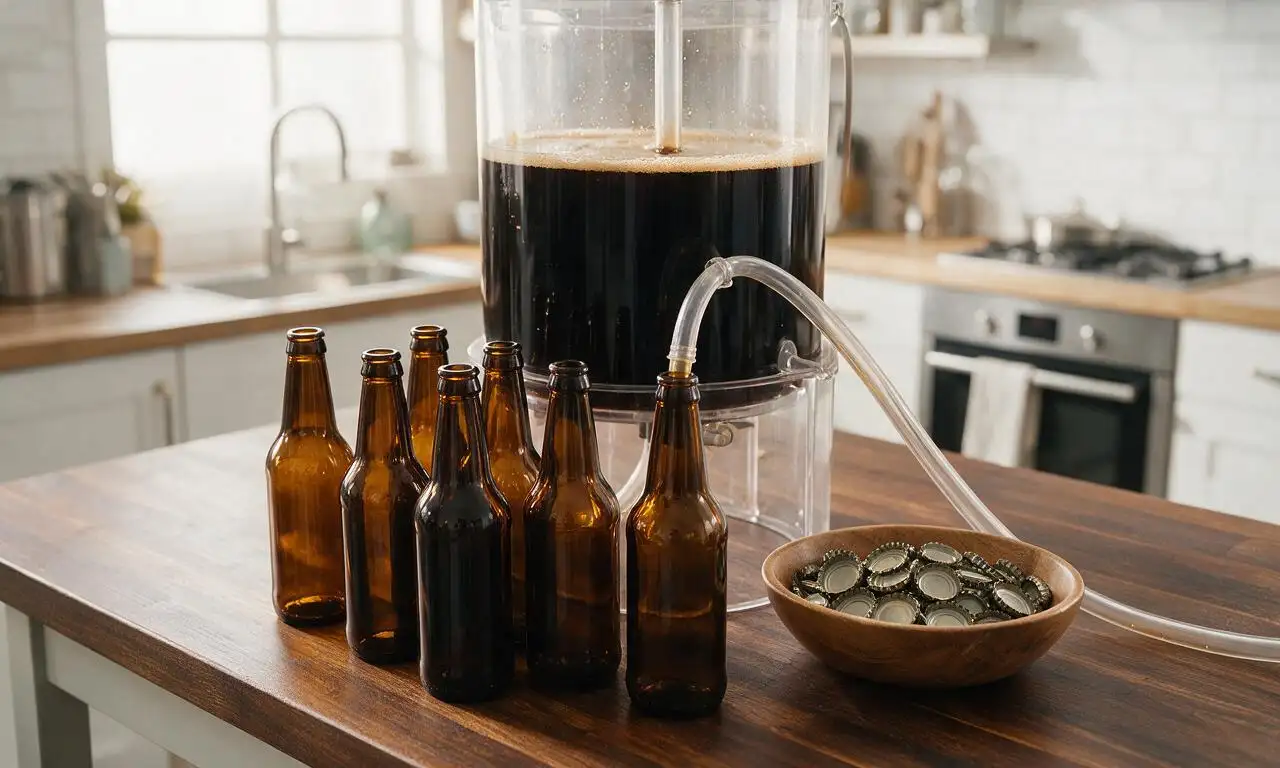
Boil 28 g (1 oz) of corn sugar in 120 ml (0.5 cup) of water for 5 minutes over high heat, then cool the sugar solution to 21°C (70°F) and add it to a sanitized bottling bucket. Siphon the fermented porter into the bucket, stirring gently to evenly distribute the priming sugar. Fill sanitized 355 ml (12 oz) amber glass bottles, leaving 2.5 cm (1 inch) of headspace in each, then seal with sanitized metal bottle caps. Store sealed bottles at room temperature (18-22°C/65-72°F) for 7 days to allow natural carbonation.
Step 6
step6:Bottle and Carbonate
7

Chill and Serve

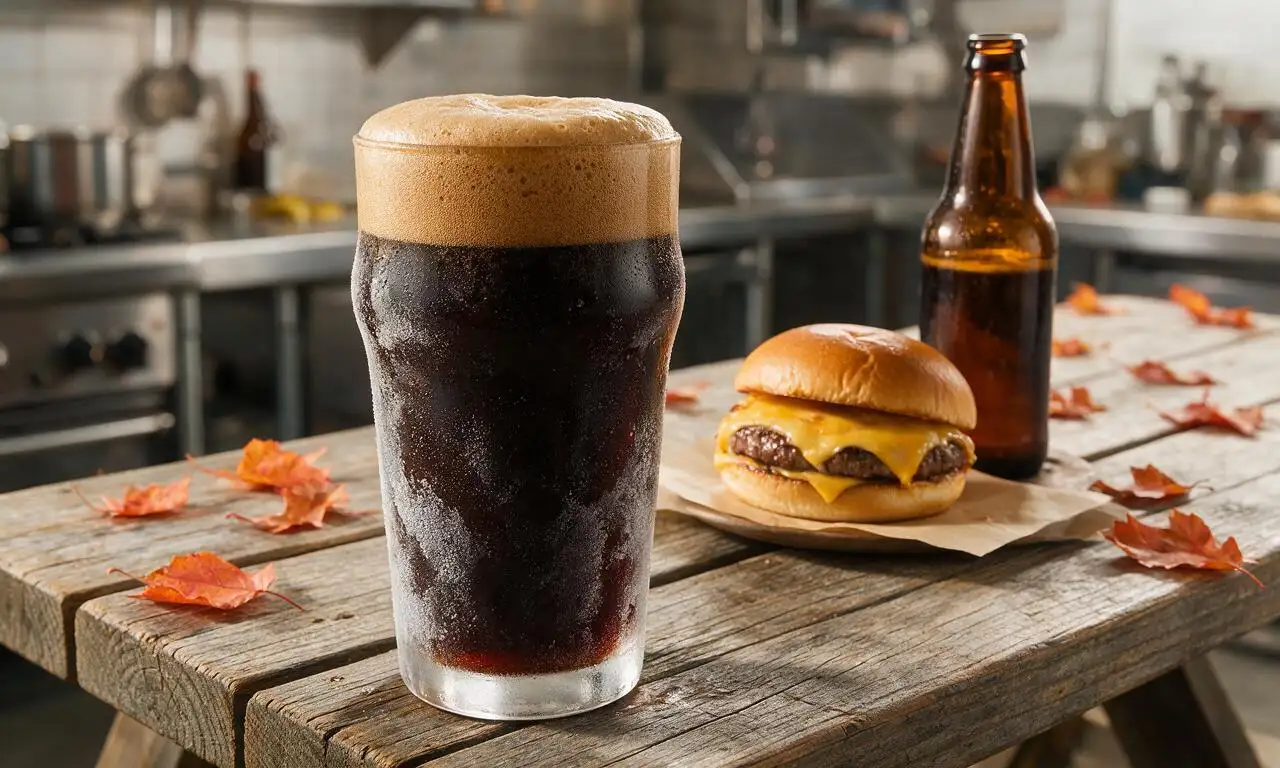
After 7 days of bottle carbonation, move bottles to a refrigerator set to 4°C (40°F) to chill for a minimum of 24 hours before serving. Pour the porter slowly into a pint glass, leaving the thin layer of yeast sediment at the bottom of the bottle to keep the beer clear. Serve with grilled smoked meats, sharp cheddar, or dark chocolate for ideal flavor pairing.
Step 7
step7:Chill and Serve

Tips

1.Sanitize every single surface that will touch cooled beer or wort — even a tiny amount of bacteria from unwashed hands or equipment can create sour, off-flavors that ruin an entire batch.
2.Avoid large temperature swings during fermentation; temperatures above 24°C (75°F) will cause the yeast to produce harsh, solvent-like off-flavors that disrupt the porter’s smooth, roasty balance.
3.For an extra coffee-forward flavor variation, add 14 g (0.5 oz) of cold-brewed black coffee to the bottling bucket when mixing in priming sugar to add rich coffee notes without extra bitterness.


✨ You May Also Like

Drinks & Beverages
🍜 Mexico

A bright, balanced tequila-based cocktail with zesty fresh lime, smooth orange liqueur, and a signature salt rim, perfect for warm summer sipping.

⏱️ 5 minutesDrinks & Beverages ★ 4.9
Drinks & Beverages
🍜 United States

Thick, creamy, nostalgic classic vanilla milkshake with a rich, smooth texture, topped with whipped cream and a cherry for cool, sweet refreshment.

⏱️ 5 minutesDrinks & Beverages ★ 4.7
Drinks & Beverages
🍜 United States

A bright, golden strong ale with fruity banana-clove notes, subtle hop spice, and soft carbonation, brewed in classic Trappist Tripel tradition.

⏱️ 2 hours aDrinks & Beverages ★ 4.5
Drinks & Beverages
🍜 United States

A frothy, nostalgic American soda fountain treat pairing bubbly cold root beer with creamy vanilla ice cream, perfect for cooling down at warm weather gatherings.

⏱️ 20 minuteDrinks & Beverages ★ 4.8
Drinks & Beverages
🍜 United States

Tart, funky, effervescent American Wild Ale is a complex fruity craft beer brewed with wild yeast, delivering bright, zesty notes perfect for warm-weather sipping.

⏱️ 2 hours aDrinks & Beverages ★ 4.4
Drinks & Beverages
🍜 United States

Bright, bubbly copycat of the iconic American caramel cola, balanced with citrus and warm spice, perfect for sipping ice-cold on hot days.

⏱️ 15 minuteDrinks & Beverages ★ 4.8

American Porter:Frequently Asked Questions

1.What sets this classic American porter apart from a traditional English porter? ▾
Great question! Unlike malt-forward, earthy English porters, this recipe leans into piney Cascade hops and a touch of crisp roasted black patent malt for that signature bold American craft edge. It balances rich chocolate and coffee notes with a clean, smooth finish, landing at a sessionable 5.2–5.8% ABV made for casual sipping.
2.Do I need professional-grade all-grain brewing equipment to make this recipe? ▾
Not at all! You can pull this off with a basic 5-gallon homebrew setup: a brew kettle, fermenter, airlock, siphon, and thermometer are all you need. If you don’t have a mash tun, use a large insulated cooler with a simple false bottom to hold crushed malts during the mash step, no fancy gear required.
3.Can I use pre-crushed malts if I don’t have a grain mill at home? ▾
Absolutely! Most homebrew supply shops will crush all the malts (2-row pale, chocolate, 60L crystal, black patent) for you for free or a tiny fee when you buy them. Just brew within 2 weeks of crushing, since pre-crushed grain stales faster, and store sealed crushed grain in a cool, dark spot until brew day.
4.How bitter should this porter be, and when do I add the Cascade hop pellets? ▾
This recipe targets a balanced 30–35 IBUs, so piney Cascade notes don’t overpower the roasty malt character. Add 70% of your Cascade pellets with 60 minutes left in the boil for clean bitterness, then the remaining 30% with 10 minutes left to lock in bright, subtle pine aroma without harshness.
5.What mash temperature works best for this porter to get that signature smooth mouthfeel? ▾
Aim for a steady mash temperature of 152–154°F (67–68°C) held for 60 minutes. This temp range creates a nice mix of fermentable and unfermentable sugars, giving you that full, smooth mouthfeel classic to American porters, without making the final beer feel heavy, cloying, or overly thin.
6.I accidentally added too much black patent malt—will that ruin my batch? ▾
Don’t panic! A little extra black patent will just amp up roast and coffee notes, but if you added more than 2 ounces over the recipe amount, offset astringency by adding a quarter teaspoon of food-grade calcium carbonate to the boil, and let the beer condition an extra 1–2 weeks in the bottle to mellow harsh flavors.
7.What yeast strain works best for this classic American porter? ▾
Reach for a clean American ale yeast, like US-05 or Wyeast 1056, for the most authentic results. These strains ferment cleanly without adding funky or overly fruity ester notes, letting the chocolate, coffee, and piney Cascade flavors take center stage. Ferment at 65–68°F (18–20°C) for the smoothest finish.
8.How long does fermentation typically take for this porter? ▾
Primary fermentation usually wraps up in 7–10 days at the recommended 65–68°F temperature, when your hydrometer reads the same final gravity (around 1.012–1.014) two days in a row. After that, let it condition in the fermenter for another 4–5 days to let harsh roast and hop notes mellow before bottling.
9.Do I need to do a secondary fermentation for this recipe? ▾
Secondary fermentation is totally optional here! Unlike super high-alcohol or hyper-hoppy beers that benefit from extended aging, this porter is smooth enough to bottle straight from primary after that short conditioning period. You only need a secondary if you plan to age it for more than 3 months, to avoid off-flavors from old yeast sediment.
10.How much priming sugar should I use to carbonate this porter? ▾
For that perfect, creamy medium carbonation (around 2.2–2.4 volumes of CO2) that pairs so well with roasty porters, use 4 ounces of corn sugar per 5-gallon batch when bottling. Avoid over-priming, since too much fizz will make roasted chocolate and coffee notes taste sharp and acidic instead of smooth and rich.
11.How long do I need to condition bottles before I can drink this porter? ▾
Let your sealed bottles condition at room temperature (68–72°F) for a minimum of 2 weeks to let carbonation fully build and flavors meld. That said, this porter gets even better at 3–4 weeks of bottle conditioning, as sharp piney hop bite softens and chocolate and coffee notes blend into a more cohesive sip.
12.Can I add extra coffee or chocolate to this recipe to amp up those flavors? ▾
Definitely! For extra coffee notes, add 4–6 ounces of cold-brewed, coarse-ground coffee to the fermenter right before bottling to avoid bitter, astringent flavors. For extra chocolate, stir in 2–3 ounces of unsweetened cacao nibs during the last 5 minutes of the boil for a richer, deeper chocolate kick.
13.What’s the ideal serving temperature for this homebrewed porter? ▾
Skip the ice-cold serving temp you’d use for light lagers! Serve this porter at 50–55°F (10–13°C) to let the rich chocolate, roasted coffee, and subtle piney Cascade notes come through. If it’s too cold, those nuanced flavors will be muted, and you’ll miss out on the beer’s balanced, smooth character.
14.The recipe says this porter pairs with hearty grilled foods—what are the best specific matches? ▾
You can’t go wrong with charred cheeseburgers, smoked brisket, grilled portobello mushrooms, or even dark chocolate s’mores! The roasty malt notes cut through fatty, charred grilled flavors, while subtle piney Cascade hops complement smoky seasonings, and the smooth finish doesn’t overpower lighter grilled veggie sides.
15.Why did my finished porter come out overly astringent and dry? ▾
That almost always comes from one of two common mistakes: either you mashed or sparged your grains at a temperature over 170°F, which pulls harsh tannins from grain husks, or you used too much black patent malt without balancing it. Next time, keep sparge water under 168°F and measure roasted malts carefully to avoid that puckering mouthfeel.
16.Can I scale this recipe down to make a 1-gallon test batch first? ▾
Absolutely! Just divide all your ingredient weights evenly by 5 for a 1-gallon batch: that means proportionally less 2-row pale, chocolate, 60L crystal, and black patent malt, plus a scaled-down amount of Cascade hops. You’ll only need half a packet of yeast, and you can keep the same 60-minute boil time as the full 5-gallon batch.
17.How long will this porter stay fresh if I store it properly? ▾
Stored in a cool, dark spot away from temperature swings and direct sunlight, this porter will taste great for up to 6 months after bottling. Unlike hoppy IPAs that fade fast, the roasty malt character holds up well over time—just note that bright piney Cascade notes will mellow after 4 months, shifting to a more malt-forward profile.
18.Do I need to adjust my water chemistry for this recipe to get the right flavor? ▾
If you’re a beginner, you don’t need to overcomplicate it! If your tap water tastes good straight from the tap, it will work perfectly fine. If you have very soft or very hard water, add a quarter teaspoon of gypsum and a half teaspoon of calcium chloride per 5 gallons to get a balanced mineral profile that makes malts and hops pop.
19.My porter came out much thinner than I expected—what went wrong? ▾
Thin, watery porter usually traces back to mashing at too low a temperature (under 150°F), which creates highly fermentable sugars that leave little body behind, or skimping on 60L crystal malt, which adds that rich, caramel-like mouthfeel. Next time, hold mash temp steady at 152–154°F and double-check your crystal malt measurement for a fuller, smoother feel.
20.Can I use whole Cascade hops instead of pellets for this recipe? ▾
You sure can! Whole Cascade cones work beautifully, just use 15–20% more whole hops by weight than the pellet measurement, since whole cones are slightly less dense and don’t isomerize as efficiently as pellets. Add them at the same timings as pellets, and use a fine mesh strainer when transferring to the fermenter to catch loose hop debris.

Comments (18)

2 days ago

OMG, this was my first ever all-grain brew and it turned out SO good! I was nervous I’d mess up the mash temp, but followed the steps exactly and ended up with a smooth, chocolatey porter that my whole homebrew club lost their minds over. Brought a growler to our last meetup and people were asking for the recipe left and right. 10/10, will brew again this fall.

yesterday

That makes our day to hear! First all-grain brews can feel so intimidating, so we’re stoked this worked out for your club meetup. The chocolate malt balance really shines when you nail that mash temp, great job sticking to the steps!

1 week ago

Game changer for our fall football tailgates! I’ve been brewing extract kits for 3 years and decided to level up to this recipe. The only tweak I made was adding a half ounce of extra roasted barley for a deeper coffee note, and it was perfect for sipping while we watched the games. Even my husband who only drinks light lager snuck a second pint!

5 days ago

Oh that extra roasted barley tweak sounds chef’s kiss! Did you notice if it made the finish a little drier? I’ve been thinking about messing with the roasted grain bill on my next batch too.

3 days ago

Love that custom tweak! Adding that extra roasted barley can amp up that rich, roasty coffee note without making it too bitter as long as you don’t over-steep it. So glad this was a tailgate hit!

3 days ago

Solid recipe, but I ran into a stuck mash my first go-round because I crushed my grains a little too fine. Ended up with a slightly lower OG than expected, but it still fermented out to a really drinkable porter, just a little lower ABV than the listed 5.6%. Still tasty, just a heads up for new brewers to watch your grain crush!

2 weeks ago

Made this for our apartment building’s annual potluck (adult table, obviously!) and it was such a hit. Total brew time was exactly as listed, 2 hours active on brew day, 3 weeks to tap, and it was perfectly carbonated right on schedule. The notes of dark chocolate and subtle caramel are exactly what I want in a classic porter, no weird off flavors at all.

1 week ago

So happy this was a potluck crowd pleaser! Apartment brew days can be tricky with limited space, so it’s awesome to hear the timeline lined up perfectly for your event. Cheers!

30 minutes ago

Wait, quick question before I start this weekend—do I really need a secondary fermenter for this? I only have one 5 gallon carboy right now and don’t want to drop extra cash if I don’t have to. Nervous I’ll mess it up if I skip that step!

5 minutes ago

I skipped secondary on my last batch of this and it turned out totally fine! Just let it sit an extra 3 days in primary to make sure all the sediment drops out before you bottle, no off flavors at all for me.

just now

Great question! You absolutely don’t need a secondary for this recipe—Frank’s tip is spot on. Just give it a full 10 days in primary to let fermentation fully finish and sediment settle, and you’ll get the same great result without extra equipment.

5 days ago

SO good. Smoked a brisket last weekend and tapped this porter right when we pulled the meat off the smoker, and the pairing was insane. The roasty notes cut through the fatty brisket perfectly, and all my guests were asking where I bought it—little did they know I brewed it in my garage! Will be making this a regular on my brew rotation.

3 days ago

That brisket pairing sounds like literal heaven. I’m making this next month for my annual smoke day, can already tell it’s gonna be a star.

yesterday

Decent recipe, but I found it a little too mild for my taste. I prefer porters with a bolder coffee kick, so next time I’ll probably add some cold press coffee at bottling to amp that up. As written it’s super approachable for people who don’t love super heavy dark beers, though, so great for sharing with people who usually drink lighter stuff.

2 weeks ago

Took first place in our local homebrew competition’s porter category with this recipe! I followed it to a T except I used a London ale yeast instead of the recommended American ale yeast for a slightly fruitier note, and the judges loved the balance of roast, chocolate, and subtle hop bite. Can’t recommend this enough for folks looking for a competition-worthy base recipe.

1 week ago

No way! I’m entering my first homebrew comp this fall and was on the fence about which porter recipe to use. Did the London yeast make it taste too much like a British porter instead of American? I want to make sure I’m in the right style category.

5 days ago

Not at all! I kept the American hop addition exactly as written, so it still had that crisp, slightly citrusy hop backbone that makes it an American porter instead of British. You’ve got this!

2 hours ago

Total newbie brewer here, almost gave up on homebrewing after my first two batches came out skunky. Decided to give this one a shot because the instructions were so clear, and wow—no skunk, no weird off flavors, just a smooth, rich porter that my roommates are already begging me to brew again. Game changer for my homebrewing confidence, fr.

30 minutes ago

That’s what we love to hear! Skunky off-flavors are usually from light exposure, so we’re glad this clear walkthrough helped you nail a great batch. Nothing beats that first successful brew with your roommates, cheers!

1 week ago

Heads up for anyone brewing this in a small apartment kitchen—your whole place is gonna smell like roasted malt for like 2 days after brew day! It’s a great smell, don’t get me wrong, but my neighbor knocked on the door thinking I was baking chocolate cookies. Ended up giving him a bottle when it was ready and he’s now asking to join my next brew day.

5 days ago

LOL I had the exact same thing happen when I brewed this last month! My downstairs neighbor texted me asking if I was running a side bakery out of my unit. The malt smell is chef’s kiss though, worth every minute of it.

3 days ago

That’s the best side effect of brew day if you ask us! Love that you gained a new brew buddy out of the deal—nothing brings neighbors together like good homebrew.

5 days ago

I’ve brewed this recipe three times now, and every single batch has been consistent. I love that it’s not overly heavy, so I can drink a couple pints while I’m grilling without feeling stuffed. The carbonation level is perfect right at the 3 week mark, no need to wait extra time for it to condition if you’re patient enough to not tap early.

2 weeks ago

Got into homebrewing with my oldest son after he graduated college, and this was the first recipe we brewed together. We had so much fun going through the steps, and when we tapped it last weekend we had a whole little family toast with it. Even my husband who says he ‘hates dark beer’ admitted it was really smooth and tasty.

1 week ago

What a special memory! Brewing with family is such a fun way to connect, and we’re so honored this recipe got to be part of that first batch with your son. That husband approval is the real win, too!

yesterday

Wait, I bottled this 2 days ago and noticed a little bit of airlock activity still—did I bottle too early? I’m scared I’m gonna have bottle bombs! I followed the timeline exactly, waited the full 10 days in primary, but when I took my final gravity reading it was still a couple points higher than the recipe said it should be.

2 hours ago

Don’t panic! If your gravity was stable for 3 days in a row before bottling, you’re fine. A little airlock activity post-bottle is just from the priming sugar kicking off, not leftover fermentation. If your gravity was still dropping when you bottled, though, you might want to crack the caps on a couple to release a little pressure every day for the next few days.

30 minutes ago

Great advice from VeteranBrewer! The key sign you’re ready to bottle is stable gravity readings over 2-3 days, not just a set number of days. If you didn’t wait for gravity to stabilize, definitely burp those bottles periodically for the first 3-4 days to avoid over-carbonation issues. You’ve got this!

1 week ago

Made this last October and it was the perfect beer for cool fall nights around the fire pit. I added a tiny bit of cinnamon stick at bottling (like, half a stick for the whole 5 gallons) and it gave it the coziest little warm spice note that wasn’t overpowering at all. Already planning my batch for this year, gonna make it a double batch so I have enough to share all season.

2 days ago

I’ve tried a ton of clone porter recipes trying to match that classic American porter taste you get at small craft breweries, and this is hands down the closest I’ve ever gotten. It’s got that perfect balance of roast, malt sweetness, and just enough noble hop bite to keep it from being cloying. Served it blind to a friend who works at a local brewery and he thought it was a commercial pour!

yesterday

Dude, same! I’ve been chasing that perfect small-brewery porter taste for years and this recipe nails it. I can’t go back to store-bought porters now, this is too good fresh.

3 days ago

Love that this recipe doesn’t require a ton of fancy, expensive ingredients! I was able to pick up all the grains, hops, and yeast for under 35 bucks at my local homebrew shop, which is way cheaper than buying a fancy pre-made kit. Turned out better than some of the 60 dollar kits I’ve bought in the past, for real.

2 days ago

Wait that’s such a good point! I dropped 70 bucks on a premium porter kit earlier this year that turned out mid, I can’t wait to try this cheaper option next. Did you use liquid or dry yeast for that price point?

yesterday

We intentionally wrote this recipe to be accessible for folks brewing on a budget! You can absolutely use a good quality dry American ale yeast for this and get fantastic results, no need for pricy liquid yeast if you’re watching costs. Cheers to affordable, great-tasting homebrew!

5 minutes ago

Brewed this for our weekly D&D game night and it was a total hit. The group went through almost 3 gallons in one night, which is saying something because half the group usually drinks seltzers. It’s smooth enough that people who don’t love dark beer will enjoy it, but flavorful enough for dark beer stans like me. Total win.

just now

Nothing pairs better with a long D&D session than a smooth homebrew, if you ask us! Love that this won over even the seltzer drinkers in your group—that’s the ultimate seal of approval.

30 minutes ago

Good recipe, but I messed up the priming sugar calculation on my first batch and it ended up way over-carbonated, like, foam-everywhere-when-I-opened-it over-carbonated. Definitely double check your priming sugar measurements before you bottle, y’all! Even with that mess, the little bit I could drink before it foamed over was really tasty, so I’m gonna try again next weekend.



