
babyback ribs in oven

title 1
babyback ribs in oven
⏱️ cook time 2 hours 10 minutes
🍽️ servings 4
⚡ Difficulty easy

intro

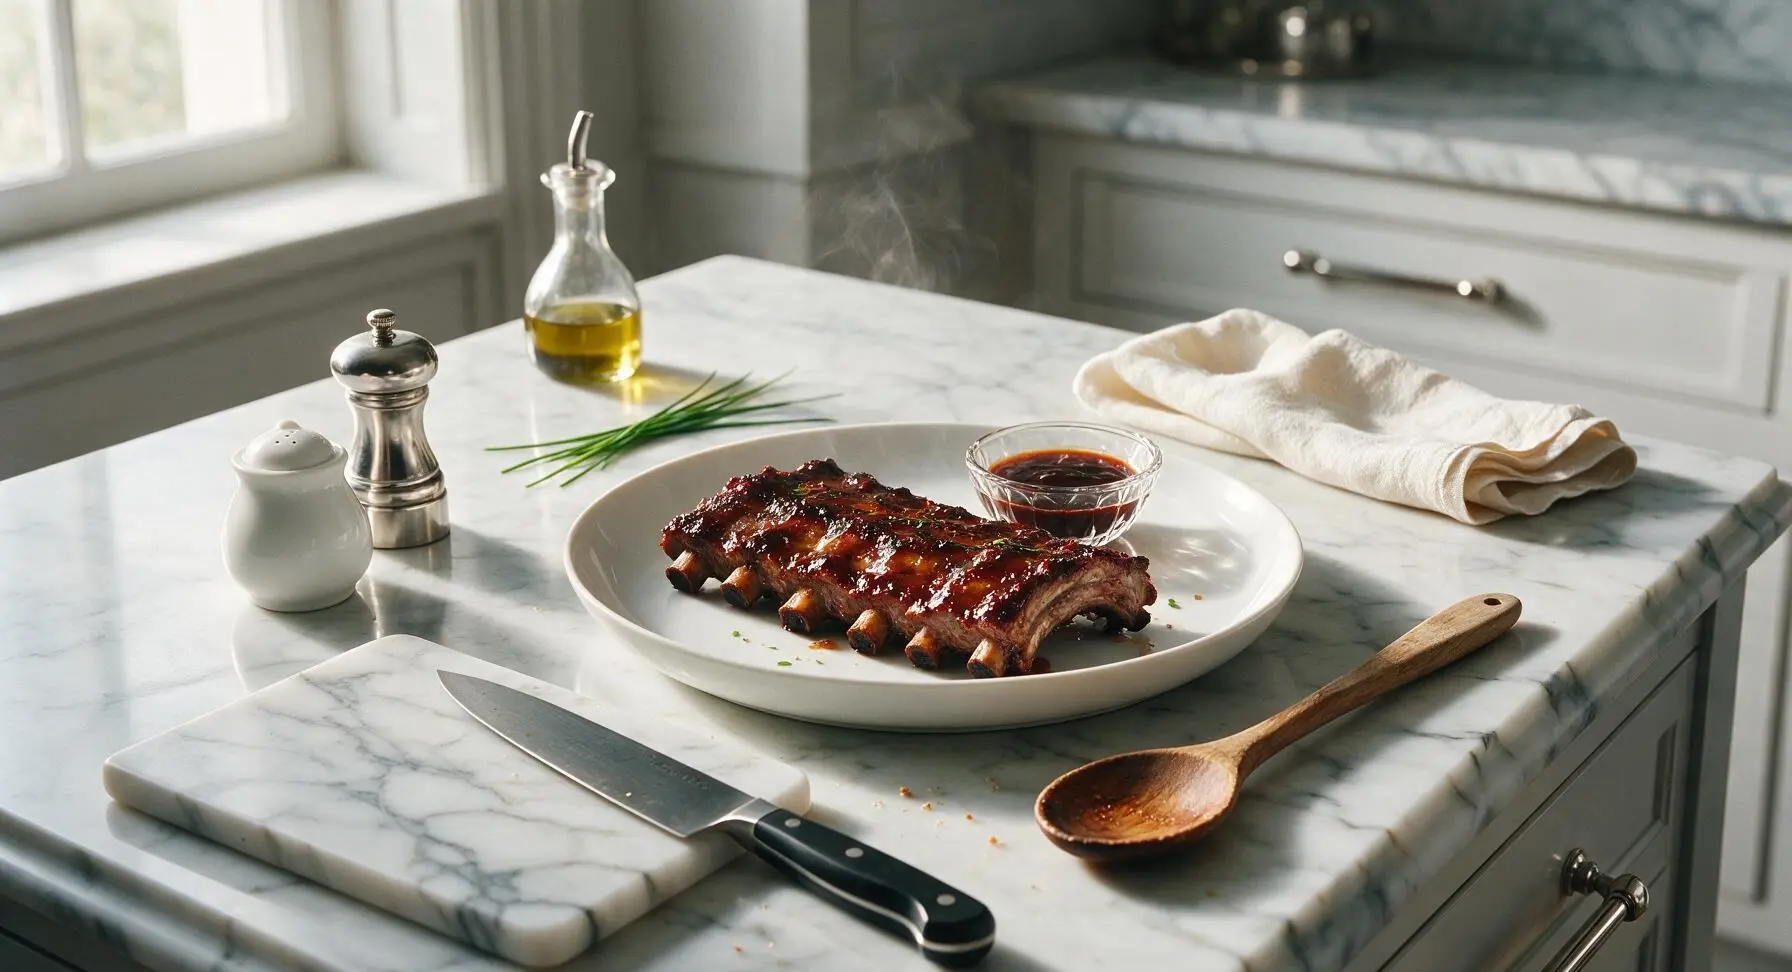
Fall-off-the-bone tender baby back ribs coated in smoky sweet glaze, cooked low and slow in the oven for classic BBQ flavor, no outdoor grill required.

Ingredients
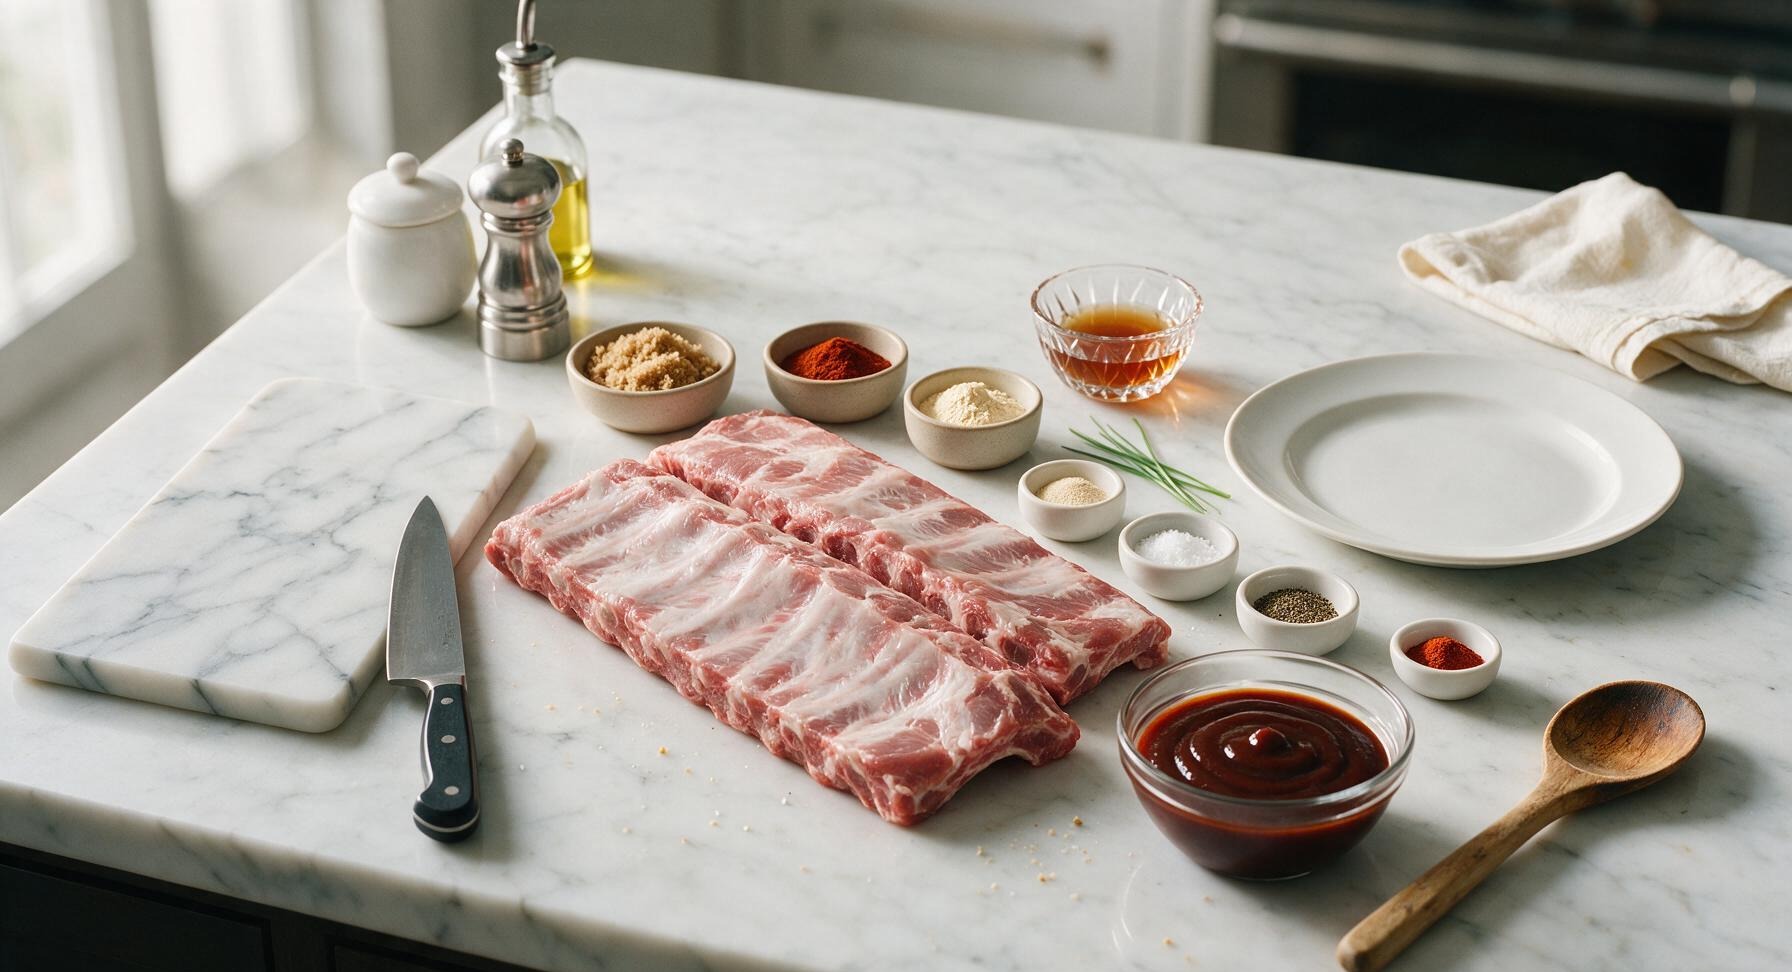
Baby back pork ribs 2 racks (approx 1.8kg / 4lbs total)
Light brown sugar 3 tbsp
Smoked paprika 2 tbsp
Garlic powder 1 tbsp
Onion powder 1 tsp
Kosher salt 1.5 tsp
Freshly ground black pepper 1 tsp
Ground cumin 0.5 tsp
Cayenne pepper 0.25 tsp
Apple cider vinegar 2 tbsp
Smoky BBQ sauce 1.5 cups

Steps

1

Trim and Prep Ribs

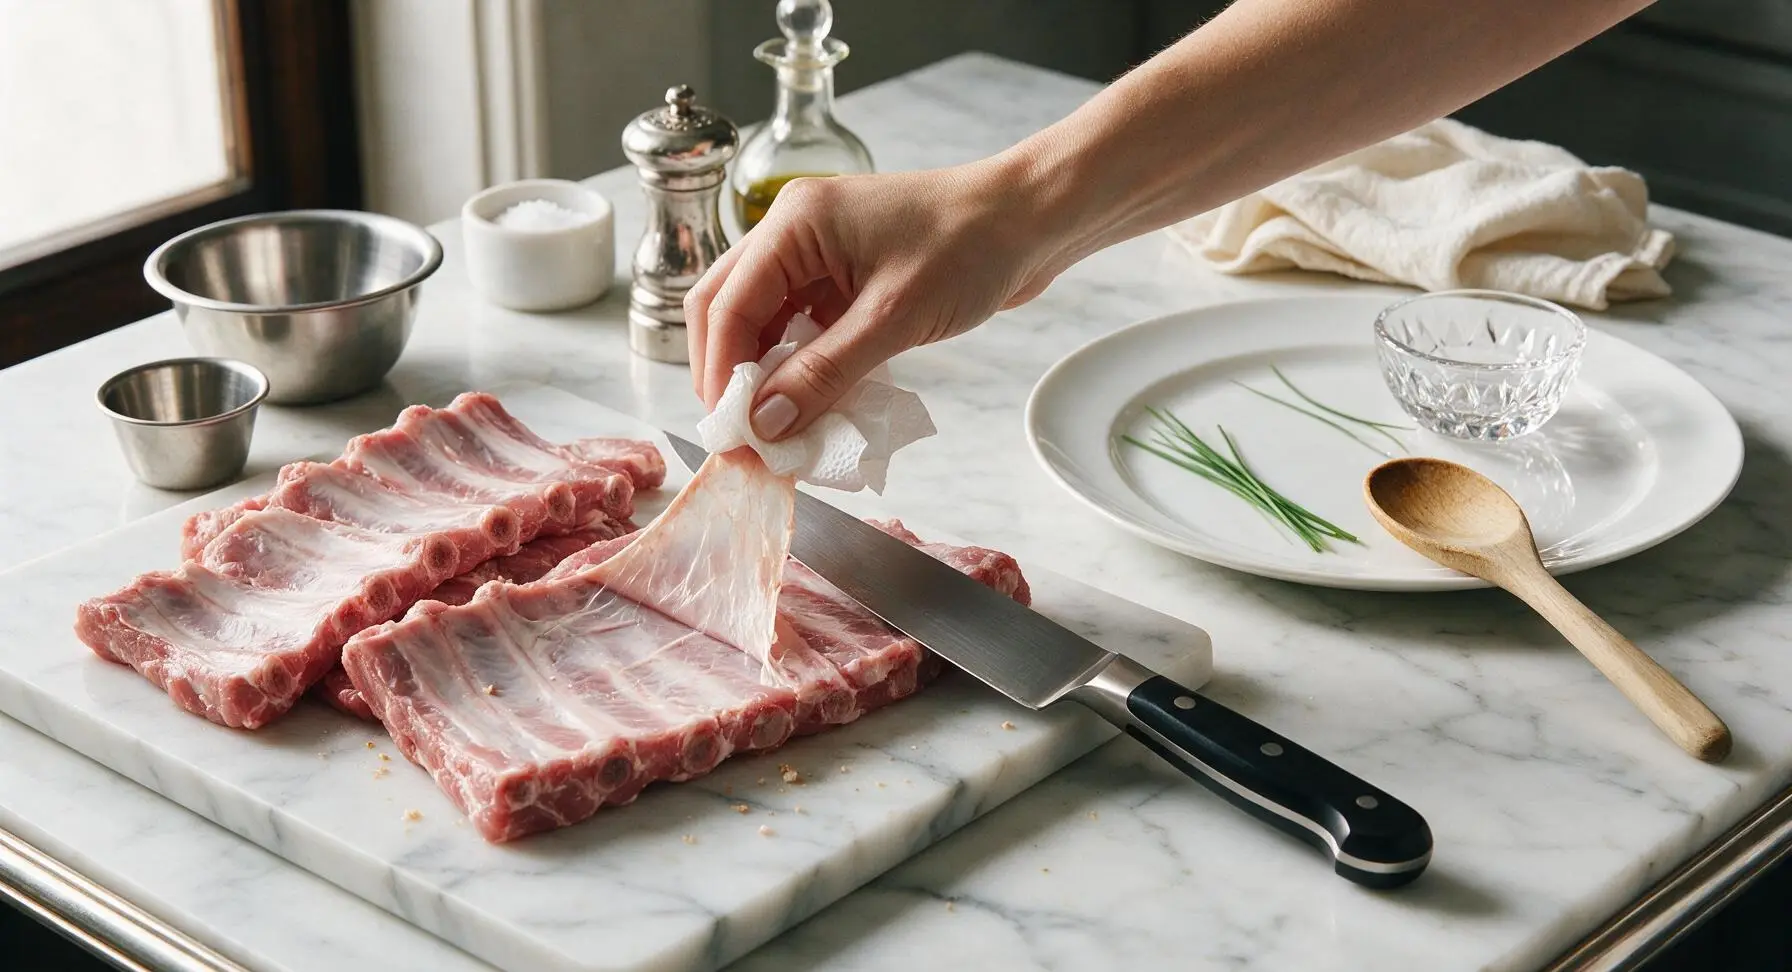
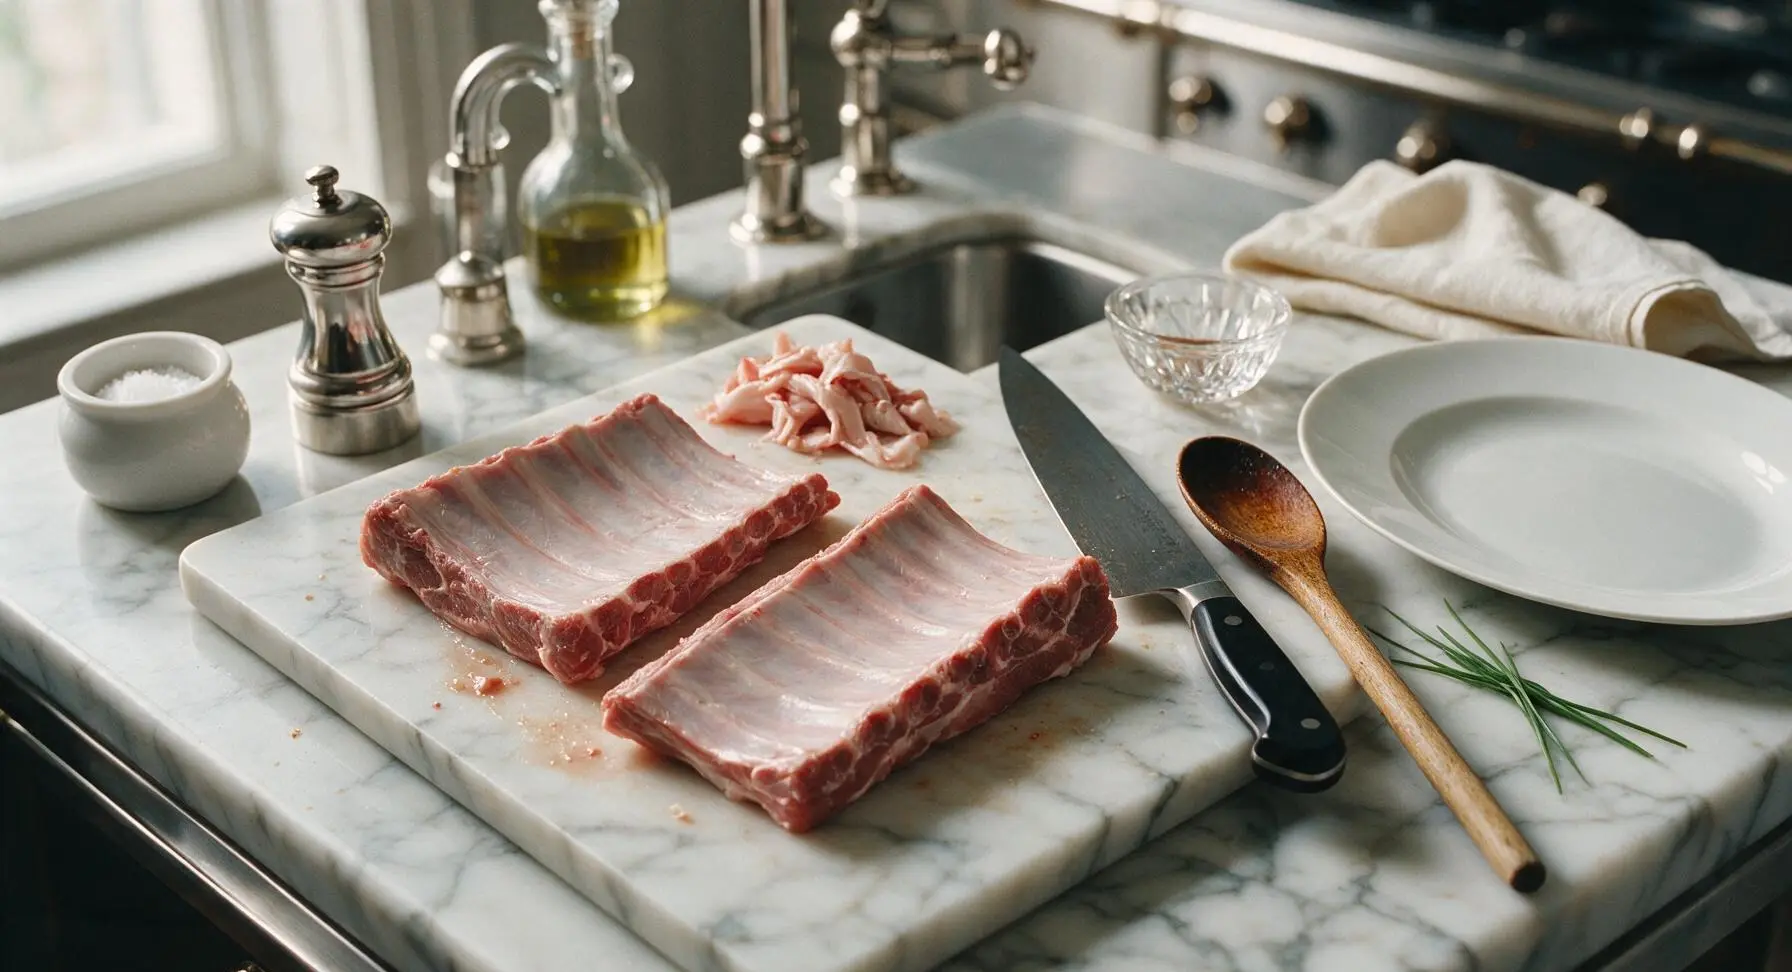
Remove the rib racks from packaging, pat completely dry with paper towels, and place bone-side up on the maple cutting board. Use the chef’s knife to gently loosen the edge of the thin, papery silverskin covering the bone side, grip the loose edge with a paper towel for traction, and pull the silverskin off in one full piece. Trim any loose, hanging fat from the meat surface, leaving a uniform 1/4 inch fat cap. The prepped ribs should lie flat with no chewy membrane remaining.
Step 1
step1:Trim and Prep Ribs
Step 1
step1:Trim and Prep Ribs
2

Mix Dry Rub

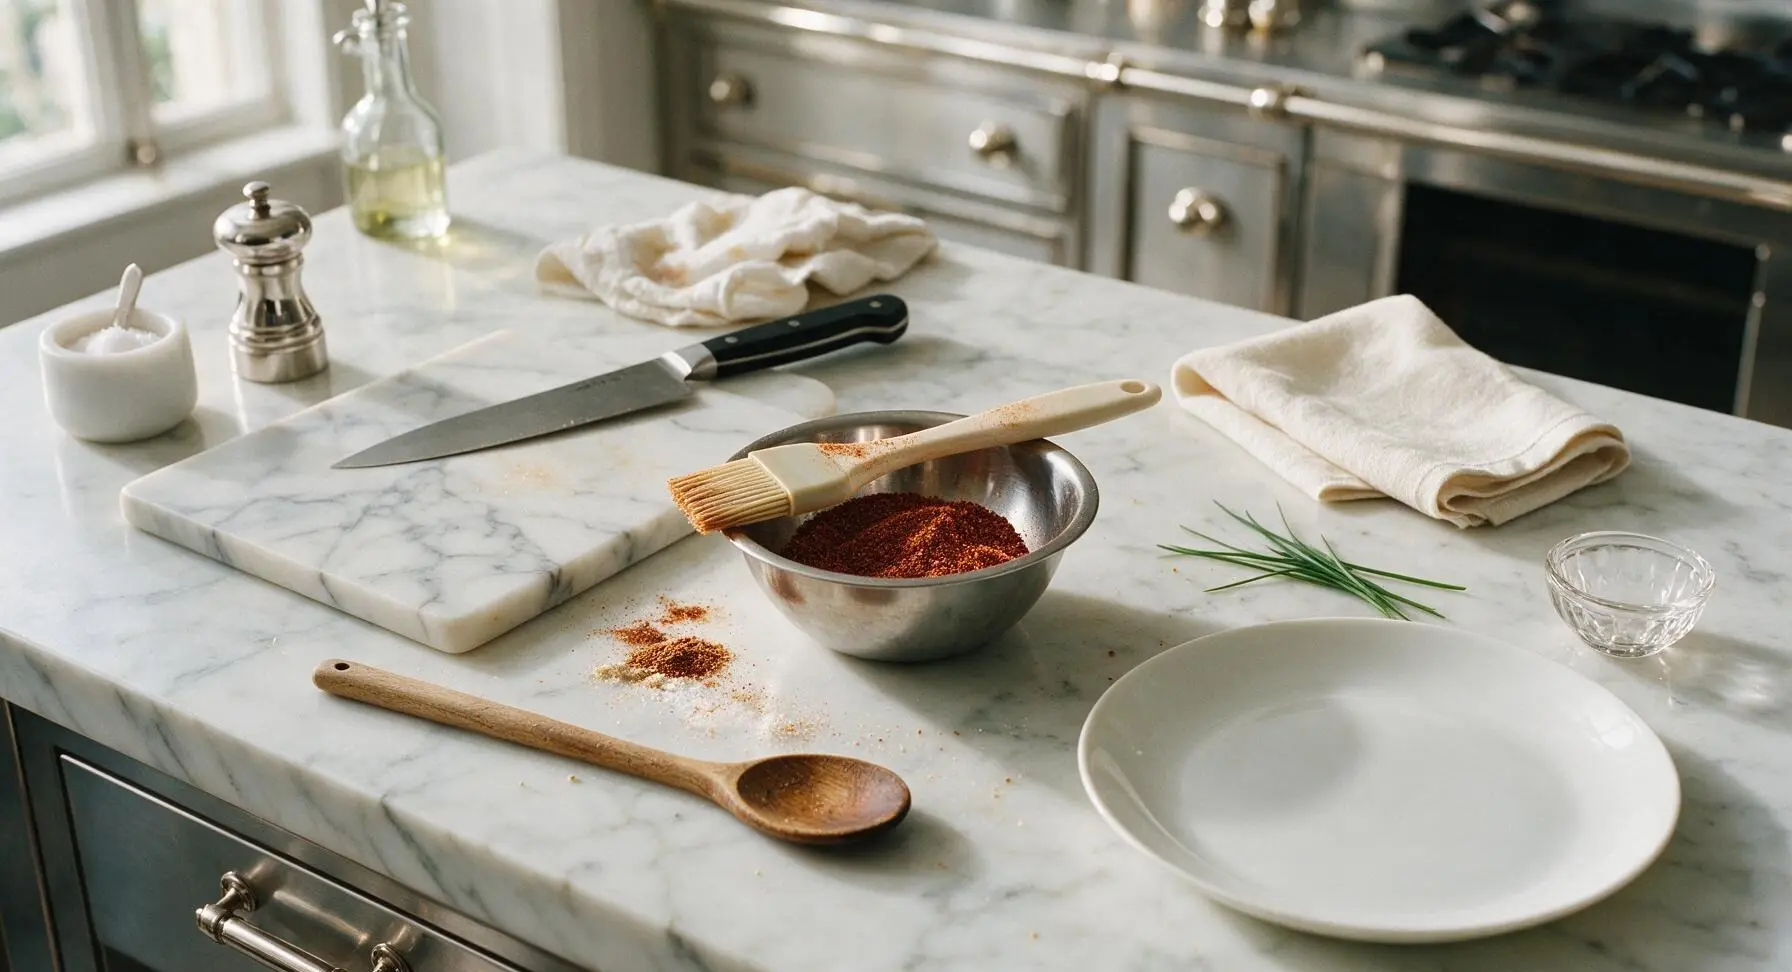
In the small stainless steel mixing bowl, combine the light brown sugar, smoked paprika, garlic powder, onion powder, kosher salt, black pepper, cumin, and cayenne pepper. Stir with the handle end of the silicone basting brush until fully combined, breaking up any clumps of brown sugar. The finished rub should be a uniform deep reddish-brown with no visible streaks of individual spices.
Step 2
step2:Mix Dry Rub
3

Coat Ribs with Rub

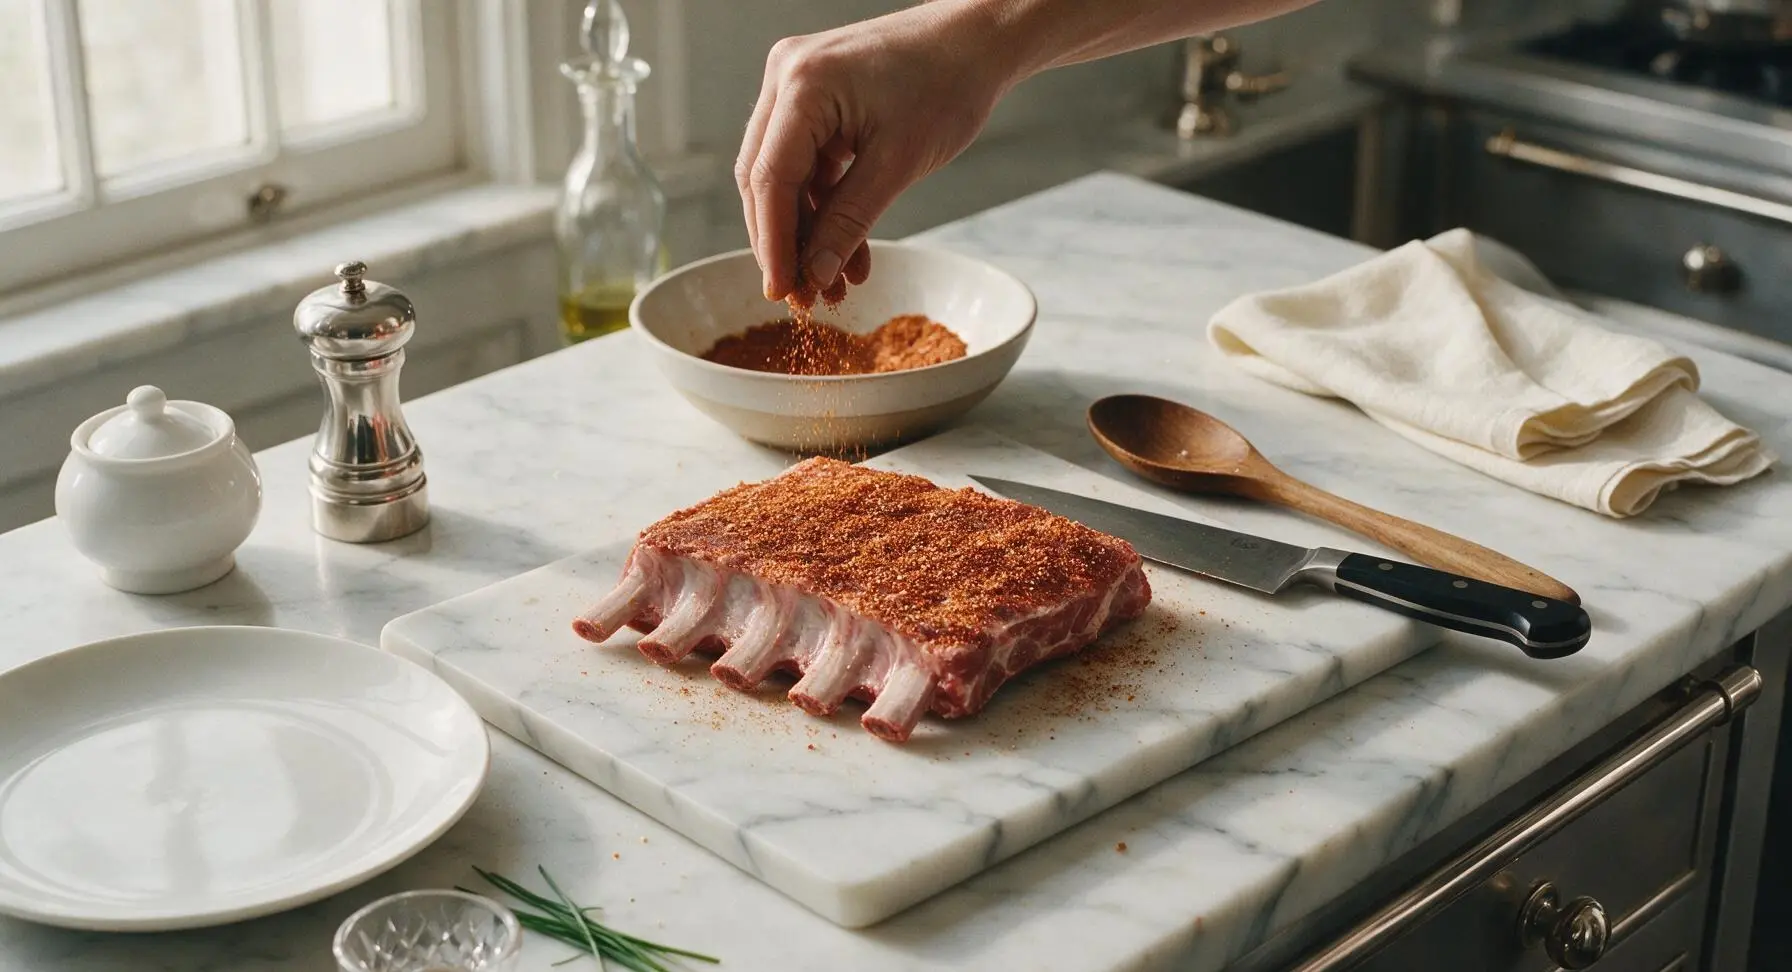
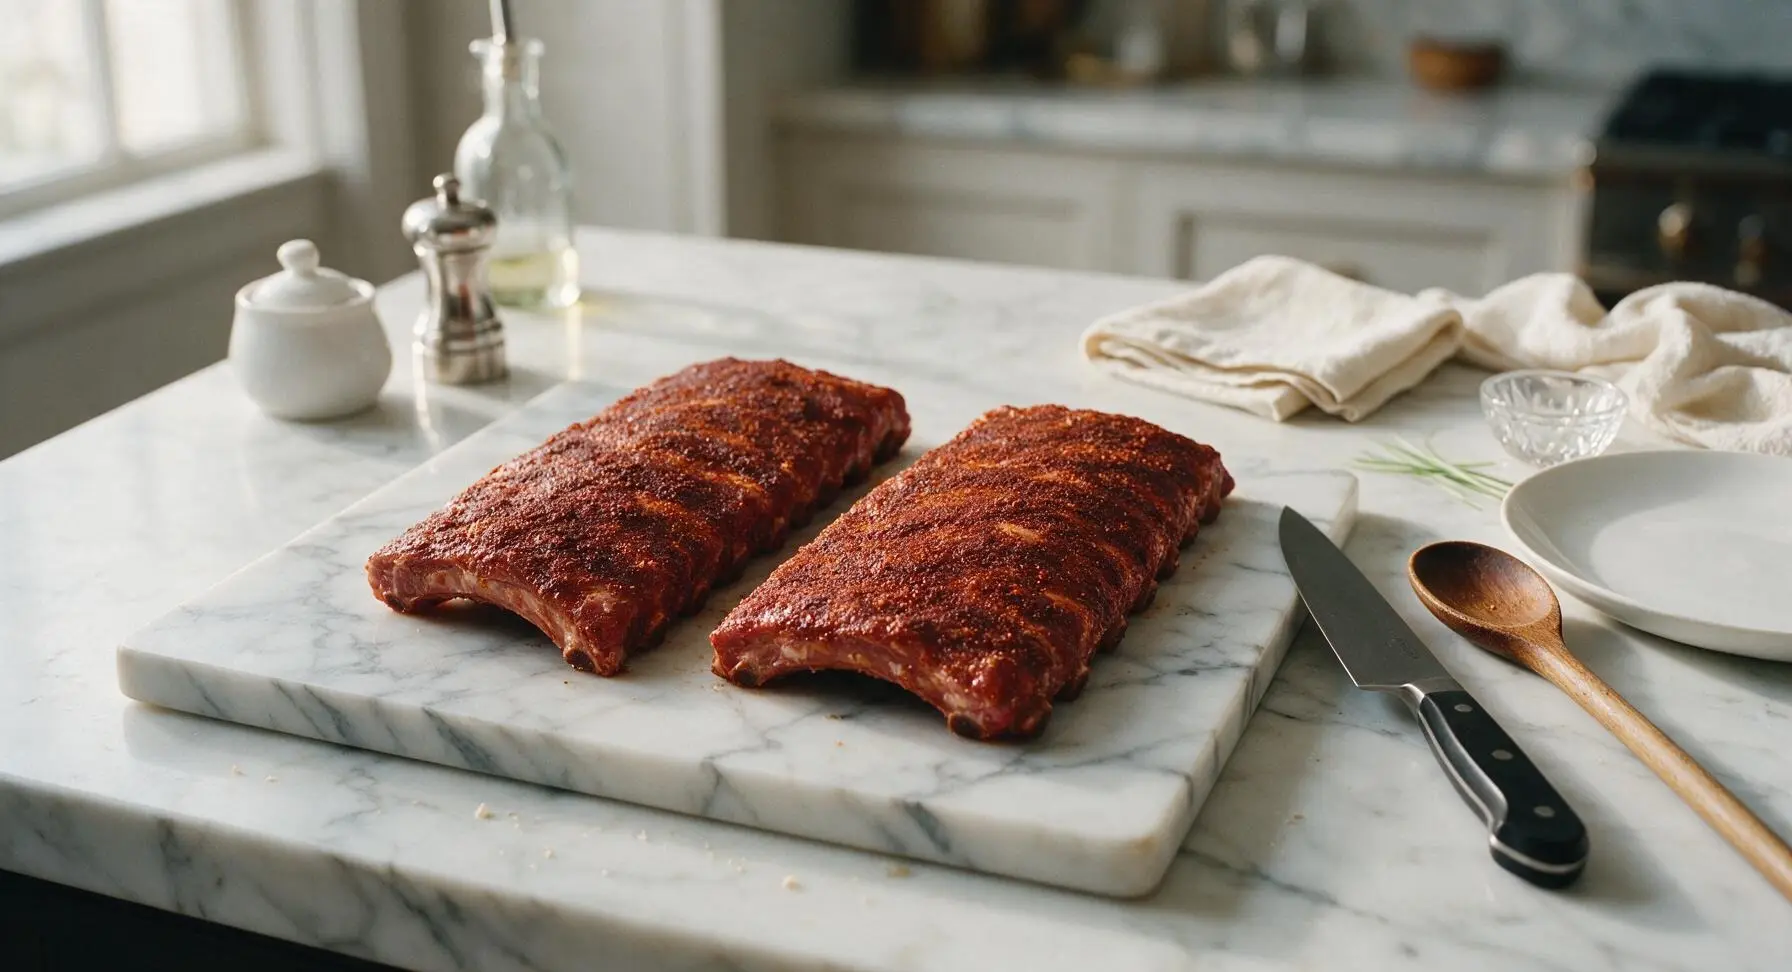
Sprinkle the dry rub evenly over every surface of both rib racks – meat side, bone side, and edges. Use clean hands to press the rub firmly into the meat so it adheres, creating a thin, even coating. No large patches of bare pink meat should be visible through the rub. Let the seasoned ribs rest at room temperature for 15 minutes while the oven preheats to 275°F (135°C).
Step 3
step3:Coat Ribs with Rub
Step 3
step3:Coat Ribs with Rub
4

Arrange for Baking

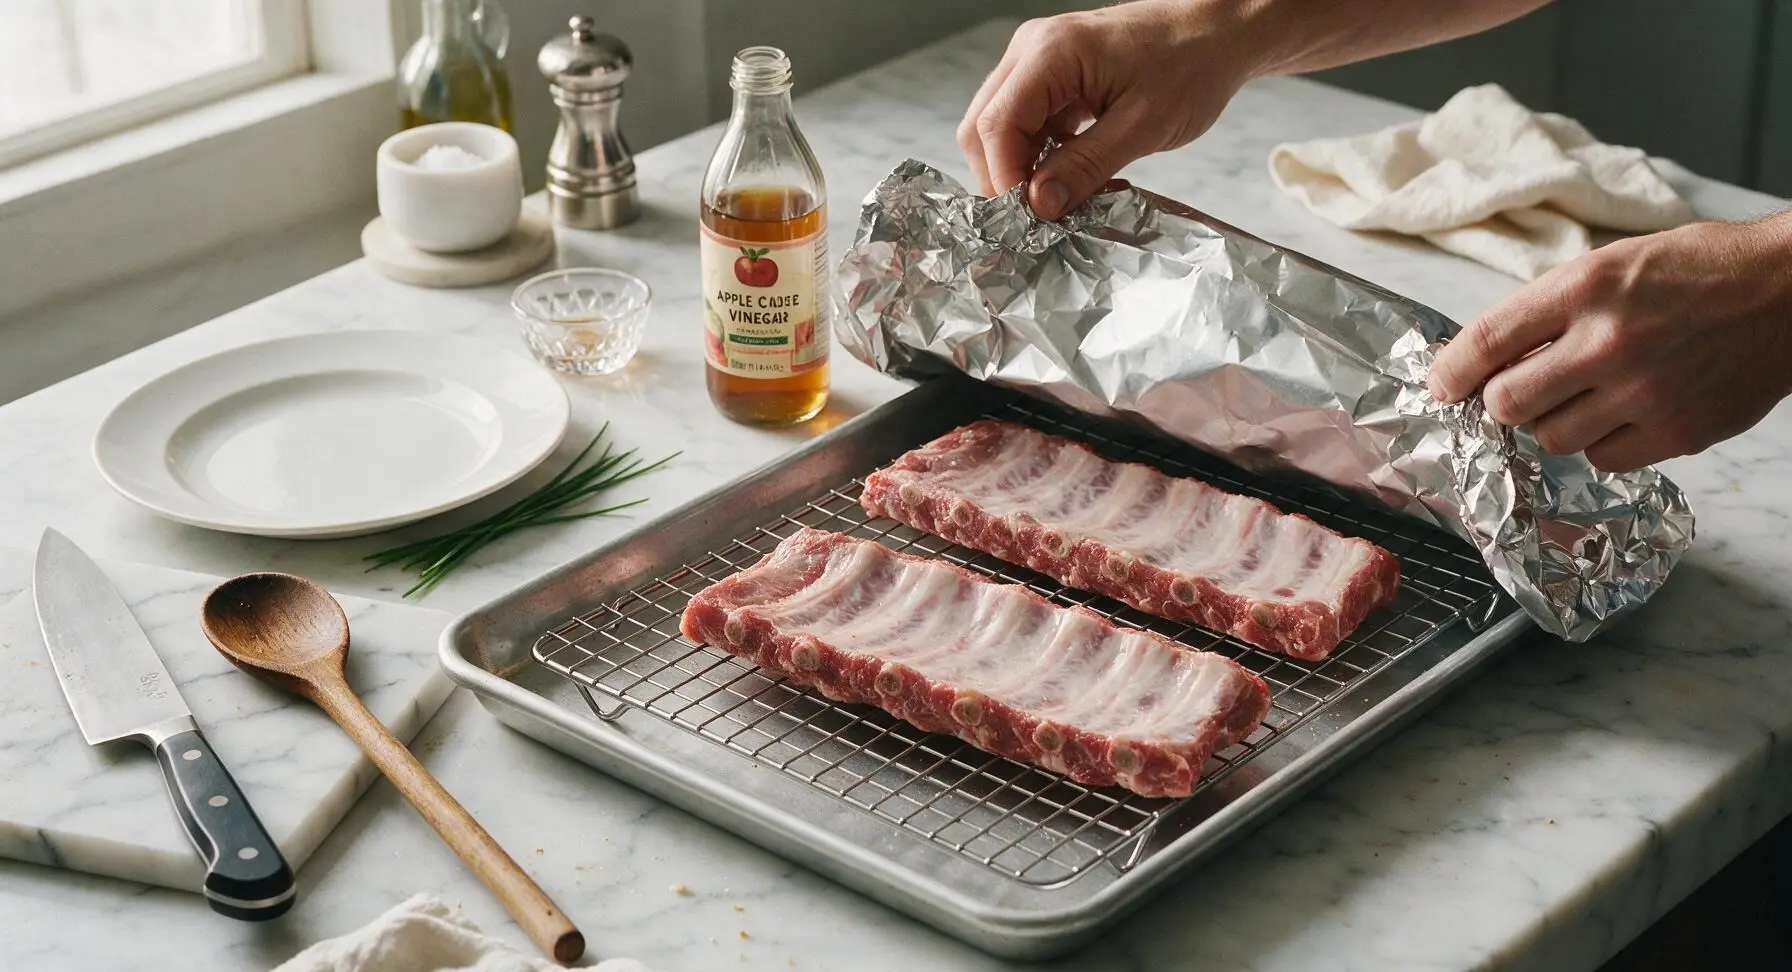
Tear two large sheets of heavy-duty aluminum foil, each long enough to fully cover the baking sheet. Place the chrome wire cooling rack inside the rimmed aluminum baking sheet, then set the seasoned rib racks bone-side down on the wire rack, ensuring they do not overlap. Drizzle 2 tbsp of apple cider vinegar over the top of the ribs, then tent the foil loosely over the baking sheet, crimping the edges tightly to seal in steam. The foil should not touch the top surface of the rib meat.
Step 4
step4:Arrange for Baking
5

Bake Low and Slow

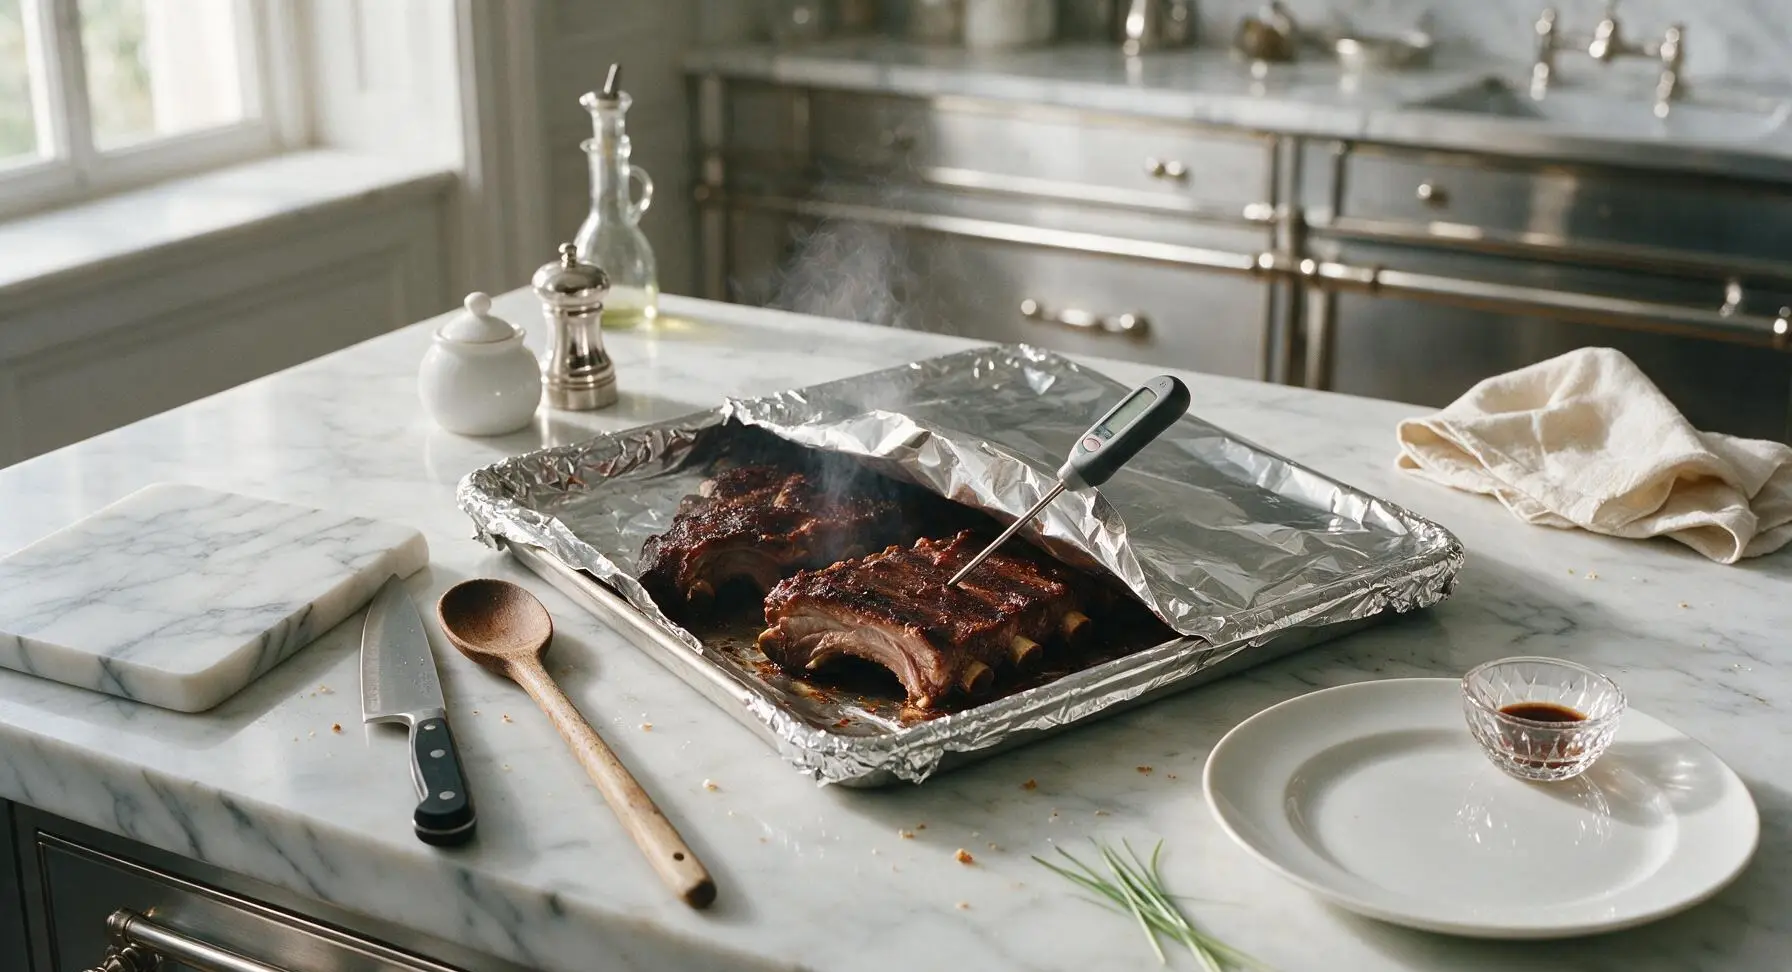
Place the sealed baking sheet on the middle rack of the preheated 275°F (135°C) oven. Bake for 2 full hours without opening the foil, until the meat is tender and pulls back 1/4 inch from the ends of the rib bones. After 2 hours, carefully pull the sheet from the oven and peel back a corner of the foil to vent hot steam, then use the digital meat thermometer to check for an internal temperature of 195°F (90°C) at the thickest part of the rib, away from bone.
Step 5
step5:Bake Low and Slow
6

Baste with BBQ Sauce

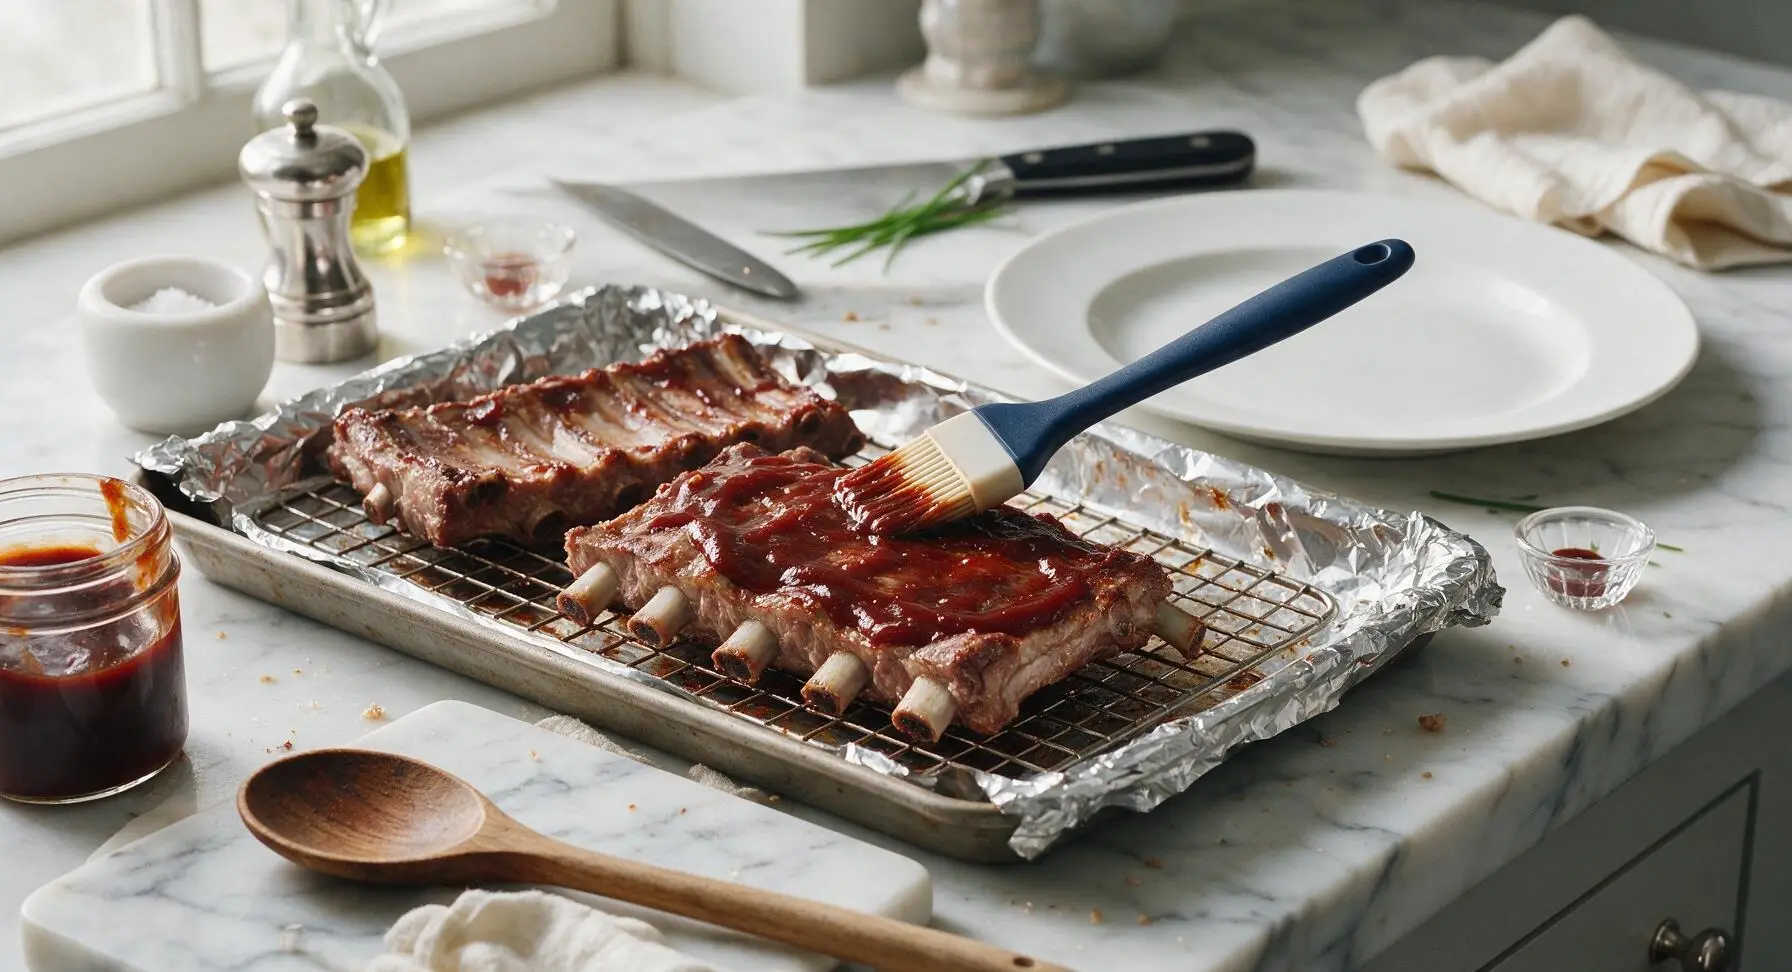
Remove the foil completely from the baking sheet. Use the silicone basting brush to coat the top and sides of both rib racks with a thick, even layer of BBQ sauce, using approximately 1 cup of the sauce total. Work the sauce into every crevice between the bones, leaving the exposed bone ends clean for easy handling.
Step 6
step6:Baste with BBQ Sauce
7

Broil to Caramelize

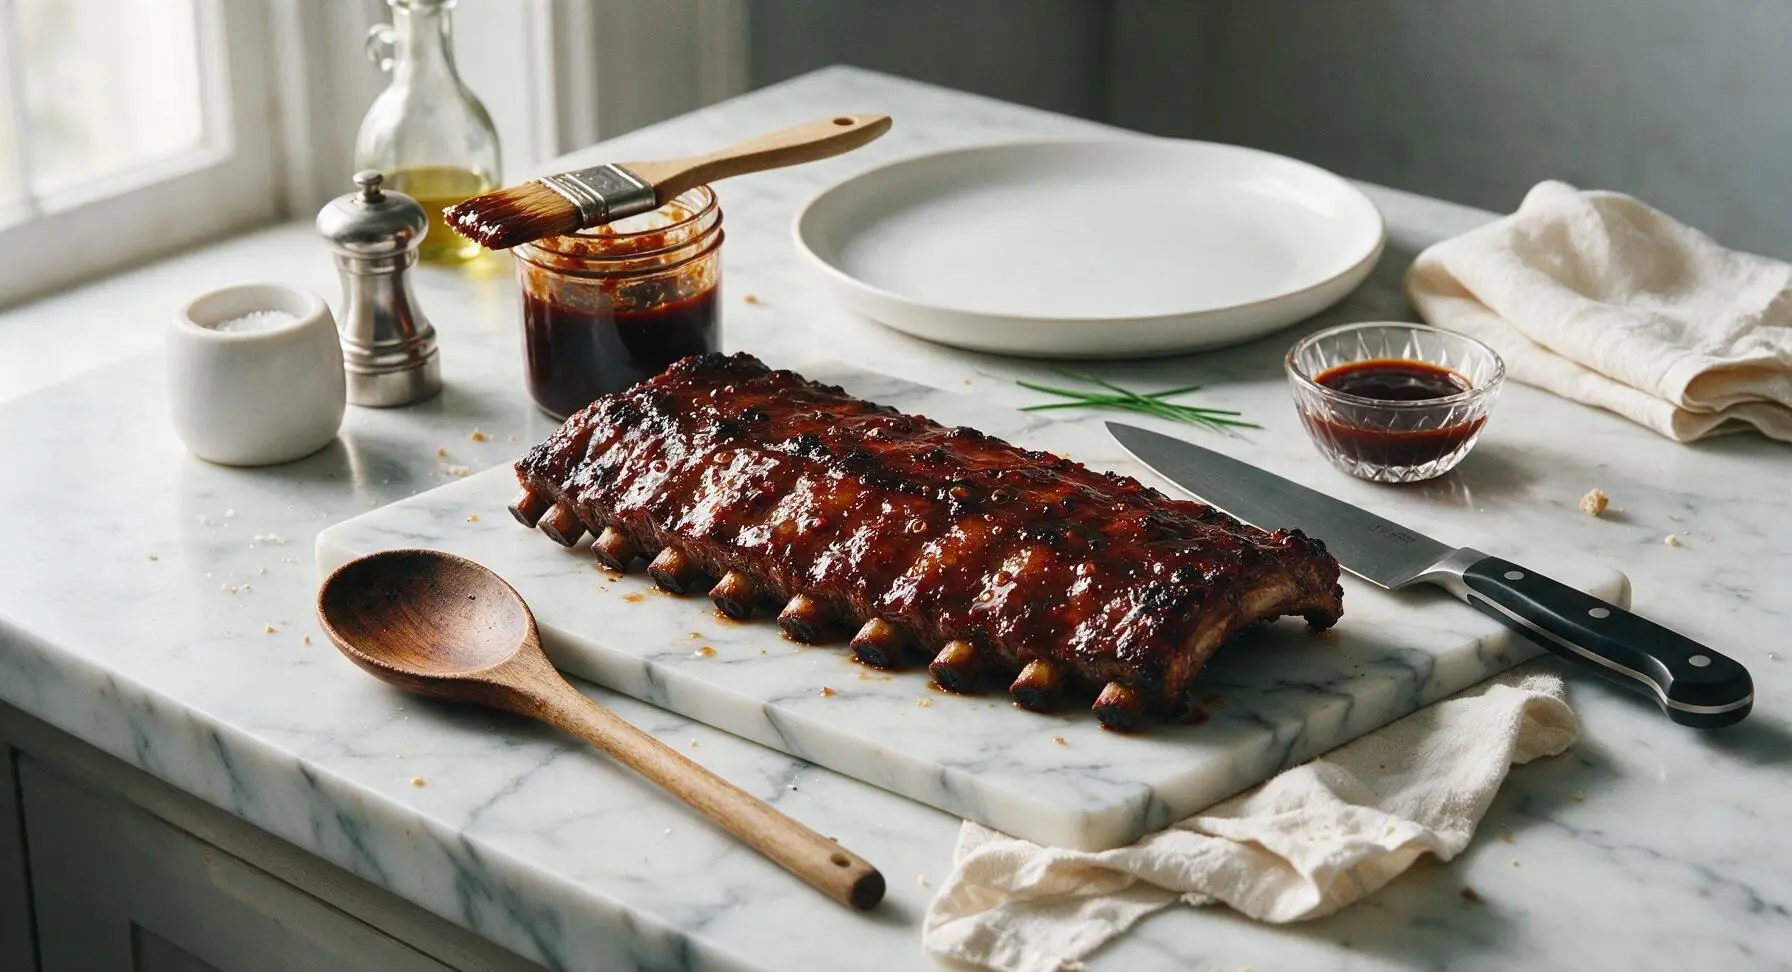
Turn the oven to high broil, keeping the baking sheet on the middle rack positioned 6 inches from the broiler element. Broil for 3-5 minutes, watching constantly, until the BBQ sauce bubbles and forms dark, sticky caramelized spots across the rib surface. Do not leave the oven unattended during this step, as the high sugar content in the sauce can burn in as little as 30 seconds. Remove from the oven once the glaze is glossy and lightly charred in spots.
Step 7
step7:Broil to Caramelize
8

Rest and Slice Ribs

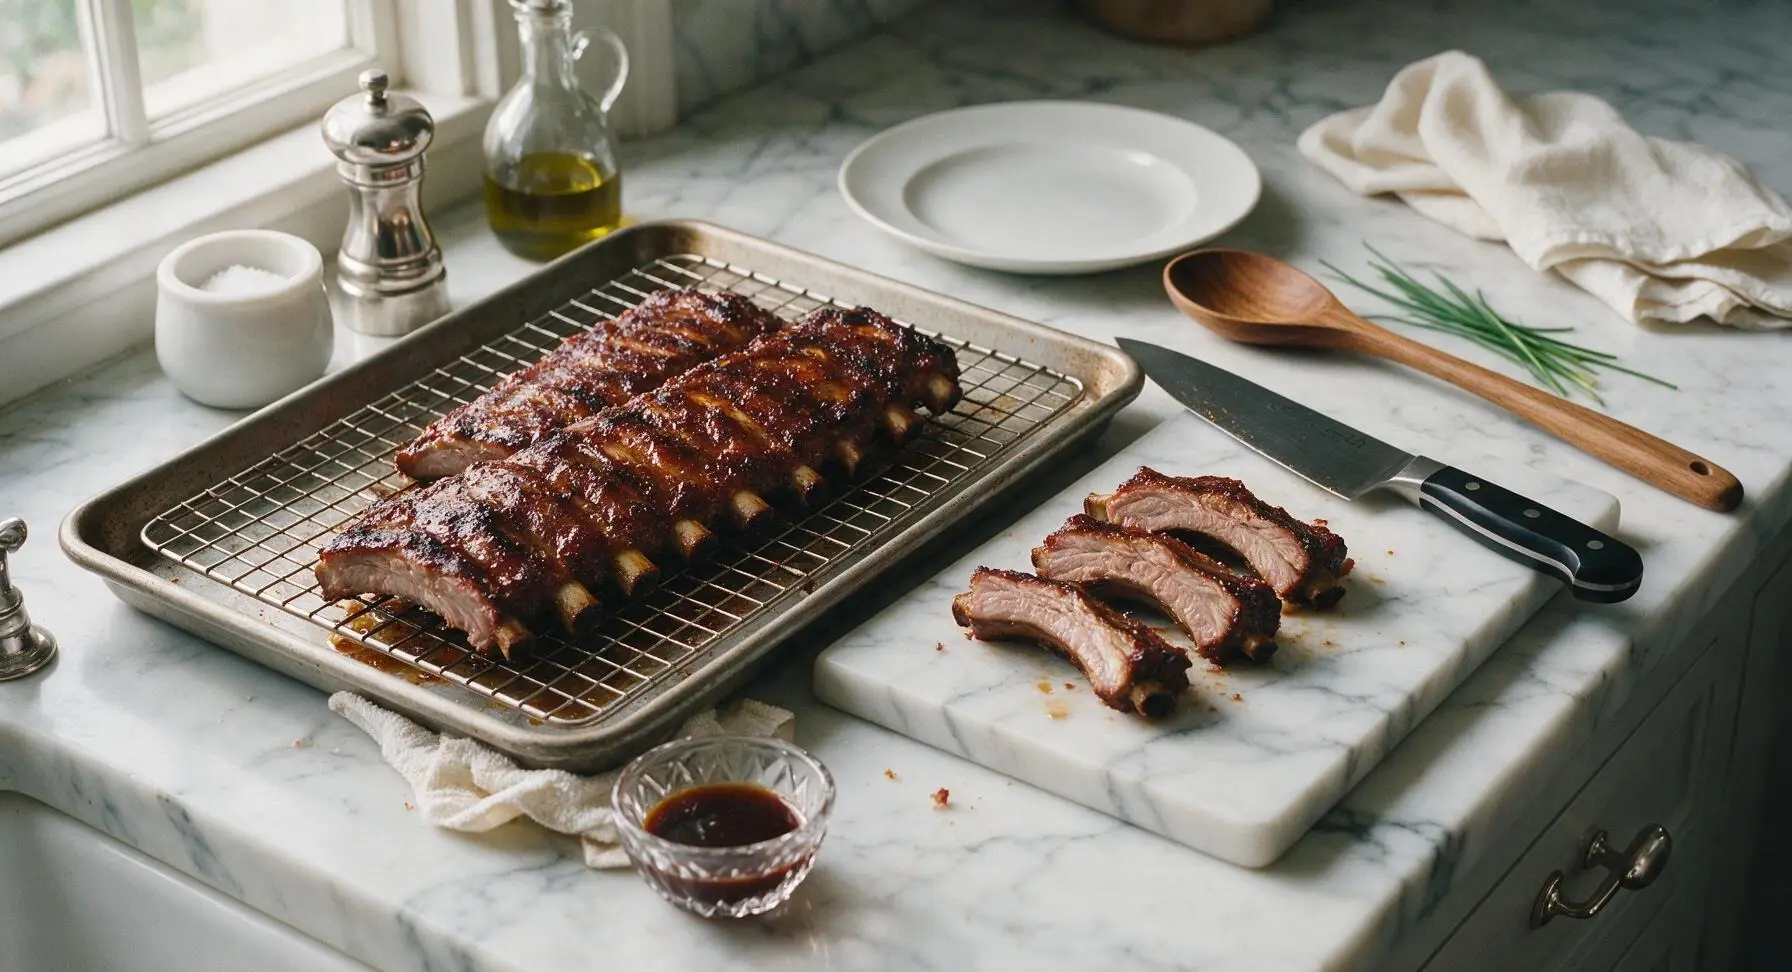
Let the ribs rest uncovered for 10 minutes on the wire rack to allow juices to redistribute and the glaze to set. Transfer the rested racks to the maple cutting board, then use the chef’s knife to slice cleanly between each bone to create individual rib portions. Arrange the sliced ribs on the matte ivory serving platter, and brush with the remaining 1/2 cup of BBQ sauce for a fresh glossy finish.
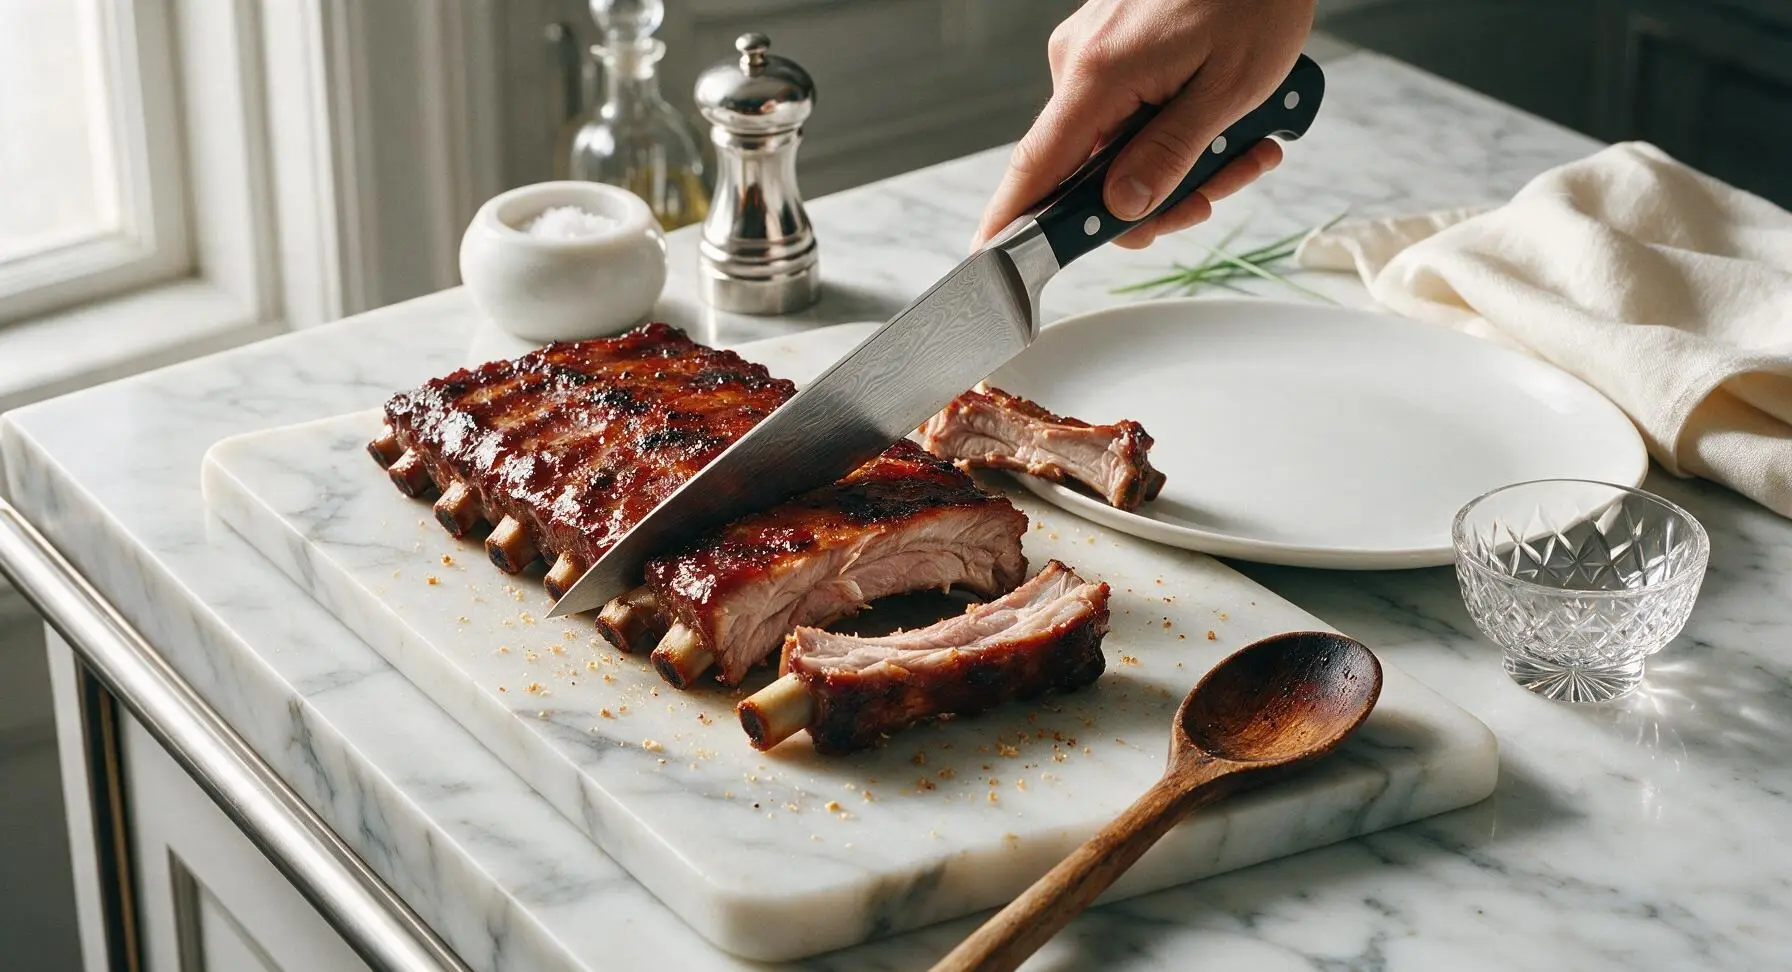
Step 8
step8:Rest and Slice Ribs
Step 8
step8:Rest and Slice Ribs

Tips

1.Always remove the papery silverskin from the bone side of the ribs: this tough membrane does not break down during low-and-slow cooking, and leaving it on will result in chewy bites and prevent the dry rub from flavoring the bone side of the meat. Use a paper towel to grip the slippery membrane for easy, no-slip removal.
2.Do not raise the oven temperature to speed up cooking: baking at a steady 275°F (135°C) slowly melts the tough connective tissue in the ribs into rich, juicy gelatin, while higher heat will seize the meat proteins and result in dry, tough ribs even if cooked to the correct internal temperature.
3.Stay directly at the oven during the broiling step: the high sugar content in BBQ sauce caramelizes extremely fast, and can go from glossy, sticky perfection to bitter, burnt black in as little as 30 seconds. Pull the ribs as soon as you see dark amber char spots appear across the glaze.


✨ You May Also Like

BBQ & Grilling
🍜 United States

Tender, melt-in-your-mouth beef brisket with a crisp, spiced bark, slow-smoked to deep smoky perfection, the iconic centerpiece of Texas backyard barbecue.

⏱️ 12 hours BBQ & Grilling ★ 4.4
BBQ & Grilling
🍜 Korea

Tender, sweet-savory marinated beef short ribs, a beloved Korean BBQ staple with caramelized, slightly charred edges and deep umami flavor, perfect for outdoor summer gatherings.

⏱️ 4 hours 2BBQ & Grilling ★ 4.8
BBQ & Grilling
🍜 United States

Juicy grilled beef patties topped with smoky homemade chili, melted cheddar, and tangy pickles on toasted brioche buns for a hearty, flavor-packed handheld meal.

⏱️ 40 minuteBBQ & Grilling ★ 4.7
BBQ & Grilling
🍜 United States

A sweet, smoky, tangy BBQ sauce brightened with peak-season dark cherries, ideal for glazing grilled ribs, chicken, pork, or summer roasted veggies.

⏱️ 35 minuteBBQ & Grilling ★ 4.7
BBQ & Grilling
🍜 United States

Rich, smoky, slightly sweet homemade bourbon BBQ sauce with deep caramel notes, ideal for glazing grilled ribs, chicken, and burgers at cookouts.

⏱️ 25 minuteBBQ & Grilling ★ 4.7
BBQ & Grilling
🍜 United States

Iconic Alabama-style BBQ featuring tender hickory-smoked chicken slathered in tangy creamy white sauce, a beloved regional Southern cookout staple.

⏱️ 3 hoursBBQ & Grilling ★ 5

babyback ribs in oven:Frequently Asked Questions

1.Do I have to remove the thin membrane on the back of the baby back ribs? ▾
Absolutely. That tough, silvery membrane on the bone side won’t break down during cooking, blocks rub and glaze from penetrating, and leaves a chewy, rubbery texture. Slide a butter knife under it near one end, grip with a dry paper towel for traction, and pull it off in one smooth sheet before seasoning.
2.What temperature and cook time creates that classic fall-off-the-bone texture? ▾
Cook ribs low and slow at 275°F (135°C) for 2.5 to 3 hours, wrapped tightly in heavy-duty aluminum foil for the first 2 hours. This gentle heat slowly melts tough connective tissue without drying out the meat, leaving it tender enough to pull cleanly off the bone without turning mushy.
3.Can I use spare ribs instead of baby back ribs for this recipe? ▾
You can, but you’ll need to adjust cook time. Spare ribs are larger, fattier, and have more connective tissue than baby backs, so add 45 to 60 minutes of total cook time at the same 275°F temperature. Trim any excess thick fat from spare ribs first to keep the glaze from getting greasy.
4.Why do you wrap the ribs in foil for part of the cook time? ▾
Wrapping tightly in foil traps steam around the ribs as they cook, which speeds up connective tissue breakdown to lock in fall-off-the-bone tenderness without drying out the meat surface. It also prevents the sweet brown sugar in the rub from burning during the long low-heat cook.
5.Do I need to marinate the ribs overnight before cooking? ▾
You don’t have to, but you can for deeper flavor if you plan ahead. The dry rub made with brown sugar, smoked paprika, garlic, and onion powder will penetrate beautifully if applied 45 minutes before cooking, but an overnight rub in the fridge will amp up savoriness even more.
6.How do I keep the ribs from drying out in the oven? ▾
First, don’t cook them at a temperature higher than 275°F, as high heat zaps moisture fast. Keep them tightly wrapped in foil for the first two-thirds of cook time to trap natural juices and steam, and resist peeking repeatedly, which lets valuable moist heat escape.
7.When is the right time to apply BBQ glaze to the ribs? ▾
Apply your glaze during the final 20 to 30 minutes of cook time, after you remove the foil wrapping. Brushing it on too early will cause the sugar in the glaze and brown sugar in your rub to burn, leaving a bitter, charred taste instead of that sticky, caramelized sweet-smoky finish.
8.Can I make these ribs ahead of time for a party or gathering? ▾
Definitely. Cook the ribs fully through the foil-wrapped stage, let them cool completely, then store covered in the fridge for up to 3 days. When you’re ready to serve, brush on glaze, and reheat uncovered on a baking sheet at 300°F for 20 to 25 minutes until heated through and sticky.
9.What if I don’t have smoked paprika for the dry rub? ▾
You can swap in regular sweet paprika plus 1/4 teaspoon of hickory smoke powder per tablespoon of paprika to get that classic smoky BBQ flavor without a grill. If you don’t have smoke powder, a pinch of ground cumin plus a tiny dash of liquid smoke works as a last-minute backup.
10.How do I know when the ribs are perfectly fall-off-the-bone done? ▾
Use the toothpick test: Stick a regular toothpick into the thickest part of the meat between two bones—if it slides in with zero resistance, and the meat pulls back about 1/4 inch from the bone ends when you lift the rack, they’re done. Meat falling completely off the bone means they’re overcooked and mushy.
11.Do I need to add liquid like apple juice to the foil packet with the ribs? ▾
You don’t need added liquid! As the ribs cook low and slow, they release plenty of natural meat juices and melted fat that create enough steam to tenderize the meat. Adding extra water, apple juice, or vinegar can water down your rub flavor and make the final glaze runny instead of sticky.
12.Can I cook these ribs using my oven’s convection setting? ▾
Yes, just lower the oven temperature by 25°F (to 250°F) to account for convection’s circulating hot air, and check for doneness 20 to 30 minutes earlier than the recipe’s suggested time. The circulating air will actually give the glaze a slightly crispier, more evenly caramelized finish if you watch cook time closely.
13.Should I season the bone side of the ribs, or just the meaty top? ▾
Season both sides evenly! Once you remove the tough back membrane, the bone side will absorb rub flavor just as well as the meaty top. Use about 60% of your rub on the meaty side and 40% on the bone side to get balanced, smoky-sweet flavor in every bite.
14.Why are my ribs tough even after cooking them for hours? ▾
Tough ribs almost always come from cooking at too high a temperature, which makes meat seize up and dry out before connective tissue can melt, or not cooking long enough at low heat. Double check your oven temp with a thermometer—many home dials run 25 to 50°F off—and make sure your foil wrap is airtight.
15.Can I freeze leftover cooked ribs for later? ▾
Absolutely. Let cooked ribs cool completely, wrap them tightly in two layers of plastic wrap followed by a layer of heavy-duty foil, and freeze for up to 3 months. Thaw in the fridge overnight, then reheat uncovered on a baking sheet at 300°F for 25 to 30 minutes, brushing on extra glaze to refresh flavor.
16.Do I need to set the ribs on a baking rack in the oven? ▾
It’s not required, but it’s highly recommended. Setting the rib rack on a wire baking rack inside your rimmed baking sheet lets hot air circulate all the way around the ribs, so they cook evenly instead of sitting in pooled juice and getting soggy on the bottom during the glazing stage.
17.Can I add a spicy kick to the rub without ruining the classic flavor? ▾
Of course! Add 1/2 to 1 teaspoon of cayenne pepper, or 1 teaspoon of smoked chipotle powder, to your brown sugar and spice rub mix for a warm, slow heat that balances the sweet, smoky base. Start with less if serving kids or heat-sensitive eaters, and offer hot sauce on the side for guests who want more fire.
18.How long should I let the ribs rest after taking them out of the oven? ▾
Let ribs rest for 10 minutes, tented loosely with a piece of foil, before slicing between the bones. This gives the hot, juicy meat time to reabsorb its natural juices, so every bite stays moist instead of all the delicious liquid running out onto the cutting board the second you slice in.

Comments (19)

2 days ago

OMG, these ribs were INSANE. I’ve always messed up ribs in the oven, they always came out tough and chewy, but followed this exactly and they were literally fall off the bone. My whole family was raving at Sunday dinner, even my super picky 10 year old asked for seconds. Will be making these every other week for sure!

1 day ago

Same! My picky kid ate three whole ribs and said it was better than the BBQ restaurant we go to! I added a little extra brown sugar to the rub and it was chef’s kiss

1 day ago

So glad to hear the whole family loved them! The extra brown sugar trick is such a good call, adds that perfect caramelized edge to the crust.

1 week ago

Game changer. I thought you needed a fancy smoker or grill to get good ribs, but this oven method is foolproof. Cook time was spot on, no guesswork needed. I used my go-to hickory BBQ sauce for the last 20 mins and it was perfect. 10/10

30 minutes ago

Quick question — can I use this same method for spare ribs instead of baby back? I have a rack in the fridge I need to use up tonight and don’t want to run to the store!

5 minutes ago

Great question! You can absolutely use this method for spare ribs, just add 25-30 minutes to the initial low-temp cook time to make sure they get tender enough before adding sauce. Enjoy!

yesterday

Made these for our college football watch party yesterday and they were a total hit. Not a single rib left by halftime. People were begging me for the recipe link before the first quarter even ended. So easy too, I prepped the rub the night before so it was zero stress day of

2 hours ago

How did the prep ahead work? I’m making these for my dorm potluck next week and want to do as much as possible ahead so I don’t have to fight for the kitchen

30 minutes ago

Love the make-ahead tip! The rub actually gets more flavorful if it sits on the ribs for 8-12 hours in the fridge, so that prep move is totally pro. Good luck at the potluck!

2 weeks ago

I’ve been making ribs for 50+ years and I have to say, this method is even easier than the one I’ve used forever. The low and slow oven temp doesn’t heat up the whole house like my old method, and the ribs come out so juicy. My grandkids practically licked the baking sheet clean!

3 days ago

Took a chance on these even though I usually grill all my ribs, and wow. The meat slid right off the bone, no tugging required. Only note: I added a pinch of cayenne to the rub for a little heat, which paired so good with the sweet BBQ sauce

2 days ago

I did the cayenne trick too! Tossed on a little smoked paprika as well and it gave that smoky flavor I usually miss when I don’t use the grill. 10/10 would recommend

5 days ago

SO good. I made these for meal prep on Sunday and ate them all week with coleslaw and roasted potatoes. They reheated perfectly in the air fryer, just as tender as when they first came out of the oven. Easy, minimal cleanup, perfect for busy weeks

2 hours ago

Wait, is there a trick to getting the membrane off the back? I always struggle with that step and ended up leaving a little bit on last time I made ribs, which made em chewy. Don’t want to mess that up here!

30 minutes ago

Use a paper towel to grip the edge! It’s so much easier than using your fingers, the membrane doesn’t slip. I get under it with a butter knife first, grab with the paper towel, and pull it right off in one piece every time

5 minutes ago

That’s exactly the trick we recommend! The paper towel gives you the grip you need to get that slippery membrane off in one go. It makes such a big difference in tenderness, so great call asking ahead of making them

1 week ago

As a Texas guy who swears by offset smokers, I was skeptical of oven baked ribs. Let me tell you, these hold up. I added a little liquid smoke to the butter I slathered on before wrapping, and you couldn’t tell they weren’t done on the smoker. My wife said they’re the best ribs I’ve ever made. Oops, guess I don’t need to stand out in the heat for 6 hours anymore

5 minutes ago

Made these last night and they were incredible! Only thing is my sauce burned a little bit on the bottom of the pan during the last 10 minutes. Any tips to avoid that next time?

just now

So glad you enjoyed the ribs! To avoid burnt sauce, try lining your baking sheet with a double layer of aluminum foil before adding the ribs back for the sauce step, or move the ribs up to a middle rack instead of the lower one for that final high-heat finish. That will keep the sauce from scorching on the hot pan!

1 week ago

Made these after a long day hike last weekend and they were the perfect post-adventure meal. Hearty, flavorful, and so easy to throw in the oven while I showered off the trail dust. I used a spicy mesquite BBQ sauce and it hit so different. 10/10 will be a regular in our rotation

5 days ago

How much sauce did you use? I always overdo it and end up with soggy ribs instead of that nice sticky crust

3 days ago

I only used about 1/3 cup per rack, brushed on super thin right before the last 15 minutes, then brushed a tiny extra layer the last 5 minutes. Perfect sticky crust, no sogginess! Don’t douse ‘em, less is more here

3 days ago

Made these for my son’s birthday dinner per his request, and he said they were better than the ribs we got at the fancy BBQ joint for his last birthday. The whole table went back for seconds, and my sister in law asked for the recipe before we even had dessert. Super easy, no fancy ingredients needed, total win

2 weeks ago

I don’t eat pork, so I tried this method with a rack of lamb ribs (adjusted cook time a little) and it worked perfectly! The meat was so tender, the rub complemented the lamb really well too. Love that the method is flexible even if you swap the protein

1 week ago

Oh that’s such a good idea! My kid doesn’t eat pork either, I’m definitely going to try this with lamb ribs next week. Did you cut the cook time down by much?

yesterday

First time making ribs ever, and I was so nervous I’d mess them up. This recipe was so straightforward, even a total beginner like me pulled it off. My roommate said they’re restaurant quality, and I felt like a total pro. The cook time was exactly right, no adjustments needed

2 hours ago

Love hearing this! We designed this recipe to be totally beginner-friendly, so it makes us so happy that your first ever rib attempt turned out restaurant quality. Great job!

5 days ago

Made these for our neighborhood potluck last weekend and they were gone in 10 minutes. I even made two full racks and thought I’d have leftovers, nope. Multiple neighbors texted me for the recipe later that night. The rub is the perfect balance of sweet and savory, no weird ingredients you have to run to a specialty store for

2 days ago

Made these in my tiny apartment oven with super basic supplies — no fancy baking sheets, no special rub ingredients, just stuff I already had in my pantry. They came out AMAZING. I was worried my tiny oven would cook them unevenly, but rotating the pan once halfway through did the trick. Best meal I’ve made all semester

1 day ago

Same! I have a tiny NYC apartment oven too and was worried about hot spots, rotating once halfway totally worked. I also lined my pan with foil so cleanup took like 2 minutes, which is a game changer for small kitchens

2 hours ago

So glad these worked out in small apartment ovens! The foil lining tip is such a good one for easy cleanup, especially when you don’t have a lot of sink space. Keep cooking, you’re doing great!

1 week ago

I’ve tried so many oven rib recipes that say they’re fall off the bone and they never are. This is the first one that actually delivered. The meat was so tender it pulled right off without any effort, and the flavor was perfect. I didn’t even change a single thing, followed it word for word

5 days ago

I felt the same way! I was so tired of recipes overpromising tender ribs and delivering chewy garbage, this one is the real deal. I’ve made it three times already

yesterday

My kids are so picky about ribs, they usually only eat the ones from the local BBQ chain, but they devoured these. I let them help mix the rub and brush on the sauce, which made them even more excited to eat them. We had them with mac and cheese and corn on the cob for the perfect fall dinner

2 hours ago

Mac and cheese and corn is the exact side combo I made too! It’s such a cozy meal, perfect for when the weather starts cooling down. My kids loved helping brush the sauce too, such a fun easy dinner activity

3 days ago

I made these for my partner’s birthday and he said they’re the best thing I’ve ever cooked. I was worried because he’s a total rib snob who swears by his grill, but he went back for a third helping and said I can make these any time. The only change I made was using a honey garlic BBQ sauce instead of regular, and it was chef’s kiss

2 days ago

Honey garlic BBQ sauce sounds incredible on these! I usually use hickory but I’m definitely grabbing a bottle of honey garlic for my next batch, that sounds like the perfect sweet savory combo

1 day ago

Honey garlic sauce is such a delicious swap! So glad your rib snob partner approved, that’s the ultimate seal of approval. Great job nailing them for his birthday!



