
Baked Macaroni and Cheese

title 1
Baked Macaroni and Cheese
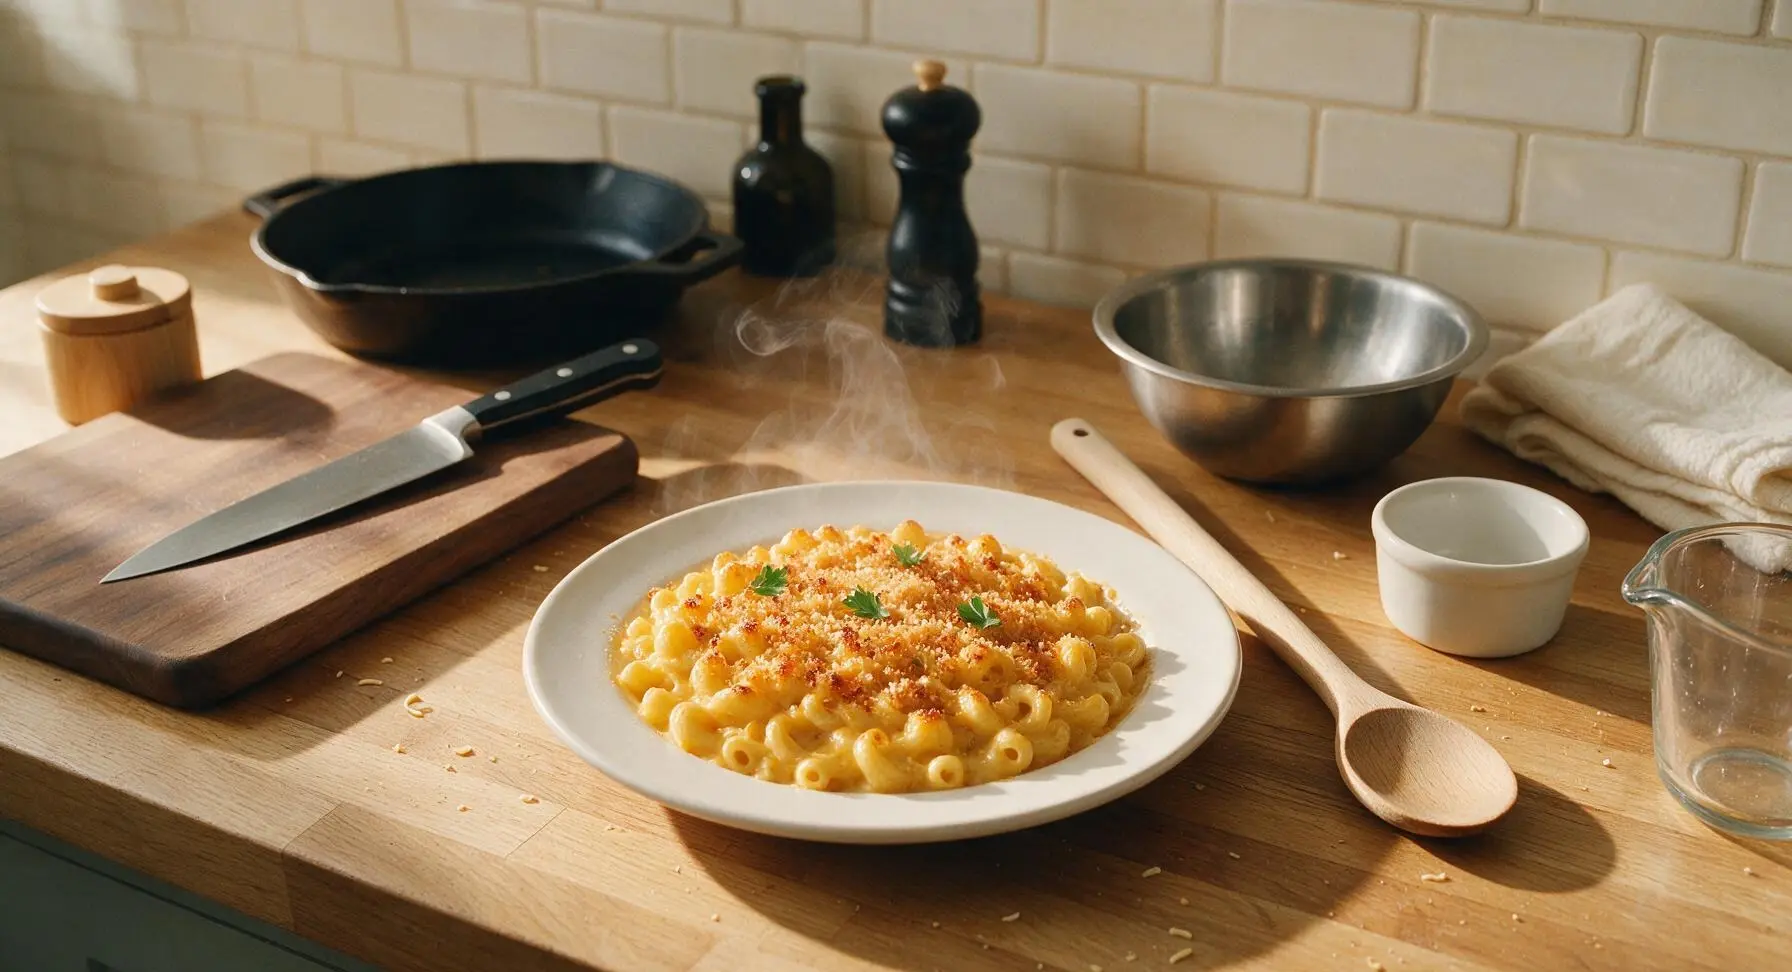
⏱️ cook time 35 minutes
🍽️ servings 6
⚡ Difficulty easy

intro

Velvety, tangy cheese sauce coats tender elbow macaroni, topped with a crisp golden panko crust, baked to bubbly perfection. The ultimate nostalgic, cozy family favorite.

Ingredients
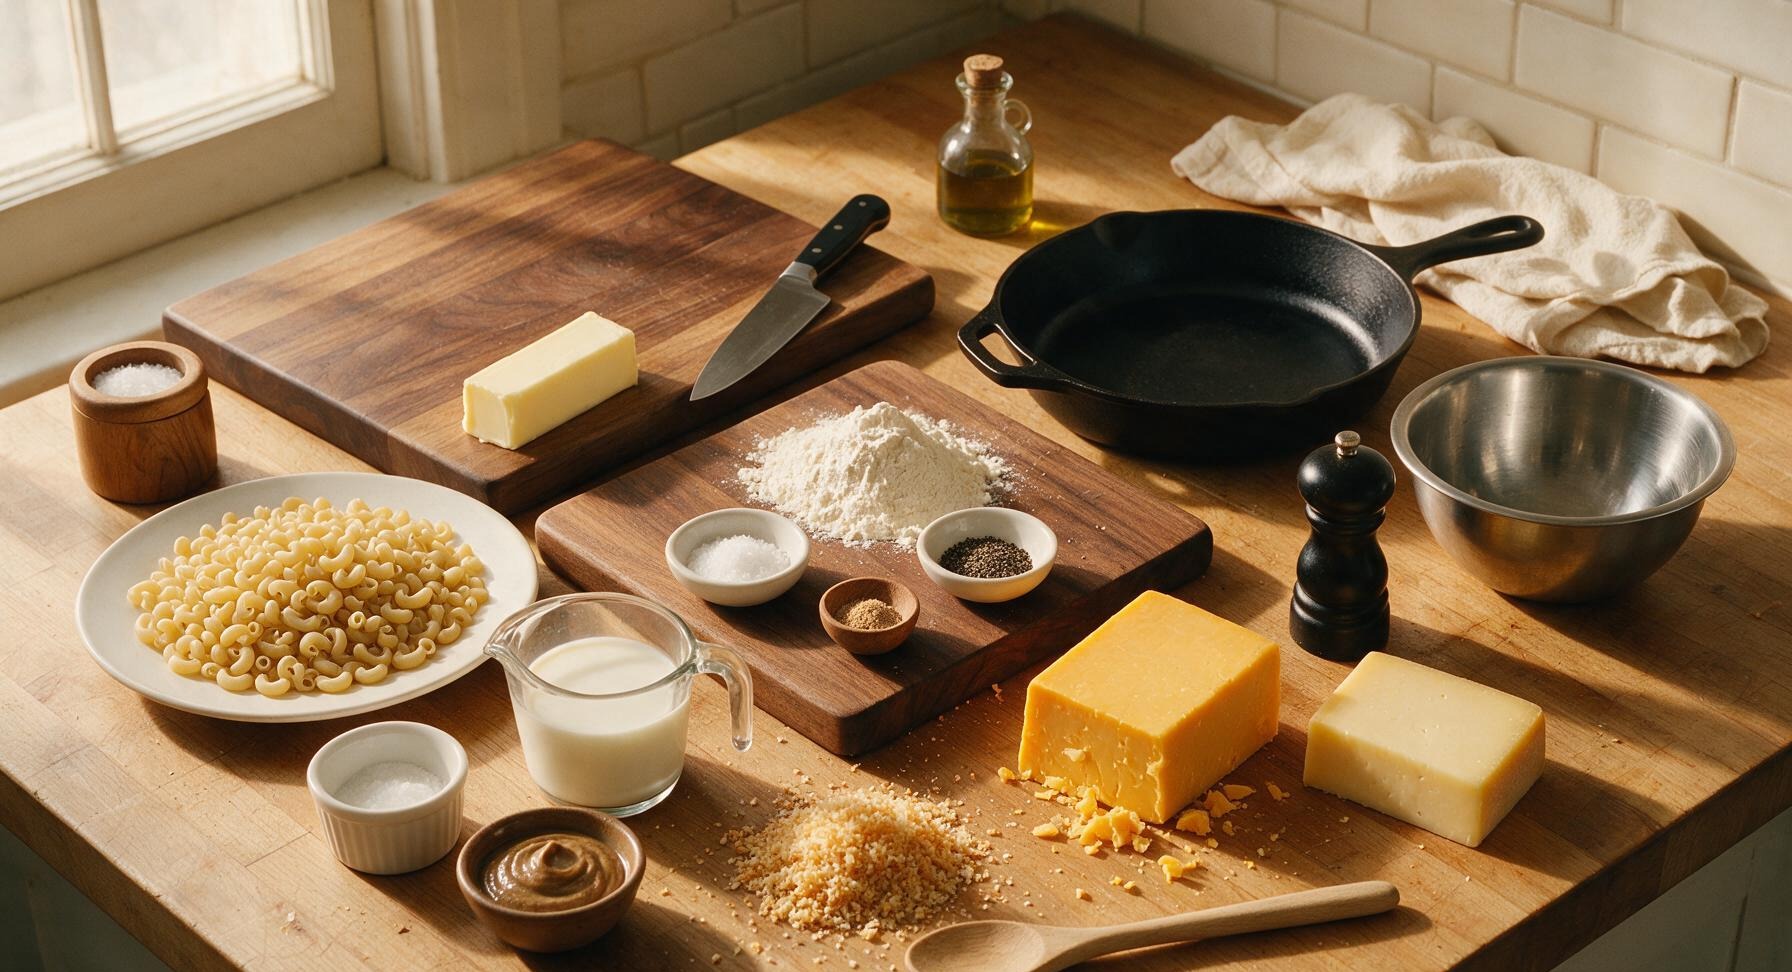
Elbow macaroni 340g (12oz)
Unsalted butter 5 tbsp (70g)
All-purpose flour 1/4 cup (30g)
Whole milk 3 cups (720ml)
Sharp cheddar cheese 225g (8oz, block)
Gruyere cheese 113g (4oz, block)
Panko breadcrumbs 1/2 cup (30g)
Kosher salt 1 tbsp (for pasta water) + 1 tsp (for sauce)
Freshly ground black pepper 1/2 tsp
Ground nutmeg 1/4 tsp
Dijon mustard 1 tsp

Steps

1

Boil Elbow Macaroni

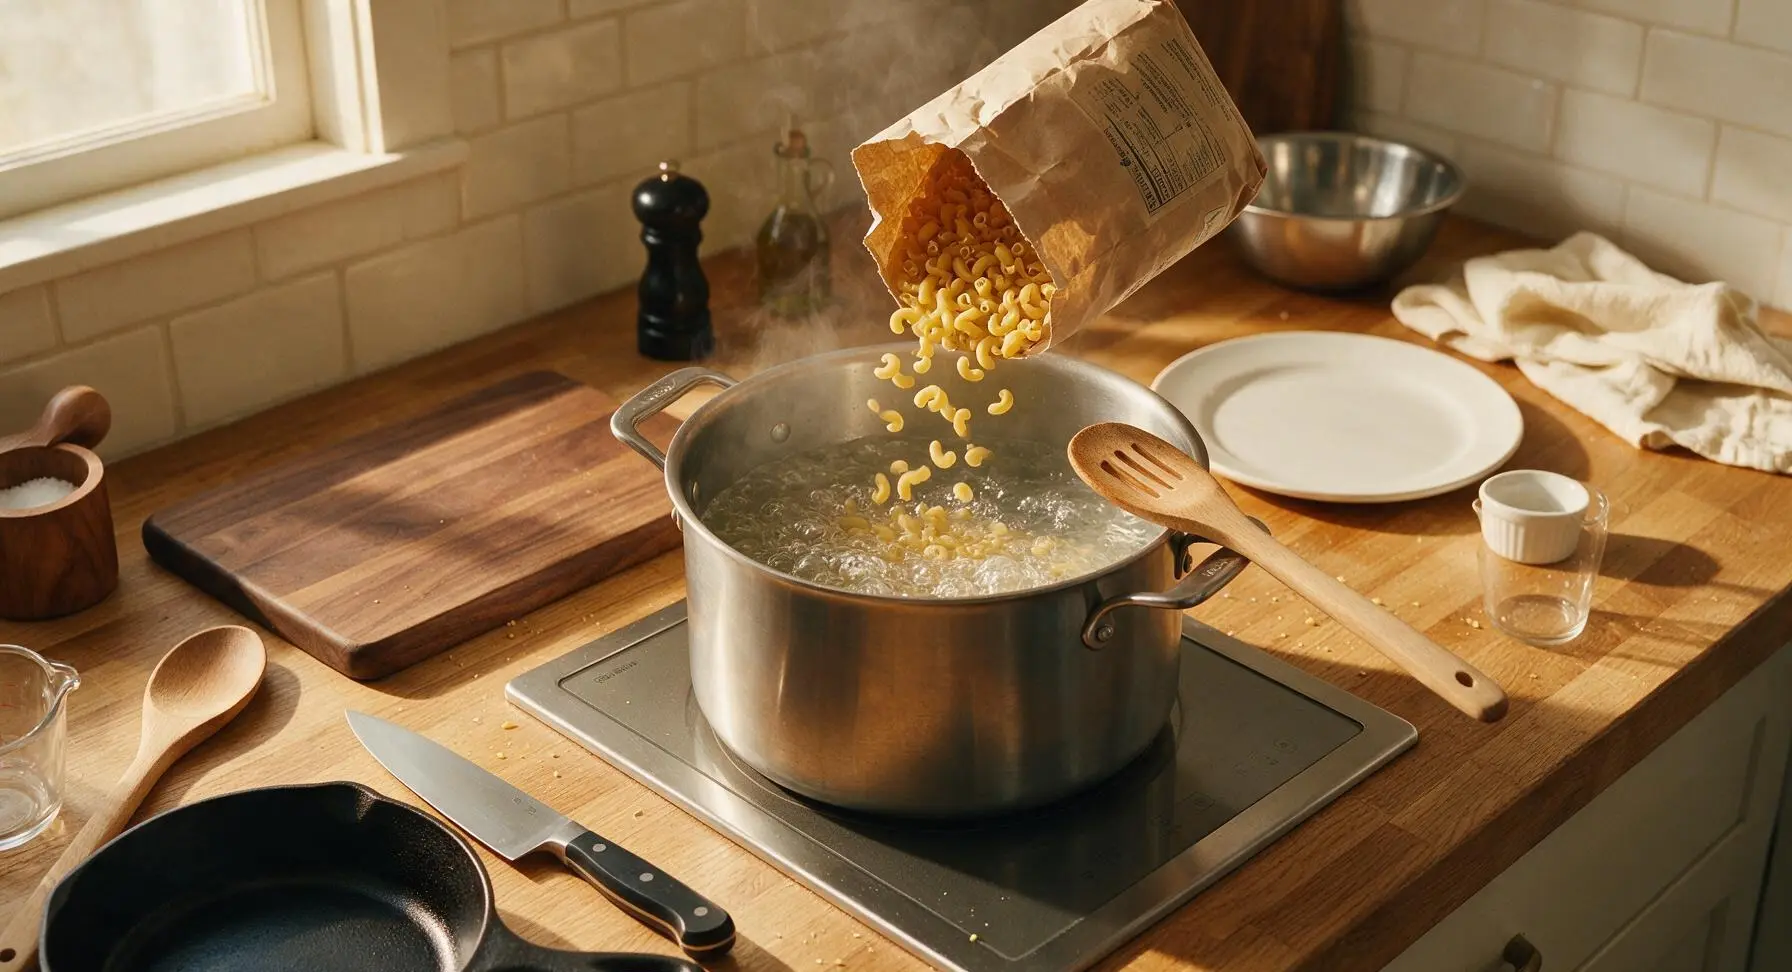
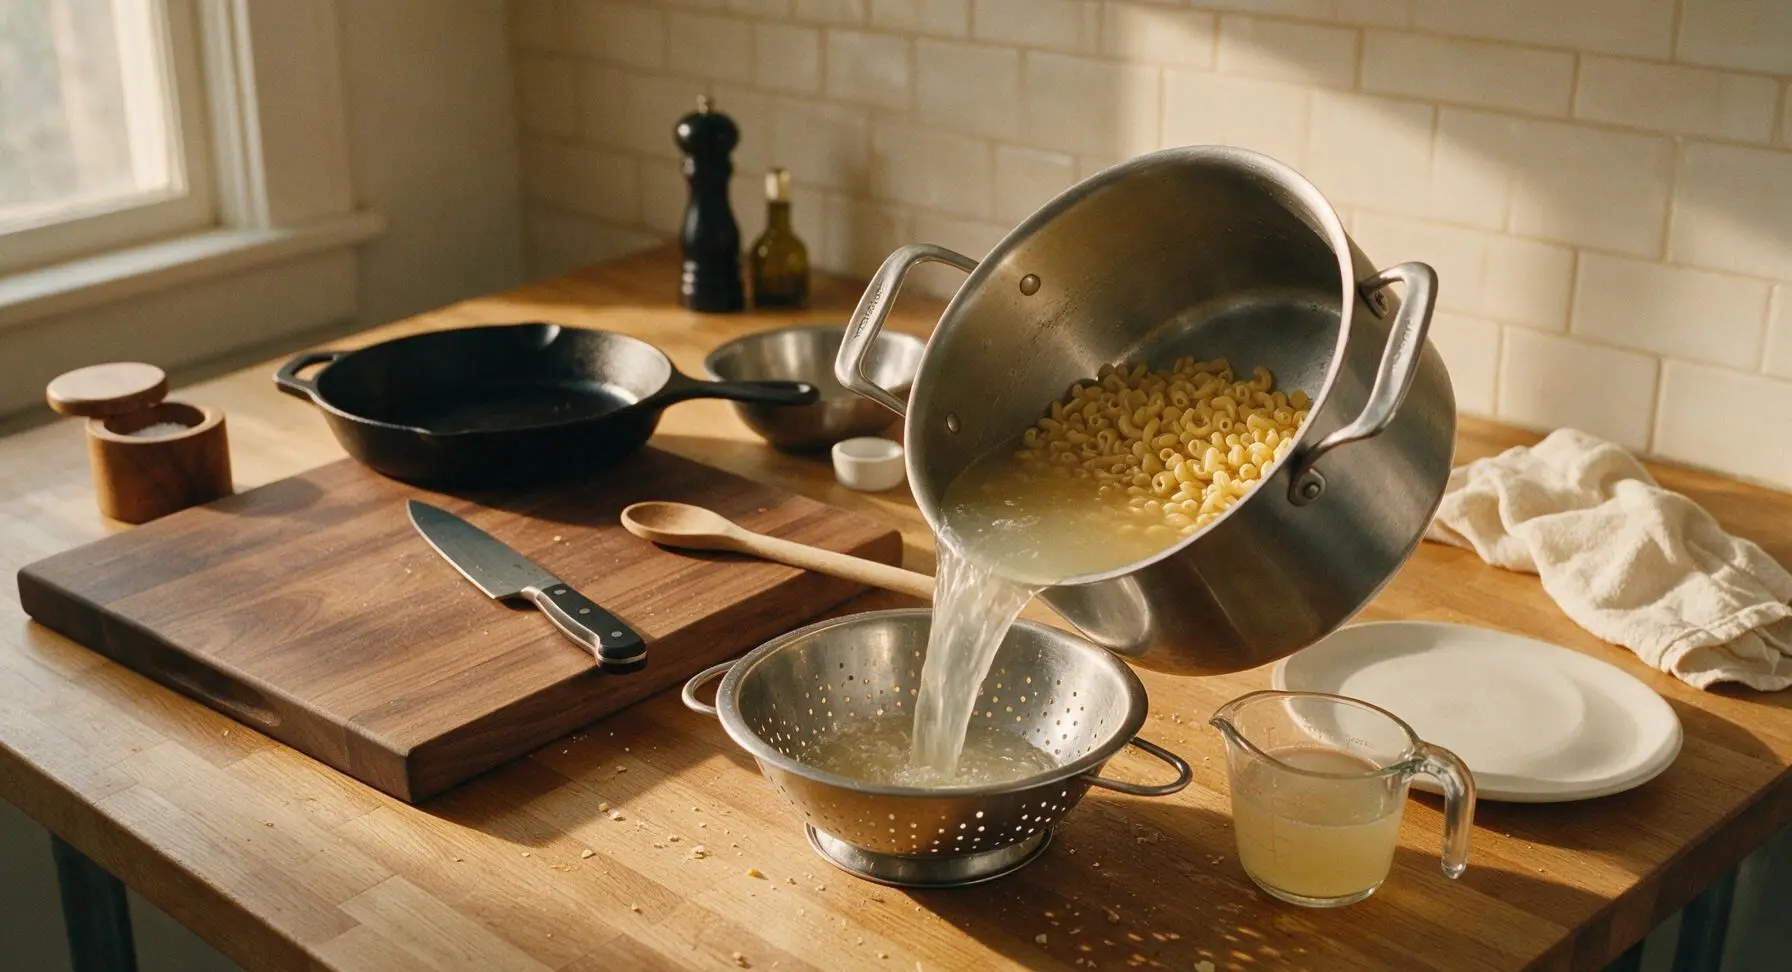
Fill the 6-quart brushed stainless steel stock pot with 4 liters of cold water, add 1 tablespoon of kosher salt, and set over high heat on the induction cooktop until water reaches a rolling boil. Add 340g dry elbow macaroni, stir once with the slotted wooden spoon to prevent noodles from sticking to the pot bottom, and cook 2 minutes shorter than the package’s al dente instruction (noodles will finish cooking during baking). Reserve 1/2 cup of starchy pasta water in the clear glass measuring cup, then drain all pasta completely in the stainless steel colander; do not rinse the pasta, as residual starch helps the cheese sauce cling to noodles.
Step 1
step1:Boil Elbow Macaroni
Step 1
step1:Boil Elbow Macaroni
2

Shred Cheese Blocks

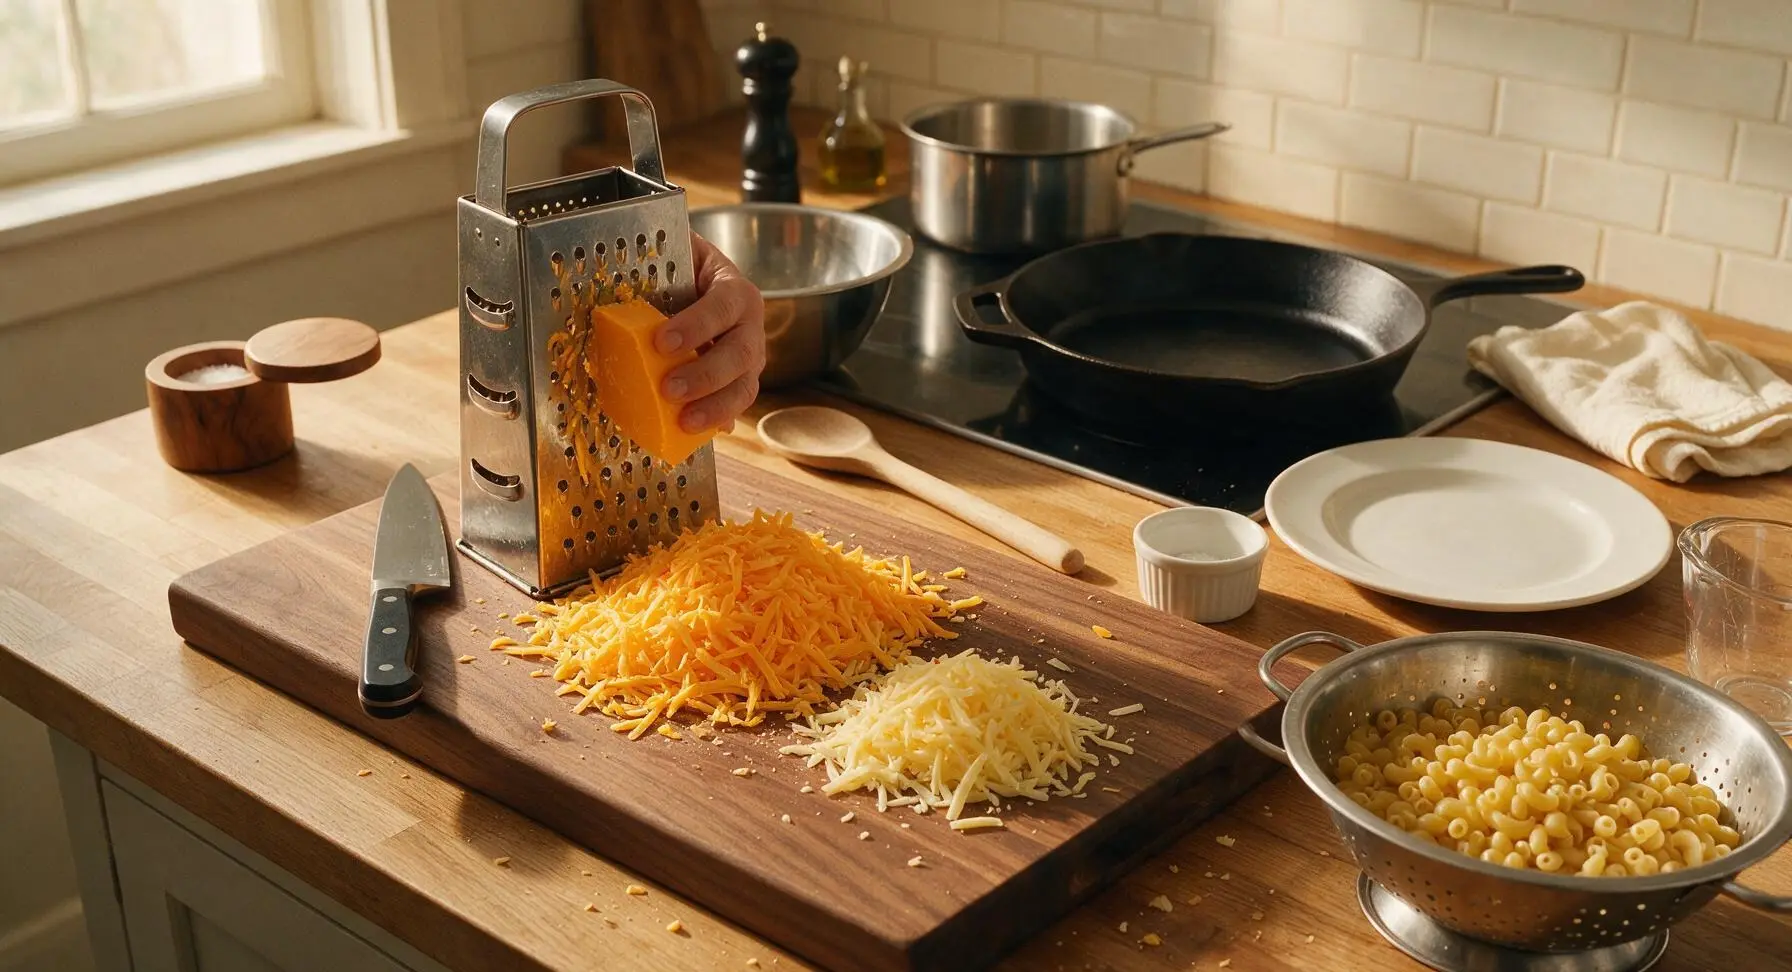
Set the 4-sided stainless steel box grater back on the walnut cutting board. Coarsely shred the 225g block of sharp cheddar and 113g block of gruyere, piling 3/4 of the combined shredded cheese in a loose mound on the cutting board for the sauce, and setting the remaining 1/4 aside in a small pile for the topping. Do not use pre-shredded cheese for this step, as anti-caking coatings will create a grainy sauce.
Step 2
step2:Shred Cheese Blocks
3

Cook Butter Roux

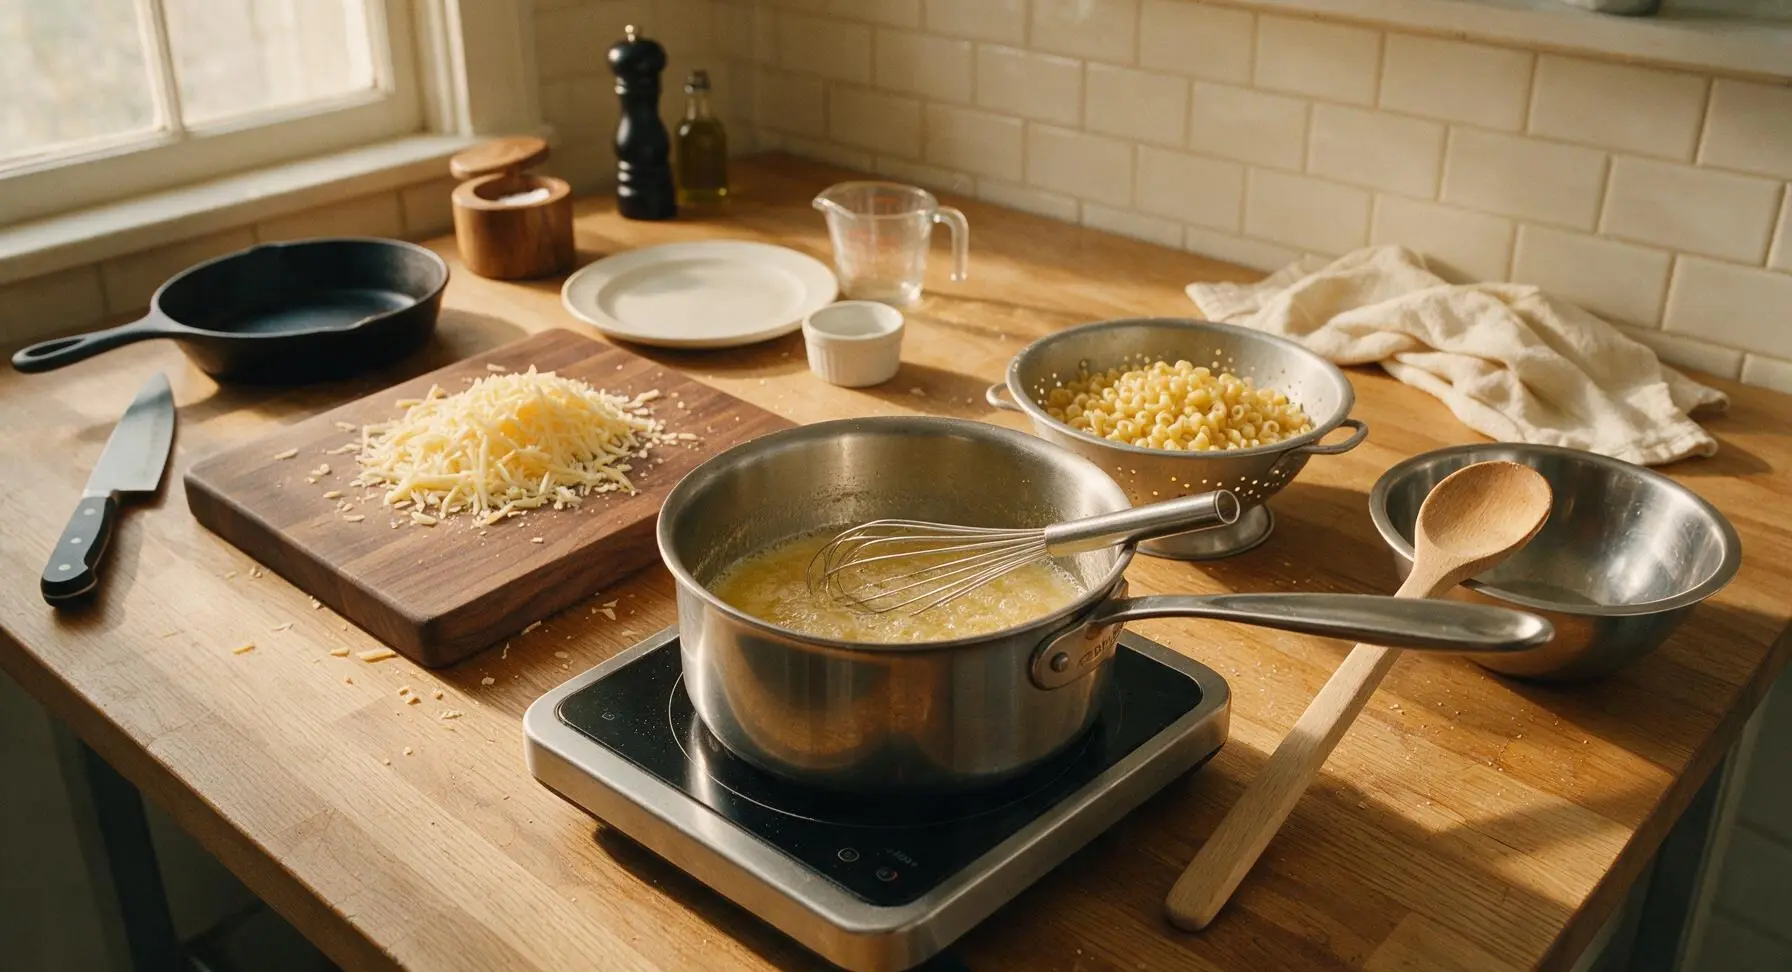
Place the 3-quart stainless steel saucepan on the induction cooktop over medium heat. Add 4 tablespoons of unsalted butter, melting until foaming subsides (about 2 minutes). Whisk in 1/4 cup all-purpose flour with the stainless steel balloon whisk, stirring constantly for 2 full minutes, until the roux turns pale golden yellow and smells faintly of toasted nuts, with no raw flour aftertaste remaining.
Step 3
step3:Cook Butter Roux
4

Whisk Cheese Sauce

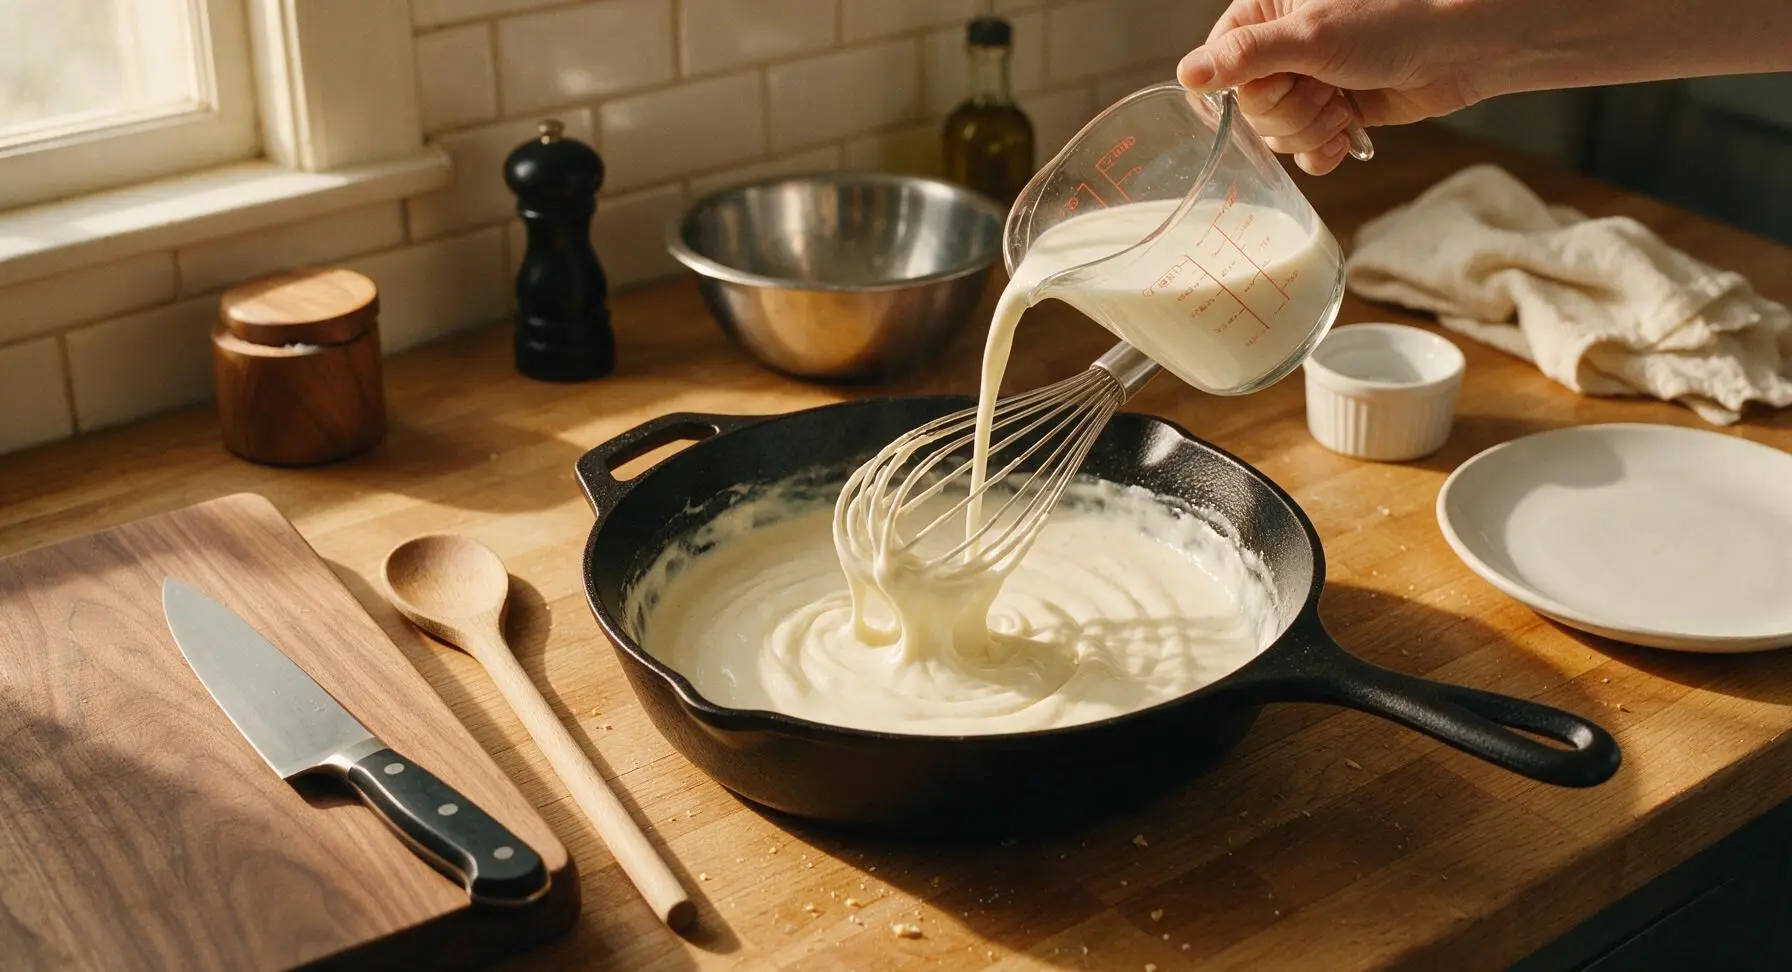
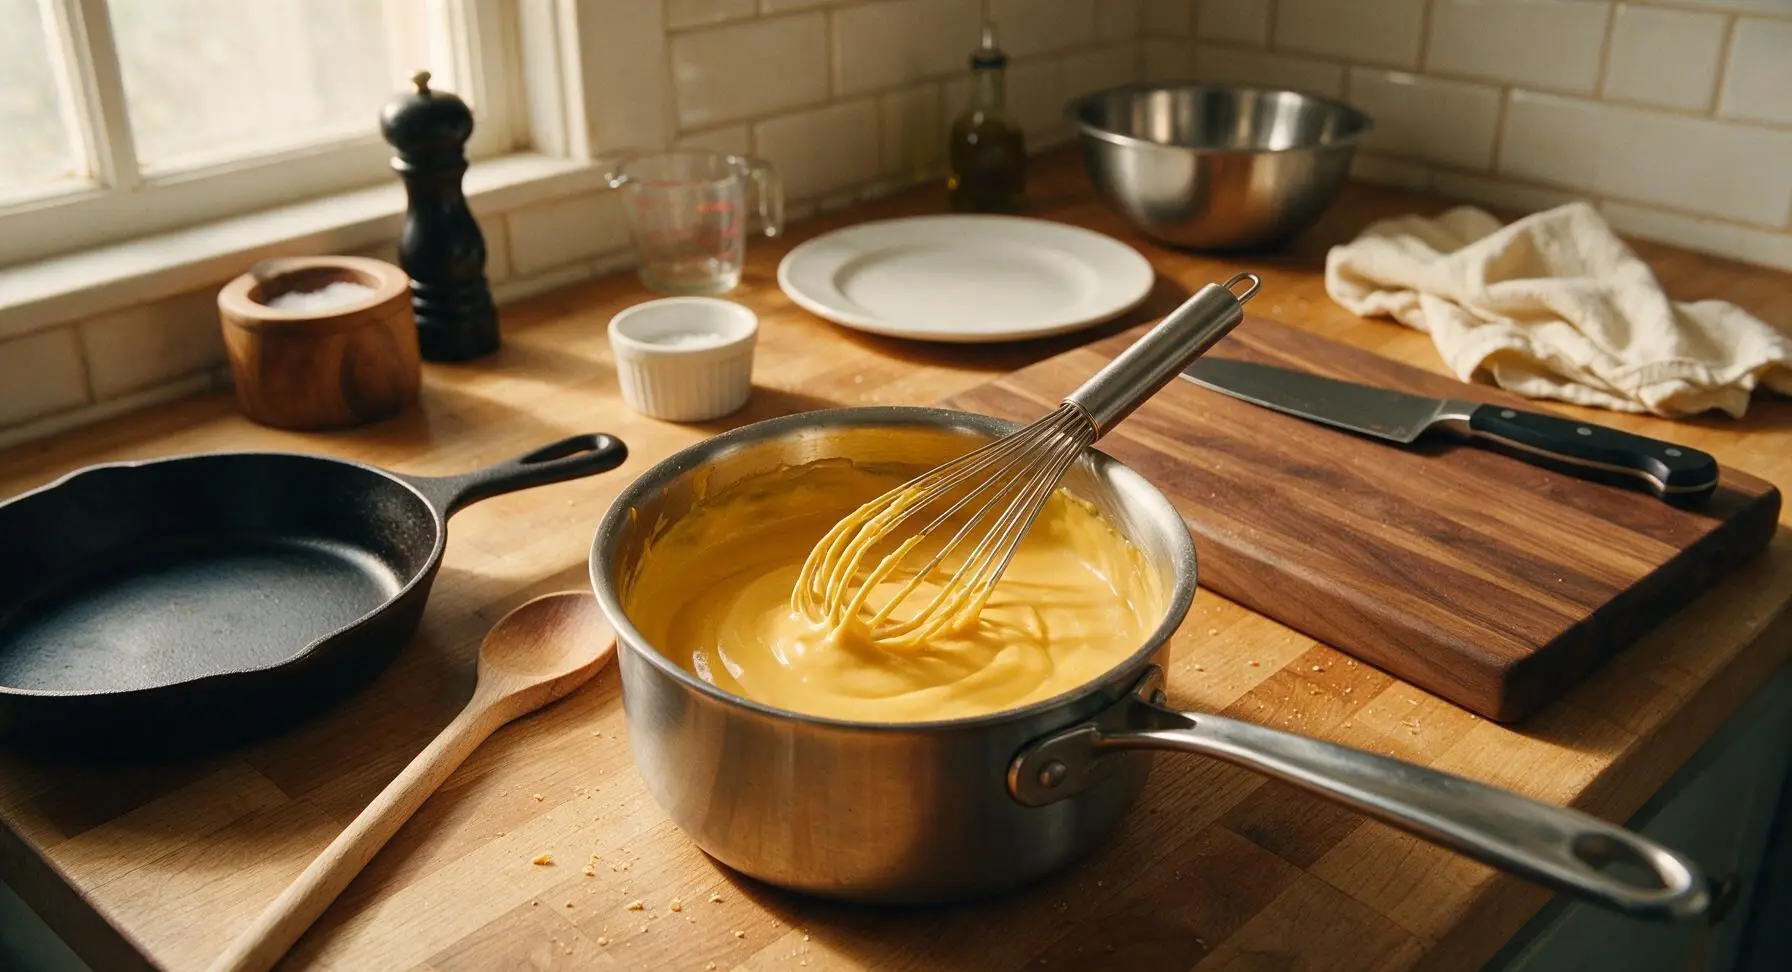
Slowly stream 3 cups of whole milk into the warm roux, whisking constantly to prevent lumps from forming, until the sauce thickens enough to coat the back of a spoon (4-5 minutes). Remove the pan from heat, then stir in 1 teaspoon dijon mustard, 1 teaspoon kosher salt, 1/2 teaspoon freshly ground black pepper, and 1/4 teaspoon ground nutmeg. Add the 3/4 portion of shredded cheddar and gruyere, whisking until cheese is fully melted and the sauce is completely smooth. Thin with 1-2 tablespoons of reserved pasta water if needed to reach a velvety, pourable consistency.
Step 4
step4:Whisk Cheese Sauce
Step 4
step4:Whisk Cheese Sauce
5

Mix Pasta and Sauce

Transfer the drained elbow macaroni from the colander into the 9x13 inch matte cream ceramic baking dish. Pour all of the smooth cheese sauce over the pasta, stirring gently with the slotted wooden spoon to coat every noodle evenly, taking care to scrape the bottom of the dish to ensure no dry pasta clumps are left. Spread the sauced pasta into a flat, even layer across the dish.
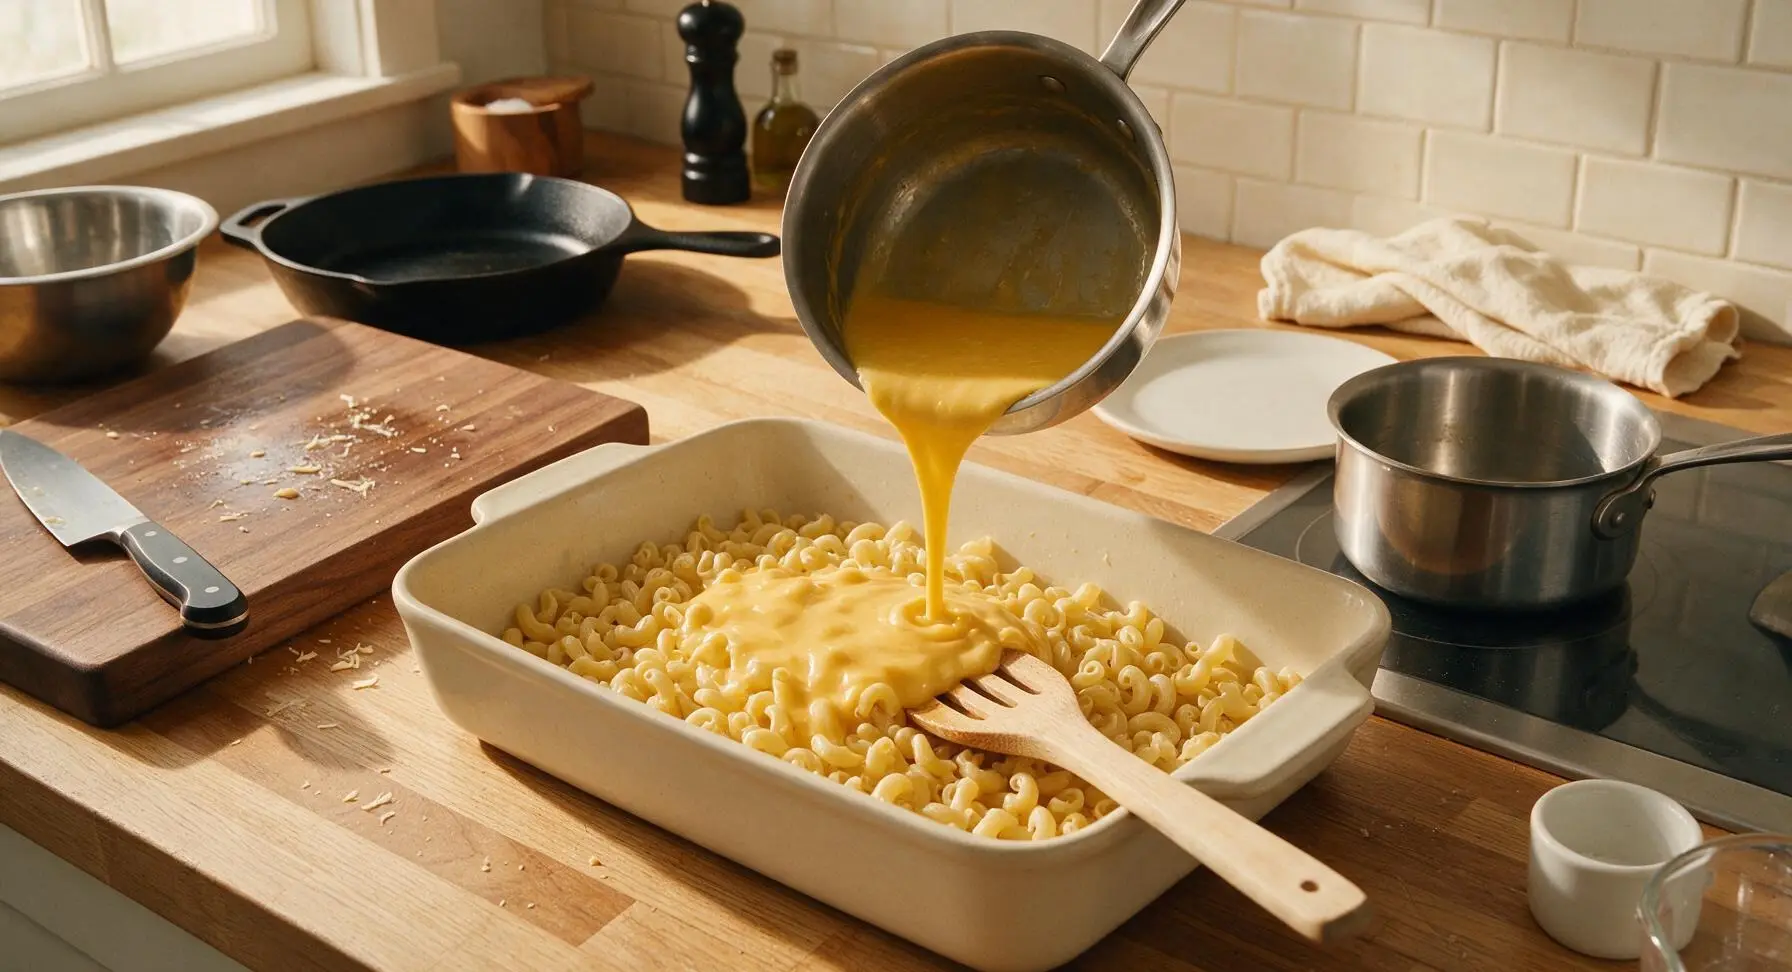
Step 5
step5:Mix Pasta and Sauce
6

Prep Breadcrumb Topping

In the small clear tempered glass mixing bowl, combine 1/2 cup panko breadcrumbs, 1 tablespoon melted unsalted butter, and the reserved 1/4 portion of shredded cheese, tossing lightly to coat crumbs evenly. Sprinkle the breadcrumb mixture in a thin, even layer over the top of the sauced pasta; do not press the crumbs down, as compacted crumbs will turn soggy instead of crisp during baking.
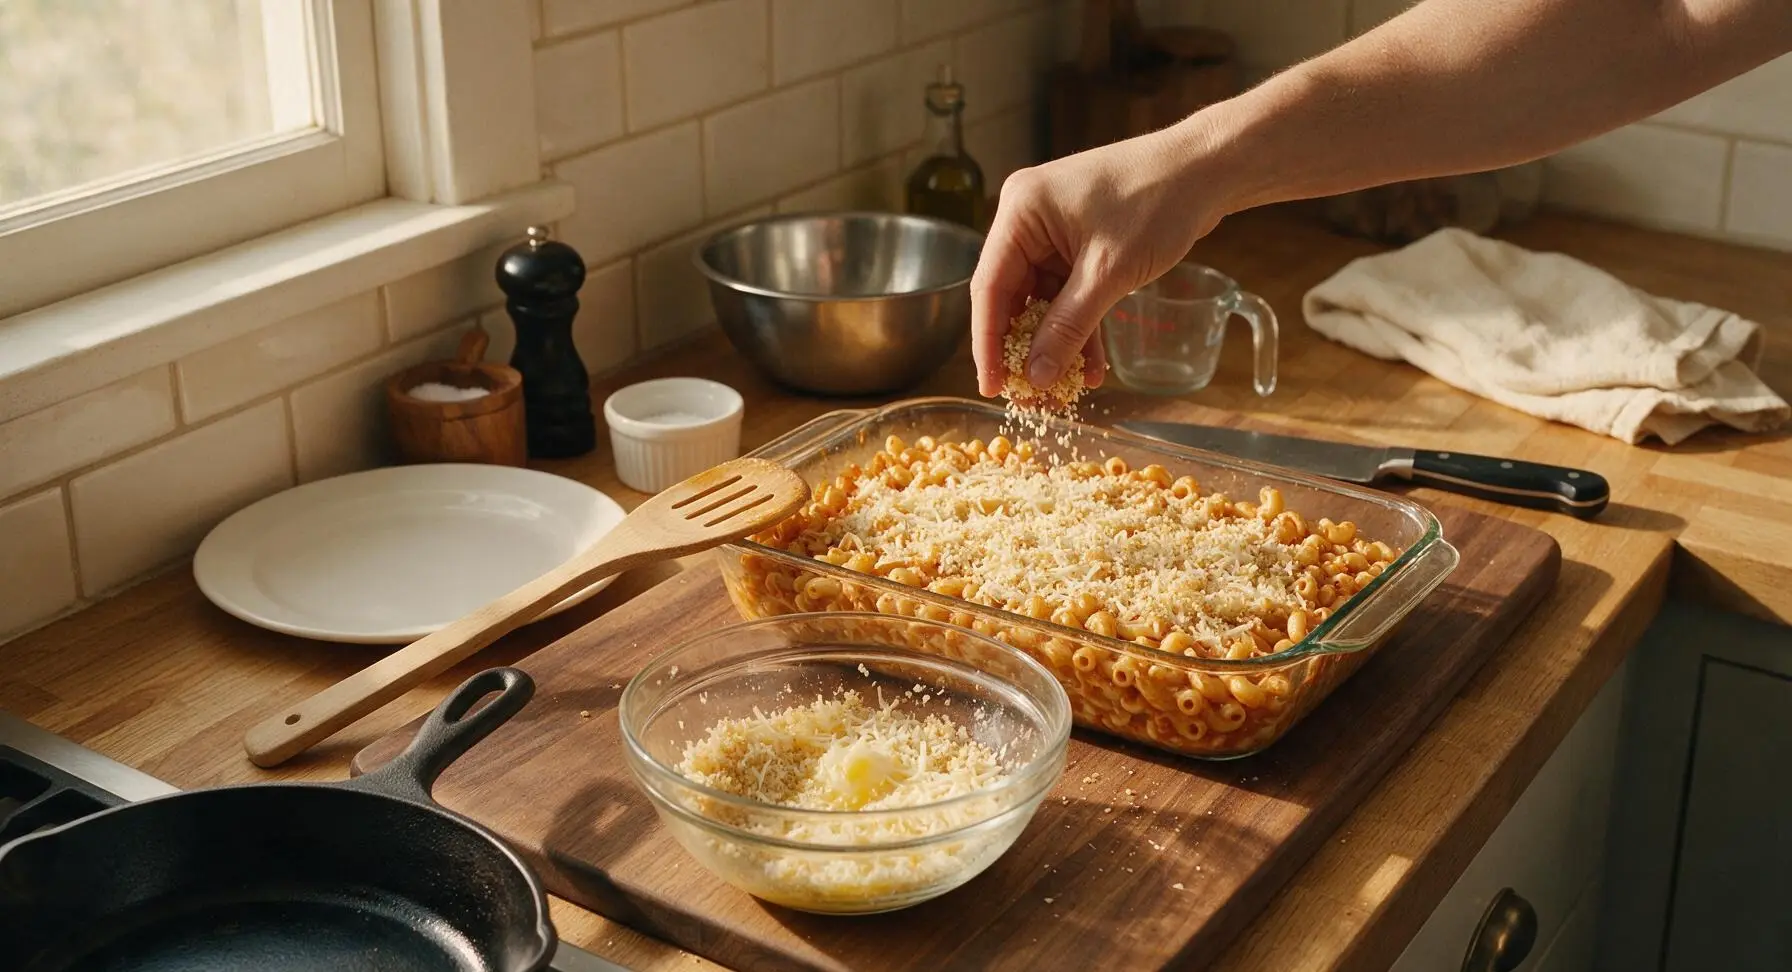
Step 6
step6:Prep Breadcrumb Topping
7

Bake Until Golden

Carefully transfer the baking dish to the middle rack of a preheated 375°F (190°C) oven. Bake for 25 minutes, until the cheese sauce is actively bubbling around the dish edges, and the breadcrumb top is deep golden brown and crisp. If the topping browns faster than expected, tent loosely with aluminum foil for the final 10 minutes of baking. Remove from the oven and let rest 5 minutes on the counter before serving, to allow the sauce to set slightly.
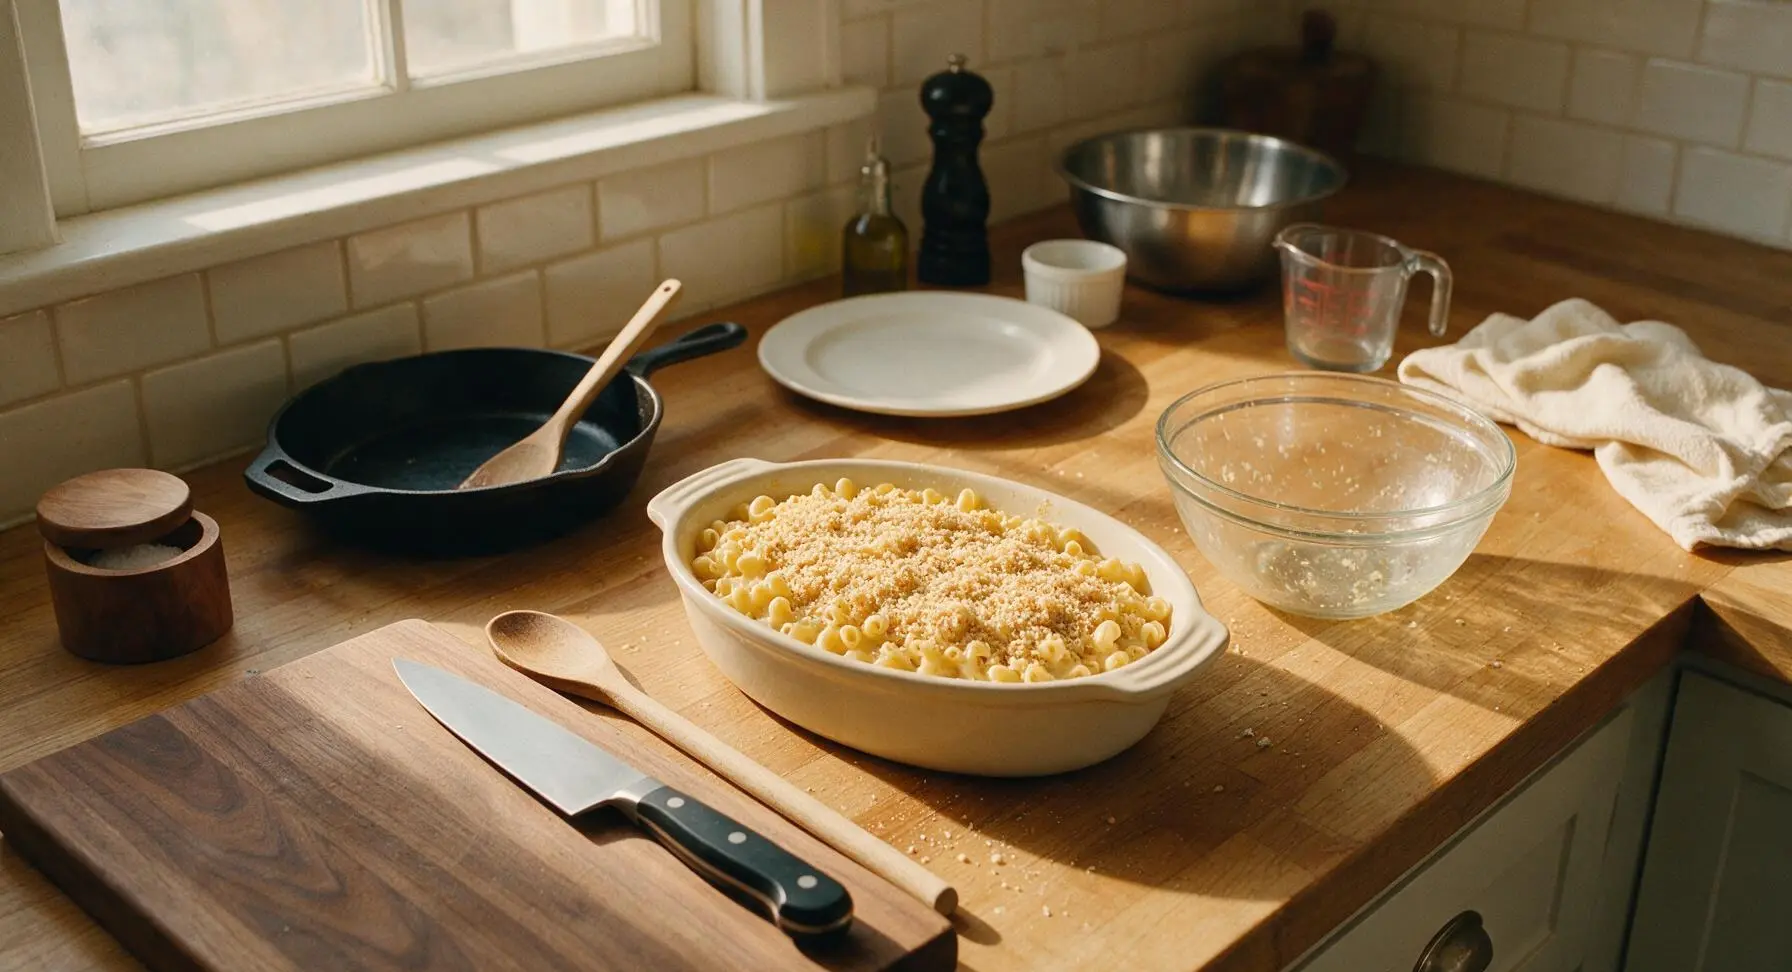
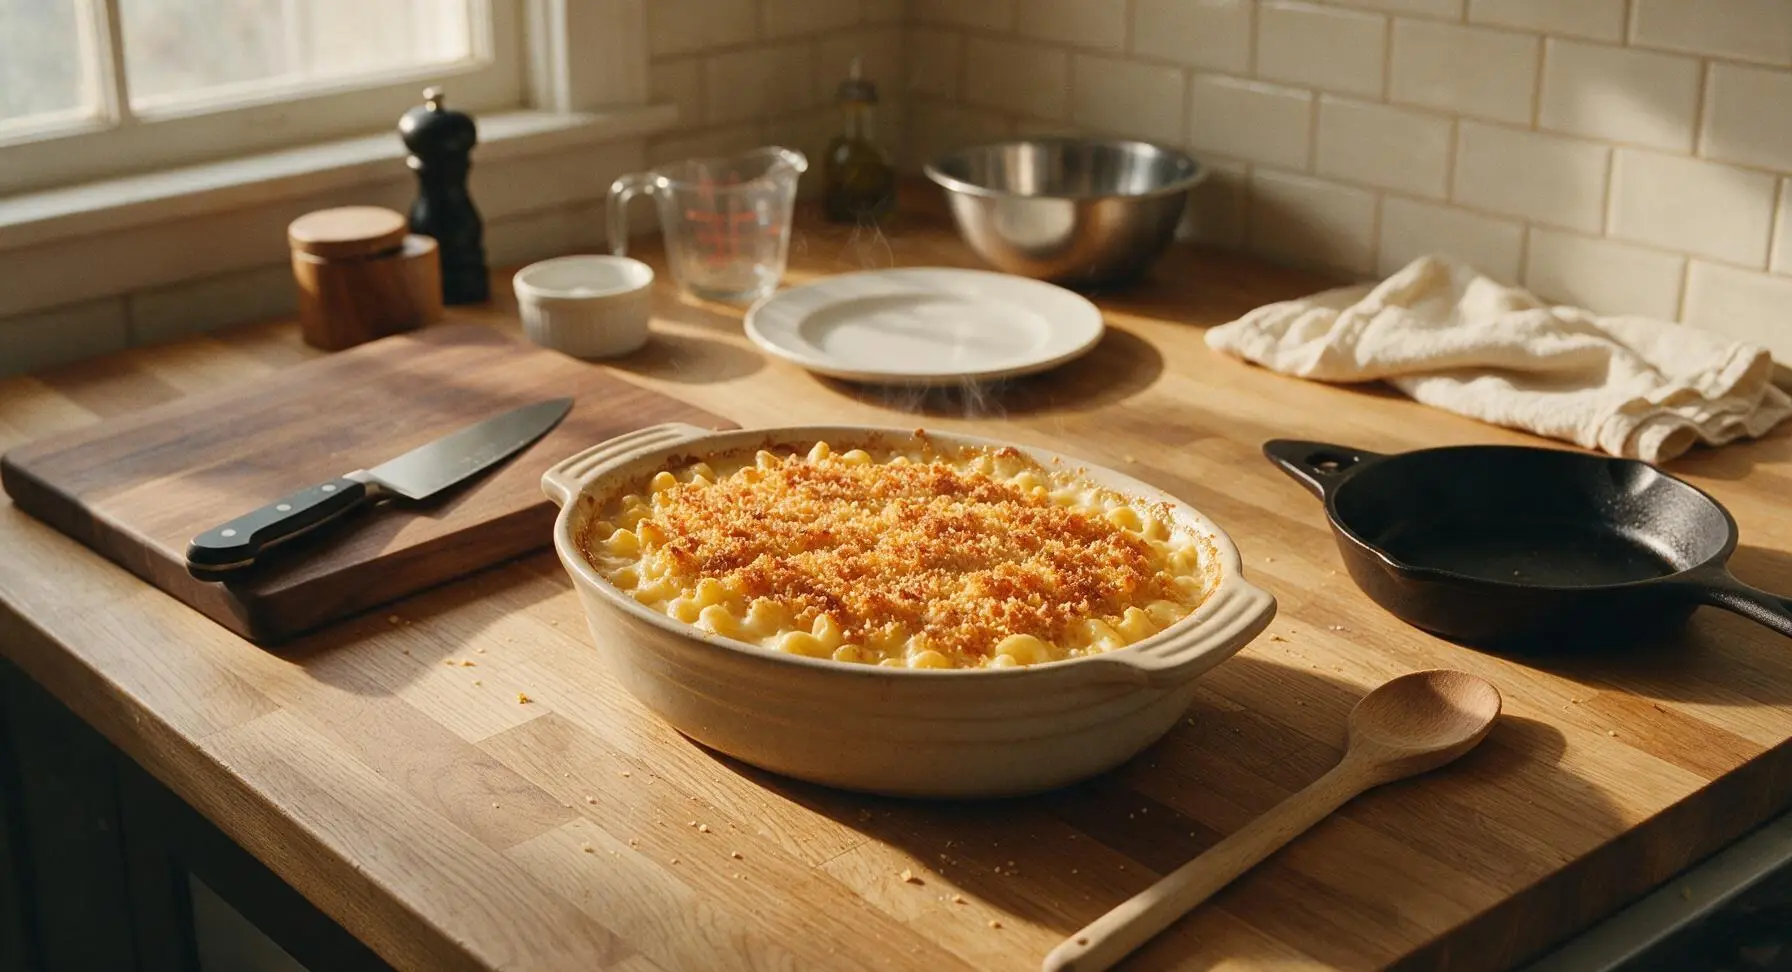
Step 7
step7:Bake Until Golden
Step 7
step7:Bake Until Golden

Tips

1.Undercook your pasta by 2 minutes: Noodles will continue to absorb liquid and cook as the mac and cheese bakes, so starting with very al dente pasta prevents mushy, over-soft noodles in the finished dish.
2.Skip pre-shredded cheese: Store-bought pre-shredded cheese is coated in potato starch and anti-caking agents that prevent smooth melting, leading to a grainy, gritty cheese sauce instead of a velvety texture.
3.Rest before serving: Let the baked mac sit for 5 full minutes after coming out of the oven. This allows the hot cheese sauce to thicken and set, so it doesn’t run off the noodles when served, and gives the breadcrumb topping time to crisp fully as it cools slightly.


✨ You May Also Like

Main Course
🍜 United Kingdom

A showstopping classic of tender seared beef, savory mushroom duxelles, and crisp prosciutto wrapped in flaky golden puff pastry, baked to juicy perfection.

⏱️ 2 hours 1Main Course ★ 4.7
Main Course
🍜 India

Tender charred marinated chicken simmered in a rich, spiced creamy tomato sauce, this iconic Anglo-Indian curry pairs perfectly with basmati rice or warm naan.

⏱️ 50 minuteMain Course ★ 4.6
Main Course
🍜 Thailand

Classic tangy, sweet, and savory Thai stir-fried rice noodles with shrimp, tofu, and crunchy garnishes, balancing all five core Thai flavor profiles.

⏱️ 30 minuteMain Course ★ 4.5
Main Course
🍜 United Kingdom

Crispy golden beer-battered cod and fluffy double-fried chips, served with tangy tartar sauce and malt vinegar: the timeless, beloved British pub comfort classic.

⏱️ 45 minuteMain Course ★ 4.7
Main Course
🍜 Mexico

Smoky, chile-marinated pork tacos with caramelized pineapple, fresh cilantro, and lime: a beloved classic Mexican street food perfect for casual summer gatherings.

⏱️ 1 hour 45Main Course ★ 4.8
Main Course
🍜 United States

Crunchy Fritos corn chips layered with savory beef chili and melted cheddar, topped with cool, zesty fixings for a beloved, cozy Tex-Mex comfort food.

⏱️ 35 minuteMain Course ★ 4.8

Baked Macaroni and Cheese:Frequently Asked Questions

1.Why does my cheese sauce turn out grainy instead of silky smooth? ▾
Grainy sauce usually comes from overheating the cheese or adding it too quickly. After making your roux with butter and flour, warm your whole milk first before whisking it in, then take the pan off direct heat before stirring in shredded sharp cheddar a handful at a time. Avoid boiling the sauce once cheese is added, as high heat breaks down cheese proteins and causes that gritty texture.
2.Can I use pre-shredded cheddar instead of shredding cheese from a block? ▾
Pre-shredded cheese is coated in anti-caking agents like potato starch that keep it from clumping in the bag, but those additives also make your sauce thicker, less velvety, and slightly muted in flavor. For the silkiest, tangiest result, shred your own block of sharp cheddar with a box grater right before making the sauce—it only takes a couple extra minutes.
3.How done should I cook elbow macaroni before adding it to the baking dish? ▾
Cook your elbow macaroni 2 minutes less than the package’s al dente recommendation, so it’s still firm with a tiny white core in the center. It will finish cooking fully while it bakes in the creamy cheese sauce, and cooking it fully ahead of time will lead to mushy, oversoft noodles that don’t hold up to the rich sauce. Drain well, no rinsing needed, before combining with sauce.
4.Why does my panko topping turn out soggy instead of crisp and golden? ▾
Soggy panko topping happens when it isn’t tossed with a little melted fat before baking, or when too much sauce seeps up into the crumbs. Melt 2 tablespoons of unsalted butter, toss it evenly with the panko, and spread it in a thin, even layer across the top of the mac right before baking. Bake uncovered on the middle rack so hot air circulates to crisp it evenly.
5.Can I substitute low-fat milk for whole milk in the cheese sauce? ▾
Whole milk gives the sauce its rich, creamy base thanks to its higher fat content, but you can swap in 2% milk if that’s all you have. Skip skim or nonfat milk, though—it will produce a thin, watery sauce that tastes flat, and won’t emulsify as smoothly with the flour-butter roux and melted sharp cheddar. For extra richness, replace ¼ cup of milk with heavy cream if you have it.
6.What ratio of butter to flour works best for the cheese sauce roux? ▾
For a stable, smooth cheese sauce that coats every noodle, use equal parts unsalted butter and all-purpose flour by weight—for a standard 9x13 pan of mac and cheese, that’s ¼ cup butter and ¼ cup flour. Cook the roux over medium heat for 2 to 3 minutes, stirring constantly, to get rid of raw flour taste before slowly whisking in warm whole milk.
7.Why does my baked mac and cheese come out dry after baking? ▾
Dry baked mac usually comes from two issues: overcooking your noodles ahead of time, or using too little sauce relative to pasta. Remember, noodles absorb sauce as they bake, so make your sauce just a touch looser than you think it should be before combining with par-cooked elbows. Cover the pan with foil for the first 20 minutes of baking to lock in moisture, then uncover to crisp the topping.
8.Can I stir in extra mix-ins like bacon or broccoli? ▾
Absolutely! This classic recipe is a perfect base for custom add-ins. Cooked, crumbled bacon, steamed broccoli florets, diced roasted ham, or caramelized onions all work beautifully. Just make sure any wet or vegetable add-ins are patted dry before stirring them in, so extra water doesn’t thin out your sharp cheddar sauce or make the panko topping soggy during baking.
9.What oven temperature gives the best baked mac and cheese results? ▾
Bake your mac and cheese at 375°F for the perfect balance of bubbly sauce and crisp topping. This temperature is hot enough to heat the sauce through and get that golden panko crust without burning the top or curdling the cheese. It will take roughly 25 to 30 minutes total, and it’s done when the edges are bubbling and the top is a deep, even golden brown.
10.Do I need to grease my baking dish before adding the mac and cheese? ▾
Yes, a quick light coat of softened unsalted butter or nonstick cooking spray on the inside of your 9x13 inch baking dish will keep cheesy noodles and panko from sticking to the sides as it bakes. It also makes serving much easier, so you can scoop neat portions without leaving crispy cheese edges stuck to the pan. A thin, even coating is all you need.
11.Can I assemble this mac and cheese ahead of time for a potluck or party? ▾
You can assemble the fully mixed mac and cheese (hold off on adding the panko topping) and store it covered in the fridge for up to 2 days before baking. When you’re ready to bake, add the butter-tossed panko top, add 5 to 10 minutes to the total bake time to account for the cold dish, and bake until bubbly. Let it rest 10 minutes before serving for clean portions.
12.Why does my roux get lumpy when I whisk in the milk? ▾
Lumpy roux happens when you add cold milk too quickly to the hot butter-flour base. Warm your whole milk in a small saucepan or the microwave first, then whisk it into the roux in small, slow increments, whisking constantly between additions. If you do end up with a few small lumps, pour the finished sauce through a fine mesh sieve before stirring in cheddar for a perfectly smooth result.
13.Is sharp cheddar really a better choice than mild cheddar for this recipe? ▾
Sharp cheddar is ideal because it has a deeper, tangier, more pronounced cheese flavor that stands up to the rich roux and milk base, so your mac and cheese tastes cheesy rather than bland. Mild cheddar melts well but has a much milder flavor that can get lost in the sauce. If you prefer extra nuttiness, swap ¼ of the sharp cheddar for Gruyère.
14.Should I rinse my elbow macaroni with water after draining it? ▾
Skip rinsing your elbow macaroni after draining! The starchy coating on the cooked noodles helps the cheese sauce cling evenly to every piece, so you get sauce in every bite. Rinsing washes that starch away, which leads to slippery noodles that the sauce slides right off of. Just drain the pasta well, shake off excess water, and toss it straight into the cheese sauce.
15.How do I reheat leftover mac and cheese so it stays creamy? ▾
Reheat leftovers in a 350°F oven, covered with foil, for 15 to 20 minutes until heated through. If the sauce seems a little thick, stir in a tablespoon or two of whole milk before reheating to loosen it back up. Avoid microwaving on high for long stretches, as that can cause the cheese sauce to separate and turn greasy, leaving you with rubbery noodles and grainy cheese.
16.Can I use a different pasta shape if I don’t have elbow macaroni? ▾
Elbow macaroni is classic because its curved shape and ridges catch and hold the thick cheese sauce perfectly, but you can swap in other small, ridged pasta shapes if needed. Cavatappi, small shells, rotini, or campanelle all work well—just avoid long, smooth pasta like spaghetti or linguine, which won’t hold the sauce nearly as well. Cook pasta 2 minutes under package al dente, just like elbows.
17.Why does my cheese sauce separate or curdle while it bakes? ▾
Sauce curdling happens when the cheese gets too hot, causing milk proteins to break and separate from the fat. Make sure you don’t boil the sauce on the stovetop before baking, and avoid baking at temperatures higher than 375°F. Using freshly shredded sharp cheddar instead of pre-shredded cheese also helps, as added anti-caking agents can cause uneven melting and separation at high heat.
18.How thick should the cheese sauce be before I mix it with the pasta? ▾
Your finished cheese sauce (before adding pasta) should be thick enough to coat the back of a wooden spoon, so when you run your finger through the sauce on the spoon, it leaves a clear line that doesn’t run. It will thin a little as it bakes and mixes with starch from the noodles, so if it’s overly thick, whisk in an extra splash of warm whole milk to loosen it to the right consistency.
19.Can I skip making the roux to save time? ▾
The roux made from equal parts unsalted butter and all-purpose flour is what gives this sauce its stable, velvety texture that doesn’t break or turn greasy while baking. You can make a roux-free version by melting cheese into warm cream, but that version will be much heavier, more likely to separate, and won’t have that balanced, nostalgic texture. The 3 minutes it takes to make the roux is absolutely worth it.
20.How long should I let mac and cheese rest after taking it out of the oven? ▾
Let your baked mac and cheese rest for 10 full minutes after you pull it out of the oven before scooping and serving. This short rest gives the bubbling hot cheese sauce time to thicken up and set a little, so it doesn’t run all over your plate when you serve it. If you cut into it straight out of the oven, the sauce will be too thin and liquidy for perfect portions.

Comments (14)

2 days ago

OMG this baked macaroni and cheese was an absolute hit at our Sunday family dinner! My kids loved it so much my picky middle kid asked for thirds, and my husband said it’s better than the version his grandma used to make. 10/10, will be adding this to our regular rotation for potlucks too!

yesterday

Same! I brought this to our church potluck last week and people were scraping the pan clean, no leftovers at all!

yesterday

That makes my day! So glad it worked for your family dinner and worked out so well for potlucks—this recipe is totally built for feeding a crowd!

3 days ago

Perfect easy recipe for my dorm meal prep! I don’t have a ton of fancy kitchen equipment and this came together so fast in 35 minutes, way cheaper than ordering takeout every night. SO creamy, no weird grainy cheese texture like other recipes I’ve tried.

2 days ago

Love that this works for dorm cooking! If you want to prep it ahead for the week, it reheats amazingly in the microwave with a tiny splash of milk to keep it creamy.

1 week ago

Game changer! I added a little crumbled bacon on top before baking and it took this over the top. The crispy breadcrumb topping is *chef’s kiss*, not too much, just the right amount of crunch against the creamy cheese.

5 days ago

I swapped the regular pasta for gluten free elbow macaroni and used GF panko for the topping, and it turned out perfect! I was worried the cheese sauce would be too thin but it was exactly the right consistency. My whole family (none of whom are GF) devoured it.

3 days ago

So happy the GF swap worked out for you! That’s such a great tip for other gluten free folks looking to make this—thanks for sharing your adjustment!

yesterday

Made this last night for my kid’s soccer team dinner and wow, so easy to throw together after work! The only thing I will say is I wish I’d doubled the recipe because 12 hungry teens cleared the entire pan in 5 minutes flat.

2 hours ago

Oh my gosh I had the exact same experience at our team dinner last month! I always double it now and still barely have leftovers.

30 minutes ago

Doubling is always the right call with teen athletes! If you do double it, just add 5-10 minutes to the bake time to make sure the center is heated all the way through.

2 weeks ago

This is my new go-to for every neighborhood block party! It holds up great in a slow cooker on warm if you need to transport it, and people always ask for the recipe. 10/10, no notes.

30 minutes ago

First time making homemade mac and cheese instead of the boxed stuff, and it was so easy! I messed up and used sharp cheddar plus a little pepper jack by accident, and it had the perfect little kick. Definitely making this again.

5 minutes ago

Pepper jack is such a good call! I add a dash of hot sauce to my cheese sauce too for an extra little zing, it’s chef’s kiss.

2 hours ago

Wait, is there a way to make this ahead and freeze it? I’m trying to stock my freezer with easy meals for when the new baby comes next month and this seems like something my toddler would actually eat.

30 minutes ago

I froze this last month! I assembled it without baking, wrapped it super tight in foil, and baked it from frozen at 375 for about an hour, turned out perfect!

5 minutes ago

Great tip from the comments! You can absolutely freeze this for up to 3 months—just add 10-15 minutes to the bake time if you’re cooking straight from frozen, and let it rest 5 minutes before serving.

5 minutes ago

Help! I made this and my cheese sauce came out a little lumpy? Did I do something wrong? It still tasted good but I want it to be smoother next time.

just now

No worries, that happens to everyone! Make sure you’re whisking the flour and butter (the roux) really well for 2-3 minutes before adding the milk, and add the cheese a handful at a time while stirring off heat so it melts smoothly instead of clumping. Give it another try, it’ll be perfect next time!

1 week ago

SO good. Made this on a rainy day when I was feeling under the weather and it hit every single comfort food spot. The crispy top layer, the gooey cheese inside, perfectly cooked pasta—no complaints at all. Will be making this every time it rains from now on.

3 days ago

I stirred in a cup of steamed broccoli florets into the cheese sauce before baking to get some veggies in for my kids, and they didn’t even complain! It paired so well with the creamy cheese, I’m gonna try adding roasted cauliflower next time too.

2 days ago

Love that veggie hack! Broccoli and cheddar is such a classic combo, roasted cauliflower sounds amazing too—might have to test that version for the site soon!

2 weeks ago

I was worried this would be too heavy but it’s actually the perfect consistency—not so cheesy that it makes you feel sluggish after eating. I served it with baked chicken thighs and a side salad and it was the perfect balanced Sunday meal.

1 week ago

I serve mine with crispy fried chicken and collard greens! It’s such a versatile side, goes with literally everything.

1 week ago

So glad you loved the consistency! I intentionally cut back a little on the heavy cream and used a mix of sharp and mild cheddar to keep it from feeling too heavy, so it works as both a side and a main dish.

5 days ago

The leftovers are even better the next day! I was worried the pasta would get mushy but it held up perfectly, the cheese sauce soaked in just a little bit and it was so flavorful for lunch all week. 10/10 for meal prep.

3 days ago

Agreed! I pack a serving for my work lunch every time I make this, it beats sad office sandwiches by a mile.

2 weeks ago

Made this for our Easter dinner alongside ham and roasted asparagus, and every single guest asked for the recipe. It’s easy enough for a weeknight but fancy enough to serve at holiday meals, total winner.



