
banana vanilla wafer dessert

title 1
banana vanilla wafer dessert
⏱️ cook time 10 minutes
🍽️ servings 8
⚡ Difficulty easy

intro

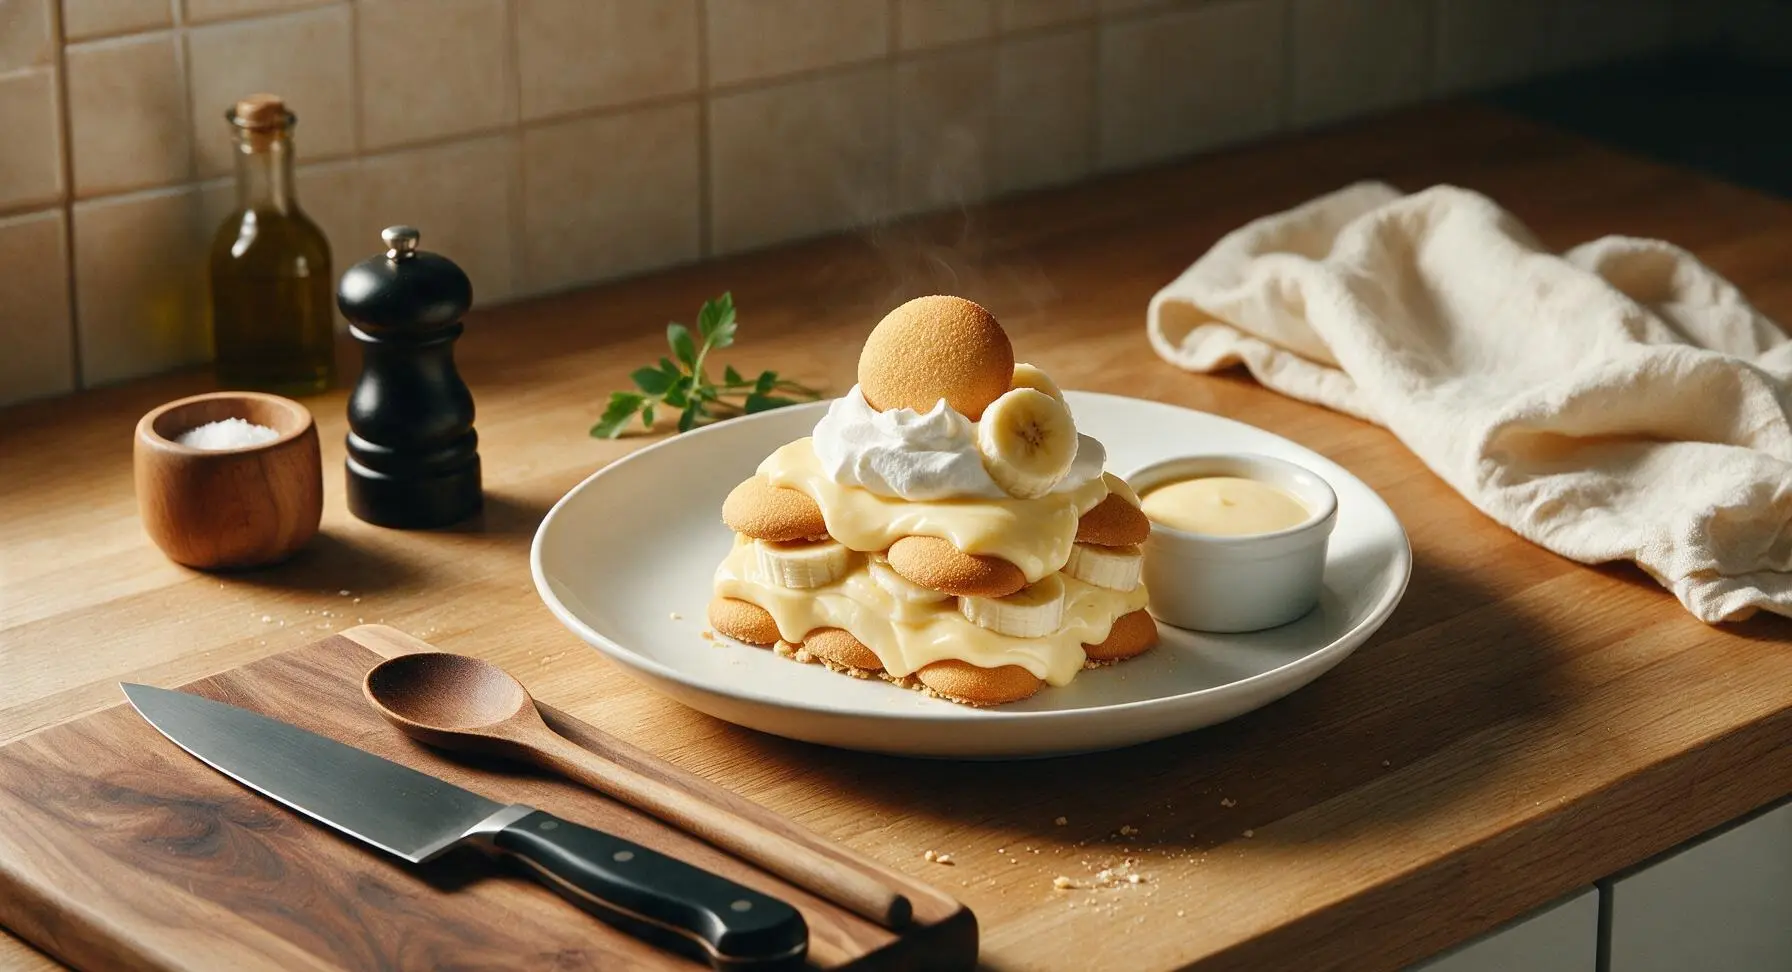
Nostalgic no-bake Southern layered dessert with tender vanilla wafers, sweet ripe bananas, and silky vanilla custard, chilled to set for creamy, perfectly balanced bites.

Ingredients
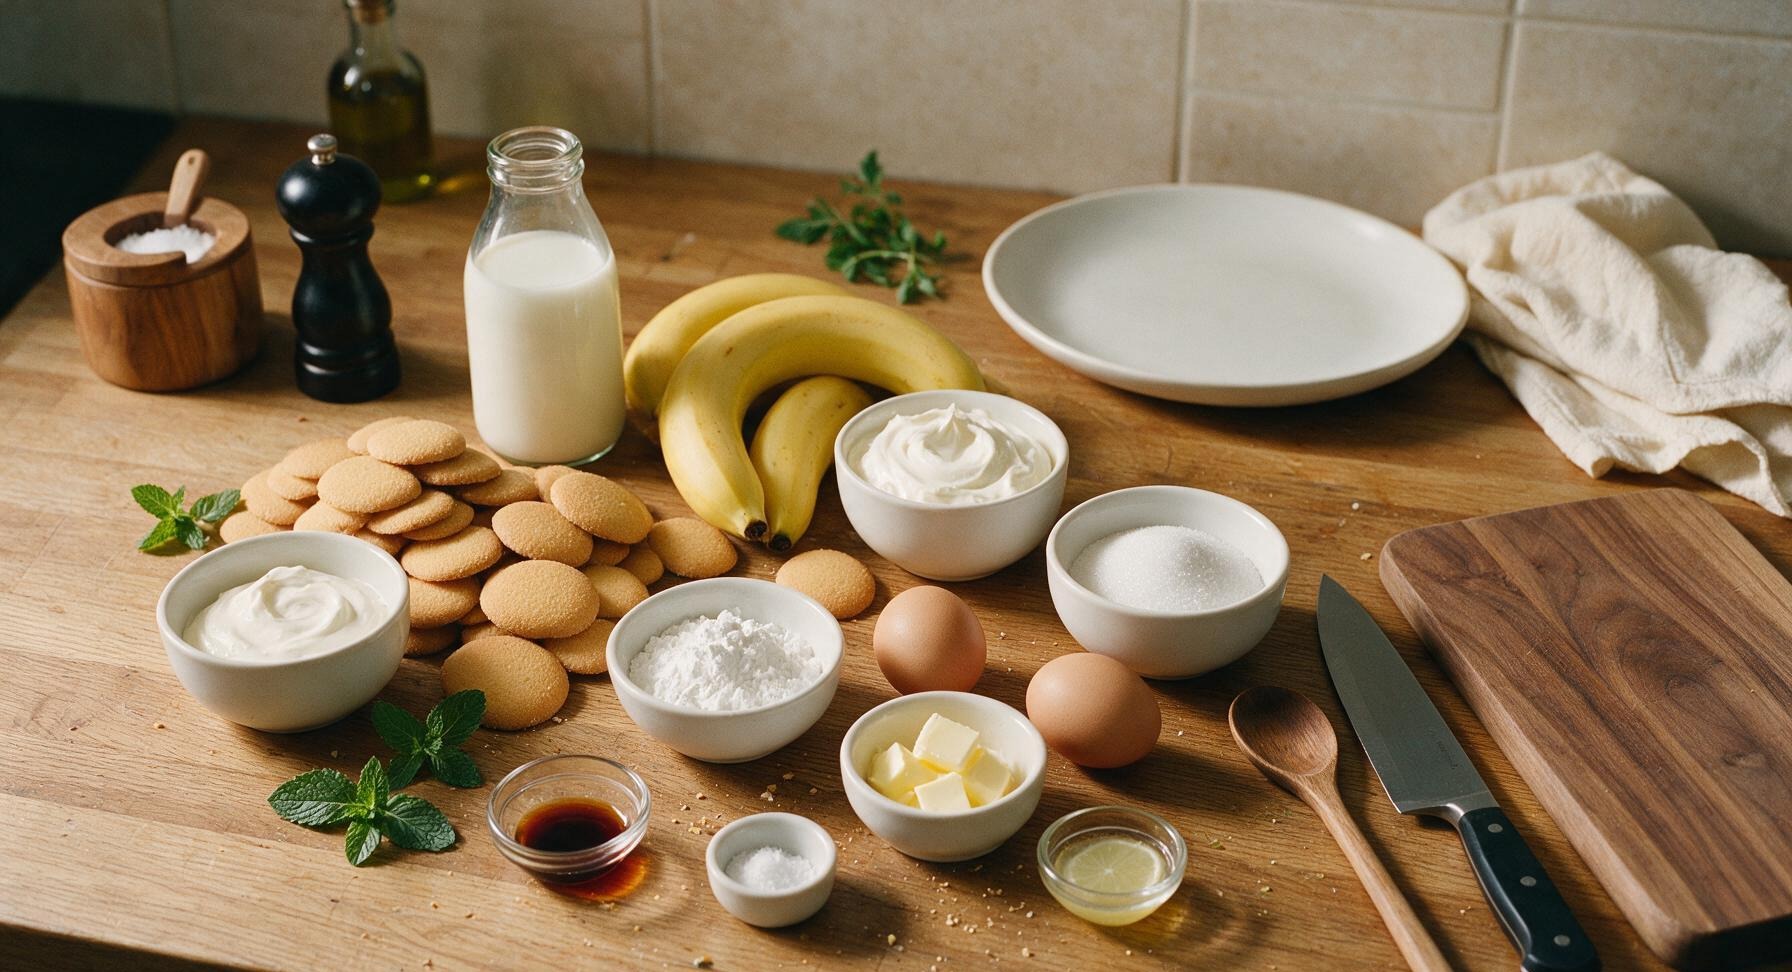
Vanilla wafer cookies 11 oz (312g) box
Ripe bananas 4 large (approx 2 cups sliced)
Whole milk 2 cups
Heavy whipping cream 1 cup
Granulated sugar 1/2 cup
Cornstarch 3 tablespoons
Large eggs 2
Unsalted butter 2 tablespoons, cut into pieces
Pure vanilla extract 1 teaspoon
Fine sea salt 1/4 teaspoon
Fresh lemon juice 1 teaspoon
Fresh mint sprigs 4-5, for garnish

Steps

1

Slice Ripe Bananas

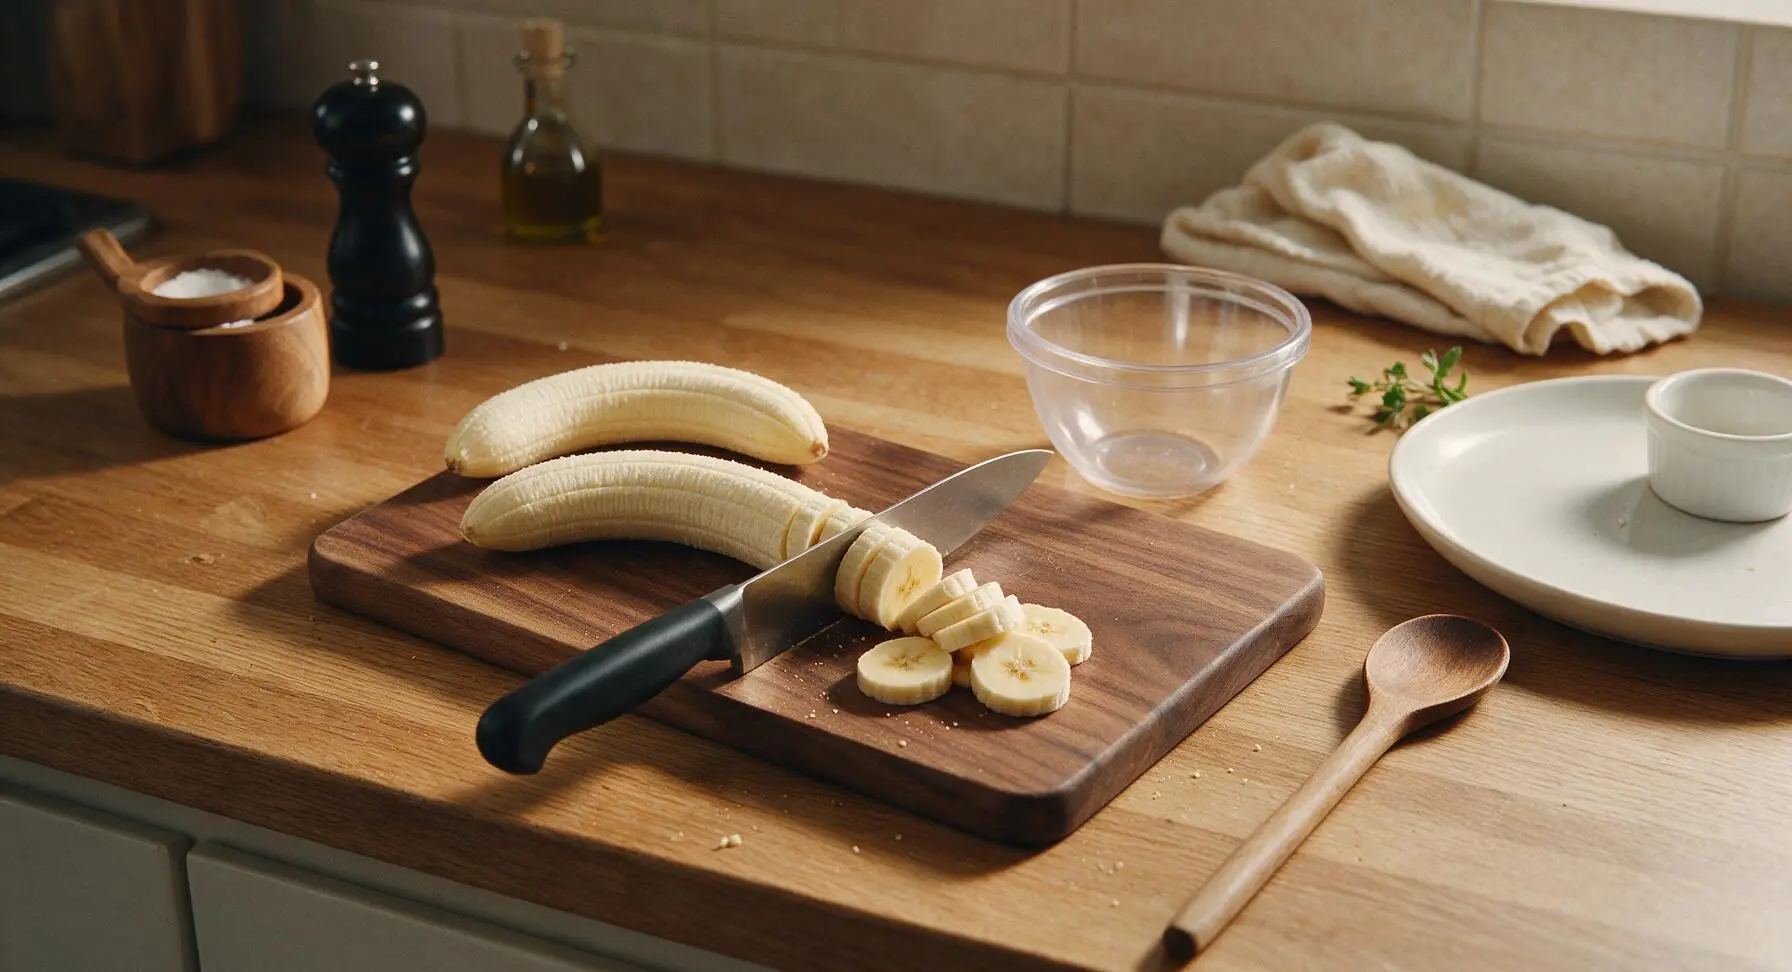
Peel all 4 ripe bananas, placing them on the light birch cutting board. Use the 8-inch stainless steel chef knife to slice the bananas into uniform 1/4-inch thick rounds, discarding any bruised or overly mushy sections. Toss the finished slices gently with 1 teaspoon fresh lemon juice in a small clear prep bowl to prevent browning, then set aside.
Step 1
step1:Slice Ripe Bananas
2

Whisk Custard Base

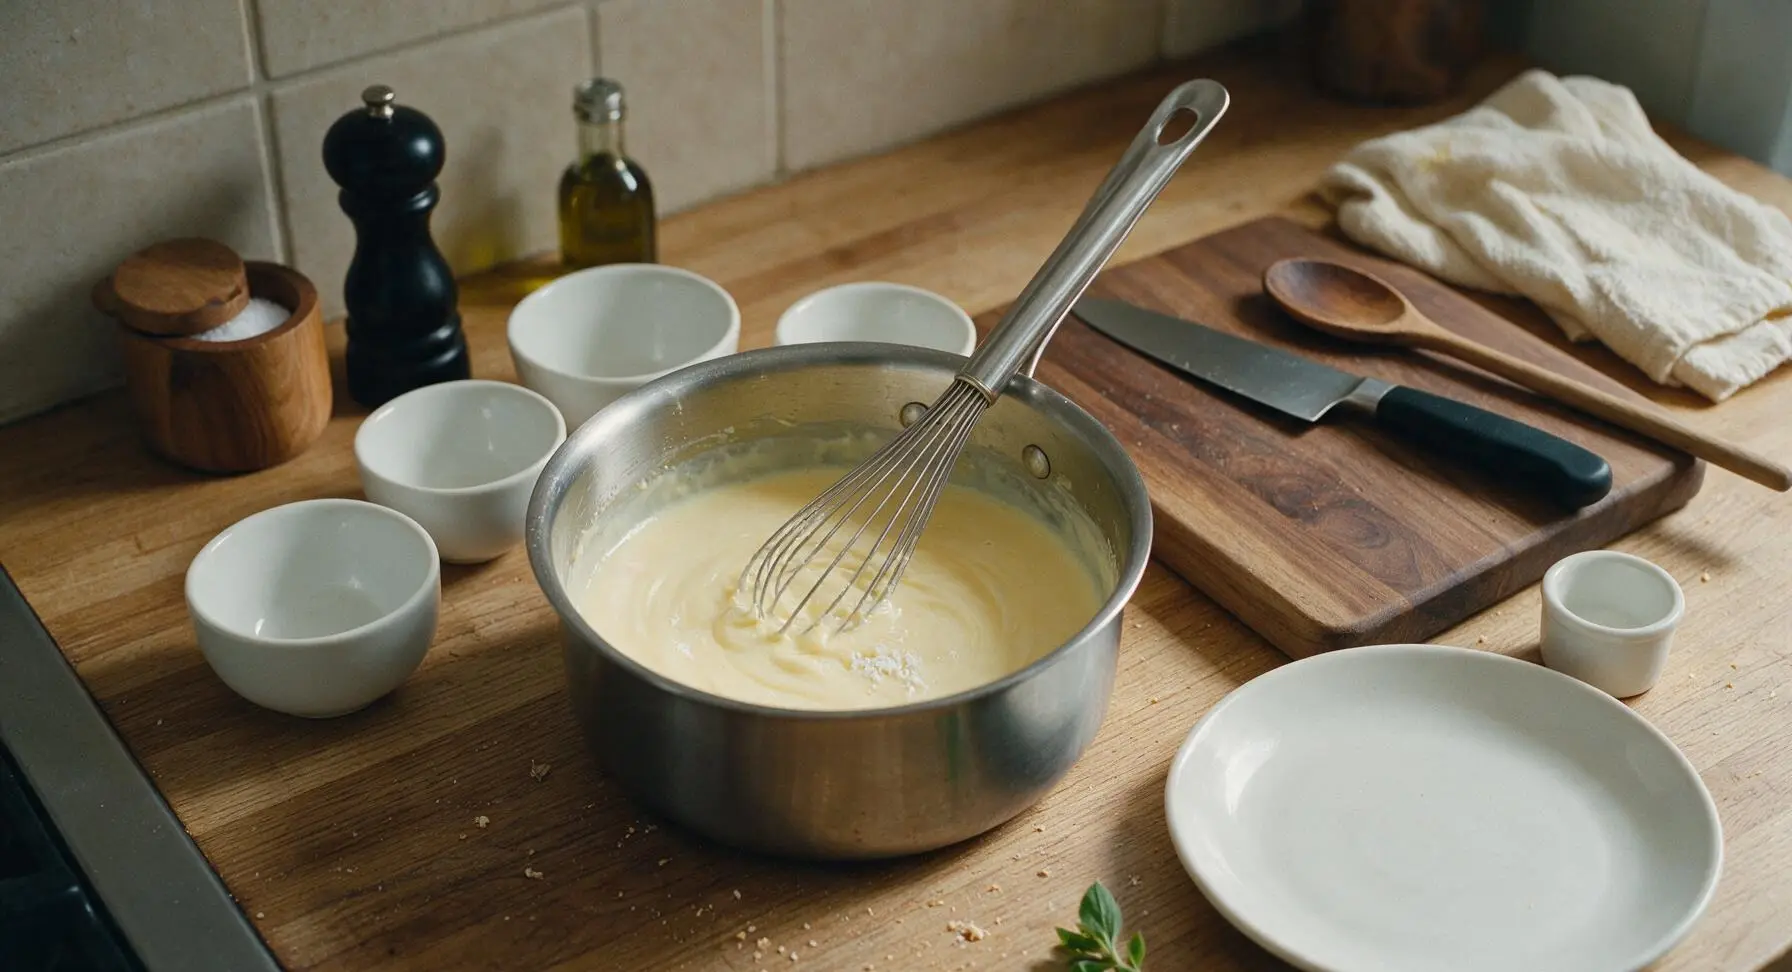
In the 2-quart brushed stainless steel saucepan, combine 2 cups whole milk, 1/2 cup granulated sugar, 3 tablespoons cornstarch, and 1/4 teaspoon fine sea salt. Use the wire whisk to stir the mixture until the cornstarch is fully dissolved, with no dry lumps remaining at the bottom of the pan. Whisk in the 2 large eggs until the base is completely smooth and pale, creamy yellow.
Step 2
step2:Whisk Custard Base
3

Cook Thick Custard

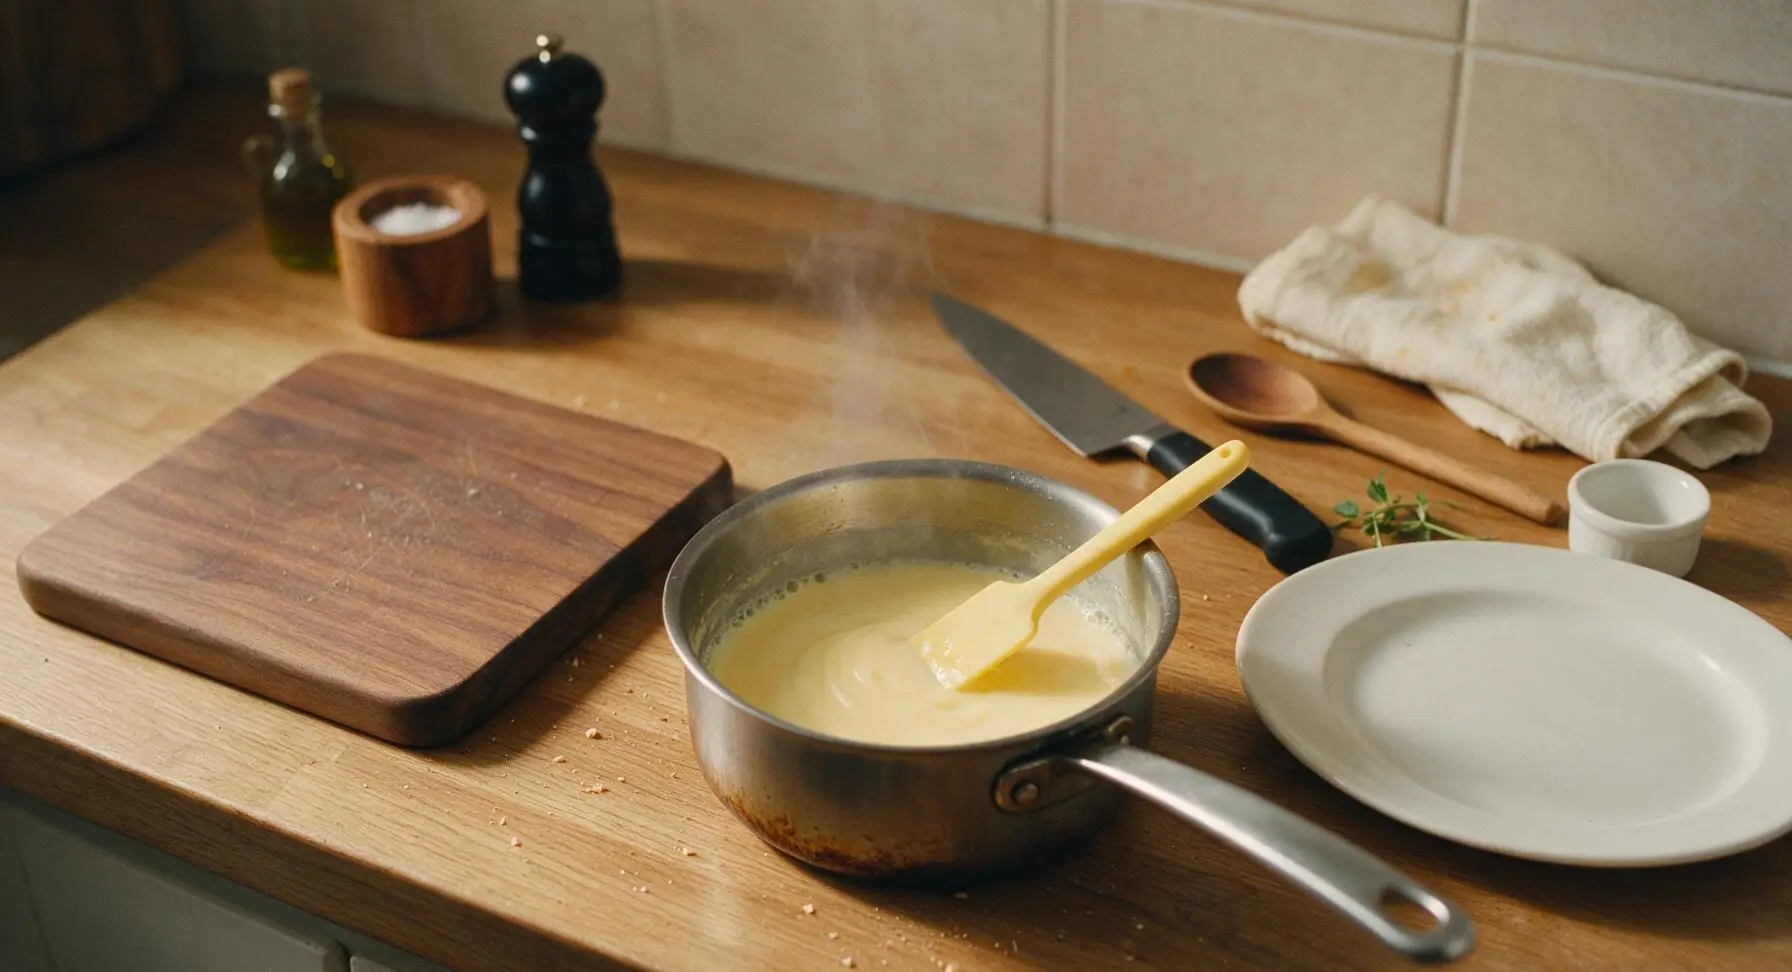
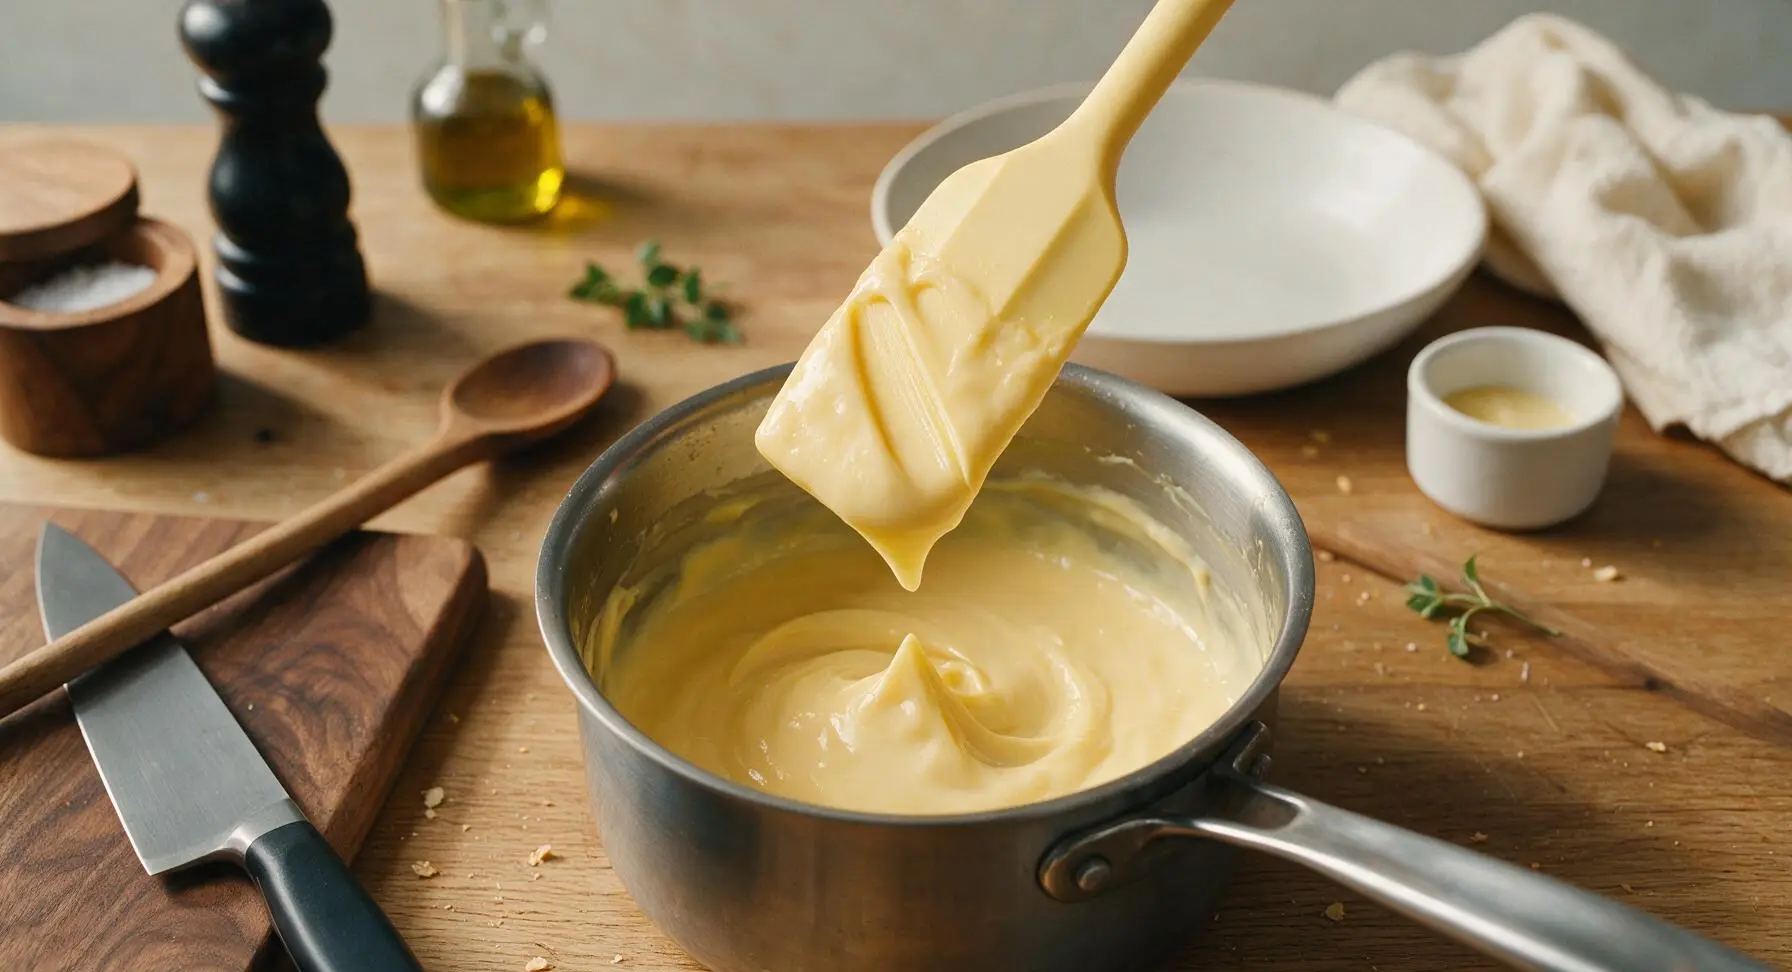
Place the saucepan over medium-low heat, stirring constantly with the pale yellow silicone spatula to prevent scorching on the pan bottom. Cook for 7-9 minutes, until the custard thickens to a smooth pudding consistency that coats the back of the spatula: when you run a clean finger through the custard on the spatula, the line should hold cleanly without running. Immediately remove the pan from heat once this consistency is reached.
Step 3
step3:Cook Thick Custard
Step 3
step3:Cook Thick Custard
4

Finish Vanilla Custard

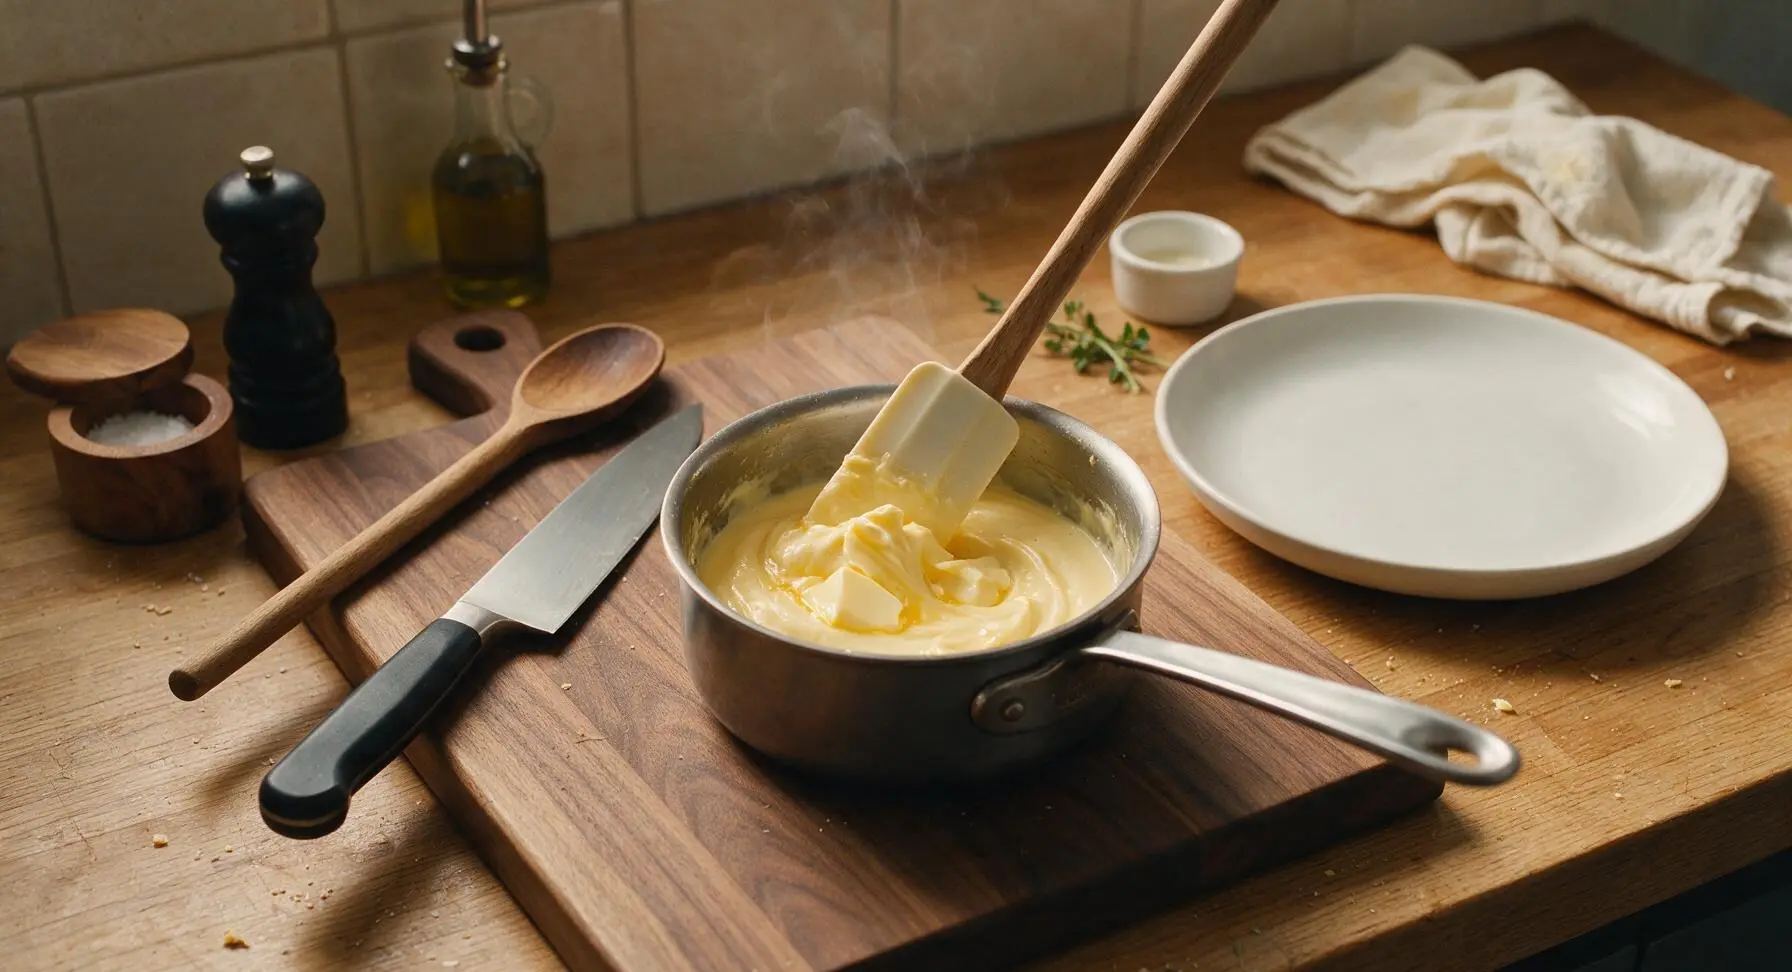
Add the 2 tablespoons of cut unsalted butter and 1 teaspoon pure vanilla extract to the hot custard, stirring gently with the silicone spatula until the butter is fully melted and incorporated, leaving the custard smooth, glossy, and fragrant. Let the custard cool for 10 minutes at room temperature, stirring once every 2 minutes to prevent a tough skin from forming on the surface.
Step 4
step4:Finish Vanilla Custard
5

Whip Cream Topping

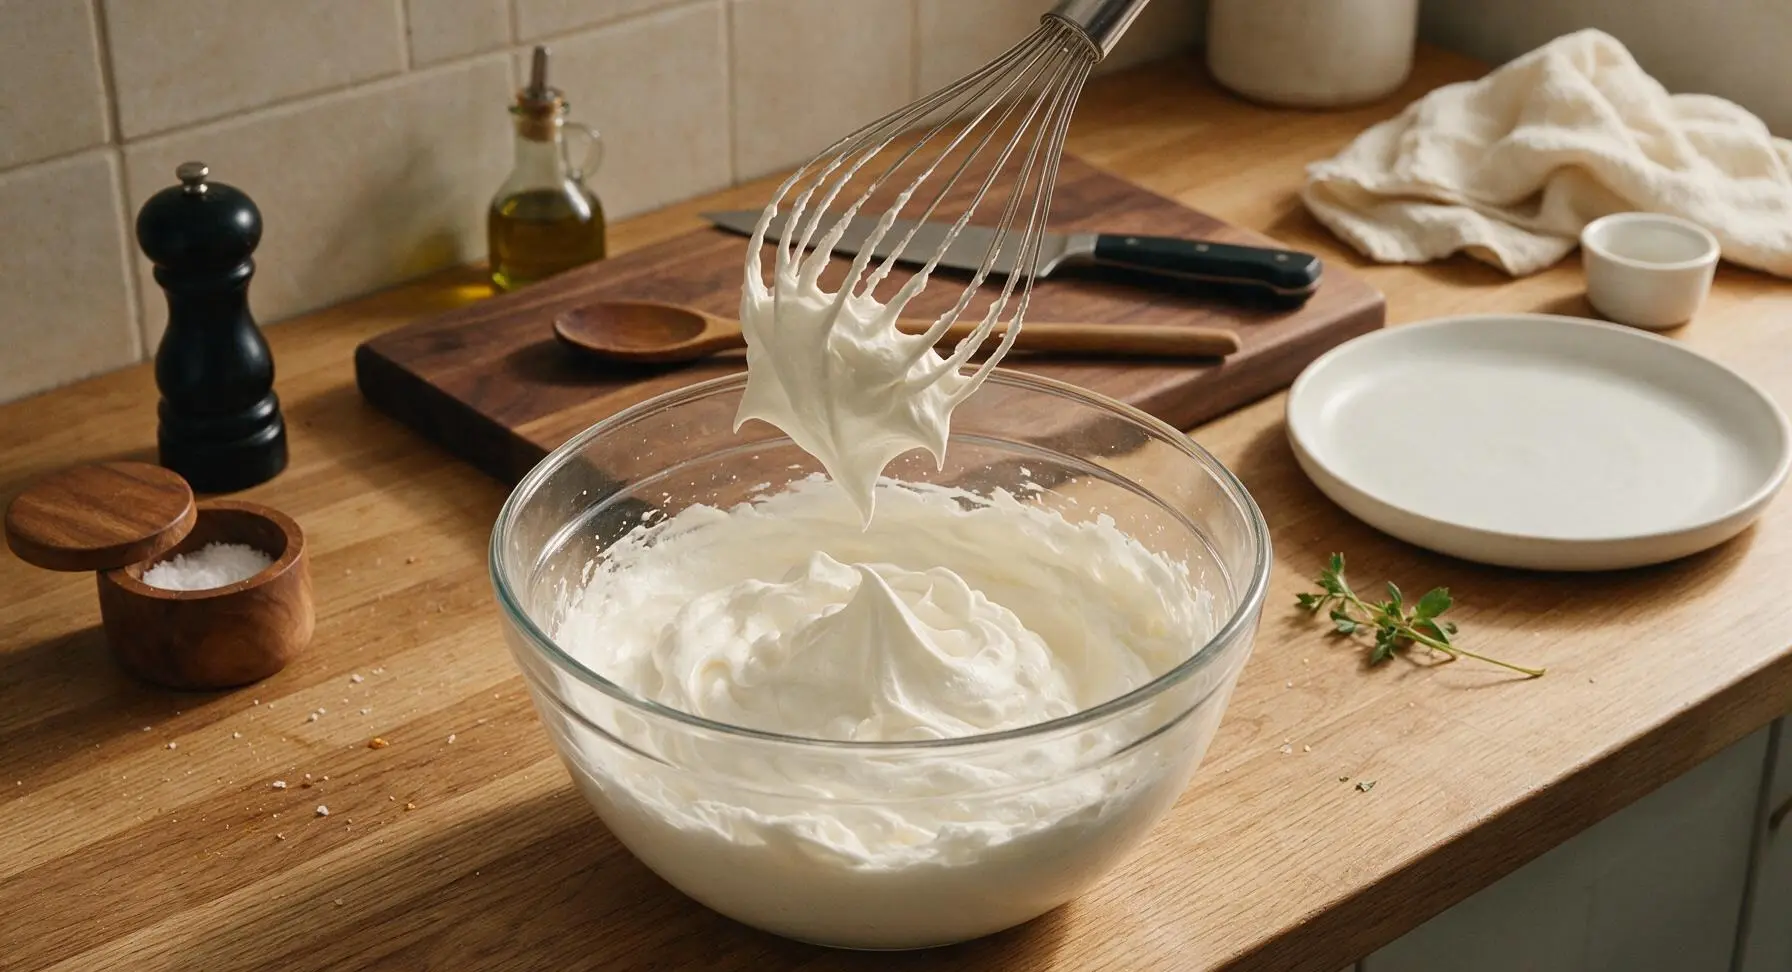
Pour 1 cup cold heavy whipping cream into a clean small clear prep bowl. Use the cleaned, dried wire whisk to whip the cream by hand for 3-4 minutes until it forms soft, billowy peaks that curl gently over when the whisk is lifted. Set half of the whipped cream aside to use as a top garnish, and gently fold the other half into the cooled custard for a lighter, fluffier texture.
Step 5
step5:Whip Cream Topping
6

Layer Dessert Components

Assemble even layers in the 9x13 inch clear glass baking dish in the following order: 1) single tight layer of vanilla wafer cookies covering the dish bottom, 2) one-third of the fluffy vanilla custard spread evenly over the cookies, 3) half of the sliced banana rounds arranged in a single overlapping layer over the custard, 4) second layer of vanilla wafers, 5) second third of the custard spread evenly, 6) remaining banana slices, 7) final layer of vanilla wafers, 8) last third of custard spread smoothly over the top to fully cover all cookies.
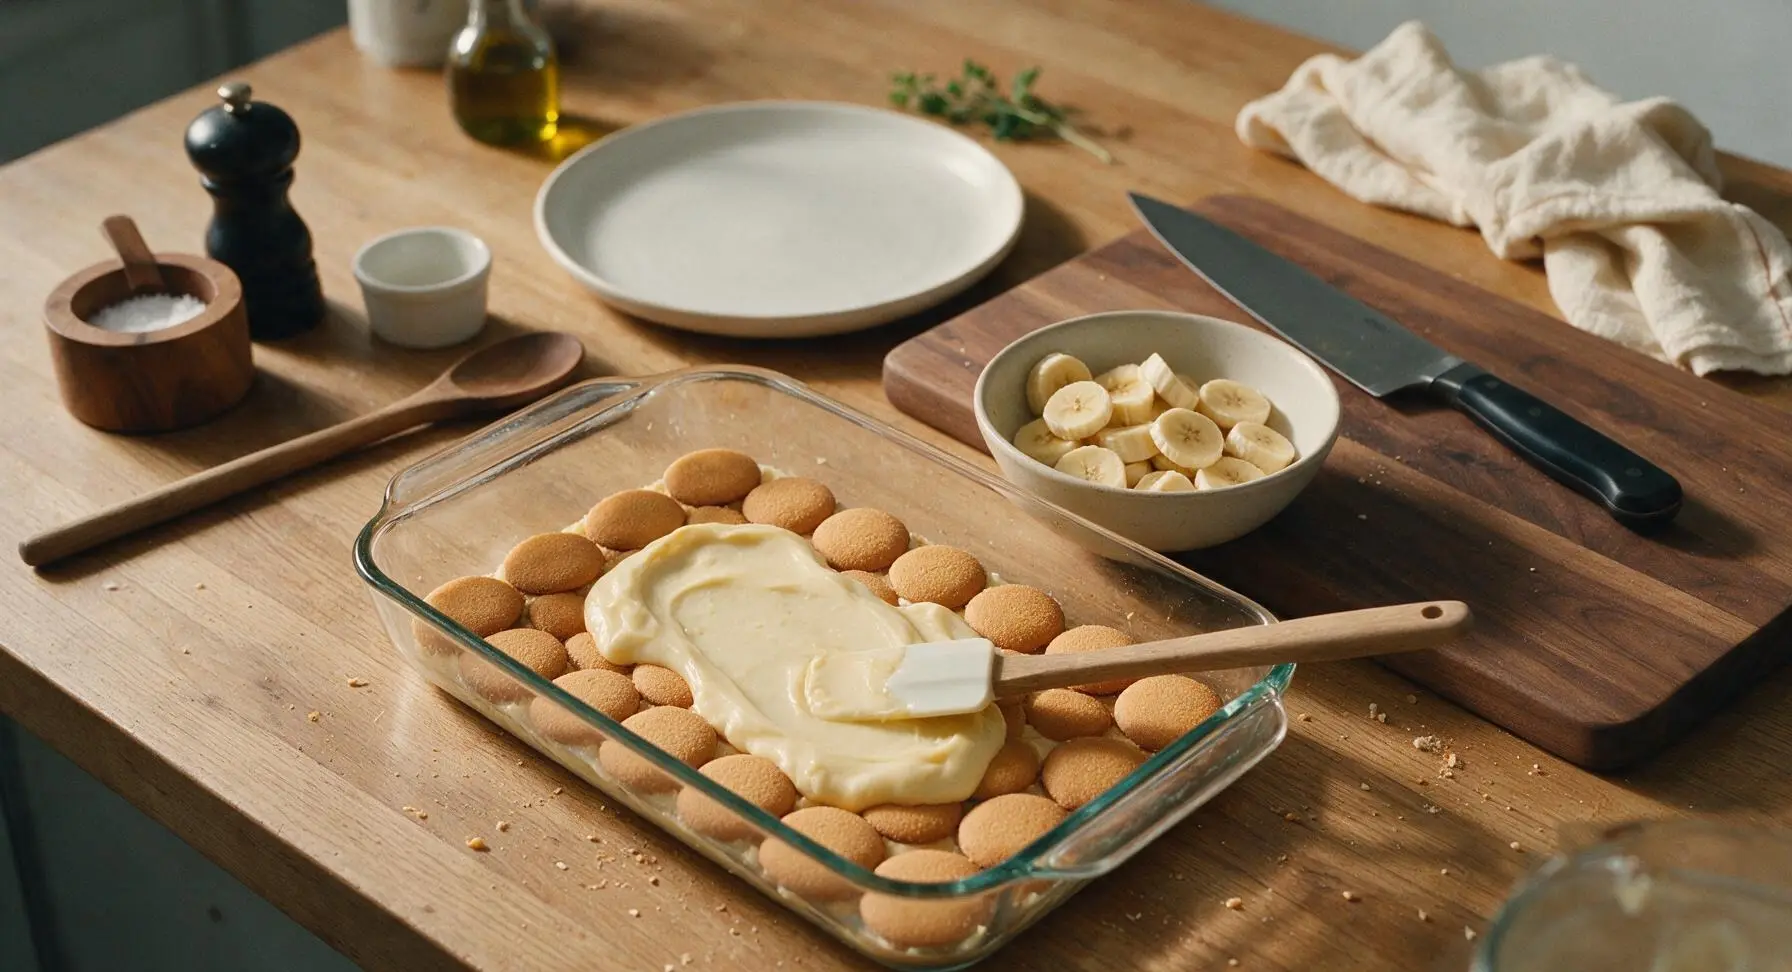
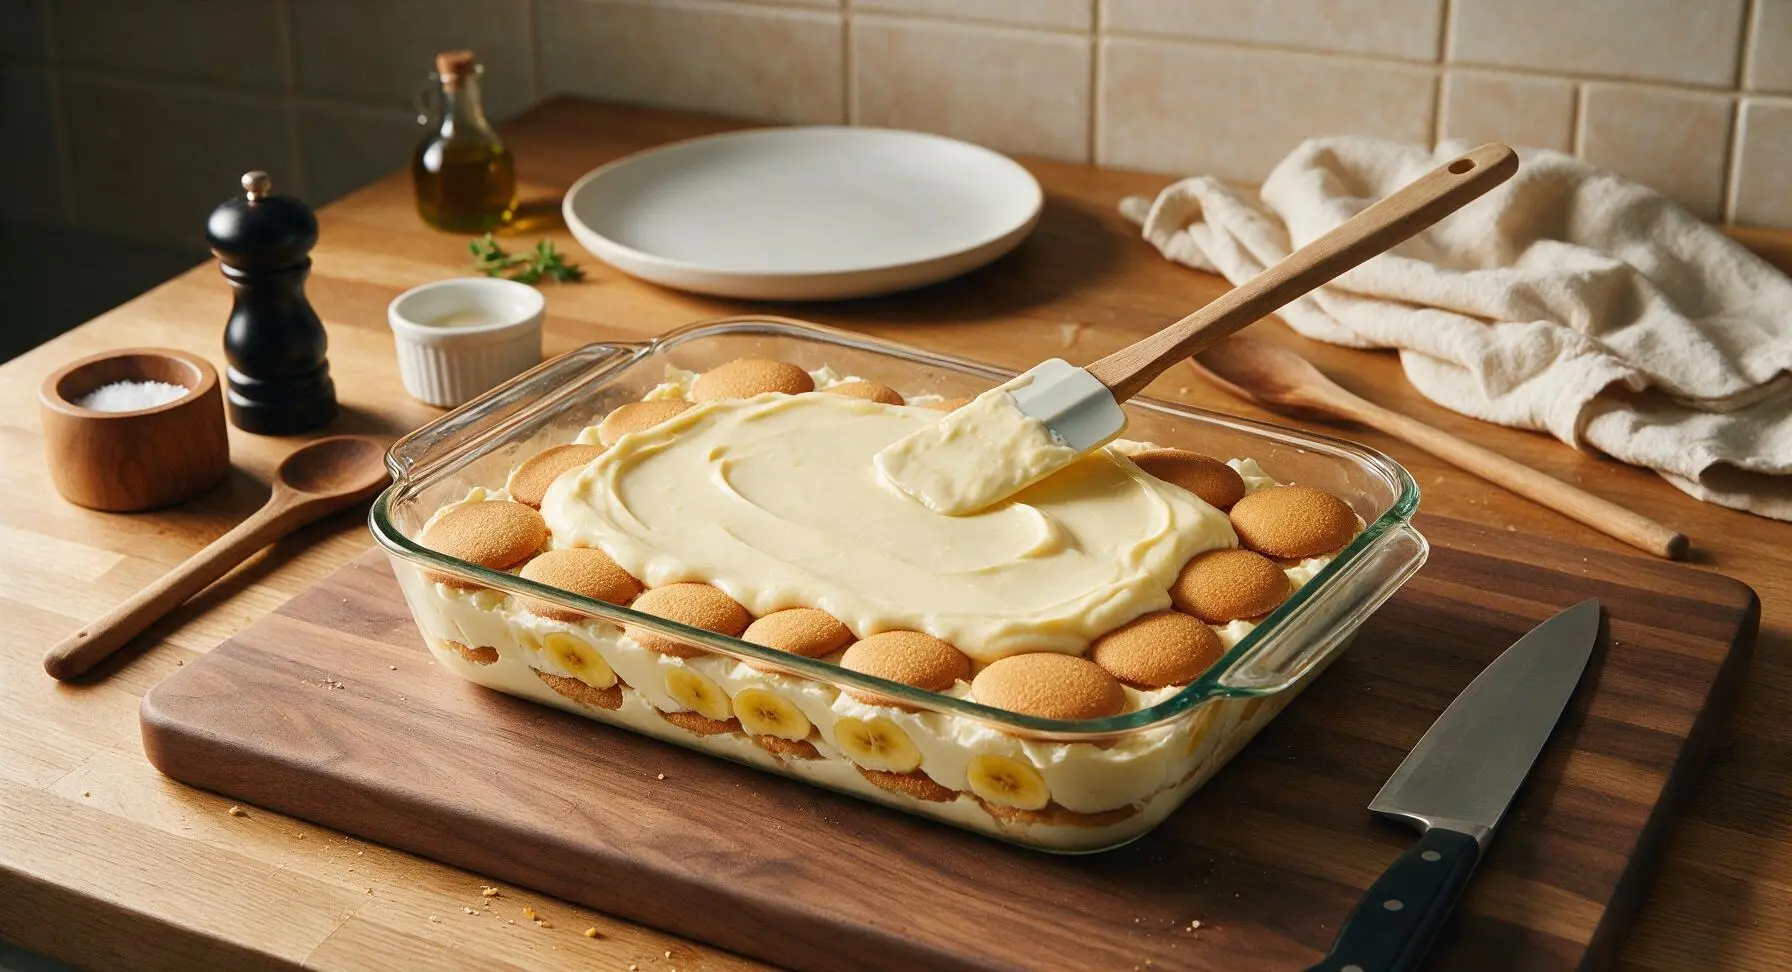
Step 6
step6:Layer Dessert Components
Step 6
step6:Layer Dessert Components
7

Chill Dessert to Set

Cover the baking dish tightly with clear plastic wrap, pressing the wrap directly against the surface of the top custard layer to prevent skin formation. Refrigerate for a minimum of 4 hours (or up to 24 hours for make-ahead prep) until the custard is fully set, and the vanilla wafers have softened to a tender, cake-like texture from absorbing custard and banana juices.
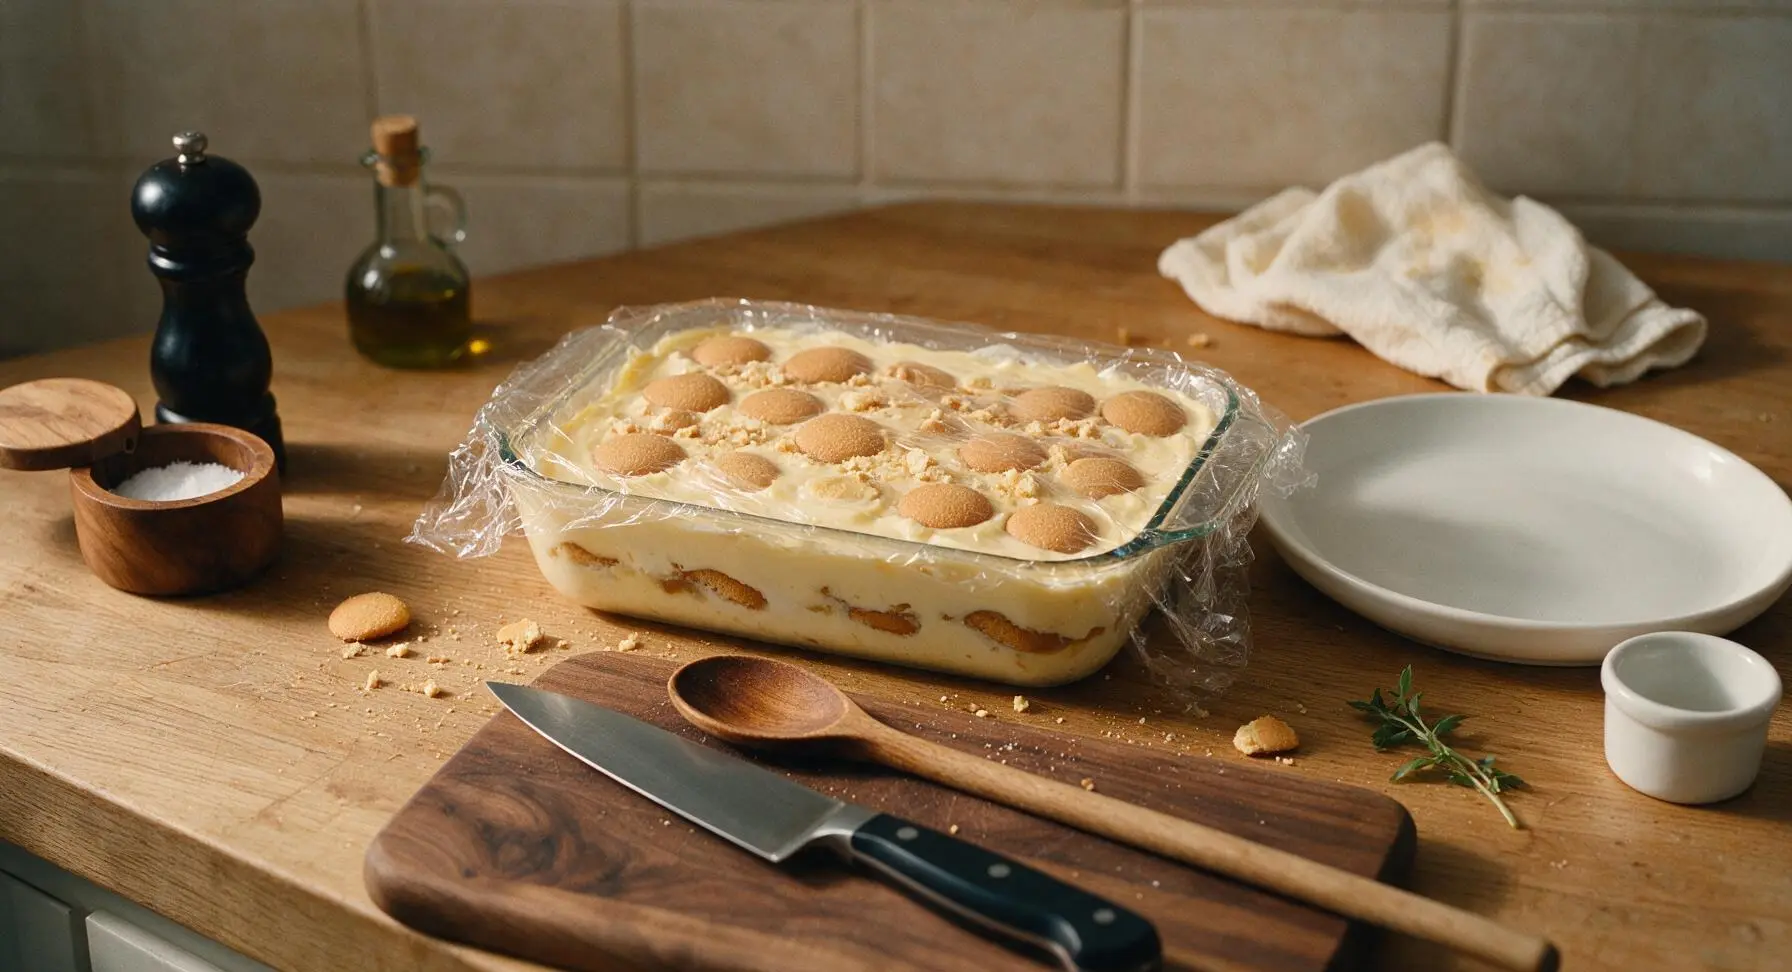
Step 7
step7:Chill Dessert to Set
8

Top and Serve Dessert

Remove the plastic wrap from the fully chilled dessert. Spread the reserved whipped cream evenly over the top custard layer. Crush 3-4 vanilla wafer cookies into fine crumbs, sprinkle the crumbs over the whipped cream, and tuck fresh mint sprigs across the top for garnish. Scoop generous individual portions onto the matte cream ceramic dessert plates, ensuring each serving includes all three component layers.
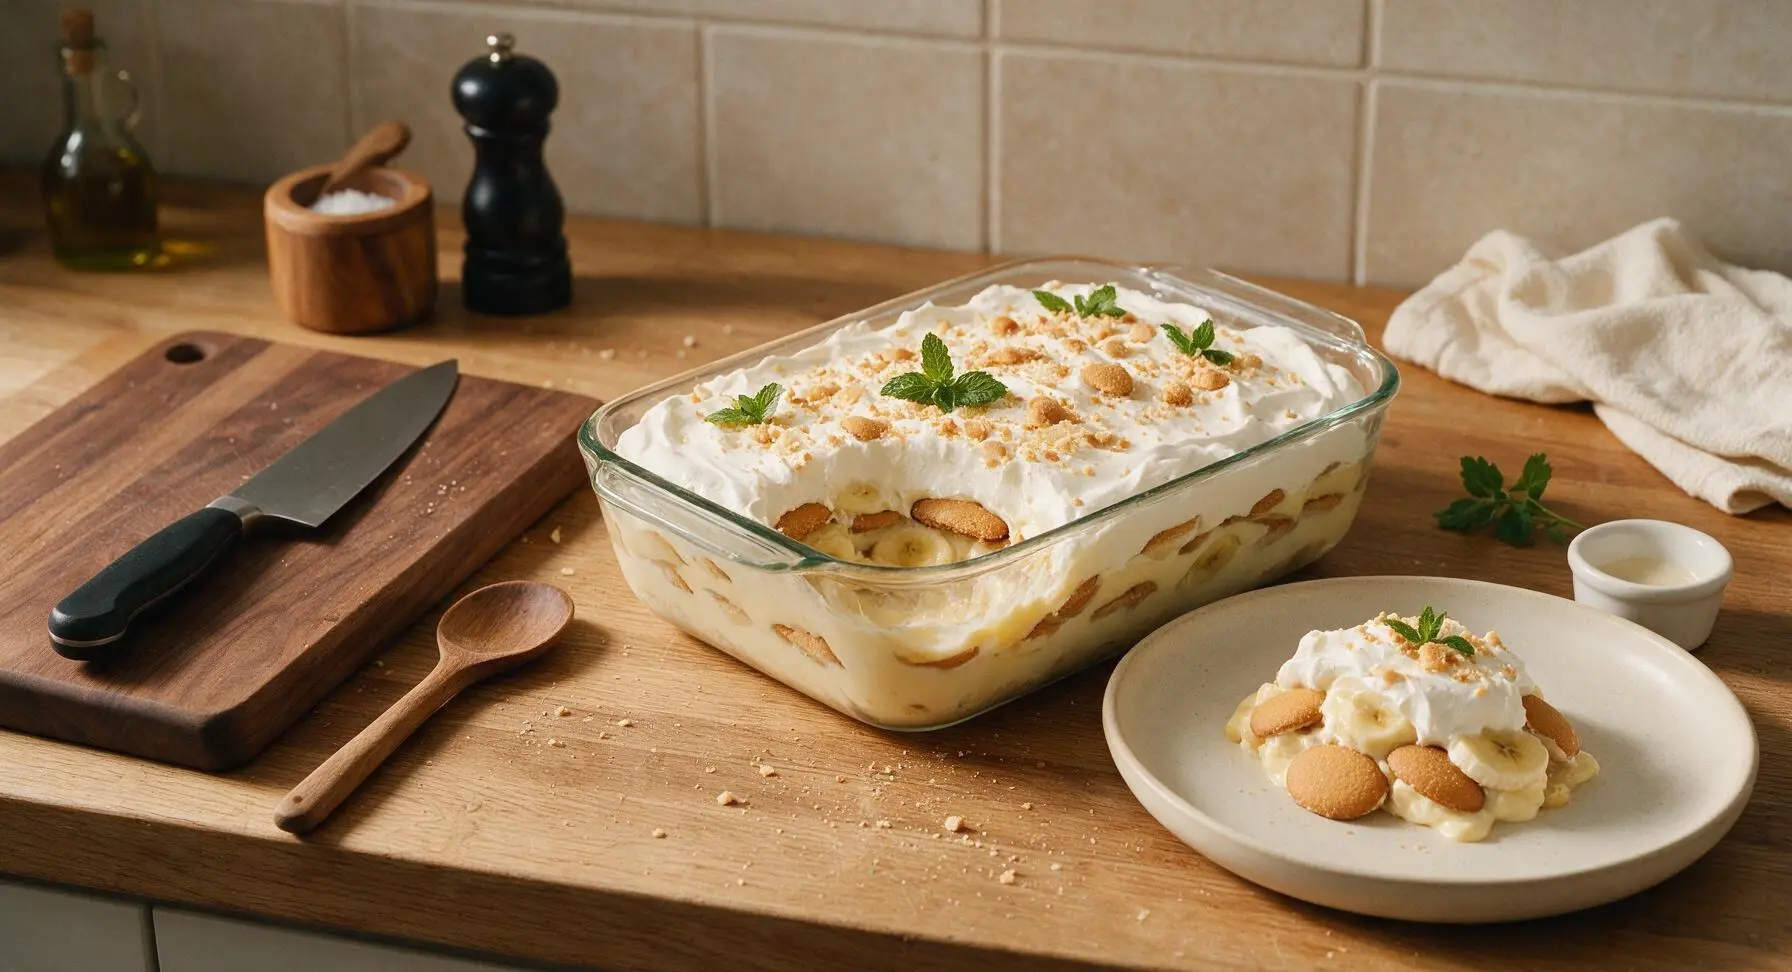
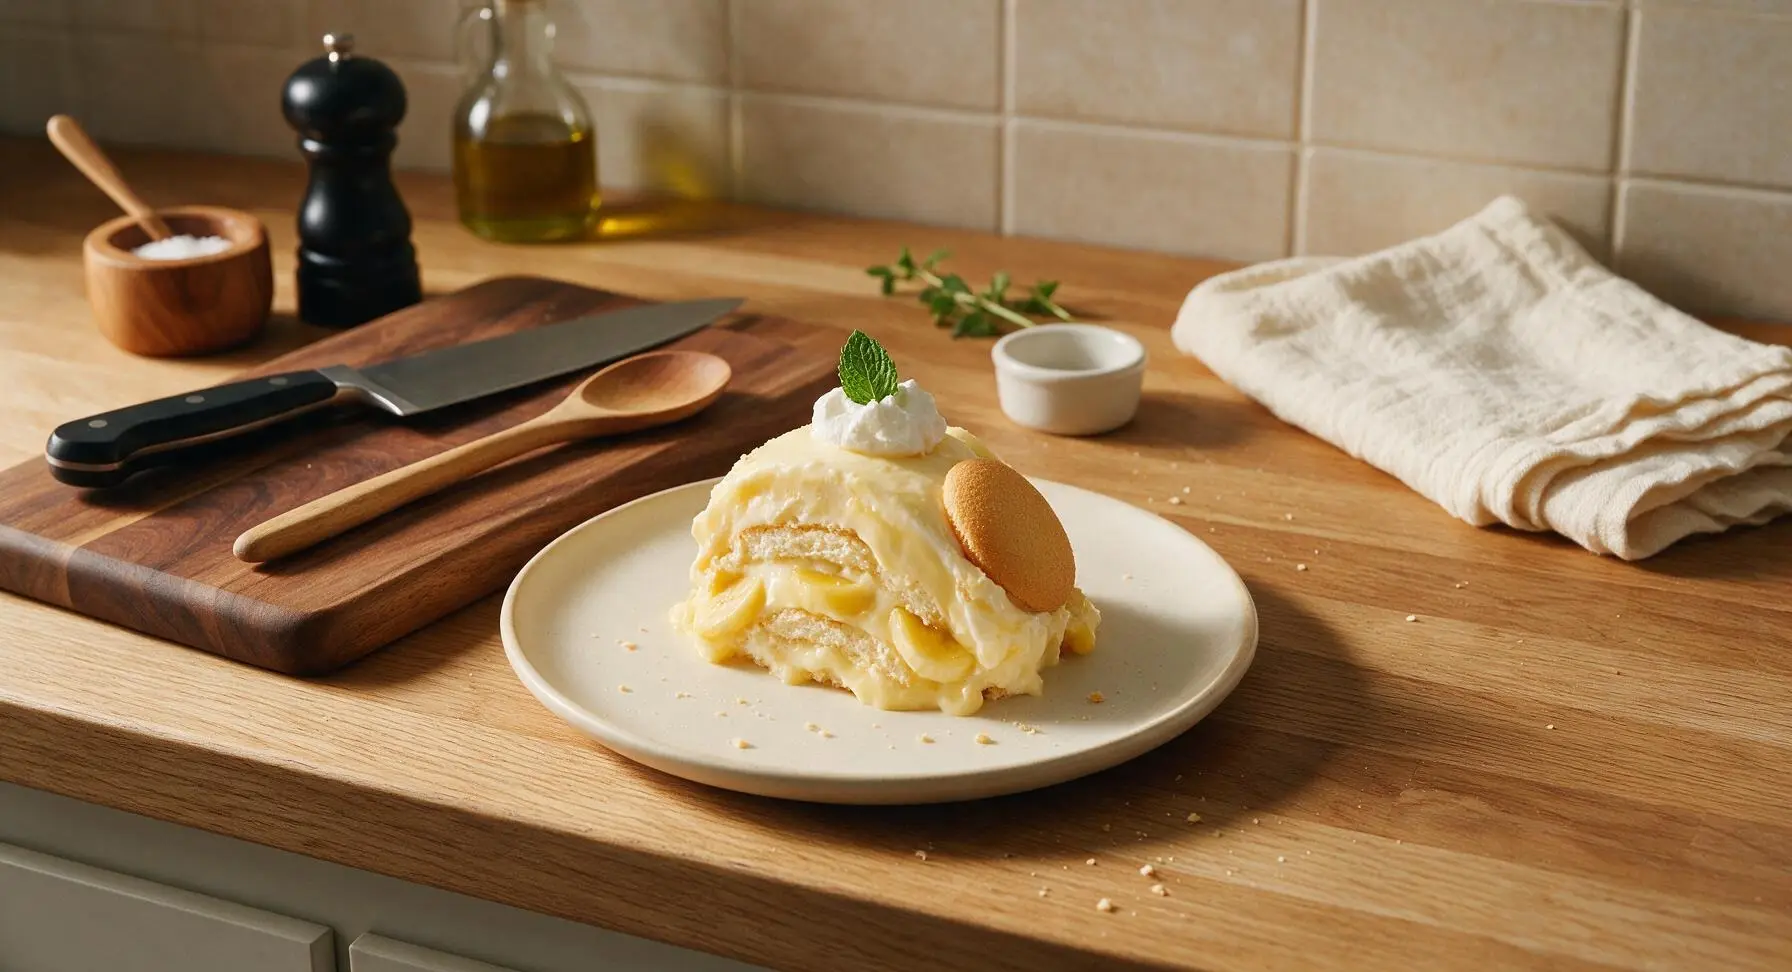
Step 8
step8:Top and Serve Dessert
Step 8
step8:Top and Serve Dessert

Tips

1.Choose bananas that are bright yellow with small light brown spots for the best flavor and texture: under-ripe green bananas are starchy and lack natural sweetness, while overripe fully brown bananas will turn mushy and release excess water that makes the custard runny as the dessert chills.
2.Always press plastic wrap directly against the exposed custard surface when chilling: this blocks air contact which causes a tough, rubbery 'skin' to form on top of the custard, ruining the smooth, creamy texture of the finished dessert.
3.Resist the urge to serve the dessert early: the full 4-hour chill time is required for the vanilla wafers to absorb moisture from the custard and bananas, softening from crisp cookies to the signature tender, cake-like layer that defines this classic dessert.


✨ You May Also Like

Desserts & Baking
🍜 Italy

Creamy, coffee-kissed classic Northern Italian no-bake dessert, with layers of rum-spiked mascarpone cream, soft ladyfingers, and a rich cocoa dusting.

⏱️ 4 hours 3Desserts & Baking ★ 4.7
Desserts & Baking
🍜 France

Flaky, shatteringly crisp, buttery French croissants with golden exteriors and soft, airy layered interiors, perfect for pairing with coffee for a special morning treat.

⏱️ 12 hours Desserts & Baking ★ 4.5
Desserts & Baking
🍜 United States

Warm, spiced baked apples topped with a fluffy golden biscuit crust, this cozy dessert pairs perfectly with vanilla ice cream for cool-weather comfort.

⏱️ 55 minuteDesserts & Baking ★ 4.6
Desserts & Baking
🍜 United States

A star-spangled classic American blueberry pie with buttery flaky crust and bright sweet-tart filling, perfect for summer patriotic gatherings.

⏱️ 1 hour 25Desserts & Baking ★ 4.7
Desserts & Baking
🍜 United States

A beloved no-bake regional Maine candy with a chewy coconut-potato center coated in rich dark chocolate, a New England holiday staple since the 1870s.

⏱️ 2 hours 3Desserts & Baking ★ 4.8
Desserts & Baking
🍜 France

Luxuriously creamy, floral frozen custard made with aromatic Tahitian vanilla beans, boasting a smooth, rich texture that melts slowly on the tongue.

⏱️ 3 hours 3Desserts & Baking ★ 4.5

banana vanilla wafer dessert:Frequently Asked Questions

1.How ripe should the bananas be for this classic Southern banana vanilla wafer dessert? ▾
Aim for bananas that are bright yellow with small, light brown flecks—they’ll be sweet, fragrant, and hold their shape perfectly when sliced. Skip fully green, starchy bananas (they lack that classic sweet depth) and completely black, overripe bananas, which turn mushy quickly and make wafer layers soggy within hours of assembly.
2.How far in advance can I assemble this dessert before serving? ▾
You can assemble it 12 to 24 hours before serving, stored tightly covered in the fridge. That chill time lets the wafers soften into that iconic tender, cake-like texture without turning mushy. I don’t recommend making it more than 2 days ahead, as the bananas will brown and the custard can separate over longer storage.
3.My vanilla custard turned out lumpy—what did I do wrong, and can I fix it? ▾
Lumps almost always come from cooking custard too fast over high heat, or not whisking constantly as you temper the eggs. To fix it, pour warm custard through a fine-mesh sieve to catch any cooked egg bits, pressing with a spatula to get all the smooth custard through. Next time, cook over medium-low heat and whisk nonstop.
4.Do I have to use whole milk and heavy whipping cream for the custard? ▾
For that signature rich, silky Southern-style custard, whole milk and heavy cream deliver the best texture and flavor, but you can swap 2% milk for whole milk if that’s what you have on hand. Skip skim milk entirely—it makes a thin, watery custard that won’t set properly, and don’t replace all the heavy cream, or you’ll lose that luxe mouthfeel.
5.Can I reduce the granulated sugar in the custard for a less sweet dessert? ▾
You can cut the granulated sugar by 2 to 3 tablespoons without ruining the custard texture, but I don’t recommend trimming it by more than that. The sugar doesn’t just add sweetness—it helps the custard set smoothly and balances the starchy wafers and bright banana flavor, so too little will make the dessert taste flat and the custard feel slightly grainy.
6.How do I keep my banana slices from turning brown before serving? ▾
First, slice your bananas right as you’re ready to layer the dessert, not ahead of time. If you need to prep them 10 to 15 minutes early, toss slices very lightly in a teaspoon of lemon juice mixed with ¼ cup water—this won’t add noticeable tartness, but slows browning. Pressing plastic wrap directly to the dessert surface also helps.
7.Why do my vanilla wafers get unpleasantly soggy when I make this dessert? ▾
Soggy wafers usually come from three common mistakes: using overripe, mushy bananas that leach extra moisture, assembling the dessert more than 24 hours before serving, or pouring boiling-hot custard directly onto the wafers. Let custard cool 10 minutes after cooking before layering, and use firm, ripe bananas for perfect soft-but-not-mushy wafers.
8.Can I use homemade vanilla wafers instead of store-bought? ▾
Absolutely! Homemade vanilla wafers add a lovely buttery, fresh-baked flavor, just make sure they’re fully cooled before layering, and bake them a tiny bit crispier than you would for eating plain—they’ll soften just like store-bought as they chill. Note homemade wafers soften a little faster, so assemble closer to serving time if you go this route.
9.Do I need to add a whipped cream topping to this dessert? ▾
A fluffy whipped cream topping is a traditional, delicious optional add-on, but it’s not required! The classic base layers of wafer, banana, and vanilla custard are perfectly balanced on their own. If you do add whipped cream, spread it on right before serving, and sprinkle a few crushed wafers on top for extra crunch.
10.What’s the best way to store leftover banana vanilla wafer dessert? ▾
Press a piece of plastic wrap directly onto the exposed surface of the leftover dessert to cut down on browning and prevent a skin from forming on the custard, then cover the dish tightly with a lid or second layer of wrap. Store in the fridge for up to 3 days, though texture is best within the first 48 hours after assembly.
11.Can I freeze this dessert for longer-term storage? ▾
I don’t recommend freezing this classic dessert, as the texture breaks down significantly when thawed. The custard will separate and turn watery, the bananas will become mushy and discolored, and the wafers will turn unpleasantly soggy instead of that perfectly tender, melded texture you want. Stick to fridge storage for best results.
12.What size and type of dish works best for layering this dessert? ▾
A standard 9x13 inch glass or ceramic baking dish works perfectly for a full batch, giving you enough room for three even layers of wafers, bananas, and custard. If you want a taller, more dramatic presentation, use a 2-quart clear glass trifle dish to show off the pretty striped layers for potlucks or gatherings.
13.Can I make a dairy-free version of this classic dessert? ▾
You can, with a few simple swaps! Use full-fat oat milk in place of whole milk, chilled full-fat coconut cream in place of heavy cream, and certified dairy-free vanilla wafer cookies. Add an extra teaspoon of cornstarch to your custard to help it set, as plant-based milks tend to be a bit thinner than dairy.
14.How do I know when my vanilla custard is done cooking? ▾
Your custard is done when it coats the back of a wooden spoon thickly enough that you can draw a clean line through it with your finger, and it reaches 170 to 175°F on an instant-read thermometer. It will thicken a little more as it cools, so don’t cook it past that point or you’ll risk curdling eggs and getting lumps.
15.Is there a specific order I should layer the ingredients in? ▾
For the most even, classic texture, start with a single layer of vanilla wafers on the bottom of your dish, top with an even layer of sliced bananas, then pour ⅓ of your warm (not boiling) custard over top. Repeat those layers two more times, finishing with custard to cover top wafers so they don’t dry out in the fridge.
16.Can I add extra mix-ins to this dessert for more flavor? ▾
Definitely! A sprinkle of ground cinnamon between layers, a drizzle of salted caramel over the top, a handful of toasted chopped pecans, or even a thin layer of smooth peanut butter under the banana slices all work beautifully. Just don’t add too many wet mix-ins, or you’ll make wafer layers soggy faster than intended.
17.Why do some old recipes say to leave this dessert out at room temperature instead of chilling it? ▾
Old-school Southern versions sometimes used a no-cook, stabilized pudding base that set at room temp, but our classic cooked custard version needs consistent fridge chilling to set safely and properly. Never leave the finished dessert out for more than 2 hours total, as the dairy and eggs can enter the food safety temperature danger zone.
18.My custard is too thin even after chilling—what went wrong? ▾
Thin custard usually comes from undercooking it (so the eggs and starch didn’t have time to thicken properly), using too much low-fat milk instead of the recommended whole milk and cream, or not letting it chill long enough. If it’s still thin after 4 hours in the fridge, stir in a cooled cornstarch slurry, though the texture won’t be quite as silky.
19.Can I use instant vanilla pudding instead of making homemade custard to save time? ▾
If you’re short on time, instant vanilla pudding mixed with equal parts whole milk and heavy cream works as a quick shortcut, and it’s what many busy Southern home cooks use for weeknight versions. Just note the flavor won’t be quite as rich or deeply vanilla as homemade cooked custard, and the texture will be a little softer.
20.Is this dessert safe to serve to young kids, pregnant people, or other immunocompromised guests? ▾
As long as you cook the custard to a safe 170°F internal temperature to fully cook the eggs, it is completely safe for all eaters, including young kids, pregnant people, and immunocompromised guests. If you have extra concerns about egg-related food safety, use pasteurized eggs for the custard to eliminate risk even if you slightly undercook the base.

Comments (7)

3 days ago

OMG this was SO good! I threw this together last minute for our church potluck last Sunday and people were begging me for the recipe before we even finished dessert. I added a tiny extra sprinkle of cinnamon on top per my grandma’s old trick and it chef’s kissed. 10 minute cook time is no joke, I spent longer picking out ripe bananas at the grocery store than I did putting the whole thing together lmao

2 days ago

Wait the cinnamon sprinkle trick sounds genius! Did you use regular ground cinnamon or the fancy Saigon stuff?

2 days ago

Love that cinnamon addition! So glad this was a hit at your potluck – this classic is always a crowd pleaser for a reason. A light dusting of cinnamon is such a cozy, perfect twist.

yesterday

Made this for my kids after school yesterday and they devoured half the pan before dinner was even on the table. My 7 year old said it’s “better than the ice cream truck treats” which is the highest possible praise in our house. Super easy, no fancy ingredients, exactly the no-fuss dessert I need for busy weeknights.

2 hours ago

That 7 year old review is better than any culinary award we could get! So happy this worked for your busy weeknight – nothing beats a quick treat the whole family goes crazy for.

1 week ago

I am TERRIBLE at baking, like I burn boxed brownies level bad, and this turned out perfect first try! I was so nervous to make something for my partner’s family dinner but everyone raved about it. The vanilla wafers get that perfect soft, pillowy texture after sitting in the fridge for a few hours, I could eat the whole pan by myself.

5 days ago

This is exactly the banana pudding my memaw used to make! I was worried no online recipe would get the ratio of wafers to bananas to pudding right but this is spot on. Game changer tip: let it chill in the fridge for at least 4 hours before serving, don’t dig in right away! The flavors meld so much better.

3 days ago

Oh thank you for the chill time tip! I was gonna make this tonight for our game night tomorrow and was gonna assemble it an hour before people showed up, I’ll make it tonight instead so it has time to sit!

3 days ago

Couldn’t agree more with that chill time tip! We recommend letting it rest for a minimum of 2 hours but 4+ is absolute perfection for that classic soft wafer texture everyone loves.

2 weeks ago

Wait has anyone tried making this ahead for meal prep? Like, does it hold up well in the fridge for 3-4 days? I’m always looking for easy sweet treats to pack in my lunch for work that don’t require a ton of effort Sunday night.

1 week ago

I made a big pan last Sunday and ate portions all week for my work lunch! It held up great, the only thing is the wafers get softer the longer it sits, which I personally love, but if you want a little crunch save some crumbled wafers to top individual servings right before you eat!

2 days ago

Made this in my dorm room with a mini fridge and no fancy equipment, no joke. Used instant vanilla pudding, store brand vanilla wafers, super ripe bananas I got for 20 cents a pop at the campus market, and it slapped. My roommate ate two servings and tried to hide the pan from me lmao. 10/10, cheap, easy, no oven required which is key for dorms that don’t allow baking.

30 minutes ago

Quick question! Can I swap the regular vanilla wafers for gluten free vanilla wafers to make this for my sister who has celiac? I don’t want the texture to be off since GF cookies can be hit or miss sometimes.

just now

Great question! Gluten free vanilla wafers work perfectly here – just make sure to let the dessert chill for the full recommended time so the cookies soften just like the regular version. I’ve made this swap multiple times for GF family members and no one can tell the difference!



