
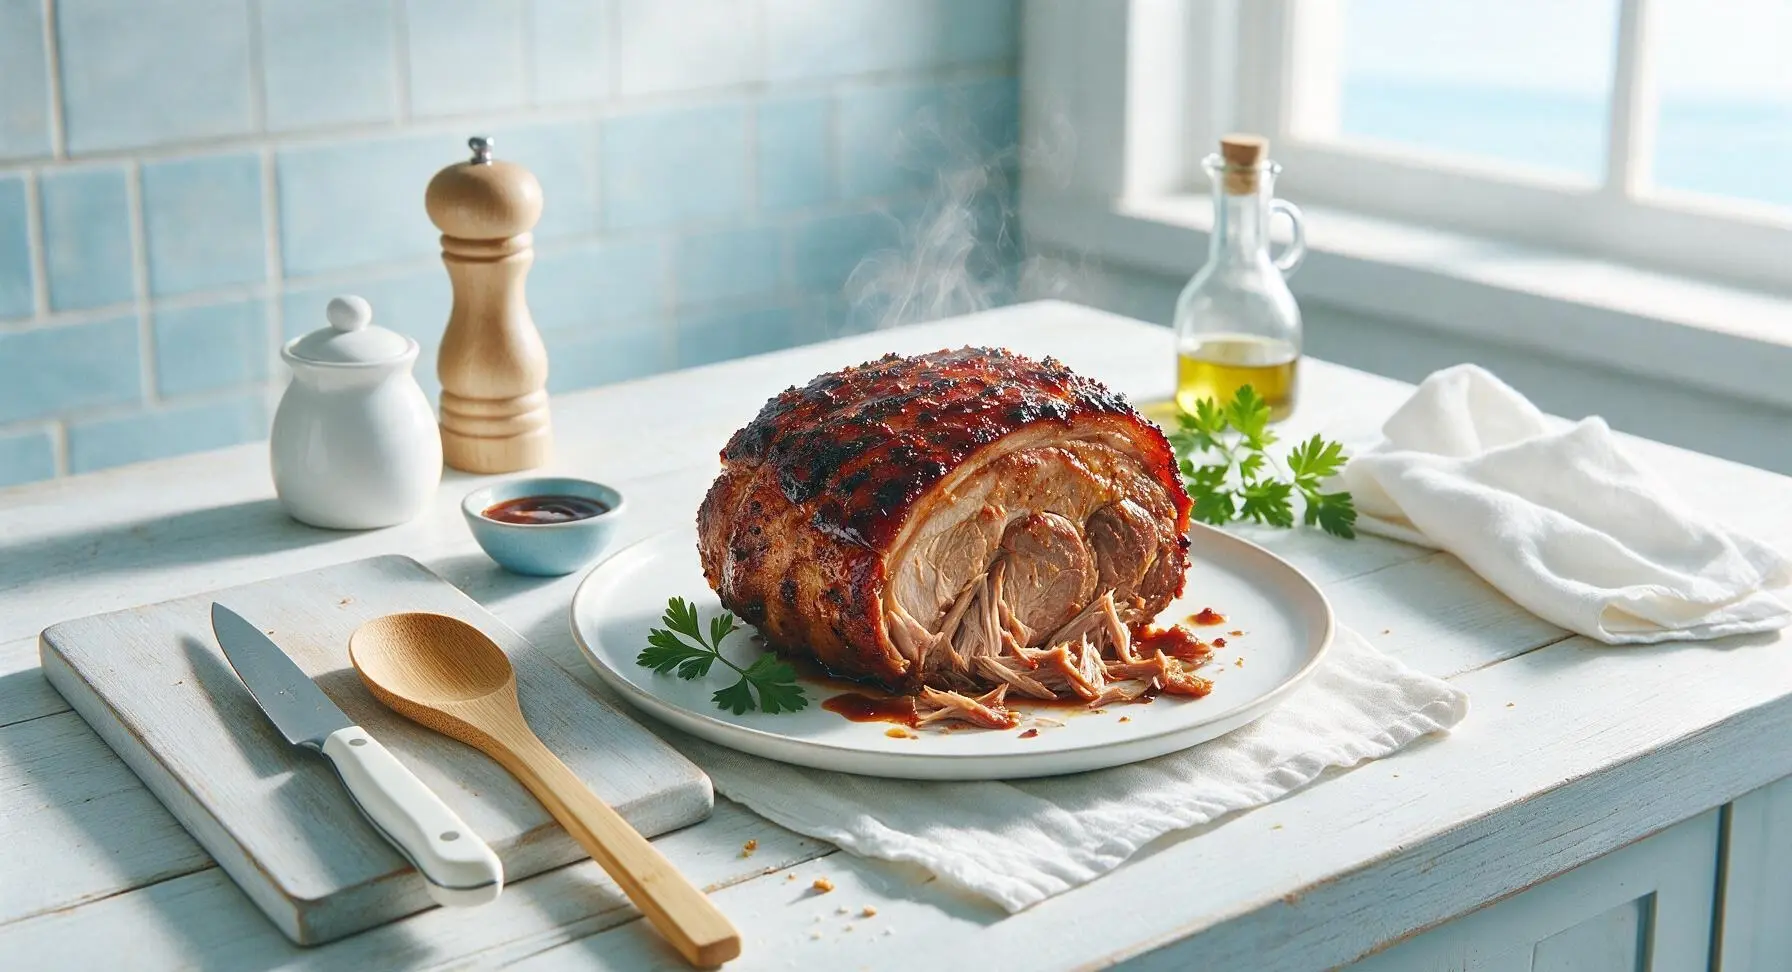
bbq pork roast

title 1
bbq pork roast
⏱️ cook time 3 hours 30 minutes
🍽️ servings 6
⚡ Difficulty medium

intro

Succulent, fall-apart tender pork roast coated in smoky-sweet rub, slow-smoked to caramelized perfection, finished with a glossy BBQ glaze—made for sunny summer gatherings.

Ingredients
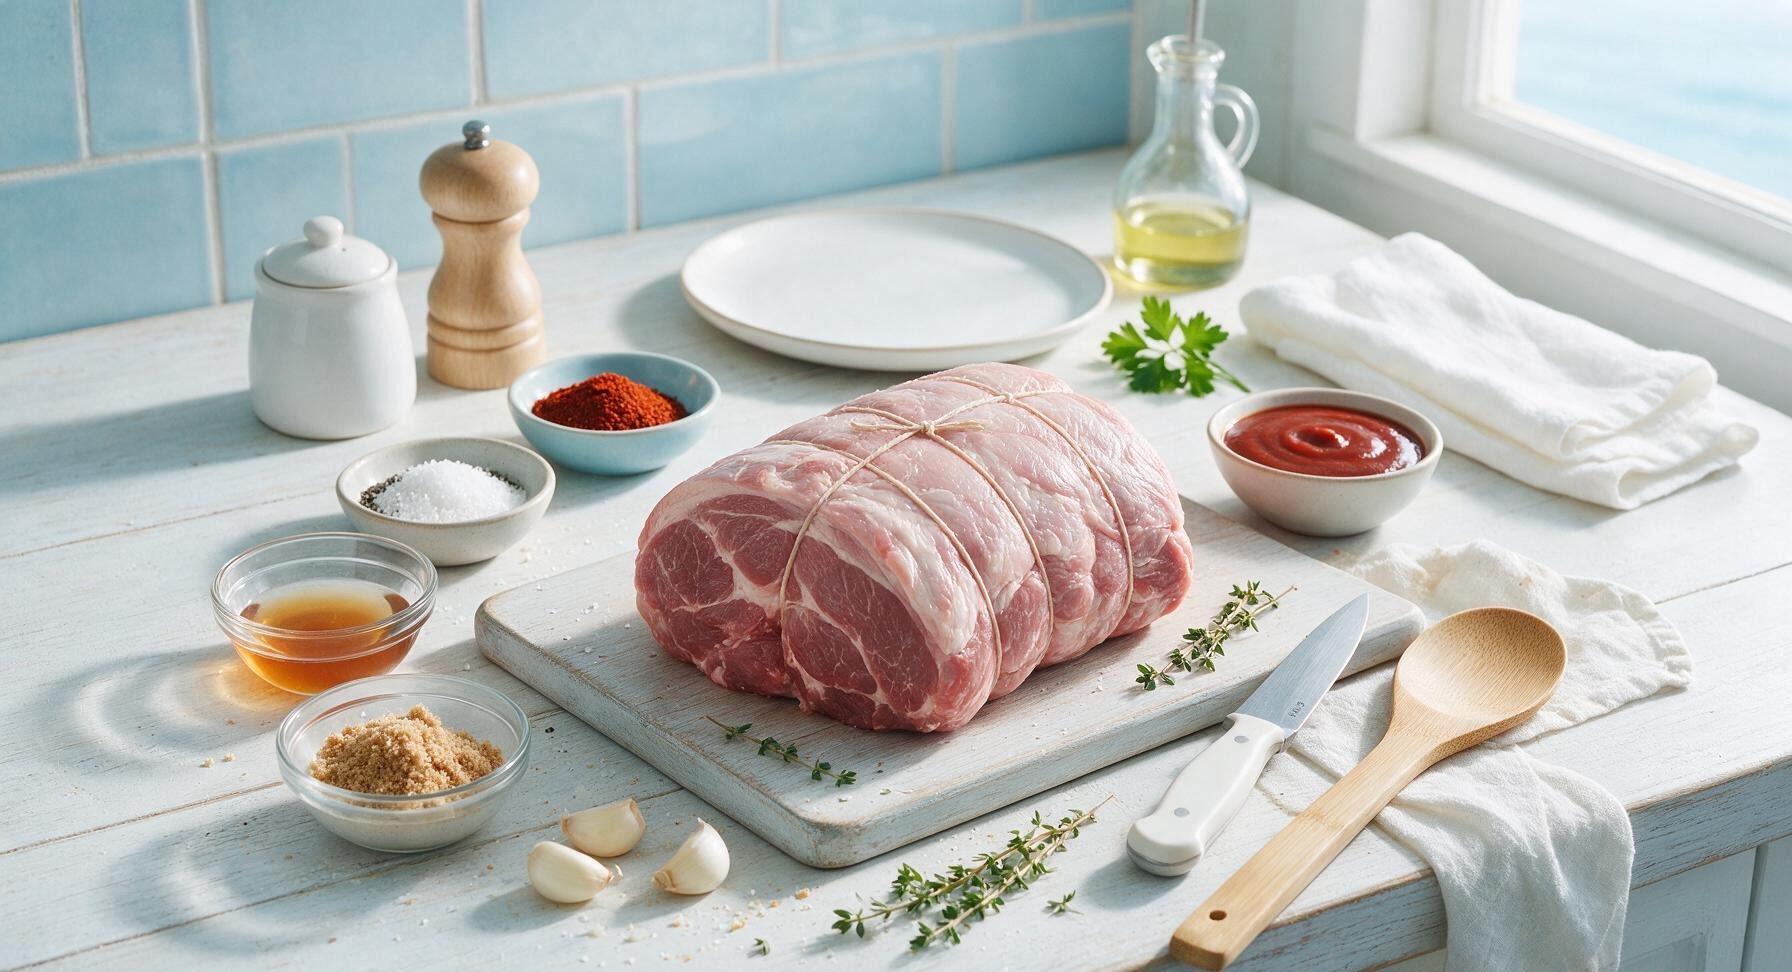
Boneless pork shoulder roast (Boston butt, tied) 2kg
Kosher salt 1 tbsp
Coarsely ground black pepper 1 tbsp
Smoked paprika 2 tsp
Garlic powder 2 tsp
Dry mustard powder 1 tsp
Light brown sugar 3 tbsp
Apple cider vinegar 2 tbsp
Garlic cloves 3, crushed
Fresh thyme 4 sprigs
Tangy tomato-based BBQ sauce 180ml

Steps

1

Trim and Prep Roast

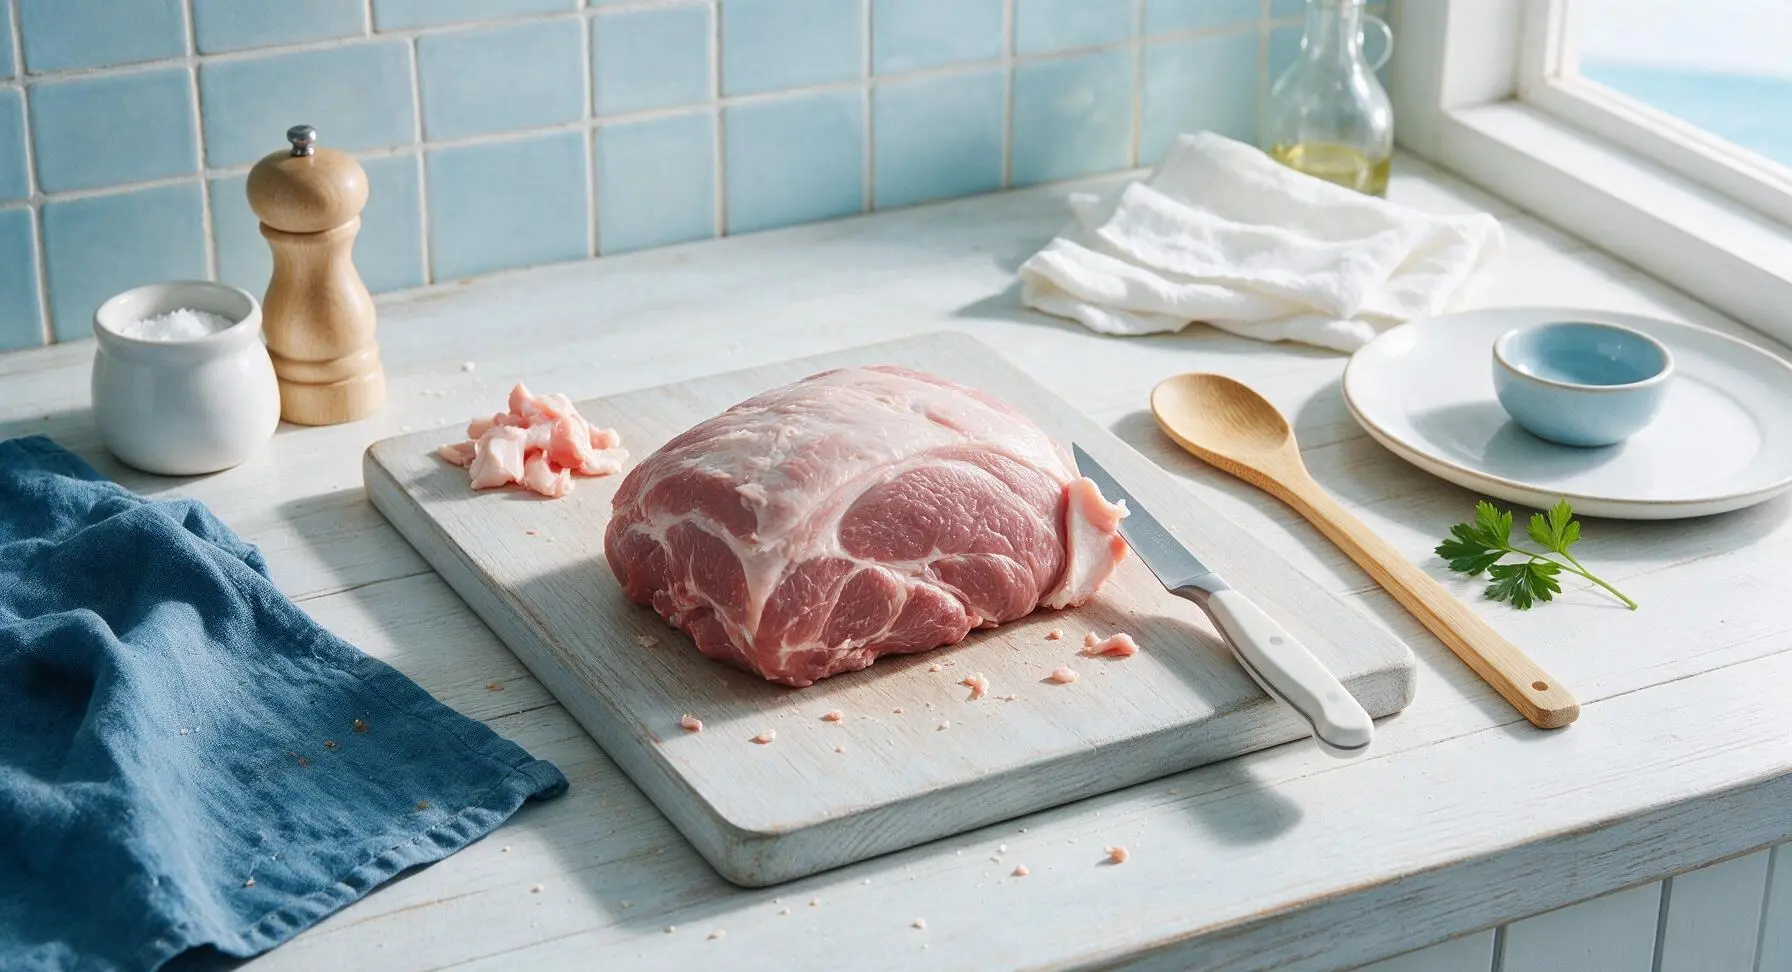
Unwrap the 2kg boneless pork shoulder roast and place it on the maple cutting board. Use the 8-inch chef knife to trim any excess hard fat or loose silver skin from the roast surface, leaving a uniform 1/4-inch thick fat cap across the top. Pat the entire surface of the roast completely dry with paper towels, discarding used towels off-frame. If the roast is not already tied, use kitchen twine to tie it at 2-inch intervals to hold its shape during cooking. The finished prepped roast should feel dry to the touch, with no ragged loose meat edges.
Step 1
step1:Trim and Prep Roast
2

Mix Dry Rub

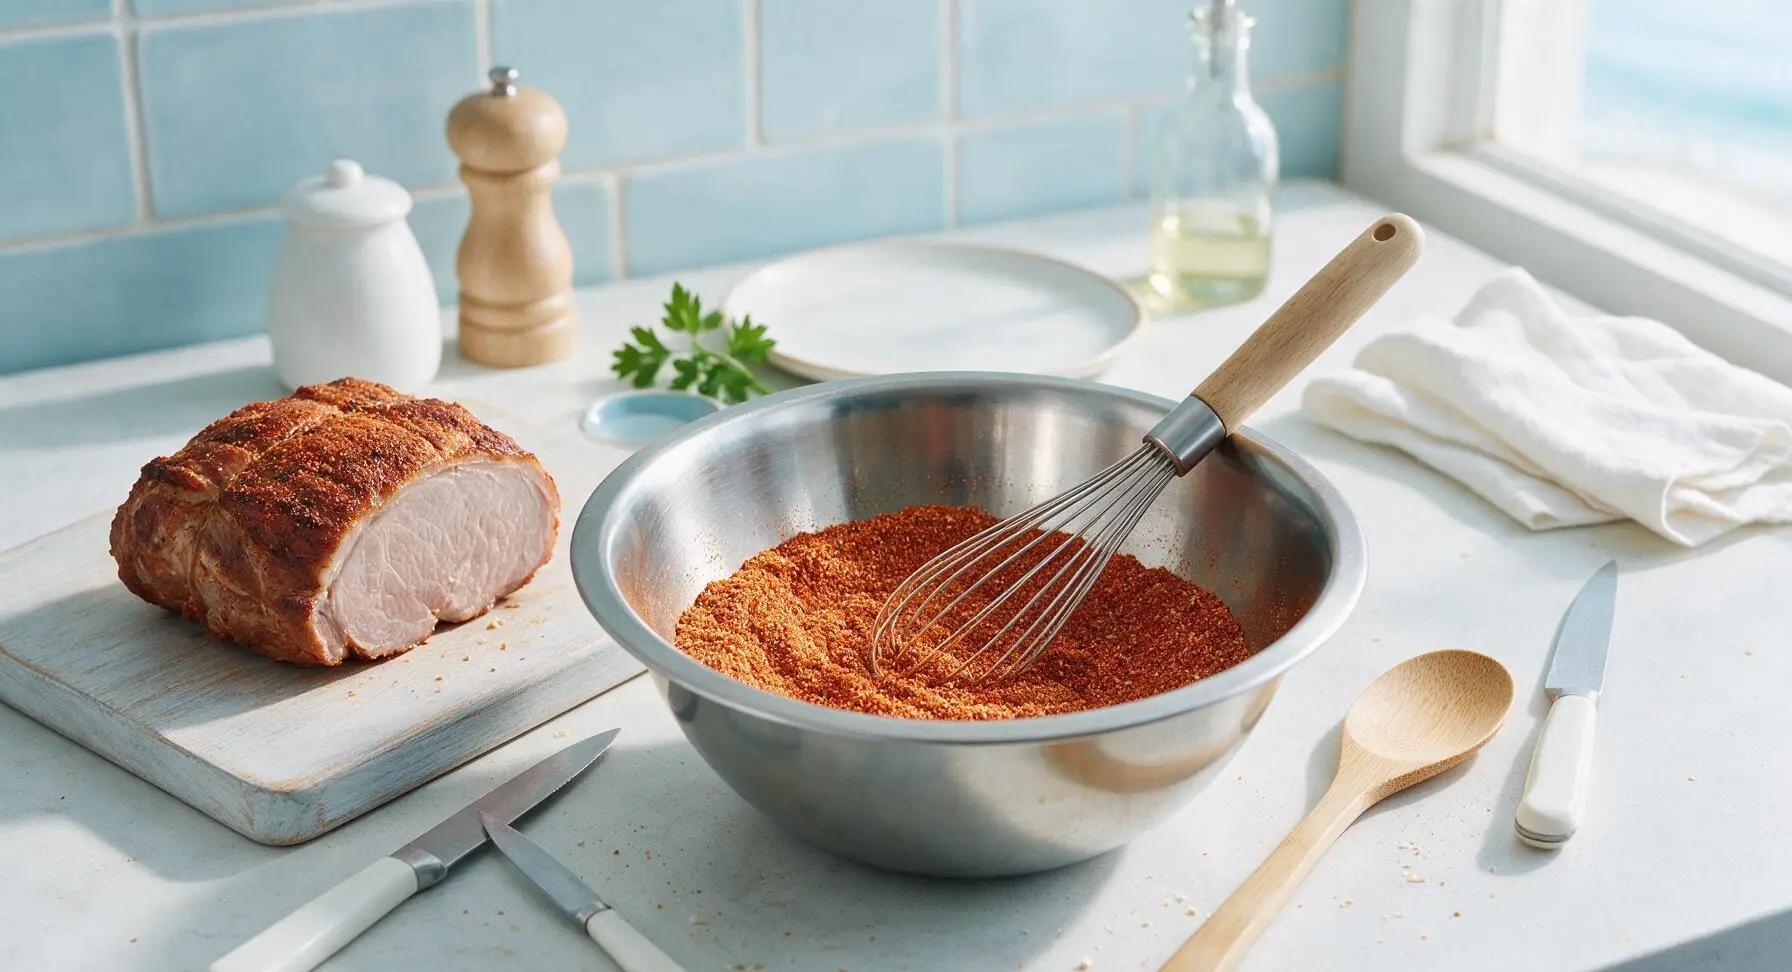
In the small stainless steel mixing bowl, combine 1 tbsp kosher salt, 1 tbsp coarse black pepper, 2 tsp smoked paprika, 2 tsp garlic powder, 1 tsp dry mustard powder, and 3 tbsp light brown sugar. Stir with the stainless steel whisk until all ingredients are evenly combined, breaking up any clumps of brown sugar with the back of the whisk. The finished rub should be a uniform warm reddish-brown, with no visible streaks of individual spices.
Step 2
step2:Mix Dry Rub
3

Coat with Dry Rub

Drizzle 2 tbsp apple cider vinegar over the entire surface of the roast, rubbing it in lightly with clean hands to help the spice mix adhere. Sprinkle the dry rub mixture evenly over all sides of the roast, pressing gently with clean hands to ensure the rub sticks firmly to every surface, including the sides and fat cap. Do not leave any bare patches of meat visible. The entire roast should be coated in a thick, even layer of the reddish-brown rub.
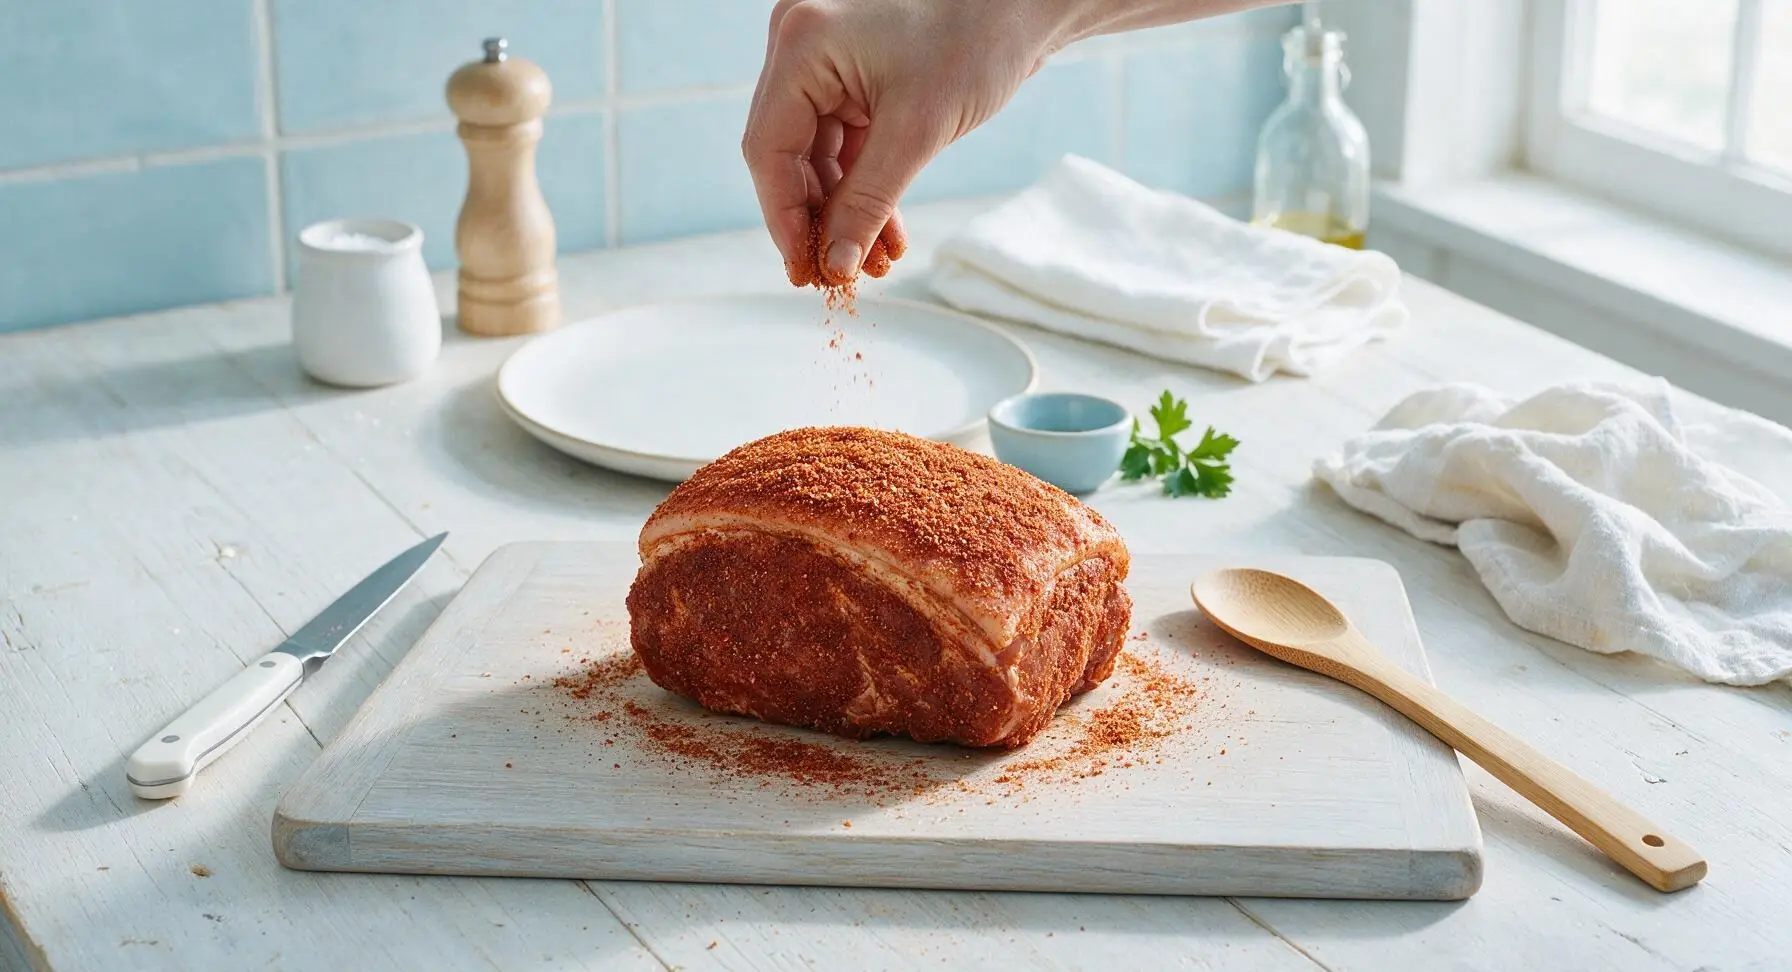
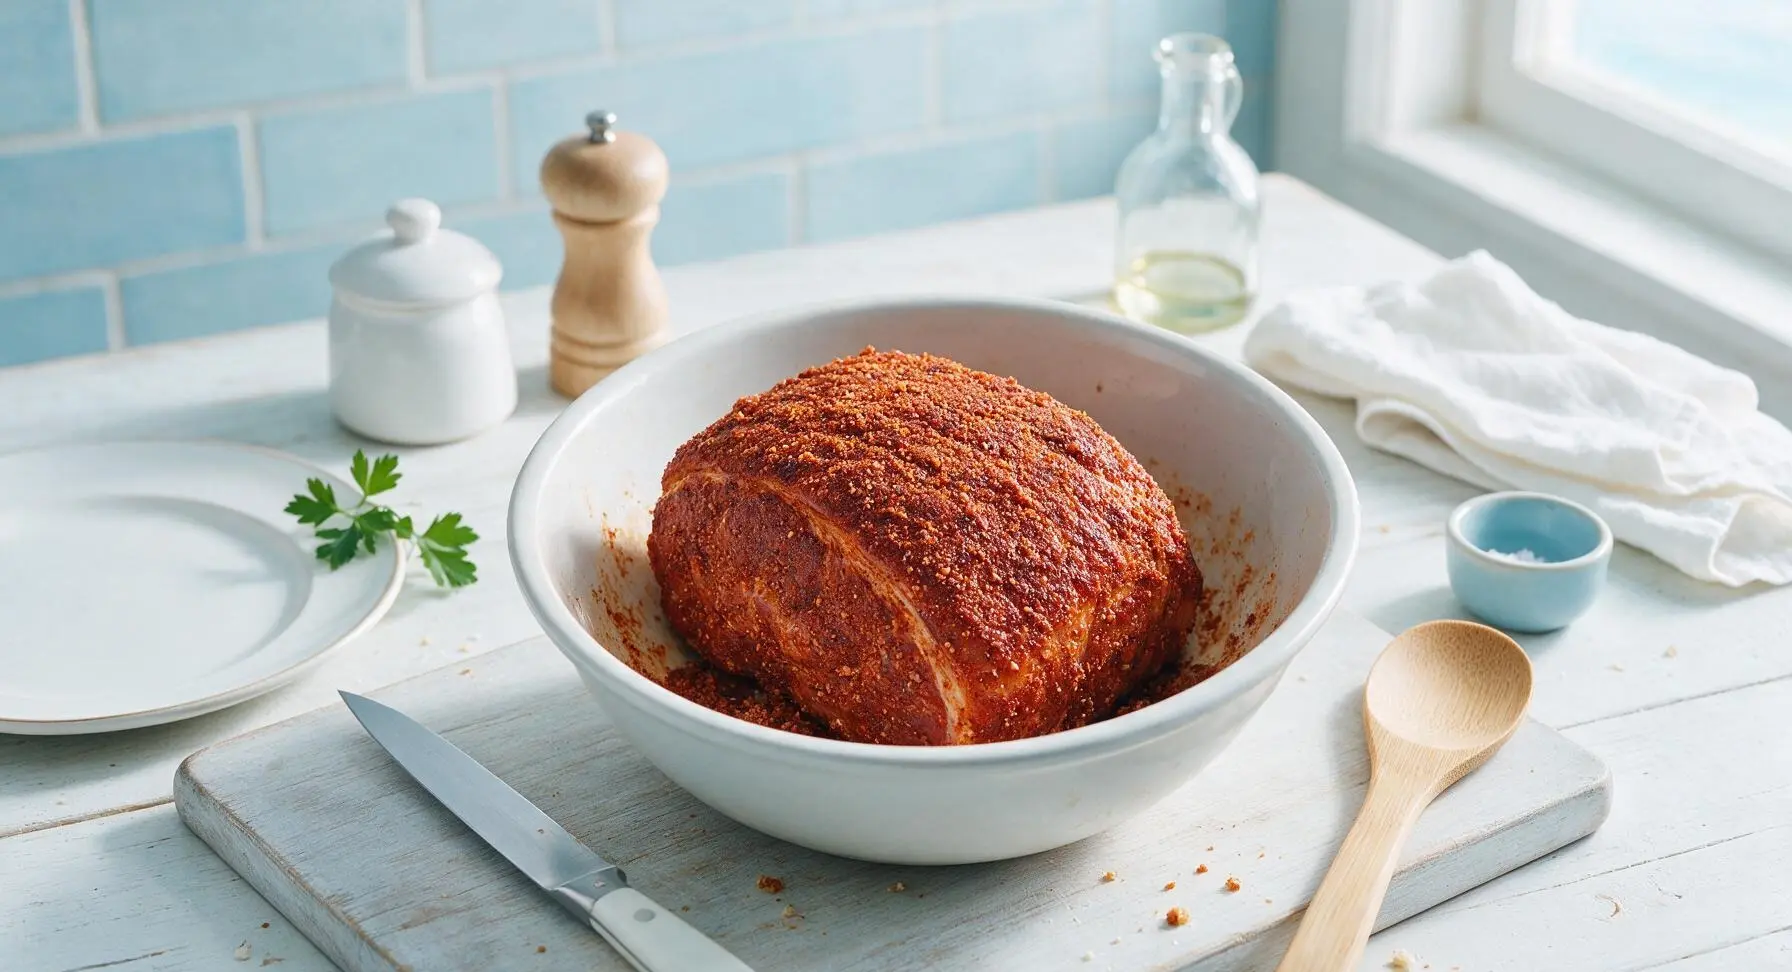
Step 3
step3:Coat with Dry Rub
Step 3
step3:Coat with Dry Rub
4

Prep for Slow Cooking

Preheat your charcoal or gas grill for indirect cooking, targeting a steady internal grill temperature of 275°F (135°C). Add a handful of hickory or apple wood chunks to the coals for gentle smoke flavor, if desired. Pull the aluminum baking tray out from under the cutting board, set the seasoned roast on the tray fat-side up, and carry it out to the grill, placing it on the indirect heat side away from direct flame. Close the grill lid to maintain temperature.
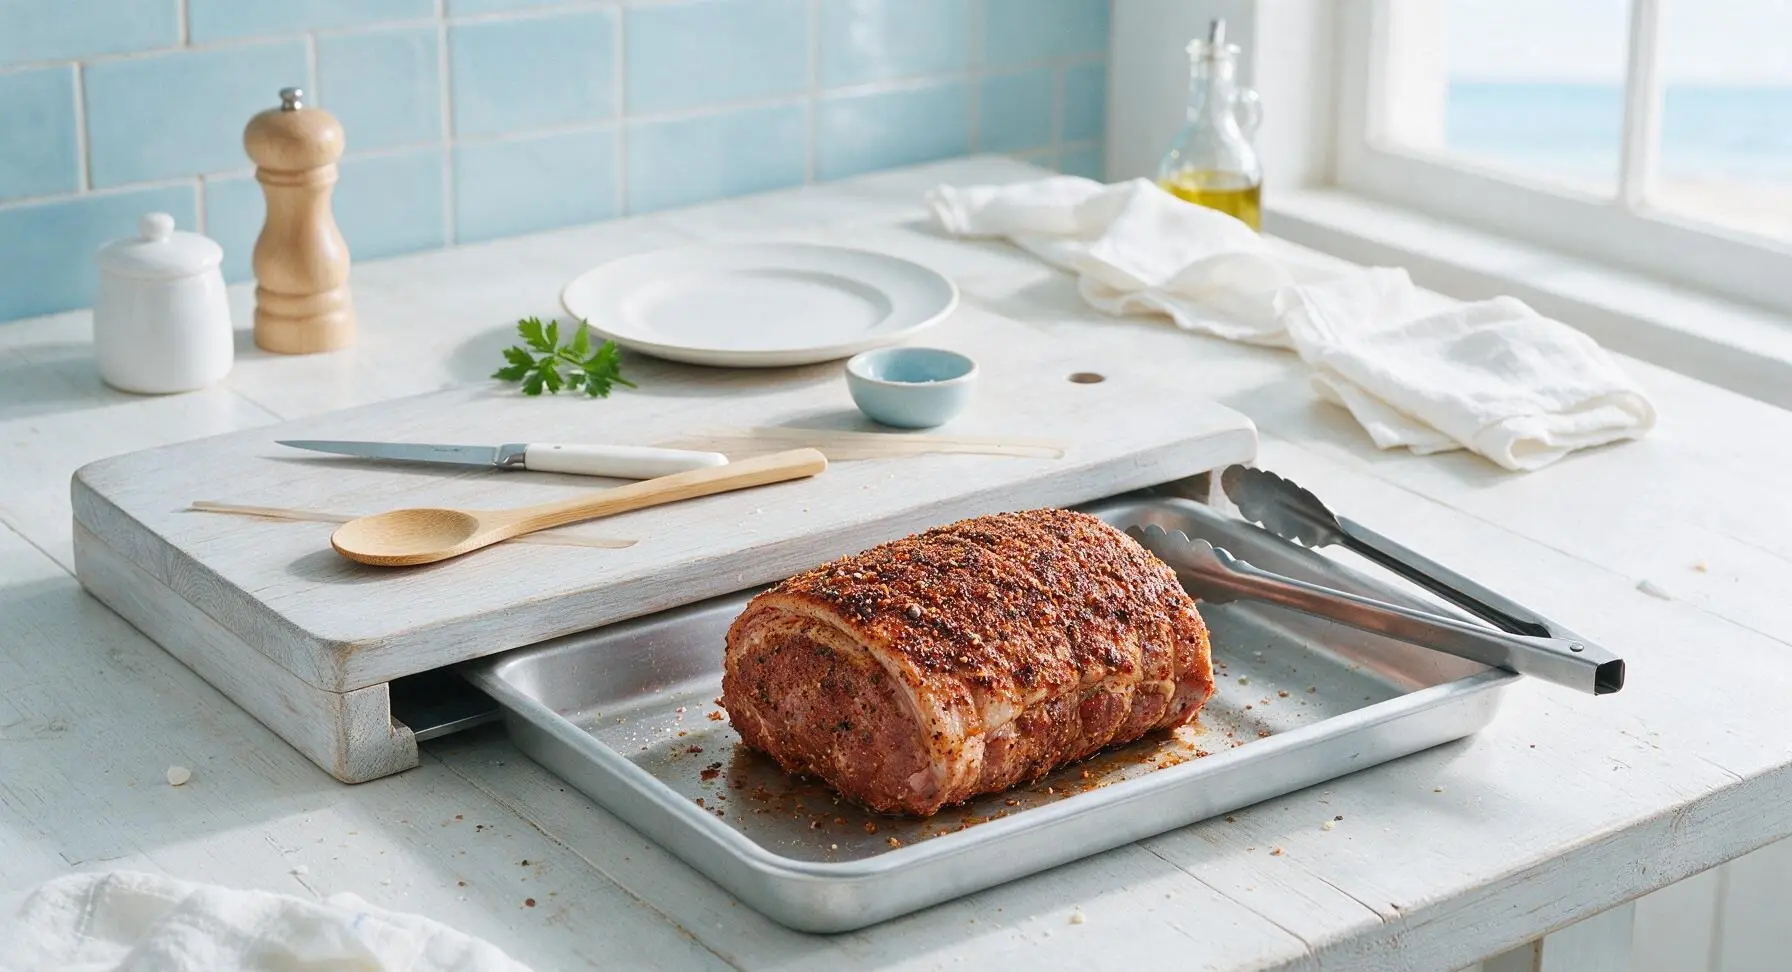
Step 4
step4:Prep for Slow Cooking
5

Smoke to Temp

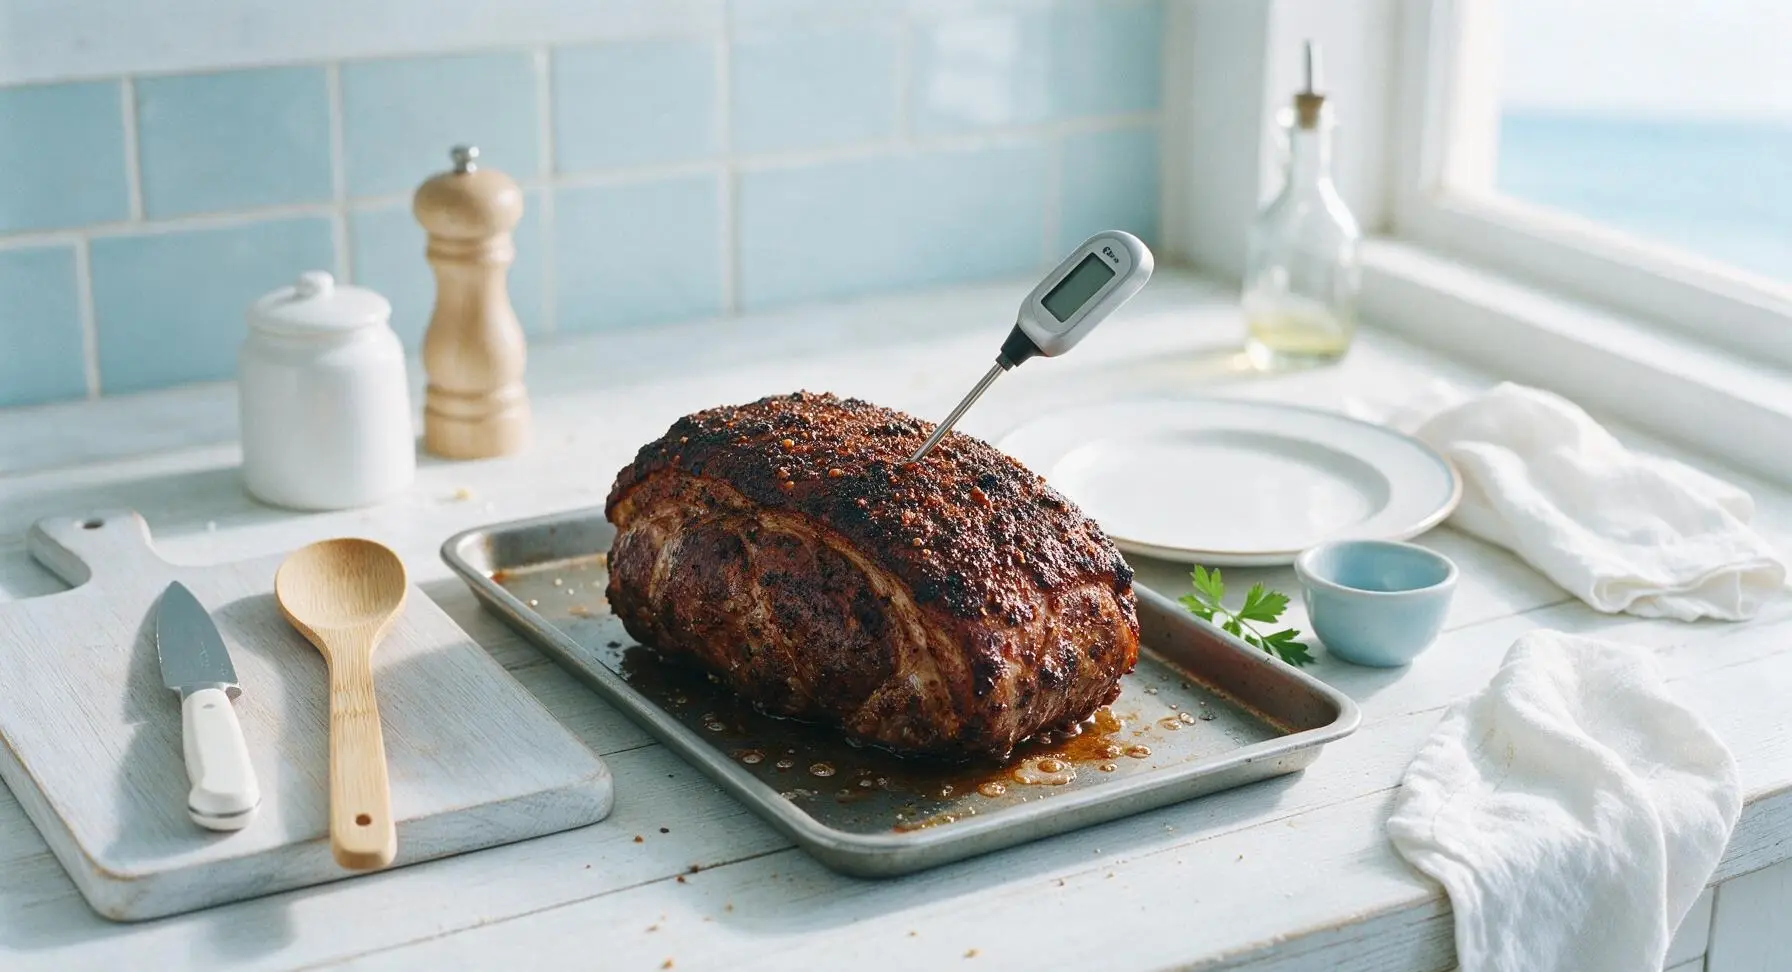
Cook the roast with the grill lid closed, maintaining a steady 275°F temperature, for 3 hours, avoiding opening the lid unnecessarily to retain heat and smoke. After 3 hours, use the kitchen tongs to bring the roast back inside on the baking tray, and insert the digital instant-read thermometer into the thickest part of the roast (avoiding any twine). The roast is ready for glazing when it reaches an internal temperature of 165°F (74°C), with a dark, slightly crisp rub exterior.
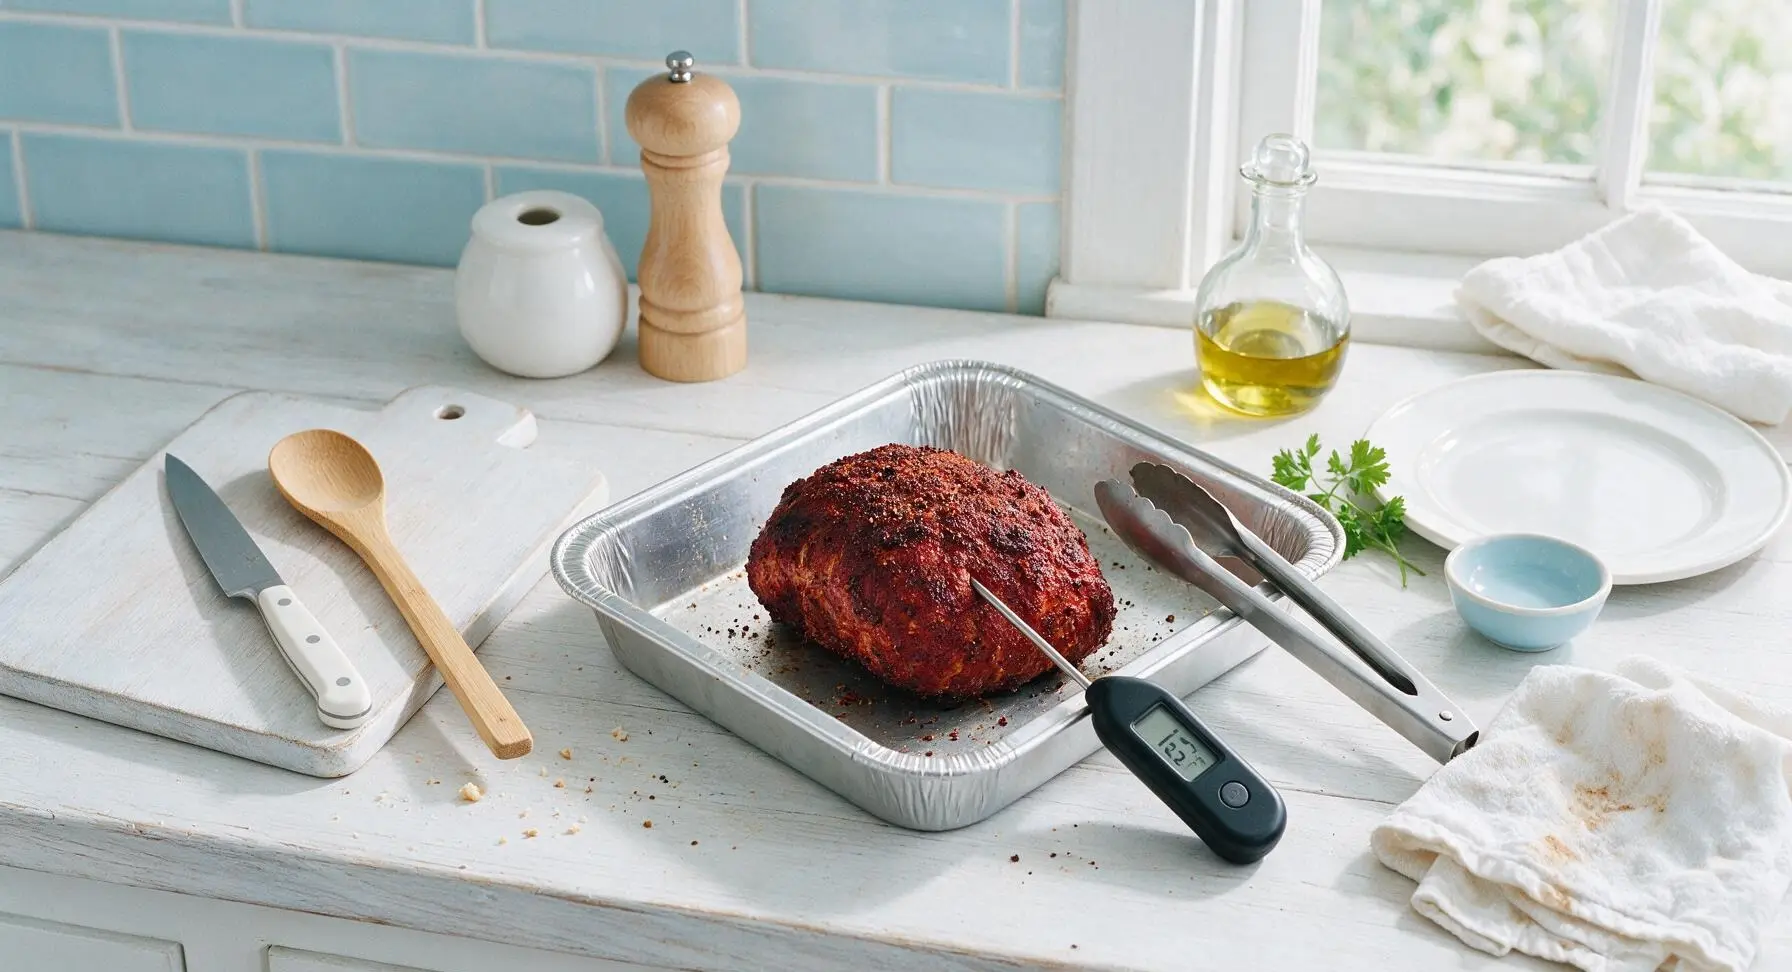
Step 5
step5:Smoke to Temp
Step 5
step5:Smoke to Temp
6

Glaze with BBQ Sauce

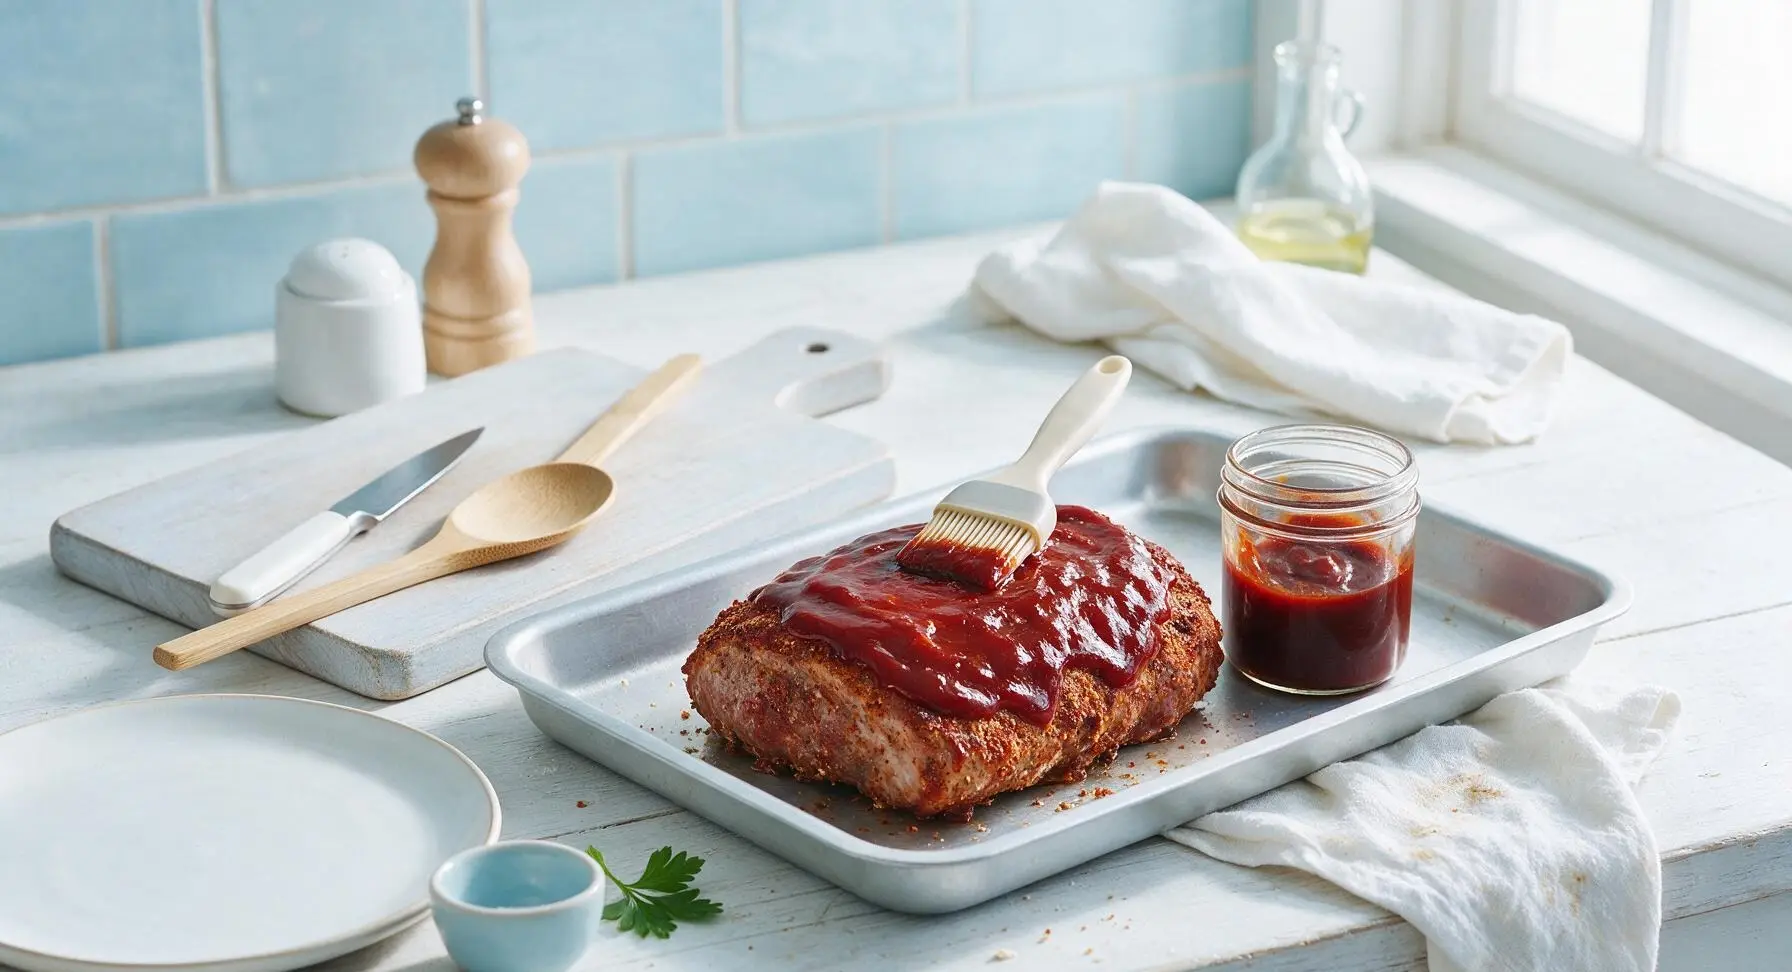
Use the silicone basting brush to coat the entire surface of the roast with half of the 180ml of BBQ sauce, spreading it in a thin, even layer. Return the sauced roast to the indirect heat of the grill, close the lid, and cook for an additional 25-30 minutes, until the sauce sets into a glossy, sticky glaze and the roast reaches an internal temperature of 195°F (90°C)—the temperature where tough connective tissue breaks down for tender, pull-apart meat.
Step 6
step6:Glaze with BBQ Sauce
7

Rest Before Slicing

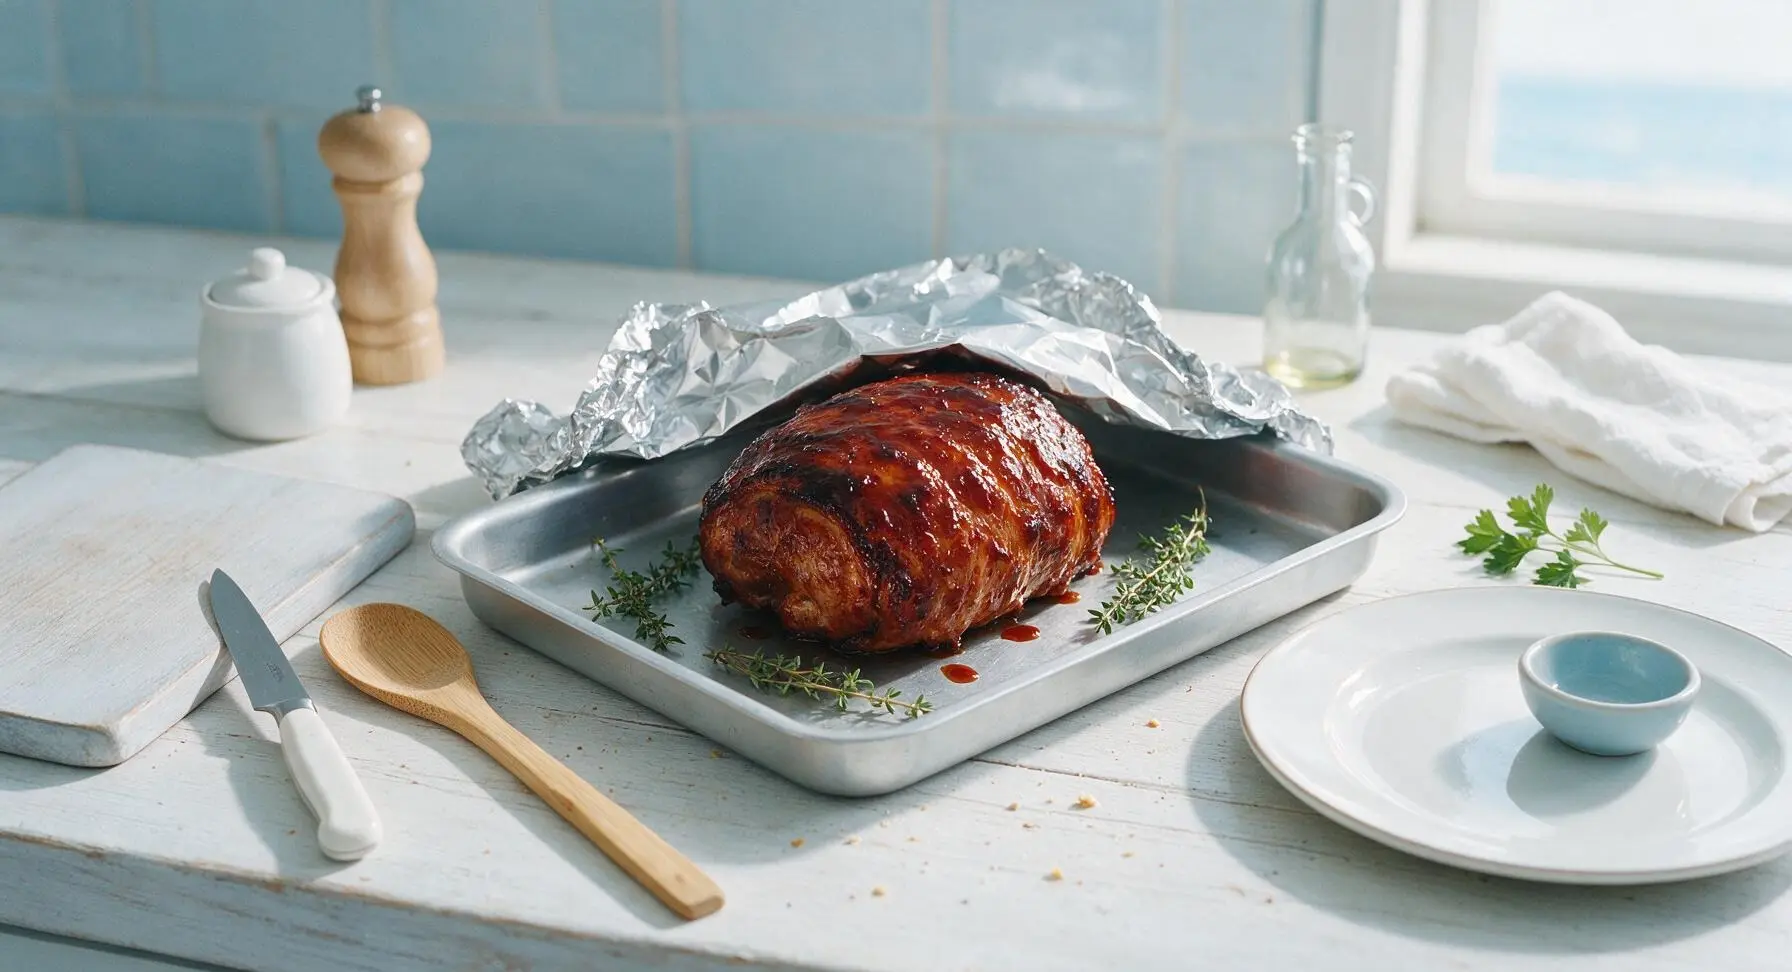
Use the tongs to transfer the finished glazed roast back to the aluminum baking tray on the counter. Tuck the 4 fresh thyme sprigs and crushed garlic cloves around the roast on the tray, then tear a sheet from the aluminum foil roll and tent it loosely over the tray. Let the roast rest for 20 minutes at room temperature to allow the juices to redistribute back into the meat, rather than running out when sliced. The internal temperature will rise 5-10 degrees during resting from carryover cooking.
Step 7
step7:Rest Before Slicing
8

Slice and Serve

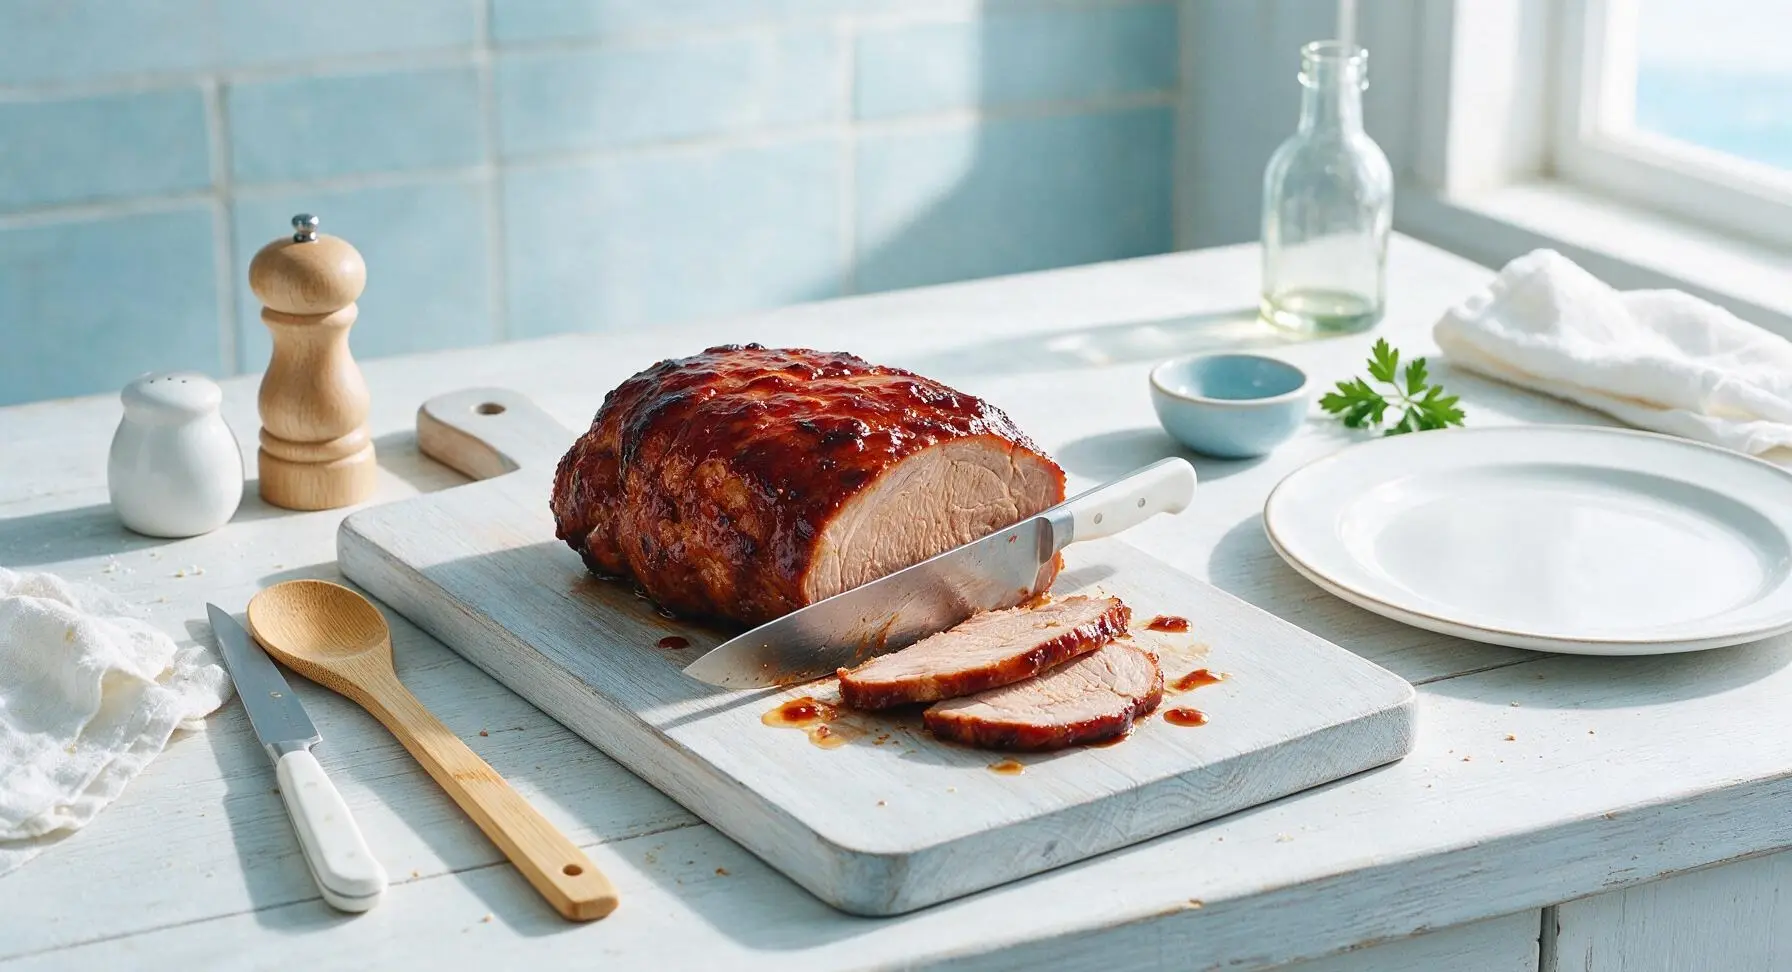
After resting, remove the foil tent and transfer the roast to the maple cutting board. Use the chef knife to slice the roast against the grain into 1/4-inch thick slices, discarding the kitchen twine. Arrange the sliced pork in a gentle fan on the matte ivory stoneware dinner plate, drizzle with the remaining BBQ sauce, and garnish with a fresh sprig of thyme. Serve immediately, with extra sauce in the small terracotta ramekin on the side.
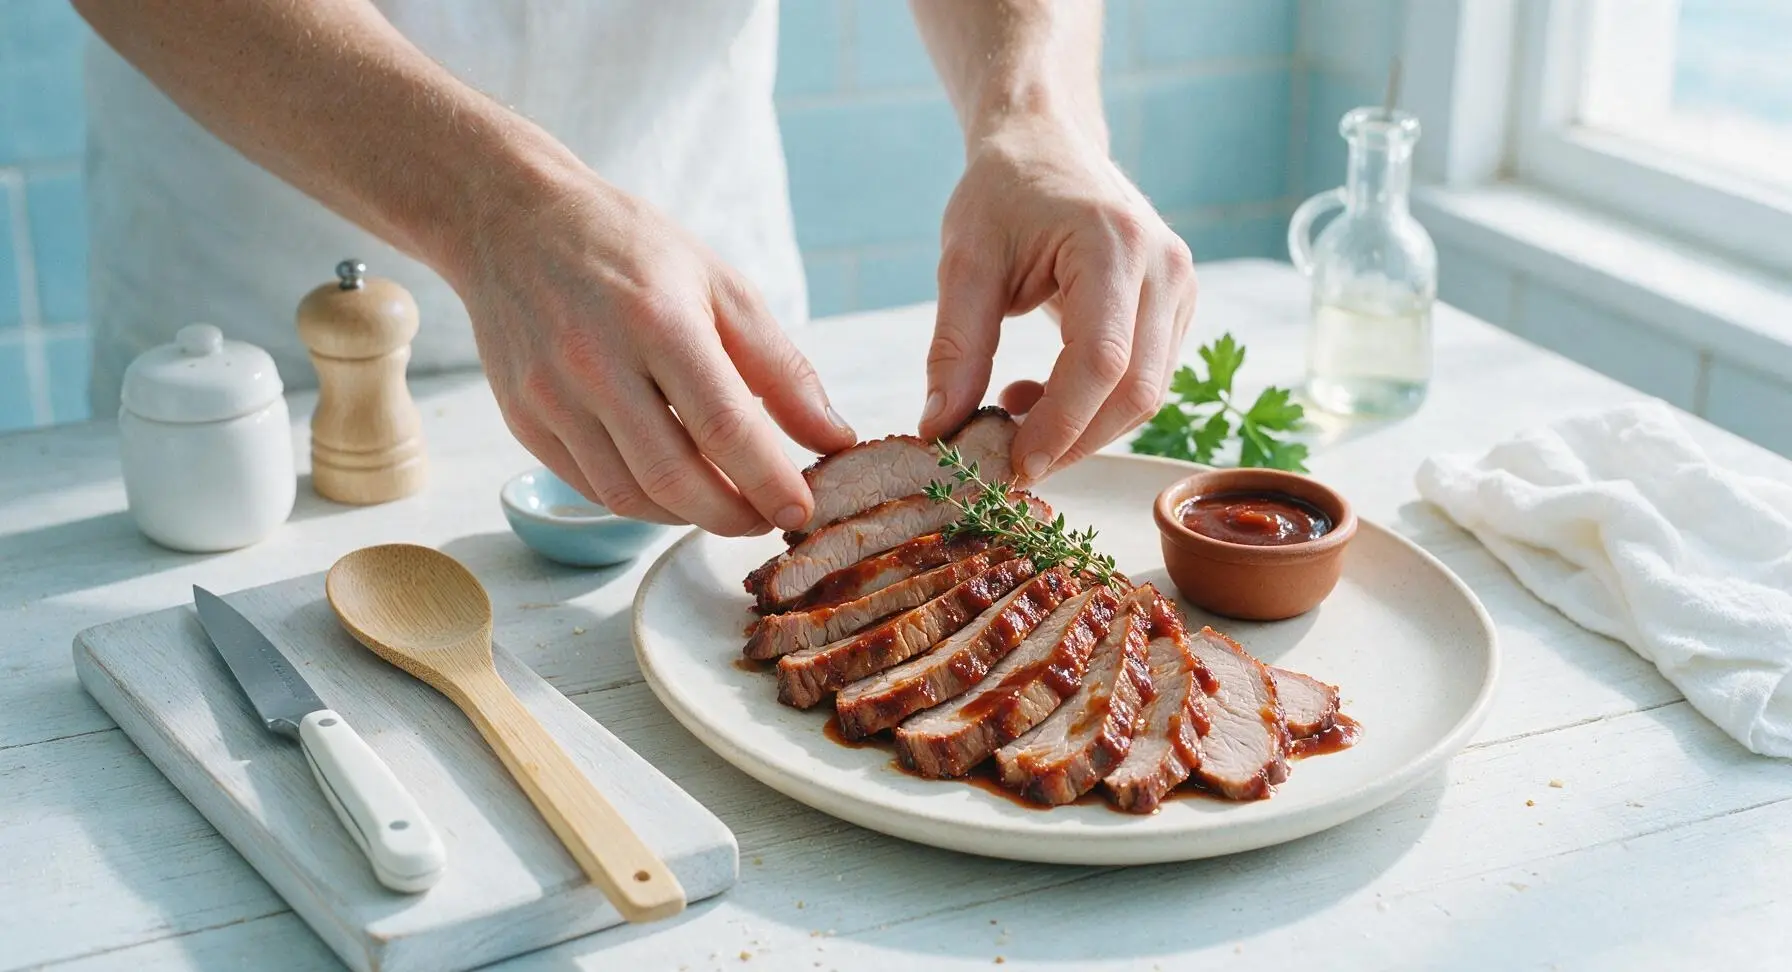
Step 8
step8:Slice and Serve
Step 8
step8:Slice and Serve

Tips

1.Pat the pork completely dry with paper towels before applying rub: a dry surface allows the spice mix to form a crisp, flavorful 'bark' during smoking, rather than steaming and turning mushy from trapped surface moisture.
2.Cook to internal temperature, not a strict timeline: Pork shoulder is ready when it reaches 195°F and a probe slides into the meat with butter-like no resistance, as connective tissue fully breaks down at this temperature—cooking by time alone often results in tough, chewy roast.
3.Resist the urge to slice immediately after cooking: The 20-minute rest allows muscle fibers to relax and reabsorb juices, so every slice stays moist instead of losing all its flavorful juice onto the plate the moment you cut into it.


✨ You May Also Like

BBQ & Grilling
🍜 United States

Tender, melt-in-your-mouth beef brisket with a crisp, spiced bark, slow-smoked to deep smoky perfection, the iconic centerpiece of Texas backyard barbecue.

⏱️ 12 hours BBQ & Grilling ★ 4.4
BBQ & Grilling
🍜 Korea

Tender, sweet-savory marinated beef short ribs, a beloved Korean BBQ staple with caramelized, slightly charred edges and deep umami flavor, perfect for outdoor summer gatherings.

⏱️ 4 hours 2BBQ & Grilling ★ 4.8
BBQ & Grilling
🍜 United States

Juicy grilled beef patties topped with smoky homemade chili, melted cheddar, and tangy pickles on toasted brioche buns for a hearty, flavor-packed handheld meal.

⏱️ 40 minuteBBQ & Grilling ★ 4.7
BBQ & Grilling
🍜 United States

A sweet, smoky, tangy BBQ sauce brightened with peak-season dark cherries, ideal for glazing grilled ribs, chicken, pork, or summer roasted veggies.

⏱️ 35 minuteBBQ & Grilling ★ 4.7
BBQ & Grilling
🍜 United States

Rich, smoky, slightly sweet homemade bourbon BBQ sauce with deep caramel notes, ideal for glazing grilled ribs, chicken, and burgers at cookouts.

⏱️ 25 minuteBBQ & Grilling ★ 4.7
BBQ & Grilling
🍜 United States

Iconic Alabama-style BBQ featuring tender hickory-smoked chicken slathered in tangy creamy white sauce, a beloved regional Southern cookout staple.

⏱️ 3 hoursBBQ & Grilling ★ 5

bbq pork roast:Frequently Asked Questions

1.What cut of pork works best for this smoked BBQ roast? ▾
Boneless Boston butt (pork shoulder) is the ideal pick, no other cut matches its results. It has even, rich marbling and connective tissue that breaks down during slow smoking to create that signature fall-apart, juicy texture. Buy it pre-tied, or tie it at home, so it holds a uniform shape for even cooking.
2.Do I need to brine the pork before applying the dry rub? ▾
You don’t need a separate wet brine for this recipe if you plan ahead. Apply the salt-heavy rub (made with kosher salt, coarse black pepper, smoked paprika, and garlic powder) 12 to 24 hours before smoking, rest the pork in the fridge, and the salt will penetrate the meat for juicy, evenly seasoned results without extra work.
3.What type of wood gives the best smoky flavor for this roast? ▾
Stick to mild, sweet hardwoods to complement the pork instead of overpowering it. Hickory is the classic traditional pick for that familiar deep BBQ smokiness, but apple, cherry, or post oak work beautifully too. Avoid heavy, resinous woods like pine or overly strong mesquite, as they’ll make the meat taste bitter.
4.Can I make this recipe if I don’t own a dedicated smoker? ▾
Absolutely! You can get great results on a standard charcoal or gas grill. Set your grill up for indirect heat, place a foil packet of soaked wood chips directly over the heat source, hold a steady temperature between 225 and 250°F, and follow the exact same cook time and temperature cues as you would on a smoker.
5.What internal temperature means the roast is perfectly done? ▾
Smoke the roast until it reaches 195 to 203°F, measured with a meat thermometer in the thickest part, away from fat or cooking twine. In this temperature range, all the tough connective tissue melts into rich, silky gelatin, giving you that tender, pull-apart texture without the meat turning mushy.
6.How long will this roast take to smoke, exactly? ▾
Plan for a rough estimate of 1.5 to 2 hours per pound at 225°F, but never rely strictly on the clock. Cook time varies based on your smoker temperature, outdoor wind and air temp, and the roast’s unique shape and marbling. Always use internal temperature as your final marker for doneness.
7.When should I apply the BBQ glaze to avoid burning it? ▾
Brush on your BBQ glaze during the final 20 to 30 minutes of cooking, once the roast hits about 190°F internal. The sugar in most BBQ glazes caramelizes and burns quickly at smoking temperatures, so applying it too early will leave you with a charred, bitter crust instead of that glossy, sticky finish.
8.Should I wrap the roast in foil or butcher paper while smoking? ▾
Wrapping is completely optional, but it can help speed up cook time if you’re on a schedule for a gathering. If you wrap in uncoated butcher paper once the roast hits 165°F, you’ll push through the common temperature “stall” faster while preserving the crisp, spiced rub crust better than tight foil will.
9.How long do I need to let the roast rest after smoking? ▾
Let the roast rest for a minimum of 30 minutes, tented loosely with foil, before slicing or pulling. Resting lets all the hot, melted juices that got pushed to the meat’s surface during cooking redistribute evenly, so you won’t lose all that flavorful moisture onto your cutting board when you cut into it.
10.Can I prep this roast ahead for a summer cookout? ▾
Absolutely! You can apply the spiced rub to the tied pork roast up to 24 hours ahead, keep it tightly wrapped in the fridge, and pop it straight on the smoker when you’re ready to cook. Leftovers keep for 3 to 4 days refrigerated, and reheat beautifully in a low oven for quick pulled pork sandwiches all week.

Comments (10)

1 week ago

OMG y’all, this smoked pork roast was the star of our Sunday family dinner! I was a little nervous about nailing the smoke level since I’m still new to my offset smoker, but the timing instructions were spot on. My kids devoured two servings each and even asked for leftovers in their lunch boxes tomorrow. 10/10 will be making this for our next neighborhood potluck!

5 days ago

So glad this was a hit with your family, MamaBearBBQ! If you’re prepping for the potluck, you can hold the cooked roast wrapped in foil in a cooler for up to 4 hours to keep it juicy without overcooking. Enjoy!

3 days ago

Wait, the cooler trick is a game changer! I did that for my last cook and people were asking how I kept it so tender the whole party. This recipe is chef’s kiss for potlucks fr

5 days ago

Taste was great, but my roast came out a little drier than I expected? I followed the cook time exactly and pulled it at the temp the recipe listed, so I’m not sure what went wrong. Any tips for keeping it juicier next time?

3 days ago

Oh I had that happen my first try too! I started letting it rest for a full 30 minutes wrapped in butcher paper after pulling it off the smoker instead of slicing right into it, and that made all the difference. All the juices redistribute instead of running all over your cutting board

2 days ago

Sorry to hear your first roast came out a little dry! A couple quick tips: make sure you’re not opening the smoker lid too often while it cooks, which lets heat out and can dry out the exterior, and definitely let it rest for 25-30 minutes tented in foil or butcher paper before slicing, just like RibsAndRanch mentioned. If your roast is on the leaner side, you can also baste it with melted butter once an hour during the cook for extra moisture!

2 hours ago

Wait, has anyone tried making this with a pork shoulder instead of the loin roast the recipe calls for? I have a big shoulder in the freezer I need to use up and I’m wondering if the cook time adjustments would be super dramatic? Don’t want to waste a good cut of meat!

30 minutes ago

I did this last month! Just bump the cook time up to about 6 hours at the same temp, spritz it with apple cider vinegar every hour, and it comes out fall-apart tender. Turned out amazing for my game day watch party

5 minutes ago

Great question! As BackyardSmoker1 mentioned, pork shoulder will need a longer cook time (plan for 5.5-6.5 hours depending on size) to reach that perfect pullable tenderness, since it’s a fattier, tougher cut than loin roast. The same dry rub and smoke wood works perfectly for it too!

2 days ago

Solid recipe, though I had to add an extra 20 minutes of cook time because my pellet grill runs a little cool. The bark came out perfectly crispy, and the store-bought BBQ sauce I paired with it (don’t judge, I was short on time) worked so well with the smoky flavor. Great weeknight meal prep protein too – I sliced up the leftovers for sandwiches all week.

yesterday

Great call adjusting the cook time for your grill – every unit runs a little differently! For next time, if you have 5 extra minutes, a quick homemade mop sauce takes this roast to the next level, but no shade at all to a good store-bought BBQ sauce, we’ve all been there on busy weeks!

yesterday

I was worried this would be too hard to pull off since the difficulty is listed as medium, but the step-by-step instructions were so easy to follow! I used hickory wood because that’s what I had on hand, and it gave the roast that classic deep BBQ flavor I was craving. My husband said it’s better than the BBQ joint we go to down the street, high praise.

2 hours ago

That’s such high praise from your husband, Sarah! Hickory is such a classic choice for smoked pork, it totally works if you don’t have apple wood on hand. So glad the steps felt approachable even for a medium-difficulty cook!

30 minutes ago

Game changer! I’ve been scared to try smoked meats because I thought you needed all this fancy equipment, but I used my regular charcoal grill with a smoke box and it turned out perfect. Took it to my office potluck and not a single slice was left. Coworkers were begging for the recipe by 9am the next day.

5 minutes ago

Wait you did this on a regular charcoal grill? I don’t have a fancy smoker either and I’ve been putting off trying this recipe, that makes me feel so much more confident giving it a go this weekend!

5 minutes ago

Just pulled this off the smoker for the first time ever and wow, I can’t believe I made something that tastes this good! The bark is crunchy, the inside is juicy, the smoke flavor is just right instead of being overpowering. So proud of myself right now lol.

just now

That’s what we love to hear! Nothing beats the feeling of nailing your first smoked meat cook. Congrats, and we’re so glad the recipe helped you pull off such a great result!

2 weeks ago

Made this for my camping trip last weekend with my portable pellet grill and it was an absolute hit. The dry rub is perfectly balanced – not too salty, not too sweet, just the right amount of paprika for a little kick. We sliced it thin and made sliders with coleslaw, chef’s kiss. Already saved the recipe to my permanent rotation.

3 days ago

Made this for my partner’s birthday cookout last weekend and every single guest asked for the recipe! I used apple wood chips like the recipe suggested and the subtle sweet smoke paired so nicely with the dry rub. SO good, I might never make regular oven pork roast again.

just now

My kids are super picky eaters and they both went back for seconds! I served it with roasted corn and mac and cheese for a classic BBQ night, and even my 4 year old who refuses all meat ate a whole helping. Will absolutely be making this again for our next family gathering.



