
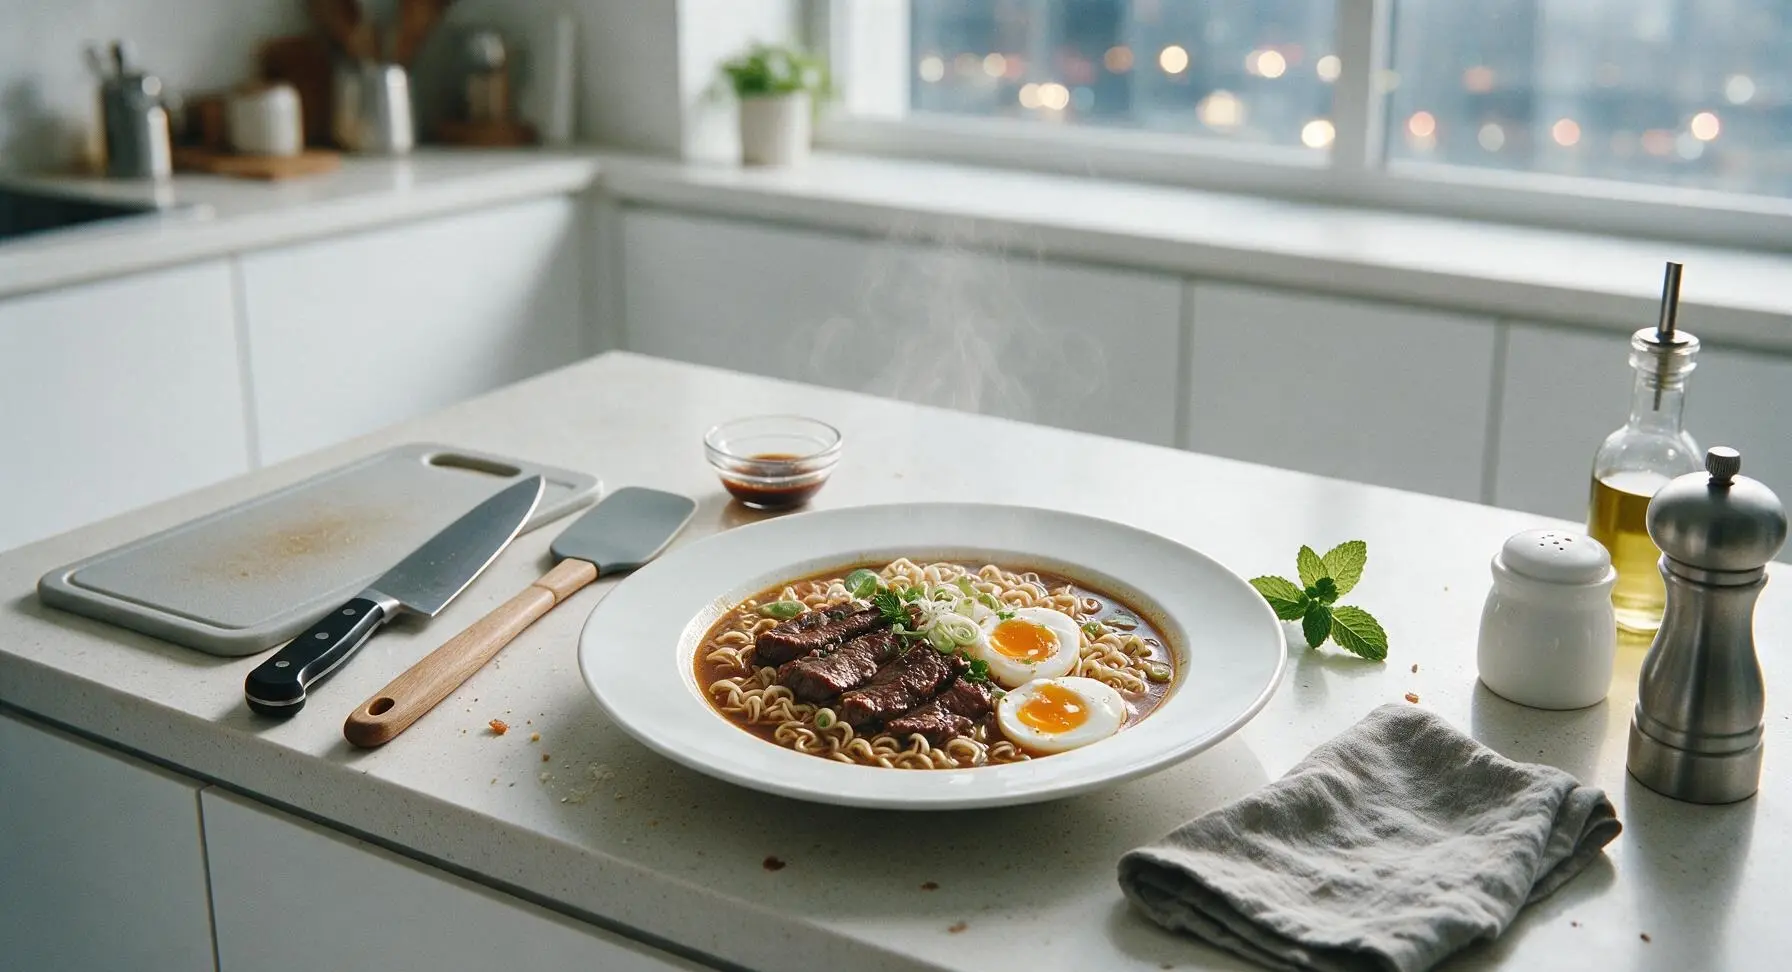
beef ramen

title 1
beef ramen
⏱️ cook time 35 minutes
🍽️ servings 4
⚡ Difficulty medium

intro

Rich umami beef broth, springy fresh noodles, tender seared beef, and runny soft-boiled eggs come together in this cozy, restaurant-worthy ramen perfect for cold winter weeknights.

Ingredients
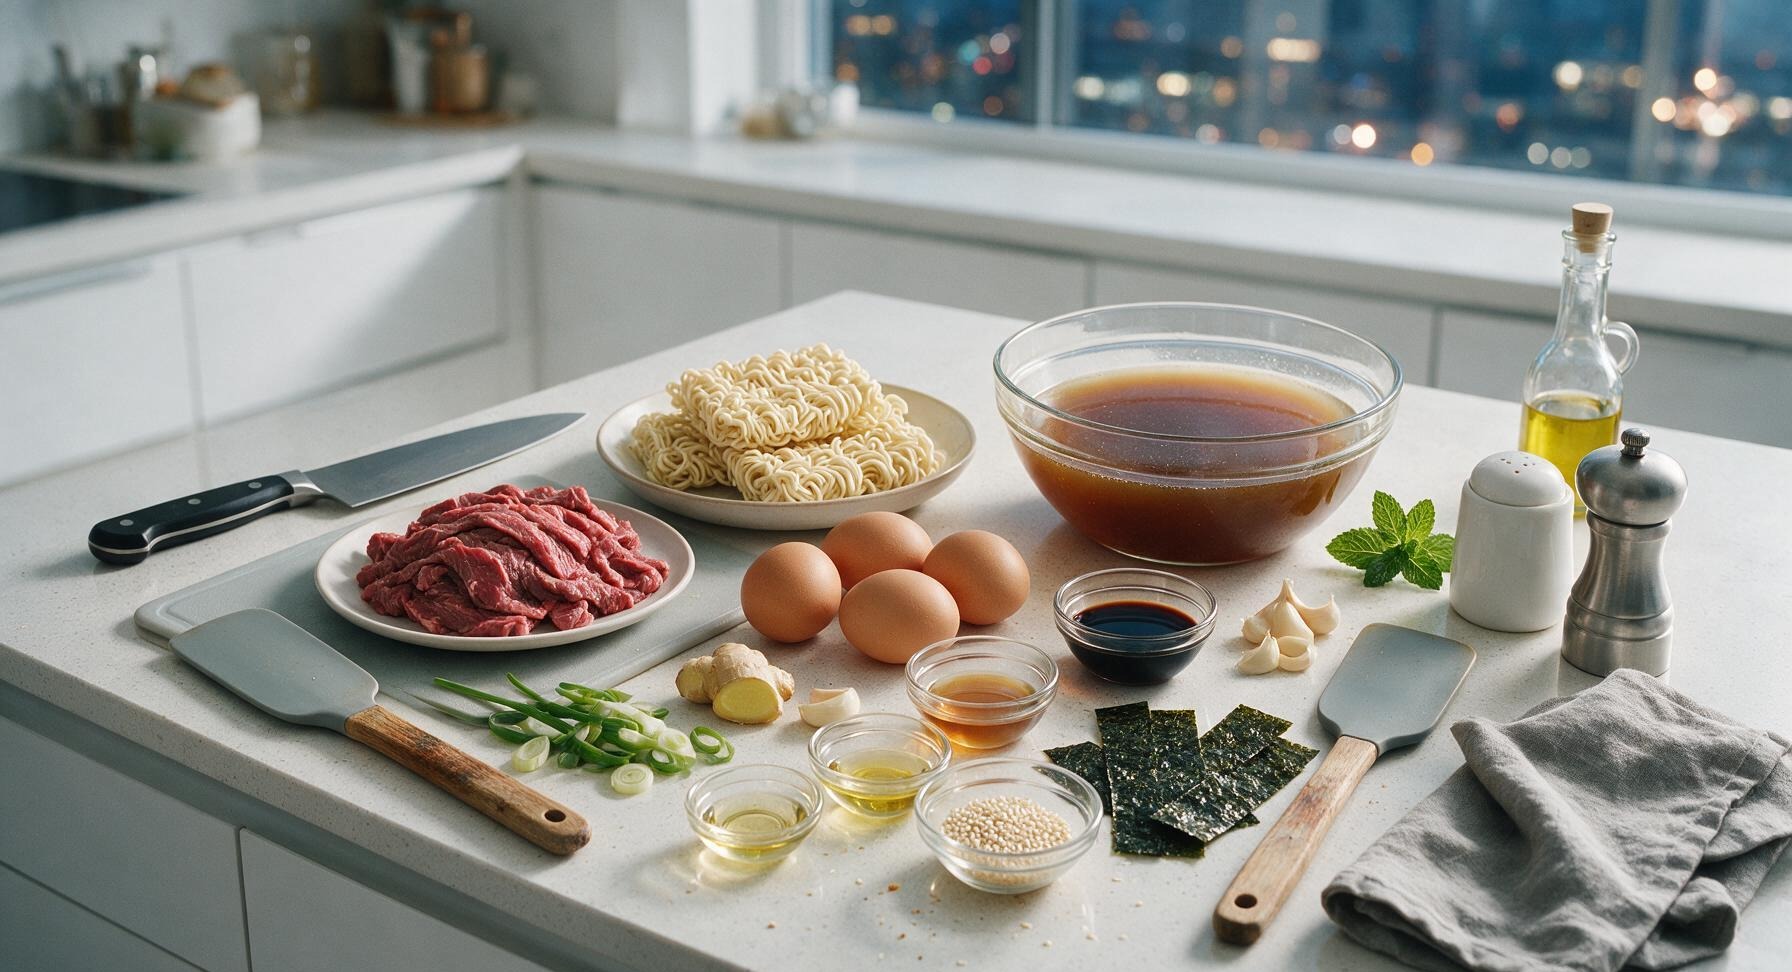
Thinly sliced beef chuck 500g
Fresh ramen noodles 600g (4 portions)
Low-sodium beef broth 1L (4 cups)
Large eggs 4
Fresh ginger 20g (1 inch piece, sliced)
Garlic cloves 4, crushed
Soy sauce 60ml (1/4 cup)
Mirin 30ml (2 tbsp)
Toasted sesame oil 15ml (1 tbsp)
Green onions 4 stalks, thinly sliced
Dried nori sheets 4, cut into 5cm strips
Toasted white sesame seeds 1 tsp
Neutral cooking oil 10ml (2 tsp)

Steps

1

Sauté Broth Aromatics

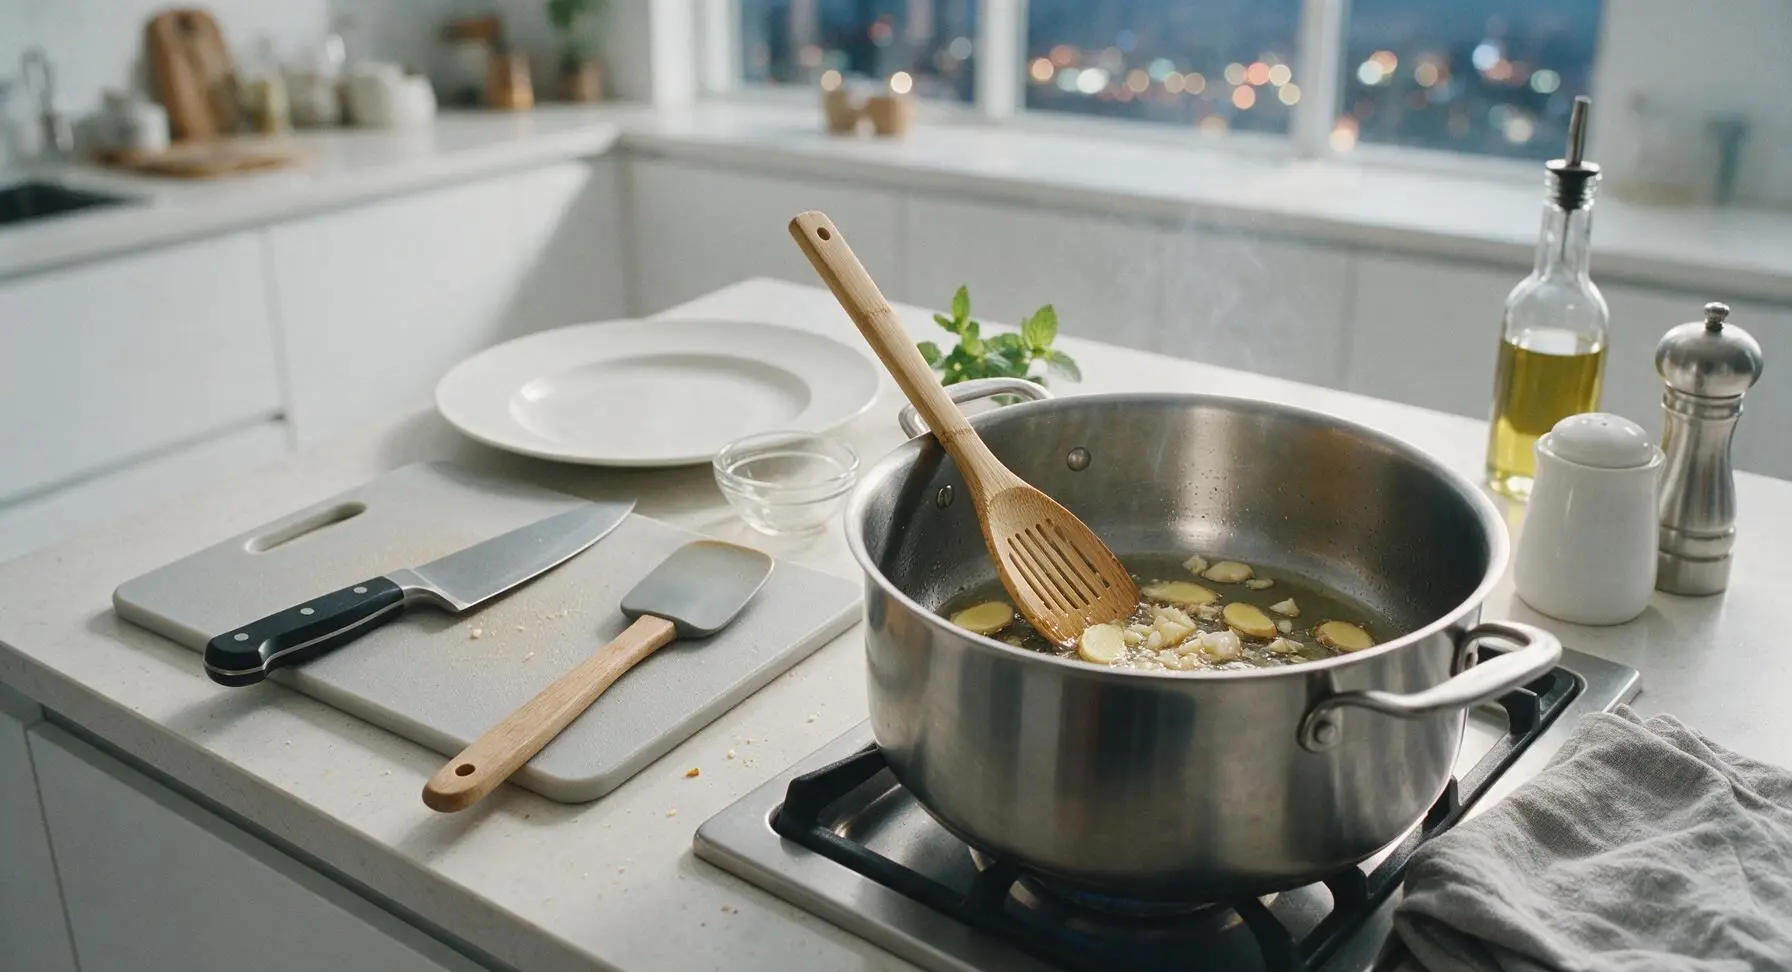
Place the 4L stainless steel stock pot on the stovetop over medium heat (175°C/350°F). Add 1 tsp neutral cooking oil, then add sliced ginger and crushed garlic. Sauté for 2 minutes, stirring frequently with the bamboo skimmer spoon, until fragrant and lightly pale golden. Watch closely to avoid burning garlic, which will make the broth taste bitter.
Step 1
step1:Sauté Broth Aromatics
2

Simmer Beef Broth

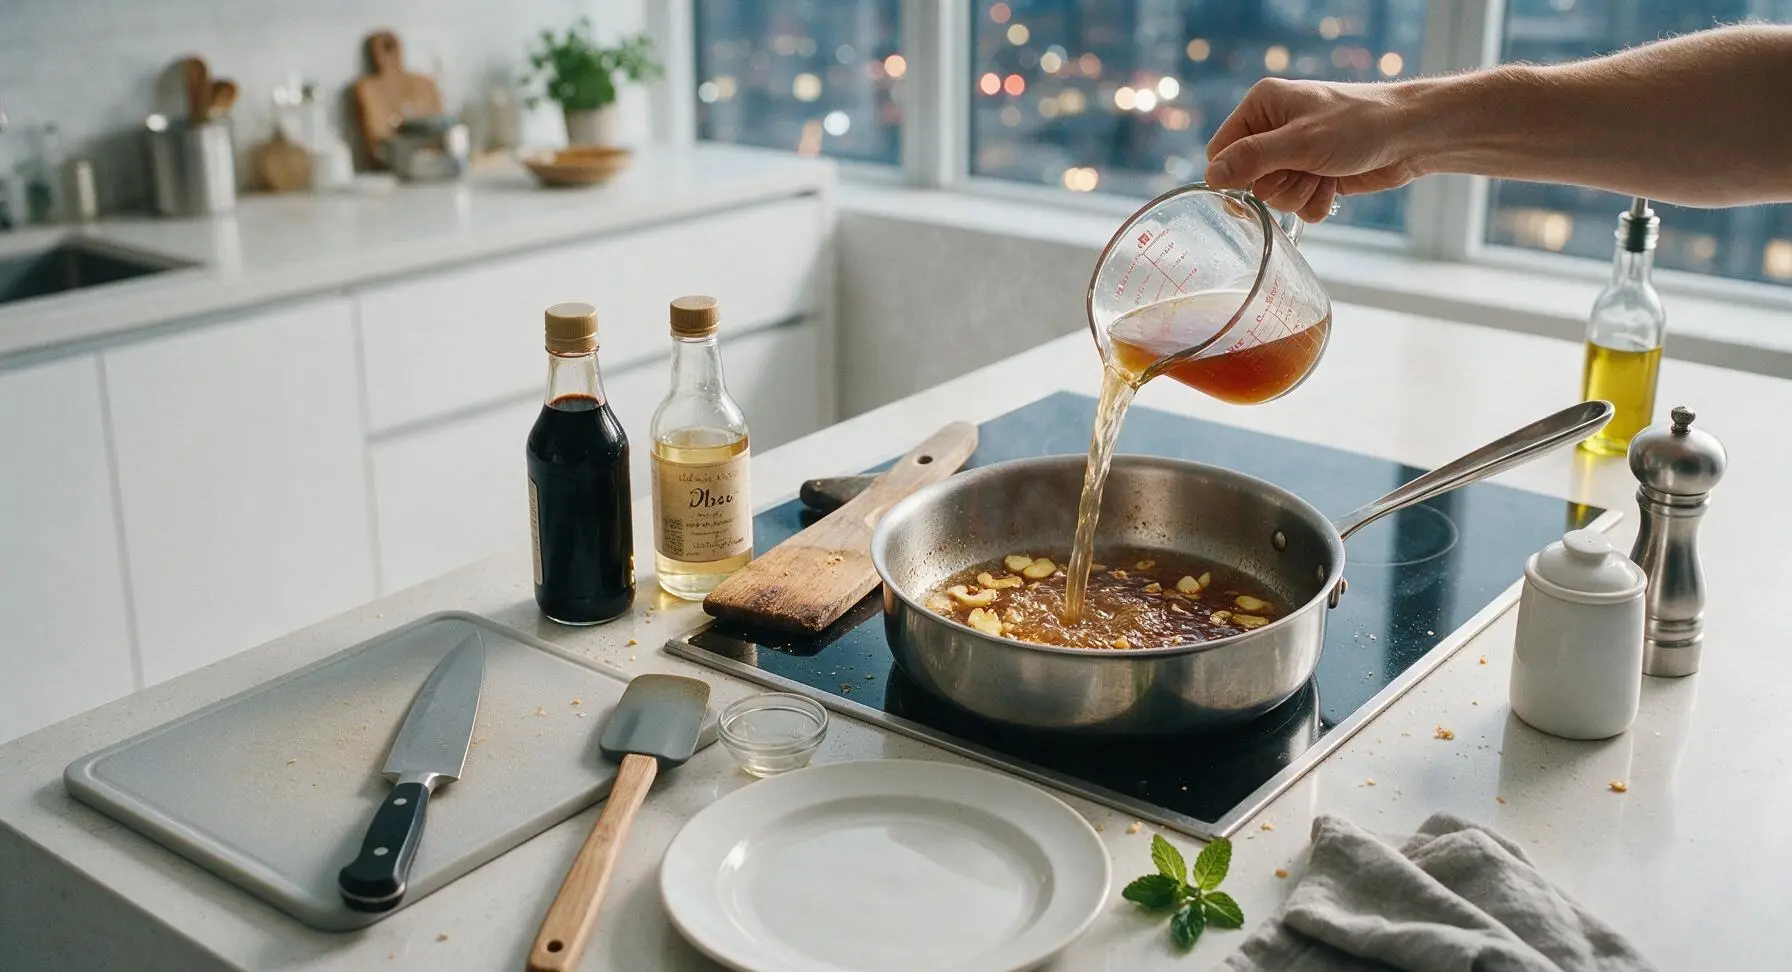
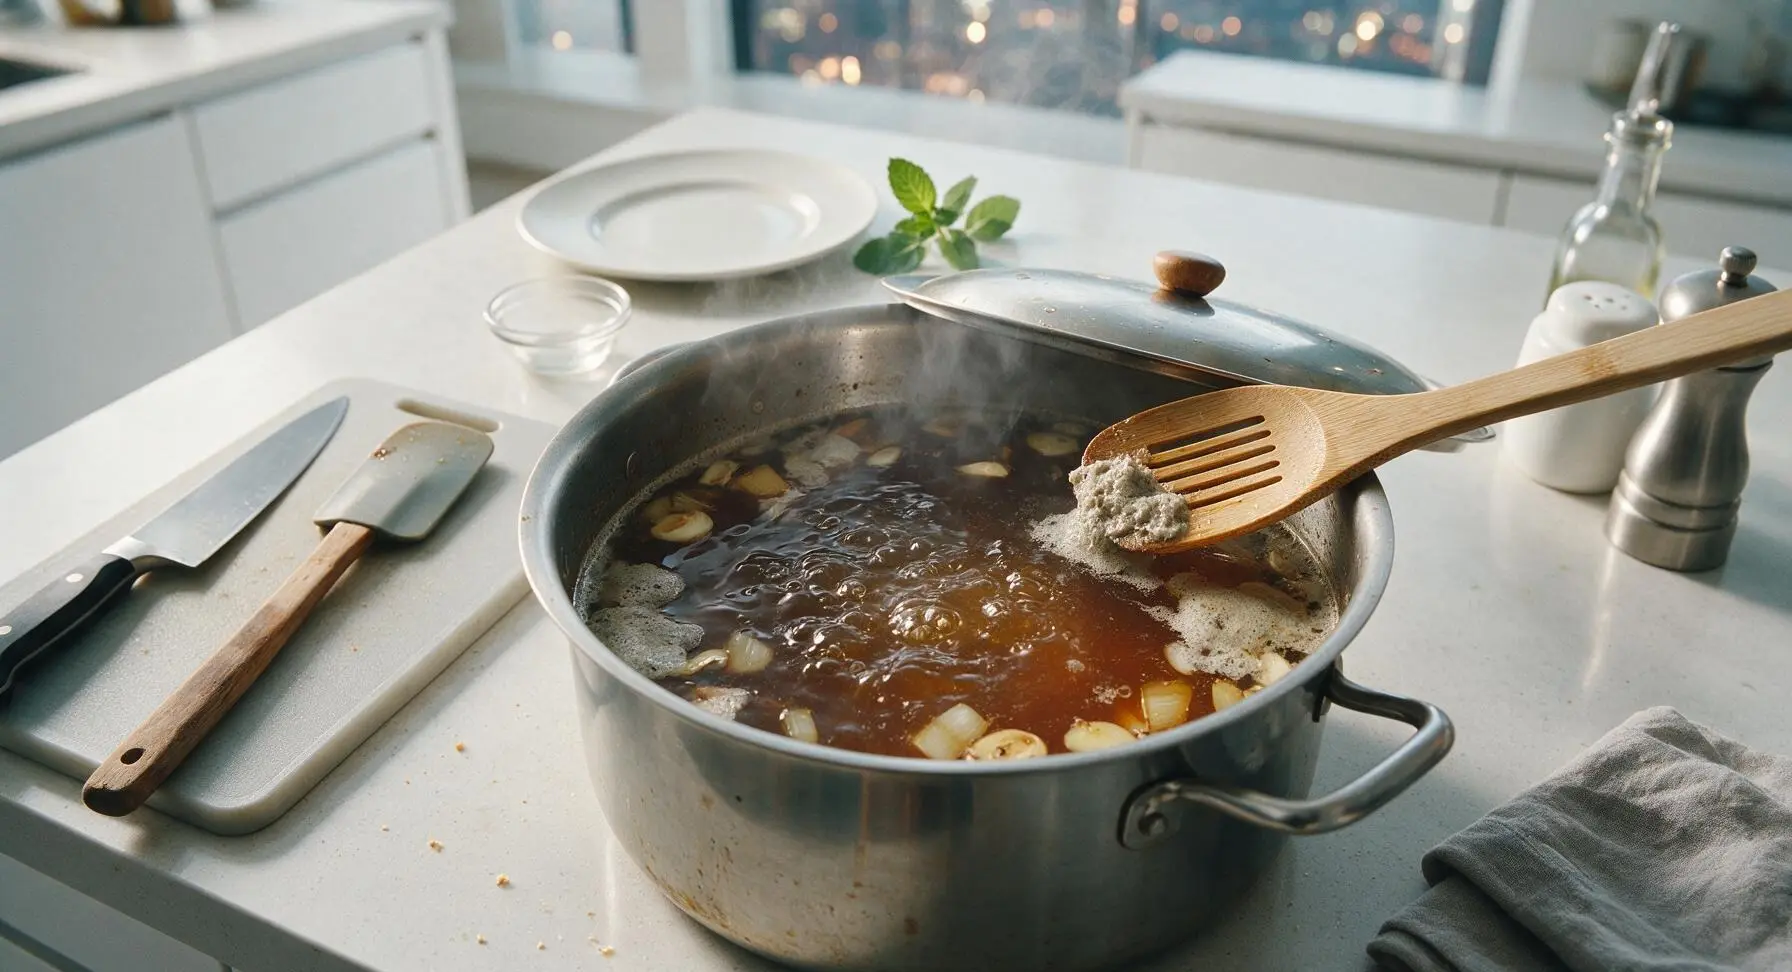
Pour 1L low-sodium beef broth, 60ml soy sauce, and 30ml mirin into the stock pot with the sautéed aromatics. Bring to a gentle rolling boil, then reduce heat to low (95°C/200°F), cover, and simmer for 20 minutes to meld flavors. Use the bamboo skimmer spoon to remove any light grey foam that rises to the surface; finished broth will be a clear, deep amber color.
Step 2
step2:Simmer Beef Broth
Step 2
step2:Simmer Beef Broth
3

Cook Soft-Boiled Eggs

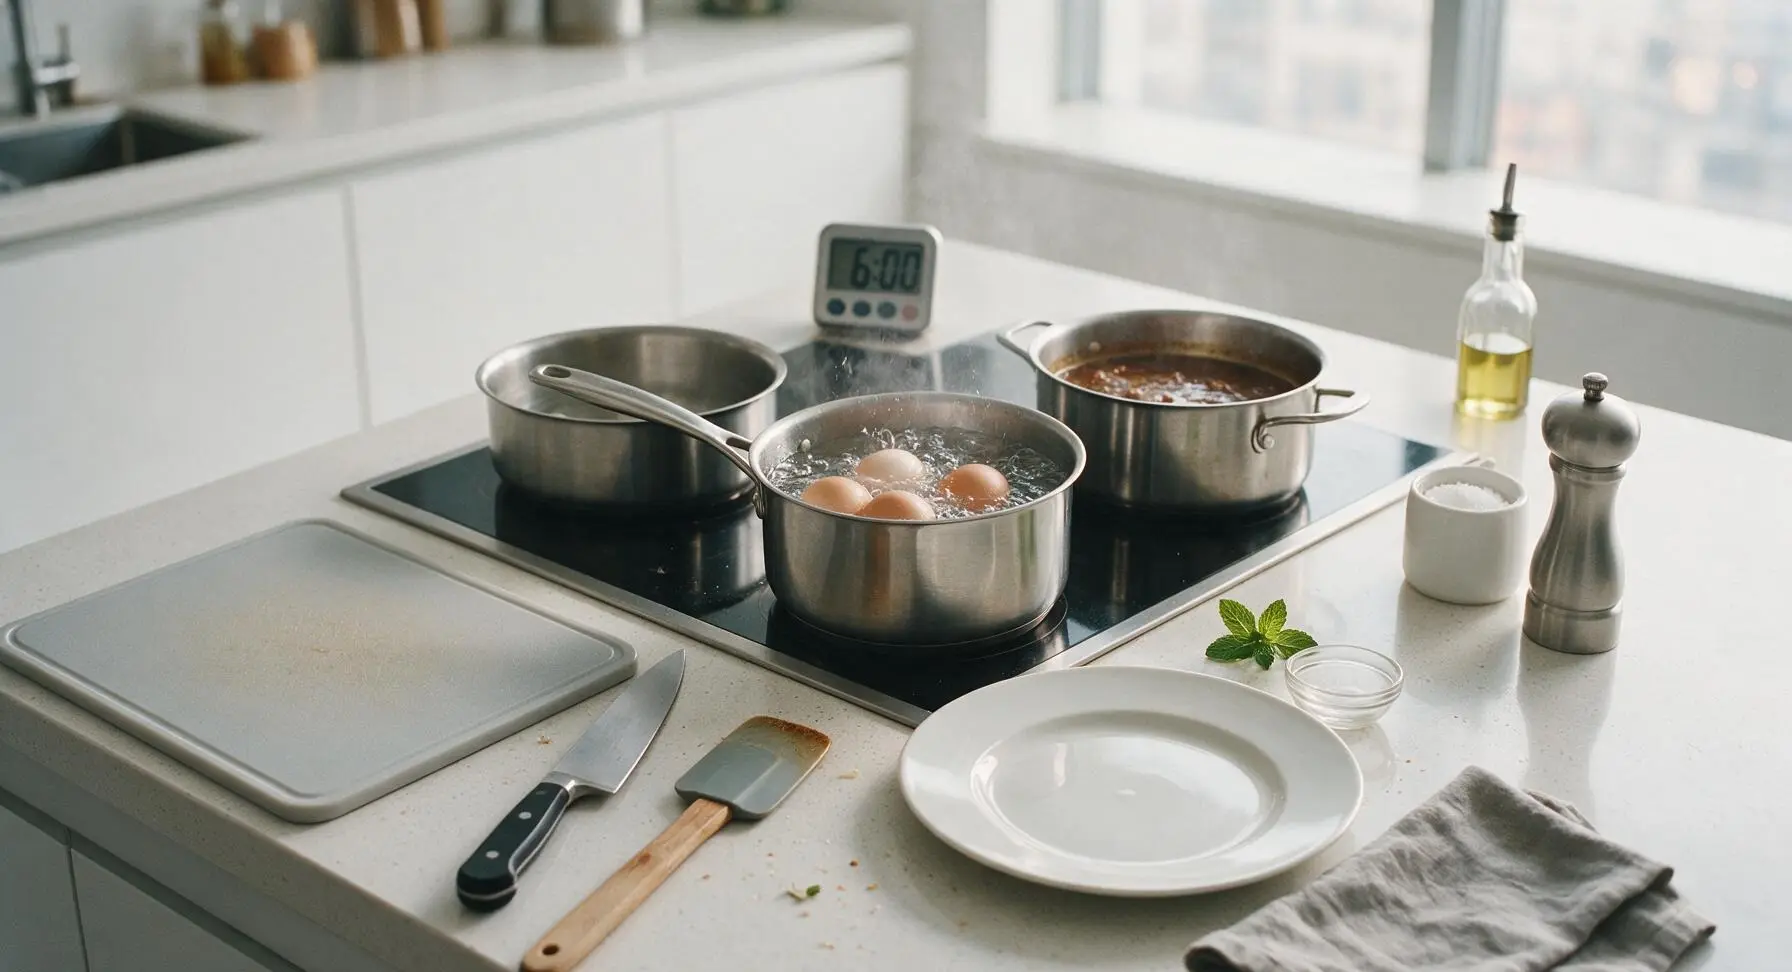
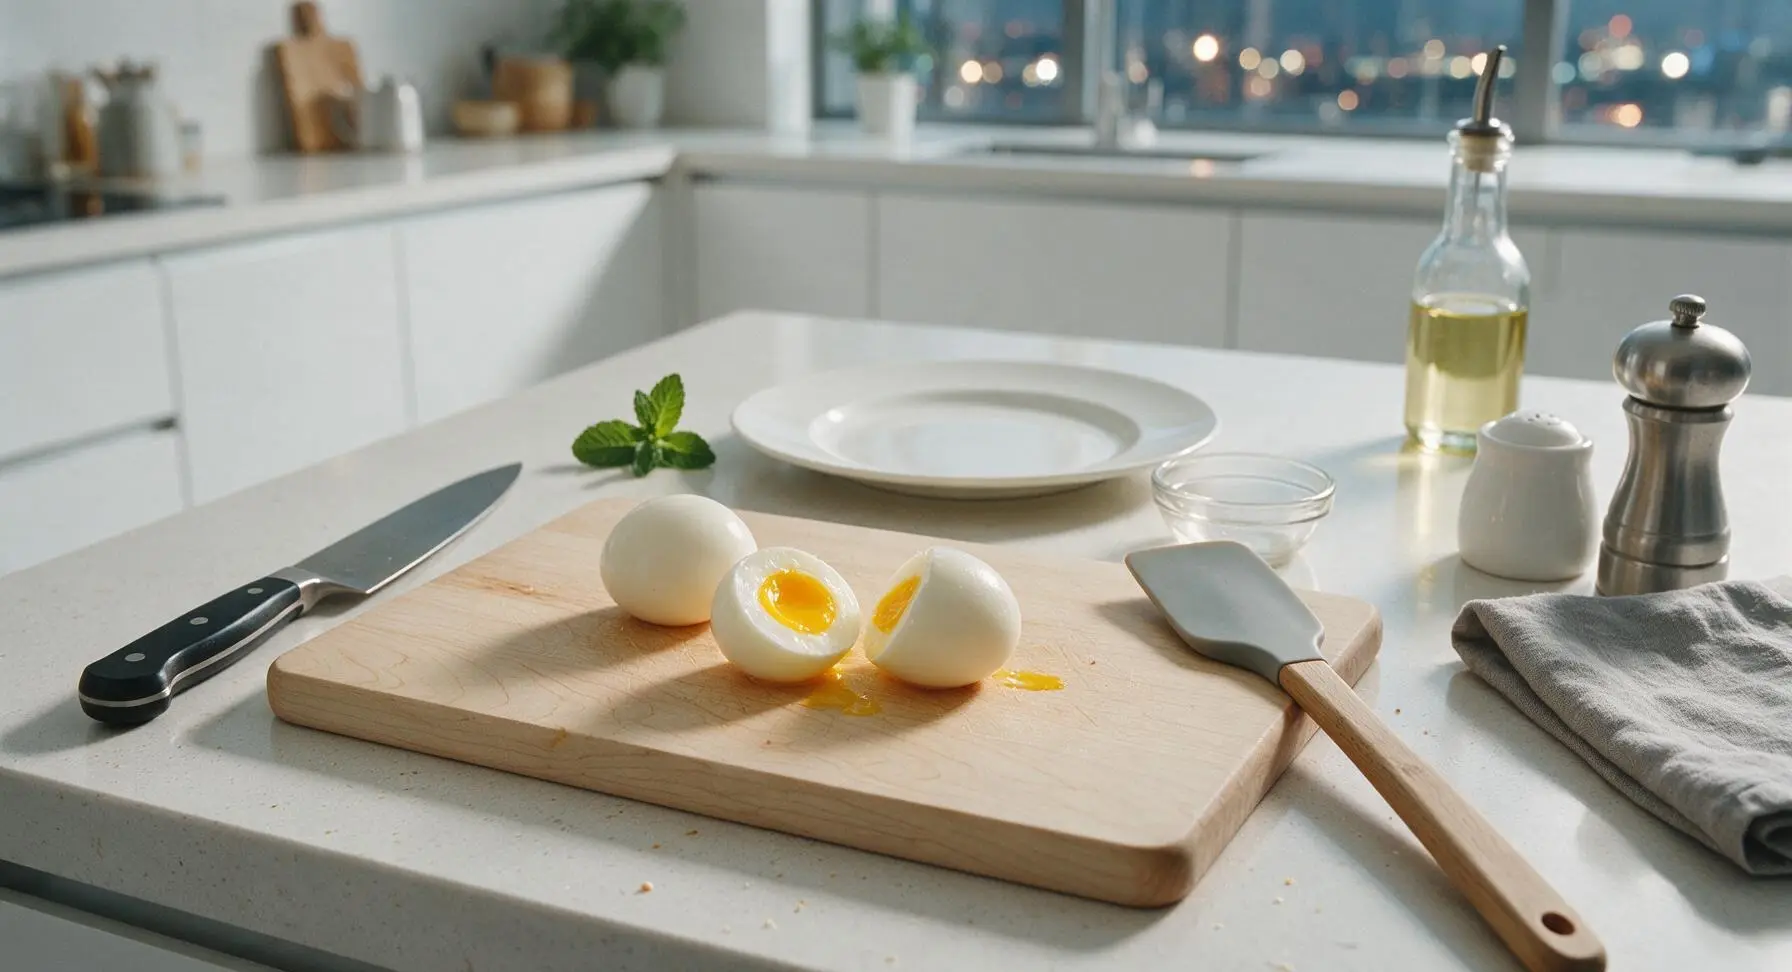
While the broth simmers, retrieve the 1.5L stainless steel saucepan from the lower cabinet, fill with water, and bring to a rolling boil over high heat. Gently lower 4 large eggs into the boiling water, set a timer for exactly 6 minutes, then immediately transfer eggs to an ice water bath for 5 minutes to stop cooking. Peel cooled eggs carefully; perfectly cooked eggs will have a set white and thick, runny golden yolk.
Step 3
step3:Cook Soft-Boiled Eggs
Step 3
step3:Cook Soft-Boiled Eggs
4

Sear Thin Beef Slices

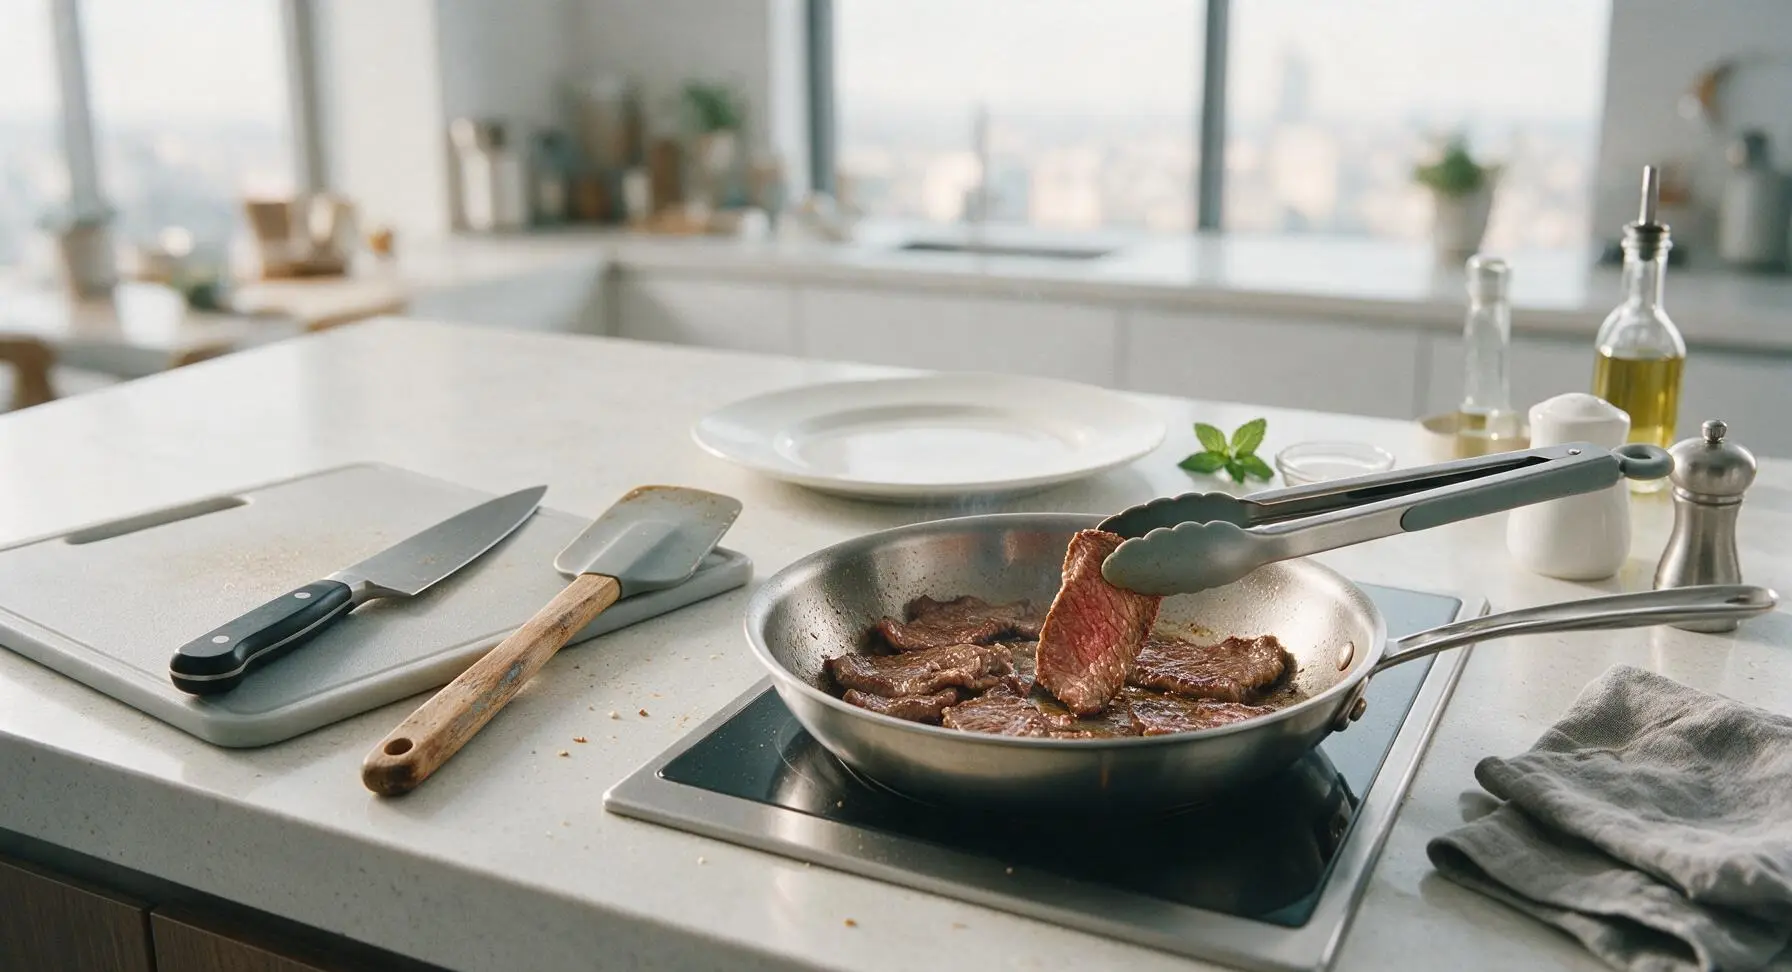
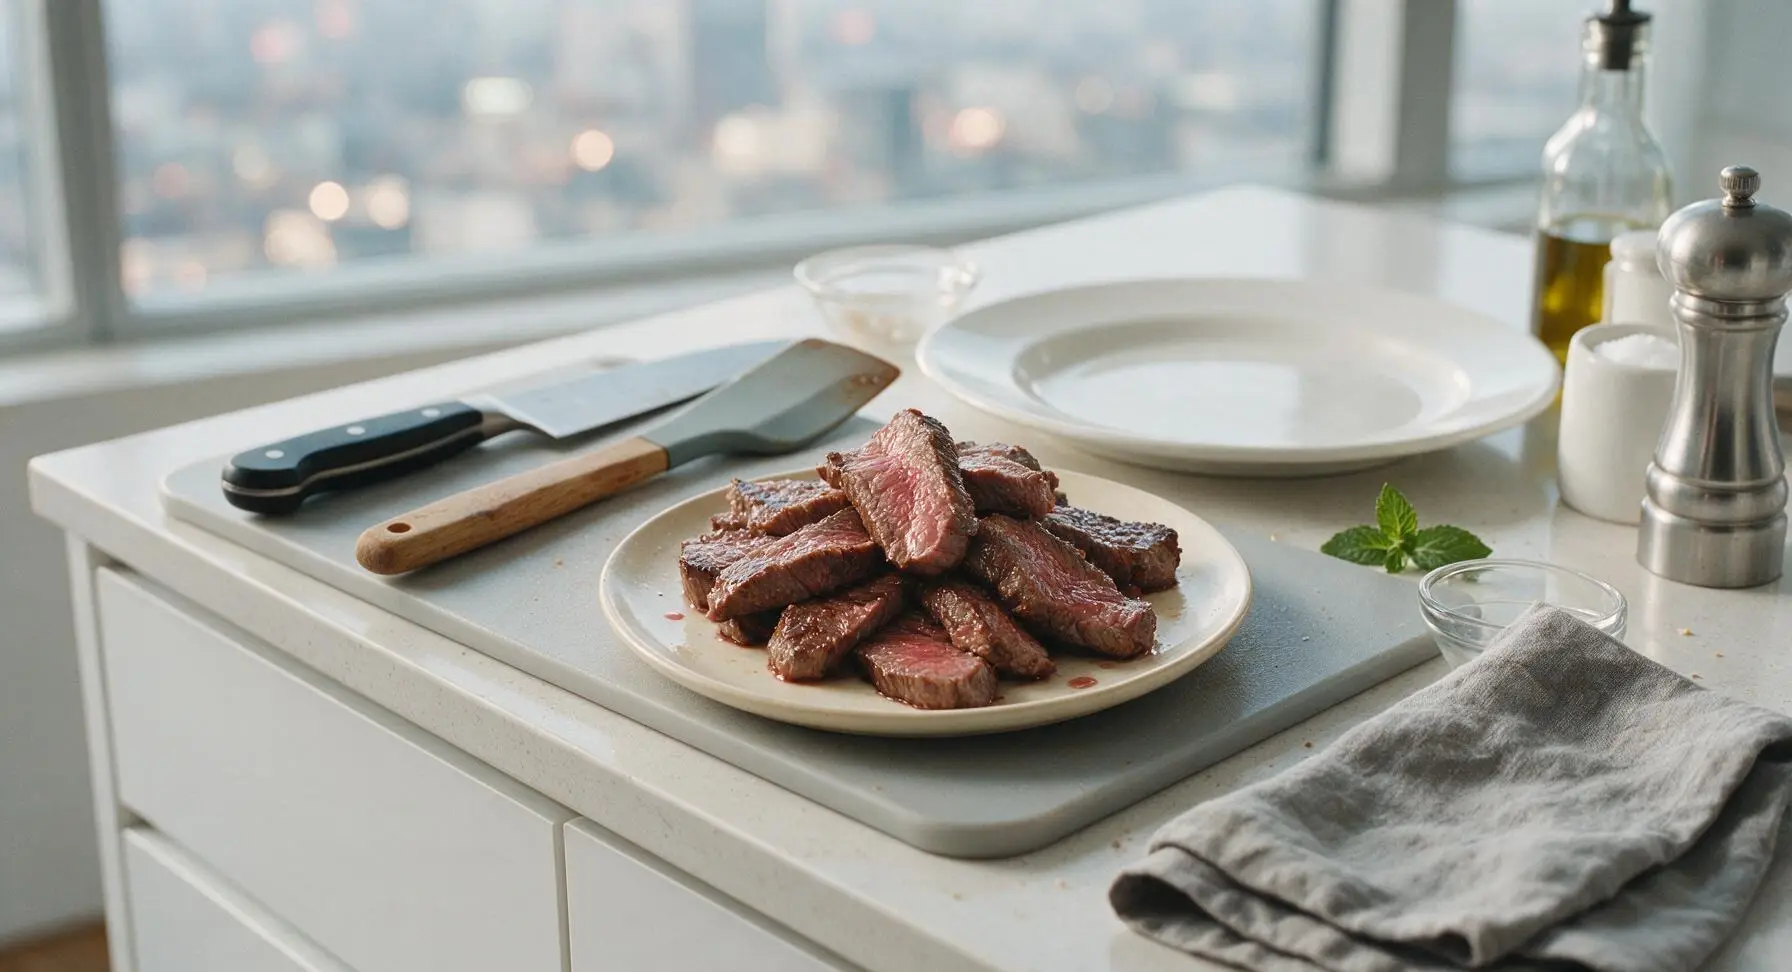
While the broth continues to simmer, heat the 20cm stainless steel skillet over medium-high heat (200°C/400°F) with the remaining 1 tsp neutral cooking oil. Working in 2 small batches to avoid crowding the pan, sear thinly sliced beef chuck for 30 seconds per side, until edges are deep golden brown but centers remain slightly pink. Transfer seared beef to the small cream ceramic side plate; do not overcook, as beef will warm through further when added to hot broth.
Step 4
step4:Sear Thin Beef Slices
Step 4
step4:Sear Thin Beef Slices
5

Cook Fresh Ramen Noodles

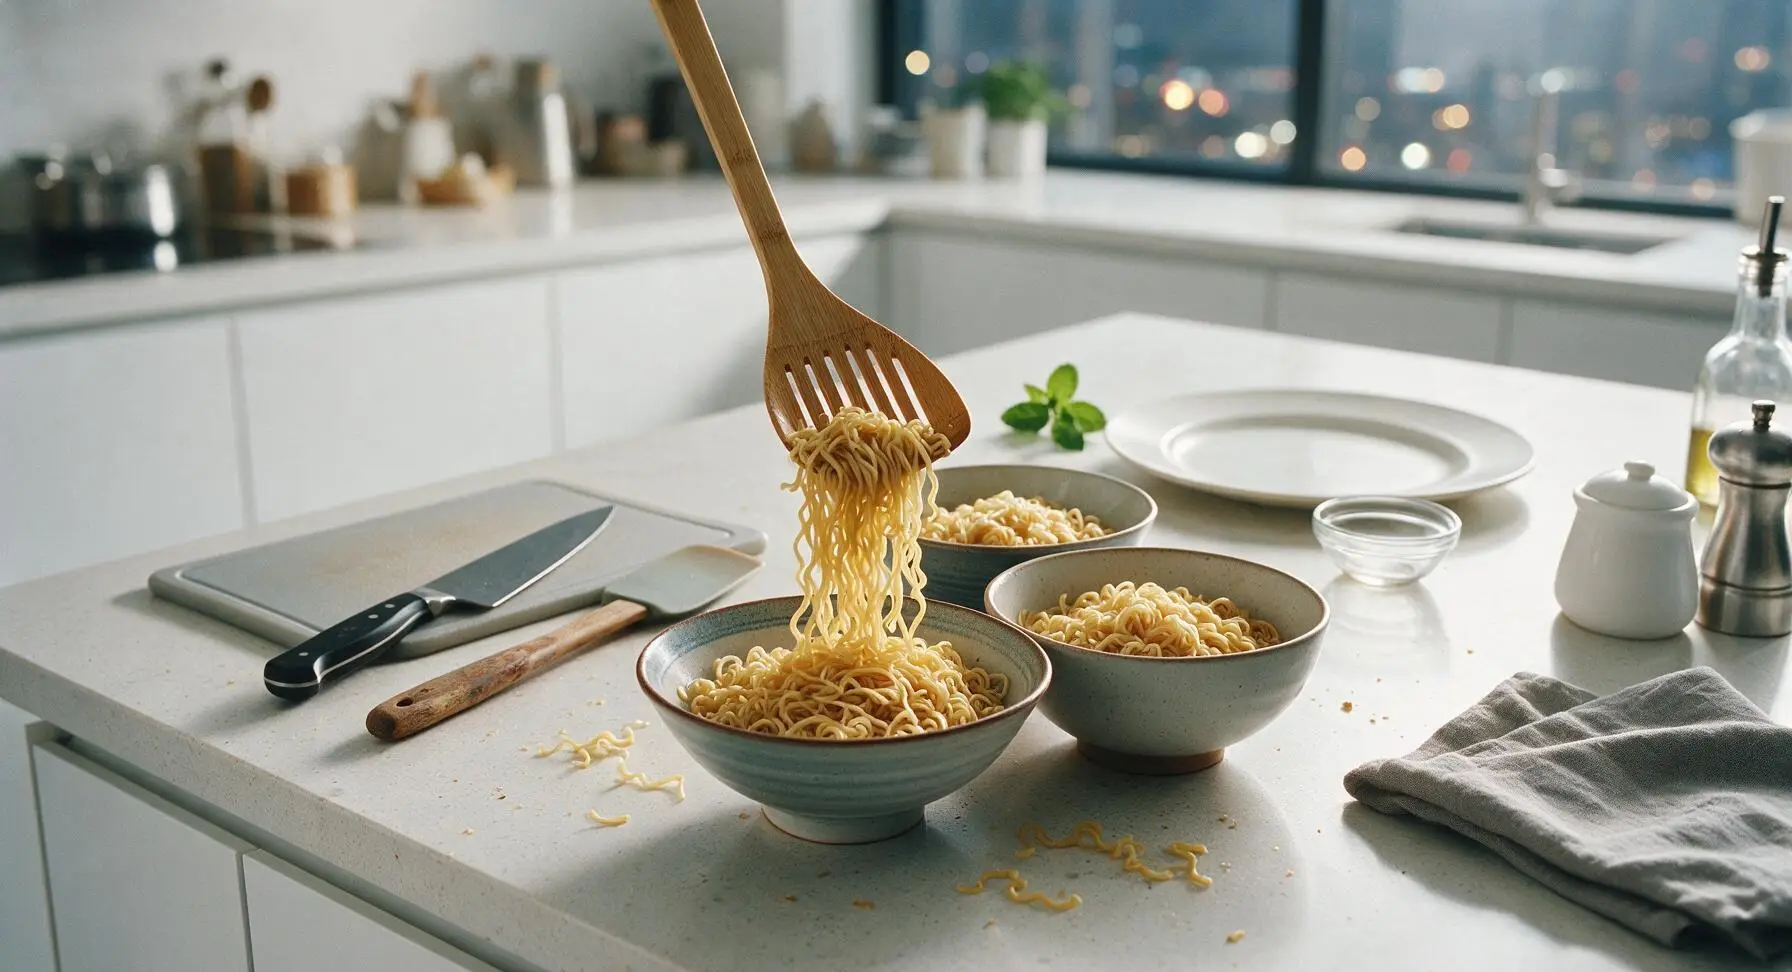
When the broth has 3 minutes of simmer time remaining, retrieve the 5L stainless steel pasta pot from the lower cabinet, fill with water, and bring to a rolling boil. Add fresh ramen noodles, cooking for 2-3 minutes (adjust per package instructions) until just tender with a springy bite — do not overcook to mushy texture. Drain noodles well, shaking off excess starchy water, then divide evenly between the 4 warmed ramen bowls.
Step 5
step5:Cook Fresh Ramen Noodles
6

Assemble Ramen Bowls

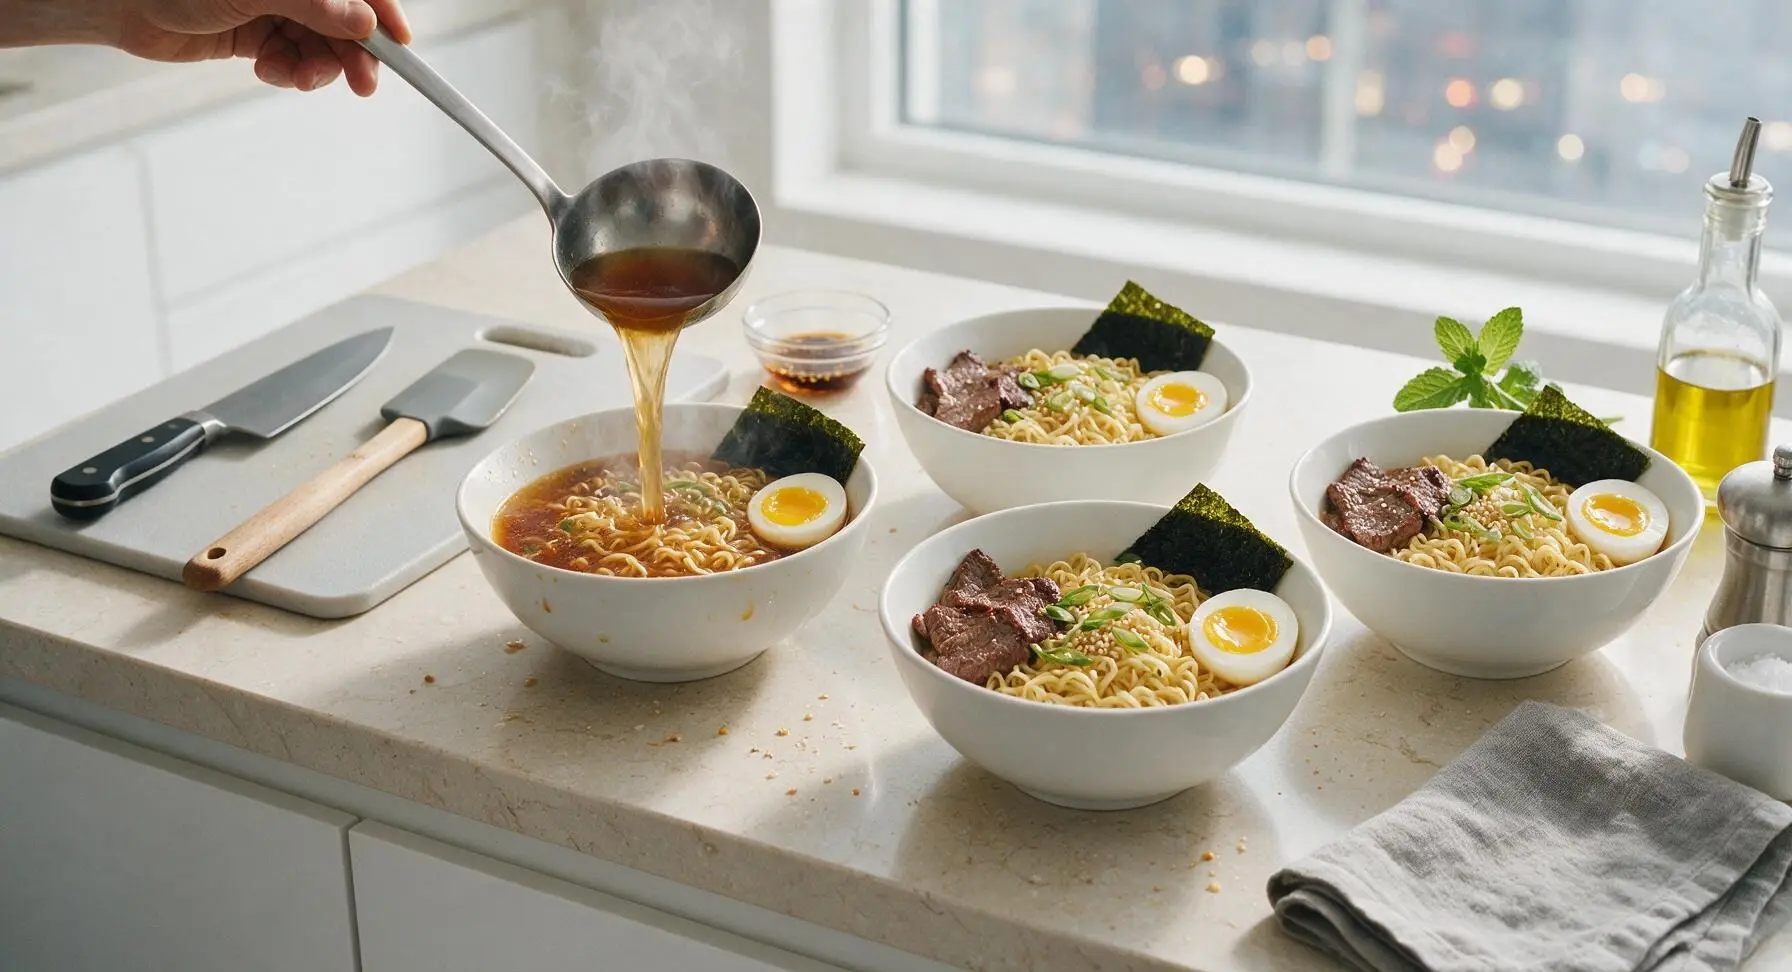
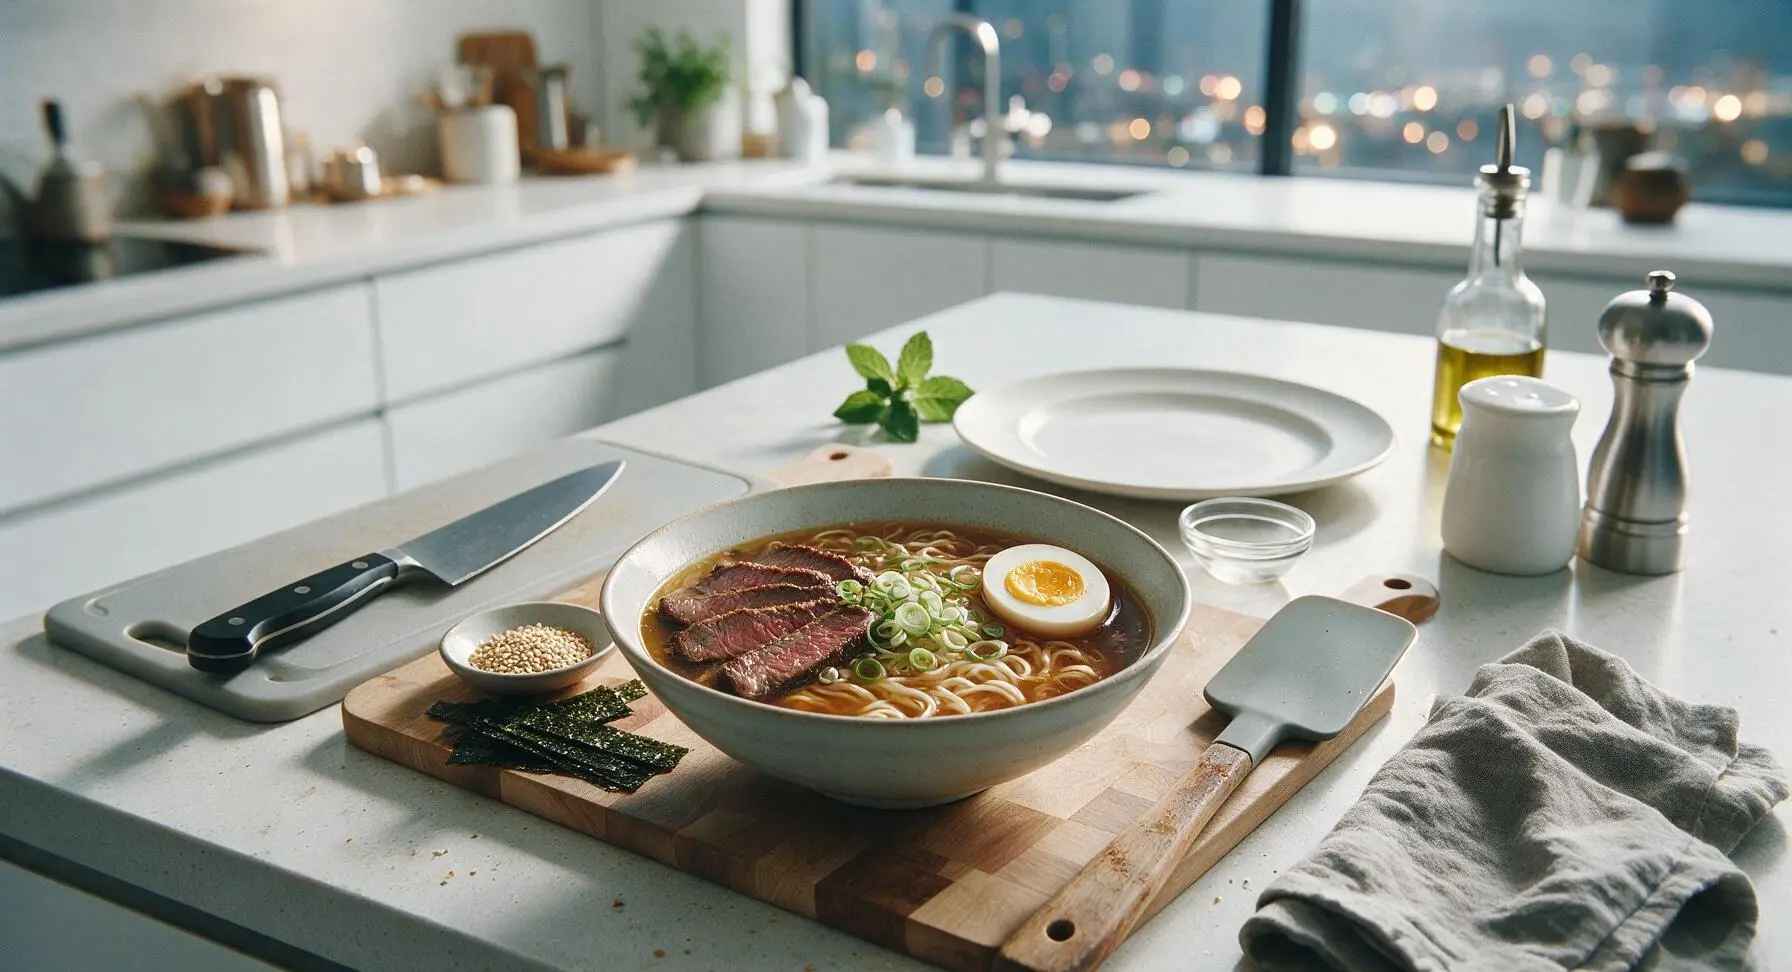
Ladle 250ml (1 cup) of hot amber beef broth over the noodles in each bowl, ensuring noodles are partially submerged and loosened slightly to prevent clumping. Fan 3-4 slices of seared beef across one side of each bowl, place a halved soft-boiled egg cut-side up opposite the beef, and tuck a nori strip against the bowl edge. Garnish with thinly sliced green onions, a light pinch of toasted sesame seeds, and a 1/4 tsp drizzle of toasted sesame oil before serving.
Step 6
step6:Assemble Ramen Bowls
Step 6
step6:Assemble Ramen Bowls

Tips

1.Avoid overcooking fresh ramen noodles: they only need 2-3 minutes to reach a springy al dente texture, as they will continue to soften once covered in hot broth. Overcooking leads to mushy, clumped noodles that ruin the dish’s signature texture.
2.Sear beef in small, even batches: crowding the skillet drops the pan temperature rapidly, causing beef to steam instead of caramelize, resulting in grey, tough slices rather than tender, golden-edged pieces.
3.Warm ramen bowls before plating: rinse bowls with hot tap water for 10 seconds and dry before adding noodles and broth to keep the soup hot for 10-15 minutes longer, preventing the dish from cooling too quickly while eating.


✨ You May Also Like

Main Course
🍜 United Kingdom

A showstopping classic of tender seared beef, savory mushroom duxelles, and crisp prosciutto wrapped in flaky golden puff pastry, baked to juicy perfection.

⏱️ 2 hours 1Main Course ★ 4.7
Main Course
🍜 India

Tender charred marinated chicken simmered in a rich, spiced creamy tomato sauce, this iconic Anglo-Indian curry pairs perfectly with basmati rice or warm naan.

⏱️ 50 minuteMain Course ★ 4.6
Main Course
🍜 Thailand

Classic tangy, sweet, and savory Thai stir-fried rice noodles with shrimp, tofu, and crunchy garnishes, balancing all five core Thai flavor profiles.

⏱️ 30 minuteMain Course ★ 4.5
Main Course
🍜 United Kingdom

Crispy golden beer-battered cod and fluffy double-fried chips, served with tangy tartar sauce and malt vinegar: the timeless, beloved British pub comfort classic.

⏱️ 45 minuteMain Course ★ 4.7
Main Course
🍜 Mexico

Smoky, chile-marinated pork tacos with caramelized pineapple, fresh cilantro, and lime: a beloved classic Mexican street food perfect for casual summer gatherings.

⏱️ 1 hour 45Main Course ★ 4.8
Main Course
🍜 United States

Crunchy Fritos corn chips layered with savory beef chili and melted cheddar, topped with cool, zesty fixings for a beloved, cozy Tex-Mex comfort food.

⏱️ 35 minuteMain Course ★ 4.8

beef ramen:Frequently Asked Questions

1.What’s the easiest way to get paper-thin slices of beef chuck without a meat slicer? ▾
Pop your beef chuck in the freezer for 25 to 30 minutes until it’s firm but not rock solid, then slice against the grain with a sharp chef’s knife. This lets you cut uniformly thin slices that sear in 30 seconds flat and stay tender, so you won’t end up with chewy, tough bites in your finished ramen bowl.
2.Can I substitute dried ramen noodles if I can’t find fresh ones? ▾
Absolutely! Dried chukamen ramen noodles work great as a swap—just cook them 1 minute less than the package directions so they stay springy and don’t turn mushy when you pour hot broth over them. Skip the included instant ramen seasoning packets, since our ginger-infused beef broth already has deep, rich umami flavor.
3.How do I get that perfect runny soft-boiled egg for ramen every time? ▾
Bring a small pot of water to a rolling boil, gently lower cold large eggs straight from the fridge, and cook for exactly 6 minutes and 30 seconds. Plunge them immediately into an ice water bath for 5 minutes to stop cooking, then peel carefully. The yolk will be thick, golden, and perfectly runny without being watery.
4.My beef broth tastes flat—how do I boost its umami like restaurant ramen? ▾
Don’t just use plain low-sodium broth straight from the carton! Simmer it for 10 minutes with sliced fresh ginger, a splash of low-sodium soy sauce, a tiny pinch of dried shiitake powder, and a smashed garlic clove. That quick steep adds layered, savory depth without requiring hours of simmering bones from scratch.
5.Can I make the beef broth ahead of time for weeknight meals? ▾
Definitely! Let the seasoned, ginger-infused broth cool completely, then store it in an airtight container in the fridge for up to 4 days, or freeze it for up to 3 months. When you’re ready to serve, just bring it back to a rolling boil before pouring it over your noodles and toppings with zero flavor loss.
6.Why does my seared beef come out tough instead of tender? ▾
Two common mistakes cause tough beef: slicing with the grain instead of against it, and overcooking the thin slices. Get your pan screaming hot, lay slices in a single layer without crowding, and sear for just 15 to 20 seconds per side. The beef will be perfectly pink and tender, not gray and chewy, when it hits your bowl.
7.Are there any good vegetable toppings I can add to this ramen? ▾
Tons! Quick-blanch baby bok choy, spinach, or enoki mushrooms in the hot broth for 30 seconds to add great color and texture. Thinly sliced green onions, toasted sesame seeds, a dollop of chili crisp, or thin strips of nori also make classic, flavorful toppings that pair beautifully with the savory beef.
8.Can I use a different cut of beef if I don’t have chuck? ▾
Yes! Thinly sliced ribeye, sirloin, or even flank steak work beautifully as substitutes. Just remember to stick to thin, against-the-grain slices and quick searing to keep them tender. Avoid tough, thick cuts like brisket or round steak unless you plan to slow-braise them for hours first, which adds significant prep time.
9.How do I keep my fresh ramen noodles from sticking together after cooking? ▾
After boiling fresh noodles for 2 to 3 minutes until they’re springy and just al dente, drain them well and give them a quick 2-second rinse under warm (not cold) water to wash off excess surface starch. Toss them with a tiny drop of toasted sesame oil right before adding to your bowl to prevent clumping.
10.Is this recipe spicy, and how can I adjust the heat level? ▾
The base recipe is totally mild, designed to highlight the rich beef and ginger broth, so it works for kids and heat-averse eaters. If you want a kick, stir a teaspoon of chili oil, a pinch of shichimi togarashi, or a dollop of spicy miso paste into your individual bowl so everyone can customize heat to taste.
11.Can I make this recipe gluten-free? ▾
Absolutely! Swap the fresh wheat ramen noodles for gluten-free brown rice ramen noodles, use certified gluten-free low-sodium beef broth, and replace any regular soy sauce added to the broth with tamari. All the core components—beef, eggs, ginger, and veggie toppings—are naturally gluten-free, so the swap is seamless.
12.How long should I simmer the fresh ginger in the broth for the best flavor? ▾
You don’t need to simmer it for hours! Slice ginger into 1/4-inch thick coins, smash them lightly with the side of your knife to release their aromatic oils, and simmer in the broth for 8 to 10 minutes right before serving. Fish the ginger pieces out if you prefer, or leave them in for extra warm, zingy flavor.
13.Why do my soft-boiled eggs crack when I boil them? ▾
Cracking usually happens from sudden temperature changes when ice-cold eggs hit roiling boiling water. To prevent this, either let eggs sit at room temperature for 10 minutes before boiling, or lower them into the water very gently with a slotted spoon instead of dropping them. The post-boil ice bath also makes peeling far easier.
14.Can I meal prep components of this ramen for quick workweek lunches? ▾
For sure! Prep the broth, peeled soft-boiled eggs (stored in cold water in the fridge), and seared beef up to 3 days ahead. Wait to cook the fresh noodles until right before you eat, since they get mushy if stored cooked. Assemble in 5 minutes flat by heating broth, cooking noodles, and piling on prepped toppings.
15.What’s the difference between this homemade broth and traditional tonkotsu ramen broth? ▾
Traditional tonkotsu requires 12+ hours of simmering pork bones to get its signature rich, milky texture, while this quick beef ramen broth uses low-sodium beef broth infused with ginger and umami boosters to get deep, savory flavor in 10 minutes. It’s designed to be accessible for weeknights, no all-day cooking required.
16.Should I salt the broth, or is low-sodium beef broth salty enough on its own? ▾
Always taste the broth right before serving after you’ve infused it with ginger and other seasonings. Low-sodium broth is intentionally mild so you can adjust salt to taste—if it feels flat, add a tiny splash of soy sauce or pinch of flaky sea salt a little at a time, so you don’t over-salt it and ruin the balanced umami flavor.
17.Can I use frozen pre-sliced hot pot beef instead of slicing my own chuck? ▾
That’s one of my favorite shortcut swaps! Frozen pre-sliced hot pot beef is cut perfectly thin, so you don’t even need to thaw it before searing—just toss the frozen slices straight into a hot pan for 10 seconds per side, and they’ll be tender and ready to go. It cuts prep time down to almost nothing for fast weeknight ramen.

Comments (6)

3 days ago

OMG this recipe is an absolute game changer! I made it for family dinner last night and my picky 8 year old asked for seconds, which never happens. The broth is so deep and savory, way better than the takeout ramen we usually order on busy weeknights. Cook time was right around 35 minutes too, perfect for when I don’t want to spend hours in the kitchen. 10/10 will be adding this to our regular meal prep rotation!

2 days ago

Right?! My kids loved it too! They turn their nose up at almost everything but they devoured this when I made it last week! I added a little soft boiled egg on top like the recipe mentions and it was chef’s kiss.

yesterday

So glad this was a hit with your family! The soft boiled egg is such a great add for extra richness, so happy you gave that a try. It makes our day to hear this is making it into regular meal rotations!

5 days ago

Super solid recipe, but I will say the difficulty felt a little higher than medium for me? I struggled to get the chashu beef tender enough in the listed cook time, ended up simmering it an extra 10 minutes. Otherwise the flavor was spot on, the soy and ginger combo in the broth is SO good. Next time I’ll prep the beef a little ahead of time to cut down on the last minute rush.

3 days ago

Thanks for the honest feedback! The thickness of your beef slices can definitely impact cook time — we recommend slicing against the grain into 1/4 inch thick pieces to get that tender texture faster without extra simmer time. Hope that trick helps for your next batch!

1 week ago

Brought this to my neighborhood potluck over the weekend and people were begging me for the recipe before they even finished their first bowl! I kept the broth warm in a slow cooker and set out toppings on the side so people could customize their bowls — corn, bamboo shoots, extra green onions, chili oil. Total crowd pleaser, will absolutely be making this again for our next game night.

2 weeks ago

Wait this is way better than the instant ramen I’ve been surviving on for the last two years lmao. I meal prepped the broth and beef on Sunday, and it lasted me all week for quick lunches between classes. I did add a squirt of sriracha to my bowl each time for a little extra heat, which paired perfectly with the savory broth. 10/10, way cheaper than ordering ramen from the shop near campus too.

1 week ago

The sriracha add is genius! I tossed in some chili crisp last time I made it and it gave the broth such a nice warm kick, highly recommend if you love heat.

5 days ago

Love that this works for your meal prep! Customizing the heat level with sriracha or chili crisp is such a fun way to make the recipe your own, we’re all about those easy personal touches. So stoked this is saving you money on takeout!

yesterday

Made this for my partner’s birthday dinner last night since ramen is his favorite, and he said it was better than the fancy ramen spot we went to for our anniversary! I was worried I’d mess up the soft boiled eggs but the timing note in the recipe was perfect, they had that runny yolk we both love. Such a special meal that didn’t feel too fussy to pull off after work.

2 hours ago

Ugh I need to make this for my boyfriend too! He’s obsessed with ramen but I’ve been too intimidated to try making it from scratch, your review is making me feel like I can actually pull it off this weekend.

30 minutes ago

Was so excited to try this, and it worked perfectly with gluten free tamari instead of regular soy sauce! I was worried the flavor would be off but it was still so rich and savory, my whole family (none of whom are gluten free) didn’t even notice a difference. Will be making this all the time now that I have a go-to gluten free ramen recipe that doesn’t taste like a compromise.



