
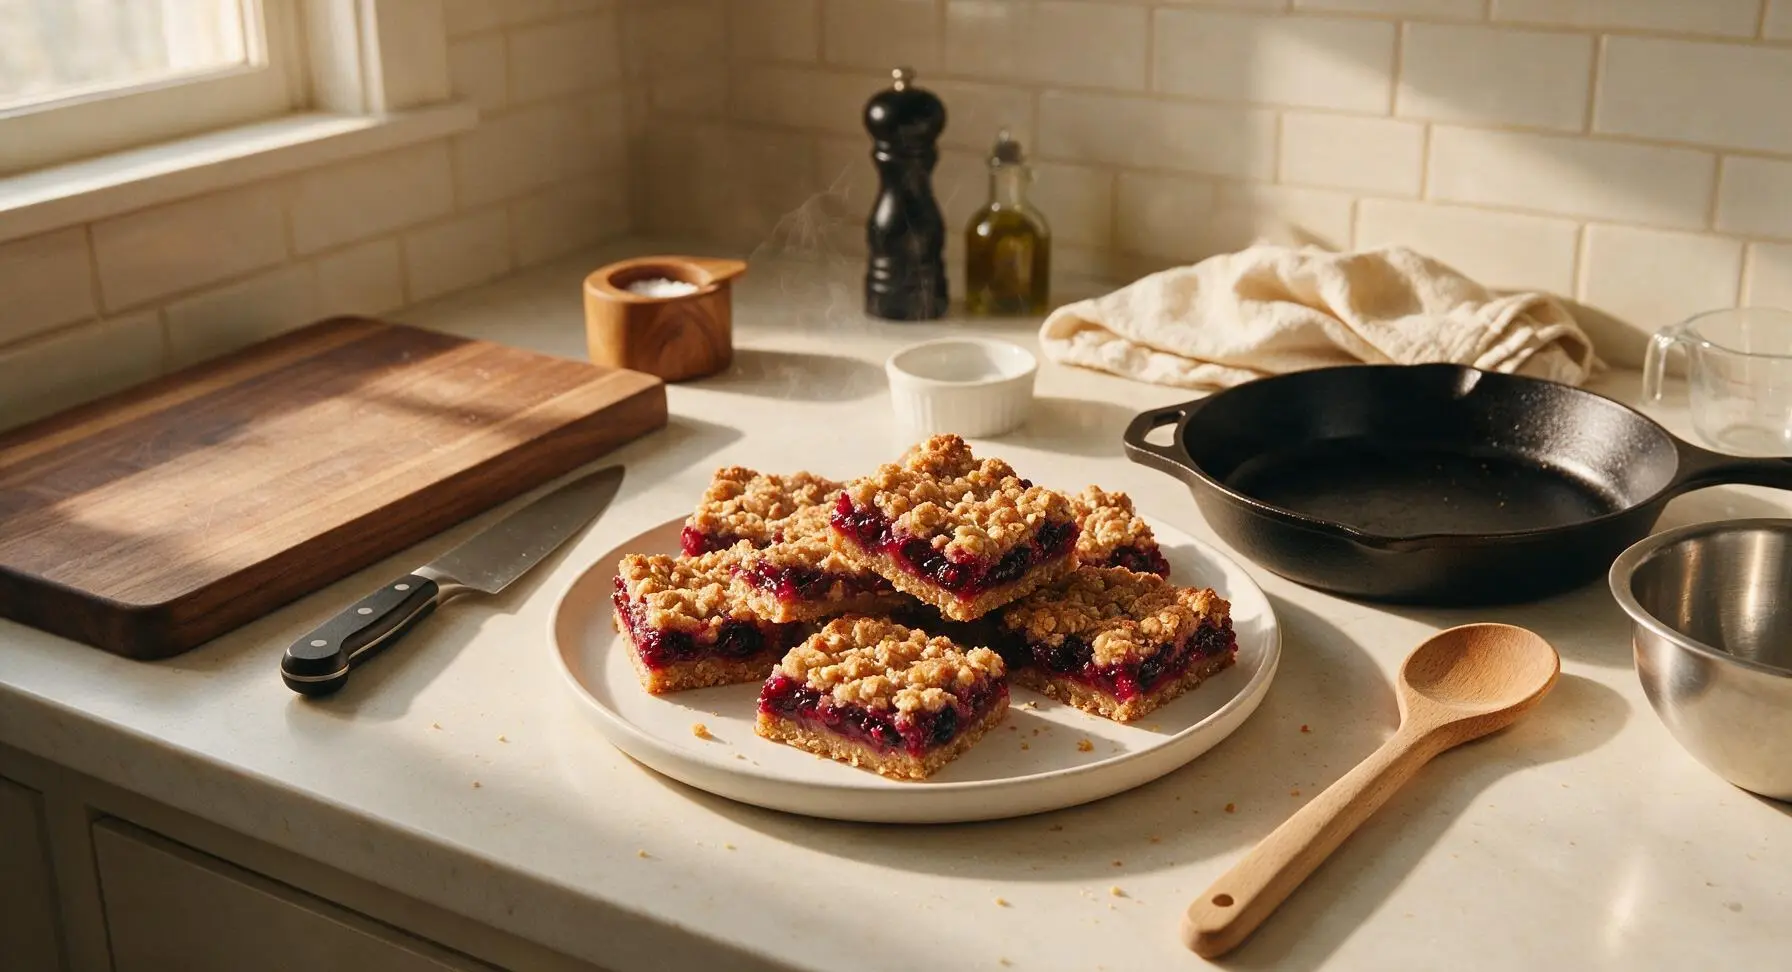
Berry Crumble Bars

title 1
Berry Crumble Bars
⏱️ cook time 35 minutes
🍽️ servings 9
⚡ Difficulty easy

intro

Buttery oaty crumble layers sandwich bright, jammy summer berry filling in these handheld, sweet-tart bars—crisp on top, juicy in the center, and perfectly portable for sharing.

Ingredients
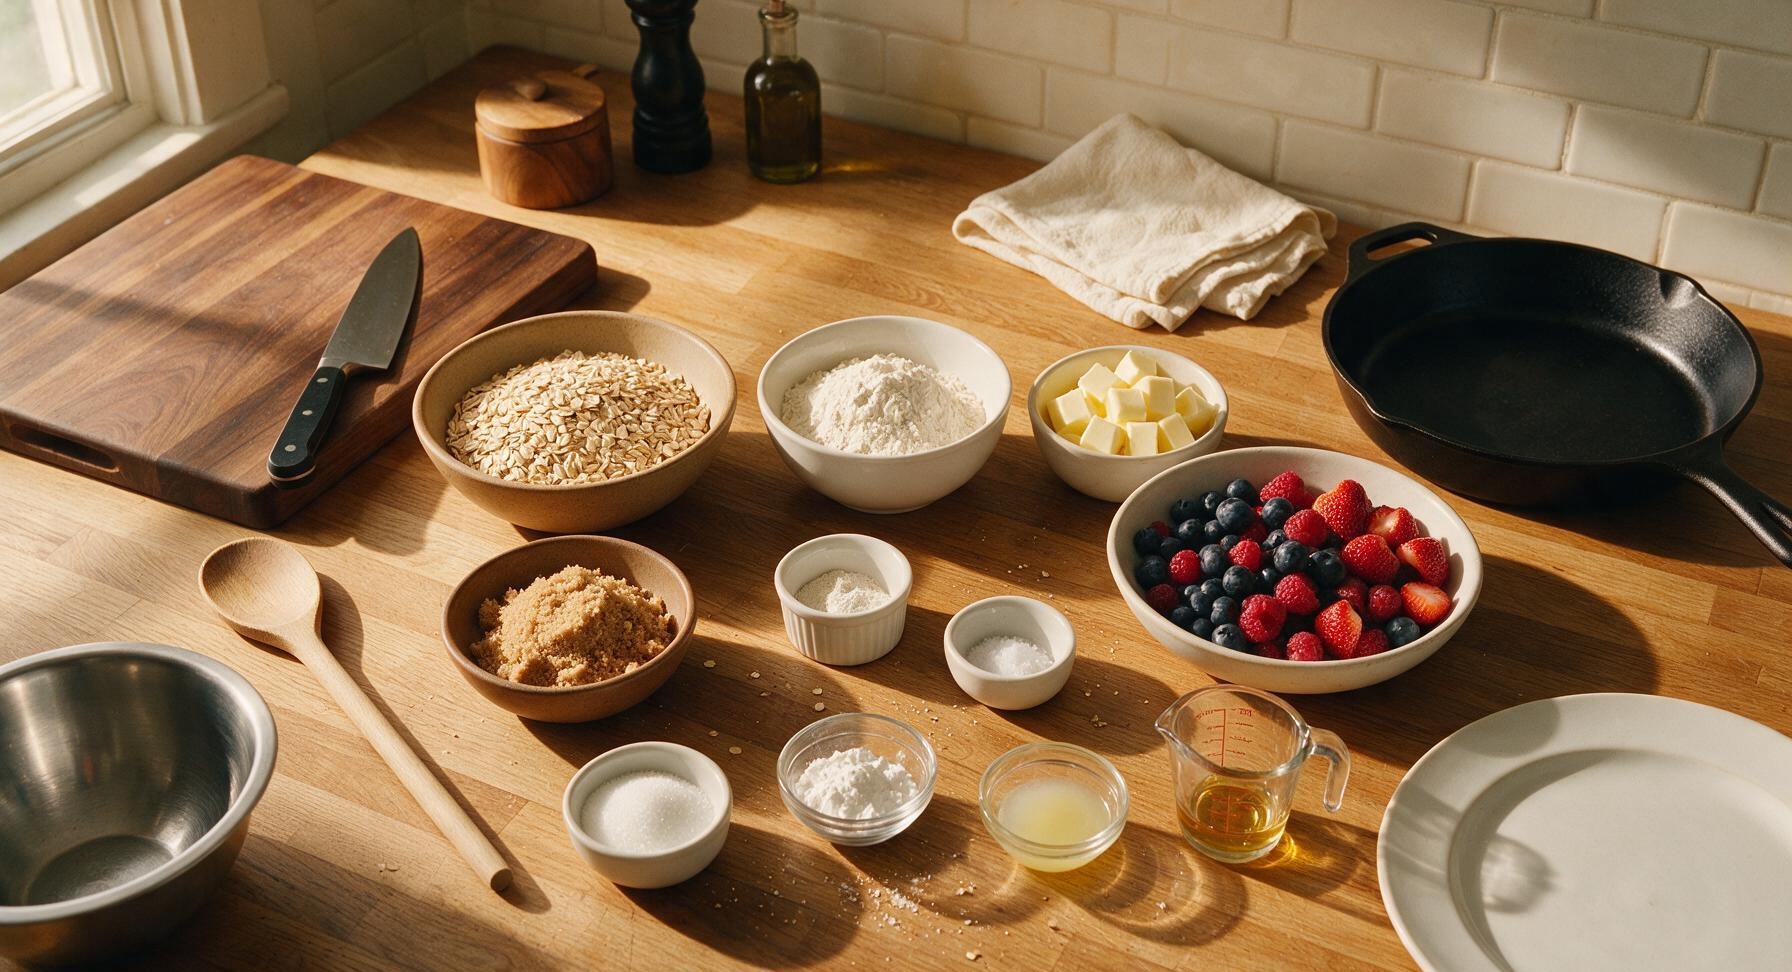
Old-fashioned rolled oats 1 1/2 cups (135g)
All-purpose flour 1 1/4 cups (150g)
Cold unsalted butter 1/2 cup (113g, cut into 1cm cubes)
Mixed fresh berries (blueberries, raspberries, hulled strawberries) 2 1/2 cups (375g)
Packed light brown sugar 3/4 cup (150g)
Baking powder 1 teaspoon
Fine sea salt 1/4 teaspoon
Granulated white sugar 2 tablespoons
Cornstarch 2 tablespoons
Fresh lemon juice 1 tablespoon
Pure vanilla extract 1 teaspoon

Steps

1

Prep Pan and Oven

Preheat oven to 375°F (190°C). Line the 9x9 inch matte light gray metal baking pan with unbleached parchment paper, leaving 2-inch overhangs on two opposite sides to act as handles for lifting the finished bars out later. Smooth the parchment flat against the pan bottom and sides, creasing at the corners to eliminate gaps.
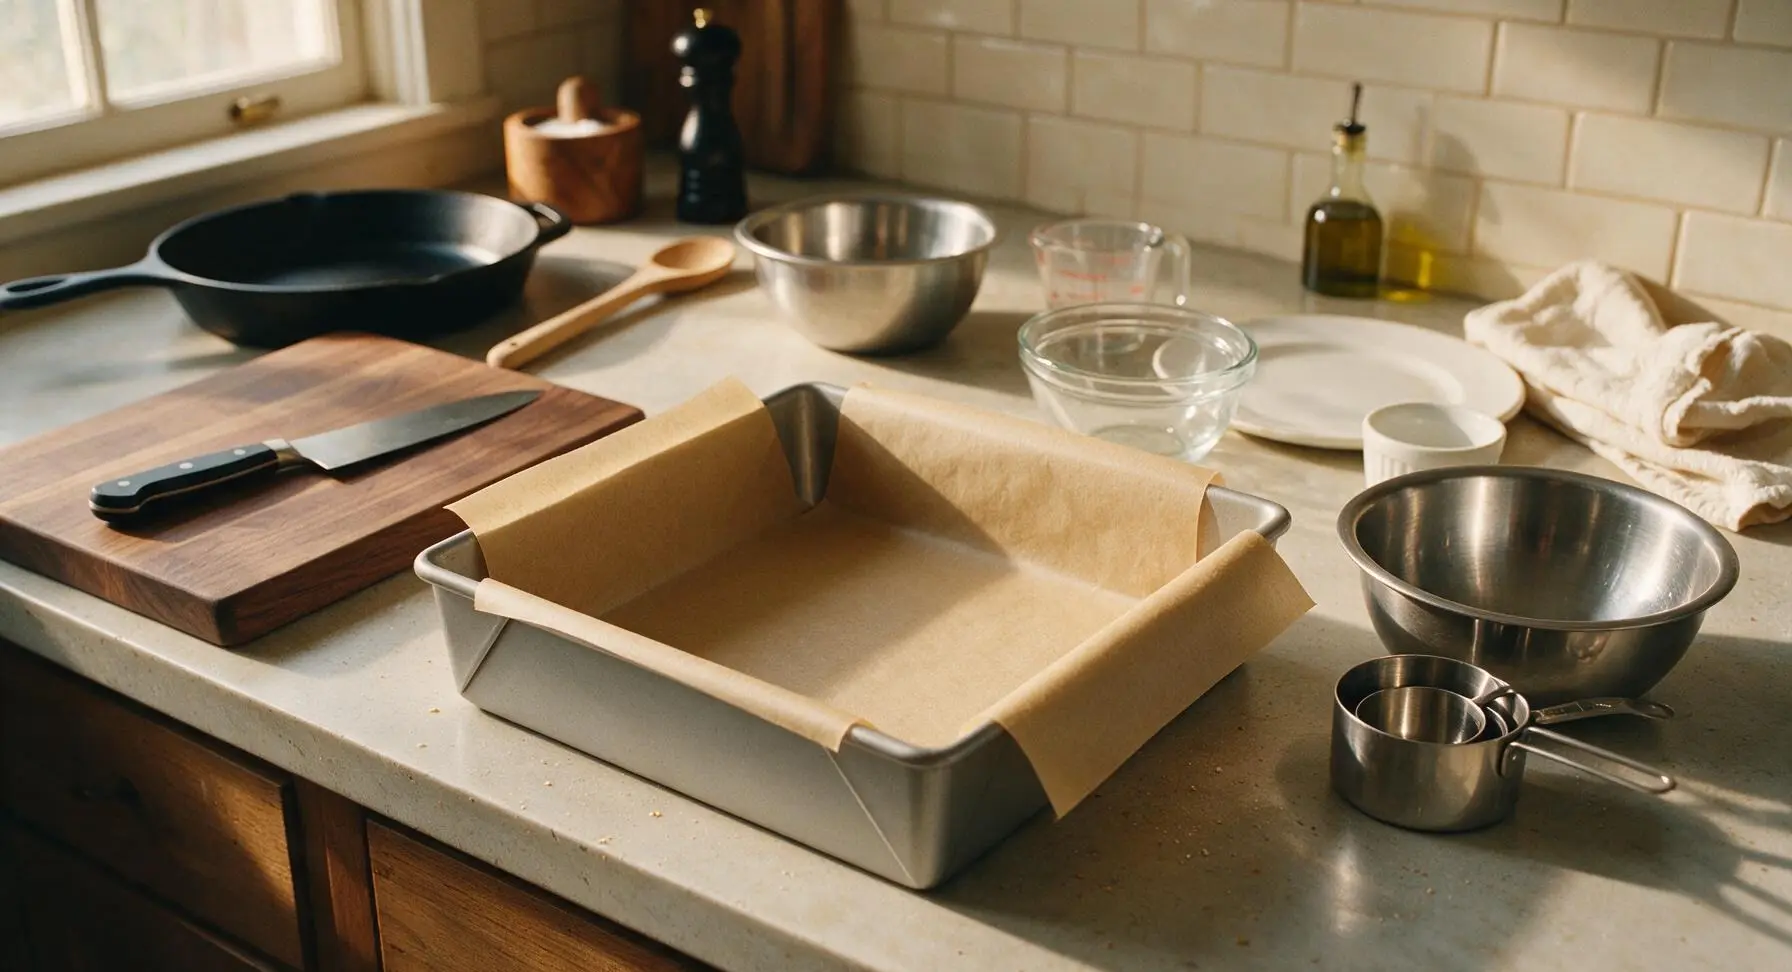
Step 1
step1:Prep Pan and Oven
2

Mix Crumble Dough

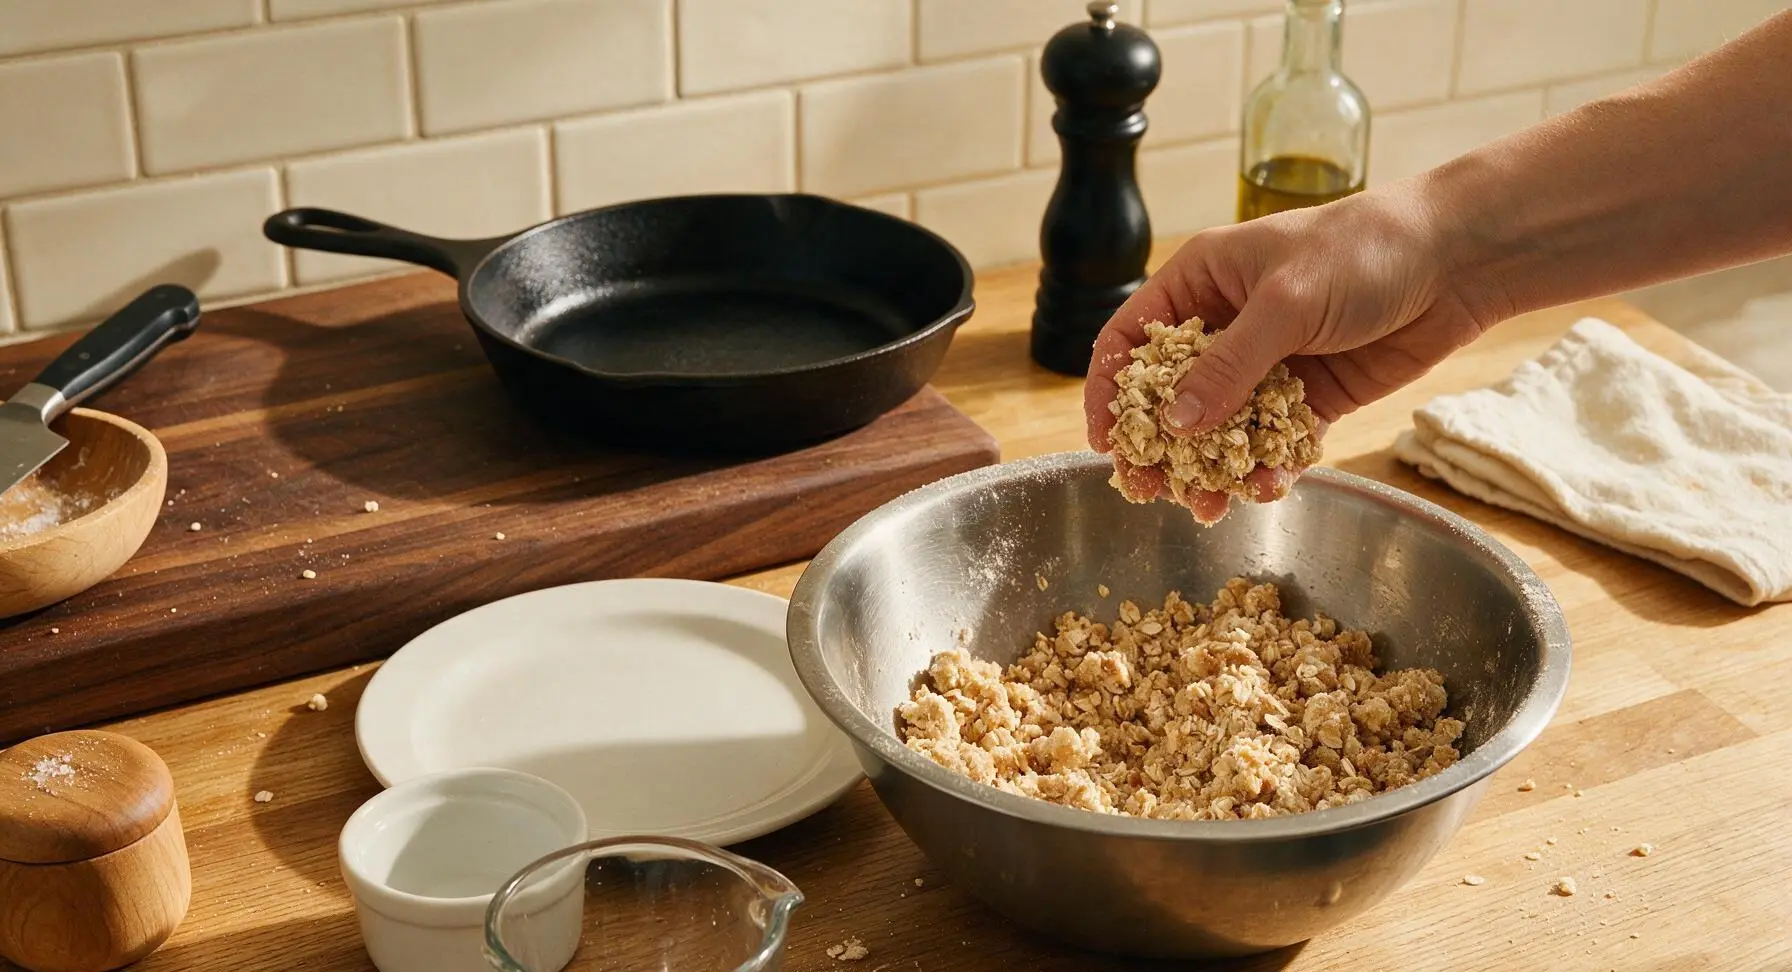
In the medium brushed stainless steel mixing bowl, combine 1 1/2 cups rolled oats, 1 1/4 cups all-purpose flour, 3/4 cup packed light brown sugar, 1 tsp baking powder, and 1/4 tsp fine sea salt. Stir briefly with the sky blue silicone spatula to combine dry ingredients. Add the cold cubed unsalted butter, then use the beech wood pastry blender to cut the butter into the dry mix until the mixture forms coarse, pea-sized crumbs that hold together when squeezed in your palm. Do not overmix into a smooth dough.
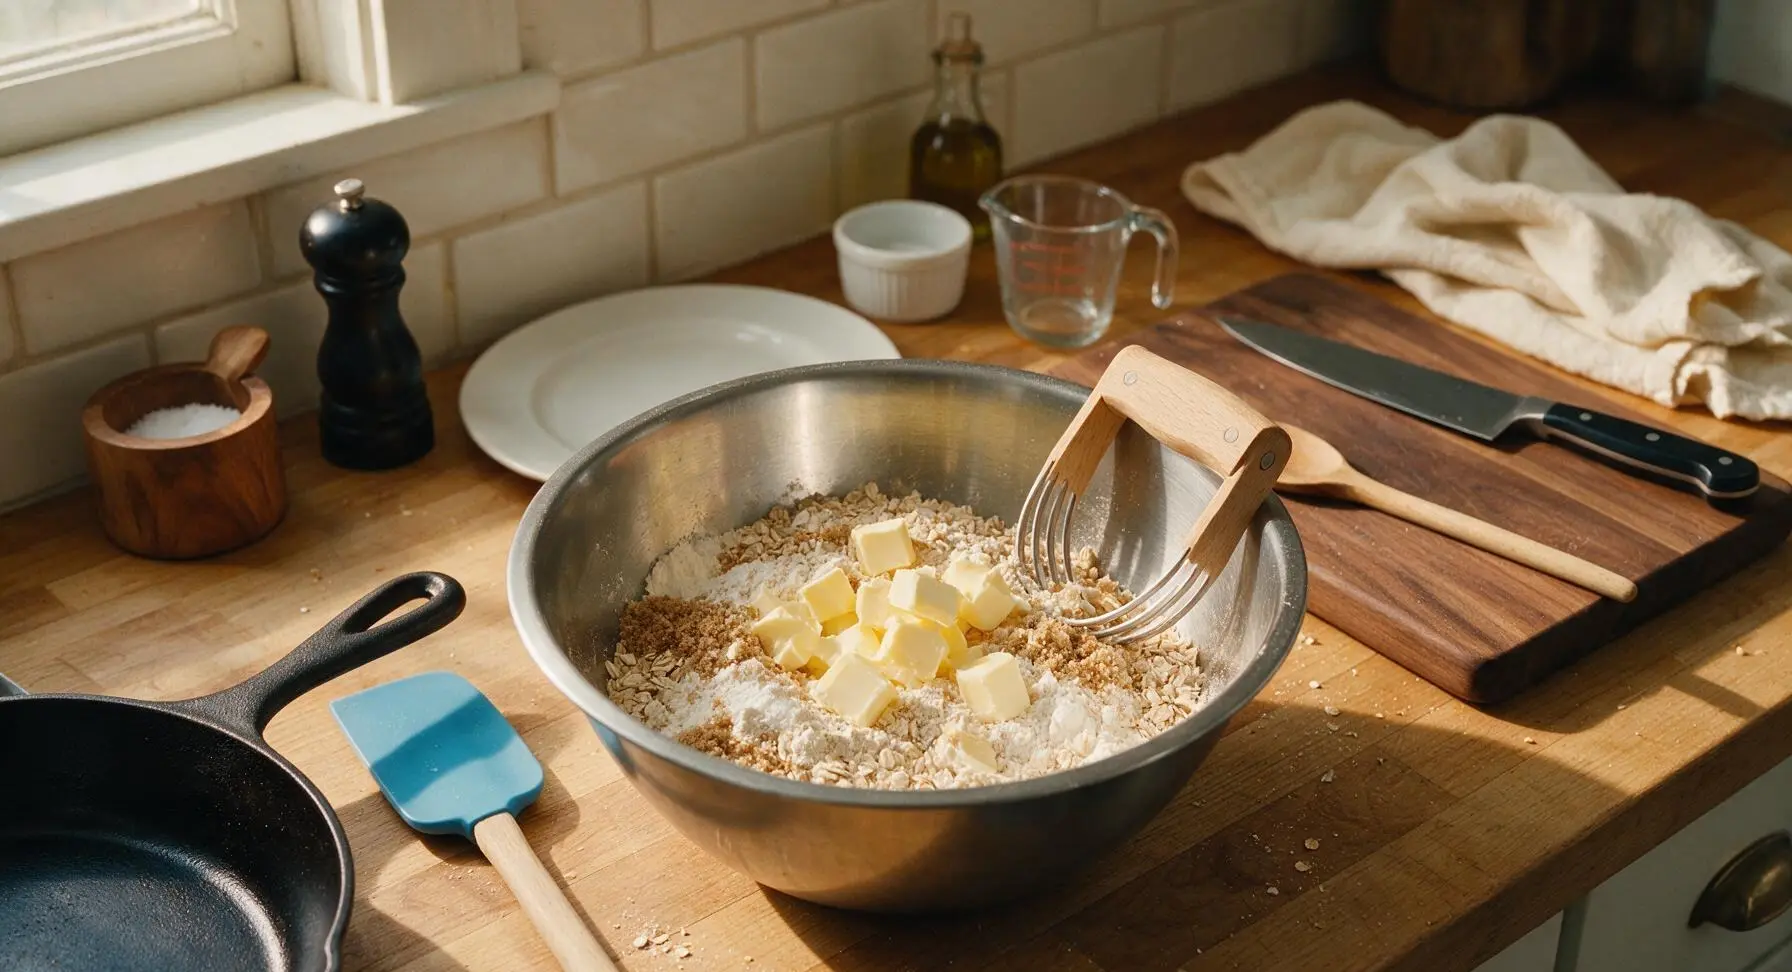
Step 2
step2:Mix Crumble Dough
Step 2
step2:Mix Crumble Dough
3

Press Crust Layer

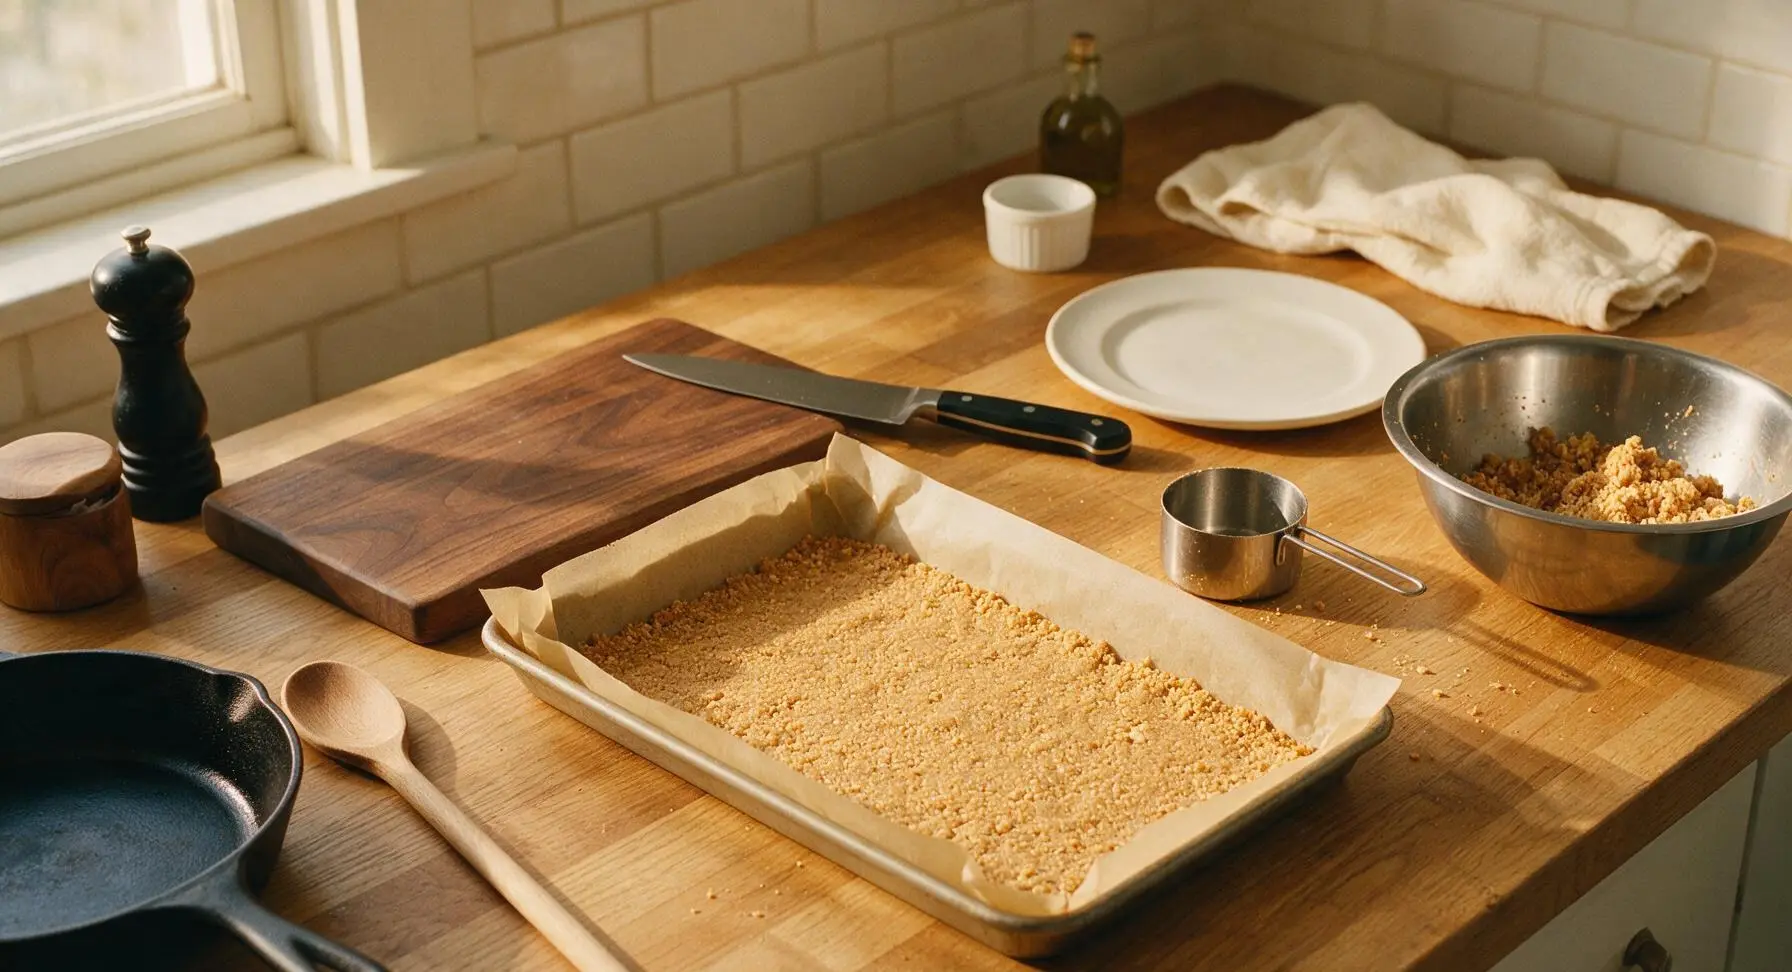
Measure out 2/3 of the crumble mixture (roughly 3 cups) and transfer it to the parchment-lined baking pan. Use the flat base of a stainless steel measuring cup to press the crumbs firmly and evenly across the pan bottom, creating a compact, flat base layer with no gaps or thin spots. The remaining 1/3 of the crumble mix stays in the mixing bowl for the topping.
Step 3
step3:Press Crust Layer
4

Make Berry Filling

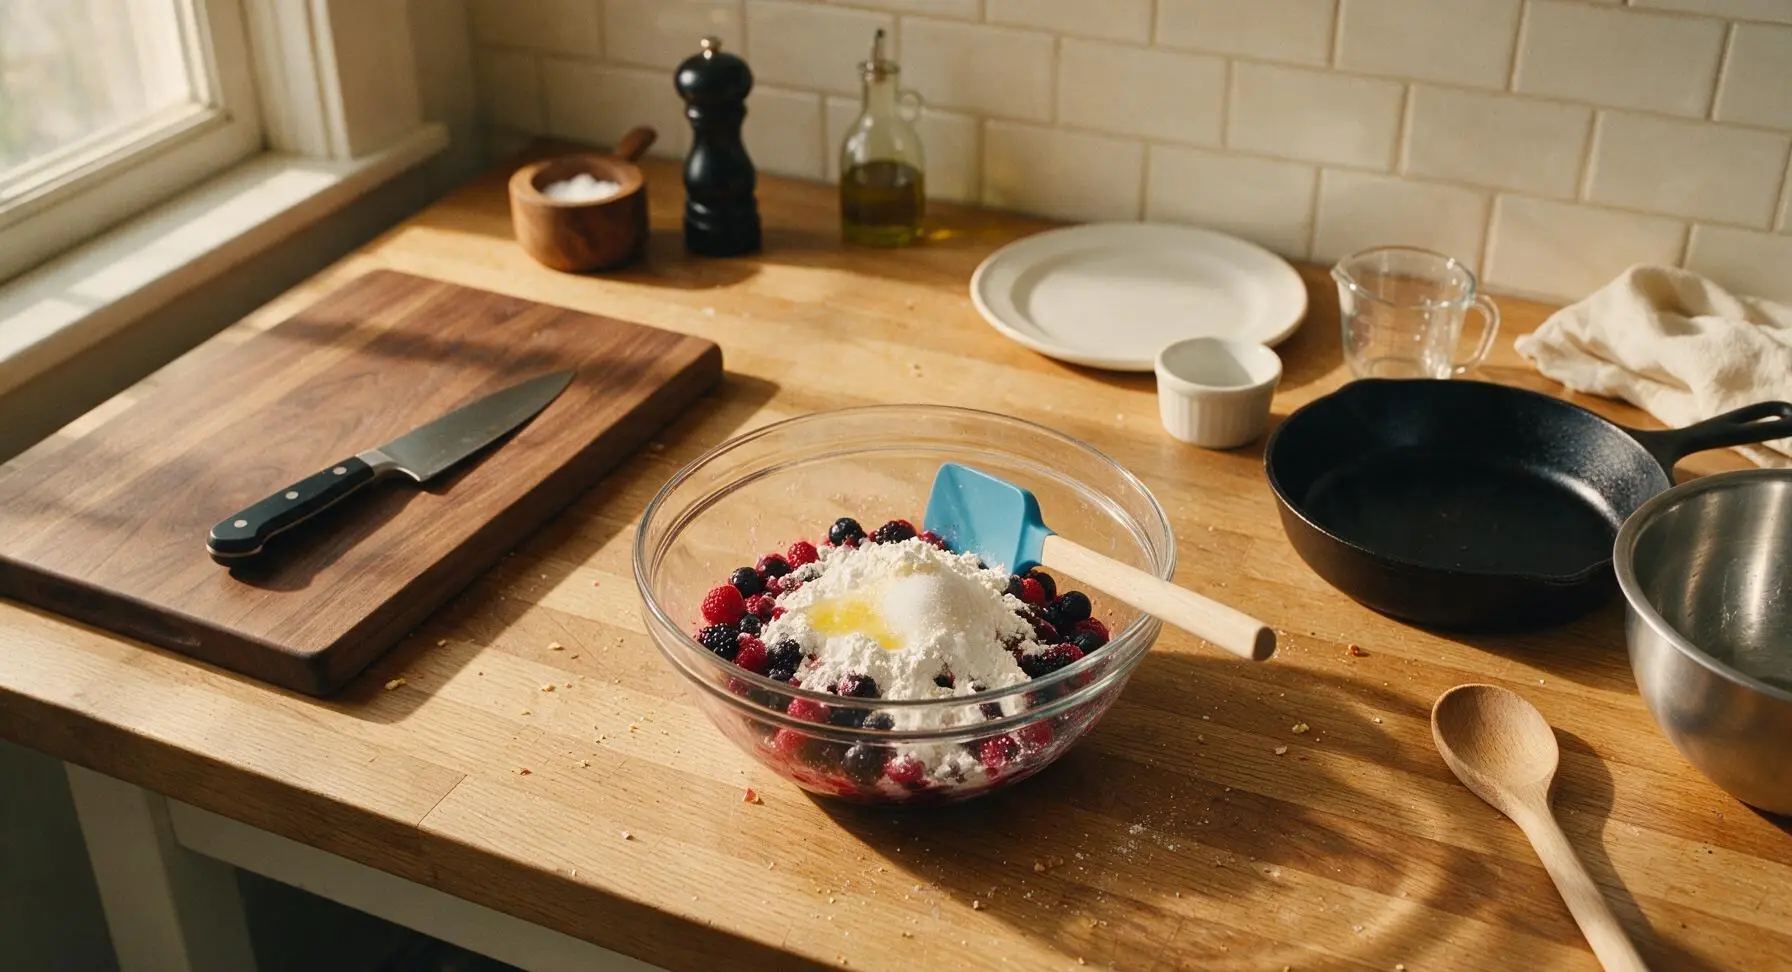
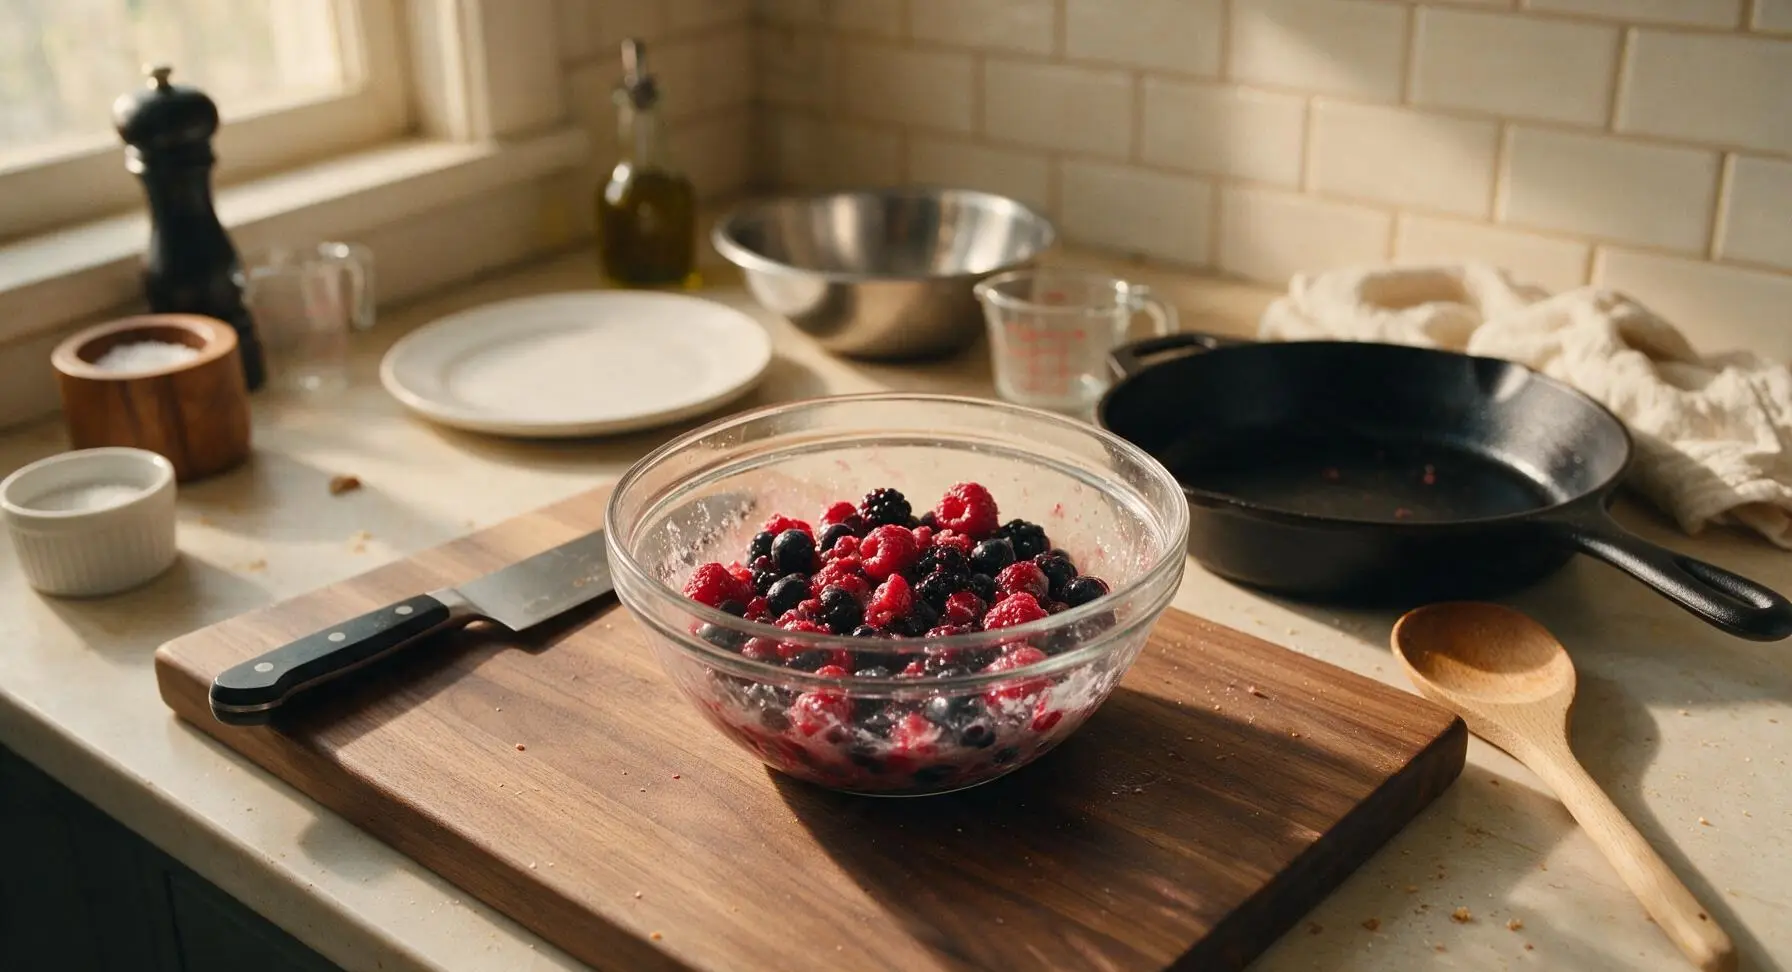
In the small clear glass mixing bowl, combine the 2 1/2 cups mixed fresh berries, 2 tbsp granulated sugar, 2 tbsp cornstarch, 1 tbsp fresh lemon juice, and 1 tsp vanilla extract. Toss gently with the silicone spatula until all berries are evenly coated in the cornstarch-sugar mixture, taking care not to mash the raspberries too much. The cornstarch will turn slightly translucent as it mixes with released berry juice.
Step 4
step4:Make Berry Filling
Step 4
step4:Make Berry Filling
5

Layer Filling and Topping

Spoon the tossed berry filling evenly over the pressed crumb base in the baking pan, spreading it gently with the spatula to create a single even layer of fruit, leaving a 1/4 inch border at the pan edges. Sprinkle the remaining 1/3 crumble mixture evenly over the top of the berries, leaving some larger crumb clumps intact for texture—do not press the topping down.
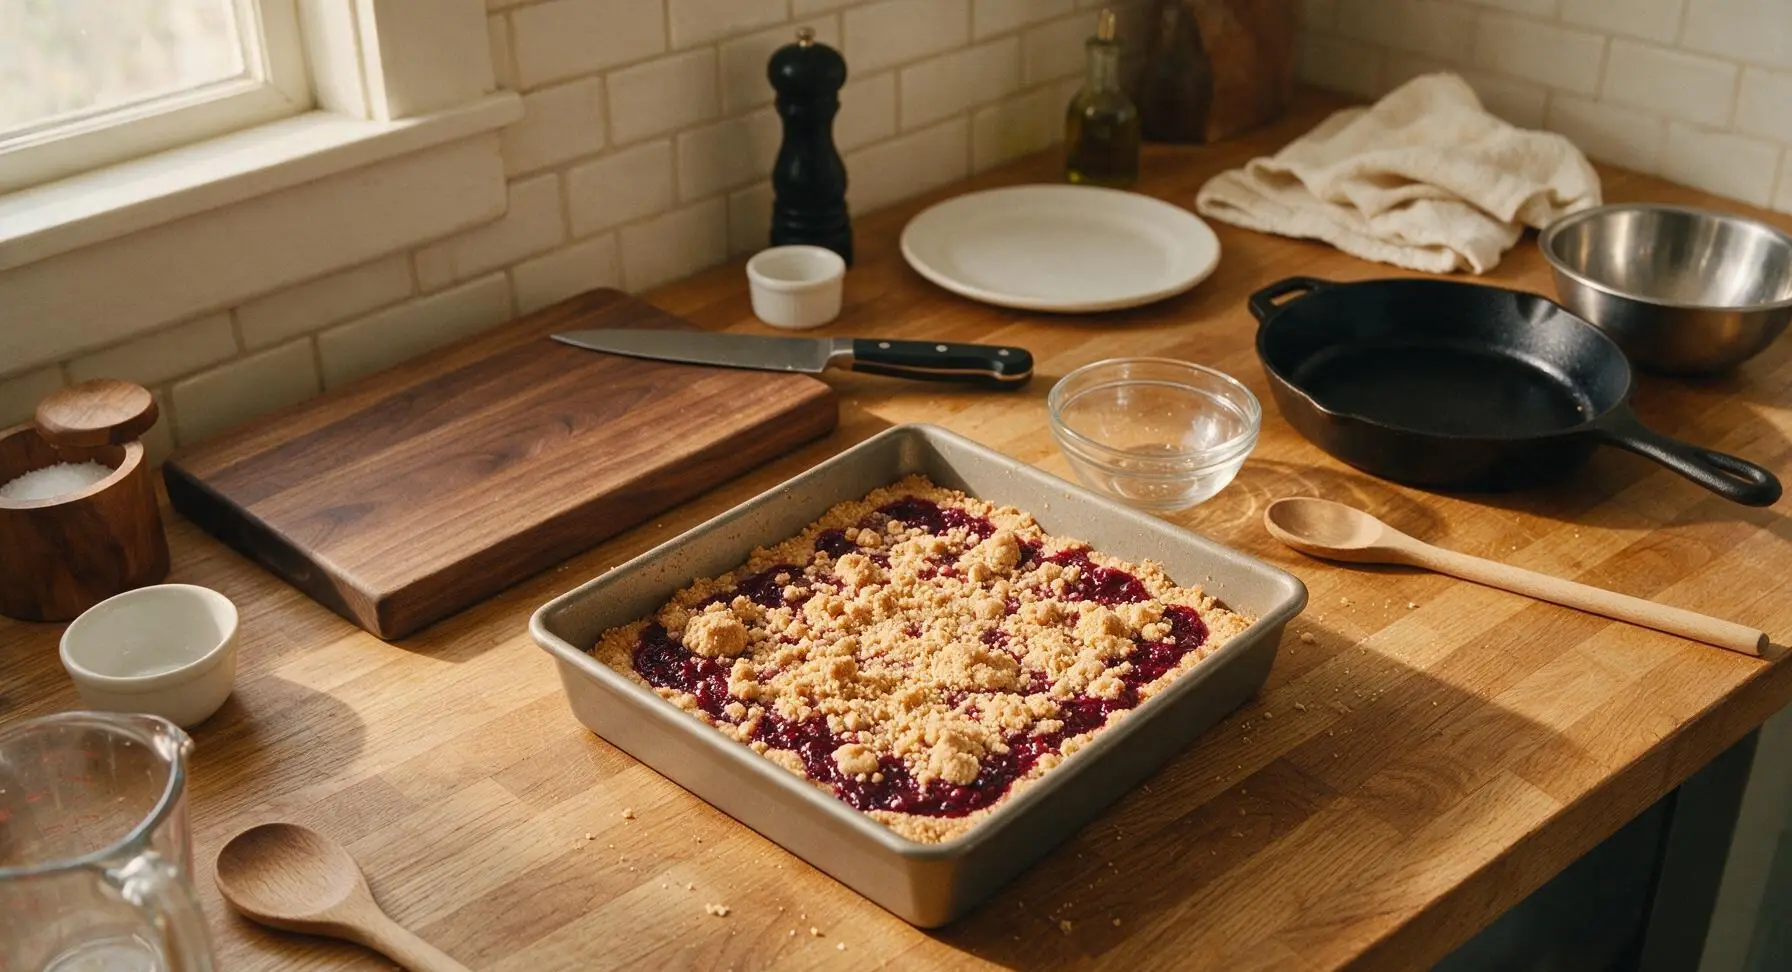
Step 5
step5:Layer Filling and Topping
6

Bake Until Golden

Place the assembled pan in the preheated 375°F (190°C) oven. Bake for 35 minutes, until the crumble topping is deep golden brown and the berry filling is bubbling vigorously around the pan edges. If the topping browns too quickly before the filling bubbles, tent loosely with a piece of foil for the last 10 minutes of baking.
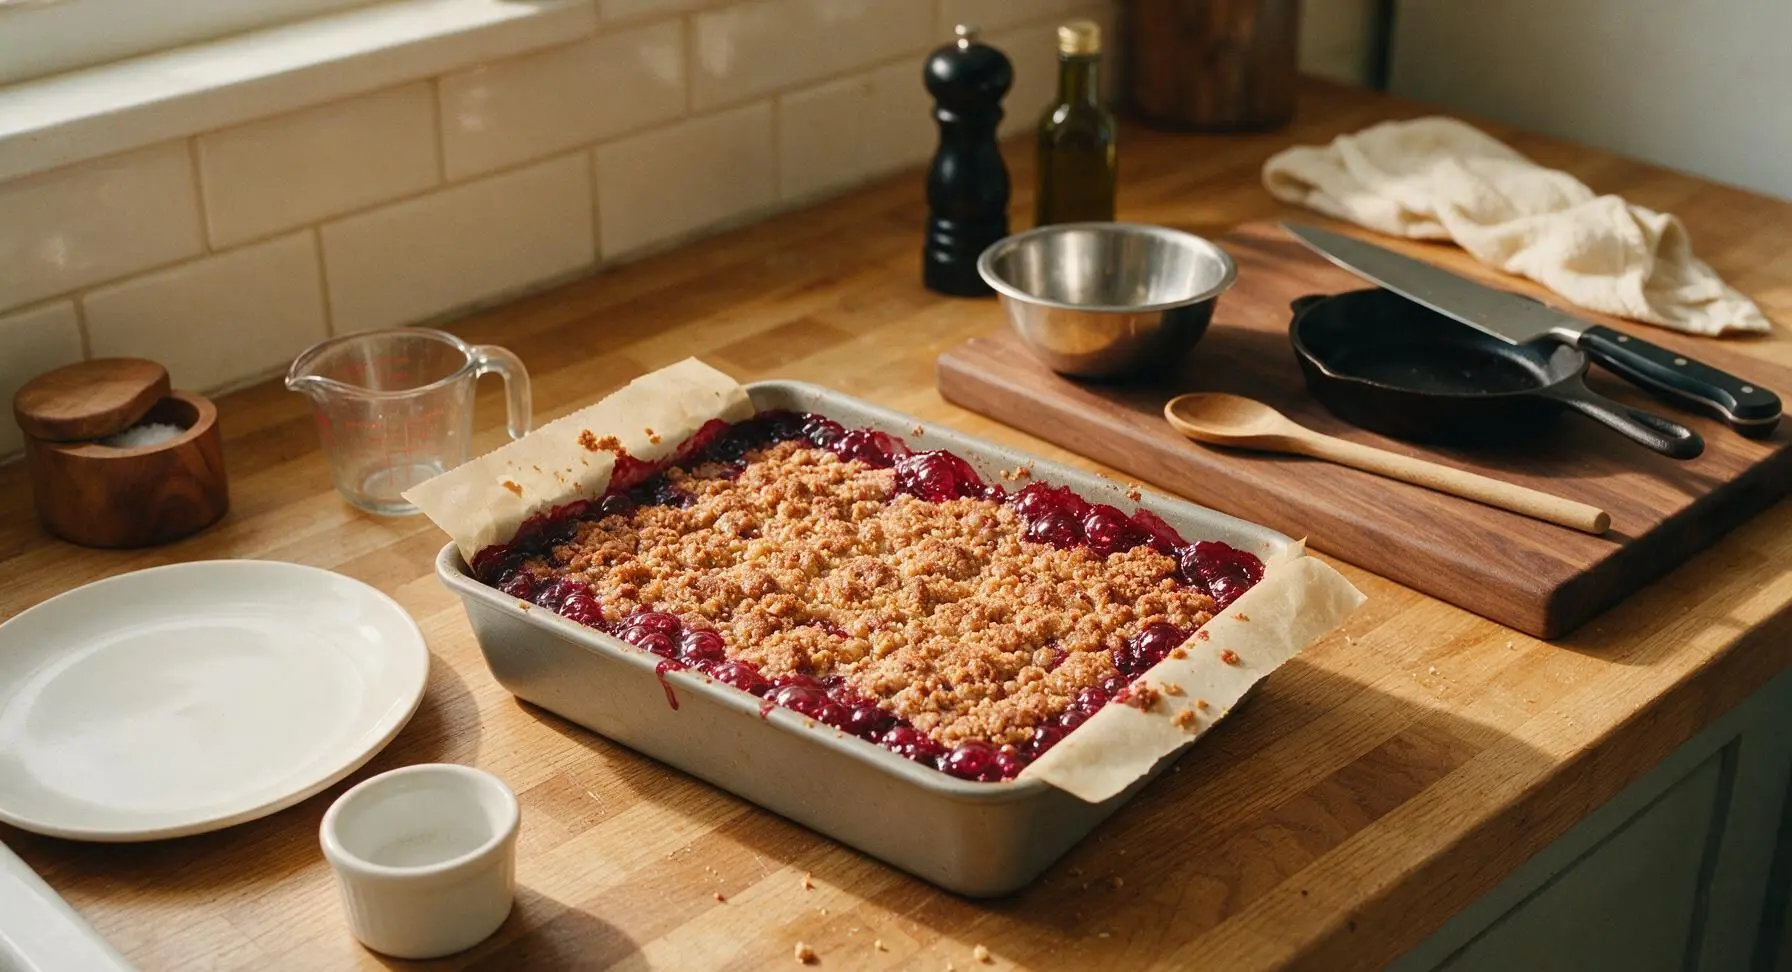
Step 6
step6:Bake Until Golden
7

Cool Bars Thoroughly

Transfer the hot pan to the matte black wire cooling rack set on the counter. Let the bars cool completely at room temperature for 1 full hour, until the berry filling is fully set. Do not attempt to cut the bars while warm, as the filling will run and the crumble will fall apart.
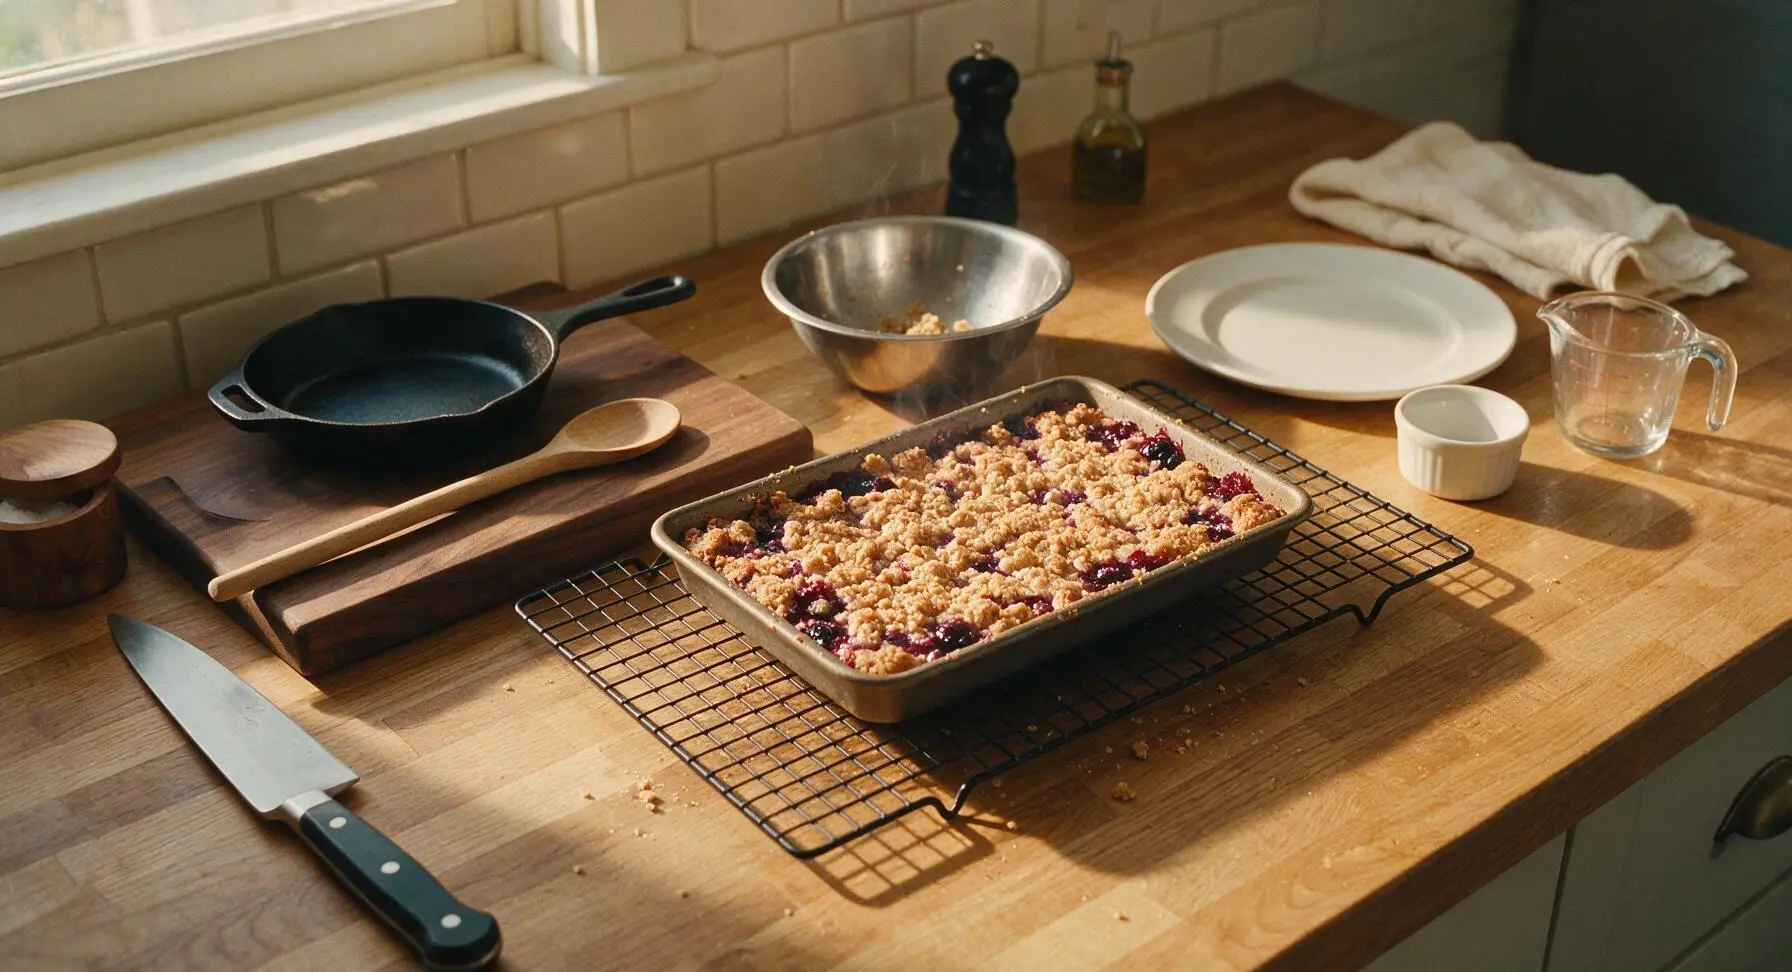
Step 7
step7:Cool Bars Thoroughly
8

Cut Into Squares

Use the parchment overhangs to lift the entire cooled block of crumble bars out of the pan and set it on the counter. Use the sharp paring knife to cut the block into 9 equal 3x3 inch squares, wiping the knife blade clean between cuts for neat edges. Transfer 3 squares to the matte cream ceramic dessert plate for serving.
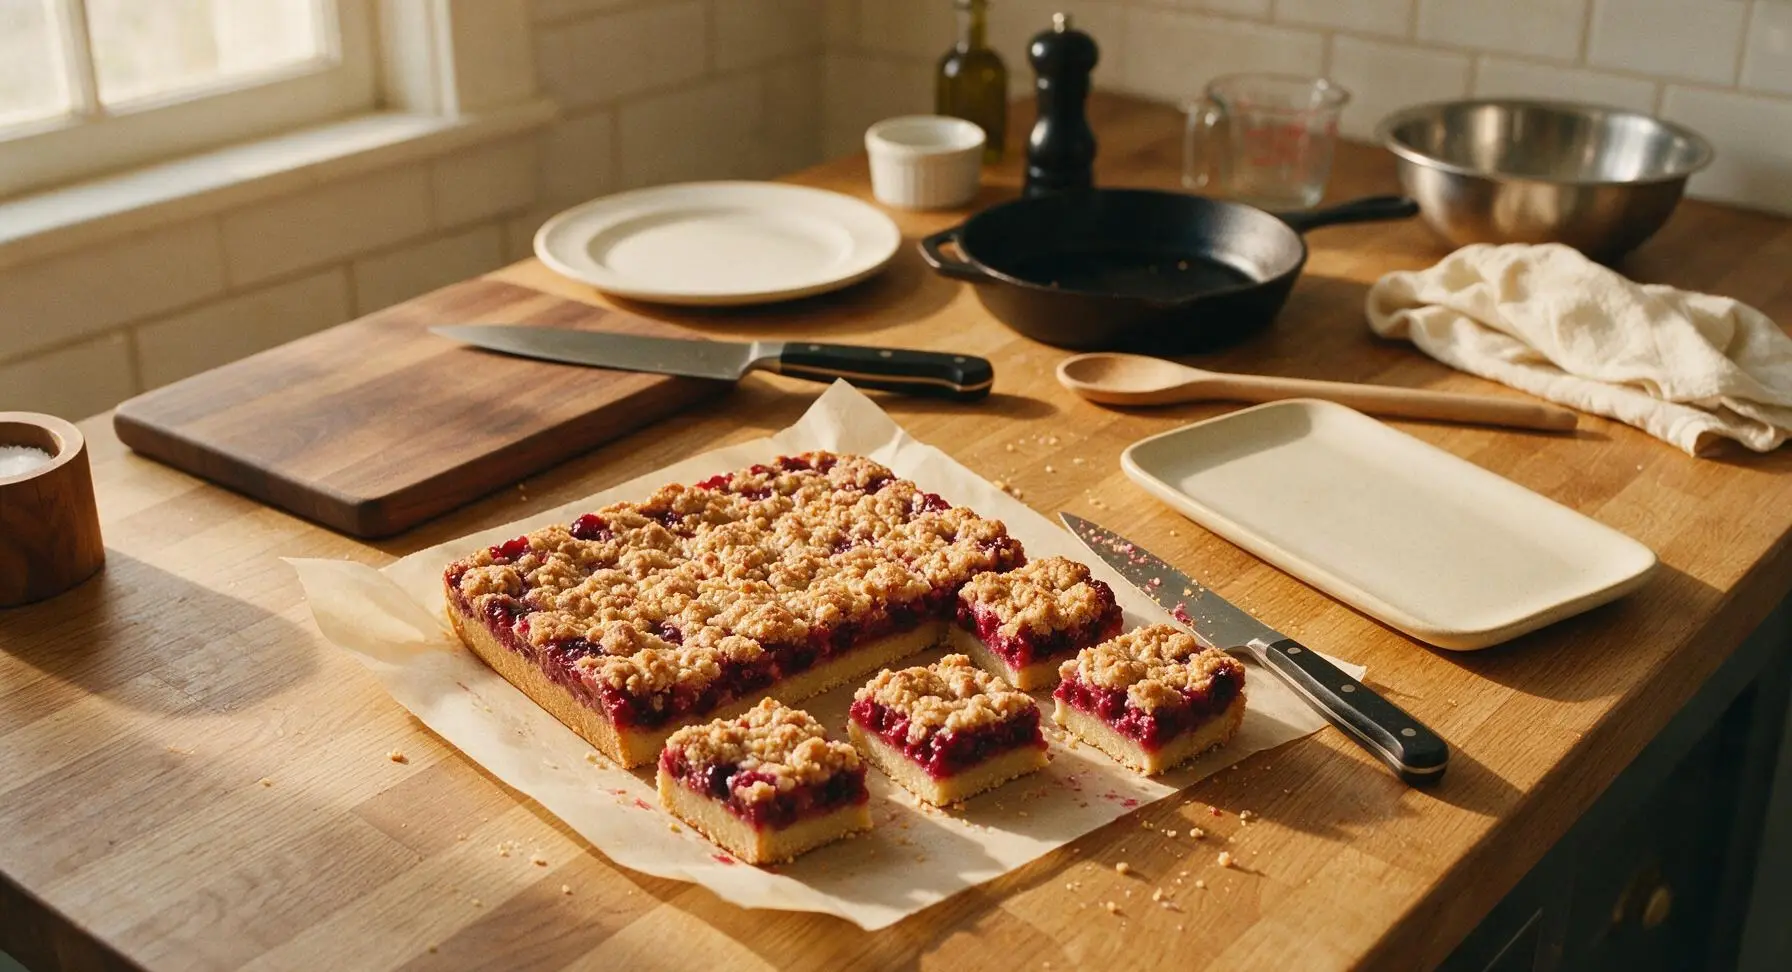
Step 8
step8:Cut Into Squares

Tips

1.Always use very cold butter for the crumble mixture: Cold butter melts slowly in the oven, creating distinct, crisp crumb clumps and a tender, not tough, crust. Room temperature butter will soak into the flour, resulting in a dense, greasy, flat crumble texture.
2.Wait a full hour for bars to cool before cutting: The cornstarch in the berry filling needs time to set as it cools to room temperature. Cutting warm bars will cause the juicy filling to run out and the crumb layers to crumble, leading to messy, uneven slices.
3.Adjust filling sugar to match your berries: For very ripe, sweet in-season summer berries, reduce the granulated sugar in the filling to 1 tablespoon to avoid over-sweetness; for tart frozen berries (thawed and drained first), increase sugar to 3 tablespoons to balance sharp tartness.


✨ You May Also Like

Desserts & Baking
🍜 Italy

Creamy, coffee-kissed classic Northern Italian no-bake dessert, with layers of rum-spiked mascarpone cream, soft ladyfingers, and a rich cocoa dusting.

⏱️ 4 hours 3Desserts & Baking ★ 4.7
Desserts & Baking
🍜 France

Flaky, shatteringly crisp, buttery French croissants with golden exteriors and soft, airy layered interiors, perfect for pairing with coffee for a special morning treat.

⏱️ 12 hours Desserts & Baking ★ 4.5
Desserts & Baking
🍜 United States

Warm, spiced baked apples topped with a fluffy golden biscuit crust, this cozy dessert pairs perfectly with vanilla ice cream for cool-weather comfort.

⏱️ 55 minuteDesserts & Baking ★ 4.6
Desserts & Baking
🍜 United States

A star-spangled classic American blueberry pie with buttery flaky crust and bright sweet-tart filling, perfect for summer patriotic gatherings.

⏱️ 1 hour 25Desserts & Baking ★ 4.7
Desserts & Baking
🍜 United States

A beloved no-bake regional Maine candy with a chewy coconut-potato center coated in rich dark chocolate, a New England holiday staple since the 1870s.

⏱️ 2 hours 3Desserts & Baking ★ 4.8
Desserts & Baking
🍜 France

Luxuriously creamy, floral frozen custard made with aromatic Tahitian vanilla beans, boasting a smooth, rich texture that melts slowly on the tongue.

⏱️ 3 hours 3Desserts & Baking ★ 4.5

Berry Crumble Bars:Frequently Asked Questions

1.Can I use frozen mixed berries instead of fresh for these Berry Crumble Bars? ▾
Absolutely! No need to thaw frozen berries first—toss them with 1 extra teaspoon of cornstarch before adding to the filling to cut down on excess juice that can make bars soggy. You’ll get the same bright, jammy flavor, and they work perfectly for off-season baking when fresh berries are pricey or hard to source.
2.Why does the recipe call for cold unsalted butter instead of room temperature? ▾
Cold butter is key for that signature crumbly, crisp texture in both the base and topping. As cold butter bits melt in the oven, they create tiny, flaky air pockets instead of spreading into a dense, greasy layer. Unsalted butter also lets you control salt levels, so the sweet-tart berry flavor stays front and center.
3.Do I have to use old-fashioned rolled oats, or can I use quick oats? ▾
Stick to old-fashioned rolled oats for the best texture! Quick oats are cut much finer, so they cook down into a softer, less distinct crumble that lacks the chewy, hearty bite these bars are known for. If you only have quick oats, reduce the amount by 2 tablespoons and avoid over-mixing to prevent mushy crumble.
4.Can I make these bars gluten-free? ▾
Definitely! Swap the all-purpose flour for a 1:1 gluten-free all-purpose baking blend that contains xanthan gum, and double check that your rolled oats are certified gluten-free to avoid cross-contamination. The rest of the recipe works exactly as written, with the same buttery, crisp crumble and juicy berry filling.
5.How do I keep the berry filling from making my bars soggy? ▾
First, don’t over-stir your berry filling—mashing too many berries releases excess juice. Toss berries with a light 1 teaspoon coating of all-purpose flour or cornstarch to thicken liquid as it bakes, and press the bottom crumble layer firmly into the pan to create a tight base that blocks juice from soaking through.
6.What size pan should I use for these bars, and do I need to line it? ▾
Use a standard 9x9-inch square metal baking pan for even, consistent baking. Always line it with a 2-inch overhang of parchment paper on two sides—this creates little "handles" that let you lift the entire slab of bars out cleanly once cooled, for neat, even slices without stuck-on crumbs.
7.Can I use all one type of berry instead of a mix? ▾
Of course! You can stick to just blueberries, raspberries, or chopped hulled strawberries if that’s what you have on hand. Raspberries make a tarter, softer filling, blueberries are extra sweet and juicy, and strawberries add bright, fresh summer flavor. Just keep the total berry measurement the same, no other tweaks needed.
8.How long do I need to let these bars cool before slicing? ▾
I know it’s tempting to cut into them warm, but let bars cool completely in the pan for at least 1 full hour, then chill for 30 minutes if you want extra clean slices. The berry filling needs time to set as it cools—cutting too early makes filling run out, leaving messy, crumbly slices instead of neat, portable bars.
9.Can I add other mix-ins to the crumble or filling? ▾
Absolutely! Try stirring ¼ teaspoon of ground cinnamon or a pinch of nutmeg into the crumble for warm, cozy depth, or toss ¼ cup of chopped toasted almonds into the topping for extra crunch. For the filling, a tiny squeeze of fresh lemon juice amps up bright berry flavor without making bars taste sour.
10.How should I store leftover Berry Crumble Bars? ▾
Store leftover bars in an airtight container, separated by layers of parchment paper to prevent sticking, in the fridge for up to 5 days. The crumble softens slightly after the first day, but you can crisp individual slices back up in a 350°F oven for 3 to 4 minutes to bring back that fresh-baked, crunchy top.
11.Can I freeze these bars for later? ▾
Definitely! Let bars cool completely, then slice into individual portions, wrap each tightly in plastic wrap, and tuck them into a freezer-safe bag or container. They keep well for up to 3 months. Thaw in the fridge overnight, or warm in the microwave for 15 seconds for a quick, fruity treat straight from the freezer.
12.Why is my crumble topping too dense instead of crumbly? ▾
That almost always happens if you over-mix the crumble, or if your butter is too warm. You want to cut cold butter into the flour, oats, and sugar until you have pea-sized clumps, not a smooth dough. If your kitchen is very warm, pop the mixed crumble in the fridge for 10 minutes before baking to keep it light.
13.Can I use dark brown sugar instead of light brown sugar? ▾
You can, but know that dark brown sugar has a higher molasses content, so it will add a deeper, more caramel-like, slightly earthier flavor to the crumble layers, and make the crumble a bit darker in color. If you prefer that richer, toffee-adjacent flavor, it’s a straight 1:1 swap with no other adjustments needed.
14.Do I need to par-bake the bottom crust before adding the filling? ▾
No par-baking is needed for this recipe! As long as you press the bottom crumble layer firmly into an even, tight layer in the pan, it will bake through perfectly under the berry filling, getting crisp and buttery without getting soggy. Skipping par-baking cuts down on prep time, making this recipe great for beginner bakers.
15.Can I make these bars vegan? ▾
Yes, it’s an easy swap! Just replace the cold unsalted butter with an equal amount of cold, solid vegan baking butter (look for one with high fat content to avoid greasy crumble). Double check that your packed light brown sugar is vegan, as some brands use bone char for processing, and you’re good to go.
16.What’s the best way to serve these bars? ▾
They’re perfect as a portable, hand-held snack at room temperature straight out of the pan, but you can dress them up for dessert too! Serve a warm square with a scoop of vanilla ice cream, a dollop of freshly whipped cream, or a drizzle of salted caramel for an extra-special summer treat for potlucks or picnics.
17.My berry filling bubbled over the sides of the pan while baking—what did I do wrong? ▾
That’s totally common, and not a mistake! Berry filling naturally bubbles as fruit breaks down and juices thicken. To avoid messy oven spills, set your baking pan on a rimmed baking sheet lined with aluminum foil to catch drips before baking. Next time, leave a ¼-inch crumble border around pan edges to contain bubbling.
18.Can I use salted butter if that’s what I have in my fridge? ▾
Absolutely! If you only have salted butter on hand, use it as a direct swap—just skip any extra pinch of salt you might otherwise add to the crumble mixture. The small amount of added salt actually amps up the bright, sweet-tart berry flavor and cuts through buttery richness, with no unpleasant salty aftertaste.

Comments (8)

2 hours ago

OMG these berry crumble bars were a total game changer for our neighborhood potluck this weekend! I used a mix of frozen strawberries and blueberries because the grocery store was out of fresh berries, and literally everyone was begging me for the recipe. Cook time was even faster than 35 minutes in my oven, super easy even for a messy, non-baker like me. My kids loved it so much they ate two each right after soccer practice, 10/10 will make on repeat.

30 minutes ago

So glad these were a hit at the potluck! Frozen berries work perfectly here—no need to thaw them first if you’re in a rush, which cuts down on prep time even more. Thanks for the sweet note, and so happy the kids approved!

5 minutes ago

Wait frozen berries work without thawing?? I’ve been putting off making this recipe because I thought I needed fancy fresh berries, I’m definitely whipping these up this week now!

yesterday

Added these to my Sunday meal prep rotation and I’m never going back! They hold up so well in the fridge for 4-5 days, I grab one for a quick breakfast on my way to work and it’s way better than the sad processed granola bars I used to buy. Not too sweet, the crumble topping has the perfect buttery crunch. SO good.

2 hours ago

Love that you’re using these for meal prep! Pro tip: wrap individual bars in parchment paper and pop them in the freezer for up to a month—they thaw in 10 minutes on the counter for an even quicker grab-and-go option.

3 days ago

Swapped the all-purpose flour for a 1:1 gluten free baking mix and these turned out absolutely perfect! I was worried the crumble would be grainy but it was just as buttery and crisp as the regular version. Brought them to my book club meetup and none of my friends could even tell they were GF. Will be making these again and again.

5 days ago

Uh, did I mess something up? My crumble topping melted all over the pan and the berry filling was super runny when I pulled it out after 35 minutes. Tasted fine but was a total goopy mess, couldn’t cut it into actual bars at all. 😅

3 days ago

Sorry to hear that happened, Jake! The most common culprit for runny filling is extra juicy berries without enough cornstarch to thicken things up. Next time, add an extra teaspoon of cornstarch if you’re using super ripe or frozen berries, and make sure you let the bars cool completely (for at least an hour!) before cutting—they set up firm as they cool, I promise!

2 days ago

I had that exact thing happen the first time I made them! I was way too impatient to let them cool and cut into them right out of the oven, total goopy mess. Waited the full hour the second time around and they sliced into perfect clean bars, it works!

1 week ago

These are the perfect little treat to serve when friends come over for coffee! I added a tiny drizzle of lemon glaze on top once they cooled, and it paired so well with the sweet, tart berries. So easy to throw together even when friends text last minute that they’re 20 minutes out. Total win.

5 days ago

The lemon glaze idea is genius! I bet that balances out the sweetness perfectly, I’m stealing that trick when I make these for my mom’s birthday brunch next weekend.

2 days ago

Made these for our office potluck earlier this week and they were gone in 10 minutes flat. I used a mix of raspberries and blackberries for a little extra tartness, and people kept coming back to ask who brought them. Way easier than the fancy berry pie I almost spent hours making, this will be my go-to potluck treat from now on.

2 weeks ago

Made these last night and they were really tasty! Only reason I’m not giving 5 stars is I wish the crumble had a little more texture for my preference. Quick question—can I swap some of the flour for oats in the crumble topping next time? Wasn’t sure if that would throw off the ratios. Already planning to make a second batch this weekend!

1 week ago

Great question! You can absolutely swap ¼ cup of the flour in the crumble topping for rolled oats for extra texture—it works beautifully and adds that classic oaty crumble feel without messing up the ratios at all. Hope you love the next batch even more!

30 minutes ago

Made these in my tiny dorm kitchen with just a toaster oven and they actually came out??? I was so sure I’d mess them up but the steps were so straightforward, even with my limited supplies and zero fancy baking tools. My roommates are obsessed, we already ate half the pan. 😂

5 minutes ago

Wait you made these in a toaster oven?? I never even thought to try baking in mine, that’s a total game changer for my tiny dorm too. Thanks for the inspo!

just now

Love that these work in a dorm toaster oven! So cool that you and your roommates are enjoying them—nothing beats a quick, easy sweet treat when you don’t have access to a full kitchen. Great job!



