
best bread for roast beef sandwich

title 1
best bread for roast beef sandwich
⏱️ cook time 25 minutes
🍽️ servings 4
⚡ Difficulty medium

intro

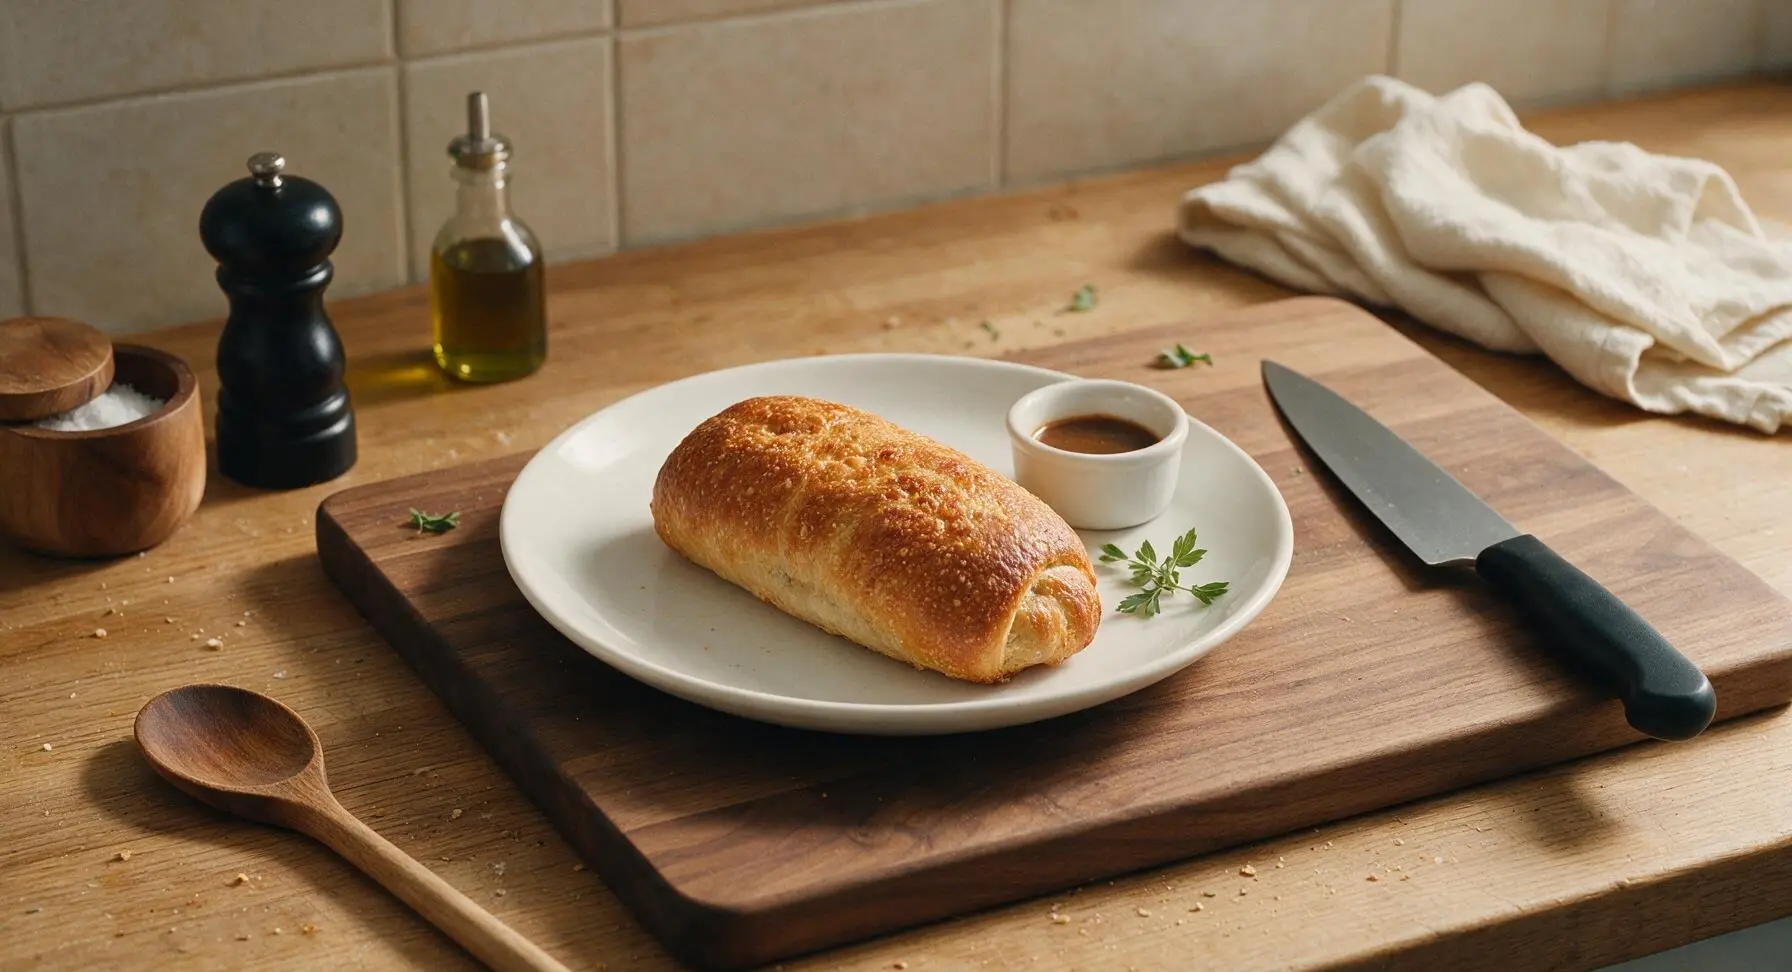
Crusty, chewy, and sturdy enough to hold juicy roast beef, tangy horseradish, and au jus without turning soggy, this homemade roll is the gold standard for unforgettable roast beef sandwiches.

Ingredients
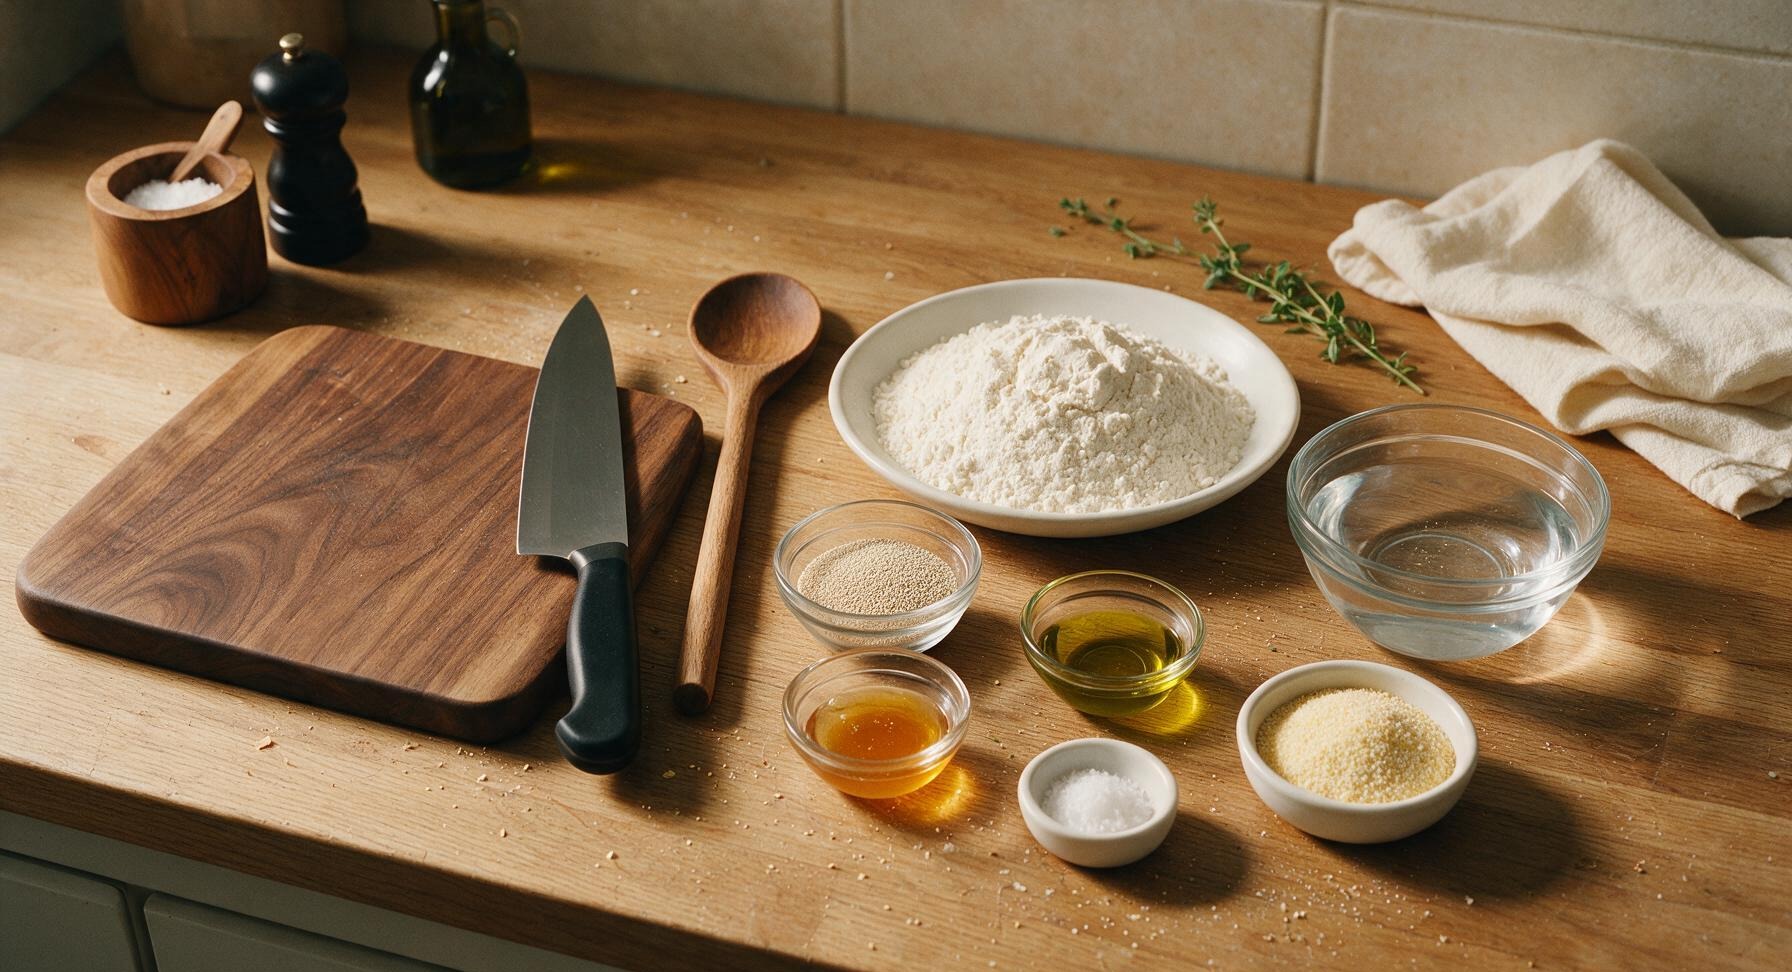
High-protein bread flour (12-14% protein content) 400g
Instant dry yeast 7g (1 standard packet)
Warm filtered water 260ml (100-105°F / 38-40°C)
Extra-virgin olive oil 15ml (1 tbsp)
Raw wildflower honey 10g (2 tsp)
Fine sea salt 6g (1 tsp)
Coarse semolina flour 2 tbsp (~20g)

Steps

1

Activate the Yeast

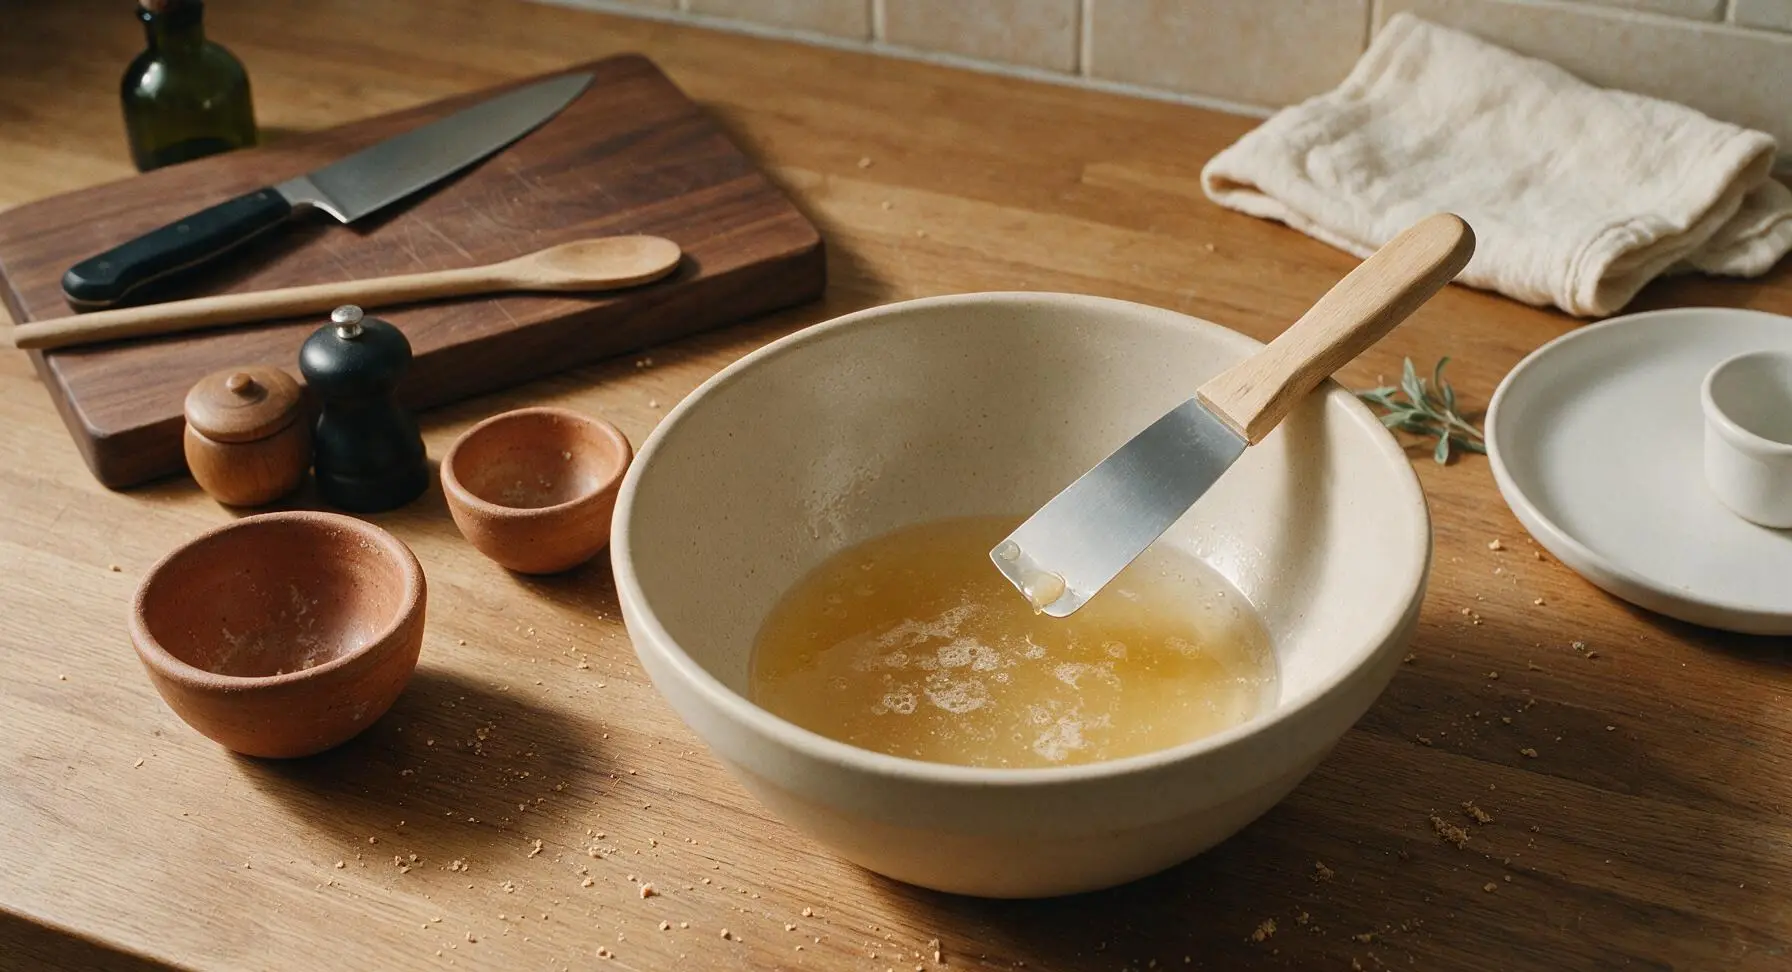
In the large light beige ceramic mixing bowl, combine warm filtered water (100-105°F, no hotter, to avoid killing yeast), raw honey, and instant yeast. Stir gently with the tip of the dough scraper to combine, then let rest for 5 minutes at room temperature. The mixture will look slightly foamy and smell faintly of fresh bread when ready, confirming the yeast is active.
Step 1
step1:Activate the Yeast
2

Mix and Knead Dough

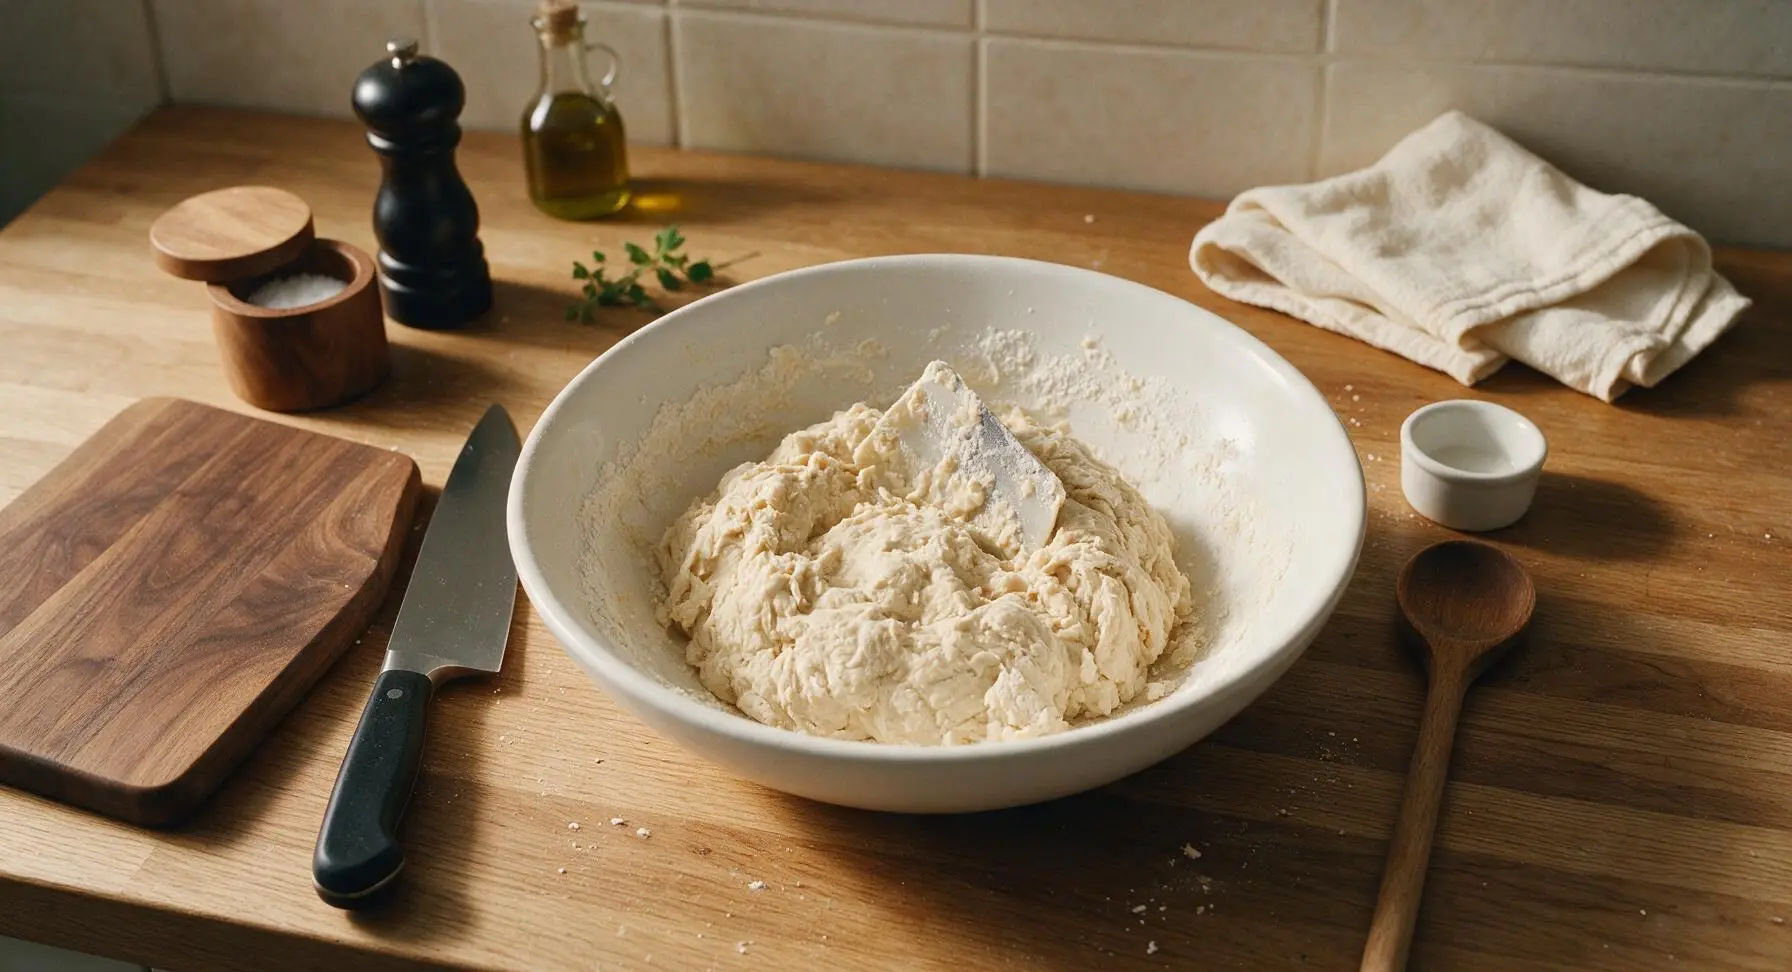
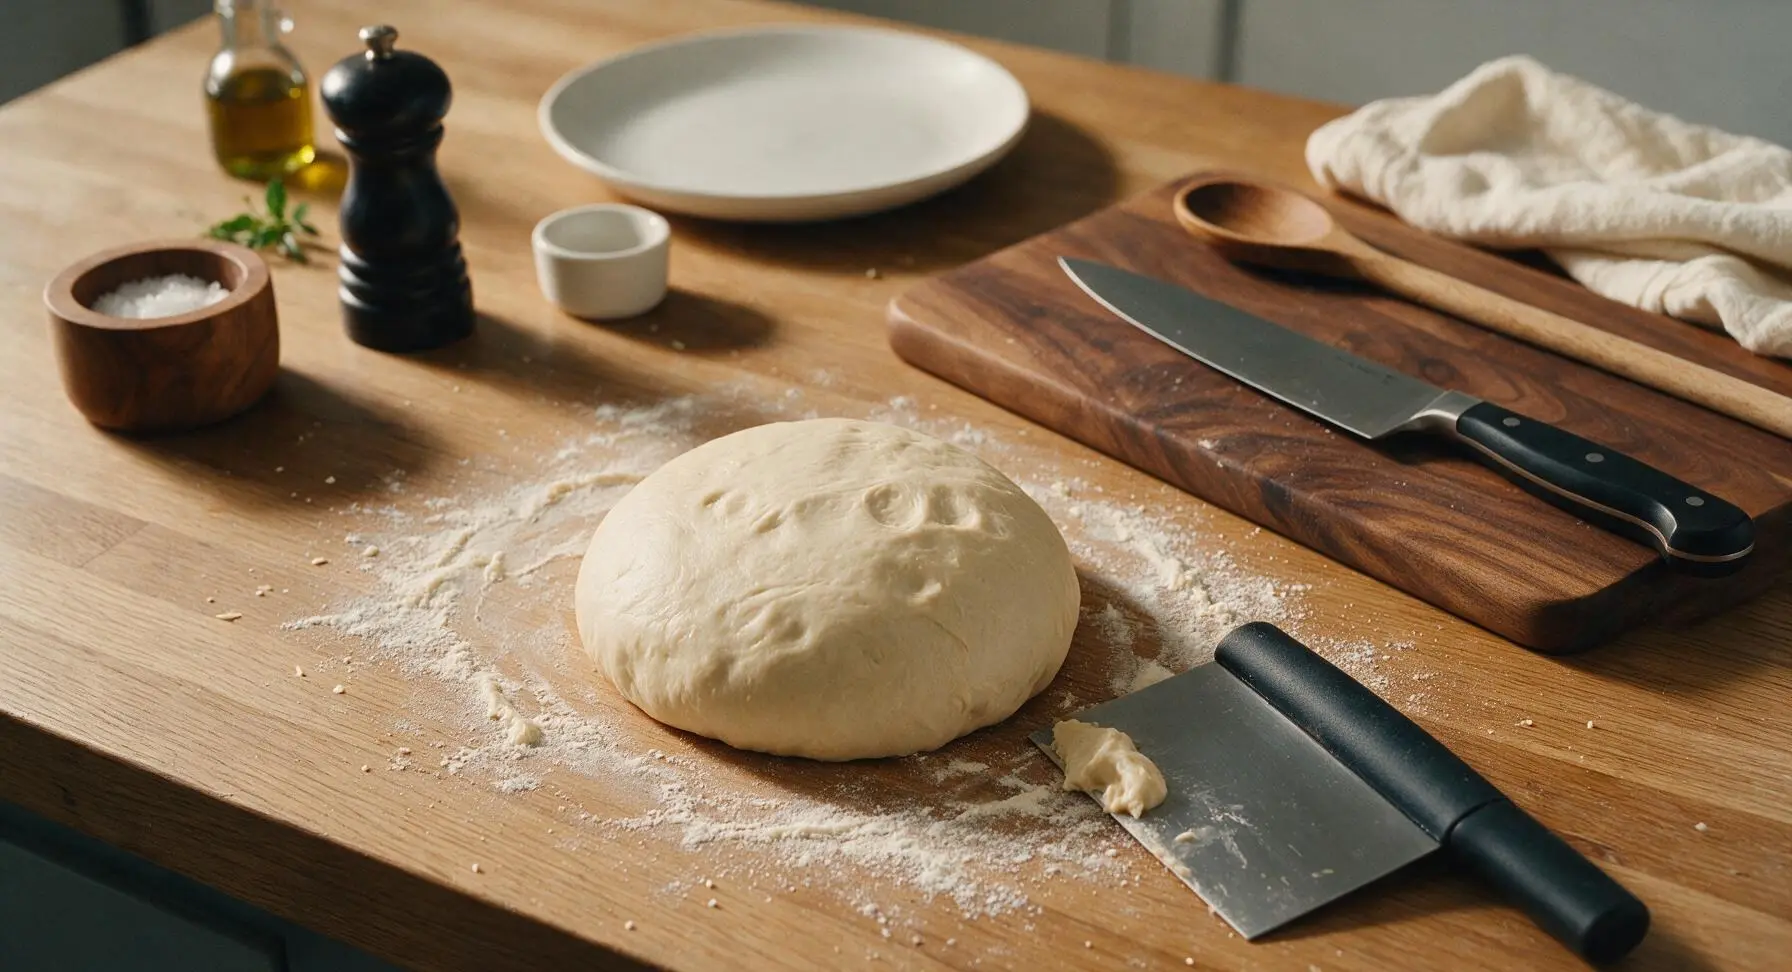
Add olive oil and fine sea salt to the activated yeast mixture, then gradually add bread flour ½ cup at a time, stirring with the dough scraper until a shaggy, sticky mass forms. Turn the dough out onto the clean oak counter (no extra flour needed initially, to avoid a tough, dense crumb) and knead for 8-10 minutes, folding the dough over itself and pushing forward with the heels of your hands. The finished dough will be smooth, elastic, and slightly tacky, pulling away cleanly from the counter without sticking heavily when properly kneaded.
Step 2
step2:Mix and Knead Dough
Step 2
step2:Mix and Knead Dough
3

First Dough Rise

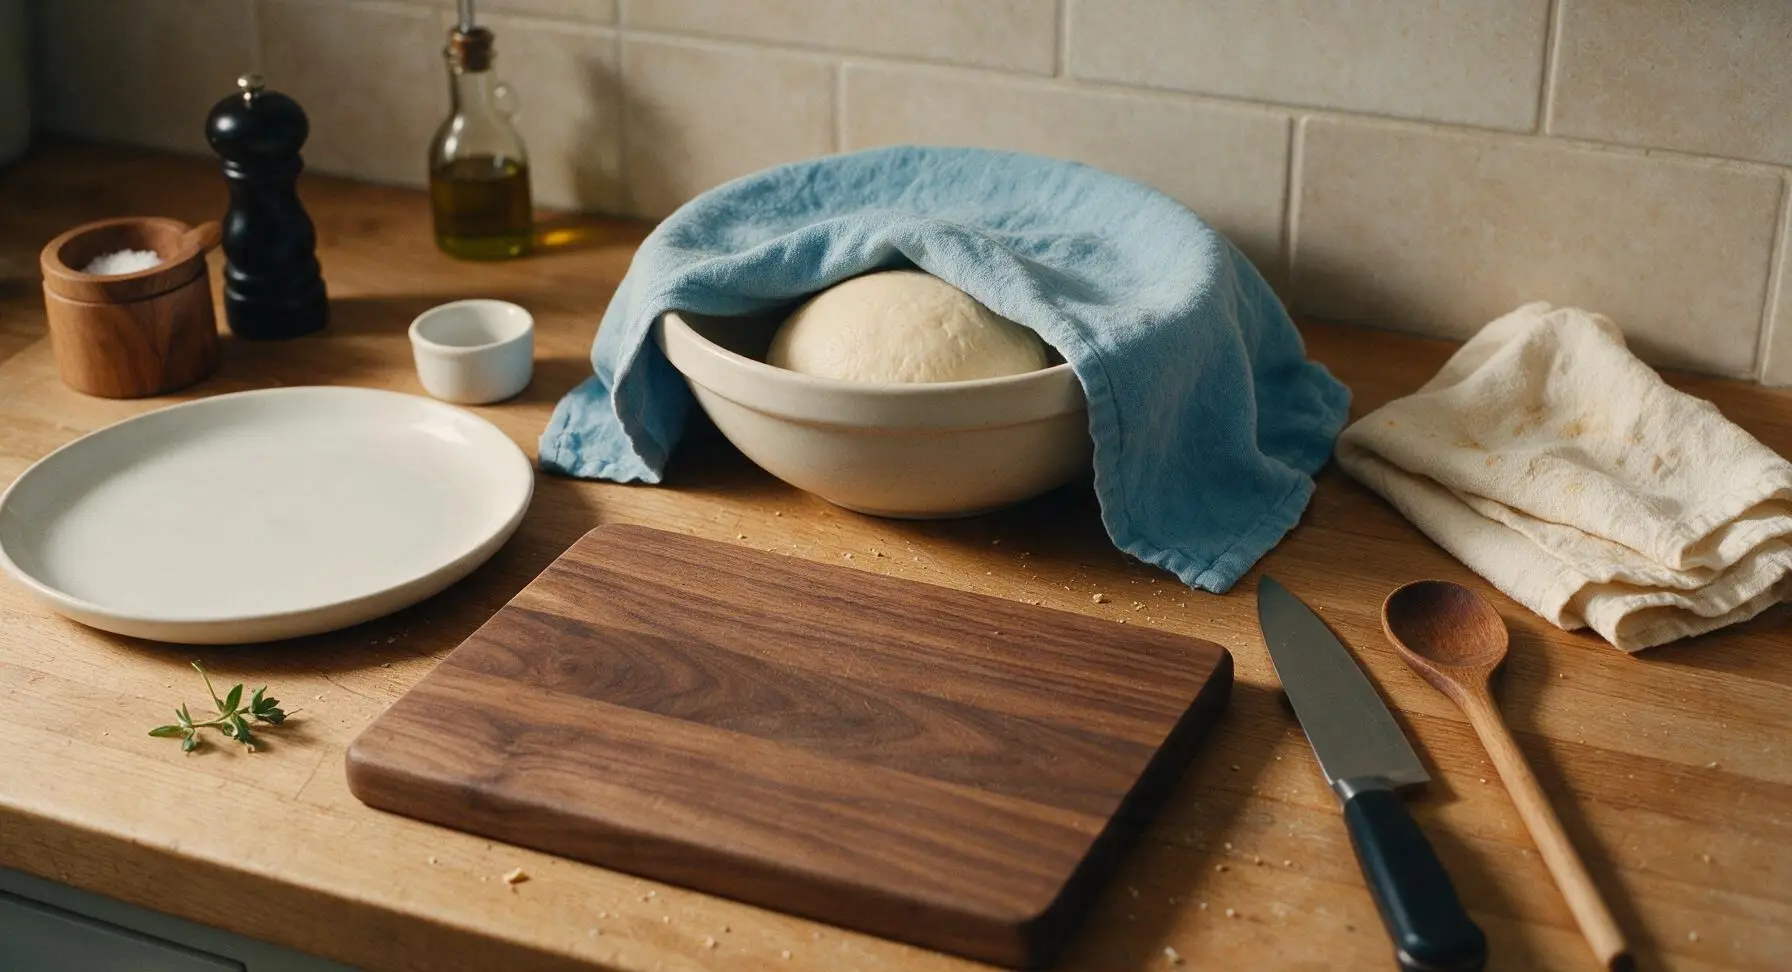
Form the kneaded dough into a tight ball, place it back into the lightly oiled ceramic mixing bowl, and turn once to coat the dough surface in a thin layer of olive oil. Cover the bowl tightly with the faded sky blue linen kitchen towel, and let rise in a warm, draft-free spot (75°F / 24°C is ideal) for 1 hour 30 minutes, until the dough has doubled in size. Test for doneness by poking a floured finger 1 inch into the dough: the indentation will remain and not spring back when fully risen.
Step 3
step3:First Dough Rise
4

Divide and Shape Rolls

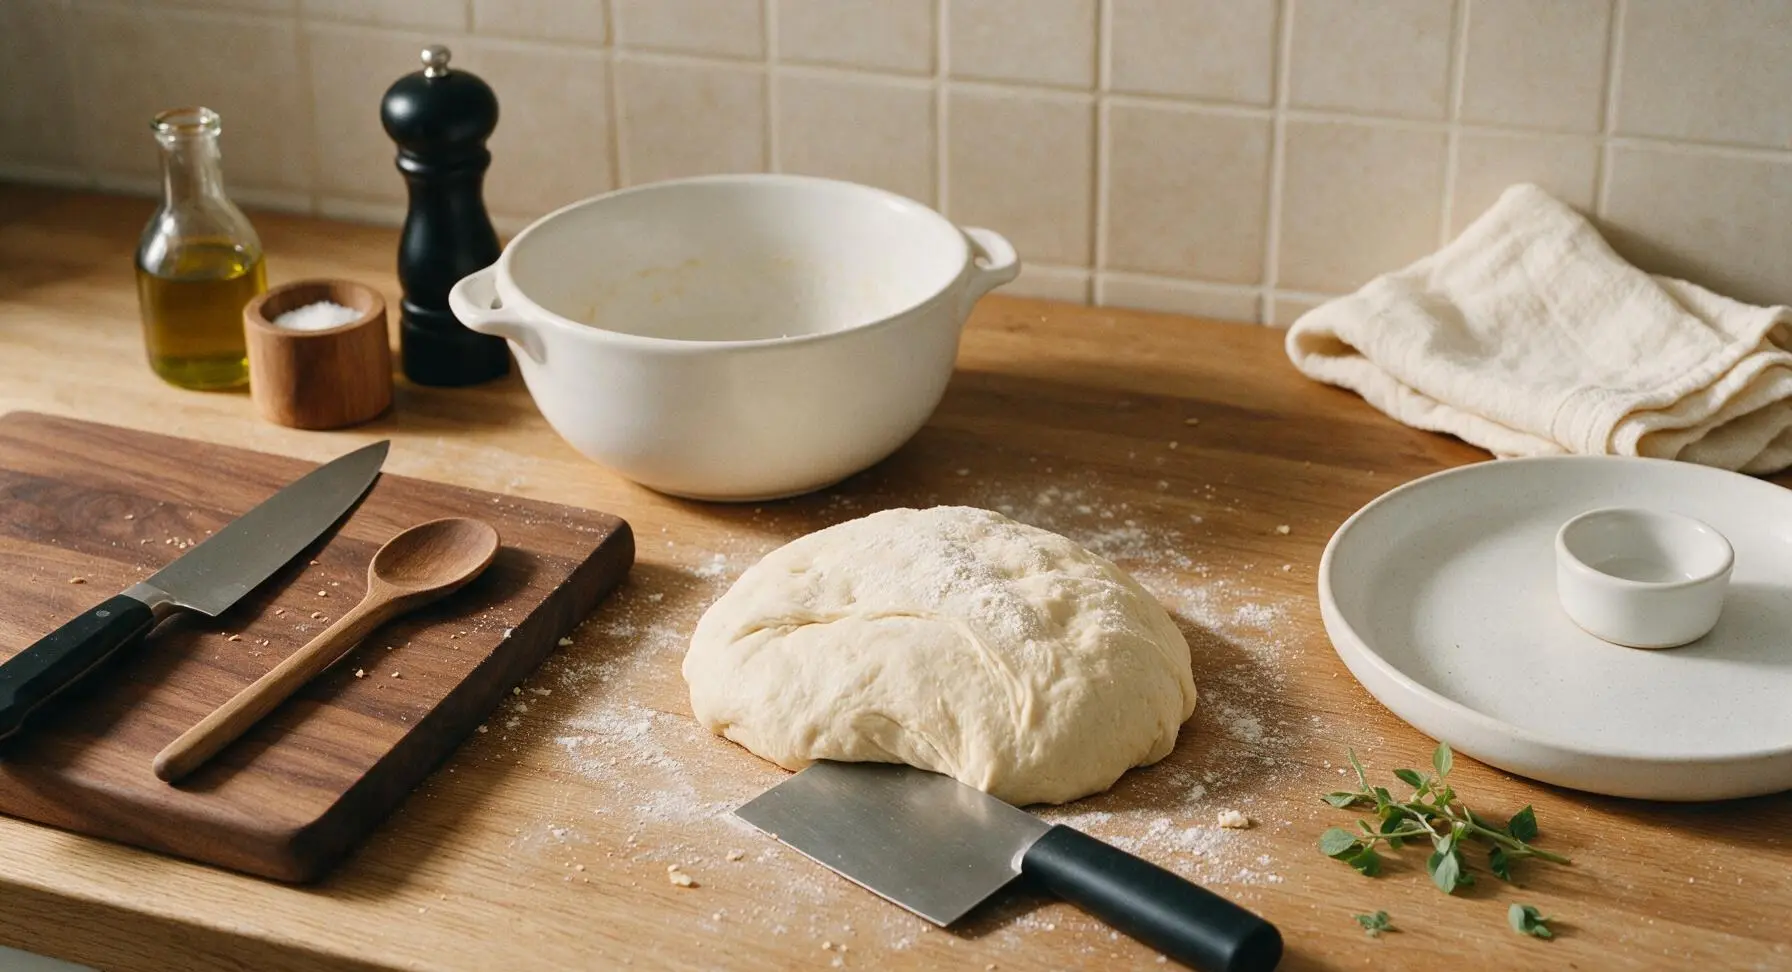
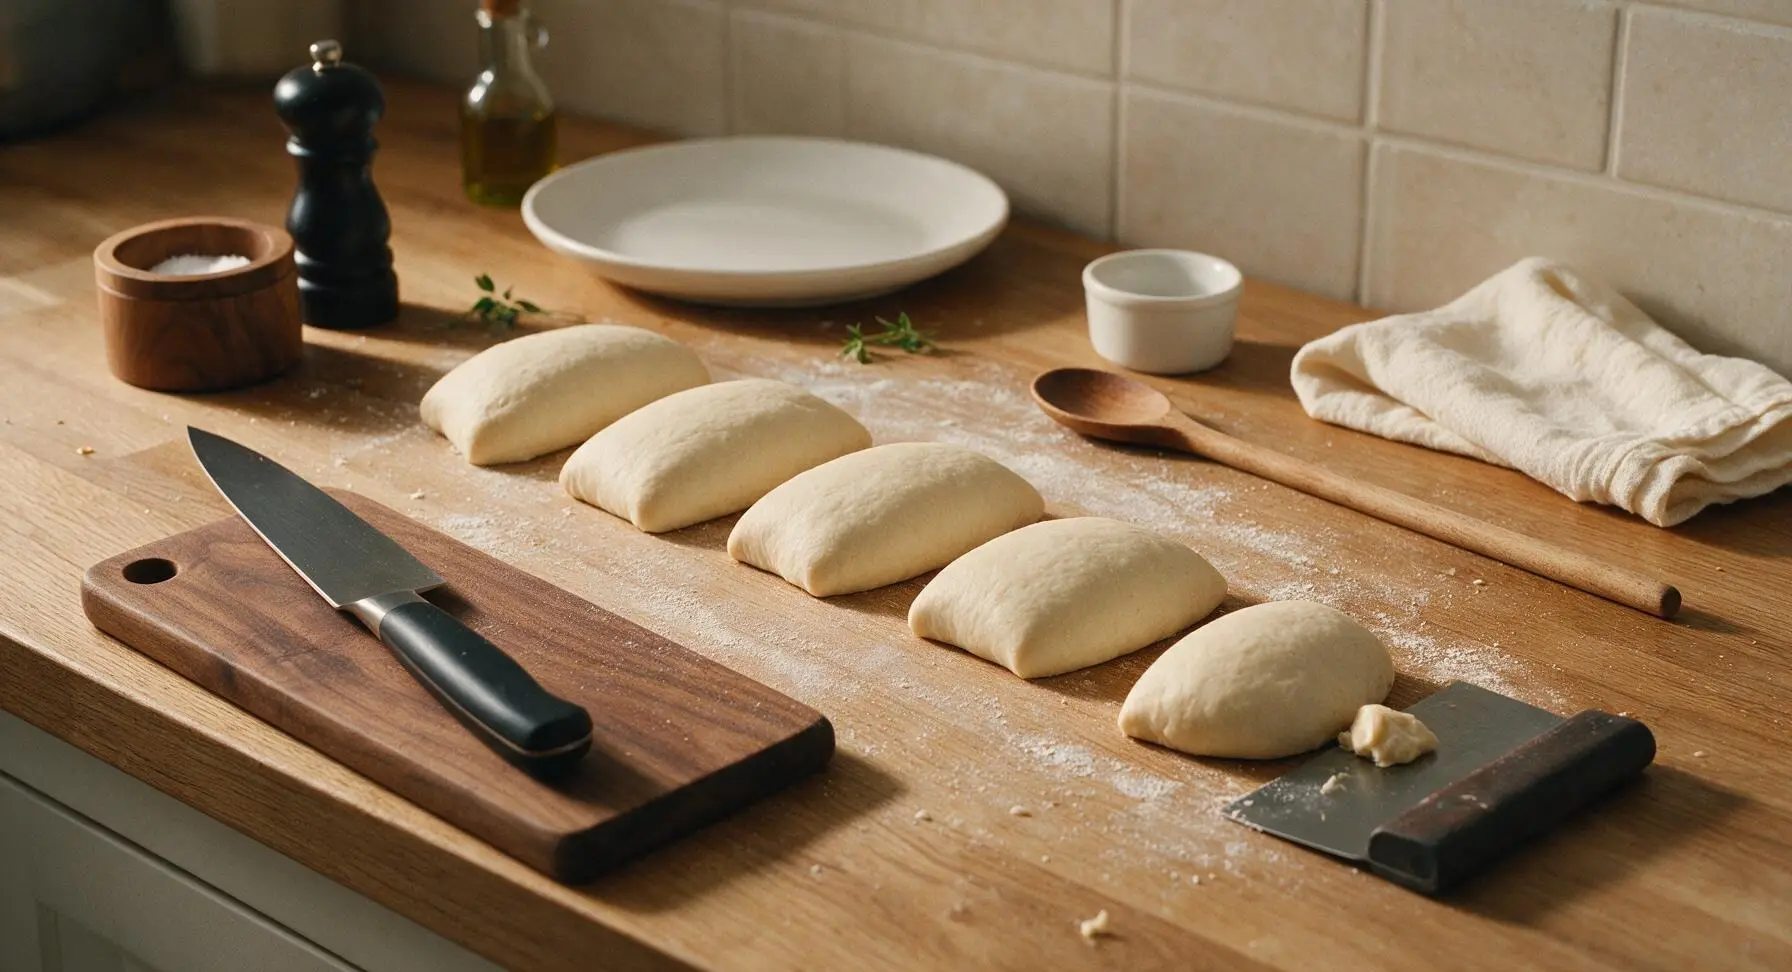
Once doubled, turn the risen dough out onto the lightly floured oak counter, and use the dough scraper to divide it evenly into 4 equal portions (each ~170g, for 8-inch sandwich rolls). Shape each portion into an oblong roll: tuck the edges of each dough piece under to create a tight, smooth top, then roll gently back and forth on the counter to form a 7-inch long log with slightly tapered ends. The tight surface tension will help the rolls rise evenly and hold their oblong shape in the oven, rather than spreading flat.
Step 4
step4:Divide and Shape Rolls
Step 4
step4:Divide and Shape Rolls
5

Second Proof Rolls

Line the heavy-gauge aluminized steel baking sheet with unbleached parchment paper, then sprinkle the parchment evenly with 1 tablespoon of coarse semolina flour to prevent sticking and create a crisp, chewy bottom crust. Arrange the shaped dough logs on the prepared baking sheet, leaving 3 inches of space between each roll to allow for spreading as they rise. Dust the tops of the rolls lightly with the remaining 1 tablespoon semolina, cover loosely with the sky blue linen towel, and let proof for 45 minutes in a warm spot, until the rolls are puffy and spring back slowly when poked (the indentation will fill halfway after 2 seconds).
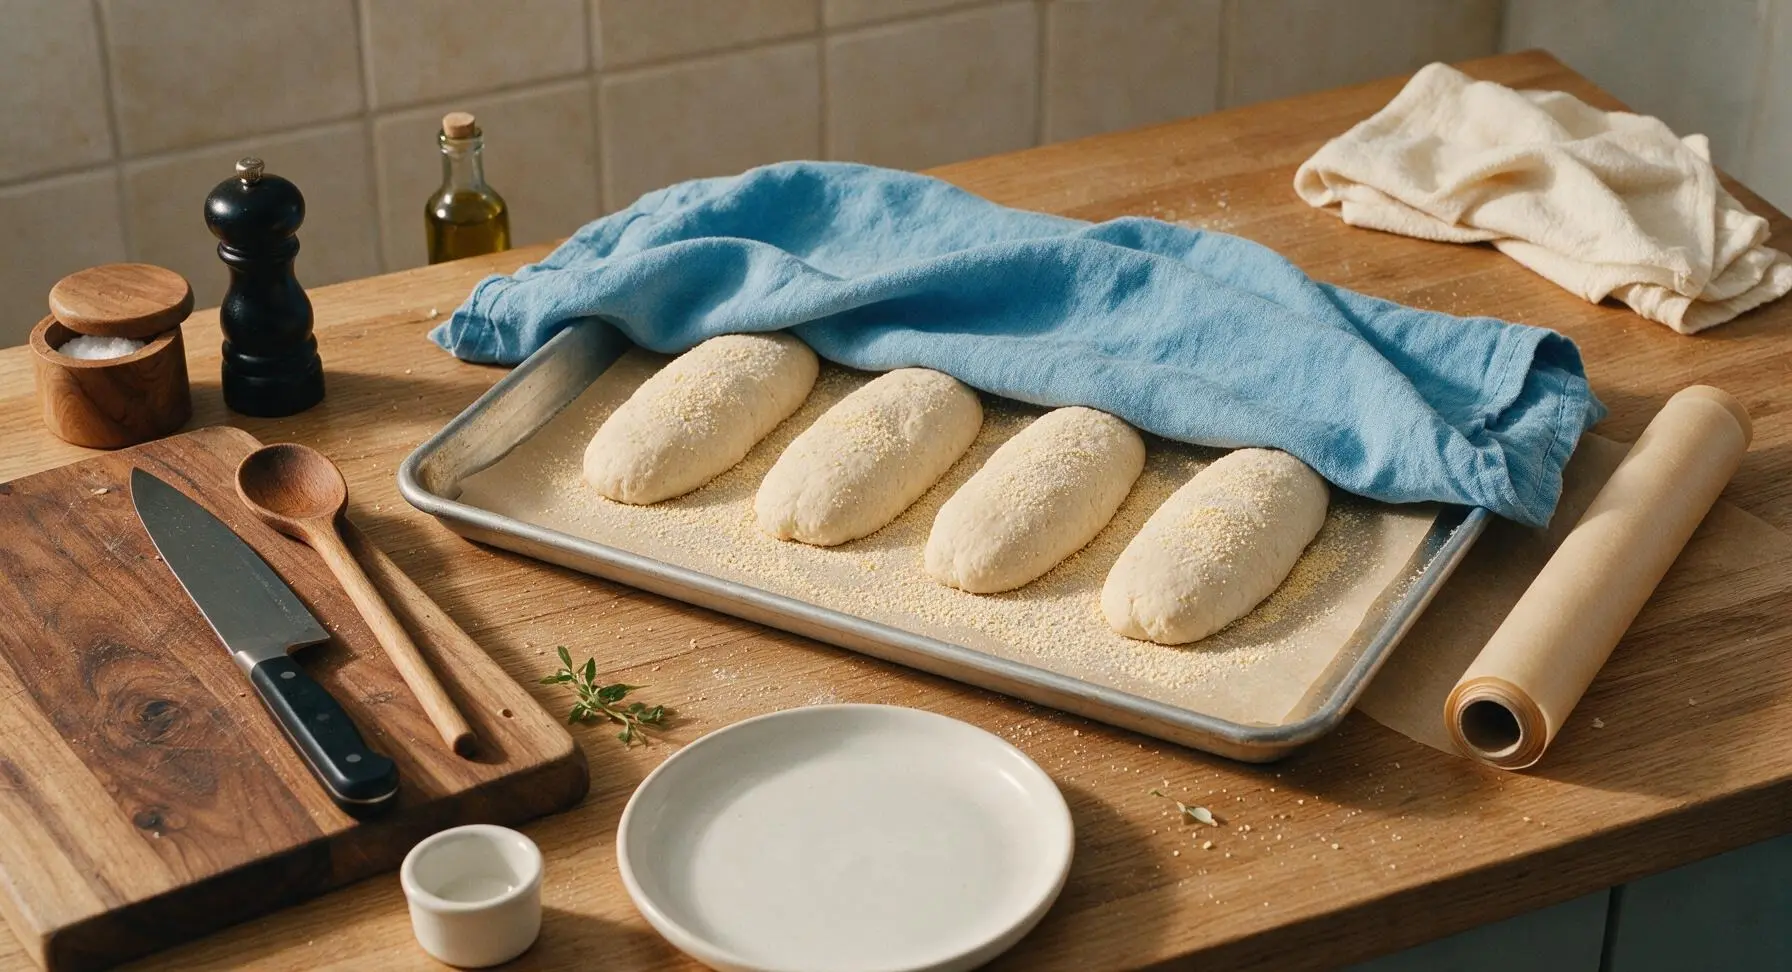
Step 5
step5:Second Proof Rolls
6

Score and Bake Rolls

Place a small metal baking pan on the bottom rack of the oven, and preheat oven to 425°F (220°C). Once preheated, carefully pour ½ cup hot water into the bottom pan to create a burst of steam (this creates a crisp, shiny crust and maximum oven spring). Remove the towel from the proofed rolls, retrieve the 9-inch chef knife from the wall magnetic strip, and use it to make a single ¼-inch deep lengthwise score down the top of each roll. Bake for 22-25 minutes on the middle rack, until the rolls are deep golden brown all over, and sound hollow when tapped firmly on the bottom. Internal temperature should read 200°F (93°C) when fully baked.
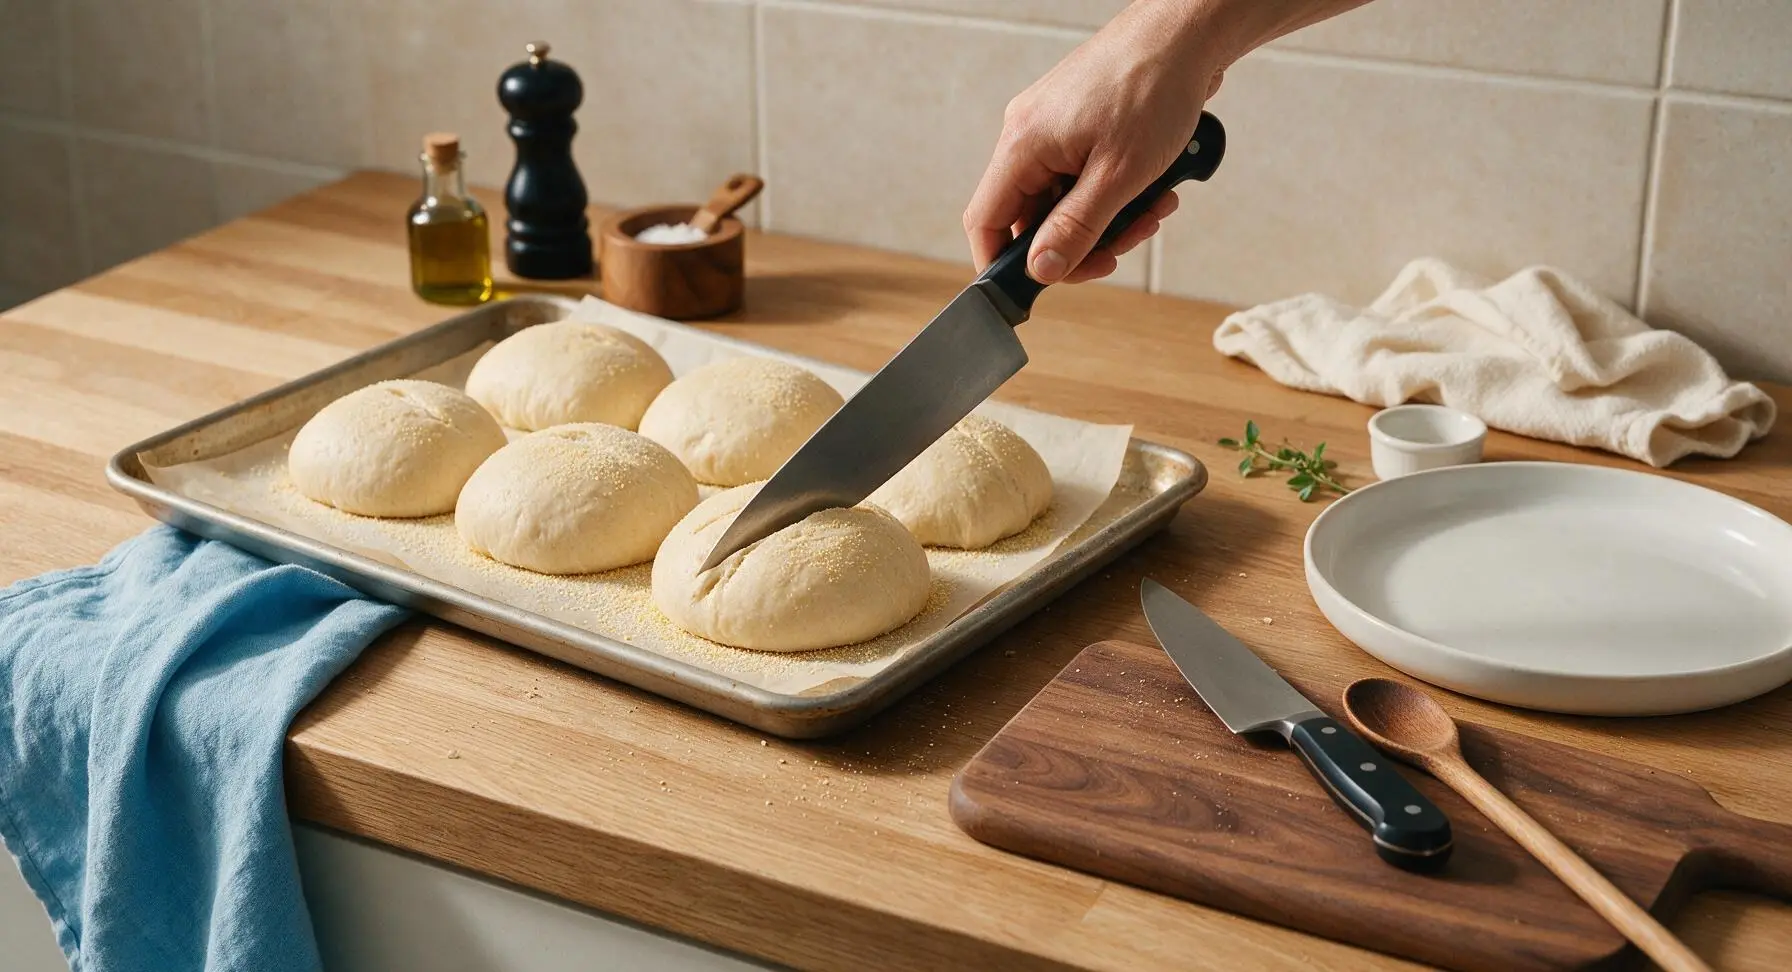
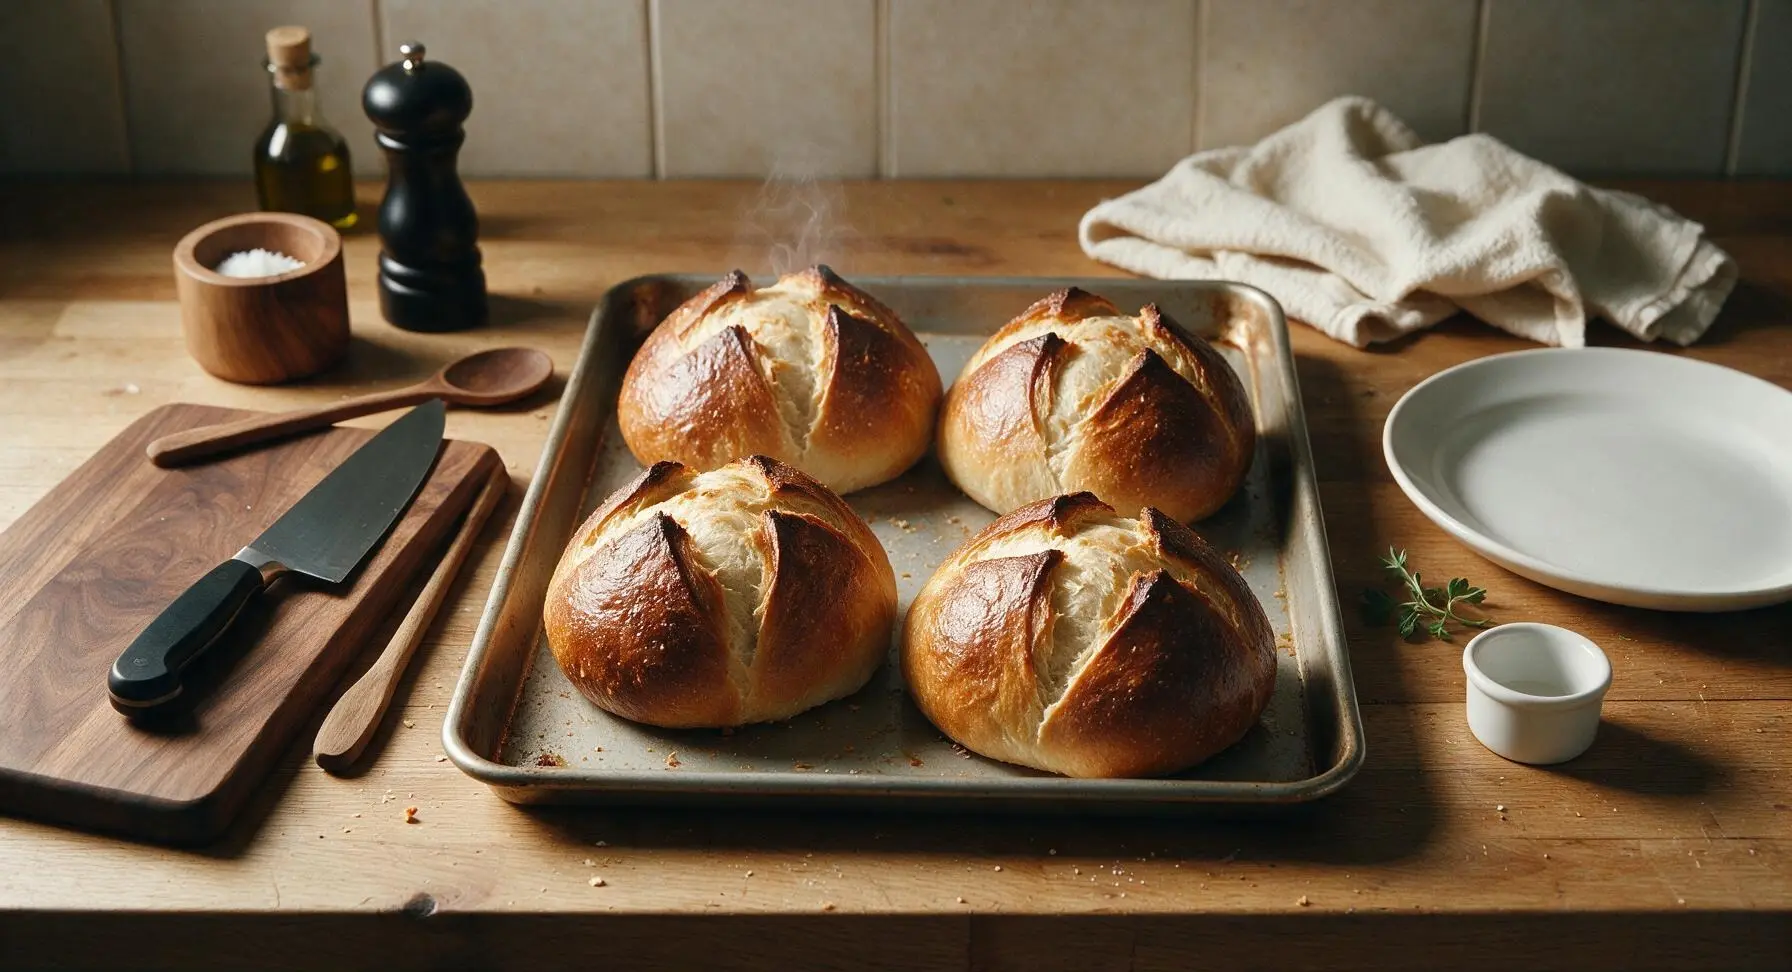
Step 6
step6:Score and Bake Rolls
Step 6
step6:Score and Bake Rolls
7

Cool Rolls Fully

Use the dough scraper to carefully transfer the hot baked rolls from the baking sheet to the chrome wire cooling rack positioned front center on the counter. Let cool completely for 30 minutes before slicing for roast beef sandwiches—cutting warm bread will compress the crumb and create a dense texture that gets soggy easily with juicy sandwich fillings. Once cool, transfer rolls to the matte cream ceramic serving platter for serving.
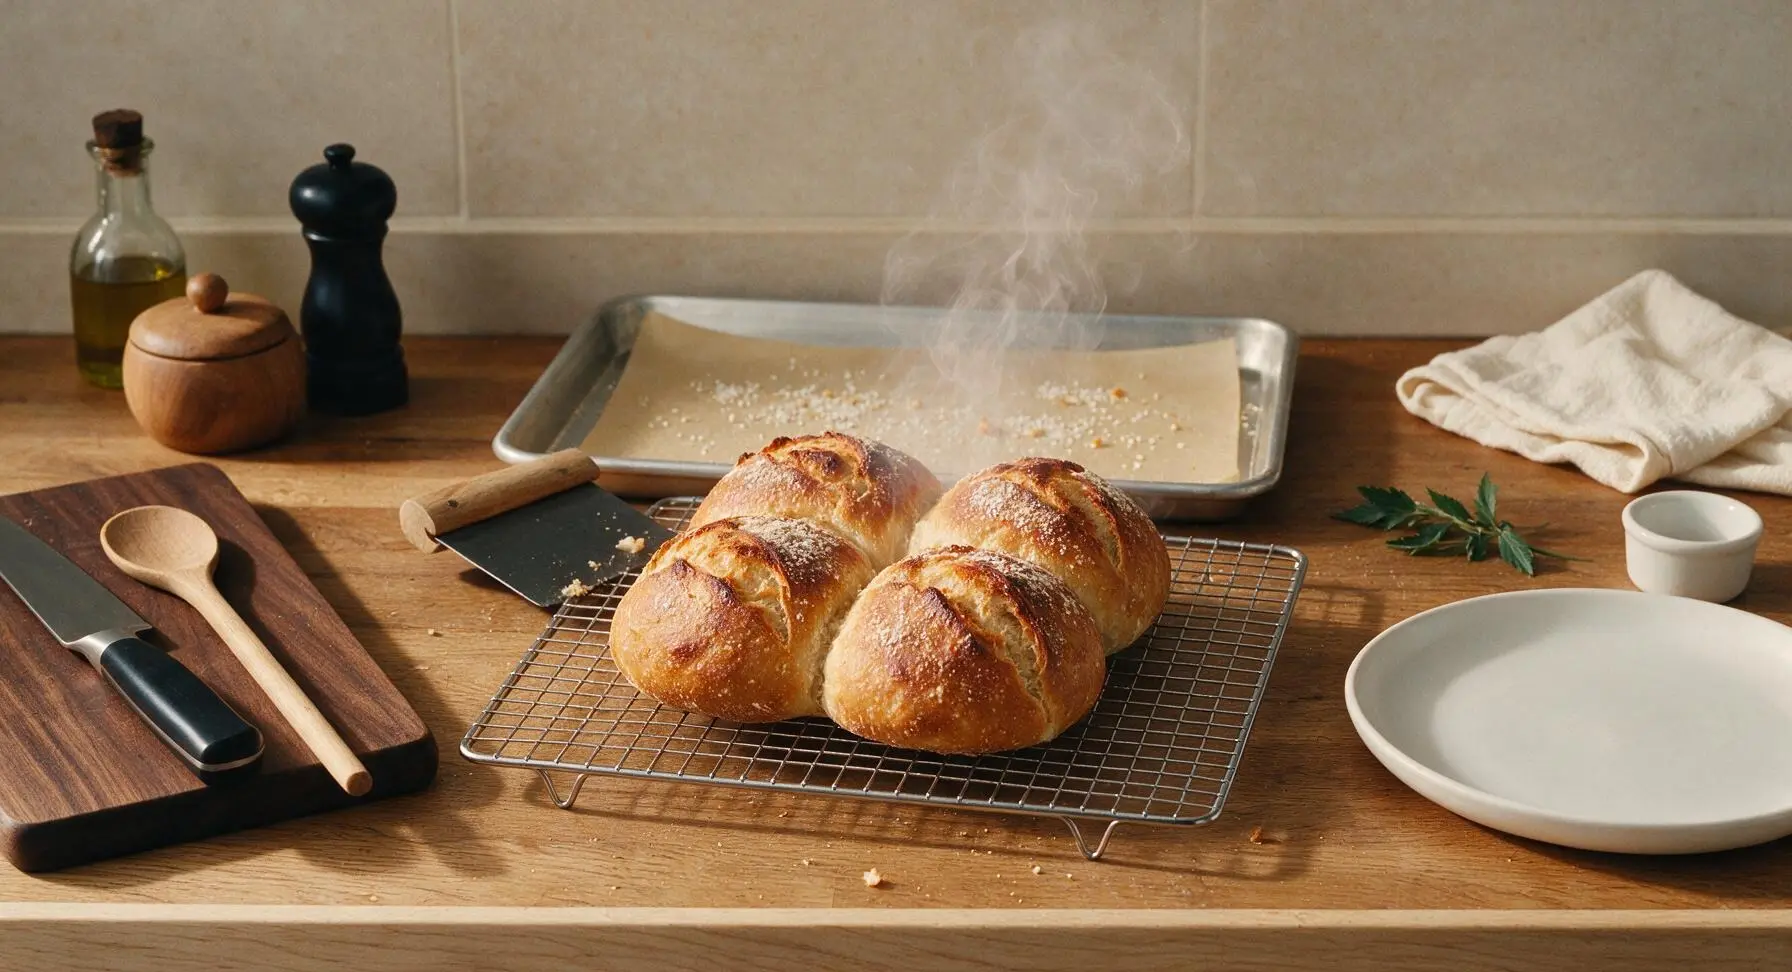
Step 7
step7:Cool Rolls Fully

Tips

1.Do not skip the steam pan when baking: pouring hot water into a preheated pan on the oven’s lower rack creates a burst of steam that keeps the dough surface soft for the first 10 minutes of baking, allowing maximum oven spring and creating a shatteringly crisp, chewy crust that resists sogginess from juicy roast beef and au jus.
2.Use high-protein bread flour (12-14% protein content) rather than all-purpose flour: the higher gluten content creates a strong, elastic crumb structure that holds up to heavy fillings like sliced roast beef, horseradish sauce, cheese, and caramelized onions without compressing or falling apart mid-bite.
3.Let rolls cool completely for 30 minutes before slicing and assembling sandwiches: cutting warm bread compresses the crumb, creating a dense texture that absorbs meat juices and condiments too quickly, leading to a soggy, disappointing sandwich.


✨ You May Also Like

Desserts & Baking
🍜 Italy

Creamy, coffee-kissed classic Northern Italian no-bake dessert, with layers of rum-spiked mascarpone cream, soft ladyfingers, and a rich cocoa dusting.

⏱️ 4 hours 3Desserts & Baking ★ 4.7
Desserts & Baking
🍜 France

Flaky, shatteringly crisp, buttery French croissants with golden exteriors and soft, airy layered interiors, perfect for pairing with coffee for a special morning treat.

⏱️ 12 hours Desserts & Baking ★ 4.5
Desserts & Baking
🍜 United States

Warm, spiced baked apples topped with a fluffy golden biscuit crust, this cozy dessert pairs perfectly with vanilla ice cream for cool-weather comfort.

⏱️ 55 minuteDesserts & Baking ★ 4.6
Desserts & Baking
🍜 United States

A star-spangled classic American blueberry pie with buttery flaky crust and bright sweet-tart filling, perfect for summer patriotic gatherings.

⏱️ 1 hour 25Desserts & Baking ★ 4.7
Desserts & Baking
🍜 United States

A beloved no-bake regional Maine candy with a chewy coconut-potato center coated in rich dark chocolate, a New England holiday staple since the 1870s.

⏱️ 2 hours 3Desserts & Baking ★ 4.8
Desserts & Baking
🍜 France

Luxuriously creamy, floral frozen custard made with aromatic Tahitian vanilla beans, boasting a smooth, rich texture that melts slowly on the tongue.

⏱️ 3 hours 3Desserts & Baking ★ 4.5

best bread for roast beef sandwich:Frequently Asked Questions

1.Why are these rolls better than regular store-bought dinner rolls for roast beef sandwiches? ▾
These rolls are formulated specifically for hearty, drippy fillings: they have a thick, crackly crust and chewy, tight crumb that stands up to juicy roast beef, creamy horseradish, and au jus without turning soggy or falling apart mid-bite. Most soft store-bought dinner rolls are too light and pillowy, turning mushy within minutes of adding fillings.
2.Why do you call for high-protein bread flour with 12-14% protein content? ▾
Higher protein content develops stronger gluten networks as you knead the dough, which creates that signature chewy texture and sturdy, dense-but-airy crumb that won’t collapse under heavy fillings. Lower-protein flours like all-purpose or pastry flour produce softer, floppier rolls that can’t hold up to au jus dips or piled-high roast beef.
3.Can I use all-purpose flour instead of high-protein bread flour if that’s all I have? ▾
You can, but you’ll need to boost the protein to get the right structure: add 2 tablespoons of vital wheat gluten per cup of all-purpose flour to hit a 12-13% protein level. Without that boost, your rolls will be softer, less crusty, and far more likely to turn soggy when loaded with roast beef, horseradish, and au jus.
4.Why use instant dry yeast instead of active dry yeast for this recipe? ▾
Instant dry yeast mixes straight into your dry ingredients with no pre-proofing step required, which cuts down prep time and delivers a more consistent, even rise for that perfect sturdy crumb. If you only have active dry yeast, just activate it in your warm water with a pinch of honey for 5 minutes until foamy before mixing, and it works just as well.
5.How warm should the filtered water be to get the best dough rise? ▾
Aim for water between 105–110°F, which feels like comfortably warm bath water to the touch. Water hotter than 120°F will kill your yeast, leading to dense, flat rolls, while too-cold water slows rise time dramatically, resulting in a tight, tough crumb. Skip heavily chlorinated tap water, too—it can inhibit yeast activity and throw off your rise.
6.What purpose does raw wildflower honey serve, and can I skip it entirely? ▾
The raw wildflower honey does double duty: it feeds the yeast to support a strong, even rise, and adds a subtle, bright floral sweetness that balances salty roast beef, sharp horseradish, and rich au jus. You can swap in regular raw honey if you don’t have wildflower, but don’t skip it entirely—it also helps the crust brown to that perfect golden crisp.
7.Why do you add extra-virgin olive oil to the dough? ▾
The small amount of extra-virgin olive oil in this recipe keeps the inner crumb tender without making it soft or pillowy, helps the crust crisp up beautifully in the oven, and adds a faint fruity depth that pairs perfectly with savory roast beef. Don’t add extra oil, though—too much will make rolls greasy and far less resistant to sogginess from juicy fillings.
8.How do I get that signature shatteringly crisp, crackly crust on these rolls? ▾
The secret is steam during the first 10 minutes of baking: preheat your oven, place a shallow metal pan on the lower rack while it preheats, then pour a cup of hot water into that pan right after you put the rolls in. The steam keeps the dough surface soft as it expands, then evaporates to leave that perfect, crusty exterior that stands up to au jus.
9.How sturdy are these rolls, really? Will they hold up to dipping in au jus? ▾
These rolls are specifically engineered to resist sogginess: the tight gluten structure and thick, crisp crust act as a natural barrier, so they’ll hold piled-high roast beef, slathered horseradish, and even quick au jus dips without turning mushy for 15–20 minutes after assembly. That’s 3–4 times longer than standard soft dinner rolls hold up to wet fillings.
10.How long do I need to let the dough rise for the best texture? ▾
Plan for a first rise of 1.5–2 hours in a warm, draft-free spot until the dough doubles in size, then shape your rolls and let them do a second 30–45 minute rise until puffy. Rushing the rise leads to dense, tough rolls, while over-rising makes dough collapse in the oven, creating a fragile crumb that can’t support heavy sandwich fillings.
11.Can I make these rolls ahead of time for a roast beef dinner or party? ▾
Absolutely! Bake the rolls fully, let them cool completely on a wire rack, then store in an airtight container at room temperature for up to 2 days, or freeze for up to 3 months. To bring back that fresh-baked crisp crust, pop them in a 375°F oven for 5 minutes right before serving, and they’ll taste like you baked them that morning.
12.What size should I shape the rolls to be ideal for roast beef sandwiches? ▾
Portion your dough into 4–5 ounce balls per roll, which bake up to roughly 4 inches across and 2.5 inches tall. That’s the perfect size to hold 4–5 ounces of sliced roast beef plus toppings, without the bread overwhelming the fillings. Be sure to pinch the seams tightly on the bottom of each roll so they hold their round shape as they rise.
13.Do I need to score the tops of the rolls before baking them? ▾
Yes, make a quick ¼-inch deep slash across the top of each roll right before baking. That gives the dough room to expand evenly in the oven without bursting at random seams, and creates that classic artisan roll look. Use a sharp serrated knife or bread lame for the cleanest cut, so you don’t accidentally deflate the puffy, risen dough.
14.Why is my crust coming out soft instead of crisp and chewy? ▾
Soft crust usually stems from one of three common missteps: skipping the steam during the first 10 minutes of baking, underbaking the rolls so excess moisture stays trapped in the crumb, or storing rolls in a sealed container while they’re still warm, which traps condensation. Always let rolls cool fully on a rack before storing to keep crust crisp.
15.Can I add seeds or other toppings to the rolls without ruining their structure? ▾
Definitely! Lightly brush the top of each shaped, risen roll with a little water right before baking, then sprinkle on sesame seeds, poppy seeds, flaky sea salt, or dried garlic and onion. Just keep toppings light—thick layers of cheese or heavy seed coatings will weigh down the crust, making it less crisp and more prone to sogginess with wet fillings.
16.How do I keep the cut side of the roll from getting soggy once I add fillings? ▾
For extra sogginess protection, toast the cut sides of fully cooled rolls on a dry skillet or under the broiler for 30–60 seconds before assembling your sandwiches. That quick toast creates a thin, crisp barrier that repels meat juices, horseradish cream, and au jus, so your sandwich stays intact from the first bite to the last with no mushy middle.
17.Are these rolls only good for roast beef sandwiches, or can I use them for other meals? ▾
While they’re perfectly formulated for roast beef and French dip sandwiches, they work beautifully for any hearty, drippy filling! Use them for meatball subs, pulled pork sandwiches, loaded turkey and gravy sliders, or even thick, stacked breakfast sandwiches. Their sturdy crumb and crisp crust stand up to any wet, savory filling without falling apart.

Comments (14)

2 days ago

OMG these rolls are a total game changer for our weekly Sunday roast beef nights! I’ve tried so many crusty roll recipes that either turn out rock hard or too soft and squishy to hold up to sliced roast, au jus dip, and horseradish sauce. These had the perfect shatteringly crisp crust and chewy, soft center that didn’t get soggy even after loading them up. My kids even ate them plain right out of the oven before I could assemble the sandwiches!

yesterday

Wait did you do the ice cube trick for the steam like the recipe says? I’m nervous I’ll mess that part up but I want that crust as good as yours!

yesterday

So glad these were a hit with your family, Liz! The steam from the ice cubes is key for that crispy crust – just make sure your oven is fully preheated before tossing them in, and you’ll get that perfect shatter every time.

1 week ago

Made these last night for a watch party with my buddies and they were SO good. I slathered them with a little garlic butter before baking and they smelled insane. Only tiny issue is mine were a little paler on top than the photo, but they still tasted amazing.

5 days ago

Great call adding the garlic butter, that sounds delicious! If you want a deeper golden top next time, try brushing them with a little egg wash right before they go in the oven, and make sure your oven rack is positioned in the upper third for the last 5 minutes of bake time.

3 days ago

Perfect for meal prep! I baked a double batch on Sunday, sliced them, and stuck them in the freezer. They toast up perfectly in 2 minutes straight from frozen, and they’re sturdy enough to pack with roast beef, cheese, and veggies for my work lunches all week. Saved me so much money instead of buying bakery rolls every week.

5 days ago

As someone who grew up on Italian beef sandwiches, I’m super picky about my crusty rolls. These have the exact right texture to hold up to dipped beef without turning to mush! I brought them to a neighborhood potluck last weekend and people were asking me for the recipe before they even finished their first bite.

3 days ago

Oh I brought these to my office potluck too! Someone thought I bought them from the fancy Italian bakery down the street, I felt so proud lol.

2 weeks ago

I’ve been baking bread for 40+ years and I was skeptical a medium-difficulty roll recipe could live up to the "best crusty rolls" name, color me impressed. The crumb structure is exactly what you want for a hearty sandwich, and the crust holds that crackle even a day after baking if you store them in a paper bag (pro tip, don’t put them in plastic!). Only note: I added a teaspoon of diastatic malt powder to the dough for extra depth, and it worked beautifully.

1 week ago

Wait diastatic malt powder? Where do you even buy that? I’m a total baking newbie, would the recipe still work without it?

1 week ago

Thanks so much for the kind words, Tom! That malt powder tip is fantastic for folks who have it on hand. For new bakers, the recipe works perfectly without any extra add-ins – you’ll still get that amazing crust and crumb without a special trip to the store.

yesterday

I’m a broke college student with basically zero fancy baking equipment, no stand mixer, just a big bowl and a cheap baking sheet. I was worried this would be too hard for me since it’s marked medium difficulty, but I followed the steps super carefully and they turned out! Way better than the sad grocery store rolls I usually buy for my roast beef sandwich meal preps. Only tiny hiccup was I cut the first rise short because I was running to class, so they were a little denser than the photos look, but they still tasted awesome.

2 hours ago

That makes us so happy to hear, Alex! This recipe is totally doable without fancy gear – all you really need is a little patience for the dough to rise, and you’re golden. Great job sticking with it!

2 hours ago

Made these for my son’s birthday cookout and they were the perfect vessel for slow-roasted beef, caramelized onions, and provolone. I even made a few mini versions for the kids and they devoured them. Will absolutely be adding this to my regular potluck rotation!

30 minutes ago

Wait, hold up, I made my first batch with all-purpose last week and they were chef’s kiss, but I have a giant bag of bread flour I need to use up. Has anyone swapped it in before? I don’t want it to mess up the crust texture when I make these for my husband’s birthday roast beef dinner this weekend!

5 minutes ago

I used bread flour for my last batch! It made the crumb a little chewier which I personally loved, crust was just as crispy as the original. You’ll be totally fine, happy birthday to your husband!

5 minutes ago

Okay, full transparency, I burn 90% of the things I bake, so I was fully expecting to mess these up. I followed the directions exactly, even set three timers so I wouldn’t overbake them, and HOLY COW they came out perfect. My wife said they’re better than the rolls we get at our favorite sandwich shop. 10/10, will make again even if I almost set off the smoke alarm when I tossed the ice cubes in the oven (oops, don’t lean in when you do that, y’all).

just now

This made our whole team laugh! So glad they turned out perfect for you, and thanks for the PSA about leaning in when adding the ice – steam burns are no joke!

just now

LMAO I did the exact same thing last week! Had a red mark on my forearm for two days, but the rolls were so good it was worth it.

1 week ago

These rolls are exactly what was missing from our weekly family Sunday dinners. I used to drive 20 minutes out of my way to pick up crusty rolls from the bakery across town, and now I can make them at home for a fraction of the cost. They have the perfect amount of chew, don’t get soggy when we dip them in au jus, and my grandkids keep begging for extra to take home after dinner.

2 hours ago

Made these to take on a weekend backpacking trip, packed with sliced roast beef, hard cheese, and pickles, and they held up perfectly for 3 days in my pack without getting squished or moldy. The crust didn’t even go soft! Way better than the tortillas or squishy sandwich bread I usually bring, they were the perfect trail lunch.

30 minutes ago

What a genius use for these rolls! We never would have thought to take them backpacking, but that makes total sense with how sturdy they are. Thanks for sharing that awesome tip!

1 week ago

I smoked a 4lb brisket last weekend and needed a solid roll to make sliced beef sandwiches for the crew that came over to watch the game. These rolls were the perfect match – sturdy enough to hold a pile of brisket, pickles, and BBQ sauce without falling apart, crust had that perfect crunch when you bit into it. 10/10, will be my go-to roll for every BBQ from now on.

5 days ago

Oh these would be amazing for brisket sandwiches! I’ve only used them for Italian beef so far, I need to make a batch for my next brisket smoke.

3 days ago

Wait I made these for pastrami sandwiches last week and they slapped. Perfect amount of crust to stand up to the fatty meat and mustard, zero sogginess.

2 weeks ago

Grew up going to Jewish delis in Brooklyn and I’m super particular about my sandwich rolls. These have the exact right crust-to-crumb ratio that I’ve been trying to replicate at home for years. I sprinkled a little coarse salt and caraway seed on top before baking and they tasted just like the rolls I used to get as a kid. Absolute home run of a recipe.

yesterday

Made these for my wife and I’s first at-home date night after we got married, paired with slow roasted beef, creamy horseradish, and roasted veggies. She said they were better than the fancy restaurant sandwiches we had on our honeymoon. I felt like a total pro baker even though I’d never made bread from scratch before. Only mishap was I forgot to score the tops before baking so they split a little weird, but they tasted perfect anyway.

yesterday

The lumpy/weird split tops are just homemade charm, I promise! I score my tops super shallow and they still split sometimes, but no one cares once they take a bite and taste how good they are. Sounds like the perfect date night!



