
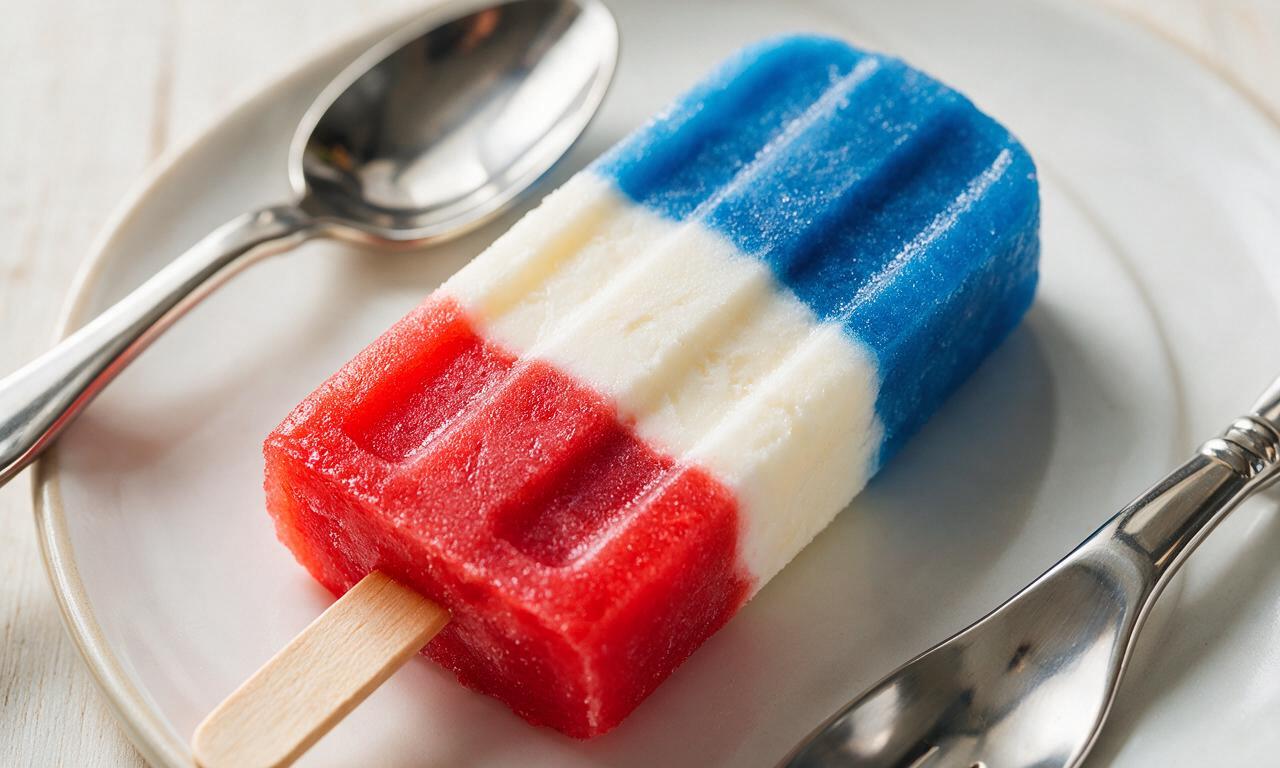
Bomb Pop

Bomb Pop
⏱️ cook time 6 hours 20 minutes (20 minutes active prep, 6 hours freezing time)
🍽️ servings 6
⚡ Difficulty easy

intro

Iconic tri-color frozen pops with bright cherry, creamy citrus, and sweet blue raspberry layers—a nostalgic, icy treat perfect for beating sweltering summer heat.

Ingredients

Unsweetened tart cherry juice 3/4 cup (180 ml)
Unsweetened blue raspberry fruit drink 3/4 cup (180 ml)
Unsweetened chilled lemonade 2/3 cup (150 ml)
Sweetened condensed milk 2 tbsp (30 ml)
Granulated white sugar 3 tbsp (38 g)

Steps

1

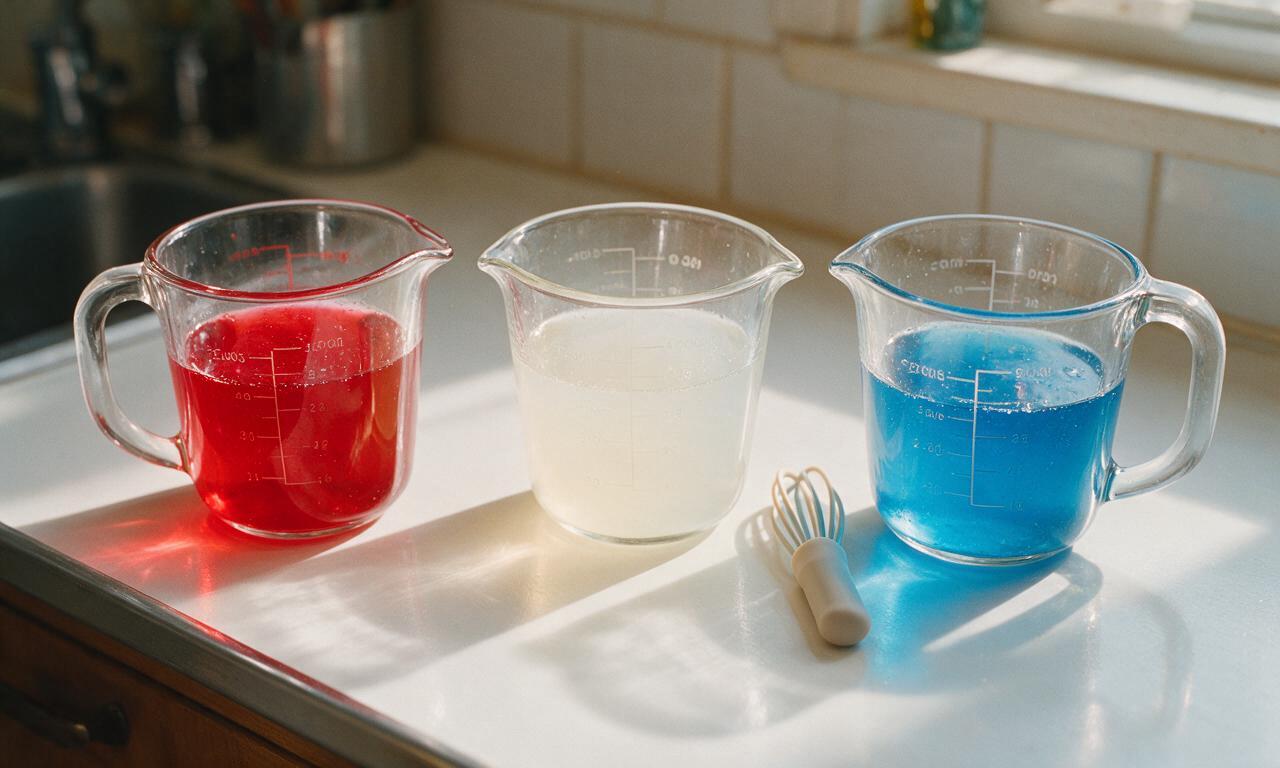
Mix three flavor bases

In three separate 1-cup (240ml) glass measuring cups, stir each flavor layer until fully combined and sugar is fully dissolved: 1) Red layer: 3/4 cup (180ml) unsweetened tart cherry juice mixed with 1.5 tbsp (19g) granulated sugar; 2) White layer: 2/3 cup (150ml) unsweetened chilled lemonade mixed with 2 tbsp (30ml) sweetened condensed milk to create a pale opaque white liquid (totaling 180ml / 3/4 cup); 3) Blue layer: 3/4 cup (180ml) unsweetened blue raspberry fruit drink mixed with 1.5 tbsp (19g) granulated sugar. Chill all three mixtures in the refrigerator for 10 minutes until they reach 40°F (4°C).
Step 1
step1:Mix three flavor bases
2

Pour red cherry layer

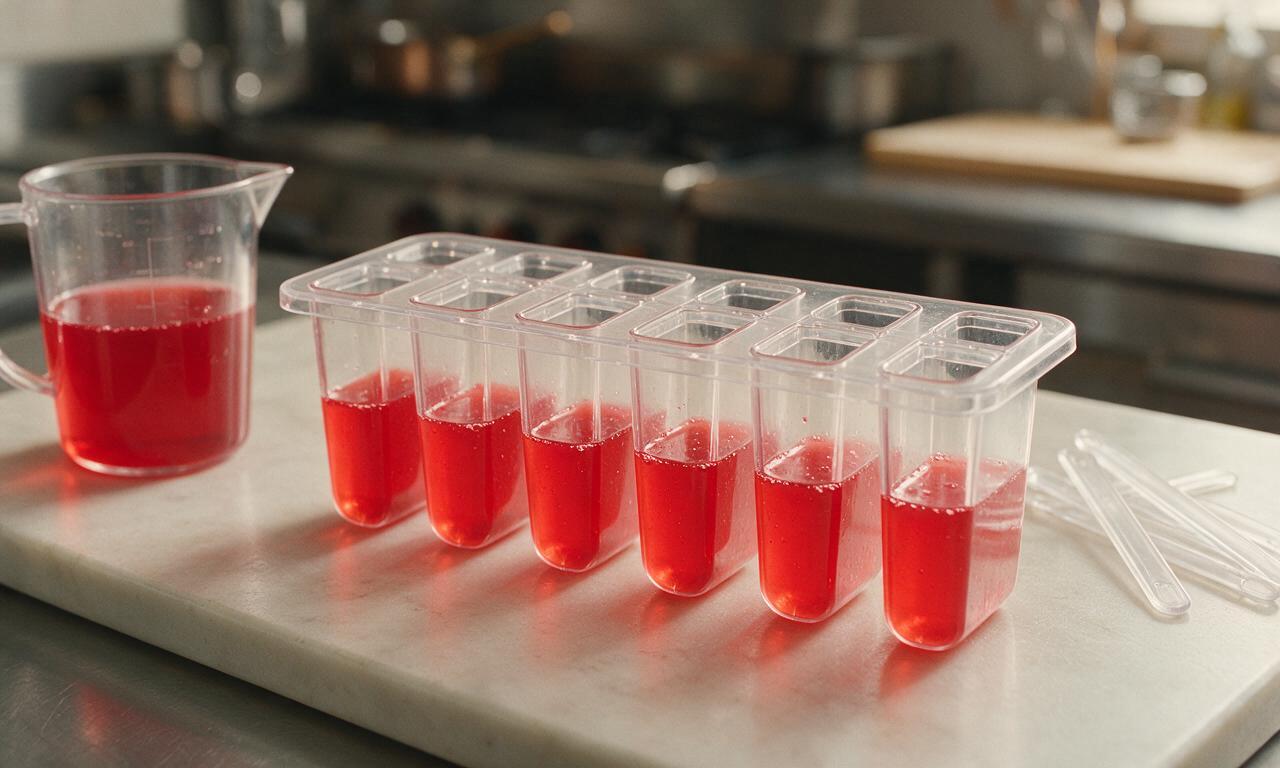
Set out a 6-cavity 3-oz popsicle mold (no lid or sticks yet). Pour 30ml (1 fl oz) of the chilled red cherry mixture evenly into each mold cavity, filling each exactly one-third of the way to the top. Tap the base of the mold firmly on the kitchen counter for 10 seconds to release any trapped air bubbles that could cause gaps in the frozen pop.
Step 2
step2:Pour red cherry layer
3

Partially freeze red layer

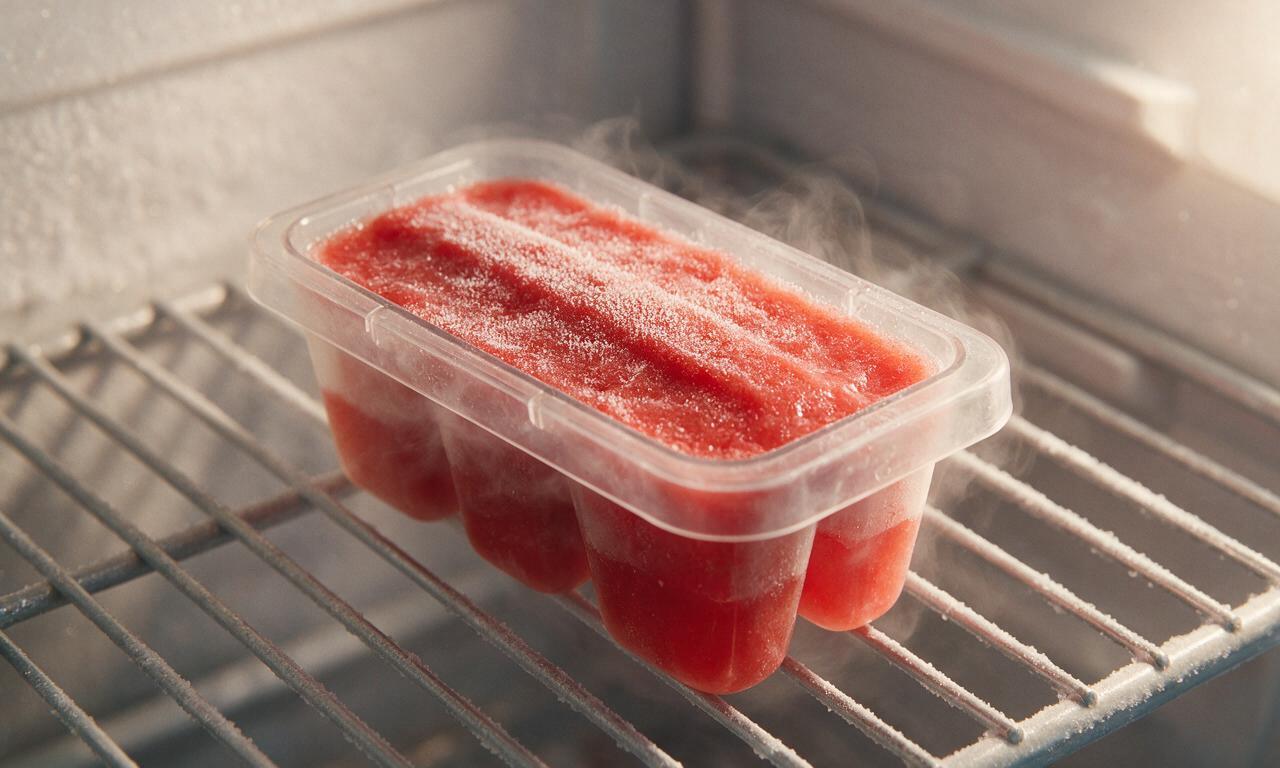
Place the uncovered popsicle mold on a level shelf in a freezer set to 0°F (-18°C) for 1 hour and 15 minutes, until the red layer is firm to a light touch but not completely rock-hard. This semi-firm state prevents the next layer from mixing in; do not insert popsicle sticks at this stage.
Step 3
step3:Partially freeze red layer
4

Add white citrus layer

Remove the mold from the freezer. Hold a small metal teaspoon just above the surface of the frozen red layer in each cavity, and slowly pour 30ml (1 fl oz) of the chilled white lemon mixture over the back of the spoon to fill each cavity to the two-thirds mark. Pouring over the spoon disperses the liquid gently so it does not dent or melt the frozen red layer. Tap the mold gently for 5 seconds to settle the white liquid.
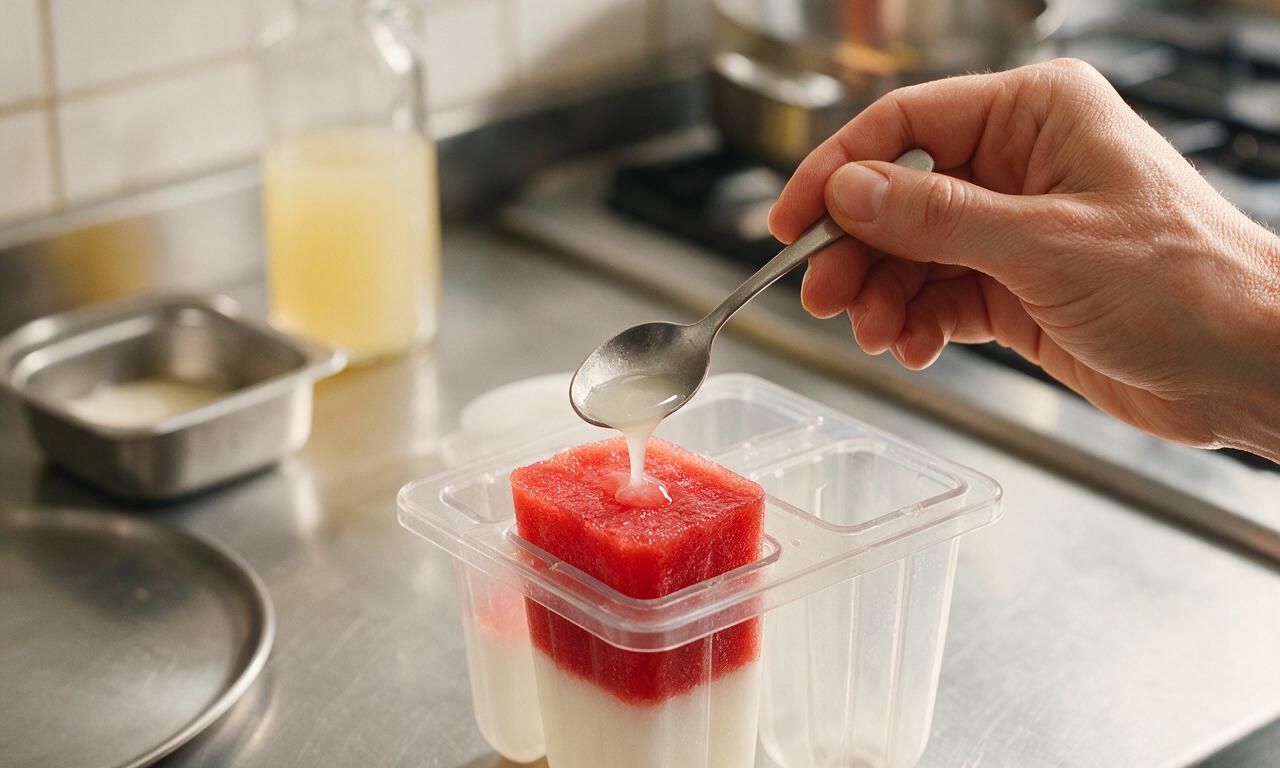
Step 4
step4:Add white citrus layer
5

Freeze white layer, add sticks

Return the uncovered mold to the 0°F (-18°C) freezer for 45 minutes, until the white layer is firm enough to hold a popsicle stick upright without it leaning. Insert one smooth wooden popsicle stick straight down into the center of each pop, pushing the tip until it rests just at the top of the frozen red layer.
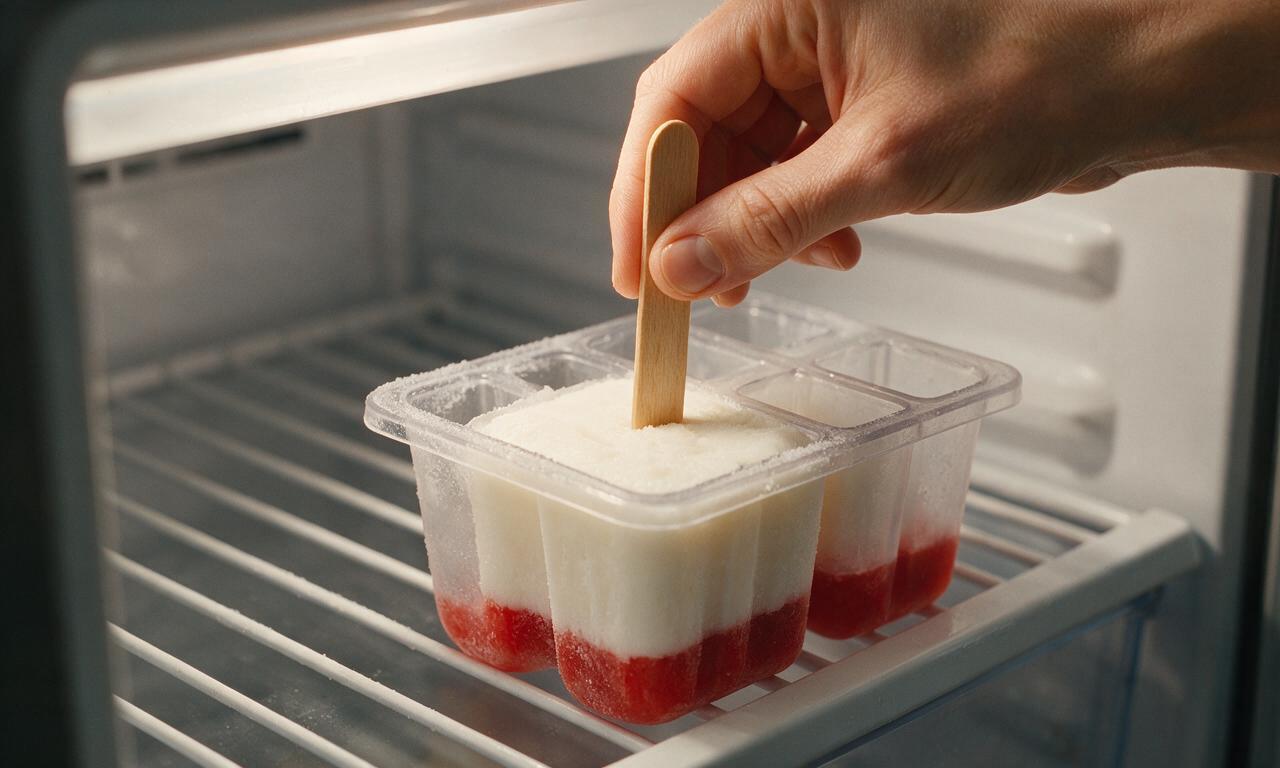
Step 5
step5:Freeze white layer, add sticks
6

Pour final blue layer

Remove the mold from the freezer. Again use the spoon-pour method to slowly add 30ml (1 fl oz) of chilled blue raspberry mixture to each cavity, filling each mold to the manufacturer’s marked fill line just below the rim. Do not overfill, as liquid expands by roughly 9% when frozen and can leak out of the mold.
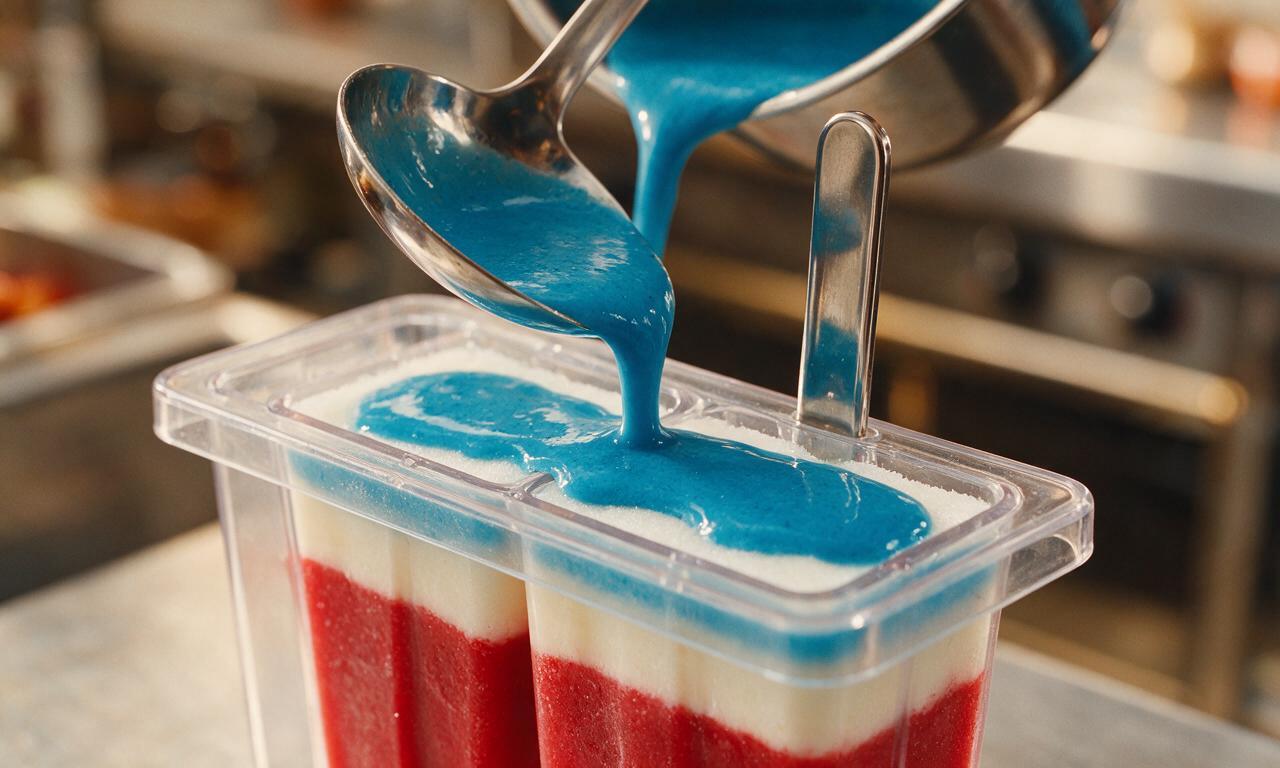
Step 6
step6:Pour final blue layer
7

Freeze pops until solid

Secure the popsicle mold lid in place to hold the sticks straight, then return the mold to the 0°F (-18°C) freezer for a final 4 hours, until all layers are completely frozen solid. Test for doneness by gently wiggling a stick: there should be no slushy movement in the pop.
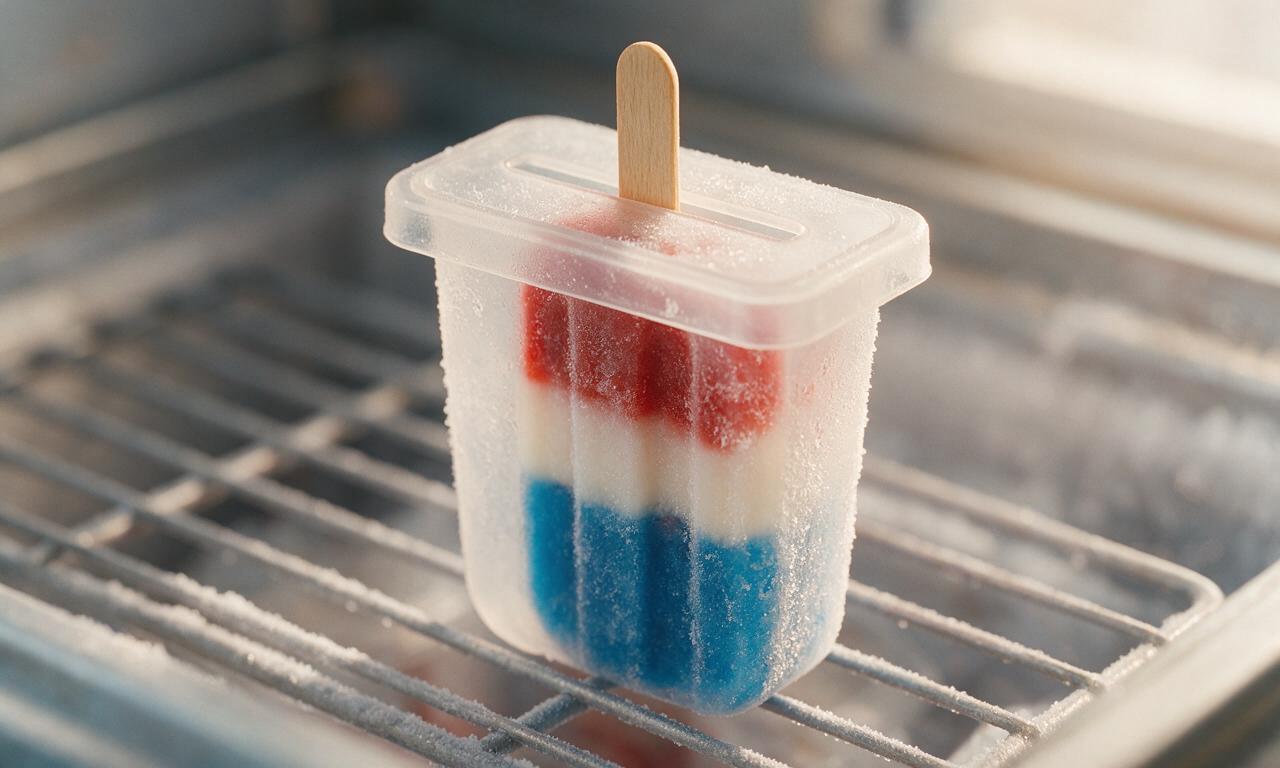
Step 7
step7:Freeze pops until solid
8

Unmold and serve immediately

When ready to serve, remove the mold lid. Hold the bottom 2 inches of the mold under warm (100°F / 38°C) running tap water for 15 to 20 seconds, taking care not to let water run over the top of the pops onto the frozen surface. Gently pull each pop straight out by its stick and serve right away.
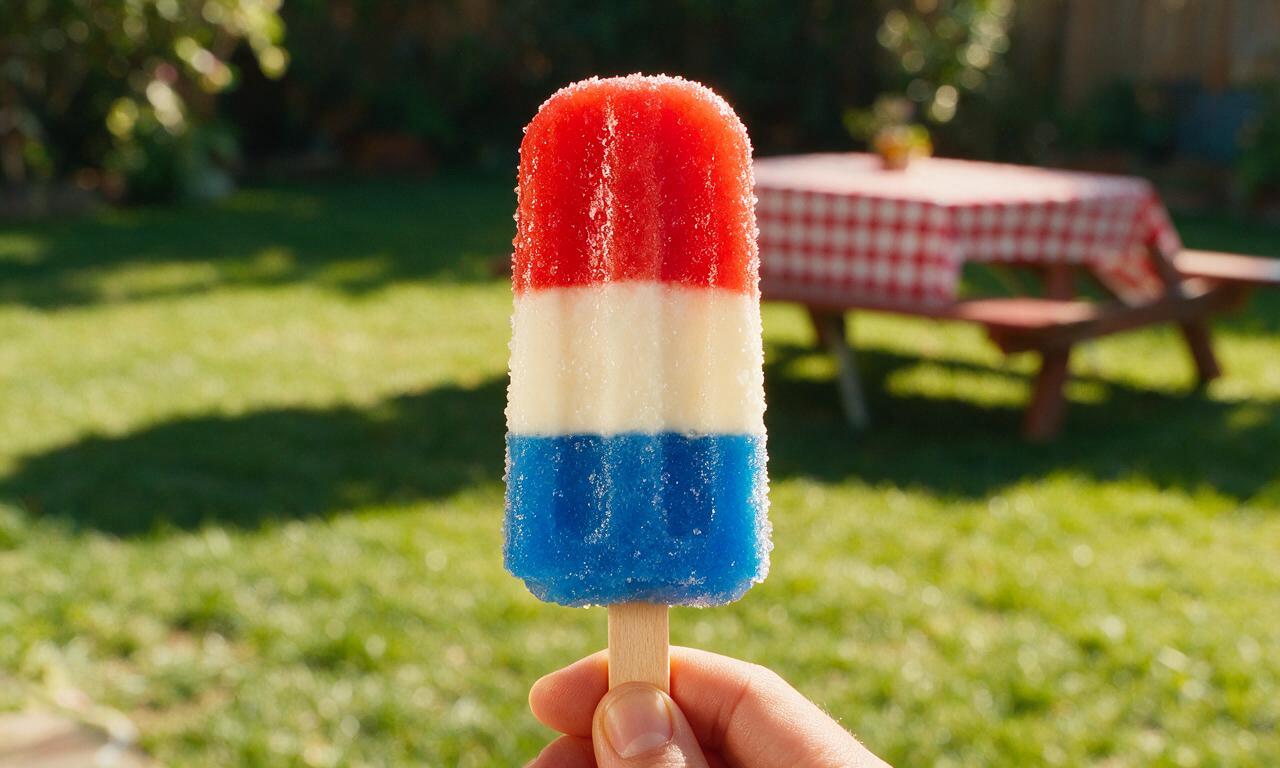
Step 8
step8:Unmold and serve immediately

Tips

1.Always chill your flavor mixtures to 40°F (4°C) before pouring onto partially frozen layers; warm liquid will melt existing layers and cause muddy, bleeding colors that ruin the iconic striped look.
2.Do not rush the partial freezing steps between layers: pouring all three flavors at once will result in mixed, uneven color bands instead of sharp, distinct red, white, and blue stripes.
3.If you don’t have a dedicated popsicle mold, use 3-oz disposable paper cups, cover the top tightly with aluminum foil after adding the final layer, and poke popsicle sticks through the foil to hold them upright as they freeze.


✨ You May Also Like

Desserts & Baking
🍜 Italy

Creamy, coffee-kissed classic Northern Italian no-bake dessert, with layers of rum-spiked mascarpone cream, soft ladyfingers, and a rich cocoa dusting.

⏱️ 4 hours 3Desserts & Baking ★ 4.8
Desserts & Baking
🍜 France

Flaky, shatteringly crisp, buttery French croissants with golden exteriors and soft, airy layered interiors, perfect for pairing with coffee for a special morning treat.

⏱️ 12 hours Desserts & Baking ★ 4.7
Desserts & Baking
🍜 United States

Warm, spiced baked apples topped with a fluffy golden biscuit crust, this cozy dessert pairs perfectly with vanilla ice cream for cool-weather comfort.

⏱️ 55 minuteDesserts & Baking ★ 4.7
Desserts & Baking
🍜 United States

A star-spangled classic American blueberry pie with buttery flaky crust and bright sweet-tart filling, perfect for summer patriotic gatherings.

⏱️ 1 hour 25Desserts & Baking ★ 4.8
Desserts & Baking
🍜 United States

A beloved no-bake regional Maine candy with a chewy coconut-potato center coated in rich dark chocolate, a New England holiday staple since the 1870s.

⏱️ 2 hours 3Desserts & Baking ★ 4.9
Desserts & Baking
🍜 France

Luxuriously creamy, floral frozen custard made with aromatic Tahitian vanilla beans, boasting a smooth, rich texture that melts slowly on the tongue.

⏱️ 3 hours 3Desserts & Baking ★ 4.6

Bomb Pop:Frequently Asked Questions

1.Do I need special molds to get that classic Bomb Pop shape?
You don’t need branded official Bomb Pop molds, though 3-oz rocket-style popsicle molds will nail that nostalgic tapered shape. If you don’t have specialty molds, 3-oz disposable paper cups and wooden popsicle sticks work perfectly—just snip the paper away once fully frozen to release pops cleanly without smudging layers.
2.Why do I need to freeze each layer separately instead of pouring all three at once?
Freezing each layer solid before adding the next is non-negotiable to get those crisp, distinct red, white, and blue bands with no bleeding. If you pour all layers at once, the liquids will mix into a muddled purple-pink mess, and you’ll lose that iconic tri-color look that makes these pops feel like the classic summer treat.
3.How long do I need to freeze each layer before adding the next one?
Plan for 60 to 75 minutes of freeze time per layer, depending on how cold your freezer runs. You’ll know a layer is ready when it’s firm to the touch and doesn’t shift if you nudge the mold gently. Don’t rush this step—soft layers will mix when you pour the next flavor on top, ruining those clean lines.
4.Can I use pre-sweetened juice instead of the unsweetened versions listed in the recipe?
You can, but you’ll want to cut back or skip the added granulated sugar entirely to avoid overly sweet pops that taste cloying instead of bright and fruity. Taste each mixed flavor base before pouring; it should taste slightly stronger than you want the final pop to be, since freezing mutes sweet and fruity flavors.
5.What gives the white layer that classic creamy, citrusy Bomb Pop flavor?
The white layer comes from mixing chilled unsweetened lemonade with sweetened condensed milk, which adds that rich, smooth, slightly tangy profile that balances the bright fruit layers. Stir them together gently right before pouring to avoid clumps, and make sure the lemonade is well-chilled so the condensed milk doesn’t seize up when mixed.
6.My layers keep bleeding into each other—what am I doing wrong?
Bleeding almost always happens when the lower layer isn’t fully frozen, or when you pour the next layer too fast and too warm. Let each layer freeze until completely firm, and pour new, chilled layers slowly over the back of a small spoon held just above the frozen layer to soften impact and prevent digging into the set pop below.
7.When do I add the popsicle sticks so they stay straight and centered?
Add the sticks after you pour and freeze the first two (red cherry and white citrus) layers, right before topping with the final blue raspberry layer. The semi-firm lower layers will hold the stick straight and centered without it sinking or tilting, so you won’t end up with loose sticks that pull out when you unmold.
8.How much granulated sugar do I add to each of the fruit layers?
Start with 2 tablespoons of granulated sugar per 1 cup of unsweetened fruit juice or drink, then taste and adjust. Remember that freezing dulls sweet and tart flavors, so the liquid base should taste slightly sweeter than you want the finished pop to be. Skip extra sugar if you prefer tarter, less candy-like pops.
9.Can I make these pops dairy-free for vegan or lactose-intolerant eaters?
Absolutely! Swap the regular sweetened condensed milk for a full-fat canned coconut sweetened condensed milk to keep the white layer creamy and rich without dairy. Just give it a good stir before mixing with the chilled lemonade, and make sure it’s well-chilled to keep layers firm when pouring.
10.How long do these homemade Bomb Pops need to freeze fully before they’re ready to eat?
After you add the final blue raspberry layer, let the pops freeze for a full 4 to 6 hours, or ideally overnight, to make sure they’re completely solid all the way through. Freezer temperatures can vary, so don’t pull them early if the center still feels soft when you gently wiggle the stick.
11.What’s the easiest way to get the pops out of the molds without them breaking?
Hold the outside of each mold cavity under warm (not boiling) running water for 10 to 15 seconds, then gently tug the stick to pull the pop straight out. Don’t use super hot water, as that will melt the outer layer too quickly and cause dripping or misshapen pops, and avoid twisting the stick, which can snap the pop off inside the mold.
12.Can I add real fruit chunks to these pops for extra texture?
You can, but add very small, finely chopped pieces of cherry or raspberry only to the matching fruit layers, dropping them in right after you pour each layer before it freezes. Skip large chunks, as they’ll get rock-hard and icy, and can break up clean layer lines if they sink between sections as the pop sets.
13.Why does my white layer look curdled when I mix it?
Curdling happens if your lemonade is too warm when you stir in the sweetened condensed milk, since the acid in warm lemonade can make the milk proteins seize up. Make sure your lemonade is fully chilled before mixing, and stir slowly and gently until smooth—if small lumps form, strain the mixture through a fine sieve before pouring.
14.How long will these homemade Bomb Pops stay good in the freezer?
Stored in an airtight freezer bag or tightly wrapped in plastic wrap to prevent freezer burn, these pops will stay fresh and flavorful for up to 6 weeks. After that, they’ll start to develop icy, off-flavors from freezer exposure, even if they’re kept at a consistent 0°F freezer temperature.
15.Can I use fresh-squeezed lemonade instead of store-bought unsweetened chilled lemonade for the white layer?
Definitely! Fresh-squeezed lemonade will give the white layer an even brighter, zippier citrus flavor that pairs perfectly with the sweet cherry and blue raspberry layers. Just make sure to strain out any pulp and chill it completely before mixing with the sweetened condensed milk to avoid curdling or lumps.
16.My pops are super hard and icy instead of having that classic slushy bite—what went wrong?
Icy, rock-hard texture usually happens when the sugar content is too low, or if pops partially thawed and refroze during storage. The granulated sugar lowers the freezing point to keep that perfect slushy-icy bite, so don’t skip it entirely. Store pops in the coldest part of your freezer away from the door to avoid temperature swings that cause large ice crystals.
17.Is there a way to make a boozy version of these pops for adult summer gatherings?
You can absolutely spike these for adult summer parties, but add no more than 1 ounce of clear spirit (like vodka or white rum) per full batch of pop base, split evenly across the fruit layers. Too much alcohol lowers the freeze point too much, leaving you with a slushy, drippy mess that won’t hold its iconic tri-color shape.

Comments (9)

3 days ago

OMG these taste EXACTLY like the bomb pops I used to chase down the ice cream truck for as a kid! I made them for my Fourth of July cookout last weekend and every single guest was asking for the recipe. So easy to throw together too, I was worried the layers would be a hassle but it was totally straightforward. 10/10 will be making these all summer long!

2 days ago

Did you have to wait super long for each layer to set before pouring the next one? I’m worried I’ll mess up the layers and they’ll all mix together!

2 days ago

Great question! You only need to let each layer freeze for about 45-60 minutes until it’s firm to the touch before adding the next, that way they won’t bleed together. No need to wait the full freeze time between layers 😊

2 days ago

Tried these with my 7 and 9 year old last night as a fun summer activity, and they went crazy for them! Loved that the ingredient list was super simple, no weird additives or fancy syrups I had to track down at the specialty grocery store. We even added a little pop of sour candy to a few of them for a fun twist, chef’s kiss.

yesterday

Love the sour candy twist idea! That sounds like such a fun custom add-in, I’ll have to test that version for my next batch. So glad you and the kids had a good time making them!

1 week ago

Game changer for pool days! I keep a batch of these in my deep freezer at all times now, they’re the perfect cool down when it’s 100+ degrees out. Way better than the store bought ones too, I can control how much sugar goes in so I don’t feel guilty giving one to my toddler every now and then. SO good.

5 days ago

Wait, I was today years old when I realized how easy homemade bomb pops are? I always thought you needed fancy popsicle molds or something, but I just used the cheap disposable molds I grabbed at the dollar store and they turned out perfect. Only note: don’t fill them all the way to the top, they expand a little when they freeze! Learned that the hard way when I had blue sticky mess all over my freezer shelf lmao.

3 days ago

Oh my god thank you for the heads up about not filling to the top! I almost did that last night when I prepped my first batch, you just saved me from a huge freezer mess. Appreciate you!

1 week ago

Great low-sugar swap option! I swapped the regular lemonade for zero-sugar lemonade and used sugar-free cherry and blue raspberry drink mix, and you literally can’t tell the difference. Perfect for when I’m craving a nostalgic treat but don’t want the sugar crash later. Will absolutely make again!

5 days ago

Wait does the zero-sugar version get the same icy texture? I tried sugar-free pops before and they got super weird and crumbly, would love to know before I buy ingredients!

3 days ago

I had that same issue the first time I tried sugar-free pops! I added a tiny splash of light corn syrup like the recipe mentions in the pro tips, and they came out perfectly smooth, no crumbliness at all!

2 weeks ago

Made these for my grandkids when they were visiting over the long weekend, and they said they were better than the ones from the ice cream truck! Brought back so many memories of eating these after little league games in the 90s. Super easy recipe, no fancy steps, even a guy like me who barely cooks could pull it off no problem.

1 week ago

Right?! That exact little league post-game memory is what made me click on this recipe! Nothing hits like that classic cherry-lemon-blue raspberry flavor, no fancy artisanal popsicle can compare.

yesterday

So happy this recipe is naturally gluten free! I brought these to our neighborhood block party and all the kids (and adults!) with gluten allergies were so excited to have a treat they could eat without asking a million questions. The layers looked so pretty too, they were the first thing gone from the dessert table.

30 minutes ago

That makes me so happy to hear! I love developing recipes that work for as many dietary needs as possible, and I’m thrilled these were a hit at your block party. Thanks for sharing!

5 minutes ago

Wait these are so cheap to make? I’m a broke college student living in a dorm with a tiny mini fridge freezer, and I was able to make a whole batch for like $5 worth of ingredients. My roommates are obsessed, we’ve already made two batches this month for our late night study sessions. 10/10, no notes.

just now

Threw a batch of these in our cooler for our weekend camping trip, and they were the perfect treat after a long hike! They stayed frozen in the cooler for hours even when it was 85 degrees out, no drippy mess all over the kids’ hands like regular ice cream. Will be a staple on all our summer trips from now on.



