
boneless chicken thigh recipes air fryer

title 1
boneless chicken thigh recipes air fryer
⏱️ cook time 18 minutes
🍽️ servings 4
⚡ Difficulty easy

intro

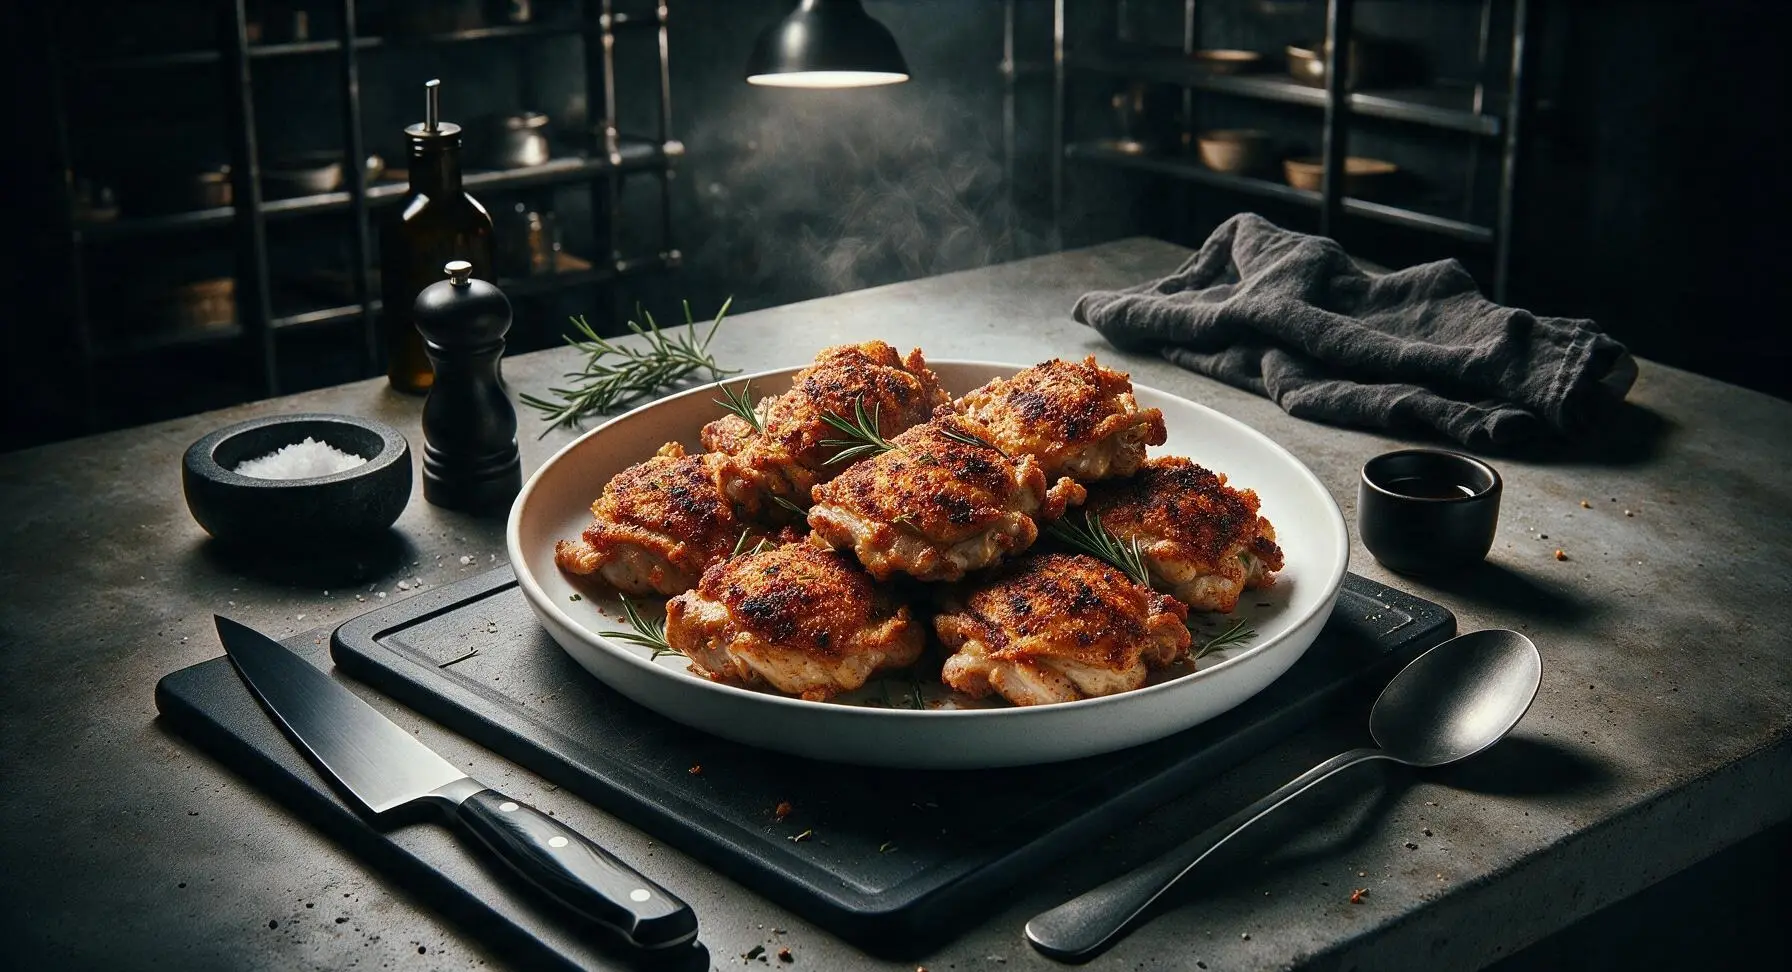
Juicy, shatteringly crisp boneless skin-on chicken thighs coated in smoky garlic-paprika rub, cooked fast in the air fryer for a no-fuss, flavor-packed weeknight main.

Ingredients
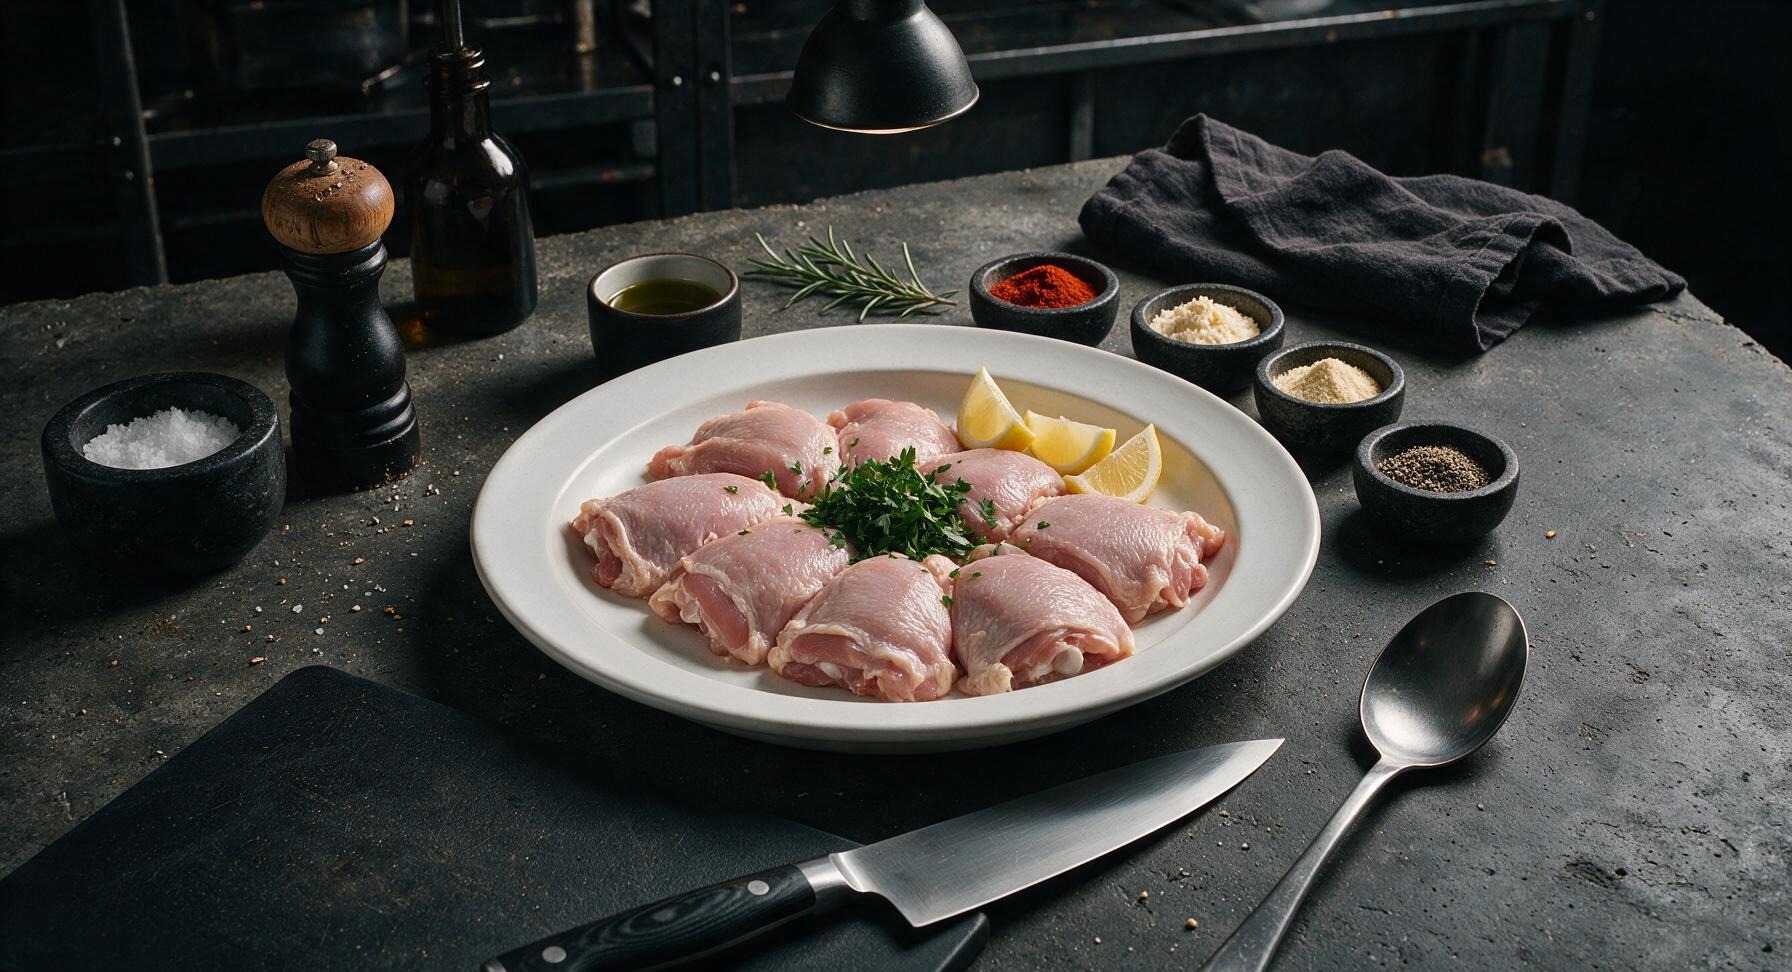
Boneless skin-on chicken thighs (trimmed of excess fat) 680g (about 8 pieces)
Smoked paprika 1 tbsp
Garlic powder 1 tsp
Onion powder 1 tsp
Freshly ground black pepper 1/2 tsp
Kosher salt 1 tsp
Extra-virgin olive oil 1 tbsp
Fresh flat-leaf parsley (chopped, for garnish) 2 tbsp
Fresh lemon (cut into wedges, for serving) 1 small

Steps

1

Pat Chicken Dry

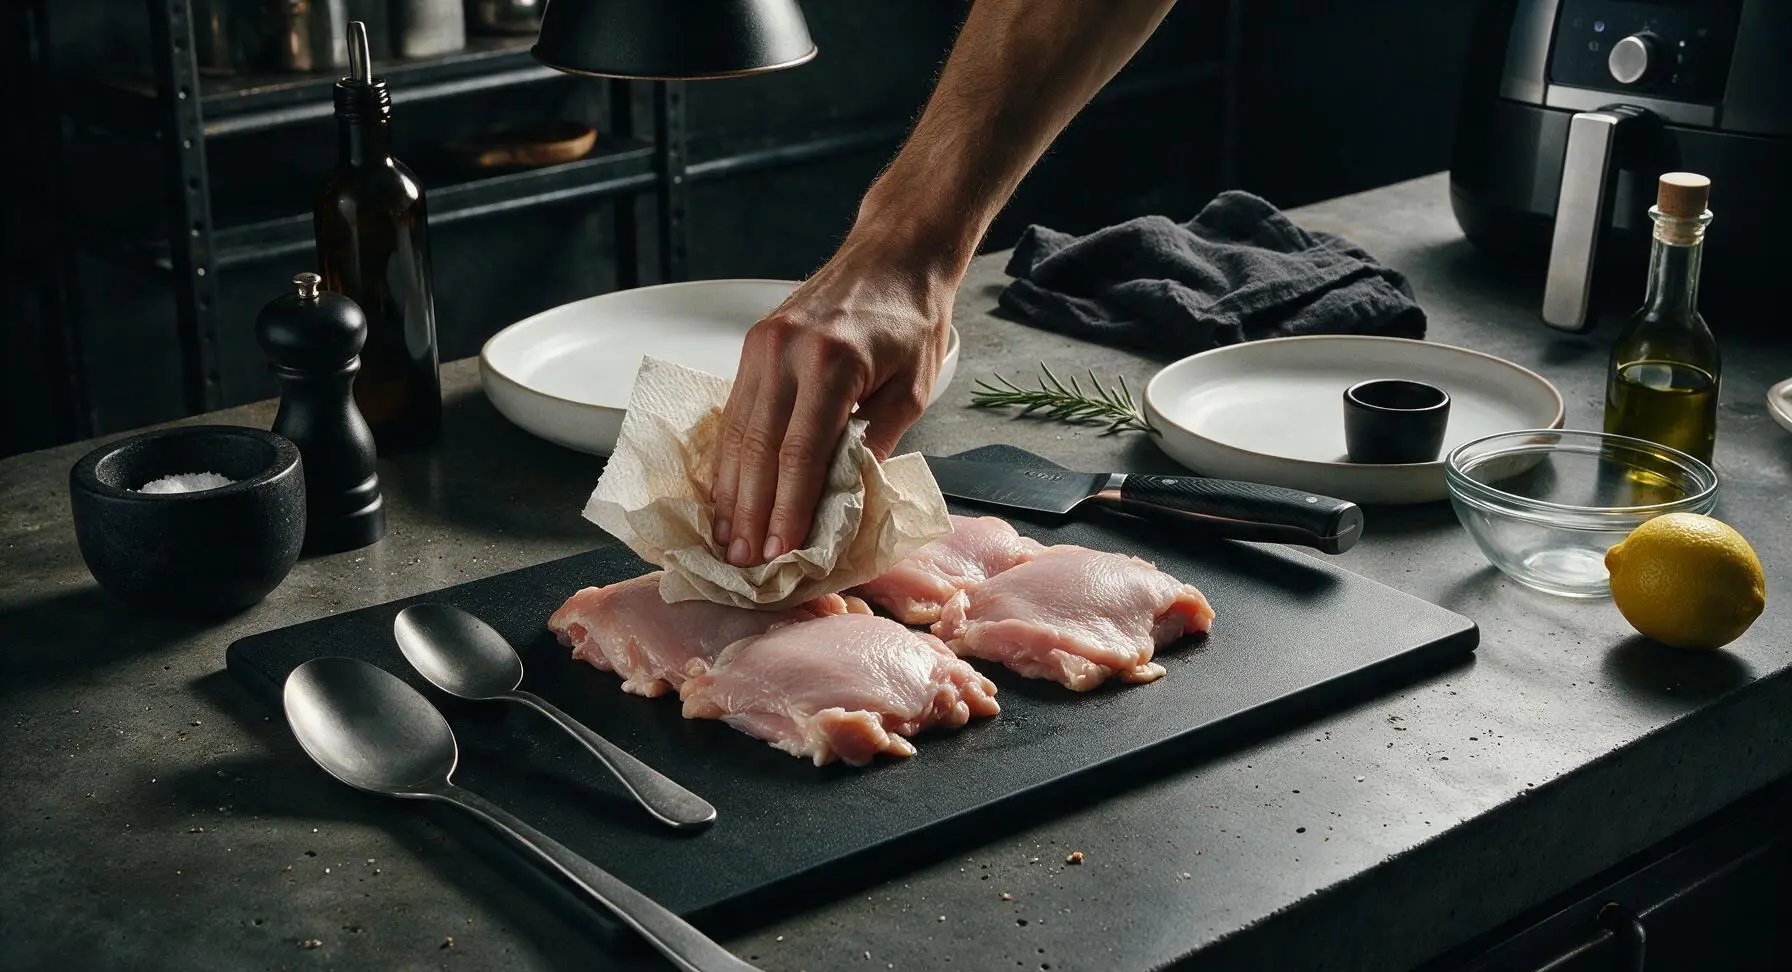
Remove the 8 boneless skin-on chicken thighs from packaging, and place them on the honey-toned bamboo cutting board. Use the crumpled unbleached paper towel to firmly pat every surface of the chicken (especially the skin side) completely dry. Trim any large, loose pieces of excess fat or hanging skin with the chef knife as you go. The chicken is ready when it feels matte and dry to the touch, with no visible surface moisture; dry skin is critical for achieving crisp, non-rubbery results in the air fryer.
Step 1
step1:Pat Chicken Dry
2

Mix Spice Rub

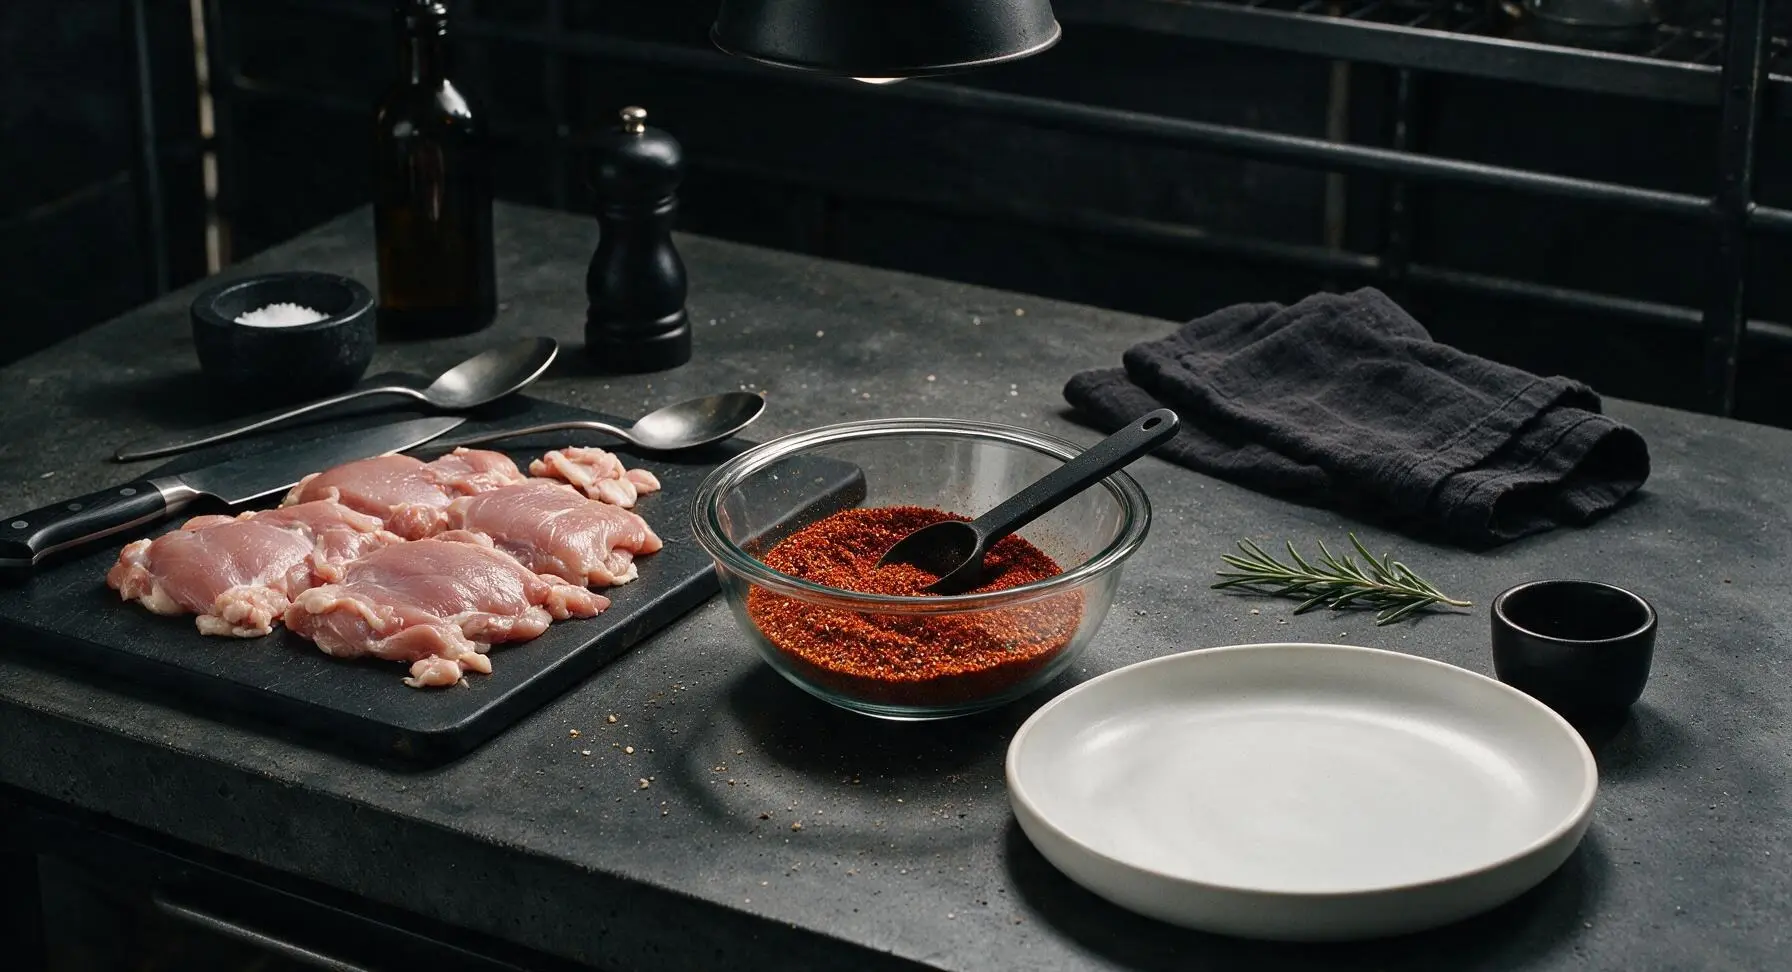
In the 12cm clear glass mixing bowl, combine 1 tablespoon smoked paprika, 1 teaspoon garlic powder, 1 teaspoon onion powder, 1 teaspoon kosher salt, and 1/2 teaspoon freshly ground black pepper. Stir the spices together with the smallest matte black measuring spoon until fully blended, with no clumps of paprika remaining. The finished rub will be a deep rust-red color with evenly distributed light and dark spice flecks.
Step 2
step2:Mix Spice Rub
3

Coat Chicken in Oil

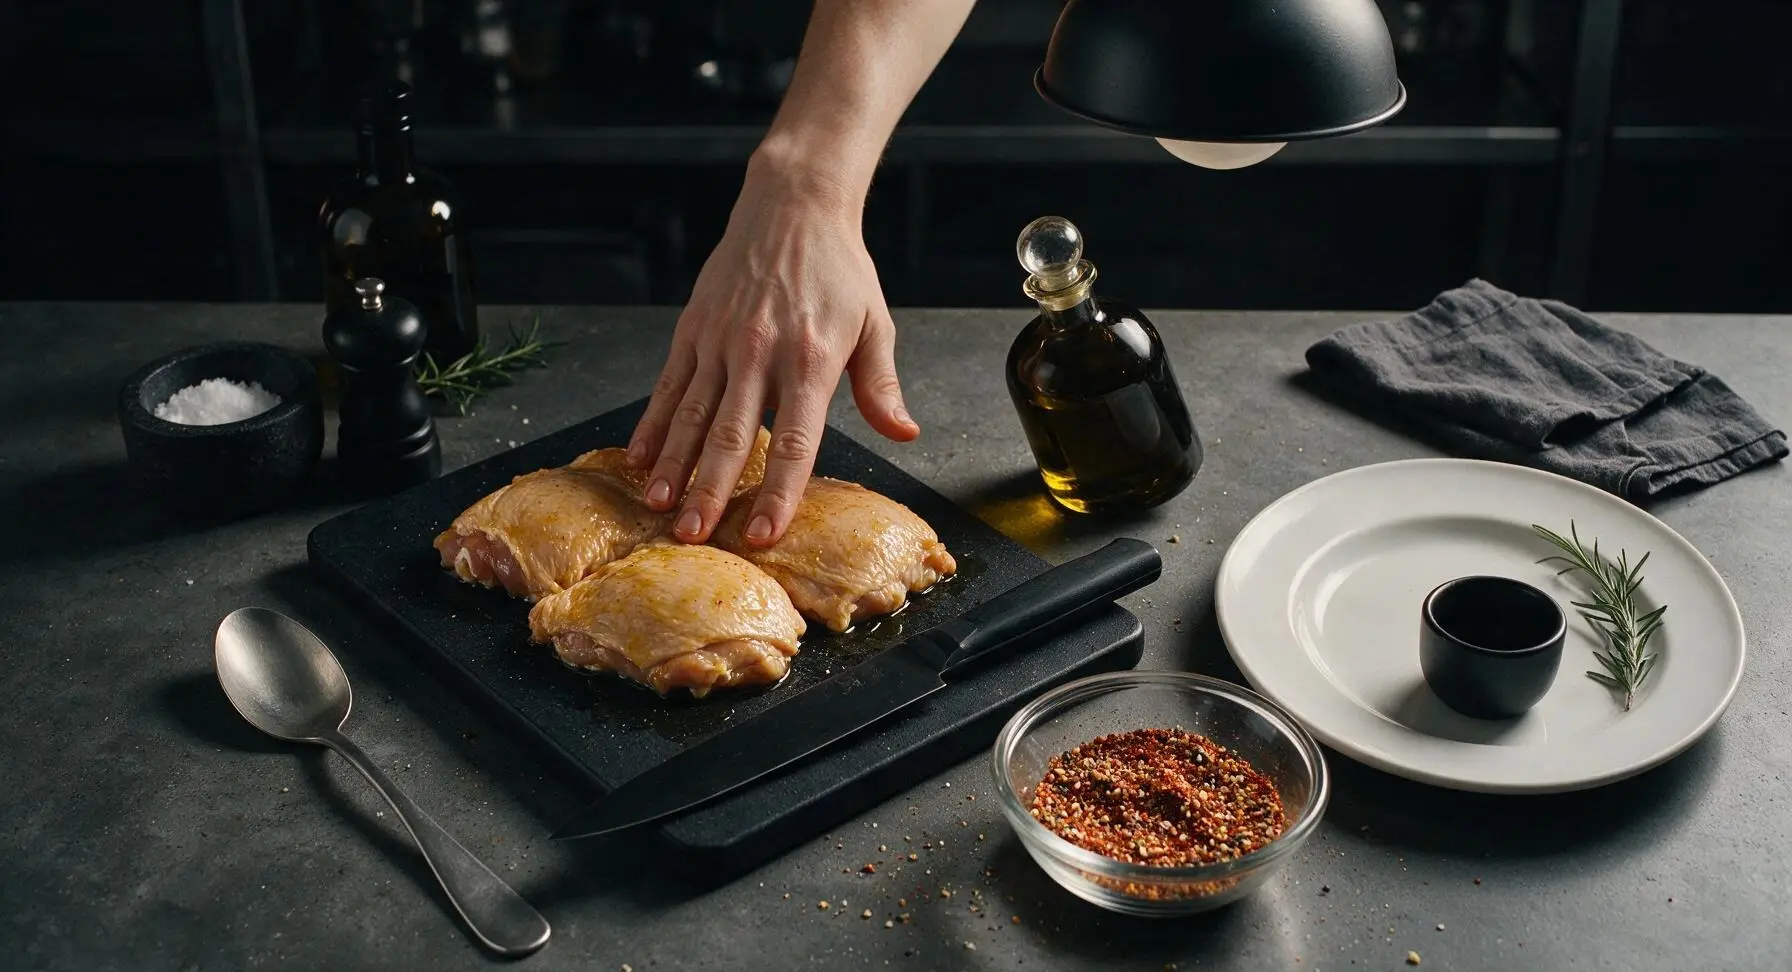
Drizzle 1 tablespoon of extra-virgin olive oil evenly over all sides of the dried chicken thighs on the cutting board. Use clean hands to rub the oil into every surface of the chicken, including slightly under the edge of the skin where it meets the meat, to help the spice rub adhere and encourage even crisping. The chicken will have a thin, glossy sheen across the skin, with no pools of excess oil left on the cutting board.
Step 3
step3:Coat Chicken in Oil
4

Apply Spice Rub

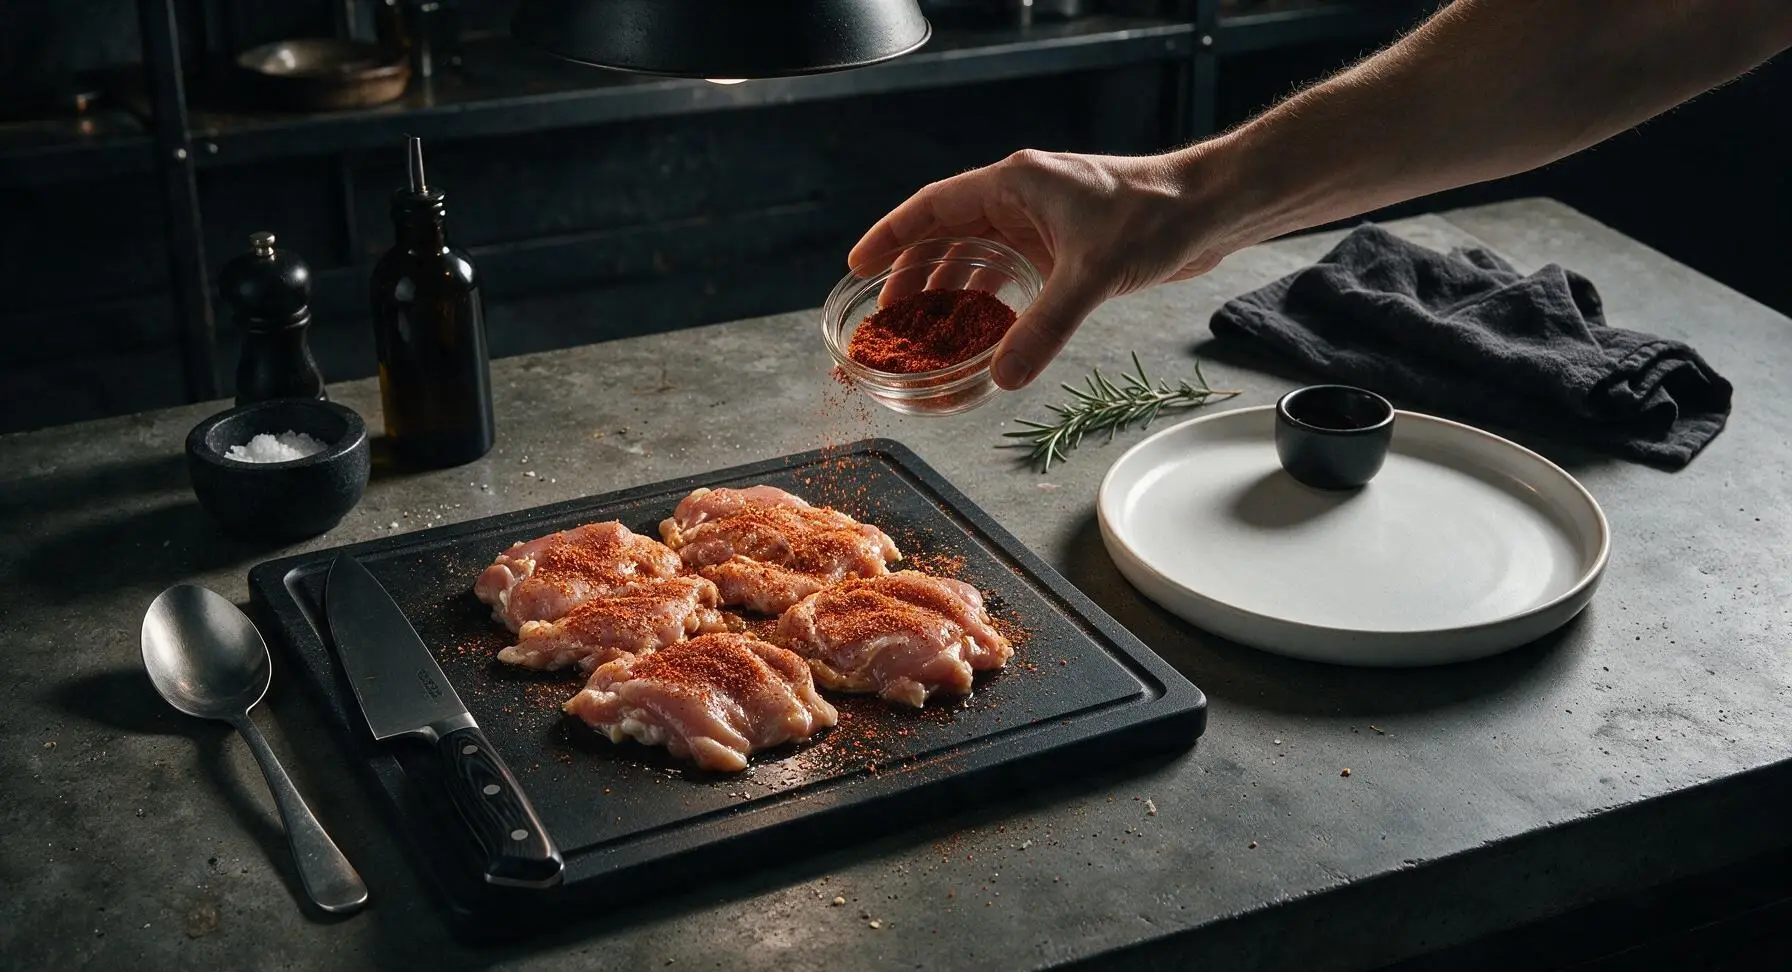
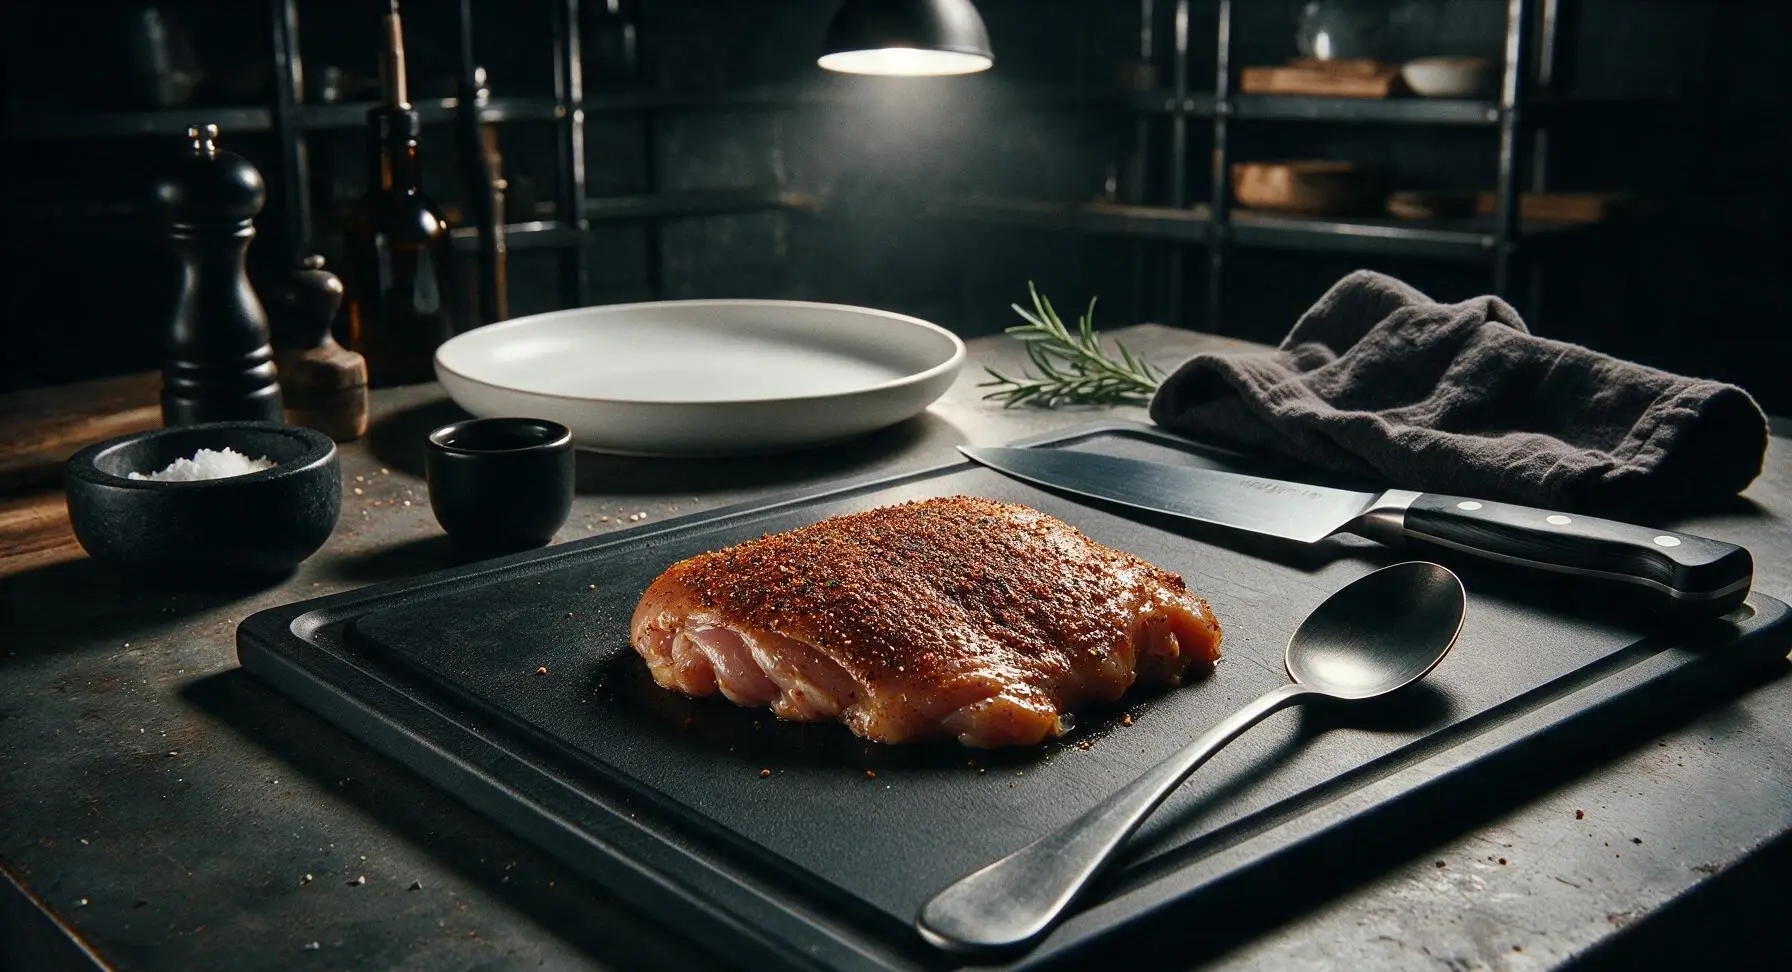
Sprinkle the blended spice rub evenly over every surface of the oiled chicken thighs, including the meat side and under the loose edge of the skin. Use your fingers to press the rub firmly into the chicken so it adheres, rather than falling off during cooking. Every piece of chicken should be evenly coated in the red spice blend, with no large bare patches of skin or meat visible.
Step 4
step4:Apply Spice Rub
Step 4
step4:Apply Spice Rub
5

Arrange in Air Fryer

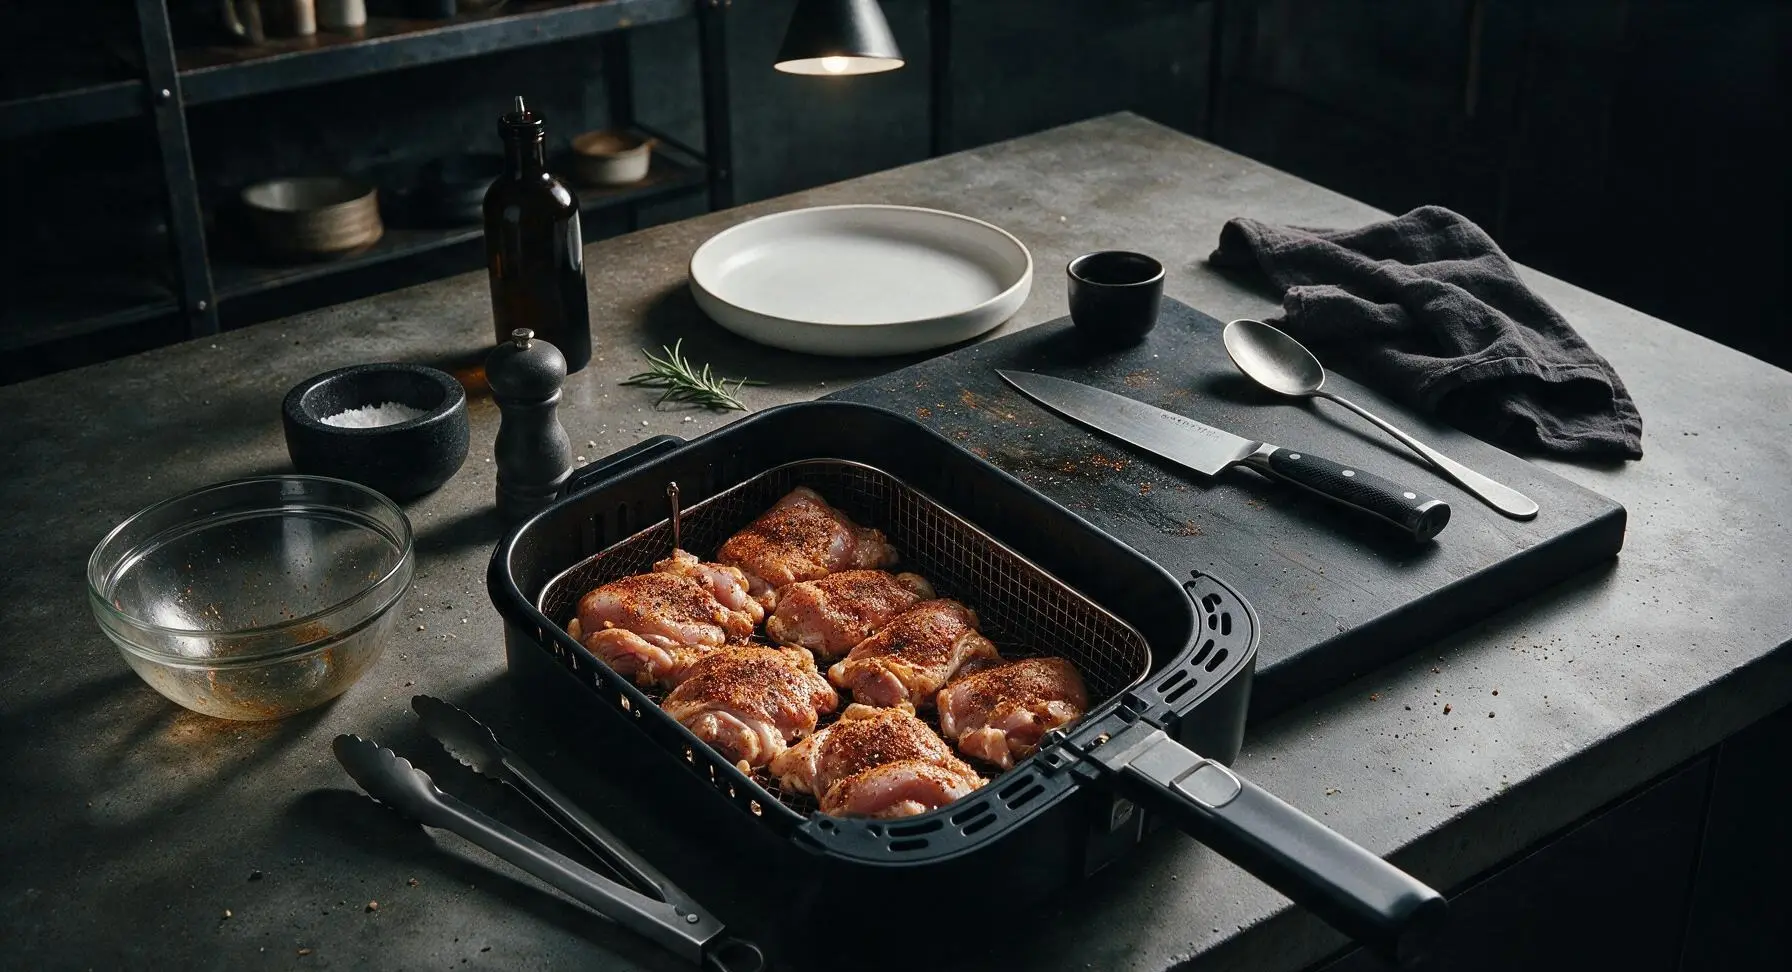
Use the stainless steel tongs to transfer the seasoned chicken thighs to the air fryer basket, pulling the basket out from the unit first. Arrange the thighs in a single layer, skin-side up, leaving 1/4 inch of space between each piece to allow hot air to circulate. Do not stack the thighs, as this will cause steaming instead of crisping. No oil or parchment paper is needed in the basket, as the oil on the chicken and rendered fat will prevent sticking.
Step 5
step5:Arrange in Air Fryer
6

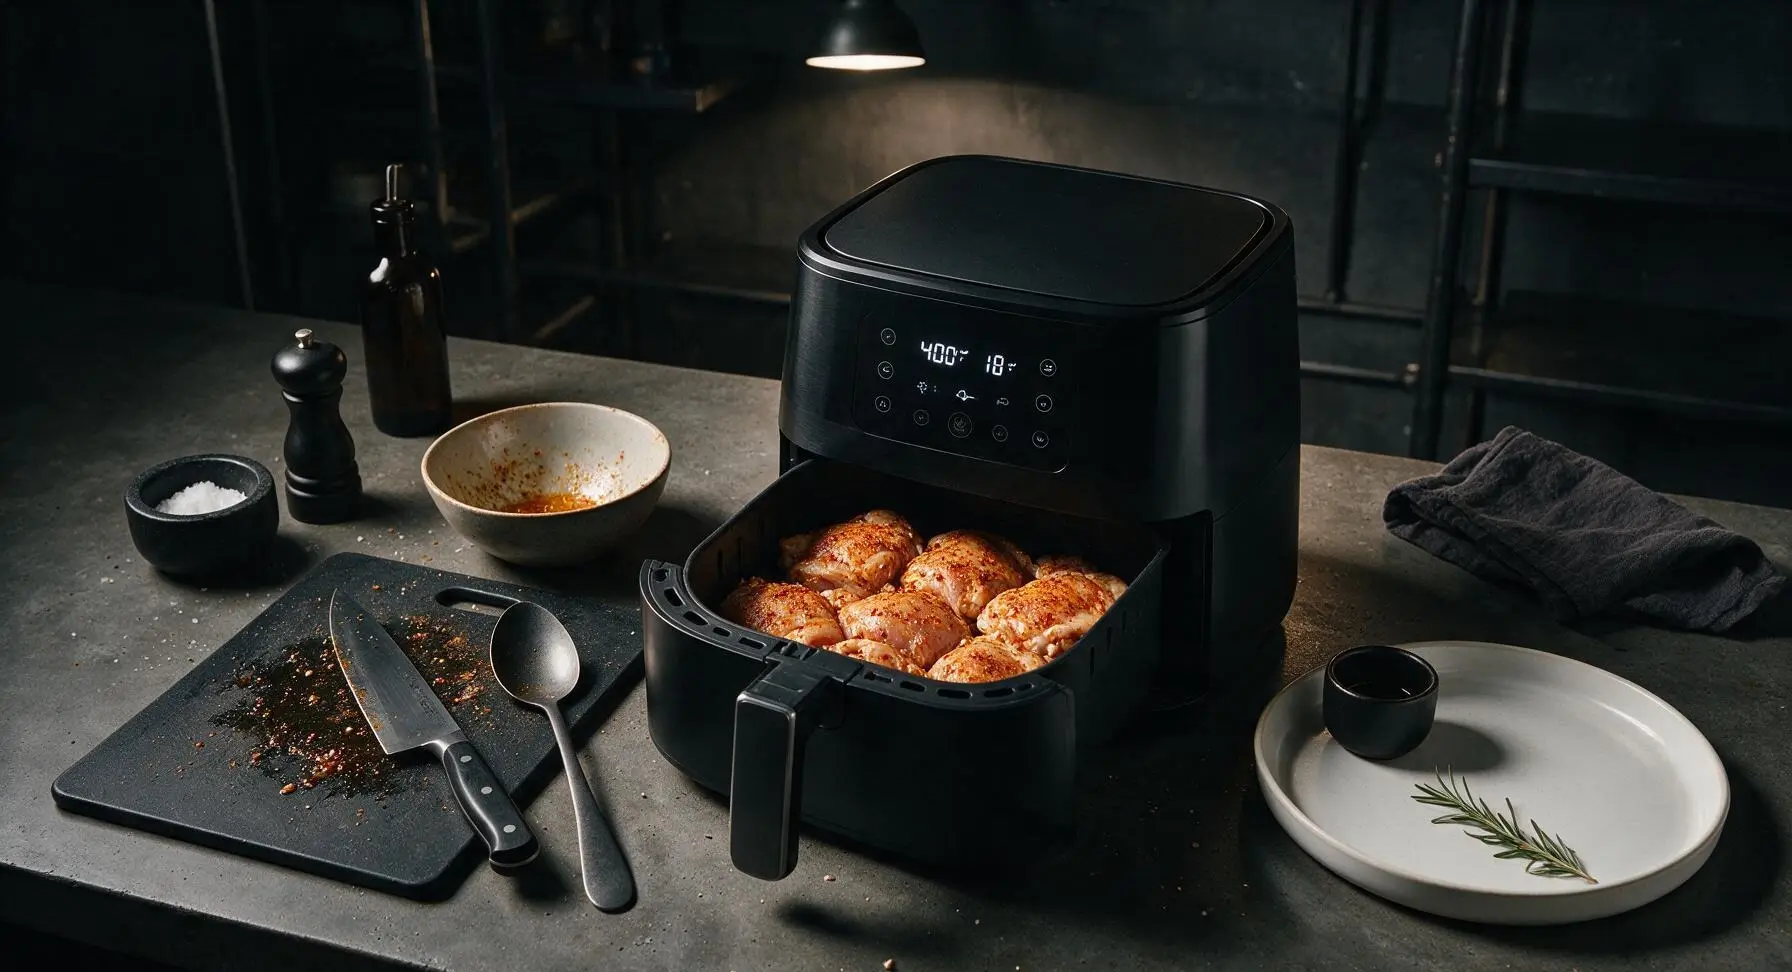
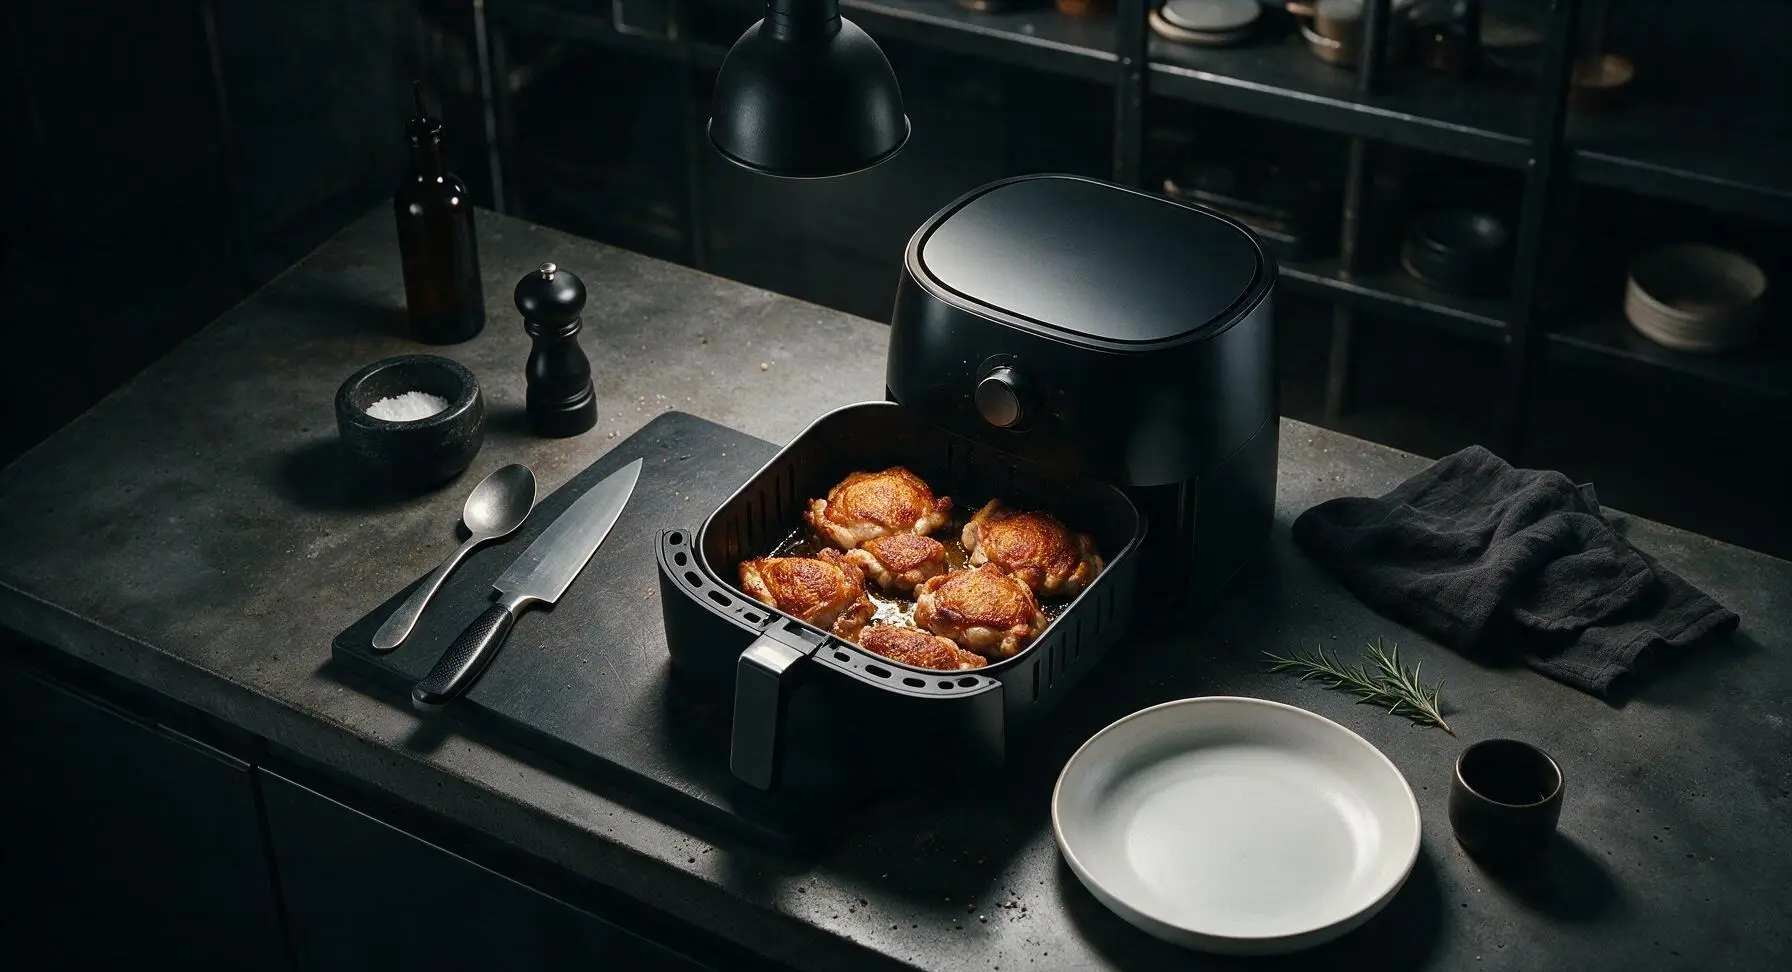
Air Fry Chicken

Slide the basket back into the air fryer, set the temperature to 400°F (200°C), and cook for 18 minutes total, no flipping required. The chicken is done when the skin is deep golden and crispy, and the thickest part of each thigh reaches an internal temperature of 165°F (74°C) on a meat thermometer. Avoid opening the air fryer unnecessarily during cooking to maintain consistent circulating heat.
Step 6
step6:Air Fry Chicken
Step 6
step6:Air Fry Chicken
7

Rest Chicken Briefly

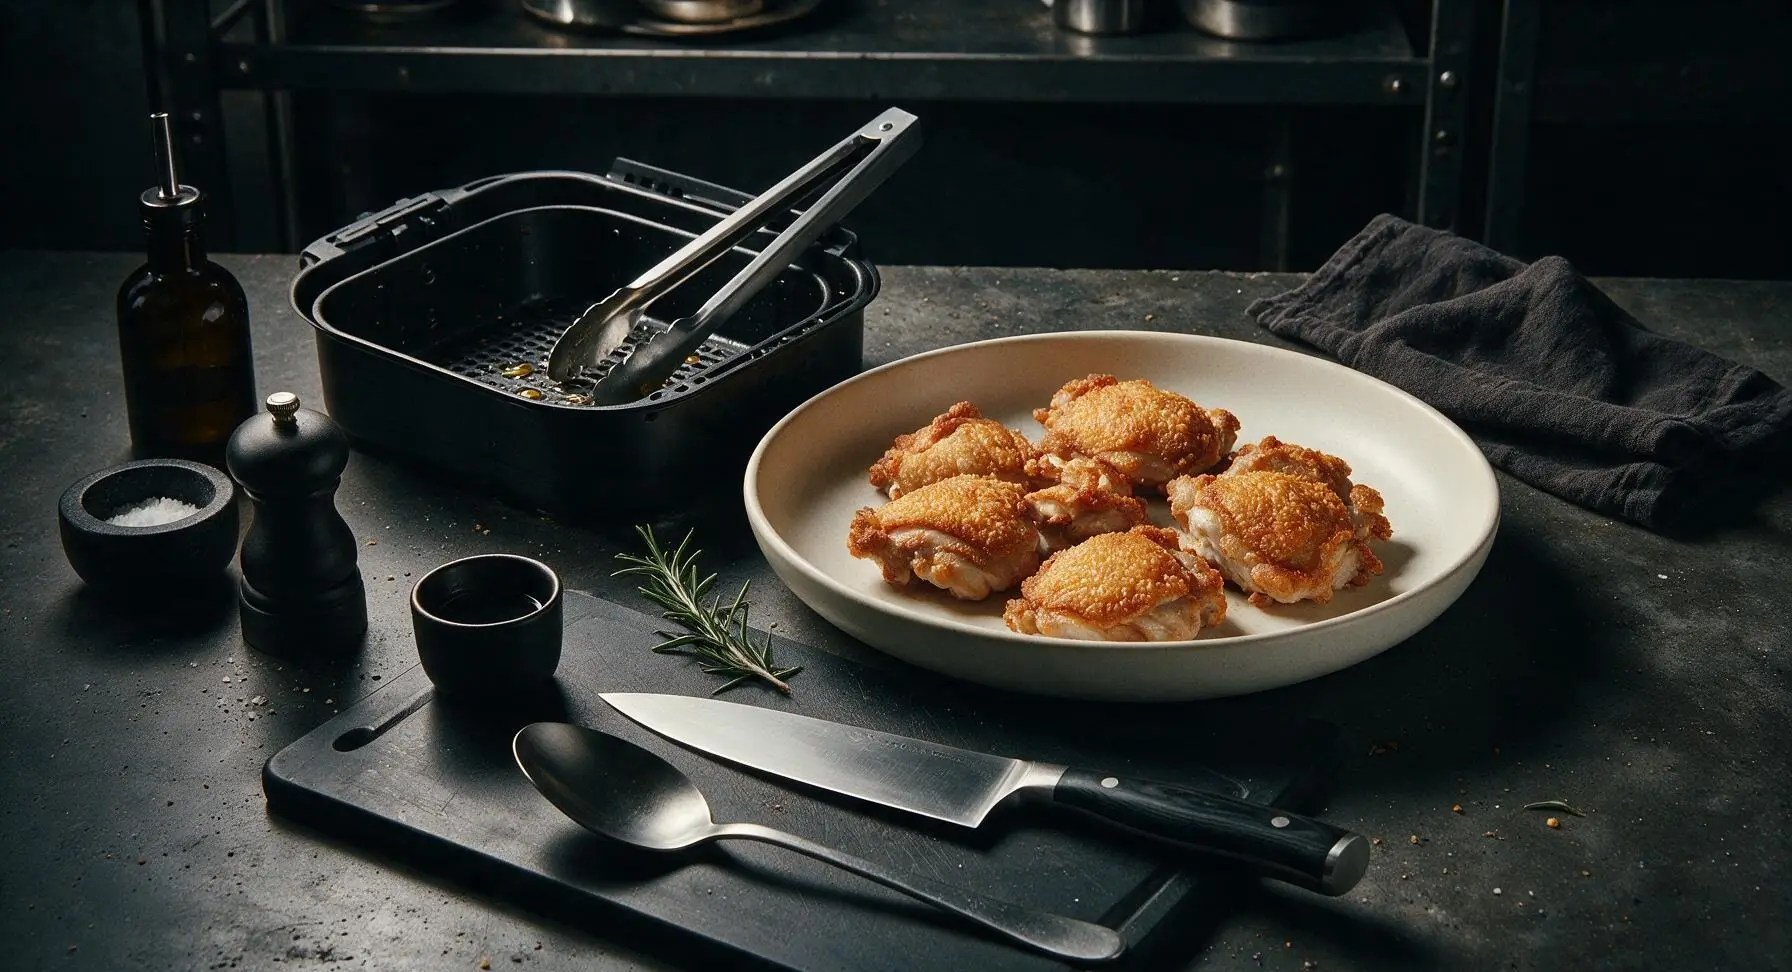
Use the stainless steel tongs to transfer the cooked chicken thighs from the air fryer basket to the matte cream white ceramic dinner plate, and let them rest for 3 minutes before serving. Resting allows the juices to redistribute through the meat, so every bite is juicy rather than having juices run out onto the plate when cut. You may lightly tent the plate with a small piece of aluminum foil to retain heat, but do not wrap tightly as this will trap steam and make the crispy skin soggy.
Step 7
step7:Rest Chicken Briefly
8

Garnish and Serve

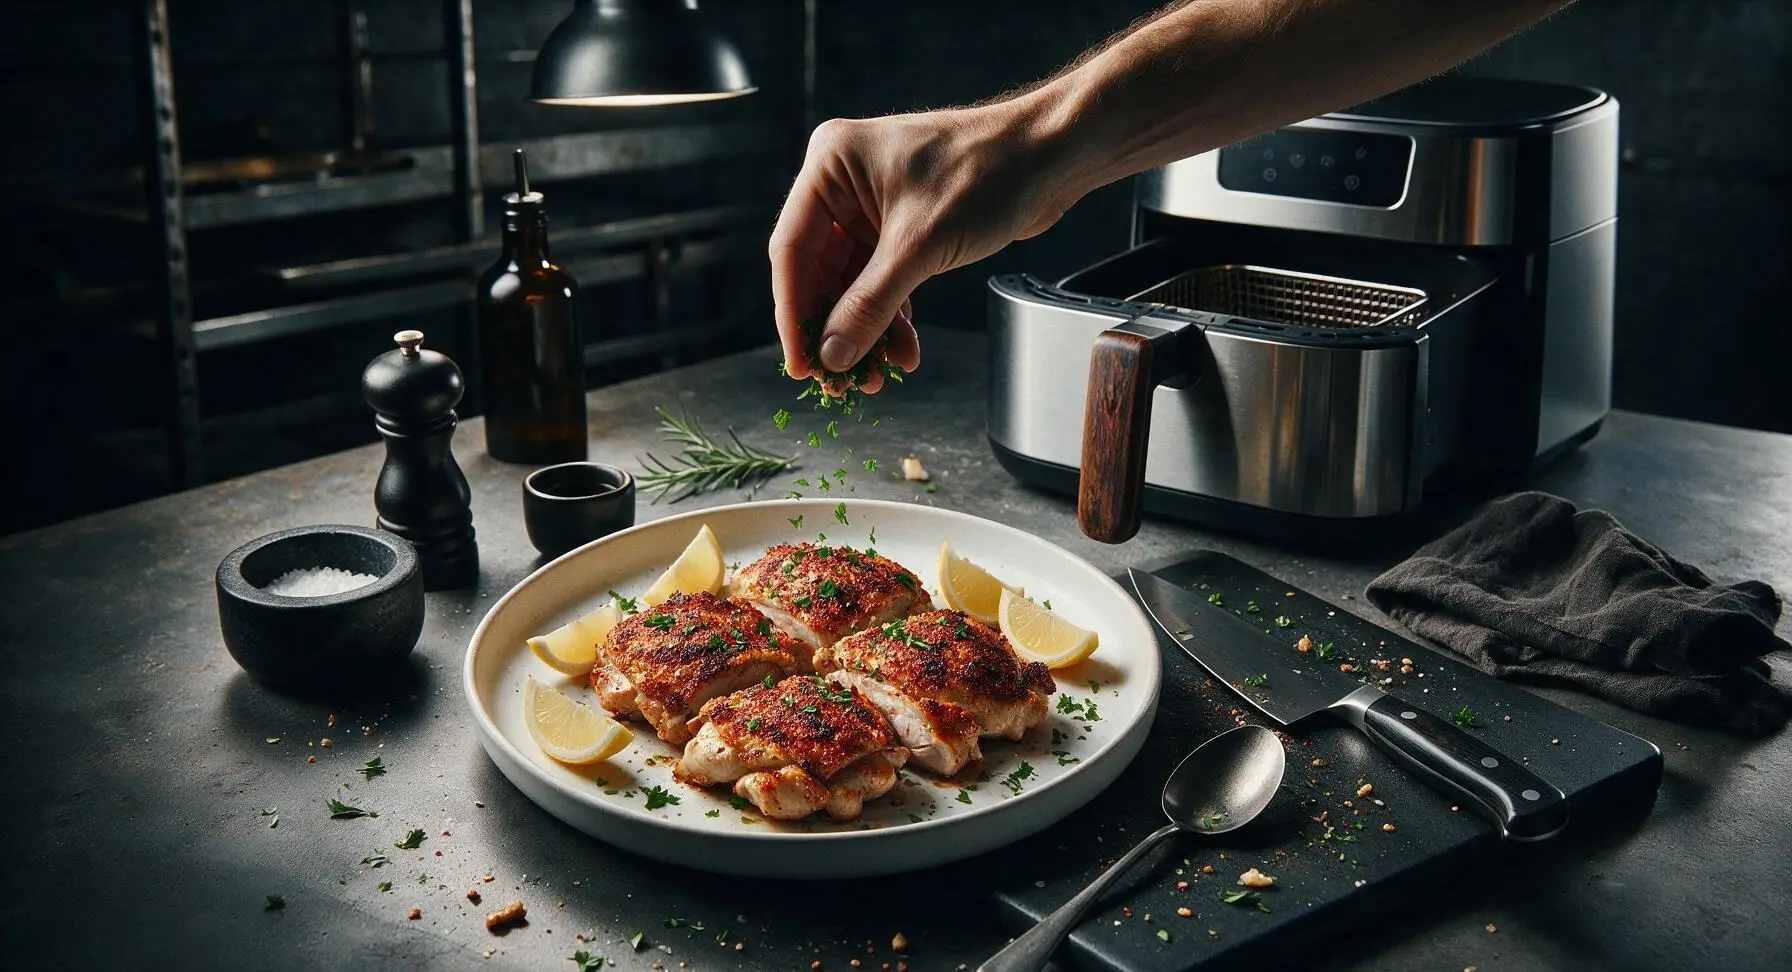
After resting, sprinkle the chopped fresh flat-leaf parsley evenly over the crispy chicken thighs. Cut the whole lemon into 4 wedges with the chef knife, and arrange them alongside the chicken on the plate, for squeezing over top right before eating. The finished chicken will have shatteringly crisp skin, juicy tender meat, and warm smoky garlic-paprika flavor in every bite.
Step 8
step8:Garnish and Serve

Tips

1.Always pat chicken skin completely dry before seasoning: any residual moisture on the skin will turn to steam in the air fryer’s circulating heat instead of allowing the skin to crisp, leading to rubbery, chewy skin rather than the desired shatteringly crisp texture.
2.Never overcrowd the air fryer basket: if your air fryer is smaller than 5.8 quarts and cannot fit all 8 thighs in a single layer with 1/4-inch gaps between pieces, cook them in two batches. Overcrowding blocks hot air flow, leading to uneven cooking and soggy, steamed skin.
3.Skip parchment paper liners for this recipe: liners block hot air circulation under the chicken and trap rendered fat against the skin, softening the crisp crust and creating unevenly cooked spots. The thin layer of olive oil and rendered chicken fat will prevent sticking without a liner.


✨ You May Also Like

Main Course
🍜 United Kingdom

A showstopping classic of tender seared beef, savory mushroom duxelles, and crisp prosciutto wrapped in flaky golden puff pastry, baked to juicy perfection.

⏱️ 2 hours 1Main Course ★ 4.7
Main Course
🍜 India

Tender charred marinated chicken simmered in a rich, spiced creamy tomato sauce, this iconic Anglo-Indian curry pairs perfectly with basmati rice or warm naan.

⏱️ 50 minuteMain Course ★ 4.6
Main Course
🍜 Thailand

Classic tangy, sweet, and savory Thai stir-fried rice noodles with shrimp, tofu, and crunchy garnishes, balancing all five core Thai flavor profiles.

⏱️ 30 minuteMain Course ★ 4.5
Main Course
🍜 United Kingdom

Crispy golden beer-battered cod and fluffy double-fried chips, served with tangy tartar sauce and malt vinegar: the timeless, beloved British pub comfort classic.

⏱️ 45 minuteMain Course ★ 4.7
Main Course
🍜 Mexico

Smoky, chile-marinated pork tacos with caramelized pineapple, fresh cilantro, and lime: a beloved classic Mexican street food perfect for casual summer gatherings.

⏱️ 1 hour 45Main Course ★ 4.8
Main Course
🍜 United States

Crunchy Fritos corn chips layered with savory beef chili and melted cheddar, topped with cool, zesty fixings for a beloved, cozy Tex-Mex comfort food.

⏱️ 35 minuteMain Course ★ 4.8

boneless chicken thigh recipes air fryer:Frequently Asked Questions

1.Do I have to use skin-on boneless chicken thighs for this recipe, or can I use skinless? ▾
Skin-on thighs are highly recommended for that signature shatteringly crisp texture the recipe promises, as the rendered skin creates that crave-worthy crunch without extra breading. If you only have skinless thighs, pat them extremely dry with paper towels, give them a light spritz of olive oil before seasoning, and note you won’t get the same crisp outer layer, though they’ll still stay juicy.
2.Can I use bone-in chicken thighs instead of boneless for this recipe? ▾
Absolutely! Bone-in thighs have even deeper, richer flavor, but you’ll need to adjust your cook time. Add 4 to 6 minutes to the total air fryer time, and always check for a 165°F internal temperature at the thickest part, away from the bone, to confirm they’re fully cooked and safe to eat.
3.Why isn’t my chicken skin getting crispy in the air fryer? ▾
The #1 culprit for soggy skin is excess moisture! Make sure you pat the chicken skin completely dry with paper towels before applying the rub, don’t overcrowd the air fryer basket, and skip dousing the skin in extra oil—you want rendered chicken fat to crisp the skin, not trap steam under it.
4.What temperature should I set my air fryer to for this recipe? ▾
Set your air fryer to 400°F for the best results. This high, circulating heat quickly renders fat from the chicken skin to get that perfect crisp, while cooking the thigh meat fast enough to lock in juiciness instead of drying it out. Always preheat for 2 to 3 minutes first for even, consistent cooking.
5.How long do these chicken thighs take to cook all the way through? ▾
For standard 6 to 8 ounce boneless skin-on thighs, plan for 12 to 14 minutes total at 400°F, flipping the thighs halfway through cook time. Exact time will vary a little based on your air fryer model and thigh size, so always verify doneness with a meat thermometer for total accuracy.
6.Can I substitute regular sweet paprika if I don’t have smoked paprika? ▾
You can, but you’ll miss that deep, smoky backbone that makes this rub so flavorful. If using sweet paprika, add a tiny pinch (1/8 teaspoon) of ground cumin or a light sprinkle of smoked salt to mimic that smoky note, so the seasoning doesn’t taste flat or one-note on the finished chicken.
7.Do I need to add oil to the chicken or air fryer basket for this recipe? ▾
You won’t need any added oil for this recipe! The skin on the chicken thighs renders plenty of rich fat as it cooks, which is more than enough to crisp the skin and keep the seasoning stuck to the meat. A quick wipe of the basket with a paper towel before cooking is all you need to prevent minor sticking.
8.How do I know when the chicken is fully cooked and safe to eat? ▾
Always use an instant-read meat thermometer for the most reliable result: stick it into the thickest part of the thigh, and it should read 165°F when fully done. The juices will run clear (not pink) when you cut into the thickest section, and the skin will be deep golden and crisp all over.
9.Can I stack the chicken thighs in the air fryer to cook more at once? ▾
Skip stacking if you want that even, all-over crisp! Stacking traps steam between the thighs, which leads to soggy skin and uneven cooking. If you need to make a larger batch, cook in single-layer batches, and keep finished thighs warm on a wire rack in a 200°F oven while you work.
10.Can I prep these seasoned chicken thighs ahead of time for weeknight meals? ▾
Absolutely! You can trim the thighs, pat them dry, and coat them in the garlic-paprika rub up to 24 hours ahead of time, stored covered in the fridge. Don’t season them more than a day in advance, though—the salt in the rub will draw out too much moisture, ruining that crisp skin texture.
11.What should I serve with these chicken thighs for a full weeknight meal? ▾
These bold, smoky thighs pair perfectly with quick, simple sides! Try roasted broccoli or air fryer potato wedges cooked right alongside the chicken, a simple green salad with lemon vinaigrette, buttered rice, or roasted corn on the cob for a balanced, low-fuss dinner.
12.My finished chicken tastes bland—what went wrong, and how can I fix it next time? ▾
Most bland rub issues come from skimping on seasoning, especially kosher salt. For 4 thighs (about 1.5 pounds total), use 1 teaspoon of kosher salt alongside the listed paprika, garlic powder, onion powder, and pepper, and coat every side—even tucking a little rub under the skin—instead of only seasoning the top.
13.How should I store leftover cooked chicken thighs? ▾
Let leftover thighs cool completely to room temperature (within 2 hours of cooking for food safety), then store them in an airtight container in the fridge for up to 4 days. Keep the skin side facing up when storing to prevent trapped moisture from making the skin go soggy before you reheat it.
14.What’s the best way to reheat leftovers so the skin stays crispy? ▾
Skip the microwave—it will turn the skin rubbery and make the meat tough. Reheat leftovers in your air fryer at 375°F for 3 to 5 minutes, flipping halfway, until the chicken is heated through and the skin crisps back up. A toaster oven on the bake setting works great too.
15.Can I make this recipe with chicken breasts instead of thighs? ▾
You can, but you’ll need to adjust your cook time to avoid dry, tough meat. Use 1-inch thick boneless skin-on chicken breasts, cook at 380°F for 10 to 12 minutes, and pull them as soon as they hit 160°F internal temp (they’ll carryover cook to 165°F as they rest) to keep them juicy.
16.Should I flip the chicken thighs halfway through air frying? ▾
Yes, flipping halfway through cook time is key for even crispness and even cooking. Start the thighs skin-side up for the first 6 minutes, then flip them skin-side down for the next 6 to 8 minutes to let fat render fully, then flip back skin-side up for the last minute for extra crunch.
17.Can I add extra seasonings to the rub to customize the flavor? ▾
Absolutely! This garlic-paprika base is super versatile. Add a pinch of cayenne for spicy heat, a teaspoon of brown sugar for a subtle sweet-smoky balance, a sprinkle of dried oregano for an herby twist, or a pinch of lemon zest for bright, fresh flavor that cuts through rich chicken skin.

Comments (3)

3 days ago

OMG these are a total game changer!! I threw these together last minute for weeknight dinner after work, and my two picky toddlers AND my husband went back for seconds. The outside got so perfectly crispy in the air fryer in just 18 minutes, I didn’t even have to wait around forever for my oven to preheat. The garlic paprika rub is chef’s kiss — not too spicy, but packed with so much warm, savory flavor. Already added this to my regular meal prep rotation for work lunches this week! 10/10, no notes.

2 days ago

Wait quick question — did you use skin-on or skinless boneless thighs? I tried a similar air fryer chicken recipe once and mine never got that crispy crunch, wondering if I grabbed the wrong cut at the grocery store! Thanks!

yesterday

Great question! We use skin-on boneless chicken thighs for that perfect shatteringly crisp top — if you’re using skinless thighs, just pat them extra dry with paper towels and give them a light spritz of olive oil spray before air frying to get a similar crispy texture! So glad the recipe was a hit for your family 😊

1 week ago

SO good! I brought these to my neighborhood block party potluck last weekend and people were hounding me for the recipe before I even set the platter down on the table. I added a tiny extra pinch of smoked paprika because I’m obsessed with that deep, smoky flavor, and it paired so perfectly with the garlic. It was insanely easy too — I didn’t have to stress about slaving over the stove for hours before the party. Will absolutely be making these for every get-together from now on!

5 days ago

Love that you added extra smoked paprika — that’s such a delicious, easy tweak! So happy these were a total hit at your potluck, thanks so much for giving the recipe a try!

5 minutes ago

Man, this recipe is foolproof. I’m notoriously terrible at cooking chicken that doesn’t come out dry and rubbery, but these stayed perfectly juicy through the whole 18 minute cook time and the crispy garlic paprika coating was insane. I made a big batch on Sunday for meal prep and ate them for lunches all week — even when I reheated leftovers for 2 minutes in the air fryer a couple days later, they still stayed crispy. Zero complaints, this is going in my permanent weeknight rotation.



