
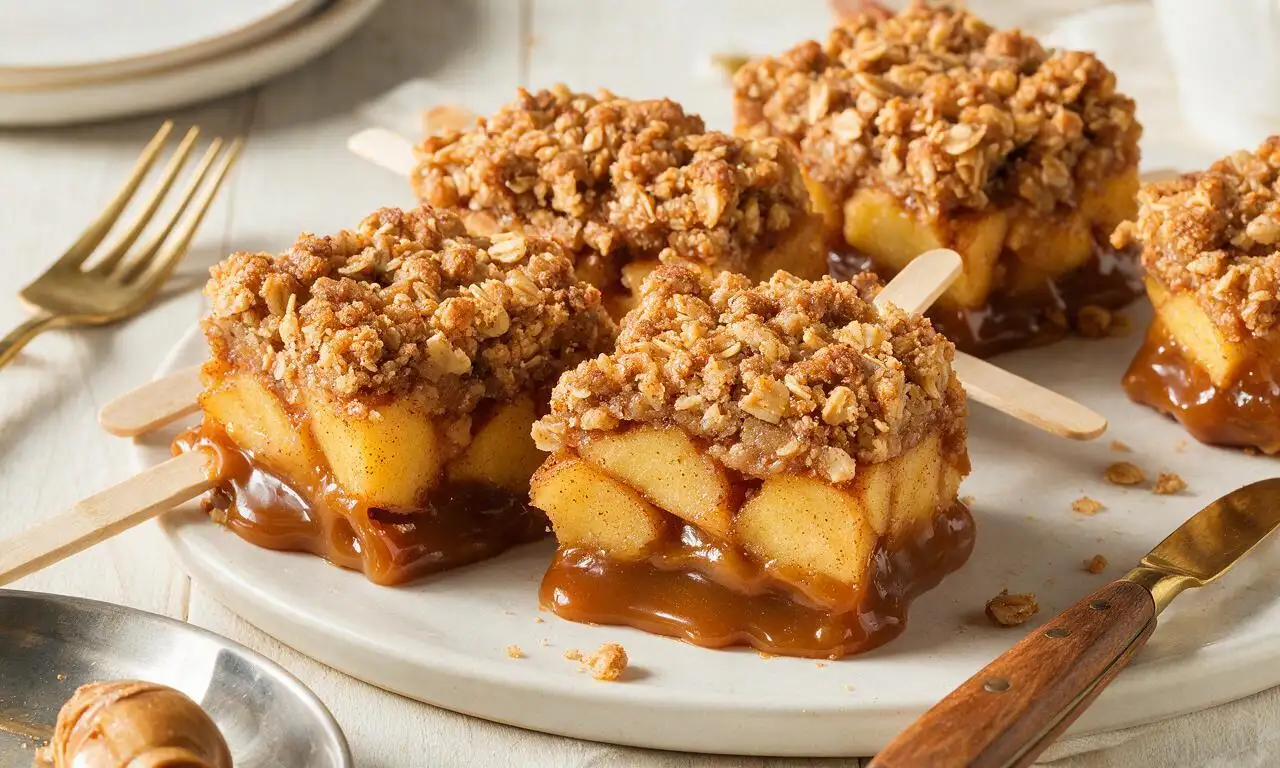
Caramel Apple Bars

title 1
Caramel Apple Bars
⏱️ cook time 55 minutes (plus 2 hours cooling time)
🍽️ servings 12
⚡ Difficulty easy

intro

Buttery spiced oat crumble bars layered with tart cinnamon apples and gooey salted caramel, a cozy, shareable fall baked treat perfect for groups.

Ingredients

Granny Smith apples 450g (about 3 medium, peeled, cored, sliced 1/4-inch thick)
Salted caramel sauce 240ml (1 cup)
Old-fashioned rolled oats 135g (1 1/2 cups)
All-purpose flour 265g (2 cups + 2 tablespoons)
Unsalted butter 226g (1 cup, melted)
Light brown sugar 150g (3/4 cup, packed)
Granulated white sugar 50g (1/4 cup)
Ground cinnamon 1 1/2 teaspoons
Fine sea salt 1/2 teaspoon
Baking soda 1/2 teaspoon
Fresh lemon juice 15ml (1 tablespoon)

Steps

1

Prep pan and oven

Preheat your oven to 350°F (175°C). Line a 9x13 inch (23x33cm) baking pan with parchment paper, leaving 2-inch overhang on the two long sides to easily lift finished bars out later. Lightly grease the exposed pan edges with a thin coating of butter to prevent sticking.
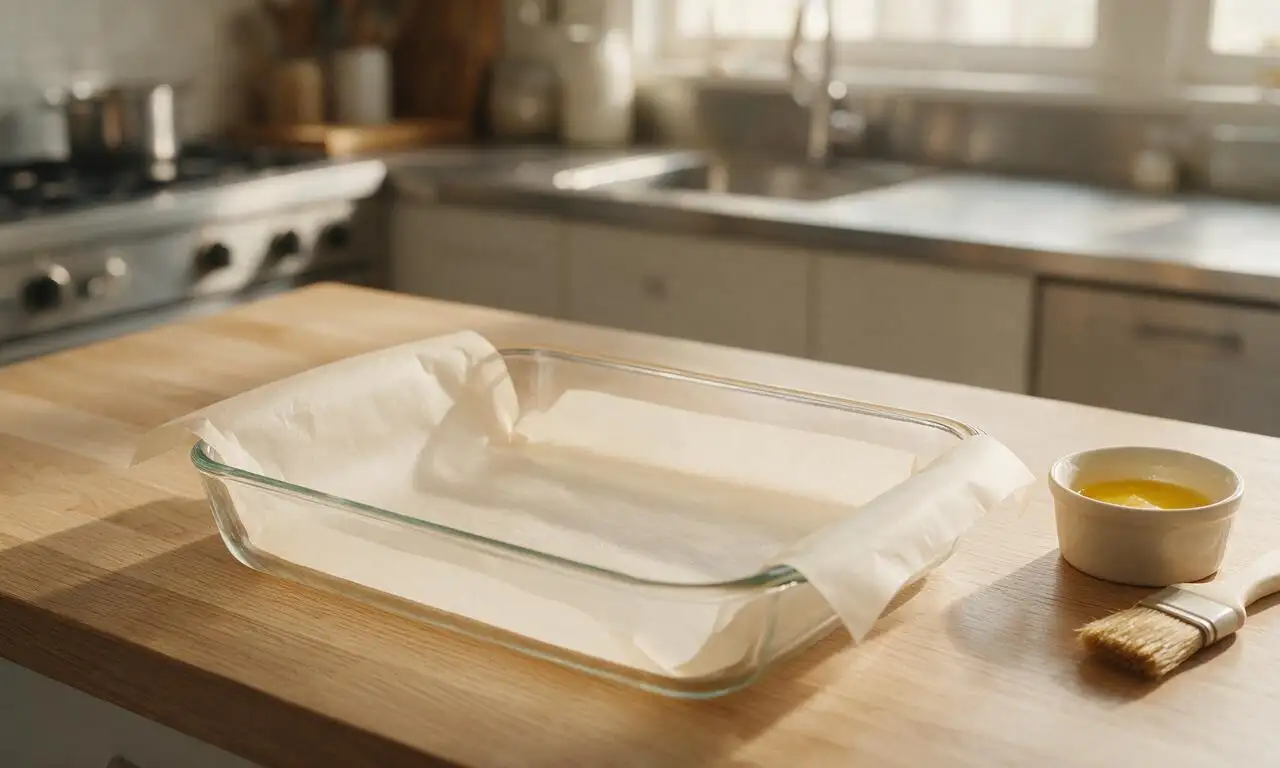
Step 1
step1:Prep pan and oven
2

Mix crumb base

In a large mixing bowl, whisk together 2 cups (240g) all-purpose flour, 1 1/2 cups (135g) old-fashioned rolled oats, 3/4 cup (150g) packed light brown sugar, 1/4 cup (50g) granulated sugar, 1 teaspoon ground cinnamon, 1/2 teaspoon fine sea salt, and 1/2 teaspoon baking soda until evenly combined. Pour in 1 cup (226g) melted unsalted butter and stir with a rubber spatula until all dry ingredients are evenly moistened and form coarse, clumpy crumbs.
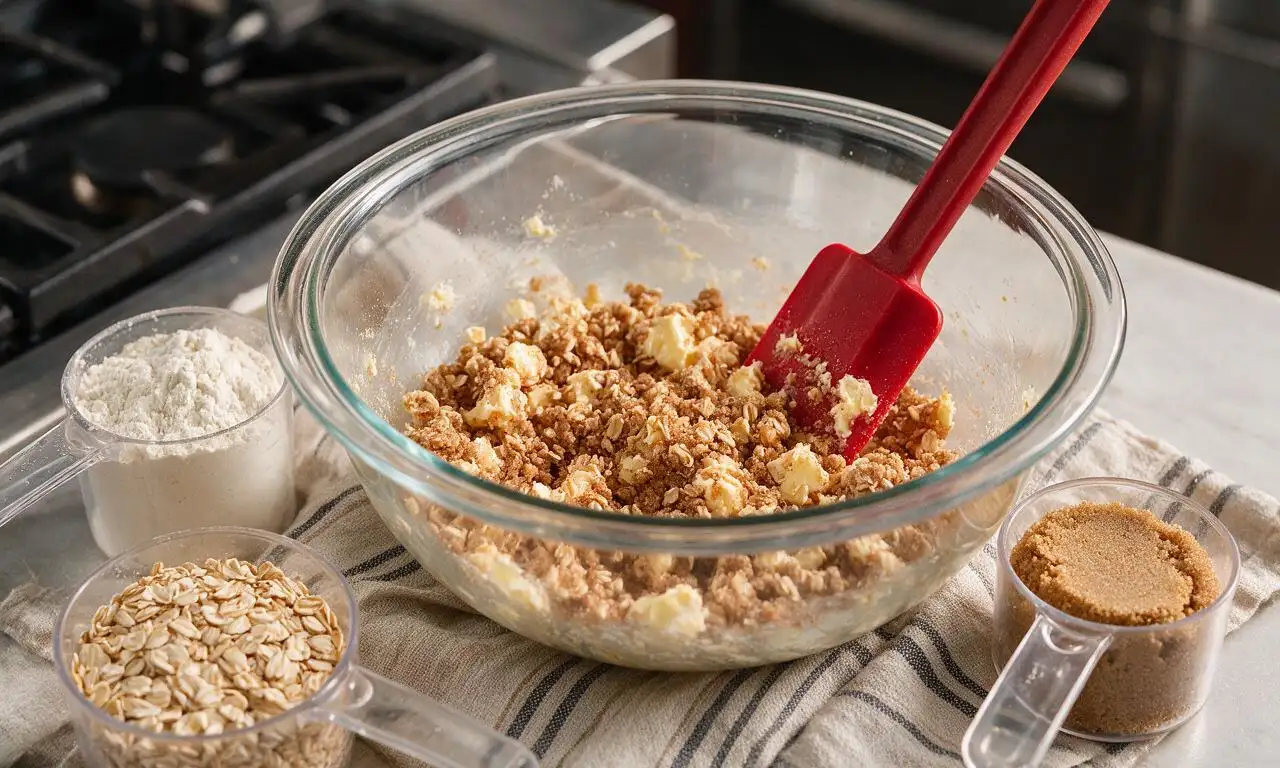
Step 2
step2:Mix crumb base
3

Press crust layer

Measure out 2 1/2 cups (about 480g) of the crumb mixture and transfer it to the prepared baking pan. Press the crumbs firmly and evenly into the bottom of the pan to form a tight, flat base layer, making sure to reach all corners of the pan. Set the remaining crumb mixture aside to use as the topping.
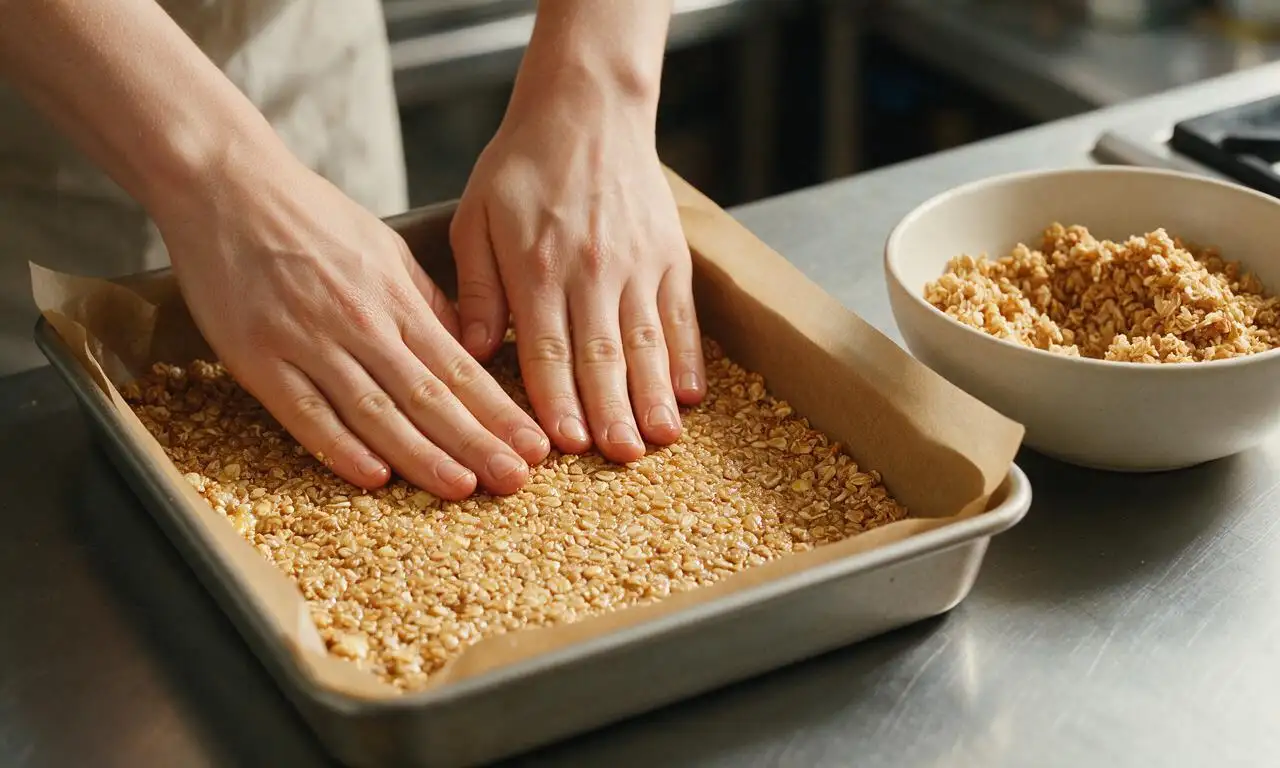
Step 3
step3:Press crust layer
4

Toss apple filling

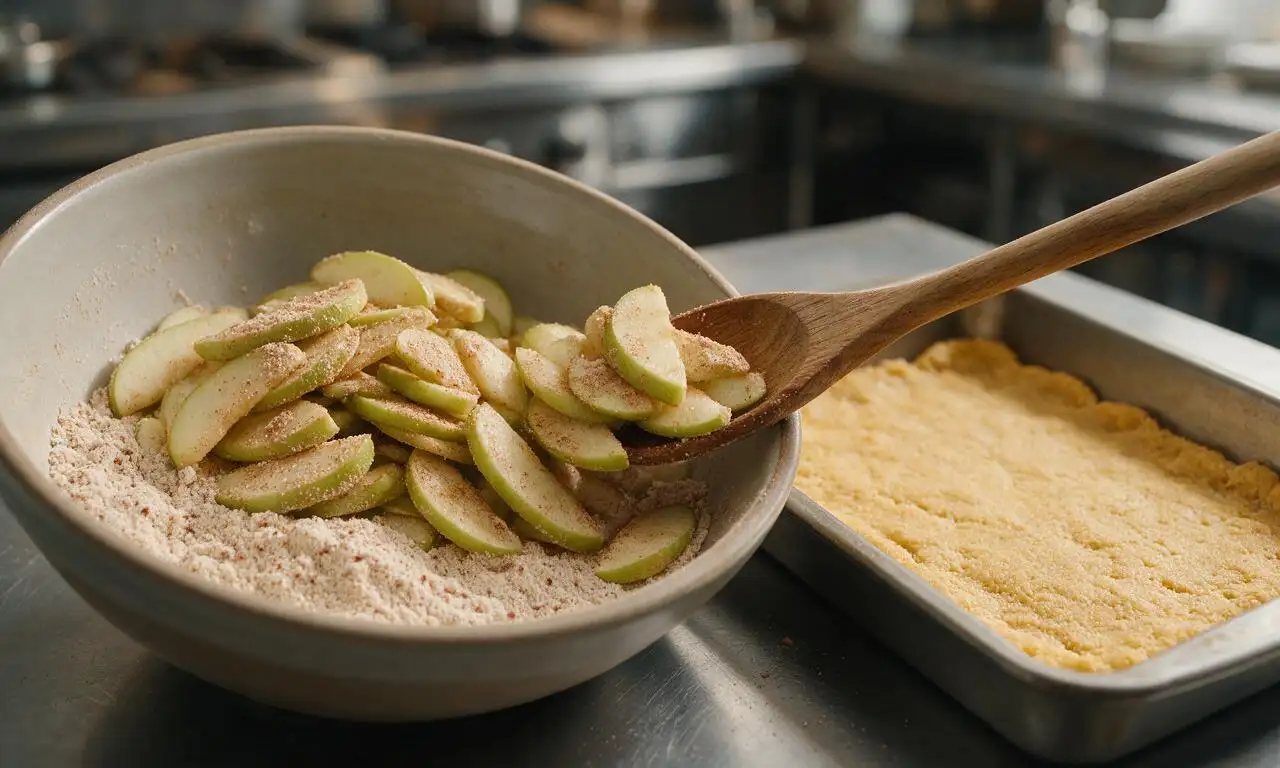
In a medium bowl, combine the 450g of 1/4-inch thick sliced Granny Smith apples, 1 tablespoon fresh lemon juice, remaining 2 tablespoons all-purpose flour, and remaining 1/2 teaspoon ground cinnamon. Toss until all apple slices are evenly coated in the flour-cinnamon mixture, then spread the apples in a single, even layer over the pressed crust in the pan.
Step 4
step4:Toss apple filling
5

Drizzle caramel layer

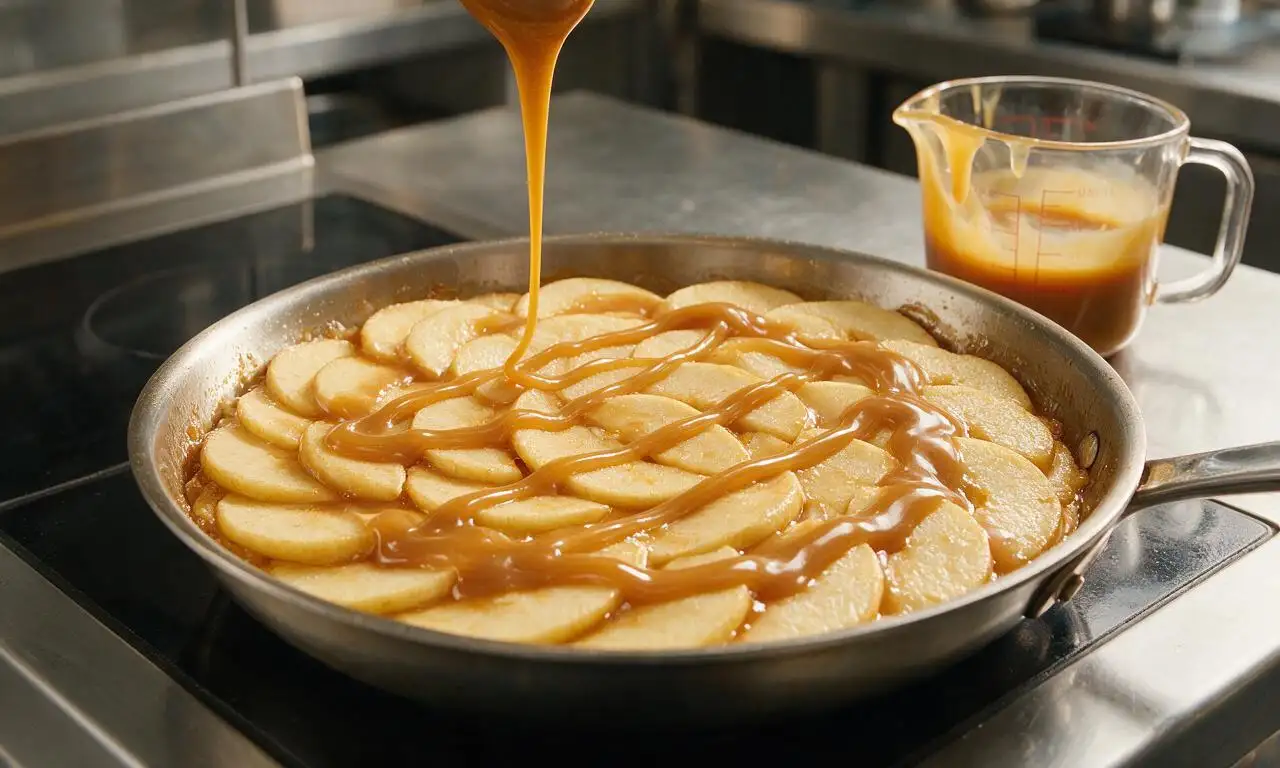
Warm the 1 cup (240ml) salted caramel sauce for 15 seconds in the microwave on 50% power until it is pourable but not boiling. Drizzle 3/4 of the caramel evenly over the apple layer, taking care to cover most of the apple surface without letting caramel run directly onto the pan edges (which can burn during baking). Save the remaining 1/4 cup caramel for drizzling after baking.
Step 5
step5:Drizzle caramel layer
6

Top and bake bars

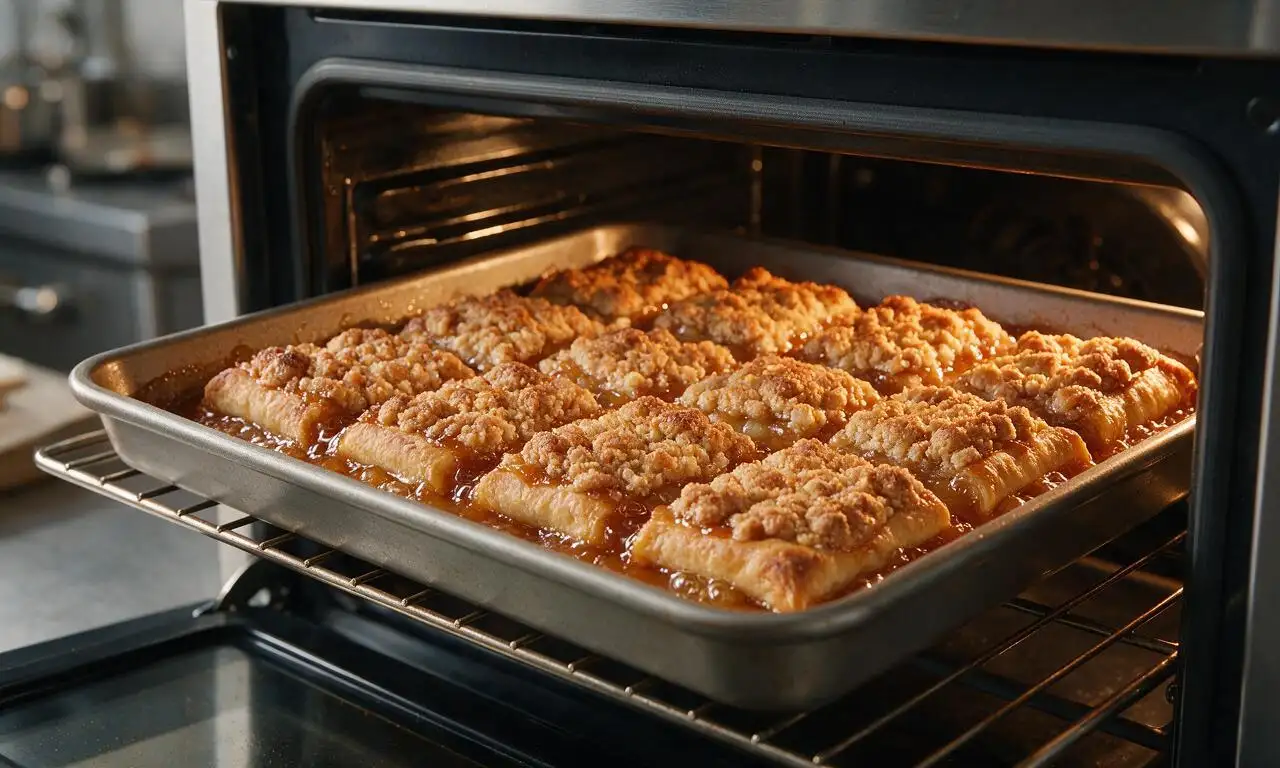
Sprinkle the reserved crumb mixture evenly over the caramel and apple layer, gently patting the crumbs down slightly to adhere. Place the pan in the preheated 350°F (175°C) oven and bake for 32-35 minutes, until the top crumb layer is deep golden brown and the caramel filling is bubbling around the edges of the pan.
Step 6
step6:Top and bake bars
7

Cool and finish bars

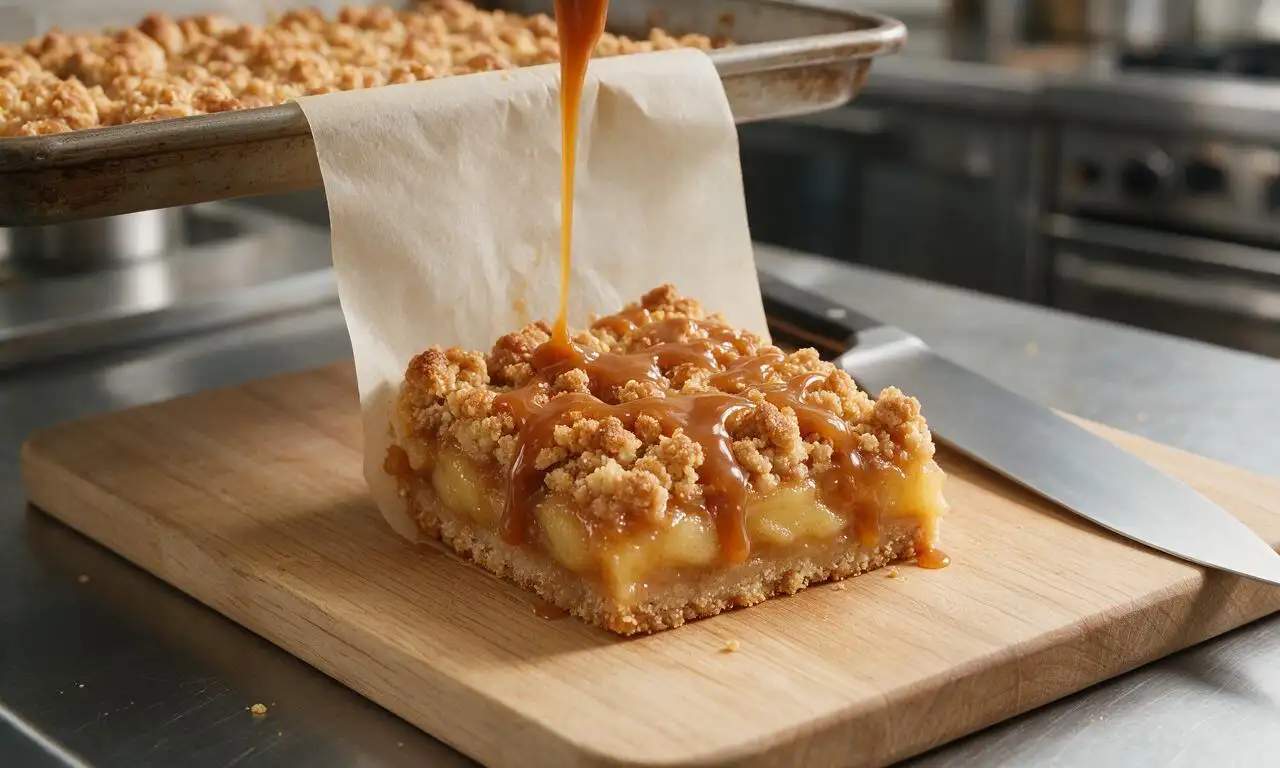
Remove the pan from the oven and transfer it to a wire rack to cool completely at room temperature for 2 full hours (do not cut warm, as the caramel will run). Once fully cooled, use the parchment overhang to lift the entire bar slab out of the pan, drizzle with the remaining 1/4 cup salted caramel sauce, and cut into 12 equal rectangular bars.
Step 7
step7:Cool and finish bars

Tips

1.Do not cut the bars while they are warm—wait the full 2 hours of cooling time to let the caramel set, otherwise the filling will run and slices will be messy. For extra clean cuts, chill bars for 30 minutes before slicing and wipe your knife blade clean between each cut.
2.Use firm, tart baking apples such as Granny Smith, Honeycrisp, or Braeburn for this recipe. Soft, mealy apple varieties like Red Delicious will break down into mush during baking and make the bottom crust soggy.
3.Choose a thick, high-quality salted caramel sauce (homemade or premium jarred) for this recipe. Thin, runny ice cream topping caramel will seep into the crust and fail to form a chewy, distinct caramel layer.


✨ You May Also Like

Desserts & Baking
🍜 Italy

Creamy, coffee-kissed classic Northern Italian no-bake dessert, with layers of rum-spiked mascarpone cream, soft ladyfingers, and a rich cocoa dusting.

⏱️ 4 hours 3Desserts & Baking ★ 4.7
Desserts & Baking
🍜 France

Flaky, shatteringly crisp, buttery French croissants with golden exteriors and soft, airy layered interiors, perfect for pairing with coffee for a special morning treat.

⏱️ 12 hours Desserts & Baking ★ 4.5
Desserts & Baking
🍜 United States

Warm, spiced baked apples topped with a fluffy golden biscuit crust, this cozy dessert pairs perfectly with vanilla ice cream for cool-weather comfort.

⏱️ 55 minuteDesserts & Baking ★ 4.6
Desserts & Baking
🍜 United States

A star-spangled classic American blueberry pie with buttery flaky crust and bright sweet-tart filling, perfect for summer patriotic gatherings.

⏱️ 1 hour 25Desserts & Baking ★ 4.7
Desserts & Baking
🍜 United States

A beloved no-bake regional Maine candy with a chewy coconut-potato center coated in rich dark chocolate, a New England holiday staple since the 1870s.

⏱️ 2 hours 3Desserts & Baking ★ 4.8
Desserts & Baking
🍜 France

Luxuriously creamy, floral frozen custard made with aromatic Tahitian vanilla beans, boasting a smooth, rich texture that melts slowly on the tongue.

⏱️ 3 hours 3Desserts & Baking ★ 4.5

Caramel Apple Bars:Frequently Asked Questions

1.Why does this recipe call for Granny Smith apples specifically? ▾
Granny Smiths have a bright, tart flavor that perfectly balances the rich, sweet caramel and buttery oat crumble, so your bars won’t taste cloyingly sweet. Their firm, crisp texture also holds up well during baking, so you won’t end up with mushy, waterlogged apple layers. If you swap them, opt for another firm, tart-sweet variety like Honeycrisp or Braeburn.
2.Can I use store-bought salted caramel sauce instead of homemade? ▾
Absolutely! Store-bought salted caramel works perfectly here to cut down on prep time—just pick a high-quality, thick version, not the thin, runny ice cream topping that will seep all over your bars. If your sauce is extra sweet, sprinkle a pinch of flaky sea salt over the caramel layer before adding the top crumble to balance the flavor.
3.Do I have to use old-fashioned rolled oats, or can I use quick oats? ▾
Stick to old-fashioned rolled oats for the best texture, trust me. Quick oats are cut much finer and processed to cook faster, so they’ll make your crumble turn soft, mealy, and less chewy. Old-fashioned oats hold their shape during baking, giving the crust and topping that hearty, nutty, slightly crisp bite that makes these bars feel so cozy.
4.My bars always turn out soggy in the middle—what am I doing wrong? ▾
Sogginess almost always comes from excess apple juice or too-thin caramel sauce. Toss your diced apples with a tablespoon of all-purpose flour before layering them to absorb released moisture as they bake, and stick to a thick caramel sauce. Also, let bars cool completely for at least 2 hours before slicing, so layers have time to set fully.
5.Can I make these bars gluten-free for a friend with a gluten sensitivity? ▾
You can easily adapt this recipe to be gluten-free with one simple swap: replace the all-purpose flour with a 1:1 gluten-free all-purpose baking blend that contains xanthan gum. Make sure your rolled oats are certified gluten-free to avoid cross-contamination, too. Double-check your caramel label for hidden gluten additives to keep things safe.
6.Should I use salted or unsalted butter for the crumble? ▾
This recipe works best with unsalted butter, because it lets you control exactly how much salt goes into the crumble to balance the sweet caramel and tart apples. If you only have salted butter on hand, that works too—just cut any extra added salt in the crumble by half, so bars don’t end up overly salty paired with the salted caramel layer.
7.How do I get clean, neat slices when I cut the bars? ▾
The number one trick for clean slices is to let the bars cool completely to room temperature, then chill them in the fridge for 30 minutes before cutting. Use a sharp, thin knife, and wipe the blade clean with a paper towel between every slice. Cutting warm bars will make the gooey caramel and soft apples drag for messy edges.
8.Can I prep these bars ahead of time for a fall party? ▾
These bars are ideal for party prep! You can bake them up to 2 days ahead, let them cool completely, then store them tightly covered in the fridge. For the best texture, pull them out 20 minutes before serving to take the chill off, so the caramel gets soft and gooey again and the crumble has that perfect buttery bite.
9.Do I need to peel the apples before adding them to the bars? ▾
Peeling is totally a personal preference, but I recommend peeling Granny Smiths for this recipe. Their skin is thicker and chewier than other apple varieties, and it can get a little tough and leathery when baked. If you love the extra fiber from skins, leave them on—just dice apples extra small (1/4-inch pieces) to avoid stringy bits.
10.Why is my crumble too dry and crumbly instead of holding together? ▾
If your crumble won’t clump together when you squeeze it, it’s usually because your butter was too cold, or you didn’t work it into the dry ingredients enough. Your unsalted butter should be cool, not rock-hard from the fridge, when you cut it into the flour and oat mix. Mix until you get pea-sized clumps that hold their shape when squeezed.
11.Can I add extra mix-ins like nuts or chocolate chips? ▾
Absolutely, these bars are super customizable! Chopped pecans or walnuts tossed into the crumble add a wonderful nutty crunch that pairs perfectly with apple and caramel. You can also sprinkle a handful of cinnamon chips or semi-sweet chocolate chips over the apple layer—just keep add-ins to ½ cup total so they don’t overpower the classic flavor.
12.What size pan should I use for these bars? ▾
For the perfect ratio of crumble, apple, and caramel layers, use a standard 9x9-inch square metal baking pan. If you only have a 9x13-inch pan, you can double the recipe, or note that single-batch bars will be thinner and bake 5-7 minutes faster. Line the pan with parchment paper overhang to easily lift the whole block out for slicing.
13.How should I store leftover caramel apple bars? ▾
Store leftover bars in an airtight container, separated by layers of parchment paper so they don’t stick together, in the fridge for up to 5 days. The cold temperature keeps the caramel from oozing out and the fresh apple filling from spoiling quickly. Avoid storing them at room temperature for more than 24 hours, as the filling can get soggy.
14.Can I freeze these bars for later? ▾
Yes, these bars freeze beautifully! Let them cool completely, then cut into individual slices and wrap each tightly in plastic wrap before tucking them into a freezer-safe bag or container. They’ll keep for up to 3 months. When you’re ready to eat, thaw in the fridge overnight, or warm for 10 seconds in the microwave for that fresh-baked gooey texture.
15.How much cinnamon should I add to the apple filling? ▾
For that classic cozy fall flavor, toss your diced Granny Smith apples with 1 teaspoon of ground cinnamon, plus a tiny pinch of nutmeg if you have it on hand. Don’t overdo the spice, though—you want cinnamon to complement the bright apple and rich caramel, not overpower it. If you love extra spice, you can bump it up to 1.5 teaspoons max.
16.Do I need to pre-bake the bottom crumble crust before adding filling? ▾
You don’t need to fully pre-bake the crust, but I recommend par-baking it for 10 minutes at 350°F before adding the apple and caramel layers. This creates a firm, crisp base that won’t get soggy from the juicy apple filling and wet caramel. Skipping this step will leave you with a softer bottom crust that’s more likely to stick to the pan.

Comments (6)

3 days ago

OMG these caramel apple bars are a total game changer! I brought them to my kid’s soccer team potluck last weekend and every single last bar was gone before the halftime snacks even wrapped up. The crumb topping is perfectly buttery, and the caramel doesn’t get all sticky and messy like the store-bought caramel apple treats I’ve tried before. So easy to throw together too, even for someone who burns cookies half the time like me lmao. 10/10 will be making these every fall from now on!

2 days ago

Wait did you use homemade caramel or the store-bought soft caramels melted down? I’m making these for my book club next week and don’t want to mess up the caramel layer!

yesterday

So glad these were a hit at the potluck! @MidwestBaker22 you can absolutely use melted store-bought soft caramels with a tablespoon of heavy cream to thin them for this recipe — it cuts down prep time without sacrificing that rich caramel flavor. If you’re feeling fancy, a quick homemade salted caramel works beautifully too!

1 week ago

Meal prepped these for my dorm floor hangout and everyone was asking for the recipe within 10 minutes. I added a tiny sprinkle of flaky sea salt on top right before I pulled them out of the oven and *chef’s kiss* it cuts the sweetness so well. Only note is don’t skip the cooling time!!! I tried cutting a piece 45 minutes out of the oven and the caramel oozed everywhere, still tasted amazing but looked a hot mess lmao

2 days ago

My kids went absolutely crazy for these bars! I’ve been testing fall dessert recipes for our annual family apple picking trip get-together and these are officially at the top of the list. I used a mix of Honeycrisp and Granny Smith apples like the recipe suggested and the sweet-tart balance is perfect. Only thing is my crust came out a little crumbly when I pressed it into the pan — did I not melt the butter enough?

yesterday

So happy your kids loved them! A crumbly crust usually means the butter was a little too cool when you mixed it in, or you didn’t press the crumb mixture firmly enough into the bottom of the pan. Next time, make sure your butter is fully melted and press the crust down really well with the flat bottom of a measuring cup before adding the apple and caramel layers, it’ll hold together perfectly!

5 days ago

SO good!!! I made these for my office Halloween party and people were going back for seconds (and thirds, no judgment). I was worried they’d be too sweet but the apple layer keeps everything light and fresh tasting. I even swapped half the all purpose flour for whole wheat to make them a tiny bit healthier and no one even noticed. Will absolutely be adding this to my regular rotation.

3 days ago

Oh the whole wheat swap is such a smart idea! Did you adjust the butter amount at all when you did that? I love sneaking in whole grains where I can but don’t want to dry out the crust

2 days ago

I didn’t change the butter at all! It came out exactly the same texture as when I used all AP flour, just a little nuttier taste. I’d recommend giving it a shot, you can’t go wrong!

2 weeks ago

Wow, this recipe is so much easier than I thought it would be! I’ve never made anything with caramel before and was totally intimidated, but the steps are super straightforward. The cooling time is brutal waiting to dig in, but it’s 100% worth it. Had a warm piece with a scoop of vanilla ice cream last night and it was the perfect cozy fall dessert. 10/10

yesterday

Made these for my Sunday family dinner and everyone was raving! I added a little extra cinnamon to the apple filling because my family loves warm spices, and it was chef’s kiss. The only heads up is my caramel took a tiny bit longer to set than the recipe said, but that might just be because my kitchen is super warm right now from the oven being on all day. Definitely a new fall staple for us!

2 hours ago

Love that you added extra cinnamon — that’s such a cozy tweak! If your kitchen runs warm, you can pop the pan in the fridge for the last 30 minutes of cooling time to help the caramel set up faster without ruining the texture. So glad your family enjoyed them!



