
chicken and cheese

title 1
chicken and cheese
⏱️ cook time 20 minutes
🍽️ servings 4
⚡ Difficulty easy

intro

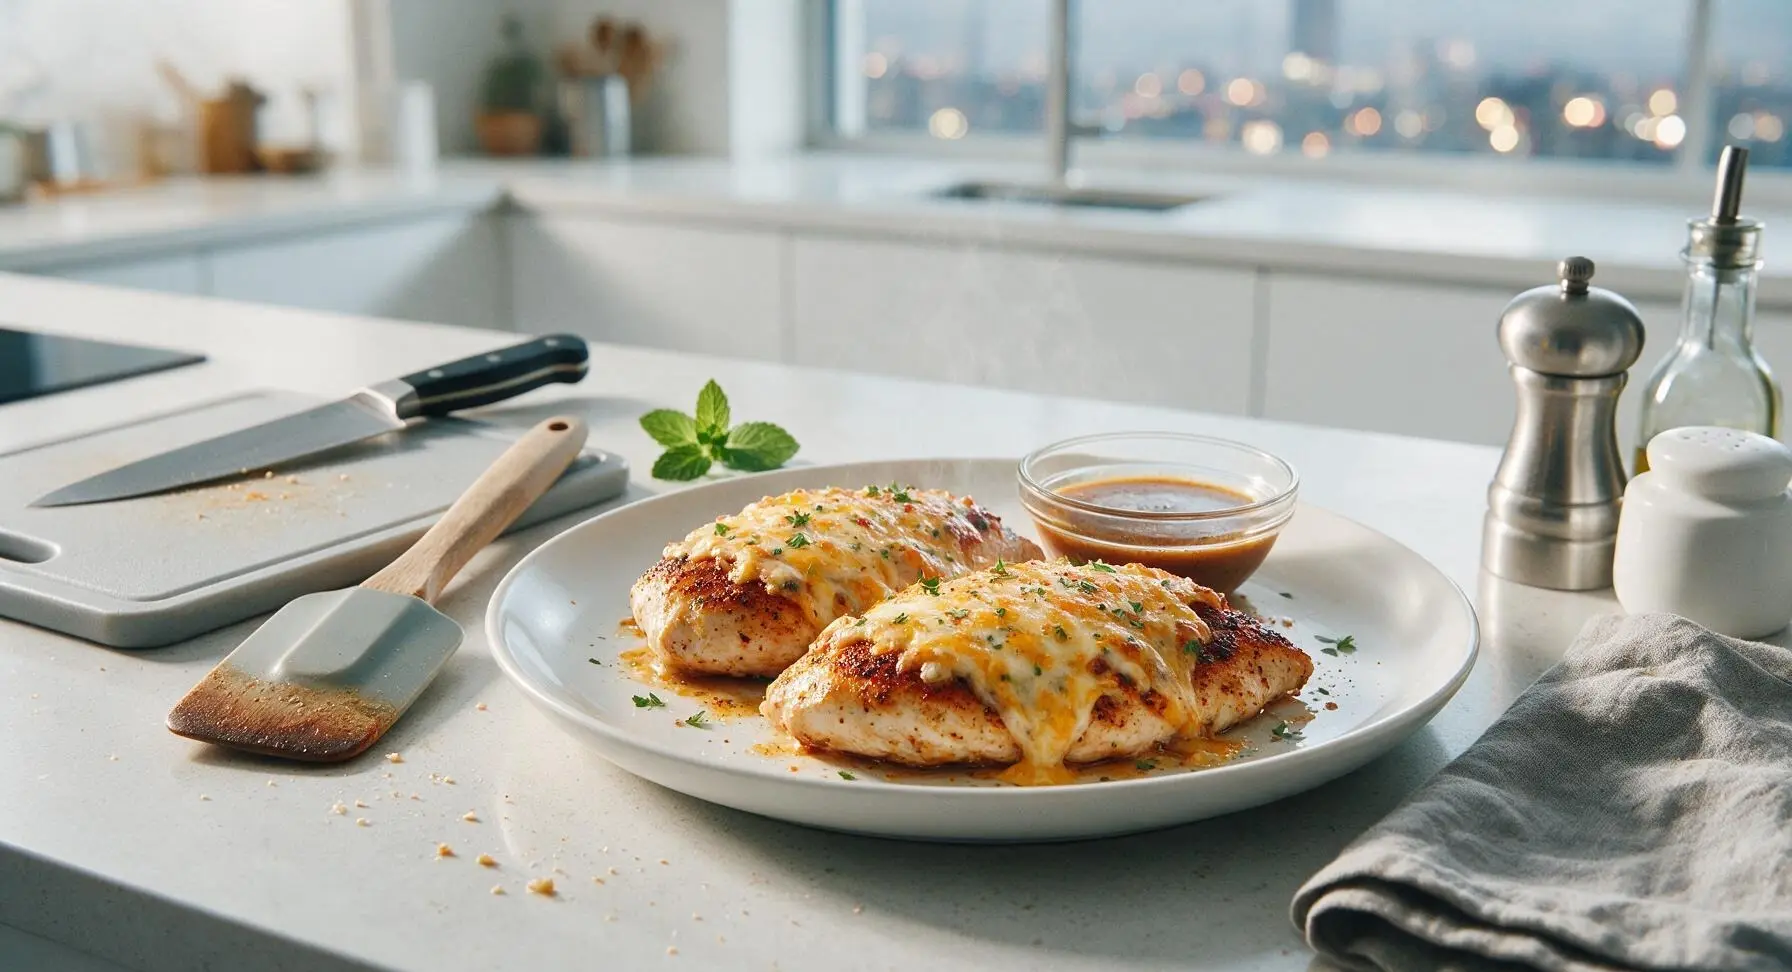
Juicy, crisp-seared chicken breasts topped with bubbly, golden three-cheese blend, seasoned with warm spices and fresh herbs, ready in 30 minutes for a satisfying, family-friendly weeknight meal.

Ingredients
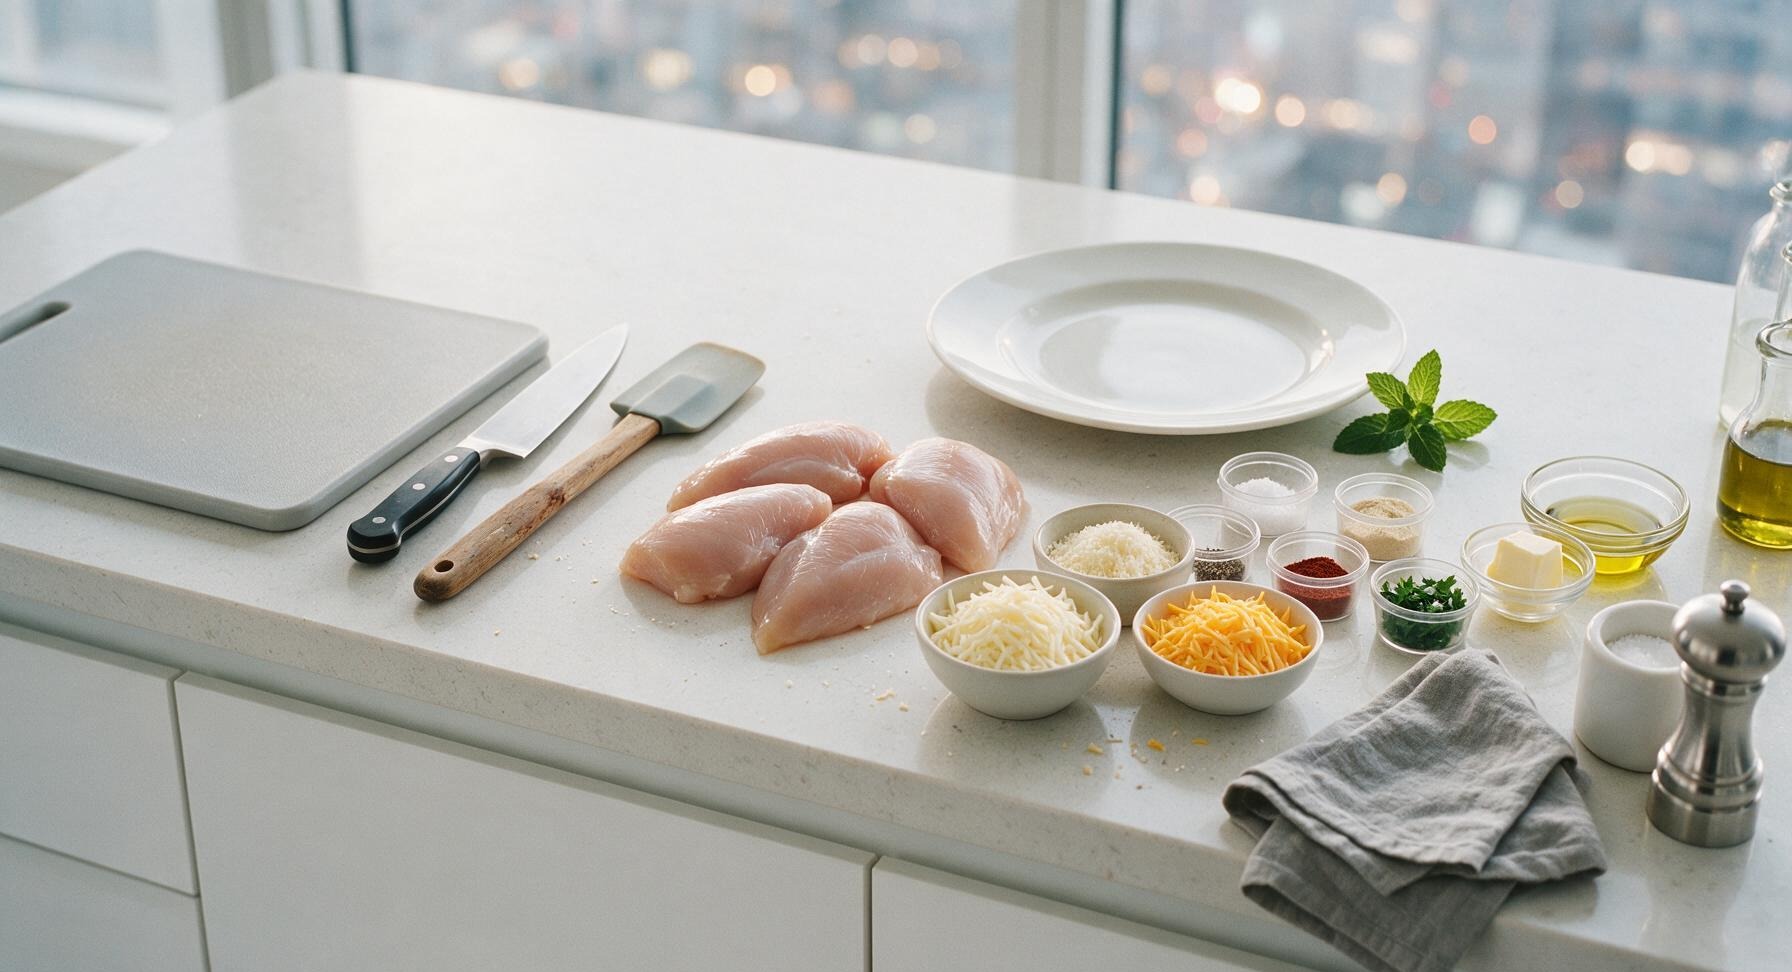
Boneless, skinless chicken breasts 600g (4 x 150g pieces)
Low-moisture mozzarella cheese, shredded 120g
Sharp cheddar cheese, shredded 80g
Grated parmesan cheese 30g
Extra-virgin olive oil 2 tbsp
Unsalted butter 1 tbsp
Kosher salt 1 tsp
Freshly ground black pepper 1/2 tsp
Garlic powder 1 tsp
Smoked paprika 1/2 tsp
Fresh flat-leaf parsley, chopped 2 tbsp

Steps

1

Pound and Season Chicken

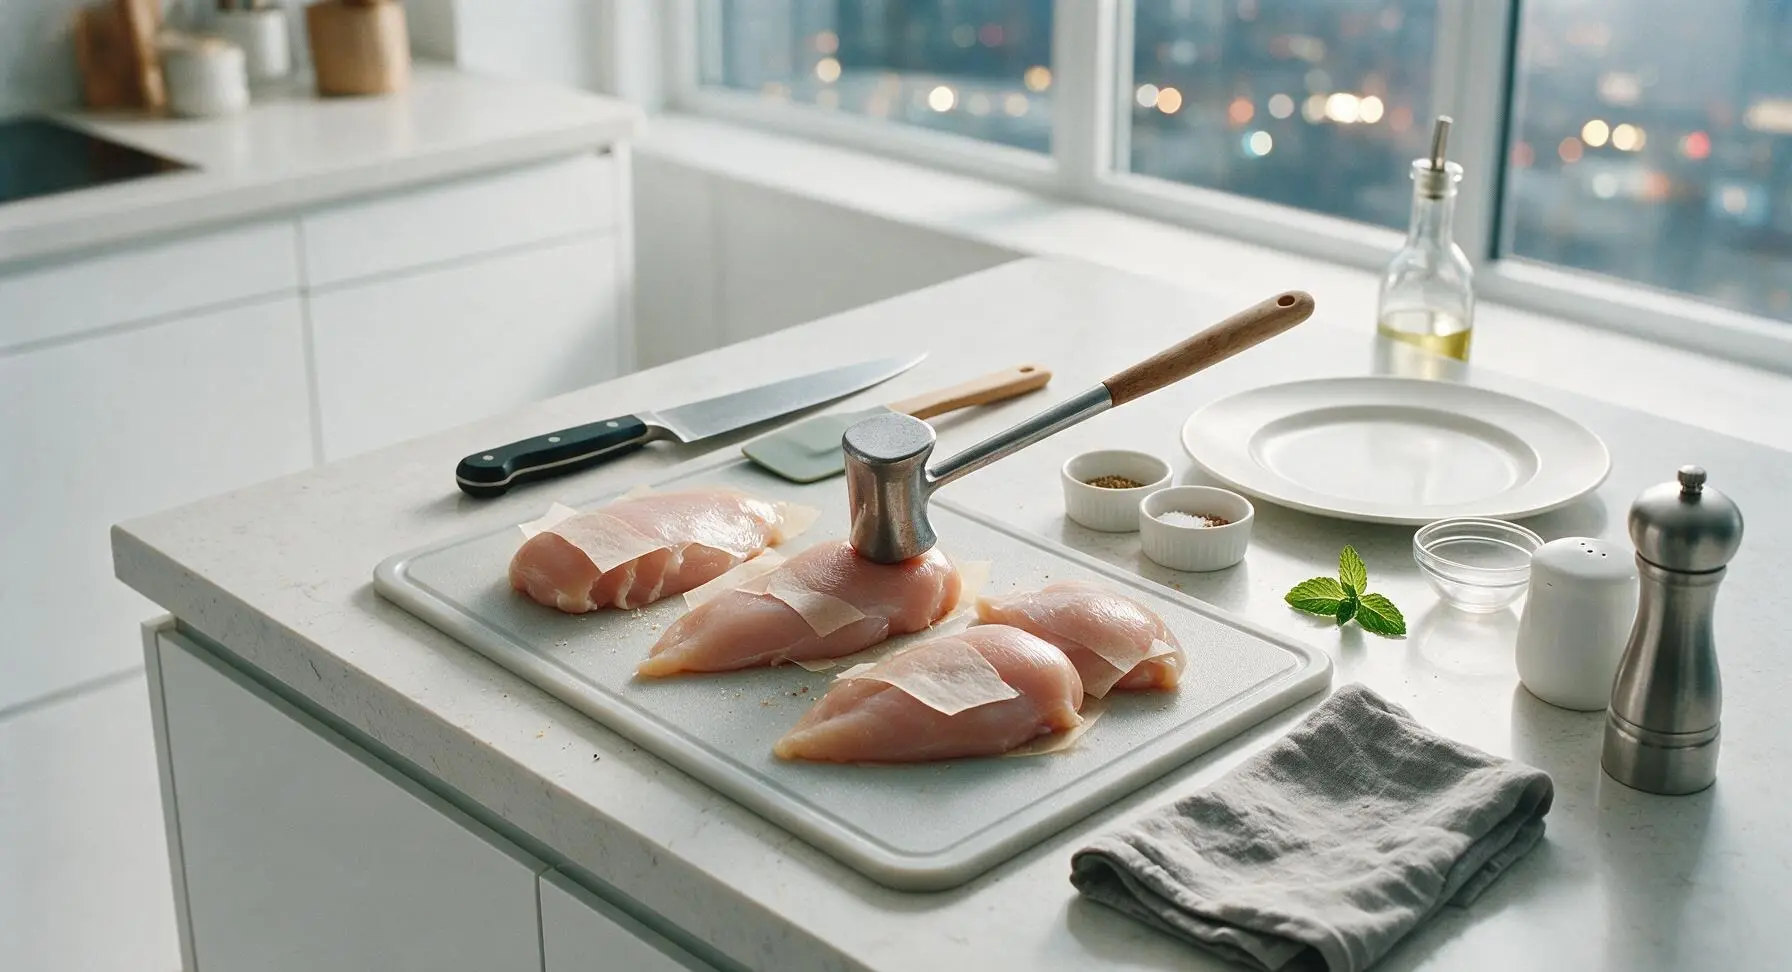
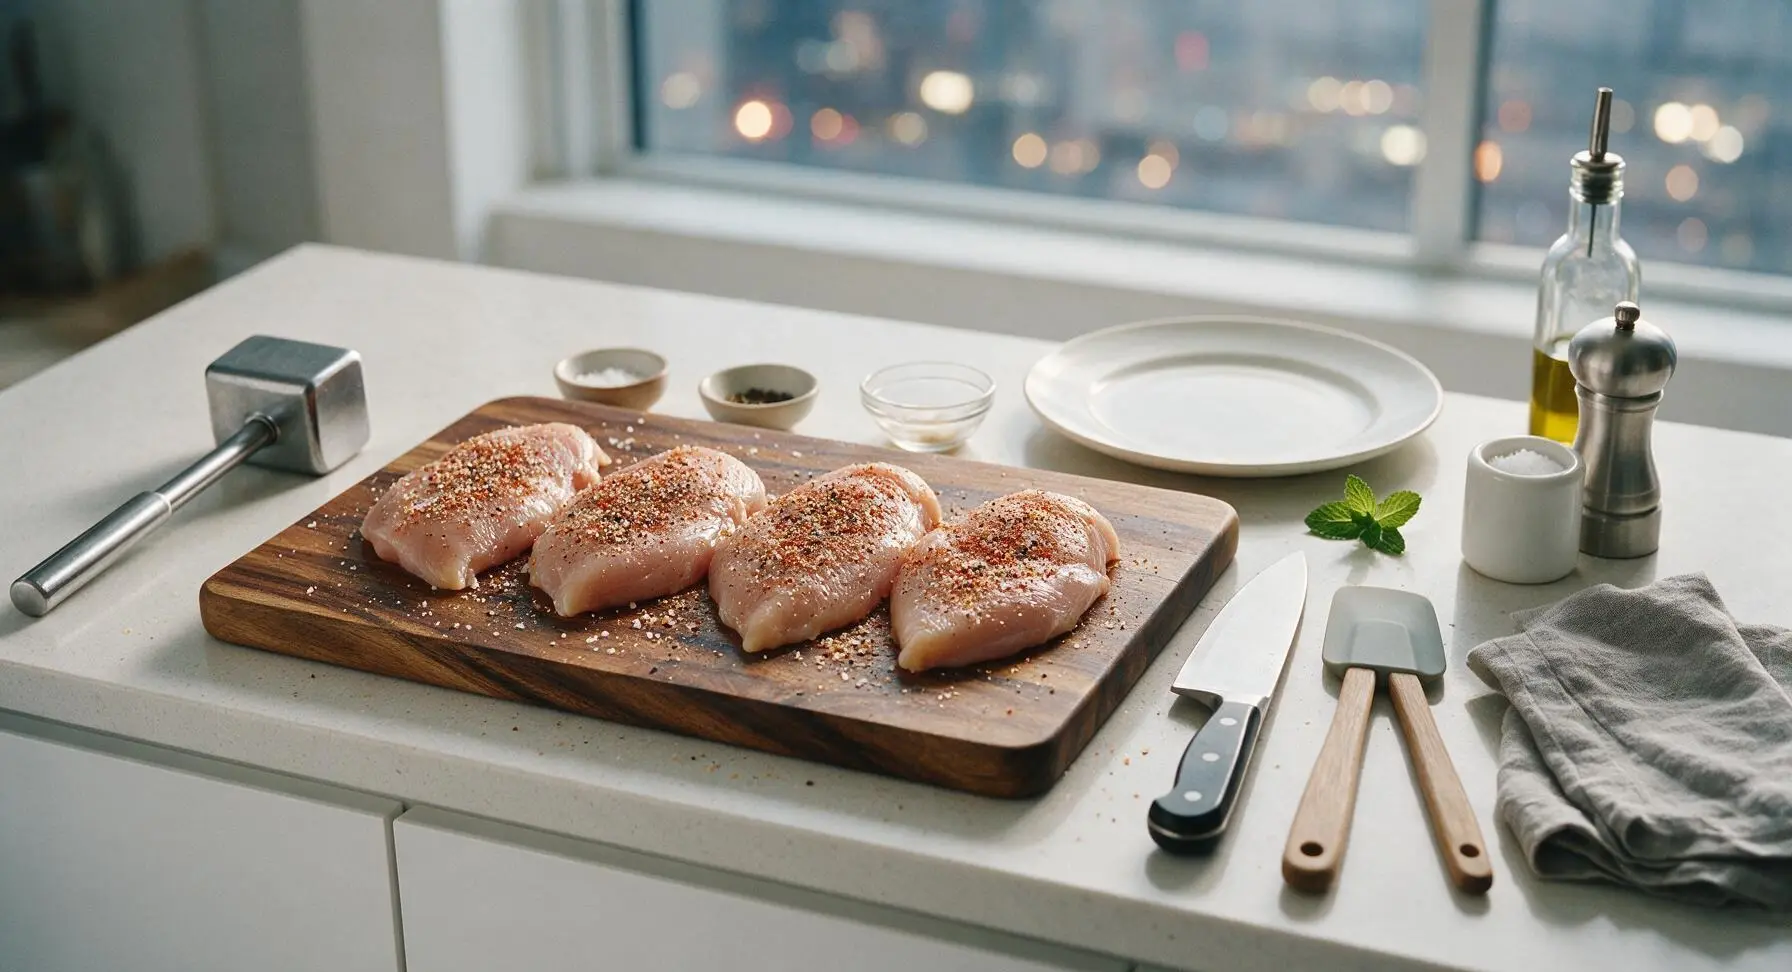
Place 4 boneless, skinless chicken breasts on the dark acacia wood cutting board. Cover each breast with a small sheet of parchment paper to prevent tearing and splatter. Use the flat side of the stainless steel meat mallet to pound the thickest end of each breast to a uniform 2cm thickness, ensuring no section is thicker than the rest for even cooking. Sprinkle all sides evenly with 1 tsp kosher salt, 1/2 tsp freshly ground black pepper, 1 tsp garlic powder, and 1/2 tsp smoked paprika, pressing spices gently into the meat surface so they adhere during searing.
Step 1
step1:Pound and Season Chicken
Step 1
step1:Pound and Season Chicken
2

Preheat Cooking Skillet

Set the 28cm matte black carbon steel skillet on the stovetop over medium heat. Add 2 tbsp extra-virgin olive oil and 1 tbsp unsalted butter. Heat for 2 minutes, until the butter is fully melted, foaming gently, and just turning a pale golden hue; do not let the butter turn dark brown or smoke, as this will create a bitter, burnt crust on the chicken.
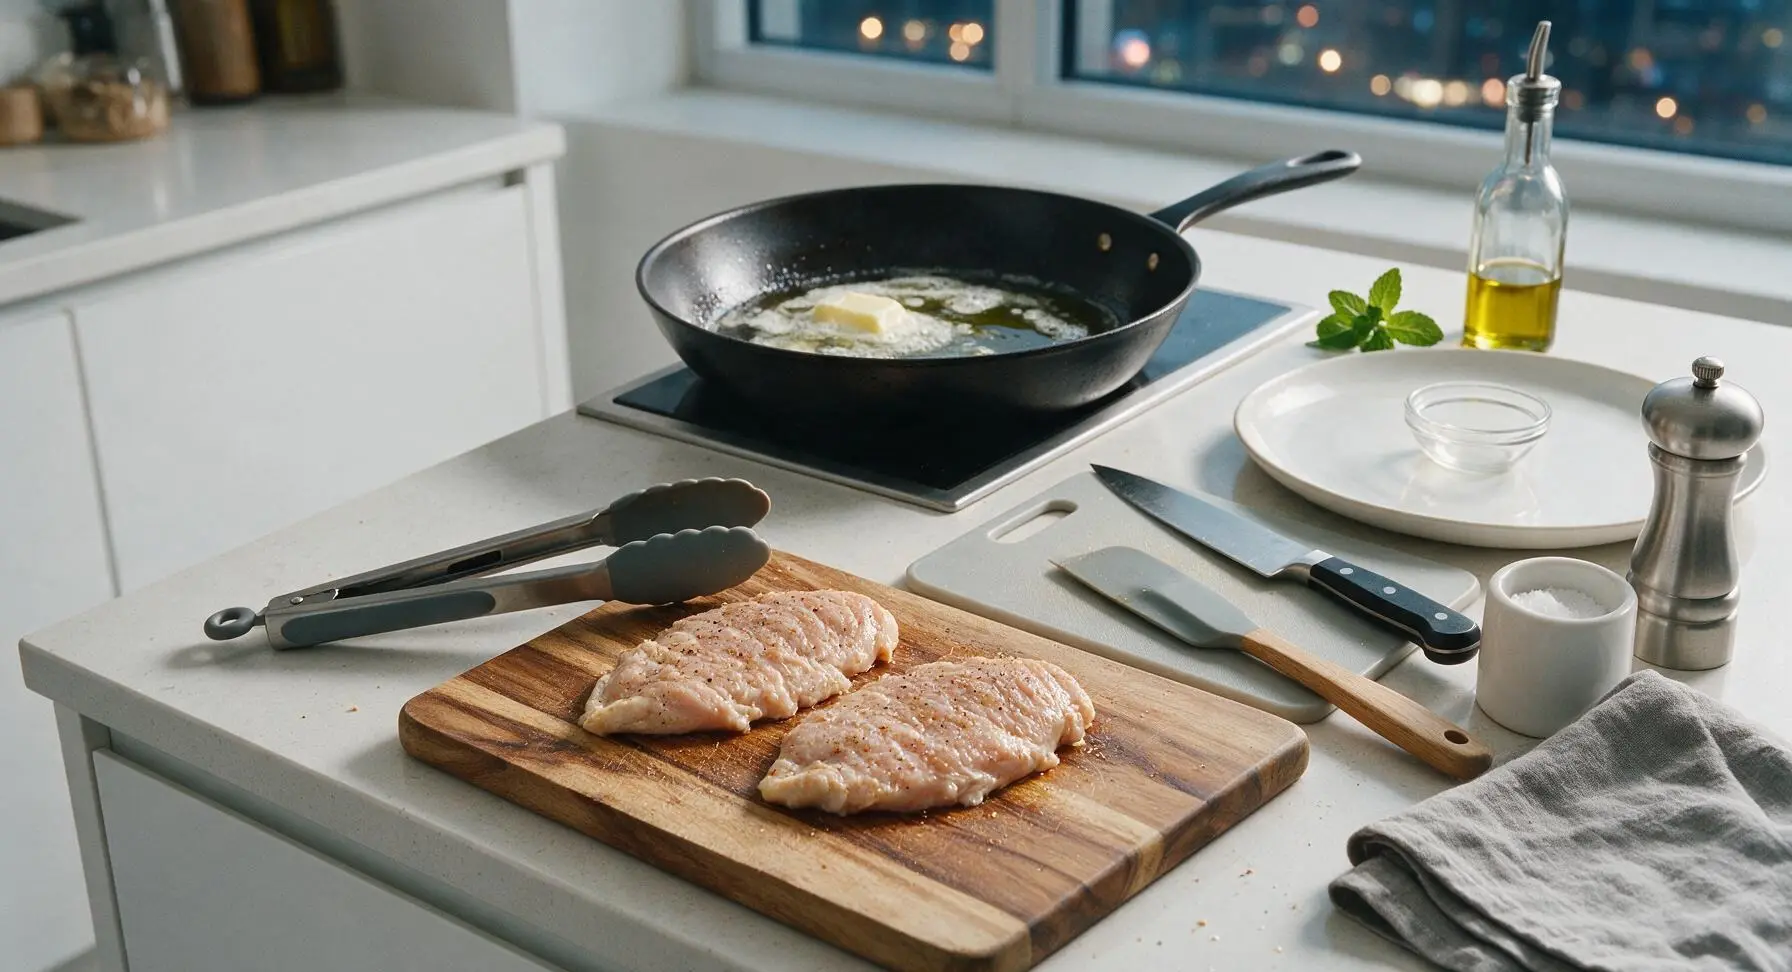
Step 2
step2:Preheat Cooking Skillet
3

Sear First Chicken Side

Use the silicone-tipped metal tongs to carefully lower each seasoned chicken breast into the hot skillet, laying the pieces away from your body to avoid hot oil splatter. Cook undisturbed for 6 full minutes over medium heat, resisting the urge to move or lift the chicken early, as this will break the developing crisp crust. The first side is ready when it is deep golden brown and releases easily from the pan with no sticking.
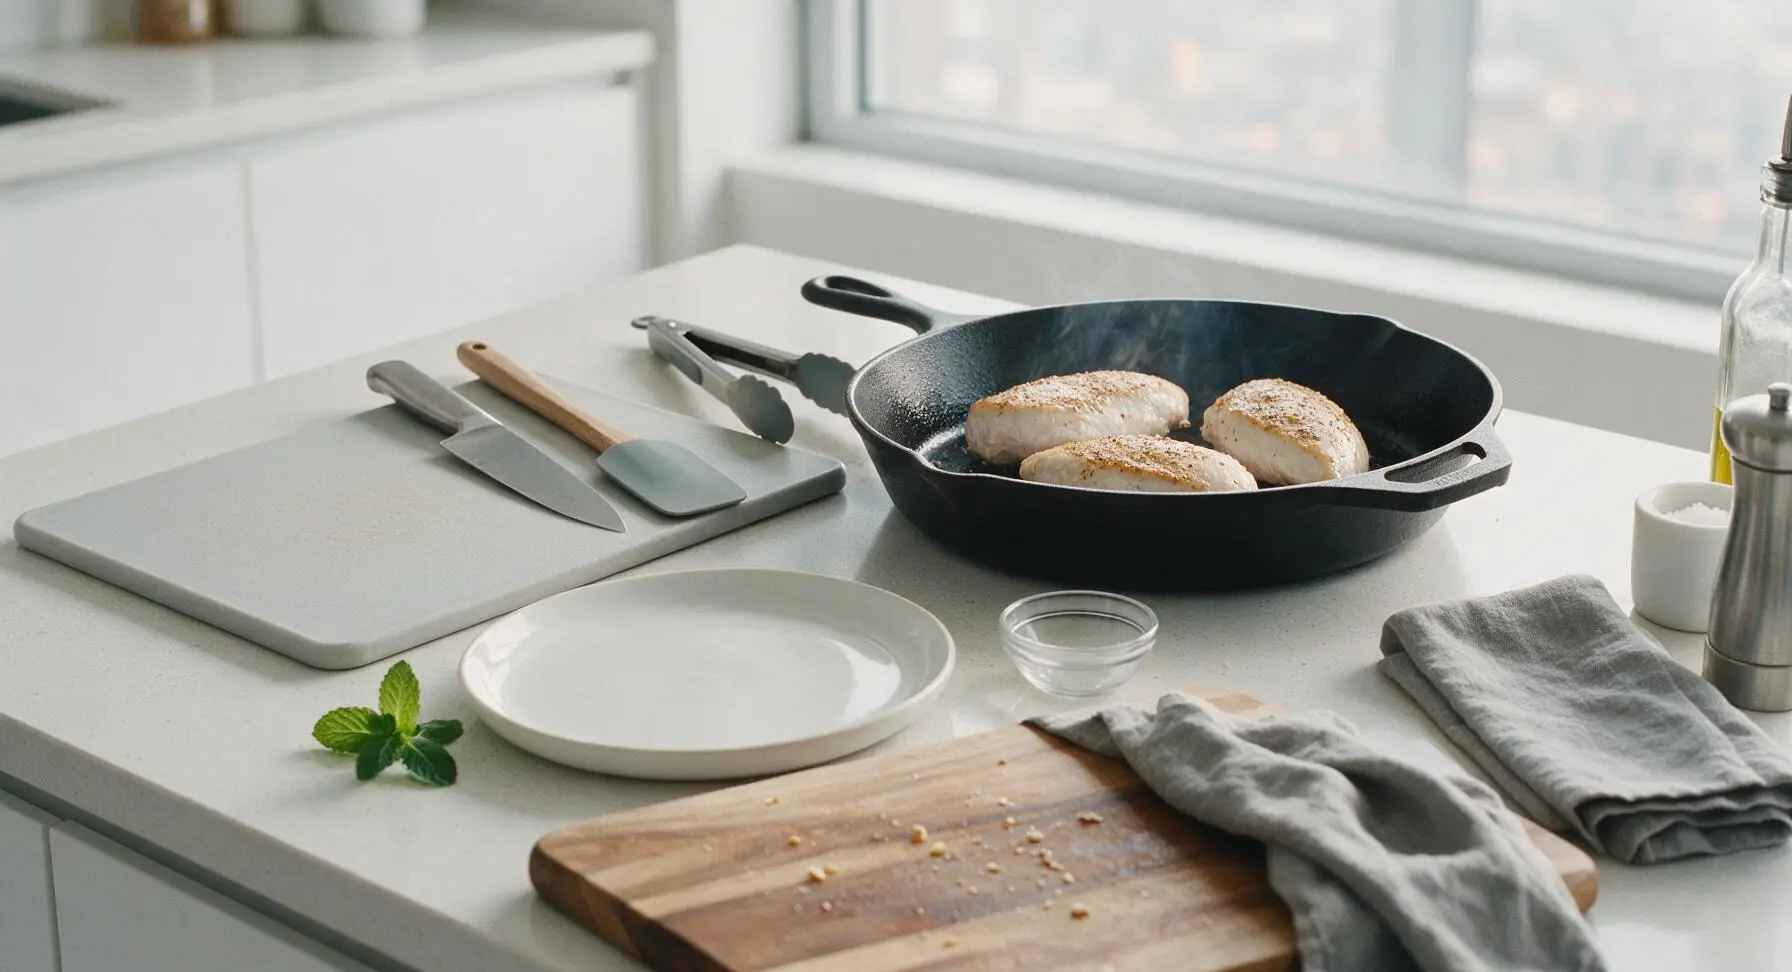
Step 3
step3:Sear First Chicken Side
4

Flip and Verify Doneness

Use the tongs to flip each chicken breast to the second side. Cook for an additional 4 minutes, until the second side forms a matching golden crisp crust. Insert the stainless steel instant-read thermometer into the thickest part of the largest breast: it should read 71°C (160°F). The chicken will continue to carry-over cook while the cheese melts, so it will reach a safe 74°C (165°F) without drying out.
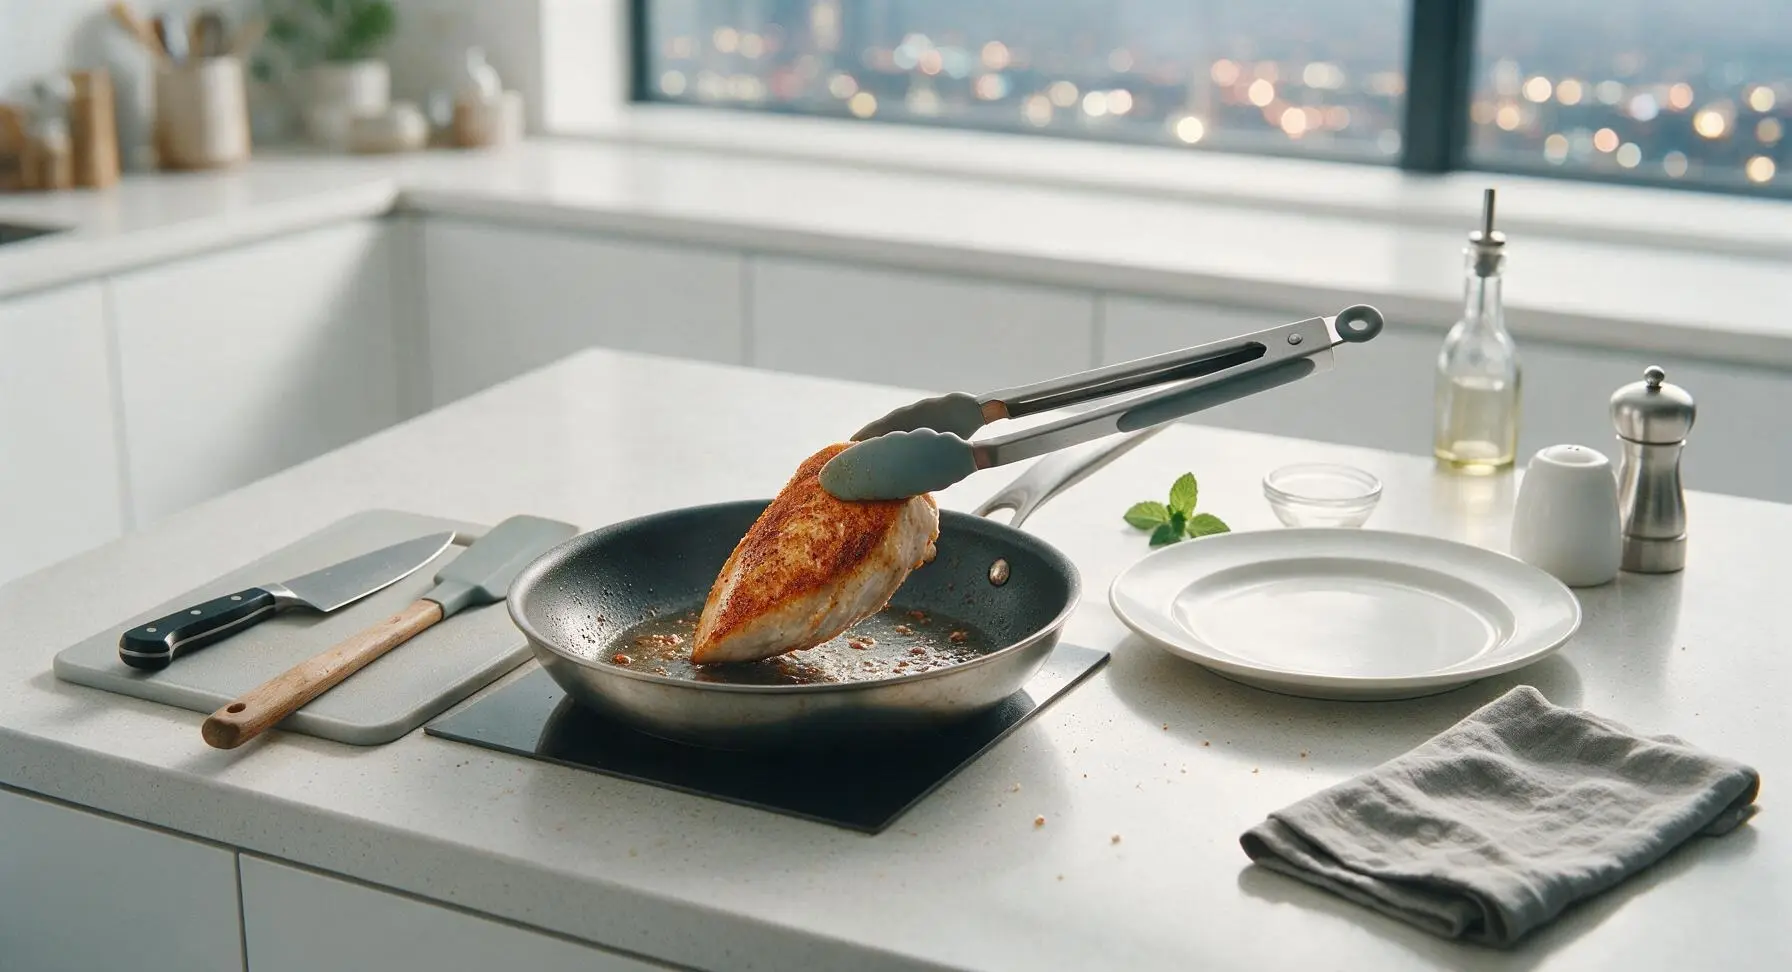
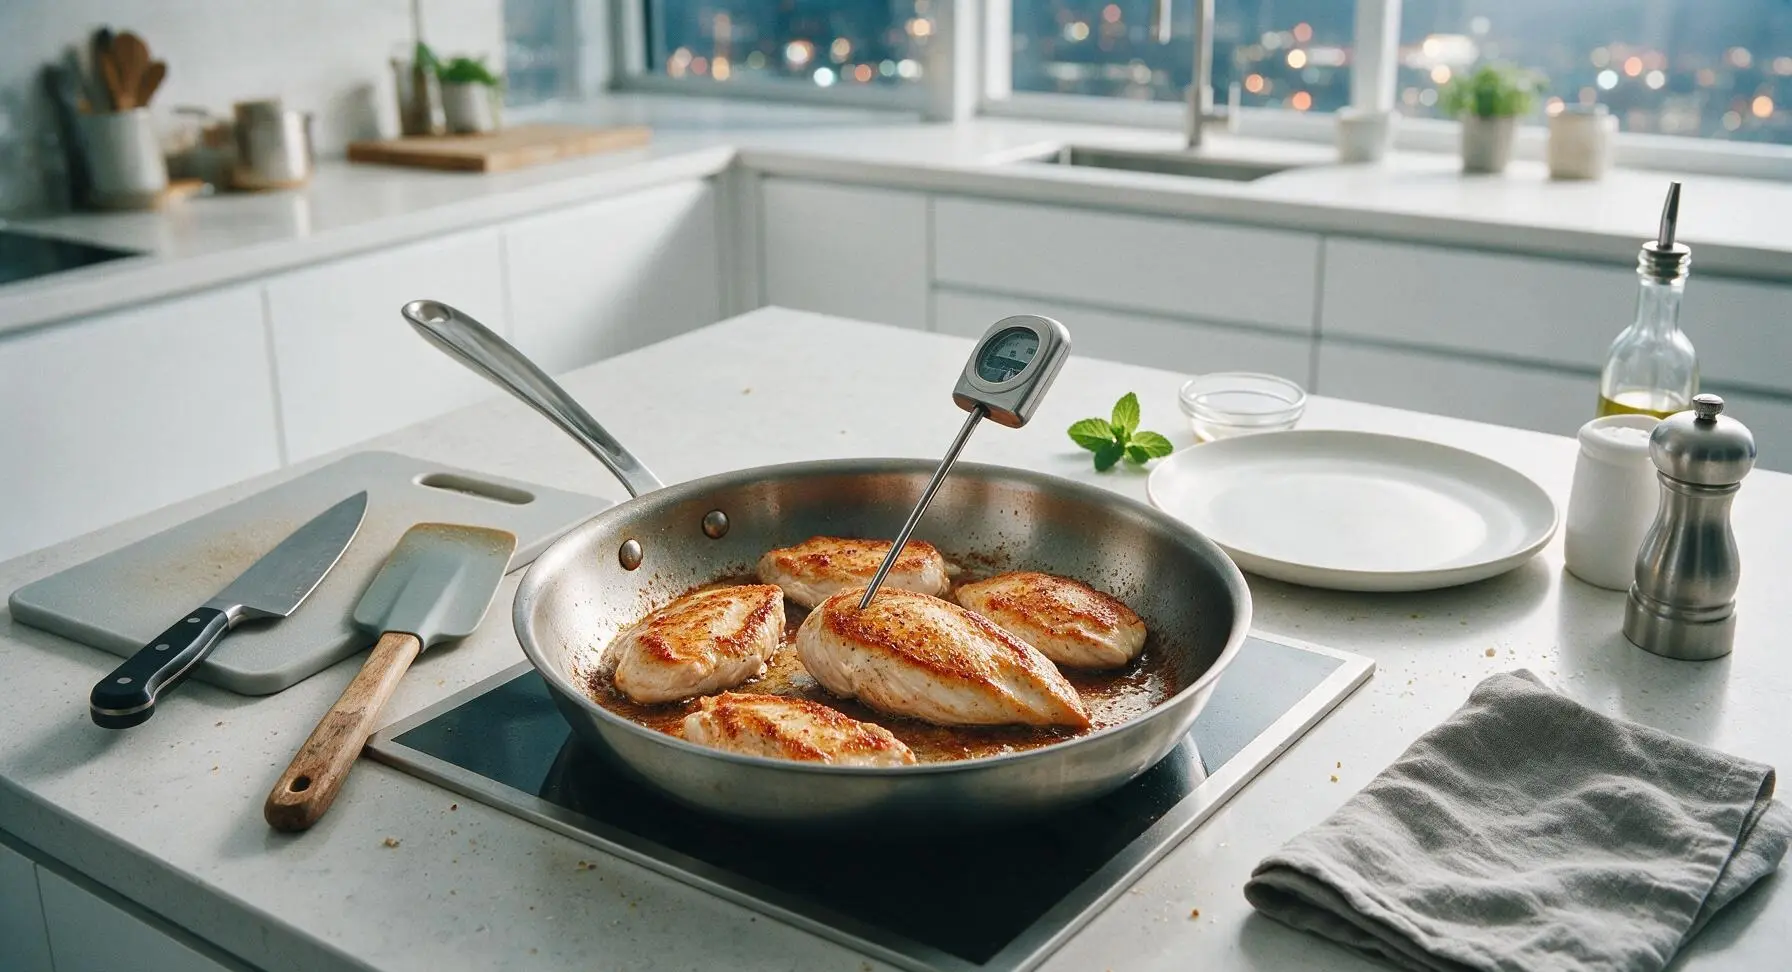
Step 4
step4:Flip and Verify Doneness
Step 4
step4:Flip and Verify Doneness
5

Top and Melt Cheese

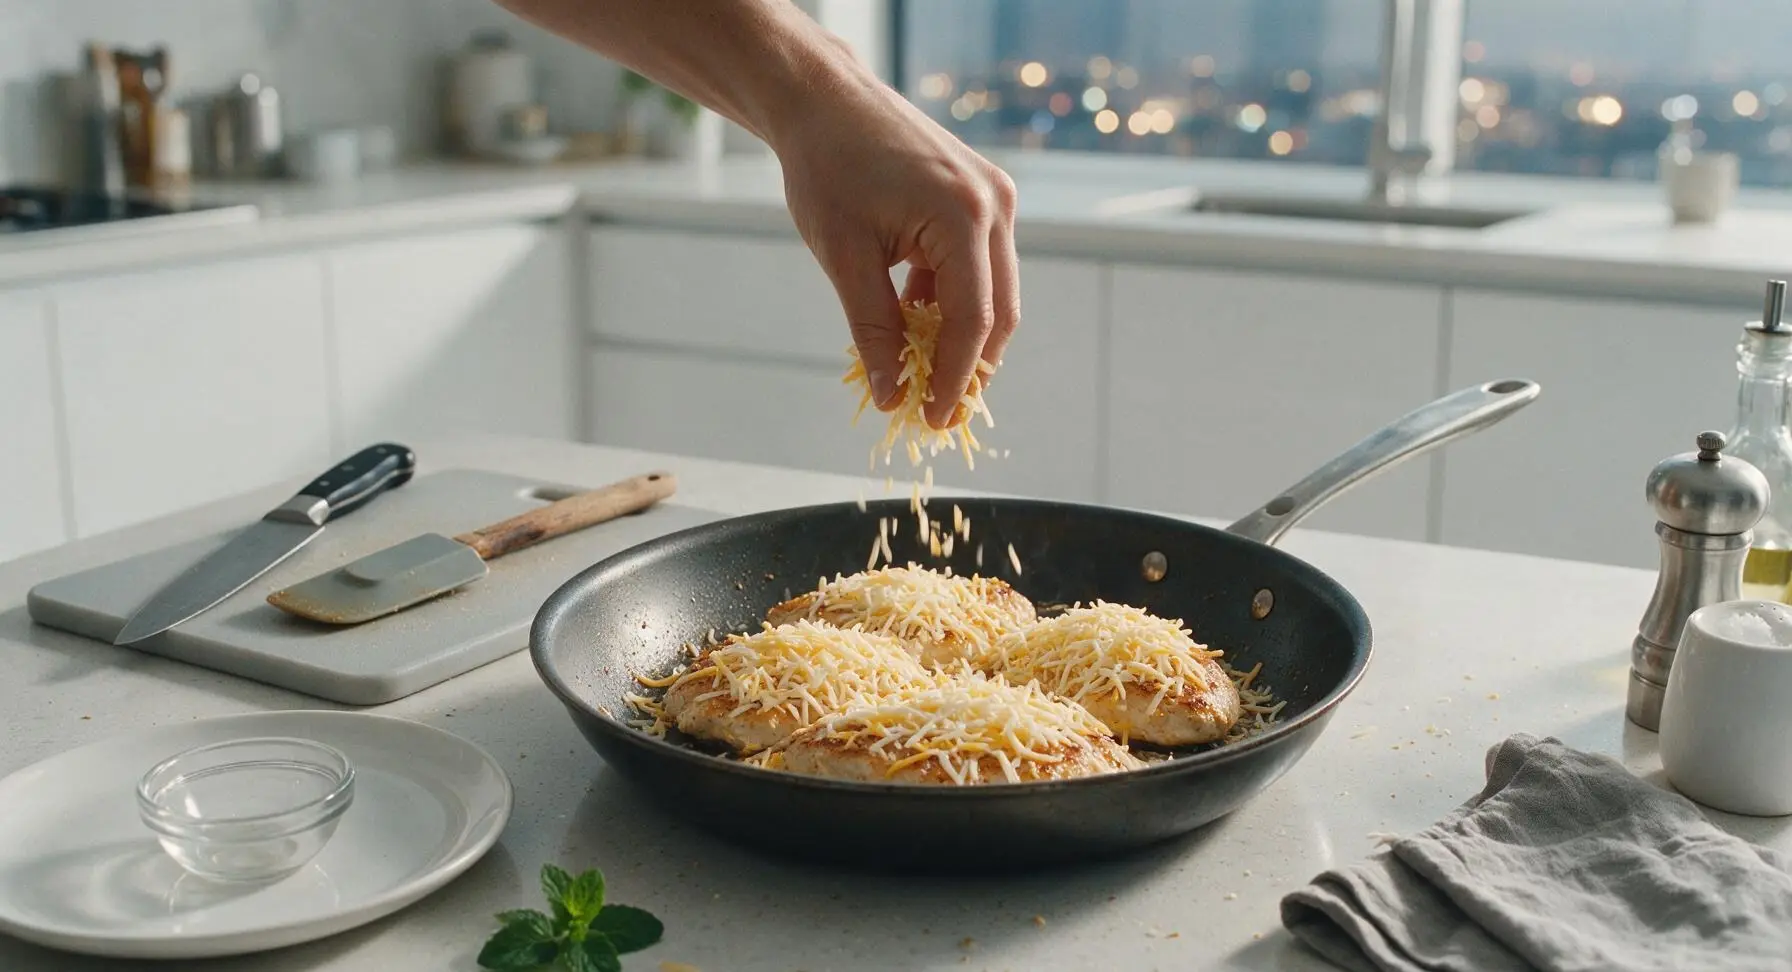
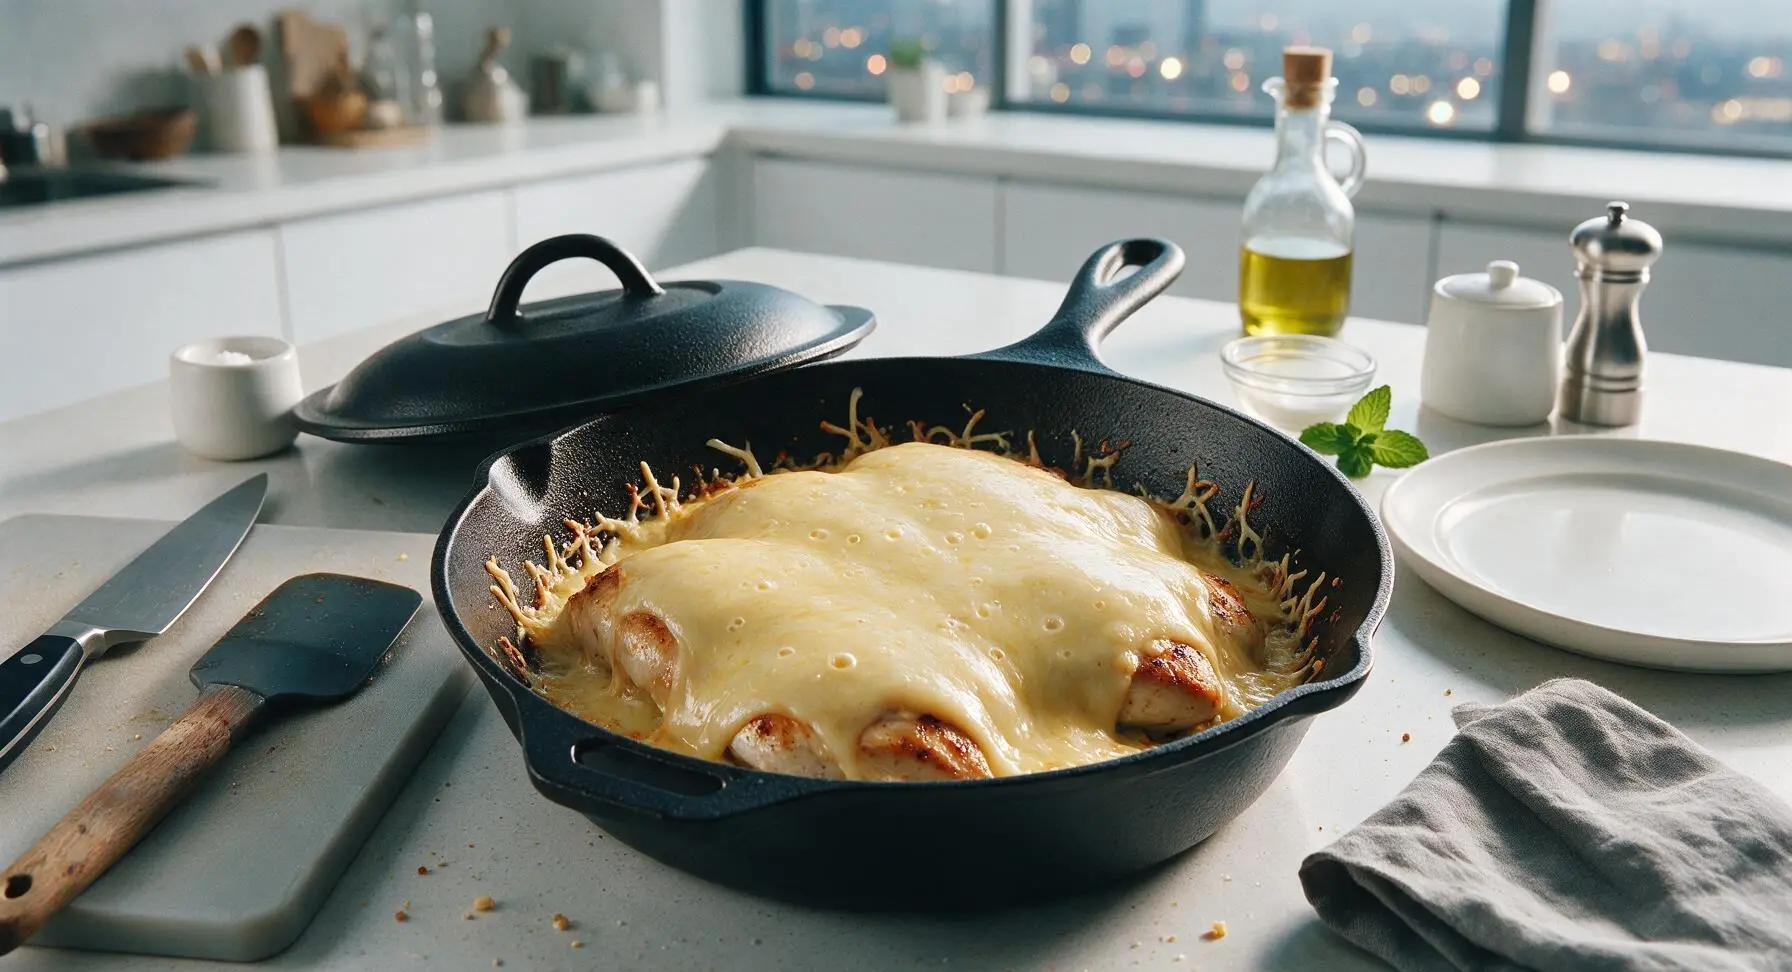
Reduce stovetop heat to medium-low. Evenly distribute the mixed shredded cheeses (120g low-moisture mozzarella, 80g sharp cheddar, 30g grated parmesan) across the top of each chicken breast, leaving a 5mm border around each edge to prevent excess cheese from burning on the pan surface. Cover the skillet with a tight-fitting lid and cook for 2-3 minutes, until the cheese is fully melted, glossy, and bubbling, with faint golden spots forming where cheese touches the hot pan.
Step 5
step5:Top and Melt Cheese
Step 5
step5:Top and Melt Cheese
6

Plate and Add Garnish

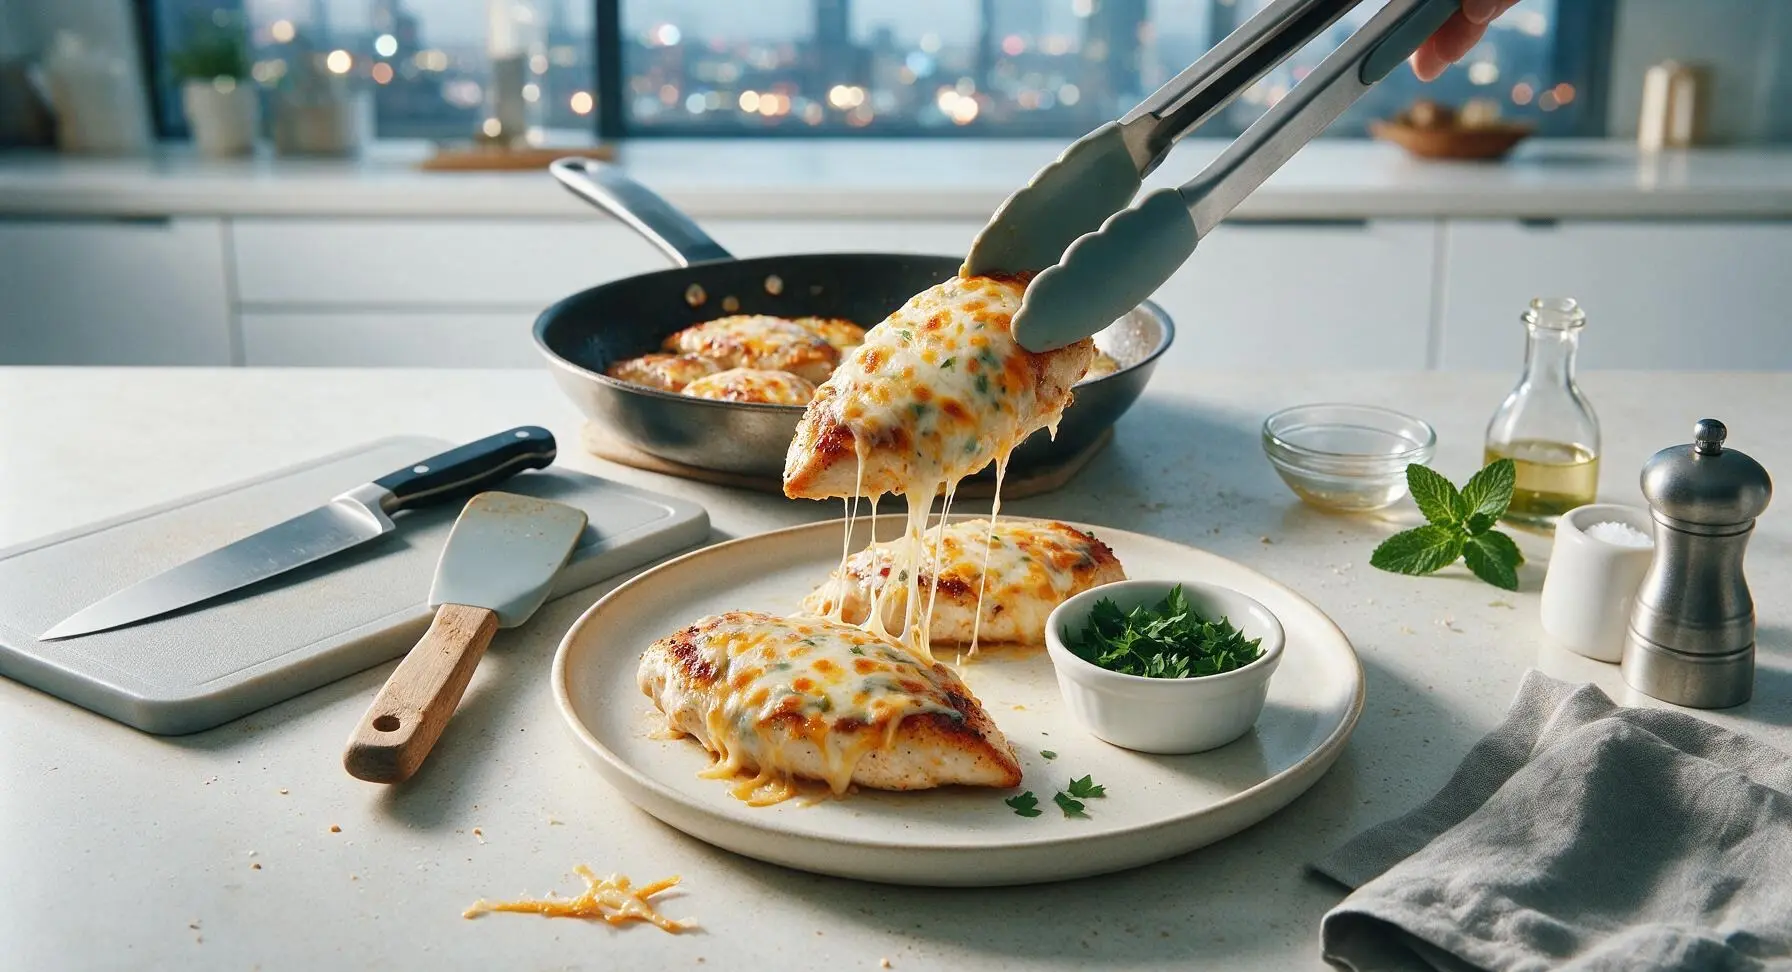
Turn off the stovetop heat. Use the silicone-tipped metal tongs to transfer one chicken breast to the matte cream stoneware dinner plate (reserving the remaining three breasts for additional servings), letting any excess oil drip back into the skillet before plating. Sprinkle a pinch of the 2 tbsp freshly chopped flat-leaf parsley over the melted cheese top. Let the plated chicken rest for 2 minutes to allow juices to redistribute before serving, ensuring juicy, tender meat in every bite.
Step 6
step6:Plate and Add Garnish

Tips

1.Pound chicken to an even 2cm thickness for consistent cooking: uneven breasts will have dry, overcooked thin sections by the time the thickest part reaches a safe temperature, leading to mixed texture in every bite.
2.Skip fresh mozzarella for this recipe and use low-moisture mozzarella: fresh mozzarella contains high water content that releases as it melts, making the crispy chicken crust soggy, while low-moisture mozzarella melts into a smooth, stretchy layer without excess moisture.
3.Do not move the chicken during the first 6 minutes of searing: lifting or shifting the chicken early breaks the contact between the meat and hot pan, preventing the formation of a deep, crisp golden crust and causing the chicken to stick.


✨ You May Also Like

Main Course
🍜 United Kingdom

A showstopping classic of tender seared beef, savory mushroom duxelles, and crisp prosciutto wrapped in flaky golden puff pastry, baked to juicy perfection.

⏱️ 2 hours 1Main Course ★ 4.7
Main Course
🍜 India

Tender charred marinated chicken simmered in a rich, spiced creamy tomato sauce, this iconic Anglo-Indian curry pairs perfectly with basmati rice or warm naan.

⏱️ 50 minuteMain Course ★ 4.6
Main Course
🍜 Thailand

Classic tangy, sweet, and savory Thai stir-fried rice noodles with shrimp, tofu, and crunchy garnishes, balancing all five core Thai flavor profiles.

⏱️ 30 minuteMain Course ★ 4.5
Main Course
🍜 United Kingdom

Crispy golden beer-battered cod and fluffy double-fried chips, served with tangy tartar sauce and malt vinegar: the timeless, beloved British pub comfort classic.

⏱️ 45 minuteMain Course ★ 4.7
Main Course
🍜 Mexico

Smoky, chile-marinated pork tacos with caramelized pineapple, fresh cilantro, and lime: a beloved classic Mexican street food perfect for casual summer gatherings.

⏱️ 1 hour 45Main Course ★ 4.8
Main Course
🍜 United States

Crunchy Fritos corn chips layered with savory beef chili and melted cheddar, topped with cool, zesty fixings for a beloved, cozy Tex-Mex comfort food.

⏱️ 35 minuteMain Course ★ 4.8

chicken and cheese:Frequently Asked Questions

1.What’s the best way to get a perfectly crisp sear on my chicken breasts? ▾
First, pat chicken completely dry with paper towels right before seasoning—surface moisture is the #1 enemy of a crisp crust. Heat your olive oil until it shimmers, lay chicken down away from you, and don’t poke, move, or flip it for 4–5 full minutes to let that deep golden, crunchy crust form.
2.Why does this recipe call for low-moisture mozzarella instead of fresh mozzarella? ▾
Fresh mozzarella has very high water content that releases watery liquid as it melts, leaving you with soggy cheese topping and diluted flavor instead of that bubbly, stretchy, golden top. Low-moisture mozz melts smoothly without excess water, pairing perfectly with sharp cheddar and nutty parmesan for balanced flavor.
3.How thick should my chicken breasts be for even cooking? ▾
Aim for uniform 1-inch thick breasts for the most consistent results. If your breasts are extra thick on one tapered end, pound the thicker side gently with a meat mallet or heavy skillet until the whole breast is an even thickness—this prevents the thin end from drying out before the thick center cooks through.
4.What internal temperature should I cook the chicken to for juicy, food-safe results? ▾
Pull the chicken from the stovetop when the thickest part hits 160°F, right before you add the cheese topping. It will continue to cook 5°F from residual heat (called carryover cooking) to reach the food-safe 165°F as the cheese melts, so you won’t end up with tough, overcooked, dry chicken.
5.Can I use a different skillet if I don’t have a cast iron skillet for this recipe? ▾
Absolutely! Any heavy-bottomed, oven-safe skillet works perfectly here—stainless steel, enameled cast iron, or hard-anodized aluminum are all great picks. Just avoid thin, lightweight nonstick skillets that can’t hold consistent high heat for searing, and confirm the handle is oven-safe for the broiler step.
6.How do I get the cheese topping perfectly bubbly and golden without burning it? ▾
After searing both sides of the chicken, sprinkle your three-cheese blend evenly over each breast, then pop the skillet under a preheated broiler 6 inches from the heat for 2–3 minutes. Keep a close eye on it the whole time—broilers heat fast, and perfect golden cheese can burn in as little as 30 seconds.
7.What seasonings pair best with this chicken and three-cheese topping? ▾
Stick to warm, complementary spices that won’t overpower the cheese: garlic powder, smoked paprika, a pinch of onion powder, black pepper, and a light sprinkle of kosher salt work beautifully. Finish with chopped fresh parsley or thyme right after broiling for a bright, fresh pop of herb flavor.
8.Can I substitute pre-shredded store-bought cheese for freshly shredded cheese here? ▾
You can, but note that pre-shredded cheese is coated in anti-caking agents like potato starch that can make the melted topping slightly grainy instead of perfectly smooth. If you do use pre-shredded, toss it with a tiny pinch of cornstarch to help it melt more evenly and avoid a clumpy texture.
9.What quick side dishes work well for this 30-minute weeknight meal? ▾
Pick sides that match the recipe’s fast timeline to keep dinner simple: roasted broccoli tossed in olive oil, buttery egg noodles, a simple arugula salad with lemon vinaigrette, garlic roasted baby potatoes, or steamed green beans with a squeeze of lemon all pair perfectly with the rich, cheesy chicken.
10.Can I use chicken thighs instead of chicken breasts for this recipe? ▾
Absolutely! Boneless, skinless chicken thighs are a fantastic swap if you prefer extra rich, juicy meat. They’ll take roughly the same total cook time, just trim any excess loose fat before searing, and cook them to a 165°F internal temperature for food safety, no carryover cook adjustment needed.
11.How should I store leftover cooked chicken with cheese topping? ▾
Let leftovers cool completely to room temperature within 2 hours of cooking, then transfer them to an airtight container and keep them in the fridge for up to 3 days. Reheat in a 350°F oven or toaster oven for 8–10 minutes until warmed through to keep the cheese bubbly and chicken crisp instead of soggy.
12.Why is my cheese not melting smoothly on top of the chicken? ▾
This usually happens if the chicken surface is too wet when you add the cheese, or if your heat is too low when melting. Pat the top of the seared chicken lightly with a paper towel to soak up any excess rendered juice before adding cheese, and use high broiler heat to get that fast, even, smooth melt.
13.Can I prep components of this meal ahead for faster weeknight cooking? ▾
Definitely! Shred your cheese blend and mix it together 2–3 days ahead, and pound your chicken breasts to uniform thickness the night before, storing them sealed in the fridge. You can even mix your custom spice blend ahead of time so all you have to do on cook night is season, sear, top, and broil.
14.Is there a way to make this recipe lower in dairy or fully dairy-free? ▾
For a lower-dairy swap, cut the total cheese amount in half and use part-skim mozzarella and reduced-fat cheddar. For fully dairy-free, use a high-melting dairy-free mozzarella and cheddar blend, plus a sprinkle of nutritional yeast in place of parmesan to get that same nutty, savory, cheesy flavor.
15.Do I need to cover the skillet while searing the chicken? ▾
Skip the lid while searing! Trapping steam under a lid will make the chicken surface moist instead of crisp, leading to a pale, soggy crust instead of that deep golden sear you want. Only use a lid briefly if the thickest part of the chicken is still under 150°F after searing both sides, to help it cook through faster.
16.How do I keep the melted cheese from sticking all over my skillet when serving? ▾
Let the chicken rest in the skillet for 2 full minutes after pulling it from the broiler before you scoop it out with a thin, flexible spatula. That short rest lets the melted cheese set slightly so it lifts cleanly off the pan instead of oozing off the chicken and leaving a sticky, burnt cheese mess behind.
17.Can I add extra mix-ins to the cheese topping for more flavor? ▾
Absolutely! Toss in a tiny bit of crumbled cooked bacon, a pinch of red pepper flakes for gentle heat, a sprinkle of dried oregano for an Italian twist, or thin slices of pickled jalapeño for a bright, zesty kick. Just don’t pile toppings too thick, or they’ll weigh down the cheese and keep it from melting evenly.

Comments (9)

2 hours ago

OMG this was SO good! I threw this together on a random weeknight when I had zero meal plan and it was on the table in 18 minutes flat, no joke. My twins are super picky about chicken (they hate when it’s dry) and they both asked for seconds! The three cheese blend gets all melty and crispy on the edges in the skillet—game changer.

30 minutes ago

Wait did you use the exact cheese blend listed or swap any? I only have mozzarella and parm in my fridge right now, wondering if I can skip the asiago?

5 minutes ago

So glad your twins loved it! You can absolutely swap in whatever melty cheeses you have on hand—mozzarella and parm will work great, just add a little extra parm for that sharp, nutty kick if you’re skipping the asiago.

yesterday

Made this for my Sunday football watch party and it was a total hit! I cut the chicken into bite-sized pieces after searing so people could grab them with toothpicks, and the cheese topping stayed perfectly melty for like 20 minutes after I pulled it off the stove. Only thing I added was a little sprinkle of red pepper flakes for heat, 10/10.

2 hours ago

Love the bite-sized party hack! Adding red pepper flakes is such a good call for a little extra warmth, I’ll have to try that next time I make these for a game day spread.

3 days ago

As someone who barely knows how to boil water without burning it, this recipe was foolproof! I was worried I’d mess up the sear on the chicken but the instructions were super straightforward, and the melted cheese covered up the one tiny spot I overcooked lmao. Already added this to my weekly meal rotation.

5 days ago

Wait has anyone tried making this ahead for meal prep? I’m wondering if the cheese gets all rubbery when you reheat it in the microwave for work lunches. I’m always on the hunt for high-protein lunches that don’t taste sad by Wednesday.

3 days ago

I made this last week for meal prep! I stored the chicken and cheese separately, then added the cheese on top when I reheated the chicken for 90 seconds, it melted perfect no rubbery texture at all.

2 days ago

Great question! Ryan’s hack is spot on—if you’re prepping ahead, store the cheese topping separately and add it right when you reheat for the best texture. If you do top it ahead, reheat covered in the oven at 325 for 10 minutes instead of the microwave to keep the cheese creamy.

1 week ago

Made this for our family potluck last weekend and every single person asked for the recipe! I used a mix of sharp cheddar, mozzarella, and smoked gouda instead of the three cheeses listed because that’s what I had, and the smoky flavor from the gouda was insane. Will 100% be making this again soon.

5 days ago

Oh the smoked gouda swap sounds chef’s kiss! I’m making this for our neighborhood block party next weekend and I’m definitely stealing that idea, thank you!

2 weeks ago

This was so quick to make after a long day on the trails! I paired it with some roasted broccoli and quinoa and it was the perfect high-protein, filling dinner. The cheese crust on the chicken from the skillet was *chef’s kiss* no sad bland chicken here.

30 minutes ago

Wait quick question—do you cover the skillet when you melt the cheese? I tried this last night and the cheese didn’t get all fully melted on top before the chicken was done cooking, so I had to pop it under the broiler for a minute. Tasted great anyway, just wondering if I missed a step!

5 minutes ago

I usually turn the heat down to low and put a lid on the skillet for 2 minutes right after I add the cheese, melts perfectly every time without burning the bottom of the chicken!

just now

Steve’s tip is exactly what I recommend! Once you add the cheese, turn heat to low, cover for 1-2 minutes and the residual heat will melt the cheese perfectly without overcooking the chicken. The broiler trick works great too though, so glad it still tasted good!

5 minutes ago

This is the best keto-friendly chicken recipe I’ve tried in months! I used a blend of fontina, parmesan, and provolone for the topping (all low carb, no added weird fillers) and it was so rich and satisfying, I didn’t even miss the breaded chicken I usually make. My husband said it tastes like something from a fancy steakhouse!

just now

Oh thank you for listing the cheese swaps for keto! I’ve been scrolling for a low-carb chicken dinner that doesn’t feel like diet food, can’t wait to try your version this weekend.

2 days ago

Made this for my first ever dinner party in my new apartment and I was so stressed it would flop, but it came out perfectly! The skillet sear gives the chicken such a nice golden crust, and the melted cheese makes it look way fancier than it is, especially for a 20 minute recipe. All my roommates raved about it.



