
Christmas Chocolate Covered Oreos

title 1
Christmas Chocolate Covered Oreos
⏱️ cook time 10 minutes
🍽️ servings 12
⚡ Difficulty easy

intro

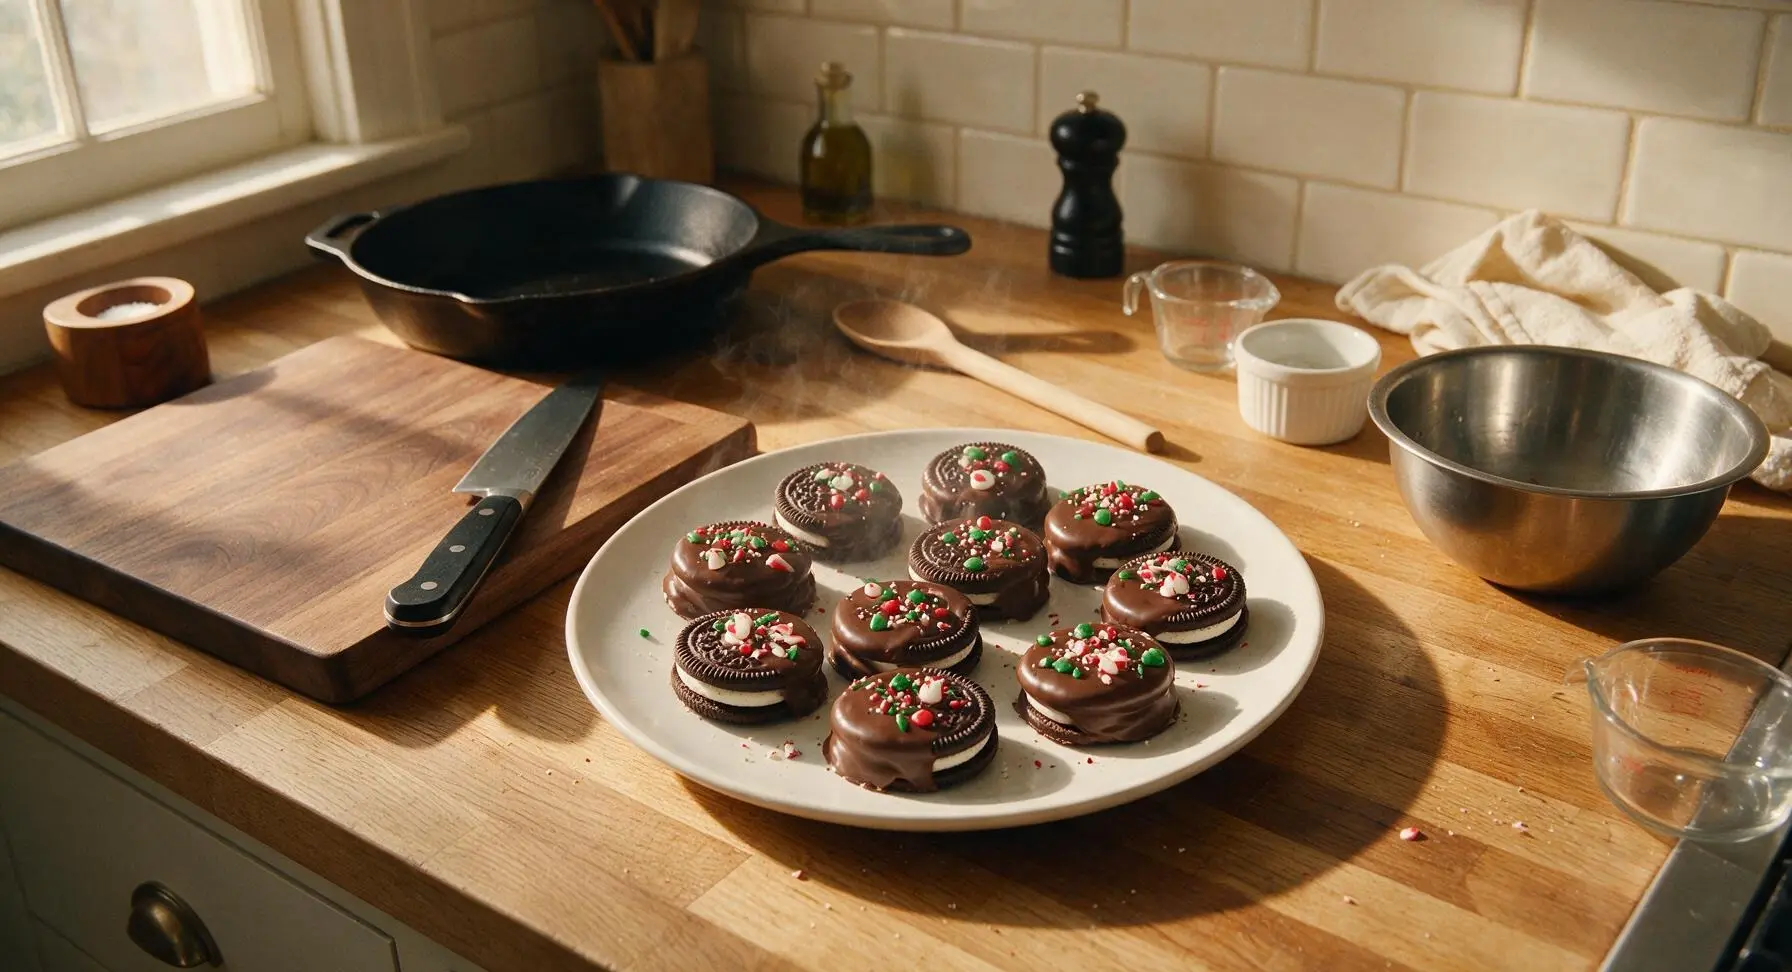
Crunchy, cream-filled Oreos enrobed in smooth, glossy chocolate, decorated with festive red, green, and peppermint toppings—perfect for holiday cookie platters, gifting, and cozy Christmas snacking.

Ingredients
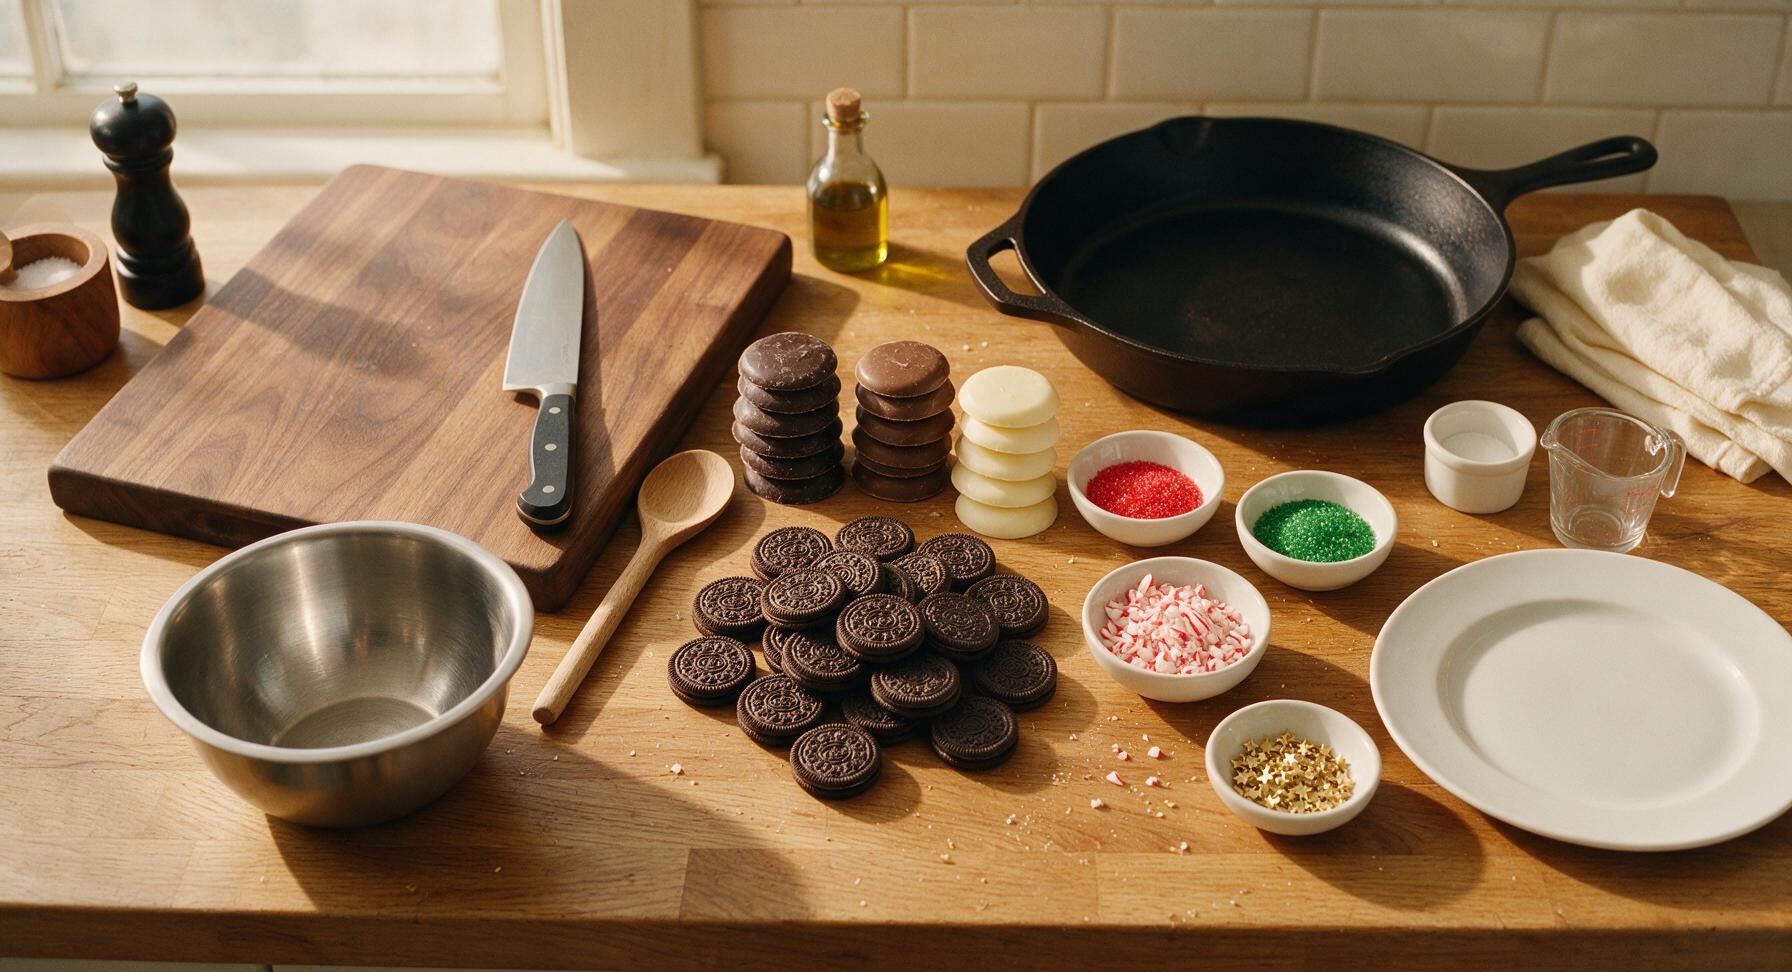
Original Oreo cookies 24 cookies (1 standard 14.3oz package)
Semi-sweet dark chocolate melting wafers 8oz (225g)
Milk chocolate melting wafers 4oz (113g)
White chocolate melting wafers 4oz (113g)
Red sanding sugar 2 tbsp
Green sanding sugar 2 tbsp
Crushed peppermint candy canes 1/4 cup (30g)
Edible gold star sprinkles 1 tbsp

Steps

1

Prep Dipping Station

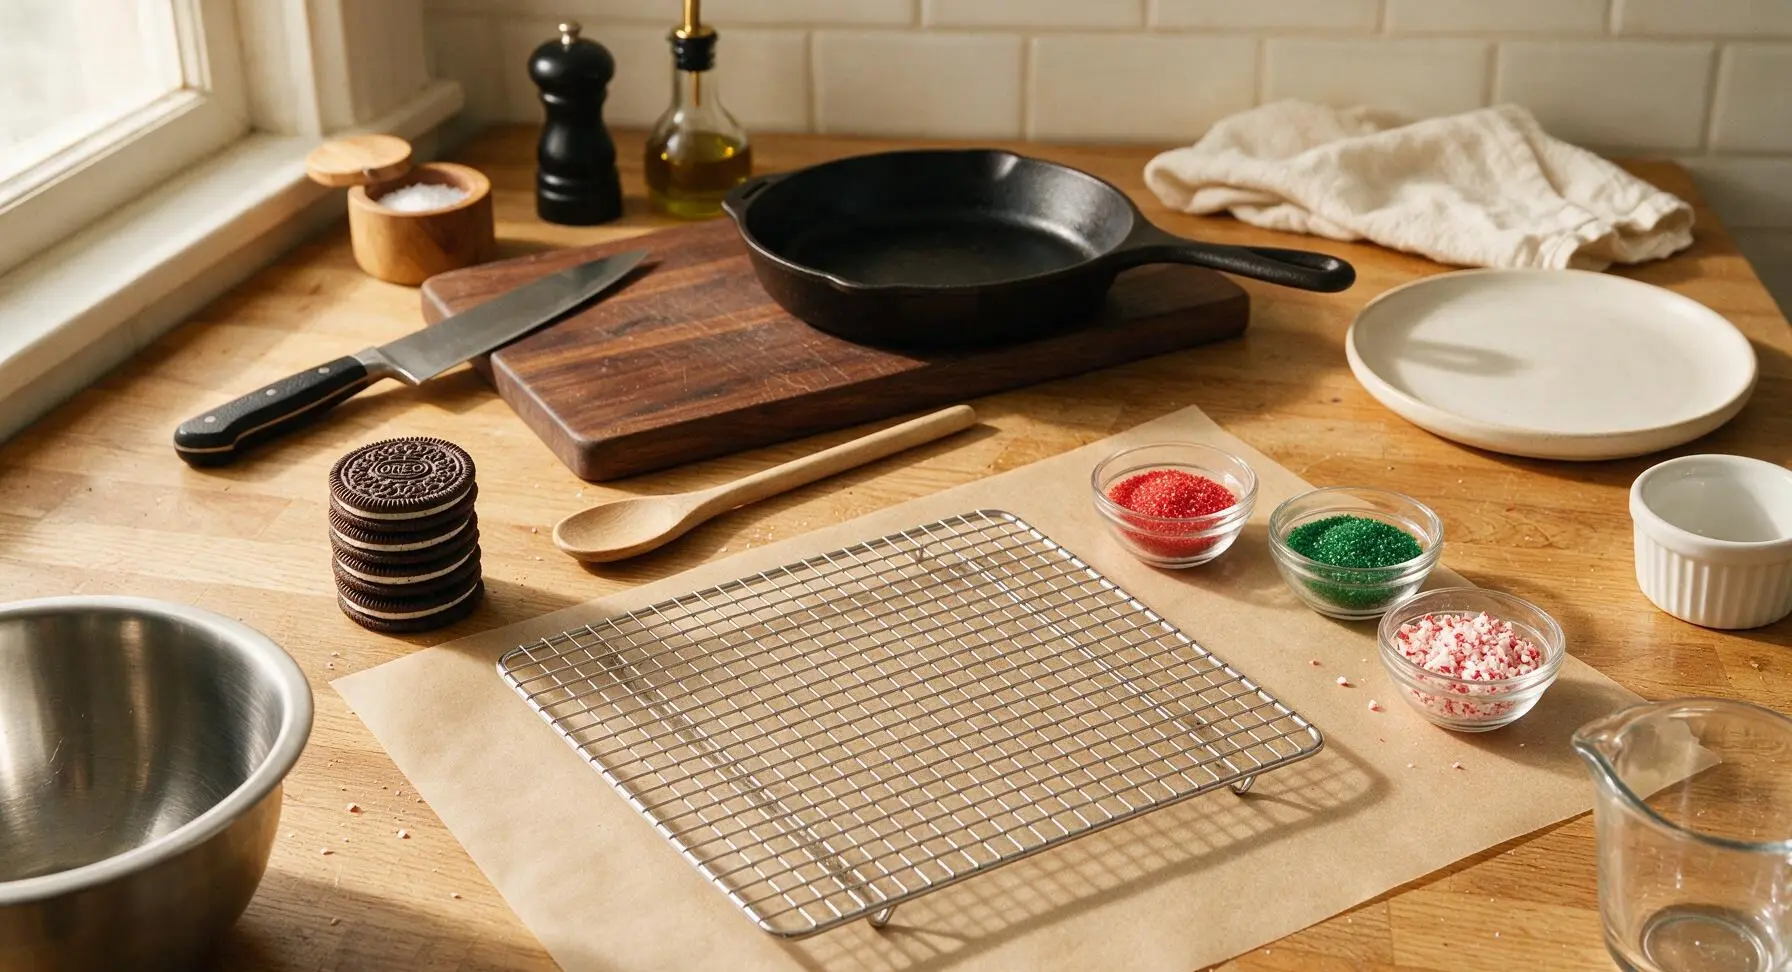
First, lay a sheet of unbleached tan parchment paper across the central work area, then set the chrome wire cooling rack directly on top of the parchment to catch any chocolate drips. Fill each of the three clear glass ramekins with one topping: red sanding sugar, green sanding sugar, and crushed peppermint, placing them within easy reach next to the rack. Ensure all tools are completely dry, as even a drop of water will cause melted chocolate to seize. Unwrap all 24 Oreo cookies and set them in a neat pile next to the cooling rack.
Step 1
step1:Prep Dipping Station
2

Melt Chocolate Gently

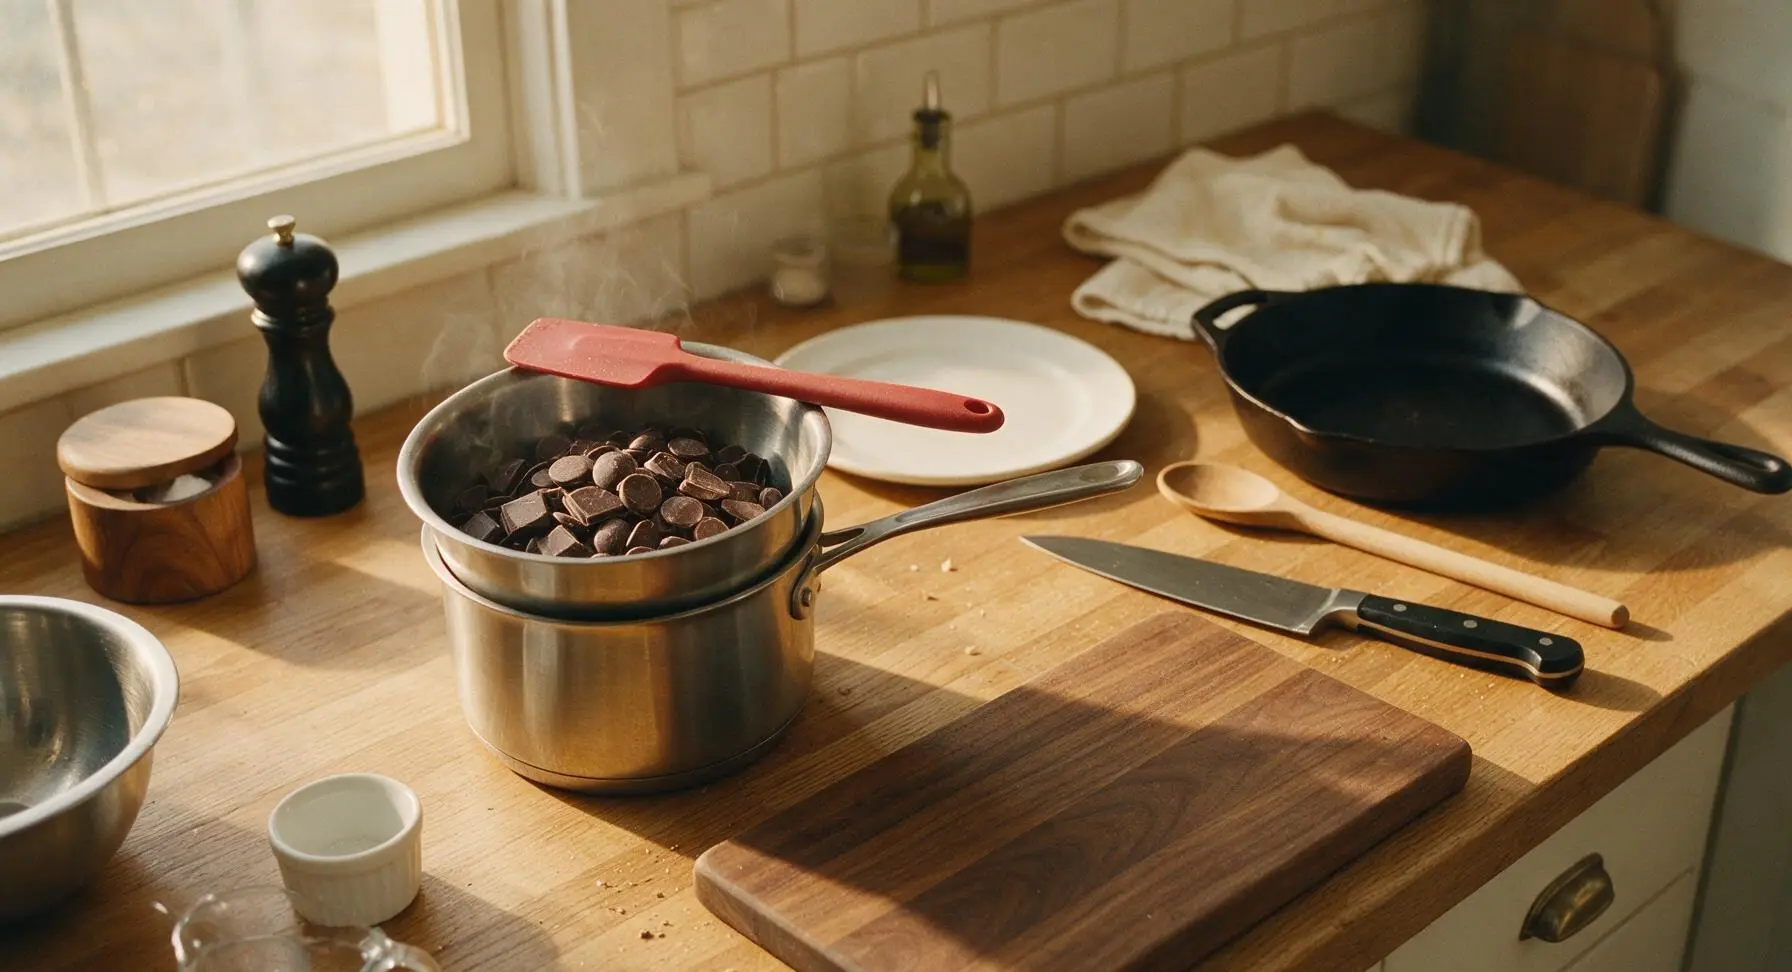
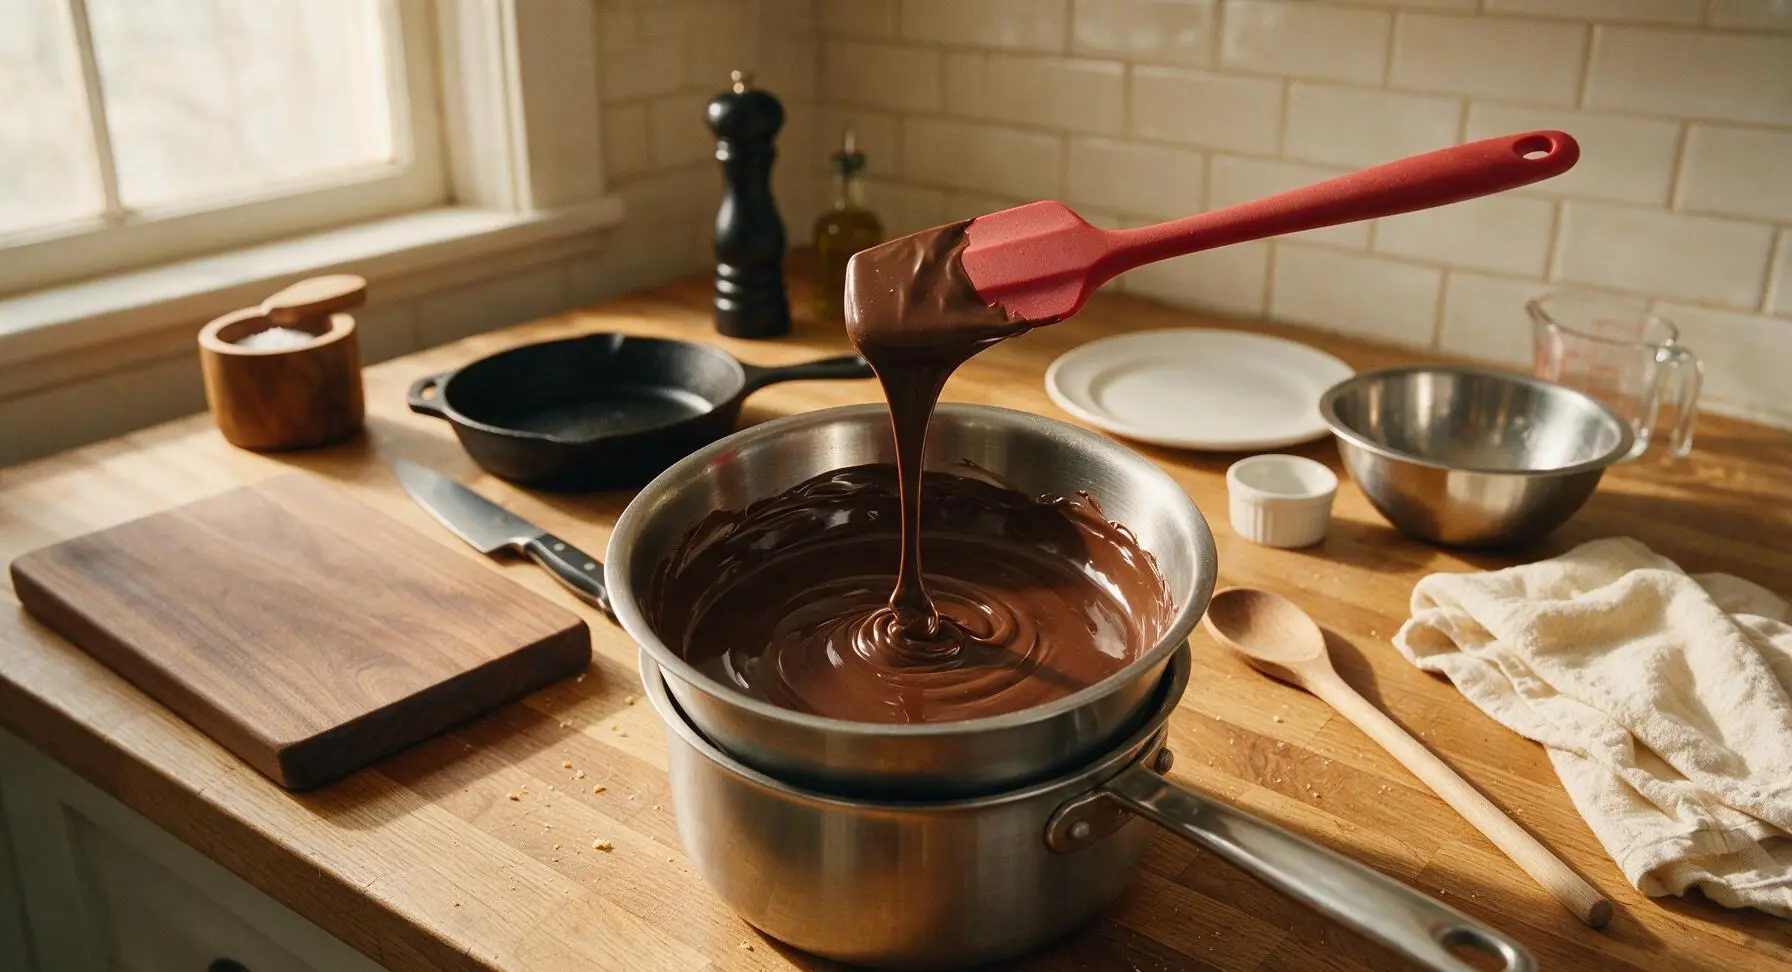
Fill the bottom pot of the brushed stainless steel double boiler with 1 inch of water, bringing it to a very gentle simmer (no rolling boil, to avoid steam getting into the chocolate). Melt one chocolate variety at a time in the top pot of the double boiler, starting with semi-sweet dark chocolate, followed by milk chocolate, then white chocolate to avoid color cross-contamination. Stir slowly with the matte red silicone spatula until chocolate is completely smooth, 3-4 minutes per chocolate type, maintaining a temperature between 88-90°F (31-32°C) for dark chocolate, 86-88°F (30-31°C) for milk and white chocolate. Wipe the top pot completely dry between chocolate varieties to prevent seizing.
Step 2
step2:Melt Chocolate Gently
Step 2
step2:Melt Chocolate Gently
3

Dip Oreos Evenly

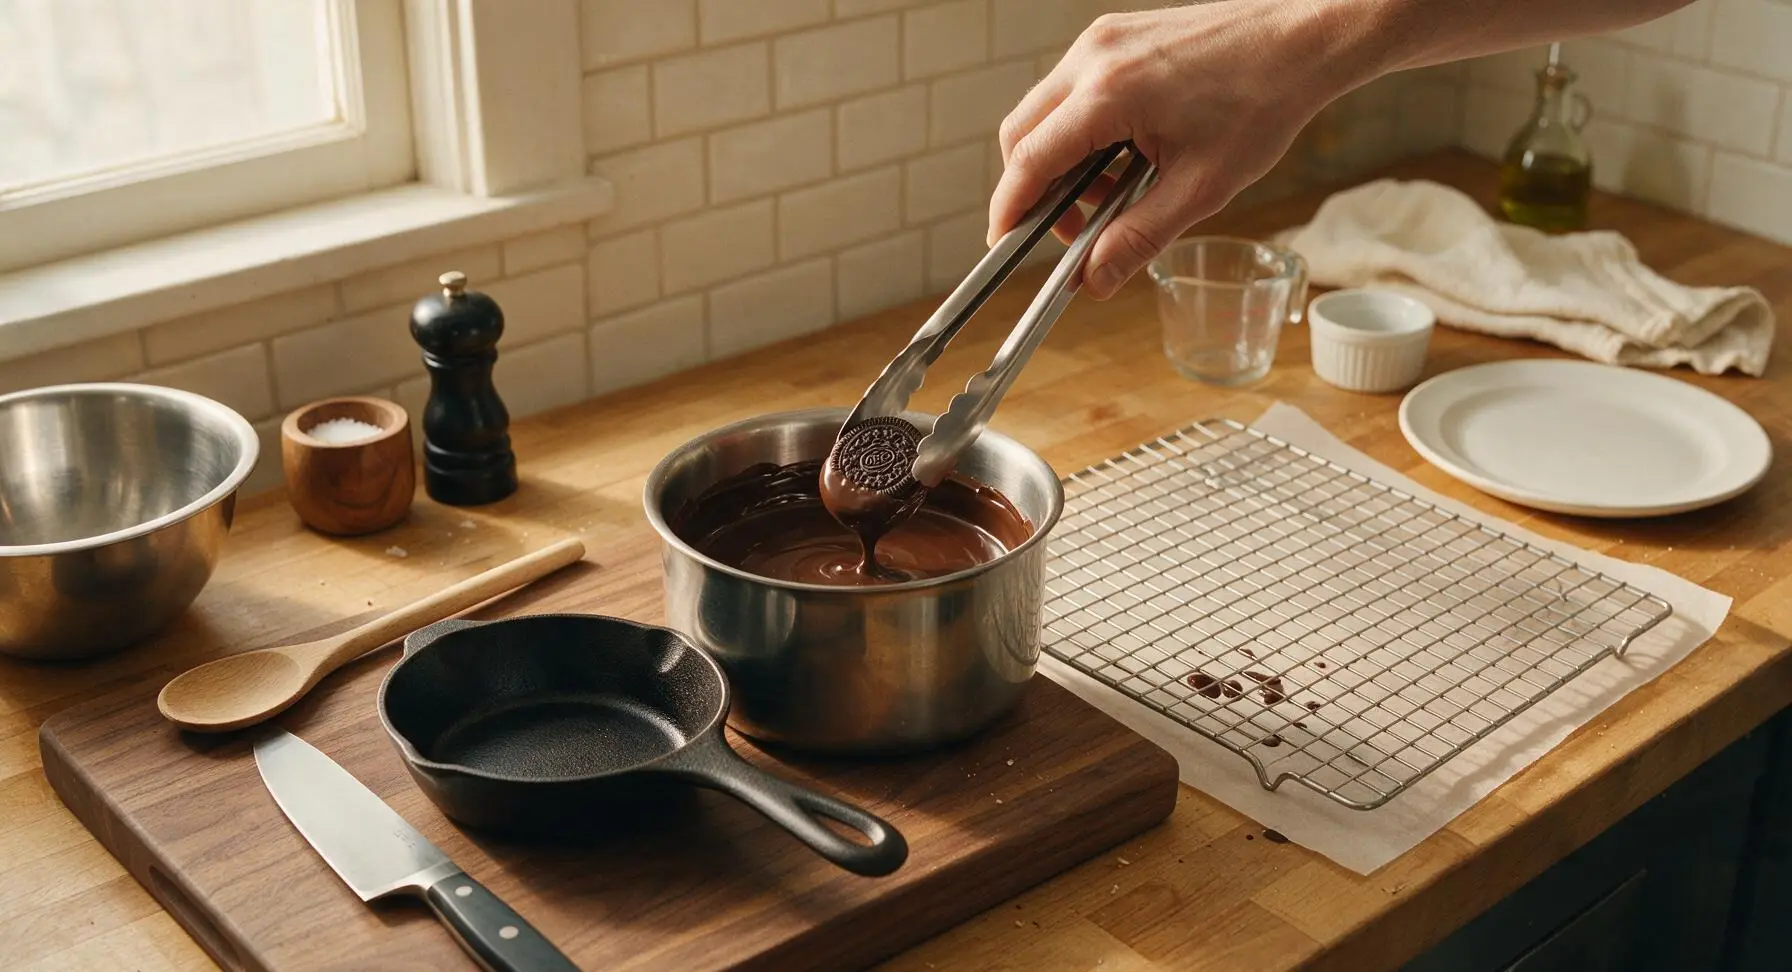
Working one cookie at a time while chocolate is melted and smooth, use the stainless steel tongs to grasp an Oreo by its edge, submerging it fully into the melted chocolate until every surface is coated. Lift the cookie out of the chocolate, holding it above the pot for 2-3 seconds to let excess chocolate drip off, tapping the tongs gently against the pot edge to encourage drips. Avoid coating the cookies too thickly, as excess chocolate will pool around the base when set. Dip 8 cookies per chocolate variety for a mixed assortment.
Step 3
step3:Dip Oreos Evenly
4

Transfer to Rack

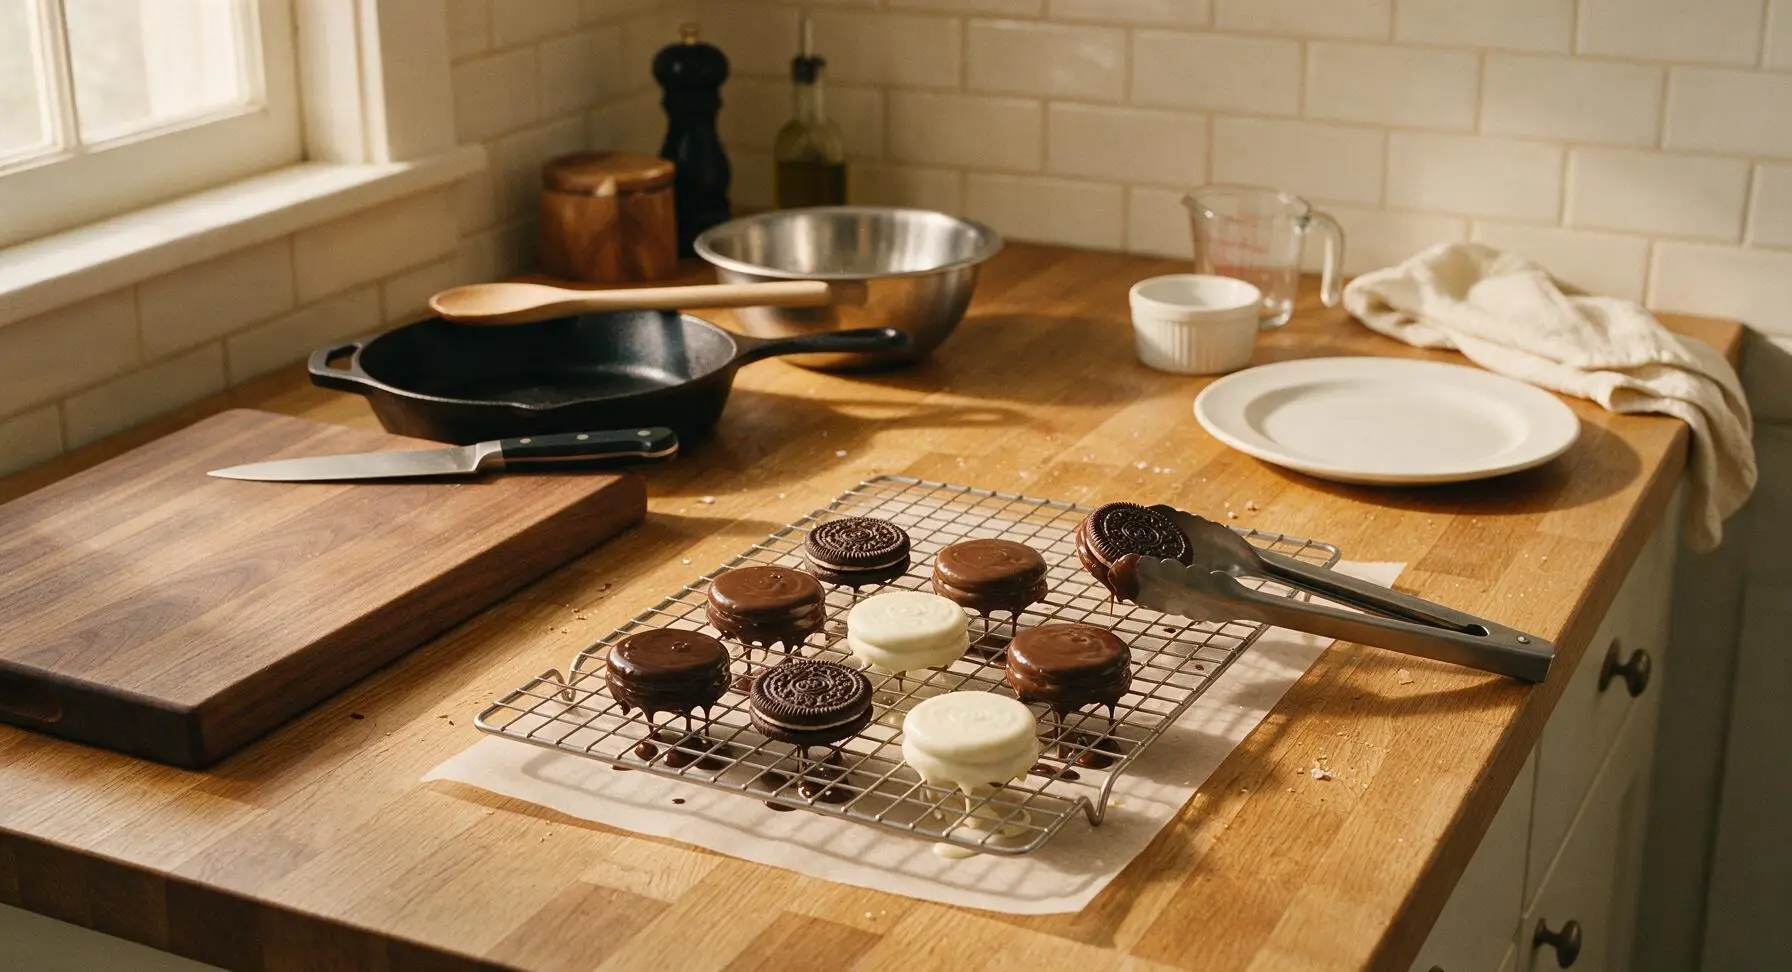
After excess chocolate has dripped off, carefully place each chocolate-coated Oreo onto the wire cooling rack, leaving 1/2 inch of space between cookies to prevent them from sticking together as they set. If chocolate pools around the base of a cookie after placing, use the tip of the red silicone spatula to gently scrape away the excess before it sets. Repeat the dipping process with all 24 cookies, switching chocolate varieties as you go for a mixed selection.
Step 4
step4:Transfer to Rack
5

Add Festive Toppings

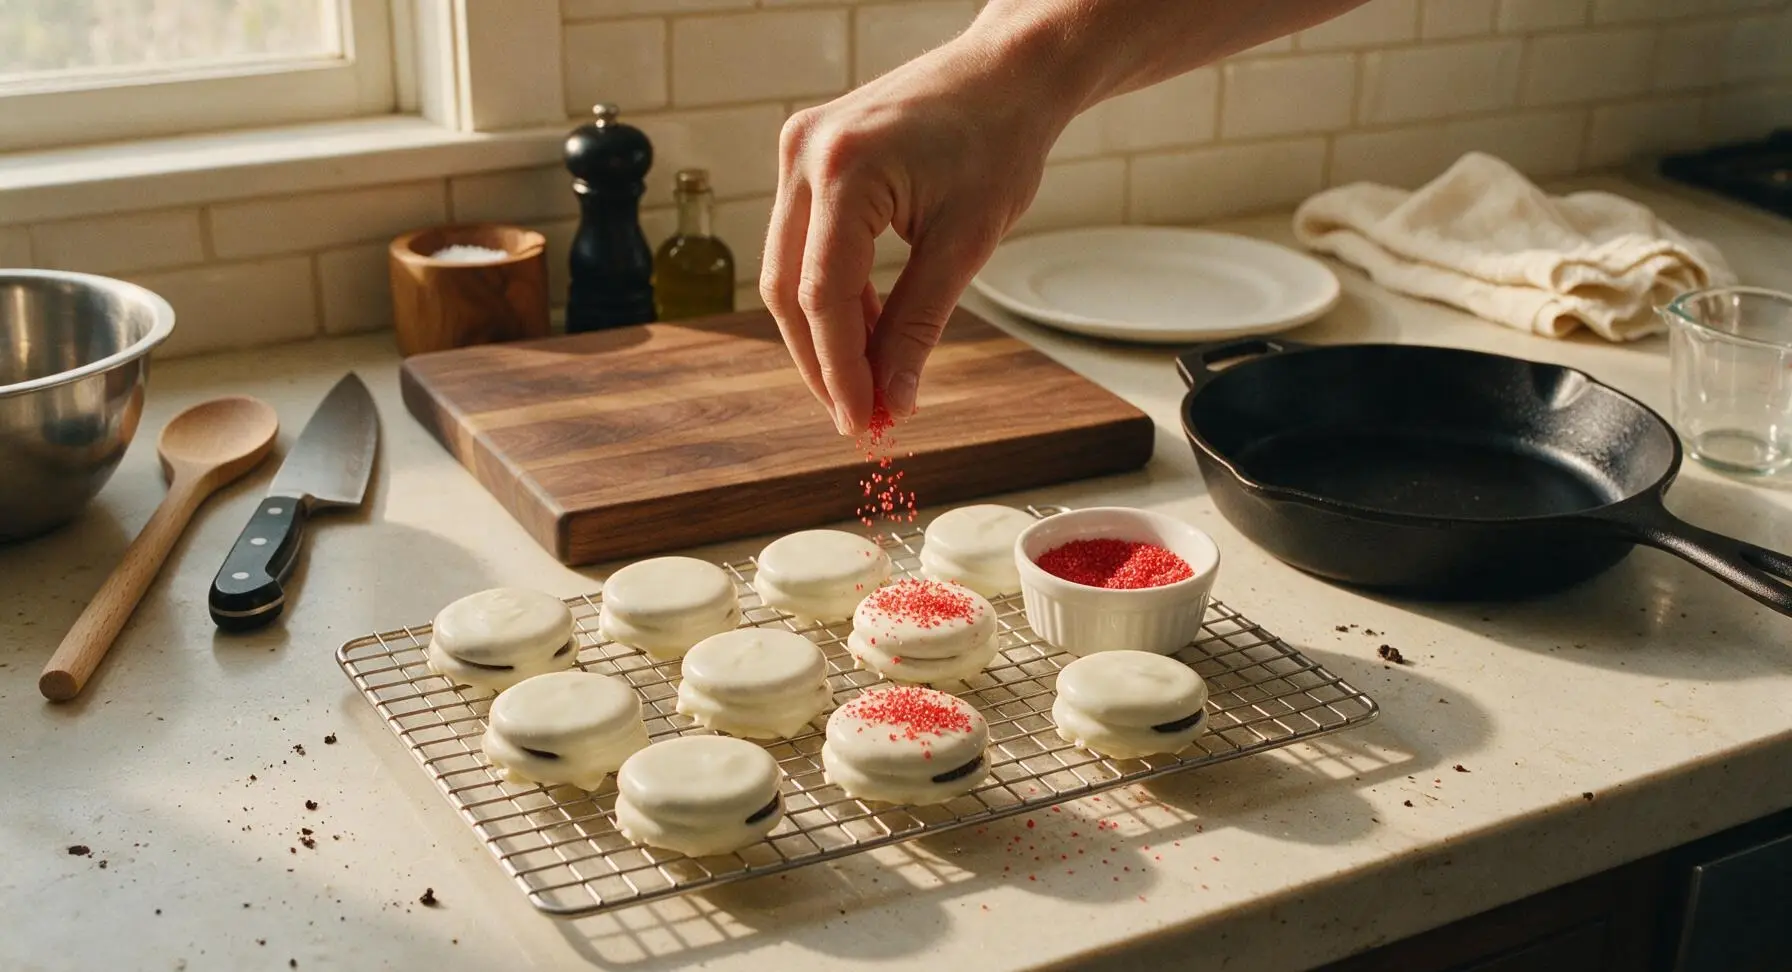
Immediately after placing each cookie on the rack (before the chocolate sets, within 30 seconds of dipping), sprinkle with your chosen festive toppings: alternate between red sanding sugar, green sanding sugar, crushed peppermint bits, and edible gold star sprinkles. For a decorative pattern, drizzle thin lines of contrasting chocolate (e.g., white chocolate drizzle over dark chocolate cookies, dark chocolate drizzle over white chocolate cookies) across the top using the tip of the spatula. Do not wait to add toppings, as they will not stick once the chocolate hardens.
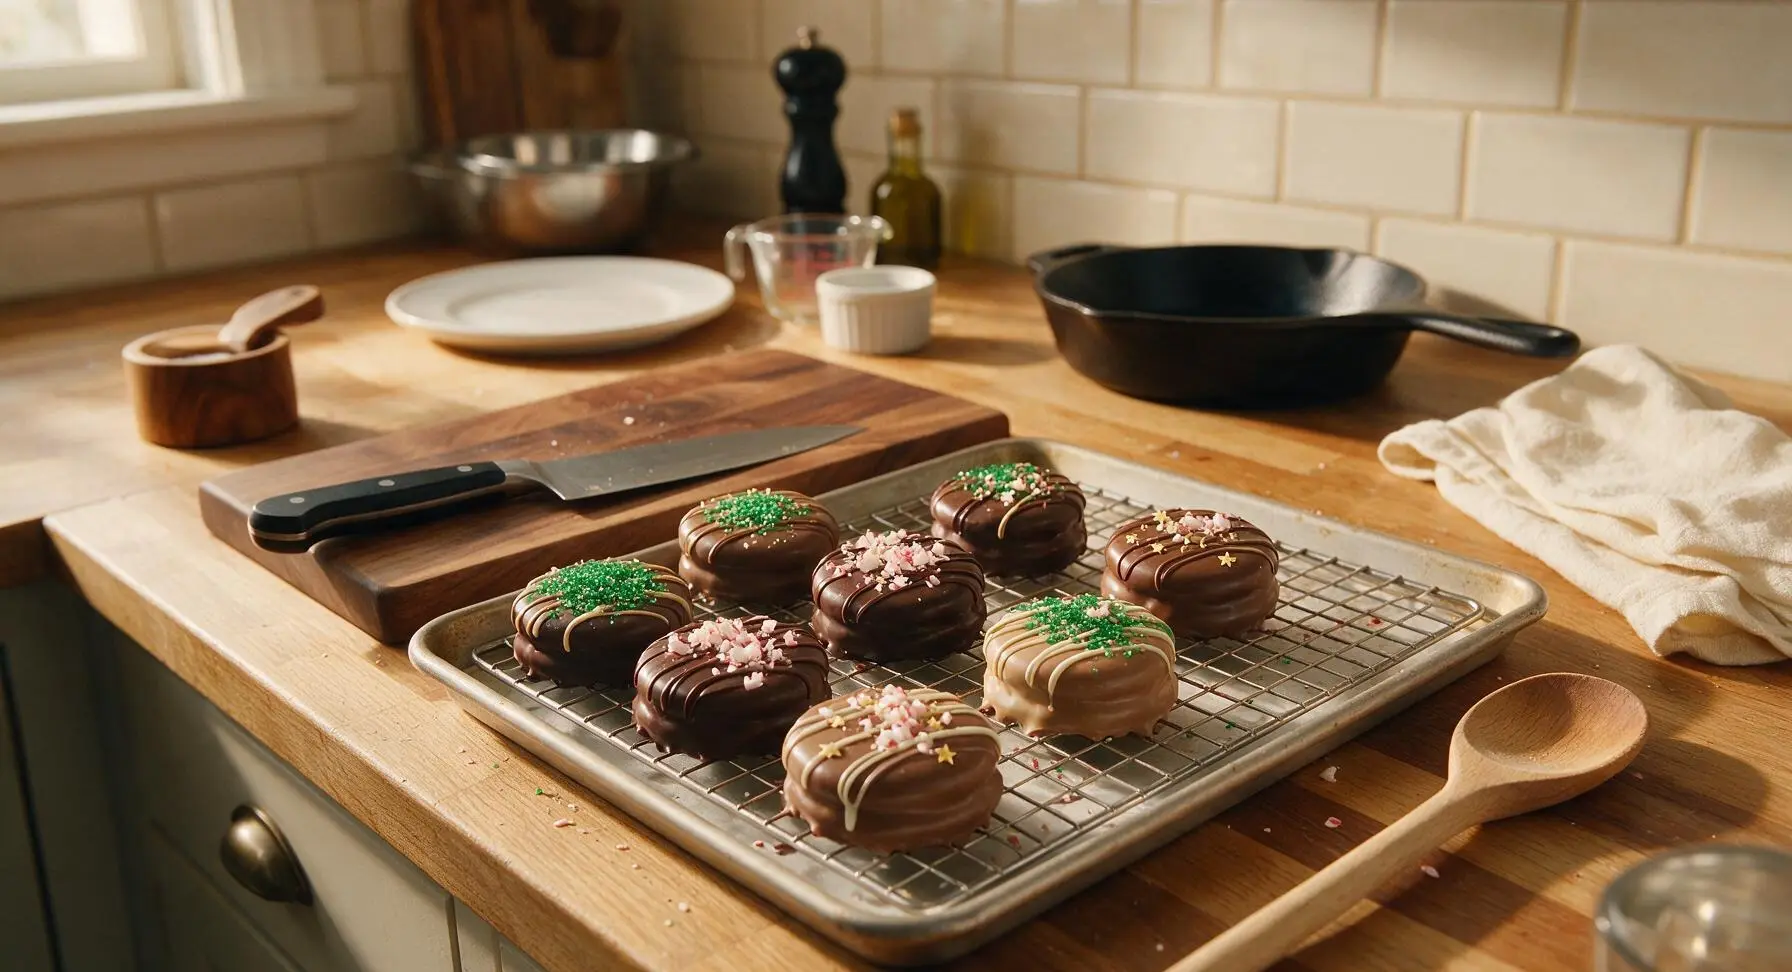
Step 5
step5:Add Festive Toppings
Step 5
step5:Add Festive Toppings
6

Chill Until Set

Once all cookies are dipped and decorated, transfer the entire wire cooling rack (still on the parchment paper) to the refrigerator for 25-30 minutes, until the chocolate is completely firm to the touch and no longer glossy or tacky when pressed lightly with a fingertip. Do not chill for longer than 1 hour, as condensation can form on the chocolate surface and cause dull white sugar bloom.
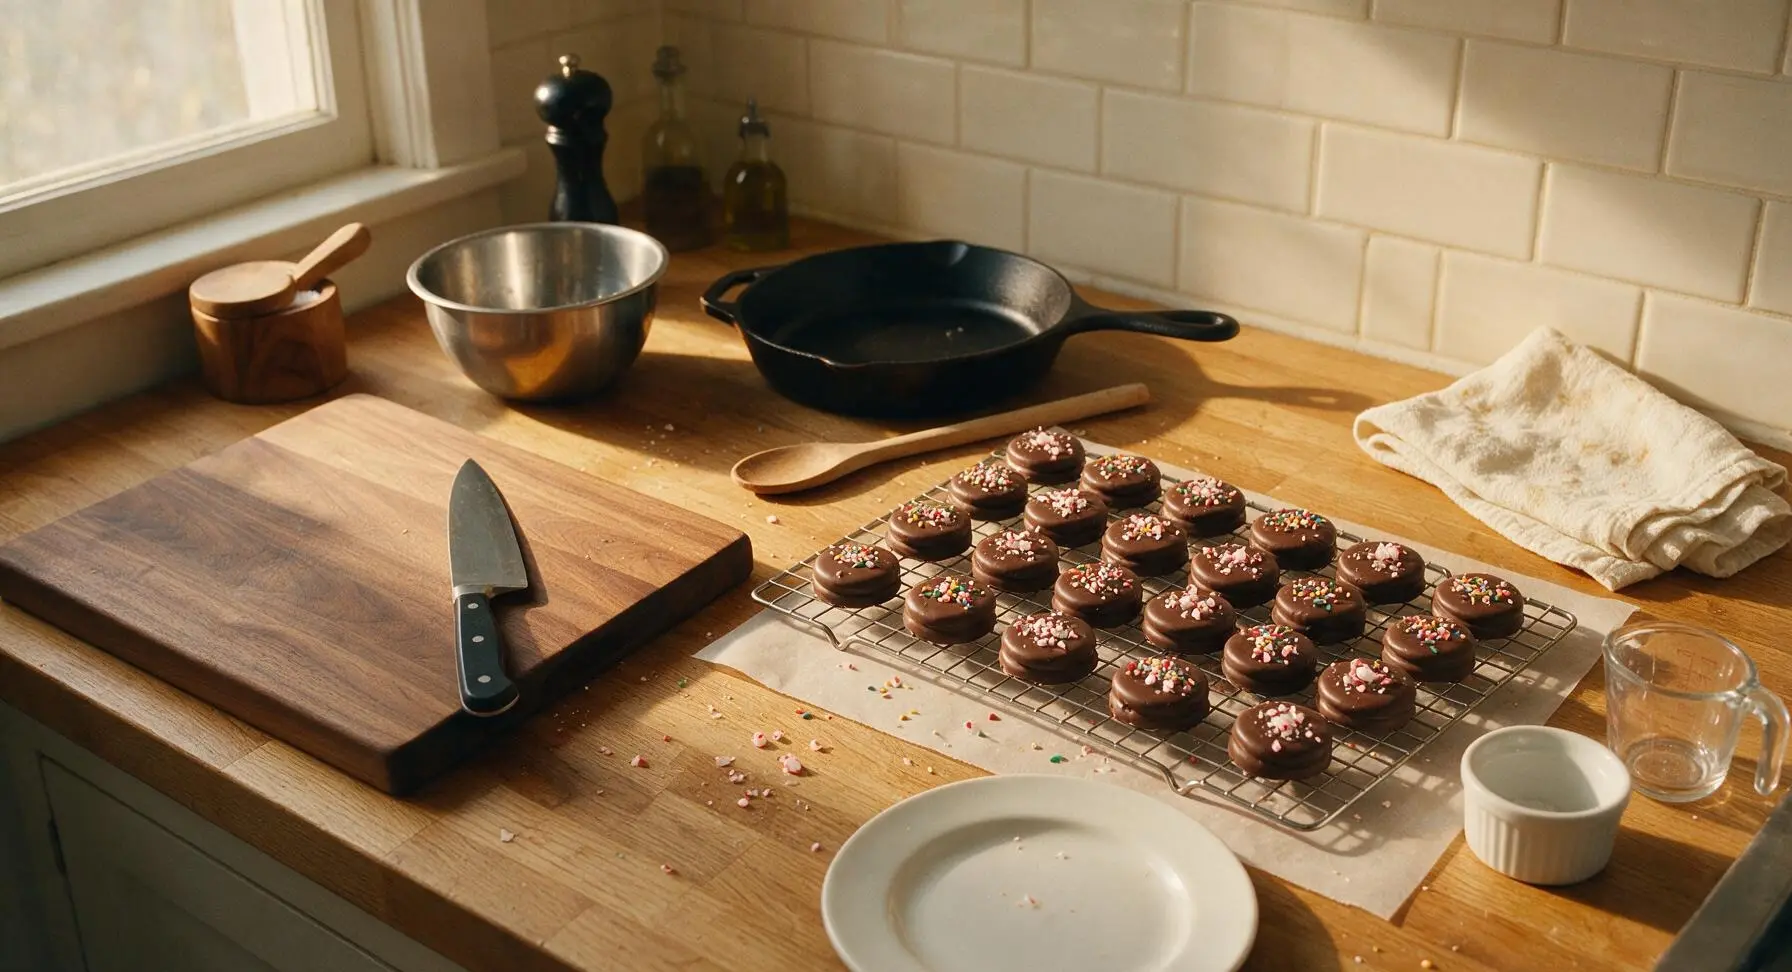
Step 6
step6:Chill Until Set
7

Plate for Serving

Once chocolate is fully set, carefully lift each Oreo off the cooling rack, peeling away any small chocolate drip feet from the base if needed. Arrange the cookies in a loose, inviting pile on the large matte white ceramic serving platter, mixing dark, milk, and white chocolate varieties for a festive, colorful display. Sprinkle a few extra peppermint crumbs and gold stars across the top of the pile for extra visual appeal.
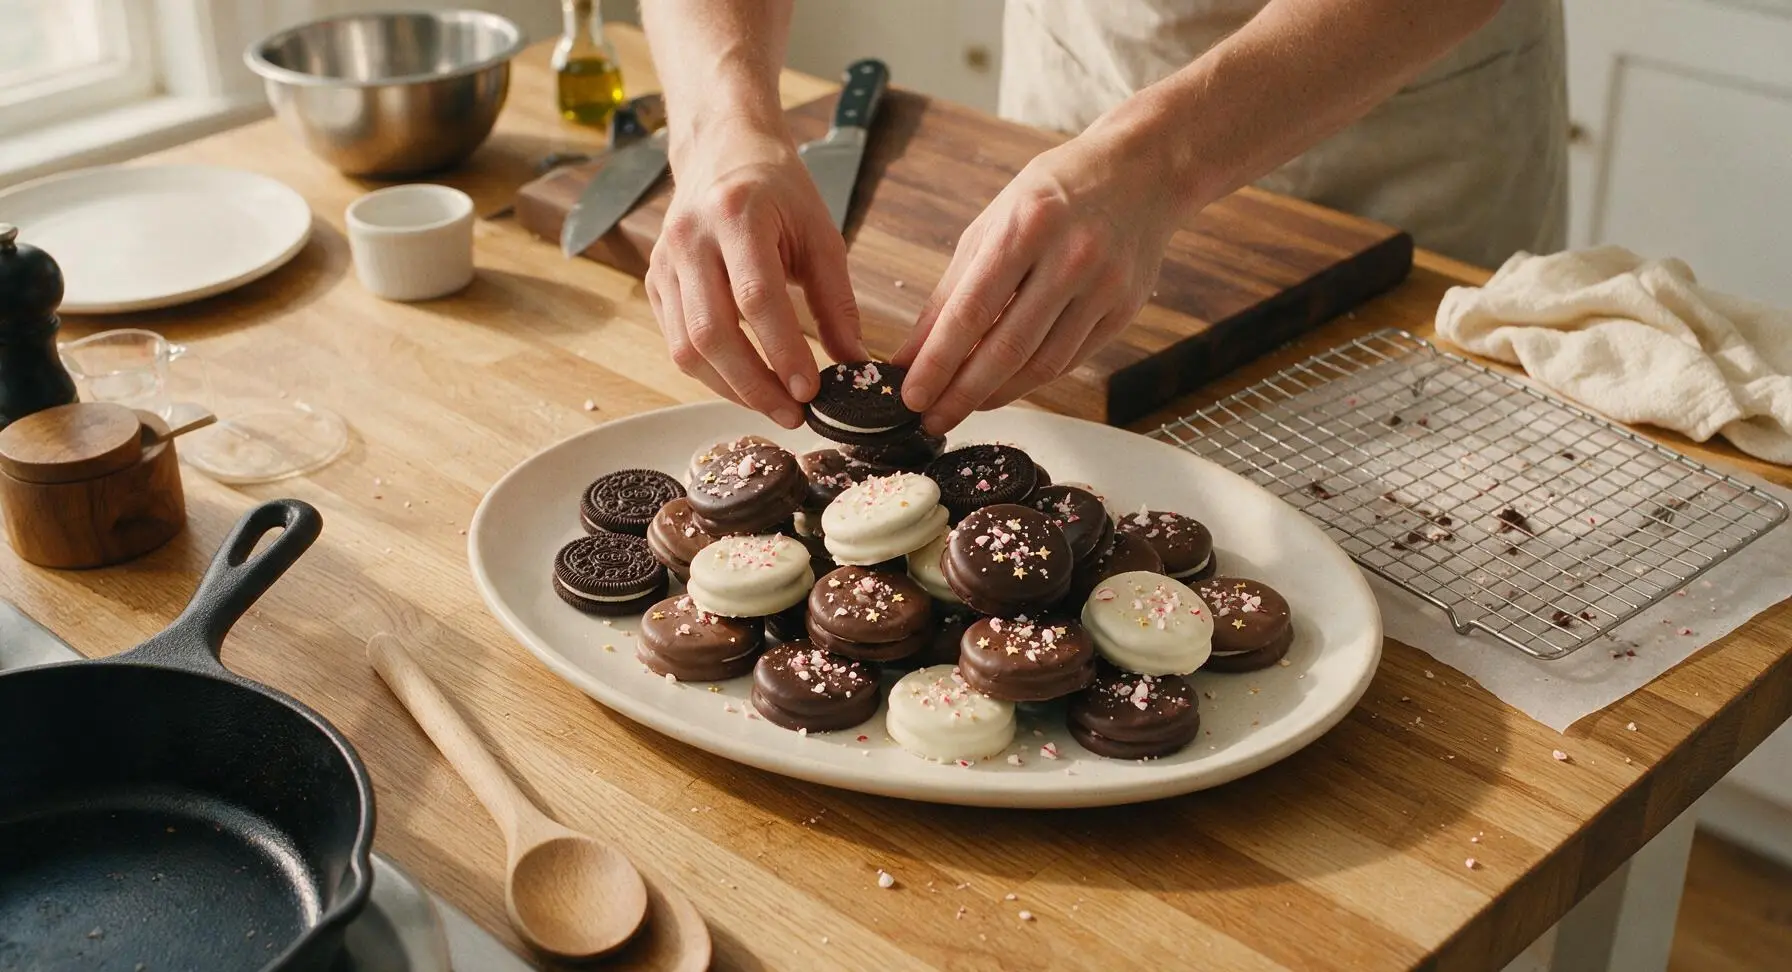
Step 7
step7:Plate for Serving

Tips

1.Use compound chocolate melting wafers instead of pure couverture chocolate for this recipe: they are formulated to melt to a smooth, dip-ready consistency without requiring careful tempering, eliminating the risk of dull, streaky chocolate bloom for beginner cooks.
2.Ensure all bowls, tongs, and spatulas are completely dry before coming into contact with melted chocolate: even a single drop of water or steam condensation will cause chocolate to seize into a thick, grainy paste that cannot be thinned or used for dipping.
3.If chocolate thickens while you are dipping cookies, set it back over the gently simmering double boiler for 10-15 seconds, stirring slowly to return it to a smooth, fluid consistency. Avoid overheating chocolate above 95°F (35°C), as this will cause it to burn and develop a bitter, off flavor.


✨ You May Also Like

Desserts & Baking
🍜 Italy

Creamy, coffee-kissed classic Northern Italian no-bake dessert, with layers of rum-spiked mascarpone cream, soft ladyfingers, and a rich cocoa dusting.

⏱️ 4 hours 3Desserts & Baking ★ 4.7
Desserts & Baking
🍜 France

Flaky, shatteringly crisp, buttery French croissants with golden exteriors and soft, airy layered interiors, perfect for pairing with coffee for a special morning treat.

⏱️ 12 hours Desserts & Baking ★ 4.5
Desserts & Baking
🍜 United States

Warm, spiced baked apples topped with a fluffy golden biscuit crust, this cozy dessert pairs perfectly with vanilla ice cream for cool-weather comfort.

⏱️ 55 minuteDesserts & Baking ★ 4.6
Desserts & Baking
🍜 United States

A star-spangled classic American blueberry pie with buttery flaky crust and bright sweet-tart filling, perfect for summer patriotic gatherings.

⏱️ 1 hour 25Desserts & Baking ★ 4.7
Desserts & Baking
🍜 United States

A beloved no-bake regional Maine candy with a chewy coconut-potato center coated in rich dark chocolate, a New England holiday staple since the 1870s.

⏱️ 2 hours 3Desserts & Baking ★ 4.8
Desserts & Baking
🍜 France

Luxuriously creamy, floral frozen custard made with aromatic Tahitian vanilla beans, boasting a smooth, rich texture that melts slowly on the tongue.

⏱️ 3 hours 3Desserts & Baking ★ 4.5

Christmas Chocolate Covered Oreos:Frequently Asked Questions

1.Can I use regular chocolate bars instead of specialized melting wafers for this recipe? ▾
You absolutely can, but melting wafers are designed to set smooth, glossy, and firm without tempering, which cuts down on prep work. If you use regular chopped chocolate bars, take the time to temper it properly to avoid dull, soft coating that melts easily at room temperature. Add 1 teaspoon of coconut oil per 4 ounces of chocolate if you need a thinner dip consistency.
2.How do I keep my chocolate from seizing up when I melt it? ▾
Seizing happens when even a tiny drop of water gets into melted chocolate, turning it grainy and clumpy. Always use completely dry bowls and utensils when melting, and avoid covering melting chocolate (trapped condensation can drip in). If it does seize, stir in 1 teaspoon of neutral vegetable oil or shortening at a time to smooth it back out as best you can.
3.How far in advance can I make these Christmas chocolate covered Oreos for holiday events? ▾
These are ideal for prep ahead! When stored properly in an airtight container in a cool, dark spot (away from direct sunlight or heat vents), they stay fresh and crunchy for up to 2 weeks. I recommend making them 3-5 days ahead of your party or gifting date for the best texture and freshest taste, so you don’t have last-minute holiday prep stress.
4.What’s the easiest way to get a smooth, even chocolate coating on every Oreo? ▾
Skip the messy fork method that leaves drips and uneven spots! Use a chocolate dipping tool or a regular dinner fork to lower the Oreo fully into melted chocolate, tap the fork gently on the edge of the bowl to shake off excess coating, then scrape the bottom of the fork against the bowl rim before sliding the Oreo onto your lined baking sheet. This gives a thin, even coat every time.
5.How long do these chocolate covered Oreos stay fresh after making? ▾
When stored correctly in an airtight container with layers separated by parchment paper (to prevent sticking), they stay fresh for 2 full weeks at cool room temperature (60-68°F). Avoid storing them in the fridge long-term, as condensation can cause sugar bloom on the chocolate and make the Oreo cookie soften faster than it would at room temp.
6.Can I use flavored Oreo varieties instead of the original ones called for? ▾
Absolutely! Original Oreos are a classic, but mint, peanut butter, birthday cake, or even seasonal gingerbread Oreos work beautifully for extra holiday flair. Just note that filled Oreos with extra-thick cream may be a little trickier to dip without sliding apart, so hold them gently as you lower them into the melted chocolate to avoid splitting.
7.Why is my set chocolate coating looking streaky, dull, or blotchy? ▾
That’s called chocolate bloom, and it happens for two common reasons: either you didn’t temper regular chocolate properly, or condensation formed on the chocolate while it set (usually from fridge storage). It’s totally safe to eat, but for a glossy finish, let coated Oreos set at cool room temp, and temper non-wafer chocolate correctly before dipping.
8.Do I need any special tools to dip these Oreos without making a huge mess? ▾
You don’t need fancy equipment, but a few low-cost items make the process way easier: a small, deep microwave-safe bowl for melting chocolate, a chocolate dipping fork (or regular table fork), parchment-lined baking sheets for setting, and small ramekins to hold your toppings. You can also use a toothpick to fish out any stray Oreo crumbs from the melted chocolate between dips.
9.Can I add peppermint flavor to the chocolate for a classic holiday taste? ▾
You sure can, and it’s one of my favorite festive twists! Stir ¼ teaspoon of food-grade peppermint extract into 8 ounces of melted white or milk chocolate right before dipping—don’t add more, because extra extract can make chocolate seize up. Pair it with crushed candy cane toppings for that iconic Christmas peppermint crunch everyone loves.
10.How do I get holiday toppings to stick properly instead of sliding off the chocolate? ▾
Timing is everything here! Add your red sanding sugar, crushed peppermint, sprinkles, or other toppings immediately after you place the dipped Oreo on the parchment-lined sheet. If you wait even 2-3 minutes, the chocolate will start to set and toppings won’t adhere. You don’t need to press hard—just a light sprinkle right after dipping is all it takes for a firm stick.
11.Can I freeze these chocolate covered Oreos for longer storage? ▾
Yes, they freeze beautifully for up to 3 months! Let the coated, decorated Oreos set fully at room temperature first, then layer them in an airtight container between sheets of parchment paper, and seal tightly. Thaw them in the container in the fridge for 4-6 hours before serving, to prevent condensation from ruining the chocolate finish.
12.What other festive toppings work besides red sanding sugar for these Oreos? ▾
The options are endless for holiday fun! Try crushed candy canes, green sanding sugar, gold edible glitter, mini holiday sprinkles (like snowflakes or reindeer), crushed pretzel bits for a salty-sweet twist, drizzles of contrasting chocolate, or even tiny edible holly decorations. Stick to small, light toppings so they don’t slide off the setting chocolate.
13.Is it better to melt chocolate in the microwave or on the stovetop with a double boiler? ▾
Both methods work great, so pick what’s easiest for you! For the microwave, heat chocolate in 30-second bursts, stirring well between each, to avoid burning. For a double boiler, keep the water at a gentle simmer (not a rolling boil) and make sure the top bowl doesn’t touch the water, stirring constantly until smooth. Never rush melting with high heat.
14.How can I make these allergy-friendly for school holiday parties? ▾
Start by checking labels carefully! Use certified gluten-free Oreos (regular Oreos are made with wheat), dairy-free vegan chocolate melting wafers for milk allergies, and skip nut-based toppings entirely. Make sure all your tools and work surfaces are fully washed and sanitized before prepping to avoid cross-contamination with common allergens like nuts, dairy, or wheat.
15.What’s the best way to package these Oreos for homemade Christmas gifts? ▾
Let the Oreos set fully first, then tuck them into clear cellophane treat bags tied with red or green ribbon, or stack them in small holiday tins lined with parchment paper. Add a cute handwritten tag, and keep them stored in a cool spot until gifting. Avoid leaving them in a hot car while delivering, as the chocolate can melt and ruin your pretty decorations.
16.My melted chocolate is really thick and clumpy when I dip—how do I fix that? ▾
Thick chocolate is usually either overheated, or has small crumbs from broken Oreos mixed in. First, fish out any stray crumbs with a spoon. If it’s still thick, stir in ½ teaspoon of paramount crystals, coconut oil, or neutral vegetable shortening at a time until it thins to a smooth, dippable consistency. Don’t add water, as that will make it seize and get even clumpier.
17.Is it better to set dipped Oreos on parchment paper or wax paper while they dry? ▾
Parchment paper is the best choice, because set chocolate peels away from it cleanly without sticking or leaving a fuzzy wax residue. Wax paper works in a pinch, but it can leave a faint waxy film on the bottom of the chocolate if the coating is still warm when it touches the paper. Never set dipped Oreos directly on a bare baking sheet, as they will stick hard.
18.How long do I need to let the coated Oreos set before I can serve or package them? ▾
If you’re using melting wafers in a 65°F room, they’ll be fully set and firm to the touch in about 30 minutes. If your space is warmer, pop the tray of dipped Oreos in the fridge for 10-15 minutes to speed up setting—just don’t leave them in there longer, as fridge condensation can cause dull chocolate bloom once you take them out.

Comments (16)

3 days ago

OMG these are SO good! I threw these together last night for my youngest’s class holiday party and the kids went absolutely feral for them. The 10 minute prep time is no joke—no fancy ingredients, no complicated steps, even my 7 year old helped dip them. We added crushed candy canes on top and they looked so festive! 10/10 will be making these every Christmas from now on.

2 days ago

Wait did you use regular milk chocolate or the melting wafers? I tried making dipped Oreos last year and the chocolate seized up on me mid-dip 😭

yesterday

So glad these were a hit with the class! Pro tip for anyone dealing with seized chocolate: make sure no water gets in your melting bowl, and if it does seize, stir in a tiny bit of vegetable oil to smooth it back out. Melting wafers are super forgiving for beginners too!

5 days ago

Total game changer for my annual ugly sweater party. I’m absolutely terrible at baking—like, burn the slice-and-bake cookies level bad—and these turned out perfect. I did half with dark chocolate, half with white chocolate, and drizzled red and green icing on top for the vibe. My friends kept asking who made them, no one believed I did it lmao.

3 days ago

Love that these worked for your ugly sweater party! The mix of dark and white chocolate sounds delicious—such a fun, easy way to customize them for any event.

5 days ago

Made these for our neighborhood cookie exchange this past weekend and they were the first plate to get emptied! I rolled some in Christmas sprinkles, some in crushed peppermint, some in mini M&Ms, so there was a little something for everyone. Super easy, minimal mess, totally worth it.

1 week ago

Wait why did I never think to make these before? I’ve been overcomplicating my Christmas cookie spread for YEARS. 10 minutes, no baking required, everyone loses their minds over them. I brought a batch to my office potluck yesterday and my boss asked for the recipe before I even left the break room.

5 days ago

Same! I made these for our team holiday lunch last week and people were taking handfuls to bring home to their kids. Way less stress than sugar cookies that take 3 hours to decorate.

3 days ago

That’s the best part about these—they look so fancy and thoughtful, but barely take any effort! So happy they were a hit at your office potluck.

yesterday

My kids loved it! We have a tradition of making Christmas treats every Sunday after church, and this was the perfect pick for this week. My 4 year old was able to help dip almost all by herself, and she was so proud to pass them out to her Sunday school class this morning. Only note: make sure you have extra Oreos on hand because your kids will sneak half the pack before you even start dipping 😂

2 hours ago

Oh that’s such a good tip about the extra Oreos! I learned that the hard way last year when my grandkids ate so many while we were making them I barely had enough to bring to our family dinner.

30 minutes ago

These are so cute! I added little pretzel antlers and red candy noses to make them look like reindeer and they were the star of my daughter’s holiday cheerleading practice snack table. So easy to customize for any theme, honestly. I feel like you could make these for every holiday just by switching up the sprinkles. Only reason I’m not giving 5 stars is I wish the recipe mentioned how much chocolate you actually need per Oreo—I ran out halfway through my second batch and had to run to the grocery store in my fuzzy socks.

5 minutes ago

Thank you for the feedback! We’ve updated the recipe card to note that you’ll need about 12 oz of melting chocolate for a full standard pack of Oreos—so sorry you had to make a mid-bake grocery run! The reindeer twist sounds absolutely adorable.

2 weeks ago

Made these with my niece last night when she was over visiting, and honestly? Way better than the fancy overpriced chocolate covered treats they sell at the mall. We used white chocolate and crushed up candy canes, and they taste exactly like the peppermint bark Oreos they sell for a limited time, but cheaper and way fresher. Will make again.

yesterday

Wait, cook time says 10 minutes? That’s not a lie, but let’s be real, if you’re letting your kids help decorate, add an extra 20 minutes for sprinkles everywhere and chocolate smudges on every surface of your kitchen. Worth every second of the mess though, my boys thought these were the coolest thing ever. We did green chocolate with red sprinkles for Grinch themed Oreos and they were a hit at our family Christmas dinner.

2 hours ago

The Grinch theme is such a good idea! My kid has been obsessed with the Grinch movie all month, I’m definitely stealing that for our treat night this week.

30 minutes ago

The Grinch themed Oreos sound so fun! You’re totally right about the extra time with kid helpers—sprinkle mess is half the fun of holiday baking, right? 😊

5 minutes ago

As a college student with zero kitchen equipment besides a microwave and a paper plate, these were perfect for my dorm holiday party. No oven needed, no fancy tools, I melted the chocolate in the microwave in 30 second bursts, dipped the Oreos, threw on some sprinkles from the dollar store, and everyone thought I was a baking genius. 10/10, cheap, easy, delicious.

just now

Wait do these hold up okay if you make them a day ahead? I want to make them for my floor’s holiday party but I have a final exam the day of so I need to prep them the night before.

1 week ago

I make these every single year for my work potluck and my extended family Christmas dinner, and they never miss. People always ask for the recipe and they’re so low effort I almost feel bad taking credit for them… almost. This year I added a little flaky sea salt on top of the dark chocolate ones and it elevated them so much, highly recommend that little hack. They hold up great in an airtight container for a whole week too, so they’re perfect for quick holiday meal prep when you have a million events back to back.

2 days ago

SO good! I was worried these would be too basic, but I brought them to my friend’s girls’ night Christmas movie marathon and we ate almost the entire batch while watching Elf. The white chocolate ones with crushed peppermint are my personal favorite, they taste like Christmas in a bite.

yesterday

Nothing pairs better with a Christmas movie marathon than easy, chocolatey treats! The white chocolate peppermint combo is a chef’s kiss classic for a reason.

3 days ago

Tried making these for the first time this year after seeing the recipe pop up on my feed, and I’m hooked. I used dark chocolate melting wafers, topped some with toffee bits, some with sprinkles, some with crushed peppermint, and gave them out as little neighbor gifts with handwritten notes. Super affordable, way more personal than a store bought gift.

yesterday

Game changer alert! I used to spend hours making decorated sugar cookies for Christmas every year and I’d be so stressed by the time the holidays rolled around I couldn’t even enjoy them. These take 10 minutes, look super festive, and taste better than those sugar cookies half the time. I’m never going back.

2 hours ago

Right?! I gave up fancy sugar cookies two years ago and my stress levels around holiday hosting dropped so much. No one cares if the cookies are perfectly decorated, they just want chocolate and sprinkles.

30 minutes ago

We’re all about low-stress, high-reward holiday recipes around here! So glad these are helping you skip the baking stress and actually enjoy the season.

5 days ago

I’m in charge of snacks for our office holiday party every year, and these are now permanently on the menu. You can make a huge batch in almost no time, they travel really well, no need to keep them warm or cold, and there’s literally no one who doesn’t like an Oreo covered in chocolate. Absolute no-brainer.

1 week ago

I’ve been making chocolate covered Oreos for my grandkids at Christmas for almost 20 years, and this recipe is exactly how I make them! So simple, even the little ones can help, and they’re always the first treat gone from the cookie plate. I love that younger people are finding this easy little treat instead of buying fancy expensive desserts for the holidays.

5 days ago

What a wonderful compliment coming from someone who’s been making these for decades! There’s something so special about simple, nostalgic treats that bring families together year after year.

30 minutes ago

Wait a second, I made these last night and I swear I ate half the batch before I even put them out for my roommates. The combo of crunchy Oreo and smooth melted chocolate is just unbeatable, especially when you add a little peppermint extract to the white chocolate. 10 minutes, zero stress, maximum deliciousness. This is going to be my go-to last minute treat for every holiday from now on.

5 minutes ago

Wait adding peppermint extract to the chocolate? That’s genius! I’ve been topping mine with candy canes but never thought to mix the flavor right into the chocolate itself. Trying that tonight!

just now

That peppermint extract hack is such a good call! It adds that perfect cozy holiday flavor without any extra work. So glad you loved the recipe!



