
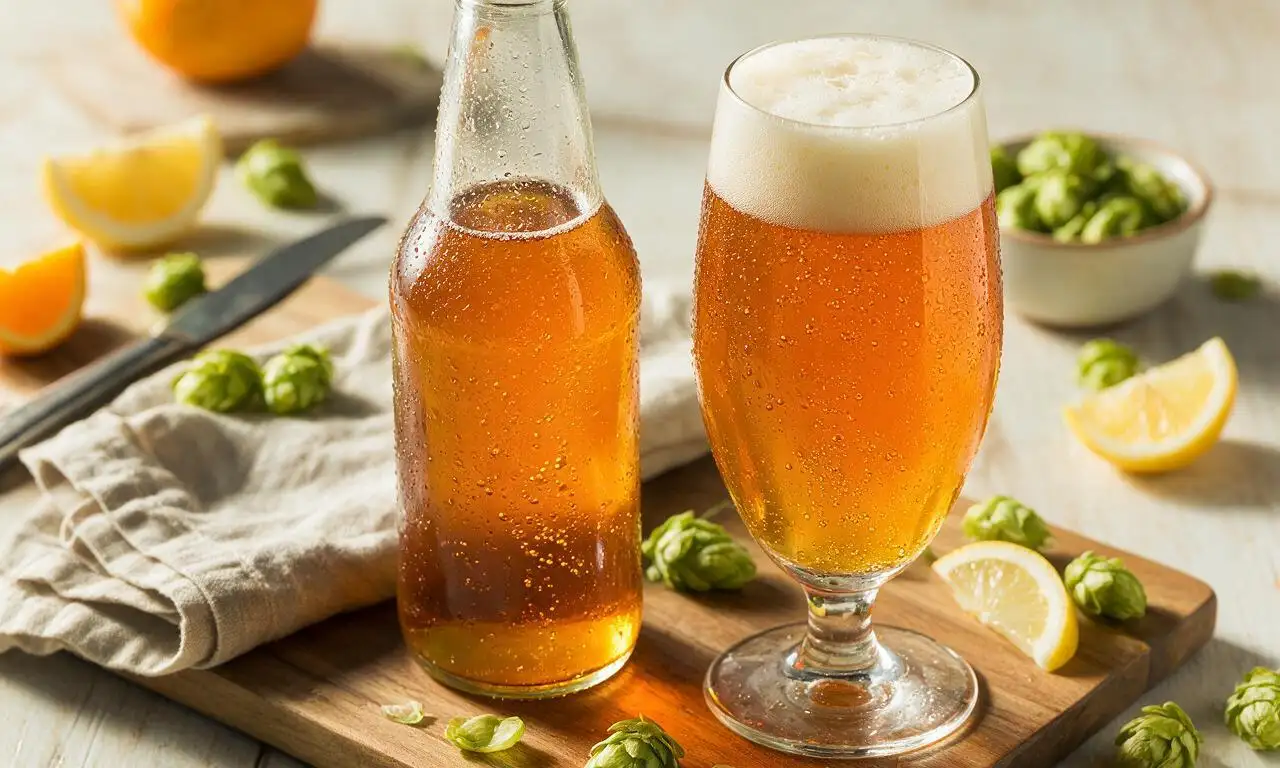
Craft Beer

title 1
Craft Beer
⏱️ cook time 2 hours active prep, 3 weeks total time
🍽️ servings 8
⚡ Difficulty medium

intro

Brew a crisp, citrusy small-batch Cascade-hopped craft beer at home, ideal for sipping ice-cold at casual warm-weather backyard gatherings with friends.

Ingredients

Liquid pale malt extract 1.8 kg (4 lbs)
Cascade hop pellets 28 g (1 oz)
US-05 dry ale yeast 11 g (1 standard packet)
Corn priming sugar 113 g (1/2 cup)
Filtered chlorine-free water 4.7 L (5 quarts)

Steps

1

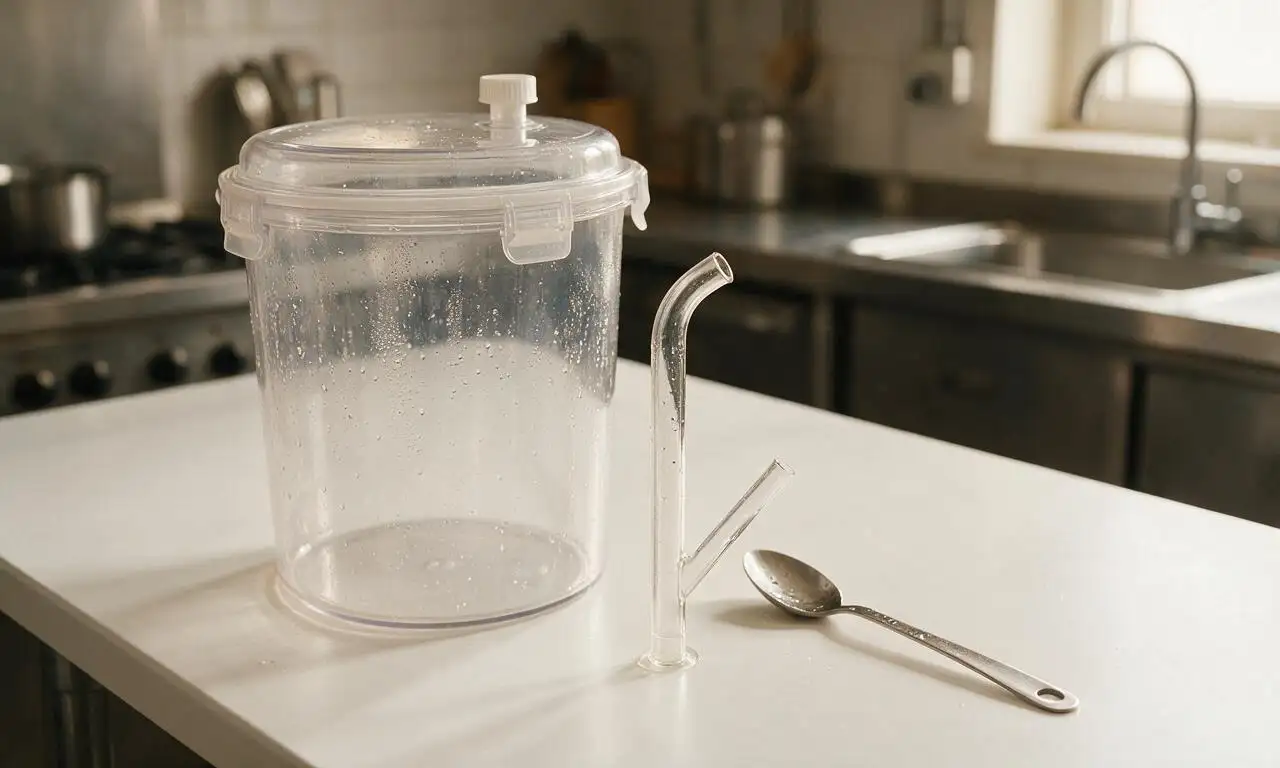
Sanitize Brewing Equipment

Wash all fermentation buckets, siphons, stirring spoons, and bottles with food-grade no-rinse brewer sanitizer, mixed at a ratio of 1 tablespoon sanitizer per 4 L of cool water. Let all items air dry completely for 10 minutes before use; wipe away any residual sanitizer pools to avoid soapy off-flavors in the finished beer.
Step 1
step1:Sanitize Brewing Equipment
2

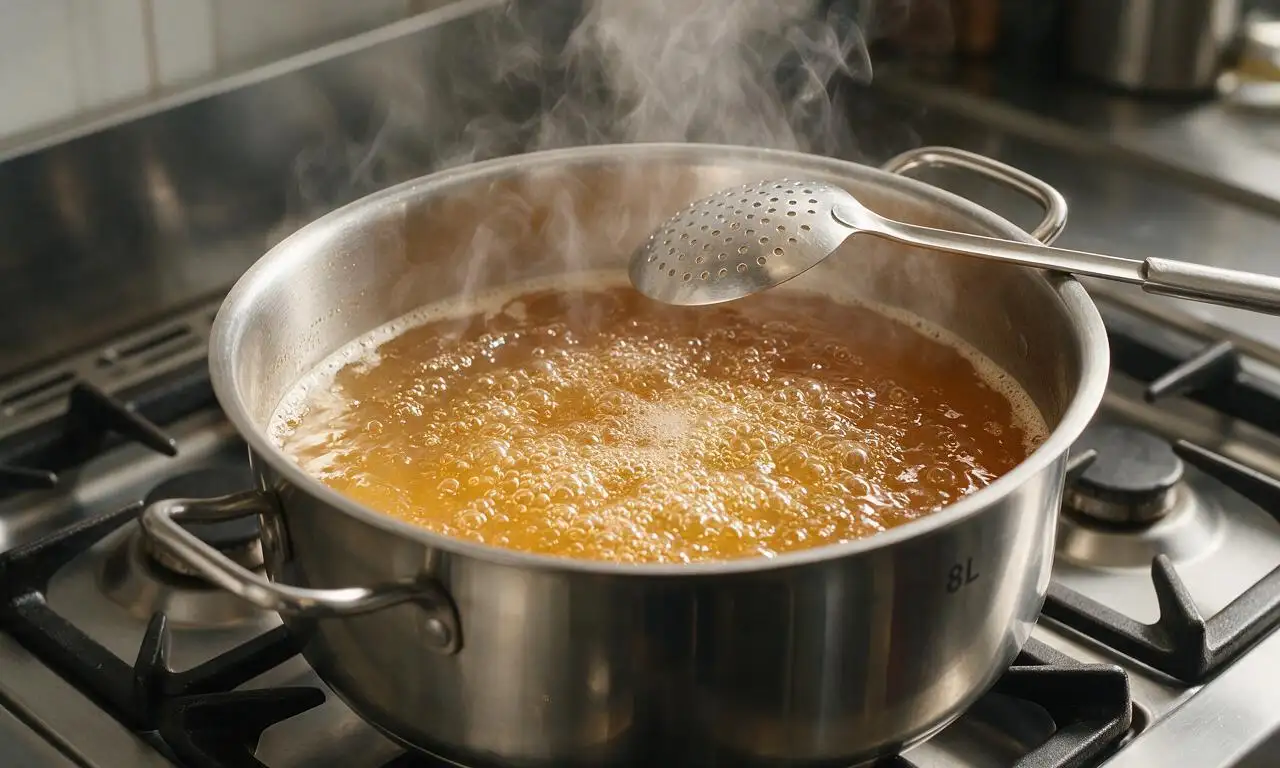
Boil the Malt Wort

Pour 3.8 L (4 quarts) of filtered chlorine-free water into a large 8 L stockpot, bring to a rolling boil over medium-high heat (100°C/212°F). Stir in the full 1.8 kg of liquid pale malt extract until fully dissolved with no remaining clumps. Maintain a gentle rolling boil for 60 minutes, adjusting heat to medium to prevent sticky boil-overs onto your stovetop.
Step 2
step2:Boil the Malt Wort
3

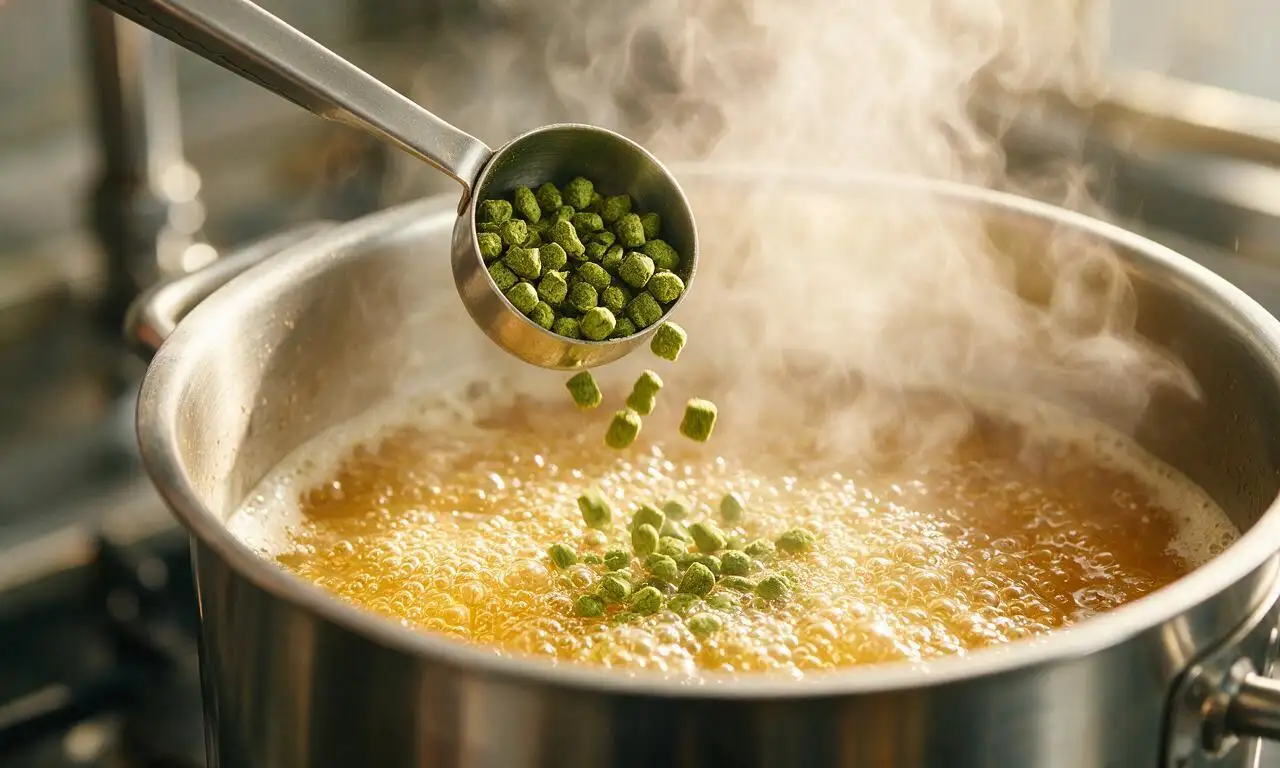
Add Hops in Stages

Add 14 g (0.5 oz) of Cascade hop pellets at the very start of the 60-minute boil to add balanced bitterness. Add the remaining 14 g (0.5 oz) of Cascade hops during the last 5 minutes of the boil to preserve bright, citrusy pine aroma. Turn off the stovetop heat once the full 60-minute boil is complete, and cover the pot tightly.
Step 3
step3:Add Hops in Stages
4

Cool Wort and Pitch Yeast

Move the covered stockpot to an ice bath filled with equal parts cold water and ice for 20 minutes, until the wort cools to exactly 21°C (70°F). Pour the cooled wort into your sanitized fermentation bucket, then top up with the remaining 0.9 L (1 quart) of filtered water to reach 4.7 L total volume. Sprinkle the full 11 g packet of dry ale yeast evenly over the wort surface, then seal the bucket with an airlock filled halfway with sanitizer solution.
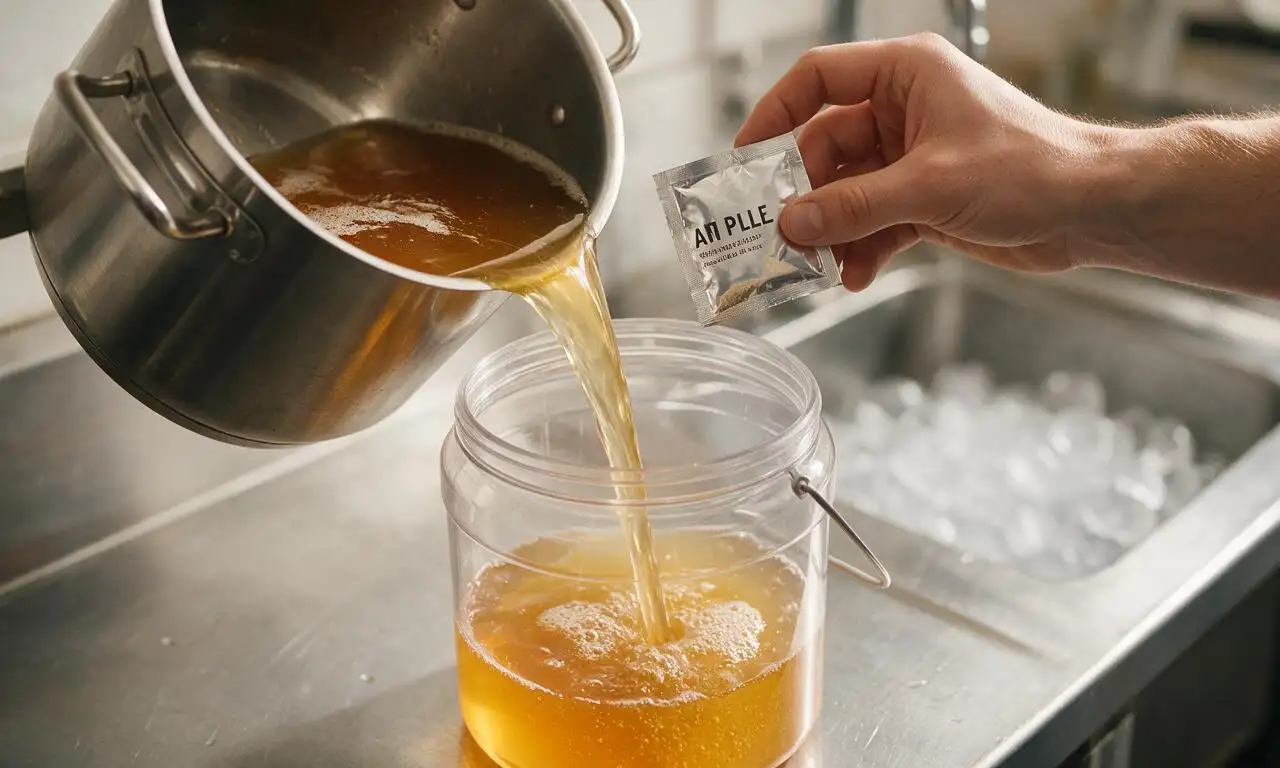
Step 4
step4:Cool Wort and Pitch Yeast
5

Ferment the Beer

Store the sealed fermentation bucket in a dark, temperature-controlled space held at a steady 18–21°C (65–70°F) for 14 full days. You will see consistent bubbles rising through the airlock for the first 3–7 days as active fermentation converts sugar to alcohol; do not open the bucket during this period to avoid bacterial contamination.
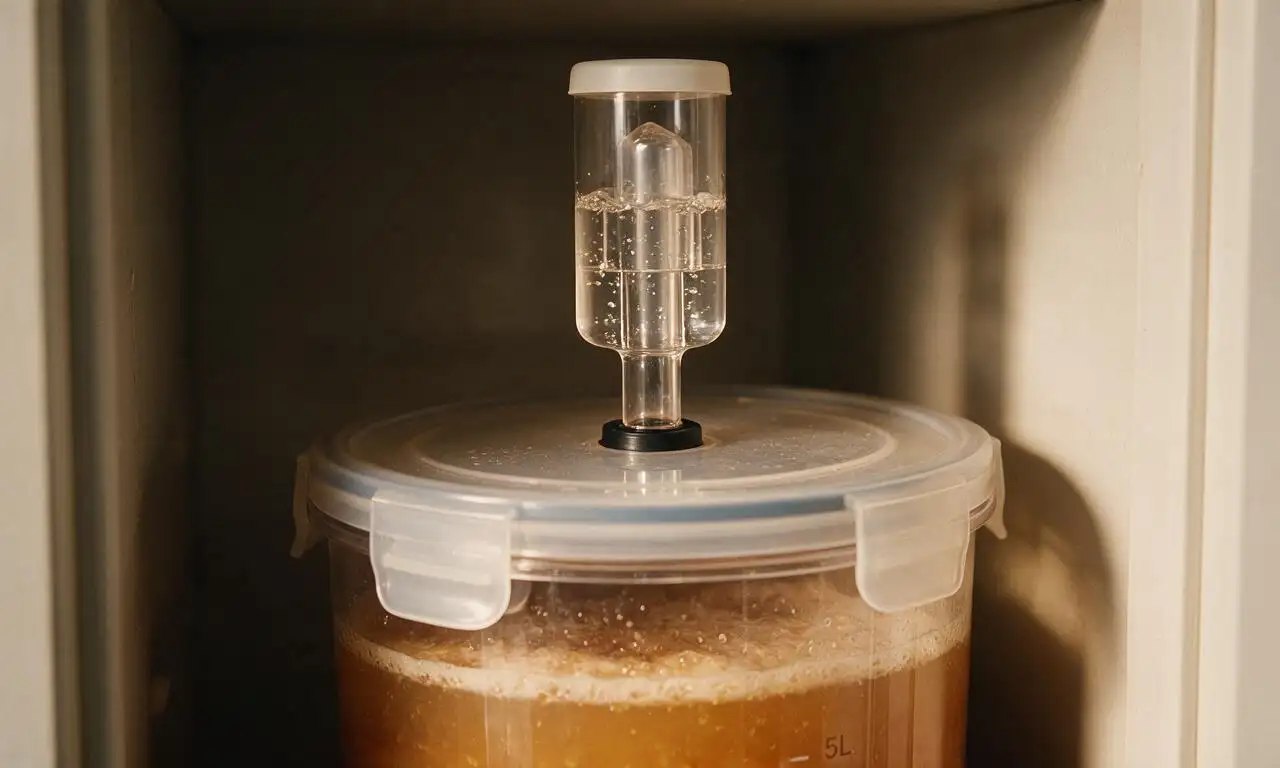
Step 5
step5:Ferment the Beer
6

Bottle and Carbonate

Boil 113 g (1/2 cup) of corn priming sugar in 240 ml (1 cup) of water for 5 minutes over high heat, then pour the solution into a sanitized bottling bucket. Siphon the fully fermented beer into the bottling bucket, stirring gently with a sanitized spoon to mix evenly with the sugar solution. Siphon the beer into sanitized 355 ml (12 oz) glass bottles, cap tightly with metal crown caps, and store at 18–21°C (65–70°F) for 7 days to build natural carbonation.
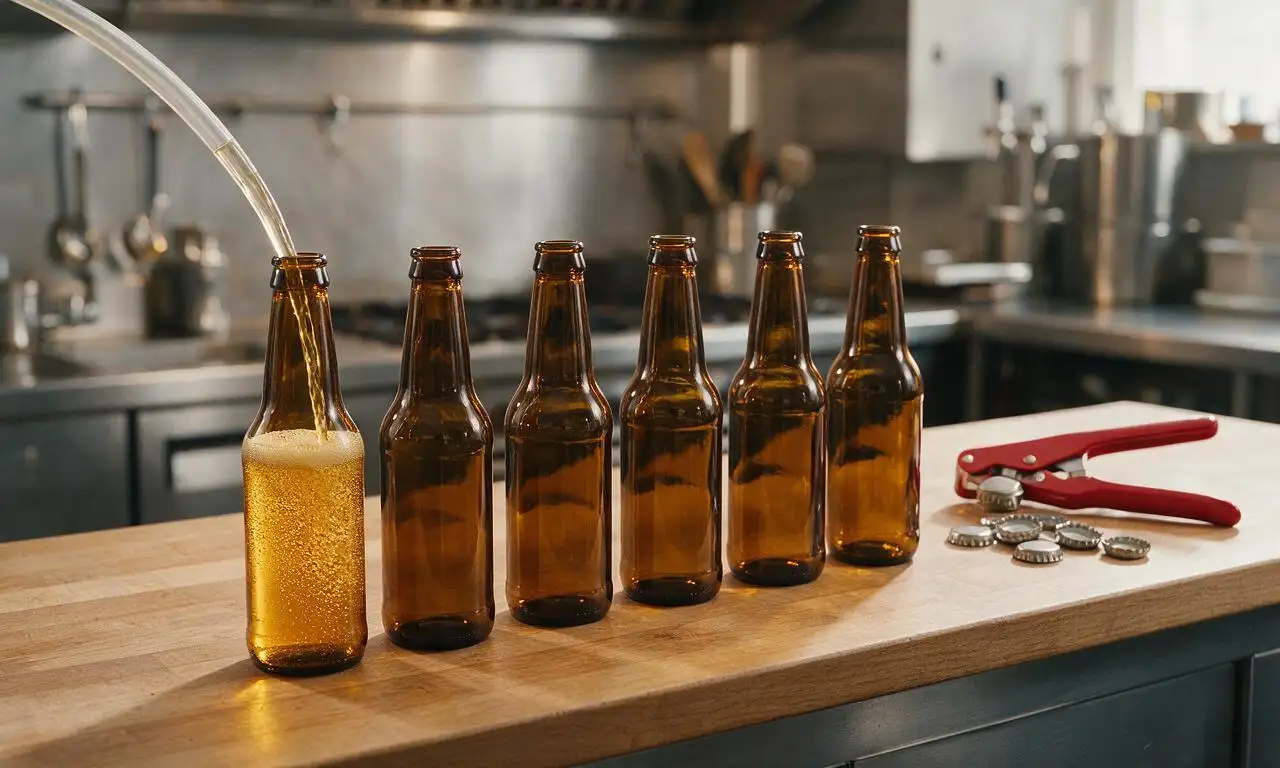
Step 6
step6:Bottle and Carbonate
7

Chill and Serve

After 7 days of carbonation, move the sealed bottles to a refrigerator set to 4°C (40°F) to chill for 24 hours before opening. Pour slowly into a chilled pint glass, stopping before the thin layer of pale yeast sediment at the bottom of the bottle pours out, for the clearest, best-tasting glass of beer.
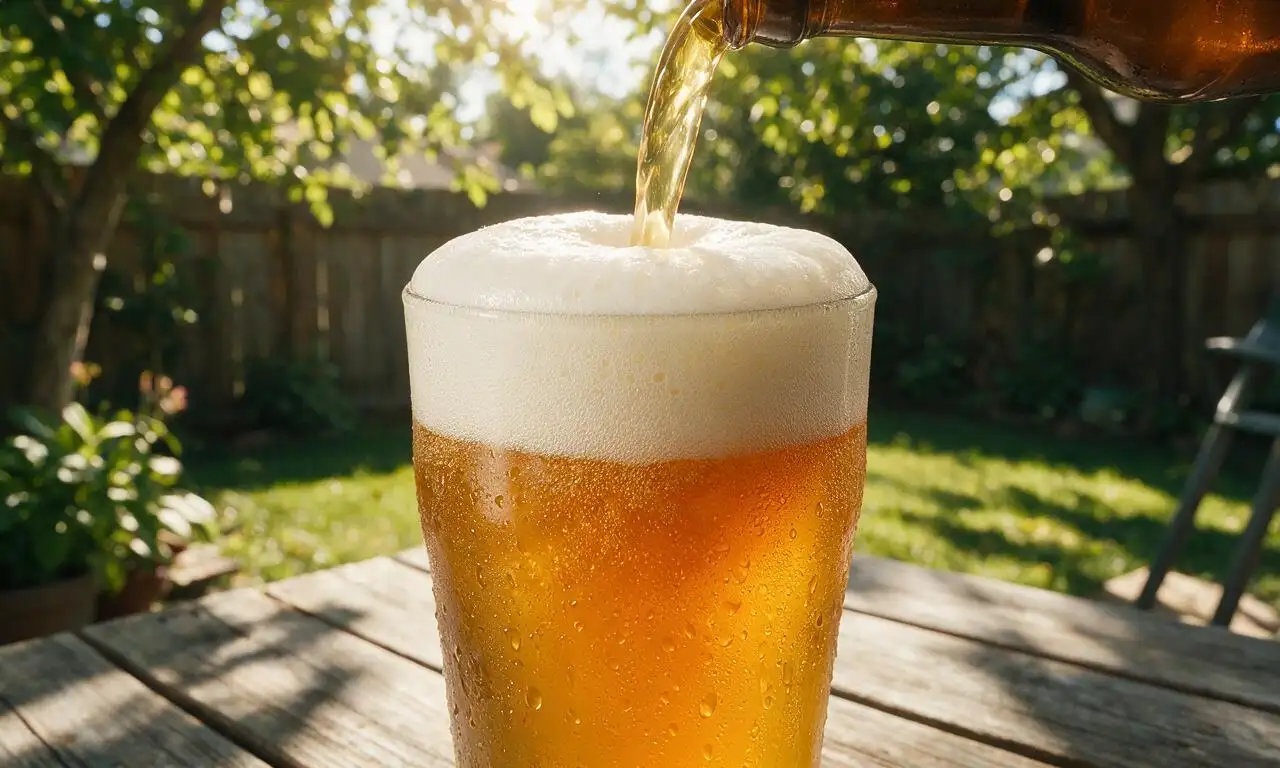
Step 7
step7:Chill and Serve

Tips

1.Always use filtered, chlorine-free water for brewing; tap water with chlorine will create harsh, medicinal off-flavors that ruin finished beer.
2.Never skip sanitizing every surface that touches cooled wort or beer; even a tiny amount of bacteria can turn your batch sour or moldy.
3.For a more intensely hoppy IPA-style beer, add an extra 7 g (0.25 oz) of Cascade hops 1 minute before the boil ends for a bright citrus aroma boost.


✨ You May Also Like

Drinks & Beverages
🍜 Mexico

A bright, balanced tequila-based cocktail with zesty fresh lime, smooth orange liqueur, and a signature salt rim, perfect for warm summer sipping.

⏱️ 5 minutesDrinks & Beverages ★ 4.9
Drinks & Beverages
🍜 United States

Thick, creamy, nostalgic classic vanilla milkshake with a rich, smooth texture, topped with whipped cream and a cherry for cool, sweet refreshment.

⏱️ 5 minutesDrinks & Beverages ★ 4.7
Drinks & Beverages
🍜 United States

A bright, golden strong ale with fruity banana-clove notes, subtle hop spice, and soft carbonation, brewed in classic Trappist Tripel tradition.

⏱️ 2 hours aDrinks & Beverages ★ 4.5
Drinks & Beverages
🍜 United States

A frothy, nostalgic American soda fountain treat pairing bubbly cold root beer with creamy vanilla ice cream, perfect for cooling down at warm weather gatherings.

⏱️ 20 minuteDrinks & Beverages ★ 4.8
Drinks & Beverages
🍜 United States

Tart, funky, effervescent American Wild Ale is a complex fruity craft beer brewed with wild yeast, delivering bright, zesty notes perfect for warm-weather sipping.

⏱️ 2 hours aDrinks & Beverages ★ 4.4
Drinks & Beverages
🍜 United States

Bright, bubbly copycat of the iconic American caramel cola, balanced with citrus and warm spice, perfect for sipping ice-cold on hot days.

⏱️ 15 minuteDrinks & Beverages ★ 4.8

Craft Beer:Frequently Asked Questions

1.How much finished beer does this small-batch Cascade craft beer recipe yield? ▾
This recipe makes 1 gallon (roughly 10 standard 12-ounce bottles) of finished beer, perfect for new brewers who don’t want to invest in bulky equipment or waste ingredients on their first batch. It’s sized to fit common 1-gallon glass fermentation jugs, so no oversized kettles or dedicated storage space is required.
2.Why does the recipe specify chlorine-free filtered water? ▾
Chlorine and chloramine in regular tap water react with malt and hop compounds to create harsh, medicinal, band-aid-like off-flavors that drown out Cascade’s bright citrus notes. Use filtered fridge water, bottled spring water, or tap water treated with one campden tablet 20 minutes before brewing for a clean, crisp finish.
3.Can I substitute whole Cascade hops for the Cascade hop pellets called for? ▾
Absolutely! Whole Cascade hops work beautifully, just use 15% more by weight than the listed pellet measurement, since whole hops are less dense and absorb more wort during the boil. They’ll still deliver that classic grapefruit, pine, and bright lemon zest character that defines Cascade’s iconic American craft profile.
4.What fermentation temperature works best for the US-05 dry ale yeast in this recipe? ▾
US-05 ale yeast performs best held at a steady 65–70°F throughout fermentation. Stash your fermentation jug in a cool, dark spot away from direct sun or heating/cooling vents. If it gets too warm, you’ll get harsh solvent-like off-flavors; too cold, and yeast will go dormant before fermentation finishes.
5.Can I use dry pale malt extract instead of the recommended liquid pale malt extract? ▾
Dry pale malt extract works as a substitute if liquid is hard to track down, but liquid extract delivers a softer, fresher, less bready malt backbone that lets bright Cascade hop notes take center stage. If you swap, use 10% less dry extract by weight, since it is more concentrated than the liquid version.
6.How long do I need to ferment this beer before it’s ready to bottle? ▾
Plan for 7–10 days of primary fermentation at the recommended 65–70°F range. You’ll know it’s ready to bottle when airlock bubbles slow to one or fewer per minute, and the beer holds a consistent final gravity reading for two straight days, which prevents over-carbonation and dangerous bottle bombs.
7.What does the corn priming sugar do, and can I swap it for regular table sugar? ▾
Corn priming sugar is added right before bottling to feed remaining yeast, creating natural carbonation inside sealed bottles without adding harsh off-flavors. You can use plain white table sugar in a pinch, but corn sugar ferments much cleaner, leaving no cidery aftertaste that would muddle Cascade’s crisp citrus profile.
8.How long after bottling do I need to wait before I can drink this beer? ▾
Let bottles condition at a steady room temperature (65–70°F) for a minimum of 2 weeks to let carbonation fully develop and sharp flavors mellow. If you can wait 3–4 weeks, you’ll get an even smoother, more balanced sip, perfect for serving ice-cold at casual warm-weather backyard gatherings.
9.I’m a total homebrewing beginner—what basic equipment do I need for this recipe? ▾
You don’t need a fancy professional setup! Grab a 1-gallon glass fermentation jug, airlock and rubber stopper, 3-gallon boiling pot, auto-siphon, bottling wand, bottle capper, and 10 sanitized 12-ounce pry-off beer bottles. The non-negotiable rule: sanitize every surface that touches cooled wort to avoid spoilage.
10.How does this homebrew compare to commercial Cascade-hopped craft beers I buy? ▾
This recipe brews a crisp, balanced pale ale rather than a high-alcohol, super-bitter IPA, so it’s extra sessionable for all-day sipping. It has that same signature Cascade grapefruit, pine, and subtle floral note you love in West Coast craft brews, with a smooth light malt base and approachable 5% ABV.
11.What’s the best way to store finished bottles, and how long will the beer stay fresh? ▾
Store capped bottles upright in a cool, dark spot like a basement or refrigerator, away from direct sunlight which creates unpleasant skunky off-flavors in hoppy beer. It will stay crisp for up to 6 months, but tastes best within the first 3 months when Cascade’s bright citrus aromas are most vibrant.
12.I accidentally added extra Cascade hops while brewing—did I ruin my batch? ▾
Don’t panic! A little extra Cascade will just amp up that bright citrus and pine character, which is a win for most hop lovers. If you added significantly more than the recipe called for, just let bottles condition an extra 1–2 weeks; harsh fresh hop bitterness mellows over time for a balanced, extra-hoppy brew.

Comments (14)

2 weeks ago

OMG this Cascade homebrew recipe is a total game changer! I’ve messed around with big batch brews before that took forever and wasted so much grain when they didn’t turn out, but this small batch size was perfect for my tiny apartment setup. Got that bright citrusy Cascade hop punch I was craving, totally tastes like the craft IPAs I drop $18 a four pack on at the liquor store. 10/10 will brew again next month!

1 week ago

So stoked this worked for your small space setup! That classic Cascade citrus zing is exactly what we were going for with this recipe — pro tip, dry hop an extra half ounce of Cascade if you want even more of that bright grapefruit note next batch!

5 days ago

Wait, hold up — total newbie to homebrewing here. Is this actually doable if I’ve never brewed anything before? The medium difficulty rating is making me nervous, I don’t wanna drop money on supplies and end up with skunky garbage lmao

3 days ago

Total newbie too when I tried this 2 months ago! Just follow the temp steps exactly, don’t skip sanitizing *every single thing* that touches the beer, and mine turned out great. No skunk, just nice smooth hoppy beer. You got this!

1 week ago

Brewed a batch of this for my last backyard potluck and everyone lost their minds! People kept asking which local brewery I picked it up from, I felt so cool saying I made it myself. The Cascade hops have that perfect piney finish that pairs so good with burgers and brats. SO good.

3 days ago

Quick question — I don’t have a dedicated brew kettle big enough for the full 2.5 gallon batch, can I split the boil between two regular stock pots? My studio apartment stove is tiny too so I can’t fit a giant pot on it right now.

2 days ago

I did exactly that last batch! Just make sure you split the grain and hop additions evenly between both pots so the ratio stays spot on, and keep the boil temp consistent across both. Worked like a charm for me, no weird flavor issues at all.

2 days ago

Great question! Splitting the boil works totally fine as long as you keep your ingredient ratios consistent and hit the full 60 minute boil time for both pots. Just be extra careful when transferring to the fermenter to avoid splashing too much, which can introduce oxygen and cause off-flavors.

1 week ago

Did this brew with my 19 year old son over the weekend for our first father-son brew day, and the active 2 hour prep time was totally manageable. We’re 1 week into fermentation right now and it’s already smelling amazing, can’t wait to taste it in a couple more weeks!

5 days ago

Love that this was a father-son project! Make sure you take a gravity reading right before bottling to make sure fermentation is fully done — you’re gonna love how that bright Cascade flavor comes through once it’s carbonated.

2 days ago

Ugh, I think I messed up my first go at this. My beer came out way too bitter, almost undrinkable. Did I boil the hops too long? I swear I followed the timing but I might have gotten distracted by my dog barking at the mailman mid-boil and lost track.

yesterday

Oh I did that my first time too! I accidentally added all the late addition hops right at the start of the boil instead of holding them for the last 15 minutes, turned out super astringent and bitter. Next time set phone timers for every single hop addition, total game changer.

yesterday

So sorry your first batch didn’t turn out as expected! Over-boiling aroma hops can absolutely ramp up the harsh bitter notes, as can not straining out all the hop trub before transferring to the fermenter. Timers for every step are a total lifesaver — give it another shot, you’ve got this!

3 days ago

Bottled a batch of this last week and snuck a couple to my regular tailgate crew last Sunday. Even my friends who only drink light lager were raving about it! The Cascade isn’t too overpowering, it’s smooth enough for people who don’t drink super hoppy beer all the time. Will absolutely be making this for football season all fall.

5 days ago

Pro tip for anyone making this: save a couple empty craft beer bottles from the store instead of buying brand new ones, just make sure you sanitize them super well. Saved me like 30 bucks on supplies for this small batch, and the bottles seal just as good as the expensive homebrew store ones.

3 days ago

Yes! I’ve been doing that for years, just make sure you don’t use bottles with twist-off caps, those don’t seal tight enough for proper carbonation. Saved a ton of cash and keeps glass out of the landfill, total win win.

2 hours ago

Wait how important is the temperature control during fermentation? My apartment stays around 72 degrees most days, is that too warm for this yeast? I don’t have a fancy temp-controlled fermentation fridge or any fancy brew gear.

30 minutes ago

72 is right at the upper end for most ale yeasts, I’d say try to keep it a couple degrees cooler if you can. I used to just wrap my fermenter in a wet t-shirt and point a small desk fan at it when I lived in a hot third-floor apartment, that dropped the temp just enough to avoid weird solvent-like off-flavors.

5 minutes ago

Great question! Consistent temps around 65-68 degrees are ideal for this yeast strain, and 72 degrees can lead to some subtle harsh, boozy off-notes if it gets any warmer. The wet t-shirt fan trick that u/HomebrewVet mentioned works super well for small batches if you don’t have a dedicated brew fridge!

yesterday

Just cracked my first properly carbonated bottle of this last night and I’m OBSESSED. That classic Cascade grapefruit and pine flavor is so spot on, way better than I expected for my third ever homebrew. Brought a bottle over to my neighbor who’s a retired craft brewer and he said it was legit, which is the highest praise I could ever get.

2 days ago

Love that this is a small batch! I hate recipes that make 5 gallons of something, I live alone and don’t have space to store that much beer, let alone drink it before it goes flat. 2.5 gallons is the perfect size for me to have a few bottles a week without waste.

yesterday

That’s exactly why we developed this small batch size! It’s perfect for solo brewers, small spaces, or anyone who doesn’t want to commit to a giant 5 gallon batch that takes forever to get through. So glad it works for your setup!

1 week ago

I’ve been homebrewing for over 20 years, mostly big 5 gallon batches for my local homebrew club, and I tried this small batch Cascade recipe on a whim when I had some leftover hops from a bigger brew. Super straightforward, clean instructions, and the finished beer is crisp, well balanced, and lets that classic Cascade hop character shine like it should. Great recipe for new and experienced brewers alike.

3 days ago

About how much did y’all spend on supplies for this? I’m trying to get into homebrewing but I don’t wanna blow a whole bunch of money on fancy equipment right off the bat, since I’m not even sure I’ll stick with it long term.

2 days ago

I already had a big stock pot and kitchen thermometer, so I only spent about $35 on the grain, hops, yeast, a small 3 gallon fermenter, and bottle caps for this batch. Way cheaper than I thought it would be, and I can reuse the fermenter for every future batch so it only gets cheaper from here.

just now

Wait, has anyone tried adding a little extra fruit to this? I was thinking of throwing in some fresh grapefruit peel during dry hop to amp up that citrus note from the Cascade hops, would that mess up the flavor?

just now

I did that! Added the zest of one whole grapefruit (make sure you skip the white pith, that adds harsh bitter flavor!) during dry hop and it was insane. Tasted like that fancy grapefruit IPA I used to drive 45 minutes to get from the brewery out in the hills. 10/10 recommend.

just now

That grapefruit addition sounds incredible! Cascade hops pair so well with bright, zesty citrus, and just like u/FruitBeerFan noted, skip the bitter white pith to avoid harsh off-notes. That variation sounds so good we might have to test it for a future recipe twist!



