
Donuts

Donuts
⏱️ cook time 2 hours 30 minutes
🍽️ servings 12
⚡ Difficulty medium

intro

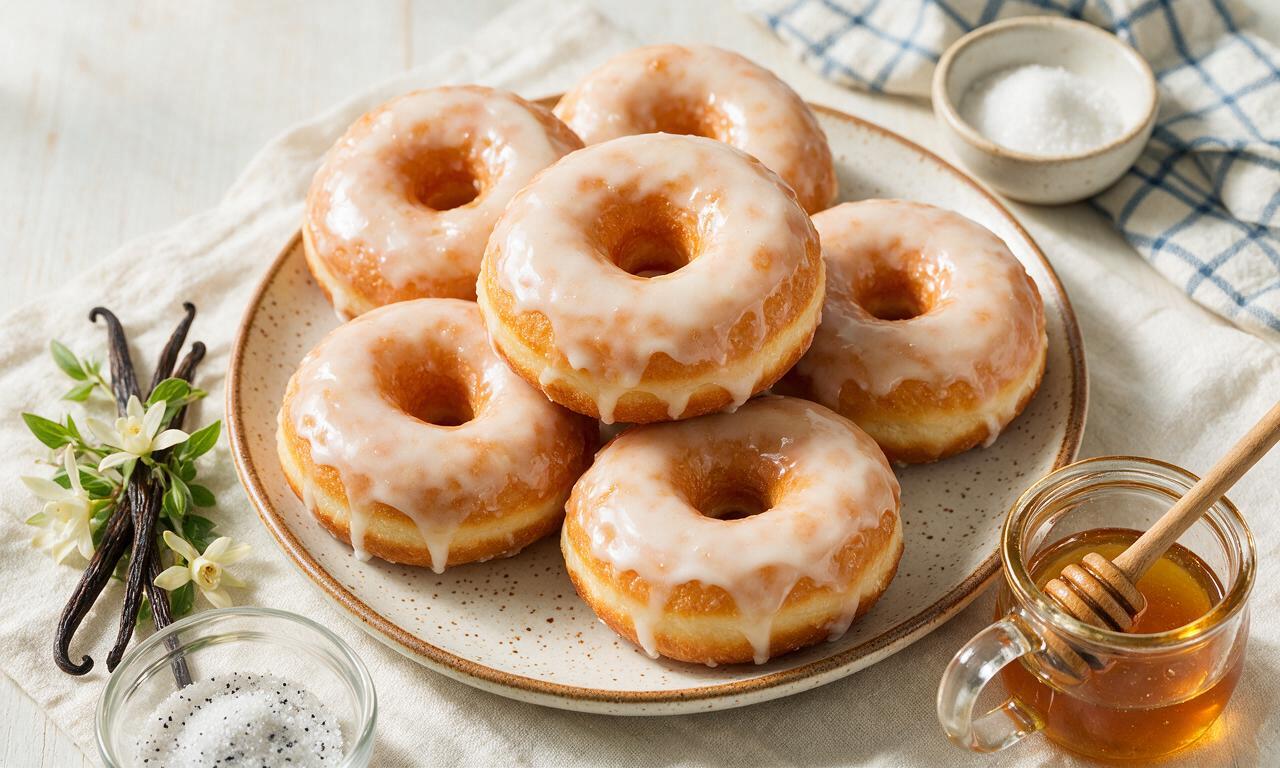
Light, pillowy yeast-raised donuts coated in glossy vanilla glaze, with crisp golden edges and soft, airy centers for a nostalgic, indulgent homemade treat.

Ingredients

All-purpose flour 500g (4 cups)
Instant dry yeast 7g (2 1/4 tsp)
Whole milk (for dough) 240ml (1 cup)
Granulated sugar 60g (1/4 cup)
Unsalted butter 57g (4 tbsp)
Large eggs 2 units
Fine table salt 5g (1 tsp)
Vanilla extract 10ml (2 tsp)
Neutral vegetable oil (canola/sunflower) 1L (4 cups)
Powdered sugar 240g (2 cups)
Whole milk (for glaze) 30ml (2 tbsp)

Steps

1

Activate the Yeast

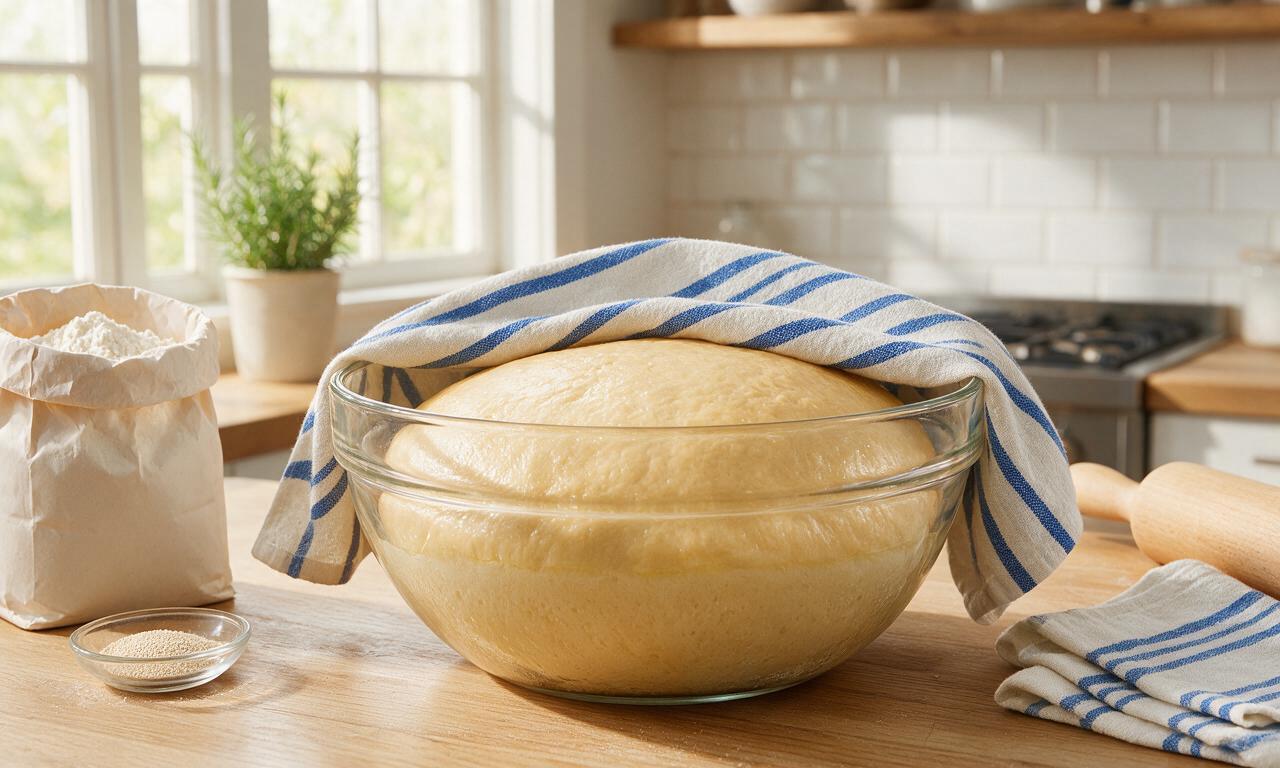
In a large mixing bowl, combine 240ml whole milk warmed to 38°C/100°F, 7g instant dry yeast, and 10g of the granulated sugar; stir gently and let rest 5 minutes until the surface looks foamy to confirm active yeast. Add the remaining 50g granulated sugar, cooled melted 57g unsalted butter, 2 room-temperature large eggs, 5ml (1 tsp) vanilla extract, 5g fine salt, and 500g all-purpose flour. Mix with a wooden spoon until a shaggy, sticky dough forms, then turn out onto a lightly floured surface and knead by hand for 8 minutes until smooth and elastic. Place dough in a greased bowl, cover with a damp tea towel, and let rise in a warm 24°C/75°F draft-free spot for 60 minutes until doubled in volume.
Step 1
step1:Activate the Yeast
2

Roll and Cut Donuts

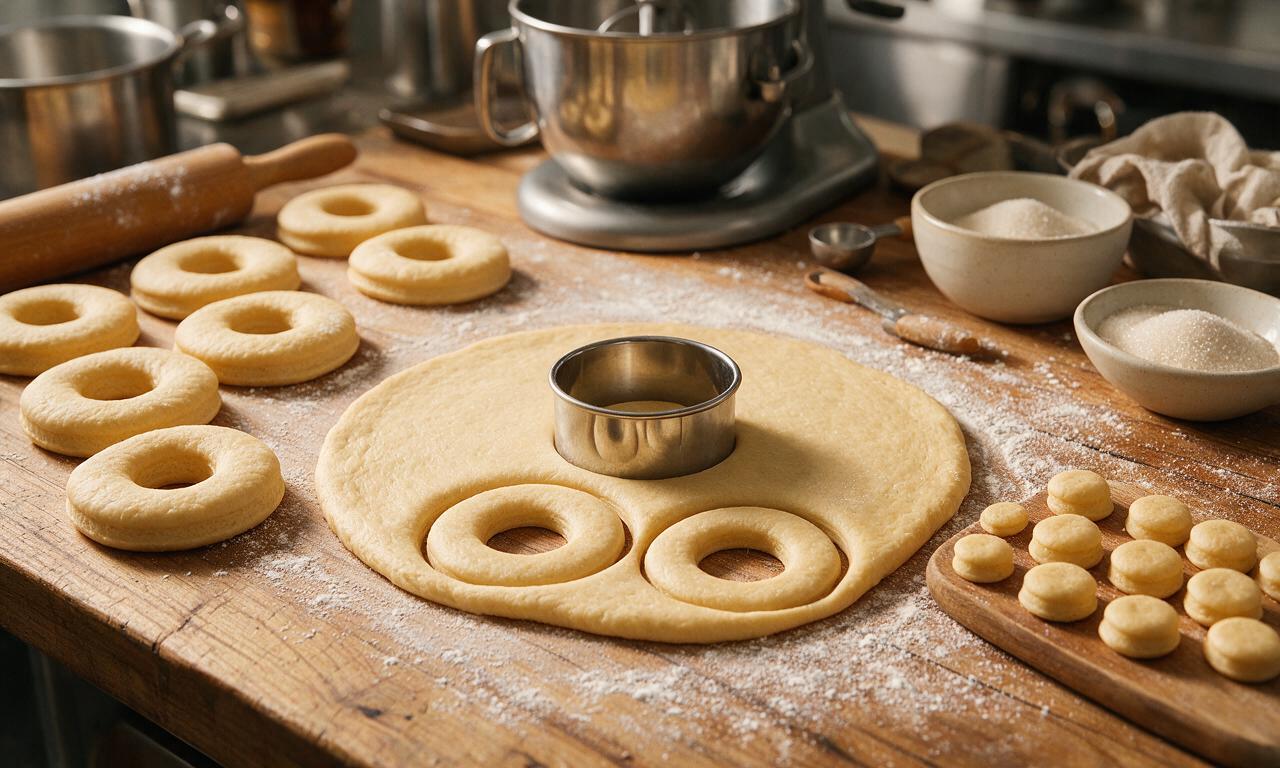
Once dough has fully doubled, punch it down firmly in the center to release all trapped air, then turn out onto a lightly floured work surface and roll to a uniform 1.25cm (1/2 inch) thickness. Use a 9cm (3.5 inch) round donut cutter (or a large drinking glass paired with a 2.5cm/1 inch small round cutter for the center hole) to cut out donut rings. Gather leftover dough scraps, re-roll only once to avoid tough donuts, and cut additional rings to yield 12 total donuts plus 12 small donut holes.
Step 2
step2:Roll and Cut Donuts
3

Let Donuts Rise Again

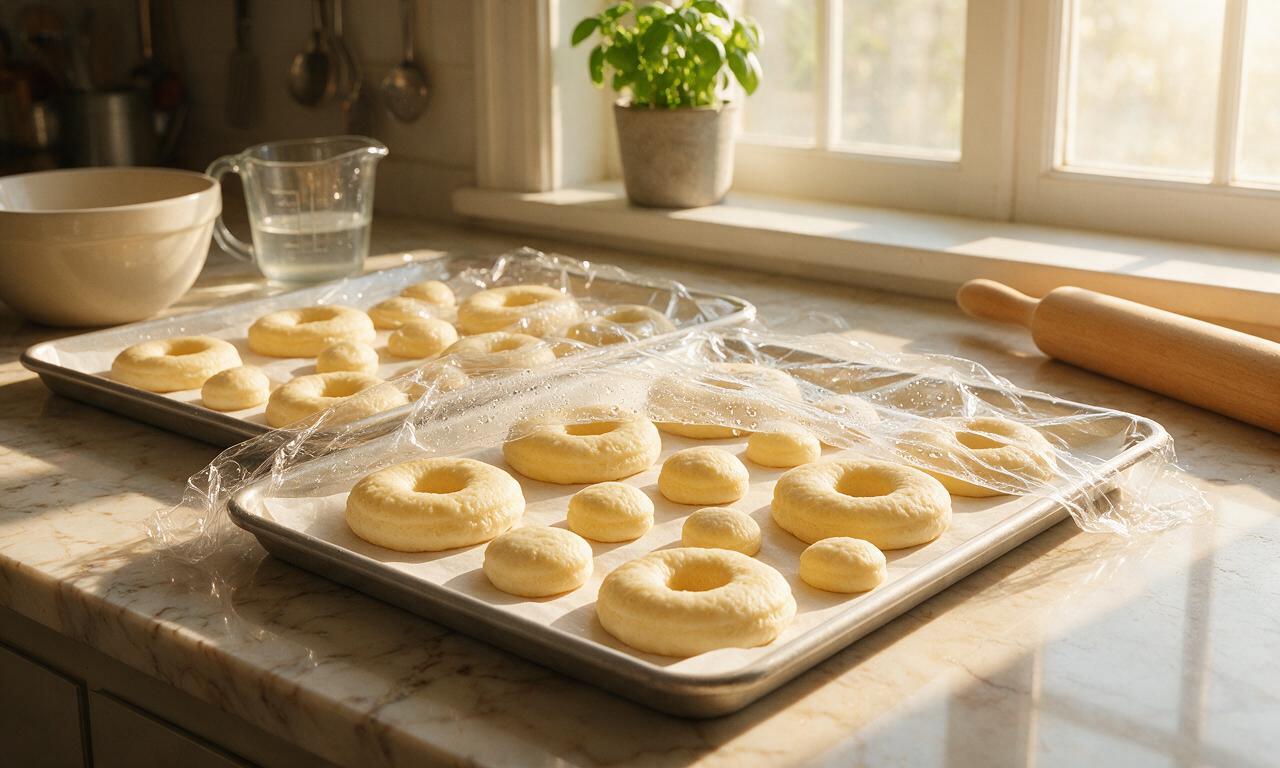
Arrange cut donut rings and holes 5cm (2 inches) apart on parchment paper-lined baking sheets, cover loosely with lightly greased plastic wrap, and let rise a second time in the same warm spot for 30 minutes. Donuts are ready to fry when they are puffy, 1.5 times their original size, and hold a shallow indent when gently pressed with a clean finger.
Step 3
step3:Let Donuts Rise Again
4

Heat Oil and Fry Donuts

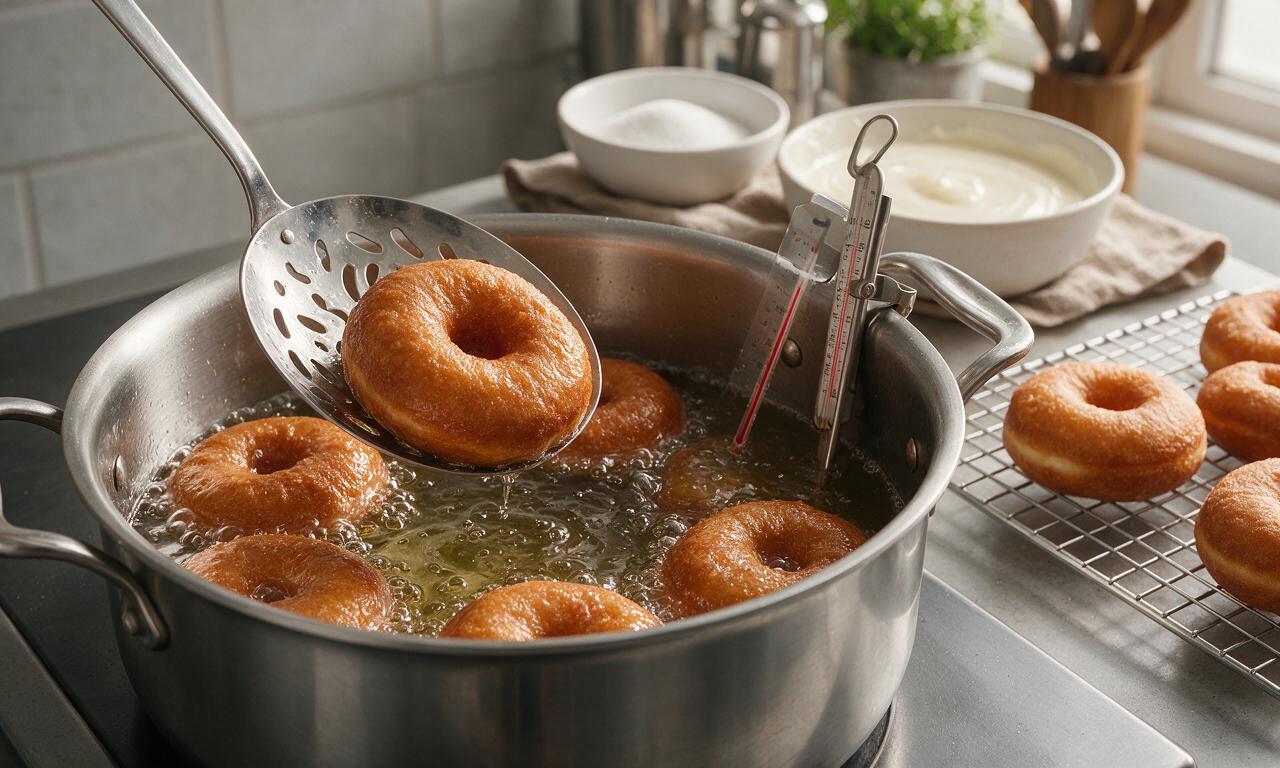
Pour 1L of neutral vegetable oil into a deep, heavy-bottomed Dutch oven or pot, and heat over medium heat to exactly 175°C/350°F, monitored with a clip-on candy thermometer. Carefully lower 2-3 donuts at a time into the hot oil (do not overcrowd the pot, as this drops oil temperature sharply) and fry for 90 seconds per side until deep, even golden brown. Use a slotted metal spoon to transfer fried donuts to a wire rack set over a baking sheet to drain excess oil. Fry donut holes for 45 seconds per side, adjusting stove heat as needed to maintain a steady 175°C/350°F oil temperature between batches.
Step 4
step4:Heat Oil and Fry Donuts
5

Make the Vanilla Glaze

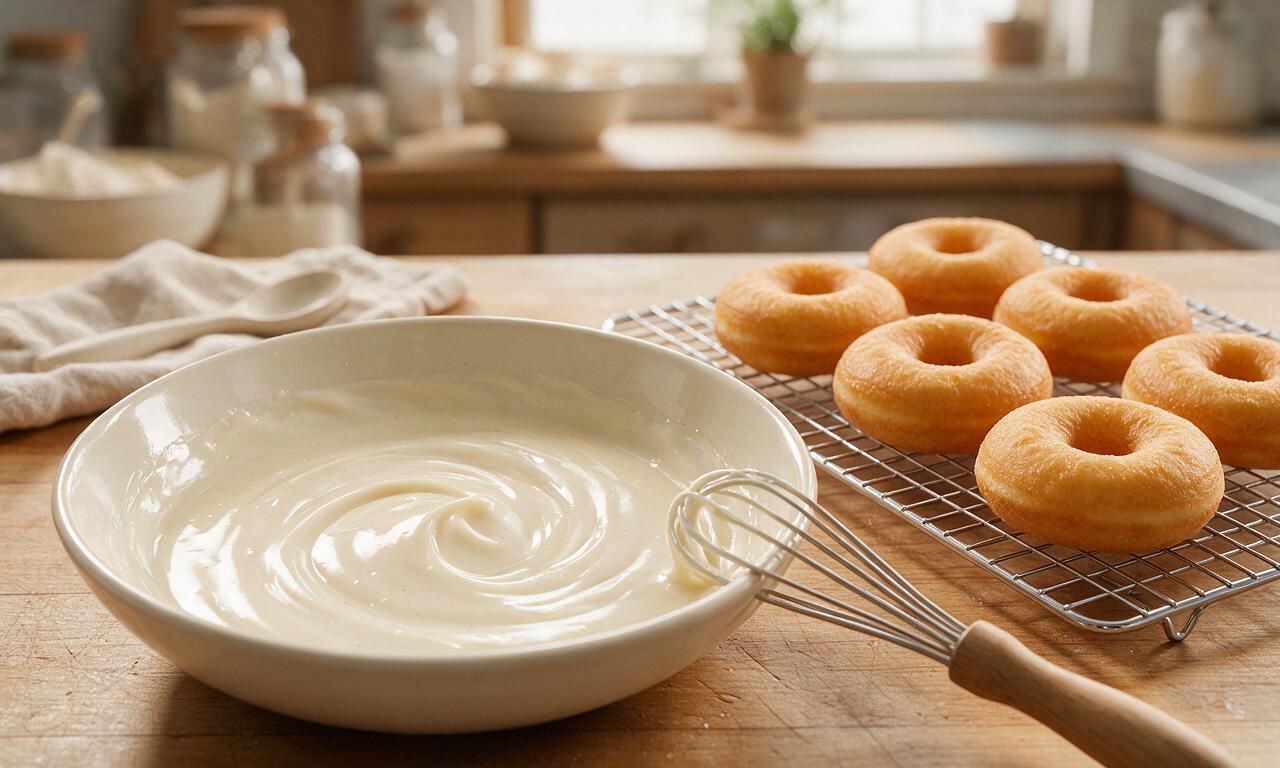
Let fried donuts cool on the rack for 5 minutes while preparing the vanilla glaze: in a wide, shallow bowl, whisk together 240g powdered sugar, 30ml whole milk, and the remaining 5ml (1 tsp) vanilla extract until completely smooth, with a thick, pourable consistency that coats the back of a spoon. Adjust consistency if needed: add 1ml (1/4 tsp) extra milk if glaze is too thick to dip, or 15g (1 tbsp) extra powdered sugar if glaze is too thin and runs off the spoon.
Step 5
step5:Make the Vanilla Glaze
6

Glaze the Warm Donuts

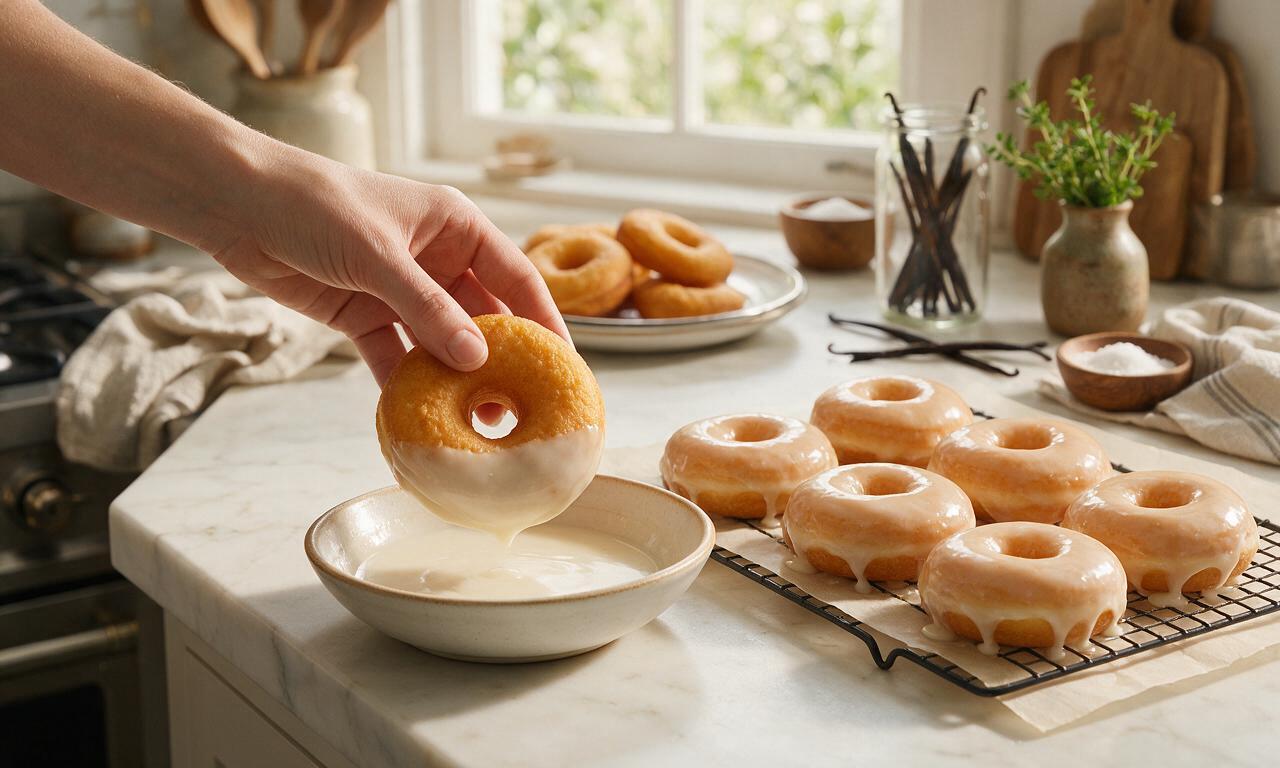
Dip each warm (not scalding hot) donut fully into the glaze, flipping once with a fork to coat both sides evenly, then lift and hold over the bowl for 10 seconds to let excess glaze drip off. Place glazed donuts back on the wire rack, and let rest for 15 minutes at room temperature until the glaze sets to a slightly crisp, shiny coating before serving.
Step 6
step6:Glaze the Warm Donuts

Tips

1.Always use a candy thermometer to monitor frying oil temperature: oil hotter than 180°C/355°F will burn donut exteriors before the interior cooks through, while oil cooler than 165°C/325°F will make donuts absorb excess oil and turn greasy and dense.
2.Only re-roll dough scraps one time when cutting donuts: over-working or repeatedly re-rolling the dough will develop excess gluten, resulting in tough, chewy donuts instead of light, pillowy ones.
3.Glaze donuts while they are still warm (around 45°C/115°F, not scalding hot) so the glaze adheres evenly and forms a slight crisp shell as it sets; glazing cold donuts will cause the glaze to slide off and set unevenly.


✨ You May Also Like

Desserts & Baking
🍜 Italy

Creamy, coffee-kissed classic Northern Italian no-bake dessert, with layers of rum-spiked mascarpone cream, soft ladyfingers, and a rich cocoa dusting.

⏱️ 4 hours 3Desserts & Baking ★ 4.8
Desserts & Baking
🍜 France

Flaky, shatteringly crisp, buttery French croissants with golden exteriors and soft, airy layered interiors, perfect for pairing with coffee for a special morning treat.

⏱️ 12 hours Desserts & Baking ★ 4.7
Desserts & Baking
🍜 United States

Warm, spiced baked apples topped with a fluffy golden biscuit crust, this cozy dessert pairs perfectly with vanilla ice cream for cool-weather comfort.

⏱️ 55 minuteDesserts & Baking ★ 4.7
Desserts & Baking
🍜 United States

A star-spangled classic American blueberry pie with buttery flaky crust and bright sweet-tart filling, perfect for summer patriotic gatherings.

⏱️ 1 hour 25Desserts & Baking ★ 4.8
Desserts & Baking
🍜 United States

A beloved no-bake regional Maine candy with a chewy coconut-potato center coated in rich dark chocolate, a New England holiday staple since the 1870s.

⏱️ 2 hours 3Desserts & Baking ★ 4.9
Desserts & Baking
🍜 France

Luxuriously creamy, floral frozen custard made with aromatic Tahitian vanilla beans, boasting a smooth, rich texture that melts slowly on the tongue.

⏱️ 3 hours 3Desserts & Baking ★ 4.6

Donuts:Frequently Asked Questions

1.Can I use active dry yeast instead of instant dry yeast for this donut recipe?
Absolutely! Use 25% more active dry yeast than the instant amount called for, and activate it first in warm (105–110°F) whole milk with a pinch of sugar for 5–7 minutes until foamy. This confirms the yeast is alive before mixing. All other rise times and steps will stay exactly the same once your yeast is proofed.
2.Why did my donuts turn out dense instead of light and pillowy?
Dense donuts usually come down to three common issues: under-kneaded dough that can’t trap the gas yeast produces, under-proofed dough that didn’t have time to develop light air pockets, or old, inactive yeast that fails to rise properly. Avoid overcrowding the fryer too, as dropping oil temperature leads to greasy, heavy donuts instead of fluffy ones.
3.What oil temperature is best for frying these donuts to get crisp golden edges?
Hold a steady 350–360°F, measured with a candy or deep-fry thermometer for consistent results. If oil is too hot, the outside burns before the airy center cooks through; too cold, and donuts soak up excess oil and turn greasy. Fry 1–1.5 minutes per side, and let oil rebound to temp between batches.
4.Can I make the dough ahead of time to fry fresh the next morning?
Definitely! After the first bulk rise, punch the dough down, cover it tightly, and store it in the fridge for up to 12 hours. This cold slow rise actually develops a deeper, richer flavor. When ready to cook, roll, cut, and let donuts proof at room temp for 30–45 minutes before frying as normal.
5.Do I have to use whole milk for the dough, or can I substitute lower-fat milk?
Whole milk’s fat content creates a softer, more tender crumb and richer flavor, but you can swap in 2% milk in a pinch. Skip skim milk entirely, as it produces a drier, less pillowy donut. If you only have skim, stir in 1 tablespoon of melted unsalted butter per cup of skim to mimic whole milk’s fat level.
6.How do I get that perfectly smooth, glossy vanilla glaze that doesn’t drip everywhere?
Mix glaze to a thick, honey-like consistency: 2 cups powdered sugar, 3–4 tablespoons whole milk, 1 teaspoon vanilla, and a tiny pinch of salt. Dip warm (not piping hot) donuts straight into the glaze, let excess drip off for 10 seconds, then set on a wire rack for 15 minutes to set fully before serving.
7.Can I bake these donuts instead of frying them for a lower-fat version?
You can, though the texture will be slightly less crisp on the edges and more bread-like than classic fried yeast donuts. Preheat your oven to 375°F, place cut donuts on a parchment-lined sheet, proof until puffy, bake 8–10 minutes until golden, then brush with melted butter before glazing to help it stick.
8.How do I know when the dough has proofed long enough before rolling and cutting?
For the first bulk rise, press a floured finger 1 inch into the dough: if the indentation slowly springs back halfway, it’s ready; if it springs back fully, it needs more time; if it deflates immediately, it’s over-proofed. After cutting, donuts should feel light and puffy, 50% larger than their initial cut size.
9.Why does my glaze turn streaky or dull instead of staying shiny?
Streaky, dull glaze usually happens if you dip donuts that are too hot (scalding donut heat melts glaze sugar and causes separation as it cools) or if your glaze is too thin. Wait for donuts to cool 2–3 minutes post-fry so they’re warm, not scalding, and add extra powdered sugar if glaze runs too freely off a spoon.
10.Can I freeze these glazed donuts for later, and how do I reheat them?
For best results, freeze unglazed donuts: let fried donuts cool completely, wrap tightly in plastic wrap and foil, and freeze for up to 3 months. Thaw at room temp for 1 hour, warm 10 seconds in the microwave, then dip in fresh glaze. Glazed donuts can be frozen, but their glaze will turn sticky and absorb into the crumb as they thaw.
11.What can I use if I don’t have a donut cutter to shape the dough?
No specialty tool required! Use a 3-inch round cookie or biscuit cutter for the outer donut shape, then a 1-inch round cutter (or even a clean plastic water bottle cap, or large piping tip) to punch out the center hole. Make sharp, straight cuts without twisting, so donuts rise evenly instead of cooking lopsided.
12.How much kneading does this donut dough actually need?
If kneading by hand, work the dough for 8–10 minutes on a lightly floured surface until it’s smooth, soft, and passes the windowpane test (stretch a small piece thin enough to see light through without tearing). If using a stand mixer with a dough hook, knead on medium-low for 4–5 minutes—over-kneading will make tough donuts.
13.My donuts absorb way too much oil when frying—what am I doing wrong?
This almost always traces back to oil that’s too cool (below 340°F) or donuts that aren’t fully proofed before frying. Under-proofed donuts have a tight crumb that soaks up oil instead of searing on contact, and low oil temp doesn’t set the outer crust fast enough. Never press down on donuts while they fry, as that forces oil into the crumb too.
14.Can I add fillings like jam or pastry cream to these donuts?
Absolutely! Skip cutting the center hole to make solid donut rounds, fry as normal, and let them cool 5 minutes. Fit a piping bag with a long, narrow filling tip, load it with your chosen filling, poke a hole in the donut’s side, and pipe 1–2 tablespoons of filling inside until the donut feels slightly heavy, then glaze as normal.
15.How long do these glazed donuts stay fresh after making them?
These donuts are best eaten the same day they’re made, when they’re at their pillowy, crisp-edged peak. Store leftovers in an airtight container at room temperature for up to 2 days—note the glaze will soften and edges lose crispness after the first day. Skip refrigerating, as that speeds up staling and dries out the soft crumb.
16.What’s the purpose of unsalted butter in the dough, and can I use salted butter instead?
Unsalted butter adds rich, tenderizing fat that creates that signature melt-in-your-mouth crumb, without adding unplanned salt that can throw off flavor balance or slow yeast activity. If you only have salted butter, use it, but cut any added salt in the dough by ¼ teaspoon per stick of butter to keep flavor balanced, not overly salty.

Comments (14)

2 days ago

OMG these donuts are SO good! I made them for my boys’ Saturday sleepover and the whole crew devoured them in 10 minutes flat. The vanilla glaze is perfectly sweet, not cloying at all, and the crumb is so light and fluffy it feels like you’re biting into a cloud. Worth every minute of the rise time!

1 week ago

Took these to my office potluck last week and people were begging me for the recipe before I even left. I was nervous about working with yeast since I’m pretty new to baking, but the steps were super straightforward even if it took a little over 2 hours total. Pro tip: don’t skip the second rise, that’s what makes them so pillowy!

3 days ago

Okay I’ll be real, I messed up the first batch because my water was too hot for the yeast and it didn’t proof. Second try went perfectly though! These taste exactly like the fancy donuts I pay $4 for at my local bakery, I can’t believe I made them at home. 10/10 will make again for my roommate’s birthday next month.

5 days ago

I did a little twist and added a teaspoon of cinnamon to the glaze, and it was chef’s kiss. My husband said these are better than the donut shop we stop at on Sunday mornings. Perfect weekend treat when you’ve got a little extra time to hang around while the dough rises.

2 hours ago

Quick question! I don’t have a stand mixer at my apartment, can I knead this dough by hand without it turning out dense? I’ve been craving homemade donuts forever and really want to try this recipe this weekend.

30 minutes ago

Great question! You absolutely can knead by hand — just plan for 8-10 minutes of kneading on a lightly floured surface until the dough is smooth and pulls away from your hands easily, no stand mixer required. Just make sure not to add too much extra flour while kneading or they’ll turn out dense! Hope you love them!

2 weeks ago

I’ve been making yeast donuts for 50 years and this recipe is hands down one of the best I’ve ever tried. The vanilla glaze is perfectly balanced, not overly sweet, and the dough stays soft for days if you store them in an airtight container. My granddaughter helped me cut out the donut shapes and had a blast.

1 week ago

This is such a ringing endorsement! I’ve been scrolling forever looking for a tried-and-true donut recipe that doesn’t come out tough, I’m definitely saving this to make this weekend. How thick did you roll the dough out before cutting?

yesterday

Made these last night and the flavor was incredible, but my glaze turned out super runny and slid right off the donuts instead of setting up nicely. Any idea what I did wrong? I followed the measurements exactly as written!

2 hours ago

Sorry to hear the glaze gave you trouble! Runny glaze usually happens if the milk is added a little too fast, or if the donuts were still too warm when you dipped them. Try adding an extra 2-3 tablespoons of powdered sugar next time, and wait until the donuts are just barely warm (not hot!) to dip, and the glaze will set up into that perfect crackly coating. So glad you loved the flavor though!

1 week ago

Game changer! I brought these to my neighborhood block party potluck and they were the first dessert gone, even beat out the famous brownies my neighbor brings every year. I added a little rainbow sprinkle topping for the kids and they went wild.

5 days ago

Wait, did you make these the night before or the morning of? I want to bring them to a brunch next weekend but I don’t want to wake up at 5am to get the rise time in!

2 days ago

Can I make the dough the night before and let it do the first rise in the fridge? I’m hosting brunch for 8 people and want to cut down on morning prep time as much as possible.

yesterday

You absolutely can do the first rise in the fridge overnight! Just take the dough out about 30 minutes before you plan to roll and cut it the next day to take the chill off, then proceed with the second rise as written. It makes brunch prep so much easier, and the slow cold rise actually adds even more depth of vanilla flavor — win win!

3 days ago

My kids loved it! I was worried the 2.5 hour cook time would be too much for a Sunday morning, but most of that is just waiting for the dough to rise so I was able to drink my coffee and watch the game while it proofed. The donuts came out so fluffy, I didn’t even burn them which is a miracle for me.

2 days ago

This is exactly what I needed to hear! I thought I’d be chained to the kitchen the whole time, but if most of it is hands-off rise time I can totally squeeze these in before our family hike next weekend. Thanks for sharing!

5 days ago

Wait a second, do these reheat well? I want to make a big batch for meal prep for my kids’ breakfasts for the week, but I don’t want them to get all stale and tough in the fridge. Would microwaving them for 10 seconds work?

3 days ago

I made a batch last week and stored them in an airtight container on the counter (not the fridge!) and they were still soft on day 3. 10 seconds in the microwave makes them taste fresh out of the fryer, no sogginess at all! My kids ate them for breakfast all week no complaints.

2 days ago

Totally agree with BusyBakerBeth! These stay best stored at room temp in an airtight container for up to 3 days, and a quick 10 second zap in the microwave brings all that fluffy freshness back. I don’t recommend storing them in the fridge as that can make them go stale faster. So smart to make them ahead for busy school mornings!

2 weeks ago

These were so fluffy! I tried making them with half whole wheat flour on a whim to make them a *little* more nutrient dense for my kids, and they still came out amazing. The glaze was perfectly shiny and had that amazing vanilla flavor, I used vanilla bean paste instead of extract and it was chef’s kiss.

1 week ago

Oh the whole wheat swap is genius! Did you do 50/50 whole wheat to all purpose, or a different ratio? I’ve been trying to sneak more whole grains into my family’s treats without them noticing, and this sounds perfect.

5 days ago

I did exactly 50/50! I was worried it would make them dense but they were still so light, my husband didn’t even notice the whole wheat until I told him. Definitely give it a shot!

1 week ago

Ugh, my donuts absorbed so much oil when I fried them! They were still tasty but super greasy, not light like the photos look. Did I have the oil temp too low? I didn’t have a thermometer so I was guessing, oops.

5 days ago

I had that exact same problem my first time making donuts! I got a cheap candy thermometer after that and keeping the oil between 350-365F fixed it completely — if it’s too low, the dough just sits there and soaks up oil instead of frying up fast and fluffy.

3 days ago

HomeCookHero is exactly right! Oil temp is the #1 culprit for greasy donuts. If you don’t have a thermometer, you can test it by dropping a small scrap of dough into the oil — it should sizzle immediately and float to the top, turning golden brown in about 60 seconds. If it browns faster than that, the oil is too hot, if it takes longer and doesn’t sizzle hard, it’s too low. Next batch will be perfect!

yesterday

SO good! I made these for my daughter’s 7th birthday sleepover and set up a little topping bar with sprinkles, crushed Oreos, chocolate drizzle, and cinnamon sugar so the girls could customize their own donuts. It was such a hit, I’m already planning to do it for my son’s birthday in a few months.

2 hours ago

The topping bar idea is such a game changer for kid parties! Did you make the donuts ahead of time and let them dip and top when they arrived, or did you make them fresh right before the party? I need to steal this for my kid’s upcoming birthday!

30 minutes ago

I fried the donuts a couple hours before the party and let them cool completely, then set out the glaze and toppings right when the girls got there so they could dip their own! It kept them occupied for almost 45 minutes, total mom win.



