
Eyeball Cake Pops

title 1
Eyeball Cake Pops
⏱️ cook time 1 hour 20 minutes
🍽️ servings 12
⚡ Difficulty easy

intro

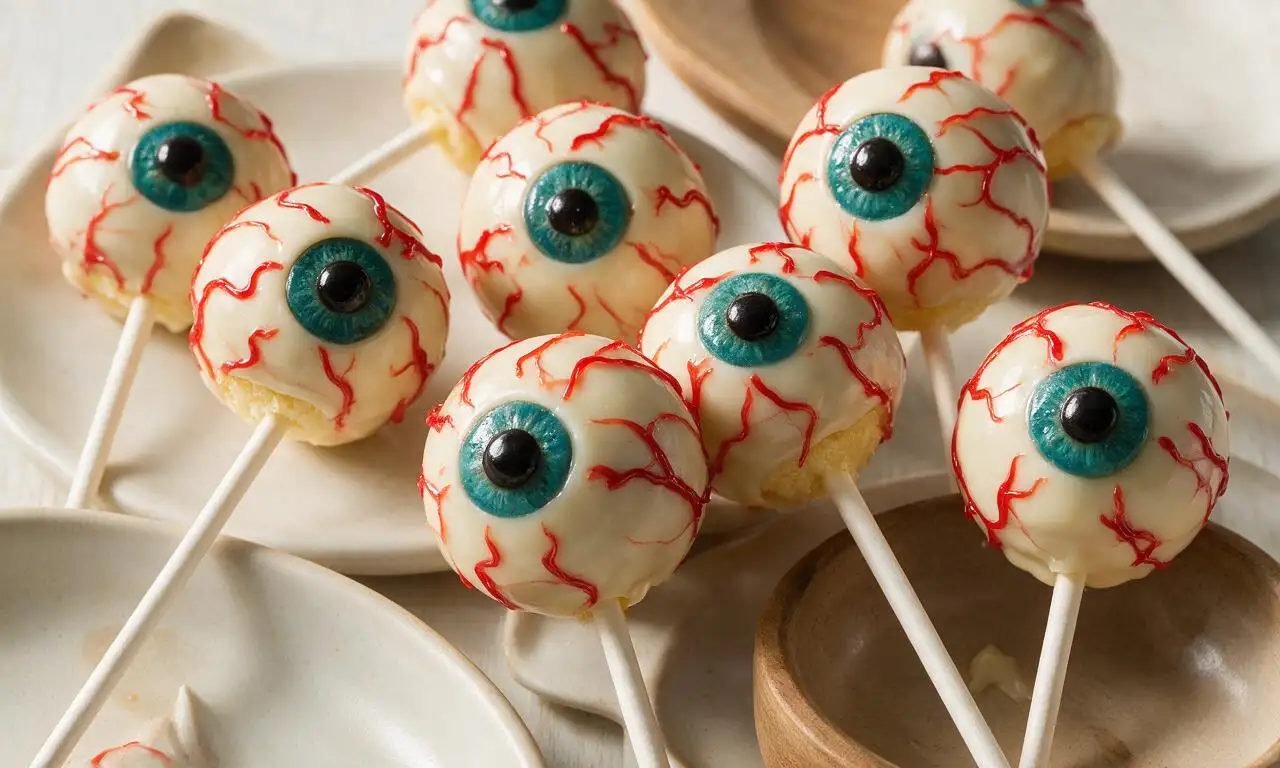
Playful, spooky cake pops shaped like ghoulish bloodshot eyeballs, with a moist vanilla cake center and crisp candy coating, ideal for Halloween party spreads.

Ingredients

Unfrosted baked vanilla cake, fully cooled 350 grams (1 9-inch round layer)
Full-fat cream cheese frosting 120 grams (1/2 cup)
White candy melting wafers 400 grams (2 cups)
Green candy melting wafers 50 grams (1/4 cup)
Neutral vegetable oil (canola or sunflower) 1 tablespoon (15 ml)
Red gel food coloring 1 teaspoon (5 ml)
Black edible food marker 1 unit
Paper lollipop sticks 12 count

Steps

1

Make cake crumb base

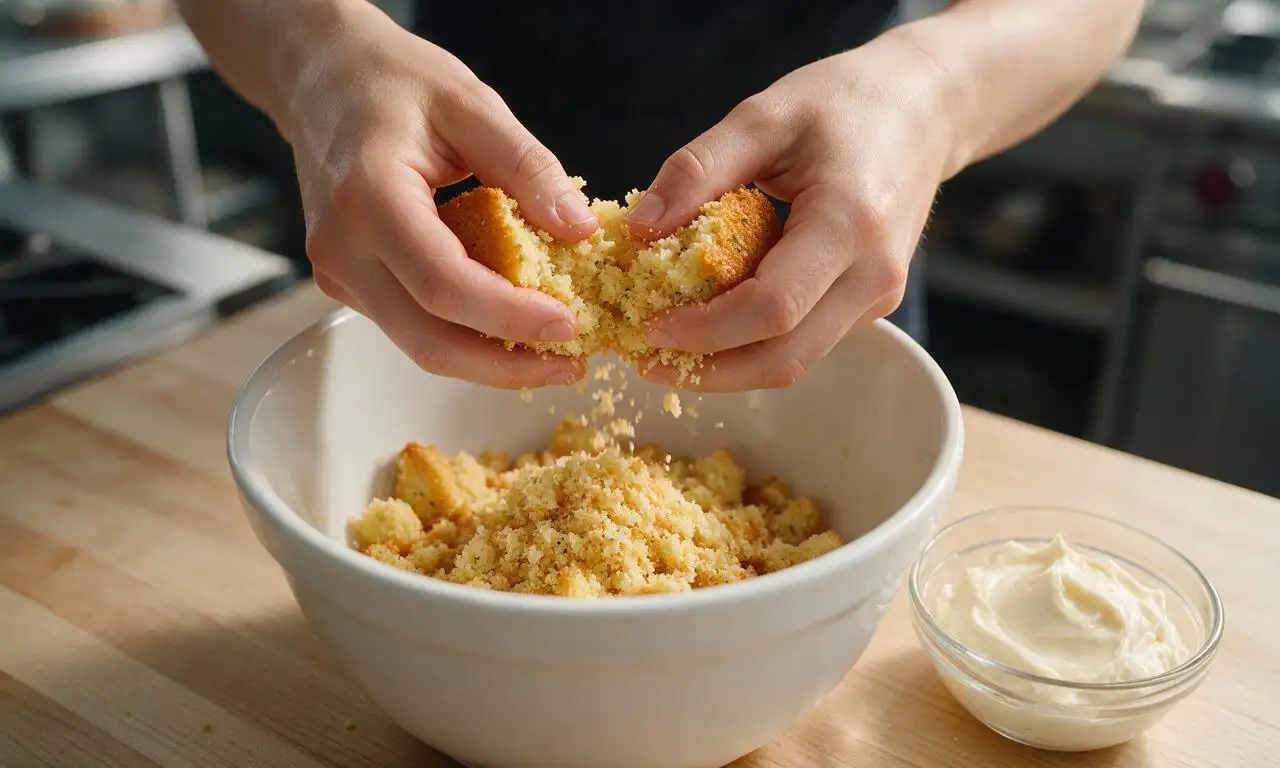
Crumble the fully cooled 350g unfrosted vanilla cake into fine, even crumbs in a large mixing bowl, picking out any dark, hard crust edges. Add 120g full-fat cream cheese frosting, and mix with clean hands until the mixture holds together firmly when squeezed, with no dry crumb patches. Avoid adding extra frosting, as this will make the pops too soft to stay secured to sticks.
Step 1
step1:Make cake crumb base
2

Shape uniform cake balls

Scoop 30 gram (2 tablespoon) portions of the cake and frosting mixture, rolling each portion between your palms to form smooth, perfectly round 1.5-inch balls. Arrange all 12 balls in even rows on a parchment-lined baking sheet, then chill in the refrigerator at 4°C (40°F) for 20 minutes until firm to the touch.

Step 2
step2:Shape uniform cake balls
3

Melt candy and anchor sticks

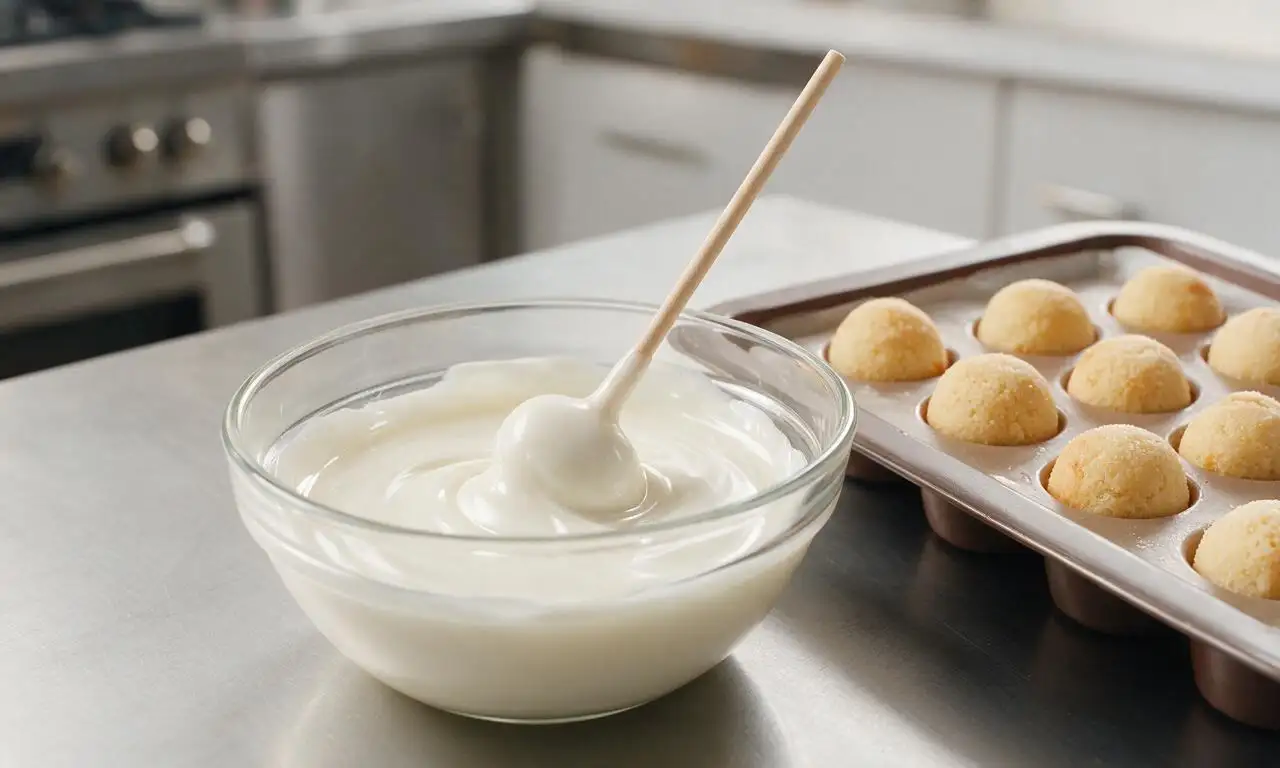
Add 400g white candy melting wafers and 1 tablespoon (15ml) neutral vegetable oil to a microwave-safe glass bowl. Heat in 30-second intervals at 50% microwave power, stirring thoroughly between each interval, until fully smooth and melted (total heating time approximately 2 minutes). Dip 1/4 inch of the tip of each lollipop stick into the melted white candy, then push the dipped end halfway into each chilled cake ball. Return the tray to the refrigerator for 10 minutes to set the stick anchors.
Step 3
step3:Melt candy and anchor sticks
4

Coat pops in white candy

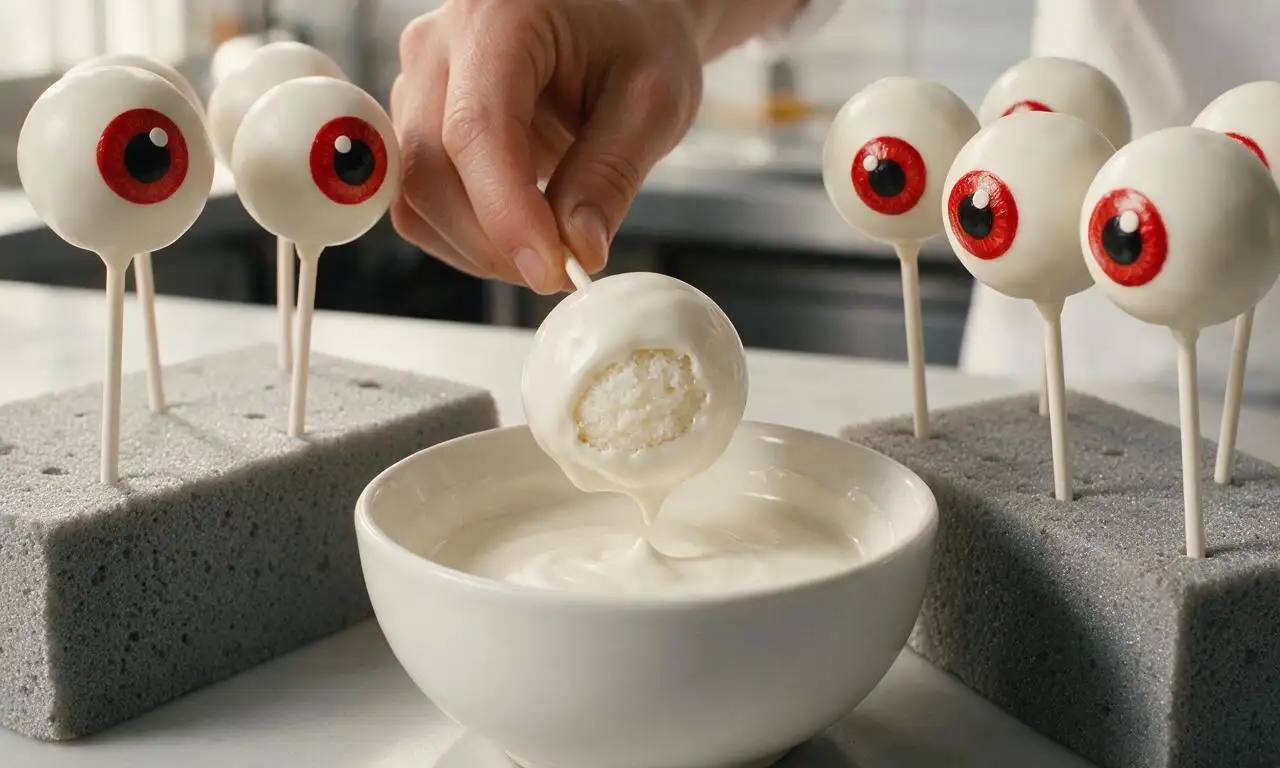
Working one pop at a time to prevent the cake from softening, hold the lollipop stick and fully submerge the cake ball into the melted white candy, tilting the bowl as needed to cover the entire surface. Lift the pop out gently, tapping the stick against the edge of the bowl for 10 seconds to remove excess candy and create a smooth, drip-free surface. Stand each coated pop upright in a styrofoam block to set for 15 minutes at room temperature (20°C/68°F).
Step 4
step4:Coat pops in white candy
5

Add green iris details

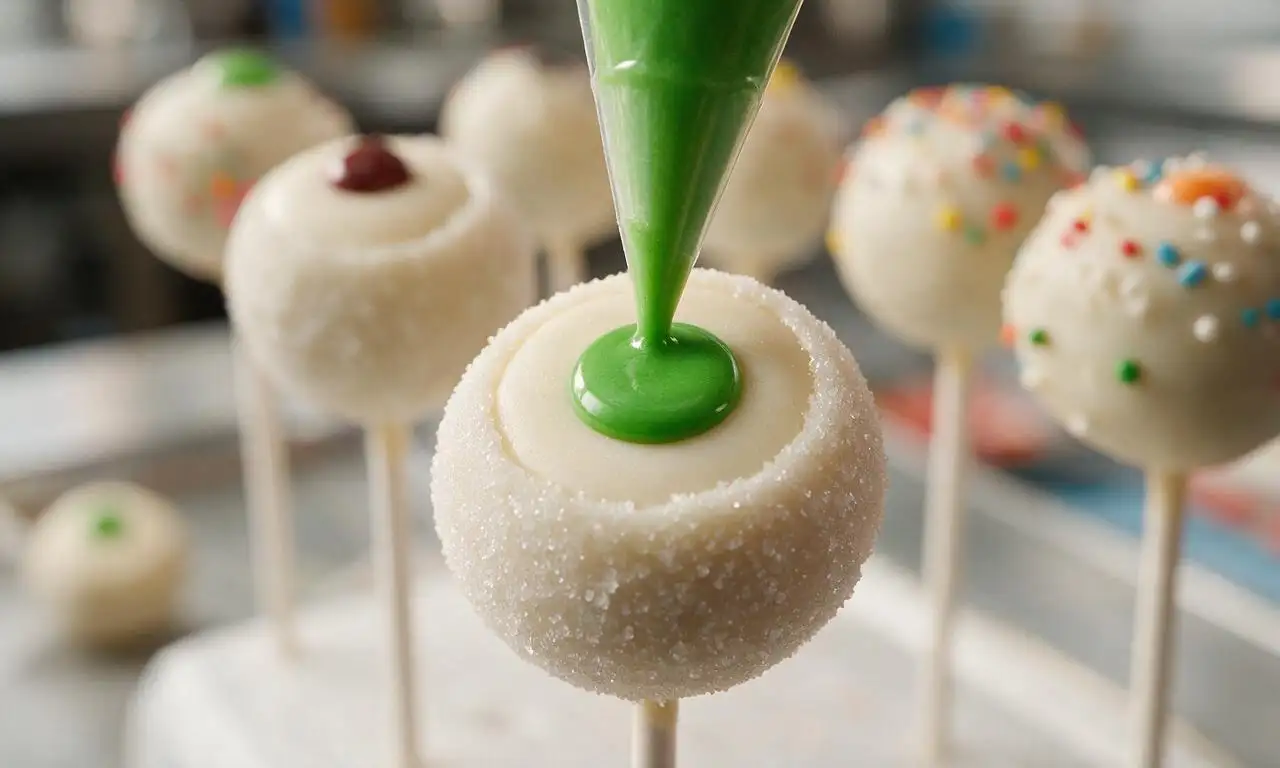
Add 50g green candy melting wafers to a small microwave-safe bowl, melting using the same 30-second, 50% power method until completely smooth (about 1 minute total heat time). Transfer the melted green candy to a small parchment piping bag fitted with a 1/4-inch round tip, or a resealable plastic bag with a tiny 1/8-inch corner cut off. Pipe a 1/2-inch wide solid green circle centered on the front of each set white pop to form the eye iris, then let set for 5 minutes at room temperature.
Step 5
step5:Add green iris details
6

Add pupils and veins

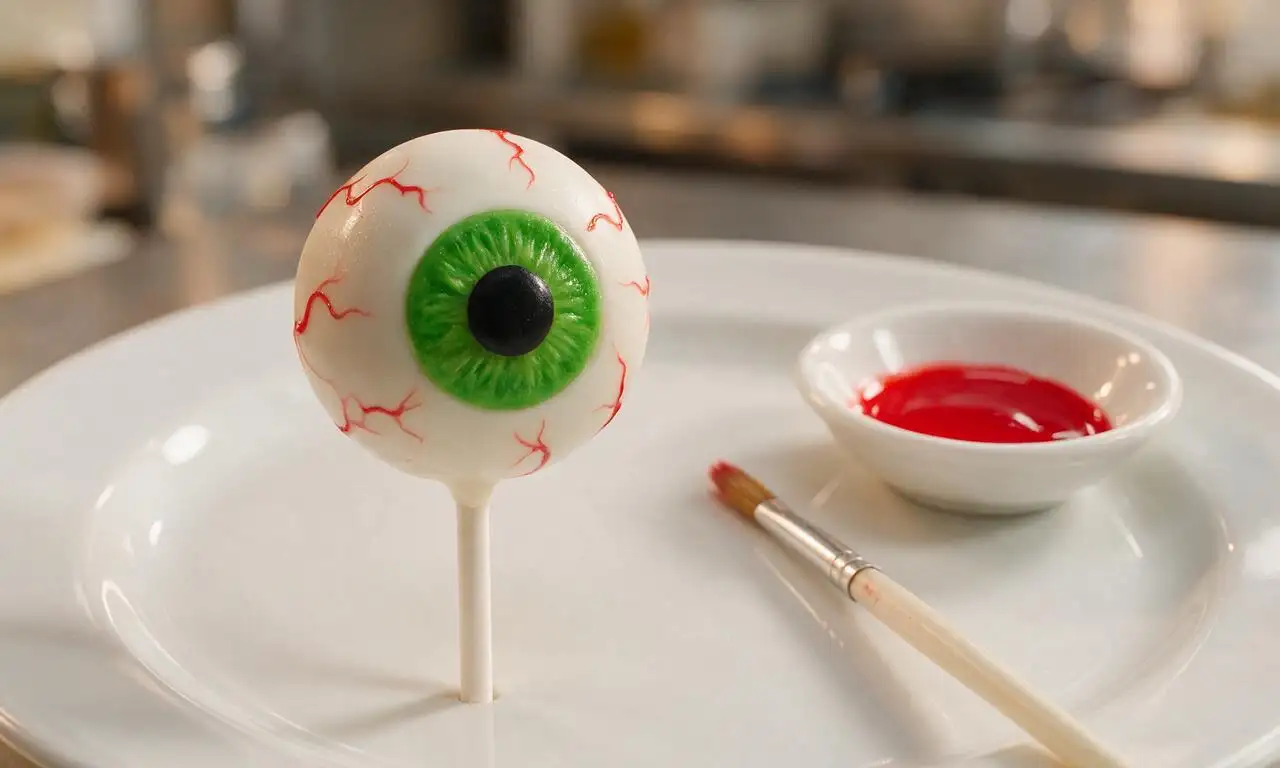
Use the black edible food marker to draw a solid 1/4-inch black circle directly in the center of each green iris to form the eye pupil. Dip a small, thin food-safe paintbrush into 1 teaspoon (5ml) red gel food coloring, and paint wiggly, thin, uneven red lines stretching from the edge of the iris out to the edge of the pop to mimic bloodshot eye veins. Let the fully decorated pops set for 10 minutes at room temperature before serving.
Step 6
step6:Add pupils and veins

Tips

1.Never heat candy melts at full microwave power, as high heat will cause them to seize into a thick, unusable lumpy mass; always use 50% power and stir between short 30-second heating bursts.
2.If your cake and frosting mixture is too sticky to roll smoothly, chill it in the fridge for 10 minutes before shaping; if it is too dry and cracks when rolled, mix in 1 extra tablespoon of frosting at a time until it holds its shape.
3.For an extra realistic eye effect, add a tiny 1/8-inch dot of leftover melted white candy on the upper edge of each black pupil to mimic a light reflection before the candy fully sets.


✨ You May Also Like

Desserts & Baking
🍜 Italy

Creamy, coffee-kissed classic Northern Italian no-bake dessert, with layers of rum-spiked mascarpone cream, soft ladyfingers, and a rich cocoa dusting.

⏱️ 4 hours 3Desserts & Baking ★ 4.7
Desserts & Baking
🍜 France

Flaky, shatteringly crisp, buttery French croissants with golden exteriors and soft, airy layered interiors, perfect for pairing with coffee for a special morning treat.

⏱️ 12 hours Desserts & Baking ★ 4.5
Desserts & Baking
🍜 United States

Warm, spiced baked apples topped with a fluffy golden biscuit crust, this cozy dessert pairs perfectly with vanilla ice cream for cool-weather comfort.

⏱️ 55 minuteDesserts & Baking ★ 4.6
Desserts & Baking
🍜 United States

A star-spangled classic American blueberry pie with buttery flaky crust and bright sweet-tart filling, perfect for summer patriotic gatherings.

⏱️ 1 hour 25Desserts & Baking ★ 4.7
Desserts & Baking
🍜 United States

A beloved no-bake regional Maine candy with a chewy coconut-potato center coated in rich dark chocolate, a New England holiday staple since the 1870s.

⏱️ 2 hours 3Desserts & Baking ★ 4.8
Desserts & Baking
🍜 France

Luxuriously creamy, floral frozen custard made with aromatic Tahitian vanilla beans, boasting a smooth, rich texture that melts slowly on the tongue.

⏱️ 3 hours 3Desserts & Baking ★ 4.5

Eyeball Cake Pops:Frequently Asked Questions

1.Why do my cake pop balls keep sliding off the stick when I dip them in the candy coating? ▾
That’s such a common, easy-to-fix misstep! First, confirm your mixed cooled vanilla cake and cream cheese frosting dough is firm, not sticky to the touch, and chill rolled balls for 20 minutes before assembling sticks. Dip ¼ inch of each lollipop stick into melted candy before pushing it halfway into a ball, then chill 10 more minutes to set the anchor before full dipping.
2.My melted candy coating is thick and clumpy—how do I get a smooth, even finish on the eyeballs? ▾
Great question! Melt your white and green candy wafers slowly in 30-second microwave bursts, stirring thoroughly between each round to avoid overheating. Stir in 1 teaspoon of neutral canola or sunflower oil per cup of melted wafers to thin it to a light, honey-like consistency for easy dipping. Don’t heat wafers above 90°F, as that causes permanent clumping even oil won’t fix.
3.Can I prep these eyeball cake pops ahead of time for my Halloween party, and how should I store them? ▾
Absolutely—these are ideal for advance Halloween party prep! Once the candy coating is fully set and decorated, tuck the cake pops in an airtight container layered between parchment paper, and store them in the fridge for up to 3 days. Let them rest at room temperature for 10 minutes before serving to keep the vanilla cake center moist and the candy coating crisp.

Comments (12)

2 days ago

OMG these were such a hit at my kid’s 2nd grade Halloween class party! I was worried they’d be too fussy since I’m not a super experienced baker, but the easy difficulty rating was no lie. The red gel “blood veins” were my favorite touch, so many kids screamed (in a good way) when they saw them. SO good, will make every year now!

2 hours ago

Wait, quick question — can I use store-bought frosting instead of making the homemade buttercream for the cake pop filling? I’m crunched for time before my friend’s costume party this weekend and don’t wanna mess it up.

30 minutes ago

Great question! Store-bought frosting works totally fine here — just start with 2/3 of the container, mix it in, and add more a little at a time until the cake mixture holds its shape when rolled. Too much frosting will make the pops slide off the sticks, so go slow! Have fun at the party!

1 week ago

Game changer for my annual Halloween potluck! I brought 40 of these and they were gone in 10 minutes flat. I used green candy melts for half of them to make monster eyeballs too, and people went crazy for the variety. Only tiny note: make sure your candy coating is the right temp, mine got a little clumpy on the first batch.

5 days ago

Omg the green monster eye idea is genius! I was just trying to figure out how to mix things up so I don’t show up with the exact same treat as last year. Stealing that!

5 days ago

Love the green candy melt twist! So smart for variety. For clumpy coating, try stirring in a teaspoon of vegetable shortening or coconut oil to thin it out — it’ll make dipping so much smoother next time!

yesterday

Made these with my 7 year old twins last night for their trunk or treat event, and they had an absolute blast decorating the eyes. We used mini M&Ms for the irises instead of the candy melts the recipe suggested because we already had a giant bag in the pantry, and it worked perfectly. My kids loved it, 10/10 family activity.

30 minutes ago

Mini M&Ms for irises is such a smart hack! I hate buying random specialty candy I’ll never use again, so that’s way more budget friendly. Gonna try that when I make these with my daughter this weekend!

3 days ago

These are so much better than the store-bought Halloween cake pops I usually grab from the grocery store! The cake inside is super moist, and the white chocolate coating has the perfect crunch. I added a little orange food coloring to half the coating for a pumpkin adjacent vibe, chef’s kiss.

2 weeks ago

Ugh, my first batch was a disaster! The cake balls kept falling off the sticks when I tried to dip them, and the coating cracked on half the ones that stayed on. Did I do something wrong? I followed the recipe exactly, I swear.

1 week ago

I had that happen the first time I made cake pops too! Try popping the rolled cake balls in the fridge for 20 minutes before you dip them, and dip the tip of the stick in melted candy before shoving it in the cake ball — it acts like glue! Worked like a charm for my second batch.

1 week ago

So sorry your first batch was tricky! The tip from HomeBakeVeteran is spot on — chilling the balls and pre-dipping the stick ends makes a huge difference. If your coating is cracking, that usually means the cake balls are too cold when you dip them, so let them sit out for 5 minutes after chilling before coating. You’ve got this!

5 days ago

Perfect easy treat for my dorm Halloween party! I don’t have a fancy stand to hold the pops while they dry, so I just poked holes in a leftover cardboard box and stuck the sticks in there, worked totally fine. Total cook time was right around an hour 20 for me, no surprises.

3 days ago

The cardboard box hack is genius — no need for fancy equipment! So glad the timing worked out for your party, hope everyone loved them!

2 days ago

Quick win for my gluten free household! I swapped the regular vanilla cake mix for a gluten free yellow cake mix, and followed the rest of the recipe exactly, and you couldn’t even tell the difference. Brought them to my book club Halloween meetup and even the non-gluten free folks were asking for the recipe.

yesterday

Oh thank you for sharing the GF swap! My son has celiac and I’ve been stressing about finding a fun Halloween treat he can bring to his class party that doesn’t taste like cardboard. This is perfect!

yesterday

So happy the gluten free swap worked out for you! We’ve tested this with GF cake mix a few times and it’s always a hit, so glad your book club loved them. Thanks for sharing the tip!

just now

These are so cute I almost didn’t want to eat them! Almost. 😂 The red gel veins look so realistic, my roommate jumped when she saw the plate of them on the counter. I added little edible glitter on top for extra sparkle, 10/10.

yesterday

I made a test batch of these last night and they were so good! Quick question though — has anyone tried making these ahead of time and freezing them? I want to prep a big batch for my kid’s Halloween parade next week but don’t have time to make them the night before.

2 hours ago

I freeze cake pops all the time! Just make sure they’re fully coated and dry, then store them in an airtight container with layers of parchment paper between them. They’ll keep for up to a month, just thaw them in the fridge for a few hours before serving!

30 minutes ago

Great question! The freezer tip from FreezerMealQueen is exactly what we recommend. Just don’t add the red gel blood veins until after they’re thawed, because the gel can run a little as it defrosts. Happy prepping!

1 week ago

I made these for my grandkids when they came to visit over the weekend, and they were obsessed! I’ve been making cake pops for years, but the eyeball design is just too cute. I used dark chocolate for the pupils instead of black candy melts because that’s what I had on hand, and it worked beautifully.

5 days ago

Dark chocolate pupils sound so much tastier than black candy melts, honestly! Black candy coating always tastes a little waxy to me, so I’m definitely stealing that swap for my batch. Thanks for the idea!

5 minutes ago

This was the first baking project I’ve ever done completely on my own, and they actually turned out cute! I was so nervous I’d mess them up, but the steps were super straightforward. The only thing I messed up was I put too much red gel on some of them so it dripped down the sides, but honestly it just made them look extra spooky, so win?

just now

Yay, we’re so proud of you for nailing your first solo baking project! The drippy red gel is such a happy accident — extra spooky is always a good thing when it comes to Halloween treats. Great job!



