
grilled chicken breast

title 1
grilled chicken breast
⏱️ cook time 12 minutes
🍽️ servings 4
⚡ Difficulty easy

intro

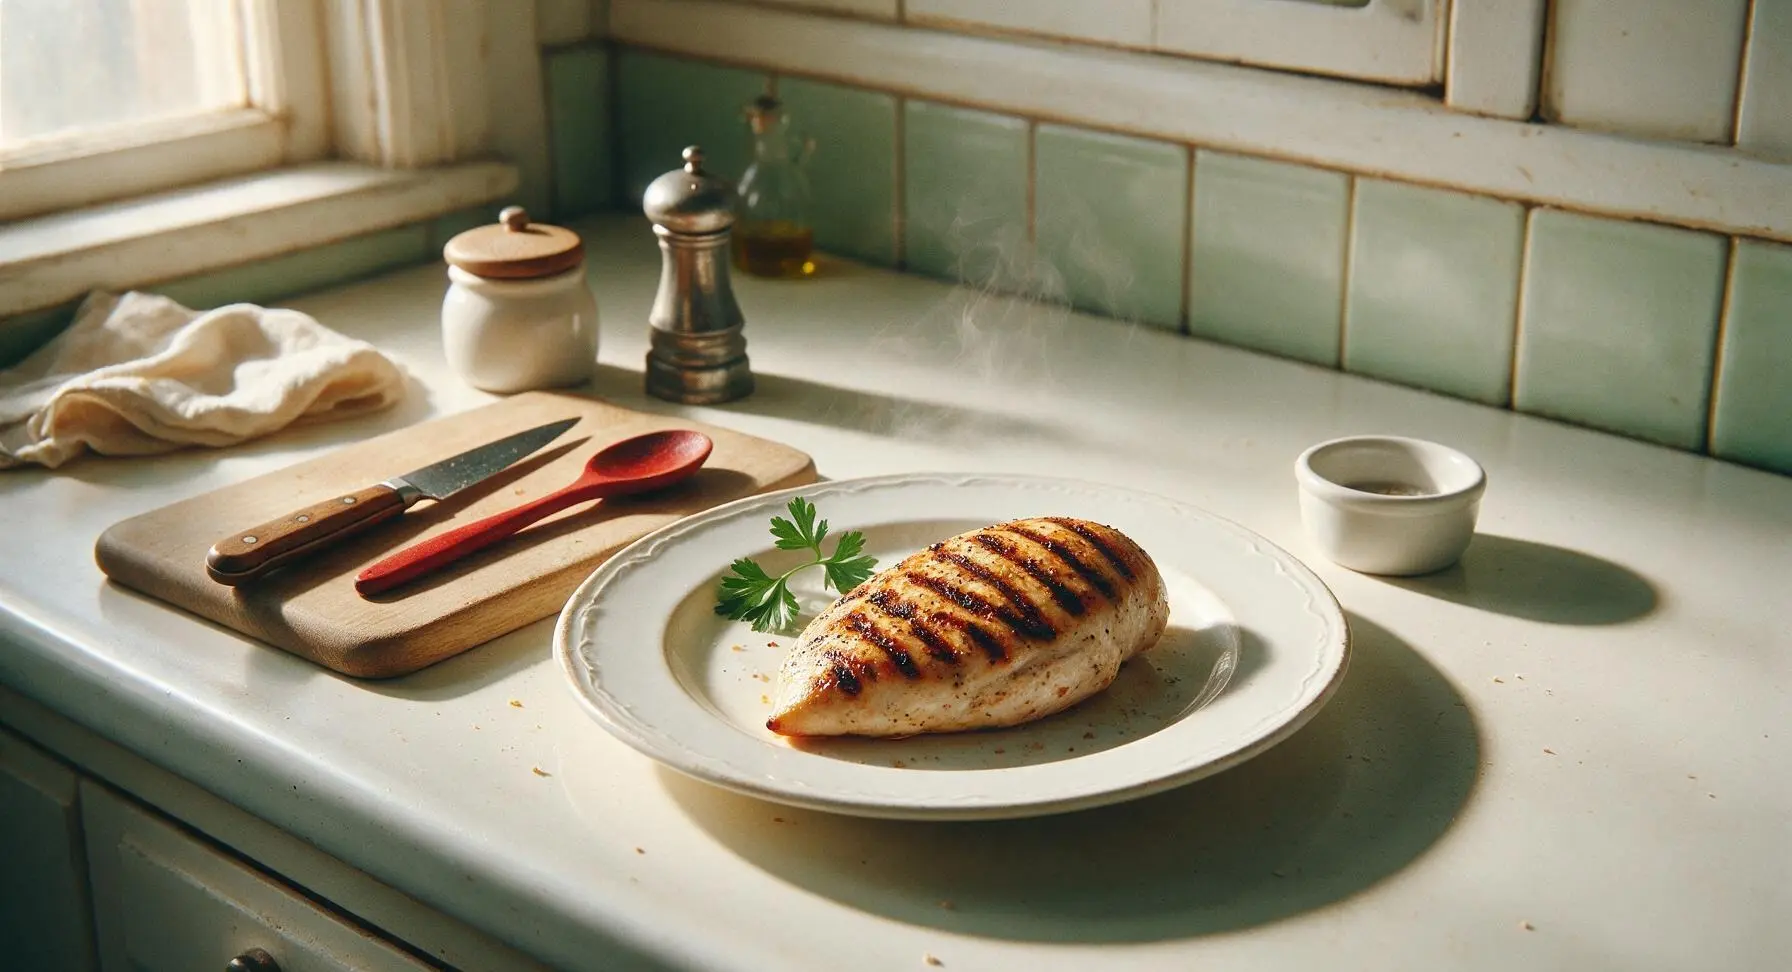
Juicy, evenly charred grilled chicken breast with simple savory seasoning, perfect for summer cookouts, quick weeknight meals, or weekly meal prep.

Ingredients
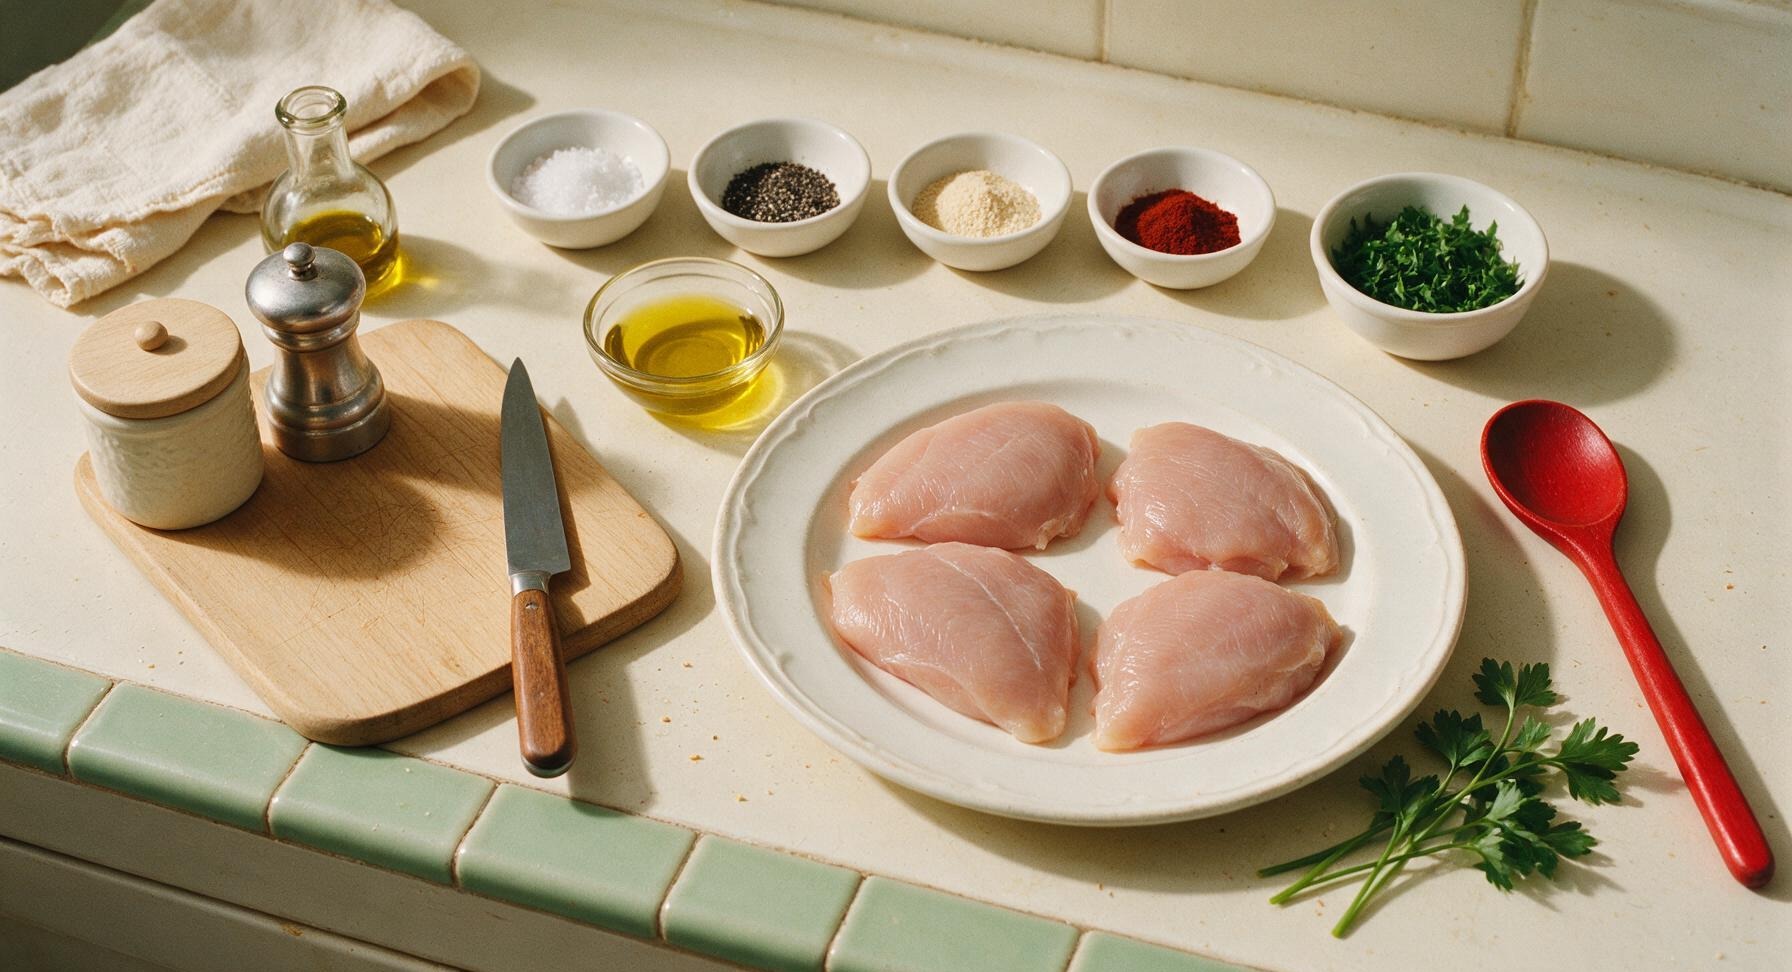
Boneless, skinless chicken breasts 680g (4 x 170g/6oz pieces)
Extra-virgin olive oil 2 tablespoons
Coarse kosher salt 1.5 teaspoons
Freshly ground black pepper 1 teaspoon
Garlic powder 1 teaspoon
Smoked paprika ½ teaspoon
Fresh flat-leaf parsley 2 tablespoons (chopped, for garnish)

Steps

1

Pound Chicken Evenly

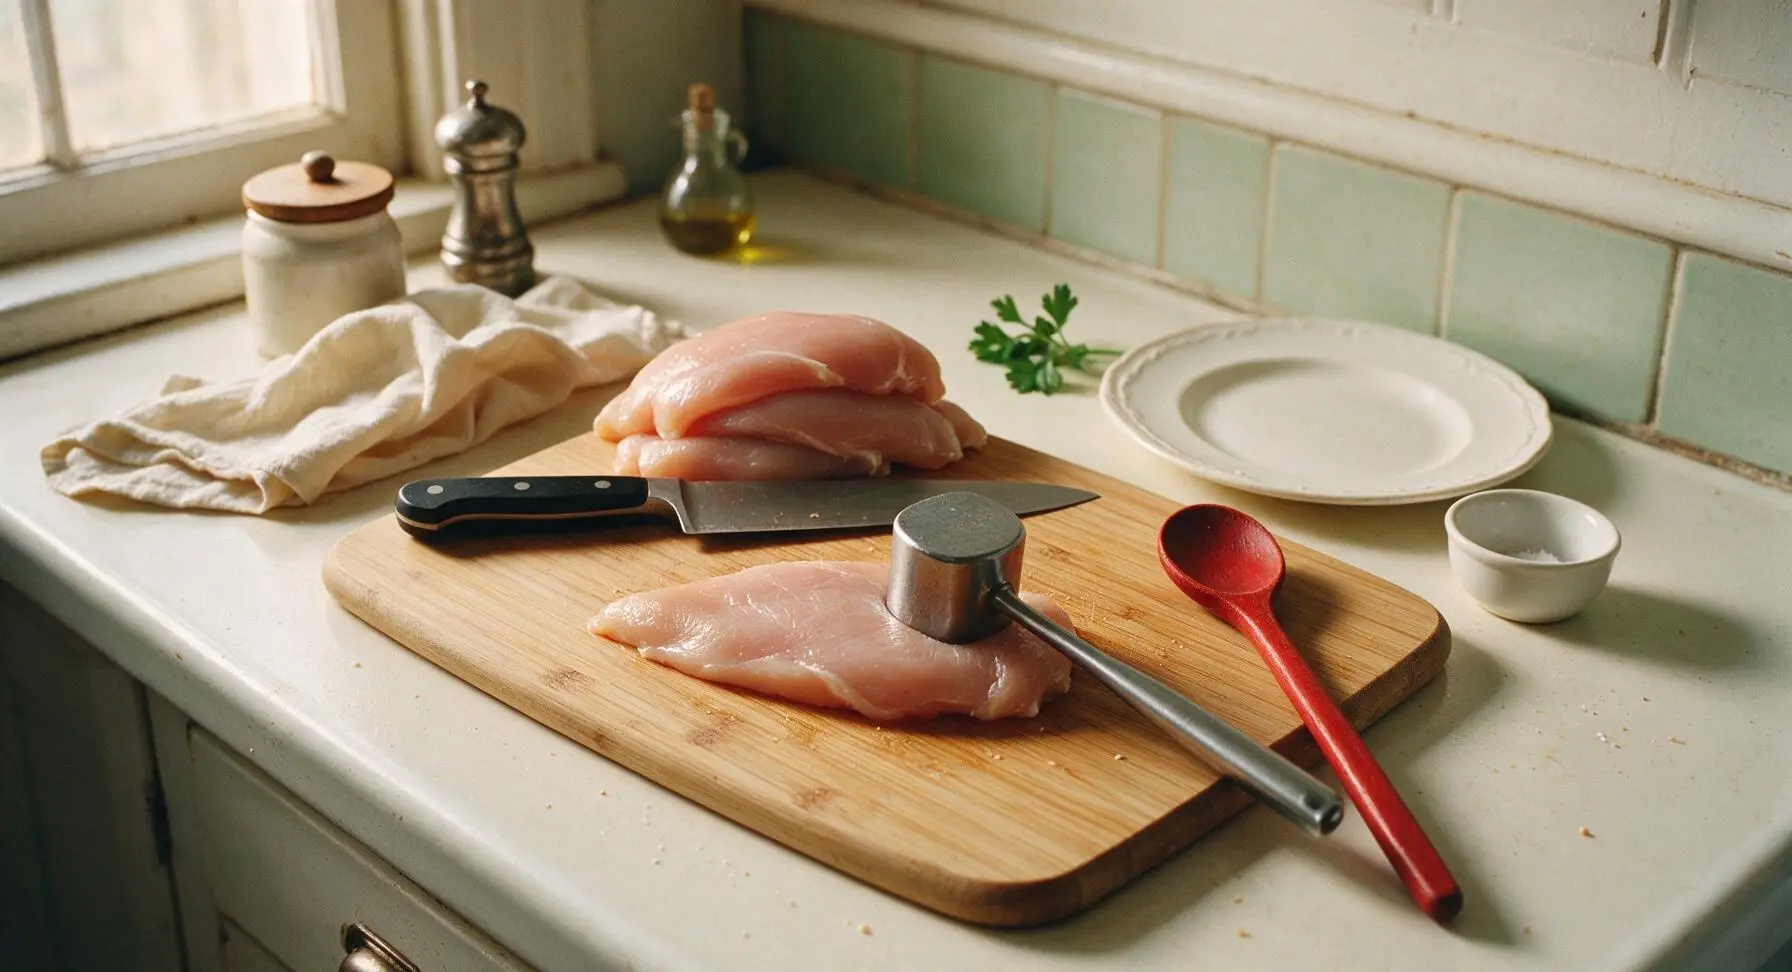
Place one raw chicken breast at a time on the honey bamboo cutting board. Using the stainless steel meat pounder, gently pound the thicker tapered end of each breast until the entire piece is a uniform 1-inch (2.5cm) thickness. This ensures even cooking so the thin end does not dry out before the thick end reaches safe temperature. Trim any loose, hanging fat fragments from the edges of the chicken as you work, discarding them.
Step 1
step1:Pound Chicken Evenly
2

Season Chicken Breasts

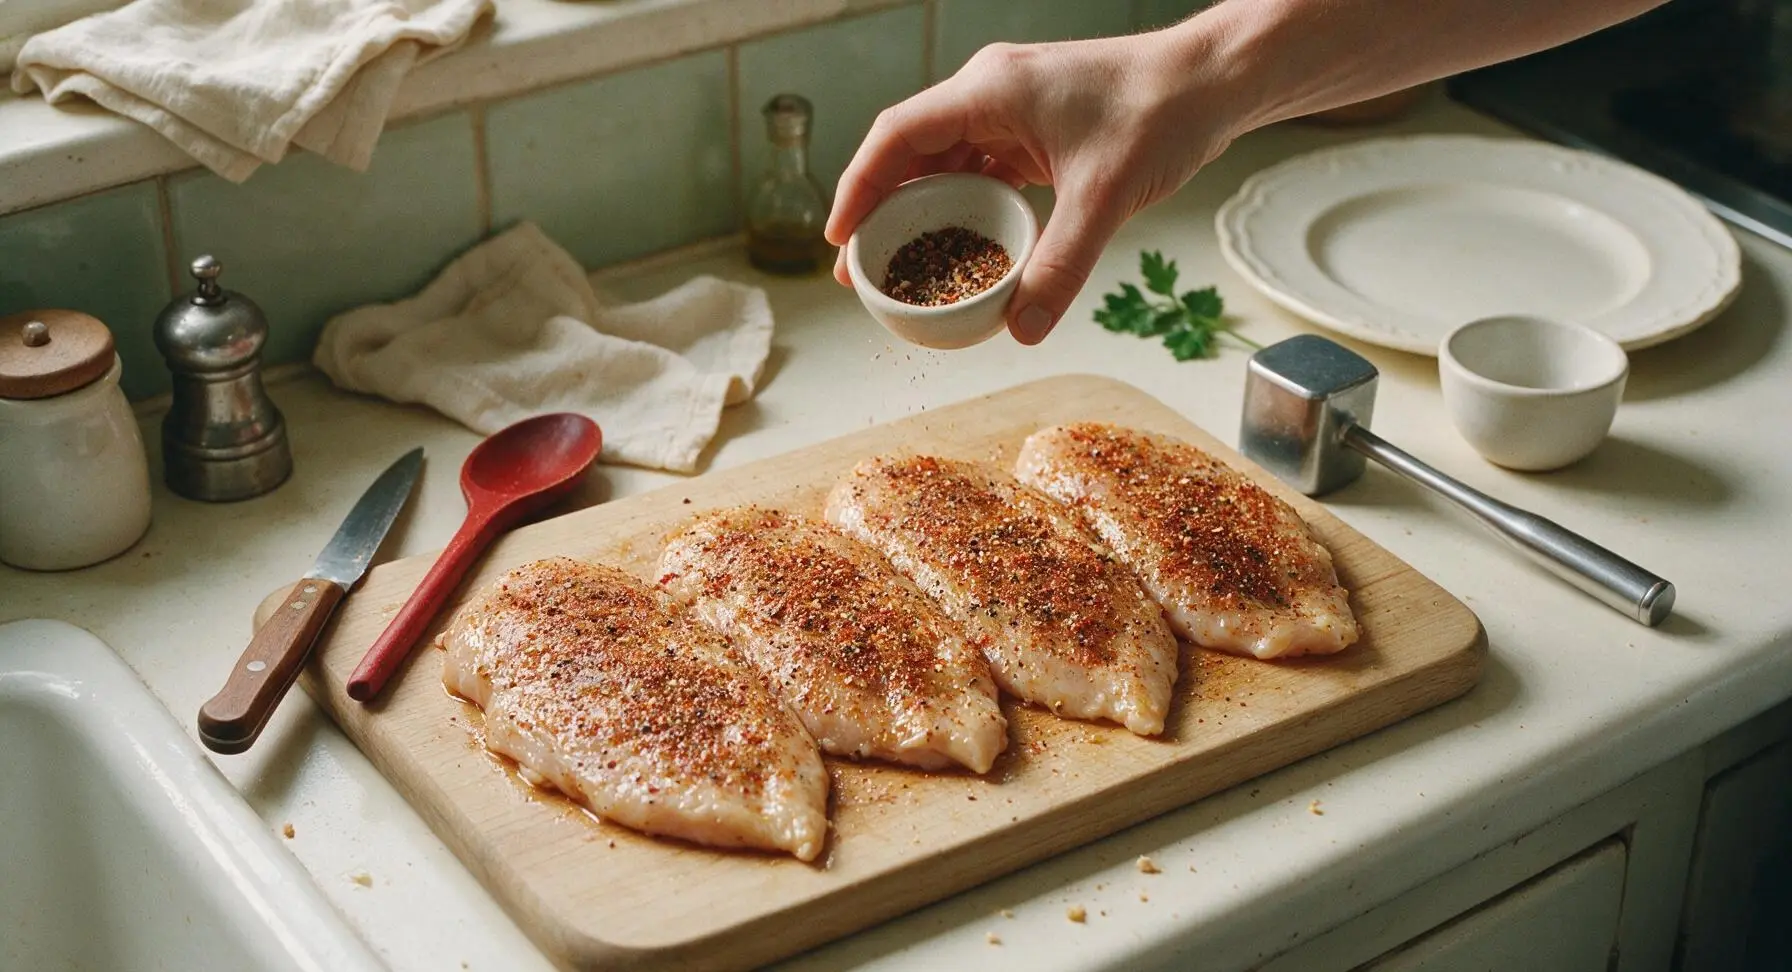
Use the stainless steel measuring spoons to portion 2 tablespoons of extra-virgin olive oil, drizzling it evenly over all four pounded chicken breasts and rubbing to coat every surface lightly. Use the measuring spoons to portion 1.5 teaspoons kosher salt, 1 teaspoon freshly ground black pepper, 1 teaspoon garlic powder, and ½ teaspoon smoked paprika into one of the matte white pinch bowls, mixing until evenly blended. Sprinkle the spice mix evenly over both sides of every chicken breast, pressing gently so the seasoning adheres to the oiled surface. Let the seasoned chicken rest at room temperature for 10 minutes before grilling to take the chill off, which promotes even cooking. Visual cue: no bare, unseasoned patches of chicken remain, and the spice mix sticks to the oil rather than falling loose onto the board.
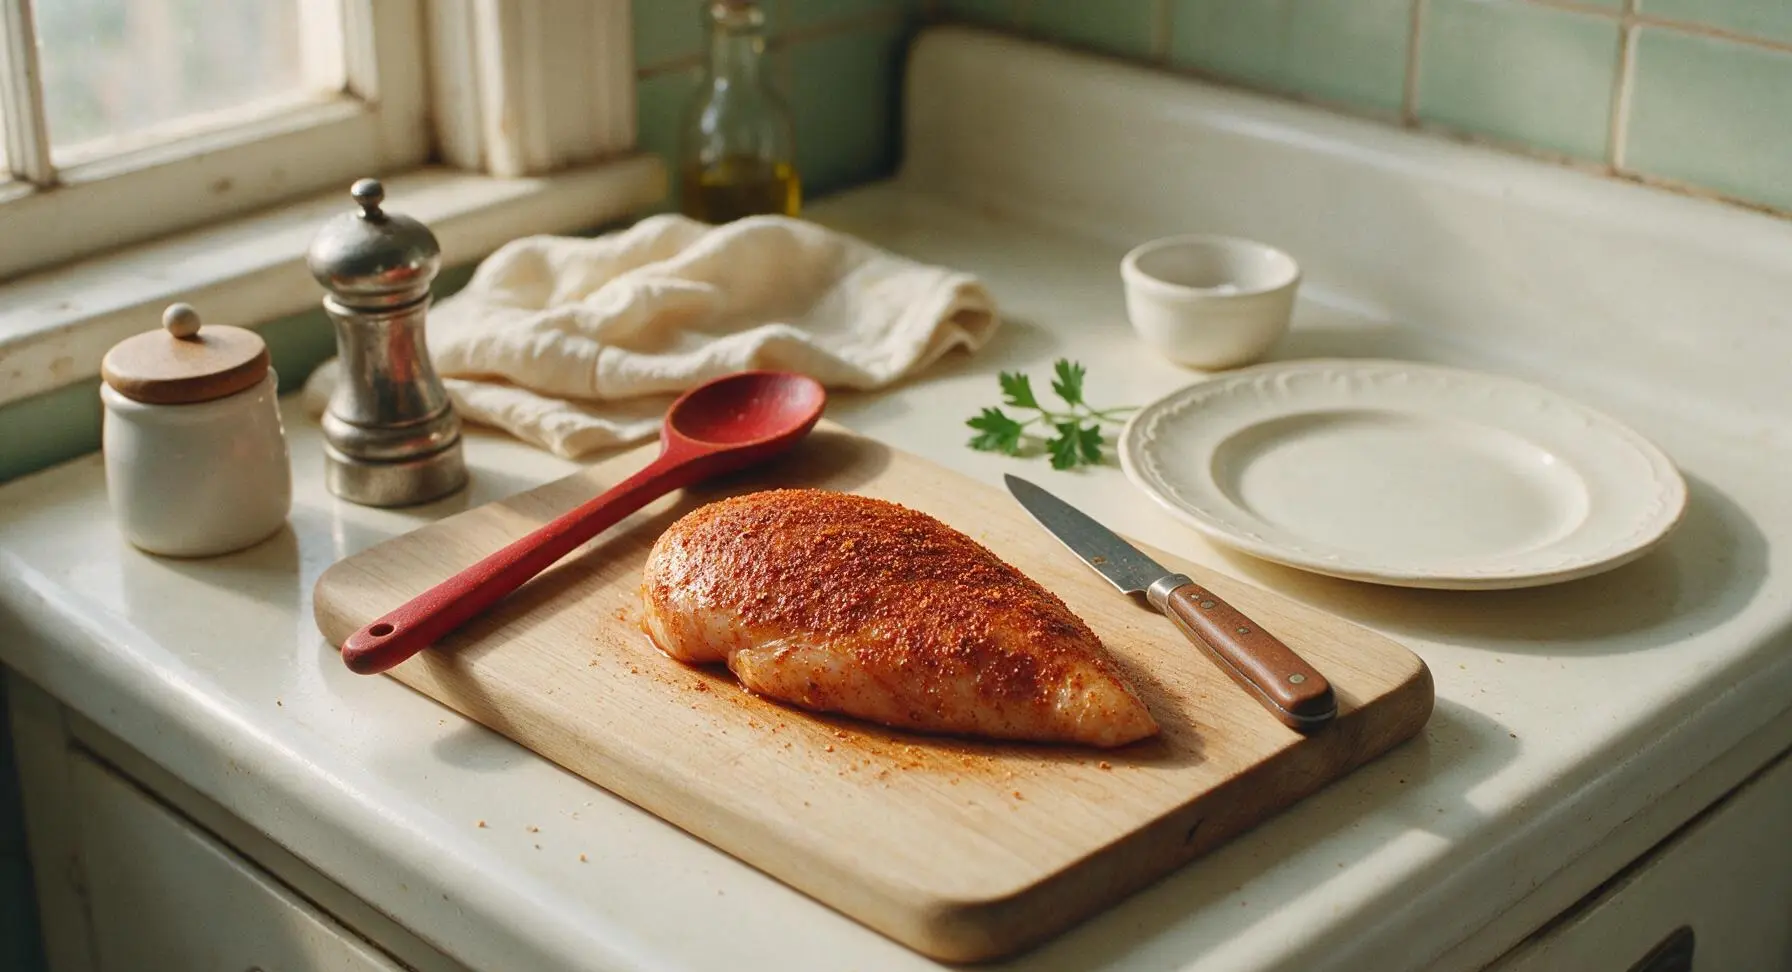
Step 2
step2:Season Chicken Breasts
Step 2
step2:Season Chicken Breasts
3

Preheat Grill to Temp

Turn the countertop electric grill to medium-high heat, adjusting the dial to reach a steady surface temperature of 400°F (200°C). Let the grill preheat fully for 10 minutes before adding chicken; a properly preheated grill creates distinct grill marks and prevents the chicken from sticking to the cast iron grates. Use the long grill tongs to hold a small oiled paper towel, wiping a thin layer of oil across the grates to further prevent sticking. Visual cue: faint heat haze rises from the grates when the grill is fully preheated, and a drop of water flicked onto the grates will dance and evaporate in 1-2 seconds.
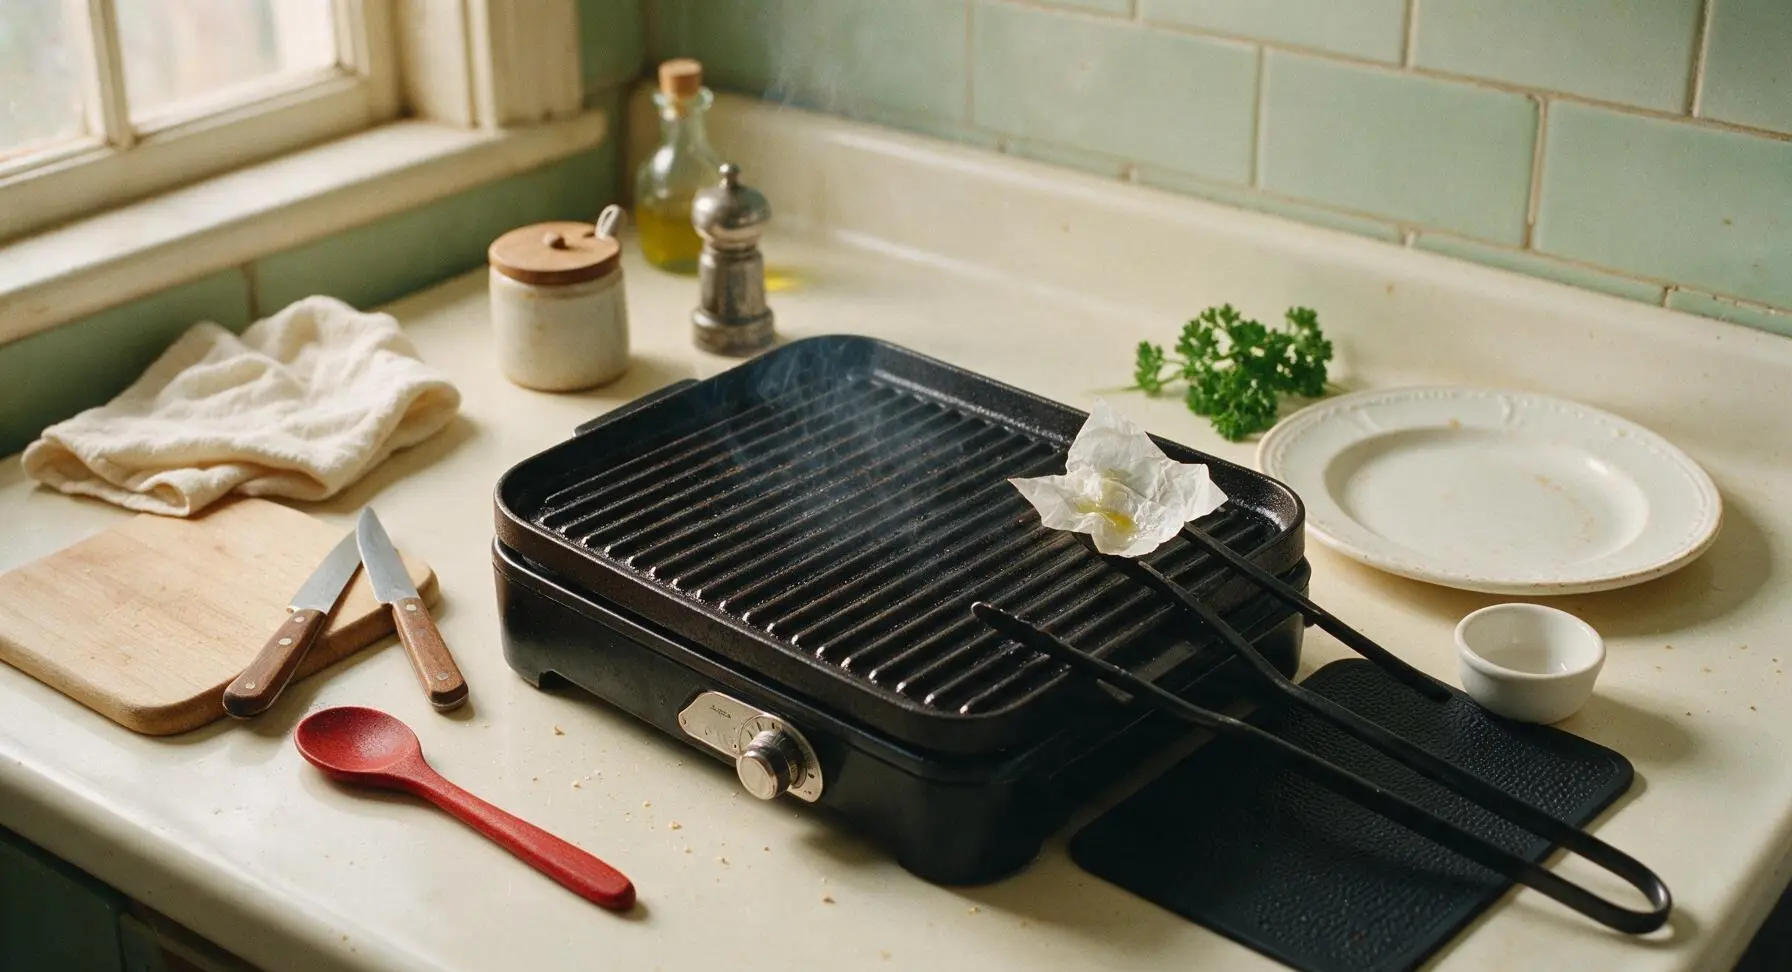
Step 3
step3:Preheat Grill to Temp
4

Grill First Side

Using the long stainless steel grill tongs, place the seasoned chicken breasts on the preheated grill grates, arranged diagonally across the grates to create classic crosshatch marks. Close the grill lid and cook for exactly 6 minutes, without lifting, moving, or flipping the chicken during this time. Visual cue: the edges of the chicken touching the grates will turn opaque white as the first side cooks, and faint sizzling sounds will be audible.
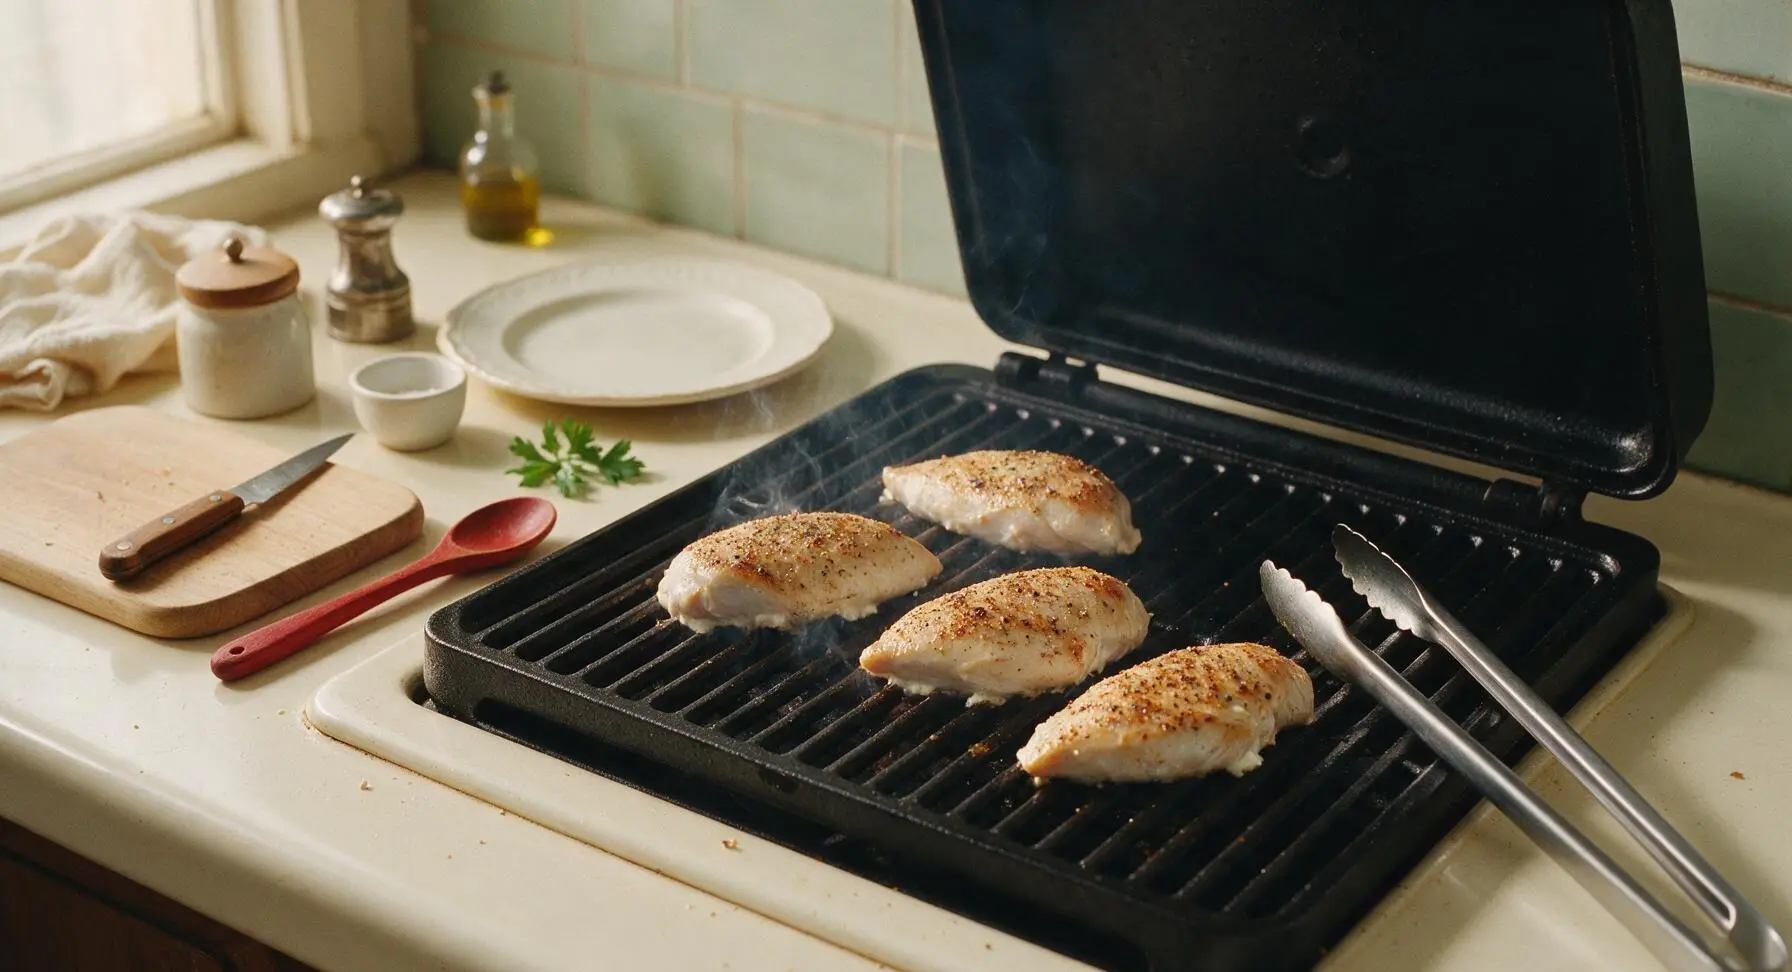
Step 4
step4:Grill First Side
5

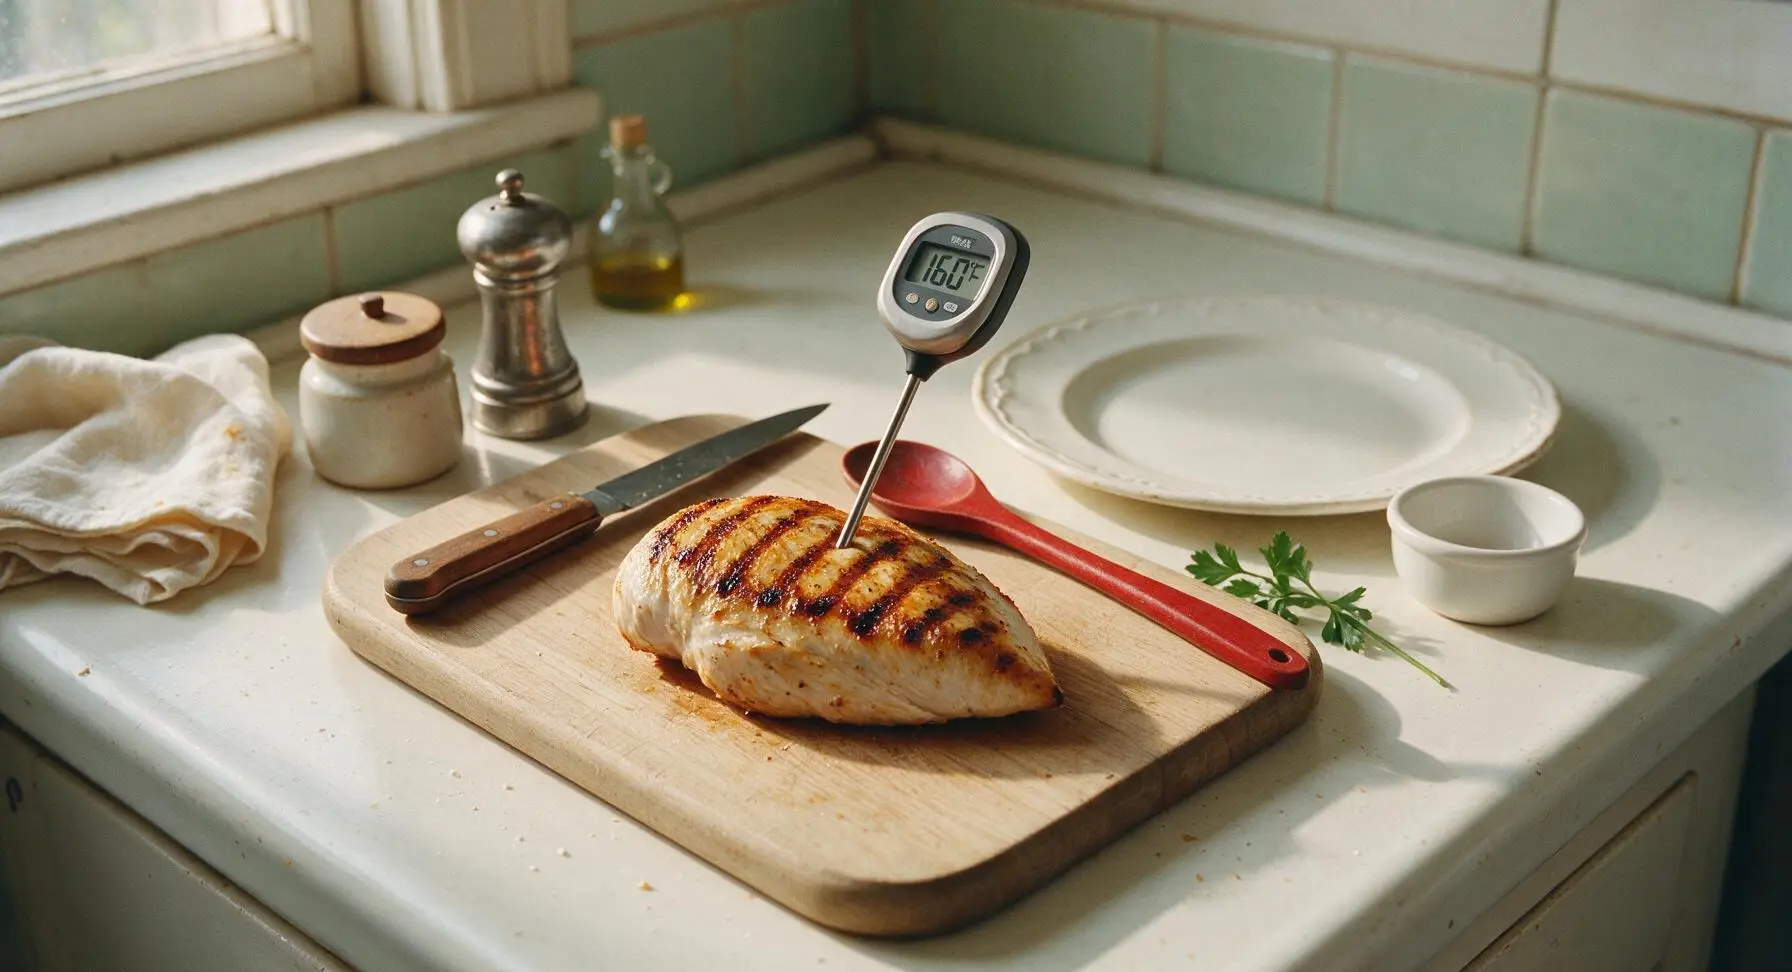
Flip and Cook Through

After 6 minutes, use the grill tongs to flip each chicken breast to the second side. Close the lid and cook for an additional 5-6 minutes, until the internal temperature measured with the instant-read thermometer reaches 160°F (71°C) when inserted into the thickest part of the breast, avoiding contact with the grill grates with the probe. Do not overcook, as the chicken will continue to rise 5°F in temperature while resting to reach the food-safe 165°F (74°C). Visual cue: the cooked first side has deep golden, slightly dark grill marks with no burnt black patches.
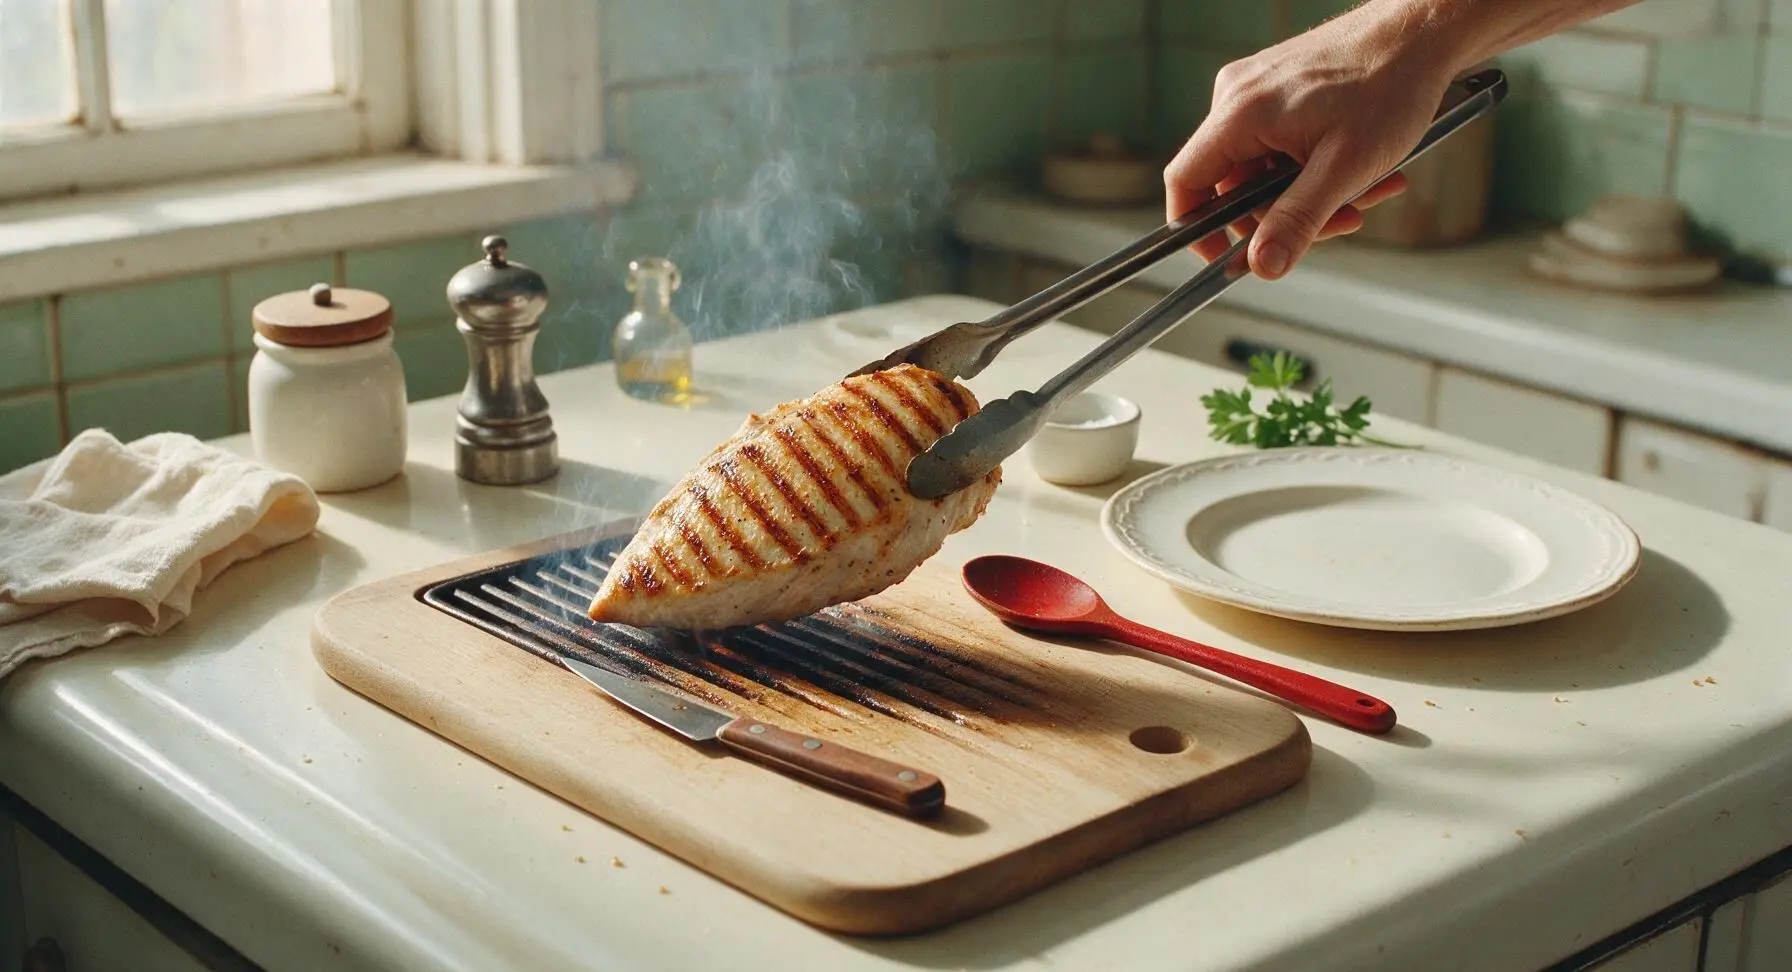
Step 5
step5:Flip and Cook Through
Step 5
step5:Flip and Cook Through
6

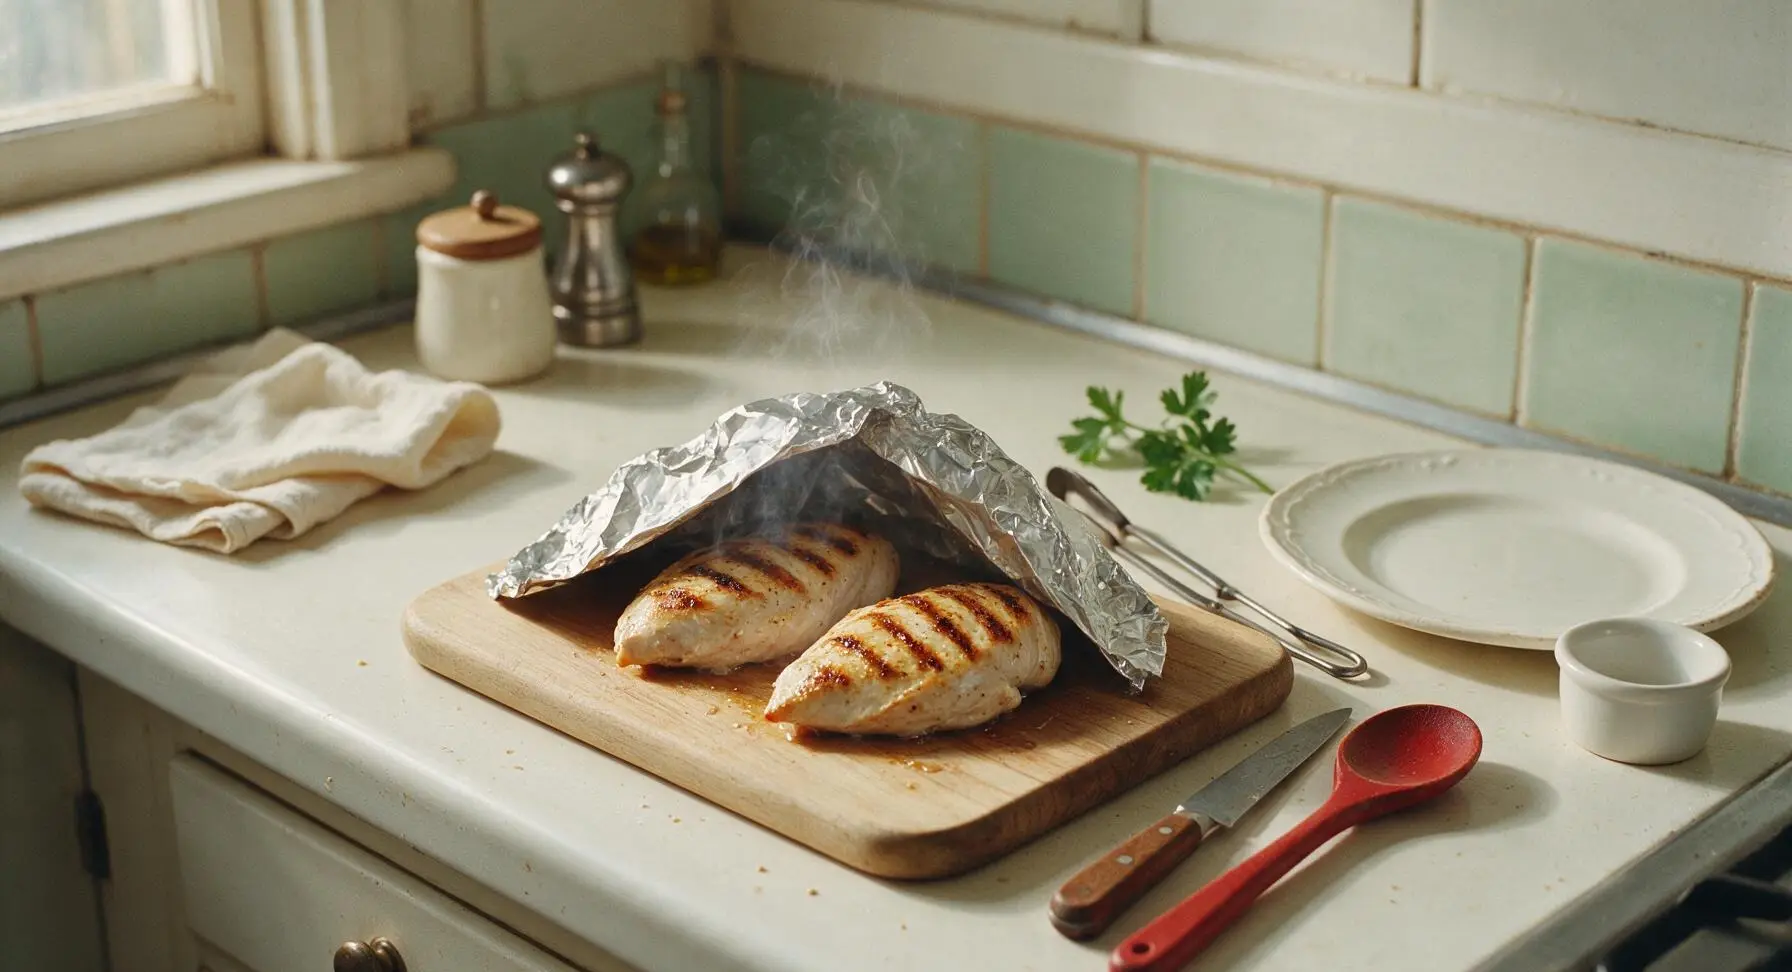
Rest Chicken Before Serving

Use the grill tongs to transfer the cooked chicken breasts from the grill to the clean section of the bamboo cutting board. Loosely tent a small piece of aluminum foil over the top of the chicken, and let it rest for 5 full minutes. This allows the muscle fibers to relax and reabsorb juices, so the chicken stays juicy instead of leaking all its juice when sliced. Visual cue: thin, clear juice beads on the surface of the resting chicken, with no pink liquid visible.
Step 6
step6:Rest Chicken Before Serving
7

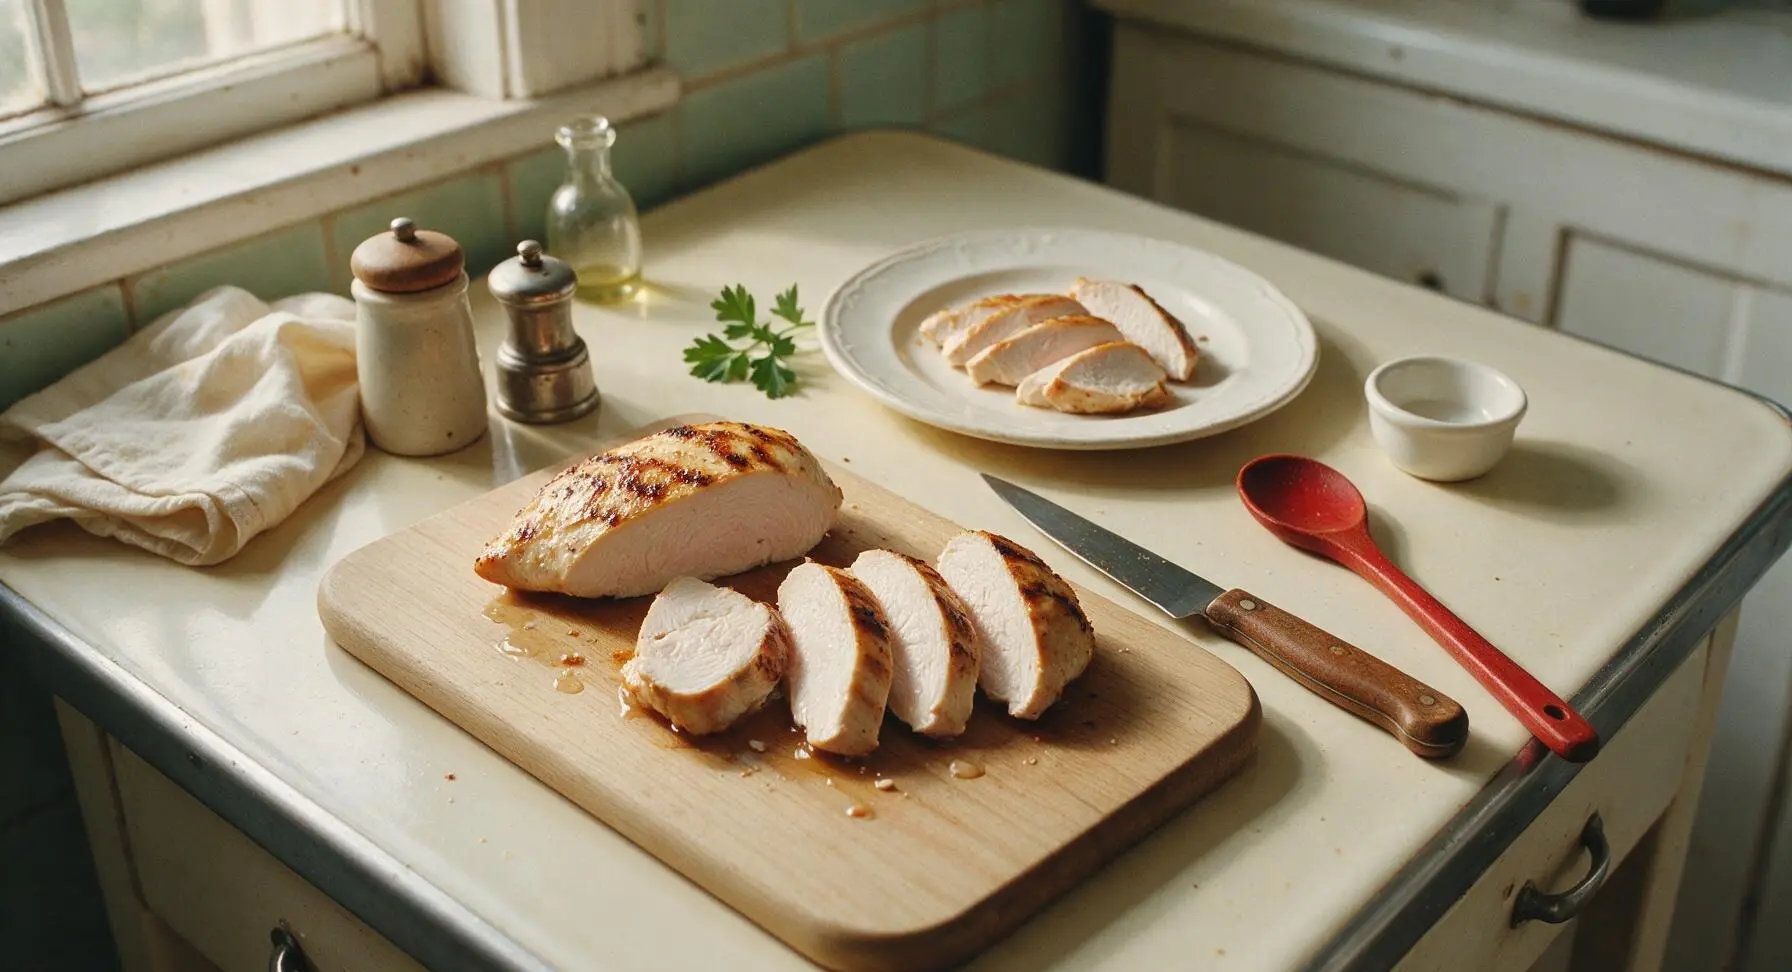
Slice and Plate Dish

After resting, use the 8-inch chef’s knife to slice each chicken breast against the grain (perpendicular to the direction of the muscle fibers) into ½-inch (1cm) thick slices. Arrange the sliced chicken in a slightly fanned pattern on the matte cream white ceramic dinner plate, then sprinkle the top with 2 tablespoons of chopped fresh flat-leaf parsley for garnish. Serve immediately. Visual cue: the sliced chicken has a pale, opaque white interior with no trace of pink, and clear juice runs from the slices rather than cloudy, pink liquid.
Step 7
step7:Slice and Plate Dish

Tips

1.Never skip pounding the chicken to a uniform 1-inch thickness: the naturally tapered thin end of a raw breast will cook 2-3 minutes faster than the thick end, leading to dry, overcooked edges and undercooked centers if left in its natural shape.
2.Pull the chicken from the grill at 160°F internal temperature, not 165°F: carryover cooking will raise the internal temperature by 5°F as it rests, resulting in juicy, tender chicken instead of tough, rubbery overcooked breast that climbs to 170°F+ by the time it is served.
3.Resist the urge to press down on the chicken with tongs while it grills: squeezing the breast forces flavorful, juicy fat and moisture out of the meat onto the grill, leading to dry final results and unnecessary grease flare-ups that burn the chicken surface.


✨ You May Also Like

BBQ & Grilling
🍜 United States

Tender, melt-in-your-mouth beef brisket with a crisp, spiced bark, slow-smoked to deep smoky perfection, the iconic centerpiece of Texas backyard barbecue.

⏱️ 12 hours BBQ & Grilling ★ 4.4
BBQ & Grilling
🍜 Korea

Tender, sweet-savory marinated beef short ribs, a beloved Korean BBQ staple with caramelized, slightly charred edges and deep umami flavor, perfect for outdoor summer gatherings.

⏱️ 4 hours 2BBQ & Grilling ★ 4.8
BBQ & Grilling
🍜 United States

Juicy grilled beef patties topped with smoky homemade chili, melted cheddar, and tangy pickles on toasted brioche buns for a hearty, flavor-packed handheld meal.

⏱️ 40 minuteBBQ & Grilling ★ 4.7
BBQ & Grilling
🍜 United States

A sweet, smoky, tangy BBQ sauce brightened with peak-season dark cherries, ideal for glazing grilled ribs, chicken, pork, or summer roasted veggies.

⏱️ 35 minuteBBQ & Grilling ★ 4.7
BBQ & Grilling
🍜 United States

Rich, smoky, slightly sweet homemade bourbon BBQ sauce with deep caramel notes, ideal for glazing grilled ribs, chicken, and burgers at cookouts.

⏱️ 25 minuteBBQ & Grilling ★ 4.7
BBQ & Grilling
🍜 United States

Iconic Alabama-style BBQ featuring tender hickory-smoked chicken slathered in tangy creamy white sauce, a beloved regional Southern cookout staple.

⏱️ 3 hoursBBQ & Grilling ★ 5

grilled chicken breast:Frequently Asked Questions

1.Why does my grilled chicken breast always turn out dry instead of juicy? ▾
That almost always traces back to two common missteps: uneven breast thickness that leaves thin edges overcooked by the time the thick part is done, and cooking past the ideal pull temperature. I pull breasts at 160°F to let carryover cooking bring them to the food-safe 165°F as they rest. Pounding to a uniform 1-inch thickness and salting 30 minutes before grilling also locks in moisture.
2.Do I really need to pound my chicken breasts before grilling? ▾
Absolutely, and it’s a 2-minute step that makes a massive difference in even cooking. Raw boneless, skinless breasts are naturally thicker at one end and paper-thin at the other, so pounding them to a consistent 1-inch thickness ensures every part cooks at the same rate. No more dried-out, stringy thin sections while you wait for the thick end to cook through.
3.How far in advance can I season the chicken before grilling? ▾
For the juiciest, most flavorful result, season with coarse kosher salt 30 to 60 minutes before grilling. This gives salt time to draw out surface moisture that reabsorbs into the meat for extra tenderness. Your black pepper and garlic powder can go on right before grilling, since they can burn over high heat if left on too long. If crunched for time, salting right before cooking works too.
4.What grill temperature works best for juicy, evenly charred chicken breast? ▾
Aim for a medium-high grill surface temperature of 425°F to 450°F, which is hot enough to create that nice, even char without burning the outside before the inside cooks through. If using a charcoal grill, wait until coals are covered in light gray ash before spreading them, and keep a small cooler zone to move chicken to if flare-ups pop up.
5.How long do I grill chicken breast to keep it as juicy as possible? ▾
For 1-inch thick pounded breasts, cook 6 to 8 minutes total, flipping once halfway through. Resist the urge to flip repeatedly or press down on the chicken with a spatula, which squeezes out all that precious juice. Always use an instant-read thermometer in the thickest part to confirm it hits 160°F before pulling it off the heat.
6.How do I stop big flare-ups that burn my chicken on the grill? ▾
Flare-ups happen when excess fat or oil drips onto hot coals or burners, so first, pat your seasoned chicken lightly before brushing with a thin, even coat of extra-virgin olive oil—don’t douse it. Keep a small unheated section of your grill as a safe zone to move chicken to if flare-ups spike, and never spray cooking spray directly onto hot grates.
7.Do I really have to let grilled chicken rest after taking it off the grill? ▾
Yes, this non-negotiable 5-minute rest is key to juicy results. When you cook chicken over high heat, muscle fibers contract and push moisture toward the center. If you cut into it right off the grill, all that juice runs onto your plate instead of staying in the meat. Tent it loosely with foil while it rests to keep it warm without making the seasoned crust soggy.
8.Is this grilled chicken recipe good for weekly meal prep? ▾
This recipe is ideal for weekly meal prep, since the simply seasoned, juicy chicken holds up beautifully for 3 to 4 days stored in an airtight container in the fridge. Let cooked chicken cool completely before storing, and slice it only right before you use it to lock in extra moisture. It works great on salads, in wraps, grain bowls, or quick reheated plates.
9.Can I add extra seasonings or marinades without making the chicken dry? ▾
Absolutely! The base of kosher salt, black pepper, and garlic powder is totally customizable—just stick to a few simple rules. Skip sugar-heavy rubs that burn fast over medium-high heat, don’t marinate more than 2 hours in acidic ingredients like lemon juice (which can make the outer layer mushy), and always pat chicken lightly before oiling for a good char.
10.Should I oil the grill grates or the chicken itself to prevent sticking? ▾
For the least sticking and best char, oil the chicken, not the hot grates. Brushing your pounded, seasoned chicken breasts with a thin even coat of extra-virgin olive oil creates a barrier between the meat and hot metal, without causing excess oil drips that trigger flare-ups. Wait until chicken releases easily from the grate before flipping—if it sticks, it just needs another 30 to 60 seconds to form a crust.
11.What’s the easiest way to pound chicken breasts to an even thickness if I don’t have a meat mallet? ▾
No fancy tools required! Place each chicken breast between two sheets of plastic wrap or inside a slightly open resealable plastic bag to let air escape, then use the flat bottom of a heavy cast-iron skillet, a rolling pin, or even a full canned good from your pantry to pound the thicker end until the whole breast is a uniform 1-inch thick.
12.Can I make this recipe on an indoor grill pan if I don’t have an outdoor grill? ▾
Absolutely, this recipe translates perfectly to indoor cooking for quick weeknight meals. Preheat your cast-iron grill pan over medium-high heat until it’s just starting to smoke, then cook the oiled, seasoned chicken for the same 6 to 8 minutes total, flipping halfway. Turn on your stovetop vent to cut down on smoke, and use the same 160°F pull temp and 5-minute rest for juicy results.
13.Why doesn’t my chicken get that nice, even grill char I see in recipe photos? ▾
That perfect, even char comes from three easy fixes: First, make sure your grill is fully preheated to 425–450°F before you put chicken down—cold grates steam instead of char. Second, pat the chicken surface dry before oiling and seasoning, because excess surface moisture will steam instead of sear. Finally, don’t move the chicken for the first 3 to 4 minutes so the crust has time to form.

Comments (20)

2 days ago

OMG this was a total game changer! I’ve always struggled with dry, rubbery grilled chicken that even my dog turns his nose up at, but this came out so juicy my kids asked for seconds before they finished their first serving. Threw it on for our Sunday family dinner and everyone raved. 12 minutes cook time is no joke too, perfect for busy weeknights!

1 day ago

So happy to hear your whole family loved it, BBQMom82! That quick cook time is exactly why this is my go-to for busy weeks too—no need to slave over the grill for hours to get juicy results.

1 week ago

Added this to my weekly meal prep rotation and it’s chef’s kiss. Holds up so well in the fridge for 4 days, doesn’t get that weird chalky texture most grilled chicken gets when you reheat it. I seasoned mine with a little extra paprika and garlic powder per my preference, but followed the cook method exactly. Zero complaints!

5 days ago

Second this! I meal prep 5 of these every Sunday for my post-workout lunches and it’s saved me so much money on takeout. No more sad dry chicken salads for me!

3 days ago

Brought a platter of these sliced up to our neighborhood block party potluck last weekend and people were hovering by the grill asking me for the recipe before I even set the plate down. SO good, even the folks who say they hate chicken breast were going back for thirds. No more dry chicken for this girl!

2 hours ago

Wait, quick question! I tried this last night and the flavor was amazing, but my chicken was a little charred on the outside before it hit temp on the inside. I have a little tiny charcoal grill on my apartment balcony, did I have the heat too high?

1 hour ago

Oh I had that exact issue my first time too! If you’re using a small charcoal grill, pile the coals a little off to one side so you have a cooler zone to move the chicken to if the outside chars too fast before it cooks through. Fixed it for me!

30 minutes ago

Great tip from BalconyGrillDan! Small grills often run hotter than larger full-size ones, so creating that two-zone fire is the perfect fix. So glad you loved the flavor even with the little char mishap!

yesterday

This is such a versatile base recipe! I used it last night to top my Caesar salad, and earlier this week I sliced it up for chicken wraps for my husband’s work lunch. It’s juicy enough that you don’t even need extra dressing if you don’t want it, which is a win for keeping lunches light.

20 hours ago

Love hearing how you’re customizing it, Gigi! It really does work for everything from salads to sandwiches to tacos—so many ways to switch it up week to week.

1 week ago

OMGGGG I cannot sing this recipe’s praises enough. My 8 year old is the pickiest eater on the planet, usually he will only eat chicken nuggets and refuses any “real” chicken I make. He ate TWO whole breasts last night and asked if we can have this every night for dinner. I could cry. Thank you!!

5 days ago

Wait this gives me so much hope! My 7 year old is the exact same way, all she wants is nuggets and mac and cheese. I’m making this tonight, fingers crossed it works for us too!

4 days ago

That makes my whole day to hear, Lulu! There’s no better win than getting a picky kid to happily eat a home cooked meal. Fingers crossed it’s a hit for your house too, Mia!

2 weeks ago

Made these for our college football tailgate last Saturday, cooked em up on my travel grill right in the parking lot. People were going crazy for em, I had guys from the tailgate three spots over coming over to ask what I was making. 12 minute cook time meant I didn’t miss a second of pre-game either. 10/10

5 days ago

Wait, I almost skipped the part about letting the chicken rest after grilling because I was in a rush to get dinner on the table, and I’m so glad I didn’t. All the juices stayed in instead of running all over my plate! Game. Changer. Who knew 5 minutes of resting made that big of a difference?

3 days ago

I used to skip resting too! I thought it was just a fancy chef thing that didn’t matter for regular weeknight cooking, but wow, it really does lock all that juice in. Game changer is right!

2 days ago

I’m so glad you didn’t skip that rest step, Meg! It’s such a small, easy step but it makes all the difference between juicy chicken and chicken that leaks all its juice onto your cutting board the second you slice it.

3 days ago

Perfect for my low carb lifestyle! I paired it with grilled zucchini and a little cauliflower rice for a quick, high protein dinner that took literally no time at all. No fancy ingredients required, which I love— I already had everything I needed in my pantry and fridge.

2 days ago

Same! I’m always on the hunt for simple, no-fuss high protein recipes that don’t require 15 weird specialty ingredients. Adding this to next week’s menu for sure.

30 minutes ago

Help! I bought super thick chicken breasts (like almost 2 inches thick) from the grocery store, will the 12 minute cook time still work or do I need to adjust? I’m making this for date night tonight and don’t want to serve raw or dry chicken 😭

20 minutes ago

I had thick ones last week! I just butterflied them first so they were an even thickness all the way across, cooked em for 12 minutes total and they came out perfect. No dry spots, no raw middle. You’ve got this!

10 minutes ago

Rachel’s tip is spot on! If your breasts are extra thick, either butterfly them to an even 1-inch thickness or add 3-4 minutes of cook time over slightly lower heat, and make sure you temp to 165F in the thickest part. Date night’s gonna be great!

2 weeks ago

I’ve been grilling chicken for 40+ years and I’ll be honest, I thought I had it down pat. Tried this method on a lark when my granddaughter sent me the link, and I’ll be damned if it wasn’t the juiciest chicken breast I’ve ever made. My wife even commented on it, which is saying something because she never compliments my grilling! Ha!

1 week ago

That’s the highest compliment we could ask for! So glad you gave the method a shot, and that it earned you a rare compliment from your wife. That’s a win in my book!

1 week ago

Made this over our camp grill on our weekend camping trip last weekend and it was perfect! No fancy equipment needed, cooked fast, and even the kids ate it without complaining after a long day of hiking. Will definitely be a staple on all our future camping trips.

yesterday

Followed the cook method exactly but swapped the regular seasoning for a spicy cajun rub, and it came out insane. Juicy, flavorful, had just the right kick. Sliced it up for po boys last night and my roommate said it was better than the ones we get at our favorite sandwich shop downtown.

12 hours ago

Cajun rub for po boys is such a good call! I usually do a lemon herb seasoning for mine but I’m 100% stealing that idea for next weekend’s dinner. Thanks for the inspo!

8 hours ago

That cajun swap sounds incredible, Javi! The cooking method works with literally any rub or seasoning blend you love, so it’s so fun to see all the creative variations people come up with. That po boy sounds like a dream.

5 minutes ago

I cannot believe how easy this was. I got home from work late, was exhausted, threw this together in the time it took my roasted veggies to cook, and had a full, delicious dinner on the table in under 20 minutes total. No marinating required? Sign me up for life.

just now

No long marinating times required is exactly what we’re going for! Who has time to plan ahead and marinate chicken for hours on a busy work night? This recipe is built for those chaotic evenings when you need good food fast.

3 days ago

Quick question for folks— I only have a gas grill on my patio, will this method work just as well or do I need to adjust temps? I’ve had bad luck with dry gas grill chicken in the past so I’m nervous to mess it up!

2 days ago

Gas grill works perfectly! I don’t own a charcoal grill at all, made this last week on my gas grill set to medium-high, followed the timing exactly and it was so juicy. Just make sure you preheat the grill fully before you put the chicken on!

1 day ago

Gary is 100% right! This method works beautifully on gas, charcoal, even a good indoor grill pan if you don’t have outdoor space. Preheating is key to getting that nice sear without overcooking the inside, just like he said.

2 days ago

Made this for my dinner party last night, sliced it thin and served it over a big arugula salad with lemon vinaigrette. All my guests were asking for the recipe before they left, even my friend who swears she “can’t cook” said she’s gonna make it this weekend. So elegant but so easy!

5 days ago

Chicken breast is always the cheapest protein at my grocery store, so I’m always looking for new ways to make it not boring. This is hands down the best one I’ve found. No expensive ingredients, super fast, tastes like something you’d pay $20 for at a restaurant. Win win.

3 days ago

Same! I’m a broke college student with a tiny dorm grill, made this for me and my roommates last night and we all lost our minds. So cheap, so easy, no fancy stuff required.

just now

Love that this recipe is totally allergy friendly for my family— no dairy, no nuts, no soy, just simple seasonings. It’s so hard to find easy grilled recipes that don’t call for weird marinades with ingredients my kids can’t have. This is going into our permanent weekly rotation.

2 days ago

I’m recovering from surgery and need super easy, high protein meals that don’t require a ton of effort to make. This was perfect— my partner was able to throw it on the grill in no time, it was juicy and easy to eat, and I didn’t have to choke down dry bland chicken for once. 10/10

yesterday

Let me preface this by saying I burn literally everything I cook. I have zero grill skills, I once managed to burn hot dogs so bad they turned to charcoal. But THIS? I followed the directions exactly last night, set a timer so I didn’t forget it, and it came out perfect. Juicy, not burnt, flavorful. I feel like an actual chef now, y’all.

20 hours ago

This is what we love to hear, Sue! This recipe is designed to be totally foolproof, even for folks who don’t consider themselves good at grilling. So proud of you for nailing it— that perfect chicken is well deserved!



